1
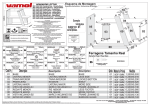
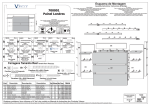
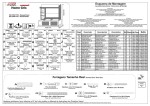
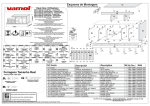
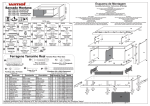
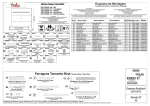
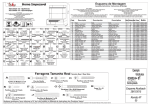
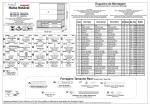
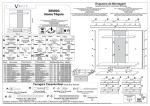
Esquema de Montagem
MESA NOTEBOOK SONATA
0,834 m
REF.:04000422 Imbuia/Preto - Imbuia/Black
REF.:04000432 Carvalho/Preto - Carvalho/Black
REF.:04000433 Zebrano/Branco - Zebrano/White
REF.:04000436 Dorale/Preto - Dorale/Black
REF.:04000437 Vulcano/Preto - Vulcano/Black
REF.:040004153 Amendoa/Cacau - Amendoa/Cacau
REF.:040004153 Avelã/Cacau - Amendoa/Cacau
3.00
m
118
”
m
A
500233
Cavilha de Madeira
8 x 30
Tarugo de madeira
Wood Dowel
18un.
B
500246
Parafuso 3,5 x 12
Flangeado
Tornillo/Screw
42un.
C
500255
Parafuso 5,0 x 50,0
Estrurural
Tornillo/Screw
04un.
500256
Pino do Girofix
Tornillo del Girofix
Girofix Pin
09un.
500501
Parafuso 3,5 x 12
Rebaixado
Tornillo/Screw
D
E
D+M
B
D+M
A
J
E
E
D+M
A
F
Chapinha de Metal
Chapa de Metal
Sheet metal
500228
K
01un.
500242
G
08un.
Cantoneira Angular
Gran Angular
Wide Angle
501507
P
01un.
L
Indústria Moveleira
Etiqueta Logo
Logo
03un.
500273
Tampa do Girofix
Cubre Girofix
Cover Girofix
01un.
501053
H
Puxador
Manejar
Handle
I
09un.
500232
M Castanha do GirofixN
Girofix
500267
B
03
03 A
J
04
E
02
08
D+M
500231
L
L
L
L
H+B
08un.
L
500290
J
03un.
Cantoneira de Metal
4 furos
Soporte metálico
Metal bracket
10
01
L
06un.
Sapata Redonda
Zapato Ronda
Shoe Round
P
A
A
06
500520
B
B
A
A
11
PA
D+M B
A
Sr. Director:
Para un conjunto mejor de nuestro producto, siga estas instrucciones:
* El móvil debe ser montado acostado boca arriba.
* Separe las partes y accesorios.
* Introducir los tornillos.
* El cable Girofix pins.
Después de asientos de las piezas y tornillos de fijación, los muebles deben ser levantadas:
* El fondo debe ser clavado en la plaza de los móviles de observación.
Deje las puertas y estantes extraíbles para montar y ajustar los últimos
3.
0
11 0m
8”
0:30 Min
09
Caro Montador:
Para uma melhor montagem de nosso produto, siga as seguintes instruções:
* O Móvel deve ser montado deitado com a frente para cima.
* Separe as peças e acessórios.
* Encaixe as cavilhas.
* Parafuse os pinos de Girofix.
Após o encaixe das peças e fixação dos parafusos, o móvel deve ser levantado:
* Os fundo deverão ser pregados observando o esquadro do Móvel.
Deixe as portas e prateleiras removíveis para serem encaixadas e reguladas por último.
Dear Editor:
For a better assembly of our product, follow these instructions:
* The Mobile should be mounted lying face-up.
* Separate the parts and accessories.
* Insert the bolts.
* Screw pins Girofix.
After seating of the parts and fixing screws, the furniture should be lifted:
* The fund should be nailed to the square of the observing Mobile.
Leave the doors and removable shelves to be fitted and adjusted last
15
0,4
0,970m
Assembly Instructions / Instruccione de Montaje
Corrediça Metálica 300mm
Metal Slide
Metal Slide
500258
O
08un.
Prego 10 x 10
Clavo
Nail
A
A
01un.
D+M
05
A
A
E
12
D+M
A
07
A
16
D+M
E
A
E
Esquema Atualizado
18/06/2013
D+M
A
Revisão Nº
04
E
Exemplo
02un.
Uma empresa que próspera de forma sustentável.
Mão Francesa Grande
Big Hand francés
French Big Hand
Qualquer problema, favor informar o Nº de Lote contido no Manual de Instruções dos Produtos Vamol
Cualquier problema, por favor proporcione el número de lote que figuran en el Manual de Instrucción de la Vamol productos / Any problem, please provide the lot number contained in the Instruction Manual of the products Vamol
Cód. da peça
Una empresa que forma sostenible próspero.
A company that sustainably prosperous.
040004 + 01
Cód. do produto.
Cód Pç DESCRIÇÃO
01
02
03
04
05
06
07
08
09
10
11
12
16
1
PAINEL TRASEIRO
LATERAL ESQ.
BASE DA GAVETA
LATERAL DIR. GAVETEIRO
LATERAL ESQ. GAVETA
FRENTE GAVETA
CONTRA FUNDO GAVET
LATERAL DIREITA
TAMPO
MOLDURA LATERA
MOLDURA TAMPO
FUNDO GAVETA
LATERAL DIR. GAVETA
QTDE MAT. PRIMA
DESCRIPCIÓN
DESCRIPTION
PANEL TRASERO
LATERAL IZQUIERDA
BASE DA CAJÓN
LATERAL DERECHA CAJÓN
LATERAL IZQUIERDA CAJÓN
FRENTE DEL CAJÓN
FONDO DEL CAJON
LATERAL DERECHA
TAMPO
MARCO LATERA
MARCO TAMPO
FONDO CAJÓN
LATERAL DIR. DERECHA
REAR PANEL
LEFT SIDE
DRAWER BASE
DRAWER RIGHT SIDE
DRAWER LEFT SIDE
DRAWER FRONT
FUND OF THE DRAWER
RIGHT SIDE
SURFACE
FRAME SIDE
FRAME TAMPO
UPPER DRAWER
RIGHT SIDE DRAWER
01
01
01
01
01
01
01
01
01
01
01
01
01
5
Passo
09
D+M
A
B
D+M
D+M
E
J
E
D+M
A
B
90
09
PA
P
C
A
A
A
B
B
B
03
03 A
04
J
E
02
H
B
A
A
D+M
B
05
A
07
A
E
12
D+M
A
08
08
0,830X0,385
0,750X0,385
0,243X0,385
0,258X0,385
0,300X0,100
0,275X0,168
0,188X0,100
0,750X0,385
0,900X0,385
0,686X0,080
0,901X0,080
0,218X0,307
0,300X0,100
Passo
06
A
A
MDP 15MM
MDP 15MM
MDP 15MM
MDP 15MM
MDP 15MM
MDP 15MM
MDP 15MM
MDP 15MM
MDP 15MM
MDF 15MM
MDF 15MM
MDF 03MM
MDP 15MM
MEDIDA
A
01
E
E
01
L
L
L
L
Passo
4º Passo
K
N
K
09
B
K
N
B
K
B
B
P
D+M
P
J
E
F
E
D+M
A
A
B
A
03
03 A
J
08
B
10
02
08
D+M
01
K
N
Max.
10Kg
10
N
N
K
L
L
B
L
L
L
L
Max.
30Kg
04
E
B
B
Peso máximo por espaço;
Peso máximo para el espacio;
Maximum weight for space;
A
A
11
K
B
D+M
A
11
B
D+M A
A
09
K
E
A
L
K
16
D+M
D+M
L
2
D+M
A