1
focus e
ISA S.p.A.
Via del Lavoro, 5
06083 Bastia Umbra
(PG) - ITALY
12 - 16 - 18 - 20 - 24
12+12
428038446_1ac_IGBFDE
Tel. 075 80171
Fax 075 8000900
www.isaitaly.com
- Manuale d'uso e manutenzione
- Operator's manual
- Notice d’ entretien
- Gebrauchsanweisung
- Instrucciones de uso y manutención
I
GB
F
D
E
FOCUS E
1.0
NOTE - AVVERTENZE ............................................ 3 - 9
NOTE - IMPORTANT NOTES
NOTE - NOTICE
ANMERKUNGE - HINWEISE
NOTAS - INSTRUCCIONES
2.0
CARATTERISTICHE TECNICHE ............................... 10 - 11
TECHNICAL FEATURES
CARACTERISTIQUES TECHNIQUES
TECHNISCHE ANGABEN
CARACTERÍSTICAS TÉCNICAS
3.0
IDENTIFICAZIONE DELL' APPARECCHIATURA .......... 12
IDENTIFICATION OF THE EQUIPMENT
IDENTIFICATION DE L' APPAREIL
IDENTIFIKATION DIE APPARATUR
IDENTIFICATION DEL APARATO
4.0
PANNELLO DI CONTROLLO ................................... 13 - 20
CONTROL PANEL
TABLEAU DE COMANDE
SCHALTTAFEL
PANEL DE CONTROL
5.0
PULIZIA .............................................................. 21
CLEANING
NETTOYAGE
REINIGUNG
LIMPIEZA
6.0
POSIZIONAMENTO / LIVELLAMENTO ........................22
POSITIONONG / LEVELLING
POSITIONNEMENT / NIVELLEMENT
AUFSTELLUNG / NIVELLIERUNG
POSICIONAMIENTO / NIVELACIÓN
7.0
COLLEGAMENTO ELETTRICO ................................. 23
ELECTRICAL CONNECTION
BRANCHEMENT ELECTRIQUE
ANSCHLUBANDIESTROMVERSORGUNG
CONEXIÓN ELÉCTRICA
8.0
MANUTENZIONE ................................................... 24
MAINTENANCE
MANUTENTION
WARTUNG
CONSERVACION
9.0
SERVIZIO ASSISTENZA ..........................................25 - 26
CUSTOMER ENGINEERING
SERVICE APRES VENTE
KUNDENDIENST
SERVICIO ASISTENCIA
4 280 38446 1 ac
•2
I
GB
F
D
E
1.0
NOTE / AVVERTENZE
NOTE / IMPORTANT NOTES - NOTE / NOTICE
ANMERKUNGE / HINWEISE - NOTAS / INSTRUCCIONES
Riferitevi sempre al presente manuale prima di compiere qualsiasi operazione.
Conservare con cura il presente manuale e fate in modo che sia sempre disponibile vicino all'apparecchiatura in prossimità di essa.
Prima di effettuare qualsiasi tipo di intervento disconnettere l'apparecchiatura dall'alimentazione elettrica.
Interventi su parti elettriche, elettroniche o componenti dell'impianto frigorifero devono essere eseguiti da personale specializzato, nel pieno
rispetto delle norme vigenti.
La Società non si assume alcuna responsabilità per eventuali danni a persone, animali o al prodotto conservato in caso di:
- Uso improprio dell’apparecchiatura - Non rispetto delle norme vigenti - Installazione non corretta - Inosservanza del presente Manuale
- Inosservanza del programma manutenzione - Modifiche non autorizzate - Installazione nell'apparecchiatura di pezzi di ricambio non originali
- Installazione e utilizzo dell’apparecchiatura per scopi diversi da quelli che ne hanno caratterizzato la progettazione e la vendita.
Always refer to this manual before performing any operation.
Carefully preserve this manual and make sure it is always on hand either near your equipment or within close proximity of it.
Before doing any type of work, disconnect the equipment from the electrical power supply.
Any work on electrical, electronic and thermodynamic parts must be carried out by specialized personnel, in full respect of the regulations in
force.
The Society will not assume any responsibility for damage to people, animals or products in the following cases:
- Incorrect use of the equipment - Failure to comply with the regulations in force - Incorrect installation - Failure to observe the instructions listed in
this manual - Failure to observe the maintenance program - Modifications that have not been authorized - Installation of non-original spare parts on
the equipment - Installation and use of the equipment for any purposes other than the ones for which it has been designed and sold.
Avant de commencer toute opération, il est recommandé de consulter la notice.
Il est conseillé de garder soigneusement cette notice et de faire en sorte qu’elle soit toujours disponible à côté de l’équipement.
Avant d’effectuer toute opération débrancher l’équipement.
Les interventions sur les parties électriques, électroniques et thermodynamiques relèvent de la compétence d’un personnel qualifié qui doit les
exécuter dans le respect des normes en vigueur.
La Société n’est pas responsable pour les dommages éventuels à personnes, animaux ou produits en cas de:
- Utilisation incorrecte de l’installation - Non respect des normes en vigueur - Installation non correcte - Non respect des normes indiquées dans
cette notice - Non respect des indications concernant la maintenance - Toute modification non autorisée - Installation de pièces de rechange non
originales - Installation et utilisation de l’équipement pour des buts différents de ceux qui ont été prévus par le fabricant.
Welche Operation Sie auch immer durchführen wollen - lesen Sie stets zuvor die diesbezüglichen Anweisungen des Handbuches durch.
Bewahren Sie das Handbuch sorgfältig auf und sorgen Sie dafür, daß es immer direkt am Gerät oder zumindest in dessen unmittelbarer Nähe
greifbar ist.
Nehmen Sie das Gerät unbedingt vom Netz, bevor Sie irgendwelche Eingriffe vornehmen.
Eingriffe an den elektrischen, elektronischen und thermodynamischen Bauteilen mußten von Fachpersonal unter sorgfältiger Beachtung
aller gültigen Vorschriften und Normen vorgenommen werden.
Die Gesellschaft übernimmt keinerlei Verantwortung für eventuelle Schäden an Personen, Tieren, Sachen oder dem zu kühlenden Produkt in
den
folgenden Fällen:
- Falscher Geräteeinsatz - Nichtbeachtung der gültigen Vorschriften - Fehlerhafte Geräteinstallation - Nichtbeachtung der Vorschriften des
vorliegenden Handbuchs - Nichtbeachtung der Wartungsvorschriften und -zeiträume - Nicht genehmigten Änderungen - Verwendung von nicht
originalen Ersatzteilen im Gerät - Installation und Einsatz des Geräts zu anderen als bei Projektierung und Verkauf angegebenen Zwecken.
Referirse siempre al presente manual antes de completar cualquier funcionamiento.
Conservar con cuidado el manual presente y tenerlo siempre está disponible al lado del aparato, antes de efectuar cualquier tipo de intervención
para desconectar el aparato del alimentacion eléctrica.
Las intervenciones en partes electricas, electrónicas o componentes del sistema refrigerado, deben ser realizarsadas por personal
especializados, en el lleno respeto de las normas vigentes.
La Sociedad no se toma responsabilidad por los posibles daños y perjuicios a las personas, animales o al producto conservado en caso de:
- Uso impropio del aparato – no respeto de las normas vigentes - Instalación impropia – No observancia del presente Manual
- La no-observancia del mantenimiento del programa - Cambios no autorizados - Instalación en el aparato de repuestos no originales
- La instalación y uso del aparato para los propósitos diferentes de lo que ha caracterizado la planificación y la venta del mismo aparato.
FOCUS E
4 280 38446 1 ac
•3
I
GB
F
D
E
1.0
NOTE / AVVERTENZE
NOTE / IMPORTANT NOTES - NOTE / NOTICE
ANMERKUNGE / HINWEISE - NOTAS / INSTRUCCIONES
DISIMBALLO
UNPACKING - DÉBALLAGE - AUSPACKEN - DESEMBALAJE
La movimentazione dell'apparecchio va effettuata esclusivamente mediante carrello elevatore, di potenza adeguata al peso dell'apparecchio e
manovrato da personale qualificato: durante tale operazione l'apparecchio deve tassativamente essere posizionato sull'apposito pallet fornito in
dotazione (pallet che va conservato per successive movimentazioni).
Liberare l' apparecchio dall' imballo togliendo le viti che lo bloccano al pallet.
Tutti i materiali dell'imballo sono reciclabili da smaltire in accordo alle disposizioni legislative locali, abbiate cura di distruggere i sacchetti in "plastica"
per evitare che costituiscano fonte di pericolo (soffocamento) per i giochi dei bambini.
The refrigerator must be moved only using a service-lift, the power of which must be adequate to the weight of the refrigerator,
the service-lift should be operated only by qualified staff. Remove the packing from the apparatus and also the transport supports, first taking
off the lower cover.
All packanging materials are recyclable and to be disposed of in accordance with local regulations; be careful to destroy "plastic" bags in order
to avoid children suffocation.
Le déplacement de l'appareil doit étre effectué exclusivement à l'aide d'un élévateur d'une puissance équivalente au poids de l'appareil et manoeuvré
par le personnel qualifié. Enlever l'emballage de l'appareil et aussi les supports pour le transport en démontant le carter inférieure.
Enlever les vis qui le bloquent à la pallette en bois.
Tous les matériaux de l’emballage sont recycables et doivent être éliminés conformément aux dispositions législatives locales ; prendre soin de détruire
les sachets en “plastique” afin d’éviter qu’ils représentent une source de danger (étouffement) dans les jeux d’enfants.
Die Umstellung des Gerätes muß ausschließlich durch einen in seiner Leistung dem Gewicht des Gerätes angepaßten Wagenheber erfolgen
und von qualifiziertem Personal Das Gerät aus der Verpackung nehmen, untere Schutzabdeckung abmontieren und die Transportstützen beseitigen.
Das Verpackungsmaterial ist wiederverwendbar und gemäß den örtlichen Bestimmungen zu entsorgen; achtzugeben ist dabei auf die Platiksäcke,
um Gefahrenquellen für spielende Kinder zu vermeiden.
El desplazamiento del aparato debe ser efectuado mediante un elevador de potencia adecuada al peso del mismo, por parte de
personal calificado: durante tal operación, el aparato debe ser colocado solamente sobre el correspondiente pallet en dotación (pallet
que será conservado para sucesivos desplazamientos). Quite el embalaje al aparato, extrayendo los tornillos que sujetan al pallet de
madera.
Todos los materiales del embalaje son reciclables y se eliminan en conformidad con las normas legislativas locales, tómese el cuidado
de destruir las bolsitas de "plástico" para evitar que representen un peligro (sofocación) para los niños.
FOCUS E
4 280 38446 1 ac
•4
I
GB
F
D
E
1.0
NOTE / AVVERTENZE
NOTE / IMPORTANT NOTES - NOTE / NOTICE
ANMERKUNGE / HINWEISE - NOTAS / INSTRUCCIONES
ACCENSIONE / SPEGNIMENTO APPARECCHIATURA
START-UP OF THE EQUIPMENT - MISE EN FONCTION / DESACTIVATION
ZUDUNG APPARATUR - ENCENDIDO DEL APARATO
mod. 12
- 16 - 18 - 20 - 24
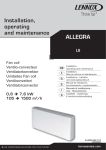
- Dopo aver posizionato l'apparecchio procedere alla sua messa in funzione inserendo la spina nella presa di alimentazione.
L' apparecchiatura si accende o si spegne tenendo premuto il pulsante 1 per alcuni secondi.
Si consiglia di dotare la presa di alimentazione del vostro impianto elettrico di un interruttore onnipolare con apertura minima tra i
contatti di 3 mm, dimensionato al carico e rispondente alle norme vigenti.
- After completings operations as per "ISTALLATION" instructions, plug the cabinet in.
The cabinet switches on or off by pressing the button “1” for some seconds
It is advisable to equip the socket of your electric system with an omnipolar switch having minimum mm. 3 opening between the contacts,
rated for the load and made accorting to the present norms.
- Aprés avoir placé l'appareil, suivant les indications d'installations, procedér à la mise en fonction en introduisant la fiche dans la prise
de courant.
Pour mettre en fonction l’appareil ou pour le désactiver, appuyer sur la touche 1 pour quelques secondes.
On conseille d'équiper la prise d'alimentation de votre installation électrique d'un interrupteur unipolaire avec une ouverture de 3 mm entre
les contacts, selon la charge électrique et les normes en vigeur.
- Nachdem Sie das Geraet aufgestellt haben, stecken Sie den Stecker gemaess um es in Betrieb zu setzen.
Das Geraet schaltet ein oder schaltet aus, indem Sie die Taste 1 einige Sekunden druecken.
wir raten Ihnen, die Steckdose von Ihrer Elektroanlage mit einem einpoligen Schalter mit einer Mindestoeffnung zwischen
den kontakten von 3 mmm auszuruesten, gemaess Ladung und gueltigen Normen.
- Después haber posicionado el aparato proceder a su encendido insertando el enchufe en la toma de la alimentacion.
El aparado se enciende o se apaga apretando la tecla 1 para unos segundos.
Se aconseja de dotar el enchufe de alimentación de su instalación eléctrica de un interruptor omnipolar con abertura mínima entre
los contactos de 3 mm, adaptado a la carga y que cumple las normas vigentes.
FOCUS E
4 280 38446 1 ac
•5
I
GB
F
D
E
1.0
NOTE / AVVERTENZE
NOTE / IMPORTANT NOTES - NOTE / NOTICE
ANMERKUNGE / HINWEISE - NOTAS / INSTRUCCIONES
ACCENSIONE / SPEGNIMENTO APPARECCHIATURA
START-UP OF THE EQUIPMENT - MISE EN FONCTION / DESACTIVATION
ZUDUNG APPARATUR - ENCENDIDO DEL APARATO
mod.
12+12
1
2
ON
ON
OFF
OFF
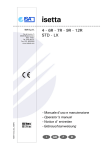
- Dopo aver posizionato l'apparecchio procedere alla sua messa in funzione inserendo la spina nella presa di alimentazione.
Agendo sugli interruttori 1 e 2 si accendono o si spengono le funzioni frigorifere di una o di entrambe le sezioni (SX, DX).
Si consiglia di dotare la presa di alimentazione del vostro impianto elettrico di un interruttore onnipolare con apertura minima tra i
contatti di 3 mm, dimensionato al carico e rispondente alle norme vigenti.
- After completings operations as per "ISTALLATION" instructions, plug the cabinet in.
Using the switches 1 and 2 the refrigerating funcions of one or both the sections (left, right) are visualized.
It is advisable to equip the socket of your electric system with an omnipolar switch having minimum mm. 3 opening between the contacts,
rated for the load and made accorting to the present norms.
- Aprés avoir placé l'appareil, suivant les indications d'installations, procedér à la mise en fonction en introduisant la fiche dans la prise
de courant.
Les interrupteurs 1 et 2 permettent de faire partir ou d’arreter les fonctions frigorifiques d’une ou des deux sections
(gauche :sx, droite : dx)
On conseille d'équiper la prise d'alimentation de votre installation électrique d'un interrupteur unipolaire avec une ouverture de 3 mm entre
les contacts, selon la charge électrique et les normes en vigeur.
- Nachdem Sie das Geraet aufgestellt haben, stecken Sie den Stecker gemaess um es in Betrieb zu setzen.
Wenn man die schalter 1 und 2 drückt, schalten sich die kühlfunktionen des einen oder beider teile (links, rechts) ein oder
aus
Wir raten Ihnen, die Steckdose von Ihrer Elektroanlage mit einem einpoligen Schalter mit einer Mindestoeffnung zwischen
den kontakten von 3 mmm auszuruesten, gemaess Ladung und gueltigen Normen.
- Después haber posicionado el aparato proceder a su encendido insertando el enchufe en la toma de la alimentacion.
Pulsando sobre los pulsadores 1 y 2 se encenden y se apagan las funciones frigoríficas de una o ambas las secciones
(derecha, izquierda).
Se aconseja de dotar el enchufe de alimentación de su instalación eléctrica de un interruptor omnipolar con abertura mínima entre
los contactos de 3 mm, adaptado a la carga y que cumple las normas vigentes.
FOCUS E
4 280 38446 1 ac
•6
I
GB
F
D
E
1.0
NOTE / AVVERTENZE
NOTE / IMPORTANT NOTES - NOTE / NOTICE
ANMERKUNGE / HINWEISE - NOTAS / INSTRUCCIONES
MESSA FUORI SERVIZIO DELL'APPARECCHIATURA
SETTING THE REFRIGERATOR OUT OF ORDER - MISE HORS-SERVICE DE L' APPAREIL
AUSSERDIENSTSETZUNG DES GERÄTES - PUESTA FUERA FUNCIONAMIENTO DEL APARATO
Qualora dopo un periodo lungo di funzionamento sia necessario mettere fuori servizio l'apparecchio, si raccomanda:
1)
Renderlo inutilizzabile (es. tagliandone il cavo di alimentazione).
2)
Togliere eventuali parti o oggetti che potrebbero costituire fonti di pericolo per i giochi dei bambini.
La macchina contiene sostanze che devono essere smaltite in appositi centri in accordo con le normative vigenti.
If it were necessary to set the refrigerator out of order after a long period of operation, be careful to:
1)
Make it unusable (for example, cutting the supply cable).
2)
Remove any door or object that may result dangerous to children.
The set contains substances ozone-damaging.
Therefore, is must be disposed of in proper centres in accordance with local regulations.
S’il est nécessaire, après une longue période de fonctionnement, de mettre hors-service l’appareil, il est recommandé :
1)
De le rendre inutilisable (par exemple en coupant son câble d’alimentation)
2)
D’enlever les portes et objets éventuels qui pourraient être origine de danger au cours de jeux d’enfants.
L’appareil contient des substances endommageant l’ozone, il devra donc être élimimé dans des centres spéciaux
conformément aux dispositions législatives locales.
Falls es nach langer Verwendungszeit nötig sein sollte, das Gerät beiseite zu stellen, empfiehlt man:
1)
Unverwendbar machen (z.B. das Netzkabel durchschneiden).
2)
Türen oder Gegenstände, die eventuell eine Gefahrenquelle für spielende Kinder darstellen, entfernen.
Das Gerät enthält ozongefährdende Substanzen, weshalb eine Entsorgung gemäß den lokalen Bestimmungen
notwendig ist.
Si después de un largo periodo de funcionamiento es necesario parar el aparato, aconsejamos:
1)
hacer inutilizable el aparato (ej. cortando su cable de alimentacion)
2)
quitar posibles partes o objetos que podrían constituir fuentes de peligro para los juegos de niños
La maquina contiene substancias que tienes ser agotadas en cientros especiales en acuerdo con la
vigente normativa.
UTILIZZO - USE - UTILISATION - BENUTZUNG - USO
Esposizione e vendita di gelato.
Display and sold of ice cream.
Exposition et vente du glace.
Ausstellung und den Verkauf von Eis.
Muestra y venta del helado
USI NON CONSENTITI:
- Conservazione dei prodotti.
- Esposizione e/o conservazione di prodotti non alimentari (chimici, farmaceutici, etc ...).
NOT ALLOWED USE:
- Ice - cream/Frozen food products preservation.
- Display and/or preservation of non - food stuffs (chemicals, pharmaceutical products, etc ... ).
UTILISATIONS NON PERMISES:
- Conservations des produits.
- Exposition et/ou conservation de produits non alimentaires (chimiques - pharmaceutiques, etc ...).
Verbotene Gebrauchszwecke:
- Bewahrung der Produkte.
- Ausstellung und/oder Bewahrung von keine Nahrungsmittel (clinische, pharmazeitische ecc ...).
USOS NO AUTORIZADOS:
- Conservacion de productos.
- Conservacion de los productos no alimentarios (químico, farmacéutico, etc...).
FOCUS E
4 280 38446 1 ac
•7
I
GB
F
D
E
1.0
NOTE / AVVERTENZE
NOTE / IMPORTANT NOTES - NOTE / NOTICE
ANMERKUNGE / HINWEISE - NOTAS / INSTRUCCIONES
CONDIZIONI AMBIENTALI DI ESERCIZIO
ENVIRONMENTAL FUNCTIONING CONDITIONS - CONDITIONS AMBIANTES DE FONCTIONNEMENT
RAUMBEDINGUNGEN FUR DEN BETRIEB - CONDICIONES AMBIENTALES DE TRABAJO
Classe climatica
Climatic class- Classe climatique- Klimaklasse- Clase climática
4
Temperatura ambiente
Ambient temperature- Température ambiance- Arbeitsraumtemperatur- Temperatura ambiente
+30 °C max
Umidità relativa
Relative humidity- Umidité relative- Relative Feuchtigkeit- Humedad relativa
55 % max
REGOLAZIONE DELLA TEMPERATURA - SBRINAMENTO
TEMPERATURE SETTING - DEFROST
REGLAGE DE LA TEMPERATURE - DEGIVRAGE
- All'installazione personale qualificato dovrà provvedere alla regolazione della temperatura, in relazione ai prodotti da conservare
ed alle condizioni ambientali esterne.
DUAL TEMPERATURE SYSTEM:
La vetrina può essere utilizzata indifferentemente per prodotti con un range di temperatura di conservazione da -18°C a +6°C.
Il prodotto esposto contemporaneamente nelle due sezioni della vetrina (solo mod. 12+12) può stare ad una differenza massima di temperatura
pari a 5°C; la temperatura impostata in una delle due sezioni non può differire dall' altra di +5°C (es. SET1 = -15°C SET2 = -20°C).
L'APPARECCHIO E' DOTATO DI SBRINAMENTO AUTOMATICO.
Per un miglior funzionamento della vetrina si consiglia, una volta alla settimana, di rimuovere il gelato, effettuare uno sbrinamento
(manuale) e tenerla spenta per 12 ore.
- At the moment of installation, technical people will have to set the temperature, in connection with the products to be preserved
and with external ambient conditions.
DUAL TEMPERATURE SYSTEM:
The display case can be used for products with a preservation temperature range from -18°C (- 64,5°F) to +6°C (43°F).
The product exposed at the same time in the two sections of the case (only mod. 12+12) can have a maximum temperature difference of 5°C
(9°F); the set temperature of each one of the sections can not be of more than +5°C (9°F) from the other (ex. SET1 = -15°C (-59°F) SET2 = -20°C(68°F)).
WITH AUTOMATIC DEFROST EQUIPPED.
We sugget you to remove the ice-cream once a week for a better performance of the ice-ceam show case.
Make a manual defrosting and keep the show case off for 12 hours.
- Au moment de l'installation le technicien devra s'occuper du reglage de la temperature selon les produits a conserver
et les conditions ambiantes.
DUAL TEMPERATURE SYSTEM:
La vitrine peut être utilisée pour tout type de produits dont la température de conservation se situe entre -18°C et +6°C.
Le produit exposé simultanément dans les deux sections de la vitrine (seulement mod. 12+12) peut présenter une différence maximale de
température égale à 5°C; la température fixée pour l’une des deux sections ne peut différer de l’autre de +5°C (ex. SET1 = -15°C SET2 = 20°C).
L'APPAREIL EST EQUIPE DE DEGIVRAGE AUTOMATIQUE.
Pour un meilleur fonctionnement de la vitrine, il est conseillé, une fois par semaine, d’enlever les glaces afin d’effectuer un
dégivrage (manuel) et de la laisser éteinte pendant 12 heures.
FOCUS E
4 280 38446 1 ac
•8
I
GB
F
D
E
1.0
NOTE / AVVERTENZE
NOTE / IMPORTANT NOTES - NOTE / NOTICE
ANMERKUNGE / HINWEISE - NOTAS / INSTRUCCIONES
EINSTELLUNG DER TEMPERATUR - ABTAUUNG
REGULACIÓN DA LA TEMPERATURA - DESCACHE
- Bei der Installierung müssen Fachmänner für die Einstellung der Temperatur sorgen, unter Bezugnahme der gekühlten Produkte
und der Umgebungsbedienungen.
DUAL TEMPERATURE SYSTEM:
Der Schaukasten kann unterschiedslos verwendet werden für Produkte mit einer Konservierungstemperaturskala von – 18 °C bis +6 °C.
Das gleichzeitig in beiden Teilen des Schaukastens (nur mod. 12+12) ausgestellte Produkt kann bei einem Höchsttemperaturunterschied von 5
°C aufbewahrt werden; die in einer der beiden Teile eingestellte Temperatur darf sich von der im anderen Teil nicht um nicht mehr als +5°C
unterscheiden (z.B. SET1=-15°C SET2=-20°C).
GERAET MIT AUTOMATISCH ABTAUUNG FERSEHEN.
Für ein optimales funktionieren des schaukastens empfiehlt es sich, einmal in der woche das eis zu entfernen, den kasten
abzutauen (manuell) und ihn 12 stunden lang nicht einzuschalten:
- A la instalación personal calificado tendrá que manejar la regulación de la temperatura, en relación a los productos que hay que
conservar y a las condiciones medio-ambientales externas.
DUAL TEMPERATURE SYSTEM:
El escaparate puede ser utilizado por productos con una gama de temperatura de conservación de -18°C hasta +6°C.
El producto expuesto contemporaneamente en las dos secciones del escaparate (sólo mod. 12+12) puede tener una diferencia máxima de
temperatura de 5°C; la temperatura programada en una de las secciones no puede estar a más de +5°C dE la otra (es. SET1 = -15°C SET2 = 20°C).
EL APARATO TIENE DESCACHE AUTOMATICO YA PROGRAMADO
Por un mejor funcionamiento del escaparate, se aconseja remover el helado, efectuar una descongelaciÓn manual y dejarla
apagada por 12 oras una vez a la semana.
FOCUS E
4 280 38446 1 ac
•9
I
GB
F
D
E
2.0
CARATTERISTICHE TECNICHE
TECHNICAL FEATURES - CARACTERISTIQUES TECHNIQUES
TECHNISCHE ANGABEN - CARACTERÍSTICAS TÉCNICAS
12
16
18
20
24
12+12
1100
1440
1600
1770
2120
2120
12 (A)
16 (A)
18 (A)
20 (A)
24 (A)
12+12 (A)
V / Hz
400/3N/50Hz
400/3N/50Hz
400/3N/50Hz
400/3N/50Hz
400/3N/50Hz
400/3N/50Hz
W (max)
2100
2500
3200
3750
3850
1600
kg
240
315
340
360
450
455
12 (EXC)
16 (EXC)
18 (EXC)
20 (EXC)
24 (EXC)
12+12 (EXC)
V / Hz
400/3N/50Hz
400/3N/50Hz
400/3N/50Hz
400/3N/50Hz
400/3N/50Hz
400/3N/50Hz
W (max)
500
600
650
700
800
290
kg
/
/
/
/
/
/
L (mm)
FOCUS E
4 280 38446 1 ac
• 10
I
GB
F
D
E
2.0
CARATTERISTICHE TECNICHE
TECHNICAL FEATURES - CARACTERISTIQUES TECHNIQUES
TECHNISCHE ANGABEN - CARACTERÍSTICAS TÉCNICAS
COMPOSIZIONE VASCHETTE
S/S CONTAINERS COMPOSITION - COMPOSITION DES BACS
EISSCHALEN KOMPOSITION - COMPOSICIÓN CUBETAS
12 (+12)
mod.
12
16 (+16)
mod.
16
18 (+18)
mod.
18
20 (+20)
mod.
20
24 (+24)
mod.
lt 5
24 / 12+12
lt 5
lt 10
8 (+8)
10 (+10)
12 (+12)
12 (+12)
16 (+16)
12
16
18
20
24
mod.
8
FOCUS E
12
mod.
16
10
mod.
12
18
mod.
20
mod.
12
4 280 38446 1 ac
(360x165x120H)
(360x250x80H)
(360x250x120H)
lt 7
(360x165x150H)
lt 12
(360x250x150H)
24 / 12+12
16
• 11
I
GB
F
D
E
3.0
IDENTIFICAZIONE DELL' APPARECCHIATURA
IDENTIFICATION OF THE EQUIPMENT - IDENTIFICATION DE L' APPAREIL
IDENTIFIKATION DIE APPARATUR - IDENTIFICATION DEL APARATO
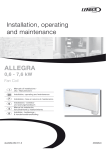
IDENTIFICAZIONE DELL' APPARECCHIATURA
IDENTIFICATION OF THE EQUIPMENT
IDENTIFICATION DE L'APPAREIL
1
Identificazione della Società Responsabile del Prodotto
Manufacturer's adress
Identification de la Société responsable du produit
2
Marchi di Conformità
Symbols of compliance
Marque de conformité
3
Ordine di Produzione
Production order
Ordre de production
4
Tipologia
Type
Type
5
Denominazione Modello
Denomination model
Dénomination modèle
6
Numero di Serie
Serial number
Numéro de série
7
Data di Produzione
Manufacturing date
Date de production
8
Tensione di Alimentazione e Frequenza
Supply voltage and frequency
Tension d' alimentation et fréquence
9
Valore di Capacità Lorda
Gross capacity
Valeur de capacité brut
10
Assorbimento a Regime
Absorption at rated capacity
Absorbement à régime
11
Assorbimento in Sbrinamento
Absorption during defrosting
Absorbement en dégivrage
12
Assorbimento Resistenze
Absorption resistances
Absorbement resistances
13
Potenza Lampade
Power lamps
Puissances lampes
14
Valore fusibile
Fuse value
Valeur fusible
15
Classe
Class
Classe
16
Numero di Motori
Number of motors in the refrigerator system
Nr des moteurs
17
Tipo di Refrigerante
Type of refrigeration
Tipe de réfrigérant
18
Quantità di Refrigerante
Refrigerant quantity in system
Quantité de réfrigérant
19
Ordine cliente
Customer order
Commande client
20
Max carico ripiano
Max shelf load
Max de chargement pour etagère
21
Max carico vasca
Max well load
Max de chargement cuve
22
Grado di Protezione contro l' acqua se diverso da IPX0
Protection grade against water if different to IPX0
Degré de protection contre eau si different de IPXO
IDENTIFIKATION DIE APPARATUR
IDENTIFICATIÓN DEL EQUIPO
1
Herstellermarke und-Adresse
Identificación de la Empresa Responsable del Producto
2
Konformitatszeichen
Sello de Conformidad
3
Reihenfolge der Produktion
Orden de Produccion
4
Typ
Tipologia
5
Benennung Modell
Denominación Modelo
6
Seriennummer
Numero de Serie
7
Herstellungsdatum
Fecha de Producción
8
Spannung und Frequenz Speisestrom
Tension de Alimentación y Frecuencia
9
Inhalt Brutto
Valor de Capacidad bruta
10
Leistungsaufnahme waehrend des Betriebs
Absorbimiento en Regime
11
Leistungsaufnahme waehrend des Abtauens
Absorbimiento en Descongelación
12
Absorption Widerstände
Absorbimientos Resistencias
13
Lampenkapazität
Potencia Lamparas
14
Wert der Sicherung
Valor fusible
15
Klasse
Clase
16
Anzahl der Motoren des Kuhlsystems
Numero de Motores
17
Verwendetes Kuhlsystem
Tipo de Refrigerante
18
Kuhlmittelmenge in der Anlage
Cantidad de Refrigerante
19
Kunden Bestellungsnummer
Pedido cliente
20
Max. Ablage Ladung
Maxima carga estante
21
Max. Wannen Ladung
Maxima carga cuba
22
Schutzgrad gegen Wasser wenn es verschieden ist von IPX0
Grado de protección contra el agua si diferente de IPX0
FOCUS E
4 280 38446 1 ac
• 12
I
GB
F
D
E
4.0
PANNELLO DI CONTROLLO
CONTROL PANEL - TABLEAU DE COMMANDE
SCHALTTAFEL - PANEL DE CONTROL
mod. 12 - 16 - 18 - 20 24
Spia Luminosa Blocco Motore
Compressor stop pilot lamp
Témoin bloquage moteur
Motor stop licht
Luz de aviso parada compressor
La centralina elettronica viene installata già settata.
Eventuali modifiche al settaggio potranno essere eseguite solo da personale qualificato.
The electronic switchboadr is factory-set before installation.
Any changes in the thermostat settings can be implemented exclusively by qualified personnel.
La centrale électronique est mise en place dejà réglèe.
Des eventuelles modifications pourront etre faites seulement par des techniciens specialisés.
Die elektr. Steuerung wird bereits in eingestellter Form installiert.
Eventuelle Änderungen beim eistellen sollen nur von qualifizierten personal.
La centralita electronica es instalada ya programada.
Los posibles cambios a la programacion de la centralita pueden ser realizados solamente por personal calificado.
FOCUS E
4 280 38446 1 ac
• 13
I
GB
F
D
E
4.0
PANNELLO DI CONTROLLO
CONTROL PANEL - TABLEAU DE COMMANDE
SCHALTTAFEL - PANEL DE CONTROL
mod. 12 - 16 - 18 - 20 24
Tastiera digitale
Display LCD
Digital keyboard
Clavier numérique
Digitaltastatur
Teclado digital
Display
Display
Display
Display
- Pulsante per l' incremento dei valori - Viene utilizzato sia per la variazione del Set Point che per quella dei
parametri - Tenendolo premuto si avrà un incremento veloce.
- Buttons to increase values - Used both for the variation of the Set Point and for the parameters
By holding it pressed down increase is fast.
- Touche pour la régression des paramètres - Il sert aussi bien à modifier le point de consigne que les paramètres – Une
pression continue augmente la vitesse de modification.
- Knopf für Werterhöhung – Wird sowohl für die Änderung des Set Points, als auch für die der Parameter verwendet – wird
dieser gedrückt, wird der Wert rasch erhöht.
- Botón para el incremento de los valores – Se utiliza ya sea para la variación del Set Point que para la de los parámetros –
Manteniéndolo presionado se obtendrá un incremento rápido.
- Pulsante per il decremento dei valori - Viene utilizzato sia per la variazione del Set Point che per quella dei
parametri - Tenendolo premuto si avrà un decremento veloce.
- Buttons to decrease values - Used both for the variation of the Set and for the parameters
By holding it pressed down decrease is fast.
- Touche pour la régression des paramètres - Il sert aussi bien à modifier le point de consigne que les paramètres – Une
pression continue augmente la vitesse de modification.
- Knopf für Wertverringerung - Wird sowohl für die Änderung des Set Points, als auch für die der Parameter verwendet wird dieser gedrückt, wird der Wert rasch verringert.
- Botón para la disminución de los valores – Se utiliza ya sea para la variación del Set Point que para la de los parámetros –
Manteniéndolo presionado se obtendrá una disminución rápida.
- Pulsante illuminazione interna
- Internal illumination button.
- Touche éclairage interne .
- Knopf für Innenbeleuchtung.
- Botón iluminación interna.
- Pulsante per l' attivazione manuale del ciclo di sbrinamento - E' attivo se non si è in fase di programmazione Set Point o parametri - Agisce tenendolo premuto per oltre 5 secondi - Durante il ciclo di sbrinamento un
asterisco verrà mostrato sul display LCD - Nel caso in cui le condizioni termodinamiche non soddisfano i
valori impostati nei parametri relativi allo sbrinamento questo non verrà eseguito.
- Button for the manual activation of the defrosting cycle - It is active when if not in the Set Point or parameter programming
phase - Act by holding it pressed down for more than 5 seconds - An asterisk will be shown on the LCD display during the
defrosting cycle. - If the thermodynamic conditions do not satisfy the values set in the parameters relative to defrosting this will
not be carried out.
- Touche pour l’activation manuelle de cycle de dégivrage – Il est actif si on n’est pas en phase de programmation du point
de consigne ou des paramètres – Il faut appuyer dessus pendant au moins 5 secondes – Pendant le cycle de dégivrage, un
astérisque s’affiche sur le visuel à cristaux liquides – Si les conditions thermodynamiques ne répondent pas aux paramètres
de dégivrage mis au point, ce dernier ne sera pas effectué.
- Knopf für Handbetrieb des Abtauzyklus – Ist aktiv, wenn weder Setpoint noch Parameter programmiert werden –
Funktioniert, indem dieser mehr als 5 Sekunden gehalten wird – Während des Abtauzyklus erscheint auf dem LCD-Display
ein Sternchen – Sollten die thermodynamischen Bedingungen nicht den in den jeweiligen Abtauparametern eingegebenen
Werten entsprechen, wird der Abtauzyklus nicht durchgeführt..
- Botón para la activación manual del ciclo de descongelamiento – Es activo si no se está en fase de programación Set Point
o parámetros – Actúa manteniéndolo presionado por más de 5 segundos – Durante el ciclo de descongelamiento un
asterisco aparecerá en el display LCD – En el caso que las condiciones termodinámicas no satisfagan los valores
establecidos en los parámetros relativos al desgongelamiento esto no será ejecutado.
FOCUS E
4 280 38446 1 ac
• 14
I
GB
F
D
E
4.0
PANNELLO DI CONTROLLO
CONTROL PANEL - TABLEAU DE COMMANDE
SCHALTTAFEL - PANEL DE CONTROL
mod. 12 - 16 - 18 - 20 24
- Premendolo e rilasciandolo si avrà la visualizzazione del Set Point che viene indicata dal lampeggio della
scritta "SET" sul display - Per variarlo, agite sui pulsanti "UP" e "DOWN" entro 5 secondi - La memorizzazione
del nuovo valore avviene automaticamente dopo 5 secondi dall' ultima azione sui tasti.
- By pressing and releasing the Set Point will be visualised. It is indicated by the flashing word “SET” on the display - To
change it, use the “UP” and “DOWN” buttons within 5 seconds - Memorisation of the new value takes place automatically after
5 seconds from the last action on the keys.
- Sa pression affichera le point de consigne qui est signalé par le clignotement de l’indication «SET» sur le visuel – Il peut être modifié
en agissant sur les touches «UP» et «DOWN» dans les 5 secondes suivant la dernière pression sur les touches – Le nouveau
paramètre est enregistré automatiquement dans les 5 secondes suivant la dernière pression sur les touches.
- Wird dieser Knopf gedrückt und wieder losgelassen, wird der Set Point durch Blinken der Schrift „SET“ auf dem Display
angezeigt – Um diesen zu ändern, die „UP“ und „DOWN“- Knöpfe binnen 5 Sekunden betätigen – Die Speicherung des neuen
Wertes erfolgt automatisch 5 Sekunden nach der letzten Betätigung der Tasten.
- Presionándolo y soltándolo se obtendrá la visualización del Set Point que se indica con la intermitencia de la inscripción
“SET” en el display – Para cambiarlo, utilize los pulsantes “UP” y “DOWN” dentro de 5 segundos – La memorización del
nuevo valor sucede automáticamete luego de 5 segundos después de la útima acción en las teclas.
VISUALIZZAZIONE DISPLAY
DISPLAY VISUALISATION - AFFICHAGE - DISPLAYANZEIGE - VISUALIZACIÓN DISPLAY
" COMP "
Sigla associata al relay compressore - Viene visualizzata quando il compressore è in funzione.
Symbol associated to the compressor relay - It is displayed when the compressor is functioning.
Sigle associé au relais du compresseur, il s’affiche lorsque le compresseur est en marche.
Zeichen für Kompressorrelais – Wird angezeigt, wenn der Kompressor in Betrieb ist.
Sigla asociada con el relay compresor – Se visualiza cuando el compresor está en función.
" SET "
Appare sul display durante la visualizzazione e l' impostazione del Set Point e dei parametri.
It appears on the display during visualisation along with the setting of the Set Point and the parameters.
Il s’affiche sur le visuel pendant l’affichage et la mise au point du point de consigne et des paramètres.
Erscheint während der Anzeige und Eingabe des Set Points und der Parameter auf dem Display.
Aparece en el display durante la visualización y la programación del Set Point y de los parámetros.
" VEN "
Sigla associata ai ventilatori - Viene visualizzata quando i ventilatori sono in funzione.
Symbol associated to the fans - It is displayed when the fans are functioning.
Sigle associé aux ventilateurs, il s’affiche lorsque les ventilateurs sont en marche.
Zeichen für Ventilatoren – Wird angezeigt, wenn die Ventilatoren in Betrieb sind.
Sigla asociada con los ventiladores – Se visualiza cuando los ventiladores están en función.
"
*
"
Sigla associata allo sbrinamento - Viene visualizzata quando lo sbrinamento è in corso.
Symbol associated to defrosting- it is displayed when defrosting is in progress.
Sigle associé au dégivrage, il s’affiche lorsque le dégivrage est en cours.
Zeichen für Abtauen - Wird angezeigt, wenn der Abtauzyklus in Betrieb ist.
Sigla asociada con el descongelamiento – Se visualiza cuando el descongelamiento está en marcha.
CONTROLLO PARAMETRI DI TERMOSTATAZIONE (I.R.A.) - optional
CONTROL OF TERMOSTATION PARAMETERS - CONTRÔLE DES PARAMÈTRES DES THERMOSTATS
KONTROLLE THERMOSTATEINSTELLUNGSPARAMETER - CONTROL PARÁMETROS DE TERMOSTATACIÓN
La vetrina è dotata di un sistema elettronico che agisce direttamente sui parametri di controllo dell' impianto
frigo. Tale sistema, è in grado di reagire alle variazioni delle condizioni ambientali (temperatura ed umidità),
intervenendo sui parametri frigoriferi impostati, adeguandoli al fine di mantenere costanti la temperatura e
la spatolabilità del gelato.
The ice cream cabinet is supplied with an electronic system that acts directly on the control parameters of the refrigerator
plant. This system is able to react to the variations of environmental conditions (temperature and humidity), intervening on the
set refrigerator parameters, adjusting them to maintain the temperature and consistency of the ice-cream constant.
La vitrine est équipée d’un dispositif électronique qui agit directement sur les paramètres de contrôle de l’installation de
réfrigération. Ce dispositif est en mesure de réagir aux modifications des conditions ambiantes (température et humidité) en
intervenant sur les paramètres mis au point et en les adaptant afin de maintenir la température constante et l’onctuosité de la
glace.
Die Vitrine ist mit einem elektronischen System ausgestattet, das direkt auf die Kontrollparameter der Kühlanlage wirkt. Dieses
System reagiert auf veränderte Umgebungsbedingungen (Temperatur und Feuchtigkeit), indem es auf die eingegebenen Kühlparameter wirkt und diese anpasst, um Eistemperatur und – konsistenz konstant zu halten.
La vitrina está equipada con un sitema electrónico que actúa directamente en los parámetros de control de la instalación frigorífico. Tal sistema tiene la capacidad de reaccionar a las variaciones de las condiciones ambientales (temperatura y humedad),
interviniendo con los parámetros frigoríficos establecidos, adaptándolos con la finalidad de mantener la temperatura y la consistencia del helado constantes.
FOCUS E
4 280 38446 1 ac
• 15
I
GB
F
D
E
4.0
PANNELLO DI CONTROLLO
CONTROL PANEL - TABLEAU DE COMMANDE
SCHALTTAFEL - PANEL DE CONTROL
mod. 12 - 16 - 18 - 20 24
CONTROLLO PARAMETRI DI SBRINAMENTO (I.D.O.)
CONTROL OF DEFROSTING PARAMETERS - CONTRÔLE DES PARAMÈTRES DE DÉGIVRAGE
KONTROLLE ABTAUPARAMETER - CONTROL PARÁMETROS DE DESCONGELAMIENTO
La centralina è dotata di un sistema di controllo intelligente dello sbrinamento (che può essere attivato o
disattivato); se attivato permette di avere il ciclo di sbrinamento solo quando è necessario e per un tempo
sufficiente a garantire la pulizia dell' evaporatore.
The control unit is supplied with an intelligent defrosting control system (that can be activated or deactivated); if activated it allows to have the defrosting cycle only when it is necessary and for a period of time sufficient to guarantee cleaning of the
evaporator.
La centrale dispose d’un système de contrôle intelligent du dégivrage (qui peut être activé ou désactivé). Son activation actionne
le cycle de dégivrage en cas de nécessité seulement et pour une durée suffisante à garantir le nettoyage de l’évaporateur.
Die Schaltzentrale ist mit einem intelligenten Abtaukontrollsystem ausgestattet, das aktiviert oder deaktiviert werden kann; ist es
aktiviert, wird der Abtauzyklus nur bei Bedarf und nur solange eingeschaltet, bis die Verdampferreinigung gewährleistet ist.
La pequeña central está equipada con un sistema de control inteligente de descongelamiento (que puede ser activado o
desactivado); si está activado permite tener un ciclo de descongelamiento sólo cuando es necesario y por un tiempo suficiente
para garantizar la limpieza del evaporador.
VISUALIZZAZIONE DELLA TEMPERATURA IMPOSTATA
DISPLAY OF THE SET TEMPERATURE - AFFICHAGE DE LA TEMPÉRATURE PROGRAMMÉE
ANZEIGE DER EINGEGEBENEN TEMPERATUR - VISUALIZACIÓN DE LA TEMPERATURA ESTABLECIDA
Premere - Sul display appare la scritta SET e viene visualizzata la temperatura precedentemente impostata.
Press - SET will appear on the display and the previously set temperature is displayed.
Appuyez - L’indication SET s’affiche ainsi que la température programmée précédemment.
Bei Druck erscheint auf dem Display die Schrift SET und es wird die zuvor eingegebene Temperatur angezeigt.
Presionar – Aparece la inscripción SET en el display y se visualiza la temperatura establecida anteriormente.
Premere per uscire e tornare alla visualizzazione della temperatura.
Press to exit and return to visualisation of the temperature.
Appuyez pour sortir et revenir à l’affichage de la température.
Drücken, um diese zu verlassen und zur Temperaturanzeige zurückzugehen.
Presionar para salir y regresar a la visualización de la temperatura.
VARIAZIONE DELLA TEMPERATURA IMPOSTATA
VARIATION OF THE SET TEMPERATURE - MODIFICATION DE LA TEMPÉRATURE PROGRAMMÉE
ÄNDERUNG DER EINGEGEBENEN TEMPERATUR - VARIACIÓN DE LA TEMPERATURA ESTABLECIDA
Premere - Sul display appare la scritta SET e viene visualizzata la temperatura precedentemente impostata.
Press - SET will appear on the display and the previously set temperature is displayed.
Appuyez - L’indication SET s’affiche ainsi que la température programmée précédemment.
Bei Druck erscheint auf dem Display die Schrift SET und es wird die zuvor eingegebene Temperatur angezeigt..
Presionar – Aparece la inscripción SET en el display y se visualiza la temperatura establecida anteriormente.
Premere per alzare la temperatura precedentemente impostata.
Press to raise the previously set temperature.
Appuyez pour augmenter la température programmée précédemment.
Drücken, um die zuvor eingegebene Temperatur zu erhöhen..
Presionar para alzar la temperatura establecida anteriormente.
Premere per abbassare la temperatura precedentemente impostata.
Press to lower the previously set temperature.
Appuyez pour diminuer température programmée précédemment.
Drücken um die zuvor eingegebene Temperatur zu verringern..
Presionar para bajar la temperatura establecida anteriormente.
Premere per inserire il nuovo valore.
Press to insert the new value.
Appuyez pour entrer le nouveau paramètre.
Drücken, um den neuen Wert einzugeben..
Presionar para introducir el nuevo valor.
FOCUS E
4 280 38446 1 ac
• 16
I
GB
F
D
E
4.0
PANNELLO DI CONTROLLO
CONTROL PANEL - TABLEAU DE COMMANDE
SCHALTTAFEL - PANEL DE CONTROL
mod. 12 - 16 - 18 - 20 24
SBRINAMENTO MANUALE
MANUAL DEFROSTING - DÉGIVRAGE MANUEL
MANUELLES ABTAUEN - DESCONGELAMIENTO MANUAL
Premere per 5 secondi per attivare lo sbrinamento. In questo modo viene riattivato anche il conteggio del
tempo per lo sbrinamento successivo (se non esistono le condizioni di temperatura all' interno del vano
refrigerato lo sbrinamento manuale non viene accettato).
Con lo sbrinamento viene anche azzerato l' intervallo per il successivo sbrinamento. Il numero degli
sbrinamenti nelle 24 ore viene impostato dalla ditta costruttrice.
NOTA: Questa funzione è attiva solo quando sul display compare la scritta " ISA " in alto a sinistra.
Press for 5 seconds to activate defrosting. In this way also the time required for the successive defrosting is re-activated
(if temperature conditions do not exist inside the refrigerator chamber manual defrosting is not accepted).
The interval for the successive defrosting is also zeroed with defrosting. The umber of defrosting cycles within 24 hours is
set by the manufacturer.
NOTE: This function is active only when “ ISA “ appears on the display on the top left-hand side.
Appuyez pendant 5 secondes pour activer le dégivrage. De cette façon, le comptage du temps pour le dégivrage successif est
aussi réactivé (si la température à l’intérieur du logement réfrigéré n’est pas adéquate, le dégivrage manuel n’est pas accepté).
Avec le dégivrage, l’intervalle pour le dégivrage suivant est aussi effacé. Le nombre de dégivrages en 24 heures est mis au point
par le fabricant.
NOTE: L’activation de cette fonction est signalée par l’affichage de l’indication « ISA « en haut à gauche du visuel.
5 Sekunden lang drücken, um den Abtauzyklus zu aktivieren. So wird auch die Zeitberechnung für den nächsten Abtauzyklus
wieder aktiviert (sind die Temperaturbedingungen im Kühlanlageninneren nicht gegeben, wird der manuelle Abtauzyklus nicht
angenommen).
Mit dem Abtauen wird auch der Zeitabstand bis zum nächsten Abtauzyklus gelöscht. Die Anzahl der Abtauzyklen innerhalb
von 24 Stunden wird werkseitig eingestellt.
HINWEIS: Diese Funktion ist nur aktiv, wenn auf dem Display die Schrift „ ISA „ oben links erscheint.
Presionar por 5 segundos para activar el descongelamiento. De este modo se reactiva también el cómputo del tiempo para el
descongelamiento sucesivo (si no existen condiciones de temperatura dentro del compartimiento refrigerado el
descongelamiento manual no es aceptado).
Con el descongelamiento también se ajusta a cero el intervalo para el descongelamiento sucesivo. El número de
descongelamientos durante las 24 horas es establecido por la compañía constructora.
NOTA: Esta función es activa sólo cuando la inscripción “ISA” aparece en el display en la parte superior izquierda.
ACCENSIONE ILLUMINAZIONE
SWITCHING ON OF THE LIGHTS - ÉCLAIRAGE INTERNE
EINSCHALTUNG BELEUCHTUNG - ENCENDIDO ILUMINACIÓN
Premere per accendere la luce interna vano vaschette.
Press to switch on the internal light of the tray compartment.
Appuyez pour éclairer le logement des barquettes.
Drücken, um die Innenbeleuchtung des Wannenbereichs einzuschalten.
Presionar para encender la luz interna compartimiento envases.
FOCUS E
4 280 38446 1 ac
• 17
I
GB
F
D
E
4.0
PANNELLO DI CONTROLLO
CONTROL PANEL - TABLEAU DE COMMANDE
SCHALTTAFEL - PANEL DE CONTROL
mod. 12+12
1
2
ON
ON
OFF
OFF
Spia Luminosa Blocco Motore
Compressor stop pilot lamp
Témoin bloquage moteur
Motor stop licht
Luz de aviso parada compressor
1
INTERRUTTORE FRIGO VETRINA SX
CABINET SWITCH SX
INTERRUPTEUR VITRINE SX
SCHALTER VITIRNE SX
INTERRUPTOR FRIO VITRINA SX
2
INTERRUTTORE FRIGO VETRINA DX
CABINET SWITCH DX
INTERRUPTEUR VITRINE DX
SCHALTER VITIRNE DX
INTERRUPTOR FRIO VITRINA DX
La centralina elettronica viene installata già settata.
Eventuali modifiche al settaggio potranno essere eseguite solo da personale qualificato.
The electronic switchboadr is factory-set before installation.
Any changes in the thermostat settings can be implemented exclusively by qualified personnel.
La centrale électronique est mise en place dejà réglèe.
Des eventuelles modifications pourront etre faites seulement par des techniciens specialisés.
Die elektr. Steuerung wird bereits in eingestellter Form installiert.
Eventuelle Änderungen beim eistellen sollen nur von qualifizierten personal.
La centralita electronica es instalada ya programada.
Los posibles cambios a la programacion de la centralita pueden ser realizados solamente por personal calificado.
FOCUS E
4 280 38446 1 ac
• 18
I
GB
F
D
E
4.0
PANNELLO DI CONTROLLO
CONTROL PANEL - TABLEAU DE COMMANDE
SCHALTTAFEL - PANEL DE CONTROL
mod. 12+12
Tastiera digitale
Display LCD
Digital keyboard
Clavier numérique
Digitaltastatur
Teclado digital
Display
Display
Display
Display
VARIAZIONE DELLA TEMPERATURA IMPOSTATA SEZIONE DX
Premere e rilasciare il pulsante SET - viene visualizzata la temperatura di Set Point della sezione DX.
Per modificare il valore premere e rilasciare il pulsante SET - la scritta SET lampeggia.
Per aumentare o diminuire la temperatura agire sui tasti 1 o 3 - premere nuovamente il pulsante SET per confermare il nuovo
valore di temperatura.
VARIAZIONE DELLA TEMPERATURA IMPOSTATA SEZIONE SX
Premere e rilasciare il pulsante SET - viene visualizzata la temperatura di Set Point della sezione DX.
Premere e rilasciare il pulsante 3 - viene visualizzata la temperatura di Set Point della sezione SX (la temperatura della sezione
SX è indicata dalla sigla SE2).
Per modificare il valore premere e rilasciare il pulsante SET - la scritta SET lampeggia.
Per aumentare o diminuire la temperatura agire sui tasti 1 o 3 - premere nuovamente il pulsante SET per confermare il nuovo
valore di temperatura.
RIGHT SECTION CHANGE OF SET TEMPERATURE
Press and release the button SET – the right section Set Point temperature is visualized.
To modify the value press and release the button SET – the writing SET will flash.
To increase or decrease the temperature, use the buttons 1 or 3 – press again the button SET to confirm the new temperature
value.
LEFT SECTION CHANGE OF SET TEMPERATURE
Press and release the button SET – the right section Set Point temperature is visualized.
Press and release the button 3 – the left section Set Point temperature is visualized (the left section temperature is indicated by
the abbreviation SE2).
To modify the value press and release the button SET – the writing SET will flash.
To increase or decrease the temperature, use the buttons 1 or 3 – press again the button SET to confirm the new temperature
value.
CHANGEMENT DE LA TEMPÉRATURE FIXÉE POUR LA SECTION DROITE (DX)
Appuyer sur SET puis relâcher le bouton. Vous visualisez la température de Set Point de la section DX
Pour modifier la valeur, appuyer sur SET puis relâcher le bouton- Le mot SET clignote.
Pour augmenter ou baisser la température, appuyer sur les touches 1 ou 3 – appuyer à nouveau sur SET afin de confirmer la
nouvelle valeur de la température..
CHANGEMENT DE LA TEMPÉRATURE FIXÉE POUR LA SECTION GAUCHE (SX)
Appuyer sur SET puis relâcher le bouton. Vous visualisez la température de Set Point de la section DX
Appuyez sur le bouton 3 puis relâchez. Vous visualisez la température de Set Point de la section SX (la température de la section SX est indiquée par le sigle SE2).
Pour modifier la valeur, appuyer sur SET puis relâcher le bouton- Le mot SET clignote.
Pour augmenter ou baisser la température, appuyer sur les touches 1 ou 3 – appuyer à nouveau sur SET afin de confirmer la
nouvelle valeur de la température..
FOCUS E
4 280 38446 1 ac
• 19
I
GB
F
D
E
4.0
PANNELLO DI CONTROLLO
CONTROL PANEL - TABLEAU DE COMMANDE
SCHALTTAFEL - PANEL DE CONTROL
mod. 12+12
Tastiera digitale
Display LCD
Digital keyboard
Clavier numérique
Digitaltastatur
Teclado digital
Display
Display
Display
Display
ÄNDERUNG DER EINGESTELLTEN TEMPERATUR IM RECHTEN TEIL
Den Knopf SET drücken und loslassen – die Set Point Temperatur des rechten Teils wird eingeblendet.
Um den Wert zu ändern, den Knopf SET drücken und loslassen – SET blinkt.
Um die Temperatur zu erhöhen oder zu verringern, die Knöpfe 1 oder 3 drücken – nochmals den Knopf SET drücken, um den
neuen Temperaturwert zu bestätigen.
ÄNDERUNG DER EINGESTELLTEN TEMPERATUR IM LINKEN TEIL
Den Knopf SET drücken und loslassen – die Set Point Temperatur des rechten Teils wird eingeblendet.Den Knopf 3 drücken
und loslassen – die Set Point Temperatur des linken Teils wird eingeblendet (die Temperatur des linken Teils wird von der
Abkürzung SE2 angezeigt).
Um den Wert zu ändern, den Knopf SET drücken und loslassen – SET blinkt.
Um die Temperatur zu erhöhen oder zu verringern die Knöpfe 1 oder 3 drücken – nochmals den Knopf SET drücken, um den
neuen Temperaturwert zu bestätigen.
VARIACIÓN DE LA TEMPERATURA PROGRAMADA SECCIÓN DERECHA
Pulsar y dejar el pulsador SET - la temperatura de Set Point de la sección derecha es visualizada.
Para modificar el valor pulsar y dejar el pulsador SET - la palabra SET relampaga.
Para aumentar o desminuir la temperatura pulsar los pulsadores 1 o 3 – pulsar de nuevo el pulsador SET para confirmar el
nuevo valor de temperatura.
VARIACIÓN DE LA TEMPERATURA PROGRAMADA SECCIÓN IZQUIERDA
Pulsar y dejar el pulsador SET - la temperatura de Set Point de la sección derecha es visualizada.
Pulsar y dejar el pulsador 3 - la temperatura de Set Point de la sección izquierda es visualizada (la temperatura de la sección
izquierda es indicada con la sigla SE2).
Para modificar el valor pulsar y dejar el pulsador SET - la palabra SET relampaga.
Para aumentar o desminuir la temperatura pulsar los pulsadores 1 o 3 – pulsar de nuevo el pulsador SET para confirmar el
nuevo valor de temperatura.
VISUALIZZAZIONE DISPLAY
DISPLAY VISUALISATION - AFFICHAGE - DISPLAYANZEIGE - VISUALIZACIÓN DISPLAY
" OFF "
FOCUS E
Sigla associata allo spegnimento della macchina tramite gli interruttori 1 e 2.
Acronym associated to the extinction of the machine through switches 1and 2.
Sigle associé à l'extinction de la machine par les interrupteurs 1et 2.
Akronym verband zur Löschung der Maschine durch Schalter 1a. 2.
Las siglas se asociaron a la extinción de la máquina a través delos interruptores 1aos 2.
4 280 38446 1 ac
• 20
I
GB
F
D
E
5.0
PULIZIA
CLEANING - NETTOYAGE - REINIGUNG - LIMPIEZA
- SUPERFICI IN ACCIAIO INOSSIDABILE:
Lavare con acqua tiepida e saponi neutri, sciacquar bene ed asciugare con panno morbido.
Evitare pagliette o lana di acciaio che deteriorano l' aspetto della superficie.
- SUPERFICI IN ACRILICO E/O IN POLICARBONATO:
Lavare con acqua tiepida usando un panno morbido o di camoscio.
Utilizzare all' occorrenza una soluzione acquosa di sapone neutro; risciacquare con acqua e asciugare con un panno morbido.
Non usare abrasivi, alcool, acetone o solventi che potrebbero causare graffi o fenomeni di corrosione.
- PARTI IN VETRO:
Usare unicamente prodotti specifici per la pulizia dei vetri. Non è consigliabile usare acqua in quanto può depositare calcare sulla superficie del vetro.
STAINLESS STEEL SURFACES:
Wash with warm water and mild detergent, rinse well and dry with soft cloth. Avoid scouring pads etc. which will spoil the finish of the stainless
steel.
ACRYLIC AND/OR POLYCARBONATE SURFACES:
Wash with lukewarm water, using a soft cloth or chamois cloth.
If necessary, use a water solution with neutral soap. Rinse with water and dry with a soft cloth.
Do not use abrasives, alcohol, acetone or solvents: they can cause scratching or corrosion.
GLASS SURFACES:
Only use products specifically designed for glass cleaning.
It is not advisable to use ordinary water which can leave a film of calcium on the surface of the glass.
SURFACES EN ACIER INOX:
Laver avec eau tiède et savon neutre, rincer bien et essuyer avec un chiffon souple. Eviter la laine d'acier qui endommagerait la surface.
SURFACES EN ACRYLIQUE ET/OU EN POLYCARBONATE:
Laver avec eau tiède en employant un chiffon souple ou de chamois.
Utileser au besoin une solution aqueuse de savon neutre; rincer àl’eau et essuyer avec un chiffon souple.
Ne pas utiliser abrasifs, alcool, acétone ou solvants qu’ils pourraient causer rayures ou phénomènes de corrosion.
SURFACES EN VITRE:
Utiliser uniquement des produits pour le nettoyage des vitres.
Avec de l'eau on pourrait avoir de taches de calcaire sur les surfaces vitrées.
FLAECHEN IN ROSTFREIEM STAHL:
Mit lauwarmen Wasser und neutraler Seife waschen, gut spülen und mit einem weichen Lappen trocknen.
Keine Metallwolle gebrauchen, da sie die Oberfläche verkratzen.
FLAECHEN IN ACRYL UND/ODER POLYKARBONAT:
Mit warmem Wasser und einem weichen Tuch oder einem Ledertuch abraiben.
Falls nötig kann dem Reinigungswasser Neutralseife zugegesetzt werden. Anschließend mit klarem Wasser abspülen und mit einem weichen Tuch
trockenreiben.
Keine scheuernden Reinigungsmittel oder Alkohol, Azeton oder Lösungsmittel bei der Reinigung verwenden, da diese Kratzer oder Korrisionsschäden
verursachen können.
SCHEIBENTEILE:
Nur spezielle Produkte für die Reinigung von Scheiben verwenden.
Den Gebrauch von Wasser vermeiden, das Kalkrückstände auf der Scheibe hinterlassen kann.
- SUPERFICIES DE ACERO INOXIDABLE:
Lave con agua tibia y jabones neutros, enjuague bien y seque con paño suave.
Evite el uso de estropajos o lana de acero que deterioran el aspecto de la superficie.
- SUPERFICIES DE PLÁSTICO:
Lave con agua y jabones neutros, enjuague bien y seque con paño suave.
Evite usar en absoluto alcohol, acetona, solventes que contaminen las superficies de manera permanente.
- PARTES DE VIDRIO:
Utilice únicamente productos específicos para limpiar vidrios.
No se aconseja el uso de agua ya que puede dejar residuos de calcáreo sobre la superficie de vidrio.
FOCUS E
4 280 38446 1 ac
• 21
I
GB
F
D
E
6.0
POSIZIONAMENTO / LIVELLAMENTO
POSITIONING / LEVELLING - POSITIONNEMENT / NIVELLEMENT
AUFSTELLUNG / NIVELLIERUNG - POSICIONAMIENTO / NIVELACIÓN
• E' necessario che il gruppo compressore condensatore sia in condizioni di libero scambio d' aria; pertanto le zone di aerazione
non devono essere ostruite da scatole o altro.
• It is necessary that the condensing unit obtains a good circulation of air around it. Also the area around the condensing unit should
not be obstructed by boxes or other objects.
• Il est nècessaire que le groupe compresseur soit en conditions de libre èchange d'air. Pourtant les zones d'aération ne doivent
pas être obstruées par cartons ou autre (ou trop près de parois).
• Es ist nötig, dass die Kondensator - Kompressoraggregate unbehindert die Luft austauschen können.
Deswegen dürfen die Lüftungsgitter nicht mit Schachteln oder anderem verstopft werden.
• Es necesario que el grupo compresor condensador esté en condiciones de cambiar el aire libremente.
Por esta razón, las zonas de ventilación no deben ser obstruídas por cajas u otros objetos.
• Posizionare l'apparecchio in piano per un migliore funzionamento.
Non posizionare contenitori di liquidi e/o oggetti in genere sul TOP dell' apparecchio.
• Place the counter in horizontal position on a clean surface. This ensures good running and improves defrosting efficacy.
Do not place containers with liquid substances and/or any other kind of object on the equipment TOP
• Positionner l'appareil en horizontal pour un parfait fonctionnement.
N' appuyer rien sur le TOP de l' appareil.
• Das Gerät eben hinstellen, damit eine optimale Funktionierung garantiert wird.
Keine Behaelter mit Flussigkeit und keine Gegenstaende auf den Top des Geraetes stellen.
• Ubique el aparato sobre una superficie plana para su mejor funcionamiento.
Generalmente no posicionar recipientes de objetos e/o líquidos en la cima del aparato
• Posizionare l' apparecchio lontano da fonti di calore (radiatori, stufe di ogni tipo, etc.) e lontano dall' influenza di continui movimenti
d' aria (causati ad esempio da ventilatori, bocchette dell' aria condizionata etc.); evitare inoltre l' esposizione ai diretti raggi del sole;
tutto ciò causa elevazione della temperatura all' interno del vano refrigerato con negative conseguenze sul funzionamento e sul
consumo di energia.
L' apparecchio non può essere usato all' aria aperta e non può essere esposto alla pioggia.
• Position the appliance away from sources of heat (radiators, ovens, etc.), and away from draughts (for example: fans, air
conditioning ducts). Also avoid direct exposure to sun's rays; in fact anything that causes the temperature to the inside of the cabinet
to rise with detrimental results to the operation of the unit and energy consumption.
Do not use the equipment in the open air and do not expose it to the rain.
• Positionner l'appareil loin des sources de chaleur (radiateurs, sources chauffantes, etc.) loin de l'influence de mouvements
continus de l'air (causés par exemple par ventilateurs, air climatisé, etc....) éviter, en outre, l'exposition directe aux rayons du soleil.
Tout ceci cause une élévation de la temperature a l'intérieur de la cuve réfrigérée avec des conséquences négatives sur le
fonctionnement et sur la consommation d'énergie. L'appareil ne peut être ni employé en plein air et ni exposé à la pluie.
N' utiliser pas l' appareil au dehors et ne l' exposer pas à la pluie.
• Das Gerät nicht in die Nähe von Wärmequellen (Heizkörper, Oefen, etc.) stellen und weit entfernt von Luftdurchzügen
(z.B.verursacht durch Ventilatoren, Klimaanlagen, etc.).
Im weiteren nicht den Sonnenstrahlen aussetzen, da dies eine Temperaturerhöhung im Innern des Kühlraumes mit negativer
Das Geraet darf nicht im Freien benutzt werden und vom Regnen schtzen.
• Ubique el aparato lejos de fuentes de calor (radiadores, estufas de cualquier tipo, etc) y lejos de la influencia de flujos continuos
de aire (causados, por ejemplo, por ventiladores, aire acondicionado, etc), evite además la exposición directa a los rayos del sol.
Todo esto causa el aumento de la temperatura en el interior del espacio refrigerado con consecuencias negativas sobre el
funcionamiento y el consumo de energía.
El aparato no puede ser utilizado en el aire abierto y estar expuesto a la lluvia.
FOCUS E
4 280 38446 1 ac
• 22
I
GB
F
D
E
7.0
COLLEGAMENTO ELETTRICO
ELECTRICAL CONNECTION - BRANCHEMENT ÉLECTRIQUE
ANSCHLUB AN DIE STROMVERSORGUNG - CONEXIÓN ELÉCTRICA
• Controllare che la tensione di rete sia corrispondente a quella riportata sulla targhetta di identificazione dell'apparecchio
e che la potenza richiesta sia adeguata.
• Check that the voltage indicated on the appliance is the same as that in the establishment .
• Contrôler que la tension éléctrique soit correspondante à celle reportée sur la plaquette d'identification de l'appareil.
• Kontrollieren Sie, dass die Netzspannung mit den Angaben auf dem Identifikationsschild des Gerätes übereinstimmt und dass
die verlangte Leistung gemäss Angabe auf demselben Schild angepasst ist.
• Controle que la tensión de la red sea correspondiente a la que figura en la placa de identificación del aparato y que la potencia
requerida sea adecuada a la indicada en la misma placa.
Si ricorda che la messa a terra è necessaria ed obbligatoria a termini di legge.
• Si consiglia di dotare la presa di alimentazione del vostro impianto elettrico di un interruttore onnipolare con apertura minima
tra i contatti di 3 mm, dimensionato al carico e rispondente alle norme vigenti.
We remind you that the "grounding" of the electric appliances is necessary for the safety and it is obligatory
by law.
• It is advisable to equip the socket of your eletric system with an omnipolar switch having minimum mm.3 opening between the
contacts, rated for the load and made accorting to the present norms.
Nous vous rappellons que le contact terre est nécessaire pour la sécurité et obligatorie vis à vis de la loi.
• On conseille d'équiper la prise d'alimentation de votre installation électrique d'un interrupteur unipolaire avec une ouverture
de 3 mm entre les contacts, selon la charge électrique et les normes en vigueur.
Die Erdung der elektrischen Geräte ist noetig für die Sicherheit und obligatorisch laut Gesetz.
• Wir raten lhnen, die Steckdose von lhrer Elektroanlage mit einem einpoligen Schalter mit einer Mindestoeffnung zwischen den
Kontakten von 3 mm auszuruesten, gemaess Ladung und gueltigen Normen.
Le recordamos que es necesaria la descarga a tierra y además obligatoria por ley.
• Se aconseja de dotar el enchufe de alimentación de su instalación eléctrica de un interruptor omnipolar con abertura mínima entre
los contactos de 3 mm, adaptado a la carga y que cumple las normas vigentes.
•
•
•
•
•
FOCUS E
Non posizionare il cavo di alimentazione in punto di passaggio.
Do not position the electrical cable in passageways where it can cause an obstruction.
Ne pas mettre le cable d'alimentation dans les points de passage.
Das Speisungskabel nicht in eine Durchgangsstelle legen.
No coloque el cable de alimentación en lugares de paso.
4 280 38446 1 ac
• 23
I
GB
F
D
E
8.0
MANUTENZIONE
MAINTENANCE - MANUTENTION - WARTUNG - CONSERVACION
- Qualsiasi intervento effettuato sull' apparecchio richiede ASSOLUTAMENTE il distacco della presa di corrente, e comunque nessuna protezione
(griglia a filo, carter) va rimossa da parte di personale non qualificato: evitare assolutamente di far funzionare l'apparecchio con tali protezione
rimosse.
CAVO DI ALIMENTAZIONE:
Ispezionare periodicamente il cavo di alimentazione al fine di controllare se danneggiato.
Il cavo di alimentazione può essere sostituito solamente dal costruttore o da un servizio di assistenza tecnica autorizzato.
SOSTITUZIONE LAMPADE:
Operazione demandata esclusivamente a personale tecnico specializzato.
CONDENSATORE:
Almeno una volta ogni 30 giorni procedere alla pulizia del condensatore da impurità (polveri e detriti) che si accumulano tra le alette e la superficie
frontale ostacolando la buona circolazione dell' aria.
Un condensatore sporco influisce negativamente sulla resa dell' impianto facendo scadere le prestazioni, determinando inutili consumi di energia
elettrica. L' operazione di pulizia va eseguita con spazzole di setola o, ancor meglio, con aspiratore.
- Any further adjustments on the refrigerator NECESSARILY require the electric plug to be removed and in any case, none of the protective elements
(the grill, the carter) must be removed by non-qualified staff.
Absolutely avoid using the refrigerator without such protection.
SUPPLY CABLE:
Check periodically the supply cable in order to detect any damage.
The supply cable shall be replaced only the manufacturer or by a qualified after-sale service centre.
LAMPS REPLACEMENT:
It must be carried out by specialized staff only.
CONDENSER:
At least once every 30 days clean the condenser of any dust or foreign particles which can accumulate between the fans and the front surface
of the condenser which can obstruct the air flow.
A dirty condenser will inhibit the performance of the unit thus causing extra energy consumption and possibly causing the unit to fail.
Cleaning should be carried out with a soft brush or preferably with a vacuum cleaner.
In order to keep the surfaces of the appliance in good condition periodic cleaning should be carried out.
- Avant toute intervention, il est ABSOLUMENT obligatoire de détacher la prise de courant et aucune protection (grille à fil, carter) ne doit étre enlevée
par le personnel non qualifié: éviter absolument de faire fonctioneer l'appareil sans ces protections.
CABLE D’ALIMENTATION:
Surveiller périodiquement le cable d’alimentation pour en contrôler l’éventuelle détérioration.
Le cable d' alimentation, peut etre remplacé seulement par le constructeur ou par un service technique qualifié.
REMPLACEMENT DES LAMPES:
Opération à demander exclusivement à personnel technique spécialisé.
CONDENSATEUR:
Au moins une fois tous les 30 jours, procéder au nettoyage du condensateur où de la poudre ou autres produits ont pu s'accumuler sur les ailettes
et sur la surface frontale en obstruant le bonne circulation de l'air.
Un condensateur sale peut influencer négativement sur le redement de l'installation frigorifique, en faisant descendre les présentations, et en
accentuant d'inutiles consommations d'énergie électrique.
L'opération de nettoyage devra être effectuée avec des brosses en soie, ou encore mieux avec un aspirateur.
- Bei jedem Eingriff der auf dem Gerät selbst erfolgt, muß die Stromzufuhr ABSOLUT unterbunden werden; auf jeden Fall dürfen die
Schutzvorrichtungen (Drahtgitter, Gehäuse) nicht durch unqualifiziertes Personal entfernt werden: das Funktionieren des Gerätes ohne diese
Schutzvorrichtungen muß absolut verhindert werden.
NETZKABEL:
Das Netzkabel ist regelmäßig zu kontrollieren um etwaige Schäden frühzeitig zu entdecken.
Das Anschlusskabel darf nur vom Hersteller oder von qualifizierten Kundendienst ersetzt werden.
LAMPEN AUSTAUSCH:
Diese Operation darf nur durch besonders spezialisierten Personal gemacht werden.
KONDENSATOR:
Mindestens einmal alle 30 Tage eine Reinigung des Kondensators von Unreinheiten (Staub und Schmutz), die sich zwischen den Lamellen und
Frontflächen ansammeln und die Luftzirkulation behindern, vornehmen.
Ein schmutziger Kondensator wirkt sich negativ auf die Leistung der Anlage aus, vermindert diese und verursacht einen unnötigen elektrischen
Energieverbrauch. Die Reinigung hat mit einer Borstenbürste oder noch besser mit einem Staubsauger zu erfolgen.
- Antes de realizar toda operación, es ABSOLUTAMENTE necesario desconectar el aparato de la toma de corriente y de todas maneras,
ninguna protección (rejilla de alambre, carter) debe ser sacada por personal no idóneo: evite por completo que el aparato funcione sin tales
protecciones.
CABLE DE ALIMENTACIÓN:
Controle periódicamente el cable de alimentación a fin de verificar que no se haya dañado.
En caso que estuviese dañado, no utilice el aparato y no trate de arreglarlo. Diríjase a personal idóneo para su sustitución.
SUBSTITUCION DE LÁMPARAS:
Operacion exclusivamente reservada al personal técnico especializado.
CONDENSADOR:
Por lo menos una vez cada 30 días limpie el condensador de impurezas (polvos y residuos) que se acumulan entre las aletas y la superficie
frontal obstaculizando la correcta circulación del aire. Un condensador sucio influye negativamente en el rendimiento de la instalación,
causando prestaciones inferiores y determinando consumos inútiles de energía eléctrica. La limpieza debe ser efectuada con cepillos de
cerdas o, mejor aún, con aspiradora.
FOCUS E
4 280 38446 1 ac
• 24
I
GB
F
D
E
9.0
SERVIZIO ASSISTENZA
CUSTOMER ENGINEERING
UTILISATION
In caso di incerto o mancato funzionamento, prima di richiedere l' intervento del centro di Assistenza, eseguire i seguenti controlli:
In case of unsuccesfull start up, before calling the service center, please check the following:
En cas de pannes avant de demander l' intervention d' un rechnicien, il faut vérifier:
ANOMALIA
CAUSA
RIMEDIO
• L' apparecchio non funziona.
• Spina non inserita.
• Mancanza di corrente.
• Inserire spina.
• Verificare erogazione di corrente.
• La temperatura interna non è
sufficientemente bassa.
• Apparecchio vicino ad una fonte
di calore.
• Eccessivo accumulo di ghiaccio sulle
pareti interne.
• Condensatore intasato.
• Allontanare fonte di calore.
• Tubi interni a contatto.
• Pale ventilatori a contatto.
• Viti / Bulloni non serrati.
• Apparecchio non livellato.
• Eliminare contatto.
• Eliminare contatto.
• Serrare.
• Livellare.
• L' apparecchio è rumoroso
(>70 db(A))
DEFECT
Se dopo questi
controlli ed
eventuali
interventi
il funzionamento
non è
ancora corretto
richiedere
l' intervento
di un tecnico
qualificato.
• Eliminare accumulo di ghiaccio .
• Pulire condensatore.
CAUSES
SOLUTIONS
• The appliance does not function
• Not insert plug.
• Power black out.
• Insert the plug.
• Check power supply.
• The internal temperature is not
low enough.
• Equipment too near to heat source.
• Increase distant from heat source.
• Excessive ice accumulation on
internal walls.
• Dusted condenser.
• Eliminate ice accumulation, by defrosting
the cabinet.
• Clean the condenser.
•
•
•
•
•
•
•
•
• The appliance is noisy
(>70 db(A)).
ANOMALIE
Internal tubes are in contact.
Blades of ventilator are obstructed.
Screws/bolts are not tightened.
Equipment on uneven surface.
CAUSE
Remove obstructions.
Remove obstructions.
Tighten screws/bolts.
Level the equipment properly.
REMEDE
• L' appareil ne marche pas.
• Fiche pas inserée.
• Manque d' electricité.
• Inserer la fiche.
• Verifier erogation electricité.
• La température interne n' est pas
suffisante.
• Appareil près d' une source de
chaleur.
• Accumulation de givre sur les parois
internes.
• Condensateur sale.
• Eloigner la source de chaleur.
•
•
•
•
• Eliminer le contact.
• Eliminer le contact.
• Serrer vis ou boulons.
• Mettre l' appareil à niveau.
• L' appareil est bruyant
(>70 db(A))
FOCUS E
Contact de tuyaux internes.
Contact de pales des ventilateurs.
Vis ou bolons non serrés.
Appareil pas mis à niveau.
4 280 38446 1 ac
If running is not yet
correct after all thos
checks and further
interventions ask a
qualified technician'
s intervention.
• 25
Si aprés ces
controles l'
appareil est
toulours en panne,
demander
l' intervention d' un
technicien qualifié.
• Eliminer la givre .
• Nettoyer le condensateur.
I
GB
F
D
E
9.0
KUNDENDIENST
SERVICIO ASISTENCIA
Im Falle eines Mangel der Fuktionsfaehigkeit, bevor Sie den Kundendienst beauftragen, bitte folgendes pruefen:
En caso de incierto o fallido funcionamiento, antes de requerir la intervención del cientro de asistencia, ejecutar los siguientes controles:
ANOMALIE
GRUND
MITTEL
• Das Geraet funktionert nicht.
• Secker ist nitch eingefuegt.
• Elektrisches Mangel.
• Stecker einfuegen.
• Elektrische Versorgung.
• Die innen Teperatur ist nicht genug
tief.
• Das Geraet ist neben eine
Heißequelle.
• Eisablagerung in der innen Wanne.
• Kondensator ist verstopft.
• Heißequelle entfernen.
Wenn nach diesen
Prüfungen und
eventuellen
Reparaturen die
Funktionsfähigkeit
nicht richtig ist,
dann fragen Sie
nach
einen
qualifizierten
Techniker an.
• Eisablagerung entfernen.
• Kondensator reinigen.
• Geraet ist geraeuschvoll
(>70 db(A))
• Innen Roehre in Kontakt.
• Fluegel des Ventilator in Kontakt.
• Schrauben nicht fest gespannt.
• Geraet nicht nivelliert.
Anomalía
• El aparato no trabaja.
• La temperatura interior no es
suficientemente baja.
Causa
• Kontakt entfernen.
• Kontakt entfernen.
• Festschrauben..
• Nievellieren.
Remedio
• Enchufe no introducido.
• Falta de corriente.
• Introducir enchufe.
• Averiguar la suministracion de corriente.
• Aparato cerca de una fuente de calor.
• Excesivo aumento de hielo en las paredes
interiores.
• Condensador obstruido.
• Alejar fuentes de calor.
Si después de
estos
controles y
eventuales
intervenciones
el funcionamiento
no es todavía
correcto
requerir
la intervención
de un técnico
calificado.
• Eliminar aumento de hielo.
• Limpiar el condensador.
• El aparato es ruidoso
(>70 db(A))
FOCUS E
•
•
•
•
Tubos interiores con contacto.
Helice ventiladores con contacto.
Tornillos no cierrados.
Aparado no nivelado.
4 280 38446 1 ac
• 26
• Eliminar contacto.
• Eliminar contacto.
• Cerrar.
• Nivelar.
I
GB
F
D
E
I
CONDIZIONI GENERALI DI GARANZIA
La venditrice garantisce le proprie apparecchiature per la durata di dodici mesi dalla consegna.
La garanzia comprende la riparazione o la sostituzione delle parti eventualmente difettose per fabbricazione o montaggio previa comunicazione scritta
del numero di matricola e della data di installazione dell' apparecchiatura.
Non rientrano nella garanzia tutte le difettosità imputabili al non corretto utilizzo dell' apparecchiatura, al non corretto allacciamento alla rete elettrica, alla
normale usura dei componenti (come ad esempio la rottura dei compressori e le lampade al neon, se non dovute a difetti di fabbricazione), le chiamate
per l' installazione, le istruzioni tecniche, le regolazioni, la pulizia del condensatore.
Il riscontro da parte di tecnici autorizzati dalla venditrice di componenti manomessi, di riparazioni non autorizzate, di uso improprio dell' apparecchiatura,
produrrà la decadenza della garanzia stessa.
Le spedizioni relative a componenti in garanzia saranno effettuate esclusivamente in porto assegnato.
Eventuali danni alle apparecchiature rilevati al momento della consegna imputabili al trasporto, dovranno essere annotati sullo stesso documento di
accompagnamento per il risarcimento dei danni da parte del vettore.
La venditrice non risponde in alcun caso di danni al prodotto conservato causati da avaria della apparecchiatura.
GB
GENERAL CONDITIONS OF WARRANTY
Seller guarantees equipment for twelve months running from delivery.
Warranty includes repair or replacement of defective parts due to fabrication or installation after written communication about serial code and data of
installation.
All defects such as incorrect use of equipment, inappropriate electrical connection, normal consumption (for example compressor breaks and fluorescent
lamp malfunctioning which do not depend on fabrication defects), as well as calls for installations, technical instructions, adjustements and compressor
cleaning are not included in the warranty.
In case seller' s technicians retrieve tampering, not authorised repairs, inappropriate use of equipment, the guarantee will not cover the goods.
Shipments of components under guarantee will be made exclusively freight collect.
Possible damages of equipment due to transport must be noticed in the same shipping document for refunding.
In any case seller is not responsible for damages to products conserved inside because of malfunctioning of the equipment.
F
CONDITIONS GENERALES DE GARANTIE
Le fournisseur garantit le matériel pour une durée de douze mois à partir de ladate de facturation.
La garantie comprend la reparation ou le remplacement des composants eventuellements defecteux pour fabrication ou montage, suite à la demande
écrite du client mentionnant le nr. de serie de l' appareil et la data d' installation.
Ne font pas partie de la garantie tous les défaut imputables à un mauvais emploi de l' appareil ou à un mauvais branchement au reseau electrique, les
normales usures des composants (ex: compresseurs, tubes fluorescents, si ne sont pas dues à des defauts de fabrication), les appels pour
installations, instructions techniques, regulations, nettoyages du condensateur.
Le constat de la part de techniciens autorisés par le fournisseur, de fausses manoeuvres, reparations non autorisées par le fournisseur, causera
l' echéance immédiate de la garantie.
L' expéditions des pièces sous garantie sera faite seulement en port du.
Les dommages survenus durant le trasnsport devront faire l' object d' une annotation sue le document de transport pour le dedommagement de la part
du transporteur.
Le fournisseur decline toute resposabilité pour degats occasionnés aux objects, aux produits, ou tiers, provoqués par un appareil vendu, meme si
celui-ci été occasionné par une panne couverte par la garantie.
D
ALLGEMEINE GEWÄHRLEISTUNGSBEDINGUNGEN
Der Hersteller garantiert die eigenen Geräte für eine Dauer von 12 Monaten ab Lieferung.
In der Gewährleistung ist Reparatur oder das Austauschen von beschädigte Teilen wegwn falscher Montage oder Herstellung inbegriffen aber nach
schriftliche Mitteilung der Matrikelnummer und des Datum der Einrichtung des Möbels.
Folgendes ist nicht inbegriffen: alle Schaden wegwn ein nicht richtiges Benutz des Gerät, ein nicht richtiges Anschließen an das elektrisches Netz,
normaler Verbrauch von Teile (wie z.B. Kompressor, Neonlicht) wenn nicht von falscher Herstellung verursacht, den Ruf für das Einrichten des
Gerät, die technische Gebrauchsanweisungen, die Regelungen, die Reinigung des Kondensator.
Sollten die Techniker von der Herstellungs Firma nachprüfen das die Teile aufgebrochen sind, das eventuelle Reparaturen nicht berechtigt wurden,
das ein nicht richtigen Benutz des Gerät stattgefunden hat, wird die Gerwähleistung fälling sein.
Die Lieferungskosten von Ersatzteile in Garantie werdwn bei der Anlieferung direkt von dem Kunden bezahlt.
Eventuelle Schaden bei der Lieferung die vom Transporteur abhängig sind, müssen auf dem Lieferschein notiert werdwn um den Schadenersatz an
den Transporteur zu fordern können.
Der Hersteller ist nicht verantwortlich für Schaden an den ausgestellten Produkte wegen Schaden des Gerät.
I
GB
F
D
E
E
CONDICIONES GENERALES DE GARANTIA
El Fabricante garantiza sus aparatos durante el periodo de 12 meses desde la fecha de entrega.
La garantia incluye la reparacion o la reposicion de componentes eventualmente defectuosos por fabricación o montaje bajo comunicación escrita del
número de serie y de la fecha de instalacion del aparato.
No estan incluidas en la garantia todas las defectuosidades debidas al uso no correcto del aparato, a una incorrecta conexion a la red electrica, al normal
desgaste de los componentes (por ejemplo la ruptura de los compresores y lamparas al neon , si no debidas a defectos de fabricación), las llamadas
para instalación, las instrucciones tecnicas, regulaciones, limpieza del condesador).
La averiguación, por parte de tecnicos autorizados por el Fabricante, de utilizo de componentes manumisos, reparaciones no autorizadas, uso impropio
del aparato, producira’ la caducidad de la misma garantia.
Las expediciones relativas a aparatos en garantia serán efectuadas exclusivamente con transporte contra reembolso.
Eventuales daños a los aparatos relevados al momento de la entrega debidas al transporte, deberán ser anotados en el mismo documento de
acompañamiento para la indemnización por parte del vector.
El Fabricante no responde en ningun caso de daños al producto conservados provocados por averiá del aparato.
I
GB
F
D
E
ISA S.p.A.
Via del Lavoro, 5
06083 Bastia Umbra (PG) – Italy
Codice Fiscale 00550080378 – Partita Iva 01847670542
DICHIARAZIONE DI CONFORMITA’ - DECLARATION OF CONFORMITY
Noi dichiariamo sotto la
responsabilità che il prodotto:
nostra
esclusiva
We declare under our responsability that the
product:
FOCUS E
al quale questa dichiarazione
conforme alle seguenti norme:
FOCUS E
si
riferisce
è
* Sicurezza del macchinario
Concetti Fondamentali, principi generali di progettazione.
Terminologia di base, metodologia – EN 292 Parte 1°
* Safety of machinery
- Settembre 1991
Concetti Fondamentali, principi generali di progettazione.
Specifiche e principi tecnici – EN 292 Parte 2° - Settembre
1991
Sicurezza degli apparecchi elettrici d’uso domestico e similare.
Norme generali EN 60335-1 – Aprile 1998 + Modifiche
2, 5, 6,
A51, A52, A53, A54, A55
Sicurezza degli apparecchi elettrici d’uso domestico e similare – Parte 2°.
Norme particolari per frigoriferi e congelatori EN 60335 -2 – 24 -
Giugno
* Compatibilità Elettromagnetica (EMC)
Limiti e metodi di misura delle caratteristiche di radiodisturbo degli apparecchi
elettrodomestici e similari a motore o termici, degli utensili e degli apparecchi
elettrici similari.
EN 55014-1 (1993)
Requisiti di immmunità per apparecchi elettrodomestici, utensili e degli apparecchi
elettrici similari.
EN 55014-2 (1997)
Parte 3: Limiti – Sezione 2: Limiti per le emissioni di corrente armonica
(apparecchiature con corrente di ingresso = 16A per fase).
EN 61000-3-2 (1995)
Parte 3: Limiti – Sezione 3: Limitazione delle fluttuazioni di tensione e dei
flicker in sistemi di alimentazione in bassa tensione per apparecchiature con
corrente nominale = 16A.
EN 61000-3-3 (1995)
Parte 4: Tecniche di prova e di misura
Sezione 2: Prove di immunità a scarica elettrostatica
EN 61000-4-2
Parte 4: Tecniche di prova e di misura
Sezione 4: Prove di immunità a transitori / treni elettrici veloci
EN 61000-4-4
* Direttiva attrezzature a pressione (PED) 97/23/CE
Poiché l’ attrezzatura rientra in classe non superiore ad I è esclusa dal campo
di applicazione della PED (art. 1 par. 3.6)
In base a quanto previsto dalle Direttive: 73/23 CEE, 93/68
CEE, 89/336 CEE, 92/31/CEE, 98/37 CEE, 89/392 CEE,
91/368 CEE, 97/23/CE.
(luogo e data di emissione)
(Place and date of release)
Basic concepts, general principles for design.
Basic terminology, methodology – EN 292
Parte 1^ (1991)
Basic concepts, general principles for design.
Technical principles and specifications – EN
292 Parte 2^ (1991)
Safety of houschold and electrical appliances.
General requirements EN 60335-1 (1998)
+ Modifications 2, 5, 6,
A51, A52, A53, A54, A55
2000
Bastia Umbra 01/07/2002
to which this declaration relates is in conformity
with the following standards or other normative
documents:
Particular requirements for refrigerator and freezers
EN 60335 -2 - 24
(2000)
* Electromagnetic compatibility (EMC)
Limits and methods of measurement of radio disturbance characteristics of
electrical motor-operated and thermal appliances for households and similar
purposes, electric tools and similar electric apparatus.
EN 55014-1 (1993)
Immunity requirements for household appliances, tools and similar apparatus.
Product family standard EN 55014-2 (1997)
Part 3: Limits – Section 2: Limits for harmonic current emissions (equipment input
current = 16A per phase).
EN 61000-3-2 (1995)
Part 3: Limits – Section 3: Limitation of voltage fluttuations and flicker in low-voltage
supply systems for equipment with rated current = 16A.
EN 61000-3-3 (1995)
Part 4: Testing and measurement techniques
Section 2: Electrostatic discharge immunity test
EN 61000-4-2
Part 4: Testing and measurement techniques
Section 4: Electrical fast transient / burst immunity test
EN 61000-4-4
* The pressure Equipment Directive (PED) 97/23/CE
As the forniture comes back in the class no superior than I it is excluded from
the PED’s application form (art. 1 par. 3.6)
Following the provisions of the Directives: 73/23 CEE,
93/68 CEE, 89/336 CEE, 92/31/CEE, 98/37 CEE, 89/392 CEE,
91/368 CEE, 97/23/CE.
Quality Manager
(Sig.Francesco Pellovini)
(Nome e firma o timbratura equivalente della persona autorizzata)
(Name or signature or equivalent stamping of authorized person)
ISA S.p.A.
Via del Lavoro, 5
06083 Bastia Umbra (PG) – Italy
Codice Fiscale 00550080378 – Partita Iva 01847670542
DICHIARAZIONE DI CONFORMITA’ - DECLARATION DE CONFORMITE
Noi dichiariamo sotto la
responsabilità che il prodotto:
nostra
esclusiva
Nous declarons sous notre seule responsabilitè
que le produit:
FOCUS E
FOCUS E
al quale questa dichiarazione si riferisce è conforme alle
seguenti norme:
auquel se réfère la présente déclaration, est conforme aux
normes suivantes:
* Sicurezza del macchinario
* Sécurité de l’ appareil
Concetti Fondamentali, principi generali di progettazione.
Terminologia di base, metodologia – EN 292 Parte 1°
- Settembre 1991
Concetti Fondamentali, principi generali di progettazione.
Specifiche e principi tecnici – EN 292 Parte 2° - Settembre
1991
Sicurezza degli apparecchi elettrici d’uso domestico e similare.
Norme generali EN 60335-1 – Aprile 1998 + Modifiche
2, 5, 6,
A51, A52, A53, A54, A55
Sicurezza degli apparecchi elettrici d’uso domestico e similare – Parte 2°.
Norme particolari per frigoriferi e congelatori EN 60335 -2 – 24 -
Concepts fondamentaux, principes généraux de conception. Terminologie et
méthodologie de base – EN 292 1°partie (Septembre 1991)
Concepts fondamentaux, principes généraux de conception. Spécificités et
principes techniques – EN 292 2° partie (Septembre 1991)
Sécurité des appareils électriques à usage domestique et similaire.
Normes générales - EN 60335-1 – April 1998 + Modifications
2, 5,
6, A51, A52, A53, A54, A55
Giugno
Sécurité des appareils électriques à usage domestique et similaire.
2° partie - Normes particuliéres pour réfrigéteteurs et congelatéurs
2000
EN 60335 -2 – 24 - Juin 2000
* Compatibilità Elettromagnetica (EMC)
* Compatibilité électromagnétique (EMC)
Limiti e metodi di misura delle caratteristiche di radiodisturbo degli apparecchi
elettrodomestici e similari a motore o termici, degli utensili e degli apparecchi
elettrici similari.
Limites et méthodoes mesure des caractéristiques de perturbations radioélectriques
des apaareils électroménagers et appareils similaires à moteur ou therminiques,
des outils et des appareils électriques similaires.
EN 55014-1 (1993)
EN 55014-1 (1993)
Requisiti di immmunità per apparecchi elettrodomestici, utensili e degli apparecchi
elettrici similari.
Conditions requires d’ immunité pour appareils électroménagers, outils et appareils
électriques similaires.
EN 55014-2 (1997)
EN 55014-2 (1997)
Parte 3: Limiti – Sezione 2: Limiti per le emissioni di corrente armonica
(apparecchiature con corrente di ingresso = 16A per fase).
Partie 3: Limites – Section 2: Limites pour les émission de courant harmonique
(appareillages ayant un courant d’ entreé = 16A par phase).
EN 61000-3-2 (1995)
EN 61000-3-2 (1995)
Parte 3: Limiti – Sezione 3: Limitazione delle fluttuazioni di tensione e dei flicker in
sistemi di alimentazione in bassa tensione per apparecchiature con corrente
nominale = 16A.
Partie 3: Limites – Section 3: Limites des fluctuations de tension et des flickers
dans des systèmes d’ alimentation à basse tension pour appareils ayant un courant
niminal = 16A.
EN 61000-3-3 (1995)
EN 61000-3-3 (1995)
Parte 4: Tecniche di prova e di misura
Sezione 2: Prove di immunità a scarica elettrostatica
Partie 4: Technique d’ essai et de mesure.
Section 2: Essais d’ immunité par rapport aux décharges électrostatiques
EN 61000-4-2
EN 61000-4-2
Parte 4: Tecniche di prova e di misura
Sezione 4: Prove di immunità a transitori / treni elettrici veloci
Partie 4: Technique d’ essai et de mesure.
Section 4: Essais d’ immunité par rapport à des train électriques rapides
EN 61000-4-4
EN 61000-4-4
* Direttiva attrezzature a pressione (PED) 97/23/CE
* Directives pour les appareils à pression (PED) 97/23/CE
Poiché l’ attrezzatura rientra in classe non superiore ad I è esclusa dal campo
di applicazione della PED (art. 1 par. 3.6)
L’ appareil est exclu de cette application (PED art 1 par. 3.6) car il est dans la
classe non supérieure à 1.
In base a quanto previsto dalle Direttive: 73/23 CEE, 93/68
CEE, 89/336 CEE, 92/31/CEE, 98/37 CEE, 89/392 CEE,
91/368 CEE, 97/23/CE.
En accord avec ce qui est prévu par les Directives:
73/23 CEE, 93/68 CEE, 89/336 CEE, 92/31/CEE, 98/37 CEE,
89/392 CEE, 91/368 CEE, 97/23/CE.
Bastia Umbra 01/07/2002
(luogo e data di emissione)
(Lieu et date d’ émission)
Quality Manager
(Sig.Francesco Pellovini)
(Nome e firma o timbratura equivalente della persona autorizzata)
(Nom ou signature ou timbre équivalent de la personne autorisée)
ISA S.p.A.
Via del Lavoro, 5
06083 Bastia Umbra (PG) – Italy
Codice Fiscale 00550080378 – Partita Iva 01847670542
DICHIARAZIONE DI CONFORMITA’ - GESETZESBEREINSTIMMUNG
Noi dichiariamo sotto la
responsabilità che il prodotto:
nostra
esclusiva
Wir
erklären
unter
unserer
Verantwortuung, daß dieser:
FOCUS E
FOCUS E
al quale questa dichiarazione si riferisce è conforme alle
seguenti norme:
* Sicurezza del macchinario
Concetti Fondamentali, principi generali di progettazione.
Terminologia di base, metodologia – EN 292 Parte 1°
eingenen
den folgenden Normen, auf die sish diese Erklärung
bezieht, entspricht:
* Sicherheit der Maschine
- Settembre 1991
Concetti Fondamentali, principi generali di progettazione.
Specifiche e principi tecnici – EN 292 Parte 2° - Settembre
1991
Sicurezza degli apparecchi elettrici d’uso domestico e similare.
Norme generali EN 60335-1 – Aprile 1998 + Modifiche
2, 5, 6,
A51, A52, A53, A54, A55
Sicurezza degli apparecchi elettrici d’uso domestico e similare – Parte 2°.
Norme particolari per frigoriferi e congelatori EN 60335 -2 – 24 -
Sicherheit der Maschine, Grundbegriffe, allgemeine Richtlinien des Entwurfs,
Terminologie und Grundmethodik – EN 292 Teil 1 (Septembre 1991)
Sicherheit der Maschine, Grundbegriffe, allgemeine Richtlinien des Entwurfs, im
speziellen und technische Prinzipien – EN 292 Teil 2 (Septembre 1991)
Sicherheit der elektrischen Teile für Haushaltszwecke und ähnliche, allgemeine
Normen - EN 60335-1 – April 1998 + Änderungen 2, 5, 6, A51,
A52, A53, A54, A55
Giugno
Sicherheit der elektrischen Teile für Haushaltszwecke und ähnliche.
Teil 2: spezifische Normen für Kühlschränke und Tiefkühlschränke
2000
EN 60335 -2 – 24 - Juni 2000
* Compatibilità Elettromagnetica (EMC)
* Elektromagnetische Kompatibilität (EMC)
Limiti e metodi di misura delle caratteristiche di radiodisturbo degli apparecchi
elettrodomestici e similari a motore o termici, degli utensili e degli apparecchi
elettrici similari.
Grenzwerte und Messmethoden für Charakteristiken der Radiostörungen von
Haushaltsgeräten und ähnlichen thermischen Geräten, oder Geräten mit Motor,
sowie von ähnlichen elektrischen Gebrauchsgegenständen und Appareten.
EN 55014-1 (1993)
EN 55014-1 (1993)
Requisiti di immmunità per apparecchi elettrodomestici, utensili e degli apparecchi
elettrici similari.
Immunitätsvoraussetzungen für Haushaltsgeräte, sowie ähnliche elektrische
Gebrauchsgegenstände und Apparete.
EN 55014-2 (1997)
EN 55014-2 (1997)
Parte 3: Limiti – Sezione 2: Limiti per le emissioni di corrente armonica
(apparecchiature con corrente di ingresso = 16A per fase).
Tail 3: Grenzwerte – Sektion 2: Grenzwerte für die Emission von harmonischem
Strom (Apparate mit Stromeingang = 16A per fase).
EN 61000-3-2 (1995)
EN 61000-3-2 (1995)
Parte 3: Limiti – Sezione 3: Limitazione delle fluttuazioni di tensione e dei flicker in
sistemi di alimentazione in bassa tensione per apparecchiature con corrente
nominale = 16A.
Tail 3: Grenzwerte – Sektion 3: Begrenzung der Spannungsfluktuationen und der
Flicker in Niederspannungs – Stromzfuhrsystemen für Apparate mit Nominalstrom
= 16A
EN 61000-3-3 (1995)
EN 61000-3-3 (1995)
Parte 4: Tecniche di prova e di misura
Sezione 2: Prove di immunità a scarica elettrostatica
Tail 4: Prüf – und Messtechniken.
Sektion 2: Immunitätsprobe elektrostatische Entladung.
EN 61000-4-2
EN 61000-4-2
Parte 4: Tecniche di prova e di misura
Sezione 4: Prove di immunità a transitori / treni elettrici veloci
Tail 4: Prüf – und Messtechniken.
Sektion 4: Immunitätsprobe: Transistoren/elektrische Hochgeschwindigkeitszüge.
EN 61000-4-4
EN 61000-4-4
* Direttiva attrezzature a pressione (PED) 97/23/CE
* Vorschrifi für Druckgeräte
Da dieses Gerät nicht in der Klasse I inbegriffen ist, ist es für
das PED (art. 1 par. 3.6) Gebrauch ausgeschlossen
Poiché l’ attrezzatura rientra in classe non superiore ad I è esclusa dal campo
di applicazione della PED (art. 1 par. 3.6)
In base a quanto previsto dalle Direttive: 73/23 CEE, 93/68
CEE, 89/336 CEE, 92/31/CEE, 98/37 CEE, 89/392 CEE,
91/368 CEE, 97/23/CE.
Bastia Umbra 01/07/2002
(luogo e data di emissione)
(Ort und Datum Ausstellung)
Aufgrund der vorgesehenen Richtlinien:
73/23 CEE, 93/68 CEE, 89/336 CEE, 92/31/CEE, 98/37 CEE,
89/392 CEE, 91/368 CEE, 97/23/CE.
Quality Manager
(Sig.Francesco Pellovini)
(Nome e firma o timbratura equivalente della persona autorizzata)
(Nome oder unterschrift oder Stenpel der betreffenden, bevokkmächtigten
Person)
ATTENZIONE - WARNING - ATTENTION
ACHTUNG - ATENCION
I
DISPOSIZIONI DI MONTAGGIO A CURA DELL' IDRAULICO DEL CLIENTE
A LAVORO ULTIMATO, PRIMA DI CHIUDERE LE PEDANE, ACCERTARSI CHE LA MACCHINA
INSTALLATA ABBIA LO SCARICO CONDENSA COLLEGATO ALLA RETE IDRICA.
GB
INSTRUCTION FOR ASSEMBLY TO BE PROVIDED BY CUSTOMER' S
PLUMBER
WHEN WORKS ARE ACHIEVED, BEFORE CLOSING THE FALSE FLOORS, PLEASE CHECK THE
MACHINE CONDENSATION FLOW IS CONNECTED TO THE HYDRAULIC SYSTEM.
F
DISPOSITION DE MONTAGE A LA CHARGE DU TECHNICIEN HYDRAULICIEN
DE L’UTILISATEUR
DÈS QUE LE MONTAGE A ÉTÉ TERMINÉ, AVANT DE METTRE LES PLANCHERS, IL FAUT
S’ASSURER QUE L’ÉVACUATION DES EAUX DE CONDENSATION DE APPAREIL INSTALLÉ
SOYENT BRANCHÉES AU RESEAU HYDRAULIQUE.
D
INSTALLATIONSLEITUNGEN FUER DEN WASSERBAUARBEITER DES KUNDEN
NACH MONTAGE, BEVOR MANDAS FUSSBRETT SCHLIESST, ERSICHERN SIE SICH DAS DER
ABFLUSS DER INSTALLIERTEN MASCHINE AND DEN HYDRAULISCHEN NETZ VERBUNDEN IST
E
DISPOSICIONES DE MONTAJE A CARGO DEL HIDRAULICO DEL CLIENTE
ACABADO EL TRABAJO, ANTES DE CERRAR LAS TARIMAS, VERIFICAR QUE LA MAQUINA
INSTALADA TENGA EL DESAGUE CONDENSACION CONECTADO CON LA RED HIDRAULICA
I
GB
F
D
E
arr_1_1002
SCHEMA ELETTRICO FUNZIONALE - WORKING ELECTRICAL DIAGRAM - SCHEMA ELECTRIQUE FONCTIONAL - BETRIEBSELEKTROSCHEMA - ESQUEMA ELECTRICO FUNCIONAL
E
FOCUS E - 12 / 16 / 18 / 20 / 24
I
GB
F
D
UNITA’ CONDENSATRICE a BORDO
Compressor built-in
Unité condensatrice incorporée
internes Aggregat
con grupo
SCHEMA ELETTRICO FUNZIONALE - WORKING ELECTRICAL DIAGRAM - SCHEMA ELECTRIQUE FONCTIONAL - BETRIEBSELEKTROSCHEMA - ESQUEMA ELECTRICO FUNCIONAL
E
FOCUS E - 12+12
I
GB
F
D
UNITA’ CONDENSATRICE a BORDO
Compressor built-in
Unité condensatrice incorporée
internes Aggregat
con grupo
SCHEMA ELETTRICO FUNZIONALE - WORKING ELECTRICAL DIAGRAM - SCHEMA ELECTRIQUE FONCTIONAL - BETRIEBSELEKTROSCHEMA - ESQUEMA ELECTRICO FUNCIONAL
FOCUS E - 12 / 16 / 18 / 20 / 24
UNITA’ CONDENSATRICE REMOTA
I
GB
F
D
E
External compressor
Unité condensatrice esterne
externes Aggregat
sin grupo
SCHEMA ELETTRICO FUNZIONALE - WORKING ELECTRICAL DIAGRAM - SCHEMA ELECTRIQUE FONCTIONAL - BETRIEBSELEKTROSCHEMA - ESQUEMA ELECTRICO FUNCIONAL
E
FOCUS E - 12+12
I
GB
F
D
UNITA’ CONDENSATRICE REMOTA
External compressor
Unité condensatrice esterne
externes Aggregat
sin grupo
SCHEMA ELETTRICO FUNZIONALE - WORKING ELECTRICAL DIAGRAM - SCHEMA ELECTRIQUE FONCTIONAL - BETRIEBSELEKTROSCHEMA - ESQUEMA ELECTRICO FUNCIONAL
I
GB
F
D
E
FOCUS E - 412135881000 / 412135882000 / 412135883100 / 412135884100
B1
VALVOLA SOLENOIDE MANDATA
DELIVERY SOLENOID VALVE
VANNE SOLENOIDE DE SORTIE
SOLENOIDE VENTIL AUSGANG
VALVULA SOLENOIDE DE ENVIO
B2
VALVOLA SOLENOIDE SBRINAM ENTO
DEFROSTING SOLENOID VALVE
VANNE SOLENOIDE DEGIVRAGE
ABTAUUNGS SOLENOIDE VENTIL
VALVULA SOLENOIDE DE DESESCARCHA M IENTO
B3
VALVOLA SOLENOIDE A 4 VIE
SOLENOID VALVE 4 WAYS
VANNE SOLENOIDE à 4 VOIES
4 WEGE VENTIL
VALVULA SOLENOIDE 4 VIAS
B5
VALVOLA SOLENOIDE ACQUA
WATER SOLENOID VALVE
VANNE SOLENOIDE EAU
WASSERSOLENOIDEVENTIL
VALVULA SOLENOIDE AGUA
C3
M ORSETTIERA MULTIPOLARE
M ULTIPLEXER TERM INAL BOARD
PLAQUE A BORNES MULTIPOLAIRE
M ULTI POLARE SCHRAUBZINGER
PLAQUETA DE ENCHUFE MULTIPOLAR
C5
CENTRALINA ELETTRONICA
ELECTRONIC CONTROL BOARD
BOITIER ELECTRONIQUE
ELEKTRONIK
CENTRALITA ELECTRONICA
C22
CONDENSATORE
CONDENSER
CONDENSEUR
KONDENSATOR
CONDENSADOR
D2
PONTE RADDRIZZATORE
BRIDGE ECTIFIER
PONT ELECTRIQUE
ELEKTRISCHE GLEICHRICHTER
PUENTE ENDRIZADOR
F2
FUSIBILE
FUSE
FUSIBLE
SCHM ELZDRAHT
FUSIBLE
I3
DEVIATORE BIPOLARE
BIPOLAR SWITCH
DETOURNEUR BIPOLAIRE
BIPOLARER SCHALTER
DESVIADOR BIPOLAR
L1
REATTORE M A GNETICO M ONOLA M PADA
REACTOR
REACTEUR M ONOLAM PE
M ONOLAM PE REAKTOR
REACTOR M ONOLA M PARA
L4
REATTORE ELETTRONICO BILAM PADA
ELECTRONIC BALLAST DOBLE LIGHTING
REACTEUR ELECTRONIQUE BILAM PE
ELEKTRONISCHE BILA M PE REAKTOR
REACTOR ELECTRONICO BILAM PARA
L5
TUBO FLUORESCENTE T8
FLUORESCENT LA M P T8
TUBE FLUORESCENT T8
FLUORESZIERENDES ROHR T8
TUBO NEON T8
R4
RESISTENZA SCALDANTE PIANETTO
HEATING RESISTOR WORKING SURFACE
RESISTANCE CHAUFFANTE PLAN
HEIZUNG ARBEITSPLATTE
RESISTENCIA DE CALOR PARA REPISA
R5
RESISTENZA SCALDANTE MUSETTO
HEATING RESISTOR FRONTAL PROFILE
RESISTANCE CHAUFFANTE CORNICHE
FRONT HEIZUNG
RESISTENCIA DE CALOR PARA LA CARITA
R 13
TELERUTTORE + TERM ICO
REM ORE CONTROL SWITCH + THERM IC
TELERUPTEUR + THERM IQUE
SCHALTER + THERM ISCHE SCHUTZ
TELERUCTOR + TERM ICO
R 14
RELAY SBRINAM ENTO
DEFROSTING RELAY
RELAIS DÉGIVRAGE
ABTAUNG RELAY
RELAY DE DESESCARCHAM IENTO
R 17
RESISTENZA SCALDANTE SEGNAGUSTI
HEATING RESISTOR FLAVOUR DISPLAY
RESISTANCE CHAUFFANTE PORTE-PARFUM S
SORTEN SCHILDER HEIZUNG
RESISTENCIA DE CALOR DESIGNA SABORES
S1
SONDA TEM PERATURA
TEM PERATURE PROBE
SONDE TEM PERATURE
TEM PERATUR FUEHLER
SONDA TEM PERATURA
S2
SONDA SBRINAM ENTO
DEFROSTING PROBE
SONDE DEGIVRAGE
ABTAUUNG FUEHLER
SONDA DE DESESCARCHAM IENTO
S3
SONDA DI CONFRONTO
CONFRONT PROBE
SONDE TEM PERATURE
TEPERATUR FUEHLER
SONDA DE COM PARACION
S7
VARIATORE DI VELOCITA'
VELOCITY TRANSFORM ER
ÉCHANGEUR DE VITESSE
GESCHWINDIGKEIT WECHSLER
VARIADOR DE VELOCIDAD
S8
PRESSOSTATO
PRESSURE SWITCH
PRESSOSTAT
DRUCKWAECHTER
PRESOSTATO
S13
SPIA LUM INOSA BLOCCO M OTORE
COM PRESSOR STOP PILOT LA M P
t émoin bloquage moteur
M OTOR STOP LICHT
LUZ DE AVISO BLOQUEO M OTOR
T6
TRASFORM A TORE ALIM ENTAZIONE
TRANSFORM ER
TRANSFORM A TEUR ALIM ENTATION
ELEKTRISCHER UM GESTALTER
TRANSFORMADOR DE ALIM ENTACION
U1
COM PRESSORE
COM PRESSOR
COM PRESSEUR
KOM PRESSOR
COM PRESOR
U2
VENTILATORE CONDENSATORE
CONDENSER FAN
VENTILATEUR CONDENSATEUR
VENTILATOR DES KONDENSATOR
VENTILADOR CONDENSADOR
U3
VENTILATORE EVAPORATORE
EVAPORATOR FAN
VENTILATEUR EVAPORATEUR
VENTILATOR DES VERDAM PFER
VENTILADOR EVAPORADOR
U8
STARTER
STARTER
STARTER
STARTER
STARTER
V1
VETRO FRONTALE RISCALDATO
FRONTAL WARM ED GLASS
VITRE FRONTALE CHAUFFANTE
HEISSES FRONT GLAS
VIDRIO FRONTAL CAIENTADO
V2
VETRO LATERALE RISCALDATO
LATERAL WARM ED GLASS
VITRE LATERALE CHAUFFANTE
HEISSES SEITEN GLAS
VIDRIO LATERAL CALENTADO
Pos. 2
UNITA' CONDENSATRICE
CONDENSING UNIT
unit é condensatrice
AGGREGAT
UNIDAD CONDENSADORA
Pos. 4
SCHEDA ON/OFF
ON/OFF BOARD
fiche on/off
EIN/AUS SCHALTER
TARJETA ON/OFF
Pos. 6
FLAT DI COLLEGAM ENTO CENTRALINA-SCHEDA ELETTRONICA
JOINING FLAT
flat de branchement
VERBINDUNGSKABEL
FLAT DE CONNEXION CENTRALITA-TARJETA ELECTRONICA
Pos. 10
SCHEDA ELETTRONICA CIRCUITI LOGIGI
LOGIC CIRCUIT ELECTRONIC FILE
FICHE ELECTRONIQUE CIRCUITS LOGIQUES
SPEICHERKARTE LOGIKSCHALTUNG
TARJETA ELECTRONICA CIRCUITOS LOGICOS
Pos. 12
M ODULO QUADRO ESTERNO
EXTERNAL BOARD M ODULE
module tableau ext erieur
EXTERNER SCHALTER
TABLERO M ODULO EXTERNO
Pos. 13
LCD GRUPPO LCD (OPTIONAL)
LCD GROUP LCD (OPTIONAL)
LCD groupe LCD ( option)
LCD GRUPPE LCD (ZUBEHOER)
LCD GRUPO LCD (OPCIONAL)
1
INGRESSO FASE ALIM ENTAZIONE CENTRALINA ELETTRONICA
ELECTRONIC BOARD FEEDING PHASE
Phase alimentation boitier electronique
VERSORGUNGS PHASE DER ELEKTRONIK
FASE DE ALIM ENTACION DE CENTRALITA ELECTRONICA
2
INGRESSO NEUTRO ALIM ENTAZIONE CENTRALINA ELETTRONICA
ELECTRONIC BOARD NEUTRAL FEEDING
Neutre alimentation boitier electronique
NEUTRALE VERSOGUNG DER ELEKTRONIK
INGRESO NEUTRO ALIM ENTACION CENTRALITA ELECTRONICA
3
USCITA FASE COM A NDO COM PRESSORE
COM PRESSOR CONTROL PHASE
Sortie phase cpmmande compresseur
AUSGANG PHASE KOM PRESSOR KOMANDO
SALIDA FASE M A NDO COM PRESSOR
7
INGRESSO NEUTRO ALIM ENTAZIONE VALVOLE
FEEDING VALVE NEUTRAL ENTRY
SORTIE NEUTRE ALIM ENTATION VANNES
NEUTRALLEITUNGSEINGANG VENTILVERSORGUNG
INGRESO NEUTRO ALIM ENTACION VALVULAA
10
USCITA FASE ALIM ENTAZIONE VALVOLA A 4 VIE
VALVE 4 WAYS FEEDING PHASE EXIT
SORTIE PHASE ALIM ENTATION VANNE A 4 VOIES
PHASENAUSGANG 4-WEG VENTILVERSORGUNG
SALIDA FASE ALIM ENTACION VALVULA A 4 VIE
14
USCITA NEUTRO VENTILATORE CONDENSAZIONE
CONDENSING FAN NEUTRAL EXIT
SORTIE NEUTRE VENTILATEUR CONDENSATION
NEUTRALLEITUNGSAUSGANG KONDENSIERVENTILATOR
SALDIA NEUTRO VENTILADOR CONDENSACION
15
USCITA FASE COM A NDO VENTILATORE CONDENSAZIONE
CONDENSING FAN EXIT COM M AND PHASE
SORTIE PHASE COM M ANDE VENTILATEUR CONDENSATION
PHASENAUSGANG STEUERUNG KONDENSIERVENTILATOR
SALIDA FASE M A NDO VENTILADOR CONDENSACION
16
USCITA FASE COM A NDO SBRINAM ENTO VENTILATORE CONDENSAZIONE
CONDENSING FAN DEFROSTING COM M AND PHASE EXIT
SORTIE PHASE COM M ANDE DEGIVRAGE VENTILATEUR CONDENSATION
PHASENAUSGANG ABTAUSTEUERUNG KONDENSIERVENTILATOR
SALIDA FASE M A NDO DESESCARCHAM IENTO VENTILADOR CONDENSACION
IS1
SEZIONATORE GENERALE (BLOCCO PORTA)
GENERAL ISOLATING SWITCH (DOOR BLOCK)
SECTIONNEUR GENERAL (BLOC PORTE)
HAUPTSCHALTER (TÜRSPERRE)
SECCIONADOR GENERAL (BLOQUEO PUERTA)
IS2
SEZIONATORE CENTRALINE ELETTRONICHE
ELECTRICAL BOARD ISOLATING SWITCH
SECTIONNEUR CENTRALES ELECTRONIQUES
TRENNSCHALTER ELEKTRONIKZENTRALEN
SECCIONADOR CENTRALITAS ELECTRONICAS
IS4
SEZIONATORE ILLUM INAZIONE
LIGHTING SWITCH
SECTIONNEUR ECLAIRAGE
TRENNSCHALTER BELEUCHTUNG
SECCIONADOR ILUM INACION
S13
SPIA ROSSA BLOCCO M OTORE
M OTOR BLOCK RED WARNING LIGHT
TEM OIN ROUGE BLOC M OTEUR
ROTE KONTROLLLA M PE M OTORSTOP
LUZ DE AVISO ROJA BLOQUEO M OTOR
T L1
TELERUTTORE COM PRESSORE
COM PRESSOR REM OTE CONTROL SWITCH
TELERUPTEUR COM PRESSEUR
FERNSCHALTER KOM PRESSOR
TELERUPTOR COM PRESOR
T L2
RELAY TERM ICO
THERM A L RELAY
RELAY THERM IQUE
THERM ORELAIS
RELAY TERM ICO
T L3
CONTATTO AUSILIARIO NORM A LM ENTE CHIUSO
NORM A LLY CLOSED AUXILIARY CONTACT
CONTACT AUXILLIAIRE NORM A LEM ENT FERM E
RESERVEKONTAKT NORM A LERWEISE GESCHLOSSEN
CONTACTO AUXILIAR NORM A LM ENTE CERRADO
T L4
CONTATTO AUSILIARIO NORM A LM ENTE APERTO
NORM A LLY OPEN AUXILIARY CONTACT
CONTACT AUXILLIAIRE NORM A LEM ENT OUVERT
RESERVEKONTAKT NORM A LERWEISE OFFEN
CONTACTO AUXILIAR NORM A LM ENTE ABIERTO
ISA S.p.A.
Via del Lavoro, 5 - 06083 BASTIA UMBRA - (PG) - ITALY
www.isaitaly.com
Focus E
I
Programmazione base
F
Programmation de base
GB
Basic programming
D
Basisprogrammierung
E
Programación de base
ISA S.p.A.
Via Del Lavoro, 5
06083 Bastia Umbra (PG) Italy
Tel: 075/80171
Fax: 075/8000900
1
PROGRAMMAZIONE BASE
T
La programmazione consente di ottenere dalla macchina
la massima flessibilità consentendo di adeguarla a uso e
condizioni diverse.
La programmazione viene effettuata tramite la tastiera T.
È possibile compiere diverse operazioni che aggiungono
potenzialità alla vostra vetrina:
1.1
1.2
1.3
1.4
Accensione
Programmazione dei gusti
(Impostazione dei gusti sul display LCD della
vetrina)
Programmazione orologio
(Impostazione data e ora)
Password
Funzioni dei tasti
Tasto "UP" per tornare indietro.
Tasto "DOWN" per andare avanti.
Tasto per confermare i dati.
Tasto per uscire da una programmazione.
1.5
Programmazione "Scatola nera"
(Registrazione e controllo della temperatura di
esercizio)
Tasti 0...9 Per scrivere un numero.
1.1 Accensione
V1
• Mettete in funzione la macchina come descritto nel
capitolo "Avviamento/Uso".
• Dopo alcuni secondi si accende il display LCD e viene
mostrato il seguente messaggio (V1).
- 3 °C
- 2 0 °C
I SA
C OM P V E N *
La scritta COMP indica che
il compressore è attivo.
La scritta ISA in alto a sinistra normalmente lampeggia
quando:
La scritta VEN indica che i ventilatori sono
in funzione; controllate la temperatura.
• si è verificata una interruzione di corrente;
• la macchina è stata disconnessa dalla rete elettrica.
Segnala, così, che bisogna riprogrammare l'ora.
Il segnale
2
* indica che lo sbrinamento è in corso.
• Premete e mantenete premuto questo tasto per circa
6 sec. fino a far apparire la successiva scritta (V2):
• Premete questo tasto per scorrere nel menù successivo (V3).
• Premete questo tasto per tornare alla videata V2.
V2
ME N U PR I NC I P A L E
› Gu s t i
V3
ME N U PR I NC I P A L E
›Or o l og i o
• Premete questo tasto per tornare alla videata V1.
Per proseguire con i menù premete il tasto "3" e appare una videata che chiede la password. Questo verrà spiegato
successivamente.
9.2 Programmazione dei gusti
Indicazione dei gusti in vendita (sistema "APP"- Advanced Product Presentation)
Nella parte anteriore delle vaschette contenenti il gelato, è posizionata una fila di display a cristalli liquidi LCD, che
indicano il gusto e il numero associato a ciascuno. Il sistema di indicazione dei gusti è facilmente programmabile da
parte dell'operatore.
• Premete e mantenete premuto questo tasto per
circa 6 sec. fino a far apparire la successiva scritta
(V2):
• Premete ancora questo tasto.
Il cursore lampeggia fino all'inserimento del numero
della vaschetta (fig. 24).
V2
ME N U PR I NC I P A L E
› Gu s t i
I nse r i r e
Num
V2.1
Inserite il numero e confermate con questo tasto.
• Premete questo tasto se si vuole tornare alla videata V1.
24
A
Il sistema consente di impostare le
scritte sui display LCD A rivolti verso il
cliente.
Con l’utilizzo della tastiera e del display,
l’operatore assegna un nome a ciascuna posizione sul display A.
1
2
LATO CLIENTE
2
4
N.B.: La numerazione (1...2...3...) sul
display frontale A è predeterminata
in fabbrica e non può essere modificata ovvero ogni riga del display è associata ad una vaschetta.
VE3004-020
1
3
Digitate il numero al quale volete associare il gusto (es: 1):
• Premete questo tasto.
Premete questi tasti; la scritta "LAMP"
diverrà lampeggiante.
Il modo lampeggiante verrà attivato solo
dopo essere usciti dalla programmazione
Premete questo tasto (si ritorna alla videata
precedente "V2.1").
• Premete questo tasto per confermare.
V2.2
I nse r i r e
1 : P ROG
Num
2 : L AM P
3
• Premete questo tasto.
e poi,
• Premete questo.
V2.3
I n s e r i r e Num
I n s . Ma n u a l e
Scrivete il numero della vaschetta seguendo l'ordine della figura 24.
Sono possibili due modi di programmazione.
Associare al numero scelto un nome fra quelli preesistenti
in memoria
Scrivere il gusto utilizzando la tastiera
• Premete questo tasto.
• Premete questo tasto.
V2.4
I nse r i r e
Ca r ame l
Nome
V2.6
• Premete più volte questo tasto fino a far apparire:
V2.5
I nse r i r e
L i mo n e
I nse r i r e
Nome
< - -
• Premete questo tasto fino a far apparire la lettera
L.
N.B.: all’inizio appaiono in minuscolo e poi in
maiuscolo.
Nome
I nse r i r e
Nome
L< - -
• Premete questo tasto per memorizzare.
V2.7
• Premete questo tasto per terminare la programmazione.
• Premete la successiva lettera: es. I
N.B.: la "I" si trova sullo stesso tasto pertanto,
dopo aver scritto la lettera "L" premete questo
tasto per creare uno spazio.
Il display si posiziona nella videata V2.1 e permette di
inserire più gusti. Dopo alcuni secondi i display si
posizioneranno come da programmazione. Utilizzate la • Continuate ad agire sui tasti per completare il nome.
stessa procedura per modificare o aggiornare messaggi
preesistenti.
• A nome completato premete questo tasto per
memorizzare.
V2.8
I n s e r i r e Nome
L I MO N E < - -
• Premete questo tasto per memorizzare.
• Premete questo tasto per terminare la programmazione.
Il display si posiziona nella pagina V2.1 e permette di
inserire più gusti. Dopo alcuni secondi i display si
posizioneranno come da programmazione. Utilizzate la
stessa procedura per modificare o aggiornare messaggi
preesistenti.
4
1.3 Programmazione orologio (parametri data ed orologio)
Dalla videata V1 premete questo tasto per almeno 6 secondi fino a far apparire "MENÙ PRINCIPALE >Gusti" .
• Premete questo tasto per scorrere fino alla successiva
videata (V3).
V3
ME N U PR I NC I P A L E
›Or o l og i o
I nse r i r e
Pa s swo r d :
• Se premete ancora questo tasto apparirà:
(vedi § 1.4); altrimenti proseguite con la
programmazione orologio.
**
La password viene impostata dalla ISA e
corrisponde al numero 11.
Ora
• Premete questo tasto. Apparirà (V3.1):
SET :
O R O L OG I O
o r a
SET :
o r a
O R O L OG I O
14H
V3.1
• Premete questo tasto, la scritta SET lampeggia (V3.2)
quindi, inserite i dati tramite i tasti da 0 a 9 della tastiera.
V3.2
• Premete questo tasto per confermare.
Esempio
Minuti
• Premete questo tasto. Apparirà (V3.3):
SET :
O R O L OG I O
Mi n
SET :
Mi n
O R O L OG I O
3 3M i n
V3.3
• Premete questo tasto, la scritta SET lampeggia (V3.4)
quindi, inserite i dati tramite i tasti da 0 a 9 della tastiera.
V3.4
• Premete questo tasto per confermare.
Esempio
Giorno
• Premete questo tasto. Apparirà (V3.5):
SET :
O R O L OG I O
dAy
SET :
dAy
O R O L OG I O
10
V3.5
• Premete questo tasto, la scritta SET lampeggia (V3.6)
quindi, inserite i dati tramite i tasti da 0 a 9 della tastiera.
V3.6
• Premete questo tasto per confermare.
Esempio
Mese
• Premete questo tasto. Apparirà (V3.7):
SET :
O R O L OG I O
Me s
SET :
Me s
O R O L OG I O
8
V3.7
• Premete questo tasto, la scritta SET lampeggia (V3.8)
quindi, inserite i dati tramite i tasti da 0 a 9 della tastiera.
V3.8
• Premete questo tasto per confermare.
Esempio
5
Anno
• Premete questo tasto. Apparirà (V3.9):
SET :
O R O L OG I O
Ann
SET :
Ann
O R O L OG I O
2000
V3.9
• Premete questo tasto, la scritta SET lampeggia
(V3.10) quindi, inserite i dati tramite i tasti da 0 a
9 della tastiera.
V3.10
• Premete questo tasto per confermare.
NOTA:
dopo ogni operazione potete tornare alla videata iniziale (V1) premendo questo
tasto. Il dato che non avate confermato prima con il tasto "SET" non viene
automaticamente memorizzato se premete "ESC" per uscire dal menù.
1.4 Password
ATTENZIONE! La macchina esce dalla fabbrica già programmata. L'accesso a queste funzioni
è riservata esclusivamente a personale QUALIFICATO e AUTORIZZATO.
Dalla videata iniziale premete questo tasto per almeno 6 secondi fino a far apparire "MENÙ PRINCIPALE
>Gusti" .
• Premete questo tasto e apparirà la videata "MENÙ
PRINCIPALE >Orologio" .
V4
• Premete ancora questo tasto e apparirà (V4):
NOTA:
I nse r i r e
Pa s s wo r d :
**
la "password" viene preimpostata dalla ditta costruttrice (numero 11); quindi digitate con i
tasti da 0 a 9 della tastiera.
• Premete questo tasto per confermare. Apparirà la videata V5.
V5
ME N U PR I NC I P A L E
› Pa r ame t r i
Sono possibili due scelte
• Se premete questo tasto entrate nelle funzioni
Parametri (vedi "Programmazione avanzata")
• Se premete questo tasto continuate con i menù
senza entrare in Parametri.
Non disponibile su
questa versione
6
V6
ME N U PR I NC I P A L E
›C l i k Ca r d
V7
ME N U PR I NC I P A L E
› Sca t o l a ne r a
V8
ME NU PR I NC I P A L E
›St a t i s t i che
1.5 Programmazione "SCATOLA NERA"
Dalla videata V1 premete questo tasto per almeno 6
secondi fino a far apparire "MENÙ PRINCIPALE >Gusti".
• Premete questo tasto e apparirà la videata "MENÙ
PRINCIPALE >Orologio".
• Premetelo ancora fino a far apparire "MENÙ PRINCIPALE >Scatola nera (V7)".
V7
ME N U PR I NC I P A L E
› Sca t o l a ne r a
• Premete questo tasto per confermare.
Esempio:
• Agendo su questi due tasti i valori aumentano o diminuiscono di 60per volta (Esempio V7.2).
(oppure)
V7.1
15: 35
10 / 08 / 00
TEP32 00 =4 5 °C
Esempio:
• Agendo su questi due tasti i valori aumentano o diminuiscono di 1 per volta (Esempio V7.3).
V7.2
15: 35
10 / 08 / 00
TEP32 6 0=4 5 °C
Esempio:
• Premete questo tasto per tornare indietro con i menù.
V7.3
(oppure)
• Premete questo tasto per tornare alla videata iniziale
V1.
7
15: 35
10 / 0 8 / 00
TEP32 01 =4 5 °C
1
PROGRAMMATION DE BASE
T
La programmation permet d’obtenir de la machine une
flexibilité maximum en permettant de l’adapter à une
utilisation et à des conditions différentes.
La programmation est effectuée à l’aide du clavier T.
1.1
1.2
1.3
1.4
1.5
Allumage
Programmation des parfums
(Etablissement des parfums sur l’écran LCD de la
vitrine)
Programmation horloge
(Etablissement date et heure)
Password
Fonctions des touches
Touche “UP” pour retourner en arrière.
Touche “DOWN” pour avancer.
Touche pour confirmer les données.
Programmation "Boîte Noire"
(Enregistrement et contrôle de la température
d’exercice)
Touche pour sortir d’une programmation.
Touches 0...9 Pour écrire un numéro
1.1 Allumage
V1
• Mettre la machine en fonction de la façon indiquée au
chapitre "Mise en marche /Utilisation".
• Après quelques secondes l’écran LCD s’allume et le
message suivant apparaît (V1).
- 3 °C
- 2 0 °C
I SA
C OM P V E N *
L’inscription COMP indique que
le compresseur est en fonction.
Normalement l’écriture ISA en haut à gauche clignote
quand:
• il y a une panne de courant;
• la machine a été disjonctée du réseau électrique.
Elle signale, ainsi, qu’il faut programmer à nouveau l’heure.
L’inscription VEN indique que les ventilateurs
sont en fonction; contrôler la température.
Le signal (*) indique que le dégivrage est en cours.
8
• Presser cette touche de façon continue pendant 6
secondes environ jusqu’à ce que l’inscription suivante
apparaisse (V2):
V2
ME N U PR I NC I P A L
› P a r f ums
V3
ME N U PR I NC I P A L
› Ho r l oge
• Presser cette touche pour défiler dans le menu suivant (V3)
• Presser cette touche pour retourner à l’écran V2.
• Presser cette touche pour retourner à l’écran V1.
Pour continuer dans les menus presser la touche "3" et un écran qui demande le password sera affiché. Tout cela sera
expliqué par la suite.
1.2 Programmation des parfums
Indication des parfums en vente (système "APP" - Advanced Product Presentation)
Dans la partie antérieure des bacs qui contiennent la glace, se trouve une file d’écran à cristaux liquides LCD, indiquant
le parfum et le numéro associé à chacun. Le système d’indication des parfums peut être facilement programmé par
l’opérateur.
• Presser cette touche de façon continue pendant 6
secondes environ jusqu’à ce que l’inscription
suivante apparaisse (V2):
• Presser encore cette touche.
Le curseur clignote jusqu’à ce que le numéro du
bac soit introduit (fig.24).
V2
ME N U PR I NC I P A L
› Pa r f ums
I n t r odu i re
Num
V2.1
Introduire le numéro et confirmer avec cette touche.
• Presser cette touche si l’on veut retourner à l’écran
V1.
24
A
Le système client permet d’établir les
inscriptions sur les écrans LCD A qui
s’adressent au client.
Avec l’utilisation du clavier et de l’écran,
l’opérateur attribue un nom à chaque
position sur l’écran A.
1
2
COTE CLIENT
2
4
N.B. La numération (1…2…3…) sur
l’écran frontal A est prédéterminée par
le fabricant et ne peut être modifiée,
car chaque ligne de l’écran est associée à un bac.
VE3004-020
1
3
Taper le numéro auquel on veut associer le parfum (ex: 1):
• Presser cette touche.
Presser ces touches; l’inscription "LAMP"
clignotera.
On activera le mode clignotant seulement
après être sorti de la programmation.
• Presser cette touche pour confirmer.
V2.2
I n t r o d u i r e Num
2 : L AMP
1 : P ROG
ESC presser cette touche (on retourne à
l’écran précédent "V2.1").
9
• Presser cette touche
et ensuite,
• Presser celle-ci.
V2.3
I n t r o d u i r e Num
I n t . Ma n u e l l e
Ecrire le numéro du bac en suivant l’ordre de la figure 24.
Deux modes de programmation sont possibles.
Associer au numéro choisi un nom parmi ceux qui
existent déjà en mémoire
Ecrire le parfum en utilisant le clavier
• Presser cette touche.
• Presser cette touche.
V2.4
I n t r odu i re
C a r ame l
Nom
V2.6
• Presser plusieurs fois cette touche jusqu’à ce
qu’apparaisse:
V2.5
I n t r odu i re
Ci t ron
I n t r odu i re
Nom
< - -
• Presser cette touche jusqu’à ce que la lettre C
apparaisse.
N.B. au début elles apparaissent en minuscules, puis en majuscules.
Nom
I n t r odu i re
• Presser cette touche pour mettre en mémoire.
V2.7
• Presser cette touche per terminer la programmation.
• Presser la lettre successive: ex. I.
Nom
C< - -
NOTE: Si les lettres se trouvent sur la même
touche, presser 6 pour créer un espace.
L’écran se place sur V2.1 et permet d’introduire plusieurs
parfums. Après quelques secondes les écrans se placeront selon la programmation. Agir de la même façon pour • Continuer à agir sur les touches pour compléter le nom.
modifier ou mettre à jour les messages antécédents.
• Une fois que le nom est complété presser cette
touche pour mettre en mémoire.
V2.8
I n t r o d u i r e Nom
Ci t ron< - -
• Presser cette touche pour mettre en mémoire.
• Presser cette touche pour terminer la programmation.
L’écran se place sur la page V2.1 et permet d’introduire
plusieurs parfums. Après quelques secondes les écrans
se placeront selon la programmation. Agir de la même
façon pour modifier ou mettre à jour les messages antécédents.
10
1.3 Programmation horloge (paramètres date et horloge)
A partir de l’écran V1 presser cette touche pendant 6 secondes au moins jusqu’à ce que "MENU PRINCIPAL>
Parfums" apparaisse.
• Presser cette touche pour défiler jusqu’à l’écran (V3)
suivant.
V3
• Si on presse encore cette touche, il apparaîtra (voir § 1.4): autrement continuer avec
la programmation horloge.
ME N U PR I NC I P A L
› Ho r l oge
I n t r odu i r e
Pa s s wo r d :
La password est établie par la ISA et
correspond au numéro 11.
Heure
• Presser cette touche, il apparaîtra (V3.1):
SET :
V3.1
• Presser cette touche, l’inscription SET clignote (V3.2),
introduire ensuite les données à l’aide des touches
de 0 à 9 du clavier.
V3.2
HOR L OG E
heu re
SET :
heu re
HOR L OG E
14h
• Presser cette touche pour confirmer.
Exemple
Minutes
• Presser cette touche. Il apparaîtra (V3.3):
SET :
HOR L OG E
Mi nu t e s
SET :
Mi n
HOR L OG E
3 3M i n
V3.3
• Presser cette touche, l’inscription SET clignote (V3.4),
introduire ensuite les données à l’aide des touches de
0 à 9 du clavier.
V3.4
• Presser cette touche pour confirmer.
Exemple
Jour
• Presser cette touche. Il apparaîtra (V3.5):
• Presser cette touche, l’inscription SET clignote (V3.6),
introduire ensuite les données à l’aide des touches de
0 à 9 du clavier.
V3.6
• Presser cette touche pour confirmer.
HOR L OG E
SET :
j ou r
V3.5
SET :
j ou r
HOR L OG E
10
Exemple
Mois
• Presser cette touche. Il apparaîtra (V3.7):
SET :
HOR L OG E
Mo i s
SET :
Mo i s
HOR L OG E
8
V3.7
• Presser cette touche, l’inscription SET clignote (V3.8),
introduire ensuite les données à l’aide des touches
de 0 à 9 du clavier.
V3.8
• Presser cette touche pour confirmer.
Exemple
11
Année
• Presser cette touche. Il apparaîtra (V3.9):
SET :
V3.9
• Presser cette touche, l’inscription SET clignote (V3.10),
introduire ensuite les données à l’aide des touches
de 0 à 9 du clavier.
V3.10
• Presser cette touche pour confirmer.
NOTE:
H O R L OG E
Ann
SET :
Ann
H O R L OG E
2000
après chaque opération on peut retourner à l’écran initial (V1) en pressant cette
touche. La donnée que l’on n’a pas confirmée auparavant avec la touche "SET" n’est
pas automatiquement mise en mémoire si l’on presse "ESC" pour sortir du menu.
1.4 Password
ATTENTION!
La machine sort déjà programmée de la fabrique.
L’accès à ces fonctions est réservée exclusivement à un personnel QUALIFIE ET AUTORISE.
Presser cette touche à partir de l’écran initial pendant au moins 6 secondes jusqu’à ce que "MENU PRINCIPAL>
Parfums" apparaisse.
• Presser cette touche et l’écran "MENU PRINCIPAL>Horloge" apparaîtra.
• Presser encore cette touche et il apparaîtra (V4).
V4
Note:
I n t r odu i r e
Pa s s wo r d :
**
le "password" est précédemment établi par le fabricant (numéro 11); taper ensuite sur les
touches de 0 à 9 du clavier.
• Presser cette touche pour confirmer. L’écran V5 apparaîtra.
V5
ME N U PR I NC I P A L
› Pa r amè t r e s
Il existe deux choix
• Si on presse cette touche , on entre dans les fonctions Paramètres (voir "Programmation avancée").
• Si on presse cette touche, on continue avec les
menus sans entrer dans "Paramètres".
Cette version n'est
pas disponible
12
V6
ME N U PR I NC I P A L
›C l i k Ca r d
V7
ME N U PR I NC I P A L
› Bo î t e No i r e
V8
ME NU PR I NC I P A L
› S t a t i s t i que s
1.5 Programmation "BOITE NOIRE"
Presser cette touche à partir de l’écran V1 pendant 6
secondes au moins jusqu’à ce que "MENU PRINCIPAL
>Parfums" apparaisse:
• Presser cette touche et l’écran "MENU PRINCIPAL
>HORLOGE" apparaîtra.
• La presser encore jusqu’à ce que "MENU PRINCIPAL
>Boîte Noire" (V7) apparaisse.
V7
ME N U PR I NC I P A L
› Bo î t e No i r e
• Presser cette touche pour confirmer.
Exemple:
• En appuyant sur ces deux touches les valeurs augmentent ou diminuent de 60 chaque fois (Exemple V7.2).
(ou bien)
V7.1
15 : 35
10 / 08 / 00
TEP3 2 0 0 = 4 5 °C
Exemple:
• En appuyant sur ces deux touches les valeurs augmentent ou diminuent de 1 chaque fois (Exemple V7.3).
V7.2
• Presser cette touche pour retourner en arrière avec
les menus.
Exemple:
V7.3
(ou bien)
• Presser cette touche pour retourner à l’écran initial V1.
13
15 : 35
10 / 08 / 00
TEP3 2 6 0 = 4 5 °C
15 : 35
10 / 0 8 / 00
TEP3 2 0 1 = 4 5 °C
1
BASIC PROGRAMMING
T
The programming adjusts the machine to different uses
and situations and thus allows to obtain its maximum
flexibility.
Programming is carried out on the keyboard T.
A number of operations can be carried out that increase
functional performance.
1.1
1.2
1.3
1.4
On
Programming of flavours
(Setting of flavours on the glass container’s LCD
display)
Programming of clock
(Setting of date and hour)
Password
Key functions
“UP” key to move backward
“DOWN” key to move forward
key to confirm data
key to exit from a programming operation
1.5
Programming “black box”
(Registration and control of operating temperature)
Keys 0...9 to write numbers
1.1 On
V1
• Turn the machine on, as described in the chapter “Start/
Use”.
• After some seconds, the LCD display is switched on and
the following message appears (V1):
The word “ISA” in the upper left corner is usually blinking
when:
- an interruption of the electric supply has occurred;
- the machine has been disconnected from the electric
supply system.
This means that the time has to be re-programmed.
14
- 3 °C
- 2 0 °C
I SA
C OM P V E N *
The word “COMP” indicates
that the compressor is running
The word “VEN” indicates that the ventilation
fans are running; check the temperature.
The sign (*) indicates that the de-frost cycle is running.
• Press this key for about 6 seconds until the following
message appears (V2):
• Press this key to go to the next menu (V3).
V2
MA I N ME N U
›F l av ou r s
V3
MA I N ME N U
›Cl oc k
• Press this key to return to the display V2.
• Press this key to return to the display V1.
To continue with the menus, press key “3”. A message appears on the display which will ask for a “password” (to be
explained later).
1.2 Programming of flavours
Display of flavours for sale (“APP” system: Advanced Product Presentation)
The anterior part of the glass container, which holds the ice cream, is equipped with an LCD display band (“ticker”). It
shows the available flavours and a selection number for each of them. The flavour indicator system can easily be
programmed by the operator.
• Press this key for about 6 seconds until the following
message appears (V2):
V2
• Press this key again.
The cursor is now blinking until a product container
number is inserted (figure 24).
MA I N ME N U
› F l av ou r s
I nse r t
No .
V2.1
Insert the number and confirm with this key.
• Press this key to return to display V1.
24
A
1
2
2
The operator can choose letters and text
for the LCD display A, which is directed
towards the customer.
With the help of keyboard and display,
the operator can assign one name (ice
cream flavour) to each position on display
A.
4
Note: The numeration (1..2..3..) on display A is pre-set by the manufacturer
and cannot be modified. Thus each display position refers to a specific product container.
VE3004-020
1
3
Key in the number with which you want to associate a flavour (e.g., 1):
• Press this key
Press these keys; the word “LAMP” will start
to blink.
The blinking mode will only be activated after
you have exited from the programming mode.
Press this key (you will now return to the previous display “V2.1”)
• Press this key to confirm
V2.2
I nse r t
1 : P ROG
No .
2 : L AMP
15
• Press this key.
Then
• Press this key.
V2.3
I nse r t
Ma n u a l
No .
I ns .
Write the number of the product container, following the order of figure 24.
There are two possible ways to carry out the programming.
Associate each chosen number with a word (name)
from the pre-set memory
Write each flavour using the keyboard
• Press this key.
• Press this key.
V2.4
I n s e r t n ame
Ca r ame l
V2.6
• Press this key repeatedly until the following
display appears:
V2.5
I nse r t
L e mo n
I nse r t
n ame
< - -
• Press this key until the letter L appears on the
display.
Note: at first the letters appear in lower case, later
in upper case format.
n ame
I nse r t
• Press this key to store.
V2.7
• Press this key to exit from programming mode.
• Press the next letter.
n ame
L< - -
NB: if the letters are on the same key, press to
create a space.
The display automatically goes to position V2.1 and allows
you to insert more flavours. After a few seconds the displays
• Continue to use the keyboard to complete the dewill indicate programming mode. Use the same procedure
sired name/word.
to modify or update pre-existing messages.
• After completion, press this key to store.
I nse r t
V2.8
n ame
L E MO N < - -
• Press this key to store.
• Press this key to exit from programming
mode.
The display automatically goes to position V2.1 and allows
you to insert more flavours. After a few seconds, the
displays will indicate programming mode. Use the same
procedure to modify or update pre-existing messages.
16
1.3 Programming of clock (date and clock parameters)
Starting from display position V1, press this key for at least 6 seconds until the message “MAIN MENU>flavours”
appears.
• Press this key to go to next display position (V3).
V3
MA I N ME N U
›Cl oc k
• If you press this key again, the following
I nse r i r e
message will appear:
Pa s s wo r d :
(see paragraph 1.4.). Otherwise continue
The password is programmed by ISA. It
with the programming of the clock.
corresponds to the number 11.
**
• Press this key. On the display the following message
will appear (V3.1):
Time
SET :
C L OCK
V3.1
• Press this key. The word “SET” is blinking on the display (V3.2). You can now insert the data with the keys
0-9 of the keyboard.
V3.2
t i me
C L O CK
14H
SET :
t i me
• Press this key to confirm.
Example
• Press this key. The following message will appear Minutes
(V3.3):
V3.3
• Press this key. The word “SET” is blinking on the display (V3.4). You can now insert the data with the keys
0-9 of the keyboard.
V3.4
• Press this key to confirm.
C L O CK
SET :
Mi nut es
C L O CK
3 3M i n
SET :
Mi n
Example
• Press this key. The following message will appear
(V3.5):
Day
V3.5
• Press this key. The word “SET” is blinking on the display (V3.6). You can now insert the data with the keys
0-9 of the keyboard.
V3.6
• Press this key to confirm.
SET :
C L O CK
dAy
C L O CK
10
SET :
dAy
Example
Month
• Press this key. The following message will appear
(V3.7):
• Press this key. The word “SET” is blinking on the display (V3.8). You can now insert the data with the keys
0-9 of the keyboard.
V3.8
• Press this key to confirm.
C L O CK
SET :
V3.7
Mo n t h
SET :
Mo n t h
C L OCK
8
Example
17
Year
• Press this key. The following message will appear
(V3.9):
• Press this key. The word “SET” is blinking on the display (V3.10). You can now insert the data with the keys
0-9 of the keyboard.
SET :
V3.9
V3.10
C L O CK
Yea r
SET :
Year
C L O CK
2000
• Press this key to confirm.
NOTE:
After each operation you can return to the initial display position V1 by pressing
this key. If you press “ESC” to exit from the menu, data that you have not previously
stored with the key “SET” will not be automatically memorized.
1.4 Password
ATTENTION!
The machine is already programmed when it leaves the factory.
Access to these functions is restricted to QUALIFIED and AUTHORIZED personnel only!
Starting from the initial display, press this key for at least 6 seconds until the message “MAIN MENU>flavours”
appears.
• Press this key and the message “MAIN MENU>Clock”
will appear on the display.
V4
I nse r t
Pa s s wo r d :
• Press this key again, and the following message will
appear (V4):
NOTE:
**
the password is pre-set by the manufacturer (number 11); use keys 0-9 of the keyboard.
• Press this key to confirm. Display position V5 will appear.
V5
MA I N ME N U
› Pa r ame t e r s
There are two choices:
• If you press this key, you enter into the “parameters”
functions (see “Advanced programming”)
• If you press this key you continue with the menus,
without entering into “Parameters”.
Not available in this
version
18
V6
MA I N ME N U
›C l i k Ca r d
V7
MA I N ME N U
›B l ac k box
V8
MA I N ME N U
›St a t i s t i cs
1.5 Programming of “BLACK BOX”
Starting from display position V1, press this key for at
least 6 seconds, until the message “MAIN MENU > flavours” appears on the display.
• Press this key and the display message “ MAIN
MENU>Clock ” will appear.
• Press the key again, until the message “MAIN MENU
>Black box (V7)” appears on the display.
V7
MA I N ME N U
› BLac k bo x
• Press this key to confirm.
Example:
• Each time you press these two keys the values increase or decrease by 60 units (Example V7.2).
V7.1
15 : 35
10 / 08 / 00
TEP3 2 0 0 = 4 5 °C
(or)
Example:
• Each time you press these two keys the values increase or decrease by 1 unit (Example V7.3).
V7.2
15 : 35
10 / 08 / 00
TEP3 2 6 0 = 4 5 °C
Example:
• Press this key to return to previous menu option
(or)
V7.3
• Press this key to move to initial display position V1.
19
15 : 35
10 / 0 8 / 00
TEP3 2 0 1 = 4 5 °C
1
BASISPROGRAMMIERUNG
T
Mit Hilfe der Programmierung kann das Gerät den verschiedenen Gebrauchsbedürfnissen optimal angepasst
werden, wodurch ein Maximum an Flexibilität gewährleistet
ist. Die Programmierung wird mit Hilfe des Tastenfelds T
durchgeführt.
Es können verschiedene Programmierungsschritte
durchgeführt werden, die die Leistungsfähigkeit Ihrer
Vitrine steigern:
1.1
1.2
1.3
1.4
1.5
Einschaltung
Programmierung der Sorten
(Einstellung der Sorten auf dem Display der Vitrine)
Programmierung der Uhr
(Einstellung von Uhrzeit und Datum)
Passwort
Tastenfunktionen
Taste "UP": zurück zum vorherigen Schritt
Taste "Down": weiter zum nächsten Schritt
Mit dieser Taste werden die Daten gespeichert.
Programmierung "Black Box"
(Speichern und Steuern der Betriebstemperatur)
Mit dieser Taste verlassen Sie die Programmierungsprozedur
Mit den Tasten 0…9 schreiben Sie die Zahlen.
1.1 Einschaltung
V1
• Schalten Sie das Gerät, wie in Kapitel "Inbetriebnahme/
Gebrauch" beschrieben, ein.
• Nach wenigen Sekunden schaltet sich das Display ein
und zeigt die folgenden Informationen (V1) an.
Die Anzeige ISA oben links blinkt normalerweise:
• nach einem Stromausfall;
• wenn das Gerät vom Netz genommen wurde.
Das Gerät zeigt auf diese Weise an, dass die Uhrzeit neu
eingegeben werden muss
- 3 °C
- 2 0 °C
I SA
C OM P V E N *
Die Anzeige KOMP zeigt an,
dass der Kompressor arbeitet.
Die Anzeige VEN zeigt an, dass die Ventilatoren
arbeiten. Kontrollieren Sie die Temperatur.
Das Zeichen (*) zeigt an, dass der Abtauvorgang aktiv ist.
20
• Halten Sie diese Taste zirka 6 Sekunden gedrückt, bis
die folgende Anzeige erscheint (V2):
• Drücken Sie diese Taste, um zum nächsten Menüpunkt
(V3) zu wechseln.
• Mit dieser Taste kehren Sie zum Bildschirminhalt (V2)
zurück.
• Mit dieser Taste kehren Sie zum Bildschirminhalt (V1)
zurück.
V2
H AU P TME N Ü
› So r t en
V3
H A U P T ME N Ü
› Uh r
1.2 Programmierung der Sorten
Angabe der angebotenen Sorten ("APP"-System - Advanced Product Presentation)
Vor den Eisschalen ist eine Reihe mit Displays angebracht, auf denen jeweils eine Eissorte in Verbindung mit einer
Nummer angezeigt wird. Die Programmierung der Sortenauswahl ist einfach und kann problemlos vom Bediener
durchgeführt werden.
• Halten Sie diese Taste zirka 6 Sekunden oder
solange bis die folgenden Anzeige (V2) erscheint,
gedrückt:
• Drücken Sie diese Taste noch mal. Der Cursor blinkt
jetzt solange, bis die Nummer der Schale eingeben
wird (s. Abb. 24).
Geben Sie die Nummer ein und bestätigen Sie die
Eingabe mit dieser Taste.
V2
H A U P T ME N Ü
› So r t en
E i ngeben
Num
V2.1
• Drücken Sie diese Taste, wenn Sie zu dem vorherigen Bildschirminhalt (V1) zurückkehren wollen.
24
A
Die Anzeigen auf den Displays A, die zur
Ansicht für den Kunden gedacht sind,
können programmiert werden. Mit Hilfe
des Tastenfelds und dem Display kann der
Bediener jeder Position auf dem Display
A einen Namen zuweisen.
1
2
VE3004-020
KUNDENSEITE
2
4
1
3
BEACHTEN SIE: Die Nummerierung
(1..2..3..) auf dem vorderen Display A
wurde vom Hersteller vorgegeben und
kann nicht geändert werden, das heißt,
jede Zeile des Displays ist an eine bestimmte Schale gekoppelt.
Drücken Sie die Nummer, der Sie die Sorte zuordnen wollen (Beisp. 1):
• Drücken Sie diese Taste.
Drücken Sie diese Taste. Die Anzeige "LAMP"
blinkt jetzt auf.
Der Blinkmodus wird nur nach Verlassen der
Programmierungsprozedur aktiviert.
Drücken Sie diese Taste. (Sie kehren zum vorhergehenden Bildschirminhalt "V2.1" zurück.)
• Bestätigen Sie mit dieser Taste.
V2.2
E i ngeben
1 : P ROG
Num
2 : L AMP
21
• Drücken Sie diese Taste,
und anschließend:
• Drücken Sie diese Taste.
V2.3
E i n g e b e n Num
E i n g . Ma n u e l l
Schreiben Sie die Nummer der Schalen. Folgen Sie dabei der in Abb. 24 angegebenen Reihenfolge.
Die Programmierung kann auf zwei Arten erfolgen.
Ordnen Sie der gewählten Nummer einen Namen aus
der Liste der schon gespeicherten Namen zu.
Geben Sie auf dem Tastenfeld den Namen der Sorte ein.
• Drücken Sie diese Taste.
• Drücken Sie diese Taste.
V2.4
E i ngeben
K a r ame l
Name
V2.6
• Drücken Sie diese Taste mehrfach bis die Anzeige
erscheint:
V2.5
E i ngeben
Z i t rone
E i ngeben
< - -
• Drücke Sie diese Taste mehrfach bis der Buchstabe Z erscheint.
Name
BEACHTEN SIE: Die Schrift erscheint zuerst in
Klein- und dann in Großbuchstaben.
E i ngeben
• Drücken Sie diese Taste, um die Eingabe zu
speichern.
Name
V2.7
Name
Z< - -
• Schreiben Sie den nachfolgenden Buchstaben, z. B. I.
• Drücken Sie diese Taste, um die Programmierungsprozedur abzuschließen.
BEACHTEN SIE: Wenn sich die Buchstaben auf
dem gleichen Taste befinden, drücken Sie 6,
um einen Leerraum zu schaffen.
Das Display kehrt jetzt zum Bildschirminhalt V2.1 zurück.
Jetzt können Sie mehrere Sorten eingeben. Nach wenigen • Betätigen Sie die Tasten solange bis der Name vollständig ist.
Sekunden setzen sich die Displays in den Programmierungsmodus. Verfahren Sie auf die gleiche Weise, wenn
• Nachdem Sie den Namen geschrieben haben,
Sie vorhergehende Eingaben ändern oder aktualisieren
drücken Sie diese Taste, um Ihre Eingabe zu
wollen.
speichern.
V2.8
E i n g e b e n Name
Z i t r on e< - -
• Drücken Sie diese Taste, um die Eingabe zu speichern.
• Drücken Sie diese Taste, um die Programmierungsprozedur abzuschließen.
Das Display kehrt jetzt zum Bildschirminhalt V2.1 zurück.
Jetzt können Sie mehrere Sorten eingeben. Nach wenigen
Sekunden setzt sich die Displays in den Programmierungsmodus. Verfahren Sie auf die gleiche Weise, wenn Sie frühere Eingaben ändern oder aktualisieren wollen.
22
1.3 Programmierung der Uhr (Parameter Uhrzeit und Datum)
Das Display ist in der Ausgangsposition. Drücken Sie jetzt diese Taste mindestens 6 Sekunden oder solange
bis die Anzeige "HAUPTMENÜ > Sorten" erscheint.
• Drücken Sie diese Taste, um bis zum nächsten Bildschirminhalt fortzuschreiten (V3).
V3
H AU P T ME N Ü
› Uh r
• Wenn Sie diese Taste noch einmal drücken,
E i ng eben
erscheint:
(s. § 1.4); andernfalls fahren Sie mit der P a s s w o r t :
Das Passwort wird von ISA eingestellt (es ist
Programmierung der Uhrzeit fort.
die Nummer 11).
**
Stunde
• Drücken Sie diese Taste. Jetzt erscheint (V3.1):
SET :
V3.1
• Drücken Sie diese Taste, die Anzeige SET blinkt (V3.2),
geben Sie jetzt die Daten mit Hilfe der Tasten 0 bis 9
ein.
V3.2
UHR
S t unde
SET :
S t unde
UHR
14H
• Drücken Sie diese Taste, um die Eingabe zu bestätigen.
Beispiel
Minuten
• Drücken Sie diese Taste, jetzt erscheint (V3.3):
SET :
V3.3
• Drücken Sie diese Taste, die Anzeige SET blinkt (V3.4),
geben Sie jetzt die Daten mit Hilfe der Tasten 0 bis 9
ein.
• Drücken Sie diese Taste, um die Eingabe zu bestätigen.
V3.4
Mi n
SET :
V3.5
• Drücken Sie diese Taste, die Anzeige SET blinkt (V3.6),
geben Sie jetzt die Daten mit Hilfe der Tasten 0 bis 9
ein.
• Drücken Sie diese Taste, um die Eingabe zu bestätigen.
Tag
• Drücken Sie diese Taste, die Anzeige SET blinkt (V3.8),
geben Sie jetzt die Daten mit Hilfe der Tasten 0 bis 9
ein.
23
UHR
10
Beispiel
SET :
V3.7
• Drücken Sie diese Taste, um die Eingabe zu bestätigen.
UHR
SET :
V3.6 T a g
Monat
• Drücken Sie diese Taste, jetzt erscheint (V3.7):
UHR
3 3M i n
SET :
Mi n
Beispiel
Tag
• Drücken Sie diese Taste, jetzt erscheint (V3.5):
UHR
V3.8
UHR
Mo n
SET :
Mo n
UHR
8
Beispiel
Jahr
Anno
• Drücken Sie diese Taste, jetzt erscheint (V3.9):
SET :
V3.9
• Drücken Sie diese Taste, die Anzeige SET blinkt (V3.10),
geben Sie jetzt die Daten mit Hilfe der Tasten 0 bis 9
ein.
V3.10
UHR
Jah r
SET :
Jahr
UHR
2000
• Drücken Sie diese Taste, um die Eingabe zu bestätigen.
BEACHTEN SIE: Mit dieser Taste können Sie jederzeit zum ersten Bildschirminhalt (V1) zurückkehren.
Diejenigen Daten, die nicht mit der Taste SET bestätigt wurden, werden nicht
gespeichert, wenn Sie die Taste ESC drücken, um das Menü verlassen.
1.4 Passwort
ACHTUNG!
Das Gerät ist schon programmiert, wenn es das Werk verlässt. Die folgenden Funktionen dürfen nur von QUALIFIZIERTEM und AUTORISIERTEM Personal durchgeführt werden.
Das Display ist in der Ausgangsposition. Drücken Sie jetzt diese Taste mindestens 6 Sekunden oder solange
bis die Anzeige "HAUPTMENÜ > Sorten" erscheint.
• Drücken Sie diese Taste. Jetzt erscheint die Anzeige "Hauptmenü > Uhr".
• Drücken Sie diese Taste erneut. Jetzt erscheint (V4):
V4
E i ng eben
Pa s s wo r t :
**
BEACHTEN SIE: Das Passwort wurde schon vom Hersteller programmiert (Nummer 11). Drücken
Sie folglich die Tasten 0 bis 9.
• Drücken Sie diese Taste erneut. Jetzt erscheint der Bildschirminhalt V5.
V5
H A U P TME N Ü
› P a r ame t e r
Hier gibt es hier zwei Wahlmöglichkeiten
• Wenn Sie diese Taste drücken, aktivieren Sie die
Funktionen der Parameter (s. "Fortgeschrittene
Programmierung")
• Wenn Sie diese Taste betätigen, können Sie mit dem
Menü fortfahren, ohne in die Funktion der Parameter
einzutreten.
NICHT VERFUEGBAR
IN DIESER VERSION
V6
H A U P TME N Ü
› K l i k - Ka r t e
V7
H A U P TME N Ü
› B l ac k Bo x
V8
24
H A U P TME N Ü
›St a t i s t i ken
1.5 Programmierung "BLACK BOX"
Das Display ist in der Ausgangsposition. Drücken Sie
jetzt diese Taste mindestens 6 Sekunden oder solange
bis die Anzeige "HAUPTMENÜ > Sorten" erscheint.
• Drücken Sie diese Taste. Jetzt erscheint die Anzeige
"HAUTMENÜ > Uhr".
• Drücken Sie diese Taste erneut und solange bis die
Anzeige "HAUTMENÜ >Black Box" (V7) erscheint.
V7
HAP TMENÜ
› B l ac k Bo x
• Drücken Sie diese Taste, um die Eingabe zu bestätigen.
Beispiel:
• Durch Betätigung dieser Tasten erhöhen oder vermindern
sich die Werte jedesmal um die Zahl 60 (Beispiel V7.2).
(oder)
V7.1
Beispiel:
• Durch Betätigung dieser Tasten erhöhen oder
vermindern sich die Werte jedesmal um die Zahl 1
(Beispiel V7.3)
• Drücken Sie diese Taste, um zu den vorhergehenden
Menüanzeigen zurückzukehren
(oder)
• Drücken Sie diese Taste um zum ersten Bildschirminhalt (V1) zurückzukehren.
25
V7.2
Beispiel:
V7.3
15 : 35
10 / 08 / 00
TEP3 2 0 0 = 4 5 °C
15 : 35
10 / 08 / 00
TEP3 2 6 0 = 4 5 °C
15 : 35
10 / 0 8 / 00
TEP3 2 0 1 = 4 5 °C
1
PROGRAMACION DE BASE
T
La programación permite obtener de la máquina la máxima
flexibilidad, adecuándola al uso y a condiciones distintas.
La programación se realiza mediante el teclado T.
Se pueden realizar varias operaciones que añaden
potencialidad a su vitrina:
1.1
1.2
1.3
1.4
Encendido
Programación de los gustos
(memorización de los gustos en el display LCD de
la vitrina)
Programación del reloj
(memorización de la fecha y de la hora)
Password
Funciones de las teclas
Tecla "UP" para volver atrás.
Tecla "DOWN" para ir hacia adelante.
Tecla para confirmar los datos.
Tecla para salir de una programación.
1.5
Programación de la "Caja negra"
(registra y controla la temperatura de ejercicio)
Teclas 0…9 Para escribir los números
1.1 Encendido
• Pongan en funcionamiento la máquina siguiendo las
instrucciones que se explican en el capítulo "Puesta
en marcha/uso".
• Después de unos segundos se puede entrar en el
display LCD y se puede leer el siguiente mensaje
(V1).
La palabra ISA escrita arriba a la izquierda,
normalmente se enciende y se apaga cuando:
• Hubo una interrupción de corriente;
• Cuando la máquina se desconectó de la corriente
eléctrica.
Señala de esta manera que hay que programar de
nuevo la hora.
26
V1
- 3 °C
- 2 0 °C
I SA
C OM P V E N *
COMP, indica que el comprensor está funcionando.
VEN, indica que los ventiladores están
funcionando; controlen la temperatura.
(*) indica que se está descongelando el frigorífico.
• Pulsen y mantengan pulsada esta tecla durante 6
segundos hasta que aparezca escrito (V2):
V2
ME N U PR I NC I P A L
› Gu s t o s
V3
ME N U PR I NC I P A L
› Re l o j
• Pulsen esta tecla para pasar al menú siguiente (V3):
• Pulsen esta tecla para volver a la página V2.
• Pulsen esta tecla para volver a la página V1.
Para continuar con los menús, pulsen la tecla “3” y aparece una página que pide la password. Este paso se explica
sucesivamente.
1.2 Programación de los gustos
Indicación de los gustos en venta (sistema "APP" - Advances Product Presentation).
En la parte anterior de los contenedores de helado, está colocada una fila de display de cristales líquidos LCD, que
indican al trabajador el gusto y el número asociado a cada uno de ellos. El sistema de indicación de los gustos se
puede programar fácilmente.
• Pulsen y mantengan pulsada esta tecla durante 6
segundos hasta que aparezca escrito (V2):
V2
ME N U PR I NC I P A L
› Gu s t o s
• Pulsen de nuevo esta tecla.
• El cursor se enciende y se apaga hasta que se
escriba el número del contenedor (fig. 24).
Esc r i b i r
Núm .
V2.1
Escriban el número y confírmenlo con esta tecla.
• Pulsen esta tecla para volver a la página V1.
24
A
El sistema permite memorizar palabras
en el display LCD A hacia la parte del
cliente. Usando el teclado del display, el
trabajador da un nombre a cada posición
en el display.
1
2
VE3004-020
LADO DEL CLIENTE
2
4
1
3
N.B.: Los números (1, 2, 3,… ) en el display frontal A se determinan en la fábrica y no se puede modificar, es decir, cada línea del display está asociada a un contenedor.
Escriban el número al que quieran asociar el gusto (ejemplo: 1).
• Pulsen esta tecla.
Pulsen estas teclas y la palabra "LAMP" se
enciende y se apaga.
El modo intermitente se activa solamente
después de que se salió de la programación.
Pulsen esta tecla (se vuelve a la página
anterior V2.1).
• Pulsen esta tecla para confirmar
V2.2
Esc r i b i r
1 : P ROG
Núm .
2 : L AMP
27
• Pulsen esta tecla.
Y después
• Pulsen esta tecla.
V2.3
E s c r i b i r Núm .
I n s . Ma n u a l
Escriban el número del contenedor siguiendo el orden de la figura 24.
Son posibles dos modos de programarla:
Asociar el número elegido a un nombre que ya existe en
la memoria:
Escriban el gusto utilizando el teclado.
• Pulsen esta tecla.
• Pulsen esta tecla.
V2.4
Esc r i b i r
Ca r ame l o
Nomb r e
V2.6
• Pulsen varias veces esta tecla hasta que
aparezca:
V2.5
Esc r i b i r
L i mó n
Esc r i b i r
Nomb r e
< - -
• Pulsen esta tecla hasta que aparezca la letra L.
N.B.: Al principio aparecen el minúscula y
después en mayúscula.
Nomb r e
Esc r i b i r
• Pulsen esta tecla para memorizar.
V2.7
• Pulsen esta tecla para terminar la programación.
• Pulsen la sucesiva letra: Ej. I.
Nomb r e
L< - -
N.B.: La "I" se encuentra en la misma tecla por
lo tanto, después de haber escrito la letra "L",
pulsen esta tecla para crear un espacio.
El display se coloca en la ‘pantalla V2.1 y permite escribir
más gustos. Después de unos segundos los display se
colocan como se pensó en la programación. Utilicen el • Sigan escribiendo con las letras hasta que completen el
mismo procedimiento para modificar y poner al día los
nombre.
mensajes ya existentes.
• Cuando hayan completado el nombre, pulsen
esta tecla para memorizarlo.
Esc r i b i r
V2.8
Nomb r e
L I MÓ N < - -
• Pulsen esta tecla para memorizar.
• Pulsen esta tecla para terminar la programación.
El display se coloca en la página V2.1 y permite escribir
más gustos. Después de unos segundos, los display se
colocan como se programó. Utilicen el mismo procedimiento para modificar o poner al día los mensajes anteriores.
28
1.3 Programación del reloj (parámetros y reloj)
• En la página V1 pulsen esta tecla por lo menos durante 6 segundos hasta que aparezca “MENU PRINCIPAL
>Gustos”.
• Pulsen esta tecla para pasar a la siguiente página (V3).
V3
• Si pulsan nuevamente esta tecla aparece:
(Véase § 1.4), sino continúen con la programación del reloj
ME N U P R I NC I P A L
› Re l o j
Esc r i b i r
Pa s s wo r d :
**
La password la memoriza la empresa ISA y
corresponde al número 11.
Hora
• Pulsen esta tecla. Aparecerá (V3.1):
SET :
V3.1
• Pulsen esta tecla, entonces la palabra SET empieza
a encenderse y a apagarse (V3.2), escriban los datos
mediante las teclas del 0 al 9 del teclado.
V3.2
RE L OJ
ho r a
RE L OJ
14H
SET :
ho r a
• Pulsen esta tecla para confirmar.
Ejemplo
Minutos
• Pulsen esta tecla. Aparecerá (V3.3)
V3.3
• Pulsen esta tecla, entonces la palabra SET empieza
a encenderse y a apagarse (V3.4), escriban los datos
mediante las teclas del 0 al 9 del teclado.
V3.4
• Pulsen esta tecla para confirmar.
RE L OJ
SET :
Mi n
RE L OJ
3 3M i n
SET :
Mi n
Ejemplo
Día
• Pulsen esta tecla. Aparecerá (V3.5)
• Pulsen esta tecla, entonces la palabra SET empieza
a encenderse y a apagarse (V3.6), escriban los datos
mediante las teclas del 0 al 9 del teclado.
V3.6
• Pulsen esta tecla para confirmar.
RE L OJ
SET :
V3.5
d í a
RE L OJ
10
SET :
d í a
Ejemplo
Mes
• Pulsen esta tecla. Aparecerá (V3.7)
V3.7
• Pulsen esta tecla, entonces la palabra SET empieza
a encenderse y a apagarse (V3.8), escriban los datos
mediante las teclas del 0 al 9 del teclado.
V3.8
• Pulsen esta tecla para confirmar.
RE L OJ
SET :
Me s
SET :
Me s
RE L OJ
8
Ejemplo
29
Año
• Pulsen esta tecla. Aparecerá (V3.9)
SET :
V3.9
• Pulsen esta tecla, entonces la palabra SET empieza
a encenderse y a apagarse (V3.10), escriban los datos mediante las teclas del 0 al 9 del teclado.
V3.10
RE L OJ
Año
SET :
Año
RE L OJ
2000
• Pulsen esta tecla para confirmar.
NOTA:
Después de que realicen cada operación pueden volver a la página inicial (V1)
pulsando esta tecla. El dato que no confirmen antes con la tecla "SET" no será
memorizado automáticamente si pulsan "ESC" para salir del menú.
1.4 Password
¡ATENCION! La máquina sale de fábrica ya programada.
El acceso a esta función está reservado única y exclusivamente a personal CUALIFICADO y AUTORIZADO.
• En la página inicial, pulsen esta tecla durante unos 6 segundos hasta que aparezca “MENU PRINCIPAL>
Gustos“
• Pulsen esta tecla y aparecerá la página “MENU PRINCIPAL>Reloj"
• Pulsen de nuevo esta tecla y aparecerá (V4)
NOTA:
V4
Esc r i b i r
Pa s s wo r d :
**
La "password" la mete la empresa constructora (número 11); por lo tanto, escríbanla con
las teclas del 0 al 9 del teclado.
• Pulsen esta tecla para confirmar. Aparecerá la página V5.
V5
ME N U PR I NC I P A L
› Pa r áme t r o
Son posibles dos elecciones:
• Si pulsan esta tecla, entran en las funciones de los
parámetros (Véase “Programación avanzada“).
• Si pulsan esta tecla, continúan con el menú sin entrar
en los Parámetros.
No es disponible
en esta versión
30
V6
ME N U PR I NC I P A L
›C l i k Ca r d
V7
ME N U PR I NC I P A L
› Ca j a n eg r a
V8
ME NU PR I NC I P A L
›Es t ad í s t i ca s
1.5 Programación "CAJA NEGRA"
En la página V1, pulsen esta tecla por lo menos durante
6 segundos hasta que aparezca “MENU PRINCIPAL >
Gustos”.
• Pulsen esta tecla y aparecerá la página “MENU PRINCIPAL > Reloj“.
• Púlsenla de nuevo hasta que aparezca “MENU PRINCIPAL
> Caja negra" (V7).
V7
ME N U PR I NC I P A L
› Ca j a n eg r a
• Pulsen esta tecla para confirmar.
Ejemplo:
• Pulsando estas dos teclas los valores aumentan o
disminuyen 60 a la vez (Ejemplo V7.2)
V7.1
15 : 35
10 / 08 / 00
TEP3 2 0 0 = 4 5 °C
(o)
Ejemplo:
• Pulsando estas dos teclas los valores aumentan o
disminuyen 1 a la vez (Ejemplo V7.3)
V7.2
• Pulsen esta tecla para volver hacia atrás con los menú Ejemplo:
V7.3
(o)
• Pulsen esta tecla para volver a la página inicial (V1).
31
15 : 35
10 / 08 / 00
TEP3 2 6 0 = 4 5 °C
15 : 35
10 / 0 8 / 00
TEP3 2 0 1 = 4 5 °C
ISA S.p.A.
Via del Lavoro, 5 - 06083 BASTIA UMBRA - (PG) - ITALY
www.isaitaly.com
Focus E
I
Programmazione dei gusti
F
Programmation de parfumes
GB
Programming of flavours
D
Programmierung der Sorten
E
Programación de los gustos
ISA S.p.A.
Via Del Lavoro, 5
06083 Bastia Umbra (PG) Italy
Tel: 075/80171
Fax: 075/8000900
I
Indicazione dei gusti in vendita (sistema "APP"- Advanced Product Presentation)
Nella parte anteriore delle vaschette contenenti il gelato, è posizionata una fila di display a cristalli liquidi LCD, che
indicano il gusto e il numero associato a ciascuno. Il sistema di indicazione dei gusti è facilmente programmabile da
parte dell'operatore.
• Premete e mantenete premuto questo tasto per
circa 6 sec. fino a far apparire la successiva scritta
(V2):
• Premete ancora questo tasto.
Il cursore lampeggia fino all'inserimento del numero
della vaschetta (fig. 24).
V2
ME N U PR I NC I P A L E
› Gu s t i
I nse r i r e
Num
V2.1
Inserite il numero e confermate con questo tasto.
• Premete questo tasto se si vuole tornare alla videata V1.
24
A
Il sistema consente di impostare le
scritte sui display LCD A rivolti verso il
cliente.
Con l’utilizzo della tastiera e del display,
l’operatore assegna un nome a ciascuna posizione sul display A.
1
2
LATO CLIENTE
2
4
N.B.: La numerazione (1...2...3...) sul
display frontale A è predeterminata
in fabbrica e non può essere modificata ovvero ogni riga del display è associata ad una vaschetta.
VE3004-020
1
3
Digitate il numero al quale volete associare il gusto (es: 1):
• Premete questo tasto.
Premete questi tasti; la scritta "LAMP"
diverrà lampeggiante.
Il modo lampeggiante verrà attivato solo
dopo essere usciti dalla programmazione
Premete questo tasto (si ritorna alla videata
precedente "V2.1").
• Premete questo tasto per confermare.
V2.2
I nse r i r e
1 : P ROG
Num
2 : L AM P
2
• Premete questo tasto.
e poi,
• Premete questo.
V2.3
I n s e r i r e Num
I n s . Ma n u a l e
Scrivete il numero della vaschetta seguendo l'ordine della figura 24.
Sono possibili due modi di programmazione.
Associare al numero scelto un nome fra quelli preesistenti
in memoria
Scrivere il gusto utilizzando la tastiera
• Premete questo tasto.
• Premete questo tasto.
V2.4
I nse r i r e
Ca r ame l
Nome
V2.6
• Premete più volte questo tasto fino a far apparire:
V2.5
I nse r i r e
L i mo n e
Nome
I nse r i r e
Nome
< - -
• Premete questo tasto fino a far apparire la lettera
L.
N.B.: all’inizio appaiono in minuscolo e poi in
maiuscolo.
I nse r i r e
Nome
L< - -
• Premete questo tasto per memorizzare.
V2.7
• Premete questo tasto per terminare la programmazione.
• Premete la successiva lettera: es. I
N.B.: la "I" si trova sullo stesso tasto pertanto,
dopo aver scritto la lettera "L" premete questo
tasto per creare uno spazio.
Il display si posiziona nella videata V2.1 e permette di
inserire più gusti. Dopo alcuni secondi i display si
posizioneranno come da programmazione. Utilizzate la • Continuate ad agire sui tasti per completare il nome.
stessa procedura per modificare o aggiornare messaggi
preesistenti.
• A nome completato premete questo tasto per
memorizzare.
V2.8
I n s e r i r e Nome
L I MO N E < - -
• Premete questo tasto per memorizzare.
• Premete questo tasto per terminare la programmazione.
Il display si posiziona nella pagina V2.1 e permette di
inserire più gusti. Dopo alcuni secondi i display si
posizioneranno come da programmazione. Utilizzate la
stessa procedura per modificare o aggiornare messaggi
preesistenti.
3
F
Indication des parfums en vente (système "APP" - Advanced Product Presentation)
Dans la partie antérieure des bacs qui contiennent la glace, se trouve une file d’écran à cristaux liquides LCD, indiquant
le parfum et le numéro associé à chacun. Le système d’indication des parfums peut être facilement programmé par
l’opérateur.
• Presser cette touche de façon continue pendant 6
secondes environ jusqu’à ce que l’inscription
suivante apparaisse (V2):
• Presser encore cette touche.
Le curseur clignote jusqu’à ce que le numéro du
bac soit introduit (fig.24).
V2
ME N U PR I NC I P A L
› Pa r f ums
I n t r odu i re
Num
V2.1
• Introduire le numéro et confirmer avec cette touche.
• Presser cette touche si l’on veut retourner à l’écran
V1.
24
A
Le système client permet d’établir les
inscriptions sur les écrans LCD A qui
s’adressent au client.
Avec l’utilisation du clavier et de l’écran,
l’opérateur attribue un nom à chaque
position sur l’écran A.
1
2
COTE CLIENT
2
4
N.B. La numération (1…2…3…) sur
l’écran frontal A est prédéterminée par
le fabricant et ne peut être modifiée,
car chaque ligne de l’écran est associée à un bac.
VE3004-020
1
3
Taper le numéro auquel on veut associer le parfum (ex: 1):
• Presser cette touche.
Presser ces touches; l’inscription "LAMP"
clignotera.
On activera le mode clignotant seulement
après être sorti de la programmation.
• Presser cette touche pour confirmer.
V2.2
I n t r o d u i r e Num
2 : L AMP
1 : P ROG
ESC presser cette touche (on retourne à
l’écran précédent "V2.1").
4
• Presser cette touche
et ensuite,
• Presser celle-ci.
V2.3
I n t r o d u i r e Num
I n t . Ma n u e l l e
Ecrire le numéro du bac en suivant l’ordre de la figure 24.
Deux modes de programmation sont possibles.
Associer au numéro choisi un nom parmi ceux qui
existent déjà en mémoire
Ecrire le parfum en utilisant le clavier
• Presser cette touche.
• Presser cette touche.
V2.4
I n t r odu i re
Ca r ame l
Nom
V2.6
• Presser plusieurs fois cette touche jusqu’à ce
qu’apparaisse:
V2.5
I n t r odu i re
Ci t ron
Nom
I n t r odu i re
Nom
< - -
• Presser cette touche jusqu’à ce que la lettre C
apparaisse.
N.B. au début elles apparaissent en minuscules, puis en majuscules.
I n t r odu i re
• Presser cette touche pour mettre en mémoire.
V2.7
• Presser cette touche per terminer la programmation.
• Presser la lettre successive: ex. I.
Nom
C< - -
NOTE: Si les lettres se trouvent sur la même
touche, presser 6 pour créer un espace.
L’écran se place sur V2.1 et permet d’introduire plusieurs
parfums. Après quelques secondes les écrans se placeront selon la programmation. Agir de la même façon pour • Continuer à agir sur les touches pour compléter le nom.
modifier ou mettre à jour les messages antécédents.
• Une fois que le nom est complété presser cette
touche pour mettre en mémoire.
V2.8
I n t r o d u i r e Nom
Ci t ron< - -
• Presser cette touche pour mettre en mémoire.
• Presser cette touche pour terminer la programmation.
L’écran se place sur la page V2.1 et permet d’introduire
plusieurs parfums. Après quelques secondes les écrans
se placeront selon la programmation. Agir de la même
façon pour modifier ou mettre à jour les messages antécédents.
5
GB
Display of flavours for sale (“APP” system: Advanced Product Presentation)
The anterior part of the glass container, which holds the ice cream, is equipped with an LCD display band (“ticker”). It
shows the available flavours and a selection number for each of them. The flavour indicator system can easily be
programmed by the operator.
• Press this key for about 6 seconds until the following
message appears (V2):
V2
• Press this key again.
The cursor is now blinking until a product container
number is inserted (figure 24).
MA I N ME N U
› F l av ou r s
I nse r t
No .
V2.1
Insert the number and confirm with this key.
• Press this key to return to display V1.
24
A
1
2
2
The operator can choose letters and text
for the LCD display A, which is directed
towards the customer.
With the help of keyboard and display,
the operator can assign one name (ice
cream flavour) to each position on display
A.
4
Note: The numeration (1..2..3..) on display A is pre-set by the manufacturer
and cannot be modified. Thus each display position refers to a specific product container.
VE3004-020
1
3
Key in the number with which you want to associate a flavour (e.g., 1):
• Press this key
Press these keys; the word “LAMP” will start
to blink.
The blinking mode will only be activated after
you have exited from the programming mode.
Press this key (you will now return to the previous display “V2.1”)
• Press this key to confirm
V2.2
I nse r t No .
2 : L AM P
1 : P ROG
6
• Press this key.
Then
• Press this key.
V2.3
I nse r t
Ma n u a l
No .
I ns .
Write the number of the product container, following the order of figure 24.
There are two possible ways to carry out the programming.
Associate each chosen number with a word (name)
from the pre-set memory
Write each flavour using the keyboard
• Press this key.
• Press this key.
V2.4
I n s e r t n ame
Ca r ame l
V2.6
• Press this key repeatedly until the following
display appears:
V2.5
I nse r t
L e mo n
n ame
I nse r t
n ame
< - -
• Press this key until the letter L appears on the
display.
Note: at first the letters appear in lower case, later
in upper case format.
I nse r t
• Press this key to store.
V2.7
• Press this key to exit from programming mode.
• Press the next letter.
n ame
L< - -
NB: if the letters are on the same key, press to
create a space.
The display automatically goes to position V2.1 and allows
you to insert more flavours. After a few seconds the displays
• Continue to use the keyboard to complete the dewill indicate programming mode. Use the same procedure
sired name/word.
to modify or update pre-existing messages.
• After completion, press this key to store.
I nse r t
V2.8
n ame
L E MO N < - -
• Press this key to store.
• Press this key to exit from programming
mode.
The display automatically goes to position V2.1 and allows
you to insert more flavours. After a few seconds, the
displays will indicate programming mode. Use the same
procedure to modify or update pre-existing messages.
7
D
Angabe der angebotenen Sorten ("APP"-System - Advanced Product Presentation)
Vor den Eisschalen ist eine Reihe mit Displays angebracht, auf denen jeweils eine Eissorte in Verbindung mit einer
Nummer angezeigt wird. Die Programmierung der Sortenauswahl ist einfach und kann problemlos vom Bediener
durchgeführt werden.
• Halten Sie diese Taste zirka 6 Sekunden oder
solange bis die folgenden Anzeige (V2) erscheint,
gedrückt:
• Drücken Sie diese Taste noch mal. Der Cursor blinkt
jetzt solange, bis die Nummer der Schale eingeben
wird (s. Abb. 24).
Geben Sie die Nummer ein und bestätigen Sie die
Eingabe mit dieser Taste.
V2
H A U P T ME N Ü
› So r t en
E i ngeben
Num
V2.1
• Drücken Sie diese Taste, wenn Sie zu dem vorherigen Bildschirminhalt (V1) zurückkehren wollen.
24
A
Die Anzeigen auf den Displays A, die zur
Ansicht für den Kunden gedacht sind,
können programmiert werden. Mit Hilfe
des Tastenfelds und dem Display kann der
Bediener jeder Position auf dem Display
A einen Namen zuweisen.
1
2
VE3004-020
KUNDENSEITE
2
4
1
3
BEACHTEN SIE: Die Nummerierung
(1..2..3..) auf dem vorderen Display A
wurde vom Hersteller vorgegeben und
kann nicht geändert werden, das heißt,
jede Zeile des Displays ist an eine bestimmte Schale gekoppelt.
Drücken Sie die Nummer, der Sie die Sorte zuordnen wollen (Beisp. 1):
• Drücken Sie diese Taste.
Drücken Sie diese Taste. Die Anzeige "LAMP"
blinkt jetzt auf.
Der Blinkmodus wird nur nach Verlassen der
Programmierungsprozedur aktiviert.
Drücken Sie diese Taste. (Sie kehren zum vorhergehenden Bildschirminhalt "V2.1" zurück.)
• Bestätigen Sie mit dieser Taste.
V2.2
E i ngeben
1 : P ROG
Num
2 : L AMP
8
• Drücken Sie diese Taste,
und anschließend:
• Drücken Sie diese Taste.
V2.3
E i n g e b e n Num
E i n g . Ma n u e l l
Schreiben Sie die Nummer der Schalen. Folgen Sie dabei der in Abb. 24 angegebenen Reihenfolge.
Die Programmierung kann auf zwei Arten erfolgen.
Ordnen Sie der gewählten Nummer einen Namen aus
der Liste der schon gespeicherten Namen zu.
Geben Sie auf dem Tastenfeld den Namen der Sorte ein.
• Drücken Sie diese Taste.
• Drücken Sie diese Taste.
V2.4
E i ngeben
K a r ame l
Name
V2.6
• Drücken Sie diese Taste mehrfach bis die Anzeige
erscheint:
V2.5
E i ngeben
Z i t rone
E i ngeben
Name
< - -
• Drücke Sie diese Taste mehrfach bis der Buchstabe Z erscheint.
Name
BEACHTEN SIE: Die Schrift erscheint zuerst in
Klein- und dann in Großbuchstaben.
E i ngeben
V2.7
• Drücken Sie diese Taste, um die Eingabe zu
speichern.
Name
Z< - -
• Schreiben Sie den nachfolgenden Buchstaben, z. B. I.
• Drücken Sie diese Taste, um die Programmierungsprozedur abzuschließen.
BEACHTEN SIE: Wenn sich die Buchstaben auf
dem gleichen Taste befinden, drücken Sie 6,
um einen Leerraum zu schaffen.
Das Display kehrt jetzt zum Bildschirminhalt V2.1 zurück.
Jetzt können Sie mehrere Sorten eingeben. Nach wenigen • Betätigen Sie die Tasten solange bis der Name vollständig ist.
Sekunden setzen sich die Displays in den Programmierungsmodus. Verfahren Sie auf die gleiche Weise, wenn
• Nachdem Sie den Namen geschrieben haben,
Sie vorhergehende Eingaben ändern oder aktualisieren
drücken Sie diese Taste, um Ihre Eingabe zu
wollen.
speichern.
V2.8
E i n g e b e n Name
Z i t r on e< - -
• Drücken Sie diese Taste, um die Eingabe zu speichern.
• Drücken Sie diese Taste, um die Programmierungsprozedur abzuschließen.
Das Display kehrt jetzt zum Bildschirminhalt V2.1 zurück.
Jetzt können Sie mehrere Sorten eingeben. Nach wenigen
Sekunden setzt sich die Displays in den Programmierungsmodus. Verfahren Sie auf die gleiche Weise, wenn Sie frühere Eingaben ändern oder aktualisieren wollen.
9
E
Indicación de los gustos en venta (sistema "APP" - Advances Product Presentation).
En la parte anterior de los contenedores de helado, está colocada una fila de display de cristales líquidos LCD, que
indican al trabajador el gusto y el número asociado a cada uno de ellos. El sistema de indicación de los gustos se
puede programar fácilmente.
• Pulsen y mantengan pulsada esta tecla durante 6
segundos hasta que aparezca escrito (V2):
V2
ME N U PR I NC I P A L
› Gu s t o s
• Pulsen de nuevo esta tecla.
• El cursor se enciende y se apaga hasta que se
escriba el número del contenedor (fig. 24).
Esc r i b i r
Núm .
V2.1
Escriban el número y confírmenlo con esta tecla.
• Pulsen esta tecla para volver a la página V1.
24
A
El sistema permite memorizar palabras
en el display LCD A hacia la parte del
cliente. Usando el teclado del display, el
trabajador da un nombre a cada posición
en el display.
1
2
VE3004-020
LADO DEL CLIENTE
2
4
1
3
N.B.: Los números (1, 2, 3,… ) en el display frontal A se determinan en la fábrica y no se puede modificar, es decir, cada línea del display está asociada a un contenedor.
Escriban el número al que quieran asociar el gusto (ejemplo: 1).
• Pulsen esta tecla.
Pulsen estas teclas y la palabra "LAMP" se
enciende y se apaga.
El modo intermitente se activa solamente
después de que se salió de la programación.
Pulsen esta tecla (se vuelve a la página
anterior V2.1).
• Pulsen esta tecla para confirmar
V2.2
Esc r i b i r
1 : P ROG
Núm .
2 : L AMP
10
• Pulsen esta tecla.
Y después
• Pulsen esta tecla.
V2.3
E s c r i b i r Núm .
I n s . Ma n u a l
Escriban el número del contenedor siguiendo el orden de la figura 24.
Son posibles dos modos de programarla:
Asociar el número elegido a un nombre que ya existe en
la memoria:
Escriban el gusto utilizando el teclado.
• Pulsen esta tecla.
• Pulsen esta tecla.
V2.4
Esc r i b i r
Ca r ame l o
Nomb r e
V2.6
• Pulsen varias veces esta tecla hasta que
aparezca:
V2.5
Esc r i b i r
L i mó n
Esc r i b i r
Nomb r e
< - -
• Pulsen esta tecla hasta que aparezca la letra L.
N.B.: Al principio aparecen el minúscula y
después en mayúscula.
Nomb r e
Esc r i b i r
• Pulsen esta tecla para memorizar.
V2.7
• Pulsen esta tecla para terminar la programación.
• Pulsen la sucesiva letra: Ej. I.
Nomb r e
L< - -
N.B.: La "I" se encuentra en la misma tecla por
lo tanto, después de haber escrito la letra "L",
pulsen esta tecla para crear un espacio.
El display se coloca en la ‘pantalla V2.1 y permite escribir
más gustos. Después de unos segundos los display se
colocan como se pensó en la programación. Utilicen el • Sigan escribiendo con las letras hasta que completen el
mismo procedimiento para modificar y poner al día los
nombre.
mensajes ya existentes.
• Cuando hayan completado el nombre, pulsen
esta tecla para memorizarlo.
Esc r i b i r
V2.8
Nomb r e
L I MÓ N < - -
• Pulsen esta tecla para memorizar.
• Pulsen esta tecla para terminar la programación.
El display se coloca en la página V2.1 y permite escribir
más gustos. Después de unos segundos, los display se
colocan como se programó. Utilicen el mismo procedimiento para modificar o poner al día los mensajes anteriores.
11
ISA S.p.A.
Via del Lavoro, 5 - 06083 BASTIA UMBRA - (PG) - ITALY
www.isaitaly.com