1
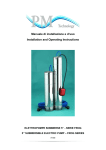
e.s.p. series I GB H Manuale di installazione e d’uso Installation and Operating Instructions Beüzemelési és használati utasítások 2 5 8 Indice 1.Generalitá ............................................................................................................................................................................................. 3 2. Descrizione serie e.s.p. ....................................................................................................................................................................... 3 3. Funzionalità e protezioni garantite ...................................................................................................................................................... 3 4. Installazione - Settaggio ..................................................................................................................................................................... 3 4.1 Reset ............................................................................................................................................................................................ 4 5.Stati del sistema.................................................................................................................................................................................... 4 5.1.Segnali di allarme ......................................................................................................................................................................... 4 6.Allacciamenti elettrici .......................................................................................................................................................................... 4 7.Trasporto e immagazzinamento ........................................................................................................................................................... 4 8.Problemi & Rimedi .............................................................................................................................................................................. 4 Avvertimenti per la sicurezza La tabella seguente riporta la descrizione della simbologia ricorrente nel presente manuale, a cui è bene prestare attenzione per un utilizzo sicuro del prodotto. Simbolo Descrizione SCOSSE ELETTRICHE Rischio di scosse elettriche se non si osserva quanto prescritto ATTENZIONE AVVERTENZA Rischio di danni alle cose (pompa, impianto, quadro,..), alle persone o all’ambiente se non si osserva quanto prescritto Leggere attentamente il manuale prima di procedere 2 1.Generalità Nel seguente manuale sono riportate le istruzione di installazione e d’uso per la serie di quadri di controllo e.s.p. . Leggere il manuale prima di installare ed usare il prodotto. Per ulteriori informazioni contattare l’ufficio vendita / assistenza. L’azienda respinge qualsiasi responsabilità in caso di danni o incidenti dovuti alla non osservanza delle istruzioni descritte in questo manuale. La procedura di installazione deve essere eseguita esclusivamente da personale esperto e qualificato, usando ATTENZIONE le idonee attrezzature e rispettando le norme di antinfortunistica. Riferirsi sempre ai regolamenti, alle leggi, alle norme locali e/o nazionali vigenti per quanto riguarda l’installazione e gli allacciamenti. 2.Descrizione serie e.s.p. La gamma è composta dai seguenti modelli: Sline20: utilizzabile con carichi monofase fino ad un massimo di 20A (230V) Tline10: utilizzabile con carichi trifase fino ad un massimo di 10A (400V / a richiesta 230V) Tline20: utilizzabile con carichi trifase fino ad un massimo di 20A (400V / a richiesta 230V) Tline30: utilizzabile con carichi trifase fino ad un massimo di 30A (400V / a richiesta 230V) 3.Funzionalità e protezioni garantite Protezione contro il funzionamento a secco, mediante il controllo del cosphi Accensione e spegnimento dell’elettropompa tramite pulsante on/off Protezione contro il sovraccarico Protezione contro sovratensione/sottotensione Protezione contro il cortocircuito Protezione contro mancanza fase (motore trifase) 4.Installazione - Settaggio È possibile utilizzare l’ e.s.p. in funzionamento manuale o automatico. Funzionamento Manuale: , premere il pulsante ‘set-up’ Accendere il dispositivo manuale (MAN) e premere ‘enter’ Tramite i cursori per impostare la modalità . scegliere se impostare prima il valore di cosphi (CP a display) o di corrente (AA a display). Effettuata la scelta premere enter visualizzato. , muoversi con i cursori e impostare il primo parametro agendo sui cursori Scelto il valore desiderato premere di nuovo enter per incrementare o decrementare il valore e passare all’impostazione del secondo parametro richiesto. ATTENZIONE: Nel settaggio di entrambi i valori, il display lampeggerà quando, agendo con i cursori sopra riportati, si raggiunge il valore di ampere o cosphi assorbiti in quel momento dal motore. Funzionamento Automatico: ), premere il pulsante ‘set-up’ Accendere il dispositivo( automatica (AUT) e premere ‘enter’ , muoversi con i cursori per impostare la modalità . A questo punto inizia l’auto-settaggio dei valori di corrente e cosphi: questo stato dura 15 secondi, durante i quali il display lampeggerà visualizzando in alternanza la scritta CAL (calibrazione) ed il valore di ampere in quel momento assorbiti dalla pompa. Al termine di tale operazione verranno memorizzati i parametri necessari per il funzionamento in sicurezza della pompa. ATTENZIONE: se durante il periodo di calibrazione si notano delle sostanziali differenze tra il valore di corrente che lampeggia a display e il valore di targa del motore, è possibile interrompere la calibrazione premendo il pulsante di accensione/spegnimento . 3 4.1.Reset Per resettare il sistema, e quindi cancellare tutti i dati memorizzati, è sufficiente tenere premuto il pulsante set-up per 3 secondi sino a quando verrà visualizzato a display il messaggio ‘RES’. È indispensabile effettuare questa operazione ogni qualvolta si desideri installare il dispositivo con un’elettropompa avente caratteristiche di targa diverse da quella precedentemente utilizzata. 5.Stati del sistema Fase di accensione: ad ogni avviamento il sistema effettua un’operazione di autodiagnosi, durante la quale sul display lampeggia la frequenza di rete. Fase di normale funzionamento: al termine dell’autodiagnosi viene visualizzata la corrente assorbita dal motore. 5.1.Segnali di allarme A-1: allarme mancanza fase (motori trifase) il sistema spegne il motore A-2: allarme sovraccarico il sistema spegne il motore A-3: allarme mancanza acqua – attesa ripristino il sistema è momentaneamente in stand-by in attesa che si ripristini il livello d’acqua. Tentavi di riavvio ogni 10, 20, 40, 80, 120 minuti A-4: allarme mancanza acqua – sistema bloccato dopo 120 minuti il sistema va in blocco Dopo avere eliminato le eventuali anomalie, è possibile resettare gli allarmi spegnendo e riaccendendo l’e.s.p. tramite l’apposito segnale on-off. 6.Allacciamenti elettrici I collegamenti elettrici dovranno essere eseguiti esclusivamente da personale esperto e qualificato Verificare che i dati di targa del motore siano compatibili con il carico che l’e.s.p. dovrà controllare. Assicurarsi che il cavo che collega il motore all’ e.s.p. sia correttamente dimensionato. La non conformità del cavo può causare danni all’impianto e pericolosi surriscaldamenti. Accertarsi che i collegamenti e la rotazione del motore siano corretti. Collegamenti scorretti in versioni monofase, o condensatori erroneamente dimensionati rispetto alla targa del motore, possono provocare il danneggiamento del dispositivo e.s.p. . Assicurarsi che il collegamento di terra con un cavo giallo-verde della giusta sezione sia collegato nella maniera corretta. La mancanza di un’adeguata messa a terra può provocare gravi pericoli per l’utilizzatore. 7.Trasporto e immagazzinamento. I quadri e.s.p. vengono forniti in imballi di cartone di varie dimensioni. Al ricevimento verificare che l’impallo non presenti danneggiamenti o tracce di acqua/umidità. Immagazzinare in luogo asciutto e con temperature comprese tra -10°C e +40°C. ATTENZIONE 8.Problemi & Rimedi Problema Il motore non si avvia e il display visualizza la frequenza di rete Allarme A-1 Allarme A-2 Allarme A-3 Allarme A-4 L’ e.s.p. non si accende Causa Tensione di alimentazione troppo bassa Uno dei fili di alimentazione motore non è collegato o è danneggiato Assorbimento di corrente troppo alto dovuto a: pompa bloccata, problemi nel motore, tensione di alimentazione troppo alta. Rilevato funzionamento marcia a secco dell’elettropompa Rilevato definitivo funzionamento marcia a secco dell’elettropompa Assenza ponte nell’uscita SW o il contatto esterno è aperto/scollegato. Index 4 Rimedio Verificare tensione con pinza amperometrica Controllare e/o sostituire i cavi e riattivare il sistema Controllare pompa e dati targa motore Spegnere e riaccendere il dispositivo per uscire dal blocco di marcia a secco Inserire ponticello di contatto nella porta SW oppure verificare i contatti dall’esterno. 1.Overview .............................................................................................................................................................................................. 6 2. e.s.p. series description ....................................................................................................................................................................... 6 3. Features and assured protections ......................................................................................................................................................... 6 4.Installation - Setting ............................................................................................................................................................................. 6 4.1.Reset .............................................................................................................................................................................................. 7 5.System status ........................................................................................................................................................................................ 7 5.1.Alarm signals ................................................................................................................................................................................ 7 6.Electrical connection ............................................................................................................................................................................ 7 7.Transport and storage ........................................................................................................................................................................... 7 8.Possible problems and remedies ........................................................................................................................................................... 7 Safety warnings The following table shows the description of symbols used in this manual, which you should pay attention to, for a safe use of the product. Symbol Description ELECTRIC SHOCK Failure to comply with safety warnings may cause risk of electric shocks WARNING WARNING Failure to comply with safety warnings may cause environment or property damage ( pump, system, panel,..) Please read carefully this manual before proceeding 1.Overview 5 The following manual contains instructions for installation and use of e.s.p. control panels series. Read this manual carefully before installing and using the product. For more information contact sales / service department. Manufacturer denies any liability for damages or accidents due to no compliance with the instruction described hereinafter. Installation procedure must be carried out only by skilled and experienced staff, using suitable WARNING equipment and protections, according with safety standard. Always refer to rules, laws, local and/or national regulations concerning installation power connections. 2. e.s.p.series description e.s.p. series is composed of the following models: Sline20: operable with single-phase loads up to max. 20A (230V) Tline10: operable with three-phase loads up to max. 10A (400V / on demand 230V) Tline20: operable with three-phase loads up to max. 20A (400V / on demand 230V) Tline30: operable with three-phase loads up to max. 30A (400V / on demand 230V) 3. Features and assured protections The system has been designed to protect electropumps from dry running through cosphi control. Switching on / off of electropumps by on/off push-button Overload protection Overvoltage/Undervoltage protection Short-circuit protection Dry running protection Phase failure protection (three-phase motors). 4.Installation - Setting e.s.p. can be used in manual or automatic mode. This choice is made pushing ‘set up’ button and then pushing ‘enter’ Manual mode: Switch on the device , push set-up button , scroll with arrow keys to set manual mode (MAN) and push ‘enter’ . Using arrow keys Once chosen, push enter , choose if you want to set before cosphi value (‘CP’ on screen) or current value (‘AA’ on screen). and set the first value using arrow keys Once you choose the value, push again to increase or decrease the displayed values. to store it and to get on to the second required parameter setting. ATTENTION: when you scroll up and down with arrow keys during setting time, the display will flash when you rise ampere or cosphi values absorbed by motor in that very moment. Automatic mode: Switch on the device ‘enter’ , push set-up button , scroll with arrow keys to set automatic mode (AUT) and push . Now the device starts a self-setting of current and cosphi values: this status lasts 15 seconds. During this time the display will flash, alternating ‘CAL’ message (calibration) and ampere values absorbed by electropump in that very moment. At the end of this status, all needed parameters for a safe operation of the pump will be stored. ATTENTION: if, during calibration time, you note great differences between current value that flashes on screen and motor nominal current value, you can stop calibration pushing on/off button 4.1.Reset To reset the system, and so cancel all stored data, push set-up button on the screen. 6 and hold it for 3 seconds, till ‘RES’ message will appear You must do it every time you need to install the e.s.p. device to an electropump with different nominal features from the previous utilized one. 5. System status Switch-on status: the system makes a self-diagnosis at every switching on and during this time mains frequency flashes on display. Usual operating status: at the end of self-diagnosis, absorbed current is visualized on display. 5.1.Alarm signals A-1: phase failure warning (three-phase motors) the device switches off the motors A-2: overload warning the device switches off the motors A-3: water lack warning – waiting for re-establishment device is temporarily in stand-by waiting for level water reestablishment. Restart try after 10, 20, 40, 80, 120 minutes. A-4: water lack warning – blocked system after 120 minutes the system blocks. After solving alarm signals, reset alarms switching off and restarting l’ e.s.p. by on/off button 6.Electrical connection Electrical connections must be carried out only by expert and qualified staff. Make sure that motor nominal parameters are compatible with load controlled by e.s.p.. Make sure cable that connect motor and e.s.p. is correctly dimensioned. No conformity of the cable may cause damages and dangerous overheating. Verify that connection and rotation are correct. Erroneous connections in single phase versions, or wrongly dimensioned capacitors relative to motor type, can cause e.s.p. device damage. Provide a proper ground connection with a yellow-green cable with a correct size. Wrong cable connection may cause serious dangers for user. 7.Transport and storage e.s.p. control panels are delivered in cardboard packaging with different sizes and shapes. Take care to note that the packaging does not present externally visible damages or moisture/water signs. In case of damaged product, inform our sales departments within 5 days from receipt. Store the product in a dry site at a temperature between -10°C and +40°C. WARNING 8.Possible problems and remedies Problem Motor doesn’t start and display visualizes mains frequency Alarm A-1 Alarm A-2 Alarm A-3 Alarm A-4 e.s.p. doesn’t switch-on Cause Mains voltage is too low Remedy Verify voltage with amperometric clamp A motor supply wire is not connected or is damaged. Absorbed current is too high due to: blocked pump, motor problems, too high supply voltage. Electropump dry running detected Electropump dry running definitively detected No jumper in SW port or outer connection is open/ disconnected. Check and / or replace the cable and reactivate the system. Check pump and nominal motor data. 7 Switch off and on the system to come out of the blocking dry running. Insert contact jumper in SW port or verify the contact externally. Tartalomjegyzék 1.Áttekintés ............................................................................................................................................................................................. 6 2. e.s.p. sorozat leírása............................................................................................................................................................................ 6 3. Funkciók és védelmek ......................................................................................................................................................................... 6 4.Beüzemelés - Beállítás ......................................................................................................................................................................... 6 4.1.Reset .............................................................................................................................................................................................. 7 5.Rendszerállapot .................................................................................................................................................................................... 7 5.1.Vészjelzések ................................................................................................................................................................................. 7 6.Elektromos bekötés .............................................................................................................................................................................. 7 7.Szállítás és tárolás ............................................................................................................................................................................... 7 8.Lehetséges meghibásodások és megoldásuk ........................................................................................................................................ 7 Biztonságtechnikai figyelmeztetések A következő táblázat az ezen útmutatóban használt szimbólumok/jelek leírását tartalmazza, melyekre figyelemmel kell lennie a termék biztonságos használata érdekében. Jel WARNING Leírás ELEKTROMOS ÁRAMÜTÉS A biztonsági figyelmeztetések figyelmen kívül hagyása áramütés veszélyét eredményezheti FIGYELMEZTETÉS A biztonsági figyelmeztetések figyelmen kívül hagyása dologi( szivattyú, a rendszer, a panel, stb.) és környezeti károkat okozhat. Kérjük, olvassa el az útmutatást, mielőtt beüzemeli a terméket! 8 1.Áttekintés A következő leírás az e.s.p. vezérlő panel-sorozat beüzemelésére és használatára vonatkozó utasításokat tartalmaz. Kérjük, olvassa el az útmutatást mielőtt beüzemeli és használatba veszi a terméket! További információkért vegye fel a kapcsolatot az értékesítési/szolgáltatási osztállyal. A gyártó elutasít minden felelősséget károkra vagy balesetekre vonatkozólag, melyek az itt következő utasítások be nem tartásából adódnak. A beüzemelést csak szakképzett személy/személyzet végezheti, megfelelő eszközök és FIGYELEM védőfelszerelés használata és a biztonságtechnikai előírások betartása mellett. A hálózatra való csatlakozáskor minden esetben vegye figyelembe a helyi és/vagy nemzeti előírásokat. 2. Az e.s.p. sorozat leírása Az e.s.p. sorozat a következő modellekből áll: Sline20: egy fázisról, max 20A (230V) terheléssel működtethető Tline10: három fázisról max. 10A (400V / igény esetén 230V) terheléssel működtethető Tline20: három fázisról max. 20A (400V / igény esetén 230V) terheléssel működtethető Tline30: három fázisról max. 30A (400V / igény esetén 230V) terheléssel működtethető 3. Funkciók és védelmek A rendszert úgy tervezték, hogy megvédje a szivattyúkat a szárazfutástól cos fi vezérlés által. Elektromos szivattyú ki/be kapcsolása a ki/be nyomógombbal Túlterhelés-védelem Túlfeszültség/Alacsony feszültségszint védelem Rövidzár-védelem Szárazfutás-védelem Fáziskiesés-védelem (háromfázisú motorok). 4.Beüzemelés-Beállítás e.s.p. használható kézi és automata üzemmódban. Ez a ‘set up’ gomb majd az ‘enter’ megnyomásával választható ki. Kézi üzemmód: Kapcsolja be az egységet nyomjon ‘enter’-t , nyomja meg a set-up gombot a (MAN) üzemmódig és . A nyilak használatával ha kívánja, beállíthatja a cos fi értéket (‘CP’ a kijelzőn) vagy az áramértéket (‘AA’ a kijelzőn). Ha kiválasztotta, nyomjon ’enter’-t kijelzett értéket. , lapozzon a nyilakkal és állítsa be az első értéket a nyilak használatával Ha megvan a kiválasztott érték, nyomjon növelve vagy csökkentve a a tároláshoz, majd továbblépéshez a második paraméter beállításához. FIGYELEM: a beállítás során, amikor a nyilakkal fel és le lapoz, a kijelző villogni fog, amikor az adott pillanatban a motorról érkező áram- és cos fi-értéken áthalad. Automata mód: Kapcsolja be az egységet nyomjon ‘enter’-t , nyomja meg a ’set-up’ gombot , lapozzon a nyilakkal az (AUT) üzemmódig és . Ekkor az egység önműködően beállítja az áram és a cos fi értékeket, mely kb. 15 másodpercig tart. Ezalatt az idő alatt a kijelző váltani fog, a ’CAL’ üzenet és az adott pillanatban a szivattyúról érkező áramérték között. A folyamat végén, a szivattyú biztonságos üzemeléséhez szükséges értékek tárolódnak. FIGYELEM: ha a kalibráció során nagy különbséget észlel a motor névleges áramértéke és a kijelzőn látható áramérték között, a kalibrációt a ki/be gomb megnyomásával leállíthatja. 9 4.1.Reset A rendszer reseteléséhez és minden tárolt adat törléséhez, nyomja meg a ’set-up’ gombot és tartsa 3 másodpercig nyomva, míg a ‘RES’ felirat meg nem jelenik a kijelzőn. Ezt minden esetben el kell végeznie, ha az e.s.p. egységet egy a megelőzőtől eltérő nominális értékekkel rendelkező új szivattyúra szereli fel. 5. Rendszerállapot Bekapcsolt állapot: a rendszer minden bekapcsoláskor egy önellenőrzést hajt végre, ami alatt a tápfeszültség frekvenciája fog a kijelzőn villogni. Rendes üzemelési állapot: az önellenőrzés végén a mért áramérték jelenik meg a kijelzőn 5.1.Vészjelzések A-1: fázishiba figyelmeztetés (háromfázisú motorok) az egység leállítja a motort. A-2: túlterhelés figyelmeztetés az egység leállítja a motort. A-3: vízhiány figyelmeztetés – helyreállításra várakozás az egység ideiglenesen stand-by-ba kapcsol, várva a vízszint helyreállítódását. Újraindulási próbálkozás 10, 20, 40, 80, 120 perc múlva. A-4: vízhiány figyelmeztetés – elakadt/blokkolt rendszer 120 perc múlva a rendszer blokkolódik. A vészjelzések feloldása után, a vészjelzések törléséhez kapcsolja ki az e.s.p. –t és 1 perc múlva ismét kapcsolja be a ki/be gombbal. 6.Elektromos bekötés Az elektromos bekötést szakember és szakképzett személyzet végezheti. Győződjön meg arról, hogy a motor névleges értékei megegyeznek az e.s.p. által vezérelhető értékekkel. Győződjön meg, hogy az e.s.p.-t és a motort összekötő vezeték megfelelően van méretezve. A kábel nem megfelelősége károsodáshoz és veszélyes túlhevüléshez vezethet. Ellenőrizze a csatlakozásokat és a forgásirányt. Az 1 fázisú verzióknál a hibás bekötés, vagy a motor típushoz rosszul méretezett kondenzátor az e.s.p. egység károsodását okozhatja Végezzen földelést megfelelő méretű zöld/sárga vezetékkel. Helytelen kábelcsatlakozás komolyan veszélyeztetheti a kezelőt. 7.Szállítás és tárolás e.s.p. vezérlő egységeket különböző méretű és formájú kartondobozban szállítjuk. Figyeljen arra, hogy a csomagoláson nincs külső látható sérülés vagy nedvességre/vízre utaló jel. Sérült termék esetén a kézhezvételtől számított 5 napon belül jelezze azt értékesítési osztályunknak. Tárolja a terméket száraz helyen -10°C and +40°C közötti hőmérsékleten. WARNING 8.Lehetséges meghibásodások és megoldásuk Hiba A motor nem indul, a kijelző a betáp frekvenciáját mutatja Riasztás A-1 Riasztás A-2 Riasztás A-3 Riasztás A-4 e.s.p. nem kapcsol be Oka A betáp feszültség alacsony A motor tápkábele nem csatlakozik vagy sérült Mért áram túl magas, elakadt szivattyú motor, motor probléma, túl magas betáp feszültség miatt Szivattyú szárazfutását érzékelte. Szivattyú szárazfutását érzékelte a rendszer. Nincs jumper az SW porton, vagy a kapcsolat nyitott/szétkapcsolt. 10 Megoldás Ellenőrizze a feszültséget mérőkészülékkel Ellenőrizze és/vagy cserélje a kábelt, majd indítsa újra a rendszert. Ellenőrizze a szivattyút és annak névleges adatait. Kapcsolja ki majd be a rendszert, hogy kikerüljön a szárazfutás blokkolásából. Helyezzen be egy jumpert az SW portra vagy ellenőrizze a kötést külsőleg. PM S.r.l. Via E. Fermi n°43/45 36071 ARZIGNANO (VI) - ITALY Cod. fisc. e Partita IVA: 03499510240 Tel: 0444 673043 Fax: 0444 677273 [email protected] www.pmtechnology.eu 11