1
Gascon
Document n° 1146-14
25/03/2011
FR
NL
EN
IT
ES
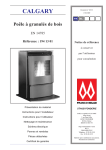
Poêle à bois
EN 13240
Référence : 134 13 15
Puissance : 11 kW
Notice de référence
à conserver
par l’utilisateur
pour consultation
Présentation du matériel
FRANCO BELGE
Instructions pour l’installateur
Rue Orphée Variscotte
59660 MERVILLE (FRANCE)
Instructions pour l’utilisateur
Téléphone : 03 28 43 43 22
Fax : 03 28 43 43 60
Pièces détachées
Certificat de garantie
Matériel sujet à modifications
sans préavis.
Document non contractuel.
“GASCON” - réf. 134 13 15
FRANCO BELGE vous félicite de votre choix.
FRANCO BELGE garantie la qualité de ses appareils
et s’engage à satisfaire les besoins de ses clients.
Fort de son savoir-faire de plus de 80 ans,
FRANCO BELGE utilise les technologies les plus avancées dans la conception
et la fabrication de l’ensemble de sa gamme d’appareils de chauffage.
Ce document vous aidera à installer et utiliser votre appareil,
au mieux de ses performances, pour votre confort et votre sécurité.
SOMMAIRE
Présentation du matériel . . . . . . . . . . . . . . . . . . . . . . . . . . . . . . . . . . p. 3
Colisage . . . . . . . . . . . . . . . . . p. 3
Descriptif de l’appareil . . . . . . . . . . p. 3
Caractéristiques générales . . . . . . . p. 3
Principe de fonctionnement . . . . . . . p. 3
Instructions pour l’installateur . . . . . . . . . . . . . . . . . . . . . . . . . . . . . . p. 4
Avertissement pour l’usager . . . . . . p. 4
Conduit de raccordement . . . . . . . . p. 5
Le local d’implantation . . . . . . . . . . p. 4
Montage du plateau cendrier . . . . . . p. 6
Le conduit d’évacuation . . . . . . . . . p. 4
Contrôles avant mise en service . . . . p. 6
Montage de la buse d’évacuation. . . . p. 5
Entretien de la cheminée . . . . . . . . p. 6
Instructions pour l’utilisateur . . . . . . . . . . . . . . . . . . . . . . . . . . . . . . . p. 7
Combustible . . . . . . . . . . . . . . . p. 7
Entretien de la cheminée . . . . . . . . p. 8
Allumage . . . . . . . . . . . . . . . . . p. 7
Entretien du poêle . . . . . . . . . . . . p. 8
Conduite de la combustion . . . . . . . p. 8
Consignes de sécurité . . . . . . . . . . p. 8
Décrassage. . . . . . . . . . . . . . . . p. 8
Causes de mauvais fonctionnement . . p. 9
Pièces détachées . . . . . . . . . . . . . . . . . . . . . . . . . . . . . . . . . . . . . p. 10
2
Notice de référence “1146”
“GASCON” - réf. 134 13 15
Présentation du matériel
Cet appareil est conçu pour brûler le bois en toute sécurité
ATTENTION
une mauvaise installation peut avoir de graves conséquences.
Il est recommandé de faire appel à un professionnel qualifié pour son installation ainsi que
pour les besoins de maintenance régulière.
1 Présentation du matériel
1.1 Colisage
1.3 Descriptif de l’appareil
• 1 colis : Poêle.
Poêle à bois - conforme à la EN 13240
1.2 Caractéristiques générales
• Appareil de chauffage à fonctionnement intermittent.
• Buse d’évacuation en fonte, démontable pour
raccorder l’appareil soit par le dessus, soit par l’arrière.
Référence . . . . . . . . . . . . . . . . . 134 13 15
Puissance calorifique nominale . . . . kW
11
Dimensions utiles du foyer
(de la chambre de combustion)
- Largeur . . . . . . . . . . . . . . . . mm
520
- Profondeur . . . . . . . . . . . . . . mm
304
- Hauteur. . . . . . . . . . . . . . . . mm
265
Dimension des bûches
- Longueur maxi . . . . . . . . . . . . cm
50
Capacité du cendrier. . . . . . . . . litres
5
Poids . . . . . . . . . . . . . . . . . . kg
140
Volume de chauffe corrigé . . . . . . . m3
450
Dépression optimum de la cheminée . Pa
11
Température des fumées (moyenne) . C°
273
Débit massique des fumée . . . . . . g/s
13,7
Rendement . . . . . . . . . . . . . . . %
73,3
Co (13% O2) . . . . . . . . . . . . . . . %
0,16
• 2 portes hublot à ouverture latérale, munie de 2 vitres
en vitrocéramique permettant d’observer la
combustion.
• Réglage d’allure par volet d’entrée d’air primaire.
• Cendrier de grande contenance.
Combustion longue durée : L’appareil avec une charge
de 11.5 kg de bois sec au ralenti (air primaire fermé,
rep. B, fig. 6, page 7) et une dépression de 6 Pa,
fonctionne dans ces conditions, plus de 11 heures.
1.4 Principe de fonctionnement
Le “Gascon” est un appareil conçu pour fonctionner
uniquement portes fermées. La diffusion de la chaleur
s’effectue essentiellement par rayonnement au travers
de la vitre et tout autour du foyer.
Nota : Les performances indiquées ci-contre résultent d’essais effectués suivant la norme EN 13240 avec des
bûches de 35 cm de longueur et une dépression de 11 Pa, masse de combustible 4,9 kg, entrée d’air ouvert à
moitié.
4 3 2
6 5 2
4 1
Ø
1 2 5
Ø
1 3 9
7 1 2
6 1 4
6 8 1
5 2 4
Figure 1 - Dimensions en mm
Notice de référence “1146”
3
“GASCON” - réf. 134 13 15
Instructions pour l’installateur
2 Instructions pour l’installateur
2.1 Avertissement pour l’usager
A
To u s l e s r è g l e m e n ts l o c a u x e t n a t i o n a u x ,
notamment ceux qui font référence à des normes
nationales et européennes, doivent être respectés
lors de l’installation de l’appareil.
Un poêle mal installé peut être à l’origine de graves
incidents (incendie de cheminée, inflammation de
matériaux d’isolation à base de plastique des cloisons,
etc...).
L’isolation de l’appareil et du conduit d’évacuation
des gaz doit être renforcée et réalisée suivant les
règles de l’art afin d’assurer la sécurité du
f o n c t i o n n e m e n t d e l ’ a p pa r e i l . S e r é f é r e r a u x
réglementations locales en vigueur.
Pour la France :
Arrêté du 22 octobre 1969 : Conduit de fumée
desservant les logements.
Arrêté du 22 octobre 1969 et Arrêté du 24 mars
1982 : Aération des logements.
N o r m e N F P 5 1 - 2 0 1 : Tr a v a u x d e f u m i s t e r i e
(DTU 24-1).
Norme NF D 35-302 : Tuyaux et coudes de fumée en
tôle.
Le non-respect des instructions de montage entraine la
responsabilité de celui qui l’effectue.
La responsabilité du constructeur est limitée à la
fourniture du matériel.
6 5 0 m m
B
4
7 0 0
m m
6 5 0 m m
C
7 0 0 m m
6 5 0 m m
2.2 Le local d’implantation
Ventilation : Pour permettre le bon fonctionnement en
tirage naturel, vérifier que l’air nécessaire à la
combustion peut être prélevé en quantité suffisante
dans la pièce où est installé l’appareil ; dans les
h a b i t a t i o n s é q u i p é e s d ’ u n e V M C ( Ve n t i l a t i o n
Mécanique Contrôlée), celle-ci aspire et renouvelle l’air
ambiant ; dans ce cas l’habitation est légèrement en
dépression et il est nécessaire d’installer une prise d’air
extérieure, non obturable, complémentaire propre à la
cheminée et d’une section au moins égale à 50 cm2.
Emplacement de l’appareil : Choisir un emplacement
central dans l’habitation qui favorise une bonne
répartition de l’air chaud de convection dans la pièce
principale.
La diffusion de l’air chaud vers les autres pièces se fera
par les portes de communication.
Ces pièces doivent être en dépression ou équipée de
grilles d’aérations, non réglable, placées de façon à ne
pas être obstruées pour favoriser la circulation de l’air
chaud.
Plancher et cloisons : S’assurer que le plancher est
capable de supporter la charge totale de l’appareil.
Dans le cas contraire, le renforcer par une chape en
béton pour répartir cette charge.
S’assurer qu’ils ne sont pas constitués ni revêtus de
matériaux inflammables ou se dégradant sous l’effet de
la chaleur (papiers peints, moquettes, lambris, cloisons
légères avec isolation à base de plastique).
Lorsque le plancher est combustible, prévoir une
isolation adéquate par exemple une plaque en tôle.
Faire bien attention de respecter les dégagements
d’installation jusqu’aux cloisons en matériau
7 0 0 m m
D
1 5 0 m m
1 5 0
m m
1 5 0
m m
Figure 2 - Dégagement mimimum d’installation
combustible (rep. A, B et C fig. 2), aux parois en
matériau non-combustible (rep. D, fig. 2). Ne mettre
aucun objet en matériaux combustibles ou rideaux,
tentures etc…
2.3 Le conduit d’évacuation
Conduit existant : Le conduit d’évacuation doit être
conforme à la réglementation en vigueur.
- Le conduit doit être en bon état et doit permettre un
tirage suffisant (voir tableau page 3).
- Le conduit doit être compatible avec son utilisation,
dans le cas contraire il sera nécessaire de procéder au
tubage ou au chemisage du conduit.
Notice de référence “1146”
“GASCON” - réf. 134 13 15
Instructions pour l’installateur
- Si la cheminée a des tendances aux refoulements, à
cause de sa situation par rapport à des obstacles
voisins, il faut coiffer la sortie d’un antirefouleur
efficace ou rehausser la cheminée.
- Si la dépression de la cheminée est bien au-delà des
valeurs recommandées, il faut installer un modérateur
de tirage efficace sur le conduit de raccordement, Il
doit être visible et accessible.
Conduit inexistant : Le conduit d’évacuation doit être
conforme à la réglementation en vigueur.
- Le conduit de cheminée ne doit pas reposer sur
l’appareil.
- Le conduit doit être éloigné de tout matériau
inflammable (charpente, menuiserie, cloison légère,
etc...).
- Le conduit doit permettre un ramonage mécanique.
180°
2.4 Montage de la buse d’évacuation
Figure 3 - Installation de la buse d’évacuation
- Le conduit doit être propre ; effectuer un ramonage à
La buse d’évacuation permet l’utilisation de tuyaux de
Ø 125 mm ou de Ø 139 mm selon que le raccordement
s’effectue à l’intérieur ou à l’extérieur de la buse.
Figure 3
Il est possible d’installer un départ fumée de dessus ou
arrière avec la même buse. Il suffit d’enlever les 2 vis et
de faire pivoter l’adaptateur de 180 degrées.
Faire attention à ce que le joint d’étanchéité soit bien
placé.
l’aide d’une brosse métallique “hérisson” pour éliminer
les dépôts de suies et décoller les goudrons.
- Le conduit doit avoir une isolation thermique
suffisante.
- Un conduit dont les parois internes sont froides, rend
impossible la formation du tirage thermique et
provoque de la condensation.
- Le conduit d’évacuation doit être étanche à l’eau.
- Le conduit doit être de section normale et constante
sur toute sa hauteur. Cette section doit être
équivalente au diamètre de raccordement de
l’appareil. Un conduit trop large risque de rendre le
tirage thermique nul.
- Le conduit ne doit être raccordé qu’à un seul appareil.
- Il doit avoir 4 à 5 mètres de hauteur et doit déboucher à
40 cm du faîte de la maison ou de toute construction à
moins de 8 m.
- Dans le cas de terrasse ou de toit dont la pente est
inférieure à 15°, la souche doit au moins être égale à
1,20 m.
- Le couronnement ne doit pas freiner le tirage.
2.5 Conduit de raccordement
- Le conduit de raccordement doit être réalisé
conformément à la réglementation en vigueur.
- L’appareil doit se trouver aussi près que possible de la
cheminée.
- L’appareil sera raccordé au conduit de fumée au
moyen de tuyaux de fumée du commerce agréés pour
résister aux produits de combustion (exemple : inox,
tôle émaillée...).
- Le diamètre du tuyau ne doit pas être inférieur au
diamètre de la buse de l’appareil. Si c’est le cas, la
réduction doit être de diamètre immédiatement
1
Figure 4 Conduit de
raccordement
1
2
4
5
1
3
4
3
Notice de référence “1146”
6
1 - Cheminée
2 - Matériau
réfractaire
façonné en
entonnoir
3 - Plaque non
combustible
4 - Accès au
nettoyage
5 - Isolation
6 - Plaque non
combustible
amovible et
ventilée
5
“GASCON” - réf. 134 13 15
inférieur au diamètre de la buse et être située le plus
loin possible du raccordement à l’appareil.
- Le raccordement peut se faire, soit verticalement sur
un conduit débouchant sous le plafond, soit
horizontalement sur un conduit partant du sol.
- L’emboîtement du conduit de raccordement sur la
buse de l’appareil ainsi que sur le conduit de fumée se
fera de manière étanche.
- Pour les habitations équipées d’une Ventilation
Mécanique Contrôlée, l’étanchéité doit empêcher
l’extracteur d’aspirer les fumées hors du conduit.
- Le conduit de raccordement ainsi que le modérateur
de tirage éventuel doivent être visibles, accessibles et
ramonables.
Instructions pour l’installateur
A
2.6 Montage du plateau cendrier
Figure 5
Afin d’éviter toute détérioration au cours du transport, le
plateau de récupération a été placé derrière la porte de
foyer.
Accrocher le plateau au bas de la façade A.
2.7 Contrôles avant mise en service
Vérifier, l’état des joints de mastic, que la porte ferme
bien et que la vitre n’est pas détériorée, que les
passages de fumée ne sont pas obstrués par les
composants de l’emballage ou des pièces démontées.
Toutes les pièces amovibles doivent être à leur place
respective.
Note : S’il s'agit d'une tresse en céramique, c’est un
consommable et donc amenées à être changées par
l'utilisateur.
Figure 5 - Montage du plateau
2.8 Entretien de la cheminée
Très important : Afin d’éviter tout incident (feu de
cheminée, etc...) les opérations d’entretien devront être
réalisées régulièrement.
C o n f o r m é m e n t a u R è g l e m e n t S a n i ta i r e
Départemental Type (RSDT) vous devez procéder
au minimum à deux ramonages mécaniques
annuels du conduit d’évacuation et du conduit de
raccordement à l’appareil dont une fois pendant la
période d’utilisation.
En cas d’usage fréquent du poêle, procéder à plusieurs
ramonages annuels de la cheminée et du conduit de
raccordement.
En cas de feu de cheminée, il faut couper le tirage
de la cheminée, fermer les entrées d’air de
l’appareil, fermer portes, fenêtre, trappes et appeler
les pompiers sans attendre.
N’OUVREZ SURTOUT PAS LA PORTE DE
L’APPAREIL (APPEL D’AIR).
6
Notice de référence “1146”
“GASCON” - réf. 134 13 15
Instructions pour l’utilisateur
3 Instructions pour l’utilisateur
Le Fabricant décline toute responsabilité concernant
les détériorations de pièces qui seraient causées par
l’emploi d’un combustible non recommandé ou par
toute modification de l’appareil ou de son installation.
N’utiliser que les pièces de rechange fournies par
le fabricant.
To u s l e s r è g l e m e n ts l o c a u x e t n a t i o n a u x ,
notamment ceux qui font référence à des normes
nationales et européennes, doivent être respectés
lors de l’utilisation de l’appareil.
«Ne pas utiliser l’appareil par temps doux»
Certaines conditions météorologiques (ex : Brouillard et
redoux) empêchent un tirage suffisant de la cheminée
et peuvent être à l’origine d’asphyxie.
3.1 Combustible
Cet appareil n’est pas un incinérateur.
- Utiliser des bûches de bois dur d’au moins 2 ans de
coupe et stockées dans un endroit abrité et ventilé
(humidité <20%).
- Utiliser du bois dur dégageant beaucoup de chaleur et
produisant de bonnes braises.
- Les grosses bûches doivent être fendues et coupées à
la longueur d’utilisation avant d’être stockées.
• Combustible recommandé
Bois de chauffage : Charme
• Combustible de remplacement
Bois de chauffage : Chêne, frêne, érable, bouleau,
orme, hêtre, etc...)
• Combustibles interdits
«Bois vert» ; du bois vert ou trop humide diminue le
rendement de l’appareil et provoque l’encrassement
des parois internes et du conduit d’évacuation (suies,
bistre, goudron...).
«Bois récupéré» ; la combustion de bois traité (traverse
de chemin de fer, poteau télégraphique, chute de
contreplaqué ou d’aggloméré, palette, etc...) provoque
rapidement l’encrassement de l’installation (suies,
bistre, goudron...), nuit à l’environnement (pollution,
odeur...) et sont cause d’emballement du foyer avec
surchauffe.
F
«Bois vert» et «bois récupéré» peuvent provoquer un
feu de cheminée.
3.2 Allumage
Figure 6
- Ouvrir en grand le volet de réglage d’air (rep. B1).
- Ouvrir les portes vitrées.
- Placer sur la grille du papier sec froissé (type journal),
du petit bois très sec et quelques bûches de bois dur
de petit diamètre.
- Allumer le papier et refermer les portes vitrées.
- Lorsque les braises sont bien vives, charger le foyer
avec du combustible et refermer les portes (rep. A).
Lors du premier allumage, le feu ne sera poussé que
progressivement pour permettre aux différentes pièces
de se dilater normalement et de se sécher.
Lors du premier allumage, l’appareil peut émettre de la
fumée et diffuser une odeur de peinture neuve. Ne pas
s’en inquiéter et bien aérer la pièce pendant les
premières heures de fonctionnement.
Tout charbon et combustible liquide !
A : Ouverture de la porte de chargement
B : Clapet d’air (réglage de l’air primaire)
B1 = clapet ouvert
B2 = clapet fermé
C : Outil de manoeuvre
Figure 6 - Organes de manoeuvre
Notice de référence “1146”
7
“GASCON” - réf. 134 13 15
Instructions pour l’utilisateur
3.3 Conduite de la combustion
3.6 Entretien du poêle
L’appareil doit fonctionner avec les portes vitrées
convenablement fermées. Le contrôle d’allure
s’effectue par le volet de réglage d’air primaire (rep. B).
L’expérience vous montrera quelle position vous
convient le mieux.
Le poêle est équipé d'un système "vitre propre" par
balayage de la vitre grâce à l'air primaire.
Le système est d'autant plus efficace que le volet est
ouvert.
• L’appareil doit être nettoyé régulièrement ainsi que le
• Chargement du combustible :
- Ouvrir doucement les portes vitrées, sans faire
d’appel d’air brutal, afin d’éviter les émanations de
fumées dans la pièce.
- L’intervalle de chargement minimal pour une
puissance calorifique nominale est de 1,2 heures.
- Les bûches doivent être placées sur les braises.
- Pour une allure soutenue, veiller à ce qu’il y ait
toujours au moins 2 bûches sur le brasier. L’allure du
foyer est meilleure lorsqu’il y a plusieurs bûches et
qu’elles ne sont pas trop grosses.
- Pour une allure réduite (par exemple la nuit), choisir
des bûches plus grosses.
- Après chargement, refermer les portes vitrées (rep. A,
figure 6, page 7).
conduit de raccordement et le conduit de fumées.
• Ouvrir la porte vitrée, éventuellement, ôter les grilles
de face, nettoyer toutes les parois de la chambre de
combustion et nettoyer la grille de foyer.
• Le nettoyage de la vitre vitrocéramique peut
s’effectuer avec un chiffon doux humecté d’un produit
approprié du commerce ; cette opération sera réalisée
lorsque l’appareil est froid ; après nettoyage, rincer à
l’eau claire ; n’utiliser pas de nettoyants abrasifs.
• La vitre en vitrocéramique résiste à une température
de 750°C, en cas de bris de verre, suite à une
manoeuvre malhabile, il est déconseillé de remplacer
la vitre cassée par un matériau autre que celui fourni
par le fabricant.
• Toutes les pièces constituant l’habillage, peuvent être
frottées à sec avec une brosse douce ou avec un
chiffon légèrement humide. En cas de condensations
ou d’aspersion d’eau involontaire, nettoyer les parties
souillées avant qu’elles ne sèchent.
• Vérifier l’absence d’obstruction avant un rallumage à
la suite d’une longue période d’arrêt.
• L’appareil ne peut être utilisé sur un conduit de fumées
desservant plusieurs appareils.
3.4 Décrassage
• Maintenir les grilles d’aération libres de toute
- Évacuer les cendres régulièrement.
- Ne jamais laisser les cendres s’amonceler jusqu’au
• Les chicanes doivent être enlevées régulièrement, les
contact de la grille qui ne serait plus refroidie et
pourrait se détériorer.
- Évacuer les cendres lorsque le foyer est refroidi.
- Retirer le tiroir-cendrier à l’aide de l’outil fourni.
- Vider les cendres en prenant les précautions d’usage
pour les braises incandescentes.
3.5 Entretien de la cheminée
Très important : Afin d’éviter tout incident (feu de
cheminée, etc...) les opérations d’entretien devront être
réalisées régulièrement.
C o n f o r m é m e n t a u R è g l e m e n t S a n i ta i r e
Départemental Type (RSDT) vous devez procéder
au minimum à deux ramonages mécaniques
annuels du conduit d’évacuation et du conduit de
raccordement à l’appareil dont une fois pendant la
période d’utilisation.
En cas d’usage fréquent du poêle, procéder à plusieurs
ramonages annuels de la cheminée et du conduit de
raccordement.
En cas de feu de cheminée, il faut couper le tirage
de la cheminée, fermer les entrées d’air de
l’appareil, fermer portes, fenêtre, trappes et appeler
les pompiers sans attendre.
obstruction.
cendres ou dépôts nettoyés. Les cendres ne doivent
pas s’accumuler.
• Les joints de porte doivent être vérifiés annuellement
et remplacés si besoins.
3.7 Consignes de sécurité
Ce poêle est un appareil qui produit de la chaleur et
peut provoquer des brûlures par contact.
L'appareil peut encore rester chaud une fois éteint.
INTERDISEZ À VOS ENFANTS DE S’EN
APPROCHER
N’OUVREZ SURTOUT PAS LA PORTE DE
L’APPAREIL (APPEL D’AIR).
La cheminée doit être impérativement vérifiée et
nettoyée par un spécialiste.
8
Notice de référence “1146”
“GASCON” - réf. 134 13 15
Instructions pour l’utilisateur
3.8 Causes de mauvais fonctionnement
þ : Ce signe vous recommande de faire
appel à un professionnel qualifié pour
effectuer ces opérations.
Situation
Causes probables
- Action
Le feu prend mal. Le feu ne
tient pas
Bois vert ou trop humide
- Utiliser du bois dur d’au moins deux ans de coupe et
ayant été stocké sous abri ventilé.
Les bûches sont trop grosses
- Pour l’allumage, utiliser du papier froissé et du petit
bois très sec. Pour l’entretien du feu, utiliser des
bûches refendues.
Bois de mauvaise qualité
- Utiliser du bois dur dégageant beaucoup de chaleur et
produisant de bonnes braises (charme, chêne, frêne,
érable, bouleau, orme, hêtre, etc...).
Air primaire insuffisant
- Ouvrir en grand le volet d’air primaire.
- Ouvrir la grille d’entrée d’air frais extérieure.
Le tirage est insuffisant
þ
- Vérifier que le conduit n’est pas obstrué, effectuer un
ramonage mécanique si nécessaire.
- Vérifier que le conduit d’évacuation est conforme.
Le feu s’emballe.
Excès d’air
- S’assurer que le volet est bien fermé (rep. B, fig. 6,
p. 7)
- Fermer partiellement ou complètement le volet d’air
primaire.
Le Tirage est excessif
þ
Bois de mauvaise qualité
- Installer un modérateur de tirage.
- Ne pas brûler en continu, du petit bois, des fagots, des
chutes de menuiseries (contreplaqué, palette, etc...).
Emanation de fumées à
l’allumage.
Emanation de fumées
pendant la combustion.
Le conduit d’évacuation est froid
- Réchauffer le conduit en faisant brûler une torche de
La pièce est en dépression (en
pression négative)
- Dans les habitations équipées d’une Ventilation
papier dans le foyer.
Le tirage est insuffisant
Mécanique Contrôlée, entrouvrir une fenêtre donnant
sur l’extérieur jusqu’à ce que le feu soit bien lancé.
þ
- Vérifier la conformité du conduit d’évacuation et son
isolation.
- Vérifier que le conduit n’est pas obstrué, effectuer un
ramonage mécanique si nécessaire.
Chauffage insuffisant.
Le vent s’engouffre dans le
conduit
þ
- Installer un anti-refouleur sur le couronnement.
La pièce est en dépression (en
pression négative)
þ
- Dans les habitations équipées d’une ventilation
mécanique contrôlée, il est nécessaire d’installer une
prise d’air extérieure complémentaire.
Bois de mauvaise qualité
- N’utiliser que le combustible recommandé.
Mauvais brassage de l’air chaud
de convection
- Vérifier le circuit de convection (grilles d’entrée,
conduit d’air, grilles de diffusion).
- Vérifier que les pièces voisines sont équipée de grille
d’aération pour favoriser la circulation de l’air chaud.
Notice de référence “1146”
9
“GASCON” - réf. 134 13 15
Pièces détachées
4 Pièces détachées
Pour toute commande de pièces détachées, indiquer : Le type et la référence de l’appareil y compris l’indice littéral
de couleur (inscrit sur la plaque signalétique ou le certificat de garantie), la désignation et le code article de la
pièce.
Exemple : Poêle bois “GASCON”, réf. 134 13 15, indice de couleur Y, dessus 352165 EF.
Y = 134 13 15 Y
L = 134 13 15 L
N° Code
1
2
3
4
5
6
7
7
7
7
7
7
7
7
8
9
9
9
9
9
9
9
9
10
10
10
10
10
10
10
10
11
12
13
14
15
15
15
15
15
15
15
15
16
16
16
16
16
16
16
16
17
18
19
20
21
10
207315
222575
236135
259015
259037
270414
300132
300132
300132
300134
300132
300132
300132
300132
300491
301172
301172
301172
301172
301172
301172
301172
301172
303860
303860
303860
303860
303860
303860
303860
303860
305016
305214
306285
309233
310734
310734
310734
310734
310734
310734
310734
310734
310830
310830
310830
310830
310830
310830
310830
310830
315614
319738
322717
326602
327905
B = 134 13 15 B
P = 134 13 15 P
E = 134 13 15 E
C = 134 13 15 C
N = 134 13 15 N
Q = 134 13 15 Q
Désignation . . . . . . . . Type . . . . . Y . . L . . B . . P . . E . . C . . N . . . . Q . . Qté
77
EF
MK
RH
RJ
RP
EP
ER
EF
77
EF
MK
RH
RJ
RP
EP
ER
77
EF
MK
RH
RJ
RP
EP
ER
EB
EB
EF
EB
77
EF
MK
RH
RJ
RP
EP
ER
77
EF
MK
RH
RJ
RP
EP
ER
EB
EB
EB
EB
77
Habillage arrière . . . . . . . . . . . . . . . Y. . . L. . . B . . P . . E . . C . . N . . . . Q
Chicane . . . . . . . . . . . . . . . . . . . Y. . . L. . . B . . P . . E . . C . . N . . . . Q
Plaque d’obturation . . . . . . . . . . . . . Y. . . L. . . B . . P . . E . . C . . N . . . . Q
Patte de fixation . . . . . . . . . . . . . . . Y. . . L. . . B . . P . . E . . C . . N . . . . Q
Patte de fixation . . . . . . . . . . . . . . . Y. . . L. . . B . . P . . E . . C . . N . . . . Q
Clapet d’air . . . . . . . . . . . . . . . . . . Y. . . L. . . B . . P . . E . . C . . N . . . . Q
Pied . . . . . . . . . . . . . . . . . . . . . . . . . L . . . . . . . . . . . . . . . . . . . . . . . .
Pied. . . . . . . . . . . . . . . . . . . . . . Y . . . . . . . . . . . . . . . . . . . . . . . . . . . .
Pied . . . . . . . . . . . . . . . . . . . . . . . . . . . . . . . . . . . . . . . . C . . . . . . . . .
Pied . . . . . . . . . . . . . . . . . . . . . . . . . . . . . . . . . P . . . . . . . . . . . . . . . .
Pied . . . . . . . . . . . . . . . . . . . . . . . . . . . . . B . . . . . . . . . . . . . . . . . . . .
Pied . . . . . . . . . . . . . . . . . . . . . . . . . . . . . . . . . . . . . E . . . . . . . . . . . . .
Pied . . . . . . . . . . . . . . . . . . . . . . . . . . . . . . . . . . . . . . . . . . . . N. . . . . .
Pied . . . . . . . . . . . . . . . . . . . . . . . . . . . . . . . . . . . . . . . . . . . . . . . . . Q
Dessous . . . . . . . . . . . . . . . . . . . Y. . . L. . . B . . P . . E . . C . . N . . . . Q
Porte de cendrier . . . . . . . . . . . . . . . . . . L . . . . . . . . . . . . . . . . . . . . . . . .
Porte de cendrier . . . . . . . . . . . . . . Y . . . . . . . . . . . . . . . . . . . . . . . . . . . .
Porte de cendrier . . . . . . . . . . . . . . . . . . . . . . . . . . . . . . . . . C . . . . . . . . .
Porte de cendrier . . . . . . . . . . . . . . . . . . . . . . . . . . P . . . . . . . . . . . . . . . .
Porte de cendrier . . . . . . . . . . . . . . . . . . . . . . B . . . . . . . . . . . . . . . . . . . .
Porte de cendrier. . . . . . . . . . . . . . . . . . . . . . . . . . . . . . E . . . . . . . . . . . . .
Porte de cendrier . . . . . . . . . . . . . . . . . . . . . . . . . . . . . . . . . . . . . N. . . . . .
Porte de cendrier. . . . . . . . . . . . . . . . . . . . . . . . . . . . . . . . . . . . . . . . . . Q
Buse . . . . . . . . . . . . . . . . . . . . . . . . . L . . . . . . . . . . . . . . . . . . . . . . . .
Buse . . . . . . . . . . . . . . . . . . . . . Y . . . . . . . . . . . . . . . . . . . . . . . . . . . .
Buse . . . . . . . . . . . . . . . . . . . . . . . . . . . . . . . . . . . . . . . . C . . . . . . . . .
Buse. . . . . . . . . . . . . . . . . . . . . . . . . . . . . . . . . P . . . . . . . . . . . . . . . .
Buse . . . . . . . . . . . . . . . . . . . . . . . . . . . . . B . . . . . . . . . . . . . . . . . . . .
Buse . . . . . . . . . . . . . . . . . . . . . . . . . . . . . . . . . . . . E . . . . . . . . . . . . .
Buse . . . . . . . . . . . . . . . . . . . . . . . . . . . . . . . . . . . . . . . . . . . . N. . . . . .
Buse . . . . . . . . . . . . . . . . . . . . . . . . . . . . . . . . . . . . . . . . . . . . . . . . Q
Brique gauche . . . . . . . . . . . . . . . . Y. . . L. . . B . . P . . E . . C . . N . . . . Q
Brique droite . . . . . . . . . . . . . . . . . Y. . . L. . . B . . P . . E . . C . . N . . . . Q
Arrière de foyer . . . . . . . . . . . . . . . Y. . . L. . . B . . P . . E . . C . . N . . . . Q
Grille . . . . . . . . . . . . . . . . . . . . . Y. . . L. . . B . . P . . E . . C . . N . . . . Q
Côté droit . . . . . . . . . . . . . . . . . . . . . . L . . . . . . . . . . . . . . . . . . . . . . . .
Côté droit . . . . . . . . . . . . . . . . . . . Y . . . . . . . . . . . . . . . . . . . . . . . . . . . .
Côté droit . . . . . . . . . . . . . . . . . . . . . . . . . . . . . . . . . . . . . C . . . . . . . . .
Côté droit . . . . . . . . . . . . . . . . . . . . . . . . . . . . . . P . . . . . . . . . . . . . . . .
Côté droit . . . . . . . . . . . . . . . . . . . . . . . . . . B . . . . . . . . . . . . . . . . . . . .
Côté droit . . . . . . . . . . . . . . . . . . . . . . . . . . . . . . . . . . E . . . . . . . . . . . . .
Côté droit . . . . . . . . . . . . . . . . . . . . . . . . . . . . . . . . . . . . . . . . . N. . . . . .
Côté droit . . . . . . . . . . . . . . . . . . . . . . . . . . . . . . . . . . . . . . . . . . . . . . Q
Côté gauche . . . . . . . . . . . . . . . . . . . . . L . . . . . . . . . . . . . . . . . . . . . . . .
Côté gauche . . . . . . . . . . . . . . . . . Y . . . . . . . . . . . . . . . . . . . . . . . . . . . .
Côté gauche . . . . . . . . . . . . . . . . . . . . . . . . . . . . . . . . . . . . C . . . . . . . . .
Côté gauche . . . . . . . . . . . . . . . . . . . . . . . . . . . . P . . . . . . . . . . . . . . . .
Côté gauche. . . . . . . . . . . . . . . . . . . . . . . . . B . . . . . . . . . . . . . . . . . . . .
Côté gauche . . . . . . . . . . . . . . . . . . . . . . . . . . . . E . . . . . . . . . . . . . . . .
Côté gauche . . . . . . . . . . . . . . . . . . . . . . . . . . . . . . . . . . . . . . . . N. . . . . .
Côté gauche . . . . . . . . . . . . . . . . . . . . . . . . . . . . . . . . . . . . . . . . . . . . Q
Conduit d’air . . . . . . . . . . . . . . . . . Y. . . L. . . B . . P . . E . . C . . N . . . . Q
Support grille . . . . . . . . . . . . . . . . . Y. . . L. . . B . . P . . E . . C . . N . . . . Q
Suppl. de support . . . . . . . . . . . . . . Y. . . L. . . B . . P . . E . . C . . N . . . . Q
Chicane . . . . . . . . . . . . . . . . . . . Y. . . L. . . B . . P . . E . . C . . N . . . . Q
Suppl. de dessous . . . . . . . . . . . . . . . . . . L . . . . . . . . . . . . . . . . . . . . . . . .
.
.
.
.
.
.
.
.
.
.
.
.
.
.
.
.
.
.
.
.
.
.
.
.
.
.
.
.
.
.
.
.
.
.
.
.
.
.
.
.
.
.
.
.
.
.
.
.
.
.
.
.
.
.
.
.
.
.
.
.
.
.
.
.
.
.
.
.
.
.
.
.
.
.
.
.
.
.
.
.
.
.
.
.
.
.
.
.
.
.
.
.
.
.
.
.
.
.
.
.
.
.
.
.
.
.
.
.
.
.
.
.
01
01
01
08
02
01
04
04
04
04
04
04
04
04
01
01
01
01
01
01
01
01
01
01
01
01
01
01
01
01
01
01
01
01
01
01
01
01
01
01
01
01
01
01
01
01
01
01
01
01
01
01
01
01
01
01
Notice de référence “1146”
“GASCON” - réf. 134 13 15
Pièces détachées
4 8
1 0
2 3
3 6
1 6
4 8
5 0
1 1
1
2 8
2 0
1 3
2
2 2
5
4 7
1 4
2 7
1 9
5 1
1 8
2 9
1 2
5 5
5 5
6
2 6
4 2
4 5
1 7
4 0
4 1
4 9
4
3 9
3 0
2 1
4 7
3
1 5
4
2 4
4 5
5 4
4 9
4 3
8
4 6
3 8
5 2
3 3
2 5
4 1
4 0
4 2
3 1
3 7
4 3
4 4
3 2
4 6
9
7
5 3
3 4
4 3
Figure 7 - Vue éclatée de l’appareil
Notice de référence “1146”
11
“GASCON” - réf. 134 13 15
Y = 134 13 15 Y
L = 134 13 15 L
N°
Code
21
21
21
21
21
21
21
22
23
24
25
25
25
25
25
25
25
25
26
26
26
26
26
26
26
26
27
28
28
28
28
28
28
28
28
29
29
29
29
29
29
29
29
30
31
32
33
34
36
37
38
39
40
41
42
43
44
45
46
47
48
49
50
51
52
53
327905
327905
327905
327905
327905
327905
327905
330022
331001
331700
331800
331800
331800
331800
331800
331800
331800
331800
331900
331900
331900
331900
331900
331900
331900
331900
332003
352165
352165
352165
352165
352165
352165
352165
352165
359806
359806
359806
359806
359806
359806
359806
359806
624045
158626
101063
101062
101057
105006
134705
134711
179624
188829
181632
110404
189825
808001
181634
181633
181625
142316
142881
269501
269449
161039
988920
12
Pièces détachées
B = 134 13 15 B
P = 134 13 15 P
E = 134 13 15 E
C = 134 13 15 C
N = 134 13 15 N
Q = 134 13 15 Q
Désignation . . . . . . . . Type . . . . . Y . . L . . B . . P . . E . . C . . N . . . . Q . . Qté
EF
MK
RH
RJ
RP
EP
ER
EB
EF
EF
77
EF
MK
RH
RJ
RP
EP
Er
77
EF
MK
RH
RJ
RP
EP
ER
EB
77
EF
MK
RH
RJ
RP
EP
ER
77
EF
MK
RH
RJ
RP
EP
ER
Suppl. de dessous . . . . . . . . . . . . . . Y . . . . . . . . . . . . . . . . . . . . . . . . . . . . . . 01
Suppl. de dessous . . . . . . . . . . . . . . . . . . . . . . . . . . . . . . . . . C . . . . . . . . . . . 01
Suppl. de dessous . . . . . . . . . . . . . . . . . . . . . . . . . P . . . . . . . . . . . . . . . . . . 01
Suppl. de dessous . . . . . . . . . . . . . . . . . . . . . B . . . . . . . . . . . . . . . . . . . . . . 01
Suppl. de dessous . . . . . . . . . . . . . . . . . . . . . . . . . . . . . E . . . . . . . . . . . . . . . 01
Suppl. de dessous . . . . . . . . . . . . . . . . . . . . . . . . . . . . . . . . . . . . N. . . . . . . . 01
Suppl. de dessous . . . . . . . . . . . . . . . . . . . . . . . . . . . . . . . . . . . . . . . . . Q . . 01
Plaque d’âtre . . . . . . . . . . . . . . . . . Y. . . L. . . B . . P . . E . . C . . N . . . . Q . . 01
Adaptateur . . . . . . . . . . . . . . . . . . Y. . . L. . . B . . P . . E . . C . . N . . . . Q . . 01
Support . . . . . . . . . . . . . . . . . . . . Y. . . L. . . B . . P . . E . . C . . N . . . . Q . . 01
Porte droite . . . . . . . . . . . . . . . . . . . . . L . . . . . . . . . . . . . . . . . . . . . . . . . . 01
Porte droite. . . . . . . . . . . . . . . . . . Y . . . . . . . . . . . . . . . . . . . . . . . . . . . . . . 01
Porte droite . . . . . . . . . . . . . . . . . . . . . . . . . . . . . . . . . . . . C . . . . . . . . . . . 01
Porte droite . . . . . . . . . . . . . . . . . . . . . . . . . . . . . P . . . . . . . . . . . . . . . . . . 01
Porte droite . . . . . . . . . . . . . . . . . . . . . . . . . B . . . . . . . . . . . . . . . . . . . . . . 01
Porte droite . . . . . . . . . . . . . . . . . . . . . . . . . . . . . . . . . E . . . . . . . . . . . . . . . 01
Porte droite . . . . . . . . . . . . . . . . . . . . . . . . . . . . . . . . . . . . . . . . N. . . . . . . . 01
Porte droite . . . . . . . . . . . . . . . . . . . . . . . . . . . . . . . . . . . . . . . . . . . . . Q . . 01
Porte gauche . . . . . . . . . . . . . . . . . . . . L . . . . . . . . . . . . . . . . . . . . . . . . . . 01
Porte gauche . . . . . . . . . . . . . . . . . Y . . . . . . . . . . . . . . . . . . . . . . . . . . . . . . 01
Porte gauche. . . . . . . . . . . . . . . . . . . . . . . . . . . . . . . . . . . . C . . . . . . . . . . . 01
Porte gauche . . . . . . . . . . . . . . . . . . . . . . . . . . . . P . . . . . . . . . . . . . . . . . . 01
Porte gauche . . . . . . . . . . . . . . . . . . . . . . . . B . . . . . . . . . . . . . . . . . . . . . . 01
Porte gauche . . . . . . . . . . . . . . . . . . . . . . . . . . . . . . . . E . . . . . . . . . . . . . . . 01
Porte gauche . . . . . . . . . . . . . . . . . . . . . . . . . . . . . . . . . . . . . . . N. . . . . . . . 01
Porte gauche . . . . . . . . . . . . . . . . . . . . . . . . . . . . . . . . . . . . . . . . . . . . Q . . 01
Conduit d’air . . . . . . . . . . . . . . . . . Y. . . L. . . B . . P . . E . . C . . N . . . . Q . . 01
Dessus . . . . . . . . . . . . . . . . . . . . . . . . L . . . . . . . . . . . . . . . . . . . . . . . . . . 01
Dessus . . . . . . . . . . . . . . . . . . . . Y . . . . . . . . . . . . . . . . . . . . . . . . . . . . . . 01
Dessus . . . . . . . . . . . . . . . . . . . . . . . . . . . . . . . . . . . . . . . C . . . . . . . . . . . 01
Dessus . . . . . . . . . . . . . . . . . . . . . . . . . . . . . . . P . . . . . . . . . . . . . . . . . . 01
Dessus . . . . . . . . . . . . . . . . . . . . . . . . . . . B . . . . . . . . . . . . . . . . . . . . . . 01
Dessus . . . . . . . . . . . . . . . . . . . . . . . . . . . . . . . . . . . E . . . . . . . . . . . . . . . 01
Dessus. . . . . . . . . . . . . . . . . . . . . . . . . . . . . . . . . . . . . . . . . . . N. . . . . . . . 01
Dessus . . . . . . . . . . . . . . . . . . . . . . . . . . . . . . . . . . . . . . . . . . . . . . . Q . . 01
Façade . . . . . . . . . . . . . . . . . . . . . . . . L . . . . . . . . . . . . . . . . . . . . . . . . . . 01
Façade . . . . . . . . . . . . . . . . . . . . Y . . . . . . . . . . . . . . . . . . . . . . . . . . . . . . 01
Façade . . . . . . . . . . . . . . . . . . . . . . . . . . . . . . . . . . . . . . . C . . . . . . . . . . . 01
Façade . . . . . . . . . . . . . . . . . . . . . . . . . . . . . . . P . . . . . . . . . . . . . . . . . . 01
Façade . . . . . . . . . . . . . . . . . . . . . . . . . . . B . . . . . . . . . . . . . . . . . . . . . . 01
Façade . . . . . . . . . . . . . . . . . . . . . . . . . . . . . . . . . . . E . . . . . . . . . . . . . . . 01
Façade. . . . . . . . . . . . . . . . . . . . . . . . . . . . . . . . . . . . . . . . . . . N. . . . . . . . 01
Façade . . . . . . . . . . . . . . . . . . . . . . . . . . . . . . . . . . . . . . . . . . . . . . . Q . . 01
Cendrier . . . . . . . . . . . . . . . . . . . Y. . . L. . . B . . P . . E . . C . . N . . . . Q . . 01
Poignée . . . . . . . . . . . . . . . . . . . Y. . . L. . . B . . P . . E . . C . . N . . . . Q . . 01
Axe de fermeture. . . . . . . . . . . . . . . Y. . . L. . . B . . P . . E . . C . . N . . . . Q . . 01
Axe de fermeture. . . . . . . . . . . . . . . Y. . . L. . . B . . P . . E . . C . . N . . . . Q . . 01
Axe d’articulation. . . . . . . . . . . . . . . Y. . . L. . . B . . P . . E . . C . . N . . . . Q . . 01
Joint . . . . . . . . . . . . . Ø 15 . . . . . Y. . . L. . . B . . P . . E . . C . . N . . . . Q . . 2 m
Goupille cannelée . . . . . . 6x45 . . . . . Y. . . L. . . B . . P . . E . . C . . N . . . . Q . . 01
Goupille cannelée . . . . . . 6x30 . . . . . Y. . . L. . . B . . P . . E . . C . . N . . . . Q . . 01
Tige de commande . . . . . . . . . . . . . Y. . . L. . . B . . P . . E . . C . . N . . . . Q . . 01
Verre réfractaire . . . . 278 X 220 X 4 . . . Y. . . L. . . B . . P . . E . . C . . N . . . . Q . . 02
Joint . . . . . . . . . . . . . Ø 6 . . . . . . Y. . . L. . . B . . P . . E . . C . . N . . . . Q . . 2 m
Clou cannelé . . . . . . . . 6x30 . . . . . Y. . . L. . . B . . P . . E . . C . . N . . . . Q . . 04
Vis à bout plat . . . . . . . M5x6 . . . . . Y. . . L. . . B . . P . . E . . C . . N . . . . Q . . 02
ED Poignée . . . . . . . . . . . . . . . . . . . Y. . . L. . . B . . P . . E . . C . . N . . . . Q . . 01
Joint . . . . . . . . . . . . . Ø 15 . . . . . Y. . . L. . . B . . P . . E . . C . . N . . . . Q . 1,64 m
Joint . . . . . . . . . . . . . Ø 10 . . . . . Y. . . L. . . B . . P . . E . . C . . N . . . . Q . 1,33 m
Tresse de céramique . . . . Ø 7 . . . . . . Y. . . L. . . B . . P . . E . . C . . N . . . . Q . 3,16 m
Joint . . . . . . . . . . . . . 7x3 . . . . . . Y. . . L. . . B . . P . . E . . C . . N . . . . Q . . 1 m
Joint . . . . . . . . . . . . . . . . . . . . . Y. . . L. . . B . . P . . E . . C . . N . . . . Q . . 08
Déflecteur . . . . . . . . . . . . . . . . . . Y. . . L. . . B . . P . . E . . C . . N . . . . Q . . 01
Déflecteur . . . . . . . . . . . . . . . . . . Y. . . L. . . B . . P . . E . . C . . N . . . . Q . . 01
Peinture de retouche. . . . . (P) . . . . . . . . . . . . . . . . . P . . . . . . . . . . . . . . . . . . 01
Porte vitrée complète de droite . . . . . . . . . . . . . . . . . . . . . . . . . . . . . . N. . . . . . . . 01
Notice de référence “1146”
“GASCON” - réf. 134 13 15
Y = 134 13 15 Y
L = 134 13 15 L
Pièces détachées
B = 134 13 15 B
P = 134 13 15 P
E = 134 13 15 E
C = 134 13 15 C
N = 134 13 15 N
Q = 134 13 15 Q
N° Code
Désignation . . . . . . . . Type . . . . . Y . . L . . B . . P . . E . . C . . N . . . . Q . . Qté
53
53
53
53
53
53
53
54
54
54
54
54
54
54
54
55
Porte
Porte
Porte
Porte
Porte
Porte
Porte
Porte
Porte
Porte
Porte
Porte
Porte
Porte
Porte
Axe .
988922
988924
988926
988928
988930
988932
988994
988744
988923
988925
988927
988929
988931
988933
988995
100939
vitrée complète de droite . . . . . . . Y . . . . . . . . . . . . . . . . . . . . . . . . . . . .
vitrée complète de droite . . . . . . . . . . . L . . . . . . . . . . . . . . . . . . . . . . . .
vitrée complète de droite . . . . . . . . . . . . . . . B . . . . . . . . . . . . . . . . . . . .
vitrée complète de droite . . . . . . . . . . . . . . . . . . P . . . . . . . . . . . . . . . .
vitrée complète de droite . . . . . . . . . . . . . . . . . . . . . . E . . . . . . . . . . . . .
vitrée complète de droite . . . . . . . . . . . . . . . . . . . . . . . . . . C . . . . . . . . .
vitrée complète de droite . . . . . . . . . . . . . . . . . . . . . . . . . . . . . . . . . . Q
vitrée complète de gauche . . . . . . . . . . . . . . . . . . . . . . . . . . . . . N. . . . . .
vitrée complète de gauche . . . . . . Y . . . . . . . . . . . . . . . . . . . . . . . . . . . .
vitrée complète de gauche . . . . . . . . . . L . . . . . . . . . . . . . . . . . . . . . . . .
vitrée complète de gauche . . . . . . . . . . . . . . B . . . . . . . . . . . . . . . . . . . .
vitrée complète de gauche . . . . . . . . . . . . . . . . . P . . . . . . . . . . . . . . . .
vitrée complète de gauche . . . . . . . . . . . . . . . . . . . . . E . . . . . . . . . . . . .
vitrée complète de gauche . . . . . . . . . . . . . . . . . . . . . . . . . C . . . . . . . . .
vitrée complète de gauche . . . . . . . . . . . . . . . . . . . . . . . . . . . . . . . . . Q
. . . . . . . . . . . . . . . . . . . . . Y. . . L. . . B . . P . . E . . C . . N . . . . Q
.
.
.
.
.
.
.
.
.
.
.
.
.
.
.
.
.
.
.
.
.
.
.
.
.
.
.
.
.
.
.
.
01
01
01
01
01
01
01
01
01
01
01
01
01
01
01
02
Notes
Notice de référence “1146”
13
Certificat de Garantie
Garantie légale
Les spécifications, dimensions et renseignements
portés sur nos documents ne sont qu’indicatifs et
n’engagent nullement le vendeur.
Dans un souci d’amélioration de nos matériels, toute
modification jugée utile par nos services pourra
intervenir sans préavis.
Les dispositions du présent certificat de garantie ne
sont pas exclusives du bénéfice au profit de l’acheteur
du matériel, concernant la garantie légale ayant trait à
des défauts ou vices cachés, qui s’applique, en tout
état de cause, dans les conditions des articles 1641 et
suivants du code civil, et dans le pays où a été acheté
le matériel.
Garantie contractuelle
Nos matériels sont garantis contre les défauts et vices
cachés sous conditions :
1) De l’installation et de la mise au point de l’appareil par un
installateur professionnel.
2) Du respect des instructions données dans nos documents
techniques, notices d’installation et de réglage.
3) De l’installation, de l’utilisation et de l’entretien de l’appareil
réalisés conformément aux normes et législations en
vigueur et aux indications des notices technique jointe à
l’appareil.
Cette garantie porte sur le remplacement, en nos
ateliers, des pièces reconnues défectueuses
d’origine par notre service “contrôle garantie” : port et
main d’œuvre à la charge de l’utilisateur. De plus, si
les réparations ou l’échange des pièces couverts par
la garantie se montrent trop onéreux par rapport au
prix de l’appareil, la décision de changer ou de réparer
l’appareil appartiendra au vendeur.
Notre garantie est de 2 (deux) ans sur tous appareils
exception faite des foyers et inserts pour lesquels
notre garantie est de 5 (cinq) ans à l’exclusion de :
1) Les voyants lumineux, les fusibles, les résistances
électriques, les ventilateurs et thermocouples.
2) Les pièces d’usure ou en contact avec des températures
importantes à savoir : soles et grilles foyères, plaques de
fond, déflecteurs, cendriers, peintures et traitements de
surface des parties décoratives. Sont également exclus de
cette garantie les joints, vitres et plaques en
vitrocéramique.
3) Les avaries qui résulteraient de l’utilisation de l’appareil
avec un combustible autre que celui précisé en nos notices.
4) Les détériorations de pièces provenant d’éléments
extérieurs à l’appareil (refoulement de cheminée, effets
d’orage, humidité, pression ou dépression non conforme,
chocs thermique, coup de feu, ...).
5) Les dégradations de pièces électriques, résultant de
branchement et d’utilisation sur secteur dont la tension,
mesurée à l’entrée de l’appareil, serait inférieure ou
supérieure à 10 % de la tension nominale de 220 volts.
Exclusion de responsabilité
Dans l’hypothèse de fabrication d’un bien à la
demande du client, notre responsabilité, en qualité de
sous-traitant, ne pourra en aucun cas être engagée à
l’égard du client ou des tiers pour défectuosité
provenant de l’installation ou d’un défaut de
conception du bien.
* Nom et adresse de l’installateur : _ _ _ _ _ _ _ _ _ _ _ _ _ _ _ _ _ _ _ _ _ _ _ _ _ _ _ _
_ _ _ _ _ _ _ _ _ _ _ _ _ _ _ _ _ _ _ _ _ _ _ _ _ _ _ _ _ _ _ _ _ _ _ _ _ _ _ _ _ _ _ _
(
Téléphone :_ _ _ _ _ _ _ _ _ _ _ _ _ _ _ _ _ _ _ _ _ _ _ _ _
* Nom et adresse de l’utilisateur : _ _ _ _ _ _ _ _ _ _ _ _ _ _ _ _ _ _ _ _ _ _ _ _ _ _ _ _ _
_ _ _ _ _ _ _ _ _ _ _ _ _ _ _ _ _ _ _ _ _ _ _ _ _ _ _ _ _ _ _ _ _ _ _ _ _ _ _ _ _ _ _ _
Date de la mise en service :
___ ___ / ___ ___ / ___ ___ ___ ___
Référence de l’appareil : q
Couleur :
qY
qL
Numéro de série :
134 13 15
qB
qP
qE
qC
qN
qQ
___ ___ ___ ___ ___ ___
• Ce certificat est à compléter et à conserver soigneusement par l’utilisateur.
En cas de réclamation, faire une copie dûment remplie et l’adresser à :
FRANCO BELGE
Rue Orphée Variscotte, 59660 MERVILLE, FRANCE.
Gascon
Document n° 1146-14
25/03/2011
FR
NL
EN
IT
ES
Hout kachel
EN 13240
Referentie : 134 13 15
Vermogen : 11 kW
Gebruiksaanwijzing
te behouden door de
gebruiker voor nadere
consultatie.
Presentatie van het materiaal
Voorschriften voor de installateur
Instructies voor de gebruiker
Wisselstukken
Waarborg certifikaat
FRANCO BELGE
Rue Orphée Variscotte
59660 MERVILLE (FRANCE)
Téléfoon : 00 333 28 43 43 22
Fax : 00 333 28 43 43 60
Materiaal dat zonder voorafgaand
bericht gewijzigd kan worden.
Niet verbindend document.
“GASCON” - ref. 134 13 15
FRANCO BELGE feliciteert u met uw keuze.
FRANCO BELGE, garandeert de kwaliteit van zijn apparaten en doet de belofte zijn klanten
tevreden te stellen.
Steunend op meer dan 80 jaar knowhow, gebruikt FRANCO BELGE de meest geavanceerde
technologieën voor het ontwerp en de fabricage
van een volledig assortiment verwarmingsapparaten.
Dit document zal u helpen uw apparaat zo te installeren dat het optimaal functioneert,
voor uw comfort en uw veiligheid.
INHOUD
Presentatie van het materiaal . . . . . . . . . . . . . . . . . . . . . . . . . . . . . bladz. 3
Verpakking. . . . . . . . . . . . . . bladz. 3
Beschrijving van het toestel . . . . bladz. 3
Algemene kenmerken . . . . . . . . bladz. 3
Werkingsprincipe . . . . . . . . . . bladz. 3
Voorschriften voor de installateur . . . . . . . . . . . . . . . . . . . . . . . . . . bladz. 4
Waarschuwing voor de gebruiker . bladz. 4
Aansluitleiding . . . . . . . . . . . . bladz. 5
Het lokaal . . . . . . . . . . . . . . bladz. 4
Montage van de aslade . . . . . . . bladz. 6
Afvoerleiding. . . . . . . . . . . . . bladz. 4
Verificatie voor de inwerkingstelling bladz. 6
Montage van de afvoerbuis. . . . . bladz. 5
Onderhoud van de schoorsteen . . bladz. 6
Instructies voor de gebruiker . . . . . . . . . . . . . . . . . . . . . . . . . . . . . bladz. 7
Brandstoft . . . . . . . . . . . . . . bladz. 7
Onderhoud van de schoorsteen . . bladz. 8
Ontsteking . . . . . . . . . . . . . . bladz. 7
Onderhoud van de kachel . . . . . bladz. 8
Regeling van de verbranding . . . . bladz. 8
Belangrijke raadgevingen. . . . . . bladz. 8
Legen . . . . . . . . . . . . . . . . bladz. 8
Reden van een slechte werking . . bladz. 9
Wisselstukken . . . . . . . . . . . . . . . . . . . . . . . . . . . . . . . . . . . . . bladz. 10
2
Gebruiksaanwijzing “1146”
“GASCON” - ref. 134 13 15
Presentatie van het materiaal
Dit toestel werd ontworpen om hout te verbranden in alle veiligheid
OPGEPAST
een slechte installatie kan ernstige gevolgen veroorzaken.
Het wordt aangeraden een geschoold vakman in de arm te nemen voor de installatie
en voor de regelmatige servicebeurten.
1 Presentatie van het materiaal
1.1 Verpakking
1.3 Beschrijving van het toestel
• 1 pak : Kachel.
Hout kachel, overeenkomstig EN 13240
1.2 Algemene kenmerken
• Verwarmings apparaat dat met tussenpozen werkt.
• Gietijzeren uitlaatpijp, die gedemonteerd kan worden
om het apparaat via de bovenkant of de achterkant aan
te sluiten.
Referentie . . . . . . . . . . . . . . . . . 134 13 15
Nuttig nominaal vermogen . . . . . . kW
11
Nuttig afmetingen haard gem
- Breedte . . . . . . . . . . . . . . . . mm
520
- Diepte . . . . . . . . . . . . . . . . mm
304
- Hoogte . . . . . . . . . . . . . . . . mm
265
Afmeting van de houtblokken
- Lengte maxi . . . . . . . . . . . . . . cm
50
Inhoud asbak . . . . . . . . . . . . . liter
5
Gewicht . . . . . . . . . . . . . . . . . kg
140
450
Verw. volume . . . . . . . . . . . . . . m3
Optimale depressie. . . . . . . . . . . Pa
11
Temperatuur van de verbrande gassen C°
273
Debiet van de verbrande gassen . . . g/s
13,7
Rendement . . . . . . . . . . . . . . . %
73,3
Co (13% O2) . . . . . . . . . . . . . . . %
0,16
• Controlevenster met 2 deuren aan de zijkant, voorzien
van 2 ruiten van glaskeramiek, zodat het
verbrandingsproces kan worden gevolgd.
• Werkingsgangregeling door luchtklep.
• Grote aslade.
Langdurige verbranding : Het apparaat werkt met
11,5 kilo (zee bladz. 7, § 3.1) droog hout bij lage
intensiteit (primaire luchttoevoer dicht, # B, fig. 6,
bladz. 7) en bij een druk van 6 Pa meer dan 11 uur.
1.4 Werkingsprincipe
Dit toestel is een apparaat dat alleen met een gesloten
deur kan werken. De warmte wordt voornamelijk
verspreid door uitstraling langs de ruit en rondom de
toestel.
Opmerking : De hiernaast weergegeven prestaties
zijn het resultaat van tests die volgens de norm
EN 13240 werden uitgevoerd (Afmeting van de
2 houtblokken 35 cm, depressie van 11 Pa, werkt met
4,9 kilo droog hout), overgang van de open lucht voor
50%.
4 3 2
6 5 2
4 1
Ø
1 2 5
Ø
1 3 9
7 1 2
6 1 4
6 8 1
5 2 4
Figuur 1 - Afmetingen in mm
Gebruiksaanwijzing “1146”
3
“GASCON” - ref. 134 13 15
Voorschriften voor de installateur
2 Voorschriften voor de installateur
2.1 Waarschuwing voor de gebruiker
A
Alle lokale en nationale voorschriften, met name de
voorschriften die verwijzen naar de nationale en
Europese normen, moeten bij de installatie van dit
toestel worden nageleefd.
D e z e i n s ta l l a t i e z a l , i n i e d e r g e v a l m o e t e n
beantwoorden aan de technische reglementering
volgens en aan de gebruiksaanwijzing die verplichtend
dit toestel begeleidt.
Een slecht geïnstalleerde kachel kan ernstige
incidenten veroorzaken (schoorsteenbrand,
ontbranding van isolatiemateriaal op basis van plastic
in wanden enz…).
Degene die de montageinstructies niet aanhoudt is
daar zelf aansprakelijk voor.
De aansprakelijkheid van de Fabrikant is beperkt tot de
levering van het materiaal.
7 0 0 m m
6 5 0 m m
B
7 0 0
m m
6 5 0 m m
2.2 Het lokaal
Ventilatie : Voor een goede werking met natuurlijke
trek, controleer dat er genoeg lucht die nodig is voor de
verbranding aanwezig is in het vertrek waar de kachel
zich bevindt.
In dat geval bevindt de woning zich in een lichte
onderdruk en dient er aan de buitenzijde behalve de
schoorsteen een extra luchtinlaatsysteem geplaatst te
worden dat niet afgesloten kan worden en een
doorsnede heeft van minstens 50 cm².
Plaats van het apparaat : Kies een plaats in het
midden van de woning zodat de warme convectielucht
goed in het belangrijkste vertrek verdeeld wordt.
De verspreiding van de warme lucht naar de andere
vertrekken gebeurt via de tussendeuren.
Deze onderdelen moeten een onderdruk hebben of
voorzien zijn van niet afstelbare ventilatieroosters die
zodanig geplaatst dienen te worden dat zij niet
verstopt kunnen raken, teneinde de circulatie van
warme lucht te bevorderen.
Vloer en wanden : Kontroleren dat de vloer het gewicht
kan verdragen van de totale last bestaande uit de
toestel.
Zorg ervoor dat zij niet bestaan uit of bedekt zijn met
ontvlambaar materiaal of verslechteren onder invloed
van de warmte (behang, tapijt, lambrisering, lichte
wanden met isolatie op basis van plastic).
Let goed op dat u genoeg ruimte vrijlaat ten
opzichte van wanden van ontvlambaar materiaal
( # A, B en C, fig. 2) aan de wanden in niet-brandbaar
materiaal (D, fig. 2). Plaats geen brandbare
voorwerpen, gordijnen, behang etc... rondom het
apparaat.
2.3 Afvoerleiding
Bestaande leiding : De afvoerleiding moet
overeenkomen met de geldende reglementaire teksten
en regels van het vak.
Het rookuitlaatkanaal moet in goede staat verkeren en
genoeg trek mogelijk maken (Zie tabel bladzijde 3).
4
C
7 0 0 m m
6 5 0 m m
D
1 5 0 m m
1 5 0
m m
1 5 0
m m
Figuur 2 - Minimale veiligheidstafstand
- De leiding moet overeenkomen met het gebruik dat
men ervan gaat doen, zo niet zal de leiding verbuisd
moeten worden.
- De leiding moet zuiver zijn en regelmatig
onderhouden worden ; de schoorsteen vegen met een
metalische borstel “Schoorsteenvegersragelbol” om
het roet te verwijderen en het teer los te maken.
- De leiding moet een voldoende thermische isolatie
hebben : een leiding waarvan de binnenwanden koud
zijn maakt de thermische trek onmogelijk en
veroorzaakt kondensatie.
- De rookleiding moet absoluut dicht zijn en van
normale en onveranderlijke doorsnede zijn
(bijvoorbeeld 2,5 dm2). Een leiding die te breed is kan
de thermische trek vernietigen.
Gebruiksaanwijzing “1146”
“GASCON” - ref. 134 13 15
180°
Voorschriften voor de installateur
zichtbaar en toegankelijk te zijn. Dient zichtbaar en
toegankelijk te zijn.
Rookleiding bestaat nog niet : De afvoerleiding moet
overeenkomen met de geldende reglementaire teksten
en regels van het vak.
- De leiding van de schoorsteen mag niet op het
apparaat rusten.
- De leiding moet verwijderd worden van alle brandbare
materialen (timmerwerk, schrijnwerk, lichte
wanden...).
- De leiding moet een mekanische reiniging
veroorloven.
2.4 Montage van de afvoerbuis
Figuur 3 - Montage van de afvoerbuis
- De leiding mag maar op één enkel toestel verbonden
worden.
- De leiding moet 4 tot 5 m hoog zijn en moet 40 cm
boven het dak van het huis uitkomen of van ook welk
ander gebouw dat ten minste op 8 m van de
schoorsteen staat. In geval van een terras of van een
dak waarvan de helling onder de 15° is, moet het
buitenkomende deel van de schoorsteen ten minste
1,20 m hebben.
- Een bekroning van de schoorsteen mag de trek niet
verminderen.
- Indien de schoorsteen neiging heeft tot terugslaan, in
geval van zijn situatie tegenover aangrenzende
hindernissen, zal een antineerslagtoestel op de
uitgang moeten geplaats worden ofwel zal de
schoorsteen verhoogd moeten worden.
- Als de depressie van de schoorsteen overdreven is,
zal er een trekbreker geplaatst moeten worden dient
De afvoerbuis maakt het gebruik van buizen Ø 125 mm
of Ø 139 mm mogelijk naar gelang dat de aansluiting
plaatsvindt aan de binnenkant of de buitenkant van de
afvoerbuis.
Figuur 3
Het is mogelijk om met dezelfde buis de rookafvoer
bovenaan of achteraan te installeren. Daarvoor
verwijdert u de 2 schroeven en doet u het
aanpassingsstuk over 180 graden draaien.
Let erop dat de afdichtingsvoeg goed is aangebracht.
2.5 Aansluitleiding
Het apparaat moet zo dicht mogelijk bij de schoorsteen
geplaatst worden.
Het apparaat moet op het rookkanaal aangesloten
worden met erkende rookbuizen die bestend zijn tegen
verbrandingsproducten (bijvoorbeeld : Roestvrij staal,
geëmailleerd plaatijzer…).
De diameter van de buizen mag niet kleiner zijn dan de
diameter van de uitlaatpijp van het apparaat. Als dat wel
het geval is moet de verloopkoppeling een diameter
hebben die net iets kleiner is dan de diameter van de
uitlaatpijp en zo ver mogelijk van de verbinding op het
apparaat geplaatst worden.
Figuur 4 Aansluitleiding
1 - Schoorsteen
2 - Warmtewerend
material in vorm
van een trechter
verwerkt
3 - Afneembare en
geventileerde nietbrandbare plaat
4 - Bezoekklep
5 - Isolatie
6 - Afneembare en
geventileerde
niet- brandbare
plaat
Gebruiksaanwijzing “1146”
5
“GASCON” - ref. 134 13 15
De aansluiting kan verticaal plaatsvinden op een kanaal
dat onder het plafond uitkomt of horizontal plaatsvinden
op een kanaal dat van de vloer vertrekt.
De inpassing van de verbindingspijp op de uitlaatpijp
van het apparaat en op het rookkanaal moet afdichtend
zijn.
Vo o r d e w o n i n g e n d i e u i t g e r u s t z i j n m e t e e n
mekanische gekontroleerde ventilatie moet de
dichtheid de extracteur beletten van de roken uit de
leiding te zuigen.
De verbindingspijp en de eventuele trekregelaar
moeten zichtbaar en toegankelijk zijn en geveegd
kunnen worden.
Voorschriften voor de installateur
A
2.6 Montage van de aslade
Figuur 5
Om beschadiging tijdens het vervoer te voorkomen, is
de aslade achter de deur van de vuurhaard gezet.
Bevestig de lade onder aan de voorkant A.
Figuur 5 - Montage van de aslade
2.7 Verificatie voor de inwerkingstelling
2.8 Onderhoud van de schoorsteen
Controleer de staat van de pakkingen in mastiek,
controleer of de deur goed sluit en of de gietijzeren
bovenkant waterdicht is, of de ruit niet beschadigd is,
dat er geen onderdelen van de verpakking of
gedemonteerde stukken in de rookdoorgangen zitten.
Kontroleren dat de uitneembare stukken op hun plaats
staan.
Noteren : Als het om een streng in keramische koord, is
het geschikt voor consumptie en dus gebracht om door
de gebruiker veranderd te worden
Te n e i n d e a l l e i n c i d e n t e n t e v e r m i j d e n
(schoorsteenvuur
enz...),
zullen
de
onderhouds-operaties regelmatif moeten gebeuren.
Als de kachel vaak gebruikt wordt, moeten de
schoorsteen en de verbindingspijp meerdere keren
per jaar geveegd worden.
In geval van brand in de schoorsteen moet de trek
van hiervan onderbroken worden, moeten ramen en
deuren, luiken en sleutels gesloten worden, het
aansluitgat gesloten worden met behulp van
vochtige doeken en dient vervolgens de brandweer
gewaarschuwd te worden.
OPEN VOORAL NIET DE DEUR VAN HET
APPARAAT (SCHOORSTEENTREK)
6
Gebruiksaanwijzing “1146”
“GASCON” - ref. 134 13 15
Instructies voor de gebruiker
3 Instructies voor de gebruiker
De waarborg wordt niet toegekend indien er stukken
beschadigd worden ingevolge het gebruik van een
niet overeenkomstige brandstof of ingevolge een
modificatie op het toestel of de installatie. Gebruik
uitsluitend door de fabrikant geleverde
reserveonderdelen.
• Vervangende brandstof
Brandhout : Eikenhout, essenhout, ahornhout,
berkenhout, iepenhout, beukenhout, enz.
• Verboden brandstoffen
Alle lokale en nationale voorschriften, met name de
voorschriften die verwijzen naar de nationale en
Europese normen, moeten bij het gebruik van dit
toestel worden nageleefd.
«De kachel bij zacht weer niet gebruiken»
Bij zekere weersomstandingheden (o.a. mist en
kwakkelweer) trekt de schoorsteen slecht en is er kans
op verstikking.
Alle steenkolen en brandolie !
“Groen hout”; groen of te vochtig hout vermindert het
rendement van het apparaat en vervuilt de
binnenwanden en het rookkanaal (roet, bister, teer…).
“Gerecycled hout”; de verbranding van bewerkt hout
(treinbielzen, telegraafpalen, stukjes spaanplaat of
hardboard, pallets, enz…) vervuilt de installatie snel
(roet, bister, teer…), schaadt het milieu (vervuiling,
stank…) en veroorzaakt het doorslaan van de
stookplaats met oververhitting.
3.1 Brandstoft
F
Dit toestel is geen verbrandingsoven.
- Gebruik blokken van hard hout dat minstens 2 jaar
geleden werd gekapt en dat op een beschutte en
geventileerde
plaats
werd
bewaard
(Luchtvochtigheid < 20%).
- Gebruik hard hout dat veel warmte vrijmaakt en goede
kooltjes vormt.
- Grote blokken moeten doorgehakt en op maat
gemaakt worden voordat u ze opslaat.
• Aanbevolen brandstof
Brandhout : Haagbeuk
A : Openen van de laaddeur
B : Trekbegrensklep (primaire lucht)
Opgepast ! “Groen hout” en “gerecycled hout”
kunnen schoorsteenbrand veroorzaken.
3.2 Ontsteking
Figuur 6
- Open de luchtafstelklep volledig (rep. B1).
- De glasdeur open.
- Plaats droog verkreukeld papier (kranten
bijvoorbeeld), zeer droge stukjes hout en enkele
blokken hard hout met een kleine diameter op het
rooster.
- Steek het papier aan en doe de glasdeur weer dicht.
- Als de kooltjes goed rood zijn, vult u de vuurhaard met
brandstof en sluit u de deur en het aansteekluik.
B1 = Open klep
B2 = Gesloten klep
C : Grijpgereedschap voor de asla
Figuur 6 - Bedieningsonderdelen
Gebruiksaanwijzing “1146”
7
“GASCON” - ref. 134 13 15
Bij het eerste gebruik, voert u het vuur langzaam op
zodat de verschillende onderdelen zich normaal
kunnen uitzetten en drogen.
Als u hem voor het eerst aansteekt kan de toestel rook
en een geur van nieuwe verf veroorzaken. Dit mag u
niet verontrusten en u moet het vertrek tijdens de eerste
uren gebruik goed luchten.
3.3 Regeling van de verbranding
Het toestel moet werken met de glazen deur goed
gesloten. De werkingsgang wordt geregeld door de
luchtklep (rep. B).
U zult zelf bemerken welke stand u het beste schikt.
De kachel is uitgerust met een "Schoon venster"
systeem waarbij de secundaire lucht langs de
binnenkant van het venster scheert, zodat geen roet
afgezet kan worden.
H e t s y s t e e m i s v e e l e ff i c i ë n t e r d a n w a n n e e r
kleppen/schuiven open staan.
• Lading van de brandstof :
- Langzaam de haarddeur openen ten einde geen
brutale luchttrek te veroorzaken, dit vermeidt
uitdampingen in de plaats.
- De houtblokken moeten op de gloeinde kooltjes
geplaatst worden.
- Voor een versterkte werking, ervoor zorgen dat er
altijd 2 houtblokken op de gloeiende kool liggen. De
gang van de haard is beter wanneer er meerdere
houtblokken in liggen die niet te dik zijn.
Voor een nominaal verwarmingsvermogen zit er
minstens 1,2 uur tussen twee vullingen.
De maximale stapelhoogte is ongeveer 2 houtblokken
met een diameter van 12 cm.
- Voor een verminderde werkingsgang (bij voorbeeld
voor de nacht), dikkere houtblokken kiezen.
- Na de lading, de laaddeur opnieuw sluiten (rep. A,
page 7).
3.4 Legen
- De gloeiende houtskool schudden met het haardijzer.
- U verwijdert de as elke dag. Nooit de assen in de
asbak tot aan de rooster laten opgaan ; deze zouden
van onder kouder worden en snel beschadigingen
ondergaan.
- De assen verwijderen wanneer de kachel koud is.
- De aslade uitnemen met hulp van een
beschermingshandschoen.
Wanneer men de asbak ledigd, oppassen met de
gloeikolen en de nodige voorzorgen nemen.
3.5 Onderhoud van de schoorsteen
Zeer belangrijk ! Ten einde alle incidenten te vermijden
(schoorsteenvuur
enz...),
zullen
de
onderhouds-operaties regelmatif moeten gebeuren.
Als de kachel vaak gebruikt wordt, moeten de
schoorsteen en de verbindingspijp meerdere keren
per jaar geveegd worden.
In geval van brand in de schoorsteen moet de trek
van hiervan onderbroken worden, moeten ramen en
deuren, luiken en sleutels gesloten worden, het
aansluitgat gesloten worden met behulp van
8
Instructies voor de gebruiker
vochtige doeken en dient vervolgens de brandweer
gewaarschuwd te worden.
OPEN VOORAL NIET DE DEUR VAN HET
APPARAAT (SCHOORSTEENTREK)
De schoorsteen moet 1 tot 2 maal per jaar door een
vakman gereinigd worden.
3.6 Onderhoud van de kachel
• Het apparaat moet regelmatig schoongemaakt
worden, evenals de aansluitleidingen en de
rookgasbuis.
• Verwijder aanslag in de vuurhaard, reinig het rooster
van de stookplaats.
• De glasceramische haard kan schoongemaakt worden
met een doekje en een aangepast reinigingsmiddel.
Dit moet gebeuren als het apparaat koud is. Na het
schoonmaken, spoelt u met schoon water. Gebruik
geen schuurmiddelen.
• De glasceramische ruit is bestend tegen temperaturen
tot 750°C. Als het glas per ongeluk breekt, raden wij u
af de gebroken ruit te vervangen door een ander
materiaal, dan dat van de fabrikant.
• Alle onderdelen van de bekleding kunnen gereinigd
worden met een zachte borstel of met een vochtig
doekje. Als er condensatie plaats vindt of water
gemorst wordt, moeten de betrokken gedeeltes
schoongemaakt worden, voordat zij opdrogen.
• Controleer of er geen verstoppingen zijn alvorens na
een lange stilstandsperiode het apparaat opnieuw aan
te zetten.
• Het apparaat kan niet gebruikt worden met een
rookgasbuis waarop ook andere apparaten zijn
aangesloten.
• Het verlichtingsrooster steeds vrij houden.
• De keerplaatje platen regelmatig moet worden
verwijderd en elke as of deposito’s schoongemaakt
weg.
• Puin mag niet worden toegestaan te bouwen up. The
deur touw zeehonden mogen worden ieder jaar
gecontroleerd en vervangen wanneer dit nodig is.
3.7 Belangrijke raadgevingen
Ook als de kachel ge-doofd is, kan hij nog een tijd
heet blijven.
Deze kachel brengt hitte voort en kan brandwonden
veroorzaken als iemand ermee in contact komt.
VERBIED UW KINDEREN OM IN DE BUURT VAN
DE KACHEL TE KOMEN.
Gebruiksaanwijzing “1146”
“GASCON” - ref. 134 13 15
Instructies voor de gebruiker
3.8 Reden van een slechte werking
þ : Dit teken raadt u aan een beroep te
doen op een vakman om deze
handelingen uit te voeren.
Situatie
Waarschijnlijke redenen
- Aktie
Moeilijkheden met de
ontsteking. Het vuur blijft niet
branden
Groen hout of te vochtig
- Gebruik hard hout dat minder dan twee jaar geleden
werd gekapt en op een beschutte geventileerde plaats
werd bewaard.
De houtblokken zijn te dik
- Voor de ontsteking, gebruikt men papier en zeer droog
klein hout. Voor het onderhoud van het vuur, gebruikt
men houtblokken die gespleten zijn.
Hout van slechte kwaliteit
- Gebruik hard hout dat veel warmte voortbrengt en
goede kooltjes maakt (haagbeuk, eikenhout,
essenhout, ahornhout, berkenhout, iepenhout,
beukenhout, enz...).
Primaire lucht niet voldoende
- De klep van primaire lucht volledig openen.
- De rooster voor frisse buitenlucht openen.
De trek is niet voldoende
þ
- Kontroleren dat de leiding niet verstopt is, indien nodig
een mekanische reiniging uitvoeren.
- Kontroleren dat de rookleiding overeenkomstig is.
Het vuur loopt dol op
Te veel lucht
- Kontroleren dat de ontstekingluik sluiten is (# B, fig. 6,
bladz. 7).
- Gedeeltelijk of volledig de primaire luchtklep sluiten.
De trek is te hevig
þ
Hout van slechte kwaliteit
- Een trekbreker plaatsen.
- Niet in continu kleine houtstukjes, takkenbossen,
shrijnwerkerijafval verbranden (triplex-hout,
paletten,enz...).
Roken bij de ontsteking
De rookleiding is koud
- De rookleiding verwarmen door een fakkel papier te
De plaats is in depressie
- In de woningen uitgerust met een mekanisch
verbranden in de haard.
gekontroleerde ventilatie, een venster lichtjes openen
die buiten geeft todat het vuur goed brandt.
Rook komt uit het toestel
gedurende de verbranding
De trek is onvoldoende
þ
- Kontroleren dat de schoorsteen overeenstemt met de
normen en haar isolatie.
- Kontroleren dat de leiding niet verstopt is, een reiniging
uitvoeren indien nodig.
De wind stroomt in de leiding
þ
- Een antiterugslagsysteem op de bekroning monteren.
De plaats is in depressie
þ
- In de woningen uitgerust met een mekanische
gekontroleerde ventilatie, is het noodzakelijk van een
buitenluchtopnemingsklep te installeren voor het
toestel alleen.
Onvoldoende verwarming
Hout van slechte kwaliteit
- Aanbevolen brandstof gebuiken.
Slechte mengeling van de warme
konvektielucht
- D e om loop k ontr oler en v an de konv ek tie
(ingangroosters, luchtleiding, diffusieroosters).
- Kontroleren dat de naasttaande plaatsen uitgerust zijn
met aeratieroosters ten einde de circulatie van de
warme lucht te begunstigen.
Gebruiksaanwijzing “1146”
9
“GASCON” - ref. 134 13 15
Wisselstukken
4 Wisselstukken
Voor iedere bestelling van wisselstukken, het volgende aanduiden : het type en referentie van het toestel en de
kleurcode (staat vermeld op aanduidingsplaatje), de beschrijving en het codenummer van het stuk.
Bijvoorbeeld : Hout kachel “GASCON”, ref. 134 13 15, kleurcode Y, Bovenplaat 352165 EF.
Y = 134 13 15 Y
L = 134 13 15 L
N°
1
2
3
4
5
6
7
7
7
7
7
7
7
7
8
9
9
9
9
9
9
9
9
10
10
10
10
10
10
10
10
11
12
13
14
15
15
15
15
15
15
15
15
16
16
16
16
16
16
16
16
17
18
19
20
21
10
Code
207315
222575
236135
259015
259037
270414
300132
300132
300132
300134
300132
300132
300132
300132
300491
301172
301172
301172
301172
301172
301172
301172
301172
303860
303860
303860
303860
303860
303860
303860
303860
305016
305214
306285
309233
310734
310734
310734
310734
310734
310734
310734
310734
310830
310830
310830
310830
310830
310830
310830
310830
315614
319738
322717
326602
327905
B = 134 13 15 B
P = 134 13 15 P
E = 134 13 15 E
C = 134 13 15 C
N = 134 13 15 N
Q = 134 13 15 Q
Beschrijving. . . . . . . . . . . . . . . . . Y . . L . . B . . P . . E . . C . . N . . . . Q . Aantal
77
EF
MK
RH
RJ
RP
EP
ER
EF
77
EF
MK
RH
RJ
RP
EP
ER
77
EF
MK
RH
RJ
RP
EP
ER
EB
EB
EF
EB
77
EF
MK
RH
RJ
RP
EP
ER
77
EF
MK
RH
RJ
RP
EP
ER
EB
EB
EB
EB
77
Achtermantel . . . . . . . . . . . . . . . . . Y. . . L. . . B . . P . . E . . C . . N . . . . Q
Keerplaat . . . . . . . . . . . . . . . . . . . Y. . . L. . . B . . P . . E . . C . . N . . . . Q
Afschermplaat . . . . . . . . . . . . . . . . Y. . . L. . . B . . P . . E . . C . . N . . . . Q
Hechtingspoot . . . . . . . . . . . . . . . . Y. . . L. . . B . . P . . E . . C . . N . . . . Q
Hechtingspoot . . . . . . . . . . . . . . . . Y. . . L. . . B . . P . . E . . C . . N . . . . Q
Luchtklep . . . . . . . . . . . . . . . . . . . Y. . . L. . . B . . P . . E . . C . . N . . . . Q
Poot . . . . . . . . . . . . . . . . . . . . . . . . . L . . . . . . . . . . . . . . . . . . . . . . . .
Poot . . . . . . . . . . . . . . . . . . . . . Y . . . . . . . . . . . . . . . . . . . . . . . . . . . .
Poot . . . . . . . . . . . . . . . . . . . . . . . . . . . . . . . . . . . . . . . . C . . . . . . . . .
Poot . . . . . . . . . . . . . . . . . . . . . . . . . . . . . . . . . P . . . . . . . . . . . . . . . .
Poot . . . . . . . . . . . . . . . . . . . . . . . . . . . . . B . . . . . . . . . . . . . . . . . . . .
Poot. . . . . . . . . . . . . . . . . . . . . . . . . . . . . . . . . . . . . E . . . . . . . . . . . . .
Poot . . . . . . . . . . . . . . . . . . . . . . . . . . . . . . . . . . . . . . . . . . . . N. . . . . .
Poot. . . . . . . . . . . . . . . . . . . . . . . . . . . . . . . . . . . . . . . . . . . . . . . . . Q
Voetstuk . . . . . . . . . . . . . . . . . . . Y. . . L. . . B . . P . . E . . C . . N . . . . Q
Asbakdeur . . . . . . . . . . . . . . . . . . . . . . L . . . . . . . . . . . . . . . . . . . . . . . .
Asbakdeur . . . . . . . . . . . . . . . . . . Y . . . . . . . . . . . . . . . . . . . . . . . . . . . .
Asbakdeur . . . . . . . . . . . . . . . . . . . . . . . . . . . . . . . . . . . . . C . . . . . . . . .
Asbakdeur . . . . . . . . . . . . . . . . . . . . . . . . . . . . . P . . . . . . . . . . . . . . . .
Asbakdeur . . . . . . . . . . . . . . . . . . . . . . . . . . B . . . . . . . . . . . . . . . . . . . .
Asbakdeur . . . . . . . . . . . . . . . . . . . . . . . . . . . . . . . . . E . . . . . . . . . . . . .
Asbakdeur . . . . . . . . . . . . . . . . . . . . . . . . . . . . . . . . . . . . . . . . . N. . . . . .
Asbakdeur . . . . . . . . . . . . . . . . . . . . . . . . . . . . . . . . . . . . . . . . . . . . . Q
Buis . . . . . . . . . . . . . . . . . . . . . . . . . L . . . . . . . . . . . . . . . . . . . . . . . .
Buis . . . . . . . . . . . . . . . . . . . . . . Y . . . . . . . . . . . . . . . . . . . . . . . . . . . .
Buis . . . . . . . . . . . . . . . . . . . . . . . . . . . . . . . . . . . . . . . . C . . . . . . . . .
Buis . . . . . . . . . . . . . . . . . . . . . . . . . . . . . . . . . P . . . . . . . . . . . . . . . .
Buis . . . . . . . . . . . . . . . . . . . . . . . . . . . . . B . . . . . . . . . . . . . . . . . . . .
Buis . . . . . . . . . . . . . . . . . . . . . . . . . . . . . . . . . . . . . E . . . . . . . . . . . . .
Buis . . . . . . . . . . . . . . . . . . . . . . . . . . . . . . . . . . . . . . . . . . . . N. . . . . .
Buis . . . . . . . . . . . . . . . . . . . . . . . . . . . . . . . . . . . . . . . . . . . . . . . . . Q
Steunplaat . . . . . . . . . . . . . . . . . . Y. . . L. . . B . . P . . E . . C . . N . . . . Q
Steunplaat . . . . . . . . . . . . . . . . . . Y. . . L. . . B . . P . . E . . C . . N . . . . Q
Achterstuk . . . . . . . . . . . . . . . . . . Y. . . L. . . B . . P . . E . . C . . N . . . . Q
Rooster . . . . . . . . . . . . . . . . . . . . Y. . . L. . . B . . P . . E . . C . . N . . . . Q
Rechter zijpaneel . . . . . . . . . . . . . . . . . . L . . . . . . . . . . . . . . . . . . . . . . . .
Rechter zijpaneel . . . . . . . . . . . . . . Y . . . . . . . . . . . . . . . . . . . . . . . . . . . .
Rechter zijpaneel . . . . . . . . . . . . . . . . . . . . . . . . . . . . . . . . . C . . . . . . . . .
Rechter zijpaneel . . . . . . . . . . . . . . . . . . . . . . . . . . P . . . . . . . . . . . . . . . .
Rechter zijpaneel . . . . . . . . . . . . . . . . . . . . . . B . . . . . . . . . . . . . . . . . . . .
Rechter zijpaneel. . . . . . . . . . . . . . . . . . . . . . . . . . . . . . E . . . . . . . . . . . . .
Rechter zijpaneel . . . . . . . . . . . . . . . . . . . . . . . . . . . . . . . . . . . . . N. . . . . .
Rechter zijpaneel . . . . . . . . . . . . . . . . . . . . . . . . . . . . . . . . . . . . . . . . . Q
Linker zijpaneel . . . . . . . . . . . . . . . . . . . L . . . . . . . . . . . . . . . . . . . . . . . .
Linker zijpaneel . . . . . . . . . . . . . . . Y . . . . . . . . . . . . . . . . . . . . . . . . . . . .
Linker zijpaneel . . . . . . . . . . . . . . . . . . . . . . . . . . . . . . . . . . C . . . . . . . . .
Linker zijpaneel . . . . . . . . . . . . . . . . . . . . . . . . . . . P . . . . . . . . . . . . . . . .
Linker zijpaneel . . . . . . . . . . . . . . . . . . . . . . . B . . . . . . . . . . . . . . . . . . . .
Linker zijpaneel . . . . . . . . . . . . . . . . . . . . . . . . . . . E . . . . . . . . . . . . . . . .
Linker zijpaneel . . . . . . . . . . . . . . . . . . . . . . . . . . . . . . . . . . . . . . N. . . . . .
Linker zijpaneel . . . . . . . . . . . . . . . . . . . . . . . . . . . . . . . . . . . . . . . . . . Q
Doorgang. . . . . . . . . . . . . . . . . . . Y. . . L. . . B . . P . . E . . C . . N . . . . Q
Roostersteun . . . . . . . . . . . . . . . . . Y. . . L. . . B . . P . . E . . C . . N . . . . Q
Bijstuk steun . . . . . . . . . . . . . . . . . Y. . . L. . . B . . P . . E . . C . . N . . . . Q
Keerplaat . . . . . . . . . . . . . . . . . . . Y. . . L. . . B . . P . . E . . C . . N . . . . Q
Bijstuk zijkant . . . . . . . . . . . . . . . . . . . . L . . . . . . . . . . . . . . . . . . . . . . . .
.
.
.
.
.
.
.
.
.
.
.
.
.
.
.
.
.
.
.
.
.
.
.
.
.
.
.
.
.
.
.
.
.
.
.
.
.
.
.
.
.
.
.
.
.
.
.
.
.
.
.
.
.
.
.
.
.
.
.
.
.
.
.
.
.
.
.
.
.
.
.
.
.
.
.
.
.
.
.
.
.
.
.
.
.
.
.
.
.
.
.
.
.
.
.
.
.
.
.
.
.
.
.
.
.
.
.
.
.
.
.
.
01
01
01
08
02
01
04
04
04
04
04
04
04
04
01
01
01
01
01
01
01
01
01
01
01
01
01
01
01
01
01
01
01
01
01
01
01
01
01
01
01
01
01
01
01
01
01
01
01
01
01
01
01
01
01
01
Gebruiksaanwijzing “1146”
“GASCON” - ref. 134 13 15
Wisselstukken
4 8
1 0
2 3
3 6
1 6
4 8
5 0
1 1
1
2 8
2 0
1 3
2
2 2
5
4 7
1 4
2 7
1 9
5 1
1 8
2 9
1 2
5 5
5 5
6
2 6
4 2
4 5
1 7
4 0
4 1
4 9
4
3 9
3 0
2 1
4 7
3
1 5
4
2 4
4 5
5 4
4 9
4 3
8
4 6
3 8
5 2
3 3
2 5
4 1
4 0
4 2
3 1
3 7
4 3
4 4
3 2
4 6
9
7
5 3
3 4
4 3
Figuur 7 - Overzicht onderdelen van het toestel
Gebruiksaanwijzing “1146”
11
“GASCON” - ref. 134 13 15
Y = 134 13 15 Y
L = 134 13 15 L
N°
Code
21
21
21
21
21
21
21
22
23
24
25
25
25
25
25
25
25
25
26
26
26
26
26
26
26
26
27
28
28
28
28
28
28
28
28
29
29
29
29
29
29
29
29
30
31
32
33
34
36
37
38
39
40
41
42
43
44
45
46
47
48
49
50
51
327905
327905
327905
327905
327905
327905
327905
330022
331001
331700
331800
331800
331800
331800
331800
331800
331800
331800
331900
331900
331900
331900
331900
331900
331900
331900
332003
352165
352165
352165
352165
352165
352165
352165
352165
359806
359806
359806
359806
359806
359806
359806
359806
624045
158626
101063
101062
101057
105006
134705
134711
179624
188829
181632
110404
189825
808001
181634
181633
181625
142316
142881
269501
269449
12
Wisselstukken
B = 134 13 15 B
P = 134 13 15 P
E = 134 13 15 E
C = 134 13 15 C
N = 134 13 15 N
Q = 134 13 15 Q
Beschrijving . . . . . . . . Type . . . . . Y . . L . . B . . P . . E . . C . . N . . . . Q . Aantal
EF
MK
RH
RJ
RP
EP
ER
EB
EF
EF
77
EF
MK
RH
RJ
RP
EP
Er
77
EF
MK
RH
RJ
RP
EP
ER
EB
77
EF
MK
RH
RJ
RP
EP
ER
77
EF
MK
RH
RJ
RP
EP
ER
Bijstuk zijkant . . . . . . . . . . . . . . . . Y . . . . . . . . . . . . . . . . . . . . . . . . . . . . . . 01
Bijstuk zijkant . . . . . . . . . . . . . . . . . . . . . . . . . . . . . . . . . . . C . . . . . . . . . . . 01
Bijstuk zijkant . . . . . . . . . . . . . . . . . . . . . . . . . . . . P . . . . . . . . . . . . . . . . . . 01
Bijstuk zijkant . . . . . . . . . . . . . . . . . . . . . . . . B . . . . . . . . . . . . . . . . . . . . . . 01
Bijstuk zijkant. . . . . . . . . . . . . . . . . . . . . . . . . . . . . . . . E . . . . . . . . . . . . . . . 01
Bijstuk zijkant . . . . . . . . . . . . . . . . . . . . . . . . . . . . . . . . . . . . . . . N. . . . . . . . 01
Bijstuk zijkant. . . . . . . . . . . . . . . . . . . . . . . . . . . . . . . . . . . . . . . . . . . . Q . . 01
Haardplaat . . . . . . . . . . . . . . . . . . Y. . . L. . . B . . P . . E . . C . . N . . . . Q . . 01
Aanpasstuk. . . . . . . . . . . . . . . . . . Y. . . L. . . B . . P . . E . . C . . N . . . . Q . . 01
Steun . . . . . . . . . . . . . . . . . . . . . Y. . . L. . . B . . P . . E . . C . . N . . . . Q . . 01
Rechter deur . . . . . . . . . . . . . . . . . . . . . L . . . . . . . . . . . . . . . . . . . . . . . . . . 01
Rechter deur . . . . . . . . . . . . . . . . . Y . . . . . . . . . . . . . . . . . . . . . . . . . . . . . . 01
Rechter deur . . . . . . . . . . . . . . . . . . . . . . . . . . . . . . . . . . . . C . . . . . . . . . . . 01
Rechter deur . . . . . . . . . . . . . . . . . . . . . . . . . . . . P . . . . . . . . . . . . . . . . . . 01
Rechter deur . . . . . . . . . . . . . . . . . . . . . . . . B . . . . . . . . . . . . . . . . . . . . . . 01
Rechter deur . . . . . . . . . . . . . . . . . . . . . . . . . . . . . . . . E . . . . . . . . . . . . . . . 01
Rechter deur . . . . . . . . . . . . . . . . . . . . . . . . . . . . . . . . . . . . . . . N. . . . . . . . 01
Rechter deur . . . . . . . . . . . . . . . . . . . . . . . . . . . . . . . . . . . . . . . . . . . . . q . . . 01
Linker deur . . . . . . . . . . . . . . . . . . . . . . L . . . . . . . . . . . . . . . . . . . . . . . . . . 01
Linker deur . . . . . . . . . . . . . . . . . . Y . . . . . . . . . . . . . . . . . . . . . . . . . . . . . . 01
Linker deur . . . . . . . . . . . . . . . . . . . . . . . . . . . . . . . . . . . . . C . . . . . . . . . . . 01
Linker deur . . . . . . . . . . . . . . . . . . . . . . . . . . . . . P . . . . . . . . . . . . . . . . . . 01
Linker deur . . . . . . . . . . . . . . . . . . . . . . . . . B . . . . . . . . . . . . . . . . . . . . . . 01
Linker deur . . . . . . . . . . . . . . . . . . . . . . . . . . . . . . . . . E . . . . . . . . . . . . . . . 01
Linker deur . . . . . . . . . . . . . . . . . . . . . . . . . . . . . . . . . . . . . . . . N. . . . . . . . 01
Linker deur . . . . . . . . . . . . . . . . . . . . . . . . . . . . . . . . . . . . . . . . . . . . . Q . . 01
Doorgang. . . . . . . . . . . . . . . . . . . Y. . . L. . . B . . P . . E . . C . . N . . . . Q . . 01
Bovenplaat . . . . . . . . . . . . . . . . . . . . . . L . . . . . . . . . . . . . . . . . . . . . . . . . . 01
Bovenplaat . . . . . . . . . . . . . . . . . . Y . . . . . . . . . . . . . . . . . . . . . . . . . . . . . . 01
Bovenplaat . . . . . . . . . . . . . . . . . . . . . . . . . . . . . . . . . . . . . C . . . . . . . . . . . 01
Bovenplaat . . . . . . . . . . . . . . . . . . . . . . . . . . . . . P . . . . . . . . . . . . . . . . . . 01
Bovenplaat . . . . . . . . . . . . . . . . . . . . . . . . . B . . . . . . . . . . . . . . . . . . . . . . 01
Bovenplaat . . . . . . . . . . . . . . . . . . . . . . . . . . . . . . . . . E . . . . . . . . . . . . . . . 01
Bovenplaat . . . . . . . . . . . . . . . . . . . . . . . . . . . . . . . . . . . . . . . . N. . . . . . . . 01
Bovenplaat . . . . . . . . . . . . . . . . . . . . . . . . . . . . . . . . . . . . . . . . . . . . . Q . . 01
Voorfront . . . . . . . . . . . . . . . . . . . . . . . L . . . . . . . . . . . . . . . . . . . . . . . . . . 01
Voorfront . . . . . . . . . . . . . . . . . . . Y . . . . . . . . . . . . . . . . . . . . . . . . . . . . . . 01
Voorfront . . . . . . . . . . . . . . . . . . . . . . . . . . . . . . . . . . . . . . C . . . . . . . . . . . 01
Voorfront . . . . . . . . . . . . . . . . . . . . . . . . . . . . . . P . . . . . . . . . . . . . . . . . . 01
Voorfront . . . . . . . . . . . . . . . . . . . . . . . . . . B . . . . . . . . . . . . . . . . . . . . . . 01
Voorfront . . . . . . . . . . . . . . . . . . . . . . . . . . . . . . . . . . E . . . . . . . . . . . . . . . 01
Voorfront. . . . . . . . . . . . . . . . . . . . . . . . . . . . . . . . . . . . . . . . . . N. . . . . . . . 01
Voorfront . . . . . . . . . . . . . . . . . . . . . . . . . . . . . . . . . . . . . . . . . . . . . . Q . . 01
Asbak. . . . . . . . . . . . . . . . . . . . . Y. . . L. . . B . . P . . E . . C . . N . . . . Q . . 01
Haaksleutel. . . . . . . . . . . . . . . . . . Y. . . L. . . B . . P . . E . . C . . N . . . . Q . . 01
Sluitas . . . . . . . . . . . . . . . . . . . . Y. . . L. . . B . . P . . E . . C . . N . . . . Q . . 01
Sluitas . . . . . . . . . . . . . . . . . . . . Y. . . L. . . B . . P . . E . . C . . N . . . . Q . . 01
As. . . . . . . . . . . . . . . . . . . . . . . Y. . . L. . . B . . P . . E . . C . . N . . . . Q . . 01
Dichting . . . . . . . . . . . Ø 15 . . . . . Y. . . L. . . B . . P . . E . . C . . N . . . . Q . . 2 m
Ribstift . . . . . . . . . . . . 6x45 . . . . . Y. . . L. . . B . . P . . E . . C . . N . . . . Q . . 01
Ribstift . . . . . . . . . . . . 6x30 . . . . . Y. . . L. . . B . . P . . E . . C . . N . . . . Q . . 01
Bedieningstang . . . . . . . . . . . . . . . Y. . . L. . . B . . P . . E . . C . . N . . . . Q . . 01
Glas . . . . . . . . . . 278 X 220 X 4 . . . Y. . . L. . . B . . P . . E . . C . . N . . . . Q . . 02
Dichting . . . . . . . . . . . Ø 6 . . . . . . Y. . . L. . . B . . P . . E . . C . . N . . . . Q . . 2 m
Geribde pin . . . . . . . . . 6x30 . . . . . Y. . . L. . . B . . P . . E . . C . . N . . . . Q . . 04
Kraagschroef . . . . . . . . M5x6 . . . . . Y. . . L. . . B . . P . . E . . C . . N . . . . Q . . 02
ED Haaksleutel. . . . . . . . . . . . . . . . . . Y. . . L. . . B . . P . . E . . C . . N . . . . Q . . 01
Dichting . . . . . . . . . . . Ø 15 . . . . . Y. . . L. . . B . . P . . E . . C . . N . . . . Q . 1,64 m
Dichting . . . . . . . . . . . Ø 10 . . . . . Y. . . L. . . B . . P . . E . . C . . N . . . . Q . 1,33 m
Keramische koord . . . . . . Ø 7 . . . . . . Y. . . L. . . B . . P . . E . . C . . N . . . . Q . 3,16 m
Dichting . . . . . . . . . . . 7x3 . . . . . . Y. . . L. . . B . . P . . E . . C . . N . . . . Q . . 1 m
Dichting. . . . . . . . . . . . . . . . . . . . Y. . . L. . . B . . P . . E . . C . . N . . . . Q . . 08
Deflektor . . . . . . . . . . . . . . . . . . . Y. . . L. . . B . . P . . E . . C . . N . . . . Q . . 01
Deflektor . . . . . . . . . . . . . . . . . . . Y. . . L. . . B . . P . . E . . C . . N . . . . Q . . 01
Gebruiksaanwijzing “1146”
“GASCON” - ref. 134 13 15
Y = 134 13 15 Y
L = 134 13 15 L
N°
Code
52
53
53
53
53
53
53
53
53
54
54
54
54
54
54
54
54
55
161039
988920
988922
988924
988926
988928
988930
988932
988994
988744
988923
988925
988927
988929
988931
988933
988995
100939
Wisselstukken
B = 134 13 15 B
P = 134 13 15 P
E = 134 13 15 E
C = 134 13 15 C
N = 134 13 15 N
Q = 134 13 15 Q
Beschrijving . . . . . . . . Type . . . . . Y . . L . . B . . P . . E . . C . . N . . . . Q . Aantal
Retoucheerverf. . . . . . . . (P) . . . . . . . . . . . . . . . . . P . . . . . . . . . . . . . . . .
Rechter Volledige deur . . . . . . . . . . . . . . . . . . . . . . . . . . . . . . . . . . N. . . . . .
Rechter Volledige deur . . . . . . . . . . . Y . . . . . . . . . . . . . . . . . . . . . . . . . . . .
Rechter Volledige deur . . . . . . . . . . . . . . . L . . . . . . . . . . . . . . . . . . . . . . . .
Rechter Volledige deur . . . . . . . . . . . . . . . . . . . B . . . . . . . . . . . . . . . . . . . .
Rechter Volledige deur . . . . . . . . . . . . . . . . . . . . . . . P . . . . . . . . . . . . . . . .
Rechter Volledige deur. . . . . . . . . . . . . . . . . . . . . . . . . . . E . . . . . . . . . . . . .
Rechter Volledige deur . . . . . . . . . . . . . . . . . . . . . . . . . . . . . . C . . . . . . . . .
Rechter Volledige deur . . . . . . . . . . . . . . . . . . . . . . . . . . . . . . . . . . . . . . Q
Linker Volledige deur . . . . . . . . . . . . . . . . . . . . . . . . . . . . . . . . . . . N. . . . . .
Linker Volledige deur . . . . . . . . . . . . Y . . . . . . . . . . . . . . . . . . . . . . . . . . . .
Linker Volledige deur . . . . . . . . . . . . . . . . L . . . . . . . . . . . . . . . . . . . . . . . .
Linker Volledige deur . . . . . . . . . . . . . . . . . . . . B . . . . . . . . . . . . . . . . . . . .
Linker Volledige deur . . . . . . . . . . . . . . . . . . . . . . . . P . . . . . . . . . . . . . . . .
Linker Volledige deur . . . . . . . . . . . . . . . . . . . . . . . . . . . E . . . . . . . . . . . . .
Linker Volledige deur . . . . . . . . . . . . . . . . . . . . . . . . . . . . . . . C . . . . . . . . .
Linker Volledige deur . . . . . . . . . . . . . . . . . . . . . . . . . . . . . . . . . . . . . . . Q
As. . . . . . . . . . . . . . . . . . . . . . . Y. . . L. . . B . . P . . E . . C . . N . . . . Q
.
.
.
.
.
.
.
.
.
.
.
.
.
.
.
.
.
.
.
.
.
.
.
.
.
.
.
.
.
.
.
.
.
.
.
.
01
01
01
01
01
01
01
01
01
01
01
01
01
01
01
01
01
02
Noteren
Gebruiksaanwijzing “1146”
13
Waarborg certifikaat
Wettelijke garantie :
De preciseringen, afmetingen, en inlichtingen die op
onze documenten staan zijn slechts informatief en
binden de firma Franco-Belge totaal niet.
Omdat wij voortdurend proberen ons materiaal te
verbeteren, kunnen door ons noodzakelijk geachte
wijzigingen worden doorgevoerd zonder bericht
vooraf.
De bepalingen van deze garantie doen geen afbreuk
aan het feit dat de koper hiernaast nog over de
mogelijkheid beschikt om te vorderen op grond van
fouten en verborgen gebreken in alle gevallen waarbij
aan de voorwaarden van artikels 1641 en volgende
van het Frans Burgerlijk Wetboek is voldaan en in het
land waar het materiaal werd aangekocht.
de gebruiker. Als bovendien de herstellingen of de
vervanging van stukken gedekt door de garantie te
duur zijn in verhouding tot de prijs van het apparaat,
kan alleen de firma Franco-Belge besluiten het
apparaat te vervangen of te herstellen.
Onze garantie is 2 (twee) jaar voor alle apparaten met
uitzondering van haarden en inserts waarvoor een
garantie van 5 (vijf) jaar geldt. Vallen niet onder de
garantie :
1)
2)
3)
Contractuele garantie :
Onze apparaten hebben een garantie tegen alle
verborgen defecten en gebreken, onder voorwaarde
dat :
4)
1) De installatie en ingebruikneming van het apparaat door een
beroepsinstallateur worden uitgevoerd.
2) Men zich houdt aan de instructies die in onze technische
documenten, installatiehandleiding en instelhandleiding
gegeven worden.
3) Het apparaat gebruikt en onderhouden wordt volgens de
geldende normen en wetgeving en volgens de technische
handleiding gevoegd bij het apparaat.
5)
Deze garantie betreft de vervanging in onze
werkplaatsen, van de oorspronkelijke, door onze
afdeling “garantiecontrole” als defect erkende
onderdelen, portkosten en arbeidsloon ten laste van
* Naam en adres voor de installateur :
Lampjes,
zekeringen,
elektrische
weerstanden,
ventilatoren.
De onderdelen die versleten zijn of in contact met hoge
temperaturen : bodems en roosters van haarden,
grondplaten,
deflectoren,
aslades,
verf
en
oppervlaktebehandeling van de decoratieve delen, evenals
dichtingen en raampjes.
De schade die het gevolg zou zijn van gebruik van het
apparaat met andere brandstoffen dan diegene die in onze
handleidingen worden aangeraden.
De beschadiging van onderdelen van het apparaat door
externe elementen (stuwing van schoorsteen, onweer,
vochtigheid, niet conforme druk of lage druk, thermische
schokken, schoten, enz...).
De beschadiging van elektrische onderdelen, vanwege
aansluiting op en gebruik van een net waarvan de
spanning, gemeten bij de ingang van het apparaat, 10%
lager is of hoger dan de nominale spanning van 220 volt.
Uitsluiting van aansprakelijkheid :
Als een goed gemaakt wordt op verzoek van de klant,
kan onze aansprakelijkheid als onderaannemer niet
worden ingeroepen ten opzichte van de klant of
derden vanwege defecten van de installatie of een
conceptiefout van het goed.
_ _ _ _ _ _ _ _ _ _ _ _ _ _ _ _ _ _ _ _ _ _ _ _
_ _ _ _ _ _ _ _ _ _ _ _ _ _ _ _ _ _ _ _ _ _ _ _ _ _ _ _ _ _ _ _ _ _ _ _ _ _ _ _ _ _
( Telefoon :_ _ _ _ _ _ _ _ _ _ _ _ _ _ _ _ _ _ _ _ _ _ _ _ _
* Naam en adres voor de gebruiker : _ _ _ _ _ _ _ _ _ _ _ _ _ _ _ _ _ _ _ _ _ _ _ _ _
_ _ _ _ _ _ _ _ _ _ _ _ _ _ _ _ _ _ _ _ _ _ _ _ _ _ _ _ _ _ _ _ _ _ _ _ _ _ _ _ _ _
Datum van inwerkingstelling :
Referentie van het toestel :
Kleur :
qY
Reeksnummer :
qL
___ ___ /___ ___ / ___ ___ ___ ___
q 134 13 15
qB
qP
qE
qC
qN
qQ
___ ___ ___ ___ ___ ___
Dit certifikaat moet zordvuldig behouden worden door de gebruiker. In geval van reclamatie, een ingevulde
copie maken en het opsturen naar :
FRANCO BELGE,
Rue Orphée Variscotte, 59660 MERVILLE, FRANCE.
ARDENNES
Document n° 1146-14
25/03/2011
FR
NL
EN
IT
ES
Wood stove
EN 13240
Model : 134 13 15
Output : 11 kW
Technical manual
to be saved
by the user
for future reference
Description of the appliance
FRANCO BELGE
Installation instructions
Operating instructions
Spare parts
Warranty certificate
Rue Orphée Variscotte
59660 MERVILLE (FRANCE)
Telephone : 00 333 28 43 43 22
Fax : 00 333 28 43 43 60
Subject to modifications.
“ARDENNES” - model 134 13 15
FRANCO BELGE congratulates you on your choice.
FRANCO BELGE, guarantees the quality of its appliances and is committed to meet its
customers’ needs.
FRANCO BELGE, which can boast a 80-year experience in the industry of heating devices, uses
state-of-the-art technologies
to design and manufacture its whole range of products.
This document contains instructions on how to install your appliance and make full use of its
functions, both for your comfort and safety.
CONTENTS
Description of the unit . . . . . . . . . . . . . . . . . . . . . . . . . . . . . . . . . . . p. 3
Package . . . . . . . . . . . . . . . . . p. 3
Appliance description . . . . . . . . . . p. 3
Specifications . . . . . . . . . . . . . . p. 3
Operating principle. . . . . . . . . . . . p. 3
Installation instructions . . . . . . . . . . . . . . . . . . . . . . . . . . . . . . . . . . p. 4
Warning to the user . . . . . . . . . . . p. 4
Chimney connector . . . . . . . . . . . p. 5
Location of the unit . . . . . . . . . . . p. 4
Mounting the tray . . . . . . . . . . . . p. 6
Chimney . . . . . . . . . . . . . . . . . p. 5
Pre-utilisation check . . . . . . . . . . . p. 6
Mounting the flue collar . . . . . . . . . p. 5
Maintenance of the Chimney . . . . . . p. 6
Instructions for user . . . . . . . . . . . . . . . . . . . . . . . . . . . . . . . . . . . . p. 7
Fuel . . . . . . . . . . . . . . . . . . . . p. 7
Maintenance of the Chimney . . . . . . p. 8
Lighting . . . . . . . . . . . . . . . . . . p. 7
Maintenance of the stove . . . . . . . . p. 8
Operating procedure . . . . . . . . . . . p. 8
Safety advice . . . . . . . . . . . . . . . p. 8
De-ashing . . . . . . . . . . . . . . . . p. 8
Trouble shooting . . . . . . . . . . . . . p. 9
Spare parts . . . . . . . . . . . . . . . . . . . . . . . . . . . . . . . . . . . . . . . . . p. 10
2
Technical manual “1146”
“ARDENNES” - model 134 13 15
Description of the unit
This appliance is meant to burn wood safely
WARNING
Incorrectly installed, this appliance can be dangerous and possibly cause serious accidents.
We recommend that you engage the services of a professional engineer for its installation
and the regular maintenance requirements.
1 Description of the unit
1.1 Package
1.3 Appliance description
• 1 package : Stove
Wood stove - in conformity with EN 13240
1.2 Specifications
• intermittent-burning heating appliance.
• Detachable flue spigot for rear or top chimney
connection.
Model. . . . . . . . . . . . . . . . . . .
Nominal Heat Output . . . . . . . . . kW
Hearth dimensions
(combustion chamber)
- Width . . . . . . . . . . . . . . . . mm
- Depth . . . . . . . . . . . . . . . . mm
- Height . . . . . . . . . . . . . . . . mm
Logs dimensions
- Depth maxi . . . . . . . . . . . . . cm
Ash pan capacity . . . . . . . . . . litre
Weight . . . . . . . . . . . . . . . . . kg
Heated volume . . . . . . . . . . . . m3
Chimney draught required . . . . . . Pa
Flue mass gas flow . . . . . . . . . . g/s
Flue mean gas temperature . . . . . C°
Efficiency . . . . . . . . . . . . . . . . %
Co (13% O2) . . . . . . . . . . . . . . %
134 13 15
11
• Front loading door fitted with large refractory glass
panel.
• Adjustable air control for controlling the burning rate.
• Large ash-pan.
520
304
265
Long lasting burning cycle : When the appliance is
loaded with à 11,5 kg of dry wood (primary air inlet
closed, rep. B, fig. 5, page 7) with a 6 Pa draught, it runs
for 11 hours.
50
5
140
450
11
13,7
273
73,3
0,16
1.4 Operating principle
The “ARDENNES” is designed for operating only with
the door closed. Heat is mainly diffused by radiation,
through the window and body of the appliance.
Note : The indicated performances result from tests carried out in accordance with standard EN 13240 with logs of
35 cm and a draught of 11 Pa, fuel mass of 4,9 kg and air inlet open at 50 %.
4 3 2
6 5 2
4 1
Ø
1 2 5
Ø
1 3 9
7 1 2
6 1 4
6 8 1
5 2 4
Figure 1 - Dimensions in mm
Technical manual “1146”
3
“ARDENNES” - model 134 13 15
Installation instructions
2 Installation instructions
2.1 Warning to the user
All the local and national regulations, and in
particular those relating to national and European
standards, must be observed when installing the
appliance.
An incorrectly installed heating appliance can
cause serious accidents (chimney fires, burning of
plastic insulation materials, in partition walls, etc...).
The insulation of both the appliance and the
exhaust gas pipe has to be reinforced and done
a c c o r d i n g t o t h e Sta n d a r d s a n d t h e B u i l d i n g
Regulations for safety reasons. The installation must be
carried out according to the Standards and the Building
Regulations.
Failure to respect the mounting instructions leads to
engage the responsibility of the one doing the
installation.
The manufacturer’s responsibility shall be limited to the
supply of the appliance.
2.2 Location of the unit
Ventilation : For satisfactory appliance operation with
a natural draught, check that sufficient air for
combustion is available in the room. In houses
equipped with one VMC (controlled mechanical
ventilation), this one aspire and renew the ambient air ;
in this case, the residence is under slight low pressure
and a non-sealable external air intake must be
installed in addition to the chimney itself, at least 50 cm²
in section.
Position of the unit : For new installations, select a
central position within the house, to provide a good heat
distribution around the building. The heat distribution
towards the other rooms will be made through the
communicating doors. These rooms must be at low
pressure or fitted with non-adjustable air registers,
placed so that they cannot be obstructed, to
encourage circulation of the hot air.
Floor and walls :
Make sure there are
not combustible or
covered
with
combustible material.
Otherwise it must
necessary to install a
non-combustible
protection. There must
be a clearance of at
least 150 mm at each
side of the appliance
and at the back of the
appliance from a
1 5 0
non-combustible wall.
This distance must be
extended
to
a
minimum clearance of
400 mm from any
combustible materials.
This measurement
1 5 0
may be reduced to a
minimum gap of 50 mm
when the non-combustible wall is at least 200 mm thick.
There should ideally be a minimum gap of 300 mm at
the right hand side of the stove, this will ensure the best
possible access to the loading door. When using a
single wall flue pipe, there must be a clearance (A) of at
least three times its diameter (B) from any combustible
materials. If the appliance has to be located in an
opening, this distance must be extended to a minimum
clearance (A) of 450 mm from the pipe or the stove body
to any combustible materials.
Hearth : The appliance must stand on a fireproof
hearth.
It is possible to provide a hearth made of non
combusible board/sheet material or tiles at least 12 mm
thick (C).
Constructional hearths should be constructed of solid
non combustible material at least 125 mm thick
(including the thickness of any non combustible floor
under the hearth).
The hearth must protrude at least 300 mm in front of the
stove and 150 mm each side.
Hearths are provided to prevent combustion appliances
setting fire to the building fabric and furnishings and to
limit the risk of people being accidentally burnt.
Therefore, they should be separated from adjacent
combustible materials and should be satisfactorily
delineated from surrounding floor finishes (carpets
etc...) as follows.
Combustible material should not be placed under a
constructional hearth for a solid fuel appliance within a
vertical distance of 250 mm from the upper surface of
the hearth, unless there is an airspace of at least 50 mm
between the combustible material and the underside of
the hearth.
Where a superimposed hearth has been placed onto a
constructional hearth, combustible material placed on
or besid the constructional hearth should not extend
under the superimposed hearth by more than 25 mm or
closer to the appliance than 150 mm.
B
A
A
1 5 0
1 5 0
C
1 5 0
3 0 0
Figure 2 - Minimum clearances
4
Technical manual “1146”
“ARDENNES” - model 134 13 15
180°
Installation instructions
A
Figure 3 - Mounting the flue collar
Figure 4 - Mounting the tray
Ensure that the hearth (superimposed or
constructional) is suitably delineated to discourage
combustible floor finishes from being laid too close to
the appliance, by marking the edges or providing a
change of level.
Position the appliance on the hearth such that
combustible marerial cannot be laid closer to the base
of the appliance than :
(a) At the front, 300 mm if the appliance is an open
fire or stove which an, when opened, be operated as
an open fire, or 225 mm in any other case.
(b) At the back and sides, 150 mm or in accordance with
the recommendations below which relate to distance
from hearth to walls. Please refer to section J of the
Building regulations.
When using a single wall flue pipe, there must be a
clearance (A) of at least 450 mm from any combustible
materials (timber mantel, girder).
anti-down draught cowl must be installed on the
chimney or the chimney height must be increased.
- If the chimney draught is excessive or irregular, a
draught stabilizer (barometric damper) must be
installed to the connector pipe it must be visible and
accessible.
Chimney to be built / New flue : The chimney must
comply with Current Building Regulations. If in doubt,
consult your Dealer or local Building Inspector.
- The appliance must not support the weight of the flue.
- It must be distant from any combustible material
(walls, cross members).
- It must permit an easy sweeping.
2.3 Chimney
Existing flue : The chimney must comply with Current
Building Regulations. If in doubt, consult your Dealer or
local Building Inspector.
- The flue must be in good condition and must provide
sufficient draught (refer to technical details p. 3).
- The flue must be suitable for the installation of fuel
burning appliances, otherwise it must necessary to
install a tubing.
- The flue must be clean. It should be swept to remove
soot and dislodge tar deposits.
- The flue must be well insulated. If the flue inner wall
surfaces are cold, a good thermal draw is impossible
causing condensation problems (tar formation etc...)
to occur.
- The flue must be watertight.
- The flue must not be shared with other appliances.
- The chimney must have a constant cross section.
- When the cross-section of the chimney is too large, it
has difficulties in obtaining a good draught.
- The chimney must be at least 4.5 m (15 ft) high and be
at 40 cm above the ridge of the roof and 8 meters away
from any construction.
- In case of a flat roof or when the roof gradient is lower
than 15°, the stack must be 1,2 m (4 feet) high at least.
- The capping must not restrain the draught.
- If the chimney has any down draught tendency, due to
its position in relation to nearby obstacles, then an
Technical manual “1146”
2.4 Mounting the flue collar
The stove is supplied with a connection flue spigot with
an inner diameter of 125 mm and an outer diameter of
139 mm. The same smoke outlet can be used to install a
top or rear flue. All you have to do is remove the
2 screws and turn the adapter 180 degrees (figure 3).
Ensure that the seal is fitted correctly.
2.5 Chimney connector
- The connection to flue must be carried out according
to local building regulations.
- The appliance must be installed as close as possible
to the chimney.
- The connector pipe must be approved for installation
with combustion products (either 24 ga. black painted
or blued steel or 316 grade 20 ga. Stainless steel or
1 mm vitreous enamelled steel).
- Pipe diameter must not be less than the appliance
spigot diameter. If there is no other solution, the
reduction can not be more than one diameter lower
than the flue spigot and be situated as distant as
possible from the flue connection of the appliance.
- The connection can be either vertical or horizontal. For
horizontal connections, avoid right angle bends.
- The join between the connection pipe and the
stovepipe, and the flue, must be leak tight.
- For the premises equipped with a mechanical
controlled ventilation, the airtightness has to prevent
the exhauster drawing out the smokes from the
exhaust gas pipe.
- The connection pipe and any draught stabiliser must
have access for cleaning.
5
“ARDENNES” - model 134 13 15
Installation instructions
2.6 Mounting the tray
2.8 Maintenance of the Chimney
To avoid damage during transport, the tray has been
stored behind the main door (figure 4).
Centre the tray on tab “A” and lower into place.
Very important : In order to avoid any incident
(chimney fire, etc...), maintenance tasks must be
carried out regularly. If the appliance is regularly used,
the chimney should be swept several times per year,
together with the stovepipe connection section.
If the chimney catches fire, you must cut off the flue
draught, close the doors and windows, hatches and
keys, stop up the connection hole with wet cloths
and call the Fire Brigade.
2.7 Pre-utilisation check
- Check that the seals of the smoke-line are in good
condition. Check that the door closes correctly. Check
that the glass is not damaged. Check that the smoke
passages are not obstructed by packaging or
removable parts. Check that all removable parts are
correctly installed.
Note : If it acts of a ceramics braid, it is consumable and
thus brought to be changed by the user.
6
DO NOT OPEN THE DOOR OF THE APPLIANCE
(OR AIR INLET) UNDER ANY CIRCUMSTANCES
Technical manual “1146”
“ARDENNES” - model 134 13 15
Instructions for user
3 Instructions for user
The manufacturer will not be responsible for damages
on parts of the appliance due to the use of prohibited
fuel or due to an alteration of the appliance or its
installation. Only use replacement parts supplied
by the manufacturer.
All the local and national regulations, and in
particular those relating to national and European
standards, must be observed when using the
appliance.
Don’t run the stove in mild weather with coal ! Under
certain circumstances (e.g. fog and repeated thaw) the
chimney will not draw sufficiently well and thus be at the
origin of asphyxia.
3.1 Fuel
This appliance is not an incinerator.
Use hard wood logs, which have been cut for at least
two years and stored, under a ventilated shelter.
Use hardwood that have a higher calorific value per cu
metre (Yoke-elm, oak, ash, maple, birch, elm, beech,
etc...). Large logs must be split and cut to an useful
length (Humidity < 20 %), before being stored in a
sheltered and ventilated place.
• Recommended fuel
Firewood : Hornbeam
• Suitable fuel
Firewood : Oak, ash, maple, birch, elm, beech, etc...
• Prohibited fuel
“Green wood” ; green or damp wood reduces the
appliance efficiency and soils the glass, the internal
walls and the flue (soot, tar, etc...).
“Recovered wood” ; railway sleepers, telegraph poles,
offcuts of plywood or chip board, pallets, etc... Burning
treated wood quickly clogs the flue ways (soot, tar,
etc...), pollutes the environment (pollution and smell,
etc...) and cause the fire to burn too quickly and
overheat.
F
Green wood and recovered wood can cause a chimney fire.
3.2 Lighting
Figure 5
- Open the air regulation flap (rep. B1).
- Open the main doors.
- Place on the grate on scrunched up paper, some
brushwood and some hardwood of small diameter.
- Set light to the paper and close the glass doors.
- When the wood is well lit partially, load the appliance
without excess and close the main doors (rep. A).
At the first lighting, the fire must be progressively
increased to allow the various parts to expand normally
and to dry up.
When the fire is lit for the first time, the appliance may
give off fumes from the new paint. This is normal but
ensure the room is well ventilated during the first few
hours operation.
Any form of coal and fuel oil !
A : Opening/closing the
main door
B : Draught control
(primary air inlet)
B1 = open
B2 = close
C : Tool
Figure 5 - Operating devices
Technical manual “1146”
7
“ARDENNES” - model 134 13 15
Instructions for user
3.3 Operating procedure
3.6 Maintenance of the stove
The appliance must function all door properly
closed. The burning rate can be adjusted by the air
control flap (rep. B).
Experience will show you which settings are best for
your situation.
The airwash system works with the air control flap.
When the air control flap is full open the system works at
its strongest efficiency.
The more closed down the control flap is, the less
effective the airwash will be (when shut down
completely, the airwash system can not function).
- The appliance must be cleaned regularly, together
• Loading the fuel :
- The door should be opened slowly, avoiding a sudden
rush of intake air, so that smoke does not escape into
the room.
- The minimum reloading interval for nominal heat
output is 1.2 hours.
- The logs must be placed on the glowing embers.
- For a briskly burning fire, there should always be at
least two logs in the fire. The fire will burn better if
there are several logs.
- For a slower burning fire (for example, at night), select
larger logs.
- After loading the firebox, close the main doors (rep. A,
page 7).
3.4 De-ashing
- Ashes must be removed regularly.
- Ashes must never be allowed to pile up to the grate.
The grate would not be cool down and could rapidly be
damaged.
- Empty the ashes when the appliance is cold.
- Pick up the ash pan using a tool.
- Empty the ashes carefully with regard to the live
embers.
3.5 Maintenance of the Chimney
Very important : In order to avoid any incident
(chimney fire, etc...), maintenance tasks must be
carried out regularly. If the appliance is regularly used,
the chimney should be swept several times per year,
together with the stovepipe connection section.
If the chimney catches fire, you must cut off the flue
draught, close the doors and windows, hatches and
keys, stop up the connection hole with wet cloths
and call the Fire Brigade.
with the connecting pipe and the flue pipe.
- Open the door and remove all deposits in the firebox
and clean the removable fire grate.
- Cleaning of the glass door can be done with a soft
cloth dampened with water and vinegar or potassium ;
this must be done when the appliance is cold ; then
rinse with clear water. Do not use abrasive cleaners.
- The “vitroceramic” glass will resists to temperatures of
up to 750 C. Should the glass break due to misuse, it
must be replaced by the manufacturers own product.
- Check that there are no obstructions before relighting
after a long period of disuse.
- The appliance must not be used with a flue serving
several appliances.
- To maintain the grates ventilation free of any
obstruction.
- For enamelled finishes, the stove body can be cleaned
using a soft cloth either dry, or slightly damp with a
very mild detergent.
- The baffle plates should be removed regularly and any
ash or deposits cleaned away. Ashes must not be
allowed to build up.
- The door rope seals should be checked annually and
replaced when required.
NEVER CLEAN ENAMEL SURFACES WHILST THE
STOVE IS HOT.
The cast iron body panels of non-enamelled stoves can
be cleaned with a proprietary stove cleaner or
re-sprayed / touched up using a stove paint. These
products are available from your Franco Belge Dealer.
3.7 Safety advice
This appliance produces heat and may cause severe
burns if touched.
The stove may still be HOT even when the fire has burnt
out.
KEEP CHILDREN AWAY.
DO NOT OPEN THE DOOR OF THE APPLIANCE
(OR AIR INLET) UNDER ANY CIRCUMSTANCES
Chimney condition should be checked at least once per
year by a professional engineer.
8
Technical manual “1146”
“ARDENNES” - model 134 13 15
Instructions for user
3.8 Trouble shooting
þ : This sign means that you should ask
for a qualified engineer to do the work.
Situation
Probable causes
- Corrective action
Fire difficult to start. Fire goes
out.
Wood green… or too damp
- Use hard wood logs, which have been cut for at least
two years and stored, under a ventilated shelter.
Logs are too big
- To light the fire, use small, very dry twigs. To maintain
the fire, use split logs.
Poor quality wood
- Use hardwood that have a higher calorific value per cu
metre (Yoke-elm, oak, ash, maple, birch, elm, beech,
etc...).
Not enough primary air
- Open air control.
- Open the outside fresh air inlet grid.
Insufficient draught
þ
- Check that the flue is not obstructed, sweep it if
necessary.
- Seek advice from a chimney specialist.
Fire burns too quickly.
Too much draught
- Ensure that the lighting flap is closed (fig. 5, p. 7).
- Partially close the air control.
Excessive draught
þ
Poor quality wood
- Install a draught stabiliser to the connector pipe.
- Do not continuously burn small wood, sticks, bundles,
carpentry offcuts (plywood, pallets), etc...
Smokes when lighting up.
Smokes while burning.
Flue duct is cold
- Burn paper and kindling wood to increase heat.
Room is in decompression
(negative pressure)
- In houses equipped with mechanical ventilation, partly
Insufficient draught
open a window until the fire is well established.
þ
- Seek advice from a chimney specialist.
- Check that the flue is not obstructed, sweep it if
necessary.
Low heat output.
Down draught
þ
- Install an anti-down draught cowl.
Room is in decompression
(negative pressure)
þ
- In houses equipped with mechanical ventilation, an
outside air intake must be installed for the chimney.
Poor quality wood
- Use the recommended fuel.
Poor mixing of the convection air
- Check the air flow system (air inlet, piping, air outlet).
- Check that the next rooms are equiped with ventilation
grids to help out the hot air circulation.
Technical manual “1146”
9
“ARDENNES” - model 134 13 15
Spare parts
4 Spare parts
When ordering spare parts, specify the stove type and serial number, including the colour index (on the
guarantee or identification plate), the name of the part and the part number.
Example : Wood stove “ARDENNES”, model 134 13 15, the colour index Y, top plate 352165 EF.
Y = 134 13 15 Y
L = 134 13 15 L
N°
Code
1
2
3
4
5
6
7
7
7
7
7
7
7
7
8
9
9
9
9
9
9
9
9
10
10
10
10
10
10
10
10
11
12
13
14
15
15
15
15
15
15
15
15
16
16
16
16
16
16
16
16
17
18
19
20
21
21
21
207315
222575
236135
259015
259037
270414
300132
300132
300132
300134
300132
300132
300132
300132
300491
301172
301172
301172
301172
301172
301172
301172
301172
303860
303860
303860
303860
303860
303860
303860
303860
305016
305214
306285
309233
310734
310734
310734
310734
310734
310734
310734
310734
310830
310830
310830
310830
310830
310830
310830
310830
315614
319738
322717
326602
327905
327905
327905
10
B = 134 13 15 B
P = 134 13 15 P
E = 134 13 15 E
C = 134 13 15 C
N = 134 13 15 N
Q = 134 13 15 Q
Description . . . . . . . . . . . . . . . . . Y . . L . . B . . P . . E . . C . . N . . . . Q . . Qty
77
EF
MK
RH
RJ
RP
EP
ER
EF
77
EF
MK
RH
RJ
RP
EP
ER
77
EF
MK
RH
RJ
RP
EP
ER
EB
EB
EF
EB
77
EF
MK
RH
RJ
RP
EP
ER
77
EF
MK
RH
RJ
RP
EP
ER
EB
EB
EB
EB
77
EF
MK
Back panel . . . . . . . . . . . . . . . . . . Y. . . L. . . B . . P . . E . . C . . N . . . . Q
Flue baffle . . . . . . . . . . . . . . . . . . Y. . . L. . . B . . P . . E . . C . . N . . . . Q
Sealing plate . . . . . . . . . . . . . . . . . Y. . . L. . . B . . P . . E . . C . . N . . . . Q
Fixing plate . . . . . . . . . . . . . . . . . . Y. . . L. . . B . . P . . E . . C . . N . . . . Q
Fixing plate . . . . . . . . . . . . . . . . . . Y. . . L. . . B . . P . . E . . C . . N . . . . Q
Air control flap . . . . . . . . . . . . . . . . Y. . . L. . . B . . P . . E . . C . . N . . . . Q
Leg . . . . . . . . . . . . . . . . . . . . . . . . . . L . . . . . . . . . . . . . . . . . . . . . . . .
Leg . . . . . . . . . . . . . . . . . . . . . . Y . . . . . . . . . . . . . . . . . . . . . . . . . . . .
Leg . . . . . . . . . . . . . . . . . . . . . . . . . . . . . . . . . . . . . . . . . C . . . . . . . . .
Leg . . . . . . . . . . . . . . . . . . . . . . . . . . . . . . . . . P . . . . . . . . . . . . . . . .
Leg. . . . . . . . . . . . . . . . . . . . . . . . . . . . . . B . . . . . . . . . . . . . . . . . . . .
Leg . . . . . . . . . . . . . . . . . . . . . . . . . . . . . . . . . . . . . E . . . . . . . . . . . . .
Leg. . . . . . . . . . . . . . . . . . . . . . . . . . . . . . . . . . . . . . . . . . . . . N. . . . . .
Leg . . . . . . . . . . . . . . . . . . . . . . . . . . . . . . . . . . . . . . . . . . . . . . . . . Q
Base . . . . . . . . . . . . . . . . . . . . . Y. . . L. . . B . . P . . E . . C . . N . . . . Q
Ash pan door . . . . . . . . . . . . . . . . . . . . L . . . . . . . . . . . . . . . . . . . . . . . .
Ash pan door . . . . . . . . . . . . . . . . . Y . . . . . . . . . . . . . . . . . . . . . . . . . . . .
Ash pan door. . . . . . . . . . . . . . . . . . . . . . . . . . . . . . . . . . . . C . . . . . . . . .
Ash pan door . . . . . . . . . . . . . . . . . . . . . . . . . . . . P . . . . . . . . . . . . . . . .
Ash pan door . . . . . . . . . . . . . . . . . . . . . . . . B . . . . . . . . . . . . . . . . . . . .
Ash pan door . . . . . . . . . . . . . . . . . . . . . . . . . . . . . . . . E . . . . . . . . . . . . .
Ash pan door . . . . . . . . . . . . . . . . . . . . . . . . . . . . . . . . . . . . . . . N. . . . . .
Ash pan door . . . . . . . . . . . . . . . . . . . . . . . . . . . . . . . . . . . . . . . . . . . . Q
Flue collar . . . . . . . . . . . . . . . . . . . . . . L . . . . . . . . . . . . . . . . . . . . . . . .
Flue collar . . . . . . . . . . . . . . . . . . Y . . . . . . . . . . . . . . . . . . . . . . . . . . . .
Flue collar . . . . . . . . . . . . . . . . . . . . . . . . . . . . . . . . . . . . . C . . . . . . . . .
Flue collar . . . . . . . . . . . . . . . . . . . . . . . . . . . . . . P . . . . . . . . . . . . . . . .
Flue collar . . . . . . . . . . . . . . . . . . . . . . . . . . B . . . . . . . . . . . . . . . . . . . .
Flue collar . . . . . . . . . . . . . . . . . . . . . . . . . . . . . . . . . E . . . . . . . . . . . . .
Flue collar . . . . . . . . . . . . . . . . . . . . . . . . . . . . . . . . . . . . . . . . . N. . . . . .
Flue collar . . . . . . . . . . . . . . . . . . . . . . . . . . . . . . . . . . . . . . . . . . . . . Q
Firebrick . . . . . . . . . . . . . . . . . . . Y. . . L. . . B . . P . . E . . C . . N . . . . Q
Firebrick . . . . . . . . . . . . . . . . . . . Y. . . L. . . B . . P . . E . . C . . N . . . . Q
Back wall . . . . . . . . . . . . . . . . . . . Y. . . L. . . B . . P . . E . . C . . N . . . . Q
Grate . . . . . . . . . . . . . . . . . . . . . Y. . . L. . . B . . P . . E . . C . . N . . . . Q
R. side panel . . . . . . . . . . . . . . . . . . . . . L . . . . . . . . . . . . . . . . . . . . . . . .
R. side panel . . . . . . . . . . . . . . . . . Y . . . . . . . . . . . . . . . . . . . . . . . . . . . .
R. side panel . . . . . . . . . . . . . . . . . . . . . . . . . . . . . . . . . . . . C . . . . . . . . .
R. side panel . . . . . . . . . . . . . . . . . . . . . . . . . . . . P . . . . . . . . . . . . . . . .
R. side panel . . . . . . . . . . . . . . . . . . . . . . . . B . . . . . . . . . . . . . . . . . . . .
R. side panel . . . . . . . . . . . . . . . . . . . . . . . . . . . . . . . . E . . . . . . . . . . . . .
R. side panel . . . . . . . . . . . . . . . . . . . . . . . . . . . . . . . . . . . . . . . N. . . . . .
R. side panel . . . . . . . . . . . . . . . . . . . . . . . . . . . . . . . . . . . . . . . . . . . . Q
L. side panel . . . . . . . . . . . . . . . . . . . . . L . . . . . . . . . . . . . . . . . . . . . . . .
L. side panel . . . . . . . . . . . . . . . . . Y . . . . . . . . . . . . . . . . . . . . . . . . . . . .
L. side panel . . . . . . . . . . . . . . . . . . . . . . . . . . . . . . . . . . . . C . . . . . . . . .
L. side panel . . . . . . . . . . . . . . . . . . . . . . . . . . . . P . . . . . . . . . . . . . . . .
L. side panel. . . . . . . . . . . . . . . . . . . . . . . . . B . . . . . . . . . . . . . . . . . . . .
L. side panel . . . . . . . . . . . . . . . . . . . . . . . . . . . . E . . . . . . . . . . . . . . . .
L. side panel. . . . . . . . . . . . . . . . . . . . . . . . . . . . . . . . . . . . . . . . N. . . . . .
L. side panel . . . . . . . . . . . . . . . . . . . . . . . . . . . . . . . . . . . . . . . . . . . . Q
Air duct . . . . . . . . . . . . . . . . . . . . Y. . . L. . . B . . P . . E . . C . . N . . . . Q
Grate support . . . . . . . . . . . . . . . . Y. . . L. . . B . . P . . E . . C . . N . . . . Q
Supplementary support . . . . . . . . . . . Y. . . L. . . B . . P . . E . . C . . N . . . . Q
Flue baffle . . . . . . . . . . . . . . . . . . Y. . . L. . . B . . P . . E . . C . . N . . . . Q
Ash pan guide . . . . . . . . . . . . . . . . . . . . L . . . . . . . . . . . . . . . . . . . . . . . .
Ash pan guide . . . . . . . . . . . . . . . . Y . . . . . . . . . . . . . . . . . . . . . . . . . . . .
Ash pan guide . . . . . . . . . . . . . . . . . . . . . . . . . . . . . . . . . . . C . . . . . . . . .
.
.
.
.
.
.
.
.
.
.
.
.
.
.
.
.
.
.
.
.
.
.
.
.
.
.
.
.
.
.
.
.
.
.
.
.
.
.
.
.
.
.
.
.
.
.
.
.
.
.
.
.
.
.
.
.
.
.
.
.
.
.
.
.
.
.
.
.
.
.
.
.
.
.
.
.
.
.
.
.
.
.
.
.
.
.
.
.
.
.
.
.
.
.
.
.
.
.
.
.
.
.
.
.
.
.
.
.
.
.
.
.
.
.
.
.
01
01
01
08
02
01
04
04
04
04
04
04
04
04
01
01
01
01
01
01
01
01
01
01
01
01
01
01
01
01
01
01
01
01
01
01
01
01
01
01
01
01
01
01
01
01
01
01
01
01
01
01
01
01
01
01
01
01
Technical manual “1146”
“ARDENNES” - model 134 13 15
Spare parts
4 8
1 0
2 3
3 6
1 6
4 8
5 0
1 1
1
2 8
2 0
1 3
2
2 2
5
4 7
1 4
2 7
5 1
1 9
1 8
2 9
1 2
5 5
5 5
6
2 6
4 2
4 5
1 7
4 0
4 1
4 9
4
3 9
3 0
2 1
4 7
3
1 5
4
2 4
4 5
5 4
4 9
4 3
8
4 6
3 8
5 2
3 3
2 5
4 1
4 0
4 2
3 1
3 7
4 3
4 4
3 2
4 6
9
7
5 3
3 4
4 3
Figure 6 - Spare parts view
Technical manual “1146”
11
“ARDENNES” - model 134 13 15
Y = 134 13 15 Y
L = 134 13 15 L
N°
Code
21
21
21
21
21
22
23
24
25
25
25
25
25
25
25
25
26
26
26
26
26
26
26
26
27
28
28
28
28
28
28
28
28
29
29
29
29
29
29
29
29
30
31
32
33
34
36
37
38
39
40
41
42
43
44
45
46
47
48
49
50
51
52
53
53
53
327905
327905
327905
327905
327905
330022
331001
331700
331800
331800
331800
331800
331800
331800
331800
331800
331900
331900
331900
331900
331900
331900
331900
331900
332003
352165
352165
352165
352165
352165
352165
352165
352165
359806
359806
359806
359806
359806
359806
359806
359806
624045
158626
101063
101062
101057
105006
134705
134711
179624
188829
181632
110404
189825
808001
181634
181633
181625
142316
142881
269501
269449
161039
988920
988922
988924
12
Spare parts
B = 134 13 15 B
P = 134 13 15 P
E = 134 13 15 E
C = 134 13 15 C
N = 134 13 15 N
Q = 134 13 15 Q
Description . . . . . . . . . Type . . . . . Y . . L . . B . . P . . E . . C . . N . . . . Q . . Qty
RH
RJ
RP
EP
ER
EB
EF
EF
77
EF
MK
RH
RJ
RP
EP
Er
77
EF
MK
RH
RJ
RP
EP
ER
EB
77
EF
MK
RH
RJ
RP
EP
ER
77
EF
MK
RH
RJ
RP
EP
ER
Ash pan guide . . . . . . . . . . . . . . . . . . . . . . . . . . . P . . . . . . . . . . . . . . . . . . 01
Ash pan guide . . . . . . . . . . . . . . . . . . . . . . . . B . . . . . . . . . . . . . . . . . . . . . . 01
Ash pan guide . . . . . . . . . . . . . . . . . . . . . . . . . . . . . . . E . . . . . . . . . . . . . . . 01
Ash pan guide . . . . . . . . . . . . . . . . . . . . . . . . . . . . . . . . . . . . . . . N. . . . . . . . 01
Ash pan guide . . . . . . . . . . . . . . . . . . . . . . . . . . . . . . . . . . . . . . . . . . . Q . . 01
Hearth plate . . . . . . . . . . . . . . . . . Y. . . L. . . B . . P . . E . . C . . N . . . . Q . . 01
Adapter . . . . . . . . . . . . . . . . . . . . Y. . . L. . . B . . P . . E . . C . . N . . . . Q . . 01
Support . . . . . . . . . . . . . . . . . . . . Y. . . L. . . B . . P . . E . . C . . N . . . . Q . . 01
Right main door . . . . . . . . . . . . . . . . . . . L . . . . . . . . . . . . . . . . . . . . . . . . . . 01
Right main door . . . . . . . . . . . . . . . Y . . . . . . . . . . . . . . . . . . . . . . . . . . . . . . 01
Right main door . . . . . . . . . . . . . . . . . . . . . . . . . . . . . . . . . . C . . . . . . . . . . . 01
Right main door. . . . . . . . . . . . . . . . . . . . . . . . . . . P . . . . . . . . . . . . . . . . . . 01
Right main door . . . . . . . . . . . . . . . . . . . . . . . B . . . . . . . . . . . . . . . . . . . . . . 01
Right main door . . . . . . . . . . . . . . . . . . . . . . . . . . . . . . E . . . . . . . . . . . . . . . 01
Right main door . . . . . . . . . . . . . . . . . . . . . . . . . . . . . . . . . . . . . . N. . . . . . . . 01
Right main door . . . . . . . . . . . . . . . . . . . . . . . . . . . . . . . . . . . . . . . . . . . q . . . 01
Left main door . . . . . . . . . . . . . . . . . . . . L . . . . . . . . . . . . . . . . . . . . . . . . . . 01
Left main door . . . . . . . . . . . . . . . . Y . . . . . . . . . . . . . . . . . . . . . . . . . . . . . . 01
Left main door . . . . . . . . . . . . . . . . . . . . . . . . . . . . . . . . . . . C . . . . . . . . . . . 01
Left main door . . . . . . . . . . . . . . . . . . . . . . . . . . . P . . . . . . . . . . . . . . . . . . 01
Left main door . . . . . . . . . . . . . . . . . . . . . . . . B . . . . . . . . . . . . . . . . . . . . . . 01
Left main door . . . . . . . . . . . . . . . . . . . . . . . . . . . . . . . E . . . . . . . . . . . . . . . 01
Left main door . . . . . . . . . . . . . . . . . . . . . . . . . . . . . . . . . . . . . . . N. . . . . . . . 01
Left main door . . . . . . . . . . . . . . . . . . . . . . . . . . . . . . . . . . . . . . . . . . . Q . . 01
Air duct . . . . . . . . . . . . . . . . . . . . Y. . . L. . . B . . P . . E . . C . . N . . . . Q . . 01
Top plate . . . . . . . . . . . . . . . . . . . . . . . L . . . . . . . . . . . . . . . . . . . . . . . . . . 01
Top plate . . . . . . . . . . . . . . . . . . . Y . . . . . . . . . . . . . . . . . . . . . . . . . . . . . . 01
Top plate . . . . . . . . . . . . . . . . . . . . . . . . . . . . . . . . . . . . . . C . . . . . . . . . . . 01
Top plate . . . . . . . . . . . . . . . . . . . . . . . . . . . . . . P . . . . . . . . . . . . . . . . . . 01
Top plate . . . . . . . . . . . . . . . . . . . . . . . . . . B . . . . . . . . . . . . . . . . . . . . . . 01
Top plate . . . . . . . . . . . . . . . . . . . . . . . . . . . . . . . . . . E . . . . . . . . . . . . . . . 01
Top plate . . . . . . . . . . . . . . . . . . . . . . . . . . . . . . . . . . . . . . . . . N. . . . . . . . 01
Top plate . . . . . . . . . . . . . . . . . . . . . . . . . . . . . . . . . . . . . . . . . . . . . . Q . . 01
Front plate . . . . . . . . . . . . . . . . . . . . . . L . . . . . . . . . . . . . . . . . . . . . . . . . . 01
Front plate . . . . . . . . . . . . . . . . . . Y . . . . . . . . . . . . . . . . . . . . . . . . . . . . . . 01
Front plate . . . . . . . . . . . . . . . . . . . . . . . . . . . . . . . . . . . . . C . . . . . . . . . . . 01
Front plate . . . . . . . . . . . . . . . . . . . . . . . . . . . . . P . . . . . . . . . . . . . . . . . . 01
Front plate . . . . . . . . . . . . . . . . . . . . . . . . . . B . . . . . . . . . . . . . . . . . . . . . . 01
Front plate . . . . . . . . . . . . . . . . . . . . . . . . . . . . . . . . . E . . . . . . . . . . . . . . . 01
Front plate . . . . . . . . . . . . . . . . . . . . . . . . . . . . . . . . . . . . . . . . . N. . . . . . . . 01
Front plate . . . . . . . . . . . . . . . . . . . . . . . . . . . . . . . . . . . . . . . . . . . . . Q . . 01
Ash pan . . . . . . . . . . . . . . . . . . . Y. . . L. . . B . . P . . E . . C . . N . . . . Q . . 01
Handle . . . . . . . . . . . . . . . . . . . . Y. . . L. . . B . . P . . E . . C . . N . . . . Q . . 01
Axle . . . . . . . . . . . . . . . . . . . . . . Y. . . L. . . B . . P . . E . . C . . N . . . . Q . . 01
Axle . . . . . . . . . . . . . . . . . . . . . . Y. . . L. . . B . . P . . E . . C . . N . . . . Q . . 01
Axle . . . . . . . . . . . . . . . . . . . . . . Y. . . L. . . B . . P . . E . . C . . N . . . . Q . . 01
Gasket . . . . . . . . . . . . Ø 15 . . . . . Y. . . L. . . B . . P . . E . . C . . N . . . . Q . . 2 m
Pin . . . . . . . . . . . . . . 6x45 . . . . . Y. . . L. . . B . . P . . E . . C . . N . . . . Q . . 01
Pin . . . . . . . . . . . . . . 6x30 . . . . . Y. . . L. . . B . . P . . E . . C . . N . . . . Q . . 01
Regulator shaft. . . . . . . . . . . . . . . . Y. . . L. . . B . . P . . E . . C . . N . . . . Q . . 01
Refractory glass . . . . 278 X 220 X 4 . . . Y. . . L. . . B . . P . . E . . C . . N . . . . Q . . 02
Gasket . . . . . . . . . . . . Ø 6 . . . . . . Y. . . L. . . B . . P . . E . . C . . N . . . . Q . . 2 m
Hinge pin . . . . . . . . . . 6x30 . . . . . Y. . . L. . . B . . P . . E . . C . . N . . . . Q . . 04
Screw . . . . . . . . . . . . M5x6 . . . . . Y. . . L. . . B . . P . . E . . C . . N . . . . Q . . 02
ED Hand tool . . . . . . . . . . . . . . . . . . . Y. . . L. . . B . . P . . E . . C . . N . . . . Q . . 01
Gasket . . . . . . . . . . . . Ø 15 . . . . . Y. . . L. . . B . . P . . E . . C . . N . . . . Q . 1,64 m
Gasket . . . . . . . . . . . . Ø 10 . . . . . Y. . . L. . . B . . P . . E . . C . . N . . . . Q . 1,33 m
Ceramic rope . . . . . . . . Ø 7 . . . . . . Y. . . L. . . B . . P . . E . . C . . N . . . . Q . 3,16 m
Gasket . . . . . . . . . . . . 7x3 . . . . . . Y. . . L. . . B . . P . . E . . C . . N . . . . Q . . 1 m
Gasket . . . . . . . . . . . . . . . . . . . . Y. . . L. . . B . . P . . E . . C . . N . . . . Q . . 08
Deflector . . . . . . . . . . . . . . . . . . . Y. . . L. . . B . . P . . E . . C . . N . . . . Q . . 01
Deflector . . . . . . . . . . . . . . . . . . . Y. . . L. . . B . . P . . E . . C . . N . . . . Q . . 01
Touch-up paint . . . . . . . . (P) . . . . . . . . . . . . . . . . . P . . . . . . . . . . . . . . . . . . 01
Right complete door. . . . . . . . . . . . . . . . . . . . . . . . . . . . . . . . . . . . N. . . . . . . . 01
Right complete door . . . . . . . . . . . . . Y . . . . . . . . . . . . . . . . . . . . . . . . . . . . . . 01
Right complete door . . . . . . . . . . . . . . . . . L . . . . . . . . . . . . . . . . . . . . . . . . . . 01
Technical manual “1146”
“ARDENNES” - model 134 13 15
Y = 134 13 15 Y
L = 134 13 15 L
N°
Code
53
53
53
53
53
54
54
54
54
54
54
54
54
55
988926
988928
988930
988932
988994
988744
988923
988925
988927
988929
988931
988933
988995
100939
Spare parts
B = 134 13 15 B
P = 134 13 15 P
E = 134 13 15 E
C = 134 13 15 C
N = 134 13 15 N
Q = 134 13 15 Q
Description . . . . . . . . . Type . . . . . Y . . L . . B . . P . . E . . C . . N . . . . Q . . Qty
Right complete door . . . . . . . . . . . . . . . . . . . . B . . . . . . . . . . . . . . . . . . . .
Right complete door . . . . . . . . . . . . . . . . . . . . . . . . P . . . . . . . . . . . . . . . .
Right complete door . . . . . . . . . . . . . . . . . . . . . . . . . . . . E . . . . . . . . . . . . .
Right complete door . . . . . . . . . . . . . . . . . . . . . . . . . . . . . . . . C . . . . . . . . .
Right complete door . . . . . . . . . . . . . . . . . . . . . . . . . . . . . . . . . . . . . . . . Q
Left complete door . . . . . . . . . . . . . . . . . . . . . . . . . . . . . . . . . . . . N. . . . . .
Left complete door . . . . . . . . . . . . . . Y . . . . . . . . . . . . . . . . . . . . . . . . . . . .
Left complete door. . . . . . . . . . . . . . . . . . L . . . . . . . . . . . . . . . . . . . . . . . .
Left complete door . . . . . . . . . . . . . . . . . . . . . B . . . . . . . . . . . . . . . . . . . .
Left complete door . . . . . . . . . . . . . . . . . . . . . . . . . P . . . . . . . . . . . . . . . .
Left complete door . . . . . . . . . . . . . . . . . . . . . . . . . . . . . E . . . . . . . . . . . . .
Left complete door. . . . . . . . . . . . . . . . . . . . . . . . . . . . . . . . . C . . . . . . . . .
Left complete door . . . . . . . . . . . . . . . . . . . . . . . . . . . . . . . . . . . . . . . . . Q
Axle . . . . . . . . . . . . . . . . . . . . . . Y. . . L. . . B . . P . . E . . C . . N . . . . Q
.
.
.
.
.
.
.
.
.
.
.
.
.
.
.
.
.
.
.
.
.
.
.
.
.
.
.
.
01
01
01
01
01
01
01
01
01
01
01
01
01
02
Note
Technical manual “1146”
13
Guarantee certificate
Legal guarantee
The specifications, dimensions and information shown
on our documents are provided for information purposes
only and under no circumstances are binding upon the
vendor.
With the aim of constantly improving our equipment, all
modifications considered as necessary by our
departments may be made without notice.
The provisions of the present guarantee certificate are
not excluding or limiting the owner of the equipment’s
rights, concerning the legal guarantee regarding faults or
hidden vices which applies in all circumstances, in the
conditions detailed in articles 1641 and following of the
civil code and in the country in which the equipment was
purchased.
Contractual guarantee
Our equipment is guaranteed against faults and hidden
vices subject to the following conditions :
1) Installation and adjustment of the device by a professional
installer.
2) Observance of the instructions provided in our technical
documents and our installation/adjustment instructions.
3) The installation, use and maintenance of the device carried
out in conformity with the applicable standards and
legislation, and with the indications provided in the technical
instructions accompanying the device.
This guarantee covers the replacement, in our factory, of
parts recognised as being defective from the outset by
our “Guarantee Inspection Department”. Carriage and
*
labour is at the user’s cost. Moreover, if the repair or
replacement of parts covered by the guarantee is found
to be too costly vis-à-vis the price of the appliance, the
decision to replace or repair the appliance will be taken
by the vendor.
Our guarantee is for 2 (two) years for all appliances, with
the exception of closed combustion fireplace and inserts
for which our guarantee is 5 (five) years excluding the
following :
1) Indicator lights, fuses, electrical elements and fans.
2) Parts subject to wear or in contact with high temperatures
namely : soles and burner grills, bottom plates baffles, ash
pans, paintwork and surface treatments for decorative
parts. Also excluded from this guarantee are seals and
windows.
3) Any damage which may result from the use of the appliance
with a fuel other than that stipulated in our instructions.
4) Damage occurring to parts caused by elements outside the
appliance (down draught, storm damage, damp, abnormal
pressure or vacuum, heat shocks, etc...).
5) Damage to electrical parts caused by plugging in and using
the appliance on a mains system, the voltage of which
(measured at the entrance to the appliance) is 10% above
or below the nominal voltage of 220 V.
Exclusion of liability
In the case of a product manufactured at the client’s
request, under no circumstances may we, as a
subcontractor, be considered liable vis-a-vis the client or
third parties for defects arising from the installation or a
design fault with the item in question.
Name and address of the installer : _ _ _ _ _ _ _ _ _ _ _ _ _ _ _ _ _ _ _ _ _ _ _ _ _ _ _
_ _ _ _ _ _ _ _ _ _ _ _ _ _ _ _ _ _ _ _ _ _ _ _ _ _ _ _ _ _ _ _ _ _ _ _ _ _ _ _ _ _ _ _
(
Telephone : _ _ _ _ _ _ _ _ _ _ _ _ _ _ _ _ _ _ _ _ _ _ _ _ _ _ _ _ _ _ _ _ _ _ _ _ _
*
Name and address of the customer :
_ _ _ _ _ _ _ _ _ _ _ _ _ _ _ _ _ _ _ _ _ _ _ _ _ _
_ _ _ _ _ _ _ _ _ _ _ _ _ _ _ _ _ _ _ _ _ _ _ _ _ _ _ _ _ _ _ _ _ _ _ _ _ _ _ _ _ _ _ _
Date of installation :
__ __ / __ __ /__ __ __ __
Model of the appliance : q
134 13 15
Color :
qY
Serial number :
qL
qB
qP
qE
qC
qN
qQ
___ ___ ___ ___ ___ ___
• This certificate has to be completed and kept carefully.
In case of claims, send a copy of this to :
FRANCO BELGE,
Rue Orphée Variscotte, 59660 MERVILLE, FRANCE.
Gascon
Document n° 1146-14
25/03/2011
FR
NL
EN
IT
ES
Stufa a legna
EN 13240
Riferimento : 134 13 15
Potenza : 11 kW
Manuale di riferimento
che l’utilizzatore
deve conservare
per consultazione
ulteriore
Presentazione del materiale
FRANCO BELGE
Istruzioni per l’installatore
Rue Orphée Variscotte
59660 MERVILLE (FRANCE)
Istruzioni per l’utilizzatore
Téléphono : 00 333 28 43 43 22
Fax 00 333 28 43 43 60
Pezzi di ricambio
Certificato di garanzia
Materiale soggetto a modifiche
senza preavviso
Documento non contrattuale.
“GASCON” - rif. 134 13 15
FRANCO BELGE si compiace per la vostra scelta.
FRANCO BELGE garantisce la qualità dei suoi apparecchi
e si impegna a soddisfare le necessità della propria clientela.
Grazie al suo know-how di ben 80 anni,
FRANCO BELGE utilizza le tecnologie più avanzate nello studio
e nella fabbricazione di tutta la sua gamma di apparecchi da riscaldamento.
Questo documento vi aiuterà a installare e a utilizzare il vostro apparecchio
al meglio delle sue prestazioni,
per il vostro massimo confort e la vostra massima sicurezza.
SOMMARIO
Presentazione del materiale . . . . . . . . . . . . . . . . . . . . . . . . . . . . . . . . p. 3
Colli . . . . . . . . . . . . . . . . . . . . p. 3
Descrizione dell’apparecchio . . . . . . p. 3
Caratteristiche generali . . . . . . . . . p. 3
Principio di funzionamento . . . . . . . p. 3
Istruzioni per l’installatore . . . . . . . . . . . . . . . . . . . . . . . . . . . . . . . . . p. 4
Avviso all’attenzione dell’utente . . . . p. 4
Collegamento alla tubazione dei fumi . p. 5
Il locale di installazione . . . . . . . . . p. 4
Montaggio della piastra di ricupero . . . p. 6
Il condotto dei fumi . . . . . . . . . . . p. 4
Verifiche prima della messa in servizio p. 6
Montaggio dell’ugello di evacuazione . p. 5
Manutenzione del camino e pulitura . . p. 6
Istruzioni per l’utilizzatore . . . . . . . . . . . . . . . . . . . . . . . . . . . . . . . . . p. 7
Combustibile . . . . . . . . . . . . . . . p. 7
Manutenzione del camino e pulitura . . p. 8
Accensione . . . . . . . . . . . . . . . . p. 7
Manutenzione della stufa . . . . . . . . p. 8
Condotto della combustione . . . . . . p. 8
Avvertenza di sicurezza . . . . . . . . . p. 8
Disincrostazione . . . . . . . . . . . . . p. 8
Cause di cattivo funzionamento . . . . p. 9
Parti di ricambio . . . . . . . . . . . . . . . . . . . . . . . . . . . . . . . . . . . . . . p. 10
2
Manuale di riferimento “1146”
“GASCON” - rif. 134 13 15
Presentazione del materiale
Questo apparecchio è stato concepito per bruciare la legna in tutta sicurezza.
ATTENZIONE
Una errata installazione potrebbe causare gravi inconvenienti. Per l’installazione
dell’apparecchio si raccomanda di avvalersi di un professionista qualificato e per le esigenze
di manutenzione ordinaria.
1. Presentazione del materiale
1.1. Colli
1.3. Descrizione dell’apparecchio
• 1 collo : Stufa completa.
Stufa a legna, conforme alla EN 13240
1.2. Caratteristiche generali
• Apparecchio di riscaldamento a funzione intermittente.
• Ugello d’evacuazione in ghisa, smontabile per
collegamento sia in alto che sul retro.
Riferimento : . . . . . . . . . . . . . .
Potenza calorica nominale. . . . . . kW
Dimensioni del focolare
- Larghezza . . . . . . . . . . . . . mm
- Profondità. . . . . . . . . . . . . . mm
- Altezza utile . . . . . . . . . . . . mm
Dimensione dei ceppi
- Lunghezza. . . . . . . . . . . . . . cm
Capacità del ceneraio . . . . . . . . litri
Peso . . . . . . . . . . . . . . . . . . Kg
3
Volume corretto di riscaldamento . . m
Depressione ottima del camino . . . Pa
Portata massica dei fumi . . . . . . . g/s
Temperatura dei fumi . . . . . . . . . C°
Rendimento . . . . . . . . . . . . . . %
Co (13% O2) . . . . . . . . . . . . . . %
134 13 15
11
• Oblò con 2 apertura laterale, con 2 vetro in
520
304
265
• Regolazione del funzionamento tramite valvola ad
vetroceramica che permette di osservare la
combustione.
aria.
• Ceneraio di notevole capacità.
50
5
140
450
11
13,7
273
73,3
0,16
Combustione a lunga durata : L’apparecchio con una
carica da 11,5 kg di legna secca (vedi pagina 7, § 3.1.)
rallentata (aria primaria chiuse, rep. B, fig. 6, p. 7) e una
depressione di 6 Pa, funziona a tali condizioni per più di
11 ore.
1.4. Principio di funzionamento
Questo apparecchio “Gascon” è concepito per
funzionare unicamente con porte chiuse. La diffusione
del calore avviene essenzialmente per irraggiamento
tramite il vetro e tutto attorno al focolare.
Nota in calce : Le prestazioni indicate qui di fronte
derivano da prove condotte secondo la norma
EN 13240 con ceppi di 35 cm di lunghezza ed una
depressione di 11 Pa i una carica da 4,9 kg, entrata
d’aria aperta al 50%.
4 3 2
6 5 2
4 1
Ø
1 2 5
Ø
1 3 9
7 1 2
6 1 4
6 8 1
5 2 4
Figura 1 - Dimensioni in mm
Manuale di riferimento “1146”
3
“GASCON” - rif. 134 13 15
Istruzioni per l’installatore
2. Istruzioni per l’installatore
2.1. Avviso all’attenzione dell’utente
A
Tutte le regolamentazioni locali e nazionali,
soprattutto quelle che fanno riferimento a
normative nazionali ed europee, devono essere
rispettate durante l’installazione dell’apparecchio.
Una stufa non installata correttamente può dare
origine a dei seri incidenti (incendio nel camino,
incendio dei materiali isolanti in plastica sulle pareti,
ecc...).
L’isolamento dell’apparecchio e della tubazione di
evacuazione dei gas deve essere rinforzato e
realizzato in conformità alle norme in vigore, al fine di
garantirne la sicurezza di funzionamento.
Fare riferimento alle norme locali in vigore.
L’installatore è il solo responsabile per la mancata
osservanza delle istruzioni di montaggio.
La responsabilità del costruttore è limitata alla fornitura
del materiale.
7 0 0 m m
6 5 0 m m
B
7 0 0
m m
6 5 0 m m
2.2. Il locale di installazione
Ve n t i l a z i o n e : A l f i n e d i p e r m e t t e r e i l b u o n
funzionamento con tiraggio naturale, controllare che
l’aria necessaria alla combustione possa essere
p r e l e v a ta i n q u a n t i t à s u ff i c i e n t e n e l l o c a l e d i
i n s ta l l a z i o n e . N e l l e a b i ta z i o n i d o ta t e d i V M C
(ventilazione meccanica controllata), questa aspira e
rinnova l’aria dell’ambiente. In tal caso l’abitazione è
leggermente in depressione ed è necessario installare
una presa d’aria esterna, non otturabile,
complementare al camino e con una sezione di almeno
50 cm2.
Posizionamento dell’apparecchio : Scegliere un
luogo centrale nell’abitazione che favorisca una buona
ripartizione dell’aria calda di convezione nel locale
principale.
La diffusione dell’aria calda verso gli altri locali avviene
tramite le porte di comunicazione.
Queste stanze devono essere in depressione o
quantomeno dotate di griglie di aerazione
non regolabili, collocate in modo da non essere
ostruite, per favorire la circolazione dell’aria calda.
Pavimento e paratie : Assicurarsi che il pavimento
possa sopportare il carico totale costituito dal focolare,
la struttura esterna e la cappa ; nel caso contrario,
rinforzarlo con una soletta di cemento per ripartire
questo carico.
Assicurarsi che non siano costituiti e nemmeno rivestiti
di materiale infiammabile o che potrebbe degradarsi
sotto l’effetto del calore (carta dipinta, moquette,
zoccoli, paratie leggere con isolamento di plastica).
R i s p e t ta r e s c r u p o l o s a m e n t e g l i s c a r i c h i
dell’installazione, nonché le pareti di materiale
combustibile ( # A, B e C, fig. 2) nonché le pareti di
materiale non combustibile ( # D, fig. 2), non mettere
alcun oggetto in materiale combustibile o tende,
paramenti ecc...
2.3. Il condotto dei fumi
Condotto esistente : Il condotto dovrà essere
realizzato in conformità dei vigenti regolamenti.
4
C
7 0 0 m m
6 5 0 m m
D
1 5 0 m m
1 5 0
m m
1 5 0
m m
Figura 2 - Distanze minime di sicurezza
- Il condotto deve essere in buono stato e deve
permettere un tiraggio sufficiente. Consultare i valori
ottimali nella tabella (pagina 3).
- Il condotto deve essere compatibile alla sua
utilizzazione. In caso contrario, sarà necessario
procedere al tubaggio o all’incamiciatura del condotto.
- Il condotto deve essere pulito. Effettuare la rimozione
delle ceneri tramite una spazzola metallica “tipo
istrice”, al fine di eliminare i depositi di fuliggine e di
rimuovere il catrame.
- Il condotto dei fumi deve avere un isolamento
termico idoneo.
- Un condotto con pareti interne fredde rende
impossibile il tiraggio termico e provoca la condensa.
- Il condotto dei fumi deve essere a tenuta stagna e di
sezione normale e costante per tutta l’altezza (ad
Manuale di riferimento “1146”
“GASCON” - rif. 134 13 15
Istruzioni per l’installatore
Condotto inesistente : Il condotto dovrà essere
realizzato in conformità dei vigenti regolamenti.
- La tubazione del camino non deve appoggiare
sull’apparecchio.
- Deve essere lontana da materiale infiammabile (lavori
di carpenteria, legname, paratie leggere).
- Deve permettere una rimozione meccanica delle
ceneri.
180°
Figura 3 - Montaggio dell’ugello di evacuazione
esempio : 2,5 dm2). Un condotto troppo largo rischia di
rendere nullo il tiraggio termico.
- Il condotto deve essere collegato ad un solo
apparecchio.
- Deve avere una altezza da 4 a 5 metri e deve sfociare
a 40 cm dal tetto della casa, o a meno di 8 metri per le
altre costruzioni.
Nel caso di terrazzi o di tetti la cui pendenza è inferiore
a 15°, lo zoccolo deve essere almeno pari a 1,20 metri.
- Il coronamento non deve frenare il tiraggio.
- Qualora il camino tendesse al riflusso a causa della
sua posizione rispetto agli ostacoli che si trovano nelle
vicinanze, si deve ricoprire l’uscita con un materiale
antiriflusso efficace oppure rialzare il camino.
- Se la depressione del camino è eccessiva, bisogna
installare un moderatore di tiraggio, con
eventualmente una chiave, sul condotto di raccordo
deve essere visibile e accessibile.
2.4. Montaggio dell’ugello di evacuazione
L’ugello di evacuazione permette l’utilizzo di un tubo
con Ø 125 mm o Ø 139 mm, a seconda che il raccordo si
effettui all’interno o all’esterno dell’ugello.
Figura 3
E’ possibile installare un deviatore fumi nella parte
superiore o posteriore, utilizzando lo stesso ugello.
E’sufficiente rimuovere le 2 viti e far ruotare l’adattatore
di 180 gradi.
Assicurarsi che la guarnizione di tenuta sia
correttamente posizionata.
2.5. Collegamento alla tubazione dei fumi
L’apparecchio deve trovarsi il più possibile vicino al
camino.
L’apparecchio dovrà essere collegato al condotto dei
fumi tramite dei tubi per fumo esistenti in commercio,
resistenti ai prodotti della combustione (esempio :
acciaio inox, lamiera smaltata).
Il diametro del tubo non deve essere inferiore al
diametro del condotto. Se del caso, la riduzione deve
avere un diametro immediatamente inferiore al
diametro del condotto ed essere posta il più lontano
possibile dal collegamento all’apparecchio.
Il collegamento può avvenire sia verticalmente su di
una tubazione sfociante sotto il soffitto, sia sul retro su
di un condotto che parte dal suolo.
La giunzione della tubazione di raccordo sul condotto
dell’apparecchio e quello sul condotto dei fumi deve
essere a tenuta stagna.
Figura 4 Condotto di
raccordo
1 - Camino
2 - Materiale
refrattario
disposto ad
imbuto
3 - Targa non
combustibile
amovibile e
ripartita
4 - Portello di
accesso di
pulizia.
5 - Rivestimento
6 - Targa non
combustibile
amovibile e
ripartita
Manuale di riferimento “1146”
5
“GASCON” - rif. 134 13 15
Istruzioni per l’installatore
Per le abitazioni dotate di un VMC (ventilazione
meccanica controllata), l’impermeabilità deve impedire
all’estrattore di aspirare i fumi fuori dal condotto.
Il condotto di raccordo ed il limitatore del tiraggio
devono essere visibili e facilmente accessibili per le
operazioni di pulitura.
2.6. Montaggio della piastra di ricupero
Figura 5
Al fine di evitare il deterioramento durante il trasporto,
la piastra di ricupero è stata posta dietro la porta del
focolare. Agganciare la piastra sulla parte inferiore
della facciata A.
A
2.7. Verifiche prima della messa in
servizio
- Verificare che il vetro non è danneggiato.
- Verificare che il passaggio del fumo non è ostruito da
elementi dell’imballaggio o da parti smontati.
- Verificare che le guarnizioni del circuito dei fumi siano
in buono stato.
- Verificare che le porte chiudono bene.
- Verificare che i pezzi amovibili sono al loro posto
rispettivo.
Note : se si tratta di una treccia in ceramica, è un
consumabile e dunque portato a essere cambiato
dall’utente.
2.8. Manutenzione del camino e pulitura
Molto importante ! Per evitare qualsiasi incidente
(fuoco del camino, ecc…) le operazioni di
manutenzione devono essere realizzate regolarmente.
6
Figura 5 - Montaggio della piastra
In caso di utilizzazione frequente del focolare,
procedere a numerose puliture meccaniche annuali
del condotto dei fumi e del condotto di raccordo
sull’apparecchio.
In caso di ritorno di fiamma, bisogna interrompere il
tiraggio del camino, chiudere porte e finestre, toppe
e chiavi, turare il foro di raccordo mediante stracci
umidi e chiamare i pompieri.
SOPRATTUTTO NON APRIRE LA PORTA
DELL’APPARECCHIO
(RICHIAMO D’ARIA).
Manuale di riferimento “1146”
“GASCON” - rif. 134 13 15
Istruzioni per l’utilizzatore
3. Istruzioni per l’utilizzatore
Il fabbricante declina ogni e qualsiasi responsabilità
per eventuale deterioramento dei componenti causato
dall’impiego di un combustibile non raccomandato o
da modifiche apportate all’apparecchio, oppure da
una errata installazione dello stesso. Utilizzare solo
pezzi di ricambio forniti dal fabbricante.
Tutte le regolamentazioni locali e nazionali,
soprattutto quelle che fanno riferimento a
normative nazionali ed europee, devono essere
rispettate durante l’utilizzo dell’apparecchio.
“Non utilizzare l’apparecchio con il tempo mite”.
Alcune condizioni meteorologiche (es.: nebbia e cielo
terso) impediscono un tiraggio sufficiente del camino e
possono dare origine ad asfissia.
3.1. Combustibile
Questo apparecchio non è un inceneritore.
- Utilizzare ceppi di legno duro, tagliato da almeno
2 anni e immagazzinati in luogo riparato e
ventilato (Umidità < 20 %).
- Utilizzare legno duro che irraggi molto calore e che
produca brace sufficiente.
- I grossi ceppi devono essere tagliati alla lunghezza
d’utilizzo prima di essere immagazzinati.
Combustibile raccomandato :
• Legna per riscaldamento : Carpine
Combustibile in sostituzione :
• Legna per riscaldamento : Quercia, frassino, acero,
betulla, olmo, faggio, ecc..
Combustibili proibiti
“Legna verde” ; la legna verde o troppo umida incide
negativamente sulla resa dell’apparecchio e provoca
l’incrostazione delle pareti interne e del condotto dei
fumi (fuliggine, bistro, catrame).
“Legna recuperata” ; la combustione di legna trattata
(traversine di ferrovia, pali telegrafici, scarti di
falegnameria, o compensato, palette, ecc...), provoca
la rapida incrostazione dell’installazione (fuliggine,
bistro, catrame) e nuoce all’ambiente (odori,
inquinamento), causando surriscaldamenti e instabilità
del focolare.
F
La “Legna verde” e la “Legna recuperata” possono
provocare incendi nel camino.
3.2. Accensione
Figura 6
- Aprire totalmente la valvola d’aria superiore (n. B1)
- Aprire la porta vetrata.
- Porre sulla griglia della carta secca stropicciata (tipo
giornale), legna piccola molto secca e qualche ceppo
di legno duro di piccolo diametro.
- Accendere la carta e chiudere la porta a vetri.
- Quando la brace è ben viva, caricare il focolare con il
combustibile e chiudere la porta e la valvola (n. A).
Al primo avviamento, non alimentare eccessivamente il
fuoco al fine di permettere alle diverse parti di dilatarsi
normalmente e di asciugarsi.
Nota : Al primo avviamento, la stufa potrebbe
emettere fumo e diffondere odori sgradevoli di
vernice nuova. Non preoccupatevi, ma aerate bene il
locale durante le prime ore di funzionamento.
• Tutti i carboni e combustibile liquido !
A : Apertura dell’oblò
B : Valvola dell’aria (regolazione dell’aria
primaria)
B1 = Valvola aperta B2 = Valvola chiusa
C: Utensile di manovra
Figura 6 - Organi di manovra
Manuale di riferimento “1146”
7
“GASCON” - rif. 134 13 15
Istruzioni per l’utilizzatore
3.3. Condotto della combustione
3.6. Manutenzione della stufa
L’apparecchio deve funzionare con le porte chiuse
e la valvola d’accensione chiusa. Il controllo del
funzionamento si effettua tramite la valvola di
regolazione dell’aria principale posta sopra la parte
frontale (n. B).
L’esperienza vi sarà d’aiuto nella ricerca della miglior
posizione.
Questa stufa possiede un sistema di “pulizia del vetro”
grazie al passaggio dell’aria secondaria.
Il sistema è ancor più efficace grazie allo sportellino
aperto.
• L’apparecchio deve essere pulito regolarmente così
• Caricamento del combustibile :
- Aprire lentamente la porta vetrata senza provocare un
richiamo brutale dell’aria ed evitare quindi le
emanazioni di fumo nella stanza.
- I ceppi devono essere piazzati sulle braci.
L’intervallo di carico minimo per una potenza calorifica
nominale è di circa 1 ora e 20.
- Per un andamento sostenuto, fare attenzione a che ci
siano sempre almeno 2 ceppi sulle braci. L’andamento
del focolare è migliore quando ci sono numerosi ceppi
di dimensioni non troppo grandi.
- Per un andamento ridotto (per esempio la notte),
scegliere dei ceppi più grandi.
- Dopo il caricamento, richiudere la porta vetrata
(n. A, pagina 7, figura 6).
come il condotto di raccordo e il condotto dei fumi.
• Pulire tutte le pareti della camera di combustione,
pulire la griglia del focolare.
• La pulitura del vetro deve essere realizzata quando
l’apparecchio è freddo con un prodotto adatto presente
in commercio, dopo pulitura, risciacquare con acqua
pulita. Non utilizzare mai prodotti abrasivi.
• Il vetro, in vetroceramica resiste ad una temperatura di
750°C, in caso di rottura del vetro a causa di una
manovra maldestra, si sconsiglia di sostituirlo con del
materiale diverso da quello fornito dal produttore.
• Tutti i pezzi che costituiscono il rivestimento, possono
essere strofinati a secco con una spazzola morbida o
con un panno leggermente umido. In caso di condensa
o di aspirazione di acqua involontaria, pulire le parti
sporche prima che si asciughino.
• Verificare l’assenza di ostruzioni prima di riaccendere
dopo un lungo periodo di arresto.
• L’apparecchio non può essere utilizzato su un
condotto di fumi che serve più apparecchi.
• Non ostruire le griglie di aerazione.
• Gli schermi devono essere tolti regolarmente, le ceneri
o depositi puliti.
• Le ceneri non devono accumularsi. I giunti di porta
3.4. Disincrostazione
- Evacuare le ceneri regolarmente.
- Non lasciare mai che la cenere si accumuli fino ad
arrivare a contatto della griglia, poiché ciò potrebbe
impedire l’entrata d’aria principale e il fuoco potrebbe
spegnersi. Inoltre, la griglia non sarebbe più
raffreddata e potrebbe guastarsi.
- Togliere la cenere a focolare freddo.
- Ritirare il cassetto portacenere con l’ausilio (utilizzare
lo strumento speciale).
- Vuotare la cenere prendendo tutte le precauzioni del
caso per brace incandescente.
3.5. Manutenzione del camino e pulitura
Molto importante ! Per evitare qualsiasi incidente
(fuoco del camino, ecc…) le operazioni di
manutenzione devono essere realizzate regolarmente.
In caso di utilizzazione frequente del focolare,
procedere a numerose puliture meccaniche annuali
del condotto dei fumi e del condotto di raccordo
sull’apparecchio.
In caso di ritorno di fiamma, bisogna interrompere il
tiraggio del camino, chiudere porte e finestre, toppe
e chiavi, turare il foro di raccordo mediante stracci
umidi e chiamare i pompieri.
devono essere verificati annualmente ed essere
sostituiti se necessità.
3.7. Avvertenza di sicurezza
• Al fine di evitare che la manopola sia troppo calda, si
consiglia di lasciarla sulla porta della ceneria.
• La stufa può ancora essere calda anche quando il
fuoco si è bruciato fuori.
• Questo riscaldatore di stanza è un apparecchio
producendo il calore e può causare le ustioni severe se
toccato.
• Non mettere mai in funzione l’apparecchio quando la
porta della ceneriera é aperta.
BAMBINI DI CONSERVAZIONE ASSENTI.
Soprattutto non aprire la porta dell’apparecchio
(RICHIAMO D’ARIA).
Lo stato del camino deve verificato almeno una volta
all’anno.
8
Manuale di riferimento “1146”
“GASCON” - rif. 134 13 15
Istruzioni per l’utilizzatore
3.8. Cause di cattivo funzionamento
þ : Questo simbolo vi ricorda di contattare
un tecnico qualificato per effettuare queste
operazioni.
Situazione
Cause probabili
- Azione
Il fuoco non prende. Il fuoco
non si alimenta.
Legna verde o troppo umida
- Usare legna tagliata da almeno due anni e sistemata in
luogo riparato e ventilato.
I ceppi sono troppo grossi
- Per l’accensione, usare carta stropicciata e legna
piccola e secca. Per alimentare il fuoco, usare legna
spaccata.
Legna di cattiva qualità
- Usare legno duro che irraggi molto calore e che
produca buona brace (carpine, quercia, frassino,
acero, betulla, olmo, faggio, ecc...)
Aria primaria insufficiente
- Aprire totalmente la valvola d’aria primaria.
- Aprire la griglia d’entrata aria fresca esterna.
Tiraggio insufficiente
þ
- Controllare che il condotto non sia ostruito, effettuare
una ripulitura meccanica se necessario.
- Controllare che il condotto sia conforme.
Il fuoco è instabile.
Eccesso d’aria
- Assicurarsi che lo sportello di accensione sia ben
chiuso (rep. B, fig. 6, p. 7).
- Chiudere parzialmente o totalmente la valvola d’aria
primaria.
Tiraggio eccessivo
þ
Legna di cattiva qualità
- Installare un limitatore del tiraggio.
- Non bruciare continuamente legna piccola, fascine,
scarti di falegnameria (palette, (compensato, ecc...).
Emanazione di fumi
Il condotto dei fumi è freddo
- Riscaldare il condotto bruciando della all’accensione
Il locale è in depressione
- Nelle abitazioni dotate di VMC, aprire una finestra
carta nel focolare.
esterna per ravvivare il fuoco.
Emanazione di fumi durante
la combustione
Tiraggio insufficiente
þ
- Controllare la conformità del condotto dei fumi e il suo
isolamento.
- Controllare che il condotto non sia ostruito ed
effettuare una pulitura meccanica se necessario.
Il vento entra nel condotto
þ
- Installare un contro erogatore sul coronamento.
Il locale è in depressione
þ
- Nei locali dotati di un VMC, è necessario installare una
presa d’aria esterna complementare adatta al camino.
Riscaldamento insufficiente.
Legna di cattiva qualità
- Usare il combustibile raccomandato.
Cattiva miscelatura d’aria calda di
convezione
- Controllare il circuito di convezione (griglie d’entrata,
condotto dell’aria, griglia di diffusione).
- Controllare che i locali adiacenti siano dotati di griglia
d’aerazione per favorire.
Manuale di riferimento “1146”
9
“GASCON” - rif. 134 13 15
Parti di ricambio
4. Parti di ricambio
Per l’ordinazione delle parti di ricambio, indicare sempre : Riferimento dell’apparecchio compreso l’indice letterale
del colore (riportato sulla piastra segnaletica o sul certificato di garanzia), la descrizione ed il codice articolo del
pezzo.
Esempio : Stufa a gas “GASCON”, rif. 134 13 15, colore Y, parte superiore 352165 EF.
Y = 134 13 15 Y
L = 134 13 15 L
B = 134 13 15 B
P = 134 13 15 P
E = 134 13 15 E
C = 134 13 15 C
N = 134 13 15 N
Q = 134 13 15 Q
N°
Code
Descrizione . . . . . . . . . . . . . . . . . Y . . L . . B . . P . . E . . C . . N . . . . Q . Quant.
1
2
3
4
5
6
7
7
7
7
7
7
7
7
8
9
9
9
9
9
9
9
9
10
10
10
10
10
10
10
10
11
12
13
14
15
15
15
15
15
15
15
15
16
16
16
16
16
16
16
16
17
18
19
20
207315
222575
236135
259015
259037
270414
300132
300132
300132
300134
300132
300132
300132
300132
300491
301172
301172
301172
301172
301172
301172
301172
301172
303860
303860
303860
303860
303860
303860
303860
303860
305016
305214
306285
309233
310734
310734
310734
310734
310734
310734
310734
310734
310830
310830
310830
310830
310830
310830
310830
310830
315614
319738
322717
326602
Rivestimento posteriore . . . . . . . . . . . Y. . . L. . . B . . P . . E . . C . . N . . . . Q
Deflettore . . . . . . . . . . . . . . . . . . . Y. . . L. . . B . . P . . E . . C . . N . . . . Q
Plachetta di chiusura . . . . . . . . . . . . Y. . . L. . . B . . P . . E . . C . . N . . . . Q
Staffa di fissaggio . . . . . . . . . . . . . . Y. . . L. . . B . . P . . E . . C . . N . . . . Q
Staffa di fissaggio . . . . . . . . . . . . . . Y. . . L. . . B . . P . . E . . C . . N . . . . Q
Valvola dell’aria . . . . . . . . . . . . . . . Y. . . L. . . B . . P . . E . . C . . N . . . . Q
Piede . . . . . . . . . . . . . . . . . . . . . . . . . L . . . . . . . . . . . . . . . . . . . . . . . .
Piede . . . . . . . . . . . . . . . . . . . . . Y . . . . . . . . . . . . . . . . . . . . . . . . . . . .
Piede . . . . . . . . . . . . . . . . . . . . . . . . . . . . . . . . . . . . . . . . C . . . . . . . . .
Piede . . . . . . . . . . . . . . . . . . . . . . . . . . . . . . . . P . . . . . . . . . . . . . . . .
Piede . . . . . . . . . . . . . . . . . . . . . . . . . . . . B . . . . . . . . . . . . . . . . . . . .
Piede . . . . . . . . . . . . . . . . . . . . . . . . . . . . . . . . . . . . E . . . . . . . . . . . . .
Piede . . . . . . . . . . . . . . . . . . . . . . . . . . . . . . . . . . . . . . . . . . . N. . . . . .
Piede . . . . . . . . . . . . . . . . . . . . . . . . . . . . . . . . . . . . . . . . . . . . . . . . Q
Sotto . . . . . . . . . . . . . . . . . . . . . Y. . . L. . . B . . P . . E . . C . . N . . . . Q
Sportello cassetto . . . . . . . . . . . . . . . . . . L . . . . . . . . . . . . . . . . . . . . . . . .
Sportello cassetto . . . . . . . . . . . . . . Y . . . . . . . . . . . . . . . . . . . . . . . . . . . .
Sportello cassetto . . . . . . . . . . . . . . . . . . . . . . . . . . . . . . . . . C . . . . . . . . .
Sportello cassetto . . . . . . . . . . . . . . . . . . . . . . . . . P . . . . . . . . . . . . . . . .
Sportello cassetto . . . . . . . . . . . . . . . . . . . . . . B . . . . . . . . . . . . . . . . . . . .
Sportello cassetto . . . . . . . . . . . . . . . . . . . . . . . . . . . . . E . . . . . . . . . . . . .
Sportello cassetto . . . . . . . . . . . . . . . . . . . . . . . . . . . . . . . . . . . . . N. . . . . .
Sportello cassetto . . . . . . . . . . . . . . . . . . . . . . . . . . . . . . . . . . . . . . . . . Q
Ugello . . . . . . . . . . . . . . . . . . . . . . . . L . . . . . . . . . . . . . . . . . . . . . . . .
Ugello. . . . . . . . . . . . . . . . . . . . . Y . . . . . . . . . . . . . . . . . . . . . . . . . . . .
Ugello . . . . . . . . . . . . . . . . . . . . . . . . . . . . . . . . . . . . . . . C . . . . . . . . .
Ugello . . . . . . . . . . . . . . . . . . . . . . . . . . . . . . . . P . . . . . . . . . . . . . . . .
Ugello . . . . . . . . . . . . . . . . . . . . . . . . . . . . B . . . . . . . . . . . . . . . . . . . .
Ugello . . . . . . . . . . . . . . . . . . . . . . . . . . . . . . . . . . . . E . . . . . . . . . . . . .
Ugello . . . . . . . . . . . . . . . . . . . . . . . . . . . . . . . . . . . . . . . . . . . N. . . . . .
Ugello. . . . . . . . . . . . . . . . . . . . . . . . . . . . . . . . . . . . . . . . . . . . . . . . Q
Mattone refrattario . . . . . . . . . . . . . . Y. . . L. . . B . . P . . E . . C . . N . . . . Q
Mattone refrattario . . . . . . . . . . . . . . Y. . . L. . . B . . P . . E . . C . . N . . . . Q
Retro di focolare . . . . . . . . . . . . . . . Y. . . L. . . B . . P . . E . . C . . N . . . . Q
Griglia . . . . . . . . . . . . . . . . . . . . Y. . . L. . . B . . P . . E . . C . . N . . . . Q
Lato destro . . . . . . . . . . . . . . . . . . . . . . L . . . . . . . . . . . . . . . . . . . . . . . .
Lato destro . . . . . . . . . . . . . . . . . . Y . . . . . . . . . . . . . . . . . . . . . . . . . . . .
Lato destro . . . . . . . . . . . . . . . . . . . . . . . . . . . . . . . . . . . . . C . . . . . . . . .
Lato destro . . . . . . . . . . . . . . . . . . . . . . . . . . . . . P . . . . . . . . . . . . . . . .
Lato destro . . . . . . . . . . . . . . . . . . . . . . . . . B . . . . . . . . . . . . . . . . . . . .
Lato destro . . . . . . . . . . . . . . . . . . . . . . . . . . . . . . . . . E . . . . . . . . . . . . .
Lato destro . . . . . . . . . . . . . . . . . . . . . . . . . . . . . . . . . . . . . . . . N. . . . . .
Lato destro . . . . . . . . . . . . . . . . . . . . . . . . . . . . . . . . . . . . . . . . . . . . . Q
Lato sinistro . . . . . . . . . . . . . . . . . . . . . L . . . . . . . . . . . . . . . . . . . . . . . .
Lato sinistro . . . . . . . . . . . . . . . . . Y . . . . . . . . . . . . . . . . . . . . . . . . . . . .
Lato sinistro . . . . . . . . . . . . . . . . . . . . . . . . . . . . . . . . . . . . C . . . . . . . . .
Lato sinistro . . . . . . . . . . . . . . . . . . . . . . . . . . . . . P . . . . . . . . . . . . . . . .
Lato sinistro . . . . . . . . . . . . . . . . . . . . . . . . . B . . . . . . . . . . . . . . . . . . . .
Lato sinistro . . . . . . . . . . . . . . . . . . . . . . . . . . . . . E . . . . . . . . . . . . . . . .
Lato sinistro . . . . . . . . . . . . . . . . . . . . . . . . . . . . . . . . . . . . . . . . N. . . . . .
Lato sinistro . . . . . . . . . . . . . . . . . . . . . . . . . . . . . . . . . . . . . . . . . . . . Q
Condotto dell’aria . . . . . . . . . . . . . . Y. . . L. . . B . . P . . E . . C . . N . . . . Q
Supporto griglia . . . . . . . . . . . . . . . Y. . . L. . . B . . P . . E . . C . . N . . . . Q
Supporto supplementare . . . . . . . . . . Y. . . L. . . B . . P . . E . . C . . N . . . . Q
Deflettore . . . . . . . . . . . . . . . . . . . Y. . . L. . . B . . P . . E . . C . . N . . . . Q
10
77
EF
MK
RH
RJ
RP
EP
ER
EF
77
EF
MK
RH
RJ
RP
EP
ER
77
EF
MK
RH
RJ
RP
EP
ER
EB
EB
EF
EB
77
EF
MK
RH
RJ
RP
EP
ER
77
EF
MK
RH
RJ
RP
EP
ER
EB
EB
EB
EB
.
.
.
.
.
.
.
.
.
.
.
.
.
.
.
.
.
.
.
.
.
.
.
.
.
.
.
.
.
.
.
.
.
.
.
.
.
.
.
.
.
.
.
.
.
.
.
.
.
.
.
.
.
.
.
.
.
.
.
.
.
.
.
.
.
.
.
.
.
.
.
.
.
.
.
.
.
.
.
.
.
.
.
.
.
.
.
.
.
.
.
.
.
.
.
.
.
.
.
.
.
.
.
.
.
.
.
.
.
.
01
01
01
08
02
01
04
04
04
04
04
04
04
04
01
01
01
01
01
01
01
01
01
01
01
01
01
01
01
01
01
01
01
01
01
01
01
01
01
01
01
01
01
01
01
01
01
01
01
01
01
01
01
01
01
Manuale di riferimento “1146”
“GASCON” - rif. 134 13 15
Parti di ricambio
4 8
1 0
2 3
3 6
1 6
4 8
5 0
1 1
1
2 8
2 0
1 3
2
2 2
5
4 7
1 4
2 7
1 9
5 1
1 8
2 9
1 2
5 5
5 5
6
2 6
4 2
4 5
1 7
4 0
4 1
4 9
4
3 9
3 0
2 1
4 7
3
1 5
4
2 4
4 5
5 4
4 9
4 3
8
4 6
3 8
5 2
3 3
2 5
4 1
4 0
4 2
3 1
3 7
4 3
4 4
3 2
4 6
9
7
5 3
3 4
4 3
Figura 7 - Vista esplosa dell’apparecchio
Manuale di riferimento “1146”
11
“GASCON” - rif. 134 13 15
Y = 134 13 15 Y
L = 134 13 15 L
N°
Code
21
21
21
21
21
21
21
21
22
23
24
25
25
25
25
25
25
25
25
26
26
26
26
26
26
26
26
27
28
28
28
28
28
28
28
28
29
29
29
29
29
29
29
29
30
31
32
33
34
36
37
38
39
40
41
42
43
44
45
46
47
48
49
50
51
327905
327905
327905
327905
327905
327905
327905
327905
330022
331001
331700
331800
331800
331800
331800
331800
331800
331800
331800
331900
331900
331900
331900
331900
331900
331900
331900
332003
352165
352165
352165
352165
352165
352165
352165
352165
359806
359806
359806
359806
359806
359806
359806
359806
624045
158626
101063
101062
101057
105006
134705
134711
179624
188829
181632
110404
189825
808001
181634
181633
181625
142316
142881
269501
269449
12
Parti di ricambio
B = 134 13 15 B
P = 134 13 15 P
E = 134 13 15 E
C = 134 13 15 C
N = 134 13 15 N
Q = 134 13 15 Q
Descrizione . . . . . . . . . tipo. . . . . . Y . . L . . B . . P . . E . . C . . N . . . . Q . Quant.
77
EF
MK
RH
RJ
RP
EP
ER
EB
EF
EF
77
EF
MK
RH
RJ
RP
EP
Er
77
EF
MK
RH
RJ
RP
EP
ER
EB
77
EF
MK
RH
RJ
RP
EP
ER
77
EF
MK
RH
RJ
RP
EP
ER
Guida cassetto. . . . . . . . . . . . . . . . . . . . L . . . . . . . . . . . . . . . . . . . . . . . . . . 01
Guida cassetto . . . . . . . . . . . . . . . . Y . . . . . . . . . . . . . . . . . . . . . . . . . . . . . . 01
Guida cassetto. . . . . . . . . . . . . . . . . . . . . . . . . . . . . . . . . . . C . . . . . . . . . . . 01
Guida cassetto . . . . . . . . . . . . . . . . . . . . . . . . . . . P . . . . . . . . . . . . . . . . . . 01
Guida cassetto . . . . . . . . . . . . . . . . . . . . . . . B . . . . . . . . . . . . . . . . . . . . . . 01
Guida cassetto . . . . . . . . . . . . . . . . . . . . . . . . . . . . . . . E . . . . . . . . . . . . . . . 01
Guida cassetto . . . . . . . . . . . . . . . . . . . . . . . . . . . . . . . . . . . . . . N. . . . . . . . 01
Guida cassetto . . . . . . . . . . . . . . . . . . . . . . . . . . . . . . . . . . . . . . . . . . . Q . . 01
Piastra decorativa . . . . . . . . . . . . . . Y. . . L. . . B . . P . . E . . C . . N . . . . Q . . 01
Adattatore . . . . . . . . . . . . . . . . . . Y. . . L. . . B . . P . . E . . C . . N . . . . Q . . 01
Perno . . . . . . . . . . . . . . . . . . . . . Y. . . L. . . B . . P . . E . . C . . N . . . . Q . . 01
Porta del focolare a destra . . . . . . . . . . . . . L . . . . . . . . . . . . . . . . . . . . . . . . . . 01
Porta del focolare a destra . . . . . . . . . Y . . . . . . . . . . . . . . . . . . . . . . . . . . . . . . 01
Porta del focolare a destra . . . . . . . . . . . . . . . . . . . . . . . . . . . . C . . . . . . . . . . . 01
Porta del focolare a destra . . . . . . . . . . . . . . . . . . . . . P . . . . . . . . . . . . . . . . . . 01
Porta del focolare a destra . . . . . . . . . . . . . . . . . B . . . . . . . . . . . . . . . . . . . . . . 01
Porta del focolare a destra. . . . . . . . . . . . . . . . . . . . . . . . . E . . . . . . . . . . . . . . . 01
Porta del focolare a destra . . . . . . . . . . . . . . . . . . . . . . . . . . . . . . . . N. . . . . . . . 01
Porta del focolare a destra. . . . . . . . . . . . . . . . . . . . . . . . . . . . . . . . . . . . . . q . . . 01
Porta del focolare a sinistra . . . . . . . . . . . . . L . . . . . . . . . . . . . . . . . . . . . . . . . . 01
Porta del focolare a sinistra . . . . . . . . . Y . . . . . . . . . . . . . . . . . . . . . . . . . . . . . . 01
Porta del focolare a sinistra . . . . . . . . . . . . . . . . . . . . . . . . . . . . C . . . . . . . . . . . 01
Porta del focolare a sinistra . . . . . . . . . . . . . . . . . . . . P . . . . . . . . . . . . . . . . . . 01
Porta del focolare a sinistra . . . . . . . . . . . . . . . . B . . . . . . . . . . . . . . . . . . . . . . 01
Porta del focolare a sinistra . . . . . . . . . . . . . . . . . . . . . . . . E . . . . . . . . . . . . . . . 01
Porta del focolare a sinistra. . . . . . . . . . . . . . . . . . . . . . . . . . . . . . . . N. . . . . . . . 01
Porta del focolare a sinistra . . . . . . . . . . . . . . . . . . . . . . . . . . . . . . . . . . . . Q . . 01
Condotto dell’aria . . . . . . . . . . . . . . Y. . . L. . . B . . P . . E . . C . . N . . . . Q . . 01
Sopra. . . . . . . . . . . . . . . . . . . . . . . . . L . . . . . . . . . . . . . . . . . . . . . . . . . . 01
Sopra . . . . . . . . . . . . . . . . . . . . . Y . . . . . . . . . . . . . . . . . . . . . . . . . . . . . . 01
Sopra. . . . . . . . . . . . . . . . . . . . . . . . . . . . . . . . . . . . . . . . C . . . . . . . . . . . 01
Sopra . . . . . . . . . . . . . . . . . . . . . . . . . . . . . . . . P . . . . . . . . . . . . . . . . . . 01
Sopra . . . . . . . . . . . . . . . . . . . . . . . . . . . . B . . . . . . . . . . . . . . . . . . . . . . 01
Sopra . . . . . . . . . . . . . . . . . . . . . . . . . . . . . . . . . . . . E . . . . . . . . . . . . . . . 01
Sopra . . . . . . . . . . . . . . . . . . . . . . . . . . . . . . . . . . . . . . . . . . . N. . . . . . . . 01
Sopra . . . . . . . . . . . . . . . . . . . . . . . . . . . . . . . . . . . . . . . . . . . . . . . . Q . . 01
Facciata . . . . . . . . . . . . . . . . . . . . . . . L . . . . . . . . . . . . . . . . . . . . . . . . . . 01
Facciata . . . . . . . . . . . . . . . . . . . Y . . . . . . . . . . . . . . . . . . . . . . . . . . . . . . 01
Facciata . . . . . . . . . . . . . . . . . . . . . . . . . . . . . . . . . . . . . . C . . . . . . . . . . . 01
Facciata . . . . . . . . . . . . . . . . . . . . . . . . . . . . . . . P . . . . . . . . . . . . . . . . . . 01
Facciata . . . . . . . . . . . . . . . . . . . . . . . . . . . B . . . . . . . . . . . . . . . . . . . . . . 01
Facciata . . . . . . . . . . . . . . . . . . . . . . . . . . . . . . . . . . E . . . . . . . . . . . . . . . 01
Facciata . . . . . . . . . . . . . . . . . . . . . . . . . . . . . . . . . . . . . . . . . . N. . . . . . . . 01
Facciata . . . . . . . . . . . . . . . . . . . . . . . . . . . . . . . . . . . . . . . . . . . . . . Q . . 01
Cenerario. . . . . . . . . . . . . . . . . . . Y. . . L. . . B . . P . . E . . C . . N . . . . Q . . 01
Impugnatura . . . . . . . . . . . . . . . . . Y. . . L. . . B . . P . . E . . C . . N . . . . Q . . 01
Perno di chiusura . . . . . . . . . . . . . . Y. . . L. . . B . . P . . E . . C . . N . . . . Q . . 01
Perno di chiusura . . . . . . . . . . . . . . Y. . . L. . . B . . P . . E . . C . . N . . . . Q . . 01
Perno . . . . . . . . . . . . . . . . . . . . . Y. . . L. . . B . . P . . E . . C . . N . . . . Q . . 01
Giunto . . . . . . . . . . . . Ø 15 . . . . . Y. . . L. . . B . . P . . E . . C . . N . . . . Q . . 2 m
Coppiglia scanalata . . . . . 6x45 . . . . . Y. . . L. . . B . . P . . E . . C . . N . . . . Q . . 01
Coppiglia scanalata . . . . . 6x30 . . . . . Y. . . L. . . B . . P . . E . . C . . N . . . . Q . . 01
Barretta selettore . . . . . . . . . . . . . . Y. . . L. . . B . . P . . E . . C . . N . . . . Q . . 01
Cristallo . . . . . . . . 278 X 220 X 4 . . . Y. . . L. . . B . . P . . E . . C . . N . . . . Q . . 02
Giunto . . . . . . . . . . . . Ø 6 . . . . . . Y. . . L. . . B . . P . . E . . C . . N . . . . Q . . 2 m
Chiodo scanalato . . . . . . 6x30 . . . . . Y. . . L. . . B . . P . . E . . C . . N . . . . Q . . 04
Vite . . . . . . . . . . . . . M5x6 . . . . . Y. . . L. . . B . . P . . E . . C . . N . . . . Q . . 02
ED Maniglia . . . . . . . . . . . . . . . . . . . Y. . . L. . . B . . P . . E . . C . . N . . . . Q . . 01
Giunto . . . . . . . . . . . . Ø 15 . . . . . Y. . . L. . . B . . P . . E . . C . . N . . . . Q . 1,64 m
Giunto . . . . . . . . . . . . Ø 10 . . . . . Y. . . L. . . B . . P . . E . . C . . N . . . . Q . 1,33 m
Treccia di ceramica . . . . . Ø 7 . . . . . . Y. . . L. . . B . . P . . E . . C . . N . . . . Q . 3,16 m
Giunto . . . . . . . . . . . . 7x3 . . . . . . Y. . . L. . . B . . P . . E . . C . . N . . . . Q . . 1 m
Giunto . . . . . . . . . . . . . . . . . . . . Y. . . L. . . B . . P . . E . . C . . N . . . . Q . . 08
Deflettore . . . . . . . . . . . . . . . . . . . Y. . . L. . . B . . P . . E . . C . . N . . . . Q . . 01
Deflettore . . . . . . . . . . . . . . . . . . . Y. . . L. . . B . . P . . E . . C . . N . . . . Q . . 01
Manuale di riferimento “1146”
“GASCON” - rif. 134 13 15
Y = 134 13 15 Y
L = 134 13 15 L
Parti di ricambio
B = 134 13 15 B
P = 134 13 15 P
E = 134 13 15 E
C = 134 13 15 C
N = 134 13 15 N
Q = 134 13 15 Q
N°
Code
Descrizione . . . . . . . . . tipo. . . . . . Y . . L . . B . . P . . E . . C . . N . . . . Q . Quant.
52
53
53
53
53
53
53
53
53
54
54
54
54
54
54
54
54
55
161039
988920
988922
988924
988926
988928
988930
988932
988994
988744
988923
988925
988927
988929
988931
988933
988995
100939
Vernice di ritocco. . . . . . . (P) . . . . . . . . . . . . . . . . . P . . . . . . . . . . . . . . . .
Porta vetrata completa a destra . . . . . . . . . . . . . . . . . . . . . . . . . . . . . N. . . . . .
Porta vetrata completa a destra . . . . . . . Y . . . . . . . . . . . . . . . . . . . . . . . . . . . .
Porta vetrata completa a destra. . . . . . . . . . . L . . . . . . . . . . . . . . . . . . . . . . . .
Porta vetrata completa a destra . . . . . . . . . . . . . . B . . . . . . . . . . . . . . . . . . . .
Porta vetrata completa a destra . . . . . . . . . . . . . . . . . . P . . . . . . . . . . . . . . . .
Porta vetrata completa a destra . . . . . . . . . . . . . . . . . . . . . . E . . . . . . . . . . . . .
Porta vetrata completa a destra. . . . . . . . . . . . . . . . . . . . . . . . . . C . . . . . . . . .
Porta vetrata completa a destra . . . . . . . . . . . . . . . . . . . . . . . . . . . . . . . . . . Q
Porta vetrata completa a sinistra . . . . . . . . . . . . . . . . . . . . . . . . . . . . . N. . . . . .
Porta vetrata completa a sinistra . . . . . . Y . . . . . . . . . . . . . . . . . . . . . . . . . . . .
Porta vetrata completa a sinistra . . . . . . . . . . L . . . . . . . . . . . . . . . . . . . . . . . .
Porta vetrata completa a sinistra . . . . . . . . . . . . . . B . . . . . . . . . . . . . . . . . . . .
Porta vetrata completa a sinistra. . . . . . . . . . . . . . . . . . P . . . . . . . . . . . . . . . .
Porta vetrata completa a sinistra . . . . . . . . . . . . . . . . . . . . . E . . . . . . . . . . . . .
Porta vetrata completa a sinistra . . . . . . . . . . . . . . . . . . . . . . . . . C . . . . . . . . .
Porta vetrata completa a sinistra . . . . . . . . . . . . . . . . . . . . . . . . . . . . . . . . . Q
Perno . . . . . . . . . . . . . . . . . . . . . Y. . . L. . . B . . P . . E . . C . . N . . . . Q
.
.
.
.
.
.
.
.
.
.
.
.
.
.
.
.
.
.
.
.
.
.
.
.
.
.
.
.
.
.
.
.
.
.
.
.
01
01
01
01
01
01
01
01
01
01
01
01
01
01
01
01
01
02
Nota
Manuale di riferimento “1146”
13
Certificato di Garanzia
Garanzia legale
Le specifiche, le dimensioni e le informazioni riportate
sulla nostra documentazione sono solo indicative e
non coinvolgono la responsabilità del venditore.
Al fine di migliorare i nostri materiali, potrà essere
effettuata qualsiasi modifica ritenuta utile dai nostri
servizi senza preavviso.
Le disposizioni del presente certificato di garanzia
non sono ad esclusivo beneficio dell’acquirente del
materiale, e riguardano la garanzia legale relativa a
difetti o vizi nascosti applicabile in qualsiasi caso, alle
condizioni previste dagli articoli 1641 e successivi del
codice civile, e nei paesi in cui è stato acquistato il
materiale.
Garanzia contrattuale
I nostri materiali sono garantiti contro i difetti e vizi
nascosti a condizione che:
1) l’installazione e la posa dell’apparecchio sia effettuata da un
installatore professionista.
2) siano rispettate le istruzioni fornite nella nostra
documentazione tecnica, manuale d’installazione e messa
a punto.
3) l’installazione, l’utilizzo e la manutenzione dell’apparecchio
siano effettuate in conformità alla normativa e legislazione
vigente e secondo le indicazioni delle istruzioni tecniche
allegate all’apparecchio.
La garanzia riguarda la sostituzione, presso i nostri
laboratori, dei pezzi riconosciuti come difettosi
all’origine da parte del nostro servizio di “controllo
garanzia”: trasporto e manodopera a carico
dell’utente. Inoltre se le riparazioni o la sostituzione
dei pezzi coperti dalla garanzia si rivelano troppo
onerosi rispetto al prezzo dell’apparecchio, la
decisione di cambiare o di riparare l’apparecchio
spetterà al venditore.
La nostra garanzia è di 2 anni per tutti gli apparecchi,
ad esclusione dei focolari e inserti per i quali la nostra
garanzia è di 5 (cinque) anni, eccetto :
1) Le spie luminose, i fusibili, le resistenze elettriche, i
ventilatori.
2) i pezzi di usura o a contatto con forti temperature, ovvero:
solette e griglie dei focolari, le piastre di fondo, i deflettori, i
raccoglicenere e i trattamenti di superficie delle parti
decorative. Parimenti esclusi dalla presente garanzia sono
le giunzioni e i vetri.
3) I deterioramenti risultanti dall’utilizzo dell’apparecchio con
un combustibile diverso da quello indicato nelle nostre
istruzioni.
4) I deterioramenti di pezzi derivati da cause esterne
all’apparecchio (mandata del camino, temporali, umidità,
pressione o depressione non conforme, shock termico,
colpo di fuoco, ecc).
5) Il danneggiamento degli elementi elettronici, dovuto al
collegamento e l’utilizzo su reti la cui tensione misurata
all’ingresso dell’apparecchio sia inferiore o superiore del
10% alla tensione nominale di 220 volt.
Declinazione di responsabilità
In caso di costruzione di un bene su richiesta del
cliente, la nostra responsabilità in qualità di
subfornitori non copre difetti provocati
dall’installazione o da un difetto di progettazione del
bene, nei confronti del cliente o di terzi.
* Nome e indirizzo dell’installatore : _ _ _ _ _ _ _ _ _ _ _ _ _ _ _ _ _ _ _ _ _ _ _ _ _ _ _ _
_ _ _ _ _ _ _ _ _ _ _ _ _ _ _ _ _ _ _ _ _ _ _ _ _ _ _ _ _ _ _ _ _ _ _ _ _ _ _ _ _ _ _ _
(
Telephono :_ _ _ _ _ _ _ _ _ _ _ _ _ _ _ _ _ _ _ _ _ _ _ _ _
* Nome e indirizzo dell’utente : _ _ _ _ _ _ _ _ _ _ _ _ _ _ _ _ _ _ _ _ _ _ _ _ _ _ _ _ _ _
_ _ _ _ _ _ _ _ _ _ _ _ _ _ _ _ _ _ _ _ _ _ _ _ _ _ _ _ _ _ _ _ _ _ _ _ _ _ _ _ _ _ _ _
Data di installazione :
___ ___ / ___ ___ / ___ ___ ___ ___
Riferimento dell’apparecchio :
Colore :
qY
Numero di serie :
qL
q 134 13 15
qB
qP
qE
qC
qN
qQ
___ ___ ___ ___ ___ ___
• Il presente certificato deve essere compilato e conservato con cura dall’utilizzatore. In caso di reclami, farne
una copia debitamente compilata e inviarla a :
FRANCO BELGE
Rue Orphée Variscotte, 59660 MERVILLE, FRANCE.
Gascon
Document n° 1146-14
25/03/2011
FR
NL
EN
IT
ES
Estufa de leña
EN 13240
Referencia : 134 13 15
Potencia : 11 kW
Hojas de consulta
Conservar
por el usuario
para posteriores consultas.
Presentación del material
Instrucciones para el instalador
Instrucciones para el usuario
FRANCO BELGE
Rue Orphée Variscotte
59660 MERVILLE (FRANCE)
Téléphone : 03 28 43 43 22
Fax : 03 28 43 43 60
Piezas de recambio
Certificado de garantia
Material sujeto a modificacones sin
preaviso.
Documento no contractual.
“GASCON” - ref. 134 13 15
FRANCO BELGE le felicita por su elección.
FRANCO BELGE garantiza la calidad de sus aparatos
y se compromete a satisfacer las necesidades de sus clientes.
Valiéndose de un saber hacer de más de 80 años,
FRANCO BELGE utiliza las tecnologías más avanzadas en el diseño
y la fabricación del conjunto de su gama de aparatos de calefacción.
Este documento le ayudará a instalar y utilizar su aparato,
con las mejores prestaciones para su confort y su seguridad.
SUMARIO
Presentación del material . . . . . . . . . . . . . . . . . . . . . . . . . . . . . . . . . p. 3
Embalaje . . . . . . . . . . . . . . . . . p. 3
Descripción del aparato . . . . . . . . . p. 3
Características generales . . . . . . . . p. 3
Principio de funcionamiento. . . . . . . p. 3
Instrucciones para el instalador. . . . . . . . . . . . . . . . . . . . . . . . . . . . . . p. 4
Advertencia a la atención del usuario . p. 4
Empalme al conducto de humos . . . . p. 5
Local de implantación . . . . . . . . . . p. 4
Montaje de la bandeja de cenizas . . . p. 6
Conducto de evacuación . . . . . . . . p. 4
Control antes de la puesta en marcha . p. 6
Montaje del cono de salida de humo . . p. 5
Mantenimiento de la chimenea . . . . . p. 6
Instrucciones para el usuario . . . . . . . . . . . . . . . . . . . . . . . . . . . . . . . p. 7
Combustible . . . . . . . . . . . . . . . p. 7
Mantenimiento de la chimenea . . . . . p. 8
Allumage . . . . . . . . . . . . . . . . . p. 7
Mantenimiento de la estufa . . . . . . . p. 8
Marcha de la combustión . . . . . . . . p. 8
Instrucciones de seguridad . . . . . . . p. 8
Limpieza . . . . . . . . . . . . . . . . . p. 8
Causas de mal funcionamiento . . . . . p. 9
Piezas de recambio . . . . . . . . . . . . . . . . . . . . . . . . . . . . . . . . . . . . p. 10
2
Hojas de consulta “1146”
“GASCON” - ref. 134 13 15
Presentación del material
Este aparato está concebido para quemar leña con toda seguridad.
ATENCION
Una mala instalación puede tener graves consecuencias.
Se recomienda recurrir a un profesional cualificado para su instalación así como para las
necesidades de mantenimiento periódico.
1 Presentación del material
1.1 Embalaje
1.3 Descripción del aparato
• 1 bulto : Estufa completa.
Estufa de leña - conforme al EN 13240
• Aparato de calefacción de funcionamiento
1.2 Características generales
intermitente.
• Tobera de evacuación de fundición, desmontable para
conectar el aparato, ya sea por la parte superior, o por
la parte posterior.
Referencia . . . . . . . . . . . . . . . . 134 13 15
Potencia calorífica nominal . . . . . . kW
11
Dimensiones útil del Hogar
- Ancho. . . . . . . . . . . . . . . . . mm
520
- Fondo. . . . . . . . . . . . . . . . . mm
304
- Altura . . . . . . . . . . . . . . . . . mm
265
Dimensiones de los leños
- Longitud maxi . . . . . . . . . . . . . cm
50
Capacidad del cajón ceniza . . . . . litros
5
Peso . . . . . . . . . . . . . . . . . . . kg
140
Volumen de calentamiento corregido . m3
450
Depresión óptima de la chimenea . . . Pa
11
Temperatura de humos . . . . . . . . C°
273
Flujo (en masa) de humos . . . . . . . g/s
13,7
Rendimiento . . . . . . . . . . . . . . . %
73,3
Co (13% O2) . . . . . . . . . . . . . . . %
0,16
• Ventanilla de apertura lateral, dotada de un cristal de
vitrocerámica que permite ver la combustión.
• Ajuste del régimen funcionamiento mediante válvula
de aire.
• Cenicero de gran capacidad.
Combustión de larga duración : El aparato con una
carga de 11,5 kg de madera seca a ralentí (aire primario
cerrados, # B, fig. 6, p. 7) y una depresión de 6 Pa,
funciona en estas condiciones más de 11 horas.
1.4 Principio de funcionamiento
La estufa es un aparato diseñado para funcionar
únicamente con la puerta cerrada. La difusión del calor
se realiza esencialmente por radiación a través del
cristal y alrededor del fogón.
Nota : Los resultados indicados al lado resultan de
pruebas efectuadas según la norma EN 13240 con
lenos de 35 cm de longitud y una depresión de 11 Pa
en salida arriba, una carga de 4,9 kg de madera seca,
apertura del aire abierto al 50%.
4 3 2
6 5 2
4 1
Ø
1 2 5
Ø
1 3 9
7 1 2
6 1 4
6 8 1
5 2 4
Figura 1 - Dimensiones en mm
Hojas de consulta “1146”
3
“GASCON” - ref. 134 13 15
Instrucciones para el instalador
2 Instrucciones para el instalador
2.1 Advertencia a la atención del usuario
A
Todas las normativas locales y nacionales,
especialmente las que hacen referencia a normas
nacionales y europeas, deben ser respetadas
durante la instalación del aparato.
Una estufa mal instalada puede ser la causa de
graves incidentes (incendio de la chimenea,
inflamación de materiales de aislamiento de los
tabiques a base de plástico, etc...).
El aislamiento del aparato y del conducto de
evacuación de los gases debe estar reforzado de
acuerdo con las reglas de la técnica, con el fin de
garantizar la seguridad del funcionamiento del aparato.
Consulte la normativa local vigente.
El incumplimiento de estas instrucciones de montaje
conlleva la responsabilidad de quien lo haya efectuado.
La responsabilidad del Constructor se limita a entregar
el aparato en perfectas condiciones.
7 0 0 m m
6 5 0 m m
B
7 0 0
m m
6 5 0 m m
2.2 Local de implantación
Ventilación : Para el buen funcionamiento del aparato
en tiro natural, verificar que el aire necesario para la
combustión de la leña puesa ser tomado en cantidad
suficiente en la misma estancia donde está colocado el
aparato. En habitaciones equipadas con desglose
mecánico controlado, ésta aspira y renueva el aire
a m b i e n t e . E e n e s t e c a s o , l a h a b i ta c i ó n e s t á
ligeramente en depresión y es preciso instalar una
toma de aire exterior complementaria, no obturable,
específica de la chimenea con una sección al menos
igual a 50 cm2.
Emplazamiento del aparato : Buscar un
emplazamiento central en la habitación para que
favorezca la repartición del aire caliente de convección.
La difusión de aire caliente hacia otras estancias de la
casa se realiza por las puertas de comunicación.
Estas piezas deben estar en depresión o dotadas de
rejillas de aireación no ajustables, situadas de modo
que no puedan ser obstruidas, para favorecer la
circulación de aire caliente.
Suelo y tabiques : Hay que asegurarse que el suelo de
la habitación sea capaz de soportar el peso total de la
instalación completa (hogar, conjunto de la Chimenea,
revestimiento, campana). Si no es así reforzar el suelo
con una capa de cemento para repartir la carga.
Asegurarse que no están hechos ni revestidos de
materiales inflamables o que se degraden bajo el
efecto del calor (papel pintado, tapetes, revestimiento
en madera, puertas livianas con insolación a base de
plástico).
En caso contrario, prever una protección apropiada,
por ejemplo una placa de metal.
Preste atención a respetar las distancias de
i n s ta l a c i ó n h a s ta l a s pa r e d e s d e m a t e r i a l
combustible (marca A, B y C fig. 2), hasta las
paredes de material incombustible (marca D, fig. 2).
En el perímetro del aparato no colocar ningún
objeto combustible, cortinas, tintes, etc...
4
C
7 0 0 m m
6 5 0 m m
D
1 5 0 m m
1 5 0
m m
1 5 0
m m
Figura 2 - Distancia mínima de instalación
2.3 Conducto de evacuación
Conducto existente : El conducto de evacuación debe
ser conforme a la reglamentación en vigencia.
El conducto debe estar en buenas condiciones y tener
una depresión suficiente (ver la tabla página 3).
- El conducto debe ser compatible con su utilización,
en caso contrario es necesario entubarlo o adecuarlo.
- El conducto debe estar perfectamente limpio. Se
puede limpiar con la ayuda de un cepillo metálico
(bola con púas) para quitar el hollín y los alquitranes.
- El conducto debe tener un aislante térmico
adecuado.
- Un conducto con las paredes internas frías no permite
la formación del tiro térmico y provoca condensación.
Hojas de consulta “1146”
“GASCON” - ref. 134 13 15
Instrucciones para el instalador
Conducto de nueva construcción : El conducto de
evacuación debe ser conforme a la reglamentación en
vigencia.
- El conducto de humos no debe descansar sobre el
hogar.
- El conducto debe estar alejado de cualquier material
inflamable (armazón, carpintería, mamparas, etc...).
- Debe permitir la limpieza mecánica.
180°
Figura 3 - Montaje del cono de salida de humo
- El conducto debe ser estanco al agua.
- El conducto debe ser estanco y de sección constante
en toda su altura para favorecer el tiraje térmico. Un
conducto excesivamente largo tiene el riesgo de que
el tiraje térmico sea nulo.
- El conducto debe estar conectado a un sólo aparato.
- La altura mínima debe ser de 4 a 5 metros y
sobrepasar la parte mas alta del tejado 40 cm. La
separación con otros edificios o paredes será de
8 metros.
- En caso de terrazas o de tejados con pendiente
inferior a 15º, el conducto debe sobresalir, al menos,
1,20 m.
- El final del conducto no debe frenar el tiraje.
- Si el conducto tiene tendencia a rebufos, por no poder
evitar edificios o paredes cercanos, es aconsejable
colocar un sombrero anti -rebufo o rehacer el
conducto.
- Si la depresión de la chimenea es excesiva, hay que
instalar un moderador de tiro, o colocar una llave de
paso el el mismo conducto debe ser visible y
accesible.
2.4 Montaje del cono de salida de humo
La tobera de evacuación permite el uso de tubos de
125 mm de Ø o de 139 mm de Ø según la conexión se
realice en el interior o en el exterior del cono.
Figura 3
Es posible instalar una salida humo de parte o parte con
el mismo tubo.
Basta con retirar los 2 tornillos y con hacer girar sobre
un eje el adaptador de 180 grados.
Tener cuidado para que la junta de estanqueidad esté
colocada bien.
2.5 Empalme al conducto de humos
- El conducto de conexión debe ser realizado de
acuerdo a la reglamentación en vigencia.
- El aparato debe encontrarse lo más cerca posible de
la chimenea.
- El aparato se unirá al conducto de humos por medio
de un tubo resistente al calor y a los residuos de la
combustión de la leña (Inoxidable, tubo Vitrificado).
- El diametro del Tubo no debe ser inferior al de la
salida del aparato. Si fuera éste el caso, la reducción
debe ser de un diámetro inmediatamente inferior al
diámetro de la tobera del aparato y estar situada lo
más lejos posible de la conexión al aparato.
- La conexión puede realizarse, bien verticalmente a un
conducto que desemboque bajo el techo, bien por la
parte posterior a un conducto que parta del suelo.
- El encaje del tubo al cono del aparato debe ser
estanco.
Figura 4 Conducto de
conexión
1 - Chimenea
2 - Material
refractario en
forma de
embudo
3 - Placa no
combustible
4 - Acceso a la
limpieza
5 - Aislamiento
6 - Placa no
combustible
amovible
Hojas de consulta “1146”
5
“GASCON” - ref. 134 13 15
Instrucciones para el instalador
- En locales que exista VMC (ventilación mecánica
controlada) la estanquidad debe impedir que el
estractor aspire humos del conducto.
- El tubo de unión, el moderador de tiraje o la llave de
paso deben ser visibles, accesibles y fáciles de
limpiar.
2.6 Montaje de la bandeja de cenizas
Figura 5
A fin de evitar cualquier deterioro durante el transporte,
la bandeja de recuperación se ha situado detrás de la
puerta del fogón. Cuelgue la bandeja en la parte inferior
del frontal (marca A).
A
2.7 Control antes de la puesta en marcha
- Verificar el estado de las juntas de masilla.
- Verificar que la puerta cierra bien.
- Verificar que el cristal no esté dañado.
- Verificar que los pasos de humo no están obstruidos
por los componentes del embalaje o piezas
desmontadas.
- Verificar que las piezas amovibles están en su sitio
respectivo.
Notas : Si se trata de una trenza en cerámica, es un
consumible y en consecuencia destinado a ser
cambiado por el usuario.
Figura 5 - Montaje de la bandeja
2.8 Mantenimiento de la chimenea
Muy importante ! Para evitar cualquier incidente
(fuego en el conducto, etc...) las operaciones de
mantenimiento deben realizarse regularmente.
En caso de uso frecuente del hogar, hay que realizar
varias limpiezas anuales del conducto de humos y
comprobar el empalme del conducto con el aparato.
En caso de fuego de chimenea, es preciso cortar el
tiro de la chimenea, cerrar puertas y ventanas,
trampillas y llaves, tapar el orificio de conexión
mediante paños húmedos y llamar a los bomberos.
NO ABRA BAJO NINGÚN CONCEPTO LA PUERTA
DEL APARATO.
(SUCCIÓN DE AIRE)
6
Hojas de consulta “1146”
“GASCON” - ref. 134 13 15
Instrucciones para el usuario
3 Instrucciones para el usuario
El fabricante declina cualquier responsabilidad
referente al deterioro de piezas producido por el uso
de un combustible no recomendado o por cualquier
modificación del aparato o de su instalación. Utilizar
únicamente las piezas de recambio suministradas
por el fabricante.
Todas las normativas locales y nacionales,
especialmente las que hacen referencia a normas
nacionales y europeas, deben ser respetadas
durante el uso del aparato.
“No utilizar el aparato cuando el tiempo es suave”.
Algunas condiciones meteorológicas (por ejemplo:
niebla y subida de temperaturas en temporada fría)
no permiten que la chimenea tire lo suficiente y
pueden ser causa de asfixia.
3.1 Combustible
Este aparato no es un incinerador.
- Utilizar troncos de leña dura que hayan sido cortados
dos años antes y almacenados en lugar cubierto
(Humedad < 20 %).
- La leña dura desprende gran cantidad de calor y
produce buenas brasas.
- Los troncos grandes deben ser cortados a la medida
antes de almacenarlos en un lugar cubierto y
ventilado.
• Combustible recomendado
Leña : Carpe
• Combustible sustitutivo
Leña : Encina, fresno, arce, abedul, olmo, haya, etc...
“Leña verde” ! La leña verde o muy húmeda disminuye
el rendimiento del aparato y provoca el ensuciamiento
del cristal, de las paredes internas del hogar y del
conducto de humos (hollin, breas y alquitrán).
“Leña de recuperación” ! Traviesas de ferrocarril,
postes de teléfono o telégrafo, aglomerados, palets,
etc... La combustión de leña tratada provocan
rapidamente el ensuciamiento de la instalación,
producen malos olores y dificultan la regulación de la
marcha del fuego.
F
Cuidado ! La leña verde y de recuperación facilitan
un posible incendio en el conducto de humos.
3.2 Allumage
Figura 6
- Abra ampliamente la válvula de aire superior
(marca B1).
- Abrir la puerta acristalada.
- Colocar sobre la parrilla papel seco, astillas y troncos
de pequeño diámetro.
- Prender fuego al papel y cerrar la puerta hogar.
- Cuando las brasas estén al rojo vivo, cargue el fogón
con combustible y vuelva a cerrar la puerta (marca A).
Durante el primer encendido hay que aumentar de
manera progresiva la marcha del fuego para permitir a
las piezas de fundido una dilatación adecuada y se
sequen.
Al efectuar el primer encendido, la estufa puede
desprender humo y difundir un olor de pintura nueva.
No se preocupe y ventile correctamente la habitación
durante las primeras horas de funcionamiento.
• Combustibles prohibidos
Todo tipo de carbon y combustible líquido !
A : Apertura de la puerta de
carga
B : Válvula de aire (ajuste del
aire primario)
B1 = válvula abierta
B2 = válvula cerrada
C : Herramienta para
maniobra
Figura 6 - Órganos de maniobra
Hojas de consulta “1146”
7
“GASCON” - ref. 134 13 15
Instrucciones para el usuario
3.3 Marcha de la combustión
3.6 Mantenimiento de la estufa
El aparato debe funcionar con la puerta cerrada. El
control de la marcha de la combustión se realiza por la
entrada de aire primario (marca B).
La experiencia le enseñará la posición más
conveniente.
La estufa está equipada con un sistema "cristal limpio"
mediante barrido del cristal gracias al aire secundario.
• El aparato debe limpiarse regularmente así como el
• Carga del combustible
- Abrir la puerta hogar de forma suave para evitar el
efecto ventosa y que salga humo a la estancia.
- El intervalo de carga mínimo para una potencia
calorífica nominal es de 1,2 horas.
- Los troncos deben colocarse sobre las brasas.
- Para una marcha estable son necesarios 2 troncos
sobre las brasas de manera constante. La marcha del
fuego es mejor con varios troncos que no sean de
gran diametro.
- Para una marcha reducida (por la noche) colocar en el
hogar troncos muy grandes.
- Después de haber cargado la estufa vuelva a cerrar la
puerta acristalada (marca A, figura 6, page 7).
conducto de conexión y el conducto de humos.
• Quitar la puerta hogar, limpiar todas las paredes de la
cámara de combustión y la parrilla.
• La limpieza del cristal se realiza con el aparato frio y
con un producto apropiado. Después de limpiarlo hay
que aclarar con agua fría. Limpieza, enjuague con
agua clara. No utilice limpiadores abrasivos.
• El cristal vitrocerámico resiste una temperatura de
750ºC, en caso de rotura por un golpe o mala maniobra
no se puede reemplazar por otro que no sea de las
mismas características.
• Todas las piezas que constituyen el revestimiento
pueden frotarse en seco con un cepillo suave o con un
paño ligeramente húmedo. En caso de condensación
o aspersión involuntaria de agua, limpie las partes
manchadas antes de que se sequen.
• Comprobar la ausencia de obstrucciones antes del
encendido después de un largo periodo de parada.
• El aparato no puede utilizarse en un conducto de
humos que sirve para varios aparatos.
3.4 Limpieza
• Mantenga las rejillas de ventilación libres de cualquier
- Quitar las cenizas de manera regular.
- Las cenizas nunca deben estar en contacto con la
3.7 Instrucciones de seguridad
parrilla, esto evitaría la entrada de aire primario y el
fuego sería amortecido. La parrilla no podría enfriarse
y su deterioro sería rápido.
- Quitar las cenizas cuando el hogar esté frio.
- Retirar el cajón-cenicero con ayuda de la herramienta.
Vacíe las cenizas tomando las precauciones habituales
para las brasas incandescentes.
obstrucción.
Esta estufa es un aparato que produce calor y puede
provocar quemaduras por contacto.
El aparato puede permanecer aún caliente una vez
apagado.
PROHÍBA A LOS NIÑOS ACERCARSE.
3.5 Mantenimiento de la chimenea
Muy importante ! Para evitar cualquier incidente
(fuego en el conducto, etc...) las operaciones de
mantenimiento deben realizarse regularmente.
En caso de uso frecuente del hogar, hay que realizar
varias limpiezas anuales del conducto de humos y
comprobar el empalme del conducto con el aparato.
En caso de fuego de chimenea, es preciso cortar el
tiro de la chimenea, cerrar puertas y ventanas,
trampillas y llaves, tapar el orificio de conexión
mediante paños húmedos y llamar a los bomberos.
NO ABRA BAJO NINGÚN CONCEPTO LA PUERTA
DEL APARATO. (SUCCIÓN DE AIRE)
La chimenea debe ser verificada por un especialista
(1 a 2 veces por año).
8
Hojas de consulta “1146”
“GASCON” - ref. 134 13 15
Instrucciones para el usuario
3.8 Causas de mal funcionamiento
þ : Este signo le recomienda que recurra a
un profesional calificado para efectuar
estas operaciones.
Situación
Probables causas
- Acción
El fuego prende mal. El fuego
no se sostiene.
Leña verde o húmeda
- Utilizar troncos de leña dura que hayan sido cortados
dos años antes y almacenados en lugar cubierto.
Troncos demasiado grandes
- En el encendido utilizar troncos pequeños y secos con
una base de papel. Para el mantenimiento del fuego
utilice leños cortados longitudinalmente.
Leña de mala calidad
- La leña dura desprende gran cantidad de calor y
produce buenas brasas (roble, encina, fresno, arce,
abedul, olmo, haya, etc...).
Aire primario insufuciente
- Abrir del todo le entrada de aire primario
- Favorecer la entrada de aire exterior.
El tiraje del conducto de humos
(depresión) es insuficiente
þ
- Verificar que el conducto no esté obstruido Si es
necesario efectuar una limpieza.
- Comprobar que el conducto esté conforme.
Fluctuaciones del fuego
Exceso de entrada de aire
- Asegurarse que la válvula de encendido está bien
cerrada.
- Cerrar parcialmente o del todo la entrada de aire
primario.
Tiraje del conducto excesivo
Emanaciones de humo en la
estancia cuando se pone en
marcha el aparato.
þ
Leña de mala calidad
- No se deben utilizar maderas tratadas ni aglomerados.
Conducto de humos frio
- Calentar el conducto de humos con una cantidad
razonable de papel.
La estancia está en depresión
(presión negativa)
Emanaciones de humo
durante la combustión.
- Instalar un regulador de tiro el mismo conducto.
El tiraje del conducto de humos
(depresión) es insuficiente
- En habitaciones equipadas con VMC, hay que
entrabrir una ventana para que el fuego tome
velocidad.
þ
- Compruebe la conformidad del conducto de humo y su
aislamiento
- Verificar que el conducto no esté obstruido Si es
necesario efectuar una limpieza.
Calefacción insuficiente
El viento entra en el conducto
þ
- Instalar un sombrero anti-rebufo.
La estancia está en depresión
(presión negativa)
þ
- Si en la habitación está instalado un VMC hay que
instalar una rejilla de entrada de aire exterior cerca del
conjunto Chimenea.
Leña de mala calidad
- Utilizar el combustible recomendado.
Mala mezcla del aire caliente de
convección
- Compruebe el circuito de convección (rejillas de
entrada, conducto de aire, rejillas de difusión).
- Verificar que las piezas vecinas tienen provista rejilla
de aireación para favorecer la circulación de l aire
caliente.
Hojas de consulta “1146”
9
“GASCON” - ref. 134 13 15
Piezas de recambio
4 Piezas de recambio
Para cualquier pedido de repuestos, indicar : el tipo y la referencia del aparato incluyendo el índice literal de color
(inscrito sobre la placa que contiene la descripción), la designación y el código articulo de la pieza.
Ejemplo : Estufa de leña “GASCON”, referencia 134 13 15, color Y, superior hogar 352165 EF.
Y = 134 13 15 Y
L = 134 13 15 L
N° Código
1
2
3
4
5
6
7
7
7
7
7
7
7
7
8
9
9
9
9
9
9
9
9
10
10
10
10
10
10
10
10
11
12
13
14
15
15
15
15
15
15
15
15
16
16
16
16
16
16
16
16
17
18
19
20
21
10
207315
222575
236135
259015
259037
270414
300132
300132
300132
300134
300132
300132
300132
300132
300491
301172
301172
301172
301172
301172
301172
301172
301172
303860
303860
303860
303860
303860
303860
303860
303860
305016
305214
306285
309233
310734
310734
310734
310734
310734
310734
310734
310734
310830
310830
310830
310830
310830
310830
310830
310830
315614
319738
322717
326602
327905
B = 134 13 15 B
P = 134 13 15 P
E = 134 13 15 E
C = 134 13 15 C
N = 134 13 15 N
Q = 134 13 15 Q
Designación . . . . . . . . . . . . . . . . . Y . . L . . B . . P . . E . . C . . N . . . . Q . Calidad
77
EF
MK
RH
RJ
RP
EP
ER
EF
77
EF
MK
RH
RJ
RP
EP
ER
77
EF
MK
RH
RJ
RP
EP
ER
EB
EB
EF
EB
77
EF
MK
RH
RJ
RP
EP
ER
77
EF
MK
RH
RJ
RP
EP
ER
EB
EB
EB
EB
77
Revestimiento trasero . . . . . . . . . . . . Y. . . L. . . B . . P . . E . . C . . N . . . . Q
Cortahumos . . . . . . . . . . . . . . . . . Y. . . L. . . B . . P . . E . . C . . N . . . . Q
Placa de obturación . . . . . . . . . . . . . Y. . . L. . . B . . P . . E . . C . . N . . . . Q
Pata de fijacion. . . . . . . . . . . . . . . . Y. . . L. . . B . . P . . E . . C . . N . . . . Q
Pata de fijacion. . . . . . . . . . . . . . . . Y. . . L. . . B . . P . . E . . C . . N . . . . Q
Válvula de aire . . . . . . . . . . . . . . . . Y. . . L. . . B . . P . . E . . C . . N . . . . Q
Pié . . . . . . . . . . . . . . . . . . . . . . . . . . L . . . . . . . . . . . . . . . . . . . . . . . .
Pié . . . . . . . . . . . . . . . . . . . . . . Y . . . . . . . . . . . . . . . . . . . . . . . . . . . .
Pié . . . . . . . . . . . . . . . . . . . . . . . . . . . . . . . . . . . . . . . . . C . . . . . . . . .
Pié. . . . . . . . . . . . . . . . . . . . . . . . . . . . . . . . . . P . . . . . . . . . . . . . . . .
Pié . . . . . . . . . . . . . . . . . . . . . . . . . . . . . . B . . . . . . . . . . . . . . . . . . . .
Pié . . . . . . . . . . . . . . . . . . . . . . . . . . . . . . . . . . . . . E . . . . . . . . . . . . .
Pié . . . . . . . . . . . . . . . . . . . . . . . . . . . . . . . . . . . . . . . . . . . . . N. . . . . .
Pié . . . . . . . . . . . . . . . . . . . . . . . . . . . . . . . . . . . . . . . . . . . . . . . . . Q
Inferior . . . . . . . . . . . . . . . . . . . . Y. . . L. . . B . . P . . E . . C . . N . . . . Q
Puerta cajón ceniza . . . . . . . . . . . . . . . . . L . . . . . . . . . . . . . . . . . . . . . . . .
Puerta cajón ceniza . . . . . . . . . . . . . Y . . . . . . . . . . . . . . . . . . . . . . . . . . . .
Puerta cajón ceniza . . . . . . . . . . . . . . . . . . . . . . . . . . . . . . . . C . . . . . . . . .
Puerta cajón ceniza . . . . . . . . . . . . . . . . . . . . . . . . P . . . . . . . . . . . . . . . .
Puerta cajón ceniza . . . . . . . . . . . . . . . . . . . . . B . . . . . . . . . . . . . . . . . . . .
Puerta cajón ceniza . . . . . . . . . . . . . . . . . . . . . . . . . . . . E . . . . . . . . . . . . .
Puerta cajón ceniza . . . . . . . . . . . . . . . . . . . . . . . . . . . . . . . . . . . . N. . . . . .
Puerta cajón ceniza . . . . . . . . . . . . . . . . . . . . . . . . . . . . . . . . . . . . . . . . Q
Salida de humos . . . . . . . . . . . . . . . . . . . L . . . . . . . . . . . . . . . . . . . . . . . .
Salida de humos . . . . . . . . . . . . . . . Y . . . . . . . . . . . . . . . . . . . . . . . . . . . .
Salida de humos . . . . . . . . . . . . . . . . . . . . . . . . . . . . . . . . . . C . . . . . . . . .
Salida de humos . . . . . . . . . . . . . . . . . . . . . . . . . . P . . . . . . . . . . . . . . . .
Salida de humos . . . . . . . . . . . . . . . . . . . . . . B . . . . . . . . . . . . . . . . . . . .
Salida de humos . . . . . . . . . . . . . . . . . . . . . . . . . . . . . . E . . . . . . . . . . . . .
Salida de humos . . . . . . . . . . . . . . . . . . . . . . . . . . . . . . . . . . . . . N. . . . . .
Salida de humos . . . . . . . . . . . . . . . . . . . . . . . . . . . . . . . . . . . . . . . . . . Q
Ladrillo . . . . . . . . . . . . . . . . . . . . Y. . . L. . . B . . P . . E . . C . . N . . . . Q
Ladrillo . . . . . . . . . . . . . . . . . . . . Y. . . L. . . B . . P . . E . . C . . N . . . . Q
Hogar posterior . . . . . . . . . . . . . . . Y. . . L. . . B . . P . . E . . C . . N . . . . Q
Parrilla . . . . . . . . . . . . . . . . . . . . Y. . . L. . . B . . P . . E . . C . . N . . . . Q
Lateral derecho . . . . . . . . . . . . . . . . . . . L . . . . . . . . . . . . . . . . . . . . . . . .
Lateral derecho . . . . . . . . . . . . . . . Y . . . . . . . . . . . . . . . . . . . . . . . . . . . .
Lateral derecho . . . . . . . . . . . . . . . . . . . . . . . . . . . . . . . . . . C . . . . . . . . .
Lateral derecho . . . . . . . . . . . . . . . . . . . . . . . . . . . P . . . . . . . . . . . . . . . .
Lateral derecho . . . . . . . . . . . . . . . . . . . . . . . B . . . . . . . . . . . . . . . . . . . .
Lateral derecho. . . . . . . . . . . . . . . . . . . . . . . . . . . . . . . E . . . . . . . . . . . . .
Lateral derecho . . . . . . . . . . . . . . . . . . . . . . . . . . . . . . . . . . . . . . N. . . . . .
Lateral derecho . . . . . . . . . . . . . . . . . . . . . . . . . . . . . . . . . . . . . . . . . . Q
Lateral izquierdo . . . . . . . . . . . . . . . . . . . L . . . . . . . . . . . . . . . . . . . . . . . .
Lateral izquierdo . . . . . . . . . . . . . . . Y . . . . . . . . . . . . . . . . . . . . . . . . . . . .
Lateral izquierdo . . . . . . . . . . . . . . . . . . . . . . . . . . . . . . . . . . C . . . . . . . . .
Lateral izquierdo . . . . . . . . . . . . . . . . . . . . . . . . . . P . . . . . . . . . . . . . . . .
Lateral izquierdo . . . . . . . . . . . . . . . . . . . . . . B . . . . . . . . . . . . . . . . . . . .
Lateral izquierdo . . . . . . . . . . . . . . . . . . . . . . . . . . E . . . . . . . . . . . . . . . .
Lateral izquierdo . . . . . . . . . . . . . . . . . . . . . . . . . . . . . . . . . . . . . N. . . . . .
Lateral izquierdo . . . . . . . . . . . . . . . . . . . . . . . . . . . . . . . . . . . . . . . . . . Q
Conducto de aire. . . . . . . . . . . . . . . Y. . . L. . . B . . P . . E . . C . . N . . . . Q
Soporte reja . . . . . . . . . . . . . . . . . Y. . . L. . . B . . P . . E . . C . . N . . . . Q
Suplemento soporte . . . . . . . . . . . . . Y. . . L. . . B . . P . . E . . C . . N . . . . Q
Cortahumos . . . . . . . . . . . . . . . . . Y. . . L. . . B . . P . . E . . C . . N . . . . Q
Platillo cenicero . . . . . . . . . . . . . . . . . . . L . . . . . . . . . . . . . . . . . . . . . . . .
.
.
.
.
.
.
.
.
.
.
.
.
.
.
.
.
.
.
.
.
.
.
.
.
.
.
.
.
.
.
.
.
.
.
.
.
.
.
.
.
.
.
.
.
.
.
.
.
.
.
.
.
.
.
.
.
.
.
.
.
.
.
.
.
.
.
.
.
.
.
.
.
.
.
.
.
.
.
.
.
.
.
.
.
.
.
.
.
.
.
.
.
.
.
.
.
.
.
.
.
.
.
.
.
.
.
.
.
.
.
.
.
01
01
01
08
02
01
04
04
04
04
04
04
04
04
01
01
01
01
01
01
01
01
01
01
01
01
01
01
01
01
01
01
01
01
01
01
01
01
01
01
01
01
01
01
01
01
01
01
01
01
01
01
01
01
01
01
Hojas de consulta “1146”
“GASCON” - ref. 134 13 15
Piezas de recambio
4 8
1 0
2 3
3 6
1 6
4 8
5 0
1 1
1
2 8
2 0
1 3
2
2 2
5
4 7
1 4
2 7
1 9
5 1
1 8
2 9
1 2
5 5
5 5
6
2 6
4 2
4 5
1 7
4 0
4 1
4 9
4
3 9
3 0
2 1
4 7
3
1 5
4
2 4
4 5
5 4
4 9
4 3
8
4 6
3 8
5 2
3 3
2 5
4 1
4 0
4 2
3 1
3 7
4 3
4 4
3 2
4 6
9
7
5 3
3 4
4 3
Figura 7 - Despiece del aparato
Hojas de consulta “1146”
11
“GASCON” - ref. 134 13 15
Y = 134 13 15 Y
L = 134 13 15 L
N°
Código
21
21
21
21
21
21
21
22
23
24
25
25
25
25
25
25
25
25
26
26
26
26
26
26
26
26
27
28
28
28
28
28
28
28
28
29
29
29
29
29
29
29
29
30
31
32
33
34
36
37
38
39
40
41
42
43
44
45
46
47
48
49
50
51
52
53
327905
327905
327905
327905
327905
327905
327905
330022
331001
331700
331800
331800
331800
331800
331800
331800
331800
331800
331900
331900
331900
331900
331900
331900
331900
331900
332003
352165
352165
352165
352165
352165
352165
352165
352165
359806
359806
359806
359806
359806
359806
359806
359806
624045
158626
101063
101062
101057
105006
134705
134711
179624
188829
181632
110404
189825
808001
181634
181633
181625
142316
142881
269501
269449
161039
988920
12
Piezas de recambio
B = 134 13 15 B
P = 134 13 15 P
E = 134 13 15 E
C = 134 13 15 C
N = 134 13 15 N
Q = 134 13 15 Q
Designación . . . . . . . . Tipo . . . . . Y . . L . . B . . P . . E . . C . . N . . . . Q . Calidad
EF
MK
RH
RJ
RP
EP
ER
EB
EF
EF
77
EF
MK
RH
RJ
RP
EP
Er
77
EF
MK
RH
RJ
RP
EP
ER
EB
77
EF
MK
RH
RJ
RP
EP
ER
77
EF
MK
RH
RJ
RP
EP
ER
Platillo cenicero . . . . . . . . . . . . . . . Y . . . . . . . . . . . . . . . . . . . . . . . . . . . . . . 01
Platillo cenicero . . . . . . . . . . . . . . . . . . . . . . . . . . . . . . . . . . C . . . . . . . . . . . 01
Platillo cenicero . . . . . . . . . . . . . . . . . . . . . . . . . . . P . . . . . . . . . . . . . . . . . . 01
Platillo cenicero . . . . . . . . . . . . . . . . . . . . . . . B . . . . . . . . . . . . . . . . . . . . . . 01
Platillo cenicero . . . . . . . . . . . . . . . . . . . . . . . . . . . . . . E . . . . . . . . . . . . . . . 01
Platillo cenicero . . . . . . . . . . . . . . . . . . . . . . . . . . . . . . . . . . . . . . N. . . . . . . . 01
Platillo cenicero . . . . . . . . . . . . . . . . . . . . . . . . . . . . . . . . . . . . . . . . . . Q . . 01
Placa hogar decorativa . . . . . . . . . . . Y. . . L. . . B . . P . . E . . C . . N . . . . Q . . 01
Adaptador . . . . . . . . . . . . . . . . . . Y. . . L. . . B . . P . . E . . C . . N . . . . Q . . 01
Soporte . . . . . . . . . . . . . . . . . . . . Y. . . L. . . B . . P . . E . . C . . N . . . . Q . . 01
Puerta derecha . . . . . . . . . . . . . . . . . . . L . . . . . . . . . . . . . . . . . . . . . . . . . . 01
Puerta derecha. . . . . . . . . . . . . . . . Y . . . . . . . . . . . . . . . . . . . . . . . . . . . . . . 01
Puerta derecha . . . . . . . . . . . . . . . . . . . . . . . . . . . . . . . . . . C . . . . . . . . . . . 01
Puerta derecha . . . . . . . . . . . . . . . . . . . . . . . . . . . P . . . . . . . . . . . . . . . . . . 01
Puerta derecha . . . . . . . . . . . . . . . . . . . . . . . B . . . . . . . . . . . . . . . . . . . . . . 01
Puerta derecha . . . . . . . . . . . . . . . . . . . . . . . . . . . . . . . E . . . . . . . . . . . . . . . 01
Puerta derecha . . . . . . . . . . . . . . . . . . . . . . . . . . . . . . . . . . . . . . N. . . . . . . . 01
Puerta derecha . . . . . . . . . . . . . . . . . . . . . . . . . . . . . . . . . . . . . . . . . . . Q . . 01
Puerta izquierda . . . . . . . . . . . . . . . . . . . L . . . . . . . . . . . . . . . . . . . . . . . . . . 01
Puerta izquierda . . . . . . . . . . . . . . . Y . . . . . . . . . . . . . . . . . . . . . . . . . . . . . . 01
Puerta izquierda . . . . . . . . . . . . . . . . . . . . . . . . . . . . . . . . . . C . . . . . . . . . . . 01
Puerta izquierda . . . . . . . . . . . . . . . . . . . . . . . . . . P . . . . . . . . . . . . . . . . . . 01
Puerta izquierda. . . . . . . . . . . . . . . . . . . . . . . B . . . . . . . . . . . . . . . . . . . . . . 01
Puerta izquierda . . . . . . . . . . . . . . . . . . . . . . . . . . . . . . E . . . . . . . . . . . . . . . 01
Puerta izquierda . . . . . . . . . . . . . . . . . . . . . . . . . . . . . . . . . . . . . . N. . . . . . . . 01
Puerta izquierda . . . . . . . . . . . . . . . . . . . . . . . . . . . . . . . . . . . . . . . . . . Q . . 01
Conducto de aire. . . . . . . . . . . . . . . Y. . . L. . . B . . P . . E . . C . . N . . . . Q . . 01
Superior hogar . . . . . . . . . . . . . . . . . . . . L . . . . . . . . . . . . . . . . . . . . . . . . . . 01
Superior hogar . . . . . . . . . . . . . . . . Y . . . . . . . . . . . . . . . . . . . . . . . . . . . . . . 01
Superior hogar . . . . . . . . . . . . . . . . . . . . . . . . . . . . . . . . . . . C . . . . . . . . . . . 01
Superior hogar . . . . . . . . . . . . . . . . . . . . . . . . . . . P . . . . . . . . . . . . . . . . . . 01
Superior hogar . . . . . . . . . . . . . . . . . . . . . . . B . . . . . . . . . . . . . . . . . . . . . . 01
Superior hogar . . . . . . . . . . . . . . . . . . . . . . . . . . . . . . . E . . . . . . . . . . . . . . . 01
Superior hogar . . . . . . . . . . . . . . . . . . . . . . . . . . . . . . . . . . . . . . N. . . . . . . . 01
Superior hogar . . . . . . . . . . . . . . . . . . . . . . . . . . . . . . . . . . . . . . . . . . . Q . . 01
Frontal . . . . . . . . . . . . . . . . . . . . . . . . L . . . . . . . . . . . . . . . . . . . . . . . . . . 01
Frontal . . . . . . . . . . . . . . . . . . . . Y . . . . . . . . . . . . . . . . . . . . . . . . . . . . . . 01
Frontal . . . . . . . . . . . . . . . . . . . . . . . . . . . . . . . . . . . . . . . C . . . . . . . . . . . 01
Frontal . . . . . . . . . . . . . . . . . . . . . . . . . . . . . . . P . . . . . . . . . . . . . . . . . . 01
Frontal . . . . . . . . . . . . . . . . . . . . . . . . . . . . B . . . . . . . . . . . . . . . . . . . . . . 01
Frontal . . . . . . . . . . . . . . . . . . . . . . . . . . . . . . . . . . . E . . . . . . . . . . . . . . . 01
Frontal . . . . . . . . . . . . . . . . . . . . . . . . . . . . . . . . . . . . . . . . . . . N. . . . . . . . 01
Frontal . . . . . . . . . . . . . . . . . . . . . . . . . . . . . . . . . . . . . . . . . . . . . . . Q . . 01
Cajon ceniza . . . . . . . . . . . . . . . . . Y. . . L. . . B . . P . . E . . C . . N . . . . Q . . 01
Pomo . . . . . . . . . . . . . . . . . . . . . Y. . . L. . . B . . P . . E . . C . . N . . . . Q . . 01
Eje del cierre . . . . . . . . . . . . . . . . . Y. . . L. . . B . . P . . E . . C . . N . . . . Q . . 01
Eje del cierre . . . . . . . . . . . . . . . . . Y. . . L. . . B . . P . . E . . C . . N . . . . Q . . 01
Eje de articulación . . . . . . . . . . . . . . Y. . . L. . . B . . P . . E . . C . . N . . . . Q . . 01
Junta. . . . . . . . . . . . . Ø 15 . . . . . Y. . . L. . . B . . P . . E . . C . . N . . . . Q . . 2 m
Pasador acanalado . . . . . 6x45 . . . . . Y. . . L. . . B . . P . . E . . C . . N . . . . Q . . 01
Pasador acanalado . . . . . 6x30 . . . . . Y. . . L. . . B . . P . . E . . C . . N . . . . Q . . 01
Eje de mando . . . . . . . . . . . . . . . . Y. . . L. . . B . . P . . E . . C . . N . . . . Q . . 01
Cristal vitrocerámico . . 278 X 220 X 4 . . . Y. . . L. . . B . . P . . E . . C . . N . . . . Q . . 02
Junta . . . . . . . . . . . . . Ø 6 . . . . . . Y. . . L. . . B . . P . . E . . C . . N . . . . Q . . 2 m
Clavo acanalado . . . . . . 6x30 . . . . . Y. . . L. . . B . . P . . E . . C . . N . . . . Q . . 04
Tornillo de punta plana . . . M5x6 . . . . . Y. . . L. . . B . . P . . E . . C . . N . . . . Q . . 02
ED Pomo . . . . . . . . . . . . . . . . . . . . . Y. . . L. . . B . . P . . E . . C . . N . . . . Q . . 01
Junta. . . . . . . . . . . . . Ø 15 . . . . . Y. . . L. . . B . . P . . E . . C . . N . . . . Q . 1,64 m
Junta. . . . . . . . . . . . . Ø 10 . . . . . Y. . . L. . . B . . P . . E . . C . . N . . . . Q . 1,33 m
Cordón cerámico . . . . . . Ø 7 . . . . . . Y. . . L. . . B . . P . . E . . C . . N . . . . Q . 3,16 m
Junta . . . . . . . . . . . . . 7x3 . . . . . . Y. . . L. . . B . . P . . E . . C . . N . . . . Q . . 1 m
Junta . . . . . . . . . . . . . . . . . . . . . Y. . . L. . . B . . P . . E . . C . . N . . . . Q . . 08
Cortahumos . . . . . . . . . . . . . . . . . Y. . . L. . . B . . P . . E . . C . . N . . . . Q . . 01
Cortahumos . . . . . . . . . . . . . . . . . Y. . . L. . . B . . P . . E . . C . . N . . . . Q . . 01
Pintura de retoque . . . . . . (P) . . . . . . . . . . . . . . . . . P . . . . . . . . . . . . . . . . . . 01
Puerta de carga completa . . . . . . . . . . . . . . . . . . . . . . . . . . . . . . . . N. . . . . . . . 01
Hojas de consulta “1146”
“GASCON” - ref. 134 13 15
Y = 134 13 15 Y
L = 134 13 15 L
Piezas de recambio
B = 134 13 15 B
P = 134 13 15 P
E = 134 13 15 E
C = 134 13 15 C
N = 134 13 15 N
Q = 134 13 15 Q
N° Código
Designación . . . . . . . . . . . . . . . . . Y . . L . . B . . P . . E . . C . . N . . . . Q . Calidad
53
53
53
53
53
53
53
54
54
54
54
54
54
54
54
55
Puerta de carga completa . . . . . . . . . . Y . . . . . . . . . . . . . . . . . . . . . . . . . . . .
Puerta de carga completa . . . . . . . . . . . . . . L . . . . . . . . . . . . . . . . . . . . . . . .
Puerta de carga completa . . . . . . . . . . . . . . . . . B . . . . . . . . . . . . . . . . . . . .
Puerta de carga completa . . . . . . . . . . . . . . . . . . . . . P . . . . . . . . . . . . . . . .
Puerta de carga completa . . . . . . . . . . . . . . . . . . . . . . . . . E . . . . . . . . . . . . .
Puerta de carga completa . . . . . . . . . . . . . . . . . . . . . . . . . . . . . C . . . . . . . . .
Puerta de carga completa . . . . . . . . . . . . . . . . . . . . . . . . . . . . . . . . . . . . . Q
Puerta de carga completa . . . . . . . . . . . . . . . . . . . . . . . . . . . . . . . . N. . . . . .
Puerta de carga completa . . . . . . . . . . Y . . . . . . . . . . . . . . . . . . . . . . . . . . . .
Puerta de carga completa . . . . . . . . . . . . . . L . . . . . . . . . . . . . . . . . . . . . . . .
Puerta de carga completa . . . . . . . . . . . . . . . . . B . . . . . . . . . . . . . . . . . . . .
Puerta de carga completa . . . . . . . . . . . . . . . . . . . . . P . . . . . . . . . . . . . . . .
Puerta de carga completa . . . . . . . . . . . . . . . . . . . . . . . . . E . . . . . . . . . . . . .
Puerta de carga completa . . . . . . . . . . . . . . . . . . . . . . . . . . . . . C . . . . . . . . .
Puerta de carga completa . . . . . . . . . . . . . . . . . . . . . . . . . . . . . . . . . . . . . Q
Eje . . . . . . . . . . . . . . . . . . . . . . Y. . . L. . . B . . P . . E . . C . . N . . . . Q
988922
988924
988926
988928
988930
988932
988994
988744
988923
988925
988927
988929
988931
988933
988995
100939
.
.
.
.
.
.
.
.
.
.
.
.
.
.
.
.
.
.
.
.
.
.
.
.
.
.
.
.
.
.
.
.
01
01
01
01
01
01
01
01
01
01
01
01
01
01
01
02
Notas
Hojas de consulta “1146”
13
Certificado de Garantía
Garantía legal
Las especificaciones, dimensiones e informaciones
indicadas en nuestros documentos se proporcionan a
título meramente indicativos y no comprometen en
nada al vendedor.
Con el fin de mejorar nuestros productos, cualquier
modificación estimada útil por nuestros servicios
podrá realizarse sin previo aviso.
Las disposiciones del presente certificado de garantía
no son exclusivas del beneficio al favor del comprador
del material, en relación con la garantía legal
relacionadas con fallos o defectos ocultos, que se
aplican, en cualquier caso, en las condiciones de los
artículos 1641 y siguientes del código civil, y en el
país donde ha sido comprado el producto.
Garantía contractual
Nuestros productos garantizados contra los fallos y
defectos ocultos bajo las condiciones siguientes:
1) instalación y puesta a punto del aparato por un instalador
profesional.
2) respeto de las instrucciones indicados en nuestros
documentos técnicos, manuales de instalación y de ajuste.
3) instalación, uso y mantenimiento del aparato realizados de
acuerdo con las normas, legislaciones vigentes y las
indicaciones de los manuales técnicos suministrados con el
aparato.
Esta garantía afecta a la sustitución, en nuestros
talleres, piezas identificadas como defectuosas al
originen por nuestro servicio “control de la garantía”:
portes y mano de obra a cargo del usuario. Además,
si las reparaciones o la sustitución de las piezas
cubiertas por la garantía aparecen demasiado
onerosas con respecto al precio del aparato, la
decisión de cambiar o de reparar el aparato
pertenecerá al vendedor.
Nuestra garantía es de 2 (dos) años para todos los
aparatos salvo hogares e insertos para los cuales
nuestra garantía es de 5 (cinco) años con la exclusión
de:
1) Los pilotos luminosos, los fusibles, las resistencias
eléctricas, los ventiladores.
2) Las piezas de desgaste o en contacto con temperaturas
elevadas a saber: soleras y rejillas del hogar, placas de
fondo, deflectores, ceniceros, pinturas y tratamientos de
superficie de las partes decorativas. También están
excluidos de esta garantía las juntas y cristales.
3) Las averías que resulten del uso del aparato con un
combustible diferente del precisado en nuestros manuales.
4) Los deterioros de piezas procedentes de elementos
exteriores al aparato (escape de chimenea, efectos de
tormenta, humedad, presión o depresión no conforme,
golpes térmicos, golpe de fuego, .....).
5) Las degradaciones de piezas eléctricas, resultantes de la
conexión y del uso sobre una red eléctrica cuya tensión,
medida a la entrada del aparato, fuera inferior o superior en
un 10 % de la tensión nominal de 220 voltios.
Exclusión de responsabilidad
En la hipótesis de fabricación de un bien a la
demanda del cliente, nuestra responsabilidad, en
calidad de subcontratista, no podrá en ningún caso
ser comprometida ante el cliente o terceros en caso
de defectos procedentes de la instalación o de un fallo
de diseño del bien.
* Nombre y Dirección del instalador : _ _ _ _ _ _ _ _ _ _ _ _ _ _ _ _ _ _ _ _ _ _ _ _ _ _ _
_ _ _ _ _ _ _ _ _ _ _ _ _ _ _ _ _ _ _ _ _ _ _ _ _ _ _ _ _ _ _ _ _ _ _ _ _ _ _ _ _ _ _ _
( Teléfono : _ _ _ _ _ _ _ _ _ _ _ _ _ _ _ _ _ _ _ _ _ _ _ _ _ _ _ _ _ _ _ _ _ _ _ _ _ _
* Nombre y Dirección del usario :
_ _ _ _ _ _ _ _ _ _ _ _ _ _ _ _ _ _ _ _ _ _ _ _ _ _ _ _
_ _ _ _ _ _ _ _ _ _ _ _ _ _ _ _ _ _ _ _ _ _ _ _ _ _ _ _ _ _ _ _ _ _ _ _ _ _ _ _ _ _ _ _
_
Fecha de installatión :
Referencia del aparato :
Color :
qY
qL
___ ___ / ___ ___ / ___ ___ ___ ___
q 134 13 15
qB
qP
qE
N° de série, inscrito sobre la placa de identificación :
qC
qN
qQ
___ ___ ___ ___ ___ ___
• Esta Garantia hay que rellenarla y la debe conservar el usario.
En caso de tener que utilizar la Garantia, hacer una copia y enviarla a :
FRANCO BELGE - Rue Orphée Variscotte, 59660 MERVILLE, FRANCE.