1
ENGLISH
◆
◆
◆
The cable wire colours, or a letter, will be
marked at the connection points of most good
quality plugs. Attach the wires to their respective
points in the plug (see above). Brown is for
Live (L) (2), blue is for Neutral (N) (4).
Before replacing the top cover of the mains plug
ensure that the cable restraint (3) is holding the
outer sheath of the cable firmly and that the
leads are correctly fixed at the terminal screws.
If the plug has a fuse cover, make sure that the
fuse cover is fitted. Do not use the plug if the
fuse cover is missing or damaged.
Never use a light socket.
Using an extension cable
Always use an approved extension cable suitable
for the power input of this appliance (see rating
plate). The extension cable must be suitable for
outdoor use.
◆ Before use, inspect the cable for signs of
damage, wear and ageing. Replace the
extension cable if damaged or defective.
◆ When using a cable reel, always unwind the
cable completely.
1.
2.
3.
4.
5.
6.
7.
8.
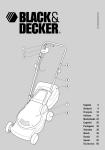
OVERVIEW (fig. A)
On/off switch
Lock-off button
Switch box
Upper handle
Lower handle
Grass bag
Motor cover
Wheels
ASSEMBLY
Before assembly, make sure that the tool
is switched off and unplugged.
Assembling the handle (fig. B)
◆ Fit the two lower handle parts (9) to the upper
handle (4) using the screws (10) and nuts (11)
as shown.
10
Fitting the handle (fig. C)
◆ Insert the ends of the lower handle (5) into the
corresponding holes (12) in the mower.
◆ Press the handle down as far as it will go.
◆ Secure the handle using the screws (13).
Assembling and fitting the grass bag (fig. D1 - D4)
GR270/GR280/GR290
◆ Insert the frame (14) into the bag (15) as shown
(fig. D1).
◆ Secure the frame into the clamping rims (16)
using a spoon handle or a similar rounded tool
(fig. D2). In order to facilitate assembly, work in
the order indicated in fig. D3.
◆ Lift the flap (17) and place the metal frame of
the grass bag into the slot (18) (fig. D4).
GR233
◆ Align the two halves of the grass bag.
◆ Press the two halves together.
◆ Clip the assembled grass bag onto the mower
and let it click into place.
USE
Let the tool work at its own pace.
Do not overload.
Adjusting the height of cut (fig. E)
Disconnect the appliance from the mains
and wait until the blade has stopped
rotating before proceeding.
The height of cut is adjusted by changing the
height of the wheels.
◆ Release the wheels (8) by swivelling them out
of the locked position.
◆ Set the wheels to the desired height setting.
◆ Swivel the wheels back into the locked position,
making sure that all wheels are set to the same
height.