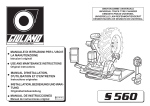
1
SMONTAGOMME UNIVERSALE
UNIVERSAL TRUCK TYRE CHANGER
DEMONTE-PNEUS UNIVERSEL
UNIVERSELLE LKW-REIFENMONTIERGERÄT
DESMONTADORA DE NEUMATICOS UNIVERSAL
MANUALE DI ISTRUZIONI PER L'USO E
LA MANUTENZIONE
USE AND MAINTENANCE INSTRUCTIONS
MANUAL D'INSTALLATION,
D'UTILISATION ET D'ENTRETIEN
INSTALLATION, BEDIENUNG UND
WARTUNG
ED. 05/02
S 554 / S 554T
Via Guerrieri, 6 - 42 015 Correggio (RE) ITALY
DICHIARAZIONE CE DI CONFORMITA'
CE DECLARATION OF CONFORMITY
DECLARATION DE CONFORMITE CE
CE - ÜBEREINSTIMMUNG
DECLARACION CE DE CONFORMIDAD
dichiara sotto la propria esclusiva responsabilità che il prodotto:
declare on our own responsibility that the product:
Smontagomme universale
Universal truck tyre changer
Déclare sous son propre responsabilité que le produit:
erklärt unter ihrer eigenen Verantwortung, daß das Erzeugnis:
Declara bajo su responsabilidad que el producto:
Demonte-pneus universel
Universelle LKW-Reifenmontiergerät
Desmontadora de neumaticos universel
al quale questa dichiarazione si riferisce E' CONFORME ALLE SEGUENTI DIRETTIVE:
to which declaration refers is IN CONFORMITY WITH THE FOLLOWING DIRECTIVES:
au quel cette déclaration se rapporte EST CONFORME AUX DIRECTIVES SUIVANTES:
darauf diese Erklärung Bezug nimmt, mit den folgenden Bestimmungen übereinstimmt:
98/37/CEE - 91/368/CEE - 93/68/CEE - 89/336/CEE - 86/217/CEE 27/404/CEE - 73/23/CEE - EN 91/263/CEE - EN 92/31/CEE - EN 93/97/
CEE - EN 98/13/CEE D.P.R. nr. 459 DEL 24/07/96
ed alle Norme:
as well as to the following norms:
ainsi qu’aux normes suivantes:
und folgender Vorschrift gemäß:
EN 292 - EN 60204-1 - EN 50081-1 - EN 50082-1
Correggio, 12/02/02
Il modello della presente dichiarazione è conforme a quanto previsto nella Norma EN 45014
The model of present declaration is in conformity with directive EN 45014
Le modèle de cette déclaration est conforme à la Norme EN 45014
Das Modell dieser Erklärung übereinstimmt mit der Bestimmung EN 45014
El modelo de la presente declaracion es conforme a cuanto està previsto en las especificaiones EN 45014
S 554
1. INTRODUZIONE
Vi ringraziamo per aver acquistato un prodotto della nostra linea di
smontagomme per pneumatici di autocarri, autobus e veicoli
industriali.
1. INTRODUCTION
Thank you for purchasing one of our tyre-changers suitable for
tyre of trucks, buses and industrial vehicles.
The machine has been constructed to the best quality principles.
La macchina è stata realizzata attraverso l’applicazione dei migliori
principi in rispetto al concetto di qualità.
Il presente manuale è realizzato con lo scopo di fornire al proprietario
e all’operatore, le istruzioni fondamentali
per permettere un corretto utilizzo dello smontagomme.
Solo in questo modo vengono infatti rispettate le condizioni
necessarie per operare in sicurezza e garantire una perfetta
efficienza ed una lunga durata della macchina.
Leggere quindi con estrema attenzione il presente manuale prima
di mettere in funzione l’attrezzatura.
Conservare questo manuale, insieme a tutto il resto della
documentazione fornita, in un luogo vicino allo smontagomme
per agevolarne la consultazione da parte degli operatori.
La documentazione tecnica è parte integrante della macchina e deve
sempre seguire il prodotto anche in caso di vendita.
Queste istruzioni sono destinate ad un pubblico avente un certo
grado di conoscenza in materia. Pertanto si è evitato di descrivere
ogni singola operazione.
Evitare di compiere operazioni che superino il livello delle proprie
capacità. Nel caso servisse assistenza, contattare il proprio
rivenditore.
Attenersi esclusivamente a quanto descritto in questo
libretto di istruzioni.
Qualsiasi altro uso non descritto è da ritenersi
improprio ed irragionevole, quindi di totale
responsabilità dell’operatore.
Fig.1
COSTRUTTORE / MANUFACTURER
CONSTRUCTEUR / HERSTELLER
GIULIANO S.r.l.
Via Guerrieri, 6 - 42015 CORREGGIO - ITALY
Tel. +39. 522. 73.11.11 - Fax. +39. 522. 63.31.09
4
1.1_Anagrafica dello smontagomme
Una completa descrizione del MODELLO (Type) e del N U M E R O
DI MATRICOLA (Nr.), faciliterà il servizio da parte dell’assistenza
tecnica.
Questi dati si trovano sulla targhetta adesiva applicata sul retro dello
smontagomme, di cui riportiamo un FAC-SIMILE per maggiore
chiarezza.
This guide has been made in order to supply the owner as well as
the user with the basic instructions for a correct use of the tyrechanger.
That’s the only way to grant the respect of the conditions
necessary to work safely and also grant the best efficiency and a
long life to the machine.
Read this guide with the utmost care before using the tyrechanger.
Keep this guide as well as all the supplied technical literature in a
safe place close to the tyre-changer so as to help the users to
consult it whenever necessary.
The technical literature is an integral part of the machine and it
must always follow the product, in case of sale too.
The herewith given instructions are addressed to an adult public
having a certain degree of knowledge in the matter. We have
therefore avoided to describe each single operation. Always
avoid to carry out operation beyond your own ability. In case of
need of assistance, contact the saler.
Follow the directions given by this guide carefully.
Any other use not described is to be considered as
improper and irrational, and thus it will be under the
whole responsibility of the operator.
1.1 Identification of the tyre-changer.
Aid the after-sales service by always specifying MODEL (Type),
and SERIAL NUMBER.
These details are shown on the label stuck in the backside of the
tyre-changer. Herebelow its FAC-SIMILE position is given.
1. PREFACE
1. EINLEITUNG
Nous vous remercions d’avoir acheté un démonte-pneus faisant
partie de notre gamme pour pneus P.L., autobus et véhicules
industriels.
Wir danken Ihnen für den Einkauf eines unserer
Reifenmontiermaschinenpalette für LKW, Autobusse und
Nutzfahrzeuge.
Die Maschine wurde nach höchsten Qualitätsansprüchen hergestellt.
La machine a été réalisée en appliquant les meilleurs principes
constructifs et un niveau de qualité supérieur.
Ce manuel a été réalisé afin de fournir au propriétaire ainsi qu’à
l’opérateur les principes fondamentaux pour l’emploi correct du
démonte-pneus.
De cette façon, les conditions nécessaires pour opérer en sécurité
sont respectées et, par conséquent, le fonctionnement correct ainsi
qu’une longue durée de la machine seront garantis.
Il faut donc lire très attentivement ce manuel avant de la mise en
marche.
Garder le manuel et l’ensemble de la documentation fournie dans un
lieu près du démonte-pneus pour en faciliter la consultation de la part
des opérateurs.
La documentation technique fait partie intégrante de la machine et
doit toujours suivre le produit, même en cas de vente.
Ces instructions sont destinées à des personnes ayant un certain
degré de connaissance en matière. On a donc evité de décrire
chaque opération. Ne pas effectuer des opérations au dehors de ses
propres capacités. En cas de besoin, contacter le revendeur.
Se tenir exclusivement aux instructions données par
ce livret.
Tout autre emploi non indiqué sera considéré impropre
et irraisonné et, par conséquent, sous l’entière
responsabilité de l’opérateur.
1.1 Caractéristiques du démonte-pneus
Une description complète du MODELE (Type) et du NUMERO DE
SERIE (Nr.) facilitera le service après-vente.
Ces données sont indiquées sur la plaque collée dans la partie
arrière du démonte-pneus.
Pour plus de clarté se référer à la position du FAC-SIMILE en figure.
Dieses Handbuch wird dem Besitzer und dem Bediener die
Grundanweisungen zur korrekten Verwendung der Maschine geben.
Auf diese Weise werden die nötigen Bedingungen beachtet, um
außer Gefahr zu arbeiten und einen ausgezeichneten Betrieb sowie
eine lange Lebensdauer der Maschine zu versichern.
Dieses Handbuch vor dem Gebrauch der Maschine aufmerksam
durchlesen.
Dieses Handbuch zusammen mit den technischen Unterlagen in der
Nähe der Maschine aufbewahren, damit ein späteres Nachschlagen
dem Bediener erleichtert wird.
Die technischen Unterlagen sind Bestandteil des Produktes und
sollen die Maschine auch im Verkaufsfall folgen.
Diese Hinweise und Anleitungen sind zur Leute mit einer guten
Fachkenntnisstufe bestimmt. Man hat deshalb vermeidet, jede
einzelne Handlung zu beschreiben.
Auf keinen Fall soll man außer seiner eigenen Fähigkeit verfahren.
Wenn nötig, sich mit dem Kundendienst in Verbindung setzen.
Die in diesem Handbuch enthaltenen Regeln sorgfältig
befolgen.
Jede andere Verwendung ist als unsachgemäß und
falsch zu betrachten, daher unter voller Verantwortung
des Bedieners.
Der Hersteller haftet nicht für eventuelle Schäden, die
aus unsachgemäßem bzw. falschem Gebrauch
entstehen.
Fig.1
1.1 Reifenmontiermaschine-Kennzeichnung
Eine vollständige Identifizierung des “MODELLS” (Type) und der
“KENNUMMER” (Nr.) erleichtert den Service des technischen
Kundendienstes.
Diese Angaben sind auf dem Typenschild lesbar, das an der Rückseite
der Maschine klebt.
Zur beste Erklärung siehe FAC-SIMILE in Abbildung.
COSTRUTTORE / MANUFACTURER
CONSTRUCTEUR / HERSTELLER
GIULIANO S.r.l.
Via Guerrieri, 6 - 42015 CORREGGIO - ITALY
Tel. +39. 522. 73.11.11 - Fax. +39. 522. 63.31.09
5
2. DESCRIZIONE DELLA MACCHINA
7
11
5
6
8
12
1)
Interruttore generale ON / OFF
2)
Leva comando rotazione ORARIA / ANTIORARIA flangia
di bloccaggio
20
20
3)
Leva comando AVANTI / INDIETRO carrello porta-utensile
4)
Leva comando SALITA / DISCESA braccio porta-flangia di
bloccagio
9
19
10
6A
17
16
7A
1
3
13
4
2
14
15
18
10
17
Fig.2
6
5)
Colonnetta porta comandi
6)
Flangia fissa di bloccaggio ruota
6A)
Flangia mobile grande di bloccaggio ruota
7)
Cono di bloccaggio Ø 100 ÷ 200 mm.
7A)
Cono di bloccaggio Ø 200 ÷ 300 mm.
8)
Ghiera di bloccaggio a manovella
9)
Utensile a rullo per montaggio / smontaggio
10)
Pedana scorrevole supporto ruota
11)
Supporto porta coni, flange e attrezzi da lavoro
12)
Carter di protezione cinghia motore
13)
Disco stallonatore
14)
Utensile a becco
15)
Pomolo per aggancio / sgancio utensile
16)
Carrello mobile
17)
Braccio porta utensile
18)
Leva bloccaggio / sbloccaggio braccio porta utensile
19)
Pomello bloccaggio flangia mobile
20)
Dispositivo registrabile di trascinamento cerchio
2. DESCRIPTION OF THE MACHINE
2. DESCRIPTION DE LA MACHINE
2. BESCHREIBUNG DER MASCHINE
1.
ON/OFF main switch
1.
Intérrupteur général ON/OFF
1.
Hauptschalter ON/OFF
2.
Locking flange control lever for rotating
2.
Levier de commande rotation HORAIRE/ANTIHORAIRE
2.
Steuerhebel für RECHTS- / LINKSDREHUNG vom
CLOCK-WISE/COUNTERCLOCKWISE
3.
Control lever for FORWARDS/BACKWARDS
de la bride de blocage
3.
moving of tool-holder carriage
4.
Control lever for UP/DOWN moving of flange-holder
Levier de commande EN AVANT / ARRIERE du chariot
Spannflansch
3.
porte-outil
4.
arm
Levier de commande MONTEE/DESCENTE du bras
Steuerhebel zur Bewegung VORWÄRTS/RÜCKWÄRTS
der Werkzeugtragschlitten
4.
porte-bride de blocage
Steuerhebel zum HEBEN / SENKEN des
Spannflanschtragarmes
5.
Controls stand
5.
Colonnette des commandes
5.
Steuerungssäulchen
6.
Wheel locking fixed flange
6.
Bride fixe de blocage roue
6.
Fester Spannflansch
6A
Wheel locking mobile flange
6-A
Bride mobile de blocage roue
6-A
Beweglicher Spannflansch
7.
100 ÷ 200 mm. locking cone
7.
Cône de blocage Ø 100 ÷ 200
7.
Kegel Ø 100 ÷ 200
7A
200 ÷ 300 mm. locking cone
7-A
Cône de blocage Ø 200 ÷ 300
7-A
Kegel Ø 201 ÷ 300
8.
Locking handle
8.
Manivelle de blocage
8.
Spannkurbel
9.
Removing/mounting roller
9.
Rouleau de montage/démontage
9.
Montage/Demontage Rollenwerkzeug
10.
Wheel support carriage
10.
Plateforme coulissant de support roue
10.
Schiebebühne
11.
Support for cones, flanges and tools
11.
Support porte-cônes, brides et outils
11.
Träger für Kegel, Flansche u. Werkzeuge
12.
Motor belt protective cover
12.
Protection courroie moteur
12.
Riemenschutz
13.
Bead breaking disk
13.
Disque décolle-talons
13.
Wulstabdrückscheibe
14.
Peak-tool
14.
Outil à bec
14.
Spitzenwerkzeug
15.
Lever for hooking/releasing carriage tool
15.
Levier pour accrochage/décrochage outil au chariot
15.
Hebel zur Kupplung / Auslösung des Werkzeuges mit
16.
Carriage
16.
Chariot mobile
17.
Tool-holder
17.
Bras porte-outil
16.
Schlitten
18.
Arm locking lever
18.
Levier blocage bras opérateur
17.
Werkzeugtragarm
19.
Mobile flange locking knob
19.
Pommeau blocage bride mobile
18.
Bedienungsarm-Sperrhebel
20.
Rim driving device
20.
Dispositif d’entraînement jante
19.
Flanschsperrknopf
20.
Felgenmitnehmer
Schlitten
7
3. NORME GENERALI
3. GENERAL
3.1_Norme generali di SICUREZZA
3.1_General SAFETY rules
Lo smontagomme è stato progettato e realizzato esclusivamente
per lo smontaggio e il montaggio dei pneumatici dai/sui cerchi.
The tyre-changer has been studied and producted exclusively for
removing/mounting tyres from/onto the rims.
Questo apparecchio dovrà essere destinato solo all’uso per il quale
è stato espressamente concepito.
This appliance must only be used for the purpose for which it is
expressly designed.
Ogni altro uso è da considerarsi improprio e quindi irragionevole. Il
costruttore non può essere ritenuto responsabile per eventuali
danni causati da usi impropri dell’attrezzatura.
Any other use is to be considered improper and thus irrational. The
constructor cannot be held responsible for any damage or injury
caused by an improper use.
L’uso dell’apparecchiatura è consentito solo a personale
maggiorenne, autorizzato e preventivamente addestrato.
The machine may only be used by adult staff, previously
authorized and trained.
Ogni manomissione o modifica dell’apparecchiatura non
preventivamente autorizzate dal costruttore, solleva quest’ultimo
da eventuali danni derivati o riconducibili agli atti suddetti.
Any tampering or modification, if not previously authorized by the
constructor, relieves this one of eventual damages referred to the
mentioned actions.
Lo smontagomme è corredato di decalcomanie di istruzione ed
avvertenze di pericolo progettate e realizzate per durare nel
tempo.
Qualora venissero danneggiate o distrutte, l’utente deve
ripristinarle chiedendole al rivenditore o al costruttore, utilizzando
i codici indicati al paragrafo 3.2.
The tyre-changer is equipped with instruction and warning stickers
designed and produced to last over time.
In case they get damaged or destroyed the user must apply to the
saler or the constructor for replacing them, using the codes given
at par. 3.2 for reference.
Qualsiasi intervento all’impianto elettrico, anche se di lieve entità,
deve essere effettuato da personale qualificato secondo le
normative nazionali vigenti.
Utilizzare solo parti di ricambio Originali indicate nel catalogo Ricambi.
Il costruttore declina ogni responsabilità in caso di reclami causati
dall’uso di componenti non originali.
Sullo smontagomme è possibile installare accessori che devono
essere esclusivamente quelli approvati dal costruttore. In caso
di montaggio di un accessorio non approvato, il costruttore non
potrà essere ritenuto colpevole di eventuali danni derivati o
riconducibili agli atti suddetti.
Non è possibile utilizzare lo smontagomme in ambienti con atmosfera
potenzialmente esplosiva a meno che non si tratti di una apposita
versione.
8
Any work on the electrics, however small, must be carried out by
qualified staff according to the current national regulations.
Only use the Original spare parts listed in the Spare Parts Catalogue.
The constructor cannot be held responsible for any claim caused by
the use of non-original spare parts.
The tyre-changer may be fitted with accessories, which must be
those approved by the constructor. The constructor cannot be
held responsible for any injury or damage deriving from unap
proved accessories.
It is forbidden to use the tyre-changer in places having potentially
explosive atmosphere, unless the machine is produced in a
special version.
3. GENERALITES
3.1_Normes générales de sécurité
3. ALLGEMEINES
3.1_Allgemeine SICHERHEIT snormen
Le démonte-pneus a été projeté et réalisé uniquement pour le
démontage / montage des pneus de/sur jantes.
Die Reifenmontiermaschine eignet sich ausschließlich zur Montage/
Demontage von Reifen auf/aus Felgen.
Cette machine devra être utilisée uniquement pour l’emploi pour
lequel elle a été conçue.
Die Maschine darf nur für die Zwecke benutzt werden, für die sie
konzipiert wurde.
Toute autre utilisation sera considerée impropre et irraisonnée.
Le constructeur ne sera pas responsable d’eventuels
endommagements dus à l’utilisation impropre de la machine.
Jeder andere Gebrauch ist als unsachgemäß und daher falsch zu
betrachten.
Der Hersteller haftet nicht für eventuelle Schäden, die aus
unsachgemäßem bzw. falschem Gebrauch entstehen.
L’emploi de la machine est permis uniquement aux majeurs, autorisés
et exercés en dessein.
Toute intervention ou modification de la machine, non préalablement
autorisée par le constructeur, dégagent celui-ci de sa responsabilité
pour d’éventuels endommagements dus aux actions susdites.
Le démonte-pneus est muni de décalcomanies d’instruction et
d’avertissement projetées et réalisées pour une longue durée.
Au cas où elles seraient endommagées ou détruites, l’utilisateur
doit les remplacer en les demandant au revendeur ou au
constructeur. Se réferer aux codes du par. 3.2.
Toute intervention sur l’installation électrique, même si peu
importante, doit être effectuée par du personnel qualifié selon les
normes nationales en vigueur.
N’utiliser que les pièces de rechange Originales indiquées sur le
catalogue Rechanges.
Die Reifenmontiermaschine darf nur von volljährigem, ausgebildetem
und autorisiertem Fachpersonal bedient werden.
Eigenmächtige Umbauten und Veränderungen an der Maschine
schließen eine Haftung seitens des Herstellers für daraus
resultierende Schäden aus.
Die Reifenmontiermaschine ist mit dauerhaften Hinweis- und
Warnklebeschildern versehen.
Werden diese beschädigt oder zerstört, so muß der Benutzer
sie sofort beim Hersteller nachfordern (siehe Kodenummern im
Abschnitt 3.2)
Jeglicher Eingriff an der elektrischen Anlage - auch von geringem
Umfang - darf nur von ausgebildetem Fachpersonal den gültigen
Landesnormen gemäß vorgenommen werden.
Le constructeur décline toute responsabilité en cas de réclamations
causées par l’emploi de pièces de rechange non originales.
An der Reifenmontiermaschine dürfen ausschließlich die
Originalersatzteile montiert werden, die im Ersatzteilkatalog
angegeben sind.
Sur le démonte-pneus, on ne peut installer que les accessoires
approuvés par le constructeur. En cas de montage d’un accessoire
non approuvé, le constructeur ne sera pas responsable d’éventuels
endommagements dus aux actions susdites.
Bei der Installation eines nicht originalen Ersatzteils kann der Hersteller
nicht für eventuelle, hieraus entstandene oder zurückführbare
Schäden haftbar gemacht werden.
Défense d’utiliser le pont élévateur dans un milieu ayant atmosphère
en puissance explosive, à moins qu’il s’agit d’une version spéciale.
An der Reifenmontiermaschine dürfen ausschließlich die vom
Hersteller zugelassenen Zubehörteile montiert werden. Bei der
Installation eines nicht zugelassenen Zubehörteils kann der
Hersteller nicht für eventuelle, hieraus entstandene oder
zurückführbare Schäden haftbar gemacht werden.
Es ist verboten, die Maschine in Räume mit Sprengatmosphäre zu
benutzen, außer wenn es sich um eine Sonderausführung handelt.
9
3.1_Norme generali di SICUREZZA
Cod. 3005421
Cod. 3005410
Presenza di tensione elettrica
Cod. 3005421
Pericolo di schiacciamento .
Prestare particolare attenzione al bloccaggio
del cerchio onde evitare la caduta del
pneumatico sollevato
Cod. 3006037
Cod. 3006038
Pericolo di schiacciamento. Tenersi a
distanza durante il funzionamento del
braccio porta flangia di bloccaggio.
Cod. 3005417
Non tenere il viso vicino al braccio
portautensili mentre lo si sgancia dal carrello
Cod. 3000961
Decalco rotazione flangia di bloccaggio
Cod. 3000963
Decalco movimento carrello braccio
portautensili
Cod. 3009565
Decalco alza-abbassa braccio porta flangia
di bloccaggio.
Cod. 3008614
Decalco max. pressione centralina idraulica
Cod. 3008616
Decalco indicazioni olio
Cod. 3008617
Decalco dati centralina idraulica.
Cod. 3009565
Decalco rotazione motore
Cod. 3006038
MAX.
130 bar
(1885 PSI)
Cod. 3005417
Cod. 3006037
Cod. 3008614
Cod. 3005410
Nel caso le targhette di pericolo risultino illeggibili
o siano state rimosse, sostituirle immediatamente. Non utilizzare lo smontagomme se mancante
di una o più targhette di pericolo.
Non interporre oggetti che ne ostruiscano la visione all'operatore.
Per eventuali richieste utilizzare il codice indicato
nella presente tavola. (Fig. 3)
Cod. 3005087
Flow
4.2 lt./min
Max Press. 130 Bar
Tank Capacity 5,2 lt.
Cod. 3008617
10
OIL
AGIP OSO
46
Cod. 3008616
Cod. 3000961
Cod. 3000963
Cod. 3009565
Fig.3
3.1_General SAFETY rules
3.1_Normes générales de SECURITE’
3.1_Allgemeine SICHERHEITShinweise
Cod. 3005410
Live electrical panel
Cod. 3005410
Présence de tension électrique
Cod. 3005410
Spannungsanwesenheit
Cod. 3005421
Danger of crushing.
Pay particular attention to the rim locking
so as to prevent the lifted tyre to roll off.
Cod. 3005421
Danger d’écrasement.
Prêter attention particulière au blocage
de la jante, afin d’eviter la chute du pneu
soulevé.
Cod. 3005421
Quetschungsgefahr.
Auf die Einspannung der Felge besonders
achtgeben, um den Abfall vom gehobenen
Reifen zu vermeiden
Cod. 3006037
Cod. 3006038
Danger of crushing.
Keep out of the range of action of the
flange-holding arm during working
phase.
Cod. 3006037
Cod. 3006038
Danger d’écrasement.
Se tenir hors du rayon d’action du bras
porte-bride de blocage lors de son
fonctionnement.
Cod. 3006037
Cod. 3006038
Quetschungsgefahr.
Außer dem Wirkungskreis vom
Flanschtragarm beim Betrieb bleiben.
Cod. 3005417
Do not keep your face close to the toolholding arm when releasing it from
carriage.
Cod. 3005417
Ne pas tenir le visage près du bras porte-outils lors du décrochage du chariot.
Cod. 3005417
Das Gesicht fern vom Werkzeugtragarm
beim Schlittenloshaken halten.
Cod. 3000961
Locking flange rotation (decal).
Cod. 3000961
Decalco rotation bride de blocage.
Cod. 3000961
Abziehbild: Drehung des Spannflansch
Cod. 3000963
Carriage mouvement (decal).
Cod. 3000963
Decalco mouvement chariot bras porteoutils.
Cod. 3000963
Abziehbild: Bewegung des
Werkzeugtragarmschlittens
Cod. 3009565
UP/DOWN of flange-holding arm (decal)
Cod. 3009565
Hydraulic unit max. pressure (decal)
Decalco levage-descente bras portebride de blocage
Cod. 3009565
Cod. 3008614
Abziehbild: Heben/Senken des
Spannflanschtragarmes
Cod. 3008616
Oil reference (decal)
Cod. 3008614
Decalco pression maxi. unité hydraulique
Cod. 3008614
Abziehbild: Hydraulikeinheit – Max. Druck
Cod. 3008617
Hydraulic unit data (decal)
Cod. 3008616
Decalco repère huile
Cod. 3008616
Abziehbild: Ölangaben
Cod. 3009565
Motor rotation (decal)
Cod. 3008617
Decalco données unité hydraulique.
Cod. 3008617
Abziehbild: Hydraulikeinheit - Angaben
Cod. 3005087
Decalco rotation moteur
Cod. 3005087
Motordrehungsabziehbild
In case the warning sticker are unreadable or have
been removed, it is necessary to replace them
immediately. Do not use the tyre-changer if one or
more stikers are missing.
Do not interpose objects which could obstruct
operator’s sight.
When ordering the stickers always use the codes
given in this diagram as a reference (fig.3)
Si les étiquettes d’avertissement sont illisibles ou
ont été enlevées il faut les remplacer
immédiatement.
Ne pas utiliser le démonte-pneus s’il manque d’une
ou de plusieurs étiquettes d’avertissement de danger.
Ne pas interposer des objets qui peuvent
obstruer la vision à l’opérateur.
Pour toute commande éventuelle, se réferer aux
codes de la fig.3
Werden die Gefahren- und Verbotschilder
beschädigt oder zerstört, so muß der Benutzer sie
sofort ersetzen. Die Reifenmontiermaschine nicht
benutzen, wenn ein oder mehr Gefahren- u.
Verbotschilder vermißt werden.
Keine Gegenstände dazwischenlegen, die dem
Bediener die Aussicht verdecken könnten.
Bei Bestellung immer die Kode-Nr. in Abb.3
angeben.
11
4. TRASPORTO, STOCCAGGIO E
MOVIMENTAZIONE
Lo smontagomme deve essere trasportato nell'imballo originale e
mantenuto nella posizione indicata sull'imballo stesso.
Lo spostamento della macchina imballata deve essere effettuato
inforcando con un carrello elevatore di adeguate capacità, nei
punti indicati dalla figura 4.
760
920
Nel caso la macchina venisse momentaneamente immagazzinata,
accertarsi che l'ambiente viene riposta sia conforme ai seguenti
requisiti:
- Umidità relativa max. 95%
- Temperatura: min: -5° C; max: +60° C
4. TRANSPORT, MOVING AND
STORING
The machine must be transported in its original package
and kept in the position shown on the package itself.
Move the machine by means of a fork-lift truck having
enough loading capacity. Fit the forks as shown in fig.4
Should the machine be temporarily stored, make sure that
the storing place has the following requirements:
-
Max. relative humidity: 95%
Temperature: min. –5°C; max. +60°C
975
Fig.4
5. DISIMBALLO
5. UNPACKING
Togliere il coperchio della cassa e accertarsi che lo smontagomme
non abbia subito danni durante il trasporto.
Togliere anche gli accessori in dotazione.
After having removed the package, make sure that the tyre-changer
has not suffered any damage during transportation.
Take out the standard delivered accessories too.
Le parti dell'imballo non devono essere lasciati alla portata dei
bambini in quanto potenziali fonti di pericolo.
The package units must be stored in a safe place, out of children’s
reach, being them a possible source of danger.
Estrarre la macchina sollevandola dall'apposita staffa facendo
attenzione alla consolle di comando che, non essendo fissata,
potrebbe danneggiarsi.
Unpack the machine by using the relevant hanger for lifting it.
During this phase pay attention not to damage the control unit,
which is not fixed.
6. INSTALLAZIONE
Fig.5
12
6. INSTALLATION
6.1_Scelta del luogo di installazione
6.1_Installation site
Al momento della scelta del luogo di installazione, è necessario
osservare le normative vigenti per la sicurezza sul lavoro
Chose the installation site according to the current rules on
Safety at Work.
Lo smontagomme automatico, necessita di collegamenti con la rete
elettrica. E’ perciò opportuno installare la macchina in prossimità
di tale fonte energetica.
The automatic tyre-changer needs to be connected to the electric
network. It is therefore advisable to install it in a place where this
connection is available.
Inoltre, sul luogo prescelto per l’installazione, devono essere
disponibili almeno gli spazi indicati dalla figura 5 per permettere il
regolare funzionamento di tutte le sue parti.
Moreover, the installation space must allow the operator to use
the machine and all its components without any restriction (see
dimensions given in fig. 5)
Se la macchina viene installata all'aperto è necessario che sia
protetta da una tettoia per ripararla dalla pioggia.
In case of installation in the open air it is necessary to protect the
machine against rain by means of a lean-to.
E' proibita l'installazione dello smontagomme in ambienti
con atmosfera esplosiva.
IT IS FORBIDDEN to use the machine in explosive
atmosphere
Le démonte-pneus doit être transporté dans son emballage
original et tenu dans la position indiquée sur l’emballage même.
Le déplacement de la machine emballée doit être effectué
moyennant un chariot élévateur approprié, dont les fourches
doivent être placées aux points indiqués par la figure 4.
Si la machine est temporairement mise en stock, il faut s’assurer
que le milieu ait:
humidité relative maxi. 95%
temperature: mini. –5°C; maxi. +60°C
4. TRANSPORT UND LAGERUNG
Die Reifenmontiermaschine in ursprünglicher Verpackung
transportieren und in der angegebenen Stellung halten.
Zur Verlagerung der verpackten Maschine einen Gabelstapler von
angemessener Tragkraft benutzen und die Gabeln an den in der
Abbildung 4 angegebenen Stellen einschieben.
Wird die Maschine zeitweilig eingelagert, so soll man sicherstellen,
daß der Lagerraum den folgenden Erfordernissen entspricht:
Relativfeuchtigkeit: 95% Max.
Temperatur: -5°C Min. - +60°C Max.
5. AUSPACKEN
5. DEBALLAGE
760
920
4. TRANSPORT, STOCKAGE ET
DEPLACEMENT
975
Enlever le couvercle de la caisse et s’assurer que la machine est
intacte et qu’il n’y a pas de parties endommagées par le transport.
Enlever aussi les accessoires en dotation.
Nach Entfernen des Verpackungsdeckel die Maschine auf ihre
Unversehrtheit überprüfen und sicherstellen, daß keine
offensichtlichen Schäden vorliegen.
Die mitgelieferten Zubehöre entfernen.
Ne pas laisser l’emballage à la portée des enfants, étant-il une
source potentielle de danger.
Die einzelnen Teile der Verpackung nicht lassen, wo diese
erreichbar von Kindern sein könnten (mögliche Gefahrquelle)
Sortir la machine en la soulevant par l’étrier de levage. Faire attention
à la console de commande qui, n’étant pas fixée, pourrait
s’endommager.
Die Maschine durch den eigens dazu eingebrachten Bügel aufheben
und dabei sehr aufmerksam sein, das Steueraggregat nicht zu
beschädigen, da es nicht befestigt ist.
6. INSTALLATION
6. INSTALLATION
Fig.4
6.1 Choix du lieu d’installation
6.1 Installationsort
Lors du choix du lieu d’installation, il faut observer les normes en
vigueur pour la sécurité sur le lieu de travail.
Der gewählte Aufstellungsort
Sicherheitsvorschriften entsprechen.
Le démonte-pneus automatique a besoin de connexions au réseau
électrique. Il est, donc, opportun d’installer la machine près de cette
source d’énergie.
Die automatische Reifenmontiermaschine braucht eine
Stromnetzverbindung. Es ist deshalb zweckmäßig, die Maschine in
der Nähe einer Energiequelle aufzustellen.
En plus, sur le lieu choisi pour l’installation, la place disponible doit
correspondre aux indications de la fig. 5 pour permettre un
fonctionnement correct de la machine et de toutes ses parties.
Der Aufstellungsraum muß dazu mindenstens die in Abb. 5
angegebenen Abmessungen haben, um einen regelmäßigen Betrieb
der Maschine zu erlauben.
En cas d’installation à l’extérieur, il faut proteger la machine contre
la pluie par un abri.
Wird die Maschine im Freien aufgestellt, so ist es nötig, sie durch
eines Schutzdach vor Regen zu schützen.
DEFENSE d’emploi en milieux ayant atmosphère explosive.
Es ist verboten, die Reifenmontiermaschine in Räume mit
Explosivatmosphäre aufzustellen.
muß
den
geltenden
Fig.5
13
150
50
100
Ø 8mm.
Lo smontagomme universale deve essere installato su un pavimento di cemento ben livellato di almeno 15 cm di spessore e di una
qualità minima di cemento pari a B25, secondo le normative
DIN 1045 (fondamenta).
Per maggiore chiarezza si veda il disegno a fianco e la tabella
sottoindicata.
Dimensioni fondamenta in cm
L u n g h ez z a
Larghez z a
Spessore
200
164
15
Qualità del
cemento
Resistenz a
superficie alla
pressione
B 25
425 Kg / cm2
The universal tyre-changer must be installed on a level concrete
floor at least 15 cm thick, with a minimum concrete quality of B25 in
compliance with DIN 1045 requirements (foundations).
See the diagram herebelow.
Foundation dimensions in cm
Length
Width
Thickness
200
164
15
Quality of
concrete
Min. pressure
resistance of
surface
B 25
425 Kg / cm2
TERRENO
GROUND
CEMENTO ARMATO
REINFORCED CONCRETE
GRIGLIA ELETTROSALDATA
ELECTRO-WELDED GRID
STRATO DI GHIAIA
PEBBLE GRAVEL
Ø 16
Se le caratteristiche del pavimento sopra menzionato non sono
disponibili, si devono predisporre fondazioni sotto ai punti
d'appoggio.
If a floor of this type is not available on site, a suitable foundation
under the bearing points must be provided.
The installation surface must be levelled in all directions.
La superficie sulla quale lo smontagomme universale sarà installato
deve essere piana in tutte le direzioni.
Pendenze orizzontali fino a 0.25% possono essere compensate
tramite appositi spessori, cunei o simili.
Ø 16
Operando su ruota di peso superiore a 1000 Kg è necessario fissare lo smontagomme al pavimento utilizzando apposite viti di ancoraggio
Con una punta in Widia Ø 16, forare il pavimento alla profondità di
almeno 130 mm, passando per i fori già predisposti sul telaio di
base.
Ø 16
Se sul pavimento esiste una coperture supplementare (B), oppure
si rendono necessari spessori o cunei per compensare pendenze
del suolo (C), devono essere utilizzate viti di ancoraggio più
lunghe.
Inserire in ogni foro il tassello di ancoraggio.
Accertarsi sempre che le viti di ancoraggio penetrino di almeno
125 mm. nella soletta di cemento, come illustrato in figura.
Fig.6
14
Serrare a fondo le viti di ancoraggio.
Inclinations up to 0,25% relative to the horizontal can be compensated using suitable shims, wedges or the alike.
When working with tyres having a weight higher than
1000 kg. it is necessary to fix the tyre-changer to the ground
by means of suitable anchoring bolts.
Use a Ø 16 widia bit to drill the floor to a depth of at least 130 mm.,
passing through the holes already provided in the base frame.
If there is an additional floor covering (B), or if shims or wedges are
necessary for levelling any eventual inclination of the ground (C),
longer anchor bolts must be used.
Fit the anchor plug provided into each hole.
Make always sure that the bolts extend at least 125 mm into the
concrete slab, as shown in fig. 6
Tighten the anchor bolts.
150
Ø 8mm.
100
Die universelle Reifenmontiermaschine muß auf ebenem
Betonboden von mindestens 15 cm. Stärke und einer
Mindestbetongüte von B25 nach DIN 1045 (Fundament) aufgestellt
werden.
Zur Erklärung siehe die nachstehende Tabelle.
50
Le démonte-pneus universel doit être installé sur un sol en béton bien
nivelé, d’au moins 15 cm d’épaisseur et de qualité B25, comme
d’après les normes DIN 1045 (fondations).
Pour plus de clarté voir le tableau et le schéma ci-après.
Dimension fondations en cm
L o n g u eu r
200
Largeur
Qualité du
béton
Pression
résistance mini.
de la surface
B 25
425 Kg / cm2
Epaisseur
164
15
Fundamentmaße in cm
L än g e
Breite
Stärke
200
164
15
Betongüte
Mindestbodenbelastung
B 25
425 Kg / cm2
SOL
BODEN
BETON ARME'
EISNBETON
GRILLE ELECTROSOUDEE
ELEKTROGELÖTETES GITTER
GRAVIER
SCHOTTER
Ø 16
Si le sol n’a pas ces caractéristiques, il faut prévoir des fondations
appropriées au-dessous des points d’appui.
La surface, sur laquelle le démonte-pneus universel sera installé,
doit être parfaitement plate.
Ist am Aufstellort kein diesen Angaben entsprechender
Bodenbelag vorhanden, müssen zumindest unter den
Stützpunkten Fundamente der angegebenen Betongüte
vorbereitet werden.
Die Aufstellfläche muß in alle Richtungen eben sein.
Toute inclinaison jusqu’à 0,25% par rapport à l’horizontale peut
être compensée moyennant des cales.
En cas d’opérations avec des roues d’un poids supérieur
à 1000 kg. il faut fixer le démonte-pneus au sol en
utilisant des vis d’ancrage appropriées.
Avec un foret en widia Ø 16, percer le sol à la profondeur d’au
moins 130 mm. en passant par les trous déjà réalisés sur
l’embase.
Si, sur le sol, il y a un revêtement additionnel (B) ou si on doit
compenser les pentes du sol moyennant des cales (C), il faudra
utiliser des vis d’ancrage plus longues.
Introduire dans chaque trou le tasseau d’ancrage.
Les vis d’ancrage doivent, en tout cas, pénétrer d’au moins
125 mm dans la semelle en béton, comme indiqué en figure.
Serrer à fond les vis d’ancrage.
Bodeneigungen bis zu 0,25% sind mit entsprechenden
Paßscheiben, Keilen oder ähnlichem ausgleichbar.
Ø 16
Bei Handlungen mit Reifen, die schwerer als 1000 kg. sind,
ist es nötig, die Maschine am Boden mit
Verankerungsschrauben zu befestigen.
Mit einer Widiaspitze Ø 16 den Boden von mindenstens 130 mm.
Tiefe bohren. Die auf der Grundplatte anwesenden Bohrungen als
Bohrreferenzpunkt benutzen.
Ø 16
Ist am Aufstellort ein zusätzlicher Bodenbelag (B) vorhanden oder
müssen wegen vorhandener Bodenneigung (C) Paßstücke oder
Keile verwendet werden, so sind längere Befestigungsdübel zu
verwenden.
Eine Verankerungsschraube in jede Bohrung einfügen.
Die Schrauben müssen mindestens 125 mm in den Beton
hineinragen (siehe Abbildung).
Die Verankerungsschrauben festschrauben.
Fig.6
15
6.2_Assemblaggio parti.
Montare il supporto comandi infilando il tubo nell'apposito sostegno
e bloccando il tutto come indicato nella fig. 7
Montare il supporto flange avvitando le due viti indicate nella fig. 8
6.3_Collegamento elettrico.
Tutte le operazioni per il collegamento elettrico devono
essere eseguite da personale professionalmente
qualificato
L’utente deve provvedere a:
Dotare l’impianto elettrico del luogo di installazione di un circuito
di protezione di terra efficiente.
Dotare l’impianto elettrico di un apposito interruttore automatico
differenziale tarato a 30 mA.
Dotare il cavo di alimentazione di una spina conforme alle Norme
vigenti in materia (almeno 16A).
Fig.7
Fig.10
Il dimensionamento dell’impianto elettrico va eseguito in base alla
potenza elettrica assorbita (vedi targhetta)
La caduta di tensione a pieno carico non deve superare il 4% del
valore nominale della tensione indicata sulla targhetta dati.
Se fosse necessario cambiare la tensione di funzionamento della
macchina occorre intervenire sulla morsettiera come da
schema elettrico a pag. 62
Collegare la macchina alla rete elettrica e controllare che il senso
di rotazione del motore sia quello indicato dalla freccia (Fig. 9)
In caso contrario, fare invertire da personale specializzato, due
fili nella spina.
La rotazione del motore in senso inverso, protratta per
diversi secondi , può provocare danni irreparabili allo
stesso.
NOTA: sia il motore elettrico che il quello della centralina idraulica
sono dotati di un dispositivo salvamotore (Fig. 10) contro le
sovracorrenti
Fig. 8
Fig.9
16
6.2_Parts assembling
6.2_Assemblage des parties
6.2_Einbau der Teile
Mount the control stand by fitting the hose in its support and fix as
shown in fig.7
Monter le bras des commandes en introduisant le tuyau dans son
support. Bloquer le tout comme indiqué en fig. 7.
Das Steuerungssäulchen durch Stecken der Säulchenstange
in den Träger einbauen und das Ganze festmachen (siehe
Abb.7)
Mount the flange support and fix it by means of the two screws shown
in fig.8
Monter le support des brides en vissant les deux vis indiquées en
fig.8
6.3_Electrical connection.
6.3_Branchement électrique.
All the operations on the electrics must be carried out
by skilled staff.
The user must take care to:
- equip the electric system of installation site with an efficient protective ground circuit.
- equip the electric system with an automatic circuit breaker (differential) adjusted at 30mA
- equip the feeding cable with a plug according to the relevant
current regulations (at least 16A)
The electric system adjusting must be made in accordance with
the absorbed electrical power (see plate)
The voltage drop with full load must never exceed 4% of the volt
age nominal value shown by the data plate.
In case of need to change the machine operating voltage, it is
necessary to reset the terminal board as per electrical diagram
at page 62.
Connect the tyre-changer to the power supply network, switch it
on and check the motor running direction (same as indicated
by the arrow – fig.9).
In case of opposite running direction, it is necessary to have
two wires inverted in the plug by expert staff.
The motor run made in the opposite direction, if longer
than a few seconds, can cause irreparable damages to
the motor itself.
Remarks: both electrical motor and hydraulic unit motor are
equipped with an overload cutout (fig.10) against overloads.
Den Flanschträger mittels der zwei Schrauben befestigen
(siehe Abb. 8)
6.3_Elektrischer Anschluß
Toutes les opérations pour le branchement électrique
doivent être effectuées par du personnel
professionnellement qualifié.
L’utilisateur devra s’occuper de:
- munir le système électrique du lieu d’installation d’un circuit de
protection de terre efficace.
- munir le système électrique d’un intérrupteur automatique
différentiel réglé à 30 mA.
- munir le câble d’alimentation d’une fiche conforme aux normes
en vigueur (au moins 16A)
Jeglicher Eingriff an der elektrischen Anlage - auch von
geringem Umfang - darf nur vom ausgebildetem
Fachpersonal vorgenommen werden.
Der Bediener soll:
-
die elektrische Anlage mit einem wirkenden Erdeschutzkreis
versehen.
die elektrische Anlage mit einem automatischen Schalter
(Differential) mit Eichung auf 30 mA.
die Zuleitung mit einem Stecker den gültigen Vorschriften
gemäß (mindenstens 16A)
Le dimensionnement du système électrique doit être effectué selon
la puissance électrique absorbée (voir plaque).
Die Dimensionierung der elektrischen Anlage soll der absorbierten
Stromstärke gemäß ausgeführt werden (siehe Schildchen).
La chute de tension à pleine charge ne doit pas dépasser le 4% de
la valeur nominale de la tension indiquée sur la plaque des
données.
Der Spannungsabfall unter Vollast muß das 4% des Nennwertes
der auf dem Typenschild angegebenen Spannung nicht übersteigen.
S’il était nécéssaire de changer la tension de fonctionnement de la
machine, il faut intervenir sur le serre-câbles comme indiqué dans
le schéma électrique à page 62
Wird es nötig, die Betriebspannung der Maschine zu ändern, so
muß man das Klemmenbrett nach dem Schaltplan auf Seite 62
einstellen.
Connecter la machine au réseau électrique et contrôler que le moteur
tourne dans le sens indiqué par la flèche (fig. 9).
Dans le cas contraire, faire inverser deux fils dans la fiche uniquement
par du personnel spécialisé.
La rotation du moteur en sens contraire, si prolongée de
plusieurs secondes, peut provoquer des pannes
irréparables au moteur même.
Remarque: le moteur électrique comme celui de l’unité hydraulique
sont equipés d’un dispositif de sécurité (fig.10) contre les
surintensités.
Die Maschine mit dem elektrischen Netz verbinden und
sicherstellen, daß die Motordrehung der vom Pfeil angegebenen
Richtung entspricht (Abb.9)
Anderenfalls zwei Leiter am Stromstecker vom Fachpersonal
umkehren lassen.
Die umgekehrte Motordrehung, wenn länger als einige
Sekunden, kann unersetzbare Motorschaden verursachen.
Sowohl der Elektromotor als auch der Motor des
Hydraulikaggregats sind mit einem Überlastschalter gegen die
Überströme versehen (Abb.10)
17
6.4_Test di funzionamento
7
11
5
6
Prima di cominciare a lavorare con lo smontagomme sono
necessari alcuni controlli per verificarne il corretto funzionamento
e la corretta installazione.
8
12
20
Effettuare tutte le manovre seguenti con il braccio
porta-utensile (17) in posizione FUORI LAVORO.
Utilizzare la fig. 11 per effettuare il Test di funzionamento.
20
Agire quindi sulla leva (18) per sbloccare il braccio e tirarlo verso se
stessi per portare il braccio fuori lavoro.
Azionare l'interruttore generale (1) posto sul quadro comandi. La
macchina deve accendersi.
9
Azionare la leva (2) nel senso indicato dalla freccia continua per far
ruotare la flangia (6) in senso ANTIORARIO
19
Azionale la leva (2) nel senso indicato dalla freccia tratteggiata per
far ruotare la flangia (6) in senso ORARIO
10
Azionare la leva (3) nel senso indicato dalla freccia continua per
muovere il carrello (16) verso DESTRA
6A
17
16
7A
1
3
13
4
2
Azionare la leva (3) nel senso indicato dalla freccia tratteggiata per
muovere il carrello (16) verso SINISTRA
Azionare la leva (4) nel senso indicato dalla freccia continua per
ABBASSARE il braccio porta flangia
14
Azionare la leva (4) nel senso indicato dalla freccia tratteggiata per
SOLLEVARE il braccio.
15
L'azionamento del braccio porta flangia crea dei
potenziali punti di schiacciamento.
Operare sempre al di fuori del raggio di azione del
braccio.
18
10
17
Fig.11
18
6.4_Operation test
6.4_Operation test
6.4_Betriebtest
Before working with tyre-changer it is necessary to carry out some
tests to check the correct operation and installation as well.
Avant de la mise en marche du démonte-pneus, il faut effectuer
quelques contrôles pour vérifier le correct fonctionnement ainsi
que la corrècte installation.
Vor der Aufnahme der Arbeit sind einige Prüfungen erforderlich, um
den korrekten Betrieb sowie die fehlerfreie Aufstellung der Maschine
festzustellen.
All the following operations must be carried out with the
tool-holder (17) set OUT OF WORK.
Effectuer toutes les opérations suivantes avec le bras porteoutil (17) en position HORS TRAVAIL.
Alle folgende Überprüfungen mit Werkzeugtragarm (19) in
RASTSTELLUNG ausführen.
Zum Betriebtest auf Abb. 11 sich beziehen.
Refer to fig. 11 for carrying out the running test.
Pour effectuer le test de fonctionnement se réferer à la fig.11
Then, act on lever 18 to unlock the arm. Pull it and set it out of work.
Agir sur le levier 18 pour débloquer le bras et le positionner hors
travail.
Durch Betätigung Hebels 18 den Arm freigeben und in Raststellung
stellen.
Actionner l’intérrupteur général (1) placé sur le tableau de commande.
La machine doit se mettre en marche.
Hauptschalter (1) auf Steuertafel betätigen. Die Maschine soll sich in
Betrieb setzen.
Actionner le levier (2) dans le sens indiqué par la flèche continue pour
faire tourner la bride (6) en sens ANTIHORAIRE
Hebel (2) in Richtung des ununterbrochenen Pfeils zur
LINKSDREHUNG Flansches (6) betätigen.
Actionner le levier (2) dans le sens indiqué par la flèche hachurée
pour faire tourner la bride (6) en sens HORAIRE.
Hebel (2) in Richtung des gestrichelten Pfeils zur RECHTSDREHUNG
Flansches (6) betätigen.
Switch on the main switch (1) on control panel. The machine must
turn on.
Set lever (2) in the position indicated by the continuous arrow to let
the flange (6) turn COUNTERCLOCKWISE.
Set lever (2) in the position indicated by the dashed arrow to let the
flange (6) turn CLOCKWISE.
Set lever (3) in the position indicated by the continuous arrow to move
the carriage (16) RIGHTWARDS.
Set lever (3) in the position indicated by the dashed arrow to move the
carriage (16) LEFTWARDS.
Set lever (4) in the position indicated by the continuous arrow to
LOWER the flange-holding arm.
Set lever (4) in the position indicated by the dashed arrow to LIFT the
arm.
Actionner le levier (3) dans le sens indiqué par la flèche continue pour
déplacer le chariot (16) vers DROITE.
Actionner le levier (3) dans le sens indiqué par la flèche hachurée
pour déplacer le chariot (16) vers GAUCHE.
Actionner le levier (4) dans le sens indiqué par la flèche continue
pour BAISSER le bras porte-bride.
Actionner le levier (4) dans le sens indiqué par la flèche hachurée
pour SOULEVER le bras porte-bride.
The action of the flange-holding arm can create some
possible crushing points. Always work out of the arm’s
action range.
L’actionnement du bras porte-bride entraîne des points
d’écrasement potentiels.
Opérer toujours hors du rayon d’action du bras.
Hebel (3) in Richtung des ununterbrochenen Pfeils zur
RECHTSBEWEGUNG Schlittens (16) betätigen.
Hebel (3) in Richtung des gestrichelten Pfeils zur LINKSBEWEGUNG
Schlittens (16) betätigen.
Hebel (4) in Richtung des ununterbrochenen Pfeils zum SENKEN
Flanschtragarmes betätigen.
Hebel (4) in Richtung des gestrichelten Pfeils zum HEBEN
Flanschtragarmes betätigen.
Bei Betätigung des Flanschtragarmes entstehen
potentielle Quetschungspunkte.
Immer außer Reichweite des Armes bleiben.
19
7. USO
7. USE
7.1_Avvertenze per l'uso
7.1_Notes for use
L'inosservanza delle istruzioni e delle avvertenze può
provocare lesioni gravi agli operatori e ai presenti.
Non usare la macchina prima di aver letto e compreso
tutte le istruzioni contenute nel presente manuale.
Mantenere le persone non autorizzate lontane dalla zona di lavoro
Keep unauthorized people far from the working area.
Accertarsi di aver rispettato tutte le Norme vigenti durante l'installazione dello smontagomme.
Make always sure to respect all the current rules in phase of
tyre-changer installation.
Tutti gli operatori devono essere opportunamente addestrati prima
dell'utilizzo della macchina.
All the operators must be suitably trained before using the machine.
Non lasciare mai oggetti sullo smontagomme che durante il funzionamento potrebbero essere fonte di pericolo.
Non modificare o manomettere in nessun modo lo smontagomme
se non su espressa autorizzazzione del costruttore.
Durante l'utilizzo dello smontagomme, raccogliere i capelli lunghi,
non indossare abiti ampi o svolazzanti, cravatte pendenti,
collane, anelli, orologi che potrebbero essere presi da parti in
movimento.
Tenere sempre disponibile questo manuale e non dimenticare di
consultarlo.
Per arrestare lo smontagomme in condizioni di emergenza:
- Ruotare l'interruttore generale sulla posizione "0"
- Staccare la spina elettrica
Utilizzare solamente accessori e ricambi originali.
Fig.10
20
The non-observance of instructions and warnings can
cause serious injuries to the operator or third persons.
Do not use the machine before having read and understood
all the instructions given in this manual.
Never leave objects on tyre-changer, which during the working phase
could represent a source of danger.
Do not modify or tamper with the tyre-changer unless previously
agreed by manufacturer.
During working phase, draw up long hair, DO NOT wear large clothes,
ties, chains, rings, watches, which could be caught by moving
parts.
Keep this manual in a safe place and do not forget to consult it.
To stop tyre-changer in emergency case:
Switch off the main switch to “0”
Disconnect the electric plug
Only use original accessories and spare parts.
7. EMPLOI
7. BETRIEB
7.1 Avertissements
7.1 Allgemeine Sicherheitshinweise
L’inobservance des instructions et des avertissements
peut provoquer de graves lésions aux opérateurs ainsi
qu’aux présents.
Ne pas utiliser la machine avant d’avoir lu et compris
toutes les instructions contenues dans ce livret.
Die Nichtbeachtung der Sicherheitshinweise kann
schwere Verletzungen dem Bediener sowie den
Anwesenden verursachen.
Dieses Handbuch und die enthaltenen Hinweise vor
Gebrauch der Maschine durchlesen.
Tenir les personnes non-autorisées loin de la zone de travail.
Die Unbefugten sollen sich von Arbeitszone fernhalten.
S’assurer d’avoir respecté toutes le Normes en vigueur lors de
l’installation du démonte-pneus.
Sich vergewissern, daß alle laufende Vorschriften bei Aufstellung
der Maschine befolgt worden sind.
Tous les opérateurs doivent être opportunément exercés avant
d’utiliser la machine.
Alle Bediener sollen vor Gebrauch der Maschine angemessen
ausgebildet werden.
Ne laisser jamais des objets sur le démonte-pneus, qui pourraient
devenir source de danger lors du fonctionnement.
Keine Gegenstände auf der Maschine lassen, die während
des Betriebs eine Gefahrquelle darstellen könnten.
Ne pas modifier ou altérer le démonte-pneus, à moins d’avoir été
expressément autorisé par le constructeur.
Lors de l’emploi du démonte-pneus, il faut: attacher les cheveux
longs, ne pas porter des vêtements larges, des cravates, des
colliers, des bagues, des montres qui pourraient s’accrocher aux
parties en mouvement.
Garder ce livret à la disposition de l’opérateur et n’oublier pas de le
consulter.
Pour arrêter le démonte-pneus en état d’urgence:
tourner l’intérrupteur général sur “0”
débrancher la fiche électrique
N’utiliser que des accessoires et des pièces de rechange d’origine.
Die Reifenmontiermaschine auf keinen Fall verändern, außer
wenn man vom Hersteller ausdrücklich ermächtigt wird.
Beim Betrieb soll der Bediener lange Haare aufbinden und
bzw. Kleidungen mit flatternden Zipfeln, Krawatten, Ketten,
Ringe und Uhren NICHT TRAGEN, weil diese von beweglichen
Teilen mitgenommen sein könnten.
Dieses Handbuch immer zur Verfügung halten und nicht
vergessen, es nachzuschlagen.
Zum Anhalten der Maschine im Notfall:
Hauptschalter zu “0” drehen.
Stecker abschalten
Nur echte Zubehöre und Ersatzteile verwenden.
21
7.2_Bloccaggio del cerchio
20
La macchina è progettata per lavorare su pneumatici da 14" a 26"
montati su cerchi con foro centrale di diametro da un minimo di
100 mm. a un massimo di 300 mm.
A seconda del tipo di cerchio montato sul pneumatico, occorre
quindi procedere in modi diversi per bloccarlo sulla flangia.
C
B
CERCHI CON FORO CENTRALE Ø 100 ÷ 200
Per bloccare cerchi con queste caratteristiche si usa la flangia fissa
(A) abbinata al cono piccolo (B). (Fig. 12)
CERCHI CON FORO CENTRALE Ø 201 ÷ 300
A
A
Fig.12
Fig.13
Per bloccare cerchi con queste caratteristiche occorre montare la
flangia grande (C) come indicato in fig. 13 e usare il cono grande
(D) (Fig. 14).
ATTENZIONE.
In fase di bloccaggio assicurarsi che il cerchione sia ben
posizionato sulla flangia, onde evitare la caduta della
ruota.
20
20
Ribaltare in posizione di fuori lavoro il braccio porta-utensili (17).
C
Agendo sulla leva (3) allontanare la pedana mobile (10) dalla flangia
e farvi salire la ruota mantenendo la stessa in posizione verticale.
D
ATTENZIONE !
Questa operazione può essere estremamente pericolosa! Effettuarla manualmente solo nel caso si sia assolutamente sicuri di riuscire a mantenere in equilibrio la
ruota. Per ruote pesanti e di grandi dimensioni si DEVE
utilizzare un adeguato mezzo di sollevamento.
8
Azionando la leva (4) per alzare od abbassare il braccio porta-flangia
fino a centrare il più possibile quest'ultima rispetto al cerchio. Per
facilitare questa operazione, si consiglia di tenere il perno antirotazione della flangia (20), nella parte inferiore del cerchio.
Far combaciare il perno anti-rotazione (20) con uno dei fori di
bloccaggio del cerchione come indicato in fig.15
Inserire sulla flangia un cono di bloccaggio di adeguate dimensioni
rispetto al foro del cerchione.
Fig.14
22
Fig.15
Inserire la manovella di bloccaggio (8) sulla flangia e serrare il tutto
avvitando a fondo. (Fig. 15)
7.2_Rim locking
7.2 Blocage de la jante
The machine has been designed to work on 14”-26” tyres mounted
on rims having central hole of min. 100 mm. – max. 300 mm.
diameter.
According to the kind of rim, it is therefore, necessary to act in
different ways to lock it onto the flange.
La machine a été conçue pour opérer sur tout pneu de 14” à 26”
monté sur jante ayant trou central d’un diamètre de 100 mm. mini.
à 300 mm. maxi.
Selon le type de jante montée sur le pneu, il faut donc proceder de
façon différente pour la bloquer sur la bride.
Die Maschine eignet sich für alle Reifen von 14” bis 26”, die auf
Felgen mit Mittelloch von min. 100 mm. Durchmesser bis max.
300 mm. montiert sind.
Nach dem Felgentyp ist Flanscheinspannung verschieden, wie
folgt:
RIMS WITH CENTRAL HOLE Ø 100 ÷ 200
JANTES AVEC TROU CENTRAL DE Ø 100 ÷ 200
FELGEN MIT MITTELLOCH Ø 100 ¸ 200
To lock these rims, use fixed flange (A) together with small cone (B)
(Fig.12)
Pour bloquer toute jante ayant ces caractéristiques il faut utiliser la
bride fixe (A) accouplée au petit cône (B) (fig. 12)
Zur Einspannung dieser Felgen soll man den Festflansch (A)
zusammen mit kleinem Kegel (B) verwenden (Abb.12)
RIMS WITH CENTRAL HOLE Ø 201 ÷ 300
JANTES AVEC TROU CENTRAL DE Ø 201 ÷ 300
To lock these rims, mount big flange (C) as indicated in fig. 13 and use
big cone (D) (Fig. 14)
Pour bloquer toute jante ayant ces caractéristiques, il faut monter
la bride grande (C) comme indiqué en fig. 13 et utiliser le grand
cône (D).(Fig. 14)
In locking phase make sure that the rim is well
positionned on the flange, so as to prevent the tyre
from rolling down.
Lors du blocage il faut s’assurer que la jante soit bien
positionnée sur la bride, afin d’eviter la chute de la roue.
7.2 Einspannung der Felge
FELGEN MIT MITTELLOCH Ø 201 ¸ 300
Zur Einspannung dieser Felgen soll man den großen Flansch (C)
zusammen mit großem Kegel (D) verwenden (Abb.13-14)
Bei Einspannungsphase immer feststellen, daß die Felge
auf dem Flansch gut eingestellt ist, um einen möglichen
Radabfall zu vermeiden.
Werkzeugtragarm (17) in Raststellung hochklappen.
Tilt the tool-holder (17) out of work.
Renverser le bras porte-outil (17) en position “hors travail”
By means of the lever (3) move the mobile plate (10) away from
the flange and set the tyre keeping it in vertical position.
En actionnant le levier (3), éloigner la plate-forme mobile (10) de la
bride et y positionner la roue en la tenant en position verticale.
ATTENTION!
This operation can be extremely dangerous! Do it manually
only when you are absolutely sure to be able to keep the
tyre in position. For heavy or oversized tyres it is
COMPULSORY to use a suitable lifting device.
By means of the lever (4) lift or lower the flange-holding arm until the
flange is centered as well as possible with respect to the rim.
To facilitate this operation, it is advisable to keep the anti-rotation
flange pin (20) in the lower part of the rim.
Let the anti-rotation pin (20) match with one of the locking holes of the
rim as indicated by fig.15
Fit on the flange a locking cone having sutiable dimension with
respect to the rim.
Set the locking handle (8) on the flange and lock everything by turning
the handle as far as it goes.
Cette opération peut être extrêmement dangereuse!
L’effectuer à la main seulement si on est absolument
sûr de pouvoir tenir la roue en équilibre. Pour roues
très lourdes ou très grandes IL FAUT utiliser un moyen
de levage approprié.
Actionner le levier (4) pour soulever ou baisser le bras porte-bride
jusqu’à centrer le plus possible la bride par rapport à la jante.
Pour faciliter cette opération, il est conseillé de tenir l’axe anti-rotation de la bride (20) dans la partie inférieure de la jante.
Joindre l’axe anti-rotation (20) à l’un des trous de blocage de la
jante comme indiqué en fig. 15
Positionner sur la bride un cône de blocage de dimensions
appropriées par rapport au trou de la jante.
Introduire la manivelle de blocage (8) sur la bride et serrer le tout
en vissant à fond.
Hebel (3) betätigen, um die Schiebebühne (10) vom Flansch zu
entfernen. Das Rad darauf stellen und in senkrechter Position
halten.
Dies Vorgang kann sehr gefährlich sein! Deshalb ist es
wichtig, von Hand vorgehen, NUR WENN man ganz
sicher ist, das Rad im Gleichgewicht halten können.
Für schwere oder große Reifen ist die Verwendung
eines geeigneten Hebemittels unbedingt
ERFORDERLICH.
Hebel (4) zum Heben / Senken des Flanschtragarmes betätigen,
bis wann den Flansch mit der Felge möglichst gut zentriert ist. Um
diesen Vorgang zu erleichtern, ist es empfohlen, den
Felgenmitnehmer (20) am Unterteil der Felge zu halten.
Den Felgenmitnehmer (20) mit einem der Felgensperrlöchern
verbinden. (Abb.15)
Einen dem Loch angemessenen Kegel auf Flansch einsetzen.
Spannkurbel (8) auf Flansch auch einsetzen und das Ganze
festschrauben.
23
7.3 RUOTE TUBELESS
7.3.1_ Stallonatura e smontaggio con
UTENSILE A RULLO
1) Assicurarsi che la ruota sia bloccata e sgonfia.
2) Abbassare il braccio porta utensili (17) in posizione di lavoro, fino
a che si sarà agganciato con l'apposito cricchetto.
Verificare sempre che il braccio sia correttamente
agganciato al carrello.
3) Agendo sulle leve (3) (4) fare in modo che il rullo di smontaggio si
posizioni in prossimità del bordo del cerchione.(Fig. 16)
Fig.17
17
4) Far ruotare la ruota e contemporaneamente fare avanzare il rullo
a brevi scatti.
5) Avanzare fino al completo distacco del tallone. Per agevolare
l'operazione, con la ruota in movimento, lubrificare il tallone e la
balconata del cerchione con l'apposito grasso. (Fig. 17)
Fig.16
Prestare particolare attenzione a non schiacciarsi le dita
tra il pneumatico e l'utensile.
Per evitare rischi, ruotare in senso ORARIO se si opera
sul fianco esterno o in senso ANTIORARIO se su quello
interno.
Fig.19
2
3
1
X
8) Continuare nella spinta del pneumatico fino alla completa fuoriuscita dal cerchio nella parte esterna. (Fig. 19)
16
24
Non tenere le mani sull'utensile quando lo si riporta in
posizione di lavoro per evitare possibili schiacciamenti
tra l'utensile stesso e la ruota.
7) Far ruotare la ruota e contemporaneamente fare avanzare il rullo
a brevi scatti. (Fig. 18)
17
Fig.18
4
6) Allontanare il braccio porta-utensile dal cerchio, sganciare il
cricchetto, sollevare il braccio in posizione di fuori lavoro, traslarlo
e riagganciarlo nella seconda posizione di lavoro.
NOTA: con la maggior parte dei pneumtici è possibile evitare di compiere l'operazione 6) per passare da un tallone all'altro.
Agganciando il braccio portautensile nella posizione di lavoro centrale (X) è possibile, dopo aver sollevato il pneumatico, traslare il
carrello (16) da una parte all'altra senza sganciare il braccio (17).
7.3 TUBELESS WHEELS
7.3 ROUES TUBELESS
7.3 SCHLAUCHLOSE REIFEN
7.3.1_ Bead breaking and tire removing with
ROLLER TOOL
7.3.1_Décollage du talon et démontage
moyennant l'OUTIL À ROULEAU
7.3.1_Wulstabdrücken und Demontage mit
ROLLENWERKZEUG
1) Make sure that the tyre is locked and deflated.
1) S’assurer que la roue soit bloquée et dégonflée.
2) Set the tool-holder (17) at work by lowering it until it gets hooked
by the proper jack.
2) Baisser le bras porte-outils (19) en position de travail, jusqu’à ce
qu’il se sera accroché au petit cric approprié.
Always check that the arm is correctly hooked to the
carriage.
3) By means of levers (3) and (4) let the roller tool position itself
close to the rim edge (fig.16)
4) Let the wheel turn and, at the same time, let the roller move
forwards at brief steps.
5) Go on until the bead is completely detached.To facilitate the
operation, when the wheel is turning grease the bead and the rim
edge all around (fig.17)
Pay particular attention not to crush fingers between tyre
and tool. In order to avoid any possible risk, turn
CLOCKWISE when operating on the outer edge and
COUNTERCLOCKWISE when operating on the inner
edge.
6) Move the tool-holder away from the rim, release the jack, lift the
arm out of work, translate it and lock it in its second working
position.
DO NOT keep your hands on the tool when setting it in
working position so as to avoid any possible crushing
between tyre and tool.
7) Repeat the operations until the second bead is completely
detached (fig.18)
8) Go on pushing the tyre until the rim comes completely out (fig.19)
Remarks: with most of tyres it is possible to skip operation 6) to pass
from one bead to the other. Fix the tool-holder in middle working
position (X) and, after having lifted the tyre, move the carriage (16)
from one side to the other without releasing the arm (17).
S’assurer toujours que le bras soit correctement accroché
au chariot.
3) Actionner les leviers (3) (4) de sorte que le rouleau de demontage
se positionne près du bord de la jante (fig. 16)
4) Faire tourner la roue et, en même temps, faire avancer le rouleau
par petites saccades.
5) Proceder jusqu’au complet décollement du talon. Pour faciliter
cette opération, la roue en mouvement, graisser le talon et le bord
de la jante par la graisse en dotation (fig.17)
Prêter attention particulière à ne pas s’écraser les
doigts entre le pneu et l’outil. Afin d’eviter tout risque,
faire tourner en sens HORAIRE lors des opérations sur
le bord extérieur, et en sens ANTIHORAIRE lors des
opérations sur le bord intérieur.
6) Eloigner le bras porte-outil de la jante, décrocher le petit cric,
soulever le bras en position hors travail, le transférer et le
raccrocher dans la deuxième position de travail.
Ne pas tenir les mains sur l’outil lors de son
repositionnement en travail, afin d’eviter tout possible
écrasement entre l’outil même et la roue.
7) Faire tourner la roue et, en même temps, faire avancer le rouleau
par petites saccades. (Fig.18)
8) Continuer à pousser le pneu jusqu’au complet décollement de la
partie extérieure de la jante (fig.19).
Remarque: avec la pluspart de pneus il est possible d’éviter
l’opération 6) pour passer d’un talon à l’autre.
Fixer le bras porte-outil en position centrale de travail (X) et, après
avoir soulevé le pneu, déplacer le chariot (16) d’une côté à l’autre
sans décrocher le bras (17).
1) Feststellen, das der Reifen festgemacht und entleert ist.
2) Werkzeugtragarm (19) in Arbeitsstellung herunterlassen, bis wann er
mit der bezüglichen Sperrklinke festklemmt.
Immer feststellen, daß der Arm mit Schlitten gut befestigt ist.
3) Hebel (3) (4) betätigen, um Rollenwerkzeug an den Felgenrand zu
rücken (Abb.16)
4) Das Rad in Drehung versetzen und gleichzeitig das Rollenwerkzeug
leicht stoßweise vorrücken lassen.
5) Bis vollem Wulstabdrücken vorgehen. Um diesen Vorgang zu erleichtern,
ist es empfohlen, sowohl den Wulst als auch den Felgenrand bei Raddrehung
zu schmieren (Abb.17)
Darauf besonders achtgeben, sich die Finger zwischen Reifen
und Werkzeug nicht zu quetschen.
Um Gefahren zu vermeiden, ist es immer empfohlen, das Rad
in RECHTSDREHUNG bei Handlung der Außenseite und in
LINKSDREHUNG bei Handlung der Innenseite zu versetzen.
6) Werkzeugtragarm von Felge entfernen, Sperrklinke loshaken, Arm in
Raststellung hochklappen, verlegen und in zweiter Arbeitsstellung wieder
festmachen.
Die Hände nicht auf dem Werkzeug halten, wenn es in
Arbeitsstellung wiedergestellt wird, um mögliche
Quetschungen zwischen Werkzeug und Rad zu vermeiden.
7) Die Vorgänge am Punkt 5) und 6) wiederholen, bis vollem Abdrücken
zweites Wulsts (Abb.18)
8) Den Reifen fortdrücken, bis wann er sich von Außenseite der Felge
abtrennt (Abb. 19)
Wichtig: mit dem Großteil Reifen ist es möglich, Vorgang 6) zu
vermeiden.
Werkzeugtragarm in Mittelarbeitsstellung (X) befestigen und, nach
Anheben des Reifens, Schlitten (16) von einer Seite zu anderer
verlegen, ohne den Arm (17) zu lösen.
25
7.3.2_ Stallonatura e smontaggio con
DOPPIO UTENSILE A RULLO
1) Assicurarsi che la ruota sia bloccata e sgonfia.
2) Abbassare il braccio porta utensili (17A) in posizione di lavoro,
fino a che si sarà agganciato con l'apposito cricchetto (18).
17B
3) Abbassare anche il secondo braccio porta-utensili (17B) in posizione di lavoro, fino a che non si sarà agganciato con l'apposito
cricchetto (18) (Fig. 16/1)
17A
17A
18
Fig.17/1
Verificare sempre che i bracci sia correttamente agganciati al carrello.
4) Agendo sulle leve (3) (4) fare in modo che il rullo di smontaggio
del braccio dalla parte esterna (17A) si posizioni in prossimità del
bordo del cerchione.(Fig. 16/1)
Fig.16/1
5) Far ruotare la ruota e contemporaneamente fare avanzare il rullo
a brevi scatti.
6) Avanzare fino al completo distacco del tallone. Per agevolare
l'operazione, con la ruota in movimento, lubrificare il tallone e la
balconata del cerchione con l'apposito grasso.
(Fig. 17/1 - Fig. 17/2)
Prestare particolare attenzione a non schiacciarsi le dita
tra il pneumatico e l'utensile.
Per evitare rischi, ruotare in senso ORARIO se si opera
sul fianco esterno o in senso ANTIORARIO se su quello
interno.
17B
Fig.18/1
7) Agendo sulle leve (3) (4) fare in modo che il rullo di smontaggio
del braccio dalla parte interna (17B) si posizioni in prossimità del
bordo del cerchione.(Fig. 18/1)
8) Far ruotare la ruota e contemporaneamente fare avanzare il rullo
del braccio porta-utensili (17B) a brevi scatti. (Fig. 18/1)
9) Continuare nella spinta del pneumatico fino alla completa fuoriuscita dal cerchio nella parte esterna. (Fig. 19/1)
17A
Fig.17/2
26
17B
Fig.19/1
7.3.2_ Bead breaking and tire removing with
DOUBLE ROLLER TOOL
1) Make sure that the tyre is locked and deflated
2) Set the tool-holder (17A) at work by lowering it until it gets
hooked by the proper jack (18).
3) Set the second tool-holder (17B) at work too by lowering it until
it gets hooked by the proper jack (18) (Fig. 16/1)
7.3.2_ Décollage du talon et démontage
moyennant le DOUBLE OUTIL À ROULEAU
1) S’assurer que la roue soit bloquée et dégonflée.
1) Feststellen, das der Reifen festgemacht und entleert ist.
2) Baisser le bras porte-outils (17A) en position de travail, jusqu’àce
qu’il se sera accroché au petit cric approprié (18)
2) Werkzeugtragarm (17A) in Arbeitsstellung herunterlassen, bis er
mit der bezüglichen Sperrklinke (18) festklemmt.
3) Baisser aussi le deuxième bras porte-outils (17B) en position de
travail, jusqu’à ce qu’il se sera accroché au petit cric approprié
(18) (Fig. 16/1)
Always check that the arms are correctly hooked to the
carriage.
S’assurer toujours que les bras soient correctement
accrochés au chariot.
4) By means of levers (3) and (4) let the outside roller tool (17A)
position itself close to the rim edge (fig.16/1)
4) Actionner les leviers (3) (4) de sorte que le rouleau extérieur de
demontage (17A) se positionne près du bord de la jante
(fig. 16/1)
5) Let the wheel turn and, at the same time, let the roller move
forwards at brief steps.
6) Go on until the bead is completely detached.To facilitate the
operation, while the wheel is turning grease the bead and the rim
edge all around (fig.17/1-17/2)
Pay particular attention not to crush fingers between tyre
and tool. In order to avoid any possible risk, turn
CLOCKWISE when operating on the outer edge and
COUNTERCLOCKWISE when operating on the inner edge.
7) By means of levers (3) and (4) let the inside roller tool (17B)
position itself close to the rim edge (fig.18/1)
8) Let the wheel turn and, at the same time, let the roller move
forwards at brief steps. (fig. 18/1)
9) Go on pushing the tyre until the rim comes completely out
(fig.19/1)
7.3.2_ Wulstabdrücken und Demontage mit
DOPPELROLLENWERKZEUG
5) Faire tourner la roue et, en même temps, faire avancer le rouleau
par petites saccades.
6) Proceder jusqu’au complet décollement du talon. Pour facilitercette
opération, la roue en mouvement, graisser le talon et le bord de
la jante par la graisse en dotation (fig.17/1-17/2)
Prêter attention particulière à ne pas s’écraser les doigts
entre le pneu et l’outil.
Afin d’eviter tout risque, faire tourner en sens HORAIRE lors
des opérations sur le bord extérieur, et en sens
ANTIHORAIRE lors des opérations sur le bord intérieur.
7) Actionner les leviers (3) (4) de sorte que le rouleau intérieur de
demontage (17B) se positionne près du bord de la jante
(fig. 18/1)
8) Faire tourner la roue et, en même temps, faire avancer le rouleau
(17B) par petites saccades (Fig. 18/1).
9) Continuer à pousser le pneu jusqu’au complet décollement de la
partie extérieure de la jante (fig.19/1)
3) Zweiten Werkzeugtragarm (17B) auch in Arbeitsstellung
herunterlassen, bis er mit der bezüglichen Sperrklinke (18)
festklemmt (Abb.16/1).
Immer feststellen, daß beide Arme mit Schlitten gut befestigt
sind.
4) Hebel (3) (4) betätigen, um äußeren Rollenwerkzeug (17A) an
den Felgenrand zu rücken (Abb.16/1)
5) Das Rad in Drehung versetzen und gleichzeitig das Rollenwerkzeug
leicht stoßweise vorrücken lassen.
6) Bis vollem Wulstabdrücken vorgehen. Um diesen Vorgang zu
erleichtern, ist es empfohlen, sowohl den Wulst als auch den
Felgenrand bei Raddrehung zu schmieren (Abb.17/1-17/2)
Darauf besonders achtgeben, sich die Finger zwischen
Reifen und Werkzeug nicht zu quetschen.
Um Gefahren zu vermeiden, ist es immer empfohlen, das
Rad in RECHTSDREHUNG bei Handlung der Außenseite
und in LINKSDREHUNG bei Handlung der Innenseite zu
versetzen.
7) Hebel (3) (4) betätigen, um inneren Rollenwerkzeug (17B) an den
Felgenrand zu rücken (Abb.18/1)
8) Das Rad in Drehung versetzen und gleichzeitig das Rollenwerkzeug
(17B) leicht stoßweise vorrücken lassen (Abb.18/1)
9) Den Reifen fortdrücken, bis er sich von Außenseite der Felge
abtrennt (Abb. 19/1)
27
7.3.3_Stallonatura e smontaggio
con UTENSILE DOPPIO
1) Assicurarsi che la ruota sia bloccata e sgonfia.
2) Abbassare il braccio porta utensili (17) in posizione di lavoro, fino
a che si sarà agganciato con l'apposito cricchetto.
Verificare sempre che il braccio sia correttamente agganciato al carrello.
3) Agendo sulle leve (3) (4) fare in modo che il disco di smontaggio
si posizioni in prossimità del bordo del cerchione.
4) Far ruotare la ruota e contemporaneamente fare avanzare il
disco a brevi scatti. (Fig. 20).
5) Avanzare fino al completo distacco del tallone. Per agevolare
l'operazione, con la ruota in movimento, lubrificare il tallone e la
balconata del cerchione con l'apposito grasso.
18
15
Fig.21
Fig.20
Prestare particolare attenzione a non schiacciarsi le dita
tra il pneumatico e l'utensile.
Per evitare qualsiasi rischio, ruotare in senso ORARIO
se si opera sul fianco esterno o in senso ANTIORARIO
se su quello interno.
6) Allontanare il braccio porta-utensile dal cerchio, sganciare il
cricchetto (18), sollevare il braccio in posizione di fuori lavoro,
traslarlo e riagganciarlo nella seconda posizione di lavoro.
1
2
3
4
7) Estrarre il fermo (15), ruotare di 180° l'utensile e re-inserire il
fermo
Non tenere le mani sull'utensile quando lo si riporta in
posizione di lavoro per evitare possibili schiacciamenti
tra l'utensile stesso e la ruota.
8) Ripetere le operazioni ai punti 5) e 6) fino a che il secondo tallone
sia completamente distaccato. (Fig. 21).
9) Continuare nella spinta del pneumatico fino alla completa
fuoriuscita dal cerchio nella parte esterna. (Fig. 22)
Fig.22
28
7.3.3_Bead breaking and tyre removing with
DOUBLE TOOL
7.3.3_Décollage du talon et démontage
moyennant l’outil double.
7.3.3_Wulstabdrücken und Demontage mit
Doppelwerkzeug
1) Make sure that the tyre is locked and deflated.
1) S’assurer que la roue soit bloquée et dégonflée.
1) Feststellen, das der Reifen festgemacht und entleert ist.
2) Set the tool-holder (17) at work by lowering it until it gets hooked
by the proper jack.
2) Baisser le bras porte-outils (19) en position de travail, jusqu’à
ce qu’il se sera accroché au petit cric approprié.
2) Werkzeugtragarm (19) in Arbeitsstellung herunterlassen, bis
wann er mit der bezüglichen Sperrklinke festklemmt.
Always check that the arm is correctly hooked to the
carriage.
3) By means of levers (3) and (4) let the disk tool position itself
close to the rim edge.
4) Let the wheel turn and, at the same time, let the disk move
forwards at brief steps (fig.20)
5) Go on until the bead is completely detached. To facilitate the
operation, when the wheel is turning grease the bead and the rim
edge all around.
Pay particular attention not to crush fingers between tyre
and tool. In order to avoid any possible risk, turn
CLOCKWISE when operating on the outer edge and
COUNTERCLOCKWISE when operating on the inner
edge.
6) Move the tool-holder away from the rim, release the jack, lift the
arm out of work, translate it and lock it in its second working
position.
7) Act on lever (15) and turn the tool of 180°
DO NOT keep your hands on the tool when setting it in
working position so as to avoid any possible crushing
between tyre and tool.
S’assurer toujours que le bras soit correctement accroché
au chariot.
Immer feststellen, daß der Arm mit Schlitten gut befestigt
ist.
3) Actionner les leviers (3) (4) de sorte que le disque de demontage
se positionne près du bord de la jante.
3) Hebel (3) (4) betätigen, um die Abdrückscheibe an den Felgenrand
zu rücken.
4) Faire tourner la roue et, en même temps, faire avancer le
disque par petites saccades (fig.20).
4) Das Rad in Drehung versetzen und gleichzeitig die Scheibe
leicht stoßweise vorrücken lassen (Abb.20).
5) Proceder jusqu’au complet décollement du talon. Pour faciliter
cette opération, la roue en mouvement, graisser le talon et le
bord de la jante par la graisse en dotation.
5) Bis vollem Wulstabdrücken vorgehen. Um diesen Vorgang zu
erleichtern, ist es empfohlen, sowohl den Wulst als auch den
Felgenrand bei Raddrehung zu schmieren
Prêter attention particulière à ne pas s’écraser les doigts
entre le pneu et l’outil.
Afin d’eviter tout risque, faire tourner en sens
HORAIRE lors des opérations sur le bord extérieur, et
en sens ANTIHORAIRE lors des opérations sur le bord
intérieur.
6) Eloigner le bras porte-outil de la jante, décrocher le petit cric,
soulever le bras en position hors travail, le transférer et le
raccrocher dans la deuxième position de travail.
7) Actionner le levier (15) et faire tourner l’outil de 180°.
Ne pas tenir les mains sur l’outil lors de son
repositionnement en travail, afin d’eviter tout possible
écrasement entre l’outil même et la roue.
8) Repeat the operations of points 5) and 6) until the second bead
is completely detached (fig.21)
8) Répeter les opérations aux points 5) et 6) jusqu’au complet
décollement du deuxième talon. (fig.21)
9) Go on pushing the tyre until the rim comes completely out (fig.22)
9) Continuer à pousser le pneu jusqu’au complet décollement de
la partie extérieure de la jante (fig.22)
Darauf besonders achtgeben, sich die Finger zwischen
Reifen und Werkzeug nicht zu quetschen.
Um Gefahren zu vermeiden, ist es immer empfohlen, das
Rad in RECHTSDREHUNG bei Handlung der Außenseite
und in LINKSDREHUNG bei Handlung der Innenseite zu
versetzen.
6) Werkzeugtragarm von Felge entfernen, Sperrklinke loshaken, Arm
in Raststellung hochklappen, verlegen und in zweiter Arbeitsstellung
wieder festmachen.
7) Hebel (15) betätigen und Werkzeug von 180° drehen.
Die Hände nicht auf dem Werkzeug halten, wenn es in
Arbeitsstellung wiedergestellt wird, um mögliche
Quetschungen zwischen Werkzeug und Rad zu
vermeiden.
8) Die Vorgänge am Punkt 5) und 6) wiederholen, bis vollem
Abdrücken zweites Wulsts (Abb.21)
9) Den Reifen fortdrücken, bis wann er sich von Außenseite der
Felge abtrennt (Abb. 22)
29
7.3.4_Montaggio con utensile a rullo.
1) Assicurarsi che il cerchio sia bloccato sulla flangia.
2) Lubrificare i talloni del pneumatico e il cerchio con il grasso in
dotazione.
3) Serrare la pinza al bordo esterno del cerchio, nel punto più alto.
4) Posizionare il pneumatico sulla pedana ed abbassare la flangia
per agganciare il primo tallone alla pinza (avendo cura di mantenere quest'ultima nel punto più alto).
5) Sollevare il cerchio con il pneumatico agganciato e ruotarlo in
senso antiorario di 15-20 cm. Il pneumatico si posizionerà in modo
obliquo rispetto al cerchio. (Fig. 23)
6) Abbassare il braccio porta utensili (17) in posizione di lavoro, fino
a che si sarà agganciato con l'apposito cricchetto.
Fig.24
Fig.23
1
3
Verificare sempre che il braccio sia correttamente
agganciato al carrello.
4
7) Agendo sulle leve (3) (4) posizionare il rullo contro il secondo
tallone del pneumatico e ruotare il pneumatico fino a portare la
pinza nel punto piu basso. Il primo tallone dovrebbe essere entrato. (Fig. 24)
2
8) Posizionare il rullo a 4-5 mm. di distanza dal cerchio e premere
sul secondo tallone del pneumatico per inserire la pinza. (Fig. 25)
9) Ruotare in senso orario lubrificando con apposito grasso e contemporaneamente fare avanzare il rullo a brevi scatti verso il centro
del cerchio fino al completo inserimento del pneumatico sul
cerchio. (Fig. 26).
10) Togliere la pinza dal cerchione e portare il rullo in posizione di
fuori lavoro.
11) Posizionare la pedana sotto la verticale della ruota e abbassare
il braccio porta flangia per adagiarvi sopra la ruota.
12) Svitare la manovella di bloccaggio avendo cura di sostenere la
ruota per evitarne la caduta, traslare la pedana e rimuovere la
ruota stessa.
Fig.25
30
Fig.26
Effettuare manualmente questa operazione solo nel caso si
sia assolutamente sicuri di riuscire a mantenere in equilibrio
la ruota. Per ruote pesanti e di grandi dimensioni si DEVE
utilizzare un adeguato mezzo di sollevamento.
7.3.4_Tyre mounting with roller tool.
7.3.4_Montage moyennant l’outil à rouleau
7.3.4_Montage mit Rollenwerkzeug
1) Make sure that the rim is locked on the flange.
1) S’assurer que la jante soit bloquée sur la bride.
1) Feststellen, das die Felge auf dem Flansch festgemacht ist.
2) Grease both beads and rim by means of the supplied grease.
2) Graisser les talons du pneu ainsi que la jante par la graisse en
dotation.
2) Sowohl die Reifenwülste als auch die Felge schmieren.
3) Fix the pliers at the outer rim edge at its highest point.
4) Position the tyre on the plate and lower the flange to allow locking
the first bead with pliers (taking care to keep it at ist highest point)
5) Lift the rim with the tyre fixed on it and turn it counterclockwise
of 15-20 cm. The tyre will position itself obliquely relating to the rim
(fig. 23)
6) Lower the tool-holder (17) in its working position until it will get
hooked by the proper jack.
Check that the arm is correctly hooked to
the carriage
7) By means of levers (3) and (4) position the roller against the
second tyre bead and turn the tyre until the pliers is in its lowest
point. First bead should be set in position (fig.24)
8) Position the roller at a distance of 4-5 mm. from the rim and press
on second tyre bead in order to fit the pliers (fig.23)
9) Turn clockwise and grease with the proper grease. At the same
time, let the roller move at brief steps towards the rim center until
it is completely set on the rim (fig.26)
10) Remove the pliers from the rim and set the roller in resting position
(out of work).
11) Position the plate under the wheel vertical and lower the flangeholding arm so as to set the wheel on it.
12) Unscrew the locking handle taking care to hold up the wheel and
prevent a possible rolling down.
This operation can be extremely dangerous!
Do it manually only when you are absolutely
sure to be able to keep the tyre in position.
For heavy or oversized tyres it is COMPULSORY
to use a suitable lifting device.
3) Serrer la pince au bord extérieur de la jante, dans le point le plus
haut.
4) Positionner le pneu sur la plate-forme et baisser la bride pour
accrocher le premier talon à la pince (faisant attention à tenir celleci dans le point le plus haut)
5) Soulever la jante avec le pneu accroché et le tourner en sens
antihoraire de 15-20 cm. Le pneu se positionnera obliquement par
rapport à la jante. (fig.23)
6) Baisser le bras porte-outils (19) en position de travail, jusqu’à ce
qu’il se sera accroché au petit cric approprié.
S’assurer toujours que le bras soit correctement
accroché au chariot.
7) En actionnant les leviers (3) et (4) positionner le rouleau contre le
deuxième talon du pneu et tourner le pneu jusqu’à ce que la pince
se trouve dans le point le plus bas. Le premier talon doit être rentré
(fig. 24)
8) Positionner le rouleau à 4-5 mm. de distance de la jante et presser
le deuxième talon du pneu pour introduire la pince (fig. 23)
9) Tourner le pneu en sens horaire en graissant par la graisse en
dotation et, en même temps, faire avancer le rouleau par petites
saccades vers le centre de la jante jusqu’au complet positionnement
du pneu sur la jante (fig. 26)
3) Die Sperrzange am höchsten Punkt der Felgenaußenseite
festsetzen.
4) Den Reifen auf die Schiebebühne stellen und den Flansch
herunterlassen, um ersten Wulst mit Sperrzange festzumachen
(immer darauf beachten, die Zange am höchsten Punkt zu halten).
5) Die Felge mit festgemachtem Reifen heben und links 15-20 cm.
drehen lassen. Der Reifen wird sich in bezug auf die Felge schräg
stellen (Abb. 23)
6) Werkzeugtragarm (19) in Arbeitsstellung herunterlassen, bis
wann er mit der bezüglichen Sperrklinke festklemmt.
Immer feststellen, daß der Arm mit Schlitten gut befestigt
ist.
7) Hebel (3) (4) betätigen, um Rollenwerkzeug an den zweiten
Reifenwulst zu rücken. Den Reifen drehen lassen, bis wann sich die
Zange in niedrigstem Punkt befindet. Erster Wulst soll in Stellung
getreten sein (Abb.24)
8) Rollenwerkzeug 4-5 mm. fern von Felge stellen und auf den
zweiten Reifenwulst drücken, um die Zange einzufügen (Abb.23)
9) Rechts drehen, indem schmieren und gleichzeitig das
Rollenwerkzeug leicht stoßweise nach Felgenmitte vorrücken lassen,
bis voller Einsetzung des Reifens (Abb.26).
10) Die Zange von Felge entfernen und das Rollenwerkzeug in
Raststellung hochklappen.
10) Enlever la pince de la jante et positionner le rouleau hors travail.
11) Positionner la plate-forme sous la verticale de la roue et baisser
le bras porte-bride pour y placer la roue même.
12) Dévisser la manivelle de blocage en faisant attention à soutenir
la roue afin d’en eviter la chute. Transférer la plate-forme et enlever
la roue.
Effectuer cette operation à la main seulement si on est
absolument sûr de pouvoir tenir la roue en équilibre.
Pour roues très lourdes ou très grandes IL FAUT
utiliser un moyen de levage approprié.
11) Die Schiebebühne unter die Radsenkrechte bringen und
Flanschtragarm herunterlassen, um das Rad darauf zu stellen.
12) Die Spannkurbel lösen, indem das Rad stützen, um seinen Abfall
zu vermeiden. Die Schiebebühne verlegen und das Rad entfernen.
Dies Vorgang kann sehr gefährlich sein! Deshalb ist es
wichtig, von Hand vorgehen, NUR WENN man ganz
sicher ist, das Rad im Gleichgewicht halten können. Für
schwere oder große Reifen ist die Verwendung eines
geeigneten Hebemittels unbedingt ERFORDERLICH.
31
7.3.5_Montaggio con utensile DOPPIO.
1) Assicurarsi che il cerchio sia bloccato sulla flangia.
2) Lubrificare i talloni e il cerchio con il grasso in dotazione.
3) Serrare la pinza al bordo esterno del cerchio, nel punto più alto.
4) Posizionare il pneumatico sulla pedana ed abbassare la flangia
per agganciare il primo tallone alla pinza (avendo cura di mantenere quest'ultima nel punto più alto).
5) Sollevare il cerchio con il pneumatico agganciato e ruotarlo in
senso antiorario di 15-20 cm. Il pneumatico si posizionerà in modo
obliquo rispetto al cerchio. (Fig. 27)
6) Abbassare il braccio porta utensili (17) in posizione di lavoro, sul
fianco interno del pneumatico, fino a che si sarà agganciato con
l'apposito cricchetto.
Verificare sempre che il braccio sia correttamente
agganciato al carrello.
Fig.27
Fig.28
7) Verificare che il becco sia girato verso il pneumatico. In caso
contrario, sfilare il pomolo di bloccaggio e ruotarlo di 180°
8) Agendo sulle leve (3) (4) muovere l'utensile fino a portare il suo
punto rosso di riferimento in asse con il bordo esterno del cerchio
ad una distanza di 5 mm. dallo stesso (Fig. 28)
1
2
3
4
9) Ruotare il pneumatico in senso orario fino a portare la pinza nel
punto più basso. Il primo tallone dovrebbe essere inserito. Nel
caso si incontrassero difficoltà, aiutarsi con la leva alzatalloni per
far scivolare il tallone nel cerchio.
10) Rimuovere la pinza e fare uscire l'utensile dal pneumatico.
11) Portare l'utensile in posizione di fuori lavoro, traslarlo sul fianco
esterno del pneumatico e riagganciarlo in questa posaizione.
Non tenere le mani sull'utensile quando lo si riporta in
posizione di lavoro per evitare possibili schiacciamenti
tra l'utensile stesso e la ruota.
12) Ruotare l'utensile di 180° togliendo il pomolo di bloccaggio.
Fig.29
32
13) Avanzare con l'utensile fino a portare il suo punto rosso di riferimento in asse con il bordo esterno del cerchio ad una distanza
di 5 mm. dallo stesso, come indicato in fig. 29
7.3.5_Tyre mounting with DOUBLE TOOL.
7.3.5_Montage moyennant L’OUTIL DOUBLE.
7.3.5_Montage mit Doppelwerkzeug
1) Make sure that the rim is locked on the flange.
1) S’assurer que la jante soit bloquée sur la bride.
1) Feststellen, das die Felge auf dem Flansch festgemacht ist.
2) Grease both beads and rim by means of the supplied grease.
2) Graisser les talons du pneu ainsi que la jante par la graisse.
2) Sowohl die Reifenwülste als auch die Felge schmieren.
3) Fix the pliers at the outer rim edge at its highest point.
3) Serrer la pince au bord extérieur de la jante, dans le point le plus
haut.
3) Die Sperrzange am höchsten Punkt der Felgenaußenseite festsetzen.
4) Position the tyre on the plate and lower the flange to allow locking
the first bead with pliers (taking care to keep it at ist highest point)
5) Lift the rim with the tyre fixed on it and turn it counterclockwise of
15-20 cm.
The tyre will position itself obliquely relating to the rim.(fig. 27)
6) Lower the tool-holder (17) in its working position until it will get
hooked by the proper jack.
Check that the arm is correctly hooked to the carriage
7) Check that the peak is turned towards the tyre. Otherwise remove
the locking knob and turn it of 180°.
8) By means of levers (3) and (4) move the tool until its red spot is on
level with the outer edge at a distance of 5 mm. (fig.28)
9) Turn clockwise until the pliers is in its lowest point. First bead
should be now set in position. In case of difficulties, use the beadlifting lever to facilitate sliding the bead into the rim.
10) Remove the pliers from the rim and let the tool come out from tyre.
11) Set the tool in resting position (out of work), translate it on outer
tyre edge and fix it in this position.
4) Positionner le pneu sur la plate-forme et baisser la bride pour
accrocher le premier talon à la pince (faisant attention à tenir celleci dans le point le plus haut)
5) Soulever la jante avec le pneu accroché et le tourner en sens
antihoraire de 15-20 cm. Le pneu se positionnera obliquement par
rapport à la jante. (fig.27)
6) Baisser le bras porte-outils (17) en position de travail, sur le flanc
intérieur du pneu, jusqu’à ce qu’il se sera accroché au petit cric
approprié.
S’assurer toujours que le bras soit correctement
accroché au chariot.
7) S’assurer que le bec soit tourné vers le pneu. En cas contraire,
enlever le pommeau de blocage et tourner le bec de 180°.
8) En actionnant les leviers (3) et (4) déplacer l’outil jusqu’à porter le
point rouge de repère en ligne avec le bord extérieur de la jante à
une distance de 5 mm. de la jante même (fig. 28)
9) Tourner le pneu en sens horaire jusqu’à porter la pince dans le
point le plus bas. Le premier talon doit être rentré. En cas de
difficulté, s’aider avec le levier décolle-talons pour faire glisser le
talon dans la jante.
10) Enlever la pince et faire sortir l’outil du pneu.
DO NOT keep your hands on the tool when setting it in
working position so as to avoid any possible crushing
between tyre and tool.
12) Turn the tool of 180° and remove the locking knob.
13) Move the tool until its red spot is on level with the outer edge at
a distance of 5 mm. (fig.29)
11) Positionner l’outil hors travail, le transférer sur le flanc extérieur
du pneu et le raccrocher dans cette position.
Ne pas tenir les mains sur l’outil lors de son
repositionnement en travail, afin d’eviter tout possible
écrasement entre l’outil même et la roue.
12) Tourner l’outil de 180° en enlevant le pommeau de blocage.
13) Faire avancer l’outil jusqu’à porter le point rouge de repère en
ligne avec le bord extérieur de la jante, à une distance de 5 mm.
de la jante même, comme indiqué en fig. 29
4) Den Reifen auf die Schiebebühne stellen und den Flansch
herunterlassen, um ersten Wulst mit Sperrzange festzumachen (immer
darauf beachten, die Zange am höchsten Punkt zu halten).
5) Die Felge mit festgemachtem Reifen heben und links 15-20 cm.
drehen lassen. Der Reifen wird sich in bezug auf die Felge schräg stellen
(Abb. 27)
6) Werkzeugtragarm (19) in Arbeitsstellung an Reifeninnenseite
herunterlassen, bis wann er mit der bezüglichen Sperrklinke festklemmt.
Immer feststellen, daß der Arm mit Schlitten gut befestigt
ist.
7) Die Spitze des Werkzeuges soll nach dem Reifen gedreht sein.
Andernfalls, den Sperrknopf herausziehen und von 180° drehen lassen.
8) Hebel (3) (4) betätigen, um das Werkzeug zu verlegen, bis wann sich
der rote Referenzpunkt mit dem Felgenaußenrand 5 mm. fern von Felge
ausrichtet (Abb.28)
9) Den Reifen rechts drehen lassen, bis wann sich die Zange in
niedrigstem Punkt befindet. Erster Wulst soll in Stellung getreten sein.
Sollten Schwierigkeiten auftreten, so ist die Verwendung des
Wulstabdrückhebels ratsam, um die Wulstgleitung in die Felge zu
erleichtern.
10) Die Zange entfernen und das Werkzeug vom Reifen herausziehen.
11) Das Werkzeug in Raststellung hochklappen, es nach
Reifenaußenseite verlegen und in dieser Stellung festmachen.
Die Hände nicht auf dem Werkzeug halten, wenn es in
Arbeitsstellung wiedergestellt wird, um mögliche
Quetschungen zwischen Werkzeug und Rad zu
vermeiden.
12) Den Sperrknopf herausziehen und das Werkzeug von 180° drehen.
13) Das Werkzeug vorrücken lassen, bis wann sich der rote Referenzpunkt
mit dem Felgenaußenrand 5 mm. fern von Felge ausrichtet (Abb.29)
33
14) Posizionare la pinza per cerchioni appena sopra l'utensile a becco
come indicato in figura 30.
15) Far ruotare il pneumatico in senso orario fino a portare la pinza
nel punto più basso. Anche il secondo tallone dovrebbe essere
inserito nel cerchio. (Fig. 31)
16) Togliere la pinza dal cerchione e portare l'utensile in posizione di
fuori lavoro.
17) Posizionare la pedana sotto la verticale della ruota e abbassare
il braccio porta flangia per adagiarvi sopra la ruota.
14) Position the pliers over the peak-tool as shown by fig.30
15) Let the tyre turn clockwise until the pliers is in its lowest point.
Second bead should be set in position too. (fig.31)
16) Remove the pliers from the rim and set the tool in its resting
position (out of work)
17) Position the plate under the wheel vertical and lower the
flange-holding arm so as to set the wheel on it.
18) Unscrew the locking knob taking care to hold up the wheel and
prevent any possible rolling down.
18) Svitare la manovella di bloccaggio avendo cura di sostenere la
ruota per evitarne la caduta.
Questa operazione può essere estremamente pericolosa! Effettuarla manualmente solo nel caso si sia assolutamente sicuri di riuscire a mantenere in equilibrio la
ruota. Per ruote pesanti e di grandi dimensioni si DEVE
utilizzare un adeguato mezzo di sollevamento.
Fig.30
Fig.31
34
Non gonfiare il pneumatico con la ruota ancora montata
sull'autocentrante. Il gonfiaggio può essere pericoloso,
perciò deve essere effettuato in aoopositi luoghi di sicurezza.
This operation can be extremely dangerous! Do it manually
only when you are absolutely sure to be able to keep the
tyre in position. For heavy or oversized tyres it is
COMPULSORY to use a suitable lifting device.
DO NOT inflate the tyre when it is still fixed on the selfcentering shaft. Inflating can be dangerous and therefore
it must be carried out in suitable safe places.
14) Positionner la pince pour jantes juste au-dessus de l’outil à bec,
comme indiqué en fig. 30.
15) Faire tourner le pneu en sens horaire jusqu’à porter la pince dans
le point le plus bas. A ce point même le deuxième talon doit être rentré
dans la jante. (fig.31)
14) Die Zange kaum auf das Spitzewerkzeug stellen (Abb.30)
15) Den Reifen rechts drehen lassen, bis wann sich die Zange in
niedrigsten Punkt befindet. Auch zweiter Wulst soll in Stellung
getreten sein. (Abb. 31)
16) Enlever la pince de la jante et porter l’outil en position hors travail.
16) Die Zange von Felge entfernen und das Werkzeug in Raststellung
hochklappen.
17) Positionner la plate-forme sous la verticale de la roue et baisser
le bras porte-bride pour y placer la roue même.
17) Die Schiebebühne unter die Radsenkrechte bringen und
Flanschtragarm herunterlassen, um das Rad darauf zu stellen.
18) Dévisser la manivelle de blocage en faisant attention à soutenir
la roue afin d’en eviter la chute.
18) Die Spannkurbel lösen, indem das Rad stützen, um seinen Abfall
zu vermeiden.
Cette opération peut être extrêmement dangereuse!
L’effectuer à la main seulement si on est absolument
sûr de pouvoir tenir la roue en équilibre. Pour roues
très lourdes ou très grandes IL FAUT utiliser un moyen
de levage approprié.
Dies Vorgang kann sehr gefährlich sein! Deshalb ist es
wichtig, von Hand vorgehen, NUR WENN man ganz sicher
ist, das Rad im Gleichgewicht halten können. Für schwere
oder große Reifen ist die Verwendung eines geeigneten
Hebemittels unbedingt ERFORDERLICH.
Ne pas gonfler le pneu si la roue est encore montée sur
le centreur. Le gonflage peut être dangereux, et il doit
donc être effectué dans des endroits appropriés et en
conditions de sécurité.
Den auf selbstzentrierendem Futter noch eingebauten
Reifen nicht aufpumpen. Das Aufpumpen kann gefährlich
sein und es soll deshalb in eigens dazu bestimmten
Sicherheitsplätzen stattfinden.
Fig.30
Fig.31
35
21
7.4 RUOTE CON CAMERA D'ARIA
7.4 TYRES WITH TUBE
7.4.1_Stallonatura e smontaggio
con UTENSILE DOPPIO
7.4.1_Bead breaking and tyre removing with
DOUBLE TOOL
ATTENZIONE: Quando si sgonfia la ruota è necessario svitare la
ghiera che fissa la valvola in modo che, quest'ultima, rientrando all'interno del cerchio, non costituisca ostacolo durante la
stallonatura.
Procedere alle operazioni di stallonatura agendo esattamente come
descritto per le ruote Tubeless.
Nel caso di ruote con camera d'aria è però necessario interrompere
l'avanzamento del disco stallonatore immediatamente dopo il
distacco del tallone per evitare possibili danni a valvola e camera
d'aria.
WARNING: Unscrew the bush which fixes the valve when deflating the tyre so that the valve, coming in the inside of the rim, is
not an obstacle during bead breaking.
Follow all the steps described previously for tubeless tyres bead
breaking.
With tyres with tube, however, stop disk movement as soon as the
bead has loosened to avoid damaging the tube inflation valve.
1) Ribaltare il braccio porta utensile (17) in posizione di fuori lavoro,
traslarlo sul lato esterno della ruota e riagganciarlo in posizione di
lavoro.
2) Rotate the spindle and at the same time move the peak-tool forward inserting it between rim and bead until it is anchored to the
tool.
2) Ruotare l'autocentrante e contemporaneamente fare avanzare
l'utensile a becco inserendolo tra cerchio e tallone fino a che
quest'ultimo si sarà agganciato all'utensile.
3) Move the rim 4-5 cm. from tool so as to prevent the bead from
unhooking from tool
3) Allontanare di circa 4-5 cm. il cerchio dall'utensile in modo da
evitare l'eventuale sgangio del tallone dall'utensile stesso.
1) Tip the tool carrier arm (17) to its non-working position. Move it to
the outside plane of the wheel and rehook it in this working position.
4) Move the peak-tool outwards the outside until the red reference
dot is by the outside edge of the rim.
5) Insert lever (21) between rim and bead at the right of the tool.
14
13
4) Traslare verso l'esterno l'utensile a becco in modo da portare il
suo punto rosso di riferimento in prossimità del bordo esterno del
cerchio.
6) Press down the lever and, keeping it pressed, lower the wheel
until the edge of the rim sets itself at about 5 mm. from the peak-tool
(fig.32)
5) Inserire la leva (21) tra cerchio e tallone sulla destra dell'utensile.
15
6) Mantenendo la leva premuta abbassare la ruota fino a portare il
bordo del cerchio ad una distanza di circa 5 mm. dall'utensile a
becco. (Fig. 32)
7) Girare la ruota in senso antiorario mantenendo premuta la leva
fino alla completa fuoriuscita del tallone.
18
10
17
36
Fig.32
8) Allontanare il braccio porta utensile in posizione di fuori lavoro.
Abbassare l'autocentrante fino a premere la gomma sulla pedana
mobile (10) che, avanzata leggermente verso l'esterno, creerà lo
spazio necessario per l'estrazione della camera d'aria.
9) Estrarre la camera d'aria quindi risollevare la ruota.
7) Turn the wheel anticlockwise pressing down on lever until the
bead is completely off.
8) Move the tool carrier arm to its non-working position. Lower the
spindle until the tyre set onto the platform (10). Move the platform
sligthly outwards so as to create the gap necessary to remove the
inner tube
9) Remove the inner tube and lift the wheel again.
7.4 ROUES AVEC CHAMBRE A AIR
7.4 RÄDER MIT SCHLAUCH
7.4.1_Décollage du talon et démontage
moyennant l’OUTIL DOUBLE.
7.4.1_Wulstabdrücken und Demontage mit
DOPPELWERKZEUG
ATTENTION: Lors du dégonflage de la roue il faut dévisser la bague
qui fixe la valve de sorte que cette dernière, en rentrant dans la
jante, ne constitue pas un obstacle pendant le décollage.
Procéder aux opérations de décollage exactement comme décrit
pour les roues Tubeless.
Dans le cas de roues à chambre à air il faut cependant interrompre
l’avancement du disque décolleur immédiatement après le décollage
du talon pour éviter d’endommager la valve et la chambre à air.
VORSICHT: Bei Entleerung des Reifens ist es nötig, die
Ventilbefestigungsmutter abschrauben, damit das
Ventil in das Felgeninnere eintritt und kein Hindernis
beim Abdrücken darstellt. Abdrückvorgänge
vornehmen, genau wie schon für schlauchlose Reifen
beschrieben
Bei Schlauchreifen ist der Vorschub der Abdrückscheibe jedoch zu
unterbrechen, sobald der Wulst herausgelöst ist, um Ventil und
Schlauch nicht zu beschädigen.
1) Basculer le bras porte-outil (17) dans la position hors service, le
placer sur le côté extérieur de la roue et le raccrocher dans la position
de travail.
1) Den Werkzeugtragarm (17) in Raststellung hochklappen, auf die
Radaußenseite verlegen und in Arbeitsstellung wieder festmachen.
2) Tourner le mandrin et en même temps faire avancer l’outil à bec
en l’introduisant entre la jante et le talon jusqu’à ce que ce dernier
soit accroché à l’outil.
3) Eloigner de 4÷5 cm la jante de l’outil pour éviter tout décrochage
du talon de l’outil.
4) Déplacer l’outil à bec vers l’extérieur jusqu'à ce que son repère
rouge se trouve à proximité du bord extérieur de la jante.
5) Introduire le levier (21) entre la jante et le talon à droite de l’outil.
6) En maintenant le levier enfoncé abaisser la roue jusqu’à ramener
le bord de la jante à une distance de 5 mm de l’outil. (Fig. 32)
21
2) Das Spannfutter Drehen und gleichzeitig mit dem Nagelwerkzeug
vorfahren, wobei man es zwischen Felge und Wulst eindringen läßt,
bis der Wulst auf das Werkzeug aufgezogen ist.
3) Die Felge zirca 4-5 cm vom Werkzeug entfernen, damit es
vermieden wird, daß der Wulst vom Werkzeug rutscht.
4) Das Neagelwerkzeug nach außen verlegen, bis wann sich der
rote Referenzpunkt in der Nähe der Felgenaußenkante befindet.
5) Den Hebel (21) rechts vom Werkzeug zwischen Felge und Wulst
stecken.
14
6) Den Hebel gedrückt halten und das Rad senken, bis wann sich
der Felgenrand zirka 5 mm. fern vom Nagelwerkzeug befindet.
(Abb. 32)
7) Tourner la roue dans le sens inverse aux aiguilles d’une montre
en maintenant le levier appuyé jusqu’à ce que le talon soit
entièrement sorti.
7) Das Rad im Gegenuhrzeigersinn verdrehen, wobei man den Hebel
gedrückt hält, bis der Wulst ganz herausgelöst ist.
8) Eloigner le bras porte-outil dans la position de hors service.
Abaisser le mandrin pour appuyer le pneu sur la plate-forme mobile
qui, légèrement avancée vers l’extérieur, créera l’espace nécessaire
pour extraire la chambre à air.
8) Den Werkzeugtragarm in Raststellung hochklappen. Das
Spannfutter senken, bis wann der Reifen die Schiebebühne (10)
berührt, die, wenn nach Außen leicht verlegt wird, den erforderlichen
Platz zum Schlauchabziehen schäfft.
9) Extraire la chambre à air et soulever de nouveau la roue.
9) Den Schlauch herausziehen und das Rad heben.
13
15
18
10
17
Fig.32
37
10) Traslare il braccio portautensile sul lato interno della ruota, ruotare
l'utensile di 180° ed abbassare il braccio in posizione di lavoro.
Inserire il medesimo tra cerchio e tallone e traslarlo fino a che il
tallone sia in prossimità del bordo anteriore del cerchio (é consi
gliabile fare quest'ultima operazione ruotando contemporaneamente la ruota).
11) Allontanare di circa 4-5 cm. il cerchio dall'utensile in modo da
evitare l'eventuale sgangio del tallone dall'utensile stesso.
12) Traslare l'utensile a becco in modo da portare il suo punto rosso
di riferimento circa 3 cm. all'interno del cerchio.
13) Inserire la leva tra cerchio e tallone sulla destra dell'utensile
(vedi Fig. 33).
14) Mantenendo la leva premuta abbassare la ruota fino a portare il
bordo del cerchio ad una distanza di circa 5 mm. dall'utensile a becco, quindi ruotare la ruota in senso antiorario fino alla completa fuoriuscita della gomma dal cerchio.
Fig.33
La fuoriuscita dei talloni dal cerchio causa la
caduta del pneumatico.
Verificare sempre che nessuno si trovi accidentalmente nell'area di lavoro.
12) Move the peak-tool so that its red reference dot is about 3 cm
inside the rim.
13) Insert lever between rim and bead at the right of the tool (Fig.33)
14) Press down the lever and, keeping it pressed, lower the wheel
until the edge of the rim sets itself at about 5 mm. from the peaktool.
Turn the wheel anticlockwise pressing down on lever until the tyre
comes completely off the rim.
When the beads come off the rim, the wheel will
fall.
Always make sure there are no by-standers in the
work area.
7.4.1_Tyre mounting with DOUBLE TOOL.
1) Se il cerchio è stato smontato dall'autocentrante ribloccarlo come
descritto nel paragrafo "BLOCCAGGIO DEL CERCHIO".
1) If the rim has been removed from the spindle, lock it back as
described in par. “RIM CLAMPING”
2) Lubrificare i talloni del pneumatico e cerchio con apposita
soluzione saponata.
2) Lubricate both beads and rim with proper grease.
Assicurarsi che la pinza sia ben agganciata al
cerchio.
4) Posizionare il pneumatico sulla pedana ed abbassare l'autocentrante (avendo cura di mantenere la pinza nel punto più alto) per
agganciare il primo tallone alla pinza stessa.
38
11) Move the rim about 4-5 cm from the tool so as to prevent the rim
from detaching from tool.
7.4.1_Montaggio con UTENSILE DOPPIO
3) Serrare la pinza al bordo esterno del cerchione nel punto più alto
(vedi fig. 34).
Fig.34
10) Move the tool carrier arm to the inside plane of the tyre, turn the
peak-tool of 180° and lower the arm to its working position. Insert it
between rim and bead and move it until the bead is by the front
edge of the rim (it is advisable to do this with turning wheel).
3) Fix the clip to the outside edge of the rim at the highest point
(Fig. 34).
Make sure the pliers is firmly attached to the rim.
4) Set the tyre onto the platform and lower the spindle (keeping the
clamp at the highest point) to hook the first bead to the clamp.
10) Placer le bras porte-outil sur le côté intérieur de la roue, tourner
l’outil de 180° et abaisser le bras dans la position de travail. Introduire
l’outil entre la jante et le talon et le faire avancer jusqu’à ce que le
talon soit à proximité du bord avant de la jante (il est conseillé de
faire cette dernière opération en tournant en même temps la roue).
11) Eloigner la jante de l’outil d’environ 4÷5 cm pour éviter tout
décrochage du talon de l’outil.
12) Positionner l’outil à bec de manière à placer son repère rouge
environ 3 cm à l’intérieur de la jante.
13) Introduire le levier entre la jante et le talon à droite de l’outil
(voir Fig. 33).
14) En maintenant le levier appuyé, abaisser la roue jusqu’à placer
le bord de la jante à une distance d’environ 5 mm de l’outil; faire
tourner la roue dans le sens contraire aux aiguilles d’une montre
jusqu’à la sortie complète du pneu.
La sortie des talons de la jante provoque la chute
du pneu.
Vérifier toujours que personne ne se trouve dans
la zone de travail.
10) Den Werkzeugtragarm nach Radinnenseite verlegen, das
Werkzeug um 180° verdrehen und den Arm in Arbeitsstellung
bringen. Das Werkzeug zwischen Felge und Wulst stecken und
verlegen, bis wann sich der Wulst beim vorderen Felgenrand
befindet (bei diesem letzten Vorgang empfiehlt es sich, das Rad
gleichzeitig zu verdrehen)
11) Die Felge zirca 4-5 cm vom Werkzeug entfernen, damit es
vermieden wird, daß der Wulst vom Werkzeug rutscht.
12) Das Nagelwerkzeug verlegen, bis wann sich sein roter
Referenzpunkt 3 cm. in Felgeninnenseite befindet.
13) Den Hebel rechts vom Werkzeug zwischen Felge und Wulst
stecken (Abb. 33).
14) Den Hebel gedrückt halten und das Rad senken, bis wann sich
der Felgenrand zirka 5 mm. vom Nagelwerkzeug befindet. Dann
das Rad im Gegenuhrzeigersinn verdrehen, bis wann der Wulst von
Felge ganz gelöst wird.
Das Wulstabziehen von Felge verursacht den
Reifenabfall
Immer sicherstellen, daß sich niemand im
Arbeitsbereich befindet.
7.4.1_Montage moyennant L’OUTIL DOUBLE.
7.4.1_Montage mit DOPPELWERKZEUG
1) Si la jante a été démontée du mandrin la remonter comme décrit
dans le paragraphe “BLOCAGE DE LA JANTE”.
1) Wenn die Felge vom Spannfutter heruntergenommen worden ist,
muß sie wieder aufgespannt werden, die im Abschnitt
“EINSPANNUNG DER FELGE” beschrieben wird.
Fig.33
2) Lubrifier les talons du pneu et la jante par de la graisse appropriée.
2) Die Reifenwülste und die Felge mit geeignetem Fett schmieren.
3) Serrer la pince sur le bord extérieur de la jante dans le point le
plus haut (voir Fig. 34).
Vérifiez que la pince est bien accrochée à la jante.
4) Positionnner le pneu sur la plate-forme et baisser le mandrin (en
ayant soin de maintenir la pince dans le point le plus haut) pour
accrocher le premier talon à la pince même.
3) Die Zange am höchsten Punkt des Felgenaußenrandes befestigen
(vgl. Abb. 34).
Sicherstellen, daß die Zange ganz fest an der
Felge sitzt.
4) Den Reifen auf die Schiebebühne stellen und das Spannfutter
senken (dabei ist zu beachten, daß die Zange immer an der höchsten
Stelle bleibt), um den ersten Wulst an der Zange zu befestigen.
Fig.34
39
5) Sollevare il cerchio con il pneumatico agganciato e ruotarlo in
senso antiorario di 15-20 cm. Il pneumatico si posizionerà in modo
obliquo rispetto al cerchio.
6) Portare il braccio portautensili in posizione di fuori lavoro; traslarlo
sul fianco interno del pneumatico e riagganciarlo in questa posizione.
7) Verificare che l'utensile a becco sia posizionato sul lato della ruota. In caso contrario ruotarlo di 180°.
8) Avanzare con l'utensile fino a portare il suo punto rosso di riferimento in asse con il bordo esterno del cerchio ad una distanza di 5
mm. dallo stesso (vedi Fig. 35).
9) Portandosi sull'esterno della ruota controllare visivamente l'esatta posizione dell'utensile ed eventualmente correggerla, quindi
ruotare l'autocentrante in senso orario fino a portare la pinza nel
punto più in basso (ore 6). Il primo tallone risulterà inserito nel cerchio.
Rimuovere la pinza.
5) Lift the rim with the hooked tyre and turn it anticlockwise of about
15-20 cm. The tyre will set itself slantingly.
6) Move the tool carrier arm to its non-working position. Move it to
the inside plane of the tyre and rehook it in this position.
7) Make sure that the peak-tool is positioned on the wheel side. If
not, turn it of 180°.
8) Move the tool forward until the red reference dot is lined up with
the outside edge of the rim at about 5 mm from it (Fig. 35).
9) From the outside of the wheel visually check the exact position of
the tool and adjust it, if necessary. Then turn the spindle clockwise
until the clamp is at the bottom. First bead will be set in position
according to the rim.
Remove the clamp.
10) Remove the tool from the tyre.
11) Move the tool carrier arm to its non-working position. Move it to
the outside plane of the tyre.
10) Fare uscire l'utensile dal pneumatico.
12) Turn the tool of 180°.
Fig.35
Fig.36
11) Portare il braccio portautensili in posizione di fuori lavoro; traslarlo
sul fianco esterno del pneumatico.
12) Ruotare l'utensile di 180°.
13) Ruotare l'autocentrante fino a portare il foro della valvola in basso (a ore 6).
10
14) Portare la pedana mobile (10) sulla verticale della ruota ed abbassare l'autocentrante fino ad appoggiare il pneumatico sulla pedana stessa.
Traslare la pedana verso l'esterno in modo da creare uno spazio,
tra pneumatico e cerchio, nel quale introdurre la camera d'aria.
N.B.: Il foro per la valvola può trovarsi in posizione asimmetrica
rispetto al centro del cerchio. In questo caso è necessario posizionare ed introdurre la camera d'aria come indicato in fig. 36
Introdurre la valvola nel foro e fissarla mediante la sua ghiera.
15) Introdurre la camera d'aria nel canale del cerchio (N.B.: per agevolare l'operazione è consigliabile ruotare contemporaneamente
l'autocentrante in senso orario).
10
40
13) Turn the spindle until the valve hole is at the bottom.
14) Set the platform (10) under the wheel and lower the spindle until
the tyre touches the platform. Move the platform slightly outwards
so as to create a gap, between tyre and rim, necessary to introduce
the inner tube.
NOTE: The valve hole may be asymmetrical to the centre of the
rim. In this case position and insert the inner tube as shown in
Fig. 36.
Insert the valve through the hole and fix it with its locking ring.
15) Fit the inner tube into the rim groove (NOTE: to facilitate this
operation, it is advisable, at the same time, to turn the spindle clockwise).
5) Soulever la jante avec le pneu accroché et le tourner dans le sens
inverse aux aiguilles d’une montre de 15-20 cm. Le pneu se positionnera
de travers par rapport à la jante.
5) Die Felge mit dem angehakten Reifen heben und 15-20 cm im
Gegenuhrzeigersinn verdrehen. Der Reifen ordnet sich dann schräg
im Bezug zur Felge an.
6) Basculer le bras porte-outil dans la position hors service; le déplacer
sur le flanc intérieur du pneu et le raccrocher dans cette position.
6) Den Werkzeugtragarm in Raststellung hochklappen, nach der
Reifeninnenseite verlegen und in dieser Stellung wieder befestigen.
7) Vérifier que l’outil à bec soit positionné sur le côté de la roue. Dans le
cas contraire le tourner de 180°.
7) Sicherstellen, daß das Nagelwerkzeug auf der Radseite positioniert
ist. Andernfalls um 180° verdrehen.
8) Avancer avec l’outil en alignant son repère rouge avec le bord
extérieur de la jante à une distance de 5 mm (voir Fig. 35).
8) Das Werkzeug vorrücken, bis wann sein roter Referenzpunkt 5
mm. von Felge mit dem Felgenaußenrand ausgerichtet wird.
(vgl. Abb. 35).
9) En se plaçant du côté extérieur de la roue contrôler visuellement
la position exacte de l’outil et éventuellement la corriger, puis tourner
le mandrin à droite pour placer la pince dans le point le plus bas (6
heures). Le premier talon résultera introduit dans la jante.
Enlever la pince.
10) Faire sortir l’outil du pneu.
11) Basculer le bras porte-outil dans la position hors service; le
déplacer sur le flanc extérieur du pneu.
9) Von Radaußenseite eine Sichtprüfung vornehmen, um die korrekte
Stellung Werkzeuges festzustellen und gegebenenfalls verbessern.
Das Spannfutter dann im Uhrzeigersinn drehen, bis wann sich die
Zange am niedrigsten Punkt befindet.
Der erste Wulst muß dann in die Felge eingezogen sein. Die Zange
entfernen.
10) Das Werkzeug aus dem Reifen herausziehen.
12) Tourner l’outil de 180°.
11) Den Werkzeugtragarm in Raststellung hochklappen und nach
Reifenaußenseite verlegen.
Fig.35
13) Tourner le mandrin jusqu’à placer le trou de la valve en bas.
12) Das Werkzeug um 180° verdrehen.
Fig.36
14) Placer la plate-forme mobile (10) sous la verticale de la roue et
baisser le mandrin pour faire appuyer le pneu sur la plate-forme.
Déplacer la plate-forme vers l’extérieur de manière à créer un espace,
entre le pneu et la jante, dans lequel introduire la chambre à air.
N.B.: Le trou de la valve peut se trouver dans une position
asymétrique par rapport au centre de la jante.
Dans ce cas il faut placer et introduire la chambre à air comme
indiqué dans la fig. 36.
Introduire la valve dans le trou et la fixer au moyen de la bague.
13) Das Spannfutter verdrehen, bis die Ventilöffnung unten steht.
15) Introduire la chambre à air dans le creux de la jante (N.B.: pour
faciliter l’opération il est conseillé de faire tourner en même temps le
mandrin vers la droite).
14) Die Schiebebühne (10) unter das Rad bringen und das
Spannfutter senken, bis wann der Reifen die Schiebebühne berührt.
Die Schiebebühne nach außen verlegen, um Platz zwischen Reifen
und Felge zur Schlaucheinfügung zu schaffen.
Anm.: Die Öffnung für das Ventil kann sich in asymmetrischer
Position im Bezug zum Felgenmittelpunkt befinden. In diesem Fall
muß der Schlauch wie in Abb. 36 gezeigt angeordnet und
eingeführt werden.
Das Ventil in die Öffnung stecken und mit seiner Nutmutter
befestigen.
10
15) Den Schlauch in die Felgenrille stecken (Anm.: Um den Vorgang
zu vereinfachen, ist es ratsam, das Spannfutter gleichzeitig im
Uhrzeigersinn zu verdrehen).
10
41
16) Ruotare l'autocentrante fino a portare la valvola in basso
16) Turn the spindle until the valve is at the bottom.
17) Gonfiare leggermente la camera d'aria (fino a che non presenti
pieghe) per evitare di pizzicarla durante il montaggio del secondo
tallone.
17) Inflate the inner tube a little (until no more folds are present) so
as not to pinch it while mounting the second bead.
18) Montare sulla valvola una prolunga quindi rimuovere la ghiera di
fissaggio.
N.B.: Questa operazione consente alla valvola di essere libera e
non strapparsi durante il montaggio del secondo tallone.
19) Risollevare la ruota e montare nuovamente la pinza, all'esterno
del secondo tallone, a circa 20 cm. a destra della valvola (Fig. 38).
20) Ruotare l'autocentrante in senso orario fino a portare la pinza a
ore 9.
21) Portare il braccio porta utensili in posizione di lavoro
22) Avanzare con l'utensile fino a portare il suo punto rosso di riferimento in asse con il bordo esterno del cerchio ad una distanza di 5
mm. dallo stesso.
Fig.38
23) Ruotare in senso orario fino al completo montaggio del pneumatico. (Fig. 39)
24) Rimuovere la pinza . Estrarre l'utensile ruotando l'autocentrante in senso antiorario e traslando verso l'esterno.
25) Ribaltare il braccio porta utensile in posizione di fuori lavoro.
26) Posizionare la pedana sotto la verticale della ruota, abbassare
l'autocentrante fino ad appoggiare la ruota sulla pedana.
27) Con il pneumatico appoggiato sulla pedana controllare che la
valvola risulti perfettamente centrata con il foro di uscita. In caso
contrario, ruotare leggermente l'autocentrante in modo da aggiustarne la posizione. Fissare la valvola con la ghiera e rimuovere la
prolunga.
28) Togliere la ghiera di bloccaggio del cerchio avendo cura di sostenere la ruota per evitarne la caduta.
29) Traslare la pedana per liberare la ruota dall'autocentrante e rimuovere la ruota.
Fig.39
42
18) Fit an extension onto the valve and then remove the locking
ring.
REMARKS: The purpose of this operation is to allow the valve to be
loose so that it is not ripped out during second bead mounting.
19) Lift the wheel again and fix the clamp outside the second bead
at about 20 cm right of the valve (Fig. 38).
20) Turn the spindle clockwise until the clamp is set at 9 o’clock
position.
21) Move the tool carrier arm to its working position.
22) Bring the tool forward until the red reference dot is lined up with
the outside edge of the rim at about 5 mm from it.
23) Turn the spindle clockwise until the tyre is completely mounted
on the rim. (Fig. 39)
24) Remove the clamp. Remove the tool by turning the spindle anticlockwise and moving it outwards.
25) Tip the tool carrier arm to its non-working position.
26) Position the platform directly under the wheel and lower the spindle until the wheel rests on the platform.
27) Let the wheel lean on the platform and check that the valve is
perfectly centered with the outlet hole. If not, turn the spindle slightly
to adjust the position. Fix the valve by means the locking ring nut
and remove the extension.
28) Remove the rim locking rim nut. Support the wheel to prevent it
falling off.
29) Move the platform to release the wheel from the spindle and
remove the wheel.
16) Tourner le mandrin jusqu'à positionner la valve en bas.
16) Das Spannfutter verdrehen, bis das Ventil unten steht.
17) Gonfler légèrement la chambre à air (jusqu’à ce qu’il n’y ait plus
de plis) pour éviter de la pincer pendant le montage du deuxième
talon.
17) Den Schlauch leicht aufpumpen (bis er keine Falten mehr aufweist),
um zu verhindern, daß er während der Montage zweites Wulstes zu
verhindern.
18) Monter une rallonge sur la valve et enlever la bague de fixation.
N.B.: Cette opération permet à la vanne d’être libre et de ne pas se
déchirer pendant le montage du deuxième talon.
18) Eine Verlängerung auf dem Ventil anbringen und die Nutmutter dann
entfernen.
Anm.: Dieser Vorgang macht das Ventil frei, damit es bei Montage
zweites Wulstes nicht abgerissen wird.
19) Soulever de nouveau la roue et monter de nouveau la pince , à
l’extérieur du deuxième talon, à environ 20 cm à droite de la valve
(voir Fig. 38).
20) Tourner le mandrin à droite pour placer la pince à 9 heures.
19) Das Rad wieder heben und die Zange zirca 20 cm rechts vom Ventil
an Außenseite zweites Wulstes wieder anbringen(vgl. Abb. 38).
20) Den Spannfutter im Uhrzeigersinn drehen, bis wann die Zange in der
9-Uhr-Stellung steht.
21) Baisser le bras porte-outil dans la position de travail
21) Den Werkzeugtragearm in die Arbeitsstellung bringen.
22) Avancer l’outil pour aligner son repère rouge avec le bord
extérieur de la jante à une distance de 5 mm.
22) Das Werkzeug vorrücken, bis wann sein roter Referenzpunkt 5 mm.
von Felge mit dem Felgenaußenrand ausgerichtet wird.
23) Tourner à droite jusqu’au montage complet du pneu. (Fig. 39)
24) Enlever la pince . Extraire l’outil en tournant le mandrin vers la
gauche et en le déplaçant vers l’extérieur.
25) Basculer le bras porte-outil dans la position hors service.
26) Positionner la plate-forme sous la roue, abaisser le mandrin pour
appuyer la roue sur la plate-forme.
27) Le pneu étant appuyé sur la plate-forme, contrôler que la valve
est parfaitement en face du trou de sortie. Dans le cas contraire,
tourner légèrement le mandrin pour ajuster sa position. Fixer la valve avec la bague et enlever la rallonge.
28) Enlever l'embout de blocage de la jante en soutenant la roue
pour en éviter la chute.
29) Déplacer la plate-forme de manière à libérer la roue du mandrin
et enlever la roue.
23) Im Uhrzeigersinn verdrehen, bis die Montage des Reifens vollendet
ist. (vgl. Abb. 39).
Fig.38
24) Die Zange entfernen. Das Werkzeug herausnehmen, indem man
das Spannfutter im Gegenuhrzeigersinn dreht und nach außen fährt.
25) Den Werkzeugtragarm in Raststellung hochklappen.
26) Die Schiebebühne unter das Rad bringen, das Spannfutter senken,
bis wann das Rad die Schiebebühne berührt.
27) Mit auf der Schiebebühne stehendem Reifen feststellen, daß das Ventil
mit der Auslaßöffnung perfekt eingemittet ist. Andernfalls das Spannfutter
leicht verdrehen, um die Stellung zu verbessern. Das Ventil dann mit der
Nutmutter befestigen und die Verlängerung abnehmen.
28) Der Felgensicherungsring entfernen, indem das Rad gegen einen
Abfall unterstützt wird.
29) Die Schiebebühne verlegen, um das Rad vom Spannfutter zu
entfernen.
Fig.39
43
7.5 RUOTE CON CERCHIETTO A 3 PEZZI
7.5.1_Stallonatura e smontaggio
con UTENSILE DOPPIO
1) Bloccare la ruota sull'autocentrante, come precedentemente descritto,
e assicurarsi che la stessa sia sgonfia.
2) Abbassare il braccio porta utensili in posizione di lavoro, fino a che si
sarà agganciato con l'apposito cricchetto.
3) Posizionare il disco stallonatore a filo del cerchietto (vedi Fig. 40).
22
Fig.40
Fig.41
4) Ruotare l'autocentrante e contemporaneamente fare avanzare il disco
stallonatore a brevi scatti seguendo il profilo del cerchietto, fino al completo distacco del primo tallone (N.B.: durante l'operazione lubrificare).
ATTENZIONE: Nel caso di ruote con camera d'aria è necessario operare
con estrema cautela interrompendo l'avanzamento del disco stallonatore
immediatamente dopo il distacco del tallone per evitare possibili danni a
valvola e camera d'aria.
5) Ripetere l’operazione facendo però avanzare il disco stallonatore contro il cerchietto (vedi fig. 41) fino a liberare l’anello di bloccaggio che verrà
poi estratto con l’apposita leva (22) o con l’aiuto del disco
stallonatore.Rimuovere il cerchietto.
6) Allontanare il braccio porta utensili (17) dal bordo del cerchio. Sganciare il cricchetto e sollevare il braccio in posizione di fuori lavoro.
Traslare il braccio porta utensili sul lato interno della ruota.
7) Abbassare il braccio in posizione di lavoro.
8) Ruotare l'autocentrante e contemporaneamente fare avanzare il disco
stallonatore a brevi scatti seguendo il profilo del cerchietto, fino al completo distacco del secondo tallone (N.B.: durante l'operazione lubrificare). Continuare a spingere sul pneumatico, facendo avanzare il disco
stallonatore, fino a che, circa metà del pneumatico, non sia uscito dal
cerchio (vedi Fig. 42).
9) Portare il braccio porta utensili in posizione di fuori lavoro.
10) Traslare la pedana mobile (10) fino a portarla sotto la verticale del
pneumatico.
11) Abbassare l'autocentrante fino a che il pneumatico non appoggi sulla
pedana.
Fig.42
44
12) Traslare verso l'esterno la pedana fino alla completa uscita del pneumatico dal cerchio avendo cura di seguire la valvola nella propria sede.
7.5 WHEELS WITH 3-PIECE SPLIT RING
7.5 ROUES A CERCLE EN 3 PIECES
7.5 RÄDER MIT 3-TEILIGEM SPALTRING
7.5.1_Bead breaking and tyre removing with
DOUBLE TOOL.
7.5.1_Décollage du talon et démontage
moyennant l’OUTIL DOUBLE.
7.5.1_Wulstabdrücken und Demontage mit
DOPPELWERKZEUG
1) Clamp the wheel on the spindle as described previously and make
sure it has been deflated.
1) Bloquer la roue sur le mandrin, comme décrit précédemment et
dégonfler le pneu.
1) Das Rad wie vorstehend beschrieben auf dem Spannfutter aufspannen.
Sicherstellen, daß die Luft aus dem Rad abgelassen ist.
2) Lower the tool carrier arm to its working position until it is locked
in position by the relevant hook.
2) Abaisser le bras porte-outil dans la position de travail jusqu’à ce qu’il
soit accroché avec le crochet prévu à cet effet.
2) Den Werkzeugtragarm in Arbeitsstellung senken, bis er in den
Spannkegel eingerastet ist.
3) Position the bead breaking disk close to the rim (Fig. 40).
3) Positionner le disque décolle-talons près du cercle (voir fig. 40).
3) Die Abdrückscheibe auf die Felgenkanten bringen (vgl. Abb. 40).
4) Turn the spindle and at the same time move the disk forward a bit
at a time following the contour of the rim until the first bead is completely off (REMARKS: lubricate while doing this).
CAUTION! If the tyre has an inner tube, work very carefully and be
prepared to stop the disk immediately once the bead has been broken so as not to damage the valve and the inner tube.
4) Faire tourner le mandrin et en même temps faire avancer le disque
par petits coups jusqu’à décoller entièrement le premier talon (N.B.:
Lubrifier pendant l’opération).
ATTENTION: Dans le cas de roues à chambre à air il faut prendre des
précautions en interrompant l’avancement du disque décolleur
immédiatement après le décollage du talon pour éviter d’endommager
la valve et la chambre à air.
4) Das Spannfutter drehen und gleichzeitig die Abdrückscheibe den
Felgenprofil entlang vorrücken, bis wann erster Wulst ganz abgetrennt ist
(Anm.: Während des Vorgangs schmieren!).
ACHTUNG: Bei Schlauchreifen ist der Vorgang sehr vorsichtig
vorzunehmen, um den Vorschub der Abdrückscheibe sofort zu
unterbrechen, wenn der Wulst abgelöst ist, damit Ventil und Schlauch
nicht beschädigt werden.
5) Répéter l’opération en faisant avancer le disque contre le cercle (voir
fig. 41) jusqu’à libérer la bague de blocage qui sera ensuite enlevée au
moyen du levier (22) ou à l’aide du disque décolle-talons.
Enlever le cercle.
5) Den Vorgang wiederholen, aber die Abdrückscheibe gegen den Spaltring
(vgl. Abb. 41) bewegen, bis wann der Sperring freigegeben wird. Dann
dieser mit Hebel (22) oder der Abdrückscheibe herausziehen und Spaltring
entfernen.
6) Eloigner le bras porte-outil du bord de la jante. Décrocher le crochet
et soulever le bras dans la position hors service.
Déplacer le bras porte-outil sur le côté intérieur de la roue.
6) Den Werkzeugtragarm vom Felgenrand entfernen. Den Sperrkegel
ausrasten und den Arm in Raststellung hochklappen. Den
Werkzeugtragarm nach Radinnenseite verlegen.
7) Abaisser le bras en position de travail.
7) Den Arm in die Arbeitsstellung senken.
8) Tourner le mandrin et en même temps faire avancer le disque décolletalons par à-coups en suivant le profil du cercle, jusqu’au décollage du
deuxième talon (N.B.: Lubrifier pendant l’opération).
Continuer à pousser sur le pneu en faisant avancer le disque décolletalons jusqu’à ce que la moitié du pneumatique soit sorti de la jante
(voir Fig. 42).
8) Das Spannfutter verdrehen und gleichzeitig die Abdrückscheibe den
Felgenprofil entlang vorrücken, bis wann zweiter Wulst ganz abgetrennt
ist (Anm.: zwischendurch schmieren).
Weiter auf den Reifen drücken, indem man die Abdrückscheibe vorlaufen
läßt, bis etwa die Hälfte des Wulstes aus der Felge gelöst ist (Abb. 42).
5) Repeat this procedure but this time bring the disk against the
split-ring (Fig. 41) until the lock ring is relased. Remove this with the
special lever (22) or with the help of the disk.
Remove the split-ring.
6) Move the tool carrier arm (17) away from the edge of the rim.
Release the hook and tip the arm to its non-working position.
Move the tool carrier arm to the inside plane of the wheel.
7) Lower the arm to its working position.
8) Turn the spindle and at the same time bring the bead breaking
disk up against the tyre following the contour of the split-ring until
the second bead has been broken (NOTE: Lubricate during this
process).
Go on pressing the tyre and let the disk move forward until half tyre
has been detached from rim (Fig. 42).
9) Den Werkzeugtragarm in Raststellung hochklappen.
9) Move the tool carrier arm to its non-working position.
9) Placer le bras porte-outil dans la position hors service.
10) Die Schiebebühne (10) unter das Rad verlegen.
10) Move the platform (10) directly under the wheel.
10) Déplacer la plate-forme mobile (10) sous le pneu.
11) Abaisser le mandrin pour appuyer le pneu sur la plate-forme.
11) Das Spannfutter senken, bis wann der Reifen auf der Schiebebühne
steht.
12) Déplacer la plate-forme vers l’extérieur pour sortir complètement le
pneu de la jante en faisant attention à la valve.
12) Die Schiebebühne nach außen verlegen, bis wann sich der Reifen
aus der Felge ganz löst.
11) Lower the spindle until the wheel is resting on the platform.
12) Move the platform outwards until the tyre is completely detached
from rim. Watch out for the valve!
45
7.5.2_Montaggio con UTENSILE DOPPIO
7.5.2_Tyre mounting with DOUBLE TOOL
1) Portare il braccio porta autocentrante in posizione di fuori lavoro.
Se il cerchio è stato smontato dall'autocentrante ribloccarlo come
descritto nel paragrafo "BLOCCAGGIO DEL CERCHIO".
N.B.: Se la ruota ha la camera d'aria è necessario posizionare il
cerchio con l'asola per la valvola in basso (a ore 6).
1) Move the tool carrier arm to its non-working position. If the rim
has been removed from the spindle, put it back on the spindle as
described in the section on “LOCKING THE RIM”.
If the tyre has the inner tube, position the rim with the valve slot at
the bottom.
2) Lubrificare i talloni del pneumatico e il cerchio con l' apposito
grasso.
2) Lubricate both beads and the rim with proper grease.
3) Traslare la pedana mobile all'esterno in modo da poter farvi salire
sopra il pneumatico.
N.B.: Se la ruota ha la camera d'aria è necessario posizionare il
pneumatico con la valvola in basso (a ore 6).
4) Abbassare od alzare l'autocentrante in modo da centrare esattamente il cerchio rispetto al pneumatico.
Fig.43
5) Traslare la pedana verso l'interno in modo da far entrare il cerchio
nel pneumatico.
ATTENZIONE: Per pneumatici con camera d'aria è necessario fare
rientrare la valvola per non rischiare di danneggiarla.
Avanzare fino al completo inserimento del cerchio nel pneumatico.
6) Portare il braccio porta utensili sul lato esterno quindi abbassarlo
in posizione di lavoro con il disco stallonatore rivolto verso la ruota.
N.B.: Nel caso il pneumatico non sia sufficientemente inserito sul
cerchio, muovere l'autocentrante fino a portare il tallone del pneumatico in corrispondenza del disco stallonatore. Avanzare con il disco (e contemporaneamente ruotare l'autocentrante) fino al completo inserimento.
7) Posizionare il cerchietto sul cerchio, quindi montare l'anello di
bloccaggio aiutandosi con il disco stallonatore come in Fig. 43.
3) Move the platform outward so as to place the tyre on it.
NOTE: If the tyre has the inner tube, position the rim with the valve
slot at the bottom.
4) Lower or lift the spindle to match rim and tyre accordingly.
5) Move the platform inward so as to let the rim into the tyre.
CAUTION! If the tyre has the inner tube, push the valve inside so as
not to damage it.
Go on moving the platform until the rim is completly positioned into
the tyre.
6) Bring the tool carrier arm to the outside plane and lower it to its
work position with the disk towards the wheel.
NB: If the tyre is not inserted sufficiently on the rim, move the spindle until the tyre bead is by the disk. Bring the disk forward (with the
spindle turning) until it is completely inserted.
7) Put the split-ring on the rim and then install the locking ring with
the help of the disk as shown in Fig. 43.
8) Move the tool carrier arm to its non-working position and remove
the ring locking ring nut. Take care to support the wheel so as to
prevent it from falling off.
9) Move the platform to free the wheel from the spindle.
8) Portare il braccio porta utensili in posizione di fuori lavoro e rimuovere la ghiera di bloccaggio del cerchio, avendo cura di sostenere la ruota per evitarne la caduta.
9) Traslare la pedana per liberare la ruota dall'autocentrante.
10) Rimuovere la ruota.
46
10) Remove the wheel.
7.5.2_Montage moyennant L’OUTIL DOUBLE.
7.5.2_Montage mit DOPPELWERKZEUG
1) Basculer le bras porte mandrin en position hors service. Si la
jante a été démontée du mandrin la bloquer de nouveau comme
décrit dans le paragraphe “BLOCAGE DE LA JANTE”.
N.B.: Si la roue a une chambre à air il faut positionner la jante avec
la fente de la valve en bas.
1) Den Spannfutterarm in Raststellung bringen. Wenn die Felge vom
Spannfutter heruntergenommen worden ist, muß sie wieder
aufgespannt werden, wie im Abschnitt “RADAUFSPANNEN”
beschrieben wird.
Anm.: Wenn das Rad einen Schlauch hat, muß die Felge so
angeordnet werden, daß die Öffnung für das Ventil ganz unten (in
der 6-Uhr-Stellung) steht.
2) Lubrifier les talons du pneu et la jante par de la graisse approprieé.
3) Déplacer la plate-forme mobile vers l’extérieur pour y faire monter
le pneu.
N.B.: Si la roue a une chambre à air il faut placer le pneu avec la
valve en bas.
4) Abaisser ou soulever le mandrin pour centrer parfaitement la jante
par rapport au pneu.
5) Déplacer la plate-forme vers l’intérieur, de manière à faire entrer
la jante dans le pneu.
ATTENTION: Pour les pneus à chambre à air il faut faire rentrer la
valve pour ne pas risquer de l’endommager.
Avancer pour introduire entièrement la jante dans le pneu.
6) Déplacer le bras porte-outil sur le côté extérieur puis le baisser en
position de travail avec le disque décolle-talons tourné vers la roue.
N.B.: Si le pneu n’est pas suffisamment introduit sur la jante, bouger
le mandrin jusqu’à placer le talon du pneu en face du disque décolletalons. Avancer le disque (et en même temps tourner le mandrin)
jusqu’à l’introduction complète.
2) Die Reifenwülste und die Felge mit geeignetem Fett schmieren.
3) Die Schiebebühne nach außen verlegen, damit man den Reifen
darauf setzen kann.
Anm.:Wenn den Reifen einen Schlauch hat, muß man ihn so
anornden, daß das Ventil ganz unten steht.
4) Das Spannfutter heben oder senken, um Felge und Reifen
miteinander einzumitten.
5) Die Schiebebühne nach innen verlegen, damit sich die Felge in
den Reifen einfügt
VORSICHT: Bei Schlauchreifen muß das Ventil nach innen gedrückt
werden, damit es nicht beschädigt wird.
Weiterfahren, bis sich die Felge in den Reifen vollkommen einfügt.
7) Positionner le cercle sur la jante, puis monter la bague de blocage
à l’aide du disque décolle-talons comme illustré dans la Fig. 43.
6) Den Werkzeugtragarm nach Außenseite verlegen und in
Arbeitsstellung senken, wobei die Abdrückscheibe nach dem Rad
gerichtet wird.
Anm: wenn der Reifen in die Felge nicht ausreichend eingefügt ist,
soll das Spannfutter betätigt werden, bis wann Reifenwulst und
Abdrückscheibe ausgerichtet sind. Die Scheibe bis Volleinfügung
vorrücken (zwischendurch Spannfutter drehen).
8) Déplacer le bras porte-outil en position hors service et enlever
l'embout de blocage de la jante, en soutenant la roue pour en éviter
la chute.
7) Den Spaltring auf der Felge anordnen, dann den Sperring
montieren, wobei man sich wie in Abb. 43 gezeigt mit dem
Abdrückscheibe hilft.
9) Déplacer la plate-forme de manière à libérer la roue du mandrin.
8) Den Werkzeugtragarm in Raststellung bringen und den
Felgensicherungsring entfernen, indem das Rad gegen einen Abfall
unterstützt wird.
10) Enlever la roue.
Fig.43
9) Die Schiebebühne verlegen, um das Rad aus Spannfutter befreien.
10) Das Rad herausnehmen.
47
22
Fig.44
7.6 RUOTE CON CERCHIETTO A 5 PEZZI
7.6 WHEELS WITH 5-PIECE SPLIT RING
7.6.1_Stallonatura e smontaggio
con UTENSILE DOPPIO
7.6.1_Bead breaking and tyre removing with
DOUBLE TOOL
1) Bloccare la ruota sull'autocentrante, come precedentemente descritto, e assicurarsi che la stessa sia sgonfia.
1) Clamp the wheel on the spindle as described previously and make
sure it is deflated.
2) Abbassare il braccio porta utensili in posizione di lavoro, fino a
che si sarà agganciato con l'apposito cricchetto.
2) Lower the tool carrier arm to its working position until it is locked
in position by the proper hook.
3) Agendo sul manipolatore posizionare la ruota in modo che il disco stallonatore sfiori il bordo esterno del cerchietto a balconata.
3) Use the control levers (3) (4) to position the wheel so that the
bead breaking disk skims the outer edge of the split-ring.
4) Ruotare l'autocentrante e contemporaneamente avanzare fino al
distacco del cerchietto dal cerchio facendo attenzione a non rovinare l'anello OR.
4) Turn the spindle and at the same time move the bead breaking
disk forward until the split-ring is detached. Watch out for the O-ring.
5) Ripetere l’operazione facendo però avanzare il disco stallonatore
contro il cerchietto (vedi fig. 44) fino a liberare l’anello di bloccaggio
che verrà poi estratto con l’apposita leva (22) o con l’aiuto del disco
stallonatore.
5) Repeat this operation but this time move the disk against the
split-ring (See Fig. 44) until the locking ring is released. This ring
can be removed with the special lever (22) or with the help of the
bead breaking disk.
6) Remove the O-ring
6) Rimuovere l'anello OR.
7) Allontanare il braccio porta utensili dal bordo del cerchio. Sganciare il cricchetto e sollevare il braccio in posizione di fuori lavoro.
Traslare il braccio porta utensili sul lato interno della ruota.
8) Ruotare di 180° l'utensile e abbassare il braccio in posizione di
lavoro.
9) Ruotare l'autocentrante e contemporaneamente abbassarlo in
modo da inserire il disco stallonatore tra tallone e bordo del cerchio.
Solamente quando il tallone inizia a staccarsi avanzare con il disco
fino a portare il tallone esterno a filo con il bordo esterno del cerchio.
N.B.: Durante l'operazione lubrificare.
7) Move the tool carrier arm away from the edge of the rim. Release
the hook and tip the arm to its non-working position.
Move the tool carrier arm to the inside plane of the wheel.
8) Turn the tool head of 180° and lower the arm to its working position.
9) Turn the spindle and at the same time lower it so as to fit the bead
breaking disk between bead and rim edge. Move the disk forward
only when the bead starts detaching. Go on moving the disk until the
outer bead is clos to the rim outer edge. (Remarks: lubricate during
this operation).
10) Tip the tool carrier arm to its non-working position.
10) Ribaltare il braccio porta utensili in posizione di fuori lavoro.
11) Move the platform (10) directly under the wheel.
11) Traslare la pedana mobile (10) fino a portarla sotto la verticale
del pneumatico.
48
7.6 ROUES A CERCLE EN 5 PIECES
7.6 RÄDER MIT 5-TEILIGEM SPALTRING
7.6.1_Décollage du talon et démontage
7.6.1_Wulstabdrücken und Demontage mit
moyennant l’OUTIL DOUBLE.
DOPPELWERKZEUG
1) Bloquer la roue sur le mandrin, comme décrit précédemment et
s'assurer que le pneu soit dégonflé.
1) Das Rad wie vorstehend beschrieben auf dem Spannfutter
aufspannen. Sicherstellen, daß die Luft aus dem Rad abgelassen
ist.
2) Baisser le bras porte-outil en position de travail jusqu’à ce qu’il
soit accroché avec le crochet prévu à cet effet.
2) Den Werkzeugtragarm in Arbeitsstellung senken, bis er in den
Spannkegel eingerastet ist.
3) Au moyen des leviers de commande (3) (4) positionner la roue de
sorte que le disque décolle-talons effleure le bord extérieur du cercle
à rebord.
3) Steuerhebel betätigen, um das Rad so anzuordnen, daß die
Abdrückscheibe gerade die Außenkante des Spaltrings berührt.
4) Faire tourner le mandrin et en même temps avancer jusqu’à
décoller le cercle de la jante en faisant attention à ne pas
endommager le joint OR.
4) Das Spannfutter drehen und gleichzeitig vorwärts bewegen, bis
der Spaltring von der Felge entfernt ist. Dabei darauf achten, daß
der O-Ring nicht beschädigt wird.
5) Répéter l’opération en faisant avancer le disque décolleur contre
le cercle (voir fig. 44) jusqu’à libérer la bague de blocage qui sera
ensuite enlevée au moyen du levier (22) ou à l’aide du disque décolletalons.
5) Den Vorgang wiederholen, aber die Abdrückscheibe gegen den
Spaltring (Abb. 44) bewegen, bis der Sperring freigegeben ist, der
dann mit dem Hebel (22) oder der Abdrückscheibe herausgezogen
wird.
6) Enlever le joint OR.
6) Den O-Ring entfernen.
7) Eloigner le bras porte-outil du bord de la jante. Décrocher le crochet
et soulever le bras dans la position hors service.
Déplacer le bras porte-outil sur le côté intérieur de la roue.
7) Den Werkzeugtragarm vom Felgenhorn entfernen. Den Sperrkegel
ausrasten und den Arm in Raststellung hochklappen. Den
Werkzeugtragarm nach Innenseite verlegen.
8) Tourner l’outil de 180°et baisser le bras en position de travail.
8) Das Werkzeug um 180° verdrehen und den Arm in Arbeitsstellung
senken.
9) Tourner le mandrin et en même temps l’abaisser pour permettre
l’introduction du disque décolle-talons entre le talon et le bord de la
jante. Dès que le talon commence à se décoller, faire avancer le
disque jusqu’à porter le talon extérieur près du bord extérieur de la
jante.
N.B.: Lubrifier pendant l’opération.
22
Fig.44
9) Das Spannfutter verdrehen und gleichzeitig senken, damit die
Abdrückscheibe zwischen Wulst und Felgenhorn einrastet.
Erst wenn der Wulst beginnt, sich abzulösen, mit der Scheibe
vorwärtsfahren, bis die Außenwulst fluchtbündig mit der Außenkante
der Felge steht.
Anm.: Während dem Vorgang muß geschmiert werden.
10) Basculer le bras porte-outil en position hors service.
10) Den Werkzeugarm in Raststellung hochklappen.
11) Déplacer la plate-forme mobile (10) sous le pneu.
11) Die Schiebebühne (10) unter das Rad bringen.
49
12) Abbassare l'autocentrante fino a che il pneumatico non appoggi
sulla pedana.
13) Traslare la pedana verso l'esterno fino a sfilare il pneumatico
(con il cerchietto attaccato) dal cerchio.
12) Lower the spindle until the wheel is resting on the platform.
13) Move the platform outwards until the tyre together (with splitring) is completely off.
14) Remove the rim from the spindle.
14) Rimuovere il cerchio dall'autocentrante.
15) Posizionare il pneumatico sulla pedana con il cerchietto rivolto
verso l'autocentrante.
16) Bloccare il cerchietto sull'autocentrante agendo come descritto
per il BLOCCAGGIO DEL CERCHIO.
Il pneumatico non è fissato al cerchietto in modo
sicuro. Eventuali sollecitazioni durante il
posizionamento e/o il bloccaggio potrebbero
causarne il distacco e la conseguente caduta.
17) Sollevare la ruota.
Fig.45
18) Riportare il braccio porta utensili in posizione di lavoro.
19) Posizionare l'autocentrante in modo che il disco stallonatore risulti in corrispondenza del tallone del pneumatico.
20) Ruotare l'autocentrante e contemporaneamente avanzare con
il disco stallonatore fino alla completa fuoriuscita del pneumatico
dal cerchietto (Fig. 45)
La fuoriuscita del pneumatico dal cerchio ne
causa la caduta.
Verificare sempre che nessuno si trovi
accidentalmente nell'area di lavoro.
50
15) Position the tyre on the platform with the split-ring turned
towards the spindle.
16) Clamp the split ring on the spindle as explained in the section of
LOCKING THE RIM
The tyre is not much safely fixed to the split-ring
completely safely. Any strain on it during positioning or clamping operations could cause it to detach and fall.
17) Lift the wheel.
18) Move the tool carrier arm back to its work position.
19) Position the spindle so that the bead breaking disk is lined up
with tyre bead.
20) Turn the spindle and move the disk forward until the tyre comes
completely off the split ring. (Pict. 45)
When the beads come off the rim, the wheel
will fall.
Always make sure there are no by-standers
in the working area.
12) Baisser le mandrin pour appuyer le pneu sur la plate-forme.
13) Déplacer la plate-forme vers l’extérieur pour sortir complètement le
pneu de la jante (avec le cercle accroché).
12) Das Spannfutter senken, bis wann der Reifen die Schiebebühne
berührt.
13) Die Schiebebühne nach außen verlegen und den Reifen (mit
Spaltring daran) von Felge herausnehmen.
14) Enlever la jante du mandrin.
14) Die Felge vom Spannfutter nehmen.
15) Positionner le pneu sur la plate-forme avec le cercle tourné vers le
mandrin.
16) Bloquer le cercle sur le mandrin en agissant comme décrit pour le
BLOCAGE DE LA JANTE.
Le pneu n’est pas fixé au cercle de manière sûre.
Toute sollicitation éventuelle lors du
positionnement et du blocage peut provoquer le
décollement et la chute.
15) Den Reifen auf die Schiebebühne stellen, wobei der Spaltring
nach dem Spannfutter gerichtet wird.
16) Den Spaltring auf dem Spannfutter aufspannen, wobei vorzugehen
ist, wie im Abschnitt RADAUFSPANNEN beschrieben ist.
Der Reifen ist nicht sicher am Spaltring befestigt.
Etwaige Belastungen während der Positionierung
und/oder dem Aufspannen können zum Abtrennen
und damit zum Fallen des Reifens führen.
17) Soulever la roue.
17) Das Rad heben.
18) Ramener le bras porte-outil dans la position de travail.
18) Den Werkzeugtragarm in Arbeitsstellung bringen
19) Positionner le mandrin de sorte que le disque décolle-talons se
trouve à la hauteur du talon du pneu.
20) Tourner le mandrin et en même temps avancer le disque décolletalons jusqu’à ce que le pneu sorte complètement du cercle.(Fig.
45)
La sortie du pneu de la jante provoque sa chute.
Vérifier toujours que personne ne se trouve dans
la zone de travail.
Fig.45
19) Das Spannfutter so positionieren, daß die Abdrückscheibe auf der
Höhe des Wulstes steht.
20) Das Spannfutter drehen und gleichzeitig die Abdrückscheibe
vorwärtsfahren, bis der Reifen ganz vom Spaltring getrennt ist.(abb.
45)
Die Reifentrennung von Felge verursacht den
Reifenabfall.
Daher immer sicherstellen, daß sich niemand im
Arbeitsbereich befindet.
51
7.6.3_Montaggio con UTENSILE DOPPIO
7.6.3_Tyre mounting with DOUBLE TOOL.
1) Portare il braccio porta autocentrante in posizione di fuori lavoro.
Se il cerchio è stato smontato dall'autocentrante ribloccarlo come
descritto nel paragrafo "BLOCCAGGIO DEL CERCHIO".
1) Move the tool carrier arm to its non-working position. If the rim
has been removed from the spindle, put it back on the spindle as
described in the section on “LOCKING THE RIM”.
2) Lubrificare i talloni del pneumatico e il cerchio con apposita soluzione saponata.
2) Lubricate both beads and the rim with proper grease.
3) Move the platform outward so as to place the tyre on it.
3) Traslare la pedana mobile all'esterno in modo da poter farvi salire
sopra il pneumatico.
4) Abbassare od alzare l'autocentrante in modo da centrare esattamente il cerchio rispetto al pneumatico.
5) Traslare la pedana verso l'interno in modo da far entrare il cerchio
nel pneumatico.
Avanzare fino al completo inserimento.
Fig.46
6) Introdurre sul cerchio il cerchietto a balconata (con l'anello di battuta montato).
N.B.: Se cerchio e cerchietto presentano fenditure per eventuali fissaggi è necessario che queste siano "in fase" tra di loro.
7) Portare il braccio porta utensili sul lato esterno quindi abbassarlo
in posizione di lavoro con il disco stallonatore rivolto verso la ruota.
N.B.: Nel caso il cerchietto con balconata non sia sufficientemente
inserito sul cerchio, muovere l'autocentrante fino a portare il cerchietto
in corrispondenza del disco stallonatore. Avanzare con il disco (e
contemporaneamente ruotare l'autocentrante) fino a "scoprire" la
sede dell'anello OR di tenuta.
8) Lubrificare l'anello OR ed inserirlo nell'apposita sede.
9) Posizionare sul cerchio l'anello di bloccaggio aiutandosi con il
disco stallonatore come mostrato in Fig. 46.
Portare il braccio porta utensili in posizione di fuori lavoro e rimuovere la ghiera di bloccaggio del cerchio avendo cura di sostenere la
ruota per evitarne la caduta.
10) Traslare la pedana per liberare la ruota dall'autocentrante.
11) Rimuovere la ruota.
52
4) Lower or lift the spindle to match rim and tyre accordingly.
5) Move the platform inwards so as to let the rim into the tyre.
Go on moving the platform until the rim is completely positioned into
the tyre.
6) Fit the split-ring onto the rim with mounted lock ring.
Remarks: If the rim and the split-ring have slits for fixing devices,
make sure they are lined up with each other.
7) Move the tool carrier arm outward, then lower it in its work position with the bead breaking disk turned towards the wheel.
Remarks: If the split-ring is not inserted sufficiently on the rim, move
the spindle until the split-ring is by the disk. Bring the disk forward
(with the spindle turning) until you “discover” the O-ring seating.
8) Lubricate the O-ring and set it into its seating.
9) Position the locking ring on the rim with the help of the disk as
shown in Fig. 46.
Move the tool carrier arm to its non-working position and remove the
rim locking rim nut. Take care to support the wheel so as to prevent
it from falling off.
10) Move the platform to free the wheel from the spindle.
11) Remove the wheel.
7.6.3_Montage moyennant L’OUTIL DOUBLE.
7.6.3_Montage mit DOPPELWERKZEUG
1) Porter le bras porte-outil en position hors service.
Si la jante a été démontée du mandrin la bloquer de nouveau comme
décrit dans le paragraphe “BLOCAGE DE LA JANTE”.
1) Den Spannfutterarm in Raststellung bringen.
Wenn die Felge vom Spannfutter heruntergenommen worden ist, muß
sie wieder aufgespannt werden, wie im Abschnitt “RADAUFSPANNEN”
beschrieben wird.
2) Lubrifier les talons du pneu et la jante par de la graisse appropriée.
2) Die Reifenwülste und die Felge mit geeignetem Fett schmieren.
3) Déplacer la plate-forme mobile vers l’extérieur pour y faire monter
le pneu.
4) Baisser ou soulever le mandrin jusqu'à centrer exactement la
jante par rapport au pneu.
5) Déplacer la plate-forme vers l’intérieur pour faire entrer la jante
dans le pneu.
Avancer jusqu’à introduction complète.
6) Introduire le cercle (avec la bague de butée montée) sur la jante.
N.B.: Si la jante et le cercle ont des rainures de fixation il faut qu’elles
soient alignées entre elles.
7) Porter le bras porte-outil sur le côté extérieur puis le baisser en
position de travail avec le disque décolle-talons tourné vers la roue.
N.B.: Si le cercle n’est pas suffisamment introduit sur la jante, bouger
le mandrin pour porter le cercle en face du disque décolle-talons.
Avancer le disque (et en même temps tourner le mandrin) jusqu’à
"découvrir" le logement du joint OR.
8) Lubrifier le joint OR et l’introduire dans son logement.
9) Placer la bague de blocage sur la jante à l’aide du disque décolletalons comme illustré dans la Fig. 46.
Porter le bras porte-outil en position hors service et enlever l'embout
de blocage de la jante en soutenant la roue pour éviter la chute.
10) Déplacer la plate-forme de manière à libérer la roue du mandrin.
3) Die Schiebebühne nach außen verlegen, um den Reifen darauf
stellen können.
4) Das Spannfutter heben oder senken, um Felge und Reifen
miteinander einzumitten
5) Die Schiebebühne nach innen verlegen, um die Felge in den Reifen
einzufügen. Bis Volleinfügung weiterfahren.
6) Den Spaltring auf die Felge setzen (mit schon montiertem
Arretierungsring).
Anm.: Wenn Felge und Spaltring Spalten für die etwaige Befestigung
aufweisen, müssen diese übereinander stehen.
Fig.46
7) Den Werkzeugtragarm nach Außenseite bringen und in
Arbeitsstellung senken, wobei die Abdrückscheibe nach dem Rad
gerichtet ist.
Anm.: Wenn der Spaltring in die Felge nicht ausreichend eingefügt
ist, das Spannfutter bewegen, bis der Spaltring auf der Höhe der
Abdrückscheibe steht. Mit der Scheibe vorwärtsfahren (und gleichzeitig
das Spannfutter drehen), bis der Sitz des O-Rings freigelegt ist.
8) Den O-Ring schmieren und in seine Aufnahme legen.
9) Den Sperring auf der Felge anordnen, wobei man sich wie in Abb. 46
gezeigt mit dem Abdrückscheibe hilft.
Den Werkzeugtragarm in Raststellung bringen und den
Felgensicherungsring entfernen, indem das Rad gegen einen Abfall
unterstützt wird.
11) Enlever la roue.
10) Die Schiebebühne verlegen, um das Rad aus Spannfutter zu
befreien
11) Das Rad herausnehmen.
53
8. RIPOSIZIONAMENTO
8. RESITING
Per riposizionare lo smontagomme è necessario disporre di un
carrello elevatore.
To install the tyre-changer in a new place, a lift truck must be
available on site.
Scollegare l'alimentazione elettrica.
Disconnect the power supply.
Rimontare la staffa di sollevamento
Set up the lifting hanger again.
Sollevare lo smontagomme, tramite una cinghia da carico, e
posizionarlo nella nuova sede.
Lift the tyre-changer using a lifting belt and place it in the new site.
NOTA: Il posto scelto per riposizionare lo smontagomme deve
rispondere alle Normative Europee per la sicurezza sul lavoro.
Remarks: the installation site must be in accordance with the
European Regulations on Safety at Work.
Una volta riposizionato ricordarsi di togliere la staffa di sollevamento
Once repositionned the tyre-changer, remember to take the lifting
hanger away.
9. ACCANTONAMENTO
In caso di accantonamento per un lungo periodo di tempo (3-4 mesi)
è necessario:
- Abbassare il braccio porta flangia di bloccaggio
- Posizionare il braccio porta-utensile in posizione lavoro
- Scollegare l'alimentazione elettrica
- Ingrassare le guide del carrello porta-utensile
- Svuotare il serbatoio dall'olio e smaltirlo secondo le Norme vigenti.
10. ROTTAMAZIONE
Allorquando si decida di rottamare l'apparecchio, si raccomanda di
renderlo inoperante scollegando le fonti di alimentazione.
Asportare tutti i materiali NON ferrosi e smaltirli secondo le leggi
nazionali vigenti.
Raccogliere l'olio e smaltirlo negli appositi centri secondo le leggi
nazionali vigenti.
Rottamare il resto come materiale ferroso
9. STORING
In case of storing for a long period (3-4 months) it is necessary to:
lower the flange holding arm
set the arm out of work
disconnect the power supply
grease the carriage slides
empty the oil tank and dispose of it according to the current
regulations
10. SCRAPPING
Whenever you decide to scrap the machine, it is advisable to make
it unusable by disconnecting it from power supply.
Take all the NONFERROUS materials away and dispose of them
according to the national current regulations.
Collect the oil and dispose of it through the collection centres
according to the national current regulations.
Scrap the rest as ferrous material.
54
8. REPOSITIONNEMENT
Pour positionner le démonte-pneus dans un nouvel endroit, il faut
disposer d’un chariot élévateur.
Débrancher l’alimentation électrique.
Remonter l’étrier de levage.
Soulever le démonte-pneus moyennant une courroie appropriée
et le positionner dans le nouvel endroit.
La place choisie pour la reinstallation du démonte-pneu doit
correspondre aux Normes Européennes sur la sécurité sur lieu de
travail.
Une fois que la machine a été repositionnée, enlever l’étrier de levage.
9. MISE A’ L’ARRET
En cas de mise à l’arrêt prolongée (3-4 mois), il faut:
- Baisser le bras porte-bride de blocage
- Positionner le bras porte-outil en position de travail
- Débrancher l’alimentation électrique
- Graisser les glissières du chariot porte-outil
- Vider le réservoir et écouler l’huile d’après les Normes en vigueur.
8. WECHSEL DES
AUFSTELLUNGSORTES
Zur Umstellung der Reifenmontiermaschine ist ein Gabelstapler
erforderlich.
Die Versorgungsquelle abtrennen.
Der Bügel zum Heben wiedereinbauen.
Die Reifenmontiermaschine mittels eines geeigneten Riemens
heben und am neuen Platz stellen.
Der gewählte Aufstellungsplatz soll den europäischen Vorschriften
über die Sicherheit am Arbeitsplatz entsprechen.
Nach Neuaufstellung der Maschine sich erinnern, den Bügel zu entfernen.
9. EINLAGERUNG
Vor einer längeren (3-4 Monaten) Nichtbenutzung der Maschine sind
folgende Maßnahmen zu treffen:
Den Flanschtragarm herunterlassen
Den Werkzeugtragarm herunterlassen
Die Versorgungsquelle abtrennen
Die Schlittenführungen schmieren
Den Ölbehälter entleeren und Öl gemäß den geltenden
Gesetzen entsorgen.
10. MISE A’ LA FERRAILLE
Si l’on décide de ne plus utiliser la machine, il est recommandé de
la rendre inutilisable en débranchant les sources d’alimentation.
Enlever tous les matériaux NON-FERREUX et les traiter
conformement aux lois nationales en vigueur.
Ecouler l’huile par les centres de traitement conformement aux
lois nationales en vigueur.
Traiter le reste comme matériel FERREUX.
10. VERSCHROTTUNG
Im Falle der Verschrottung soll die Maschine durch Abtrennen der
Versorgungsquelle funktionsuntüchtig gemacht werden.
Alle NICHTeisenteile entfernen und gemäß den geltenden
Gesetzen entsorgen.
Den Ölbehälter entleeren und Öl durch die eigens dazu bestimmte
Sammelstätte gemäß den geltenden Gesetzen entsorgen.
Den Rest als Eisenmaterial entsorgen.
55
11. TRATTAMENTO OLIO
11. OIL TREATMENT
L’olio è altamente inquinante!!
Non gettare o disperdere nell’ambiente.
Oil is highly pollutant!!
Do not throw or disperse in the environment
11.1_Precauzioni generali
- Evitare il contatto diretto e prolungato con la pelle.
- Evitare la formazione di nebbie d’olio nell’atmosfera
- Evitare gli schizzi.
- Utilizzare indumenti appropriati, guanti, occhiali in caso di schizzi.
- Non utilizzare stracci unti
- Non mangiare o fumare con le mani sporche d’olio
11.2_Indicazioni di pronto soccorso
- In caso di ingestione NON provocare il vomito e rivolgersi
immediatamente al Centro Medico più vicino con le caratteristiche
del tipo di olio ingerito.
- In caso di contatto con gli occhi, risciaquare abbondantemente
con acqua fino al termine dell’irritazione. In seguito rivolgersi al
più vicino Centro Medico.
- In caso di contatto con la pelle risciacquare con acqua e sapone
detergente neutro. Non utilizzare solventi o prodotti irritanti.
11.2_First aid instructions
- In case of ingestion DO NOT induce vomiting but immediately apply
to the closest Medical Center also bringing the features of the
swallowed oil.
- In case of contact with eyes, rinse out generously with water until the
irritation gets soothed. Then apply to the closest Medical Center.
- In case of contact with skin, rinse out with water and neutral
cleansing soap. DO NOT use solvents or irritating products.
11.3_Smaltimento olio usato
Non disperdere l’olio usato nell’ambiente. Raccorglierlo in un
contenitore adeguato e smaltirlo in appositi centri specializzati o
consegnarlo ad aziende autorizzate alla raccolta.
11.3_Used oil treatment
DO NOT disperse the used oil in the environment. Collect it in a
suitable tank and dispose of it through specialized centers or
authorized collection points.
11.4_Spargimento o perdite d’olio
Rimuovere la causa della perdita e arginare la fuoriuscita dell’olio
con materiale assorbente. Pulire accuratamente con detergenti
sgrassanti la zona intaccata dall’olio per evitare pericolose
scivolate e smaltire i rifiuti secondo le norme Nazionali vigenti in
materia.
11.4_Oil spreading or leaks.
First eliminate the cause of the leakage and embank the oil coming
out by means of absorbing materials. Clean carefully the dirty area
with degreasing detergents in order to avoid any possible dangerous
slip. Dispose of waste-materials in accordance with the National
laws in force.
12. MEZZI ANTINCENDIO
12. FIRE-FIGHTING MEANS
Le indicazioni in questa tabella sono di carattere
generale. Le caratteristiche e i campi di utilizzo di
ciascun estintore devono essere richieste al fabbricante.
56
11.1_General precautions
- Avoid direct and prolonged contact with skin.
- Avoid any vaporization of oil in the atmosphere.
- Avoid oil splashes.
- Wear suitable clothes, gloves and protective glasses against
possible splashes.
- DO NOT use greasy rags.
- DO NOT eat or smoke with greasy hands
The herebelow given indications are the standard ones.
Specific features and use range of each extinguisher
must be demanded to the constructor.
Estintore
IDRICO
Estintore a
SCHIUMA
Estintore a
POLVERE
Estintore a
CO2
Materiali
SEC C H I
OK
OK
OK
OK
DRY materials
OK
OK
OK
OK
Liquidi
INFIAMMABILI
NO
OK
OK
OK
INFLAMMABLE
liquids
NO
OK
OK
OK
Apparecchiature
ELETTRICHE
NO
NO
OK
OK
ELECTRICAL
equipment
NO
NO
OK
OK
WATER
FOAM
POWDER
CO
CO2
extinguisher extinguisher extinguisher extinguisher
11. TRAITEMENT DE L’HUILE
11. ÖLBEHANDLUNG
L’huile est très polluante!!
Ne pas couler ou disperser dans l’environnement.
Das Öl ist hoch verseuchend! In die Umwelt nicht
ablassen.
11.1 Précautions générales
Eviter le contact direct et prolongé avec la peau
Eviter toute nébulisation d’huile dans l’atmosphère
Eviter les giclées
Mettre des vêtements appropriés, des gants et des lunettes, en
cas de giclées
Ne pas utiliser des chiffons graisseux
Ne pas manger ou fumer avec les mains sales d’huile.
11.2 Indications de premier secours
En cas d’ingestion NE PAS faire vomir et s’addresser
immediatement au premier centre hospitalier avec les
caractéristiques de l’huile ingérée.
-
-
En cas de contact avec les yeux, rincer abondamment par de
l’eau jusqu’à faire passer l’irritation. En suite s’addresser au
premier centre hospitalier.
En cas de contact avec la peau, rincer par de l’eau et du savon
neutre. Ne pas utiliser des solvants ou des produits irritants.
11.3 Ecoulement de l’huile usagée
Ne pas disperser l’huile usagée dans l’environnement, mais la verser
dans un conteneur approprié et l’écouler par l’intérmediaire des centres spécialisés ou la donner aux centres autorisés pour la réception.
11.4 Effusion ou fuites d’huile
Eliminer la cause de la fuite et contenir l’écoulement d’huile par du
matériel absorbant. Nettoyer avec le plus grand soin la zone entamée
par l’huile par des détergents dégraissants, afin d’éviter toute glissade éventuelle et dangereuse. Ensuite traiter les ordures selon les
normes nationales en vigueur.
12. MOYENS ANTI-INCENDIE
Les indications données ci-dessous sont générales.
Les caractéristiques ainsi que le domaine d’emploi de
chaque extincteur doivent être demandés au producteur.
Extincteur à
EAU
Extincteur à
MOUSSE
Extincteur à
POUDRE
Extincteur à
CO2
Matérieaux SECS
OK
OK
OK
OK
Liquides
INFLAMMABLES
NO
OK
OK
Appareillages
ELECTRIQUES
NO
NO
OK
11.1 Allgemeine Vorsichtsmaßnahmen
Direkte u. lange Berührung mit der Haut vermeiden
Die Ölnebelbildung in der Luft vermeiden
Ölspritzer vermeiden
Zweckmäßige Kleidungen, Handschuhe und Brille tragen
Keine schmierige Lappen verwenden
Mit fettigen Händen nicht rauchen oder essen.
11.2 Erste Hilfe Anweisungen
Im Genußfall: zum Erbrechen NICHT reizen und sich an nächsten
Krankenhaus wenden. Wichtig: Die Ölkennzeichen mitbringen.
-
-
Sollte das Öl mit den Augen in Berührung treten, so soll man
zuerst die Augen mit Wasser bis Entzündungsende reichlich
waschen. Dann sich an nächsten Krankenhaus wenden.
Sollte das Öl mit der Haut in Berührung treten, so soll man sich
mit Wasser und Neutralseife reichlich waschen. Kein
Lösungsmittel oder reizenden Stoff verwenden.
11.3 Behandlung des Gebrauchtöls
Gebrauchtöl in die Umwelt nicht ablassen. Es in einen angemessenen
Behälter gießen und durch die eigens dazu bestimmte Sammelstätte
gemäß den geltenden Gesetzen entsorgen.
11.4 Ölausgießen
Die Leckursache zuerst beseitigen und den Ölaustritt durch
Absorptionsmittel eindämmen. Die vom Öl angegriffene Fläche mit
Entfettungsmittel sorgfältig saubermachen, um mögliche gefährliche
Ausrutscher zu vermeiden. Den Müll gemäß den geltenden Gesetzen
entsorgen.
12. BRANDSCHUTZMITTEL
Hierunter sind die allgemeinen Angaben anwesend. Sich
an den Hersteller um die Kennzeichen sowie den
Verwendungsbereich jedes Feuerlöschers wenden
WASSERFeuerlöscher
SCHAUMFeuerlöscher
PULVERFeuerlöscher
KOHLENSÄUREFeuerlöscher
TROCKENE
Materialien
OK
OK
OK
OK
OK
ENTZÜNDBARE
Flüßigkeiten
NO
OK
OK
OK
OK
ELEKTRISCHE
Einrichtungen
NO
NO
OK
OK
57
13. MANUTENZIONE
T
La manutenzione è sempre vietata a personale non
autorizzato
La manutenzione regolare, come da istruzioni, è fondamentale per
un corretto funzionamento e una lunga durata dello smontagomme
Se la manutenzione non viene effettuata regolarmente, il funzionamento e l'affidabilità della macchina possono essere compromesse, a rischio sia dell'operatore che di terzi.
Prima di effettuare qualsiasi intervento di manutenzione, disinserire
l'allacciamento elettrico, scollegando la spina.
Le parti difettose devono essere sostituite esclusivamente da
personale esperto e con pezzi originali.
La rimozione o manomissione dei dispositivi di sicurezza comporta
una violazione delle Norme per la Sicurezza sul Lavoro.
Fig.47
In particolare il Costruttore non è imputabile per reclami derivanti
dall'uso di ricambi non originali o per danni causati dalla
rimozione o manomissione dei sistemi di sicurezza.
Lubrificare periodicamente, dopo una accurata pulizia con
nafta, le seguenti parti:
Guide del carrello mobile porta-utensile.
Guida del braccio porta-utensile
Sede dell'utensile (rullo o disco-becco)
Cilindro di sollevamento del braccio porta flangia di bloccaggio
Utilizzare un comune grasso lubrificante disponibile in commercio.
Controllare periodicamente il livello olio in centralina
oleodinamica, mediante l'apposita asta posta sotto il tappo (T)
della centralina stessa. (Fig. 47)
Se necessario rabboccare con olio AGIP OSO 46 od equivalenti
(ESSO NUTO H 46, SHELL TELLUS OIL 46, MOBIL DTE 25,
CASTROL HYSPIN AWS 46, CHEVRON RPM EP HYDRAULIC
OIL 46, BP ENERGOL HLP...)
X
SMALTIRE L'OLIO USATO SECONDO LE NORME NAZIONALI
VIGENTI IN MATERIA
X
Fig.48
58
Controllare la tensione della cinghia del motore elettrico. Se
fosse necessario regolarne la tensione, togliere il carte di protezione in plastica, allentare i dadi (X) indicati in figura 48 e tendere
la cinghia.
13. MAINTENANCE
Maintenance must never be performed by unauthorized
staff
Regular maintenance in accordance with the instructions given is
essential for correct operation of the tyre-changer and for its long
working life as well.
Failure to perform regular maintenance may impair the machine’s
operation and reliability, placing operator, vehicle and third
per-sons at risk.
Before any repairs or maintenance, disconnect the plug from the
power supply.
Faulty parts must always be replaced by skilled staff, with original
components.
Any removal or tampering with the safety devices constitutes a
breach of the Regulations on Safety at Work.
In particular, the manufacturer can be held responsible NEITHER for
complaints deriving from the use of non-original spare parts NOR
for damages caused by removal or tampering with the safety
devices.
Grease periodically the following parts, after having cleaned
them carefully with diesel oil:
Carriage slides
Tool-holding arm slide
Tool housing (roller or peak-disk)
Lifting cylinder of the flange holding arm
Use common lubricating grease available on the market.
Check periodically the oil level inside the hydraulic unit (T) by
means of the relevant dipstick placed under the cap of the
hydraulic unit (fig.47)
If necessary, top up with oil AGIP OSO 46 or alike (ESSO
NUTO H46, SHELL TELLUS OIL 46, MOBIL DTE 25,
CASTROL HYSPIN AWS 46, CHEVRON RPM PHYDRAULIC
OIL 46, BP ENERGOL HLP)
DISPOSE OF THE USED OIL ACCORDING TO THE NATIONAL
LAWS IN FORCE.
Check belt tension of the electrical motor. If a tension adjusting
is needed, remove the protective plastic cover, unloose the nuts
(X) shown by fig. 48 and stretch the belt.
13. ENTRETIEN
L’entretien est toujours interdit au personnel non autorisé.
13. WARTUNG
Die Wartung von Unbefugten ist streng verboten.
Un entretien régulier, comme d’après les instructions, est fondamental
pour le fonctionnement correct et une longue durée du démontepneus.
Eine regelmäßige und vorschriftsmäßige Wartung ist die Grundlage
für den einwandfreien und zuverlässigen Betrieb der
Reifenmontiermaschine.
Si l’entretien n’est pas effectué régulièrement, le fonctionnement et
la fiabilité de la machine peuvent être compromis, à risque tant de
l’opérateur que de tiers.
Eine Vernachlässigung der Wartung und Pflege kann die Funktionen
und Betriebssicherheit beeinträchtigen und die Maschine zu einer
Gefahrenquelle für Bediener und Dritte machen.
Avant d’effectuer toute intervention, il faut débrancher la fiche de la
prise du courant.
Vor jeglicher Wartungsarbeit die Versorgungsquelle abtrennen.
Les parties défectueuses ne doivent être remplacées que par des
pièces d’origine et par du personnel exercé.
L’enlèvement ou l’altération des dispositifs de sécurité comportent
une violation des Normes pour la Sécurité sur le lieu de travail.
En particulier, le constructeur ne pourra pas être consideré
responsable pour toute réclamation résultante de l’emploi de
rechanges non-originales ainsi que pour tout dommage causé par
l’enlèvement ou l’altération des systèmes de sécurité.
Lubrifier périodiquement les parties suivantes, après les avoir
nettoyées soigneusement par du gazole:
Glissières du chariot mobile porte-outil
Glissières du bras porte-outil
Logement de l’outil (rouleau ou disque-bec)
Vérin de levage du bras porte-bride de blocage
Utiliser de la graisse normalement dans le commerce.
Contrôler périodiquement le niveau d’huile dans l’unité hydraulique,
moyennant la jauge à tige au-dessous du bouchon (fig. 47)
Si nécéssaire, remplir par de l’huile AGIP OSO 46 ou similaire (ESSO
NUTO H 46, SHELL TELLUS OIL 46, MOBIL DTE 25, CASTROL
HYSPIN AWS46, CHEVRON RPM EP HYDRAULIC OIL 46, BP
ENERGOL HLP…)
ECOULER L’HUILE USAGEE CONFORMEMENT AUX NORMES
NATIONALES EN VIGUEUR EN MATIERE.
Contrôler la tension de la courroie du moteur électrique. Pour régler
la tension: enlever d’abord la protection en plastique, désserrer les
écrous (X) indiqués en fig. 48 et tendre la courroie.
T
Defekte Teile sollen nur von Fachpersonal und durch echte Teile
ersetzt werden.
Die Beseitigung oder die Abänderung der Sicherheitsvorrichtungen
stellt eine Verletzung der Vorschriften über die Sicherheit am
Arbeitplatz dar.
Der Hersteller haftet nicht für eventuelle Schäden, die aus dem Gebrauch
unechter Ersatzteile sowie aus der Beseitigung oder der Abänderung der
Sicherheitsvorrichtungen entstehen.
Fig.47
Die folgenden Teile periodisch mittels Dieselöl sorgfältig reinigen
und schmieren:
Schlittenführungen
Werkzeugtragarmführungen
(Rollen o. Schiebe-Nagel) Werkzeugsitz
Hubzylinder vom Flanschtragarm
Eine gewöhnliche Schmiere dafür verwenden.
Den Ölstand der hydraulischen Einheit mittels des unter dem
Verschluß (T) liegenden Eichstabes periodisch überprüfen (Abb.
47).
Wenn nötig, mit Öl AGIP OSO 46 oder ähnlichen auffüllen (ESSO
NUTO H46, SHELL TELLUS OIL 46, MOBIL DTE 25, CASTROL
HYSPIN AWS 46, CHEVRON RPM EP HYDRAULIC OIL 46, BP
ENERGOL HLP…)
GEBRAUCHTÖL GEMÄß DEN GELTENDEN LANDESGESETZEN
ENTSORGEN.
Die Spannung des Riemens vom Elektromotor überprüfen. Wird eine
Einstellung der Spannung notwendig, so soll man zuerst den Kunststoffschütz
entfernen, dann die Mutter (X – Abb.48) lockern und den Riemen spannen.
X
X
Fig.48
59
14. DATI TECNICI
14. TECHNICAL DATA
TECHNICAL
DATA
CARATTERISTICHE
TECNICHE
Opera su ruote da
14" - 26"
Suitable for wheels from
14" - 26"
Peso max. ruota
1500 K g .
Max. wheel weight
1500 K g .
Larghezza max. ruota
780 mm.
Max. wheel width
780 mm.
Diametro max. ruota
1200 mm.
Max. wheel diameter
1200 mm.
Motore centralina
0,75 kW 230/400 V - 3PH
Hydraulic pump motor
0,75 kW 230/400 V - 3PH
Motore riduttore
1,5 kW 230/400V - 3PH
Gearbox motor
1,5 kW 230/400V - 3PH
0 - 130 b ar
Pressione d'esercizio
0 - 130 b ar
Operating pressure
Forza stallonatore
interno-esterno
1500 K g .
Bead breaker force insideoutside
1500 K g .
Livello rumore in condizioni
di lavoro
< 70 d b
Noise level in working
condition
< 70 d b
Peso netto
400 K g .
Net weight
400 K g .
(Art. 205/98)
15. ACCESSORI A RICHIESTA
Cod. 9209551
(ART. 205/98)
Braccio supplementare con rullo tubeless per lavorare
contemporaneamente su entrambi i fianchi del pneumatico.
Cod. 9209552
(Art. 206/98)
60
(ART. 206/98)
Utensile doppio tradizionale da usare in sostituzione del rullo tubeless
per il montaggio / smontaggio di pneumatici con camera d’aria.
Leva alzatallone lunga inclusa
15. OPTIONAL ACCESSORIES
Cod. 9209551
(ART. 205/98)
Additional arm with tubeless roller tool so as to allow working on
both tyre sides at the same time
Cod. 9209552
(ART. 206/98)
Traditional double tool (disk and peak) to be used instead of
tubeless roller tool for mounting / removing tyres having inner
tube. Bead lifting lever included.
14. DONNEES TECHNIQUES
DONNEES
TECHNIQUES
14. TECHNISCHE DATEN
TECHNISCHE
DATEN
Pour roues de
14" - 26"
Spannbereich
14" - 26"
Poids maxi de la roue
1500 K g .
Maximalgewicht des Rades
1500 K g .
Largeur maxi de la roue
780 mm.
Radbreite
780 mm.
Diam. maxi de la roue
1200 mm.
Maximal Durchmesser
1200 mm.
Moteur pompe
0,75 kW 230/400 V - 3PH
Hydraulikpumpenmotor
0,75 kW 230/400 V - 3PH
Moteur réducteur
1,5 kW 230/400V - 3PH
Getriebemotor
1,5 kW 230/400V - 3PH
Betriebsdruck
0 - 130 b ar
0 - 130 b ar
Pression de service
Force étalonneur de
l'interieur et de l'exterieur
1500 K g .
Fußhebelkraft von
innen und von außen
1500 K g .
Niveau de bruit en
condition de travail
< 70 d b
Geräuschpegel bei Betrieb
< 70 d b
Poids net
400 K g .
Nettogewicht
400 K g .
(Art. 205/98)
15. ACCESSOIRES SUR DEMANDE
Cod. 9209551
(ART. 205/98)
Bras additionnel avec rouleau tubeless pour opérer en même
temps sur les deux flancs du pneus.
Cod. 9209552
(ART. 206/98)
Outil double traditionnel à utiliser au lieu du rouleau tubeless pour le
montage / démontage des pneus avec chambre à air. Levier long
décolle-talons inclus.
15. ZUSÄTZLICHE ZUBEHÖRE
Cod. 9209551
(ART. 205/98)
Zusätzliches Rollenwerkzeug für schlauchlose Reifen. Dadurch wird die
gleichzeitige Handlung beider Reifenränder erlaubt.
Cod. 9209552
(ART. 206/98)
Traditionelles Doppelwerkzeug als Ersatz für Rollenwerkzeug. Dadurch wird
die Montage / Demontage von Reifen mit Schlauch erlaubt.Inkl. von langem
Wulstabdrückhebel.
(Art. 206/98)
61
M2
M1
F1 - F2
Q1
Q2
Motore elettrico rotazione
Motore elettrico pompa idraulica
Interruttore termico salvamotore 4.0 - 6.3A
Sezionatore 12A
Invertitore di giri 3PH
M2
M1
F1-F2
Q1
Q2
Electrical motor – rotation
Electrical motor – hydraulic pump
Thermal cutout switch 4.0 – 6.3A
Disconnecting switch
3ph inverter
M2
M1
F1-F2
Q1
Q2
Moteur électrique rotation
Moteur électrique pompe hydraulique
Disjoncteur thermique 4.0 – 6.3A
Sectionneur 12A
Inverseur 3PH
M2
M1
F1-F2
Q1
Q2
Elektromotor – Drehung
Elektromotor – Hydraulikpumpe
Überlastschalter 4.0 – 6.3A
Trennschalter 12A
3PH Umlaufwechsler
NOTA: Cambiando la tensione del motore, occorre tarare la
TERMICA con i dati di targa riportati sul motore stesso
NOTE: When changing motor tension, it is necessary to adjust the
thermal cutout according to the motor data plata
U
U
U
U
V
V
V
V
W
W
W
W
400 V
62
230 V
NOTE: Si on change la tension du moteur, il faut régler le disjoncteur
thermique selon les données de plaque du moteur.
ANM.: Bei Motorspannungsänderung ist es nötig den
Überlastschalter nach den Motor-kennzeichen einzustellen.
ZC
ZA
VLP
PI
M
F
TS
D2C
Cilindro carrello porta-utensile
Cilindro braccio porta flangia di bloccaggio
Valvola limitatrice di pressione
Pompa idraulica
Motore
Filtro
Tappo sfiato
Distributore a 2 leve
ZC
ZA
VLP
PI
M
F
TS
D2C
Vérin chariot porte-outil
Vérin bras porte-bride de blocage
Vanne limitatrice de pression
Pompe hydraulique
Moteur
Filtre
Event
Distributeur à 2 leviers
ZC
ZA
VLP
PI
M
F
TS
D2C
Carriage cylinder
Flange holding arm cylinder
Pressure limiting valve
Hydraulic pump
Motor
Filter
Breather cap
Double-lever distributor
ZC
ZA
VLP
PI
M
F
TS
D2C
Schlittenzylinder
Flanschtragarmzylinder
Druckminderventil
Hydraulikpumpe
Motor
Filter
Ablaßpfropfen
2-Hebelverteiler
D2C
TS
3 cc/giro 130 bar 4.2 lt.
63