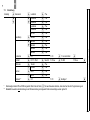
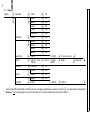
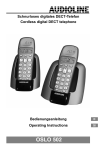
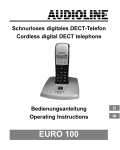
1
Schnurlostelefon
Téléphone sans fil
Telefono senza fili
Cordless telephone
DC42
Bedienungsanleitung
Mode d’emploi
Istruzioni per l’uso
Operating Instructions
2
Bedienungsanleitung . . . . . . . . . . . . . . . . . . . . . . . . . . . . 3
Mode d’emploi . . . . . . . . . . . . . . . . . . . . . . . . . . . . . . . . 27
Istruzioni per l’uso . . . . . . . . . . . . . . . . . . . . . . . . . . . . . . 51
Operating Instructions . . . . . . . . . . . . . . . . . . . . . . . . . . . 75
Declaration of Conformity . . . . . . . . . . . . . . . . . . . . . . . . . 100
2
− Inhaltsverzeichnis −
1
Sicherheitshinweise . . . . . . . . . . . . . . . . . . . . . . . . . . . . . . . . .
4
2
Inbetriebnahme . . . . . . . . . . . . . . . . . . . . . . . . . . . . . . . . . . . .
5
3
4
Bedienelemente . . . . . . . . . . . . . . . . . . . . . . . . . . . . . . . . . . . .
Display . . . . . . . . . . . . . . . . . . . . . . . . . . . . . . . . . . . . . . . . . . . .
6
7
5
Telefonieren . . . . . . . . . . . . . . . . . . . . . . . . . . . . . . . . . . . . . . .
7
6
7
Navigation im Hauptmenü . . . . . . . . . . . . . . . . . . . . . . . . . . .
Menüstruktur . . . . . . . . . . . . . . . . . . . . . . . . . . . . . . . . . . . . . . .
10
11
8
Das Telefonbuch . . . . . . . . . . . . . . . . . . . . . . . . . . . . . . . . . . .
15
9
10
Rufnummernanzeige (CLIP) . . . . . . . . . . . . . . . . . . . . . . . . .
Textnachrichten (SMS) . . . . . . . . . . . . . . . . . . . . . . . . . . . . . .
16
17
11
Mehrere Mobilteile . . . . . . . . . . . . . . . . . . . . . . . . . . . . . . . . . .
18
12
Einstellungen . . . . . . . . . . . . . . . . . . . . . . . . . . . . . . . . . . . . . .
21
13
Fehlerbeseitigung . . . . . . . . . . . . . . . . . . . . . . . . . . . . . . . . . .
22
14
15
Wichtige Informationen . . . . . . . . . . . . . . . . . . . . . . . . . . . . . .
Index . . . . . . . . . . . . . . . . . . . . . . . . . . . . . . . . . . . . . . . . . . . . .
23
24
3
− Sicherheitshinweise −
1
Sicherheitshinweise
Lesen Sie diese Bedienungsanleitung sorgfältig durch.
1.1
Bestimmungsgemäße Verwendung
Dieses Telefon ist geeignet für das Telefonieren innerhalb eines Telefonnetzes. Jede andere Verwendung gilt als nicht bestimmungsgemäß. Eigenmächtige Veränderungen oder Umbauten sind
nicht zulässig. Öffnen Sie das Gerät in keinem Fall selbst und führen Sie keine eigenen Reparaturversuche durch.
1.2
Aufstellungsort
Das Telefon ist für den Betrieb in Innenäumen mit einem Temperaturbereich von 10°C bis 30°C
ausgelegt. Die Basisstation darf nicht in Feuchträumen wie Bad oder Waschküche aufgestellt
werden. Vermeiden Sie Belastungen durch Rauch, Staub, Erschütterungen, Chemikalien,
Feuchtigkeit, Hitze oder direkte Sonneneinstrahlung. Stellen Sie die Basisstation mit einem Mindestabstand von 1 m zu anderen elektronischen Geräten auf, da es sonst zu gegenseitiger Störung kommen kann.
Verwenden Sie das Mobilteil nicht in explosionsgefährdeten Bereichen.
1.3
Netzteil
Verwenden Sie nur das mitgelieferte Steckernetzteil, da andere Netzteile das Telefon
beschädigen können. Sie dürfen den Zugang zum Steckernetzteil nicht durch Möbel
oder andere Gegenstände versperren.
1.4
Telefonanschlusskabel
Achten Sie beim Austauschen des mitgelieferten Telefonanschlusskabels auf die identische
Steckerbelegung.
1.5
Aufladbare Akkus
Werfen Sie Akkus nicht ins Feuer und tauchen Sie sie nicht ins Wasser.
1.6
Stromausfall
Bei Stromausfall kann mit dem Telefon nicht telefoniert werden. Halten Sie für Notfälle ein schnurgebundenes Telefon bereit, welches ohne eine externe Stromversorgung arbeitet.
1.7
Nebenstellenanlagen
Sie können das Telefon an einer Nebenstellenanlage anschließen. Es kann nicht garantiert werden, dass das Telefon an jeder Nebenstellenanlage funktioniert.
1.8
Hinweis für medizinische Geräte
Benutzen Sie das Telefon nicht in der Nähe von medizinischen Geräten. Eine Beeinflussung von
Herzschrittmachern kann nicht völlig ausgeschlossen werden. DECT*−Telefone können in Hörgeräten einen unangenehmen Brummton verursachen.
1.9
Reinigung und Pflege
Reinigen Sie die Gehäuseoberflächen mit einem weichen und fusselfreien Tuch. Verwenden Sie
keine Reinigungsmittel oder Lösungsmittel. Die Gummifüße der Basisstation sind nicht gegen
alle Reinigungsmittel beständig.
1.10 Entsorgung
Sie sind gesetzlich zur sachgerechten Entsorgung von Gebrauchsgütern verpflichtet.
Das nebenstehende Symbol auf Ihrem Telefon bedeutet, dass elektrische und
elektronische Altgeräte und Akkus getrennt vom Hausmüll zu entsorgen sind.
Elektrische oder elektronische Geräte entsorgen Sie bei einer Sammelstelle
eines geeigneten Entsorgungsträgers.
Akkus entsorgen Sie beim batterievertreibenden Handel sowie bei zuständigen
Sammelstellen, die entsprechende Behälter bereitstellen.
Verpackungsmaterialien entsorgen Sie entsprechend den lokalen Vorschriften.
* DECT: Digital Enhanced Cordless Telephone = Standard für kabellose Telefone.
4
− Inbetriebnahme −
2
Inbetriebnahme
2.1
Sicherheitshinweise
Achtung: Lesen Sie vor der Inbetriebnahme unbedingt die Sicherheitshinweise
in Kapitel 1.
2.2
Verpackungsinhalt prüfen
Zum Lieferumfang gehören:
−
eine Basisstation
−
ein Telefonanschlusskabel
−
ein Mobilteil
−
zwei Akkus
−
ein Netzteil
−
eine Bedienungsanleitung
2.3
Basisstation anschließen
Stellen Sie die Basisstation in der Nähe Ihrer Telefonanschlussdose und einer Netzsteckdose
auf. Verwenden sie nur die mitgelieferten Komponenten.
1. Stecken Sie den kleinen Stecker des Netzteils in die entsprechende Buchse auf der
Unterseite der Basisstation.
Sie können die Stecker nicht falsch anschließen, weil Stecker und Buchsen
konstruktiv gegen eine Verpolung geschützt sind. Die Stecker müssen hörbar in die
Buchsen an der Basisstation einrasten.
2. Stecken Sie den kleinen Stecker des Telefonanschlusskabels in die entsprechende
Buchse auf der Unterseite der Basisstation.
3. Führen Sie beide Kabel auf der Unterseite der Basisstation im vorgesehenen
Kabelkanal zur Rückseite.
4. Stecken Sie das Netzteil in eine vorschriftsmäßig installierte 230 Volt Netzsteckdose.
Das Netzteil der Basisstation muss immer angeschlossen sein.
5. Verbinden Sie das beiliegende Telefonanschlusskabel mit der Telefonsteckdose.
2.4
Akkus einsetzen
Legen Sie zwei Akkus vom Typ AAA Ni−MH 1,2 V 550 mAh
in das geöffnete Batteriefach ein. Achten Sie auf die richtige Polung (s. Abb.)! Schließen Sie das Batteriefach.
Wichtig: Verwenden Sie keine Akkus eines anderen Typs!
2.5
Akkus aufladen
Legen Sie das Mobilteil bei der ersten Inbetriebnahme für mindestens 14 Stunden in die Basisstation (Display nach oben). An der Basisstation leuchtet die Ladekontrollleuchte. Das Mobilteil erwärmt sich beim Laden. Dies ist normal und ungefährlich. Laden Sie das Mobilteil nicht mit fremden Aufladegeräten. Bei nicht richtig geladenen Akkus kann es zu Fehlfunktionen des Telefons
kommen. Der aktuelle Akkuladezustand wird im Display angezeigt:
Voll
Halb
Schwach
Leer
2.6
Ton (MFV)− oder Impuls (IWV) − Wahlverfahren
Sie können Ihr Telefon sowohl an analogen Anschlüssen (Impuls−Wahl−Verfahren) als auch an
digitalen Anschlüssen (Ton−Wahl−Verfahren) anschließen. Das Gerät ist werkseitig auf das digitale Ton−Wahlverfahren eingestellt. Sollte Ihr Telefon nicht an Ihrem Anschluss funktionieren, erfahren Sie in Kapitel 7.3 wie Sie Ihr Telefon auf das Impuls−Wahl−Verfahren umstellen können.
2.7
Betrieb an Nebenstellenanlagen
Ist Ihr Telefon über eine Nebenstellenanlage angeschlossen, können Sie über die Taste R Anrufe weiterleiten oder den automatischen Rückruf nutzen. Ob Ihr Telefon an Ihrer Nebenstellenanlage einwandfrei funktioniert, erfahren Sie bei dem Händler, bei dem die Anlage gekauft wurde.
5
− Bedienelemente −
3
Bedienelemente
3.1
1
2
3
4
5
6
7
8
9
10
11
12
13
Mobilteil
Gesprächsanzeige
Display
Freisprechen
Menü−Taste und OK−Taste
Telefonbuch
Raute−Taste (für Konferenzgespräche)
Interngespräche
Stummschaltung und Löschen / Zurück
Auswahltaste: Aufwärts durchs Menü und
Anruferliste / Wahlwiederholung / Pause
Gesprächstaste
Auswahltaste: Abwärts durchs Menü / Anruferliste
Tastensperre (ein / aus)
R−Signaltaste (Mobilteil ein / aus)
1
2
8
9
10
Basisstation
1 Paging−Taste (Mobilteil suchen)
2 LED Gesprächs− und Netzanzeige
3 LED Ladekontroll−Leuchte
C/
/
P/
4
5
11
12
13
3.2
3
6
7
1
2
3
Zur nachfolgenden Darstellungsweise:
Aus Gründen der besseren Lesbarkeit werden die Tasten des Telefons nachfolgend mit einer
standardisierten rechteckigen Kontur dargestellt. Die hier verwendeten Tastensymbole weichen deshalb leicht von der Optik der Tasten Ihres Telefon ab. Die Wiedererkennung der Tasten
ist dennoch gewährleistet.
6
− Display −
4
Display
Das Display zeigt Ihnen alle wichtigen Funktionen mit verschiedenen Symbolen und Meldungen
an.
Symbol
12−10
DC42 1
Beschreibung
Anzeige der Uhrzeit
Identifizierung des Mobilteils
Konstant leuchtend: Anzeige der Batteriekapazität.
Anzeige blinkt: Akkus müssen aufgeladen werden.
Durchlaufende Segmente: Akkus werden geladen.
Konstant leuchtend: Die Verbindung zur Basisstation ist gut.
Anzeige blinkt: Die Reichweite der Basisstation ist überschritten.
Sie führen ein Gespräch.
Konstant leuchtend: Sie führen ein externes Gespräch.
Anzeige blinkt: Es erreicht Sie ein externer Anruf.
Konstant leuchtend: Sie führen ein internes Gespräch.
Anzeige blinkt: Es erreicht Sie ein interner Anruf.
Konstant leuchtend: Sie befinden sich in der Anruferliste. Der Eintrag wurde
noch nicht angesehen.
Anzeige blinkt: Es sind neue Anrufe in der Anruferliste.
Die Rufnummer ist länger als 12 Ziffern.
Dieser Anruf wurde nicht entgegengenommen.
Er ist in der Anruferliste aufgeführt.
Dieser Anruf wurde entgegengenommen.
Er ist in der Anruferliste aufgeführt.
Sie befinden sich im Hauptmenü.
Sie befinden sich im Telefonbuch.
Sie haben eine Textnachricht (SMS) erhalten.
Die Tastensperre ist aktiviert.
Der Alarm ist aktiviert.
5
Telefonieren
Die Funktionsweise Ihres neuenTelefons wird nachfolgend durch Text und Symbole beschrieben. Ist ein Tastensymbol abgebildet, bedeutet dies, dass Sie die entsprechende Taste drücken
müssen.
Außerdem werden zusätzlich noch diese Symbole angewandt:
Nummern oder Buchstaben eingeben
2 sec Abgebildete Taste 2 Sekunden lang drücken
Tonsignalisierung am Mobilteil
Tonsignalisierung an der Basisstation
Telefonbuch oder
Text oder Symbole im Display
Die Tonsignalisierung an Mobilteil und Basisstation funktioniert nur, wenn Sie
diese zuvor nicht ausgeschaltet haben!
5.1
Einen Anruf entgegennehmen
und , Gespräch annehmen
Gespräch beenden
Klingelt das Mobilteil, können Sie durch Drücken der Tasten
D oder E die Rufton−Lautstärke des Mobilteils verändern.
Wird der Tonruf am Mobilteil ausgeschaltet, werden eingehende Gespräche nur noch
über die Basisstation signalisiert (soweit der Tonruf dort nicht auch ausgeschaltet
wurde).
7
− Telefonieren −
5.2
Freisprechen
Nutzen Sie diese Funktion, um freihändig über den Lautsprecher zu telefonieren.
Während des Gesprächs Funktion ein− oder ausschalten.
5.3
Zwei Anrufe entgegennehmen
Sie werden durch Signaltöne (Anklopfen) darauf hingewiesen, dass während des Telefonierens
ein weiterer Anruf eingeht. Die Rufnummer des zweiten Anrufers wird im Display angezeigt. Sie
können mit der folgenden Tastenfolge zwischen den beiden Gesprächspartnern hin− und herwechseln, die Verbindung zum jeweils anderen Gesprächspartner wird dabei gehalten.
, Gesprächspartner wechseln
Achtung: Die Rufnummernanzeige, das Halten von Gesprächen und das Anklopfen
sind Mehrwertdienste Ihres Netzbetreibers. Bitte fragen Sie Ihren Netzbetreiber nach
weiteren Informationen, wie z.B. der erforderlichen Flashzeit.
5.4
Anrufe führen
Rufnummer eingeben (max. 32 Stellen)
Rufnummer wählen
Falls Sie sich vertippt haben:
Kurz: Löscht die letzte Eingabe.
2 sec Lang: Löscht die ganze Nummer.
Sie können auch zuerst die Gesprächstaste drücken und erhalten damit das Freizeichen.
Geben Sie anschließend die Telefonnummer ein. Eine Korrektur einzelner Ziffern ist bei dieser
Form der Nummerneingabe allerdings nicht möglich.
5.5
Wahlpause
Bei Nebenstellenanlagen ist es erforderlich, eine bestimmte Nummer zu wählen (z.B. 9" oder
0), um ein Freizeichen für eine Amtsleitung zu bekommen. Bei wenigen, älteren Nebenstellenanlagen dauert es einige Zeit, bis das Freizeichen zu hören ist. Speziell für diese Nebenstellenanlagen kann nach der Amtsholung eine automatische Pause eingefügt werden, so dass Sie direkt
weiter wählen können, ohne das Freizeichen abzuwarten.
Drücken Sie zwischen der Amtskennziffer und der Rufnummer einmal die Taste . Im Display
erscheint die Anzeige P". Nach der Amtsholung wartet Ihr Telefon für 3 Sekunden mit dem Wählen der eigentlichen Rufnummer.
Die Pause kann auch bei der Eingabe von Rufnummern in das Telefonbuch eingegeben werden.
5.6
Wahlwiederholung
Ihr Telefon speichert die 10 zuletzt gewählten Rufnummern in einer Wahlwiederholungsliste.
Wahlwiederholungsliste öffnen (die zuletzt gewählte
Rufnummer erscheint im Display)
oder , Eintrag auswählen und Verbindung herstellen
Ist eine Rufnummer im Telefonbuch gespeichert, erscheint der gespeicherte Name im
Display.
5.6.1 Alle Rufnummern aus der Wahlwiederholungsliste löschen
in Wahlwiederholungsliste gehen
2 sec , gesamte Liste löschen
5.6.2 Eine Rufnummer aus der Wahlwiederholungsliste löschen
, oder zu löschenden Eintrag auswählen
, einzelnen Eintrag löschen
5.7
Verpasste Anrufe zurückrufen
Ihr Telefon speichert die letzten 40 Anrufe in einer Anrufliste ab.
Anrufliste öffnen und durch die gespeicherten Einträge
, oder gehen
Verbindung herstellen
8
− Telefonieren −
5.8
Gespeicherte Rufnummern aus dem Telefonbuch wählen
Im Telefonbuch gespeicherte Rufnummern (s. Kap. 8.1) können Sie schnell und einfach
abrufen.
, oder Telefonbuch öffnen und Telefonbucheintrag auswählen
Verbindung herstellen
Sie können einen Telefonbucheintrag gezielt anwählen, indem Sie innerhalb der Telefonbuchfunktion die Buchstabentaste drücken, die dem Anfangsbuchstaben des Eintrags entspricht. Beispiel: Für die Telefonnummer von Peter" drücken Sie 1x und
benutzen Sie ggf. noch die Tasten oder , um schnell zu dem gespeicherten
Eintrag zu gelangen.
5.9
Einstellen der Hörerlautstärke
Sie können während eines Gesprächs die Lautstärke in fünf Stufen anpassen.
oder Während des Gesprächs drücken.
5.10 Mikrofon im Mobilteil stummschalten
Einschalten / Ausschalten
Sie können während eines Telefongesprächs das Mikrofon im Mobilteil aus− und einschalten. Dadurch können Sie beispielsweise mit einer dritten Person sprechen, ohne dass Ihr
Gesprächspartner am Telefon mithört. Der Lautsprecher im Mobilteil bleibt aber eingeschaltet;
d.h. Sie können weiterhin Ihren telefonischen Gesprächspartner hören!
5.11 Anzeige der Gesprächsdauer
Einige Sekunden nach Beginn eines Telefonats schaltet das Display von der gewählten bzw. anrufenden Telefonnummer automatisch um auf die Anzeige der Gesprächsdauer (hh−mm−ss).
5.12 Tastensperre
3 sec Tastensperre einschalten
2x
Tastensperre ausschalten
Bei eingeschalteter Tastensperre (s. auch Kap. 7.4) können eingehende Anrufe wie gewohnt entgegengenommen werden. Nach dem Auflegen ist die Tastatursperre immer noch aktiv.
5.13 Temporäre Tonwahl
Wenn Sie Ihr Telefon mit dem Impuls−Wahlverfahren betreiben, müssen Sie nicht auf die Vorteile
des Ton−Wahlverfahrens (z.B. für die Fernabfrage eines Anrufbeantworters) verzichten.
4 sec Wechsel zum Tonwahlverfahren (für die Dauer des
Gesprächs)
Nach Gesprächsende wird wieder automatisch auf Puls−Wahlverfahren umgestellt.
5.14 Hinweise zur Reichweite
Die Reichweite des Mobilteils beträgt ca. 50 Meter in geschlossenen Räumen und ca. 300 Meter
im Freien. Bei guter Verbindung zur Basisstation leuchtet im Display das Symbol h dauerhaft.
Entfernen Sie sich zu weit von der Basisstation, blinkt das Symbol h und Sie hören
Warntöne. Nähern Sie sich der Basisstation, da das Gespräch sonst unterbrochen
wird.
Hat das Mobilteil die Verbindung zur Basisstation verloren, erscheint im Display die
Meldung Basis 1 .
5.15 Mobilteil suchen (Paging)
Wenn Sie Ihr Mobilteil verlegt haben, können Sie es suchen lassen. Drücken Sie an der Basisstation die Paging−Taste, um für 30 Sekunden die Rufsignale des Mobilteils zu hören. Drücken Sie
erneut die Paging−Taste oder die Gesprächstaste am Mobilteil, um die Funktion vor Ablauf der
30 Sekunden zu beenden.
Alle an der Basis angemeldeten Mobilteile klingeln.
oder Beendet Paging vorzeitig.
5.16 Mobilteil ein− / ausschalten
3 sec Einschalten / Ausschalten
Das Ein−/Ausschalten ist nicht möglich, wenn das Mobilteil auf der Basisstation steht.
9
− Navigation im Hauptmenü −
6
Navigation im Hauptmenü
6.1
Navigation im Menü
Alle Funktionen sind über unterschiedliche Menüs zu erreichen. Den Weg zur gewünschten
Funktion entnehmen Sie der Menüstruktur in Kapitel 7.
1. Öffnen Sie das gewünschte Menü oder Telefonbuch mit der jeweiligen Taste.
2. Mit Taste oder das gewünschte Untermenü auswählen.
3. Mit Taste das Untermenü öffnen.
4. Mit Taste oder die gewünschte Funktion auswählen.
5. Mit Taste Funktion öffnen.
6. Mit Taste oder gewünschte Einstellung auswählen.
7. Über Tastenfeld Nummern oder Buchstaben eingeben.
8. Mit Taste Eingaben bestätigen.
9. Mit Taste gelangen Sie jeweils eine Ebene zurück.
Jeder Vorgang wird automatisch abgebrochen, wenn innerhalb von 20 Sekunden
keine Eingabe erfolgt.
6.2
Signaltöne
Um Ihnen die Bedienung Ihres Telefons zu erleichtern, ist Ihr Telefon mit verschiedenen Bestätigungs−, Hinweis−, Warn− und anderen Signaltönen ausgestattet. Einige davon können Sie nach
Wunsch ein− oder ausschalten. Dazu gehören:
S Tastentöne: Jeder Tastendruck am Mobilteil wird mit einem kurzen Ton bestätigt.
S Warnton Akku leer: Bei zu geringer Batteriekapazität erinnert ein Warnton daran,
dass das Mobilteil geladen werden muss.
S Reichweiten−Warnton: Haben Sie sich zu weit von der Basis entfernt, hören Sie einen
Warnton.
Wie Sie diese aus− oder einschalten, sagt Ihnen die Menüstruktur in Kapitel 7.4.
Daneben gibt es noch andere Töne, welche Ihnen die Navigation im Menü erleichtern. Sie können nicht abgeschaltet werden. Hier die wichtigsten:
S Bestätigungston : Zwei kurze aufsteigende Töne am Ende einer erfolgreich verlaufenen Eingabe.
S Hinweiston : Ein langer hoher Ton am Ende eines auf− oder abwärts durchgeblätterten Menüs signalisiert, dass es keine weiteren Auswahlmöglichkeiten gibt.
6.3
Beispiel
Anhand des Beispiels SMS schreiben" wird hier näher erklärt, wie Sie im Haupt− und in den Untermenüs navigieren und Eingaben vornehmen. Verfahren Sie bei allen Einstellungen wie bei diesem Beispiel.
Hauptmenü öffnen
SMS−Funktion auswählen und bestätigen
oder SMS , oder Schreiben
Nachricht ?
, Nummer ? , Senden...
10
, Funktion auswählen und bestätigen (Menü SMS /
Schreiben)
Eingabeaufforderung akzeptieren
Nachricht eingeben und bestätigen
Eingabeaufforderung akzeptieren
Nummer eingeben und bestätigen
Sendevorgang läuft
7
Menüstruktur
In das Hauptmenü gelangen Sie durch Drücken der Taste . Wählen Sie anschließend mit den Tasten oder das gewünschte Untermenü und
bestätigen Sie Ihre Auswahl mit Taste . Oder tippen Sie die geforderte Information ein (eigene Eingaben sind nachfolgend kursiv gedruckt und mit gekennzeichnet). Ihre Eingabe wird i.d.R. am Ende durch einen Signalton bestätigt.
7.1
Das Telefonbuch
Telefonbuch
7.2
SMS
Hinzufügen
Ändern
Löschen
Name ?
Name xy
Name xy
Nummer ?
Nummer xy
Bestätigen?
Melodie 1−5
Melodie 1−5
Textnachrichten (SMS)
Antwort
Löschen
Weiterleiten
Details
Pers. SMS
Schreiben
Nachricht ?
Alles lösch
Eingang
Pers. SMS
Bestätigen?
Bestätigen?
SMS Einstell
Nachr Alarm
Send Service
Empfangszen.
Sendezentr.
Apparate Nr.
Text
Ein
Aus
Senden 1
Senden 2
Empfangen 1
Empfangen 2
Senden 1
Senden 2
Nummer
Nummer ?
Nummer
(SMS−Signalton)
Nummer
Nummer
Nummer
Nummer
Senden...
− Menüstruktur −
Eingang
11
12
7.3
Einstellung
Einstellung
Basis−Lautst
Lautstärke1
Lautstärke2
Lautstärke3
Lautstärke4
Lautstärke5
Ton Aus
Basis−Melody
Melodie 2
Melodie 3
Melodie 4
Melodie 5
Pin ?*
Pin Code*
Pin ? PIN alt
Neue Pin
Wählmodus
Tonwahl
Pulswahl
Flash 1
Flash 2
Werkseinst.**
Pin ?
PIN
Nummer Mobilteil
PIN neu
Pin Wdh
PIN neu
PIN
Bestätigen?
Werksseitig sind alle PIN auf 0000 eingestellt. Wenn Sie die Taste für zwei Sekunden drücken, dann brechen Sie die Programmierung ab.
Vorsicht: Es werden alle Einstellungen auf Werkseinstellung zurückgesetzt! Alle Listeneinträge werden gelöscht!
− Menüstruktur −
Mt−abmelden
Flashzeit
*
**
Melodie 1
7.4
Mobilteil
Mobilteil
Töne
Tastenton
Akku leer
Reichweite
Ein
Aus
Ein
Aus
Ein
Aus
Lautstärke1 − 5 / Ton Aus
Ext Ruf Laut
Lautstärke1 − 5 / Ton Aus
Int Melodie
Melodie 1 − 10
Ext Melodie
Melodie 1 − 10
Auto Annahme*
Ein
Aus
Name
ABC
Sprache
English / Français
Español / Italiano
Deutsch / Nederlands
...
*
Tastensperre
Länge WWdhl.***
Lang (32 Ziffern)
Kurz (20 Ziffern)
Ein**
EIN: Ein Telefonat wird angenommen, indem das Mobilteil aus der Basisstation herausgenommen wird (Werkseinstellung). Nach dem Herausnehmen
des Mobilteils sind alle Tasten für vier Sekunden gesperrt.
AUS: Ein Telefonat kann ausschließlich mit Taste angenommen werden.
** Tastensperre aufheben: Taste 2x drücken.
*** In der Wahlwiederholungsliste wird je nach Einstellung eine Rufnummer mit max. 32 bzw. 20 Ziffern gespeichert.
− Menüstruktur −
Int Ruf Laut
13
14
7.5
Datum, Uhrzeit und Wecker einstellen
Datum & Zeit
7.6
Datum einst
Datum
Uhr einst
hh−mm
Wecker einst
Aus
Ein
hh−mm
Anmelden von Basis und Mobilteilen
Anmelden
Basis−Wahl
Basis anmeld
Basis 1
Auto
Basis1 2 3 4
− Menüstruktur −
− Das Telefonbuch −
8
Das Telefonbuch
In das Telefonbuch können 50 Rufnummern mit Namen gespeichert werden. Jede Rufnummer
darf maximal 24 Stellen umfassen, für jeden Namen stehen maximal 12 Buchstaben zur Verfügung.
8.1
Rufnummern in das Telefonbuch eingeben
s. Kap. 7.1
Ist der Name bereits im Telefonbuch gespeichert, ertönt ein Signal und im Display erscheint erneut Hinzufügen . Sie müssen einen anderen Namen eingeben.
Die gewählte Melodie ertönt beim Anruf des eingetragenen Gesprächspartners. Diese
Zuordnung funktioniert allerdings nur, wenn Ihr Telefonanschluss und der des Anrufers
über die Rufnummernanzeige CLIP verfügt.
8.1.1 Hinweise zum Speichern
Geben Sie bei allen Rufnummern immer die Vorwahl mit ein, damit das Telefon auch
eingehende Ortsgespräche einem Telefonbucheintrag zuordnen kann.
Ist die Speicherkapazität von 50 Rufnummern erreicht, zeigt das Display beim nächsten Speichern die Meldung Speich. Voll . Um wieder Platz zu schaffen, müssen Sie
zuerst eine andere Rufnummer löschen.
8.1.2 Texteingabe
Die Zifferntasten sind zusätzlich mit Buchstaben beschriftet. Durch mehrmaliges Drücken der entsprechenden Taste können Großbuchstaben sowie Zahlen eingegeben werden.
Beispiel: Sie möchten den Namen "Peter" eingeben. Drücken Sie 1 x Taste , 2 x Taste ,
1 x Taste , 2 x Taste und 3 x Taste .
Weitere Hinweise für die Eingabe von Text:
1x drücken: Leerzeichen
2x drücken: Bindestrich
löscht letzten Eintrag
oder bewegt den Cursor
wechselt zwischen Groß− und Kleinschreibung
Um den gleichen Buchstaben zweimal einzugeben, geben Sie den entsprechenden Buchstaben
ein und warten Sie dann, bis der Cursor automatisch eine Stelle weiter springt.
8.2
Telefonbucheinträge ändern
s. Kap. 7.1
Um einen Eintrag direkt auszuwählen, drücken Sie die Taste, die dem Anfangsbuchstaben des Eintrages entspricht. Um z.B. den Namen Peter" direkt anzuwählen, drükken Sie 1x .
8.3
Telefonbucheinträge löschen
s. Kap. 7.1
Durch das Drücken der Taste wird der Löschvorgang abgebrochen.
8.4
Rufnummer aus dem Telefonbuch wählen
s. Kap. 5.8
15
− Rufnummernanzeige (CLIP) −
9
Rufnummernanzeige (CLIP)
Steht in Ihrer Telefonanlage die CLIP−Funktion zur Verfügung (CLIP = Calling Line Identification
Presentation), zeigt das Display bei eingehendem Anruf die Rufnummer des Anrufers an. Haben
Sie diese Rufnummer in Ihrem Telefonbuch gespeichert, wird gleich der gespeicherte Name angezeigt. Hat der Anrufer das Übertragen seiner Rufnummer unterdrückt, wird die Rufnummer
nicht angezeigt; stattdessen erscheint im Display die Meldung Nr. geheim .
Insgesamt können bis zu 40 Rufnummern in der Anruferliste gespeichert werden. Ist die Liste voll,
wird immer die älteste Rufnummer gelöscht. Wurden während Ihrer Abwesenheit neue Rufnummern in der Anruferliste gespeichert, blinkt im Display das Symbol
.
Achtung: Die Rufnummernanzeige (CLIP) sowie die Anzeige von Datum und Uhrzeit
sind optionale Dienste Ihres Netzbetreibers. Bitte fragen Sie diesen nach detaillierteren
Informationen.
9.1
Die Anruferliste
9.1.1 Rufnummer aus der Anruferliste ansehen
Um die Rufnummern der Anruferliste im Display zu sehen, gehen Sie bitte wie folgt vor:
Die zuletzt empfangene Rufnummer wird im Display
angezeigt.
Ist die Anruferliste leer, zeigt das Display die Meldung Leer .
oder Es können weitere Rufnummern aus der Anruferliste
angewählt werden.
Sind keine weiteren Rufnummern vorhanden, hören Sie einen Signalton.
Zwei Displaysymbole informieren Sie über den Status der Einträge:
Der Anruf wurde angenommen.
Der Anruf wurde nicht angenommen.
Durch Drücken der Taste werden gegebenenfalls weitere Informationen zur angezeigten Rufnummer angezeigt:
S Ist die Rufnummer länger als 12 Stellen, werden die restlichen Zahlen angezeigt.
S Zeigt Datum und Uhrzeit des Anrufs, wenn diese Daten vom Anrufer übertragen
wurden.
Mit Taste verlassen Sie die Anruferliste.
9.1.2 Rufnummer aus der Anruferliste anrufen
Um eine angezeigte Rufnummer aus der Anruferliste direkt zurückzurufen, drücken Sie die Taste
.
9.1.3 Rufnummer aus der Anruferliste im Telefonbuch speichern
Eine in der Anruferliste gespeicherte Rufnummer kann direkt im Telefonbuch gespeichert werden.
, oder Rufnummer wählen
, , Hinzufügen?
Name ?
Speichervorgang einleiten
, Namen eingeben und bestätigen
(Texteingabe s. Kap. 8.1.2)
Ist der Name bereits im Telefonbuch gespeichert, ertönt ein Signal und im Display erscheint wieder die ausgewählte Rufnummer.
1234567890
ausgewählte Rufnummer bestätigen
Melodie 1
oder , Melodie auswählen und bestätigen
9.1.4 Einzelne Rufnummer aus der Anruferliste löschen
, oder Rufnummer wählen
, Löschen ?
Löschvorgang einleiten und für ausgewählte Rufnummer
bestätigen
9.1.5 Alle Rufnummern aus der Anruferliste löschen
, oder Anruferliste öffnen
3 sec , Alles lösch
16
Löschvorgang einleiten, bestätigen
− Textnachrichten (SMS) −
10
Textnachrichten (SMS)
Sie können von Ihrem Telefon aus über das Festnetz kurze Textnachrichten (SMS = Short Message Service) von bis zu 160 Zeichen versenden, insofern die folgenden Bedingungen erfüllt
sind:
S Ihr Telefonanschluss verfügt über die CLIP−Funktion (s. Kap. 9)
S Der SMS−Dienst wurde von Ihrem Netzbetreiber aktiviert.
Beachten Sie auch, dass das Senden von SMS kostenpflichtig ist.
Die Berechnung erfolgt über Ihren Telefonnetzbetreiber.
Verschicken Sie eine SMS an einen anderen Festnetzanschluss, der über keinen
SMS−Dienst verfügt bzw. dessen Telefon keine SMS−Nachrichten empfangen kann,
wird die SMS automatisch als Sprachmeldung zugestellt.
Bei Call−by−Call−Verbindungen ist der SMS−Versand derzeit nicht möglich.
Detailliertere Informationen über den SMS−Versand per Festnetz erfahren Sie von Ihrem Netzbetreiber.
10.1 SMS−Einstellungen
10.1.1 Service Center
Die Verteilung aller SMS−Nachrichten erfolgt über ein Service Center. Die Swisscom", Cablecom" und weitere Netzbetreiber bieten diesen Service an. Ihr SWITEL Telefon ist für den Betrieb
bei Swisscom" vorbereitet. Die Nummer des Service Center der Swisscom" lautet 0622 100 000.
Die SMS−Funktion von Swisscom" ist bereits für Sie freigeschaltet. Es ist keine weitere Anmeldung erforderlich.
Um den SMS−Dienst anderer Netzbetreiber zu nutzen, müssen Sie zuerst im Hauptmenü Rufnummern für das SMS−Empfangs− und für das SMS−Sendezentrum einprogrammieren. Die Anmeldeverfahren der einzelnen Anbieter kann diesbezüglich variieren; bitte erfragen Sie deshalb beim Anbieter Ihrer Wahl vorab die erforderlichen
Rufnummern und die Vorgehensweise zur Freischaltung des SMS−Dienstes.
10.2 SMS versenden
s. Kap. 7.2
Von einer Nebenstellenanlage können Sie keine SMS versenden.
Wenn Sie eine neue SMS schreiben, erscheint im Display der Text der vorherigen
SMS. Löschen Sie mit der Taste den alten Text, bevor Sie den neuen Text eingeben.
Wie Sie Texte eingeben können, erklärt Ihnen Kapitel 8.1.2.
10.3 SMS empfangen
s. Kap. 7.2
Wenn das Empfangen einer SMS nicht möglich ist, dann müssen Sie beim Empfangszentrum die letzten zwei Ziffern der programmierten Rufnummer löschen. Die Rufnummer lautet dann 0622 100 0.
Haben Sie eine neue SMS erhalten, hören Sie einen SMS−typischen Signalton. Bei Bedarf können Sie diesen Signalton ausschalten (s. Kap. 7.2). Außerdem zeigt Ihnen das Briefumschlag−
Symbol im Display, dass Sie eine neue Textnachricht erhalten haben.
10.4 Textnachrichten verwalten
Sie können insgesamt maximal 15 Kurznachrichten speichern (allgemeines Eingangsverzeichnis und persönliches SMS−Postfach zusammen).
Sind alle Speicherplätze belegt, wird bei Eingang einer neuen SMS der älteste Eintrag
des jeweiligen Verzeichnisses gelöscht.
10.5 Persönliches SMS−Postfach
Neben dem allgemeinen Eingangsverzeichnis steht Ihnen ein persönliches SMS−Postfach zur
Verfügung. Durch diese Funktion ist es Ihnen möglich, SMS−Nachrichten zu erhalten und zu verschicken, auf die ausschließlich Sie Zugriff haben.
Das SMS−Postfach können Sie nur nutzen, wenn Ihr Netzbetreiber dies unterstützt.
Wie Sie Ihr persönliches SMS−Postfach einrichten erfragen Sie bitte bei Ihrem Netzbetreiber.
17
− Mehrere Mobilteile −
11
Mehrere Mobilteile
Sie können fünf Mobilteile an Ihre Basisstation anmelden.
Jedes Mobilteil kann gleichzeitig an vier Basisstationen angemeldet sein.
Über den international genormten GAP Standard können SWITEL−Mobilteile und auch
Mobilteile von Fremdherstellern in das Telefonsystem integriert werden. Genauso können Sie ein SWITEL−Mobilteil an Basisstationen anderer Hersteller anmelden, sofern
auch diese Geräte nach dem GAP Standard arbeiten.
Durch den Einsatz mehrerer Mobilteile haben Sie folgende Möglichkeiten:
S Interne Gespräche zwischen den Mobilteilen.
S Externe Gespräche können zwischen den Mobilteilen weitergeleitet werden.
S Eingehende externe Gespräche werden an allen Mobilteilen signalisiert.
S Konferenzgespräch mit einem externen und zwei internen Telefonen.
Benutzt bereits ein anderes Mobilteil die externe Leitung, erscheint im Display das
Symbol EXT . Ein weiteres externes Gespräch ist dann nicht möglich.
11.1 Intern telefonieren
Sobald Sie mehrere Mobilteile (nachfolgend kurz: MT) an der Basisstation angemeldet haben,
können Sie kostenlose interne Gespräche führen. Nachfolgendes Beispiel: MT 1 (interne Nr. 1)
ruft bei MT 2 (interne Nr. 2) an.
MT 1: Verbindungsaufbau zum anderen Mobilteil
, 2
MT 2: Nimmt Anruf entgegen
Erreicht Sie während eines internen Gesprächs ein externer Anruf, hören Sie kurze Signaltöne und Sie sehen die Rufnummer des Anrufers im Display, falls diese verfügbar
ist.
Beendet internes Telefonat
Nimmt externen Anruf an
11.2 Externe Gespräche intern weiterleiten
Haben Sie ein externes Gespräch an einem Mobilteil entgegengenommen, können Sie das externe Gespräch an ein anderes, internes Mobilteil weiterleiten.
MT 1: Verbindungsaufbau zum anderen Mobilteil
, 2
Sollte sich das gerufene Mobilteil nicht melden, können Sie das Gespräch durch Drükken der Taste wieder übernehmen.
Nachdem das interne Gespräch am angerufenen Mobilteil entgegengenommen wurde, haben
Sie folgende Möglichkeiten:
11.2.1 Rücksprache / Makeln
Sie können nun mit dem internen Teilnehmer sprechen und durch das Drücken der Taste zum externen Gesprächspartner zurückkehren. Sie können so beliebig oft zwischen dem externen und internen Gespräch wechseln.
11.2.2 Gespräch übergeben
Durch Drücken der Taste am ersten Mobilteil wird das externe Gespräch an das angerufene
Mobilteil übergeben.
18
− Mehrere Mobilteile −
11.3 Konferenzgespräche führen
Ein externes Gespräch kann mit einem weiteren internen Teilnehmer zum Konferenzgespräch
geschaltet werden. So können zwei Mobilteile gleichzeitig mit dem externen Teilnehmer sprechen.
MT 1: Verbindung zum externen Teilnehmer herstellen
MT 1: Verbindungsaufbau zum anderen Mobilteil
, 2
MT 2: Nimmt internen Anruf entgegen
MT 1: Schaltet alle zu einer Konferenz zusammen
Während einer Konferenz können Sie mit der Taste den externen Gesprächspartner auf Halten setzen. Durch Drücken der Tastenfolge , schalten Sie wieder
zur Konferenz zurück.
MT 1 oder MT 2: Beendet die Konferenz durch Auflegen.
11.4 An− und Abmelden von Mobilteilen
11.4.1 Anmelden von weiteren Mobilteilen des Typs DC42
3 sec Durch Drücken der Paging−Taste an der Basisstation
leiten Sie die Anmeldung ein.
Ab Drücken der Paging−Taste haben Sie 90 Sekunden Zeit, die Anmeldung eines Mobilteils durchzuführen:
, , In das Menü Anmelden gehen.
oder , , Das Menü Basis anmeld wählen und bestätigen.
Geben Sie die Nummer der Basisstation ein (1 bis 4) und
bestätigen Sie die Eingabe.
Ist das Mobilteil bereits mit einer Basisstation verbunden, blinken die entsprechenden
Nummern.
Die Basisstation wird nun gesucht.
Wurde die Basisstation gefunden, fahren Sie folgendermaßen fort:
, Geben Sie die PIN (Werkseinstellung: 0000) ein und bestätigen Sie die Eingabe. Das Mobilteil ist nun angemeldet.
Dem Mobilteil wird eine interne Rufnummer zugeteilt. Das bereits angemeldete Mobilteil hat die interne Rufnummer 1. Das zweite angemeldete Mobilteil erhält die interne
Rufnummer 2. Diese interne Rufnummer wird im Standby−Modus rechts im Display angezeigt.
11.4.2 Anmelden von DECT−GAP−Mobilteilen anderer Hersteller
Um ein DECT−GAP−Mobilteil eines anderen Herstellers anzumelden, folgen Sie den Hinweisen
in der Bedienungsanleitung des Fremdherstellers und drücken dann für 3 Sekunden die Paging−
Taste an Ihrer Basisstation. Benutzen Sie zur Anmeldung die PIN (Werkseinstellung: 0000).
11.4.3 Abmelden von Mobilteilen
Ein Mobilteil kann nur über ein anderes, noch angemeldetes Mobilteil abgemeldet werden. Es ist
nicht möglich, diese Abmeldung mit dem Mobilteil durchzuführen, das abgemeldet werden soll.
, oder , In das Menü Einstellung gehen.
oder , , Das Menü Mt−abmelden wählen und bestätigen.
Geben Sie die PIN (Werkseinstellung: 0000) ein und bestätigen Sie die Eingabe. Mit der Taste brechen Sie den Vorgang ab.
, Geben Sie die interne Nummer des abzumeldenden Mobilteils ein und bestätigen Sie die Eingabe. 19
− Mehrere Mobilteile −
11.5 Zusätzliche Basisstationen
Bei der Verwendung mehrerer Basisstationen können Sie die Reichweite des Mobilteils vergrößern. Um diesen Effekt zu nutzen, müssen alle Basisstationen mit einem Telefonanschluss verbunden sein. Je nach Verwendungszweck können Sie jede Basisstation mit der gleichen Telefonnummer belegen oder geben Sie den Basisstationen unterschiedliche Rufnummern. Achten Sie
darauf, dass sich alle Basisstationen in ihrer Reichweite überschneiden.
Das Mobilteil muss an jeder Basisstation angemeldet werden!
Bitte testen Sie vor jeder Inbetriebnahme einer neuen Basisstation die Reichweite des Mobilteils.
Ist ein Mobilteil an den Basisstationen angemeldet und wurde am Mobilteil die automatische Wahl
der Basisstation eingeschaltet (s. Kap. 7.6), wird das Mobilteil immer automatisch an die nächste
Basisstation weitergeleitet.
11.5.1 Wählen einer Basisstation
, oder , In das Menü Anmelden gehen.
oder , Das Menü Basis−Wahl wählen und bestätigen.
Im Display erscheinen alle Basisstationen, an denen das Mobilteil bereits angemeldet
ist. Die Nummer der aktiven Basisstation blinkt.
, Geben Sie die interne Nummer der Basisstation ein, auf
die das Mobilteil umgeschaltet werden soll und bestätigen
Sie die Eingabe. Oder:
Bei dieser Einstellung wechselt das Mobilteil automatisch
oder Auto , zur nächsten Basisstation, wenn die Verbindung zur
aktuellen Basisstation abbricht.
20
− Einstellungen −
12
Einstellungen
12.1
Werkseinstellungen
Sprache:
Deutsch
SMS Empfangscenter 1: 06221000
Name Mobilteil:
DC42 1
SMS Empfangscenter 2: Leer
Ruftonlautstärke Mobilteil: 3
SMS Sendecenter 1:
06221000
Ruftonmelodie extern:
3
SMS Sendecenter 2:
Leer
Ruftonmelodie intern:
1
SMS−Eingangston:
Ein
Ruftonlautstärke Basis:
3
Warnton Akku:
Ein
Ruftonmelodie Basis:
2
Warnton Reichweite:
Aus
Hörerlautstärke:
3
Tastentöne:
Ein
PIN:
0000
Tastensperre:
Aus
Wahlverfahren:
Ton (MFV)
Automatische Rufannahme: Ein
Flash−Zeit 1 (Standard): 90 ms
Uhr / Wecker:
Aus
Flash−Zeit 2:
250 ms
Pause:
3 Sekunden
Sie können das Mobilteil und die Basisstation auf Werkseinstellung zurücksetzen.
Was Sie dazu tun müssen, entnehmen Sie bitte Kapitel 7.3.
Bitte beachten Sie aber, dass dabei das Telefonbuch, die Anruferliste
und alle Rufnummern der Wahlwiederholung gelöscht werden!
12.2 PIN−Code
Der PIN−Code kann aus bis zu vier Zahlen bestehen. Die Werkseinstellung des PIN−Codes ist
"0000".
Wenn Sie den PIN−Code ändern, bewahren Sie den neuen PIN−Code gut auf. Ohne
PIN−Code können Sie viele Funktionen des Telefons nicht mehr nutzen!
12.3 Flash−Zeiten
Die Flash−Zeit beschreibt die Dauer eines Tones, der durch einen Tastendruck am Telefon erzeugt wird. Damit Ihre Telefonanlage problemlos funktioniert, kann die Anpassung der Flash−Zeit
nötig sein.
Sie können deshalb zwei unterschiedliche Flash−Zeiten einstellen, um Funktionen in Nebenstellenanlagen oder Mehrwertdienste Ihres Netzbetreibers zu nutzen (s. auch Kap. 2.7). Sie können
zwischen einer Flash−Zeit von 90 ms (Standardeinstellung) und einer Flash−Zeit von 250 ms wählen. Wie Sie die Flash−Zeiten einstellen zeigt Ihnen Kapitel 7.3 (s. auch Kap. 12.1).
12.4 Name des Mobilteils
Für das Mobilteil kann ein eigener Name einprogrammiert werden.
Dieser kann bis zu 10 Stellen umfassen.
21
− Fehlerbeseitigung −
13
Fehlerbeseitigung
Haben Sie Probleme mit Ihrem Telefon,
kontrollieren Sie bitte zuerst die folgenden Möglichkeiten:
Fehler
Lösungen
Kein
Telefongespräch
möglich.
−
−
−
Die Telefonleitung ist nicht korrekt angeschlossen oder gestört. Verwenden Sie nur das mitgelieferte Telefonanschlusskabel.
Testen Sie mit einem anderen Telefon, ob Ihr Telefonanschluss in Ordnung ist.
Das Steckernetzteil ist nicht eingesteckt oder es liegt ein
totaler Stromausfall vor.
Die aufladbaren Standard−Akkus sind leer oder defekt.
Sie haben sich zu weit von der Basisstation entfernt.
Verbindung abgehackt,
fällt aus.
−
−
Sie haben sich zu weit von der Basisstation entfernt.
Falscher Aufstellungsort der Basisstation.
Keine Wahl möglich.
−
Wahlverfahren falsch eingestellt.
Das System reagiert nicht
mehr oder befindet sich in
einem undefinierten Zustand.
−
Stellen Sie die Werkseinstellungen wieder her (s. Kap.
12.1). Ziehen Sie vorher kurzzeitig das Netzteil aus der
Steckdose.
Die Ladekontrollleuchte
leuchtet nicht.
−
Stellen Sie das Mobilteil richtig auf die Basisstation, reinigen
Sie die Kontaktflächen am Mobilteil und an der Basisstation
mit einem weichen, trockenen Tuch.
Im Display blinkt nach ein
paar Stunden das Batterie−Symbol.
−
Stellen Sie das Mobilteil für 14 Stunden auf die Basisstation.
Hilft dies nicht, erneuern Sie die aufladbaren Akkus.
Display−Anzeige dunkel.
−
Verursacht durch direkte Sonnenbestrahlung.
Lassen Sie das Mobilteil abkühlen.
Die Rufnummernanzeige
(CLIP) funktioniert nicht.
−
Die Rufnummernanzeige ist ein optionaler Service Ihres
Netzbetreibers. Bitte fragen Sie Ihren Netzbetreiber nach
weiteren Informationen.
Der Anrufer hat das Übertragen seiner Rufnummer unterdrückt.
−
−
−
22
− Wichtige Informationen −
14
Wichtige Informationen
14.1
Technische Daten
Merkmal
Wert
Standard
DECT−GAP
Stromversorgung Basisstation
220/230 V, 50 Hz
Reichweite (außen / innen)
300 m / 50 m
Standby
bis zu 109 h
Max. Gesprächsdauer
bis zu 10 h
Aufladbare Standard−Akkus
2 x AAA (1.2 V / 550 mAh)
Wahlverfahren
Ton−Wahlverfahren (MFV)
Impuls−Wahlverfahren (IWV)
Zulässige Umgebungstemperatur 10°C bis 30°C
Zulässige relative Luftfeuchtigkeit
20% bis 75%
Flash−Funktion
90 ms / 250 ms
Abkürzungen:
DECT:
Digital Enhanced Cordless Telephone
(Standard für kabellose Telefone).
GAP:
Generic Access Profile
(Standard für das Zusammenwirken von Mobilteilen und Basisstationen anderer Hersteller).
MFV:
MehrFrequenz−Verfahren
23
− Index −
15
Index
A
Abmelden von Mobilteilen, 19
Akkuladezustand, 5, 7
Akkus aufladen, 5
Akkus einsetzen, 5
Amtsleitung, 8
An− und Abmelden von Mobilteilen, 19
Analoger Telefonanschluss, 5
Anklopfen, 8
Anmelden von Basis und Mobilteilen, 14
Anmelden von DECT−GAP−Mobilteilen anderer
Hersteller, 19
Anmelden von Mobilteillen, 19
Anrufbeantworter Fernabfrage, 9
Anrufe entgegennehmen, 7
Anrufe führen, 8
Anruferliste, 7, 16
Anruferliste verlassen, 16
Apparate−Nummer eingeben, 11
Automatische Rufannahme, 13, 21
B
Basisstation anschließen, 5
Bedienelemente, 6
Bestätigungston, 10
C
CLIP, 16
CLIP Detailinformationen, 16
D
Darstellungsweise, 7
Darstellungsweise Tastensymbole, 6
Datum einstellen, 14
DECT, 23
Digitaler Telefonanschluss, 5
Display, 7
E
Eingaben bestätigen, 10
Einstellungen, 12, 21
Externe Gespräche intern weiterleiten, 18
Externes Gespräch, 7
24
F
Fehlerbeseitigung, 22
Flash−Zeit, 12, 21
Freisprechen, 8
G
GAP, 18, 23
Gespräch übergeben, 18
Gesprächsdauer, 9
H
Hauptmenü, 7
Hauptmenü öffnen, 10
Hinweiston, 10
Hörerlautstärke, 9, 21
I
Impuls (IWV) − Wahlverfahren, 5, 12
Intern telefonieren, 18
Internes Gespräch, 7
IWV, 12
K
Key lock, 7
Konferenzgespräche führen, 19
L
Lautsprecher Mobilteil, 9
Lautstärke einstellen, 12, 13
Löschen letzte Eingabe, 8
M
Mehrere Mobilteile, 18
MFV, 12, 23
Mikrofon stummschalten, 9
Mobilteil, 13
Mobilteil abmelden, 12
Mobilteil suchen, 9
− Index −
N
Name Mobilteil, 7, 13, 21
Navigation, 10
Nebenstellenanlagen, 5, 8
P
Paging, 9
Pause, 8, 21
Persönliches SMS−Postfach, 17
PIN−Code, 12, 21
R
R−Taste, 5, 8
Reichweite, 7, 9
Reichweiten−Warnton, 10, 13, 21
Rücksprache / Makeln, 18
Rufnummer aus der Anruferliste anrufen, 16
Rufnummer aus der Anruferliste ansehen, 16
Rufnummer aus der Anruferliste im Telefonbuch
speichern, 16
Rufnummer aus der Anruferliste löschen, 16
Rufnummern aus dem Telefonbuch wählen, 9
Rufnummern aus der Anruferliste löschen, 16
Rufnummern in das Telefonbuch eingeben, 15
Rufnummern speichern, 15
Rufnummernanzeige (CLIP), 16
Rufnummernlänge, 7
Ruftonlautstärke Basis, 21
Ruftonlautstärke Mobilteil, 21
Ruftonmelodie Basis, 21
Ruftonmelodie einstellen, 12, 13
Ruftonmelodie extern, 21
Ruftonmelodie intern, 21
S
Sicherheitshinweise, 4
Signaltöne, 10
SMS, 11, 17
SMS − Anzeige neuer Nachrichten, 7
SMS als Sprachmeldung zugestellt, 17
SMS empfangen, 11, 17
SMS löschen, 11
SMS schreiben, 10, 11
SMS Sendemodus auswählen, 11
SMS Service Center, 17
SMS versenden, 17
SMS verwalten, 17
SMS−Eingangston, 17, 21
SMS−Einstellungen, 11, 17
SMS−Empfangszentrum, 11, 21
SMS−Sendezentrum, 11, 21
Speicherkapazität Anruferliste, 16
Speicherkapazität Telefonbuch, 15
Sprache, 21
Sprache einstellen, 13
T
Tastensperre, 7, 9, 13, 21
Tastentöne, 10, 13, 21
Technische Daten, 23
Telefonbuch, 7, 11, 15
Telefonbucheinträge ändern, 11, 15
Telefonbucheinträge direkt anwählen, 9
Telefonbucheinträge erstellen, 11
Telefonbucheinträge löschen, 11, 15
Telefonieren, 7
Texteingabe, 15
Textnachrichten, 17
Textnachrichten verwalten, 17
Ton (MFV) − Wahlverfahren, 5, 9, 12
Töne, 10
U
Uhr einstellen, 13
Uhrzeit, 7, 21
Uhrzeit einstellen, 14
Untermenüs auswählen, 10
V
Verpackungsinhalt, 5
Verpasste Anrufe zurückrufen, 8
Vorgang abbrechen, 10
W
Wählen einer Basisstation, 20
Wahlpause, 8, 21
Wahlverfahren, 21
Wahlwiederholung, 8
Warnton "Akku leer", 10, 13, 21
Wecker, 21
Wecker einstellen, 13, 14
Werkseinstellungen, 12, 21
Z
Zusätzliche Basisstationen, 20
25
− Index −
26
1
− Table des matières −
1
Consignes de sécurité . . . . . . . . . . . . . . . . . . . . . . . . . . . . . .
28
2
Mise en service . . . . . . . . . . . . . . . . . . . . . . . . . . . . . . . . . . . .
29
3
4
Éléments de manipulation . . . . . . . . . . . . . . . . . . . . . . . . . . .
Écran . . . . . . . . . . . . . . . . . . . . . . . . . . . . . . . . . . . . . . . . . . . . .
30
31
5
Téléphoner . . . . . . . . . . . . . . . . . . . . . . . . . . . . . . . . . . . . . . . .
31
6
7
Navigation dans le menu principal . . . . . . . . . . . . . . . . . . . .
Structure de menu . . . . . . . . . . . . . . . . . . . . . . . . . . . . . . . . . .
34
35
8
Le répertoire . . . . . . . . . . . . . . . . . . . . . . . . . . . . . . . . . . . . . . .
39
9
10
Affichage du numéro d’appel (CLIP) . . . . . . . . . . . . . . . . . .
Messages écrits (SMS) . . . . . . . . . . . . . . . . . . . . . . . . . . . . . .
40
41
11
Plusieurs combinés . . . . . . . . . . . . . . . . . . . . . . . . . . . . . . . . .
42
12
Réglages . . . . . . . . . . . . . . . . . . . . . . . . . . . . . . . . . . . . . . . . . .
45
13
Elimination des perturbations . . . . . . . . . . . . . . . . . . . . . . . .
46
14
15
Informations importantes . . . . . . . . . . . . . . . . . . . . . . . . . . . .
Index . . . . . . . . . . . . . . . . . . . . . . . . . . . . . . . . . . . . . . . . . . . . .
47
48
27
− Consignes de sécurité −
1
Consignes de sécurité
Lisez très attentivement ce mode d’emploi.
1.1
Utilisation conforme aux prescriptions
Ce téléphone convient pour téléphoner à l’intérieur d’un réseau téléphonique. Toute autre utilisation est considérée comme non conforme à l’usage. Des modifications ou changements effectués
d’un propre gré ne sont pas autorisés. N’ouvrez en aucun cas l’appareil et n’effectuez aucun essai
de réparation vous−même.
1.2
Lieu d’installation
Le téléphone est conçu pour un fonctionnement à l’intérieur de pièces dont la température est
comprise entre 10 °C et 30 °C. La base ne doit pas être placée dans des pièces humides comme
la salle de bains ou la buanderie. Evitez toute nuisance par la fumée, la poussière, les tremblements, les produits chimiques, l’humidité, la grande chaleur ou l’ensoleillement direct. Posez la
base à une distance d’1 m par rapport à d’autres appareils électroniques pour éviter d’éventuelles
interactions.
N’utilisez pas le combiné dans des zones exposées aux explosions.
1.3
Bloc secteur
N’utilisez que le bloc d’alimentation fourni avec l’appareil, d’autres pouvant détruire
votre téléphone. Vous ne devez pas bloquer son accès par des meubles ou autres
objets.
1.4
Câble de raccordement téléphonique
Lorsque vous remplacez le câble de raccordement fourni avec l’appareil, veillez à une affectation
identique des plots de connexion.
1.5
Piles rechargeables
Ne jetez pas les piles dans le feu ou ne les plongez pas dans l’eau.
1.6
Panne de courant
En cas de panne de courant, vous ne pouvez pas téléphoner avec cet appareil. Pour les cas d’urgence, ayez à votre disposition un téléphone à fil fonctionnant sans alimentation externe en courant.
1.7
Installations à postes supplémentaires
Vous pouvez raccorder votre téléphone à une installation à postes supplémentaires. Il n’est pas
garanti que le téléphone puisse fonctionner sur chaque installation à postes supplémentaires.
1.8
Remarque relative aux appareils médicaux
N’utilisez pas le téléphone à proximité d’appareils médicaux. Une influence sur les stimulateurs
cardiaques ne peut être totalement exclue. Les téléphones DECT* peuvent causer un bourdonnement désagréable dans les prothèses auditives.
1.9
Nettoyage et entretien
Nettoyez les surfaces du boîtier avec un chiffon doux et non pelucheux. N’utilisez pas de produits
d’entretien ou de solvants. Les pieds en caoutchouc de la base ne résistent pas à tous les produits
d’entretien.
1.10 Elimination
La loi vous oblige à éliminer de manière appropriée les biens de consommation.
L’icône ci−contre placée sur votre téléphone signifie que les anciens appareils
électriques et électroniques doivent être éliminés séparément des ordures ménagères.
Éliminez les appareils électriques ou électroniques
dans le centre de collecte d’un organisme approprié d’évacuation des déchets.
Éliminez les piles
auprès d’un revendeur de piles ainsi que dans des centres de collectes qui tiennent à
disposition les collecteurs appropriés correspondants.
Éliminez les matériaux d’emballage conformément au règlement local.
* DECT : Digital Enhanced Cordless Telephone = Standard pour téléphones sans fil.
28
− Mise en service −
2
Mise en service
2.1
Remarques concernant la sécurité
Attention : Lisez impérativement les consignes de sécurité du chapitre 1 avant la mise
en service.
2.2
Vérification du contenu de l’emballage
Les éléments suivants font partie de la livraison :
−
une base
−
un câble de raccordement téléphonique
−
un combiné
−
deux piles rechargeables
−
un bloc d’alimentation
−
un mode d’emploi
2.3
Raccordement de la base
Posez la base dans les environs de votre prise de raccordement téléphonique et d’une prise
réseau. N’utilisez que les composants fournis avec l’appareil.
1. Mettez la petite fiche du bloc d’alimentation dans la prise correspondante située sur
la face inférieure de la base.
Vous ne pouvez pas faire d’erreur en raccordant la fiche car les fiches et les prises
sont construites de manière à être protégées contre une inversion de polarité. Les
fiches doivent s’enclencher de manière audible dans les prises de la base.
2. Mettez la petite fiche du câble de raccordement téléphonique dans la prise
correspondante située sur la face inférieure de la base.
3. Guidez les deux câbles sur la face inférieure de la base dans le caniveau électique
prévu à cet effet et conduisant vers la face arrière.
4. Enfichez le bloc d’alimentation dans une prise réseau de 230 volts installée de
manière réglementaire.
Le bloc d’alimentation de la base doit toujours être raccordé.
5. Raccordez le câble de raccordement téléphonique ci−joint avec la prise
téléphonique.
2.4
Placer les piles
Introduisez deux piles rechargeables de type AAA Ni−MH
1,2 V 550 mAh dans le compartiment à piles ouvert. Veillez
à une polarisation correcte (v. fig.) ! Fermez le compartiment à piles.
Important : N’utilisez pas de piles rechargeables d’un autre type !
2.5
Chargement des piles rechargeables
Lors de la première mise en service, posez le combiné sur sa base pendant au moins 14 heures
(écran vers le haut). Le voyant de charge clignote sur la base. Le combiné chauffe lors du chargement. C’est normal et inoffensif. Ne chargez pas le combiné avec des chargeurs d’un autre fabricant. Si les piles ne sont pas chargées correctement, le téléphone peut présenter des dysfonctionnements. Le niveau actuel de chargement des piles est affiché à l’écran :
Plein
Moyen
Faible
Vide
2.6
Systèmes de numérotation par fréquence vocale (FV) ou décimale (DC)
Vous pouvez raccordez votre téléphone aussi bien à des prises analogiques (système de numérotation décimale) qu’à des prises numériques (système de numérotation par fréquence vocale).
L’appareil est paramétré en usine sur la numérotation par fréquence vocale. Si votre téléphone
devait ne pas fonctionner sur votre branchement, consultez le chapitre 7.3 qui vous informera
comment faire passer votre téléphone sur le système de numérotation par décimale.
2.7
Fonctionnement sur des installations à postes supplémentaires
Si votre téléphone est raccordé par l’intermédiaire d’une installation à postes supplémentaires,
vous pouvez, en vous servant de la touche R, transférer des appels ou utiliser le rappel automatique. Votre revendeur, auprès duquel vous avez acheté l’installation, vous informera si votre
téléphone fonctionne parfaitement sur ce genre d’installation.
29
− Eléments de manipulation −
3
Éléments de manipulation
3.1
1
2
3
4
5
6
7
8
9
10
11
12
13
3.2
Combiné
Affichage des communications
Ecran
Mode mains−libres
Touche menu et touche OK
Répertoire
8
Touche dièse (pour conférences téléphoniques)
Communications internes
9
Secret et Effacer / Retour
10
Touche de sélection : Remonter dans le menu et
liste des appels / Touche BIS de répétition automatique
11
des derniers numéros / Pause
Touche de communication
Touche de sélection : Descendre dans le menu /
Liste d’appels
12
Verrouillage du clavier (marche/ arrêt)
Touche de signal R (combiné marche/ arrêt)
13
Base
1 Touche de paging (recherche du combiné)
2 Indicateur DEL de communication et de secteur
3 DEL voyant de contrôle de chargement
1
2
3
c/
/
P/
4
5
6
7
1
2
3
Vers la représentation suivante :
Pour des raisons de meilleure lisibilité, les touches du téléphone sont représentées ci−dessous
par un contour carré standardisé. C’est pourquoi les icônes des touches utilisées ici diffèrent
légèrement de l’optique de celles de votre téléphone. Nous garantissons cependant que vous
les reconnaîtrez.
30
− Écran −
4
Écran
L’écran vous affiche toutes les fonctionnalités importantes avec leurs différents symboles et messages.
Symbole
12−10
DC42 1
Description
Affichage de l’heure
Identification du combiné
Allumage en permanence : affichage de la capacité des piles.
Affichage clignotant : les piles rechargeables doivent être chargées.
Segments continus : les piles sont en train de se charger.
Allumage en permanence : la liaison avec la base est bonne.
Affichage clignotant : vous êtes au−delà de la portée de la base.
Vous téléphonez.
Allumage en permanence : vous passez une communication externe.
Affichage clignotant : un appel externe vous parvient.
Allumage en permanence : vous passez une communication interne.
Affichage clignotant : un appel interne vous parvient.
Allumage en permanence : vous vous trouvez dans la liste d’appels. L’enregistrement n’a pas encore été regardé.
Affichage clignotant : il existe de nouveaux appels dans la liste d’appels.
Le numéro a plus de 12 chiffres.
Cet appel n’a pas été réceptionné.
Il se trouve dans la liste d’appels.
Cet appel a été réceptionné.
Il se trouve dans la liste d’appels.
Vous vous trouvez dans le menu principal.
Vous vous trouvez dans le répertoire.
Vous avez reçu un message écrit (SMS).
Le verrouillage du clavier est activé.
L’alarme est activée.
5
Téléphoner
Le fonctionnement de votre nouveau téléphone est décrit comme suit par du texte et des symboles. Si une icône de touche est représentée, cela signifie que vous devez appuyez sur cette touche.
Par ailleurs, les icônes suivantes seront également utilisées :
Saisir des chiffres ou des lettres
2 sec Appuyez 2 secondes sur la touche représentée
Signalisation vocale sur le combiné
Signalisation vocale sur la base
Répertoire
ou
Texte ou icônes sur l’écran
La signalisation vocale sur le combiné et sur la base ne fonctionne que si
vous ne l’avez pas désactivée auparavant !
5.1
Réceptionner un appel
et , Prendre une communication
Terminer une communication
Si le combiné sonne, vous pouvez, en appuyant sur les touches
D ou E , modifier le volume de la sonnerie du combiné.
Si la sonnerie du combiné est désactivée, les communications entrantes ne sont signalisées que par l’intermédiaire de la base (dans la mesure où sa sonnerie n’a pas été
non plus désactivée).
31
− Téléphoner −
5.2
Mode mains−libres
Utilisez cette fonction pour téléphoner mains−libres par l’intermédiaire du haut−parleur.
Brancher ou débrancher la fonction pendant la
communication.
5.3
Réceptionner deux appels
Des signaux d’avertissement (signalisation d’appel en instance) vous indiquent qu’un autre appel
arrive pendant que vous téléphonez. L’écran vous affiche le numéro du deuxième correspondant.
La séquence de touches suivante vous permet de passer d’un correspondant à l’autre ; la liaison
continue d’être maintenue avec chaque correspondant.
, Changer de correspondant
Attention : L’affichage du numéro d’appel, le maintien de communications et la signalisation d’appel en instance sont des services confort de votre opérateur. Veuillez demander
de plus amples informations à votre opérateur, comme p. ex le temps de flash nécessaire.
5.4
Appeler un correspondant
Entrer le numéro d’appel (max. 32 chiffres)
Composer le numéro
Au cas où vous vous seriez trompé :
Brièvement : efface la dernière saisie.
2 sec Longuement : efface tout le numéro.
Vous pouvez également tout d’abord appuyer sur la touche de communication , vous obtenez ainsi la tonalité. Entrez ensuite le numéro de téléphone. Une correction des chiffres individuels n’est toutefois pas possible dans cette forme de saisie des numéros.
5.5
Pause de numérotation
Dans le cas d’installations à postes supplémentaires, il est nécessaire de composer un certain
numéro (par ex. le 9" ou le 0) pour obtenir la tonalité de ligne principale. Sur les quelques installations à postes supplémentaires plus anciennes, cela dure quelques instants jusqu’à ce que
vous entendiez la tonalité. Spécialement pour ces installations, après la prise de ligne, vous pouvez introduire une pause automatique afin de pouvoir continuer à composer directement le numéro sans devoir attendre la tonalité.
Entre le chiffre de la ligne principale et le numéro, appuyez une fois sur la touche . L’affichage
P" apparaît sur l’écran. Après la prise de ligne, votre téléphone attend 3 secondes pour composer
le numéro d’appel réel.
La pause peut également être enregistrée dans le répertoire lors de la saisie de numéros d’appel.
5.6
Répétition automatique des derniers numéros
Votre téléphone enregistre les 10 derniers numéros d’appel composés dans une liste de répétition automatique des derniers numéros.
Ouvrir la liste de répétition automatique des derniers
numéros (le numéro composé en dernier apparaît à
l’écran )
ou , Sélectionnez l’enregistrement et confirmez
Si un numéro est enregistré dans le répertoire, le nom enregistré apparaît à l’écran.
5.6.1 Effacer tous les numéros de la liste de répétition automatique des derniers
numéros
Naviguer dans la liste de répétition automatique des
derniers numéros
2 sec , Effacer toute la liste
5.6.2 Suppression d’un numéro d’appel issu de la liste de répétition des derniers
numéros
, ou Sélectionner l’enregistrement à effacer
,
Effacer un enregistrement individuel
5.7
Rappeler les appels manqués
Votre téléphone enregistre les 40 derniers appels dans une liste d’appels.
Ouvrir la liste d’appels et passer par les enregistrements
, ou Établir la connexion
32
− Téléphoner −
5.8
Composer des numéros enregistrés du répertoire
Des numéros enregistrés dans le répertoire (v. chap. 8.1) peuvent être appelés rapidement et
facilement.
, ou Ouvrir le répertoire et sélectionner l’enregistrement
Établir la connexion
Vous pouvez composer un enregistrement du répertoire de façon ciblée en appuyant,
dans la fonction répertoire, sur la touche lettrée qui correspond à l’initiale de l’enregistrement. Exemple : pour le numéro de téléphone de Peter", appuyez 1x sur et utilisez encore, le cas échéant, les touches ou pour accéder rapidement à l’enregistrement mémorisé.
5.9
Régler le volume sonore de l’écouteur
Vous disposez de 5 niveaux pour régler le volume pendant une communication.
ou Appuyez dessus pendant la communication.
5.10 Débranchement du microphone du combiné
Activer / Désactiver
Pendant une communication, vous pouvez brancher et débrancher le micro du combiné. De cette
façon, vous pouvez parler à une tierce personne sans que votre correspondant vous entende.
Le haut−parleur du combiné reste toutefois activé ; cela signifie que vous pouvez continuer à
écouter votre correspondant au téléphone !
5.11 Affichage de la durée de la communication
Quelques secondes après le début de votre communication, l’écran passe de l’affichage du numéro composé, ou du numéro entrant, à l’affichage de la durée de la communication (hh−mm−ss).
5.12 Verrouillage du clavier
3 sec Activer le verrouillage du clavier
2x
Débrancher le verrouillage du clavier
Lorsque le verrouillage du clavier est activé (v. également chap. 7.4) , vous pouvez continuer de
réceptionner des appels entrants. Le verrouillage du clavier reste actif après que vous avez raccroché.
5.13 Numérotation par tonalité temporaire
Si vous utilisez votre téléphone avec la numérotation décimale, vous n’avez pas besoin de renoncer aux avantages de la numérotation par fréquence vocale (par ex. pour la consultation à distance d’un répondeur).
4 sec Passage au système de numérotation par fréquence
vocale (le temps de la communication)
Au terme de la communication, le système passe à la numérotation par décimale.
5.14 Remarques sur la portée
La portée du combiné est d’env. 50 mètres en pièces fermées et d’env. 300 mètres à l’extérieur.
Si la liaison avec la base est bonne, l’icône h est allumée en permanence sur l’écran.
Si vous vous éloignez trop de la base, le symbole h clignote et vous entendez des
avertissements sonores. Rapprochez−vous de la base pour que la communication ne
soit pas interrompue.
apparaît à l’écran.
Si le combiné a perdu la liaison avec la base, le message Base 1
5.15 Comment chercher le combiné (Paging)
Si vous avez égaré votre combiné, vous pouvez le faire rechercher. Appuyez sur la touche de paging de la base pour entendre les signaux d’appel de votre combiné pendant 30 secondes. Appuyez à nouveau sur cette touche ou sur la touche de communication du combiné pour terminer
la fonction avant l’expiration des 30 secondes.
Tous les combinés déclarés sur la base sonnent.
ou Termine prématurément le Paging.
5.16 Activation / désactivation du combiné
3 sec Activer / Désactiver
Le branchement / débranchement n’est pas possible si le combiné est sur la base.
33
− Navigation dans le menu principal −
6
Navigation dans le menu principal
6.1
Navigation dans le menu
Vous pouvez accéder à toutes les fonctions via différents menus. Le chapitre 7 vous indiquera
comment accéder à la fonction de votre choix
1. Ouvrez le menu désiré ou le répertoire avec la touche adéquate.
2. Sélectionnez le sous−menu désiré avec la touche ou .
3. Ouvrez le sous−menu avec la touche .
4. Sélectionnez la fonction désirée avec la touche ou .
5. Ouvrez la fonction avec la touche .
6. Sélectionnez le réglage désiré avec la touche ou .
7. Entrez des chiffres ou des lettres via le pavé numérique.
8. Confirmez les entrées avec la touche .
9. Avec la touche vous reculez d’une position.
Toute opération est automatiquement interrompue si aucune saisie n’est effectuée pendant 20 secondes.
6.2
Signaux d’avertissement
Afin de vous en faciliter sa manipulation, votre téléphone est équipé de divers signaux tels que
signaux de confirmation, de remarque, d’avertissement et autres. Vous pouvez à votre gré activer
ou désactiver certains d’entre eux. Comme par exemple :
S Son des touches : Un son bref confirme que vous avez appuyé sur une touche de
votre combiné.
S Signal sonore d’avertissement Pile rechargeable vide : En cas de trop faible
capacité des piles, un signal sonore d’avertissement vous rappelle que vous devez
charger votre combiné.
S Signal sonore d’avertissement de la portée : Si vous vous êtes trop éloigné de la
base, vous entendez un signal sonore d’avertissement.
La structure de menu au chapitre 7.4. vous informe comment vous pouvez activer ou désactiver
cette fonction.
Il existe encore d’autres signaux qui vous facilitent la navigation dans le menu. Ils ne peuvent pas
être désactivés. Voici les principaux :
S Signal de confirmation : Deux signaux brefs ascendants signalisent à la fin de
la saisie que celle−ci a réussi.
S Signal sonore d’avertissement : Un long signal aigu que vous entendez après
avoir complètement navigué dans le menu signalise qu’il n’existe plus aucune autre
possibilité de sélection.
6.3
Exemple
L’exemple Écrire des textos" vous explique de façon plus détaillée comment naviguer dans le
menu et les sous−menus et comment effectuer des saisies. Pour tous les réglages, procédez
comme dans cet exemple.
Ouvrez le menu principal
Sélectionnez la fonction SMS et confirmez
ou SMS , ou Ecrire , Sélectionnez la fonction et confirmer (Menu SMS / Écrire)
Message ? , Acceptez la demande de saisie
Entrez le message et confirmez
Numéro ?
, Envoi 34
Acceptez la demande de saisie
Entrez le numéro et confirmez
Le message est envoyé
7
Structure de menu
Vous accédez au menu principal en appuyant sur la touche . Sélectionnez ensuite le sous−menu désiré avec les touches ou et confirmez votre
sélection au moyen de la touche . Ou entrez l’information demandée (les saisies propres sont par la suite imprimées en italique et caractérisées par ).
Votre saisie est généralement confirmée à la fin par un signal sonore .
7.1
Le répertoire
Répertoire
7.2
Nom ?
Nom xy
Nom xy
Numéro ?
Numéro xy
Confirmer ?
Mélodie 1−5
Mélodie 1−5
Messages écrits (SMS)
Réception
SMS Privé
Ecrire
Message ?
Effacer tout
Réception
SMS Privé
Confirmer ?
Confirmer ?
Config. SMS
Alerte Msg
Choix Serv.
N Réception
.N Emission
Num de Term
Répondre
Supprimer
Transférer
Détails
Texte
Activé
Désactivé
Emission 1
Emission 2
Réception 1
Réception 2
Emission 1
Emission 2
Numéro
Numéro ?
Numéro
(bip sonore SMS)
Numéro
Numéro
Numéro
Numéro
Envoi ...
− Structure de menu −
SMS
Ajouter
Modifier
Supprimer
35
36
7.3
Réglages
Réglages
Volume Base
Volume 1
Volume 2
Volume 3
Volume 4
Volume 5
Volume Coupé
Mélodie Base
Mélodie 2
Mélodie 3
Mélodie 4
Mélodie 5
Code Pin*
Code Pin*
Code Pin Ancien
CODE PIN
Nouv Pin
Numérotation
Fréq Vocales
Décimale
Réglage 1
Réglage 2
Régl. Défaut**
Code Pin
CODE PIN
Numéro du combiné
Nouveau
CODE PIN
Retaper
Nouveau CODE
PIN
CODE PIN
Confirmer ?
Tous les codes PIN sont paramétrés sur 0000 en usine. Si vous appuyez pendant deux secondes sur la touche , vous interrompez la programmation.
Prudence : Tous les paramétrages sont remis à l’état initial usine ! Tous les enregistrements de la liste sont effacés !
− Structure de menu −
Supp Combiné
Touche R
*
**
Mélodie 1
7.4
Combiné
Combiné
Bips
Bip Touche
Batt. Faible
Hors Portée
Activé
Désactivé
Activé
Désactivé
Activé
Désactivé
Volume 1 − 5 / Volume Coupé
Vol Son Ext
Volume 1 − 5 / Volume Coupé
Mélodie Int.
Mélodie 110
Mélodie Ext.
Mélodie 110
Réponse Auto*
Activé
Désactivé
Nom Combiné
ABC
Langue
English / Français
Español / Italiano
Deutsch / Nederlands
...
*
Verr Clavier
Type Rappel***
Long (32 chiffres)
Court (20 chiffres)
Activé**
ACTIVE : Une communication est réceptionnée dans la mesure où le combiné est pris de la base (réglage usine). Après la prise du combiné, toutes
les touches sont bloquées pendant quatre secondes.
DESACTIVE : Vous ne pouvez prendre une communication qu’avec la touche .
** Suppression du verrouillage du clavier : Touche Appuyer 2x dessus.
*** Dans la liste de répétion automatique des derniers numéros, un numéro d’appel est enregistré avec max. 32 ou 20 chiffres selon le réglage.
− Structure de menu −
Vol Son Int
37
38
7.5
Réglage de la date, de l’heure et de l’alarme
Date & Heure
7.6
Régl. Date
Date
Régl. Heure
hh−mm
Régl. Réveil
Désactivé
Activé
hh−mm
Déclarer la base et les combinés
Choix Base
Décl. Base
Base 1
Auto
Base 1 2 3 4
− Structure de menu −
Déclarer
− Le répertoire −
8
Le répertoire
Vous pouvez enregistrer 50 numéros avec nom dans le répertoire. Chaque numéro doit comprendre 24 chiffres maximum, chaque nom dispose de 12 lettres au maximum.
8.1
Entrer des numéros dans le répertoire
v. chap. 7.1
Si le nom est déjà enregistré dans le répertoire, un signal se fait entendre et Ajouter
apparaît à nouveau sur l’écran. Vous devez saisir un autre nom.
La mélodie se fait entendre à l’appel du correspondant enregistré. Cette attribution ne
fonctionne toutefois que si votre raccordement téléphonique et celui du correspondant
disposent d’un affichage du numéro d’appel CLIP.
8.1.1 Remarques sur l’enregistrement
Saisissez toujours les numéros d’appel avec l’indicatif afin que le téléphone puisse
aussi attribuer les communications locales à un enregistrement du répertoire.
Si la capacité de mémoire de 50 numéros est atteinte, l’écran affiche le message suivant au prochain enregistrement Mém. Pleine . Pour créer de la place, vous devez d’abord effacer un autre numéro.
8.1.2 Introduction du texte
Les touches chiffrées contiennent également des lettres. En appuyant plusieurs fois sur la touche
correspondante, vous pouvez saisir des majuscules ainsi que des chiffres.
Exemple : Vous désirez saisir le nom "Peter". Appuyez 1 x sur la touche , 2 x sur la touche
, 1 x sur la touche , 2 x sur la touche et 3 x sur la touche .
Remarques supplémentaires pour introduire le texte :
appuyer 1x : espace
appuyer 2x : trait d’union
efface la dernière saisie
ou font bouger le curseur
permute entre l’écriture en majuscules et en minuscules
Pour saisir deux fois la même lettre, saisissez la lettre adéquate et attendez ensuite que le curseur
passe automatiquement à la position suivante.
8.2
Modifier des enregistrements du répertoire
v. chap. 7.1
Pour sélectionner directement un enregistrement, appuyez sur la touche qui correspond à la première lettre de l’enregistrement. P. ex, pour composer directement le nom
Peter", appuyez 1x sur .
8.3
Effacer des enregistrements du répertoire
v. chap. 7.1
En appuyant sur la touche l’opération d’effacement est interrompue.
8.4
Composer un numéro à partir du répertoire
v. chap. 5.8
39
− Affichage du numéro d’appel (CLIP) −
9
Affichage du numéro d’appel (CLIP)
Si votre installation téléphonique dispose de la fonction CLIP (CLIP = Calling Line Identification
Presentation), votre écran affiche le numéro du correspondant appelant. Si vous avez enregistré
ce numéro dans votre répertoire, le nom enregistré est alors affiché. Si le correspondant a bloqué
la transmission de son numéro, celui−ci n’est pas affiché ; à sa place s’affiche le message suivant
Privé
.
Dans la liste d’appels, vous pouvez enregistrer 40 numéros au maximum. Si la liste est pleine,
c’est toujours le numéro d’appel le plus ancien qui est supprimé. Si, pendant votre absence, de
nouveaux numéros d’appel ont été enregistrés dans la liste d’appels, le symbole
. clignote
à l’écran.
Attention : L’affichage du numéro d’appel (CLIP) ainsi que l’affichage de la date et de
l’heure sont des services optionnels de votre opérateur. Veuillez lui demander de plus
amples informations.
9.1
La liste d’appels
9.1.1 Visualiser les numéros de la liste d’appels
Pour voir à l’écran les numéros de la liste d’appels, veuillez procéder comme suit :
Le numéro d’appel réceptionné en dernier apparaît a
l’écran.
Si la liste est vide, l’écran affiche le message Vide .
ou Vous pouvez composer d’autres numéros à partir de la
liste d’appels.
S’il n’existe pas d’autres numéros, vous entendez un signal sonore.
Deux icônes à l’écran vous informent de l’état des enregistrements :
L’appel a été pris.
L’appel n’a pas été pris.
En appuyant sur la touche vous obtenez, le cas échéant, des informations supplémentaires sur le numéro affiché :
S Si le numéro d’appel a plus de 12 positions, les chiffres restants sont affichés.
S Affiche la date et l’heure de l’appel si ces données ont été transmises par le
correspondant.
Avec la touche vous quittez la liste d’appels.
9.1.2 Appeler des numéros de la liste d’appels
Pour rappeler un numéro affiché directement de la liste d’appels, appuyez sur la touche .
9.1.3 Enregistrer dans le répertoire des numéros issus de la liste d’appels
Un numéro d’appel enregistré dans la liste d’appels peut être enregistré directement dans le répertoire.
, ou Composer le numéro d’appel
, , Ajouter ?
Nom ?
Déclencher l’enregistrement
, Saisir le nom et confirmer
(introduction du texte voir chap. 8.1.2)
Si le nom est déjà enregistré dans le répertoire, vous entendez un signal et l’écran affiche de nouveau le numéro sélectionné.
1234567890
Confirmer le numéro sélectionné
Mélodie 1
ou , Sélectionner la mélodie et confirmer
9.1.4 Effacer des numéros de la liste d’appels
, ou Composer le numéro d’appel
, Effacer ?
Déclencher l’opération de suppression et confirmer pour le
numéro d’appel sélectionné
9.1.5 Effacer tous les numéros de la liste d’appels
, ou Ouvrir la liste d’appels
3 sec , Effacer tout
40
Introduire l’effacement, confirmer
− Messages écrits (SMS) −
10
Messages écrits (SMS)
Vous pouvez à partir de votre téléphone par l’intermédiaire du réseau fixe envoyer de courts messages écrits (SMS = Short Message Service) de 160 caractères max., dans la mesure où les
conditions suivantes sont remplies :
S Votre raccordement téléphonique dispose de la fonction CLIP (v. chap. 9)
S Le service SMS a été activé par votre opérateur.
Veuillez noter que l’envoi de SMS est payant.
Vous recevrez la facture de votre opérateur.
Si vous envoyez un SMS à un autre raccordement d’un réseau fixe ne disposant pas
de service SMS ou dont le téléphone ne peut en recevoir, ce SMS est automatiquement envoyé comme message vocal.
Les envois SMS ne sont pas encore possibles avec les connexions d’appel par appel.
Votre opérateur vous donnera des informations détaillées sur l’envoi de SMS dans le réseau fixe.
10.1 Paramétrages des SMS
10.1.1 Centre de service
La distribution des messages SMS se fait par un centre de service. Swisscom", cablecom" et
d’autres exploitants de réseaux proposent ce service. Votre téléphone SWITEL est conçu pour
fonctionner avec Swisscom". Le numéro du centre de service de la Swisscom" est le 0622 100
000. La fonction SMS de la Swisscom" est déjà activée pour vous. Vous n’avez pas besoin de
la déclarer.
Pour utiliser les prestations d’un autre opérateur, vous devez programmer dans le menu de
nouveau numéros pour le centre de service d’envoi et de réception des SMS. La procédure de déclaration varie en fonction des fournisseurs. C’est pourquoi veuillez demander
au fournisseur de votre choix les numéros nécessaires et la façon de procéder pour déconnecter le centre de service SMS.
10.2 Envoi de messages SMS
v. chap. 7.2
Vous ne pouvez pas envoyer de messages SMS à partir d’une installation à postes
supplémentaires.
Si vous écrivez un nouvel SMS, le texte du SMS précédent apparaît à l’écran. Effacez
l’ancien texte avec la touche avant de saisir le nouveau texte.
Le chapitre 8.1.2. vous indique comment entrer des textes
10.3 Recevoir des SMS
v. chap. 7.2
Si vous ne pouvez pas recevoir de SMS, vous devez alors supprimer les derniers deux
chiffres du numéro programmé au centre de réception. Le numéro d’appel est alors le
0622 100 0.
Si vous avez reçu un nouveau texto, vous entendez un signal sonore typique aux SMS. En cas
de besoin, vous pouvez désactiver ce signal sonore (v. chap. 7.2). En outre, le symbole de l’enveloppe sur le display vous indique que vous avez reçu un nouveau message écrit.
10.4 Gérer les messages écrits
Vous pouvez enregistrer en tout 15 messages rapides au maximum (répertoire d’entrée général et boîte postale SMS personnelle ensemble).
Si toutes les places de mémoire sont occupées, l’enregistrement le plus ancien de
chaque répertoire sera effacé à l’arrivée d’un nouveau texto.
10.5 Boîte postale SMS personnelle
Outre le répertoire général d’arrivée, une boîte postale SMS personnelle est tenue à votre disposition. Cette fonction vous permet de recevoir et d’envoyer des SMS auxquels vous−même uniquement avez accès.
Vous ne pouvez utiliser cette boîte postale que si votre opérateur supporte cette fonction. Ce dernier vous renseignera sur la manière dont vous pouvez installer votre boîte
postale personnelle.
41
− Plusieurs combinés −
11
Plusieurs combinés
Vous pouvez déclarer cinq combinés sur votre base.
Chaque combiné peut être déclaré simultanément sur quatre bases.
Via le GAP Standard normalisé sur le plan international, les combinés SWITEL et également ceux de fabricants étrangers peuvent être intégrés dans le système téléphonique. De la même façon, vous pouvez déclarer un combiné SWITEL sur des bases
d’autres fabricants, dans la mesure où ces appareils fonctionnent selon le standard
GAP.
L’utilisation de plusieurs combinés vous offrent les possibilités suivantes :
S Communications internes entre les combinés.
S Les communications externes peuvent être transférées d’un combiné à l’autre.
S Les communications externes qui vous parviennent sont signalées à tous les
combinés.
S Conférence avec un téléphone externe et deux téléphones internes.
Si un autre combiné utilise déjà la ligne externe, le symbole EXT apparaît à l’écran.
Une autre communication externe n’est alors pas possible.
11.1 Communication interne
Dès que vous avez déclaré plusieurs combinés (en abrégé par la suite : CB) sur la base, vous
pouvez passer des communications internes gratuites. Exemple suivant : CB 1 ( N° interne 1) appelle CB 2 (N° interne 2).
CB 1 : Établissement de la communication vers un autre
, 2
combiné
CB 2 : Réceptionne l’appel
Si un appel externe vous parvient pendant une communication interne, vous entendez
de cours signaux sonores et vous voyez à l’écran le numéro d’appel du correspondant
si celui−ci est disponible.
Termine la communication interne
Prend l’appel externe
11.2 Comment transférer des communications externes à des internes
Si vous avez pris une communication externe sur un combiné, vous pouvez transférer cette communication à un autre combiné interne.
CB 1 : Établissement de la communication vers un autre
, 2
combiné
Si le combiné appelé ne réagit pas, vous pouvez reprendre la communication en appuyant sur la touche I.
Après que vous avez réceptionné la communication interne sur le combiné appelé, vous avez les
possibilités suivantes :
11.2.1 Intercommunication / Va−et−vient
Vous pouvez maintenant parler avec le correspondant interne et revenir au correspondant externe en appuyant sur la touche . Vous pouvez passer aussi souvent que vous le désirez de
la communication externe à la communication interne.
11.2.2 Transférer une communication
En appuyant sur la touche sur le premier combiné, la communication externe est transférée
au combiné appelé.
42
− Plusieurs combinés −
11.3 Comment mener des conférences téléphoniques
Une communication externe peut être branchée sur un autre correspondant interne dans le but
de mener une conférence. Ainsi, deux combinés peuvent parler simultanément avec le correspondant externe.
CB 1 : Établir la communication vers le correspondant
externe
, 2
CB 1 : Établissement de la communication vers un autre
combiné
CB 2 : Réceptionne un appel interne
CB 1 : Les commute tous pour mener une conférence
Pendant une conférence, vous pouvez mettre le correspondant externe en attente en
appuyant sur la touche . En appuyant successivement sur les touches et
, vous repassez en conférence.
CB 1 ou CB 2 : Termine la conférence en raccrochant.
11.4 Déclarer et annuler des combinés
11.4.1 Déclaration d’autres combinés de type DC42
3 sec Vous déclenchez la déclaration en appuyant sur la touche
de paging de la base.
À partir du moment où vous avez appuyé sur la touche de paging, vous avez 90 secondes pour déclarer votre combiné :
, , Sélectionner le menu Déclarer
ou , , Sélectionner le menu Décl. Base
et le confirmer.
Saisissez le numéro de la base (1 à 4) et confirmez la
saisie.
Si le combiné est déjà relié à une base, les numéros correspondants clignotent.
La base est maintenant recherchée.
Lorsque la base est trouvée, procédez comme suit :
Entrez le code PIN (réglage usine : 0000) et confirmez la
saisie. Le combiné est maintenant déclaré.
Un numéro d’appel interne est attribué au combiné. Le combiné déjà déclaré possède
le numéro d’appel interne 1. Le deuxième combiné déjà déclaré reçoit le numéro d’appel interne 2. En mode d’attente, le numéro d’appel interne est affiché à droite sur
l’écran.
11.4.2 Déclarer des combinés DECT−GAP d’autres fabricants
Pour déclarer un combiné DECT−GAP d’un autre fabricant, suivez les indications de son mode
d’emploi et appuyez ensuite pendant 3 secondes sur la touche de paging de votre base. Utilisez le code PIN pour la déclaration (réglage usine: 0000).
11.4.3 Annuler des combinés
Un combiné ne peut être annulé que par l’intermédiaire d’un autre combiné encore déclaré. Il n’est
pas possible d’exécuter cette annulation avec le combiné qui doit être annulé.
, ou , Sélectionner le menu Réglages
ou , Sélectionner le menu Supp Combiné et le confirmer.
Entrez le code PIN (réglage usine : 0000) et confirmez la
saisie. Interrompez l’opération avec la touche .
, Saisissez le numéro interne du combiné à annuler et
confirmez la saisie. 43
− Plusieurs combinés −
11.5 Bases supplémentaires
Si vous utilisez plusieurs bases, vous pouvez augmenter la portée du combiné. Pour tirer parti
de cet effet, toutes les bases doivent être raccordées à un même raccordement téléphonique. Selon l’objectif d’utilisation, vous pouvez attribuer à chaque base le même numéro de téléphone ou
donner à ces bases des numéros d’appel différents. Veuillez à ce que toutes les portées des bases se recoupent.
Le combiné doit être déclaré à chaque base !
Veuillez tester la portée du combiné avant la mise en service d’une nouvelle base. Si un combiné
est déclaré sur une base et que la numérotation automatique de la base a été activée sur le combiné, (v chap. 7.6), ce combiné sera toujours automatiquement transféré à la prochaine base.
11.5.1 Sélectionner une base
ou , Sélectionner le menu Déclarer
ou , Sélectionner le menu Choix Base et le confirmer.
Toutes les bases sur lesquelles le combiné est déjà déclaré apparaissent à l’écran. Le
numéro de la base active clignote.
, Saisissez le numéro interne de la base sur laquelle le
combiné doit être permuté et confirmez la saisie. Ou :
Dans ce réglage, le combiné passe automatiquement à la
ou Auto , base suivante quand la liaison avec la base actuelle
s’interrompt.
44
− Réglages−
12
Réglages
12.1
Réglages usine
Langue :
Allemand
Centre de réception SMS 1 : 06221000
Nom du combiné :
DC42 1
Centre de réception SMS 2 : Vide
Volume sonore de la
sonnerie du combiné :
3
Centre d’envoi SMS 1 :
06221000
Mélodie d’appel externe : 3
Centre d’envoi SMS 2 :
Vide
Mélodie d’appel interne :
1
Signal de réception SMS : Activé
Volume de la sonnerie
base :
3
Signal sonore d’avertissement
pile rechargeable :
Activé
Mélodie d’appel base :
2
Volume sonore de
l’écouteur :
3
PIN :
0000
Système de
numérotation :
Tonalité (FV)
Temps de flash 1
(Standard) :
90 ms
Signal sonore d’avertissement
portée :
Arrêt
Son des touches :
Activé
Verrouillage du clavier
Arrêt
Prise d’appel automatique : Activé
Heure/ alarme réveil :
Arrêt
Temps de flash 2 :
250 ms
Pause :
3 secondes
Vous pouvez remettre le combiné et la base sur le réglage usine.
Vous trouverez la façon de procéder au chapitre 7.3.
Tenez compte du fait que le répertoire, la liste d’appels et tous les numéros d’appels de
la répétition automatique des derniers numéros seront effacés !
12.2 Code PIN
Le code PIN peut se composer d’un nombre de 1 à 4 chiffres. Le réglage usine du code PIN est
"0000".
Si vous modifiez le code PIN, conservez bien le nouveau code. Sans code PIN, vous
ne pouvez plus utiliser beaucoup de fonctions du téléphone !
12.3 Temps de flash
Le temps de flash décrit la durée du son produit en appuyant sur une touche du téléphone. Pour
que votre installation téléphonique fonctionne parfaitement, il se peut que le réglage du temps de
flash soit nécessaire.
C’est pourquoi vous pouvez régler deux temps de flash différents afin d’utiliser des fonctions de
vos installations à postes supplémentaires ou des services confort de votre opérateur (v. également chap. 2.7 ). Vous avez la possibilité de choisir entre un temps de flash de 90 ms (réglage
standard) et un temps de flash de 250 ms. Le chapitre 7.3 vous indique comment régler les temps
de flash (v. également chap. 12.1).
12.4 Nom du combiné
Vous pouvez programmer un nom personnel pour votre combiné.
Celui−ci peut comprendre 10 caractères au maximum.
45
− Elimination des perturbations −
13
Elimination des perturbations
Si vous avez des problèmes avec votre téléphone, contrôlez tout d’abord les possibilités suivantes :
Erreurs
Solutions
Pas
de communication
téléphonique
possible.
−
−
Le câble du téléphone n’est pas correctement branché ou
est soumis à des perturbations. N’utilisez que le câble de
raccordement téléphonique fourni avec l’appareil.
Testez avec un autre téléphone si votre raccordement
téléphonique fonctionne.
Le bloc d’alimentation enfichable n’est pas branché ou il y a
une panne totale de courant.
Les piles rechargeables standard sont vides ou défectueuses.
Vous vous êtes trop éloigné de la base.
−
−
Vous vous êtes trop éloigné de la base.
Mauvais lieu d’installation de la base.
−
−
−
Connexion hachée, supprimée.
Pas de possibilité de com- −
poser un numéro.
Erreur de réglage du système de numérotation.
Le système ne réagit plus
ou il se trouve dans un
état indéfini.
−
Rétablissez les réglages usine (v. chap. 12.1). Retirez tout
d’abord temporairement le bloc d’alimentation de la prise
secteur.
Le voyant de contrôle de
charge n’est pas allumé.
−
Placez le combiné correctement sur la base, nettoyez les
surfaces de contact du combiné et de la base avec un chiffon sec et doux.
L’icône de pile à l’écran
clignote au bout de quelques heures.
−
Placez le combiné pendant 14 heures sur la base. Si cela
ne sert à rien, remplacez les piles par des nouvelles.
L’affichage de l’écran est
foncé.
−
Causé par l’ensoleillement.
Faîtes refroidir le combiné.
L’affichage du numéro
d’appel (CLIP) ne fonctionne pas.
−
L’affichage du numéro d’appel est un service optionnel de
votre exploitant de réseau. Veuillez lui demander de plus
amples informations.
Le correspondant a bloqué la transmission de son numéro
d’appel.
−
46
− Informations importantes −
14
Informations importantes
14.1
Données techniques
Caractéristique
Standard
Alimentation en courant de la
base
Portée (à l’extérieur / à l’intérieur)
Etat de veille
Durée max. de communication
Piles rechargeables standard
Numérotation
Température ambiante autorisée
Humidité atmosphérique relative
autorisée
Fonction de flash
Valeur
DECT−GAP
220/230 V, 50 Hz
300 m / 50 m
Jusqu’à 109 h
Jusqu’à 10 h
2 x AAA (1.2V / 550 mAh)
Numérotation par fréquence vocale (FV)
ou décimale (DC)
10°C à 30°C
20% à 75%
90 ms / 250 ms
Abréviations :
DECT :
Digital Enhanced Cordless Telephone
(standard pour les téléphones sans fil).
GAP :
Generic Access Profile
(standard pour l’action conjointe de combiné et de bases d’autres fabricants).
47
− Index −
15
Index
A
Affichage du numéro d’appel (CLIP), 40
Alarme réveil, 45
Annuler des combinés, 43
Appeler des numéros de la liste d’appels, 40
Appeler un correspondant, 32
B
Bases supplémentaires, 44
Boîte postale SMS personnelle, 41
C
Capacité de mémoire liste d’appels, 40
Capacité de mémoire Répertoire, 39
Centre d’envoi des SMS, 35, 45
Centre de réception des SMS, 35, 45
Centre de service SMS, 41
Chargement des piles rechargeables, 29
CLIP, 40
CLIP Informations détaillées, 40
Code PIN, 36, 45
Combiné, 37
Comment chercher le combiné, 33
Comment mener des conférences
téléphoniques, 43
Comment transférer des communications externes à des internes, 42
Communication externe, 31
Communication interne, 31, 42
Composer des numéros du répertoire, 33
Composer directement les enregistrements du
répertoire, 33
Confirmer les saisies, 34
Consignes de sécurité, 28
Contenu de l’emballage, 29
Créer des enregistrements du répertoire, 35
D
DC, 36
Débranchement du microphone, 33
Déclaration de combinés, 43
Déclarer des combinés DECT−GAP d’autres fabricants, 43
Déclarer et annuler des combinés, 43
Déclarer la base et les combinés, 38
DECT, 47
Données techniques, 47
Durée de la communication, 33
48
E
Écran, 31
Ecrire des SMS, 35
Écrire des SMS, 34
Effacer des enregistrements du répertoire, 35, 39
Effacer des numéros de la liste d’appels, 40
Effacer des SMS, 35
Effacer la dernière saisie, 32
Éléments de manipulation, 30
Elimination des perturbations , 46
Enregistrer dans le répertoire des numéros issus
de la liste d’appels, 40
Enregistrer des numéros d’appel, 39
Entrer des numéros dans le répertoire, 39
Entrer le numéro de l’appareil, 35
Envoi de messages SMS, 41
F
FV, 36
G
GAP, 42, 47
Gérer les messages écrits, 41
Gérer les SMS, 41
H
Haut−parleur combiné, 33
Heure, 31, 45
I
Installations à postes supplémentaires, 29, 32
Intercommunication / Va−et−vient, 42
Interrompre l’opération, 34
Introduction du texte, 39
K
Key lock, 31
L
Langue, 45
Ligne principale, 32
Liste d’appels, 31, 40
Longueur du numéro, 31
− Index −
M
Mélodie d’appel base, 45
Mélodie d’appel externe, 45
Mélodie d’appel interne, 45
Menu principal, 31
Messages écrits , 41
Mode mains−libres, 32
Modifier des enregistrements du répertoire, 35, 39
N
Navigation, 34
Niveau de chargement des piles, 31
Niveau de chargement des piles
rechargeables, 29
Nom combiné, 31
Nom du combiné, 37, 45
Numérotation vocale (FV), 36
O
Ouvrir le menu principal, 34
P
Paging, 33
Paramétrages des SMS, 41
Paramétrer des SMS, 35
Pause, 32, 45
Pause de numérotation, 32, 45
Placer les piles, 29
Plusieurs combinés, 42
Portée, 31, 33
Prise d’appel automatique, 37, 45
Q
Quitter la liste d’appels, 40
R
Raccordement de la base, 29
Raccordement téléphonique analogique, 29
Raccordement téléphonique numérique, 29
Rappeler les appels manqués, 32
Réceptionner des appels , 31
Recevoir des SMS, 35
Recevoir des SMS , 41
Réglage de l’alarme, 38
Réglage de l’heure, 38
Réglage de la date, 38
Réglage de la mélodie d’appel, 36
Réglage du volume sonore, 36
Réglage usine, 36
Réglages, 36, 45
Réglages usine, 45
Régler l’alarme, 37
Régler l’heure, 37
Régler la langue, 37
Régler la mélodie d’appel, 37
Régler le volume sonore, 37
Répertoire, 31, 35, 39
Répétition automatique des derniers numéros, 32
Répondeur Consultation à distance, 33
Représentation, 31
Représentation des icônes des touches, 30
S
Sélectionner des sous−menus, 34
Sélectionner le mode d’envoi des SMS, 35
Sélectionner une base, 44
Signal d’entrée des SMS, 41
Signal de confirmation, 34
Signal de réception SMS, 45
Signal sonore d’avertissement, 34
Signal sonore d’avertissement "Pile rechargeable
vide", 34, 37, 45
Signal sonore d’avertissement de la portée, 34, 37
Signal sonore d’avertissement portée, 45
Signalisation d’appel en instance, 32
Signaux, 34
Signaux d’avertissement, 34
SMS, 35, 41
SMS − Affichage de nouveaux messages, 31
SMS envoyé comme message vocal, 41
Son des touches, 34, 45
Supprimer le combiné, 36
Système de numérotation, 45
Système de numérotation décimale (DC), 36
Système de numérotation décimale (DC) , 29
Système de numérotation par fréquence vocale
(FV), 29
Système de numérotation par tonalité (FV) , 33
T
Téléphoner, 31
Temps de flash, 36, 45
Tonalité des touches, 37
Touche R, 29, 32
Transférer une communication, 42
V
Verrouillage du clavier, 31, 33, 37, 45
Visualiser les numéros de la liste d’appels, 40
Volume de la sonnerie base, 45
Volume sonore de l’écouteur, 33, 45
Volume sonore de la sonnerie du combiné, 45
49
− Index −
50
2
− Sommario −
1
Indicazioni di sicurezza . . . . . . . . . . . . . . . . . . . . . . . . . . . . . .
52
2
Messa in funzione . . . . . . . . . . . . . . . . . . . . . . . . . . . . . . . . . .
53
3
5
Elementi di comando . . . . . . . . . . . . . . . . . . . . . . . . . . . . . . . .
Display . . . . . . . . . . . . . . . . . . . . . . . . . . . . . . . . . . . . . . . . . . . .
54
55
6
Compiere telefonate . . . . . . . . . . . . . . . . . . . . . . . . . . . . . . . .
55
7
8
Navigazione nel menu principale . . . . . . . . . . . . . . . . . . . . .
Struttura di menu . . . . . . . . . . . . . . . . . . . . . . . . . . . . . . . . . . .
58
59
9
La rubrica telefonica . . . . . . . . . . . . . . . . . . . . . . . . . . . . . . . .
63
10
11
Visualizzazione del numero di chiamata (CLIP) . . . . . . . . .
Messaggi di testo (SMS) . . . . . . . . . . . . . . . . . . . . . . . . . . . .
64
66
12
Maggior numero di unità portatili . . . . . . . . . . . . . . . . . . . . . .
67
13
Impostazioni . . . . . . . . . . . . . . . . . . . . . . . . . . . . . . . . . . . . . . .
70
14
Eliminazione di errori . . . . . . . . . . . . . . . . . . . . . . . . . . . . . . . .
71
15
16
Informazioni importanti . . . . . . . . . . . . . . . . . . . . . . . . . . . . . .
Indice . . . . . . . . . . . . . . . . . . . . . . . . . . . . . . . . . . . . . . . . . . . . .
72
73
51
− Indicazioni di sicurezza −
1
Indicazioni di sicurezza
Leggere attentamente le presenti istruzioni per l’uso.
1.1
Impiego conforme agli usi previsti
Il presente apparecchio consente di compiere telefonate all’interno di una rete di telecomunicazione. Qualsiasi altro impiego è considerato come non conforme agli usi previsti. Non sono consentite modifiche o trasformazioni non autorizzate. Non aprire per nessuna ragione l’apparecchio
autonomamente ed evitare di svolgere riparazioni di propria iniziativa.
1.2
Luogo di installazione
Il telefono è stato progettato per l’uso in campo chiuso con una temperatura compresa tra 10° C
e 30° C. Si consiglia di evitare l’uso della stazione base in ambienti esposti a umidità come bagno
e locali di lavaggio. Evitare un’esposizione a fumo, polvere, vibrazioni, sostanze chimiche, umidità, calore e raggi solari diretti. Posizionare la stazione base con una distanza di 1 m da altre apparecchiature elettroniche onde evitare interferenze reciproche.
Non utilizzare l’unità portatile in aree esposte al rischio di deflagrazione.
1.3
Alimentatore di rete
Utilizzare solo l’alimentatore a spina fornito in dotazione visto che altri alimentatori di
rete potrebbero addirittura danneggiare il telefono. Non ostacolare il libero accesso
all’alimentatore a spina con mobili o altri oggetti simili.
1.4
Cavo di collegamento telefonico
Osservare un’identica disposizione degli attacchi in caso di sostituzione del cavo di collegamento
telefonico fornito.
1.5
Batterie ricaricabili
Non gettare le batterie ricaricabili nel fuoco, né sommergerle in acqua.
1.6
Caduta di tensione
In caso di caduta di tensione non è possibile impiegare l’unità per telefonare. Si consiglia di ricorrere in caso di emergenza ad un telefono con filo in grado di funzionare anche senza alimentazione elettrica esterna.
1.7
Impianti telefonici interni
È possibile collegare il telefono ad un impianto telefonico interno. Non è comunque possibile garantire che il telefono funzioni con qualsiasi tipo di impianto telefonico interno.
1.8
Avvertenza per apparecchiature mediche
Evitare di utilizzare il telefono nelle vicinanze di apparecchiature mediche. Non è possibile escludere completamente il rischio di un influsso su cardiostimolatori. Telefoni DECT* possono causare un fastidioso ronzio in presenza di apparecchi acustici.
1.9
Pulizia e cura
Pulire le superfici degli apparecchi con un panno morbido e antipilling. Non utilizzare mai detergenti o solventi. I piedini in gomma della stazione base non sono resistenti a qualsiasi detergente.
1.10 Smaltimento
Sussiste l’obbligo legislativo al corretto smaltimento di beni di consumo. Il simbolo riportato
sul telefono e raffigurato qui a lato indica che apparecchi usati elettrici ed elettronici e
batterie esauste non sono da smaltire assieme ai normali rifiuti domestici.
Procedere allo smaltimento di apparecchi elettrici o elettronici presso un centro di raccolta incaricato con lo smaltimento conforme.
Consegnare batterie ed accumulatori per lo smaltimento presso rivenditori al
dettaglio di batterie o centri di raccolta che mettono a disposizione appositi contenitori.
Smaltire confezioni ed imballaggi in base a quanto indicato dalle norme in vigore a livello
locale.
* DECT: Digital Enhanced Cordless Telephone = Standard per telefoni senza cavo.
52
− Messa in funzione −
2
Messa in funzione
2.1
Indicazioni di sicurezza
Attenzione: Prima della messa in funzione, leggere attentamente le indicazioni di sicurezza riportate al capitolo 1.
2.2
Verificare il contenuto della confezione
La confezione contiene:
−
una stazione base
−
un cavo di collegamento telefonico
−
un’unità portatile
−
due batterie ricaricabili
−
un alimentatore di rete
−
un manuale di istruzioni per l’uso
2.3
Collegare la stazione base
Posizionare la stazione base nelle vicinanze di una presa di collegamento telefonico e di una
presa elettrica. Utilizzare a tale scopo soltanto i componenti forniti in dotazione.
1. Introdurre il connettore piccolo dell’alimentatore di rete nella rispettiva presa
presente sul lato inferiore della stazione base.
Grazie alla particolare costruzione non può succedere di collegare i connettori in
maniera errata causando un’inversione delle polarità. I connettori devono scattare in
maniera udibile nelle prese della stazione base.
2. Introdurre il connettore piccolo del cavo di collegamento telefonico nella rispettiva
presa presente sul lato inferiore della stazione base.
3. Introdurre entrambi i cavi sul lato inferiore della stazione base nelle apposite
canaline presenti sul retro.
4. Inserire l’alimentatore in una presa elettrica da 230 Volt installata in conformità alle
disposizioni.
L’alimentatore della stazione base deve rimanere sempre collegato.
5. Collegare il cavo di collegamento telefonico accluso con il jack telefonico.
2.4
Inserire le batterie
Inserire due batterie del tipo AAA Ni−MH 1,2 V 550 mAh nel
vano batterie aperto. Osservare la corretta polarità (vedi figura)! Chiudere infine il vano batterie.
Importante: Non utilizzare batterie di tipo diverso!
2.5
Caricare le batterie
Posizionare l’unità portatile in sede di prima messa in funzione per minimo 14 ore nella stazione
base (display verso sopra). Presso la stazione base si accende la spia di controllo dello stato di
carica. L’unità portatile si surriscalda durante il processo di carica. Questo è un fenomeno normale
e non pericoloso. Evitare di caricare l’unità portatile con dispositivi di carica differenti o estranei.
L’uso di batterie standard non ricaricate in maniera corretta può causare difetti o guasti al telefono.
Lo stato di carica attuale è visualizzato sul display:
Carico
A metà
Debole
Scarico
2.6
Procedura di selezione a toni (MF) o a impulsi (DC)
Il telefono è collegabile sia a prese analogiche (procedura di selezione a impulsi) sia a prese digitali (procedura di selezione a toni). L’impostazione di base dell’apparecchio prevede la procedura
di selezione a toni digitale. Nel caso di mancato funzionamento del telefono presso la propria
presa, consultare il capitolo 7.3 per ottenere le indicazioni necessarie per passare alla procedura
di selezione a impulsi.
2.7
Esercizio in impianti telefonici interni
Se il proprio telefono risulta collegato ad un impianto telefonico interno, il tasto R consente di
compiere il trasferimento di chiamate oppure di utilizzare la funzione di richiamata automatica. Il
rivenditore specializzato è in grado di indicare se il telefono acquistato funzionerà senza alcun
problema nel proprio impianto telefonico interno.
53
− Elementi di comando −
3
Elementi di comando
3.1
Unità portatile
Visualizzazione di chiamata
Display
Funzione vivavoce
Tasto menu e tasto OK
Rubrica telefonica
Tasto cancelletto (per chiamate a conferenza)
Chiamate interne
Funzione di muting e Cancella / Indietro
Tasto di selezione: Scorrere il menu verso sopra e
Elenco chiamate / Ripetizione di selezione / Pausa
Tasto di chiamata
Tasto di selezione: Scorrere il menu verso sotto /
Elenco chiamate
Blocco tastiera (ON / OFF)
Tasto di segnalazione R (unità portatile ON / OFF)
1
2
3
4
5
6
7
8
9
10
11
12
13
1
2
8
9
10
Stazione base
1 Tasto di ricerca unità portatile (tasto di paging)
2 LED di visualizzazione chiamata e rete
3 LED di controllo della funzione di carica
c/
/
P/
4
5
11
12
13
3.2
3
6
7
1
2
3
Riguardo la seguente modalità di rappresentazione:
Per una migliore leggibilità i tasti del telefono sono raffigurati qui di seguito con un contorno rettangolare uniforme. I simboli dei tasti utilizzati possono pertanto discostarsi leggermente dall’ottica dei tasti del proprio telefono. Ad ogni modo è possibile riconoscere i tasti.
54
− Display −
4
Display
Il display indica le funzioni più importanti attraverso simboli e messaggi vari.
Simbolo
12−10
DC42 1
Descrizione
Visualizzazione dell’orario
Identificazione dell’unità portatile
Spia sempre accesa: Indicazione dello stato di carica delle batterie.
Indicazione lampeggia: Procedere al caricamento delle batterie.
Segmenti che scorrono: Batterie in corso di caricamento.
Spia sempre accesa: Il collegamento con la stazione base è buono.
Indicazione lampeggia: Superata la portata della stazione base.
Chiamata telefonica in corso.
Spia sempre accesa: Chiamata telefonica esterna in corso.
Indicazione lampeggia: Chiamata telefonica esterna in arrivo.
Spia sempre accesa: Chiamata telefonica interna in corso.
Indicazione lampeggia: Chiamata telefonica interna in arrivo.
Spia sempre accesa: Ci si trova nell’elenco chiamate. La voce non è stata
ancora vista.
Indicazione lampeggia: Nuove chiamate nell’elenco chiamate.
Il numero di chiamata ha più di 12 cifre.
Non è stato risposto alla chiamata.
Il numero è riportato nell’elenco chiamate.
È stato risposto alla chiamata.
Il numero è riportato nell’elenco chiamate.
Ci si trova nel menu principale.
Ci si trova nella rubrica telefonica.
È stato ricevuto un messaggio di testo nuovo.
Il blocco tastiera è attivato.
L’allarme è stato attivato.
5
Compiere telefonate
Il funzionamento del nuovo telefono è descritto attraverso testi e simboli indicati qui di seguito. La
raffigurazione di un simbolo di tasto indica che è necessario premere il rispettivo tasto.
In più si ricorre ai seguenti simboli:
Immissione di numeri o lettere
2 sec Premere il tasto raffigurato per 2 secondi
Segnalazione acustica presso l’unità portatile
Segnalazione acustica presso la stazione base
Rubrica
oppure
Testo o simboli sul display
La segnalazione acustica presso unità portatile e stazione base opera solo
se la funzione non è stata precedentemente disattivata!
5.1
Ricevere una chiamata
e , Ricevere la chiamata telefonica
Concludere la chiamata telefonica
Se l’unità portatile squilla, premendo il tasto
D o E è possibile modificare il volume del segnale di chiamata dell’unità portatile.
Avendo disattivato il segnale di chiamata presso l’unità portatile, le chiamate in arrivo
sono segnalate solo presso la stazione base (purché la segnalazione acustica di chiamata non sia stata anche qui disattivata).
55
− Compiere telefonate −
5.2
Funzione vivavoce
Questa funzione consente di telefonare a mani libere attraverso l’altoparlante integrato.
Attivare o disattivare la funzione durante la conversazione.
5.3
Ricevere due chiamate
Dei segnali acustici (avviso di chiamata) indicano la ricezione di una seconda chiamata durante lo
svolgimento della prima telefonata. Sul display viene visualizzato il numero del secondo chiamante.
La seguente combinazione di tasti consente di passare, in presenza di due interlocutori di chiamata,
da un partner all’altro trattenendo rispettivamente il collegamento con l’altro partner di chiamata.
, Cambiare il partner di chiamata
Attenzione: La visualizzazione del numero di chiamata, le funzioni di trattenimento e
avviso di chiamata sono servizi a valore aggiunto del proprio gestore di rete telefonica.
Per ulteriori informazioni, come per es. riguardo il tempo flash richiesto, si prega di rivolgersi al proprio gestore di rete telefonica.
5.4
Condurre chiamate
Immettere un numero di chiamata (max 32 cifre)
Selezionare un numero di chiamata
Nel caso di inserimento errato:
Breve: Cancella l’ultimo inserimento
2 sec Lungo: Cancella l’intero numero
È altresì possibile premere prima il tasto di chiamata e ricevere il segnale di linea libera. Inserire quindi il numero telefonico. Con una simile immissione di numeri non è possibile eseguire una
correzione di singole cifre che compongono il numero di chiamata.
5.5
Pausa di selezione
In presenza di impianti telefonici interni è necessario selezionare un determinato numero (per es. 9"
o 0) prima di ottenere un segnale di libero che indica la disponibilità della linea di collegamento di
rete. Alcuni impianti telefonici interni di vecchia data richiedono un intervallo di tempo prima di trasmettere un segnale di libero. In particolare, proprio per questi impianti telefonici interni è possibile prevedere, una volta ottenuto il segnale di linea libera, una pausa automatica che consente di comporre
il numero di chiamata desiderato senza dover necessariamente attendere il segnale di libero.
Premere tra la cifra per il segnale dalla centrale ed il numero di chiamata una volta il tasto .
Sul display viene visualizzato P". Una volta ottenuto il segnale di linea libera, il telefono aspetta
3 secondi prima di procedere con la selezione del numero che si desidera chiamare.
La pausa è anche programmabile in sede di immissione dei numeri di chiamata nella
rubrica telefonica.
5.6
Ripetizione di selezione
Il telefono memorizza gli ultimi 10 numeri di chiamata selezionati in un elenco disponibile per la
funzione di ripetizione di chiamata.
Aprire l’elenco di ripetizione di chiamata (il numero di
chiamata composto per ultimo appare sul display)
o , Scegliere la voce e instaurare un collegamento
Se il numero di chiamata è inserito nella rubrica telefonica, sul display appare il nome
rispettivamente memorizzato.
5.6.1 Cancellare tutti i numeri di chiamata dall’elenco di ripetizione di chiamata
Passare all’elenco di ripetizione di chiamata
2 sec , Cancellare tutta la lista
5.6.2 Cancellare un numero di chiamata dall’elenco di ripetizione di chiamata
,o
Selezionare la voce da cancellare
,
Cancellare una singola voce
5.7
Selezionare numeri di chiamate perse
Il telefono memorizza le ultime 40 chiamate in un elenco chiamate.
, o Aprire l’elenco chiamate e scorrere le voci memorizzate
Selezionare un collegamento
5.8
Selezionare numeri di chiamata memorizzati dalla rubrica telefonica
Numeri di chiamata memorizzati nella rubrica telefonica (vedi cap. 8.1) sono disponibili in
maniera rapida e semplice.
56
− Compiere telefonate −
, o Aprire la rubrica telefonica e scegliere una voce
dall’elenco telefonico
Selezionare un collegamento
È possibile selezionare direttamente le voci presenti nella rubrica telefonica premendo
dopo il richiamo della rubrica telefonica il tasto con la lettera iniziale della voce che si desidera chiamare. Esempio: Per il numero telefonico di Peter" premere 1x e utilizzare
se necessario anche i tasti o per passare rapidamente alla voce memorizzata.
5.9
Impostare il volume del ricevitore
Il volume è regolabile durante lo svolgimento di una chiamata in cinque livelli.
o
Premere con chiamata in corso
5.10 Silenziamento del microfono nell’unità portatile
Attivare / Disattivare
Con chiamata telefonica in corso è possibile attivare o disattivare il microfono dell’unità portatile.
In tal modo si ci può per es. consultare con una terza persona mentre è in corso una chiamata
con un altro interlocutore che non ha quindi modo di intercettare il parlato. L’altoparlante dell’unità
portatile rimane però attivato; ciò significa che è possibile sentire il partner di chiamata!
5.11 Visualizzazione della durata di conversazione
Alcuni secondi dopo l’inizio di una chiamata il display passa automaticamente dalla visualizzazione del numero di chiamata selezionato o ricevuto alla visualizzazione della durata di conversazione (hh−mm−ss).
5.12 Blocco tastiera
3 sec Attivare il blocco tastiera
2x
Disattivare il blocco tastiera
Con blocco tastiera attivato (vedi anche cap. 7.4) è possibile continuare a ricevere chiamate come
di consueto. Anche dopo aver concluso la chiamata il blocco tastiera continua a essere attivo.
5.13 Selezione a toni temporanea
Adoperando il telefono con la procedura di selezione a impulsi, non sarà necessario rinunciare
ai vantaggi della procedura di selezione a TONI (per es. per l’interrogazione a distanza di una segreteria telefonica).
4 sec Passaggio alla procedura di selezione a toni (per la durata
di una telefonata)
Alla fine della chiamata il telefono passa di nuovo automaticamente alla procedura di selezione
a impulsi.
5.14 Indicazioni riguardo la portata
La portata dell’unità mobile è di ca. 50 metri in ambienti chiusi e di ca. 300 metri all’aperto. In presenza di un buon collegamento con la stazione base, sul display è visualizzato costantemente
il simbolo h.
Nel caso di un allontanamento eccessivo dalla stazione base, il simbolo h lampeggia
facendo inoltre risuonare un segnale acustico di allarme. Avvicinarsi di nuovo alla stazione base altrimenti la chiamata in corso sarà interrotta.
Nel caso in cui l’unità portatile dovesse aver perso il collegamento con la stazione
.
base, sul display appare il messaggio Base 1
5.15 Ricerca dell’unità portatile (funzione di paging)
Con unità portatile fuori posto è possibile cercare ed individuare la posizione dell’apparecchio.
Premere sulla stazione base il tasto di paging e per 30 secondi si avvertono dei segnali acustici
emessi dall’unità portatile. Premere di nuovo il tasto di paging oppure il tasto di chiamata sull’unità
portatile per interrompere la funzione prima del trascorrere dei 30 secondi.
Tutte le unità portatili registrate presso la base iniziano a
squillare.
o
Per concludere la funzione di paging prima del decorrere
del tempo impostato.
5.16 Attivare / Disattivare l’unità portatile
3 sec Attivare / Disattivare
Non è possibile compiere le operazioni di attivazione / disattivazione fintanto che l’unità portatile
si trova inserita nella stazione base.
57
− Navigazione nel menu principale −
6
Navigazione nel menu principale
6.1
Navigare nel menu
I differenti menu consentono di raggiungere tutte le funzioni del telefono. La navigazione da seguire per giungere nella struttura menu è riportata nel capitolo 7.
1. Aprire il menu desiderato o la rubrica telefonica con il rispettivo tasto.
2. Selezionare con il tasto o il sottomenu desiderato.
3. Aprire con il tasto il sottomenu.
4. Selezionare con il tasto o la funzione desiderata.
5. Aprire con il tasto la funzione.
6. Selezionare con il tasto o l’impostazione desiderata.
7. La tastiera consente di immettere numeri o lettere.
8. Confermare con il tasto le immissioni.
9. Con il tasto si torna rispettivamente indietro di un livello.
Ogni procedura è interrotta automaticamente se entro 20 secondi non segue alcuna
immissione.
6.2
Segnali acustici
Per facilitare l’esercizio del proprio telefono, l’apparecchio è dotato di diversi suoni di esercizio,
avviso, segnalazione e altri segnali acustici. Per alcuni di questi è possibile compiere un’attivazione / una disattivazione. Ne fanno parte:
S Suono tasti: Ogni volta che si preme un tasto presso l’unità portatile si avverte un
breve suono.
S Suono di avviso Batteria scarica: Un suono di avviso richiama l’attenzione in caso
di capacità di batteria scarsa per consentire il caricamento dell’unità portatile.
S Suono di avviso portata: Il suono di avviso si avverte quando la distanza dalla
stazione base è troppo grande.
Per attivare o disattivare la funzione consultare la struttura di menu riportata al capitolo 7.4.
Oltre a questi ci sono anche altri suoni che facilitano la navigazione all’interno delle voci di menu.
Non è consentito disattivare questi suoni. Qui di seguito i suoni più importanti:
S Tono di conferma: Due suoni crescenti e consecutivi indicano la conclusione di
un’operazione di immissione e la rispettiva memorizzazione.
S Tono d’avviso: Un suono acuto e lungo alla fine di un menu scorrendo in alto o in
basso indica la mancanza di ulteriori voci da selezionare.
6.3
Esempio
Nell’esempio Scrivere SMS" è spiegata la navigazione all’interno del menu principale e dei sottomenu e lo svolgimento di funzioni e immissioni. Si consiglia di seguire l’esempio riportato per tutte
le altre impostazioni che si desiderano compiere.
Aprire il menu principale
Selezionare la funzione SMS e confermare
o SMS , o Crea , Selezionare la funzione e confermare (menu SMS / Crea)
Messaggio? , Accettare la richiesta di immissione
Inserire e confermare il messaggio
Numero ? , Accettare la richiesta di immissione
Inserire e confermare il numero
Invio...
58
Procedura di invio in corso
7
Struttura di menu
Nel menu principale si giunge premendo il tasto . Scegliere infine con i tasti o il sottomenu desiderato e confermare la selezione con il tasto
. Oppure digitare le informazioni richieste (le immissioni private sono raffigurate qui di seguito in caratteri italici e contrassegnate da ). La propria immissione è in genere confermata alla fine da un segnale acustico .
7.1
La rubrica telefonica
Rubrica
7.2
Nome ?
Nome xy
Nome xy
Numero ?
Numero xy
Confermi ?
Melodia 1−5
Melodia 1−5
Messaggi di testo (SMS)
In Arrivo
Rispondi
Cancellare
Inoltra
Dettagli
SMS Privati
Crea
Messaggio?
Canc Tutto ?
In Arrivo
SMS Privati
Confermi ?
Confermi ?
Imposta SMS
Avviso Msg.
Opzion.invio
Centro Invio
Centro Ricez
Nr Terminale
Testo
Attivato
Disattivato
Invio 1
Invio 2
Ricevi 1
Ricevi 2
Invio 1
Invio 2
Numero
Numero ?
Numero
(Tono di segnale SMS)
Numero
Numero
Numero
Numero
Invio...
− Struttura di menu −
SMS
Aggiungere
Modificare
Cancellare
59
60
7.3
Impostare
Impostare
Volume 1
Volume 2
Volume 3
Volume 4
Volume 5
Silenzioso
Melodia 1
Melodia 2
Melodia 3
Melodia 4
Melodia 5
Melodia Base
Canc Port
Cod.pin*
Codice Pin*
Cod.pin PIN vecchio
NuovoPin NuovoPin
Mf−dc
Multifrequen
Decadica
Flash 1
Flash 2
Tasto R
Config Iniz**
*
**
Cod.pin
PIN
PIN
Numero portatile
Ripeti
NuovoPin
Confermi ?
L’impostazione iniziale del PIN corrisponde a 0000. Premendo il tasto per due secondi si interrompe la programmazione.
Attenzione: Ripristino di tutte le impostazioni iniziali! Tutte le voci memorizzate negli elenchi sono cancellate!
− Struttura di menu −
Volume Base
7.4
Unità portatile
Portatile
Bip
Bip Tasti
Batt Scarica
No Campo
Attivato
Disattivato
Attivato
Disattivato
Attivato
Disattivato
Volume 1 − 5 / Silenzioso
Vol Suon Est
Volume 1 − 5 / Silenzioso
Melodia Int
Melodia 1 − 10
Melodia Est
Melodia 1 − 10
Risp Auto*
Attivato
Disattivato
Nome Port
ABC
Lingua
English / Français
Español / Italiano
Deutsch / Nederlands
...
Blocco Tast?
Lung Ripetiz***
Lungo (32 cifre)
Corto (20 cifre)
Attivato**
*
ON: Per accettare una chiamata in arrivo è sufficiente estrarre l’unità portatile dalla stazione base (configurazione iniziale). Dopo l’estrazione dell’unità
portatile tutti i tasti sono bloccati per quattro secondi.
OFF: Per accettare una telefonata è necessario premere il tasto .
** Sospendere il blocco tastiera: Premere il tasto 2 x.
*** Nell’elenco di ripetizione di chiamata sono memorizzati numeri con max. 32 ovvero 20 cifre.
− Struttura di menu −
Vol Suon Int
61
62
7.5
Impostare data, ora e sveglia
Imposta Ora
7.6
Imposta Ora
Data
Imposta Ora
hh−mm
Imp. Sveglia
Disattivato
Attivato
hh−mm
Selezionare base e unità portatili
Selez Base
Regist Base
Base 1
Auto
Base 1 2 3 4
− Struttura di menu −
Registrare
− La rubrica telefonica −
8
La rubrica telefonica
Nella rubrica telefonica è possibile memorizzare 50 numeri di chiamata con rispettivi nomi. Ogni
numero di chiamata può essere composto da massimo 24 cifre, per il nome è possibile inserire
fino a 12 lettere.
8.1
Inserire numeri di chiamata nella rubrica telefonica
vedi cap. 7.1
Nel caso in cui il nome è già memorizzato all’interno della rubrica telefonica, si avverte
un segnale e sul display appare l’indicazione Aggiungere .Ciò significa che è necessario indicare un nome differente.
La melodia desiderata risuona ogni volta che il partner di chiamata memorizzato
chiama. L’assegnazione funziona solo se il proprio allacciamento telefonico e quello
del chiamante sono abilitati alla funzione di visualizzazione del numero di chiamata
CLIP.
8.1.1 Avvertenze sulla memorizzazione
I numeri di chiamata dovranno essere immessi sempre con il rispettivo prefisso, cosa
che consente di assegnare anche ai numeri di chiamate urbane una delle voci
dell’elenco telefonico.
Una volta raggiunta la capacità di memoria di 50 numeri di chiamata, non appena si
procede a salvare la voce successiva sul display appare l’indicazione Mem Piena . Per
ottenere nuovo spazio di memoria è necessario cancellare prima un altro numero di
chiamata.
8.1.2 Immissione di testo
I tasti con le cifre presentano in più delle lettere. Premendo ripetutamente il rispettivo tasto, si ha
modo di selezionare anche lettere maiuscole e cifre.
Esempio: Per immettere per es. il nome "Peter", procedere come segue. Premere 1 x tasto ,
2 x tasto , 1 x tasto , 2 x tasto e 3 x tasto .
Ulteriori indicazioni sull’immissione di testo:
1x premere: Spazio vuoto
Premere 2 x : Trattino
Per cancellare l’ultima voce
o
per spostare il cursore
per passare da lettere minuscole a lettere maiuscole
Per inserire la stessa lettera una seconda volta, immettere la lettera e attendere fino a quando il
cursore non si sarà spostato automaticamente alla posizione successiva.
8.2
Modificare voci nella rubrica telefonica
vedi cap. 7.1
Per selezionare la voce direttamente, premere il tasto che corrisponde alla lettera iniziale della voce desiderata. Per selezionare per es. direttamente il nome Peter", premere 1x .
8.3
Cancellare voci dalla rubrica telefonica
vedi cap. 7.1
Premendo il tasto la procedura di cancellazione è interrotta.
8.4
Selezionare un numero dalla rubrica telefonica
vedi cap. 5.8
63
− Visualizzazione numero (CLIP) −
9
Visualizzazione del numero di chiamata (CLIP)
Nel caso in cui il proprio impianto telefonico sia abilitato alla funzione CLIP (CLIP = Calling Line
Identification Presentation), sul display è visualizzato in caso di chiamata in arrivo il numero telefonico del chiamante. Con numero di chiamata memorizzato nella propria rubrica telefonica, il nome
rispettivamente assegnato alla voce appare sul display. Se il chiamante ha invece soppresso la
trasmissione del proprio numero telefonico, il numero non è visualizzato; in tal caso sul display
appare l’indicazione Privato .
In tutto è possibile memorizzare 40 numeri telefonici nell’elenco chiamate. Se la lista è piena, il telefono
cancella sempre il numero di chiamata più vecchio. Se durante la propria assenza l’apparecchio ha
.
memorizzato numeri di chiamata nuovi nell’elenco chiamate, sul display lampeggia il simbolo
Attenzione: La visualizzazione del numero di chiamata (CLIP) oltre che l’indicazione di
data e orario sono servizi opzionali del proprio gestore di rete telefonica. Si prega di
consultare il proprio provider per ricevere ulteriori informazioni.
9.1
L’elenco chiamate
9.1.1 Vedere il numero telefonico nell’elenco chiamate
Per visualizzare il numero di chiamata tratto dall’elenco chiamate sul display, procedere come indicato qui di seguito:
Il numero di chiamata ricevuto per ultimo è visualizzato sul
display.
Nel caso in cui l’elenco chiamate sia vuoto, sul display appare l’indicazione Vuoto .
o
È possibile selezionare altri numeri telefonici dall’elenco
chiamate.
Un segnale acustico risuona in mancanza di ulteriori numeri di chiamata.
Due simboli di display informano sullo stato delle voci:
Si è risposto alla chiamata.
Non si è risposto alla chiamata.
Premendo il tasto sono visualizzate ulteriori informazioni relative al numero di
chiamata:
S Se il numero di chiamata dovesse avere più di 12 cifre, sono visualizzate innanzitutto
le rimanenti cifre che compongono il numero.
S Indicazione di data e orario della chiamata nel caso in cui il chiamante abbia trasmesso
queste informazioni addizionali.
Con il tasto si esce dall’elenco chiamate.
9.1.2 Selezionare un numero telefonico dall’elenco chiamate
Per richiamare direttamente un numero telefonico riportato nell’elenco chiamate, premere il tasto
.
9.1.3 Memorizzare il numero telefonico dall’elenco chiamate nella rubrica telefonica
L’apparecchio consente di memorizzare un numero di chiamata visualizzato nell’elenco chiamate direttamente nella rubrica telefonica.
, o Selezionare il numero di chiamata
, , Aggiungere ?
Nome ?
Avvio del processo di memorizzazione
, Inserire un nome e confermare
(per immissione di testo vedi cap. 8.1.2)
Se il nome risulta già memorizzato nella rubrica telefonica, si avverte un segnale acustico e sul display appare di nuovo il numero di chiamata selezionato.
1234567890
Confermare il numero di chiamata selezionato
Melodia 1
o , Selezionare e confermare la melodia
9.1.4 Cancellare singoli numeri telefonici dall’elenco chiamate
, o Selezionare il numero di chiamata
, Cancellare ? 64
Avviare e confermare la cancellazione del numero di
chiamata selezionato
− Visualizzazione numero (CLIP) −
9.1.5 Cancellare tutti i numeri telefonici dall’elenco chiamate
, o Aprire l’elenco chiamate
3 sec , Canc Tutto ?
Avviare e confermare il processo di cancellazione
65
− Messaggi di testo (SMS) −
10
Messaggi di testo (SMS)
Il telefono consente di inviare attraverso la rete fissa testi di messaggio brevi (SMS = Short Message Service) con fino a 160 caratteri; per fare questo è necessario osservare i seguenti requisiti:
S Il proprio allacciamento telefonico è abilitato alla funzione CLIP (vedi cap. 9)
S Il servizio SMS è stato attivato dal proprio gestore di rete telefonica.
Si ricorda che l’invio di SMS è soggetto ad addebiti.
L’addebito avviene attraverso il proprio gestore di rete telefonica.
Se si invia un SMS ad un allacciamento di rete fissa non abilitato al servizio SMS ovvero equipaggiato con telefoni che non sono in grado di ricevere messaggi SMS, il
messaggio SMS è inviato come messaggio vocale.
In caso di collegamenti in call by call, l’invio di un SMS al momento non è ancora possibile.
Per informazioni dettagliate sull’invio di SMS entro la rete fissa si prega di consultare il proprio gestore di rete telefonica.
10.1 Impostazioni SMS
10.1.1 Centro di servizi
La distribuzione di tutti i messaggi SMS avviene attraverso un centro di assistenza. Sia provider
come Swisscom", Cablecom" e altri gestori di rete telefonica offrono questo servizio.
Il telefono SWITEL è stato predisposto in fabbrica per il funzionamento con Swisscom". Il numero
del centro di assistenza della Swisscom" è 0622 100 000. La funzione SMS della Swisscom" è
già stata impostata.Non è più necessaria un’ulteriore registrazione.
Per usufruire invece dei servizi di un altro gestore di rete telefonica, procedere alla programmazione dei nuovi numeri di chiamata del centro di ricezione e invio SMS accedendovi dal menu principale. Il processo di registrazione può variare a seconda del
provider scelto. Si prega di richiedere presso l’offerente scelto i numeri di chiamata
necessari e la procedura da seguire per l’abilitazione del servizio SMS.
10.2 Inviare SMS
vedi cap. 7.2
Non è possibile inviare alcun SMS da un impianto telefonico interno.
Volendo scrivere un nuovo SMS, sul display appare il testo del messaggio SMS precedente. Cancellare con il tasto il testo precedente prima di procedere all’immissione di quello nuovo.
La procedura da seguire per l’immissione dei testi è indicata al capitolo 8.1.2.
10.3 Ricevere SMS
vedi cap. 7.2
Se la ricezione di un messaggio SMS non dovesse essere possibile, cancellare presso
la centrale di ricezione l’ultima due cifre del numero di chiamata programmato. Il numero di chiamata è 0622 100 0.
In caso di ricevimento di un nuovo messaggio SMS si avverte il tipico segnale acustico per SMS.
Se desiderato è anche possibile disattivare questo segnale acustico (vedi cap. 7.2). Sul display
è inoltre visualizzato il simbolo della letterina che indica la presenza di un nuovo messaggio di
testo.
10.4 Gestire messaggi di testo
È possibile memorizzare complessivamente al massimo 15 messaggi brevi (nella cartella di ricezione generale e nella casella postale per SMS personale).
Non appena tutti gli spazi di memoria sono occupati, alla ricezione di un nuovo messaggio SMS il messaggio più remoto è automaticamente cancellato dalla rispettiva lista.
10.5 Casella postale personale per SMS
Accanto al directory di ricezione generale è prevista una casella postale personale per SMS. Questa funzione consente di ricevere e inviare SMS personali, il cui accesso è infatti riservato
all’utente specifico.
La casella postale SMS è una funzione disponibile solo se messa a disposizione dal
proprio gestore di rete telefonica. Per impostare la casella postale per SMS personale
si prega di rivolgersi al proprio gestore di rete telefonica.
66
− Maggior numero di unità portatili −
11
Maggior numero di unità portatili
È possibile registrare cinque unità portatili alla stazione base.
Ogni unità portatile può essere selezionata contemporaneamente presso quattro stazioni base.
Lo standard internazionale GAP consente di integrare unità portatili SWITEL così come
unità portatili di altri costruttori nel proprio impianto telefonico. Allo stesso modo è possibile selezionare unità portatili SWITEL per stazioni base di altri costruttori, a condizione che gli apparecchi dispongano della funzione GAP standard.
L’impiego di un numero maggiore di unità portatili consente di compiere/ottenere:
S Chiamate interne tra le unità portatili.
S Trasferimento di chiamate esterne da un’unità portatile all’altra.
S Segnalazione di chiamate esterne in arrivo presso tutte le unità portatili in uso.
S Conversazione a conferenza con un interlocutore esterno e due interni.
Se un’altra unità portatile utilizza già la linea telefonica esterna, sul display è visualizzato il simbolo EST .La conduzione di un’ulteriore chiamata non è pertanto possibile.
11.1 Compiere chiamate interne
Non appena è registrato un numero maggiore di unità portatili (in seguito in breve: UP) presso la
stazione base, è possibile compiere chiamate interne gratuite. Vedere il seguente esempio: UP
1 (no. int. 1) chiama UP 2 (no. int. 2).
UP 1: Instaurare un collegamento con l’altra unità portatile
, 2
UP 2: Ricevere la chiamata
In caso di arrivo di una telefonata esterna durante la conduzione di una chiamata interna, si avvertono dei brevi segnali acustici ed il numero del chiamante, qualora disponibile, è visualizzato sul display.
Concludere la chiamata interna
Ricevere la chiamata esterna
11.2 Inoltro interno di chiamate esterne
Se viene accettata una chiamata esterna con una delle unità portatili, è possibile trasferire la chiamata esterna su un’altra unità portatile interna.
UP 1: Instaurare un collegamento con l’altra unità portatile
, 2
Se l’unità portatile selezionata non dovesse rispondere, la chiamata è ripresa con il tasto .
Dopo aver ricevuto la chiamata interna presso l’unità portatile, è possibile compiere le seguenti
operazioni:
11.2.1 Riscontro / Chiamata in attesa
È dato modo di parlare con l’interlocutore interno e di passare nuovamente al partner di chiamata
esterno premendo il tasto . Il numero di passaggi della chiamata tra interlocutore esterno ed
interno è illimitato.
11.2.2 Trasferire chiamate
Premendo il tasto sulla prima unità portatile, la chiamata esterna è trasferita sull’unità portatile chiamata.
67
− Maggior numero di unità portatili −
11.3 Compiere chiamate a conferenza
Questa funzione consente di condurre una conferenza con una chiamata esterna ed un altro interlocutore interno. In altre parole, due unità portatili possono in tal modo conversare contemporaneamente con un interlocutore esterno.
UP 1: Instaurare un collegamento con un interlocutore
esterno
, 2
UP 1: Instaurare un collegamento con l’altra unità portatile
UP 2: Ricevere la chiamata interna
UP 1: Collegare tutti gli interlocutori in una chiamata a
conferenza
Durante la conferenza è possibile trattenere il partner di chiamata esterno premendo il
tasto . Premendo la sequenza di tasti , si fa ritorno alla conversazione a
conferenza.
UP 1 o UP 2: Conclude la conferenza agganciando il
telefono.
11.4 Selezione e deselezione di unità portatili
11.4.1 Selezione di altre unità portatili del tipo DC42
3 sec La selezione è avviata premendo il tasto di paging presso
la stazione base.
A partire dal momento in cui si preme il tasto di paging, sono disponibili 90 secondi per
compiere la selezione dell’unità portatile:
, , Passare al menu Registrare .
o , , Selezionare il menu Regist Base
e confermare.
Inserire il numero della stazione base (1 a 4) e confermare
l’immissione.
Nel caso in cui l’unità portatile dovesse essere già collegata ad una stazione base, i
numeri assegnati lampeggiano.
Ha inizio la ricerca della stazione base.
Non appena la stazione base è individuata, procedere come segue:
, Inserire il codice PIN (configurazione iniziale: 0000) e confermare l’immissione. L’unità portatile è quindi registrata.
All’unità portatile è assegnato un numero di chiamata interno. Il numero di chiamata assegnato all’unità portatile già selezionata è 1. Alla seconda unità portatile selezionata è
invece assegnato il numero di chiamata 2. Questo numero di chiamata interno è visualizzato in modalità di stand−by a destra sul display.
11.4.2 Selezione di unità portatili DECT−GAP di altri costruttori
Per selezionare un’unità portatile DECT−GAP di un altro costruttore, seguire le indicazioni riportate nelle istruzioni per l’uso del rispettivo costruttore e premere quindi per ca. 3 secondi il tasto
di paging sulla propria stazione base. Immettere per la selezione il PIN (configurazione iniziale: 0000).
11.4.3 Deselezione di unità portatili
La deselezione di un’unità portatile può essere compiuta solo da parte di un’altra unità portatile
ancora selezionata. Non è possibile compiere questa deselezione con la stessa unità portatile
che si desidera deselezionare.
, o , Passare al menu Impostare .
o , , e confermare.
Selezionare il menu Canc Port
Inserire il codice PIN (configurazione iniziale: 0000) e confermare l’immissione. Con il tasto si interrompe il processo in corso.
, Inserire il numero interno dell’unità portatile che si desidera deselezionare e confermare l’immissione. 68
− Maggior numero di unità portatili −
11.5 Maggior numero di stazioni base
In caso di impiego di un maggior numero di stazioni base è possibile estendere la portata dell’unità
portatile. Per poter godere di questo effetto è necessario che tutte le stazioni base siano collegate
ad un unico allacciamento telefonico. A seconda dell’impiego desiderato, è possibile assegnare
ad ognuna delle stazioni base lo stesso numero telefonico oppure un numero di chiamata differente. Fare in modo che vi sia sufficiente intersezione nella portata di tutte le stazioni base in uso.
L’unità portatile deve risultare registrata presso ognuna delle stazioni base!
Si consiglia di provare prima della messa in funzione di una stazione base nuova, la portata della
propria unità portatile. Se un’unità portatile è registrata presso una stazione base e avendo attivato presso l’unità portatile la selezione automatica della stazione base (vedi cap. 7.6), l’unità portatile è trasferita sempre automaticamente alla prossima ovvero più vicina stazione base.
11.5.1 Selezione di una stazione base
, o , Passare al menu Registrare .
o , Selezionare il menu Selez Base e confermare.
Sul display sono visualizzate tutte le stazioni base presso le quali l’unità portatile risulta
già registrata. Il numero della stazione base attiva lampeggia.
, Inserire il numero interno della stazione base sulla quale si
desidera trasferire l’unità portatile e confermare l’immissione. Oppure:
Questa impostazione consente all’unità portatile di
o Auto , passare automaticamente alla stazione base più vicina nel
caso in cui il collegamento con la stazione base attuale è
interrotto.
69
− Impostazioni −
12
Impostazioni
12.1
Configurazione iniziale
Lingua:
Tedesco
Centro di ricezione SMS 1: 06221000
Nome unità portatile:
DC42 1
Centro di ricezione SMS 2: Vouto
Volume di suoneria unità portatile: 3
Centro di invio SMS 1:
06221000
Melodia di suoneria esterna: 3
Centro di invio SMS 2:
Vouto
Melodia di suoneria
interna:
Tono di ricezione SMS:
ON
1
Volume di suoneria base:
3
Suono di avviso batteria:
ON
Melodia di suoneria base:
2
Suono di avviso portata:
OFF
Volume del ricevitore:
3
Suono tasti:
ON
PIN:
0000
Blocco tastiera:
OFF
Procedura di selezione:
A toni (MF)
Ricezione automatica di chiamate: ON
Tempo flash 1 (standard):
90 ms
Ora / Sveglia:
OFF
Tempo flash 2:
250 ms
Pausa:
3 secondi
Per l’unità portatile e la stazione base è possibile ripristinare la configurazione iniziale.
Per compiere questa operazione seguire quanto indicato al capitolo 7.3.
Si prega di tenere presente che in tal caso tutti i dati riportati nella rubrica telefonica,
nell’elenco chiamate così come tutti i numeri di chiamata memorizzati per la ripetizione
di selezione saranno cancellati!
12.2 Codice PIN
Il codice PIN può essere composto da fino a quattro cifre numeriche. La configurazione iniziale
del codice PIN corrisponde a "0000".
Si consiglia di conservare con cura il nuovo codice PIN in caso di modifica del codice
preimpostato. Senza codice PIN non sarà più possibile usufruire di numerose funzioni
del telefono!
12.3 Tempo flash
Il tempo flash descrive la durata di un tono generato dal telefono premendo un tasto. Per il perfetto
funzionamento dell’impianto telefonico si può rendere necessaria un’impostazione del tempo
flash.
Sono due i tempi flash che consentono di usufruire delle funzioni di impianti telefonici interni o di
servizi a valore aggiunto offerti dal proprio gestore di rete telefonica (vedi anche cap. 2.7). I tempi
flash disponibili sono 90 ms (impostazione standard) e 250 ms. Per impostare i tempi flash seguire
le indicazioni riportate al capitolo 7.3 (vedi anche cap. 12.1).
12.4 Nome dell’unità portatile
Per l’unità portatile è possibile programmare un nome specifico.
Questo può essere composto da fino a 10 caratteri.
70
− Eliminazione di errori −
13
Eliminazione di errori
In presenza di problemi con il telefono, si prega di verificare innanzitutto quanto riportato nelle seguenti indicazioni.
Errore
Soluzione
Non è possibile condurre
una chiamata telefonica.
−
−
−
La linea telefonica non è collegata correttamente oppure
presenta un guasto. Utilizzare esclusivamente il cavo di
collegamento telefonico fornito.
Provare con un altro telefono se l’allacciamento telefonico
in questione è funzionante.
L’alimentatore a spina non è inserito oppure si è in presenza di una caduta di tensione totale.
Le batterie standard ricaricabili sono scariche o difettose.
La distanza dalla stazione base è troppo grande.
Collegamento disturbato,
si interrompe.
−
−
La distanza dalla stazione base è troppo grande.
Luogo di installazione della stazione base errato.
Non è possibile selezionare.
−
Impostazione errata della procedura di selezione.
Il sistema non reagisce
più oppure è in uno stato
indefinito.
−
Ripristinare la configurazione iniziale (vedi cap. 12.1). Estrarre prima brevemente l’alimentatore di rete dalla presa di
corrente.
La spia di controllo dello
stato di carica non è accesa.
−
Posizionare l’unità portatile correttamente nella stazione
base, pulire le superfici di contatto presso unità portatile e
stazione base con un panno morbido e asciutto.
Il simbolo delle batterie
lampeggia sul display già
dopo qualche ora.
−
Riporre l’unità portatile per la durata di 14 ore nella stazione
base. Se ciò non dovesse essere sufficiente, sostituire le
batterie ricaricabili.
La visualizzazione sul display è scura.
−
Il difetto è causato da raggi del sole diretti.
Fare raffreddare l’unità portatile.
La visualizzazione del numero di chiamata (CLIP)
non funziona.
−
La visualizzazione del numero di chiamata è un servizio
opzionale offerto dal proprio gestore di rete telefonica. Per
maggiori dettagli a riguardo, rivolgersi al proprio gestore di
rete telefonica.
Il chiamante ha disattivato la trasmissione del proprio numero di chiamata.
−
−
−
71
− Informazioni importanti −
14
Informazioni importanti
14.1
Specifiche tecniche
Caratteristica
Standard
Alimentazione elettrica stazione
base
Valore
DECT−GAP
220/230 V, 50 Hz
Distanza (esterni/interni)
Autonomia di stand−by
Autonomia di chiamata
Batterie standard ricaricabili
Procedura di selezione
300 m / 50 m
fino a 109 ore
fino a 10 ore
2 x AAA (1.2V / 550 mAh)
Procedura di selezione a FREQUENZA (MF)
Procedura di selezione a IMPULSI(DC)
Temperatura ambiente consentita 10°C fino 30°C
Umidità atmosferica relativa con- da 20% a 75%
sentita
Funzione flash
90 ms / 250 ms
Sigle:
72
DECT:
Digital Enhanced Cordless Telephone
(standard per telefoni senza cavo).
GAP:
Generic Access Profile
(standard per l’interazione di unità portatili con stazioni base di altri costruttori).
MF:
Procedura di selezione a toni o multifrequenza
− Indice −
15
Indice
A
Allacciamento telefonico analogico, 53
Allacciamento telefonico digitale, 53
Altoparlante unità portatile, 57
Aprire il menu principale, 58
Avviso di chiamata, 56
B
Blocco tastiera, 55, 57, 61, 70
C
Cancellare l’ultima immissione, 56
Cancellare SMS, 59
Cancellare un numero telefonico dall’elenco chiamate, 64, 65
Cancellare una voce di rubrica telefonica, 59
Cancellare voci dalla rubrica telefonica, 63
Capacità di memoria elenco chiamate, 64
Capacità di memoria rubrica telefonica, 63
Caricare le batterie, 53
Casella postale personale per SMS, 66
Centrale di invio SMS, 59
Centrale di ricezione SMS, 59
Centro di invio SMS, 70
Centro di ricezione SMS, 70
Centro di servizi SMS, 66
Chiamata esterna, 55
Chiamata interna, 55
CLIP, 64
Codice PIN, 60, 70
Collegare la stazione base, 53
Compiere chiamate a conferenza, 68
Compiere chiamate interne, 67
Compiere telefonate, 55
Condurre chiamate, 56
Confermare l’immissione, 58
Configurazione iniziale, 70
Contenuto della confezione, 53
Creare una voce di rubrica telefonica, 59
F
Funzione vivavoce, 56
G
GAP, 67, 72
Gestire messaggi di testo, 66
Gestire SMS, 66
I
Immissione di testo, 63
Immissione numero apparecchio, 59
Impianti telefonici interni, 53, 56
Impostare data, 62
Impostare lingua, 61
Impostare melodia di suoneria, 61
Impostare ora, 62
Impostare orario, 61
Impostare suoneria, 60
Impostare sveglia, 61, 62
Impostare volume, 60
Impostazioni, 60, 70
Impostazioni iniziali, 60
Impostazioni SMS, 59, 66
Impstare volume, 61
Indicazioni di sicurezza, 52
Informazioni dettagliate CLIP, 64
Inoltro interno di chiamate esterne, 67
Inserire le batterie, 53
Inserire numeri di chiamata nella rubrica telefonica, 63
Interrogazione a distanza segreteria
telefonica , 57
Interrompere procedura, 58
Inviare SMS, 66
L
Linea di collegamento di rete, 56
Lingua, 70
Lunghezza del numero di chiamata, 55
D
DC, 60
DECT, 72
Deselezionare unità portatile, 60
Deselezione di unità portatili, 68
Display, 55
Durata di conversazione, 57
E
Elementi di comando, 54
Elenco chiamate, 55, 64
Eliminazione di errori, 71
73
− Indice −
M
Maggior numero di stazioni base, 69
Maggior numero di unità portatili, 67
Melodia di suoneria base, 70
Melodia di suoneria esterna, 70
Melodia di suoneria interna, 70
Memorizzare il numero telefonico dall’elenco chiamate nella rubrica telefonica, 64
Memorizzare numeri di chiamata, 63
Menu principale, 55
Messaggi di testo, 66
MF, 60, 72
Modalità di rappresentazione, 55
Modalità di rappresentazione dei simboli
sui tasti , 54
Modificare una voce di rubrica telefonica, 59
Modificare voci nella rubrica telefonica, 63
N
Navigazione, 58
Nome unità portatile, 55, 70
Nome unità protatile, 61
O
Ora, 70
Orario, 55
P
Paging, 57
Pausa, 56, 70
Pausa di selezione, 56, 70
Portata, 55, 57
Procedura di selezione, 70
Procedura di selezione a impulsi (DC), 53, 60
Procedura di selezione a toni (MF), 53, 57, 60
R
Ricerca dell’unità portatile, 57
Ricevere chiamate, 55
Ricevere SMS, 59, 66
Ricezione automatica di chiamate, 70
Ricezione chiamate automatica, 61
Ripetizione di selezione, 56
Riscontro / Chiamata in attesa, 67
Rubrica telefonica, 55, 59, 63
74
S
Scegliere i sottomenu, 58
Scrivere SMS, 58, 59
Segnali acustici, 58
Selezionare base e unità portatili, 62
Selezionare direttamente una voce dalla rubrica
telefonica, 57
Selezionare numeri di chiamata dalla rubrica telefonica, 56
Selezionare numeri di chiamate perse, 56
Selezionare un numero telefonico dall’elenco chiamate, 64
Selezione della modalità di invio SMS, 59
Selezione di una stazione base, 69
Selezione di unità portatili, 68
Selezione di unità portatili DECT−GAP di altri costruttori, 68
Selezione e deselezione di unità portatili, 68
Silenziamento del microfono, 57
SMS, 59, 66
SMS − Visualizzazione di messaggi nuovi, 55
SMS inviata come messaggio vocale, 66
Specifiche tecniche, 72
Stato di carica delle batterie, 53, 55
Suoni, 58
Suono di avviso Batteria scarica, 58
Suono di avviso portata, 58, 61, 70
Suono di avviso"Batteria scarica", 61, 70
Suono tasti, 58, 61, 70
Sveglia, 70
T
Tasto R, 53, 56
Tempo flash, 60, 70
Tono d’avviso, 58
Tono di conferma, 58
Tono di ricezione SMS, 66, 70
Trasferire chiamate, 67
U
Unità portatile, 61
Uscire dall’elenco chiamate, 64
V
Vedere il numero telefonico
nell’elenco chiamate, 64
Visualizzazione del numero
di chiamata (CLIP), 64
Volume del ricevitore, 57, 70
Volume di suoneria base, 70
Volume di suoneria chiamata unità portatile, 70
3
− Contents−
1
Safety Information . . . . . . . . . . . . . . . . . . . . . . . . . . . . . . . . . .
76
2
Starting Up . . . . . . . . . . . . . . . . . . . . . . . . . . . . . . . . . . . . . . . .
77
3
4
Operating Elements . . . . . . . . . . . . . . . . . . . . . . . . . . . . . . . . .
Display Indicators . . . . . . . . . . . . . . . . . . . . . . . . . . . . . . . . . .
78
79
5
Telephoning . . . . . . . . . . . . . . . . . . . . . . . . . . . . . . . . . . . . . . .
79
6
7
Navigating in the Main Menu . . . . . . . . . . . . . . . . . . . . . . . . .
Menu Structure . . . . . . . . . . . . . . . . . . . . . . . . . . . . . . . . . . . . .
82
83
8
Phone Book . . . . . . . . . . . . . . . . . . . . . . . . . . . . . . . . . . . . . . .
87
9
10
Caller Number Display (CLIP) . . . . . . . . . . . . . . . . . . . . . . . .
Text Messages (SMS) . . . . . . . . . . . . . . . . . . . . . . . . . . . . . . .
88
89
11
Multiple Handsets . . . . . . . . . . . . . . . . . . . . . . . . . . . . . . . . . .
90
12
Settings . . . . . . . . . . . . . . . . . . . . . . . . . . . . . . . . . . . . . . . . . . .
93
13
Troubleshooting . . . . . . . . . . . . . . . . . . . . . . . . . . . . . . . . . . . .
94
14
15
Important Information . . . . . . . . . . . . . . . . . . . . . . . . . . . . . . .
Index . . . . . . . . . . . . . . . . . . . . . . . . . . . . . . . . . . . . . . . . . . . . .
95
96
75
− Safety Information −
1
Safety Information
Please read this operating instruction manual thoroughly.
1.1
Intended use
The telephone is suitable for telephoning within a public telephone network system. Any other
use is considered unintended use. Unauthorised modification or reconstruction is not
permitted. Under no circumstances open the device or complete any repair work yourself.
1.2
Installation location
The telephone is designed for use indoors in rooms with a temperature range from 10 °C to 30
°C. The base station should not be used in rooms exposed to moisture, such as bathrooms or
laundries. Prevent excessive exposure to smoke, dust, vibration, chemicals, moisture, heat
and direct sunlight. Position the base station with a distance of 1 m to other electronic devices
or there is a risk of mutual disturbance.
Do not use the handset in potentially explosive areas.
1.3
Power supply
Only use the power adapter plug supplied because other power supplies could damage the telephone. Ensure access to the power adapter plug is not obstructed by
furniture or such.
1.4
Telephone connection cable
If the telephone connection cable supplied needs to be replaced, ensure the pin assignment is
identical on the new one.
1.5
Rechargeable batteries
Do not throw batteries into a fire or immerse them in water.
1.6
Power failure
The telephone cannot be used to make calls in the event of a power failure. Always keep a
cord connected telephone which operates without an external power supply available in case
of emergency situations.
1.7
Private branch exchanges
The telephone can be connected to a private branch exchange. There is no guarantee that
the telephone will work on every private branch exchange.
1.8
Notes on medical equipment
Never use the telephone in the vicinity of medical equipment. It cannot be fully ruled out that
they will not affect heart pacemakers. DECT* telephones can cause an unpleasant humming
sound in hearing aids.
1.9
Cleaning and upkeep
Clean the housing surfaces with a soft, fluff−free cloth. Never use cleaning agents or solvents.
The rubber footpads on the base station are not resistant to all cleaning agents.
1.10 Disposal
You are legally obliged to dispose of consumable goods according to the applicable
laws. The adjacent symbol on the telephone indicates that electrical and electronic
apparatus and batteries no longer required must be disposed of separate from
domestic waste.
Electrical and electronic devices must be disposed of
at a suitable collection point provided by the public waste authorities.
Batteries must be disposed of at the point of sale or at the appropriate collection
points provided by the public waste authorities.
Packaging materials must be disposed of according to local regulations.
* DECT: Digital Enhanced Cordless Telephone = Standard for cordless telephones.
76
− Starting Up −
2
Starting Up
2.1
Safety information
Caution: It is essential to read the Safety Information in Chapter 1 before starting up.
2.2
Checking the contents of the package
The package contains:
−
a base station
−
a telephone connection cable
−
a handset
−
two rechargeable batteries
−
a power adapter plug
−
an operating manual
2.3
Connecting the base station
Position the base station within reach of the telephone line socket and a power outlet. Only
use the components supplied.
1. Insert the small plug on the power adapter plug cable in the corresponding socket
on the underside of the base station.
The plug cannot be connected incorrectly because the plug and socket are
designed in such a way to prevent reverse poling. The plugs must snap audibly into
the base station sockets.
2. Insert the small plug on the telephone connection cable in the corresponding socket
on the underside of the base station.
3. Feed both cables on the underside of the base station in the cable duct provided.
4. Plug the power adapter plug in a properly installed 230 Volt power outlet.
The power adapter plug from the base station must remain connected at all times.
5. Connect the telephone connection cable supplied in the telephone line socket.
2.4
Inserting the batteries
Insert two batteries of the type AAA Ni−MH 1.2 V 550 mAh
in the battery compartment after opening it. Pay attention
to correct polarity (refer to Fig.)! Close the battery compartment cover.
Important: Do not use any other type of batteries.
2.5
Charging the batteries
When preparing to use the handset for the first time, place it in the base station (display facing upwards) for at least 14 hours. The charging control lamp on the base station lights up. The handset
warms up during the charging process. This is normal and does not represent a risk. Do not
charge the handset with charging units from other manufacturers. Failure to charge the batteries
properly can lead to telephone malfunction.
The current battery charge status is indicated in the display:
Full
Half empty
Low
Empty
2.6
Tone or Pulse dialling mode
The telephone can be connected to both analogue connections (pulse dialling) and digital connections (tone dialling). The equipment is set to Tone dialling mode at the factory. If the telephone
does not work on your telephone connection, refer to Chapter 7.3 to learn how to switch the telephone to analogue, pulse dialling mode.
2.7
Operating on private branch exchanges
If your telephone is connected to a private branch exchange, the R button can be used to implement the transfer calls or automatic callback functions. The dealer where you purchased the exchange can provide information as to whether the telephone will work properly with the exchange.
77
− Operating Elements −
3
Operating Elements
3.1
1
2
3
4
5
6
7
8
9
10
11
12
13
Handset
Call indicator
Display
Hands−free call
Menu button and OK button
Phone book
Hash button (for conference calls)
Internal calls
Muting function and delete / back
Selection button: Scroll upwards in the menu
and calls list / Redialling / dialling pause
Call button
Selection button: Scroll downwards in the menu
and calls list / calls list
Key lock off/on
R−signal button (handset on/off)
1
2
8
9
10
Base station
1 Paging button (locate handset)
2 Call and power indicator LED
3 LED, charging control lamp
C/
/
P/
4
5
11
12
13
3.2
3
6
7
1
2
3
Notes on the depiction of button icons:
In order to read the manual more easily, the telephone buttons are depicted in a standardised
rectangular contour. The appearance of the icons in the buttons, therefore, deviates slightly
from that on the telephone. However, the buttons are clearly recognisable.
78
− Display Indicators −
4
Display Indicators
The display indicates all the important functions by means of various icons and messages.
Icon
Description
12−10
DC42 1
Time display
Handset identification
Constantly on: Displays battery capacity.
Indicator flashes: Batteries must be charged.
Run−through segments: Batteries are being charged.
Constantly on: The connection to the base station is good.
Indicator flashes: The handset is out of range of the base station.
A call is currently being made.
Constantly on: An external call is currently being made.
Indicator flashes: An external call has been received.
Constantly on: An internal call is currently being made.
Indicator flashes: An internal call has been received.
Constantly on: You have accessed the calls list. The call has not been viewed.
Indicator flashes: There are new calls in the calls list.
The phone number is longer than 12 digits.
The call was not taken.
The number is stored in the calls list.
The call was taken.
The number is stored in the calls list.
You have opened the main menu.
You have opened the phone book.
You have received a text message (SMS).
The key lock is activated.
The alarm is activated.
5
Telephoning
The way in which the telephone is operated is subsequently described by means of text and symbols: If a button is depicted, it means that the respective button must be pressed.
In addition, the following symbols appear:
Enter digits or letters
2 sec Press the button depicted for 2 seconds
Acoustic signal on the handset
Acoustic signal on the base station
Phonebook
or
Text or icon in the display
The ringing signals on the handset and base station only function when they
have not been deactivated beforehand!
79
− Telephoning −
5.1
Taking a call
and , Take the call
End the call
When the handset is ringing, press the or button to adjust the ringing volume.
If the ringing tone has been deactivated on the handset, incoming calls are only indicated by the base station (as long as the base ringer has not been deactivated).
5.2
Handsfree
Use this function to telephone with your hands free.
Switch the function on or off during a call
5.3
Taking two calls
You will hear acoustic signals (call waiting) if a second call is received while you are talking on the
telephone. The number of the second caller appears in the display. Press the buttons below in
the sequence described to switch between the two callers, the connection to the other caller is
put on hold.
, Switch to the other caller
Caution: The functions for phone number display, holding calls and call waiting are
supplementary services offered by your telephone network provider. Contact your network provider for further information.
5.4
Making a call
Enter the phone number (max. 32 digits)
Dial the phone number
If you enter a wrong digit:
Press briefly: Deletes the last entry.
2 sec Press longer: Deletes the entire phone number.
It is also possible to press the Call button first to obtain the dialling tone for an outside line.
Then enter the required telephone number. It is not possible to correct wrong digits individually
using this dialling procedure.
5.5
Dialling pause
In the case of private branch exchanges, it is necessary to dial a specific number (e.g. 9" or 0")
in order to obtain the dialling tone for an outside line. When using some older private branch exchanges, it takes a little time before the dialling tone becomes audible. Particularly in the case of
such private branch exchanges, it is useful to insert an automatic pause after the number for the
outside line so that the number can be dialled in a continuous process without having to wait for
the dialling tone.
Between pressing the number for an outside line and the phone number required, press the button once. P" appears in the display. After dialling the number for the outside line, the telephone
then waits 3 seconds before dialling the actual phone number.
The pause can also be entered with the phone number in the phone book.
5.6
Redialling
The telephone stores the last ten numbers dialled in a redialling list.
Open the redialling list (the last phone number dialled
appears in the display)
or , Select an entry and dial the number
If a phone number has been stored in the phone book, the name associated with it appears in the display.
5.6.1 Deleting all the numbers from the redialling list
Open the redialling list
2 sec , Delete the entire list
5.6.2 Deleting a number from the redialling list
, or Select the entry to be deleted
, Delete the individual entry
80
− Telephoning −
5.7
Calling back missed calls
The telephone stores the last 40 calls in a calls list.
, or Open and scroll through the entries stored
Dial the number
5.8
Dialling phone numbers stored in the phone book
Phone numbers stored in the phone book (refer to Section 8.1) can be dialled quickly and
easily.
, or Open the phone book and select the phone book entry
Dial the number
Phone book entries can be selected directly by opening the phone book and entering
the first letters of the entry required. Example: To access the number for Peter", for example, press once and use the or buttons, if necessary, to select the
stored entry.
5.9
Adjusting the receiver volume
The volume can be adjusted to one of five settings during a call.
or Press the button during the call
5.10 Muting the microphone in the handset
Switch the function on/off
The handset microphone can be switched on and off during a telephone call. This enables you
to confer with a third party, for example, without the caller being able to hear you. The handset
loudspeaker, however, remains on; i.e. you can still hear the caller.
5.11 Talk time display
A few seconds after a call has been taken, the phone number dialled or that of the caller disappears from the display and is replaced by the duration of call (hh−mm−ss).
5.12 Key lock
3 sec Activate the key lock function
2x
Deactivate the key lock function
Incoming calls can be taken as normal even when the key lock function is activated (also refer
to Section 7.4). The key lock function remains active after the call has been ended.
5.13 Temporary tone dialling
If you only operate the telephone using the Pulse dialling method, you can still make use of the
advantages of the Tone dialling method (e.g.: for remote access of the answering machine).
4 sec Switch to Tone dialling (for the duration of the call)
When the call is ended, the telephone automatically switches back to Pulse dialling.
5.14 Notes on range
The handset has a range of approx. 50 meters in closed rooms and approx. 300 meters outdoors.
In the case of a good connection to the base station, the h icon lights up continuously in the display.
If the handset is moved too far from the base station, the h icon flashes and acoustic
warning signals are issued. Move towards the base station, otherwise the call will be disconnected.
appears in the
If the connection to the handset has been lost, the message Base 1
display.
5.15 Searching for the handset (Paging)
If you have misplaced the handset, it can be located easily. Press the Paging button on the base
station; the handset rings for 30 seconds. To terminate the ringing function before the 30 seconds
has elapsed, simply press the Paging button again or the Call button on the handset.
All the handsets registered on the base station ring.
or Ends paging prematurely.
5.16 Switching the handset on /off
3 sec Switch on/off
It is not possible to switch the handset on/off if the handset is in the base station.
81
− Navigating in the Main Menu −
6
Navigating in the Main Menu
6.1
Navigating in the menu
All the functions can be accessed via the various menus. Refer to the menu structure in Chapter
7 to find how to access the respective functions.
1. Open the required menu or phone book using the relevant button.
2. Press or to select the required submenu.
3. Press the button to open the submenu.
4. Press or to select the required function.
5. Press the button to open the function.
6. Press or to select the setting required.
7. Enter digits or letters using the relevant digit keys.
8. Press the button to confirm the input.
9. Press the button to move one menu level back.
Every process is automatically cancelled if there is no input within 20 seconds.
6.2
Acoustic signals
To simplify operating the telephone, it is equipped with various confirmation, notification, warning
and others acoustic signals. Some of them can be activated or deactivated as required. These
include:
S Key beep: A short tone is issued each time a button on the handset is pressed.
S Low battery" warning signal: If the battery capacity is too low, a warning signal is
issued to remind you to charge the handset.
S Range warning signal: This acoustic warning signal is issued when the handset is
moved too far from the base station.
The way to switch the signals on and off is described in the menu structure in Section 7.4.
Other acoustic signals simplify navigating in the menu. They cannot be deactivated. The most important of these are:
S Confirmation signal : Two short, ascending acoustic signals are issued when input is completed successfully.
S Notification signal : A longer, higher acoustic signal is issued on reaching the
end of a menu after scrolling up or down, indicating there are no further selection options.
6.3
Example
Using the example of Writing an SMS", this section explains how to navigate in the main menu
and submenus and complete entries. Proceed as in this example for all the settings.
Open the main menu
or SMS
or Write
,
Select the SMS function and confirm
Select the function and confirm (Menu SMS / WRITE)
Write Msg
, Confirm the request for input
Enter a message and confirm
Number ?
, Confirm the request for input
Enter a phone number and confirm
Sending...
82
,
Send process is started
7
Menu Structure
Access the Main Menu by pressing the button. Then use the or buttons to select the required submenu and confirm your selection by pressing
the button. Or, type in the required information (individual entries are subsequently printed in italics and identified by ). Your entry is normally confirmed
by an acoustic signal .
7.1
Phone book
Add Entry
Modify Entry
Delete Entry
Phonebook
7.2
Number ?
Number xy
Confirm ?
Melody 1−5
Melody 1−5
Text messages (SMS)
Inbox
Reply
Delete Entry
Forward
Details
Personal SMS
Write
Write Msg
Text
Delete All
Inbox
Personal SMS
Confirm ?
Confirm ?
SMS Settings
Msg Alert
Send Service
On
Off
Send 1
Send 2
Receive 1
Receive 2
Send 1
Send 2
Number
Rcv Center
Send Center
Terminal No
Number ?
Number
Number
Number
Number
Number
Sending...
− Menu Structure −
SMS
Name ?
Name xy
Name xy
83
84
7.3
Setup
Setup
Base Volume
Volume 1
Volume 2
Volume 3
Volume 4
Volume 5
Volume Off
Base Melody
Melody 2
Melody 3
Melody 4
Melody 5
Pin ?*
PIN
internal Handset no. Pin Code*
Pin ? old PIN
New Pin
new PIN
Retype
Dial Mode
Tone Dial
Pulse Dial
Recall 1
Recall 2
PIN
Confirm ?
Default**
Pin ?
All PINs are set to 0000 at the factory. Press the button for two seconds to cancel the programming process.
Attention: All settings are reset to their default setting! All list entries are deleted!
new PIN
− Menu Structure −
Del Handset
Recall Mode
*
**
Melody 1
7.4
Handset
Handset
Beep
Keytone
Low Battery
Out Of Range
On
Off
On
Off
On
Off
Volume 1 − 5 / Volume Off
Ext Ring Vol
Volume 1 − 5 / Volume Off
Int Melody
Melody 1 − 10
Ext Melody
Melody 1 − 10
Auto Answer*
On
Off
Handset Name
ABC
Language
English / Français
Español / Italiano
Deutsch / Nederlands
...
*
Keylock ?
Redial Size***
Long (32 Digits)
Short (20 Digits)
On**
ON: An incoming call is taken by removing the handset from the base station (default setting). After removing the handset, all the buttons are inhibited
for four seconds.
OFF: An incoming call can only be taken by pressing the button.
** Deactivate key lock: Press the button twice.
*** A phone number with maximally 32 or 20 digits is stored in the redialling list depending on the setting.
− Menu Structure −
Int Ring Vol
85
86
7.5
Set date, time and alarm
Date & Time
7.6
Set Date
Date
Set Time
hh−mm
Set Alarm
Off
On
hh−mm
Registering base station and handsets
Register
Select Base
Reg Base
Base 1
Auto
Base 1 2 3 4
− Menu Structure −
− Phone Book −
8
Phone Book
The phone book can store 50 phone numbers, each with the associated name. Each phone number can comprise a maximum of 24 digits and each name a maximum of 12 letters.
8.1
Entering phone numbers in the phone book
Refer to. Section 7.1
If the name already exists in the phone book, an acoustic signal is issued and
Add Entry
appears in the display again. You have to enter another name.
The corresponding melody rings when a call is received from the caller entered. This
assignment only functions when your telephone connection and that of the caller implement the caller number display function (CLIP).
8.1.1 Notes on storing
Always enter the area access code with the phone numbers so that the telephone can
also assign incoming local calls to a phone book entry.
If the memory capacity of 50 phone numbers is reached, the message Memory Full
appears in the display. Phone book entries will then have to be deleted in order create
space.
8.1.2 Entering text
The digit keys are also labelled with letters. Pressing the respective key the necessary number
of times enables capital letters and digits to be entered.
Example: To enter the name Peter".
Press 1 x button , 2 x button , 1 x button , 2 x button and 3 x button .
Further notes on entering text:
Press once: Space
Deletes the last entry
or Move the cursor
Change between upper and lower case lettering
To enter the same letter twice, press the relevant button until the letter appears then wait till the
cursor automatically skips one position forward.
8.2
Changing phone book entries
Refer to. Section 7.1
To select an entry directly, press the corresponding button to enter the first letter of the
name required. To select the name Peter" directly, for example, press once.
8.3
Deleting phone book entries
Refer to. Section 7.1
The deletion process is cancelled by pressing the button.
8.4
Dialling a phone number from the phone book
Refer to. Section 5.8
87
− Caller Display (CLIP Function) −
9
Caller Number Display (CLIP)
If your telephone system is equipped with the CLIP function (CLIP = Calling Line Identification Presentation), the number of the caller appears in the display when they ring. If the caller’s number
is stored in the phone book, the name appears in the display instead of the phone number. If the
caller has suppressed the transfer of his phone number, the number is not displayed; the message
Withheld
appears in the display instead.
The calls list can contain up to 40 phone numbers. When the list is full, the oldest entry is automatically deleted on receipt of a new call. If new phone numbers have been stored in the calls list in
your absence, the
icon flashes in the display.
Caution: The caller number display (CLIP) and display of date and time are optional
services offered by your telephone network provider. Contact them for any detailed
information.
9.1
Calls list
9.1.1 Viewing numbers in the calls list
Proceed as follows to view the phone numbers in the calls list in the display:
The last number received appears in the display
appears in the display.
If the calls list is empty, the message Empty
or Select other phone numbers from the calls list.
If no further phone numbers are available, an acoustic signal is issued.
Two display icons provide information on the status of the entry:
The call was taken.
The call was not taken.
Pressing the button calls in further information on the phone number displayed, if
required:
S If the phone number is longer than 12 digits, the remaining digits are displayed.
S Displays the date and time of the call if this data was transferred from the caller.
Press the button to exit from the calls list.
9.1.2 Dialling numbers in the calls list
To call back a number displayed in the calls list directly, press the button.
9.1.3 Storing numbers from calls list in the phone book
A phone number stored in the calls list can be transferred directly to the phone book.
, or Select a phone number
, Add ?
Name ?
Initiate the storing process
, Enter the name and confirm
(for text input, refer to Section 8.1.2)
If the name already exists in the phone book, an acoustic signal is issued and the selected phone number reappears in the display.
1234567890
Confirm the phone number selected
Melody 1
or , Select the required melody and confirm
9.1.4 Deleting a phone number from the calls list
, or Select a phone number
, Delete ?
Initiate the deleting process and confirm for the phone
number selected
9.1.5 Deleting all phone numbers from the calls list
, or Open the calls list
3 sec , Delete All
88
Initiate the deleting process and confirm
− Text Messages (SMS) −
10
Text Messages (SMS)
The telephone can be used to transfer short text messages (SMS = Short Message Service) with
up to 160 characters via the conventional telephone network provided the following conditions are
fulfilled:
S The CLIP function is enabled for your telephone connection (refer to Section 9).
S The SMS has been activated by your telephone network provider.
Please note that sending text messages is subject to charges.
The charges are made by your telephone network operator.
If an SMS is sent to another connection in the conventional telephone network which is
has no SMS service or cannot receive texts, the message is automatically provided as
a voice message.
Sending SMS messages is not available for Call−by−Call connections at present.
Contact your telephone network provider for detailed information on transferring SMS messages
via the conventional telephone network.
10.1 SMS settings
10.1.1 Service centre
All SMS messages are distributed via a Service Centre. Swisscom", Cablecom" and other telephone network providers offer this service. Your SWITEL telephone is prepared for operation with
Swisscom". The number of the Swisscom" Service Centre is 0622 100 000. The Swisscom"
SMS functionality is already enabled. No further registrations are necessary.
In order to use the SMS services of other telephone network providers you must program the call numbers for the SMS receiving centre and SMS sending centre in the
main menu. The registration procedure required by the various providers can vary;
therefore, please ask the provider of your choice for the necessary phone numbers and
procedure for enabling the SMS service.
10.2 Sending an SMS
Refer to. Section 7.2
It is not possible to send SMS messages from a private branch exchange.
When you select writing a new SMS text, the previous text initially appears in the display. Delete the old text by pressing the button before beginning to write the new
one.
The way in which to enter texts is described in Section 8.1.2.
10.3 Receiving an SMS
Refer to. Section 7.2
If it is not possible to receive an SMS, delete the last two digits of the programmed call
numbers in the receiving sending centre. The call number is then 0622 100 0.
A specific, acoustic signal indicates an SMS has been received.
This acoustic signal can be deactivated, if necessary (refer to Section 7.2).
In addition, the Envelope icon in the display indicates that a new SMS message has been received.
10.4 Managing text messages
A maximum of 15 text messages can be stored (jointly in the basic Inbox and personal SMS directories).
When all the memory locations are full, the oldest entry is deleted from the respective
directory when a new SMS text message is received.
10.5 Personal SMS mailbox
In addition to the basic Inbox directory, a personal SMS mailbox is also available. This function
enables SMS text messages, to which only you have access, to be received and sent.
The SMS mailbox can only be used when the telephone network provider supports the
facility. Therefore, ask your telephone network provider with respect to setting up your
personal SMS mailbox.
89
− Multiple Handsets −
11
Multiple Handsets
Up to five handsets can be registered on the base station. Each handset can only be registered
on one base station at any particular time.
The standardised GAP Standard enables SWITEL handsets and even those from other
manufacturers to be integrated in the telephone system. In the same way, an
SWITEL handset can be registered on base stations from other manufacturers as long
as it, too, complies with the GAP Standard.
The use of multiple handsets provides the following options:
S Internal calls between the handsets (intercom),
S External calls can be transferred between the handsets,
S Incoming external calls are received on all handsets,
S Conference calls between two handset users and one external caller.
If one of the other handsets is currently using the outside line, the EXT icon appears
in the display. It is not possible to make another external call.
11.1 Internal calls
As soon as more than one handset (subsequently abbreviated to: HS) has been registered on the
base station, they can be used for internal calls.
Following example: HS 1 (internal HS no. 1) calls HS 2 (internal HS no. 2).
HS 1: Connection is established to other handset
, 2
HS 2: Takes the call
If an external call is received during an internal call, short acoustic signals are issued
and the caller’s number appears in the display, if available.
Ends the internal call
Takes the incoming external call
11.2 Transferring external calls internally
If you have taken an external call on a handset, the call can be transferred to another internal
handset.
HS 1: Connection is established to other handset
, 2
If the handset called does not answer, take the call back by pressing the button.
After the internal call has been taken by the handset called, the following options are available:
11.2.1 Holding a call / Brokering
You can talk to the party using the other handset and then return the external caller by pressing
the button. You can switch between the external and internal parties as often as necessary.
11.2.2 Transferring call
By pressing the button on the first handset, the external call is transferred to the handset called.
90
− Multiple Handsets −
11.3 Conference calls
An external call can be transferred to another internal handset for a conference call. This enables
two handset users to confer with the external caller at the same time.
HS 1: Establish a connection to the external subscriber
HS 1: Connection is established to the other handset
, 2
HS 2: The internal call is taken
HS 1: Connects all calls to a joint conference
During a conference call, press the button to put the external caller on hold. Press
the , buttons in succession to activate the conference facility again.
HS 1 or HS 2: Press the button to end the conference call.
11.4 Registering and deregistering handsets
11.4.1 Registering more DC42 handsets
3 sec Initiate the registration facility by pressing the Paging
button on the base station
After pressing the Paging button, the handset registration process must be completed
within the following 90 seconds:
menu
, or , Open the Register
or , , Select the Reg Base
function and confirm
Enter the number of the base station (1 to 4) and confirm
the input
If the handset is already connected to a base station, the corresponding number flashes.
A search is then made for the base station.
When the base station is found, proceed as follows:
, Enter the PIN (default setting: 0000) and confirm the input
The handset is then registered.
The handset is assigned an internal call number. The handset already registered has
the internal call number 1. The second handset registered is assigned the internal call
number 2. The internal call number appears in the right of the display when in Standby
mode.
11.4.2 Registering DECT−GAP handsets from other manufacturers
In order to register a DECT−GAP handset from another manufacturer, follow the instructions in the
operating manual provided by the original manufacturer and then press the Paging button on your base station for 3 seconds. Use the PIN to register (default setting: 0000).
11.4.3 Deregistering handsets
A handset can only be deregistered by another handset still registered. It is not possible to complete the deregistration using the handset which is to be deregistered.
menu.
, or , Open the Setup
or , , Select the Del Handset
menu and confirm.
Enter the PIN (default setting: 0000) and confirm the input
Press the button to cancel the process.
, Enter the internal call number of the handset to be
deregistered and confirm the input. 91
− Multiple Handsets −
11.5 Additional base stations
The range of the handset can be increased by using several base stations. To implement the function, all the base stations must be connected to a telephone line connection. Depending on the
intended use, each base station can be assigned the same telephone number or each can be assigned a different call number. Pay attention that all the base stations overlap with regard to their
range.
The handset must be registered on each base station.
Please test the range of the handset before starting up a new base station. If a handset is registered on the base station and the automatic base station dialling function has been activated on the
handset (refer to Section 7.6), the handset is always automatically transferred to the next base
station.
11.5.1 Selecting a base station
menu
, or , Open the Register
function and confirm
or , Select the Select Base
All the base stations to which the handset is already registered appear in the display.
The number of the base station currently active flashes.
, Enter the internal number of the base station to which the
handset should switch and confirm the input. Or:
This option causes the handset to switch to the next base
or Auto , station automatically when the connection to the current
base station is interrupted.
92
− Settings −
12
Settings
12.1
Default settings
Language:
German
SMS receive centre 1:
06221000
Handset name:
DC42 1
SMS receive centre 2:
Empty
Handset ringer volume:
3
SMS send centre 1:
06221000
External ringing melody: 3
SMS send centre 2:
Empty
Internal ringing melody:
1
SMS receive signal:
On
Base ringer volume:
3
Low battery warning signal: On
Base ringing melody:
2
Out of range warning signal: Off
Receiver volume
3
Key beep:
On
PIN:
0000
Key lock:
Off
Dialling mode:
Tone (DTMF)
Automatic answer:
On
Time / Alarm:
Off
Recall time 1 (standard): 90 ms
Recall time:2
250 ms
Pause:
3 seconds
The handset and base station can be reset to their default settings.
Refer to Section 7.3 for the procedure to do this.
Please note that, on resetting the default settings, the entries in the phone book, calls
list and phone numbers in the redialling list are deleted!
12.2 PIN code
The PIN code can contain up to four digits. The default setting of the PIN code is 0000".
If you change a PIN code, keep a note of the new PIN code in a safe place. Many of
the telephone functions cannot be used without the PIN code!
12.3 Recall times
The recall time determines the duration of a tone which is produced by pressing a button on the
telephone. In order that your telephone system can function properly, it may be necessary to adapt
the recall time (flash time).
There are two recall times available for selection in order to use functions in private branch exchanges or supplementary services offered by your telephone network provider (also refer to Sections 2.7). You can select between a recall time of 90 ms (default setting) and 250 ms. The procedure to set the recall times is described in Section 7.3 (also refer to Section 12.1).
12.4 Handset name
An individual name can be programmed for the handset.
It can comprise up to 10 characters.
93
− Troubleshooting −
13
Troubleshooting
Should problems arise with the telephone, refer to the following information first.
Faults
Corrective measures
No telephone calls possible
−
−
−
The telephone line is not connected properly or is defective.
Only use the telephone connection cable supplied.
Test whether the telephone connection is in order by using
another telephone.
The power adaptor plug is not plugged in or there is a complete power failure.
The rechargeable standard batteries are empty or defective.
The handset is too far from the base station.
Connection is disturbed or
cut off
−
−
The handset is too far from the base station.
The base station is in an unsuitable location.
Dialling not possible
−
Dialling mode is set incorrectly.
The system no longer responds or is in an undefined state
−
Reset the default settings (refer to Section 12.1). Before
doing so, disconnect the power adapter plug briefly from the
power socket.
The charging control lamp
does not light up
−
Place the handset correctly in the base station, clean the
contact surfaces on the handset and the base station with a
soft, dry cloth.
−
−
The battery icon flashes in −
the display after a few
hours
Place the handset in the base station for 14 hours. If this
does not help, replace the rechargeable batteries.
Display is dark
−
Caused by exposure to direct sunlight.
Allow the handset to cool down.
The caller number display
(CLIP) does not function
−
The caller number display function is an optional service
offered by telephone network providers. Contact your network provider for further information.
The caller has suppressed the transmission of their phone
number.
−
94
− Important Information −
14
Important Information
14.1
Technical data
Feature
Value
Standard
DECT−GAP
Power supply, base station
220/230 V, 50 Hz
Range (outdoors/indoors)
300 m / 50 m
Standby
Up to 109 h
Max. talk time
Up to 10 h
Rechargeable standard batteries
2 x AAA (1.2V / 550 mAh)
Dialling method
Tone dialling (DTMF)
Pulse dialling
Permissible ambient temperature
10°C to 30°C
Permissible relative humidity
20% to 75%
Recall (Flash) function
90 ms / 250 ms
Abbreviations:
DECT:
Digital Enhanced Cordless Telephone
(standard for cordless telephones).
GAP:
Generic Access Profile
(standard for the interoperation of handsets and base stations from other
manufacturers).
DTMF:
Dual Tone Multi−Frequency
95
− Index −
15
Index
A
Acoustic signals, 82
Additional base stations, 92
Alarm, 93
Analogue telephone connection, 77
Answering machine remote access, 81
Auto answer, 93
Automatic answering, 85
B
Base ringer volume, 93
Base ringing melody, 93
Battery charge status, 77, 79
C
Call back missed calls, 81
Call number length, 79
Call waiting, 80
Caller number display (CLIP), 88
Calls list, 79, 88
Calls list memory capacity, 88
Cancel process, 82
Changing phone book entries, 83, 87
Charging the batteries, 77
CLIP, 88
Conference calls, 91
Confirm entry, 82
Confirmation signal, 82
Connecting the base station, 77
Creating phone book entries, 83
D
DECT, 95
Default settings, 84, 93
Deleting a phone number from the calls list, 88
Deleting all phone numbers from the calls list, 88
Deleting an SMS, 83
Deleting phone book entries, 83, 87
Deleting the last entry, 80
Depiction of button icons, 78
Depiction of input, 79
Deregistering handsets, 91
Deregistering the handset, 84
Detailed information on CLIP, 88
Dialling mode, 93
Dialling numbers in the calls list, 88
Dialling pause, 80, 93
Dialling phone numbers from the phone book, 81
Digital telephone connection, 77
Display indicators , 79
DTMF, 95
96
E
Enter terminal number, 83
Entering phone numbers in the phone book, 87
Entering text, 87
Exit the calls list, 88
External calls, 79
External ringing melody, 93
G
GAP, 90, 95
H
Handset, 85
Handset loudspeaker, 81
Handset name, 79, 85, 93
Handset ringer volume, 93
Handsfree, 80
Holding a call / Brokering, 90
I
Inserting the batteries, 77
Internal calls, 79, 90
Internal ringing melody, 93
K
Key beep, 82, 93
Key lock, 79, 81, 85, 93
Key tones, 85
L
Language, 93
Low battery warning signal, 85
M
Main menu, 79
Making a call, 80
Managing SMS, 89
Managing text messages, 89
Multiple handsets , 90
Muting the microphone, 81
N
Navigation, 82
Notification signal, 82
O
Opening the main menu, 82
Operating elements, 78
Outside line, 80
− Index −
P
Package contents, 77
Paging, 81
Pause, 80, 93
Personal SMS mailbox, 89
Phone book, 79, 83, 87
Phone book memory capacity, 87
PIN code, 84, 93
Private branch exchanges, 77, 80
Pules dialling mode, 77
Pulse, 84
Pulse dialling mode, 84
R
R button, 77
R−button, 80
Range, 79, 81
Range warning signal, 82, 85, 93
Recall time, 84, 93
Receiver volume, 81, 93
Receiving an SMS, 83, 89
Redialling, 80
Registering and deregistering handsets, 91
Registering base station and handsets, 86
Registering DECT−GAP handsets from other manufacturers, 91
Registering handsets, 91
T
Taking a call, 80
Talk time, 81
Technical data, 95
Telephoning, 79
Text messages, 89
Time, 79, 93
Tone, 84
Tone (DTMF) dialling mode, 77, 81, 84
Tones, 82
Transferring call, 90
Transferring external calls internally, 90
Troubleshooting , 94
V
Viewing numbers in the calls list, 88
W
Warning signal "Low battery", 93
Warning tone "Low battery", 82
Writing an SMS, 82, 83
S
Safety information , 76
Searching for the handset, 81
Select SMS send mode, 83
Selecting a base station, 92
Selecting phone book entries directly, 81
Selecting submenus, 82
Sending an SMS, 89
Set alarm, 86
Set date, 86
Set time, 86
Setting the alarm, 85
Setting the language, 85
Setting the ringing melody, 84, 85
Setting the time, 85
Setting the volume, 84, 85
Settings, 93
Setup, 84
SMS, 83, 89
SMS provided as a voice message, 89
SMS receive centre, 93
SMS receive signal, 89, 93
SMS receiving centres, 83
SMS send centre, 93
SMS sending centres, 83
SMS service centre, 89
SMS settings, 83, 89
Storing number from calls list in phone book, 88
Storing phone numbers, 87
97
− Index −
98
− Index −
99
Declaration of conformity 4
WE
TELGO AG
OF
Route d’Englisberg 17
CH−1763 Granges−Paccot
Declare under our own responsibility that the product
MODEL:
DC42
DESCRIPTION:
Cordless DECT telephone
Is in conformity with directives: R&TTE Directive (1999/5/EC)
COMPLIANCE IS ACHIEVED BY CONFORMITY TO THE FOLLOWING:
EN60950−1:2001, EN301489−1/6, EN301406
TEST REPORT NUMBERS:
ET94B−08−034, ET93B−08−028, ET93B−08−028−1, ET94B−08−034−1, ET94S−08−121−02,
ET94S−08−121−01, ET94B−08−034−2
AUTHORISED BY:
________________________
Signed:
Name (printed):
Selim Dusi
Position in company:
Managing Director
Date of issue:
06.10.2005
Copies of this document will be held on file for a period of 10 years after the last production.
Supplier:
TELGO AG, Route d’Englisberg 17
CH−1763 Granges−Paccot
Product:
DC42
This product is intended for connection to analogue PSTN lines within Switzerland.
However, due to differences between the individual PSTNs provided in the different
countries, the approval does not, of itself, give an unconditional assurance of successful
operation on every PSTN network termination point.