1
14800
14817
Typ: LPL# 014817
Typ: LPL# 014831
Typ: LLL # 014800
www.gev.de
14831
B
LPL
LLL
4x
2x
4x
2x
A
C
D1
D2
C
2
4x
E
E1
Click
Click
F
G
1
2
3
H
I
+/- 30 °
0 - 45 °
- 90°
+ 90°
3
LED-Strahler/Leuchte mit Bewegungsmelder
Mit dem Kauf dieses Artikels haben Sie
sich für ein qualitativ hochwertiges GEV
Produkt entschieden. Bitte lesen Sie diese
Bedienungsanleitung
sorgfältig
durch,
um ein einwandfreies Funktionieren zu
gewährleisten. Bewahren Sie diese Anleitung
sorgfältig auf, um gegebenenfalls später
nachlesen zu können.
notwendige Infrarotlicht wegfiltern. Beachten
Sie die Länge des Anschlusskabels zum LEDStrahler. Eine Verlängerung des Kabels ist nicht
möglich. Montieren Sie das Solarmodul gemäß
Abb. A. Richten Sie das Solarmodul optimal zum
Sonnenlicht aus (Abb. B).
Montageort LED-Strahler
Die sicherste Bewegungserfassung wird erzielt,
wenn man sich quer zum Bewegungsmelder
bewegt.
Arbeitsweise
Der LED Strahler mit Bewegungsmelder
arbeitet nach dem Prinzip der Passiv-InfrarotTechnik. Über einen PIR-Sensor nimmt der
Bewegungsmelder in seinem Erfassungsbereich
sich bewegende Wärmequellen wahr und schaltet
automatisch ein. Ruhende Wärmequellen
schalten den Bewegungsmelder nicht ein. Der
einstellbare Dämmerungsschalter sorgt dafür,
dass der Bewegungsmelder wahlweise bei Tag
und Nacht oder nur bei Dunkelheit arbeitet. Im
Bewegungsmelder Modus schaltet der LEDStrahler die LED bei erkannter Bewegung an
und 10 Sekunden nach der letzten erkannten
Bewegung aus. Im Überwachungsmodus fängt
bei erkannter Bewegung die LED an zu blinken
und schaltet 10 Sekunden nach der letzten
erkannten Bewegung aus.
Installation LED-Strahler
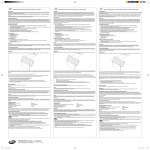
Montieren Sie den LED-Strahler gemäß Abb. C.
LED–Strahler LPL 14817/LPL 14831,
solarbetrieben
Stecken Sie den Stecker des Akkupack in die
Buchse des LED-Strahlers (Abb. D1) und setzen
den Strahler auf die Wandanschlussplatte
(Abb. E). Stecken Sie den Stecker der Solarzelle
in die Buchse des LED-Strahlers (Abb. E1).
LED-Strahler LLL 14800, batteriebetrieben
Setzen Sie 4 x 1,5 V Batterie Typ C (LR
14) unter Beachtung der Einbaulage ein
(Abb. D2) und setzen den LED-Strahler auf die
Wandanschlussplatte (Abb. E).
LED–Strahler LPL 14817/LPL 14831,
solarbetrieben
Inbetriebnahme
LED–Strahler LPL 14817/LPL 14831,
solarbetrieben
Vor der erstmaligen Verwendung muss der Akku
geladen werden. Schalten Sie den LED-Strahler
aus (siehe Einstellungen) und lassen den Akku 2
Tage bei Sonnenlicht aufladen.
Die Solarzelle lädt den integrierten Akku am Tage
auf.
Sicherheitshinweise
Bei Schäden, die durch Nichtbeachtung
dieser Bedienungsanleitung verursacht
werden, erlischt der Garantieanspruch!
Für Folgeschäden übernehmen wir
keine Haftung! Bei Sach- oder Personenschäden,
die durch unsachgemäße Handhabung oder
Nichtbeachtung
der
Sicherheitshinweise
verursacht werden, übernehmen wir keine
Haftung. In solchen Fällen erlischt jeder
Garantieanspruch.
Aus
Sicherheitsund
Zulassungsgründen ist das eigenmächtige
Umbauen und/oder Verändern des Gerätes nicht
gestattet. Wenn Sie sich bei Montage, Anschluss
oder Installation nicht sicher sind, bzw. Zweifel
über die Funktionsweise besteht, so nehmen Sie
Montage/Anschluss/Installation nicht selbst vor,
sondern wenden Sie sich an eine Fachkraft.
Einstellungen
LUX Dämmerungsschalter ca. 3 - 1000 Lux
(Abb. G).
Betriebswahlschalter (Abb. F).
F1=AUS
F2 = Bewegungsmelder Modus (LED an bei Bewegungserkennung)
F3 = Überwachungsmodus (LED blinkt bei Bewegungserkennung)
Der Bewegungsmelder lässt sich horizontal
verstellen (Abb. H). Der Erfassungswinkel und
die Reichweite lässt sich zusätzlich durch eine
aufsteckbare,
zuschneidbare
Linsenmaske
begrenzen.
Richten Sie den LED-Strahler nach Ihren
Bedürfnissen aus (Abb. I).
Montageort/Installation Solarmodul
(LED–Strahler LPL 14817/LPL 14831,
solarbetrieben)
Wählen Sie vor der Montage des Solarmoduls
einen geeigneten Platz im Außenbereich aus.
Überprüfen Sie bei Tageslicht, ob genug Licht
zur Ladung der Akkus vorhanden ist. Das
Solarmodul darf nicht hinter Glasscheiben
aufgestellt werden, da diese das zum Laden
4
Reduzierung der Leuchtdauer der LEDs
Schmutz, Laub, Schnee auf den Solarzellen
reduzieren den Ladestrom
Reduzierung der Leuchtdauer der LEDs
Kalte Temperaturen vermindern die Leistung
der Akkus
Reduzierung der Leuchtdauer der LEDs
Batterie- und Akkuhinweise
Recycling-Hinweise
Der Solar-LED Strahler darf nur mit einem 4,8 V
NiMh 1800 mAh betrieben werden!
Altbatterien dürfen nicht mit dem
unsortierten Hausmüll entsorgt werden.
Besitzer von Altbatterien sind gesetzlich
zur Rückgabe verpflichtet und können diese
unentgeltlich
bei
den
Verkaufsstellen
zurückgeben. Batterien enthalten umwelt- und
gesundheitsschädliche Stoffe und müssen
daher fachgerecht entsorgt werden.
Dieses Gerät darf nicht mit dem
unsortierten Hausmüll entsorgt werden.
Besitzer von Altgeräten sind gesetzlich
dazu
verpflichtet,
dieses
Gerät
fachgerecht zu entsorgen. Informationen
erhalten Sie von Ihrer Stadt- bzw. Gemeindeverwaltung.
Technische Daten
Erfassungsbereich140°
Reichweite
ca. 10 m, abhängig von der Montagehöhe
Zeiteinstellungfix, ca. 10 Sek. nach der letzten erkannten Bewegung
Dämmerungsschalter
ca. 3 – 1.000 Lux, stufenlos einstellbar
Lampenleistung
1x 3 W LED, wartungsfrei
Lichtfarbe
ca. 4500 K bis 6000 K
FarbwiedergabeindexRa74
SchutzartIP44
SchutzklasseIII
Empfohlene Montagehöhe
1,8 m
LED-Strahler LPL 14817/LPL 14831, solarbetrieben
Betriebsspannung
Lichtstrom LPL 14817
Lichtstrom LPL 14831
Akkus
Leuchtdauer
(bei vollgeladenen Akkus)
Abmessungen Solarmodul
Abmessungen LPL 14817
Abmessungen LPL 14831
4,8 V
120 Lumen
100 Lumen
4,8 V NiMh 1800 mAh (im Lieferumfang)
ca. 105 Tage bei 5 Schaltungen täglich
B 120 x H 195 x T 67 mm
B 70 x H 170 x T 120 mm
B 70 x H 210 x T 120 mm
LED-Strahler LLL 14800, batteriebetrieben
Betriebsspannung
6,0 V
Lichtstrom
140 Lumen
Batterien
4 x 1,5 V Typ C (LR14)
Leuchtdauer
(bei neuen Markenbatterien)
ca. 570 Tage bei 5 Schaltungen täglich
Abmessungen
B 70 x H 170 x T 120 mm
Technische und optische Änderungen ohne Ankündigung vorbehalten.
5
GB
DE
Die Sonnenscheindauer ist im Winterhalbjahr
geringer als im Sommer
FR
Ergebnis
Reduzierung der Leuchtdauer der LEDs
IT
Bedingung
Schattige Plätze führen zu verminderter
Ladung der Akkus
PL
Besondere Beachtung bei Solarleuchten (LED–Strahler LPL 14817/LPL 14831)
LED floodlight/lamp with motion detector
By purchasing this item, you have chosen a
high-quality GEV product. Please read these
operating instructions carefully to ensure
correct operation. Keep these instructions
in a safe place so that you can refer back to
them if necessary.
LED floodlight mounting position
Operation
LED floodlight LPL 14817/ LPL 14831,
solar-powered
Connect the battery pack plug to the LED
floodlight socket (Fig. D1) and place the floodlight
on the wall connection plate (Fig. E). Insert the
solar panel plug into the LED floodlight socket
(Fig. E1).
Motion detection is maximised when moving at
an angle to the motion detector.
LED floodlight installation
Mount the LED floodlight as shown in Fig. C.
The LED floodlight with motion detector
functions using passive infrared technology.
If the motion detector’s PIR sensor detects a
moving heat source in its field of detection, it
switches on automatically. Static heat sources
do not activate the motion detector. The
adjustable twilight switch can be set to ensure
that the motion detector will operate either
during the day and night or only when it is dark.
When the device is in motion detector mode,
the LED floodlight switches on the LED when
movement is detected and switches it off 10
seconds after the last movement is detected.
When the device is in monitoring mode, the LED
starts to flash when movement is detected and
switches off 10 seconds after the last movement
is detected.
LED floodlight LLL 14800, battery-powered
Insert four 1.5 V C type batteries (LR14), taking
care to install them correctly (Fig. D2), and place
the LED floodlight on the wall connection plate
(Fig. E).
Activation
LED floodlight LPL 14817/ LPL 14831,
solar-powered
You must charge the battery before using the
device for the first time. Switch off the LED
floodlight (see settings) and let the battery
charge up in the sunlight for two days.
LED floodlight LPL 14817/LPL 14831,
solar-powered
The solar panel recharges the
rechargeable battery during the day.
in-built
Settings
LUX twilight switch approx. 3 to 1,000 lux
(Fig. G).
Operation selector switch (Fig. F).
F1=OFF
F2 = motion detector mode (LED is switched on when movement is detected)
F3 = monitoring mode (LED flashes when movement is detected)
The motion detector can be adjusted horizontally
(Fig. H). You can also restrict the angle of
detection and the range by attaching a lens
mask, which can be cut to size.
Adjust the LED floodlight to the required position
(Fig. I).
Safety instructions
Under no circumstances does the warranty
cover damage resulting from failure
to observe these instructions. Nor
do we accept liability for any indirect
damage. Similarly, we can accept no
liability for any material damage or bodily injury
caused by mishandling or failure to observe
the safety instructions. No warranty claim may
be made in these cases. In addition, for safety
and compliance reasons, you are not authorised
to dismantle or alter the device in any way. If in
any doubt, rather than mounting, connecting
and installing the equipment yourself, contact a
qualified technician.
Solar module mounting position/
installation
(LED floodlight LPL 14817/LPL 14831, solarpowered)
Choose a suitable outdoor position before
installing the solar module. During the day, check
that there is enough natural light to recharge the
batteries. Do not place the solar module behind
glass, as this filters out the infrared light required
to charge the batteries. Please observe the
length of the cable connecting the module to the
LED floodlight. The cable cannot be extended.
Mount the solar module as shown in Fig. A.
Adjust the solar module to ensure that it is in an
optimum position for capturing sunlight (Fig. B).
6
Reduced LED light duration
Dirt, foliage or snow on the solar panels reduce
the charging rate
Reduced LED light duration
Cold temperatures reduce battery
performance
Reduced LED light duration
Battery and rechargeable battery
information
Recycling instructions
Do not dispose of this device with unsorted
household waste. Owners are required
by law to correctly dispose of their old
devices. Contact your local town council
for further information.
Only operate the solar-powered LED floodlight
with a 4.8 V NiMh 1,800 mAh rechargeable
battery.
Do not dispose of used batteries with
unsorted household waste. You are
required by law to return all used batteries.
These can be returned free-of-charge to
the place of sale. Batteries contain substances
that are harmful to the environment and to
human health and must therefore be disposed
of correctly.
Technical information
Field of detection
Range
Time setting
Twilight switch
Lamp power
Light colour
Colour rendering index
Protection type
Protection class
Recommended installation height
140°
approx. 10 m, depending on the installation height
set to approx. 10 seconds after the last movement
is detected
approx. 3 - 1,000 lux, infinitely variable
1 x 3 W LED, maintenance-free
approx. 4500 K to 6000 K
Ra 74
IP44
III
1.8 m
LED floodlight LPL 14817/LPL 14831, solar-powered
Operating voltage
Luminous flux
Luminous flux
Rechargeable batteries
Light duration
(with fully-charged batteries)
Solar module dimensions
Dimensions LPL 14817
Dimensions LPL 14831
4.8 V
120 lumens
100 lumens
4.8 V, NiMh, 1,800 mAh (included)
approx. 105 days if switched on five times daily
W 120 x H 195 x D 67 mm
W 70 x H 170 x D 120 mm
W 70 x H 210 x D 120 mm
LED floodlight LLL 14800, battery-powered
Operating voltage
6.0 V
Luminous flux
140 lumens
Batteries
4 x 1.5 V, C type (LR14)
Light duration (with new branded batteries) approx. 570 days if switched on five times daily
Dimensions
W 70 x H 170 x D 120 mm
Technical and design features may be subject to change without notice.
7
GB
DE
There is less sunlight during the winter months
than in the summer
FR
Result
Reduced LED light duration
IT
Condition
Shaded positions reduce battery charging
PL
Special notice for solar-powered lights (LED floodlight LPL 14817/LPL 14831)
Projecteur à LED avec détecteur de mouvement
En achetant cet article, vous avez choisi
un produit GEV de qualité supérieure. Pour
l'utiliser dans les meilleures conditions, nous
vous recommandons de lire attentivement ce
mode d'emploi. Conservez soigneusement
ce document en vue d'une éventuelle
consultation future.
indispensables au rechargement de la batterie.
De même, tenez compte de la longueur du câble
raccordant le module au projecteur ; aucune
rallonge ne peut être ajoutée. Installez le module
solaire conformément à la fig. A. Orientez-le de
manière à ce qu'il capte au mieux les rayons du
soleil (fig. B).
Fonctionnement
Emplacement du projecteur à LED
Le projecteur solaire à LED avec détecteur de
mouvement utilise la technologie infrarouge
passive. Le projecteur s'allume dès que le
capteur infrarouge passif perçoit une source
de chaleur en mouvement dans sa zone de
détection. Les sources de chaleur immobiles,
en revanche, n'ont aucun effet sur le détecteur
de mouvement. L'interrupteur crépusculaire
réglable sert à l’activation et à la désactivation
automatique du détecteur de mouvement en
fonction d'un seuil de luminosité prédéfini. En
mode détecteur de mouvement, le projecteur
à LED s'allume lorsqu'un mouvement est
détecté et s'éteint 10 secondes après le dernier
mouvement perçu. En mode surveillance, la LED
commence à clignoter lorsqu'un mouvement est
détecté et s'éteint 10 secondes après le dernier
mouvement perçu.
La détection de mouvement est optimale lorsque
le sens des déplacements est perpendiculaire
au détecteur.
Installation du projecteur à LED
Installez le projecteur à LED conformément à la
fig. C.
Projecteur à LED LPL 14817/LPL 14831,
alimentation solaire
Branchez la fiche de la batterie sur la borne du
projecteur à LED (fig. D1), puis posez l'appareil
sur l'embase de raccordement murale (fig. E).
Branchez la fiche de la cellule photovoltaïque sur
la borne du projecteur à LED (fig. E1).
Projecteur à LED LLL 14800, alimentation
par piles
Insérez 4 piles 1,5 V de type C (LR 14) en
respectant la polarité (fig. D2) puis posez le
projecteur à LED sur l'embase de raccordement
murale (fig. E).
Projecteur à LED LPL 14817/ LPL 14831,
alimentation solaire
La batterie se recharge le jour grâce à une cellule
photovoltaïque.
Mise en service
Projecteur à LED LPL 14817/LPL 14831
alimentation solaire
Avant la première utilisation de l'appareil, la
batterie doit être chargée. Éteignez le projecteur
à LED (voir Réglages) et laissez la batterie se
charger à la lumière du soleil pendant 2 jours.
Consignes de sécurité
La garantie ne couvre en aucun cas
les dommages dus à un non-respect
de la présente notice. Nous déclinons
par ailleurs toute responsabilité quant
aux éventuels dommages indirects. De même,
nous ne pourrons être tenus pour responsables
des éventuels dommages matériels ou
blessures corporelles résultant de manipulations
inappropriées ou du non-respect des consignes
de sécurité. Dans de tels cas de figure, tout
recours en garantie sera exclu. En outre, pour
des raisons de sécurité et de conformité, le
démontage et la modification du produit sont
interdits. Si vous avez des doutes quant au
montage, au raccordement ou à l'installation de
ce produit, adressez-vous à un spécialiste.
Réglages
Interrupteur crépusculaire LUX de 3 à 1000 lux
env. (fig. G).
Molette (fig. F).
F1=ARRÊT
F2 = mode détecteur de mouvement (la LED
s'allume en cas de détection de mouvement)
F3 = mode surveillance (la LED clignote en cas de détection de mouvement)
Le détecteur de mouvement peut être orienté
horizontalement (fig. H). La zone de détection
et la portée peuvent être réduites au moyen d'un
capuchon de lentille découpable.
Réglez l'orientation du projecteur à LED selon
vos besoins (fig. I).
Emplacement/Installation du module
solaire
(projecteur à LED LPL 14817/LPL 14831,
alimentation solaire)
Choisissez préalablement un emplacement
extérieur approprié. Vérifiez en journée que cet
endroit est suffisamment éclairé pour assurer le
rechargement de la batterie. Le module solaire
ne doit en aucun cas être placé derrière une
vitre. En effet, le verre filtre les rayons infrarouges
8
Diminution de l'autonomie des LED
En hiver, la durée d'ensoleillement est plus
courte qu'en été
Diminution de l'autonomie des LED
Le courant de charge est réduit lorsque la
cellule photovoltaïque est recouverte de
feuilles, de neige ou de saleté
Diminution de l'autonomie des LED
À basse température, l'efficacité des batteries
est réduite
Diminution de l'autonomie des LED
Remarques concernant les piles et les
batteries
Remarques concernant le recyclage
Cet appareil ne doit en aucun cas être
jeté avec les ordures ménagères. Les
propriétaires d'équipements électriques
ou électroniques usagés ont en effet
l'obligation légale de les déposer dans un
centre de collecte sélective. Informez-vous sur
les possibilités de recyclage auprès de votre
municipalité.
Le projecteur solaire à LED doit impérativement
fonctionner avec une batterie 4,8 V 1800 mAh.
Les piles et batteries usagées ne doivent
en aucun cas être jetées avec les ordures
ménagères. Leurs propriétaires ont en
effet l'obligation légale de les ramener
à leur point de vente, où elles seront reprises
gratuitement. Les piles contiennent des
substances dangereuses pour l'environnement
et la santé et doivent être recyclées selon la
réglementation en vigueur.
Caractéristiques techniques
Zone de détection
Portée
Durée d'activation
Interrupteur crépusculaire
Puissance
Couleur de lumière
Indice de rendu de couleur
Type de protection
Classe de protection
Hauteur de montage recommandée
140°
env. 10 m, selon la hauteur de montage
env. 10 s après le dernier mouvement perçu
env. 3 – 1 000 lux, réglable en continu
1 LED 3 W, sans entretien
env. 4500 K à 6000 K
Ra74
IP44
III
1,8 m
Projecteur à LED LPL 14817/LPL 14831, alimentation solaire
Alimentation4,8 V
Flux lumineux LPL 14817
120 lumens
Flux lumineux LPL 14831
100 lumens
Batterie
4,8 V NiMh 1800 mAh (fournie)
Autonomie
(après chargement complet de la batterie) env. 105 jours à raison de 5 activations par jour
Dimensions du module solaire
l 120 x h 195 x p 67 mm
Dimensions LLP 14817
l 70 x h 170 x p 120 mm
Dimensions LLP 14831
l 70 x h 210 x p 120 mm
Projecteur à LED LLL 14800, alimentation par piles
Alimentation6,0 V
Flux lumineux
140 lumens
Piles
4 piles 1,5 V de type C (LR14)
Autonomie
(avec des piles neuves de marque)
env. 570 jours à raison de 5 activations par jour
Dimensions
l 70 x h 170 x p 120 mm
Des modifications techniques et esthétiques peuvent être apportées sans notification préalable.
9
GB
DE
Les batteries se rechargent plus difficilement
dans les endroits ombragés
FR
Conséquence
IT
Remarque
PL
Remarques concernant l'utilisation de luminaires solaires
(projecteur à LED LPL 14817/LPL 14831)
Proiettore LED con rilevatore di movimento
Con l'acquisto di questo articolo si è scelto
un prodotto GEV di qualità superiore. Per
garantire un corretto funzionamento, leggere
le istruzioni per l'uso e conservarle con cura
per un'eventuale consultazione successiva.
collegamento al proiettore LED. Non è possibile
prolungare il cavo. Montare il modulo solare
come illustrato in Fig. A. Orientare il modulo
solare in modo che sia esposto alla luce del sole
in maniera ottimale (Fig. B).
Funzionamento
Punto di montaggio del proiettore LED
Il proiettore LED con rilevatore di movimento
sfrutta il principio alla base della tecnologia
a infrarossi passivi. Tramite un sensore PIR, il
dispositivo rileva fonti di calore in movimento
all'interno del proprio angolo di copertura e
si attiva automaticamente. Le fonti di calore
statiche non attivano il rilevatore di movimento.
L'interruttore crepuscolare regolabile interviene
nel funzionamento del rilevatore di movimento,
a scelta, di giorno e di notte oppure soltanto
nelle ore di buio. In modalità "rilevatore di
movimento", il proiettore attiva i LED ad ogni
movimento rilevato e li disattiva dopo 10
secondi dall'ultimo movimento. In modalità
"sorveglianza" il LED inizia a lampeggiare ogni
volta che rileva un movimento e si spegne dopo
10 secondi dall'ultimo movimento.
Il rilevamento ottimale si ottiene quando la
fonte di movimento è trasversale rispetto al
dispositivo.
Installazione del proiettore LED
Montare il Proiettore LED come illustrato in
Fig. C.
Proiettore LED LPL 14817/LPL 14831
a energia solare
Inserire l'attacco della batteria nell'apposita
presa del Proiettore LED (Fig. D1) e posizionare
il proiettore sulla piastra di fissaggio alla parete
(Fig. E). Inserire l'attacco della cella solare nella
presa del proiettore LED (Fig. E1).
Proiettore LED LLL 14800 a batteria
Inserire 4 batterie da 1,5 V di tipo C (LR 14) come
indicato nella figura (Fig. D2) e posizionare il
proiettore LED sulla piastra di fissaggio alla
parete (Fig. E).
Proiettore LED LPL 14817/LPL 14831
a energia solare
Durante il giorno la cella solare ricarica la batteria
integrata.
Messa in funzione
Proiettore LED LPL 14817/LPL 14831
a energia solare
Al primo avvio, la batteria deve essere già carica.
Spegnere il proiettore LED (vedere impostazioni)
e lasciarlo a caricare alla luce del sole per due
giorni.
Indicazioni di sicurezza
In caso di danni derivanti dalla mancata
osservanza delle istruzioni per l'uso, la
garanzia decade. Il produttore non si
assume alcuna responsabilità in merito
a tali danni. Inoltre, il produttore non si assume
alcuna responsabilità in caso di danni a cose o
persone conseguenti a un utilizzo non corretto
del dispositivo o alla mancata osservanza delle
norme di sicurezza. Nei suddetti casi decade ogni
diritto di garanzia. Per motivi relativi a sicurezza
e certificazioni, non è consentito apportare
variazioni e/o modifiche arbitrarie al dispositivo.
Se non si è sicuri del corretto procedimento per il
montaggio, il collegamento e l’installazione o se
si hanno dubbi sulle modalità di funzionamento,
non eseguire da soli tali operazioni, ma affidarsi
a uno specialista.
Impostazioni
Interruttore crepuscolare LUX da circa 3 a 1000
lux (Fig. G).
Selettore della modalità (Fig. F).
F1=OFF
F2 = modalità rilevatore di movimento (in caso di movimento, il LED si accende)
F3 = modalità sorveglianza (in caso di movimento, il LED lampeggia)
Il rilevatore di movimento può essere posizionato
orizzontalmente (Fig. H). L'angolo di rilevamento
e la portata possono essere ulteriormente ridotti
con una maschera per lenti da modellare e
inserire.
Orientare il proiettore LED secondo necessità
(Fig. I).
Punto di montaggio/installazione del
modulo solare
(proiettore LED LPL 14817/LPL 14831
a energia solare)
Prima di montare il modulo solare, scegliere
un punto di installazione esterno adeguato.
Verificare che durante il giorno ci sia luce
sufficiente a ricaricare la batteria. Non installare
il modulo solare dietro a vetri e vetrate, perché
la luce a infrarossi necessaria per ricaricare
la batteria verrebbe filtrata e respinta. Tenere
in considerazione la lunghezza del cavo di
10
La durata della luce dei LED è ridotta
La corrente di carica può subire una riduzione
se sulle celle solari si accumulano sporco,
foglie o neve
La durata della luce dei LED è ridotta
Le basse temperature provocano una
diminuzione delle prestazioni delle batterie
La durata della luce dei LED è ridotta
Indicazioni su batteria e accumulatore
Indicazioni per il riciclaggio
Il proiettore LED solare può essere utilizzato solo
con batterie da 4,8 V NiMh 1800 mAh.
Le batterie usate non devono essere
smaltite come rifiuti indifferenziati. Chi
possiede batterie usate è tenuto per legge
a restituirle al punto vendita. Le batterie
contengono sostanze nocive per l'ambiente
e la salute e devono pertanto essere smaltite
conformemente alle normative in vigore.
Questo dispositivo non deve essere
smaltito come rifiuto indifferenziato. Chi
possiede un vecchio dispositivo è vincolato
per legge allo smaltimento conformemente
alle normative in vigore. Per ulteriori informazioni
rivolgersi all'amministrazione comunale.
Dati tecnici
Angolo di copertura
140°
Portata
circa 10 m, in base all'altezza di montaggio
Impostazione temporalefissa, circa 10 secondi dall'ultimo movimento rilevato
Interruttore crepuscolare
ca. 3 - 1.000 Lux, regolazione continua
Potenza lampadina n. 1 LED da 3 W, manutenzione non necessaria
Colore illuminazione circa da 4500 k a 6000 k
Indice di riproduzione del colore Ra74
Tipo di protezione IP44
Classe di protezione III
Altezza di montaggio consigliata 1,8 m
Proiettore LED LPL 14817/LPL 14831 a energia solare
Tensione di esercizio
Flusso luminoso LPL 14817
Flusso luminoso LPL 14831
Batterie
Durata di illuminazione
(con batterie a piena carica)
Dimensioni modulo solare
Dimensioni LPL 14817
Dimensioni LPL 14831
4,8 V
120 lumen
100 lumen
4,8 V NiMh 1800 mAh (comprese nella fornitura)
circa 105 giorni con 5 attivazioni al giorno
L 120 x A 195 x P 67 mm
L 70 x A 170 x P 120 mm
L 70 x A 210 x P 120 mm
Proiettore LED LLL 14800 a batteria
Tensione di esercizio
Flusso luminoso
Batterie
Durata di illuminazione
(con batterie nuove e di marca)
Dimensioni
6,0 V
140 lumen
4 x 1,5 V tipo C (LR14)
circa 570 giorni con 5 attivazioni al giorno
L 70 x A 170 x P 120 mm
L'azienda si riserva il diritto di apportare modifiche tecniche ed estetiche senza preavviso.
11
GB
DE
In inverno il numero di ore di luce è minore
rispetto all'estate
FR
Risultato
La durata della luce dei LED è ridotta
IT
Condizione
I luoghi ombreggiati determinano una minore
carica della batteria
PL
Considerazioni specifiche per sistemi di illuminazione ad energia solare
(proiettore LED LPL 14187/LPL 14831)
Reflektor LED z czujką ruchu
Kupno niniejszego artykułu oznacza wybór
wysokiej jakości wyrobu marki GEV. Aby
zapewnić prawidłowe działanie wyrobu,
prosimy o uważne zapoznanie się z niniejszą
instrukcją obsługi. Instrukcję tę należy
starannie przechowywać do ewentualnego
późniejszego użytku.
umieszczać za szklanymi szybami, gdyż
odfiltrowują one promieniowanie podczerwone
wymagane do ładowania. Przestrzegaj długości
kabla łączącego z reflektorem LED. Przedłużenie
kabla nie jest możliwe. Zamontuj moduł
solarny zgodnie z rys. A. Ustaw moduł solarny
optymalnie względem światła słonecznego
(rys. B).
Sposób działania
Miejsce montażu reflektora LED
Reflektor LED działa według zasady biernej
techniki
podczerwieni.
Bierny
czujnik
podczerwieni powoduje wykrywanie przez
czujkę ruchu w zakresie detekcji poruszających
się źródeł ciepła i jej automatyczne włączenie.
Nieruchome źródła ciepła nie załączają czujki
ruchu. Regulowany wyłącznik zmierzchowy
zapewnia wybór możliwości pracy: w dzień i
w nocy lub tylko w ciemności. W trybie czujki
ruchu reflektor włącza diody LED przy wykryciu
ruchu i wyłącza je po upływie 10 sekund od
wykrycia ostatniego ruchu. W trybie dozoru
po wykryciu ruchu diody zaczynają błyskać,
wyłączenie następuje po upływie 10 sekund od
wykrycia ostatniego ruchu.
Najbardziej pewne wykrywanie ruchu można
uzyskać poruszając się poprzecznie względem
czujki ruchu.
Instalacja reflektora LED
Zamontuj reflektor LED zgodnie z rys. C.
Reflektor LED LPL 14817/LPL 14831
z zasilaniem solarnym
Podłącz wtyk akumulatora do gniazda reflektora
LED (rys. D1) i nasadź reflektor na ścienną
płytę do łączenia (rys. E). Włóż wtyk ogniwa
słonecznego do gniazda reflektora LED (rys. E1).
Reflektor LED LLL 14800, z zasilaniem
bateryjnym
Włóż 4 szt. baterii 1,5 V typu C (LR 14),
przestrzegając prawidłowego położenia
montażu (rys. D2) i nasadź reflektor LED na
ścienną płytę łączeniową (rys. E).
Reflektor LED LPL 14817/LPL 14831,
z zasilaniem solarnym
Ogniwo słoneczne w
wbudowany akumulator.
ciągu
dnia
ładuje
Uwagi dotyczące bezpieczeństwa
Uruchomienie
W przypadku szkód spowodowanych
nieprzestrzeganiem
niniejszej
instrukcji obsługi gwarancja wygasa!
Za szkody wtórne nie przyjmujemy
żadnej odpowiedzialności! Nie przyjmujemy
odpowiedzialności
w
przypadku
szkód
rzeczowych i obrażeń ciała spowodowanych
nieumiejętnym
postępowaniem
lub
niestosowaniem się do uwag związanych z
bezpieczeństwem. W takich przypadkach
wszelkie roszczenia gwarancyjne wygasają.
Z przyczyn związanych z bezpieczeństwem
i dopuszczeniami technicznymi, samowolne
przeróbki lub modyfikacje urządzenia są
niedozwolone.
Jeśli
podczas
montażu,
podłączania lub instalowania urządzenia nie
masz pewności lub masz wątpliwości co do
sposobu funkcjonowania zestawu, zleć montaż,
podłączenie i zainstalowanie specjaliście,
zamiast wykonywać je samodzielnie.
Reflektor LED LPL 14817/LPL 14831
z zasilaniem solarnym
Przed użyciem po raz pierwszy konieczne jest
naładowanie akumulatora. Wyłącz reflektor LED
(zob. Ustawienia) i pozostaw akumulator do
naładowania 2 dni przy świetle słonecznym.
Ustawienia
LUX Przełącznik zmierzchowy ok. 3 – 1000 lx
(rys. G).
Przełącznik wyboru trybu (rys. F).
F1=WYŁ.
F2 = tryb czujki ruchu (dioda LED świeci się przy wykryciu ruchu)
F3 = tryb dozoru (dioda LED błyska przy wykryciu ruchu)
Położenie czujki ruchu można zmieniać w
poziomie (rys. H). Kąt detekcji i zakres można
dodatkowo ograniczać za pomocą nasadzanej,
przycinanej maski na soczewkę.
Wykieruj reflektor LED zgodnie z potrzebami
(rys. I).
Miejsce montażu/instalacji modułu
solarnego
(reflektor LED LPL 14817/LPL 14831,
z zasilaniem solarnym)
Przed montażem modułu solarnego wybierz
odpowiednie miejsce na zewnątrz. Sprawdź
przy świetle dziennym, czy dostępna jest
dostateczna ilość światła do naładowania
akumulatora. Modułu solarnego nie wolno
12
Zmniejszenie czasu świecenia diod LED
Słońce zimą świeci krócej, niż latem
Zmniejszenie czasu świecenia diod LED
Brud, liście lub śnieg na ogniwach słonecznych
zmniejszają prąd ładowania
Zmniejszenie czasu świecenia diod LED
Niskie temperatury zmniejszają wydajność
akumulatorów
Zmniejszenie czasu świecenia diod LED
Uwagi dotyczące baterii i akumulatorów
Uwagi dotyczące recyklingu
Reflektor solarny LED wolno użytkować tylko z
akumulatorem NiMh 4,8 V 1800 mAh!
Zużytych baterii nie wolno usuwać razem
z niesortowanymi odpadami domowymi.
Posiadacze zużytych baterii są ustawowo
zobowiązani do ich zwrotu i mogą dokonać
tego nieodpłatnie w punktach zakupu. Baterie
zawierają substancje szkodliwe dla środowiska
naturalnego i zdrowia, stąd muszą podlegać
specjalistycznej utylizacji.
Dane techniczne
Obszar detekcji
Zasięg
Ustawienie czasu
Wyłącznik zmierzchowy
Moc żarówki
Barwa światła
Indeks odtwarzania kolorów
Stopień ochrony
Klasa ochrony
Zalecana wysokość montażu
Niniejszego urządzenia nie wolno usuwać
razem z niesortowanymi odpadami
domowymi. Posiadacze zużytego sprzętu
są ustawowo zobowiązani do zapewnienia
prawidłowej utylizacji urządzeń. Odpowiednie
informacje można uzyskać u właściwych władz
miejskich lub gminnych.
140°
ok. 10 m, w zależności od wysokości montażu
stałe, ok. 10 s po ostatnim wykrytym ruchu
ok. 3 – 1000 lx, regulowany bezstopniowo
1 dioda LED 3 W, bezobsługowa
ok. 4500 K do 6000 K
Ra74
IP44
III
1,8 m
Reflektor LED LPL 14817/LPL 14831 z zasilaniem solarnym
Napięcie zasilania
Strumień świetlny LPL 14817
Strumień świetlny LPL 14831
Akumulatory
Czas świecenia (przy całkowicie
naładowanych akumulatorach)
Wymiary modułu solarnego
Wymiary LPL 14817
Wymiary LPL 14831
4,8 V
120 lumenów
100 lumenów
4,8 V NiMh 1800 mAh (w zestawie)
ok. 105 dni przy 5 włączeniach dziennie
120 x 195 x 67 mm (szer. x wys. x głęb.)
70 x 170 x 120 mm (szer. x wys. x głęb.)
70 x 210 x 120 mm (szer. x wys. x głęb.)
Reflektor LED LLL 14800, z zasilaniem bateryjnym
Napięcie zasilania
Strumień świetlny
Baterie
Czas świecenia
(na nowych bateriach dobrej klasy)
Wymiary
6,0 V
140 lumenów
4 x 1,5 V, typu C (LR14)
ok. 570 dni przy 5 załączeniach dziennie
70 x 170 x 120 mm (szer. x wys. x głęb.)
Zastrzega się możliwość wprowadzania zmian technicznych i wizualnych bez wcześniejszego
powiadomienia.
13
GB
DE
Zacienione miejsca ograniczają czas, przez jaki
mogą być ładowane akumulatory
FR
Wynik
IT
Warunek
PL
Szczególnie ważne w przypadku lamp solarnych (reflektory LED LPL 14817/
LPL 14831)
14
15
Max. 14 Ct./Min aus dem deutschen Festnetz.
Mobil max. 42 Ct./Min.
International calls may vary.
MA00226701
GEV GmbH
Heidehofweg 16
25499 Tangstedt
Germany
www.gev.de
[email protected]
Hotline: +49 (0)180/59 58 555
15NKR03