1
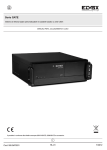
Art. 5217/SB
Monitor LCD 17"
17" Monitor LCD
MANUALE PER IL COLLEGAMENTO E L’USO - INSTALLATION AND OPERATION MANUAL
Il prodotto è conforme alla direttiva europea 2004/108/CE, 2006/95/CE e successive.
Product is according to EC Directive 2004/108/CE, 2006/95/CE and following norms.
I
Cod. S6I.521.7SB
GB
RL.01
8/2012
I
5217/SB
PRECAUZIONI
Informazioni per gli utenti applicabili nei paesi dell’Unione Europea
Informazioni per gli utenti applicabili negli Stati Uniti d’America
Posizionamento
Alimentazione
Manutenzione
Trasporto del monitor
3
3
3
3
3
3
PER INIZIARE
Contenuto confezione
Installazione del monitor
Identificazione delle parti e dei comandi
Lavorare con il gruppo a video
Personalizzazione del monitor
Introduzione ai tasti di scelta rapida
Funzionamento del menu delle funzioni
Elenco icone a video
4
4
5
5
5
5
6
7
RISOLUZIONE DEI PROBLEMI
7
CARATTERISTICHE E SPECIFICHE TECNICHE
Frequenza interfaccia
8
8
APPENDICE
Modalità di risparmio energetico standard
Modalità avanzata di risparmio energetico
Conformità FCC
8
9
9
9
Ergonomia
• Buona ergonomia visiva e qualità d’immagine per migliorare l’ambiente operativo dell’utente e per ridurre i problemi di vista e
d’affaticamento. I parametri importanti sono luminanza, contrasto, risoluzione, rifrazione, rendita colore e stabilità d’immagine.
Energia
• Modalità di risparmio energetico dopo un intervallo determinato – benefica sia per l’utente, sia per l’ambiente.
• Sicurezza elettrica
Emissioni
• Campi elettromagnetici
• Emissione disturbi
Ecologia
• Il prodotto deve essere preparato per il riciclaggio, ed il produttore è obbligato ad avere una politica ambientale come EMAS o
ISO 14 001
• Restrizioni su
- Sostanze ignifughe a base di cloro e bromo; polimeri.
- Metalli pesanti come cadmio, mercurio e piombo.
I requisiti inclusi in questa etichetta sono stati sviluppati dalla TCO Development in cooperazione con scienziati, esperti, utenti come
anche produttori di tutto il mondo.
Dalla fine degli anni 1980, la TCO è impegnata ad influenzare lo sviluppo delle attrezzature IT nella direzione di una maggiore facilità
d’impiego.
Il nostro sistema d’etichettatura è iniziato con gli schermi nel 1992 ed ora è richiesto da utenti e produttori IT di tutto il mondo.
2/20
5217/SB
PRECAUZIONI
Informazioni per gli utenti applicabili nei paesi dell'Unione Europea
Il simbolo sul prodotto o sulla sua confezione o significa che il prodotto deve essere smaltito separatamente dai normali rifiuti domestici. Tenere presente che è responsabilità dell’utente smaltire le apparecchiature elettroniche presso centri di riciclaggio e rispettare la natura. Ogni nazione dell’Unione Europea deve avere I propri centri di raccolta per il riciclaggio di apparecchi elettrici ed
elettronici. Per informazioni sulle aree di raccolta per il riciclaggio, contattare l’autorità locale preposta allo smaltimento di apparecchi elettrici ed elettronici o il negoziante presso cui è stato acquistato il prodotto.
Informazioni per gli utenti applicabili negli Stati Uniti d'America
LA LAMPADA (O LE LAMPADE) ALL’INTERNO DI QUESTO PRODOTTO, CONTENGONO MERCURIO E DEVONO ESSERE
RICICLATE O SMALTITE SECONDO LE LEGGI LOCALI E NAZIONALI. PER ULTERIORI INFORMAZIONI, CONTATTARE
ELETTRONIC INDUSTRIES ALLIANCE AL SITO WWW.EIAE.ORG. PER INFORMAZIONI SPECIFICHE SULLO SMALTIMENTO DELLE LAMPADA, VERIFICARE WWW.LAMPRECYCLE.ORG.
Posizionamento
1. Non coprire né bloccare le porte di ventilazione sul retro del monitor.
2. Non posizionare il monitor accanto a fonti di calore come radiatori o condotti d’aria, o in luoghi esposti a luce del sole diretta,
polvere eccessiva, vibrazione meccanica o corrente elettrica.
3. L’apparecchio deve essere usato solo con un'inclinazione di 5° in avanti e di 20° indietro, come normale posizione operativa. Se
l’angolo di inclinazione supera i 20°, deve essere usato solo per il montaggio a parete o per imballaggio.
Alimentazione
1.
Usare il cavo elettrico adatto al voltaggio locale.
2.
Usare un’uscita accessibile vicina al monitor.
3.
Non appoggiare nulla sul cavo elettrico.
4.
Usare solo il trasformatore attaccato al monitor.
5.
Scollegare il cavo elettrico dalla presa se:
5.1 Il monitor non viene usato per un lungo periodo.
5.2 Il cavo è danneggiato o logorato.
5.3 Il monitor è stato fatto cadere o la struttura è stata danneggiata.
5.4 Un cambio netto nella prestazione indica che c’è bisogno di assistenza.
Manutenzione
1. Pulire la struttura e i comandi con un panno morbido appena inumidito con soluzione detergente neutra. Non usare materiali
abrasivi o solventi come alcol o benzene.
2. Non sfregare, toccare o battere sulla superficie dello schermo con oggetti appuntiti o abrasivi come penne o cacciaviti, poiché
lo schermo potrebbe graffiarsi.
3. Non inserire oggetti né versare liquidi nelle porte di ventilazione sul retro del monitor, altrimenti potrebbero verificarsi incendio,
shock elettrico e/o guasti all’unità.
Trasporto del monitor
1. Quando si trasporta il monitor per riparazioni o assistenza, si raccomanda di smontarlo e posizionarlo di nuovo nel suo imballo
originale. Per smontare il supporto e la base, premere il "tasto di rilascio" che si trova nella parte posteriore del braccetto di supporto e staccare il gruppo braccetto/base quindi separare la base dal braccetto premendo le “linguette di rilascio” che si trovano
sotto la base e separare il braccetto dalla base, infine usare i cartoni originali e il materiale di imballaggio per avvolgere il display
e i suoi accessori.
3/20
I
I
5217/SB
PER INIZIARE
Contenuto confezione
Prima di iniziare, assicurarsi che il cartone contenga quanto segue:
1. Monitor LCD
2. Base del monitor e braccetto (la forma del supporto può variare a seconda del modello del monitor)
3. Cavo elettrico (la presa può variare a seconda degli standard elettrici dell’area locale)
4. Cavo segnale video
5. Cavo di segnale digitale (opzionale)
6. Cavo audio (opzionale)
7. CD-ROM (include il manuale dell'utente)
8. Guida rapida all’installazione
Installazione del monitor
1. Montare il monitor
1.1 Estrarre il monitor ed il supporto dalla confezione.
1.2 Collocare la base del monitor sul tavolo e far scorrere il braccetto sulle aperture
della base. (Verificare che l’orientamento del braccetto sia corretto.)
1.3 Tenere il monitor con entrambe le mani e poi inserire il monitor sul braccetto. (Verificare che l’orientamento del braccetto sia corretto.)
2. Collegamento del cavo di segnale
2.1 Spegnere il computer.
2.2 Collegare il cavo del segnale alla porta D-SUB situata nella parte posteriore del monitor e stringere le viti del connettore.
2.3 Collegare i cavi segnale provenienti dalla porta VGA del computer e serrare le viti
dei connettori.
2.4 Nota: assicurarsi che le impostazioni del display non superino 1280*1024, 75Hz.
3 Collegamento del cavo audio (con opzione audio)
3.1 Inserire il cavo audio nella porta AUDIO situata nella parte posteriore del monitor.
3.2 Inserire l'altra estremità del cavo audio nella porta audio computer o altra fonte
audio.
4. Connessione dell’alimentazione
4.1 Attaccare l’estremità femmina del cavo di alimentazione alla porta POWER sul retro
del monitor.
4.2 Attaccare l’estremità maschio del cavo di alimentazione ad una presa elettrica.
5. Accensione
5.1 Accendere il computer.
Si dovrebbe visualizzare l'immagine. In caso contrario, consultare la sezione Risoluzione di
problemi della presente guida.
4/20
I
5217/SB
Identificazione delle parti e dei comandi
1. La spia indica la condizione di funzionamento del monitor.
Durante ilfunzionamento del monitor, la spia appare in un verde acceso. Durante la fase di riposo del monitor, la spia appare in
un giallo sfumato.
2. Il tasto Alimentazione
indica la condizione di alimentazione del monitor.
Premendo il tasto Alimentazione si accende e spegne il monitor.
3. I tasti di funzione indicano tutte le regolazioni del monitor. In caso di regolazioni, premere uno di essi per attivare il menu delle
funzioni. Successivamente appaiono i dettagli del menu delle funzioni.
Lavorare con il gruppo a video
Il sistema OSD è semplice da utilizzare. Si può identificare la funzione del tasto dalle icone visualizzate nella finestra a scomparsa
dell’OSD. Le tre immagini di seguito indicano il cambio della funzione dei tasti nei vari livelli della struttura delle funzioni.
Primo livello
Secondo livello
Terzo livello
1. Premere
per accendere .
2. Premere uno qualsiasi degli altri quattro tasti per attivare il menu a video.
3. Premere il tasto dell'icona della funzione opposta sul menu che compare a video.
PERSONALIZZAZIONE DEL MONITOR
Il sistema a video (OSD, on screen display) fornisce un’intera gamma di strumenti personalizzabili per l’ottimizzazione della visualizzazione.
Importante: Nonostante sia disponibile un personalizzazione completa, si consiglia di adoperare la funzione Auto Aggiustamento,
preimpostata sull’ottimizzazione totale del monitor. Attivare il menu OSD, scegliere il primo tasto sinistro
lizzare la funzione Auto Aggiustamento.
per uti-
Importante: Inoltre, abbiamo anche preparato altri modi relativamente semplici per cambiare le modalità di visualizzazione. Ci sono
4 modalità che includono: GENERALE, FILM, IMMAGINE, GIOCO
INTRODUZIONE AI TASTI DI SCELTA RAPIDA
1. Regolazione automatica
Mentre appare il menu OSD, premere contemporaneamente il primo tasto a sinistra
stazioni dell’immagine.
5/20
per ottimizzare automaticamente le pre-
I
5217/SB
2. Controllo volume (audio)
Quando l’OSD è visualizzato, premere il primo tasto sulla destra
tica) e poi premere il tasto
o
per accedere al menu Automatic adjustment” (Regolazione automa-
per regolare il volume del sonoro. Premere
o
per uscire.
3. Selezione modalità
Quando l’OSD è visualizzato, premere il secondo tasto sulla sinistra
il tasto
e
; si può uscire premendo il tasto
o
per cambiare la modalità. Si può passare tra le 4 modalità usando
.
4. Menu principale
Mentre appare il menu OSD, premere il secondo tasto a destra
Quindi, premere
o
per entrare nel menu principale.
; per scegliere tra queste opzioni. Premere
per confermare la selezione
o
.per uscire.
FUNZIONAMENTO DEL MENU DELLE FUNZIONI
Con la struttura del menu OSD indicata di seguito, si può ottenere una panoramica completa del sistema OSD. Come una mappa, questa
struttura OSD è in grado di fornire una visione completa dell’intero sistema.
Per una regolazione completa, è necessario apprendere alcune funzioni.
1. Attivare il menu principale: con l’apparecchio acceso, premere un tasto di funzione per attivarla.
2. Confermare la selezione: premere
per effettuare la selezione.
3. Navigare in avanti ed all’indietro: premere
4. Regolare la scala: premere
o
o
per navigare tra le funzioni.
per aumentare o ridurre la scala delle funzioni.
5. Tornare al menu anteriore o al livello superiore: premere
6. Uscita: Premere
o
per tornare al livello superiore.
per uscire dal menu OSD; oppure non premere alcun tasto ed il menu sparirà automaticamente dopo 30 secondi.
AUTO AGGIUSTAMENTO
GENERALE
LUMINOSITÀ
GIOCO
SEGNALE D'INPUT
MODALITÀ
Alimentazione
Menu principale
ANALOGICO (D-SUB)
Deutsch
Español
MENU OSD
DISPLAY
NATIVO
䁲
TEMPERATURA
ROSSO
ɭɫɫɤɣ
VERDE
Svenska
Dansk
FREDDO
Polski
CALDO
Português
SISTEMA
MOD. RISP. ENERG.
BILANCIAMENTO DEL BIANCO
RICHIAMARO
POSIZIONE ORIZZONTALE
POS. VERTICALE
FASE
OROLOGIO DDC/CI
DEMO
INFORMAZIONI
6/20
I
5217/SB
ELENCO ICONE A VIDEO
Icona
Funzioni
Dettaglio
Icona
AUTO AGGIU- * Ottimizza automaticamente la prestazione
STAMENTO
dell’immagine
Funzioni
MOD.
ENERG.
MENU MODA- * Attivare il motore colore integrato per miLITÀ TEMA
gliorare gli effetti grafici in base alle diverse
situazioni dei contenuti dello schermo. (GENERALE, IMMAGINE, FILM, GIOCO)
Dettaglio
RISP. * Selezionare tra le modalità di risparmio
energetico standard e avanzata. Per i dettagli vedere l’appendice
* Standard: Soddisfa i requisiti di gestione
energetica EPA Energy Star
* Avanzata: Attiva la funzione Life-Extension (allungamento vita) del monitor
LUMINOSITÀ
* Regola il livello di illuminazione dello
schermo
B I L A N C I A - * Regola il bilanciamento del segnale d’inMENTO
DEL put.
BIANCO
CONTRASTO
* Regola il livello di contrasto dello schermo
P O S I Z I O N E * Sposta la posizione dello schermo a siniORIZZONTALE stra o a destra
SELEZIONE
* Selezionare il segnale di ingresso dagli inSEGNALE D'IN- gressi analogico e digitale (Opzionale)
PUT
* Impostazione predefinita: analogico (VGA)
POS.
CALE
VERTI- * Sposta la posizione dello schermo in alto
o in basso
FASE
* Regola la fase del segnale interno del monitor
LINGUA MENU * Seleziona la propria preferenza sulla linOSD
gua del menu a video.
OROLOGIO
TEMPERATURA * Seleziona l’impostazione del colore dello
COLORE
schermo – fredda, calda o utente
* Fredda: Seleziona l’impostazione del colore dello schermo come bianco bluastro.
* Calda: Seleziona l’impostazione del colore
dello schermo come bianco rossastro.
* Regola la frequenza di campionamento
dell’orologio interno del monitor
DDC/CI
* Selezionare se spegnere o accendere la
funzione DDC/CI.
* Impostazione predefinita: ATTIVO
SISTEMA
DEMO
* 2 Secondi dopo l’attivazione di questa
funzione, alcuni dei menu stimoleranno di
2 volte gli effetti di gradazione.
* Opzioni di regolazione delle specifiche
tecniche del monitor.
(MOD. RISP. ENERG. , BILANCIAMENTO
DEL BIANCO,OROLOGIO, FASE, POSIZIONE ORIZZONTALE, POS. VERTICALE,
SISTEMA, INFORMAZIONI)
INFORMAZIONI * Visualizza la frequenza, il valore di risoluzione, la porta di ingresso ed altri dettagli
riguardanti il monitor.
RICHIAMARO
* Ripristina i parametri di fabbrica reimpostati nel monitor.
RISOLUZIONE DEI PROBLEMI
Problema
1. Nessuna immagine
2. Il LED non è illuminato
1. Nessuna immagine
2. Il LED è arancione
Controllare
1. Controllare che il monitor sia acceso (premere nuovamente il tasto
).
2. Controllare che il cavo elettrico sia collegato correttamente al monitor e alla presa elettrica.
3. Controllare che la presa elettrica eroghi energia (usare un altro dispositivo per controllare la corrente).
1. Controllare che il computer sia acceso.
2. Assicurarsi che il computer non sia in modalità risparmio energetico (spostare il mouse o premere un tasto per riattivare
il computer).
3. Controllare che il cavo segnale video sia collegato correttamente a monitor e computer.
1. Lo schermo visualizza “Nes- 1. Verificare che il computer sia acceso.
sun segnale in ingresso”
2. Verificare che il cavo segnale video sia collegato correttamente a monitor e computer.
1. Lo schermo visualizza “Se- 1. Assicurarsi che la risoluzione e/o la velocità di aggiornamento siano impostate correttamente.
gnale in ingresso fuori portata”
Importante
Assicurarsi che l’impostazione di visualizzazione sia inferiore a WSXGA1280*1024,75Hz
7/20
I
5217/SB
CARATTERISTICHE E SPECIFICHE TECNICHE
Elemento
Descrizione
17"
337.9(O) x 270.3(V)mm
17"
0.294(O) x 0.294(V)mm
Dimensioni display
Panello
Pixel Pitch
Connettore
Analogico
D-sub
Inclinazione
Angolo di inclinazione
-5°~20°
Dimensioni
(L x H x P)
Nette
17"
Approssimativamente
365(L) x 387(H) x 169(P) mm
Peso
Nette
17"
Approssimativamente 3.6kg
Alimentazione
Condizioni
operative
CA
CA 100~240V, 50Hz/60Hz,1.2A
Consumo
Attivo: <42W / Standby: <2W
Temperatura
5°C to 40°C
Umidità
20% to 80% (nessuna condensa)
Altitudine
Inferiore a 10,000 fts
Condizioni di Temperatura
conservaUmidità
zione
Altitudine
-20°C to 60°C
5% to 80% (nessuna condensa)
Inferiore a 40,000 fts
Frequenza interfaccia
1. L’intervallo di frequenza seguente è il periodo di lavoro. Se la modalità inserita nel periodo in basso non corrisponde alla frequenza
di tempo supportata, l’ottimizzazione del video potrebbe non essere assicurata. Se la modalità inserita è al di fuori del periodo
di lavoro, lo schermo sarà nero (visualizzerà solo“segnale in ingresso fuori portata”) e andrà in modalità risparmio energetico.
2. Generalmente il giudizio della modalità non tiene conto della polarità di sincronismo a meno che entrambe le modalità, o più, appartengono tutte all’elenco dei tempi supportati e possono essere giudicate solo per mezzo della polarità di sincronismo.
3. Nel frattempo, la frequenza reale immessa del tempo supportato, non è richiesta in maniera precisa.
4. La normalizzazione della deviazione della scheda VGA sarà accettabile.
5. Frequenza orizzontale 30 ~ 82KHz
6. Frequenza verticale 56 ~ 76Hz
Appendice
Modalità avanzata di risparmio energetico
1.
2.
3.
I monitor tradizionali hanno la funzione di sospensione per risparmio energetico, ma l’intervallo di sospensione è difficile da decidere. Se l’intervallo è lungo, lo scopo del risparmio energetico non può essere raggiunto. Mentre, se l’intervallo è breve, il computer e il monitor LCD spesso entrerebbero in tale modalità. Quando il monitor LCD entra in sospensione, la retroilluminazoione
si spegne immediatamente. Il frequente spegnimento e accensione delle luci causerà un accorciamento della durata di queste
ultime.
La nostra soluzione al dilemma, la funzione Life-Extension del monitor
Per questo motivo, abbiamo progettato la funzione Life-Extension del monitor. Una volta selezionata l’opzione “Modalita avanzata risparmio energetico” dal menu a video, sara possibile non solo risparmiare elettricita, ma anche allungare la vita delle luci.
Principio di funzionamento della funzione Life-Extension del monitor
Per questo motivo, abbiamo progettato la funzione Life-Extension del monitor. Una volta selezionata l’opzione “Modalità avanzata risparmio energetico” dal menu a video, sarà possibile non solo risparmiare elettricità, ma anche allungare la vita delle luci.
8/20
5217/SB
* Modalità di risparmio energetico standard (senza funzione Life-Extension del monitor)
Alimentazione
Acceso
Inizio risparmio energetico
* Modalità avanzata di risparmio energetico (con funzione Life-Extension del monitor)
Alimentazione
Acceso Inizio sospensione
Inizio risparmio energetico
Questo approccio “Slow-Start-n-Delay-Off”(avviamento lento e spegnimento ritardato), minimizza lo sbalzo di energia e la temperatura causata dall’accensione e spegnimento del monitor LCD. Perciò, lo spegnimento della retroilluminazione del TFT -LCD può essere rallentato ad un livello molto più basso rispetto a prima.
4.Gli effetti collaterali della funzione Life-Extension del monitor (perché non impostare come predefinita la modalità avanzata di risparmio energetico?)
Secondo la richiesta EPA (Environmental Protection Agency, Agenzia di protezione ambiente USA) per la gestione energetica dei monitor, il consumo di energia di un monitor deve essere inferiore a 3 watt in 3 secondi dopo che il monitor entra in modalità risparmio
energetico. Ma la funzione Life-Extension dimensione l’elettricità fornita alla retroilluminazione del monitor LCD in maniera graduale.
Perciò la funzione Life-Extension del monitor è in conflitto con i requisiti EPA dei primi 7 minuti dopo l’ingresso in modalità sospensione. Nonostante ciò, confrontando i vantaggi di entrambe le condizioni, consigliamo fortemente comunque di impostare il monitor nella modalità di risparmio energetico avanzato.
5.Come far partire la funzione Life-Extension del monitor?
È possibile usare semplicemente i comandi a video per attivare la funzione Life-Extension del monitor.
1. Premere 4 tasti a caso (tranne il tasto d’alimentazione) sulla sinistra per attivare il menu OSD.
2. Premere il tasto
3. Premere
4. Premere
o
per selezionare il sistema .
per confermare la selezione.
5. Premere il tasto
6. Premere
o
per selezionare MOD. RISP. ENERG. .
per confermare la selezione.
7. Premere il tasto
8. Premere
per accedere al menu funzioni.
o
per selezionare le opzioni avanzate tra le funzioni di MOD. RISP. ENERG.
per confermare la selezione.
9. Premere il tasto
per uscire dal menu di livello superiore.
10. Premere il tasto
per uscire dal menu OSD.
Conformità FCC
1. Questo prodotto è conforme alla Parte 15 delle normative FCC. Il funzionamento è soggetto alle seguenti due condizioni: (1) Questo dispositivo non può provocare interferenze dannose; (2) questo dispositivo deve accettare tutte le interferenze ricevute, incluse le interferenze che possono provocare funzionamenti indesiderati.
2. NOTA: Questo apparecchio è stato collaudato e trovato conforme ai limiti di dispositivo digitale di Classe B, in conformità alla Parte
15 delle Norme FCC. Questi limiti sono stati stabiliti per fornire una protezione ragionevole da interferenze dannose in una installazione residenziale. Questo apparecchio genera, utilizza e può irradiare energia di frequenza radio e, se non installato ed utilizzato secondo quanto riportato nelle istruzioni, può provocare interferenze dannose alle comunicazioni radio. Non c'è tuttavia
garanzia che non si verifichino interferenze su installazioni particolari. Se questo apparecchio provocasse interferenze dannose
alla ricezione radiofonica o televisiva, che possono essere rilevate accendendolo o spegnendolo, l'utente è incoraggiato a cercare di correggere l'interferenza per mezzo di una o più delle seguenti misure:
3. Riorientare o riposizionare l'antenna ricevente.
4. Aumentare la separazione tra l’attrezzatura e il ricevitore.
5. Collegare l’attrezzatura ad una presa di corrente che sia su un circuito diverso da quello a cui è collegata il ricevitore.
6. Consultare il rivenditore o un tecnico specializzato radio / TV per ottenere supporto.
9/20
I
GB
5217/SB
PRECAUTIONS
Information for users applicable in European Union countries
Information for users applicable in United States of America
Installation
Power connection
Maintenance
Transporting the monitor
11
11
11
11
11
11
GETTING STARTED
Package contents
Monitor installation
Identifying parts and controls
Working with OSD Group
Customizing your Monitor
Hotkeys introduction
Function keys operation
OSD icon list
12
12
13
13
13
13
14
15
Troubleshooting
15
Technical Features and Specifications
Interface Frequency
16
16
Addendum
Standard Power Saving Mode
Advanced Power Saving Mode
FCC compliance
16
17
17
17
Ergonomics
Good visual ergonomics and image quality in order to improve the working environment for the user and to reduce sight and strain
problems. Important parameters are luminance, contrast, resolution, reflectance, color rendition and image stability.
Energy
Energy-saving mode after a certain time – beneficial both for the user and the environment
Electrical safety
Emissions
Electromagnetic fields Noise emissions
Ecology
The product must be prepared for recycling and the manufacturer must have a certified environmental management system
such as EMSA or ISO 14001
Restrictions on
- chlorinated and brominated flame retardants and polymers
- heavy metals such as cadmium, mercury and lead.
The requirements included in this label have been developed by TCO Development in cooperation with scientists, experts, users as
manufacturers all over the world. Since the end of the 1980s TCO has been involved in influencing the development of IT equipment
in a more user-friendly direction. Our labeling system started with displays in 1992 and is now requested by users and IT-manufacturers all over the world.
10/20
5217/SB
GB
PRECAUTIONS
Information for users applicable in European Union countries
The symbol on the product or its packaging signifies that this product has to be disposed separately from ordinary household wastes at its end of life. Please kindly be aware that this is your responsibility to dispose electronic equipment at recycling centers so
as to help conserve natural resources. Each country in the European Union should have its collection centers for electrical and electronic equipment recycling. For information about your recycling drop off area, please contact your local related electrical and electronic equipment waste management authority or the retailer where you bought the product.
Information for users applicable in United States of America
LAMP(S) INSIDE THIS PRODUCT CONTAIN MERCURY AND MUST BE RECYCLED OR DISPOSED OF ACCORDING TO
LOCAL, STATE OR FEDERAL LAWS. FOR MORE INFORMATION, CONTACT THE ELECTRONIC INDUSTRIES ALLIANCE
AT WWW.EIAE.ORG. FOR LAMP SPECIFIC DISPOSAL INFORMATION CHECK WWW.LAMPRECYCLE.ORG.
Installation
1. Do not cover or block the ventilation ports on the rear of the monitor.
2. Do not install the monitor close to heat sources such as radiators or air ducts, or in a location exposed to direct sunlight, excessive dust, mechanical vibration,or shock.
3. The apparatus shall only be used between 5° tilted forward and 20° tilted backward as normal operation position. If the tilt angle
exceeds 20°, it shall be used for wall mounting or packaging only.
Power connection
1.
Use the correct power cord for your local voltage.
2.
Use an accessible outlet close to the monitor.
3.
Do not allow anything to rest on the power cable.
4.
Only use the power adapter attached to the monitor.
5.
Disconnect the power cable from the power supply if:
5.1 You will not use the monitor for an extended period.
5.2 The cable is damaged or frayed.
5.3 The monitor has been dropped or the cabinet damaged.
5.4 A distinct change in performance indicates a need for servicing.
Maintenance
1. Clean the cabinet and controls with a soft cloth lightly moistened with a mild detergent solution. Do not use any abrasive materials or solvents such as alcohol or benzene.
2. Do not rub, touch, or tap the surface of the screen with sharp or abrasive items such as pens or screwdrivers, as the screen may
scratch.
3. Do not insert objects or spill liquids into the ventilation ports on the monitor’s rear, as fire, electric shock, and / or unit failure may
result.
Transporting the monitor
1. When carrying the display for repair or servicing, please first disassemble the monitor and pack in its original packing. To disassemble the neck and base, please press the "release button" located on the back of the neck and detach the neck/base, then
remove the base from the neck by pressing the “release tabs” located under the base plate and pull the neck off the base, finally
use the original carton and packing materials to wrap the display and its accessories.
11/20
GB
5217/SB
GETTING STARTED
Package contents
Before beginning, ensure that the carton contains the following items:
1. LCD Monitor
2. Monitor Base and Neck (the shape of base may vary according to the monitor model)
3. Power Cord (plug may vary according to the electrical standards for your area)
4. Analog Signal Cable
5. Digital Signal Cable (optional)
6. Audio Cable (optional)
7. CD-ROM (contains user manual)
8. Quick Installation Guide
Monitor installation
1. Setting up the monitor
1.1 Take out the monitor, stand and monitor base from the package.
1.2 Place the monitor base on the desk and then slide the neck into the slots of
base. (Make sure the direction of the neck is correct.)
1.3 Grasp the monitor with both hands and then slide the monitor into the neck.
(Make sure the direction of the neck is correct)
2. Connecting signal cable
2.1 Switch off your computer.
2.2 Connect the signal cable to the D-SUB port at the rear of the monitor and tighten the
connector screws
2.3 Connect the other end of signal cable to the computer's VGA port and tighten the connector screws.
2.4 Note: Ensure the display setting does not exceed 1280x1024, 75Hz.
3. Connecting audio cable (with audio option)
3.1 Plug the audio cable into the AUDIO port at the rear of the monitor.
3.2 Plug the other end of the audio cable into the audio port of your computer or other
audio source.
4. Connecting power
4.1 Plug the female end of the power cord into the POWER port at the rear of the monitor.
4.2 Plug the male end of the power cord into a power outlet.
5. Switching on
5.1 Switch on your computer.
You should now be able to see the picture. If not, refer to the trouble shooting section of this
guide.
12/20
POWER
AUDIO D-SUB DVI
GB
5217/SB
Identifying parts and controls
1. The LED light indicates the state of working. During operation, the LED Light is bright green. When dormant, the LED Light is
orange.
2. The power button
is used to identify the state of power. You can use the power button to control on & off.
3. The function keys are used for adjusting all settings. When you need some adjustment, you can achieve the goals by pressing
any of the function menus. Details for all the function menus are subsequently described.
Working with OSD Group
You will find that the OSD is very easy to use. You can identify the function of a button through the corresponding icon displayed on
the pop-up window of OSD. Now there are 3 pictures, which show that a button represents different functions in different levels of
the architecture.
First Level
Second Level
Third Level
1. Press
button to start.
2. Press any of the rest 4 buttons to activate the OSD menu.
3. Press the corresponding function icon button on the pop-up window of the OSD.
CUSTOMIZING YOUR MONITOR
The On Screen Display (OSD) system provides a full range of customizable tools to optimize your display.
Important:
Although you could perform comprehensive customization, we strongly recommend that you use the “AUTO ADJUSTMENT” function. It can utilize the default values to thoroughly optimize the performance of the display. Activate the
OSD munu. Select the first button on the left
Important:
to activate the “ATUO ADJUSTMENT” function.
In addition, we have also prepared other relatively simple methods to change the display modes. There are 4 modes,
which include: GENERAL, MOVIE, PICTURE, GAME.
HOTKEYS INTRODUCTION
1.Auto Adjustment
When the OSD functions are displayed, press the first button on the left
performance.
13/20
, and then you can automatically optimize the image
GB
5217/SB
2.Volumn Control (with audio option)
When the OSD functions are displayed, press the first button on the right
to adjust the volume of sound. Press
o
to enter the “ Volume ” menu. Then press
or
to end.
3.Theme Mode Menu
When the OSD functions are displayed, press the second button on the left
adjustments between 4 modes. Press
or
to shift the mode. You may press
e
to make
, and then you can leave automatically.
4.Main Menu
When the OSD functions are displayed, press the second button on the right
to select the option. Press
to enter into the option. Press
o
to enter the main menu. And then press
o
to leave.
FUNCTION KEYS OPERATION
According to the tree-like directory, you can discover the whole OSD system is like a map. This tree-like directory can help you to
become aware of the whole system. During the whole process, you need to know the following actions.
1. Activate the OSD main menu: Under the energized condition, press any function key to execute the function.
2. Confirm the selection: Press the
button.
3. Browse the previous or next option: Press
4. Adjust the option value: Press
or
5. Return to the higher level menu. Press
6. Exit: Press
or
.
to adjust the value.
or
to return to the higher level.
to exit OSD menu; Or if you do not press any button, it will automatically disappear after 30 seconds.
AUTO-ADJUSTMENT
GENERAL
BRIGHTNESS
PICTURE
GAME
SELECT
THEME MODE
Power
VOLUME
OSD MENU
LANGUAGE
Deutsch
16 LAUGUAGES CONTROL MENU
Italiano
䁲
TEMPERATURE
Norsk
BLUE
Русский
Suomi
COOL
Polski
Português
SYSTEM
POWER SAVING MODE
HORIZONTAL POSITION
RECALL
VERTICAL POSITION
PHASE
CLOCK
DDC/CI
DEMO
INFORMATION
14/20
GB
5217/SB
OSD ICON LIST
Icon
Function
Detail
Icon
AUTO
ADJU- * Optimize the picture performance autoSTMENT
matically.
Function
Detail
POWER SAVING * Select between Standard and Advanced
MODE
power saving modes.
See addendum for details.
* Standard: Fulfill EPA Energy Star power
management requirement
* Advanced: Activate monitor Life-Extension fuction
THEME MODE
* Activate the built-in color engine to enhance the graphic effects according to the
different situations of the display. contents
BRIGHTNESS
* Adjust the luminance level of the screen.
WHITE
REBALANCE
CONTRAST
* Adjust the contrast level of the screen.
H O R I Z O N TA L * Sposta la posizione dello schermo a siniPOSITION
stra o a destra
* Regola il bilanciamento del segnale d’input.
INPUT SIGNAL * Select the input signal from Analog, or DiSELECT
gital Inputs (Optional).
* Default: analogic (VGA)
VERTICAL PO- * Sposta la posizione dello schermo in alto
SITION
o in basso
OSD
MENU * Select your own preference of language
LANGUAGE
of OSD menu.
PHASE
* Regola la fase del segnale interno del monitor
COLOR TEMPE- * Select the setting of screen color-Cool,
RATURE
Warm or User.
* Cool: Select the setting of screen color to
be bluish white.
* Warm: Select the setting of screen color
to be reddish white.
CLOCK
* Regola la frequenza di campionamento
dell’orologio interno del monitor
DDC/CI
* Selezionare se spegnere o accendere la
funzione DDC/CI.
* Impostazione predefinita: ATTIVO
DEMO
* 2 Secondi dopo l’attivazione di questa
funzione, alcuni dei menu stimoleranno di
2 volte gi effetti di gradazione.
INFORMATION
* Visualizza la frequenza, il valore di risoluzione, la porta di ingresso ed altri dettagli
riguardanti il monitor.
RECALL
* Ripristina i parametri di fabbrica reimpostati nel monitor.
SYSTEM
* Adjust the mechanical specifications regarding the display.
(POWER SAVING MODE, WHITE BALANCE, CLOCK, PHASE, HORIZONTAL
POSITION, VERTICAL POSITION, INFORMATION)
TROUBLESHOOTING
Symptom
1.No picture
2.LED indicator is not lit.
1.No picture
2.LED indicator is orange
Check Items
1. Check if the monitor is turned on (press the button again
).
2. Check if the power cord is properly connected to the monitor and power outlet.
3 .Check if there is electricity coming from the power outlet (use another device to check for power).
1. Check if your computer is turned on.
2. Ensure the computer is not in power saving mode (move the mouse or press a key on the keyboard to wake up the computer).
3. Check if the video signal cable is properly connected to the monitor and computer.
1.Picture shows “ NO SIGNAL 1 Check if your computer is turned on.
INPUT ”
2 Check if the video signal cable is properly connected to the monitor and computer.
1.Picture shows “ INPUT SI- 1. Ensure that the resolution and/or refresh rate is set correctly.
GNAL OUT OF RANGE ”
Important
Make sure your display setup is under SXGA1280x1024@75Hz
15/20
GB
5217/SB
TECHNICAL FEATURES AND SPECIFICATIONS
Item
Description
Display Size
17"
337.9(H) x 270.3(V)mm
Panel
Pixel Pitch
17"
0.294(H) x 0.294(V)mm
Connector
Analog
Tilt
Tilt Angle
Dimensions
(W x H x D)
Net
17"
About 365(W)x387(H)x169(D)mm
Weight
Net
17"
About 3.6kg
Power
Operating
Condition
Storage
Condition
D-sub
-5°~20°
AC
AC 100~240V,50Hz/60Hz,1.2A
Consumption
Active:<42W/Standby:<2W
Temperature
5°C to 40°C
Humidity
20% to 80% (No Condensation)
Altitude
Under 10,000 fts
Temperature
-20°C to 60°C
Humidity
5% to 80% (No Condensation)
Altitude
Under 40,000 fts
Interface Frequency
1. The following frequency range is the working period. If the entered mode between below period but not match the frequency of
supported timing, display optimization would not be assured. If the entered mode is out of the working period, the display will
be blanking (just show “INPUT SIGNAL OUT OF RANGE”) then go to power saving.
2. Basically, mode judgment is regardless the sync polarity except both or more modes that are all belong to the supported timing
list and could be judged by sync polarity only.
3. In the meantime, real entered frequency of the supported timing is not requested exactly.
4. Normalization of VGA card’ s deviation will be acceptable.
5. Horizontal Frequency 30 ~ 82KHz
6. Vertical Frequency
56 ~ 76Hz
Addendum
Advanced Power Saving Mode
1. Background
The traditional monitors have the function of electricity-saving dormancy. But the interval of dormancy is difficult to decide. If the
interval is long, the purpose of saving electricity can not be achieved. While the interval is short, your computer and LCD monitor would be dormant often. When the LCD monitor becomes dormant, the back lights will be turned off immediately. The frequent turn-on and turn-off of lights will result in the lightness uneven and even shortening the life of the lights.
2. Our solution to the dilemma - Monitor Life-Extension function
In view of that, we have designed the function of Monitor Life-Extension. Once you select the option of “Advanced Power Saving Mode” in the OSD menu, and then you can not only save electricity, but extend the life of the lights.
3. Working principle of the Monitor Life-Extension function
To minimize the impact of frequent turn-on and turn-off of LCD monitor, the Life-Extension function decreases the electricity
supplied to the back-light of LCD monitor gradually, instead of cut it off right away when PC enters sleeping or off mode. Please
see following comparison graphics for details.
16/20
GB
5217/SB
* Standard Power Saving Mode (without Monitor Life-Extension function)
Power
Power Saving Start
ON
* Advanced Power Saving Mode (with Monitor Life-Extension function)
Power
ON
Sleep Start
Power Saving Start
This “Slow-Start-n-Delay-Off” approach minimizes the transit of electricity and temperature caused by the turn-on and turn-off of
LCD monitor. Therefore, the decay of backlights of TFT-LCD can be controlled in the certain level which is much less than it was.
4. The side effect of the Monitor Life-Extension function (why not preset Advanced Power Saving Mode as default?)
According to the request of EPA (US Environmental Protection Agency) to power management of monitors, the power consumption of the monitor must go down to below 3 watts within 3 seconds after the monitor steps in power saving mode. But the LifeExtension function decreases the electricity supplied to the backlights of LCD monitor gradually. Therefore, the Monitor
Life-Extension function has conflict with the requirement of EPA in the first 7 minutes after entering sleeping mode. Even
though,comparing the advantages of both conditions, we still recommend you strongly to set your monitor in Advanced Power
Saving mode.
5. How to engage the Monitor Life-Extension function?
You may simply use the OSD control to activate the Monitor
Life-Extension function.
1. Press arbitrarily 4 buttons (other than the Power Switch) to activate the OSD menu.
2. Press
button to enter function menu.
3. Press
or
4. Press
5. Press
button to select system
to confirm the selection.
or
button to select POWER SAVING MODE .
6. Press
to confirm the selection.
7. Press
or
8. Press
9. Press
10. Press the
button to select the advanced option in the POWER SAVING MODE functions.
to confirm the selection.
button to exit the higher level menu.
button to exit the OSD menu.
FCC compliance
1. This device complies with Part 15 of the FCC Rules. Operation is subject to the following two conditions (1) this device may not
cause harmful interference, and (2) this device must accept any interference received, including interference that may cause undesired operation.
2. NOTE: This equipment has been tested and found to comply with the limits for a Class B digital device, pursuant to part 15 of
the FCC Rules. These limits are designed to provide reasonable protection against harmful interference in a residential installation. This equipment generates, uses and can radiate radio frequency energy and, if not installed and used in accordance with
the instructions, may cause harmful interference to radio communications. However, there is no guarantee that interference will
not occur in a particular installation, If this equipment does cause harmful interference to radio or television reception, which can
be determined by turning the equipment off and on, the user is encouraged to try to correct the interference by one or more of
the following measures:
3. Reorient or relocate the receiving antenna.
4. Increase the separation between the equipment and receiver.
5. Connect the equipment to an outlet on a circuit different from that to which the receiver is connected.
6 .Consult the dealer or an experienced radio/TV technician for help.
17/20
5217/SB
NOTE:
18/20
5217/SB
AVVERTENZE PER L'INSTALLATORE
- Leggere attentamente le avvertenze contenute nel presente documento in
quanto forniscono importanti indicazioni riguardanti la sicurezza di installazione,
d'uso e di manutenzione.
- Dopo aver tolto l'imballaggio assicurarsi dell'integrità dell'apparecchio. Gli elementi dell'imballaggio (sacchetti di plastica, polistirolo espanso, ecc.) non devono essere lasciati alla portata dei bambini in quanto potenziali fonti di pericolo.
L'esecuzione dell'impianto deve essere rispondente alle norme CEI vigenti.
- È necessario prevedere a monte dell'alimentazione un appropriato interruttore
di tipo bipolare facilmente accessibile con separazione tra i contatti di almeno
3mm.
- Prima di collegare l'apparecchio accertarsi che i dati di targa siano rispondenti
a quelli della rete di distribuzione.
- Questo apparecchio dovrà essere destinato solo all'uso per il quale è stato
espressamente concepito, e cioè per sistemi di citofonia o videocitofonia. Ogni
altro uso è da considerarsi improprio e quindi pericoloso. Il costruttore non può
essere considerato responsabile per eventuali danni derivanti da usi impropri, erronei ed irragionevoli.
- Prima di effettuare qualsiasi operazione di pulizia o di manutenzione, disinserire
l'apparecchio dalla rete di alimentazione elettrica, spegnendo l'interruttore dell'impianto.
- In caso di guasto e/o di cattivo funzionamento dell'apparecchio, togliere l'alimentazione mediante l'interruttore e non manomettere l’apparecchio. Per l'eventuale riparazione rivolgersi solamente ad un centro di assistenza tecnica
autorizzato dal costruttore. Il mancato rispetto di quanto sopra può compromettere la sicurezza dell'apparecchio.
- Non ostruire le aperture o fessure di ventilazione o di smaltimento calore e non
esporre l’apparecchio a stillicidio o spruzzi d’acqua. Nessun oggetto pieno di liquido, quali vasi, deve essere posto sull’apparecchio.
- L'installatore deve assicurarsi che le informazioni per l'utente siano presenti sugli
apparecchi derivati.
- Tutti gli apparecchi costituenti l'impianto devono essere destinati esclusivamente all'uso per cui sono stati concepiti.
- ATTENZIONE: per evitare di ferirsi, questo apparecchio deve essere assicurato
al pavimento/alla parete secondo le istruzioni di installazione.
- Questo documento dovrà sempre rimanere allegato alla documentazione dell'impianto.
Direttiva 2002/96/CE (WEEE, RAEE).
Il simbolo del cestino barrato riportato sull’apparecchio indica che il prodotto, alla fine della propria vita utile, dovendo essere trattato separatamente dai rifiuti domestici, deve essere conferito in un centro di raccolta
differenziata per apparecchiature elettriche ed elettroniche oppure riconsegnato al
rivenditore al momento dell’acquisto di una nuova apparecchiatura equivalente.
L’utente è responsabile del conferimento dell’apparecchio a fine vita alle appropriate strutture di raccolta. L’adeguata raccolta differenziata per l’avvio successivo
dell’apparecchio dismesso al riciclaggio, al trattamento e allo smaltimento ambientalmente compatibile contribuisce ad evitare possibili effetti negativi sull’ambiente
e sulla salute e favorisce il riciclo dei materiali di cui è composto il prodotto. Per informazioni più dettagliate inerenti i sistemi di raccolta disponibili, rivolgersi al servizio locale di smaltimento rifiuti, o al negozio in cui è stato effettuato l’acquisto.
SAFETY INSTRUCTIONS FOR INSTALLERS
- Carefully read the instructions on this leaflet: they give important information on
the safety, use and maintenance of the installation.
- After removing the packing, check the integrity of the set. Packing components
(plastic bags, expanded polystyrene etc.) are dangerous for children. Installation
must be carried out according to national safety regulations.
- It is convenient to fit close to the supply voltage source a proper bipolar type
switch with 3 mm separation (minimum) between contacts.
- Before connecting the set, ensure that the data on the label correspond to those
of the mains.
- This apparatus must only be used for the purpose for which it was expressly
designed, e.g. for audio or video door entry systems. Any other use may be dangerous. The manufacturer is not responsible for damage caused by improper, erroneous or irrational use.
- Before cleaning or maintenance, disconnect the set.
- In the event of faults and/or malfunctions, disconnect from the power supply
immediately by means of the switch and do not tamper with the apparatus.
- For repairs apply only to the technical assistance centre authorized by the manufacturer.
- Safety may be compromised if these instructions are disregarded.
- Do not obstruct opening of ventilation or heat exit slots and do not expose the
set to dripping or sprinkling of water. No objects filled with liquids, such as
vases, should be placed on the apparatus.
- Installers must ensure that manuals with the above instructions are left on connected units after installation, for users' information.
- All items must only be used for the purposes designed.
- WARNING: to prevent injury, this apparatus must be securely attached to the
floor/wall in accordance with the installation instructions.
- This leaflet must always be enclosed with the equipment.
Directive 2002/96/EC (WEEE)
The crossed-out wheelie bin symbol marked on the product indicates that
at the end of its useful life, the product must be handled separately from
household refuse and must therefore be assigned to a differentiated collection centre for electrical and electronic equipment or returned to the dealer upon
purchase of a new, equivalent item of equipment.
The user is responsible for assigning the equipment, at the end of its life, to the appropriate collection facilities.
Suitable differentiated collection, for the purpose of subsequent recycling of decommissioned equipment and environmentally compatible treatment and disposal,
helps prevent potential negative effects on health and the environment and promotes the recycling of the materials of which the product is made. For further details
regarding the collection systems available, contact your local waste disposal service or the shop from which the equipment was purchased.
Risks connected to substances considered as dangerous (WEEE).
According to the WEEE Directive, substances since long usually used on electric
and electronic appliances are considered dangerous for people and the environment. The adequate differentiated collection for the subsequent dispatch of the
appliance for the recycling, treatment and dismantling (compatible with the environment) help to avoid possible negative effects on the environment and health
and promote the recycling of material with which the product is compound.
Rischi legati alle sostanze considerate pericolose (WEEE).
Secondo la nuova Direttiva WEEE sostanze che da tempo sono utilizzate comunemente su apparecchi elettrici ed elettronici sono considerate sostanze pericolose
per le persone e l’ambiente. L’adeguata raccolta differenziata per l’avvio successivo dell’apparecchio dismesso al riciclaggio, al trattamento e allo smaltimento
ambientalmente compatibile contribuisce ad evitare possibili effetti negativi sull’ambiente e sulla salute e favorisce il riciclo dei materiali di cui è composto il prodotto.
19/20
FILIALI ITALIA
Torino
Strada del Drosso, 33/8
10135 Torino
Milano
Via Conti Biglia, 2
20162 Milano
FILIALI ESTERE
ELVOX Austria GmbH
Grabenweg 67
A-6020 Innsbruck
ELVOX Shanghai Electronics Co. LTD
Room 2616, No. 325 Tianyaoqiao Road
Xuhui District
200030 Shanghai, Cina
CERT n° 9110.ELVO
ELVOX Costruzioni elettroniche S.p.A. - ITALY
Via Pontarola, 14/a - 35011 Campodarsego (Padova)
Tel 049 9202511 - Fax 049 9202603 - [email protected]
Telefax Export Dept. +39/049 9202601 - [email protected]
www.elvox.com
UNI EN ISO 9001:2008