Transcript
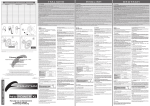
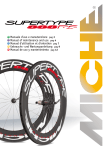
I TA L I A N O
PRESSIONI MASSIME DI ESERCIZIO - MAXIMUM OPERATING PRESSURES - MAXIMALE BETRIEBSDRUCKWERTE
(per copertoncini strada - for road tyres - für Straßenreifen)
LARGHEZZA PNEUMATICO
TYRE WIDTH
REIFENBREITE
DIMENSIONI DEL CERCHIO
RIM DIMENSIONS
FELGENGROßE
mm
20
23
25
Inch
0.80
0.90
1.00
13C
9,5 BAR
138 PSI
9,5 BAR
138 PSI
9 BAR
131 PSI
9,5 BAR
138 PSI
9 BAR
131 PSI
15C
ATTENZIONE!
• Non superate mai la pressione massima consigliata dal fabbricante del pneumatico.
• La pressione di gonfiaggio dei pneumatici NON deve mai superare il livello di pressione MENO ELEVATO tra il valore di pressione massima indicato dal fabbricante del pneumatico e quello consigliato dal costruttore del cerchio.
WARNING!
• Never exceed the maximum pressure recommended by the tyre manufacturer.
• The inflating pressure of the tyres must NOT exceed the LOWER pressure level between the maximum pressure stated by the tyre manufacturer and the value recommended
by the rim manufacturer.
ACHTUNG!
Überschreiten Sie nie den vom Reifenhersteller empfohlenen Höchstdruck.
Der Aufpumpdruck der Reifen darf AUF KEINEN FALL den NIEDRIGSTEN der vom Reifenhersteller sowie vom Felgenhersteller empfohlenen maximalen Druckwerte überschreiten.
2
1
G
G
ATTENZIONE!
4
3
D
D
4040Nm
N.m(354
- 29.5in.lbs)
lb.ft
CC
UT-CS060
• Assicuratevi che il bloccaggio rapido sia regolato in modo corretto (vedi foglio istruzioni “Quick Release”). Fate rimbalzare la bicicletta sul terreno per verificare la presenza
di parti allentate.
• Assicuratevi che i pneumatici siano gonfiati con la corretta pressione e che non vi sia
alcun danno sul battistrada o sui fianchi.
• Assicuratevi che non vi sia alcun raggio danneggiato o allentato.
• Assicuratevi che le ruote siano perfettamente centrate. Fate girare la ruota per verificare che non ondeggi su e giù o da lato a lato e che ruotando non tocchi i pattini dei freni.
• Assicuratevi che i cavi e i pattini dei freni siano in buono stato.
• Verificate il corretto funzionamento dei freni prima di iniziare la corsa.
• Verificate che i catarifrangenti siano montati saldamente e siano puliti.
• Imparate e rispettate le norme ciclistiche locali e tutti i segnali stradali durante la corsa.
APRIRE
- OPEN
APRIRE
ÖFFNEN
OPEN
NON UTILIZZATE LA BICICLETTA SE NON SONO SODDISFATTI TUTTI I
CONTROLLI PRECEDENTEMENTE ELENCATI!
C
G
B
EE
UT-BB080
FF
CHIUDERE
CLOSE
SCHLIESSEN
UT -BB080
BB
6
1 - CONSIGLI PER LA SICUREZZA
5
ÖFFNEN
7
D
D
8
AA
M
BB
C
C
30-50 Nm
(266-443 in.lbs)
CHIUDERE BB
CLOSE
SCHLIESSEN
D
D
10
9
B
B
• Seguite accuratamente il programma di manutenzione periodica (Capitolo 7).
• Usate sempre ricambi originali Campagnolo®.
• Eventuali parti piegate o danneggiate in seguito a urti o incidenti devono essere sostituite con ricambi originali Campagnolo® e non riparate.
• Indossate abiti aderenti e che vi rendano facilmente visibili (colori fluorescenti o colori
chiari).
• Evitate il ciclismo notturno poiché è più difficile essere visti dagli altri e distinguere
gli ostacoli sulla strada. Se utilizzate la bicicletta di notte, equipaggiatela con luci e
catarifrangenti adeguati.
• In caso di utilizzo della bicicletta sul bagnato, ricordate che la potenza dei freni e l'aderenza dei pneumatici sul terreno diminuiscono notevolmente, rendendo più difficile il
controllo del mezzo. Inoltre, tenete presente che a causa del progressivo asciugarsi della
superficie frenante durante la frenata, la potenza frenante potrebbe variare bruscamente.
Prestate, quindi, maggiore attenzione durante la guida sul bagnato per evitare possibili
incidenti.
• La Campagnolo s.r.l. vi raccomanda di indossare sempre il casco protettivo, di allacciarlo
correttamente e di verificare che esso sia omologato nel paese di utilizzo.
2 - SPECIFICHE TECNICHE
CC
2.1 - SPECIFICHE TECNICHE DELLA RUOTA
The text of this instruction sheet has been translated into
multiple languages starting from the English version, which
represents the faithful translation of the original instructions
in Italian.
Therefore, in the event of doubts, dissimilarities, or inconsistencies between one or more translations, the English version is
considered to be valid.
A
CAMPAGNOLO IBERICA S.L.
CAMPAGNOLO JAPAN LTD.
Via della Chimica, 4
36100 Vicenza - ITALY
Phone: +39-0444-225600
Fax: +39-0-444-225606
E-mail: [email protected]
Avda. de Los Huetos 46 Pab. 3-2a fila
01010 Vitoria - SPAIN
Phone: +34-945-2171195
Fax:+34-945-2171198
E-mail: [email protected]
65 Yoshida-cho, Naka-ku - 231-0041
Yokohama - JAPAN
Phone: +81-45-2642780
Fax: +81-45-2418030
E-mail: [email protected]
CAMPAGNOLO
DEUTSCHLAND GMBH
CAMPAGNOLO
NORTH AMERICA INC.
PRIMATEK LTD
Alte Garten 62
51371 Leverkusen - GERMANY
Phone: +49-214-206 95 3-0
Fax: +49-214-206 95 3-15
E-mail: [email protected]
5431 Avenida Encinas, Suite C
Carlsbad CA 92008 - U.S.A.
Phone: +1-760-9310106
Fax: +1-760-9310991
E-mail: [email protected]
No 4, Gongyequ 10th Rd., Nantue Dist.
TAICHUNG CITY 408 - TAIWAN (R.O.C.)
Phone: +886-4-23506831
Fax: +886-4-23596764
Campagnolo S.r.l. reserves to modify the content of this manual without notice.
The updated version will always be available www.campagnolo.com.
On our website you will also find information on the other Campagnolo® products and the spare parts catalogue.
cod. 7225836 - 01/2013
© Campagnolo s.r.l. 2013
Printed on 100% recycled paper
anteriore: 100 mm
posteriore: 130 mm
Pressione di gonfiaggio:
vedi tabella “Pressioni massime di esercizio”
rispettate le pressioni massime indicate sul pneumatico per ciclocross
KHAMSIN ASYMMETRIC
esclusivamente su strade con asfalto liscio o in
pista.
KHAMSIN ASYMMETRIC CX
per ciclocross
2.2 - SPECIFICHE TECNICHE DEI RAGGI
ATTENZIONE!
Verificate che vengano installati solo raggi originali e del tipo specifico per il Vostro
modello di ruota. L’utilizzo di raggi non adatti può essere causa di incidenti, lesioni
fisiche o morte.
ATTENZIONE!
Per valutare la corretta tensione della ruota è necessario l’utilizzo di un tensiometro: non fidatevi della tensione avvertita manualmente. E’ fondamentale quindi far
effettuare tutte le operazioni di sostituzione dei raggi da un Pro-Shop Campagnolo,
un Service Center Campagnolo o da un meccanico specializzato nel montaggio e
manutenzione delle ruote Campagnolo.
I codici di ricambio dei raggi sono disponibili all’interno del catalogo ricambi scaricabile dal nostro sito www.campagnolo.com.
3 - PNEUMATICI
I cerchi Campagnolo sono realizzati con estrema precisione dimensionale. Nel
caso in cui il montaggio del pneumatico su un cerchio Campagnolo fosse troppo
semplice, il pneumatico potrebbe essere troppo grande e quindi non aderire correttamente al cerchio.
Nel caso in cui il montaggio del pneumatico su un cerchio Campagnolo fosse
troppo difficile, questo potrebbe essere troppo piccolo. Usare esclusivamente
copertoncini di alta qualità che richiedano l’uso di leve per copertoncini e il cui
montaggio necessiti di sforzo ragionevole. L’aggiunta di talco sul pneumatico
agevolerà l’operazione di installazione. L’uso di un pneumatico che non aderisce
correttamente al cerchio può provocare l’improvvisa rottura del pneumatico stesso
e causare incidenti, lesioni fisiche o morte.
• La ruota da voi acquistata è progettata per montare copertoncini (clincher).
• Prima di montare le coperture, installate sul cerchio il flap (rim tape) di protezione
utilizzando esclusivamente quello in dotazione.
• Prima di montare le coperture per utilizzo su strada, controllate che il diametro indicato
sul pneumatico sia 622 mm e che la sezione del pneumatico sia compresa tra 23 e 25 mm,
per essere sicuri che la copertura e il cerchio siano compatibili.
• Utilizzate camere d’aria con valvola lunga (almeno 43 mm).
3.2 - PNEUMATICI PER CICLOCROSS
RUOTE - WHEELS - LAUFRADER
• Le ruote KHAMSIN ASYMMETRIC CX sono anche progettate per montare coperture
per ciclocross fino a 35 mm.
• Vi raccomandiamo di rispettare le pressioni massime indicate sul pneumatico per
ciclocross.
• Non utilizzate pneumatici per MTB da 29”.
ATTENZIONE!
Un errato montaggio del pneumatico può provocare il suo improvviso sgonfiaggio,
scoppio o distacco ed essere causa di incidenti, gravi lesioni o morte.
3.3 - INSTALLAZIONE DEL COPERTONCINO
KHAMSIN
ASYMMETRIC
TM
MANUALE USO E MANUTENZIONE
OWNER'S MANUAL
BEDIENUNGS-ANLEITUNG
5.1 - PIGNONI 11s della Campagnolo s.r.l. (su corpo RL per pignoni 11s
della Campagnolo s.r.l.)
5.1.1 - MONTAGGIO
1) I pignoni sono preassemblati e fasati sul supporto in resina (A - Fig. 2). La ghiera
G (Fig. 2) è dotata di una rondella preassemblata (H); assicuratevi che sia posizionata
come in fig 2.
2) Togliete la ghiera (G - Fig.2).
3) Inserite il supporto sul fianco del corpetto ruota libera, allineate i profili scanalati,
spingete i pignoni sul corpetto ruota libera ed estraete il supporto (A) dal mozzo (Fig.
2).
4) Nel caso di montaggio senza il supporto in resina, inserite i pignoni, sciolti o preassiemati, e i distanziali sul corpo porta pignoni del mozzo, facendo coincidere il profilo
di entrambe le scanalature (Fig. 3). Il profilo del corpo ruota libera con due scanalature
asimmetriche (Fig. 3) rende la fasatura dei pignoni automatica in quanto c’è solo una
possibilità di montaggio.
5) Utilizzando una chiave dinamometrica (D - Fig. 4) assieme all’utensile Campagnolo®
UT-BB080 (B - Fig. 4), serrate la ghiera (C - Fig. 4), fornita in dotazione con il pacco
pignoni Campagnolo®, sul corpo ruota libera a 40 Nm (354 in.lbs).
5.1.2 - SMONTAGGIO
1) Smontate la ghiera (G - Fig. 5) utilizzando l’utensile Campagnolo® UT-BB080 (B - Fig.
5) con una chiave esagonale (E - Fig. 5) da 24 mm e la chiave con catena Campagnolo®
UT-CS060 (F - Fig. 5).
2) Inserite il supporto portapignoni in resina sul fianco del corpo ruota libera e allineate i profili scanalati del corpo con quelli del supporto. Fate scorrere i pignoni sopra
al supporto.
3) Rimuovete il supporto portapignoni in resina con i pignoni dal corpo ruota libera.
• Per tutte le operazioni di montaggio, smontaggio, uso e manutenzione, consultate
il foglio istruzioni fornito con i pignoni 10S.
ATTENZIONE! Compatibilità cerchio/pneumatico
ZA du Tissot
42530 St Genest - Lerpt - FRANCE
Phone: +33-477-556305
Fax: +33-477-556345
E-mail: [email protected]
5 - MONTAGGIO E SMONTAGGIO DEI PIGNONI
18 mm
3.1 - PNEUMATICI PER UTILIZZO SU STRADA
CAMPAGNOLO FRANCE SAS
Vedi foglio istruzioni “Quick Release”.
Rim tape
Utilizzo:
CAMPAGNOLO S.R.L.
USO DEL BLOCCAGGIO RAPIDO
5.2 - PIGNONI 10S
per coperture per ciclocross
APRIRE - OPEN - ÖFFNEN
4 - MONTAGGIO DELLA RUOTA SUL TELAIO e
700C(622x15C)
per copertoncini strada
INTENDED USE – Campagnolo® product has been designed and made to be fitted and used exclusively on “racing” or “cyclocross” bikes (in the case in which the abbreviation CX
is shown), with any other use explicitly excluded. Any different use of this product (like, for instance, but without any limitation, tandem, cross-country, all mountain/enduro, off-road
acrobatic, downhill, four-cross, freeride, free-style, or any other type of extreme off-road cycling as defined by UCI) might cause accidents, physical injuries or even death and must
therefore be considered totally inappropiate, unsuitable and not recommended.
LIFESPAN - WEAR - INSPECTION REQUIREMENT - The lifespan of Campagnolo® wheels depends on many factors, such as rider size and riding conditions. Impacts, falls, improper
use or harsh use in general may compromise the structural integrity of the components and significantly reduce their lifespan. Some components are also subject to wear over time.
Please have your bicycle and its components regularly inspected by a qualified mechanic for any cracks, deformation, signs of fatigue or wear (use of penetrating fluid or other visual
enhancers to locate cracks on parts is recommended). Disassembly your bicycle components and especially the pedals, is required during these inspections. If the inspection reveals any
deformation, cracks, impact marks or stress marks, no matter how slight, immediately replace the component; components that have experienced excessive wear also need immediate
replacement. The frequency of inspection depends on many factors; check with your authorized representative of Campagnolo S.r.l. to select a schedule that is best for you.
• If you weigh over 109 kg/240 lbs we advise you not to use this product. Non compliance with this warning can damage the product irreversibly.
• If you weigh 82 kg/180 lbs or more, you must be especially vigilant and have your bicycle inspected more frequently (than someone weighing less than 82 kg/180 lbs).
Check with your mechanic to discuss whether the wheels you selected are suitable for your use, and to determine the frequency of inspections.
Important PERFORMANCE, SAFETY and WARRANTY Notice - The components of Campagnolo® 9s, 10s and 11s transmissions, as well as the brakes, rims, pedals
and all other Campagnolo® products are designed as a single integrated system. Not to affect safety, performance, longevity, functionality and the WARRANTY,
use exclusively the parts and components supplied or specified by Campagnolo S.r.l., without interfacing or replacing them with products, parts or components
manufactured by other companies.
Note: Tools supplied by other manufacturers for components similar to Campagnolo® components may not be compatible with Campagnolo® components. Likewise, tools supplied by
Campagnolo S.r.l. may not be compatible with components supplied by other manufacturers. Always check with your mechanic or the tool manufacturer to insure compatibility before
using tools supplied by one manufacturer on components supplied by another.
The user of this Campagnolo® product expressly recognizes that there are risks inherent in bicycle riding, including but not limited to the risk that a component of the bicycle
can fail, resulting in an accident, personal injury or death. By his purchase and use of this Campagnolo® product, the user expressly, voluntarily and knowingly accepts and/
or assumes these risks and agrees to hold Campagnolo S.r.l. harmless against any resulting damages.
Prestate attenzione a non danneggiare o, comunque, a non piegare alcuna porzione di
cerchio durante l’installazione del pneumatico.
• Inserite un lato del pneumatico nell'apposita sede sul cerchio (Fig. 1).
• Posizionate la camera d'aria tra cerchio e pneumatico iniziando con l'inserire la valvola
nel foro sul cerchio.
• Al fine di montare correttamente la camera d’aria e il pneumatico sul cerchio, è necessario prima gonfiare leggermente la camera d’aria.
• E’ necessario poi montare manualmente la camera d’aria e il pneumatico sul cerchio,
facendo attenzione che la camera d’aria sia posizionata correttamente all’interno del
pneumatico e che il pneumatico, a sua volta, sia posizionato correttamente sul cerchio.
• Inserite il secondo lato del pneumatico nella sede del cerchio.
• Si può quindi procedere a gonfiare la camera d’aria fino al raggiungimento della
corretta pressione di esercizio. Gonfiare la camera d’aria lentamente, assicurandosi di
mantenere la stessa e il pneumatico nella corretta posizione sul cerchio.
ATTENZIONE!
Fate riferimento al foglio istruzioni fornito dal produttore dei freni.
7. MANUTENZIONE PERIODICA DELLE RUOTE
ATTENZIONE! NOTA PER MECCANICI SPECIALIZZATI
Per
le istruzioni di assemblaggio, manutenzione e sostituzione
cerchi, raggi e mozzi rivolgetevi a un service center Campagnolo
o al vostro partner commerciale Campagnolo.
•Dopo il primo utilizzo controllate la centratura delle ruote.
ATTENZIONE!
L’utilizzo di ruote non centrate correttamente o con raggi rotti e/o danneggiati
può provocare incidenti, lesioni fisiche o morte.
• Prima di ogni uscita controllate lo stato delle coperture e la pressione di gonfiaggio.
• Fate lubrificare periodicamente i mozzi da un meccanico specializzato. Identificate
con il vostro meccanico di fiducia l’intervallo di lubrificazione più adatto alle vostre
esigenze (indicativamente ogni 2.000-5.000 km).
• Ogni 10.000-20.000 km (5.000 - 10.000 km per KHAMSIN ASYMMETRIC CX) fate
controllare e ingrassare i mozzi da un meccanico specializzato.
• Fate verificare inoltre periodicamente tutte le parti soggette ad usura (cerchi, cuscinetti dei mozzi, pattini freno) e, quando necessario, sostituitele.
• Affidate periodicamente la bicicletta ad un meccanico specializzato affinché lubrifichi i cuscinetti dei mozzi, le sfere e il meccanismo ruota libera.
• Fate controllare periodicamente da un meccanico specializzato la tensione dei raggi,
la centratura e la campanatura delle ruote.
• I periodi e i chilometraggi sono puramente indicativi e andranno modificati anche
sensibilmente in funzione delle condizioni di utilizzo e dell'intensità della vostra
attività (esempio: agonismo, pioggia, strade salate, peso dell’utilizzatore ecc.).
Contattate un meccanico specializzato per scegliere l’intervallo più adatto a voi.
7.1 - PULIZIA DELLE RUOTE
• Lo sporco danneggia la bicicletta e i suoi componenti. Pulite ed asciugate accuratamente la vostra bici dopo averla usata.
• Non lavate mai la vostra bicicletta con acqua a pressione. Non utilizzate mai spugne
abrasive o metalliche. Lavate la vostra bicicletta e i componenti Campagnolo pulendo
delicatamente con acqua e sapone neutro.
• Rilubrificate con cura la trasmissione utilizzando un lubrificante specifico. L’utilizzo
di un lubrificante di bassa qualità o non idoneo può compromettere l’integrità della
trasmissione e causare eccessiva usura o danni al sistema.
• Pulite accuratamente i residui di lubrificante rimasti sulla bicicletta e sul pavimento.
Alla fine delle operazioni di lubrificazione, sgrassate ACCURATAMENTE cerchi e
pattini freno.
ATTENZIONE!
3.4 - GONFIAGGIO E SGONFIAGGIO DELLA RUOTA
7.2 - TRASPORTO E CUSTODIA
Una pressione eccessiva riduce l’aderenza del pneumatico alla strada e aumenta il
rischio che il pneumatico possa scoppiare improvvisamente.
Una pressione troppo bassa riduce le prestazioni della ruota e aumenta la possibilità che il pneumatico si sgonfi improvvisamente e inaspettatamente. Una pressione
troppo bassa potrebbe inoltre causare danni e usura prematura del cerchio.
Quando trasportate la ruota separatamente dalla bicicletta o in vista di un periodo di
inutilizzo, riponetela in una borsa per ruote per proteggerla dagli urti e dallo sporco.
ACHTUNG!
See the “Quick Release” instruction sheet.
• Vergewissern Sie sich, dass der Schnellspanner richtig eingestellt ist (siehe
Bedienungsanleitung “Quick Release”). Heben Sie das Fahrrad leicht an und lassen
Sie es auf den Boden auffedern, um festzustellen, ob irgendwelche Bestandteile locker
sind.
• Kontrollieren Sie, dass die Reifen mit dem richtigem Druck aufgepumpt sind und
keinerlei Schäden an der Lauffläche oder an den Reifenflanken aufweisen.
• Kontrollieren Sie, dass alle Speichen in einwandfreiem Zustand sind und dass keine
Speiche locker ist.
• Kontrollieren Sie, dass die Laufräder perfekt zentriert sind. Lassen Sie das Laufrad
drehen, um festzustellen, dass es keinen Höhen- und Seitenschlag aufweist und dass
es beim Drehen nicht die Bremsschuhe berührt.
• Stellen Sie sicher, dass die Kabel und Bremsschuhe in einwandfreiem Zustand sind.
• Kontrollieren Sie die Funktionstüchtigkeit der Bremsen vor jedem Gebrauch.
• Kontrollieren Sie, dass die Rückstrahler fest montiert und sauber sind.
• Sie sollten die örtliche Straßenverkehrsordnung für Radfahrer kennen und einhalten
sowie alle Verkehrszeichen bei der Fahrt beachten.
DO NOT RIDE YOUR BICYCLE IF IT DOES NOT PASS THIS PRE-RIDE
TEST. CORRECT ANY CONDITION BEFORE YOU RIDE!
• Be sure that the periodic maintenance schedule is strictly followed (see Section 7).
• Always use original Campagnolo® spare parts.
• Parts which have been bent or otherwise damaged in an accident or as a result of
any other impact must not be re-straightened. They must be replaced immediately
with original Campagnolo® parts.
• Wear clothes which are snug-fitting and which make you visible to traffic, such as
neon, fluorescent, or other bright colors.
• Avoid biking at night, because it is more difficult for you to be seen by traffic, and it
is more difficult for you to see obstructions on the ground. If you do ride at night, you
should equip your bicycle with and use a headlight and a taillight.
• When riding in wet conditions, remember that the stopping power of your brakes
is greatly reduced and that the adherence of the tires on the ground is considerably
reduced. Also bear in mind that because of the progressive drying of the braking
surface during braking itself, braking power may vary sharply. This makes it harder to
control and stop your bicycle. Extra care is required when riding your bicycle in wet
conditions to avoid an accident.
• Campagnolo s.r.l. reminds you to always wear a properly fitted and fastened bicycle
helmet that has been approved by ANSI or SNELL.
2 - TECHNICAL SPECIFICATIONS
2.1 - WHEEL TECHNICAL SPECIFICATIONS
O.L.D
6 - FRENI
ACHTUNG!
Bei allen Eingriffen (z.B. Montage, Demontage) an Laufrader
immer geeignete Schutzhandschuhe und Schutzbrille tragen.
• Check to be sure that all quick release fasteners, nuts and bolts are properly adjusted
(see the “Quick Release” instruction sheet). Bounce the bicycle on the ground and
listen and look for anything which may be loose.
• Be sure that your tires are inflated to the correct pressure and that there is no damage whatsoever in the tread or sidewall.
• Be sure that none of the spokes are damaged or loose.
• Be sure that your wheels are perfectly centered. Spin the wheels to be sure that they
do not wobble up and down or from side to side, and that they do not make contact
with the brake pads while rotating.
• Check your brake pads and cables to be sure they are in good condition.
• Test your brakes in the beginning of your ride to make sure that they are operating
properly.
• Check all reflectors to make sure that they are clean, straight, and securely mounted.
• Learn and follow the local bicycle laws and regulations, and obey all traffic signals,
signs and laws while you ride.
5.3.1 - MONTAGGIO
5.3.2 - SMONTAGGIO
1) Smontate la ghiera (C - Fig. 10) utilizzando l'utensile TL-LR15 della Shimano Inc.
o FR-5 della Park Tool Co. (B - Fig. 10) e la chiave con catena (della Shimano Inc.
TL-SR20 - D - Fig. 10).
2) Sfilate i pignoni dal corpo RL.
4 - FITTING THE WHEEL ON THE FRAME /
USING THE QUICK RELEASE
1 - SICHERHEITSVORKEHRUNGEN
18 mm
• Pignoni della Sram Corporation
1) I pignoni sono preassemblati su un supporto (A - Fig. 9).
2) Inserite il supporto sul fianco del corpetto ruota libera, allineate i profili scanalati,
spingete i pignoni sul corpetto ruota libera ed estraete il supporto (A) dal mozzo (Fig.
9).
3) Mediante l’utensile TL-LR15 della Shimano Inc. o FR-5 della Park Tool Co. (B - Fig.
8) serrate la ghiera (C - Fig. 8) sul corpo ruota libera a 30-50 Nm (266-443 in.lbs).
Hinweis: Es ist möglich, dass Werkzeug, das von anderen Herstellern für Komponenten geliefert wird, die ähnlich sind wie Campagnolo®-Komponenten nicht mit Campagnolo®Komponenten kompatibel ist. Ebenso kann es sein, dass von Campagnolo S.r.l. geliefertes Werkzeug nicht mit Komponenten von anderen Herstellern kompatibel ist.
Bevor Sie das Werkzeug eines Herstellers an Komponenten eines anderen Herstellers benutzen, sollten Sie sie daher immer mit Ihrem Fahrradmechaniker oder mit dem
Werkzeughersteller auf ihre Kompatibilität prüfen.
Der Benutzer dieses Campagnolo®-Produkts erkennt ausdrücklich an, dass der Gebrauch des Fahrrads Gefahren mit sich bringen kann, welche den Bruch einer
Fahrradkomponente sowie auch andere Risken umfassen und Unfälle mit körperlichen und sogar lebensgefährlichen Verletzungen verursachen können. Mit dem Kauf und
Gebrauch dieses Campagnolo®-Produkts akzeptiert der Benutzer diese Gefahren und/oder geht diese Risiken ausdrücklich, freiwillig und bewusst ein. Dabei sagt er zu, dass
der Campagnolo S.r.l. niemals die Schuld für irgendeinen möglicherweise daraus entstehenden Schaden zuweisen wird.
5.1 - 11s SPROCKETS of Campagnolo s.r.l. (on FW body for 11s sprockets of Campagnolo s.r.l. )
700C(622x15C)
Importante!
Con i corpetti ruota libera 11s, utilizzate l’adattatore (M - Fig.7) solo per pacchi
pignoni 9s e 10s della Shimano Inc. e Sram Co. (l'adattatore non deve essere utilizzato con i pacchi pignoni 11s della Shimano Inc.).
Questo adattatore (M - Fig.7) deve essere inserito sul corpetto ruota libera prima del
pacco pignoni 9s e/o 10s e/o di qualsiasi, eventuale, rondella a corredo del pacco
pignoni 9s e/o 10s.
Per le istruzioni di montaggio, smontaggio e manutenzione, fate riferimento al foglio
istruzioni fornito dal produttore del pacco pignoni.
2) Mediante l’utensile TL-LR15 della Shimano Inc. o FR-5 della Park Tool Co. (B - Fig.
8) serrate la ghiera (C - Fig. 8) sul corpo ruota libera a 30-50 Nm (266-443 in.lbs).
Bremssysteme, Felgen, Pedale und alle anderen Campagnolo®-Produkte wurden als ein einziges integriertes System entwickelt. Damit die Sicherheit, Leistung,
Lebensdauer und Funktionstüchtigkeit nicht beeinträchtigt und die GARANTIE nicht ungültig wird, benutzen Sie bitte ausschließlich die von Campagnolo S.r.l.
gelieferten oder spezifizierten Bestandteile bzw. Komponenten, und kombinieren oder ersetzen Sie diese nicht mit Produkten, Bestandteilen bzw. Komponenten
anderer Hersteller.
5 - SPROCKET ASSEMBLY AND REMOVAL
Rim width:
• Pignoni della Shimano Inc.
1) Inserite i pignoni sul corpo RL verificando che:
- la superficie con il nome del gruppo di ogni pignone sia rivolta verso l'esterno del
corpo RL.
- la scanalatura più larga del pignone (A - Fig. 6) e quella più larga del corpo RL (B Fig. 6) siano allineate.
Lesen Sie die Anweisungen in diesem Handbuch bitte aufmerksam durch. Dieses Handbuch ist integrierender Bestandteil des Produkts und ist an einem sicheren Ort
aufzubewahren, um es später jederzeit wieder zu Rate ziehen zu können.
MECHANISCHE KENNTNISSE - Ein Großteil der Wartungs- und Reparaturarbeiten am Fahrrad setzen spezifische Kenntnisse, einschlägige Erfahrung und geeignetes
Werkzeug voraus. Mechanisches Talent allein könnte nicht ausreichen, um an Ihrem Fahrrad fachgerechte Wartungs- und Reparaturarbeiten auszuführen. Sollten Sie an Ihren
Fähigkeiten zweifeln, diese Arbeiten korrekt durchzuführen, so wenden Sie sich bitte an Ihren Fachhändler.
„UNFÄLLE“ – Wir machen Sie darauf aufmerksam, dass in dieser Anleitung wiederholt auf die Möglichkeit von Unfällen hingewiesen wird.
VERWENDUNGSZWECK - Dieses Campagnolo®-Produkt wurde ausschließlich entworfen und hergestellt, um auf Rennrädern oder Cyclocross-Rädern (falls diese mit dem Kennzeichen
CX versehen sind) montiert und verwendet zu werden. Andere Verwendungszwecke werden ausdrücklich ausgeschlossen. Jeder andere Gebrauch dieses Produkts (wie z.B. für Tandem,
Cross Country, All Mountain/Enduro, Offroad-Akrobatik, Downhill, Four Cross, Freeride, Free Style oder jede andere extreme Offroad-Disziplin gemäß UCI-Definition) könnte Unfälle,
körperliche Verletzungen oder den Tod verursachen und ist daher als vollkommen missbräuchlich, unangemessen und unbesonnen zu betrachten.
LEBENSDAUER - ABNUTZUNG – NOTWENDIGKEIT DER INSPEKTION - Die Lebensdauer der Campagnolo®-Laufrader hängt von vielen Faktoren wie z.B. vom Gewicht
des Fahrers und von den Einsatzbedingungen ab. Stöße, Schläge, Stürze und ganz generell ungeeigneter Gebrauch können die strukturelle Unversehrtheit der Komponenten
beeinträchtigen und deren Lebensdauer dadurch erheblich verkürzen. Einige Komponenten nutzen sich außerdem im Laufe der Zeit ab. Wir bitten Sie, Ihr Fahrrad regelmäßig
von einem Fahrradmechaniker untersuchen zu lassen, um Risse, Deformationen oder andere Ermüdungs- oder Abnutzungserscheinungen festzustellen (zur Risserkennung an
Aluminiumteilen empfehlen wir die Verwendung von Eindringmitteln oder anderen Erkennungsverfahren für Mikrobrüche). Für diese Kontrollen müssen die Komponenten
Ihres Rennrads, insbesondere die Pedale demontiert werden. Sollten bei der Inspektion auch nur die geringsten Anzeichen von Deformationen, Rissen, Schlageinwirkungen
oder Ermüdung festgestellt werden, so ist die betreffende Komponente sofort zu ersetzen, auch übermäßig abgenutzte Komponenten sind sofort zu auszutauschen. Die
Inspektionshäufigkeit hängt von vielen Faktoren ab; wenden Sie sich an einen Vertreter von Campagnolo S.r.l., um das für Sie am besten geeigneten Inspektionsintervall zu
wählen.
• Beträgt Ihr Körpergewicht mehr als 240 lb / 109 Kg, sollten Sie diese Bestandteile/Räder nicht verwenden. Die Nichtbeachtung dieses Hinweises kann zu einer irreversiblen
Beschädigung des Produktes führen.
• Beträgt Ihr Körpergewicht mehr als 180 lb/ 82 Kg, sollten Sie besonders achtsam sein und Ihr Fahrrad häufiger (als die Personen, die weniger als 180 lb/82 Kg wiegen)
überprüfen lassen. Prüfen Sie zusammen mit Ihrem Mechaniker, ob die von Ihnen ausgewählten Campagnolo®-Laufräder für die vorgesehenen Einsatzbedingungen geeignet
sind und legen Sie gemeinsam mit ihm das Inspektionsintervall fest.
Wichtiger Hinweis zu PRODUKTLEISTUNG, SICHERHEIT und GARANTIE - Die Komponenten der 9s, 10s und 11s- Campagnolo®-Antriebssysteme, sowie die
1 - SAFETY RECOMMENDATIONS
Rim size:
Gli ambienti salini (come ad esempio le strade in inverno e nelle vicinanze del
mare) possono essere causa di corrosione galvanica della maggior parte dei
componenti esposti della bicicletta. Per prevenire danni, malfunzionamenti e
incidenti, risciacquare, pulire, asciugare e rilubrificare con cura tutti i componenti
soggetti a tale fenomeno.
ATTENZIONE!
Always wear protective gloves and glasses while working
on the wheels.
5.3 - PIGNONI 9S, 10S, 11S DELLA SHIMANO INC. E PIGNONI DELLA
SRAM CORPORATION (su corpo RL Campagnolo® per pignoni 9/10/11s
della Shimano Inc. e pignoni OG 1070 - OG 1090 della Sram Corporation)
Verificate che il fianco del cerchio non presenti segni di usura, danneggiamenti o
deformazioni sulla pista frenante. Un cerchio danneggiato può rompersi improvvisamente e causare incidenti, lesioni fisiche o morte.
• Per gonfiare il pneumatico: rimuovete il tappo, svitate la valvola e gonfiate utilizzando un compressore o una pompa con manometro per ottenere la pressione desiderata,
riavvitate la valvola, quindi riposizionate il tappo.
• Per sgonfiare il pneumatico: rimuovete il tappo, svitate leggermente la valvola,
quindi premetela fino a raggiugere la pressione desiderata; riavvitate la valvola, quindi
riposizionate il tappo.
WARNING!
Una pressione del pneumatico non corretta potrebbe causare la rottura del
pneumatico o la perdita di controllo della bicicletta ed essere causa di incidenti,
lesioni fisiche o morte.
Cerchio
Dimensione battuta mozzo
ACHTUNG!
Carefully read, follow and understand the instructions given in this manual. It is an essential part of the product, and you should keep it in a safe place for future reference.
MECHANIC QUALIFICATION - Please be advised that many bicycle service and repair tasks require specialized knowledge, tools and experience. General mechanical aptitude may not
be sufficient to properly service or repair your bicycle. If you have any doubt whatsoever regarding your service/repair ability, please take your bicycle to a qualified repair shop.
"AN ACCIDENT" - Please note that throughout this manual, reference is made that "an accident" could occur. Any accident could result in damage to your bicycle, its components
and, more importantly, could cause you or a bystander to sustain severe personal injury or even death.
ATTENZIONE!
Indossate sempre guanti e occhiali protettivi mentre operate
sulle ruote.
H
DEUTSCH
WARNING!
Leggete attentamente le istruzioni riportate nel presente manuale. Questo manuale è parte integrante del prodotto e deve essere conservato in un luogo sicuro
per future consultazioni.
COMPETENZE dMECCANICHE - La maggior parte delle operazioni di manutenzione e riparazione della bicicletta richiedono competenze specifiche, esperienza e
attrezzatura adeguata. La semplice attitudine alla meccanica potrebbe non essere sufficiente per operare correttamente sulla vostra bicicletta. Se avete dubbi sulla vostra
capacità di effettuare tali operazioni, rivolgetevi a personale specializzato.
“UN INCIDENTE” – Vi preghiamo di notare che nel presente manuale si fa riferimento al fatto che potrebbe verificarsi “un incidente”. Qualunque incidente può provocare
danni alla bicicletta, ai suoi componenti e, soprattutto, potrebbe essere causa di gravi ferite o persino di morte per voi o per un passante.
USO DESIGNATO - Questo prodotto Campagnolo® è stato progettato e fabbricato per essere montato e utilizzato esclusivamente su biciclette del tipo “da corsa” o "ciclo
cross" (nel caso in cui riportino la sigla CX), con espressa esclusione di ogni altra destinazione. Qualsiasi diverso uso del presente prodotto (come ad esempio tandem,
cross-country, all mountain/enduro, off-road acrobatico, downhill, fourcross, freeride, free-style, o qualsiasi altra disciplina di off-road estremo come da definizione UCI)
potrebbe essere causa di incidenti, lesioni fisiche o morte e deve pertanto, considerarsi del tutto improprio, inopportuno e sconsigliato.
CICLO VITALE - USURA - NECESSITA’ DI ISPEZIONE - Il ciclo vitale delle ruote Campagnolo®, dipende da molti fattori, quali ad esempio il peso dell'utilizzatore, le coperture
usate e le condizioni di utilizzo. Urti, colpi, cadute e più in generale un uso improprio, possono compromettere l'integrità strutturale delle ruote, riducendone enormemente il
ciclo vitale; alcuni componenti delle ruote sono inoltre soggetti ad usurarsi nel tempo. Vi preghiamo di far ispezionare regolarmente le ruote da un meccanico qualificato, per
controllare se vi siano cricche, deformazioni, indicazioni di fatica o usura (per evidenziare cricche su particolari in alluminio si raccomanda l'utilizzo di liquidi penetranti o altri
rivelatori di microfratture). Se l'ispezione evidenziasse qualsiasi deformazione, cricca, segni di impatto o di fatica, non importa quanto piccoli, rimpiazzate immediatamente il
componente criccato; anche i componenti eccessivamente usurati devono essere immediatamente sostituiti. La frequenza delle ispezioni dipende da molti fattori; contattate
un rappresentante della Campagnolo s.r.l. per scegliere l'intervallo d'ispezione più adatto a voi.
• Se pesate più di 109 kg/240 lbs vi raccomandiamo di non utilizzare queste ruote. La mancata osservanza di questo avvertimento può provocare un danneggiamento irreversibile del prodotto.
• Se pesate più di 82 kg/180 lbs, dovete prestare particolare attenzione e fare ispezionare la vostra bicicletta con una maggiore frequenza (rispetto a chi pesa meno
di 82 kg/180 lbs). Verificate con il vostro meccanico che le ruote che avete scelto siano adatte all'uso che ne farete e stabilite con lui la frequenza delle ispezioni.
Avviso Importante su PRESTAZIONI, SICUREZZA E GARANZIA - I componenti delle trasmissioni Campagnolo® 9s,10s, 11s gli impianti frenanti, i cerchi, i pedali e
tutti gli altri prodotti Campagnolo®, sono progettati come un unico sistema integrato. Per non compromettere la SICUREZZA, le PRESTAZIONI, la LONGEVITA’, la
FUNZIONALITA’ e la GARANZIA, utilizzate esclusivamente le parti e i componenti forniti o specificati dalla Campagnolo S.r.l., senza interfacciarli o sostituirli con
prodotti, parti o componenti fabbricati da altre aziende.
Nota: Utensili forniti da altri produttori per ruote simili alle ruote Campagnolo® potrebbero non essere compatibili con le ruote Campagnolo®. Similmente, utensili forniti
dalla Campagnolo S.r.l. potrebbero non essere compatibili con componenti/ruote di altri produttori. Verificate sempre col vostro meccanico o col fabbricante dell’utensile
la compatibilità, prima di usare gli utensili di un fabbricante su componenti/ruote di un altro fabbricante. Non accertarsi della compatibilità tra utensili e componenti può
provocare uno scorretto funzionamento o la rottura del componente ed essere causa di incidenti, lesioni fisiche o morte.
L'utente di queste ruote Campagnolo® riconosce espressamente che l'uso della bicicletta può comportare rischi compresi ma non limitati al mancato funzionamento di un componente della bicicletta, causanti incidenti, lesioni fisiche o morte. Acquistando e utilizzando queste ruote Campagnolo®, l'utente assume e/o
accetta espressamente, volontariamente e coscientemente tali rischi, compresi ma non limitati al rischio di negligenza passiva o attiva da parte della Campagnolo
S.r.l. ovvero di difetti nascosti, latenti o palesi e solleva la Campagnolo S.r.l. da ogni responsabilità, sino al limite massimo consentito dalla Legge, per qualsiasi
danno risultante.
Se avete qualsiasi domanda vi preghiamo di contattare il vostro meccanico o il più vicino rivenditore Campagnolo® per ottenere ulteriori informazioni.
ATTENZIONE!
A
A
ENGLISH
front: 100 mm
rear: 130 mm
Inflation pressure:
for road tyres
see table “Maximum operating pressures”
for cyclocross tyres
comply with the maximum pressures stamped
on the cyclocross tyre
Use:
KHAMSIN ASYMMETRIC
road racing on smooth road or track surfaces
only
KHAMSIN ASYMMETRIC CX
for cyclocross
2.2 - SPOKES TECHNICAL SPECIFICATIONS
WARNING!
Only use genuine Campagnolo® spokes for your specific type and model of wheel.
Failure to use correct spokes can result in an accident, personal injury or death.
WARNING!
To correctly assess wheel tension a tensiometer must be used: do not go by the
tension you feel manually. It is therefore essential to have all the spoke replacement operations carried out by a Campagnolo Pro-Shop, a Campagnolo Service
Centre or a mechanic specialised in assembly and maintenance on Campagnolo
wheels. The spoke part numbers can be found in the spare parts catalogue which
is downloadable from our website www.campagnolo.com.
3 - TIRES
3.1 - ROAD TYRES
WARNING! Rim-Tire Compatibility
Campagnolo rims are very precise dimensionally. If a tire is too easy to install on a
Campagnolo rim, that tire is most likely too big and will not seat properly on the
rim. If a tire is too difficult to install, that tire is most likely too small. Use only
high quality tires that require the use of tire levers and a reasonable installation
effort. Using talcum powder on the tire will make installation easier. Using a tire
that does not fit properly on the rim can cause unexpected tire failure, resulting
in an accident, personal injury or death.
• The wheel you have purchased is designed to use clincher tires.
• Before fitting the tires, cover the rim using only the tape supplied with the rim.
• Before fitting any road tires, check that the diameter indicated on the tire is 622 and
that the cross-section is between 23 and 25 mm, to insure that the tire and wheel are
compatible.
• Use air chambers (inner tubes) with a long valve (at least 43 mm).
3.2 - CYCLOCROSS TYRES
• The KHAMSIN ASYMMETRIC CX wheels are also designed to fit CX tyres up to 35 mm.
• Please comply with the maximum pressures stamped on CX tyres.
• Do not use 29” MTB tyres.
WARNING!
Failure to properly install the tire can cause sudden and unexpected loss of tire
pressure, resulting in an accident, personal injury or death.
3.3 - INSTALLING CLINCHER TIRES
Be sure that you do not damage or otherwise bend any portion of the rim when
installing the tyre.
• Insert one side of the tyre into the seat provided on the rim (Fig. 1).
• Insert the valve through the hole in the rim, and then position the remainder of the
inner tube between the rim and the tyre.
• In order to install the tube on the rim, inflate the tube slightly first.
• You should then manually set the tube and tire on the rim, making sure that the tube
is positioned correctly within the tire and that the tire is positioned correctly on the rim.
• Insert the second side of the tyre tire into its seat in the rim.
You may then fully inflate the tube to the correct working pressure. Please inflate the
tube slowly, making sure that you maintain the correct positioning of the tube and
tire on the rim.
WARNING!
Check that the side of the rim does not show any sign of significant wear, damage
or deformation on the braking track, which could cause the rim to unexpectedly
break, resulting in an accident, personal injury or death.
3.4 - INFLATING AND DEFLATING THE TIRE
• To inflate the tire: remove the cap, unscrew the valve and inflate the tire using a
compressor or a pump with a pressure gauge to obtain the required pressure, then
tighten the valve and replace the cap.
• To deflate the tire: remove the cap, unscrew the valve, press and hold down the
valve to obtain the required pressure then; tighten the valve and replace the cap.
WARNING!
Excessive tire pressure reduces grip on the road and increases the risk that the
tire will unexpectedly burst.
Inflation pressure that is too low reduces tire performance and increases the probability of sudden and unexpected loss of tire pressure. In addition, premature
wear and damage to the rim may occur.
WARNING!
Incorrect tire pressure could cause tire failure or loss of control of the bicycle,
resulting in an accident, personal injury or death.
5.1.1 - ASSEMBLY
• The sprockets are pre-assembled and timed on the plastic support (A - Fig. 2). The
ring G (Fig. 2) is provided with a preassembled washer (H); ensure that it is positioned
as in fig. 2.
• Remove the ring (G - Fig.2).
• Insert the support on the side of the freewheel body, align the spline patterns, press
the sprockets onto the freewheel and extract the support (A) from the hub (Fig. 2).
• If installing the sprockets without the plastic support, install the individual or preassembled sprockets and the spacers on the sprocket body of the hub aligning the spline patterns (Fig. 3). The profile of the freewheel body with two asymmetrical grooves
(Fig. 3) ensures automatic sprocket timing since there is only one assembly option.
• Using a torque wrench (D - Fig. 4) equipped with Campagnolo® tool UT-BB080
(B - Fig. 4), tighten the lockring (C - Fig. 4), which is provided with the Campagnolo
sprockets, on to the freewheel body to 40 Nm (354 in.lbs).
5.1.2 - DISASSEMBLY
• Remove the lockring (C - Fig. 5) using the Campagnolo® tool UT-BB080 (B - Fig.
5) with a 24 mm hexagonal wrench (E - Fig. 5) and the chain whip Campagnolo®
UT-CS060 (F - Fig. 5).
• Insert the plastic sprocket carrier on the side of the freewheel body and align the
spline patterns on the body with those on the carrier. Slide the sprockets onto the
carrier.
• Slide the sprocket carrier, with the sprockets, off the freewheel body.
5.2 - 10S SPROCKETS
• Refer to the instruction leaflet enclosed with the 10s sprockets for all the assembly,
disassembly, use and maintenance operations.
5.3 - 9S, 10S, 11S SPROCKETS FROM SHIMANO INC. and SPROCKETS
FROM SRAM CORPORATION (on the Campagnolo® freewheel body for
Shimano Inc. 9/10/11s sprockets and Sram OG 1070 - OG 1090 sprockets)
5.3.1 - ASSEMBLY
• Shimano Inc. sprockets
1) Fit the sprockets on the freewheel body and check that:
- the surface with the name of the group of each sprocket is turned to the outside
of the freewheel body.
- the broadest groove of the sprocket (A – Fig. 6) and the broadest of the freewheel body (B – Fig. 6) are aligned.
Important!
With the 11s freewheel body, only use the adapter (M - Fig.7) for 9s and 10s
sprocket packs by Shimano Inc. and Sram Co. (the adapter must not be used for
11s sprocket packs by Shimano Inc.).
The adapter (M - Fig.7) must be fitted on the freewheel body of the 9s or 10s sprocket
pack, or on any washer supplied together with the 9s or 10s sprocket pack.
See the instruction sheet provided by the sprocket pack manufacturer for installation,
removal and maintenance instructions.
SOLLTEN NICHT ALLE EBEN AUFGELISTETEN KONTROLLEN
ZUFRIEDENSTELLEND AUSFALLEN, DAS FAHRRAD NICHT IN
GEBRAUCH NEHMEN!
• Halten Sie das Programm für die regelmäßige Pflege genau ein (siehe Kapitel 7).
• Verwenden Sie immer Campagnolo-Originalersatzteile.
• Durch Schläge, Stöße bzw. Unfälle verbogene oder beschädigte Teile sind durch
Campagnolo-Originalersatzteile zu ersetzen und dürfen nicht repariert werden.
• Tragen Sie eng anliegende Bekleidung, mit der Sie gut gesehen werden können (in
Leuchtfarben oder hellen Farben).
• Vermeiden Sie es, nachts mit dem Rad zu fahren, da es im Dunkeln schwieriger ist, von
anderen Verkehrsteilnehmern gesehen zu werden und man selbst Hindernisse auf der
Straße viel schlechter erkennt. Wenn Sie das Fahrrad auch nachts benutzen, sollte es mit
geeigneten Lampen und mit entsprechenden Rückstrahlern ausgestattet sein.
• Falls Sie das Fahrrad auf nasser Fahrbahn benutzen, sollten Sie daran denken,
dass Bremsleistung und Bodenhaftung der Reifen deutlich herabgesetzt sind und es
deshalb schwieriger ist, die Herrschaft über das Fahrrad zu behalten. Dadurch dass
die Bremsoberfläche beim Bremsvorgang nach und trocknen wird, kann es außerdem sein, dass sich die Bremsleistung plötzlich ändert. Fahren Sie daher auf nasser
Fahrbahn noch vorsichtiger, um jede Art von Unfällen zu vermeiden.
• Campagnolo s.r.l. empfiehlt Ihnen, immer mit Fahrradhelm zu fahren, diesen richtig festzuschnallen und darauf zu achten, ob er im Anwendungsland typengeprüft ist.
2 - TECHNISCHE SPEZIFIKATIONEN
2.1 - TECHNISCHE SPEZIFIKATIONEN DES LAUFRADS
Felge
700C(622x15C)
Breite des Schutzbands
18 mm
Abmessung Nabenanschlag
vorne: 100 mm
hinten: 130 mm
für Straßenreifen
siehe Tabelle “Maximale Betriebsdrückwerte”
für Cyclocrossreifen
die auf dem Cyclocrossreifen angegebenen
Höchstdruckwerte einhalten
Einsatz:
KHAMSIN ASYMMETRIC
ausschließlich auf Strassen mit glattem Asphalt
oder auf Radpisten
• Sram Corporation sprockets
KHAMSIN ASYMMETRIC CX
fur Cyclocross-Rädern
5.3.2 - DISASSEMBLY
• Remove the lockring (C - Fig. 10) using tool TL-LR15 from Shimano Inc. or FR-5 from
Park Tool Co. (B - Fig. 10) and a chain whip (e.g. Shimano Inc. TL-SR20 - D - Fig. 10).
• Remove the sprockets from the freewheel body.
6 - BRAKES
Please consult the instruction sheet supplied by the manufacturer.
7 - PERIODIC WHEEL MAINTENANCE
ATTENTION! NOTE FOR SPECIALIZED MECHANICS
CONTACT YOUR CAMPAGNOLO® SERVICE CENTER FOR THE INSTRUCTIONS
FOR ASSEMBLING, MAINTAINING AND REPLACING RIMS, SPOKES AND
HUBS, OR YOUR CAMPAGNOLO DEALER.
•After using the wheel for the first time, check wheel trueness and circularity.
WARNING!
Using wheels that have not been centred properly or which have broken or
damaged spokes may result in accidents, personal injury or death.
• Before every ride, check the condition of the tires and inflation pressure.
• Periodically take your bicycle to a qualified mechanic to lubricate the hubs. Check
with your mechanic to select a schedule that is best for you (approximately every
2,000/5,000 km - 1,200/3,000 miles).
• Every 10,000/20,000 km (6,000/12,000 miles)( 5.000 - 10.000 km / 3.000 - 6.000
miles for KHAMSIN ASYMMETRIC CX) please take your bicycle to a qualified
mechanic to lubricate, remove, disassemble and check the hubs.
• Periodically get the mechanic to verify every component that is subject to wear
(rims, ball bearings, brake pads) and, if necessary, get it replaced.
• Periodically bring the bike to a specialized mechanic to lubricate the hub bearings,
ball bearings and FW gear.
• At least once each month, please take your bicycle to a qualified mechanic to check
the tension of the spokes, wheel centering and wheel dish and correct as necessary.
• Periods and riding distances are purely indicative and may be significantly
different in relation to conditions of use and the intensity of your activity (for
example: racing, rain, salted Winter roads, weight of the rider etc.). Check with
your mechanic to select a schedule that is best for you.
7.1 - CLEANING THE WHEELS
• Dirt seriously damage bicycles and their components. Thoroughly clean and dry
your bike after using it in these conditions.
• Never spray your bicycle with water under pressure. Never use abrasive or metal
pads. Wash your bicycle and Campagnolo® components by wiping them down with
water and neutral soap.
• Relubricate the components carefully using a lubricant suitable to purpose. Using
poor-quality or incorrect lubricant may damage the chain and cause excessive wear
or damage to the system.
• Thoroughly clean any residual lubricant from the bicycle and floor.At the end of the
lubrication operation, CAREFULLY degrease rims and brake pads.
WARNING!
Salt water environments (as found on winter roads and near the seaside) can
cause galvanic corrosion on most bike parts. Carefully rinse, clean, dry and relubricate all exposed parts to avoid damage, malfunctions and accidents.
7.2 - TRANSPORT AND STORAGE
When transporting the wheel separately from the bike or if the wheel will not be used
for a long period of time, store it in the wheelbag to protect it against impacts and
dirt.
4. MONTAGE DES LAUFRADS AUF DEN RAHMEN
/ EINSATZ DES SCHNELLSPANNERS
Siehe “Quick Release” Bedienungs-Anleitung.
5 - MONTAGE UND DEMONTAGE DER RITZEL
5.1 - 11s RITZEL von Campagnolo s.r.l. (auf RL-Freilaufkörper für 11s
Ritzel von Campagnolo s.r.l.)
5.1.1 - MONTAGE
• Die Ritzel sind vormontiert und in der richtigen Phasenstellung auf dem
Kunstharzträger befestigt (A - Fig. 2). Die Hülse G (Abb. 2) ist mit einer vormontierten
Unterlegscheibe versehen. Kontrollieren Sie, dass die Unterlegscheibe (H) so wie in
Abb. 2 positioniert ist.
• Die Hülse demontieren (G - Abb.2).
• Den Ritzelträger auf die Seite des Freilaufkörpers aufsetzen, die gekehlten Profile
aufeinander ausrichten, die Ritzel auf den Freilaufkörper drücken. Den Träger (A Abb. 2) aus der Nabe herausziehen.
• Bei der Montage ohne den Kunstharzträger die einzelnen oder vormontierten
Ritzel und die Distanzhülsen auf den als Ritzelträger dienenden Nabenkörper
aufsetzen, dabei so vorgehen, dass das Profil beider Kehlen aufeinander ausgerichtet ist (Abb. 3). Das Profil des Freilaufkörpers mit zwei asymmetrischen Kehlen
(Abb. 3) bringt die Ritzel automatisch in Phasenstellung, so dass es nur eine einzige
Montagemöglichkeit gibt.
• Mit Hilfe des Werkzeugs (B - Abb. 4 – Campagnolo®-Bestellcode UT-BB080) die mit
der Campagnolo®- Ritzel mitgelieferte Hülse (C - Abb. 4) unter Verwendung eines
Drehmomentschlüssels (D – Abb. 4) mit einem Anziehmoment von 40 Nm (354
in.lbs) am Freilaufkörper.
5.1.2 - DEMONTAGE
• Die Hülse (C - Abb. 5) mit Hilfe des Campagnolo®-Werkzeugs UT-BB080 (B
- Abb. 5), des 24-mm-Sechskantschlüssels (E - Abb.5) und des Campagnolo®Zahnkranzabnehmers mit Rennkette UT-CS060 (F - Abb. 5) demontieren.
• Den Ritzelträger aus Kunstharz auf die Seite des Freilaufkörpers aufsetzen, die
gekehlten Profile des Freilaufkörpers auf diejenigen des Ritzelträgers ausrichten und
die Ritzel auf den Träger gleiten lassen.
• Den Ritzelträger mit den darauf befindlichen Ritzeln vom Freilaufkörper abnehmen.
5.2 - 10S-RITZEL
• Für alle Montage- und Demontagearbeiten sowie für Gebrauch und Wartung sollten
Sie immer das den 10s-Ritzeln beiliegende Anleitungsblatt zu Rate ziehen.
5.3 - 9S-, 10S- und 11S-RITZEL VON SHIMANO INC. UND RITZEL
VON SRAM CORPORATION (an Campagnolo RL-Freilaufkörper für
9/10/11s-Ritzel von Shimano Inc. und OG 1070 - OG 1090 Ritzel von
Sram Corporation)
5.3.1 - MONTAGE
Luftdruck:
2) Using tool TL-LR15 from Shimano Inc. or FR-5 from Park Tool Co. (B - Fig. 8) tighten
the lockring (C - Fig. 8) on the freewheel body to 30-50 Nm (266-443 in.lbs).
1) The sprockets are preassembled on a support (A - Fig. 9).
2) Insert the support on the side of the freewheel body, align the grooves, press the
sprockets onto the freewheel body and extract the support (A) from the hub (Fig. 9).
3) Using tool TL-LR15 from Shimano Inc. or FR-5 from Park Tool Co. (B - Fig. 8) tighten
the lockring (C - Fig. 8) on the freewheel body to 30-50 Nm (266-443 in.lbs).
Ein falscher Reifendruck könnte zum Platzen des Reifens oder zum Verlust
der Herrschaft über das Fahrrad führen und Unfälle, Verletzungen oder gar
den Tod zur Folge haben.
2.2 - TECHNISCHE SPEZIFIKATIONEN DER SPEICHEN
ACHTUNG!
Kaufen Sie nur Originalspeichen. Die Speichen müssen außerdem der spezifischen Ausführung Ihres Laufradmodells entsprechen. Die Verwendung der nicht
geeigneten Speichen kann es zu Unfällen, schweren Verletzungen oder gar zum
Tod führen.
ACHTUNG!
• Ritzel von Shimano Inc.
1) Die Ritzel auf den RL-Freilaufkörper aufsetzen und dabei kontrollieren:
- dass die Fläche mit dem Namen der Gruppe jedes Ritzels zur Außenseite des
RL-Freilaufkörpers zeigt,
- dass die breitere Kerbe am Ritzel (A - Abb. 6) und die breitere Kerbe am
RL-Freilaufkörper RL (B - Abb. 6) aufeinander ausgerichtet sind.
Wichtig!
Mit den Freilaufkörpern 11s den Adapter (M - Abb.7) nur für Ritzelpakete 9s und
10s von Shimano Inc. und Sram Co benutzen. (Der Adapter darf nicht mit den
Ritzelpaketen 11s von Shimano Inc. benutzt werden.).
Dieser Adapter (M - Abb.7) muss vor dem Ritzelpaket 9s und/oder 10s oder jeder
anderen eventuell im Lieferumfang der Ritzelpakete 9s und/oder 10s enthaltenen
Scheibe am Freilaufkörper eingesetzt werden.
Für die Montage-, Ausbau- und Wartungsanweisungen siehe das Anweisungsblatt
des Herstellers des Ritzelpakets.
2) Mit Hilfe des Werkzeugs TL-LR15 von Shimano Inc. oder des Werkzeugs FR-5 von
Park Tool Co. (B - Abb. 8) den Verschlussring (C - Abb. 8) mit 30-50 Nm (266-443
in.lbs.) am Freilaufkörper festziehen.
• Ritzel von Sram Corporation
Die korrekte Spannung des Laufrads muss mit einem Spannungsmesser gemessen
werden: Vertrauen Sie nicht auf eine manuelle Einschätzung der Spannung. Es
ist daher von grundlegender Wichtigkeit, alle Arbeiten für den Austausch der
Speichen durch einen Campagnolo-Pro-Shop, ein Campagnolo-Servicezentrum
oder einen auf die Montage und Wartung von Campagnolo-Laufrädern spezialisierten Mechaniker durchführen zu lassen. Die Ersatzteilnummern der Speichen
können Sie dem Ersatzteilkatalog entnehmen, der von unserer Homepage http://
www.campagnolo.com/ heruntergeladen werden kann.
1) Die Ritzel sind auf einem Ritzelträger vormontiert (A - Abb. 9).
2) Den Ritzelträger auf die Seite des Freilaufkörper aufsetzen, die Nutprofile aufeinander ausrichten, die Ritzel auf den Freilaufkörper schieben und den Träger (A) von
der Nabe abziehen (Abb. 9).
3) Mit Hilfe des Werkzeugs TL-LR15 von Shimano Inc. oder des Werkzeugs FR-5 von
Park Tool Co. (B - Abb. 8) den Verschlussring (C - Abb. 8) mit 30-50 Nm (266-443
in.lbs.) am Freilaufkörper festziehen.
3 - REIFEN
1) Den Verschlussring (C - Abb. 10) mit Hilfe des Werkzeugs TL-LR15 von
Shimano Inc. oder des Werkzeugs FR-5 von Park Tool Co. (B - Abb. 10) und eines
Zahnkranzabnehmers mit Kette (z. B. Shimano Inc. TL-SR20 - D - Abb. 10) demontieren.
2) Die Ritzel vom RL-Freilaufkörper abziehen.
3.1 - STRASSENREIFEN
ACHTUNG! Kompatibilitat
Campagnolo® -Felgen weisen höchste Maßgenauigkeit auf. Falls die Montage
des Reifens auf einer Campagnolo®-Felge zu leicht vonstatten geht, könnte der
Reifen zu groß sein und er wird dann nicht fest auf der Felge sitzen.
Falls dagegen die Montage des Reifens auf einer Fulcrum®-Felge zu schwierig
vonstatten geht, könnte der Reifen zu klein sein.
Verwenden Sie daher ausschließlich Reifen von hoher Qualität, die den Gebrauch
von Reifenmontierhebeln erfordern und bei deren Montage ein erheblicher
Kraftaufwand erforderlich ist. Die Verwendung von Talkumpuder auf dem Reifen
vereinfacht die Montage. Der Gebrauch eines Reifens, der nicht richtig fest auf
der Felge sitzt, kann zu plötzlichem Reifenschaden führen und könnte Unfälle
mit körperlichen und sogar lebensgefährlichen Verletzungen verursachen.
• Das erworbene Rad ist für die Montage von Drahtreifen (clincher) vorgesehen.
• Vor der Montage von Reifenmänteln ist auf der Felge nur das mitgelieferte
Schutzband zu montieren.
• Bevor Sie die Straßenreifen montieren, kontrollieren Sie bitte, dass der auf dem Reifen
angegebene Durchmesser 622 mm und der Reifenquerschnitt zwischen 23 und 25 mm
betragen, um sicherzustellen, dass der Reifen und der Felgen kompatibel sind.
• Luftschläuche mit langem Ventil (wenigsten 43 mm) verwenden.
3.2 - CYCLOCROSSREIFEN
• Auf die KHAMSIN ASYMMETRIC CX-Räder können auch Cyclocrossreifen bis zu 35
mm montiert werden.
• Halten Sie sich dabei unbedingt an die auf dem Cyclocrossreifen angegebenen
Höchstdruckwerte.
• Verwenden Sie keine 29”- MTB-Reifen.
ACHTUNG!
Eine nicht fachgerechte Montage des Reifens kann ein plötzliches Entleeren,
Platzen oder Loslösen des Reifens verursachen und zu Unfällen, schweren
Verletzungen oder gar zum Tod führen.
3.3 - MONTAGE DES DRAHTREIFENS
Beachten, dass kein Felgenbereich während der Reifenmontage beschädigt bzw.
gebogen wird.
• Eine Seite des Drahtreifens in den für ihn vorgesehene Sitz einführen (Abb. 1).
• Den Schlauch zwischen Felge und Drahtreifen positionieren und dabei langsam das
Ventil in die Bohrung der Felge einzuführen.
• Um den Luftschlauch korrekt auf die Radfelge montieren zu können, muss er zuvor
leicht aufgepumpt werden.
• Dann müssen Schlauch und Reifen von Hand auf die Felge gezogen werden, wobei
darauf zu achten ist, dass der Schlauch richtig im Reifen positioniert ist und dass der
Reifen wiederum richtig auf der Felge sitzt.
• Nun den zweiten Saum des Drahtreifens in die Felge einführen.
Erst dann kann der Schlauch bis auf den richtigen Fahrdruck aufgepumpt werden.
Den Schlauch langsam aufpumpen und dabei immer kontrollieren, dass Schlauch und
Reifen in richtiger Position im Felgenbett sitzen.
ACHTUNG!
Vergewissern Sie sich, dass die Seite der Felge keine Anzeichen von Abnutzung,
Beschädigungen oder Verformungen an der Bremsflanke aufweist. Eine
beschädigte Felge kann plötzlich brechen und zu Unfällen, Verletzungen oder
gar zum Tod führen.
3.4 - AUFPUMPEN UND ABLASSEN DES LAUFRADS
• Aufpumpen des Reifens: Ventilkappe abnehmen, Ventil lösen und mit einem
Kompressor oder einer Pumpe mit Manometer aufpumpen, um den gewünschten
Druck herzustellen, Ventil aufschrauben und Kappe einsetzen.
• Ablassen des Reifens: Ventilkappe abnehmen und Ventil leicht lösen. Dann so
lange drücken, bis der gewünschte Druck erreicht ist. Anschließend Ventil anziehen
und Kappe einsetzen.
WARNUNG!
Ein zu hoher Reifendruck reduziert die Straßenhaftung des Reifens und erhöht
das Risiko, dass der Reifen plötzlich platzt.
Ein zu niedriger Reifendruck setzt die Leistung des Laufrads herab und erhöht
die Möglichkeit, dass der Reifen plötzlich und ohne Vorzeichen den Druck verliert und platt wird. Außerdem kann ein zu niedriger Reifendruck zu Schäden und
vorzeitiger Abnutzung der Felge führen.
5.3.2 - DEMONTAGE
6 - BREMSEN
Bitte beachten Sie die Ihres Bremsen-Herstellers beigefügte Bedienungs-anleitung.
7 - REGELMÄSSIGE PFLEGE DER LAUFRÄDER
ACHTUNG! HINWEIS FÜR DEN FAHRRADMECHANIKER
WENDEN SIE SICH FÜR DIE ANWEISUNGEN ZUM ZUSAMMENBAU, ZU
WARTUNG UND ERSATZ VON FELGEN, SPEICHEN UND NABEN AN IHREN
CAMPAGNOLO-VERTRIEBSPARTNER ODER IHREN CAMPAGNOLO SERVICE
CENTER NACH.
• Nach jeder Ausfahrt den Zustand der Reifenmäntel und den Luftdruck kontrollieren.
ACHTUNG!
Die Anwendung von unrechtmäßig zentrierten Laufrädern, und/oder von
Laufrädern mit gebrochenen Speichen kann Unfälle mit körperlichen und sogar
lebensgefährlichen Verletzungen verursachen.
• Lassen Sie die Naben in regelmäßigen Abständen von einem Fahrradmechaniker
schmieren. Legen Sie zusammen mit Ihrem Fahrradmechaniker das für Ihre Ansprüche
geeignete Schmierintervall (ungefähr alle 2.000-5.000 km) fest.
• Lassen Sie die Naben alle 10.000-20.000 km (5000 - 10.000 km für KHAMSIN
ASYMMETRIC CX) von einem Fahrradmechaniker kontrollieren und schmieren.
• Lassen Sie außerdem alle Verschleißteile (Felgen, Nabenlager, Bremsschuhe) in
regelmäßigen Abständen kontrollieren und wenn nötig ersetzen.
• Bringen Sie Ihr Fahrrad regelmäßig zu einem Fahrradmechaniker, damit er die
Nabenlager und die Lagerkugeln Freilaufgetriebe schmiert.
• Die Speichenspannung, die Zentrierung und die Winkelstellung der Speichen
regelmäßig von einem Fahrradmechaniker überprüfen lassen.
• Die Zeiträume und Kilometerangaben sind lediglich Hinweise und werden je nach Einsatzbedingungen und Einsatzintensivität (Wettkampfsport,
Regen, Strassen in Meersnähe, Gewicht des Anwenders usw.) auch stark
verändert. Ihrem Fahrradmechaniker hilft gerne bei der Wahl des richtigen
Intervallzeitraums.
7.1 - REINIGUNG DER LAUFRÄDER
• Schmutz können das Fahrrad und seine Komponenten erheblich beschädigen.
Nach dem Gebrauch sollten Sie Ihr Fahrrad daher sorgfältig abspülen, reinigen und
trocknen.
• Waschen Sie Ihr Rennrad nie mit einem Wasserstrahl unter Druck. Verwenden Sie
niemals Scheuer- oder Metallschwämme zur Reinigung. Waschen Sie Ihr Rennrad und
die Campagnolo®Komponenten, indem Sie alle Teile vorsichtig mit Wasser und Seife
reinigen.
• Fetten Sie die Komponenten erneut, indem Sie ein spezielles Schmiermittel
benutzen. Die Verwendung von ungeeigneten Schmierstoffen oder solchen von minderwertiger Qualität kann die mechanische Lebensdauer der Kette beeinträchtigen und
übermäßigen Verschleiß oder Schäden am Antriebssystem hervorrufen.
• Schmierstoffreste am Rennrad und auf dem Boden sorgfältig abputzen. Am Ende
des Schmiervorgangs Felgenoberfläche und Bremsbeläge AUFMERKSAM entfetten.
ACHTUNG!
Salzwasserumgebung (wie beispielsweise auf Straßen im Winter und in
Meeresnähe) kann galvanische Korrosion an den meisten Fahrradkomponenten
verursachen. Daher sollten Sie alle exponierten Komponenten an Ihrem
Fahrrad gut abspülen, reinigen, trocknen und wieder einfetten, um Defekte,
Funktionsstörungen und Unfälle zu vermeiden.
7.2 - TRANSPORT UND AUFBEWAHRUNG
Sollten Sie das Laufrad getrennt vom Fahrrad transportieren oder es voraussichtlich
über lange Zeit nicht benutzen, dann bewahren Sie es zum Schutz vor Stößen und
Schmutz in einer Tragetasche auf.