1
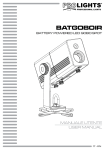
BATWASHIR
battery powered LED pin spot
MANUALE UTENTE
USER MANUAL
IT - EN
Music & Lights S.r.l. si riserva ogni diritto di elaborazione in qualsiasi forma delle presenti istruzioni per l’uso.
La riproduzione - anche parziale - per propri scopi commerciali è vietata.
Al fine di migliorare la qualità dei prodotti, la Music&Lights S.r.l. si riserva la facoltà di modificare, in
qualunque momento e senza preavviso, le specifiche menzionate nel presente manuale di istruzioni.
Tutte le revisioni e gli aggiornamenti sono disponibili nella sezione 'Manuali' sul sito www.musiclights.it
REV.002-11/14
BATWASHIR
INDICE
Sicurezza
Avvertenze generali
Attenzioni e precauzioni per l’installazione
Informazioni generali
4
4
5
1 Introduzione
1. 1 Descrizione
1. 2 Specifiche tecniche
1. 3 Elementi di comando e di collegamento
6
6
7
2 Installazione
2. 1 Montaggio
8
3 Funzioni e impostazioni
3. 1 Funzionamento
3. 2 Funzionamento tramite il controller IRC
9
10
Certificato di garanzia
Contenuto dell'imballo:
3
• BATWASHIR
• Manuale utente
BATWASHIR
4
ATTENZIONE! Prima di effettuare qualsiasi operazione con l’unità, leggere con attenzione
questo manuale e conservarlo accuratamente per riferimenti futuri. Contiene informazioni
importanti riguardo l’installazione, l’uso e la manutenzione dell’unità.
SICUREZZA
Avvertenze generali
• I prodotti a cui questo manuale si riferisce sono conformi alle Direttive della Comunità Europea e pertanto recano la sigla .
• Il dispositivo funziona con pericolosa tensione. Non intervenire mai al suo interno al di fuori delle operazioni descritte nel presente manuale; esiste il pericolo di una scarica elettrica.
• Questo dispositivo appartiene alla Classe di protezione III, pertanto deve operare sempre con un appropriato trasformatore di tensione. Controllare periodicamente l’unità, il cavo di alimentazione ed
il trasformatore. Assicurarsi che quest’ultimo sia della tipologia corretta, come indicato nel pannello
posteriore del dispositivo.
• Le operazioni di collegamento alla rete di distribuzione dell’energia elettrica devono essere effettuate
da un installatore elettrico qualificato. Verificare che frequenza e tensione della rete corrispondono alla
frequenza ed alla tensione per cui l’unità è predisposta, indicate sulla targhetta dei dati elettrici.
• L’unità non per uso domestico, solo per uso professionale.
• Evitare di utilizzare l’unità:
- in luoghi soggetti ad eccessiva umidità;
- in luoghi soggetti a vibrazioni, o a possibili urti;
- in luoghi a temperatura superiore ai 40°C.
• Evitare che nell’unità penetrino liquidi infiammabili, acqua o oggetti metallici.
• Non smontare e non apportare modifiche all’unità.
• Tutti gli interventi devono essere sempre e solo effettuati da personale tecnico qualificato. Rivolgersi al
più vicino centro di assistenza tecnica autorizzato.
• Se si desidera eliminare il dispositivo definitivamente, consegnarlo
per lo smaltimento ad un’istituzione locale per il riciclaggio.
Attenzioni e precauzioni per l’installazione
• Prima di iniziare qualsiasi operazione di manutenzione o pulizia disconnettere l’unità dalla rete di alimentazione.
• Questo prodotto è solo per uso interno. Per prevenire il rischio di incendi o scosse elettriche, non esporre il prodotto alla pioggia o all’umidità.
• Evitare di installare l’unità in prossimità di fonti di calore.
• Per la pulizia del prodotto non usare solventi tipo acetone o alcool per non danneggiare la finitura
esterna e le serigrafie dei pannelli.
• Se il dispositivo dovesse trovarsi ad operare in condizioni differenti da quelle descritte nel presente
manuale, potrebbero verificarsi dei danni; in tal caso la garanzia verrebbe a decadere. Inoltre, ogni altra
operazione potrebbe provocare cortocircuiti, incendi, scosse elettriche, rotture ect.
BATWASHIR
5
INFORMAZIONI GENERALI
Spedizioni e reclami
Le merci sono vendute “franco nostra sede” e viaggiano sempre a rischio e pericolo del distributore/cliente. Eventuali avarie e danni dovranno essere contestati al vettore. Ogni reclamo per imballi manomessi
dovrà essere inoltrato entro 8 giorni dal ricevimento della merce.
Garanzie e resi
Il prodotto è coperto da garanzia in base alle vigenti normative. Sul sito www.musiclights.it è possibile
consultare il testo integrale delle “Condizioni Generali di Garanzia”. Si prega, dopo l’acquisto, di procedere
alla registrazione del prodotto sul sito www.musiclights.it. In alternativa il prodotto può essere registrato
compilando e inviando il modulo riportato alla fine del manuale. A tutti gli effetti la validità della garanzia
è avallata unicamente dalla presentazione del certificato di garanzia. Music & Lights constata tramite verifica sui resi la difettosità dichiarata, correlata all’appropriato utilizzo, e l’effettiva validità della garanzia;
provvede quindi alla riparazione dei prodotti, declinando tuttavia ogni obbligo di risarcimento per danni
diretti o indiretti eventualmente derivanti dalla difettosità.
6
BATWASHIR
- 1 - INTRODUZIONE
1.1 DESCRIZIONE
BATWASHIR è un proiettore a batteria con sorgente LED ideato per rivoluzionare il concetto di illuminazione d’accento in applicazioni temporanee. Il sistema ottico ad alta efficienza è stato studiato combinando un chip LED RGBAWP/FullColor da 10W con una lente ad alta efficienza ad emissione 20°, risultando
altamente luminoso, compatto ed energy-saving. L’autonomia di ben 6 ore della batteria, con controllo
remoto IR a distanza rende BATWASHIR ideale per molteplici applicazioni come centropista o accentlighter per matrimoni, conferenze, showroom, clubs. L’hardware di bordo prevede due possibili soluzioni
di montaggio, con magnete per applicazione rapida su qualsiasi superfice metallica oppure con clamp a
forbice per fissaggio su binari di controsoffitto. BATWASHIR prevede anche l’applicazione di filtri colore
oppure di correzione temperatura selezionando diverse sfumature di colore. BATWASHIR è disponibile sia
in confezione singola che nella versione WASH4PACK che include quattro pezzi in una borsa di trasporto
con caricatore collettivo e kit di filtri colore.
1.2 SPECIFICHE TECNICHE
Sorgente luminosa e ottica
• 1x10W RGBAWP/FC LED
• Lux @3m: 115
• Filtri colore inclusi: CTB
• Angolo di proiezione: 20°
• Angolo di campo: 40°
• Durata media diodi LED: >50.000 ore
Funzionamento ed elettronica
• Funzionamento 100% wireless attraverso batteria a litio e controllo a infrarossi
• Batteria al litio è longeva, ricaricabile, ultraleggera
• Protezione elettronica per la gestione della batteria permette di estendere la vita e aumentare i cicli di
ricarica
• Durata batteria: 6 ore
• Tempo di ricarica: 7,5 ore
• Interruttore ON/OFF per accensione del proiettore
• Modalità IR: Ricevitore Infrarossi incorporato per remote controller
• Frequenza dei diodi anti-flicker (400Hz) per videoriprese
Corpo e alimentazione
• Corpo in alluminio pressofuso, grado di protezione: IP33
• Clamp con chiusura a forbice con anello per il posizionamento su binari da controsoffitto
• Base magnetica per il fissaggio su qualsiasi superficie metallica
• Alimentazione: DC 8,4V 900mA (esterna)
• Assorbimento medio: 5,5 W
• Peso: 0,79 kg
• Dimensioni (LxAxP): 205x92x74 mm
• Peso WASH4PACK: 3,5 kg
• Dimensioni WASH4PACK (LxAxP): 686x296x90 mm
BATWASHIR
7
1.3 ELEMENTI DI COMANDO E DI COLLEGAMENTO
1
2
3
4
5
6
7
8
3
1
Pannello Posteriore
1.
2.
3.
4.
5.
MANOPOLA DI REGOLAZIONE
INGRESSO ALIMENTAZIONE
INTERRUTTORE ALIMENTAZIONE ON/OFF
STAFFA DI MONTAGGIO
ANELLO DI SICUREZZA
2
Fig.1
6. BASE GIREVOLE per regolazione rotazione
7. BASE MAGNETICA per fissaggio su superfici
metalliche
8. MORSETTO A PINZA per fissaggio a supporti
a soffitto.
8
BATWASHIR
- 2 - INSTALLAZIONE
2.1 MONTAGGIO
Il BATWASHIR è un faretto LED, perfetto per illuminazioni centrali, di pannelli e di punti d’interesse.
La base magnetica permette di fissare l’unità alla maggior parte delle superfici metalliche, eliminando la
necessità di utilizzare i morsetti. Il morsetto a pinza con occhiello di sicurezza integrato consente il fissaggio a supporti agganciati sul soffitto.
L’unità può essere montata anche a testa in giù, su una traversa. Per il fissaggio occorrono dei supporti
robusti per il montaggio. L’area di collocazione deve avere una stabilità sufficiente e supportare almeno
10 volte il peso dell’unità.
Inoltre assicurarsi di rispettare tutte le avvertenze in materia di sicurezza.
• È assolutamente necessario assicurare il faretto contro la caduta utilizzando un cavo di sicurezza (1).
• Orientare il BATWASHIR intervenendo, se necessario, sulla manopola (2) della staffa di montaggio.
1
2
Fig.2
BATWASHIR
9
- 3 - FUNZIONI E IMPOSTAZIONI
3.1 FUNZIONAMENTO
Il BATWASHIR è dotato di alimentatore esterno DC8,4V 900mA; viene fornito con una batteria ricaricabile
al litio per il funzionamento senza cavo.
Per caricare la batteria è sufficiente collegare il cavo di alimentazione in qualsiasi momento, prima, durante o dopo il funzionamento. Per caricare la batteria prima o dopo il funzionamento, con tutti i LED spenti,
lasciare l’interruttore di accensione in posizione Off. L’indicatore luminoso sull’alimentatore esterno si illumina in Rosso quando la batteria è in carica e in Verde quando la batteria ha completato la carica.
Per una durata ottimale, caricare la batteria 24 ore prima dell’utilizzo iniziale.
Il tempo massimo di funzionamento è pari a 6 ore; il tempo di ricarica della batteria è di 7,5 ore.
ALIMENTAZIONE
BATWASHIR
ALIMENTAZIONE
PRINCIPALE
Fig.3
10
BATWASHIR
3.2 FUNZIONAMENTO TRAMITE IL CONTROLLER IRC
Per poter comandare il BATWASHIR con il telecomando a raggi infrarossi assicurarsi di puntare il telecomando direttamente verso il ricevitore dell’unità.
Modalità Automatica
La modalità Automatica consente di eseguire il programma automatico dell’unità.
Per passare in modalità Automatica:
1. Premere AUTO sul telecomando.
Per regolare la velocità del programma automatico:
2. Premere SPEED sul telecomando.
3. Premere + oppure – per aumentare o diminuire la velocità del programma.
Modalità Sound Active
La modalità Sound Active abilita l’unità per il funzionamento a tempo di musica.
Per attivare la modalità Sound Active:
1. Premere SOUND sul telecomando.
Per regolare la sensibilità sonora in modalità Sound Active:
2. Premere SENSITIVITY sul telecomando.
3. Premere + oppure - per aumentare o diminuire la sensibilità sonora.
Controllo manuale del colore
Per scegliere un colore specifico con il telecomando:
1. Premere un numero tra 0-9 per scegliere il colore preferito.
Per controllare manualmente la percentuale R, G, B, A, UV, W:
2. Premere MANUAL sul telecomando.
3. Premere R, G, B, A, UV o W per scegliere il colore.
4. Premere + oppure - per aumentare o diminuire la percentuale
di ciascun colore.
Operazioni varie
Per regolare la velocità di lampeggio stroboscopico del programma:
1. Premere STROBE sul telecomando.
2. Premere + oppure - per aumentare o diminuire la velocità di
lampeggio.
3. Premere di nuovo STROBE per disattivare il lampeggio.
Per modificare l’effetto di commutazione del programma:
• Premere FADE/SNAP sul telecomando.
• Fade cambia lentamente l’effetto. Snap cambia rapidamente
l’effetto.
Per oscurare le luci:
• Premere BLACK OUT sul telecomando.
• Verranno spente tutte le luci fino alla successiva pressione del
pulsante.
NOTA - Il telecomando non risponde ad alcun input quando è
attivo il Black Out. Se il telecomando non risponde quando viene premuto un pulsante, provare a premere Black Out; probabilmente il BLACK OUT era stato attivato involontariamente.
IRC REMOTE
BLACK
OUT
AUTO
SOUND
STROBE
SPEED
SENSITIVITY
%
MANUAL
FADE
SNAP
R
G
B
A
UV
W
+
0
1
2
3
4
5
6
7
8
9
Fig.4
All rights reserved by Music & Lights S.r.l. No part of this instruction manual may be
reproduced in any form or by any means for any commercial use.
In order to improve the quality of products, Music&Lights S.r.l. reserves the right to modify the
characteristics stated in this instruction manual at any time and without prior notice.
All revisions and updates are available in the ‘manuals’ section on site www.musiclights.it
BATWASHIR
TABLE OF CONTENTS
Safety
General instructions
Warnings and installation precautions
General information
2
2
3
1 Introduction
1. 1 Description
1. 2 Technical specifications
1. 3 Operating elements and connections
4
4
5
2 Installation
2. 1 Mounting
6
3 Functions and settings
3. 1 Operation
3. 2 Operation through the IRC Controller
7
8
Warranty
Packing content
1
• BATWASHIR
• User manual
BATWASHIR
2
WARNING! Before carrying out any operations with the unit, carefully read this instruction
manual and keep it with cure for future reference. It contains important information about
the installation, usage and maintenance of the unit.
SAFETY
General instruction
• The products referred to in this manual conform to the European Community Directives and are therefore marked with .
• The unit is supplied with hazardous voltage. Leave servicing to skilled personnel only. Never make any
modifications on the unit not described in this instruction manual, otherwise you will risk an electric
shock.
• This device falls under PROTECTION CLASS III. It has to be always operated with an appropriate transformer. From time to time check the device, the power cord and transformer. Make sure that the transformer is the correct type, the one stated on the rear panel.
• The connection to the main network of electric distribution must be carried out by a qualified electrical
installer. Check that the main frequency and voltage correspond to those for which the unit is designed
as given on the electrical data label.
• This unit is not for home use, only professional applications.
• Never use the fixture under the following conditions:
- in places subject to excessive humidity
- in places subject to vibrations or bumps;
- in places with a temperature of over 40°C or less than 2°C.
• Make certain that no inflammable liquids, water or metal objects enter the fixture.
• Do not dismantle or modify the fixture.
• All work must always be carried out by qualified technical personnel. Contact the nearest sales point for
an inspection or contact the manufacturer directly.
• If the unit is to be put out of operation definitively, take it to a local recycling
plant for a disposal which is not harmful to the environment.
Warnings and installation precautions
• Before starting any maintenance work or cleaning the projector, cut off power from the main supply.
• The unit for indoor use only. To prevent or reduce the risk of electrical shock or fire, do not expose the
unit to rain or moisture.
• Do not install the fixture near sources of heat.
• When cleaning the fixture, please do not use solvents such as acetone or alcohol, since they may damage the of the unit outer finish and the printings on the panels
• If this device will be operated in any way different to the one described in this manual, it may suffer
damage and the guarantee becomes void. Furthermore, any other operation may lead to dangers like
short circuit, burns, electric shock, etc.
BATWASHIR
3
GENERAL INFORMATION
Shipments and claims
The goods are sold “ex works” and always travel at the risk and danger of the distributor. Eventual damage will have to be claimed to the freight forwarder. Any claim for broken packs will have to be forwarded
within 8 days from the reception of the goods.
Warranty and returns
The guarantee covers the fixture in compliance with existing regulations. You can find the full version of
the “General Guarantee Conditions” on our web site www.musiclights.it. Please remember to register the
piece of equipment soon after you purchase it, logging on www.musiclights.it. The product can be also
registered filling in and sending the form available on your guarantee certificate. For all purposes, the validity of the guarantee is endorsed solely on presentation of the guarantee certificate. Music & Lights will
verify the validity of the claim through examination of the defect in relation to proper use and the actual
validity of the guarantee. Music & Lights will eventually provide replacement or repair of the products declining, however, any obligation of compensation for direct or indirect damage resulting from faultiness.
4
BATWASHIR
- 1 - INTRODUCTION
1.1 DESCRIPTION
BATWASHIR is a battery-powered projector with LED light source designed to revolutionize the concept of
accent lighting in temporary applications. The high-efficient optical system has been studied by combining a 10W RGBAWP/FullColor LED chip with a special 20° lens, resulting incredibly bright, compact and energy-saving. The battery life of 6 hours and the remote control of the fixture through IR, makes BATWASHIR
ideal for many applications such as centerpieces or accent-lighter for weddings, conferences, showrooms,
clubs. The hanging hardware provides two possible mounting solutions, magnet for fast application on
any metal surface or with a scissor clamp for mounting on ceiling rails. BATWASHIR also provides for the
application of filters or color temperature correction by selecting different shades of color. BATWASHIR is
available in a single package, or in the set version WASH4PACK which includes four pieces in a carrying
case with collective charger and color gel kit.
1.2 TECHNICAL SPECIFICATIONS
Light source and optics
• 1x10W RGBAWP/FC LED
• Lux @3m: 115
• Included filter gel: CTB
• Beam angle: 20°
• Field angle: 40°
• LEDs average life span:> 50,000 hours
Electronics and features
• 100% working wireless with lithium battery and IR control
• Lithium battery is long-lived, rechargeable, lightweight
• Electronic protection for battery management allows you to extend the life and increase the recharge
cycles
• Battery life: 6 hours
• Charging time: 7,5 hours
• Mode IR: Built-in infrared receiver for remote controller
• Frequency diode anti-flicker (400Hz) for camera recordings
Structure and Power supply
• Cast aluminum body, degree of protection: IP33
• Scissor clamp with eye loop to hang on every ceiling track
• Magnetic base to attach the pinspot on every metal surface
• Power supply: DV 8,4V 900mA (external)
• Average consumption: 5,5 W
• Weight: 0,79 kg
• Dimensions (WxHxD): 205x92x74 mm
• Weight WASH4PACK: 3.5Kgs
• Dimensions WASH4PACK: 686x296x90 mm
BATWASHIR
5
1.3 OPERATING ELEMENTS AND CONNECTIONS
1
2
3
4
5
6
7
8
3
1
Rear panel
1.
2.
3.
4.
5.
LOCKING KNOB for the mounting bracket.
POWER IN
POWER SWITCH ON / OFF
MOUNTING BRACKET
SAFETY RING to attach safety cable
2
Fig.1
6. REVOLVING BASE for rotation adjustment
7. MAGNETIC BASE for mounting on metal
surfaces
8. CLAMP for fixing on the ceiling.
6
BATWASHIR
- 2 - INSTALLATION
2.1 MOUNTING
The BATWASHIR is a battery-powered LED pin spot, perfect for lighting centerpieces, cakes, and focal
points. Its magnetic base affixes to most metal surfaces, eliminating the need for clamps. The built-in scissor clip with safety loop easily attaches to drop ceiling supports, for quick setup and cable management.
The unit can also be mounted upside down to a cross arm. For fixing, stable mounting clips are required.
The mounting place must be of sufficient stability and be able to support a weight of 10 times of the unit’s
weight.
When carrying out any installation, always comply scrupulously with all the regulations (particularly regarding safety) currently in force in the country in which the fixture’s being used.
• Always additionally secure the pin spot with the safety rope from falling down (1).
• Adjust the BATWASHIR and use the knob (2) to slightly release or tighten the locking mechanism of the
bracket if is necessary.
1
2
Fig.2
BATWASHIR
7
- 3 - FUNCTIONS AND SETTINGS
3.1 OPERATION
The BATWASHIR has an external auto-ranging DV 8,4V 900mA power supply.
This device comes with a rechargeable lithium battery for cable-free operation. To charge the battery,
simply plug in the external power cord at any time before, during, or after operation. To charge the battery
before or after operation with the LED off, leave the power switch in the Off position. The indicator light
on the external power supply turns red while the battery is charging, then it turns green when the battery
is done charging.
For optimal battery life, charge the BATWASHIR battery 24 hours prior to initial use.
The maximum operating time is 6 hours; the charging time of the battery is 7,5 hours.
POWER IN
MAIN POWER
Fig.3
8
BATWASHIR
3.2 OPERATION THROUGH THE IRC CONTROLLER
To control the BATWASHIR with the infrared remote control make sure to point the controller directly at
the receiver on the product.
Automatic Mode
Automatic Mode will enable you to run the automatic programs on the product.
To turn on Automatic Mode:
1. Press AUTO on the controller.
To adjust the speed of the automatic program:
2. Press SPEED on the controller.
3. Press + or – to either increase or decrease the speed of the program.
Sound Active Mode
Sound Active Mode will enable the product to respond to the music.
To turn on Sound Active mode:
1. Press SOUND on the controller.
To adjust sound sensitivity in Sound Active mode:
2. Press SENSITIVITY on the controller.
3. Press + or – to either increase or decrease sound sensitivity.
Manual Color Control
To choose a specific color with the controller:
1. Press any number between 0-9 to choose your color.
To manually control the R, G, B, A, UV or W percentage:
2. Press MANUAL on the controller.
3. Press R, G, B, A, UV or W to choose your color.
4. Press + or – to increase or decrease the percentage of each color.
Miscellaneous Operation
To adjust the strobe rate of the program:
1. Press STROBE on the controller.
2. Press + or – to increase or decrease the strobe rate.
3. Press STROBE again to turn off the strobe.
To change the switching effect of the program:
• Press FADE/SNAP on the controller.
• Fade will slowly switch the effect. Snap will rapidly switch the effect.
To black out the lights:
• Press BLACK OUT on the controller.
• This will turn off all the lights until the button is pressed again.
NOTE - The controller will not respond to any inputs when Black
Out is activated. If the remote does not respond when a button is
pressed, try pressing BLACK OUT. You may have inadvertently activated BLACK OUT.
IRC REMOTE
BLACK
OUT
AUTO
SOUND
STROBE
SPEED
SENSITIVITY
%
MANUAL
FADE
SNAP
R
G
B
A
UV
W
+
0
1
2
3
4
5
6
7
8
9
Fig.4
"
• Si prega, dopo l’acquisto, di
procedere alla registrazione del
prodotto sul sito www.musiclights.it.
In alternativa il prodotto può essere
registrato compilando e inviando il
modulo riportato sul retro.
• Sono esclusi i guasti causati da
imperizia e da uso non appropriato
dell’apparecchio.
• La garanzia non ha più alcun effetto
qualora l’apparecchio sia stato
manomesso.
• La garanzia non prevede la
sostituzione dell’apparecchio.
• Sono escluse dalla garanzia le parti
esterne, le lampade, le manopole, gli
interruttori e le parti asportabili.
• Le spese di trasporto e i rischi
conseguenti sono a carico del
possessore dell’apparecchio.
• A tutti gli effetti la validità della
garanzia è avallata unicamente
dalla presentazione del certificato di
garanzia.
Estratto dalle
Condizioni Generali di Garanzia
Il prodotto è coperto da garanzia
in base alle vigenti normative.
Sul sito www.musiclights.it è
possibile consultare il testo
integrale delle “Condizioni
Generali di Garanzia”.
• Please remember to register the
piece of equipment soon after you
purchase it, logging on
www.musiclights.it. The product
can be also registered filling in and
sending the form available on your
guarantee certificate.
• Defects caused by inexperience
and incorrect handling of the
equipment are excluded.
• The guarantee will no longer be
effective if the equipment has
been tampered.
• The guarantee makes no provision
for the replacement of the
equipment.
• External parts, lamps, handles,
switches and removable parts are
not included in the guarantee.
• Transport costs and subsequent
risks are responsibility of the
owner of the equipment.
• For all purposes, the validity of
the guarantee is endorsed solely
on presentation of the guarantee
certificate.
Abstract
General Guarantee Conditions
The guarantee covers the unit
in compliance with existing
regulations. You can find the
full version of the “General
Guarantee Conditions” on our
web site www.musiclights.it.
CERTIFICATO DI GARANZIA
GUARANTEE CERTIFICATE
"
Place Stamp Here
Affrancare
Spett.le
Music&Lights S.r.l.
Via Appia Km 136.200
04020 Itri (LT) Italy
"
Purchased by / Acquistato da
SERIAL N° / SERIE N°
MODEL / MODELLO
SURNAME / COGNOME
Purchased by / Acquistato da
SERIAL N° / SERIE N°
MODEL / MODELLO
Dealer’s stamp
and signature
N.
PROV.
"
"
SURNAME / COGNOME
CITY / CITTà
ADDRESS / VIA
NAME / NOME
N.
NAME / NOME
ADDRESS / VIA
CITY / CITTA’
Dealer’s stamp
and signature
Timbro e firma
del Rivenditore
ZIP CODE / C.A.P.
Timbro e firma
del Rivenditore
Purchasing date
Data acquisto
PROV.
Purchasing date
Data acquisto
FORM TO BE FILLED IN AND KEPT / CEDOLA DA COMPILARE E CONSERVARE
ZIP CODE / C.A.P.
FORM TO BE FILLED IN AND MAILED / CEDOLA DA COMPILARE E SPEDIRE
©2014 Music & Lights S.r.l.
PROLIGHTS is a brand of Music & Lights S.r.l .company.
Via Appia, km 136,200 - 04020 Itri (LT) - ITALY
Phone +39 0771 72190 - Fax +39 0771 721955
www.musiclights.it - email: [email protected]
ISO 9001:2008 Certified Company
PROLIGHTS è un brand di proprietà della Music & Lights S.r.l.
MUSIC & LIGHTS S.r.l.