1
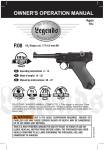
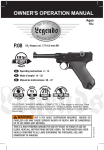
Legends C96
CO2 AIRGUN / CAL. .177 (4.5 mm)
OWNER’S MANUAL • MANUEL DU PROPRIÉTAIRE • MANUAL DE OPERACIONES
380 fps
VELOCITY
capacity
ou t
e i l l e de C
O2
19
B
vélocité
amovible
Operating instructions 2 - 13
Mode d´emploi 14 - 25
Instrucciones de operación 26 - 37
READ THIS OWNER’S MANUAL COMPLETELY. This airgun is not a toy. Treat
it with the same respect you would a firearm. Always carefully follow the safety
instructions found in this owner’s manual and keep this manual in a safe place for
future use.
WARNING: NOT A TOY. ADULT SUPERVISION REQUIRED. MISUSE OR
CARELESS USE MAY CAUSE SERIOUS INJURY OR DEATH. MAY BE DANGEROUS
UP TO 300 YARDS (274 METERS).
THIS IS A HIGH POWERED AIRGUN FOR USE BY THOSE 16 YEARS OF AGE OR
OLDER. READ ALL INSTRUCTIONS BEFORE USING. THE PURCHASER AND USER
SHOULD CONFORM TO ALL LAWS GOVERNING THE PURCHASE, USE, AND
OWNERSHIP OF AIRGUNS.
EN
DESCRIPTION
A
y
th
T
C
OPERATION
CARE
SAFETY INSTRUCTIONS
2
O
1
2
3
4
5
6
EN
SAFETY INSTRUCTIONS
WARNING: THIS AIRGUN CAN CAUSE SERIOUS INJURY OR DEATH. READ
AND FOLLOW THE INSTRUCTIONS CAREFULLY. DO NOT LOAD A PROJECTILE INTO
THE AIRGUN UNTIL YOU ARE READY TO SHOOT. IF YOU DO LOAD A PROJECTILE AND
THEN DECIDE NOT TO SHOOT, REMOVE IT EITHER MANUALLY OR BY SHOOTING THE
AIRGUN AT A SAFE TARGET. AN UNLOADED AIRGUN WHICH IS “ON SAFE” IS SAFEST.
ACCIDENTS HAPPEN FAST, PLEASE HANDLE THE AIRGUN SAFELY.
Airguns differ in their operation and you are never ready to fire any gun until
you are thoroughly familiar with it. Read the following operating instructions
thoroughly prior to operating.
These symbols,
, mark warnings and cautions in this operation manual.
Carefully follow them for your own safety and the safety of others.
CAUTION
FAILURE TO FOLLOW THE INSTRUCTIONS AND RECOMMENDATIONS IN THIS OWNER'S
MANUAL MAY RESULT IN BODILY INJURY INCLUDING FACE, EYE, AND EAR INJURY,
BLINDNESS, OR DEAFNESS.
CAUTION:
EYE PROTECTION
REQUIRED
WEAR YOUR
SHOOTING GLASSES
Operating Procedures
1. Learning the Parts of Your Air Pistol
2. Operating the Safety
3. Installing and Removing CO2 Capsules
4. Loading and Unloading Projectiles
5. Aiming and Firing Safely
6. Use and Handling of CO2 Capsules
7. Maintenance, Cleaning,
and Storage
8. Trouble Shooting
9. Reviewing Safety
10. Repair / Service / Warranty
3
EN
DESCRIPTION
1. Learning the Parts of Your Air Pistol
Hammer
Front sight
Rear sight
Safety
CO2 Magazine (left side)
CO2
capsule
chamber
Follower
Loading
port
CO2
magazine
Follower
lock
piercing screw
Muzzle
Charging handle
Magazine release
Magazine cover
release
Trigger
illustration 1
4
y
EN
OPERATION
WARNING: BE SURE THE AIRGUN IS ALWAYS POINTED IN A SAFE
DIRECTION. NEVER POINT THE AIRGUN AT ANY PET OR PERSON EVEN IF IT IS
UNLOADED. ALWAYS ASSUME AND HANDLE THE AIRGUN AS IF IT WERE LOADED
AND READY TO FIRE.
CAUTION
• ONLY HANDLE THE AIRGUN WHEN IT IS ON SAFE.
• ALWAYS MAKE SURE THAT THE MUZZLE POINTS INTO A SAFE DIRECTION.
2. Operating the Safety
SAFE
FIRE
illustration 2a
illustration 2b
CAUTION
LIKE ALL MECHANICAL DEVICES, AN AIRGUN SAFETY CAN FAIL. EVEN WHEN THE SAFETY
IS "ON SAFE", YOU SHOULD CONTINUE TO HANDLE THE AIRGUN SAFELY. NEVER POINT THE
AIRGUN AT ANYTHING YOU DO NOT INTEND TO SHOOT.
CAUTION
NEVER LOAD THE MAGAZINE UNTIL YOU HAVE VERIFIED THE AIRGUN WILL DISCHARGE CO2
PROPERLY.
WARNING: USE ONLY 12g CO2 CAPSULES. ANY ATTEMPT TO USE
OTHER TYPES OF GAS CAPSULES COULD BE EXTREMELY DANGEROUS AND
COULD RESULT IN SERIOUS INJURY OR DEATH. GASES OTHER THAN CO2 COULD
RESULT IN AN EXPLOSION OR RUPTURE OF THE AIRGUN.
5
EN
OPERATION
3
3. Installing and Removing CO2 Capsules
•
•
(i
•
•
•
u
w
•
•
illustration 3
illustration 4
illustration 5
illustration 6
illustration 7
3A. Installing a CO2 Capsule
• Put the airgun “ON SAFE” (see Step 2)
• Remove the CO2 magazine by pressing the magazine release button
(illustration 3).
• Pull down magazine cover (illustration 4).
• Press and hold magazine cover release to remove (illustration 5).
• Turn piercing screw counter-clockwise to lower (illustration 6).
• Before installing a CO2 capsule, place one drop of RWS Chamber lube on the
top of the small end of the CO2 capsule.
• Insert one 12g CO2 capsule, with the small neck of the capsule pointing
upward, into the magazine (illustration 6).
• Turn piercing screw clockwise until it pierces the capsule.
• Put the lower cover back on the CO2 magazine and insert magazine (illustr. 7).
• Aim the airgun in a SAFE DIRECTION.
• Take “OFF SAFE” (See Step 2B).
• Pull back charging handle.
• Make sure the airgun is pointed in a safe direction. Pull the trigger to fire the pistol.
• If the airgun does not make a popping noise after pulling the trigger, the CO2 is
not being discharged. In that event put the airgun “ON SAFE” (See Step 2).
Remove the lower cover from the magazine and turn the piercing screw on the
bottom of the magazine until you hear the capsule pierce.
4
•
•
NOTE: A slight seepage of CO2 may occur until piercing screw is tight.
•
•
NOTE: Never try to force any CO2 capsule into or out of place. Do not store
your airgun with a CO2 capsule in it. If you know you will not be using your airgun
for an extended period of time, empty the CO2 capsule and remove it from the
airgun. This is very important to remember, as it will prolong the longevity of your
airgun seals.
•
in
•
(i
•
•
6
in
7
EN
OPERATION
3B. Removing a CO2 Capsule
• Put the airgun “ON SAFE” (see Step 2)
• Remove the CO2 magazine by pressing the magazine release button
(illustration 3).
• Pull down magazine cover (illustration 4).
• Press and hold magazine cover release to remove (illustration 5).
• Turn the piercing screw on the bottom of the magazine counter-clockwise,
until you hear gas start to escape, being careful not to come in contact
with the escaping gas. Allow all the gas to escape.
• Continue turning the screws counterclockwise.
• Remove the CO2 capsule.
WARNING: KEEP HANDS AND FACE AWAY FROM ESCAPING CO2 GAS.
IT CAN CAUSE FROSTBITE IF ALLOWED TO COME IN CONTACT WITH SKIN. ALWAYS
MAKE SURE THE CO2 CAPSULE IS EMPTY BEFORE ATTEMPTING TO REMOVE IT FROM
THE AIRGUN BY SLOWLY TURNING THE GAS CAPSULE PUNCTURE SCREW COUNTERCLOCKWISE ALL THE WAY UNTIL YOU NO LONGER HEAR THE ESCAPE OF CO2 GAS.
4. Loading and Unloading Projectiles
.
illustration 8
illustration 9
illustration 10
illustration 11
4A. Loading BBs
• Put the airgun “ON SAFE” (see Step 2)
• Point the airgun in a SAFE DIRECTION.
• Remove the CO2 magazine by pressing the magazine release button.
• Pull down magazine cover (illustration 4).
• Locate the BB follower (illustration 10). Pull the BB follower down until it locks
in place.
• Insert up to 19 BBs into the lower hole on the front of the magazine
(illustration 10).
• Slide magazine cover up and insert the loaded magazine into the air pistol.
• Your gun is now loaded and ready to fire only after reading the entire manual,
including section 9 on reviewing safety.
7
OPERATION
EN
CAUTION
USE ONLY .177 CALIBER (4,5 MM) STEEL BBS. DO NOT ATTEMPT TO REUSE BBS THAT HAVE
BEEN FIRED OR ARE DEFORMED. DO NOT USE BUCK SHOT, DARTS, BALL BEARINGS, OR
OTHER FOREIGN OBJECTS BECAUSE THEY CAN CAUSE INJURY TO YOU OR SOMEONE ELSE
OR MAY DAMAGE AND/OR JAM THE AIRGUN.
4B. Unloading BBs
• Aim the air pistol in a SAFE DIRECTION, take it “OFF SAFE”
(See Step 2) and fire.
• Repeat this procedure several times until you are sure you are no longer firing BBs.
NOTE: The airgun must be charged with CO2 when following these steps but
remember, do not store your airgun with a CO2 capsule in it.
WARNING: NEVER ASSUME THAT BECAUSE THE AIRGUN NO LONGER
FIRES A PROJECTILE AND/OR THE MAGAZINE IS REMOVED FROM THE GRIP FRAME
THAT A PROJECTILE IS NOT LODGED IN THE BARREL. ALWAYS TREAT THE AIRGUN
AS THOUGH IT IS LOADED AND WITH THE SAME RESPECT YOU WOULD A FIREARM.
CAUTION
SHOOTS STEEL BBs ONLY!
IMPORTANT: Firing the airgun with too little gas pressure left may cause a BB to
get stuck in the barrel.
4C. Removing a Jammed BB
• Unload all of the BBs (see Step 4B).
• Make sure the air pistol is “ON SAFE”.
• Remove the magazine by pressing down on the magazine release button.
• Insert a .177 caliber ramrod into the muzzle end of the barrel and carefully push
the jammed BB into the breech. The barrel could be damaged and the warranty
will be void if the proper sized ramrod is not used.
• Hold the air pistol upright and shake until the jammed BB falls out.
• If you are not able to unjam your air pistol by following this procedure, take
no further action. Call Umarex USA (479)-646-4210 and ask for the service
department.
CAUTION
YOUR BACKSTOP SHOULD BE INSPECTED FOR WEAR BEFORE AND AFTER EACH USE.
DISCONTINUE USE IF THE BACKSTOP SURFACE SHOWS SIGNS OF FAILURE. ALWAYS
PLACE THE BACKSTOP IN A LOCATION THAT WILL BE SAFE SHOULD THE BACKSTOP FAIL.
DISCONTINUE THE USE OF A BACKSTOP IF THE PROJECTILE REBOUNDS OR RICOCHETS.
NOTE: Many factors affect airgun performance and velocity, including brand of
projectile, lubrication, barrel condition and temperature.
8
EN
OPERATION
5. Aiming and Firing Safely
• You and others with you should always wear shooting glasses to protect
your eyes.
• Always aim your air pistol in a SAFE DIRECTION. When you are sure of your
target and backstop, and the area around the target is clear, take “OFF SAFE” and
squeeze the trigger to fire.
• Do not shoot at hard surfaces or the surface of water. Projectiles may bounce off
or ricochet and hit someone or something you had not intended to hit.
• Do not shoot at fragile surfaces such as glass or mirrors.
• Always choose your target carefully. Only targets which cannot be completely
penetrated or which will not cause ricochets should be used.
• Your backstop should be checked for wear before and after each use. Replace
your backstop if the surface is worn or damaged, or if a ricochet occurs.
• The air pistol is correctly aimed when the front sight blade is positioned exactly
in the notch and even with the
rear sight. The top of the front
sight blade should be even
with the top of the notch in the
rear sight. The bulls-eye should
appear to rest on the top of the
front sight.
o
FIRE
1. Put safety on “Fire”
2. Pull back charging handle
3.
Pull trigger
illustration 12
illustration 13
Adjusting Rear Sights
1. Push & hold
illustration 14
2. Adjust
9
OPERATION
CARE
EN
6. Use and Handling of CO2 Capsules
It is possible that certain conditions may affect a CO2 capsule, which can impact
its proper performance. These conditions include the usage, maintenance
and storage at temperatures that are higher or lower than normal outdoors
temperatures (60°-80° F/16°-27° C). Another condition may be when the gun is
fired rapidly.
1. High temperatures can increase pressure in the CO2 capsule and also within
the gun, leading to higher than standard operating pressure. This excess
pressure could cause the gun to malfunction or be permanently damaged.
Maximum storage or operation temperature should never exceed 122° F
(50° C). This temperature can be reached if you leave the gun under direct
sunlight on a bright day. Thus, to ensure proper gun operation, do not expose
it to high temperatures or direct sunlight for long periods of time. Otherwise,
the CO2 capsule could overheat and explode, which could damage the airgun
and cause injuries or death to people around it.
2. Fast consecutive shooting may produce a decrease of temperature in the
gun, as well as the CO2 capsule. This could result in lower projectile velocities
and may even lower gas pressure enough so that the pistol will not fire. This
condition can be especially apparent when shooting in cold weather and can
be avoided by allowing more time between shots. This permits the gas to
increase in temperature and pressure and produce normal velocities.
3. During rapid fire, the muzzle velocity of each shot will diminish. This can affect
shooting accuracy and you will get fewer shots per CO2 capsule.
4. Care should be exercised to insure that the gun is not shot with a CO2 capsule
that is low in pressure. Here are some indicators of insufficient pressure:
A) The sound of the shot is not as loud as when the capsule is full.
B) The projectile hits the target, but in a lower position than it would with a full
CO2 capsule (that is, the shooting speed has dropped).
CAUTION
NEVER ATTEMPT TO REUSE A CO2 CAPSULE FOR ANY PURPOSE.
CAUTION
ALWAYS CHECK TO MAKE SURE THE AIRGUN IS UNLOADED WHEN GETTING FROM
STORAGE OR FROM ANOTHER PERSON.
10
8
n
s
t
EN
OPERATION
WARNING: CO2 CAPSULES MAY EXPLODE AT TEMPERATURES ABOVE
122° F. DO NOT MUTILATE OR INCINERATE THEM. DO NOT EXPOSE THEM TO
HEAT OR STORE CO2 CAPSULES AT TEMPERATURES ABOVE 122° F.
7. Maintaining Your Airgun
With care and routine inspections your airgun will provide many sessions of
shooting enjoyment. Abuse, neglect and continued exposure to the elements will
impair the performance of any airgun. To ensure continued proper function, apply
1 to 2 drops of RWS Spring Cylinder oil onto all moving parts such as the BB
follower, gas capsule piercing knob and the trigger hinge (1000 shots).
CAUTION
BEFORE ANY CARE, CLEANING OR MAINTENANCE, ALWAYS BE SURE YOUR AIRGUN IS
UNLOADED. KEEP POINTED IN A SAFE DIRECTION. IT IS IMPORTANT TO PERFORM ROUTINE
INSPECTIONS AND MAINTAIN YOUR AIRGUN PROPERLY.
CAUTION
OILS THAT CONTAIN ACID OR RESIN CAN DAMAGE SEALS AND POSSIBLY THE FINISH OF
THE AIRGUN.
e
WARNING: AN AIRGUN THAT IS NOT OPERATING PROPERLY MAY
BE DANGEROUS. IT SHOULD BE KEPT SAFELY FROM USE BY ANYONE UNTIL
REPAIRED OR DESTROYED. DO NOT TRY TO TAKE THE AIRGUN APART. IT IS
DIFFICULT TO REASSEMBLE AND IMPROPER DISASSEMBLY OR REASSEMBLY
CAN CAUSE SERIOUS INJURY OR DEATH.
8. Trouble
Shooting
Poor firing
performance
Airgun does
not function
Low velocity
CO2 capsule is empty
CO2 capsule is defective
Extreme temperature
Incorrect projectiles
11
SAFETY INSTRUCTIONS
EN
9. Reviewing Safety
•
Always aim in a SAFE DIRECTION. Always keep the muzzle of the airgun
pointed in a SAFE DIRECTION.
Always keep your finger off the trigger and out of the trigger guard until ready
to shoot.
Never point the airgun at anything you do not intend to shoot.
Always treat the airgun as though it is loaded and with the same respect
you would a firearm.
Never look down the barrel of an airgun.
Always keep the airgun “ON SAFE” until you are ready to shoot.
Always check to see if the airgun is “ON SAFE” and unloaded when
getting it from another person or from storage.
Use only the proper size and type of projectile as it is marked on the airgun.
Never reuse ammunition.
Do not shoot at hard surfaces or at the surface of water. The BB may
bounce off or ricochet and hit someone or something you had not intended
to hit.
Do not shoot at fragile objects such as windows.
Place the backstop in a location that will be safe should the backstop fail.
Your backstop should be checked for wear before and after each use.
All backstops are subject to wear and will eventually fail. Replace your
backstop if the surface is worn or damaged or if a ricochet occurs.
Do not attempt to disassemble or tamper with your airgun. Unauthorized
repairs or modifying the function of your airgun in any way may be unsafe
and will void your warranty.
Before you store your airgun, make sure it is unloaded, the CO2 capsule is
removed, and is “ON SAFE.”
Always store your airgun in a secure location away from unauthorized
users and separate from ammunition.
•
•
•
•
•
•
•
•
•
•
•
•
•
•
•
10. Repair / Service / Warranty
Do not return defective or damaged product to the dealer. If your airgun needs
repair, call Umarex USA (479) 646-4210 and ask for the Service Department
or visit www.umarexusa.com. DO NOT ATTEMPT TO DISASSEMBLE IT!
Your airgun requires special tools and fixtures to repair it. Any disassembly or
modification not performed by Umarex USA will void the warranty.
WARNING: DO NOT BRANDISH OR DISPLAY THIS AIRGUN IN PUBLIC –
IT MAY CONFUSE PEOPLE AND MAY BE A CRIME. POLICE AND OTHERS MAY THINK
IT IS A FIREARM. DO NOT CHANGE THE COLORATION AND MARKINGS TO MAKE IT
LOOK MORE LIKE A FIREARM. THAT IS DANGEROUS AND MAY BE A CRIME.
12
CARE
EN
CAUTION
THE COMPONENTS OF THIS AIRGUN WERE ENGINEERED AND MANUFACTURED TO DELIVER
OPTIMUM PERFORMANCE. ANY MODIFICATION OR TAMPERING WITH AN AIR PISTOL MAY
CAUSE A MALFUNCTION, VOID YOUR WARRANTY AND MAY MAKE IT UNSAFE TO USE. ANY
CHANGE IN PERFORMANCE (SUCH AS A LOWERED TRIGGER PULL FORCE AND SHORTENED
TRIGGER TRAVEL) INDICATES POSSIBLE MODIFICATION, TAMPERING AND/OR WEAR. SUCH
AIR PISTOL SHOULD BE INSPECTED, REPLACED, OR PROPERLY REPAIRED BY ONLY QUALIFIED
UMAREX USA PERSONNEL. ANY AIR PISTOL THAT HAS BEEN DROPPED SHOULD BE CHECKED
BY QUALIFIED PERSONNEL TO ENSURE THAT ITS FUNCTION HAS NOT BEEN AFFECTED.
90 DAY LIMITED WARRANTY
This product is warranted to the retail consumer for 90 days from date of
purchase against defects in material and workmanship and is not transferable.
WHAT IS COVERED: Replacement parts and labor.
WHAT IS NOT COVERED: Shipping charges to Umarex USA for defective
product and damages caused by abuse or failure to perform normal maintenance
as well as any other expense. Consequential damages, or incidental expenses,
including damage to property. Some states do not allow the exclusion or limitation
of incidental or consequential damages, so the above limitation or exclusion may
not apply to you.
WARRANTY CLAIMS: Warranty Claims and Repair for U.S. and Canadian
customers only. Call Umarex USA (479)-646-4210 and ask for the Service
Department. If it is determined a return is necessary, you will be issued a Return
Authorization Number. Write this number boldly on the box and return the product
prepaid to Umarex USA (Canadian customers will be provided with the address
of an authorized Canadian Repair Facility). Your name, address, phone number
and a note explaining the defect found must be included in the package. A copy
of the original dated cash register receipt must accompany the return. U.S.
customers, include a check made to Umarex USA in the amount provided by
Umarex USA’s service department to cover shipping and handling.
IMPLIED WARRANTIES: Any implied warranties, including the implied
warranties of merchantability and fitness for a particular purpose, are limited
in duration to 90 days from date of retail purchase. SOME STATES DO NOT
ALLOW LIMITATIONS ON HOW LONG IMPLIED WARRANTY LASTS, SO
THE ABOVE LIMITATIONS MAY NOT APPLY TO YOU. TO THE EXTENT ANY
PROVISION OF THIS WARRANTY IS PROHIBITED BY FEDERAL, STATE,
OR MUNICIPAL LAW; WHICH CANNOT BE PREEMPTED, IT SHALL NOT BE
APPLICABLE. THIS WARRANTY GIVES YOU SPECIFIC LEGAL RIGHTS,
AND YOU MAY ALSO HAVE OTHER RIGHTS, WHICH VARY FROM STATE TO
STATE AND COUNTRY TO COUNTRY.
13
ES
DESCRIPCIÓN
OPERACIÓN
CUIDADO
INSTRUCCIONES DE SEGURIDAD
LEA COMPLETAMENTE ESTE MANUAL DE OPERACIÓN DEL USUARIO.
Esta arma de aire comprimido no es un juguete. Trátela con el mismo respeto
que trataría un arma de fuego. Siempre siga las instrucciones de seguridad
encontradas en este manual del usuario y mantenga este manual en un lugar
seguro para uso futuro.
ADVERTENCIA: NO ES UN JUGUETE. SE REQUIERE LA SUPERVISIÓN
DE UN ADULTO. EL MAL USO O USO DESCUIDADO PUEDE CAUSAR SERIAS LESIONES
O LA MUERTE. PUEDE SER PELIGROSO HASTA 300 YARDAS (274 METROS).
ÈSTA ES UN ARMA DE AIRE COMPRIMIDO DE ALTO PODER PARA USO DE PERSONAS
MAYORES DE 16 AÑOS O MÁS. LEA TODAS LAS INSTRUCCIONES ANTES DE
USARSE. EL COMPRADOR O USUARIO DEBE DE AJUSTARSE A TODAS LAS LEYES
QUE REGULAN LA COMPRA, USO Y POSESIÓN DE ARMAS DE AIRE COMPRIMIDO.
26
P
1
2
3
4
5
INSTRUCCIONES DE SEGURIDAD
ES
ADVERTENCIA: ESTA ARMA DE AIRE COMPRIMIDO PUEDE CAUSAR
SERIAS LESIONES O LA MUERTE. LEA Y SIGA LAS INSTRUCCIONES CUIDADOSAMENTE. NO CARGUE UN PROYECTIL EN EL ARMA DE AIRE HASTA QUE ESTÉ LISTO
PARA DISPARAR. SI USTED CARGA EL PROYECTIL Y LUEGO DECIDE NO DISPARAR,
QUÍTELO YA SEA MANUALMENTE O DISPARANDO EL ARMA HACIA UN BLANCO
SEGURO. UN ARMA DE AIRE DESCARGADA QUE TIENE EL “SEGURO” – ON SAFE
ES LA MÁS SEGURA. LOS ACCIDENTES SUCEDEN RÁPIDO, POR FAVOR MANEJE
CUIDADOSAMENTE EL ARMA DE AIRE.
Las armas de aire comprimido difieren en su operación y usted nunca está
listo para disparar ningún arma de aire comprimido hasta que usted esté
completamente familiarizado con ella. Lea las siguientes instrucciones de
operación antes de operarlas.
Estos símbolos,
, marcan advertencias y precauciones en el manual de
operación. Cuidadosamente sígalas por su propia seguridad y por la seguridad
de otros.
PRECAUCIÓN
EL FALTAR A CUMPLIR LAS INSTRUCCIONES Y RECOMENDACIONES EN EL MANUAL DEL
PROPIETARIO PUEDE RESULTAR EN LESIONES CORPORALES INCLUYENDO LA CARA, OJO Y
LESIONES AL OÍDO, CEGUERA O SORDERA.
ADVERTENCIA:
SE REQUIERE PROTECCIÓN
DE LOS OJOS.
USE SUS LENTES
DE DISPARAR.
Procedimientos de Operación
6. Uso y Manejo de las
1. Aprendiendo las Partes de
Cápsulas de CO2
Su Pistola de Aire
7. Mantenimiento, Limpieza y
2. Operando bajo Seguridad
Almacenamiento
3. Instalando y Quitando las Cápsulas CO2 8. Solución de Problemas
4. Cargando y Descargando los Proyectiles 9. Revisando la Seguridad
5. Apuntando y Disparando con Seguridad 10. Reparación/Servicio/Garantía
27
ES
DESCRIPCIÓN
1. Aprendiendo las Partes de Su Arma de Aire
Percutor
Punto
de Mira
Alza
Seguro
Cargador del CO2 (izquierdo)
Seguidor
de BB
Compartimento
CO2
Puerto
de Carga
Cargador
del CO2
Retén del
Elevador
Perforador
Boca
Armando mecanismo
Emisión del Cargador
Gatillo
ilustración 1
28
Cobertor de la
palanca liberadora
del cargador
o
ES
OPERACIÓN
ADVERTENCIA: ASEGÚRESE QUE EL ARMA DE AIRE COMPRIMIDO
ESTÉ SIEMPRE APUNTANDO HACIA UNA DIRECCIÓN SEGURA. NUNCA APUNTE
EL ARMA DE AIRE COMPRIMIDO HACIA NINGUNA PERSONA AÚN SI ESTÁ
DESMONTADA O DESCARGADA. NUNCA APUNTE EL ARMA DE AIRE COMPRIMIDO
HACIA ALGO QUE NO INTENTA DISPARAR. SIEMPRE SUPONGA Y MANEJE EL ARMA
DE AIRE COMPRIMIDO COMO SI ESTUVIERA CARGADA Y LISTA PARA DISPARAR.
PRECAUCIÓN
• SOLAMENTE MANEJE EL ARMA DE AIRE CUANDO ESTÉ CON EL SEGURO – ON SAFE.
• SIEMPRE ASEGÚRESE QUE EL CAÑÓN APUNTE HACIA UNA DIRECCIÓN SEGURA.
2. Operando la Seguridad
SAFE
FIRE
ilustración 2a
ilustración 2b
PRECAUCIÓN
COMO TODOS LOS ARTEFACTOS MECÁNICOS, EL SEGURO DE UN ARMA DE AIRE PUEDE
FALLAR. AÚN CUANDO EL SEGURO ESTÉ “EN SEGURO,” – ON SAFE, DEBE DE CONTINUAR
MANEJANDO EL ARMA DE AIRE CON SEGURIDAD. NUNCA APUNTE EL ARMA DE AIRE HACIA
ALGO QUE NO INTENTE DISPARAR.
PRECAUCIÓN
NUNCA CARGUE EL CARGADOR HASTA QUE HAYA VERIFICADO QUE EL ARMA DE AIRSOFT
DESCARGARÁ CO2 APROPIAMENTE.
ADVERTENCIA: USE SOLAMENTE CÁPSULAS CO2 DE 12g.
CUALQUIER INTENTO DE USAR OTROS TIPOS DE CÁPSULAS DE GAS PUEDE SER
EXTREMADAMENTE PELIGROSO Y PUEDE RESULTAR EN SERIAS LESIONES O
MUERTE. LOS GASES QUE NO SON CO2 PUEDEN RESULTAR EN UNA EXPLOSIÓN
O RUPTURA DEL ARMA DE AIRE.
29
ES
OPERACIÓN
•
3. Instalando e Quitando la Cápsula de CO2
c
•
d
to
q
•
•
ilustración 3
ilustración 4
ilustración 5
ilustración 6
ilustración 7
3A. Instalando una Cápsula Nueva CO2
• Ponga el arma de aire “EN SEGURO” (ON SAFE) (vea Paso 2).
• Remueva el cargador de CO2 presionando del botón para soltar el cargador de
CO2 (ilustración 3).
• Tire hacia abajo el cobertor del cargador (ilustración 4).
• Presione y sostenga la palanca liberadora del cargador para removerlo (ilustr. 5).
• Gire el tornillo perforador en dirección contraria a las manecillas del reloj para
bajarlo (ilustración 6).
• Antes de instalar una cápsula CO2, ponga una gota de Lubricante de Cámara
RWS arriba de la puntita de la cápsula CO2.
• Inserte dos cápsulas de 12g de CO2, con el cuello de la cápsula apuntando
hacia arriba, en el cargador (illustration 6).
• Tornillo de sujeción del cilindro girando a favor de las manecillas del reloj hasta
que el cilindro de CO2 sea perforado.
• Vuelva a colocar la tapa cobertora en el cargador de CO2 e inserte el cargador
(ilustración 7).
• Apunte el Arma de aire en una dirección segura.
• Quite el seguro (vea Paso 2).
• Jale hacia atrás la palanca de carga.
• Asegúrese de que el arma de aire este apuntando en una dirección segura, jale
el gatillo hasta hacer un disparo.
• Si el arma de aire no hace un sonido de estallido después de jalar el gatillo, el
gas CO2 no está descargando. En ese caso coloque el arma de aire en MODO
SEGURO (ON SAFE) (Vea Paso 2). Remueva la cubierta baja del
cargador y gire el tornillo de perforación en el fondo del cargador hasta que
escuche la cápsula perforarse.
NOTA: Puede ocurrir una leve filtración de CO2 hasta que el tornillo perforador
esté apretado.
NOTA: Nunca trate de forzar ninguna cápsula CO2 en y fuera de lugar. No guarde su arma de aire con la cápsula CO2 en ella. Si sabe que no estará usando su
arma de aire por un período extenso de tiempo, vacíe la cápsula CO2 y quítela
del arma de aire.
3B. Quitando una Cápsula de CO2
• Ponga el arma de aire “EN SEGURO” (ON SAFE) (vea Paso 2).
• Remueva el cargador de CO2 presionando del botón para soltar el cargador de
CO2 (ilustración 3).
• Tire hacia abajo el cobertor del cargador (ilustración 4).
30
4
•
•
•
•
•
c
•
d
•
d
•
c
7
e
OPERACIÓN
ES
• Presione y sostenga la palanca liberadora del cargador para removerlo (ilustración 5).
• Afloje el Tornillo de sujeción del cilindro girándolo en contra de las manecillas
del reloj hasta que escuche que el gas se está liberando teniendo cuidado de no
tocar el cilindro o el gas que está siendo liberado ya que podría provocarle una
quemadura. Deje que todo el gas termine de liberarse.
• Continúe aflojando el tornillo de sujeción (ilustración 6).
• Quite la cápsula CO2 vacía y tírela.
ADVERTENCIA: MANTENGA LAS MANOS Y CARA LEJOS DEL ESCAPE
DEL GAS CO2. PUEDE CAUSAR CONGELAMIENTO SI SE PERMITE QUE TENGA CONTACTO
CON LA PIEL. SIEMPRE ASEGÚRESE QUE LA CÁPSULA CO2 ESTÉ VACÍA ANTES DE
INTENTAR QUITARLA DEL ARMA DE AIRE, QUÍTELA GIRANDO COMPLETAMENTE EL
TORNILLO DE PERFORACIÓN DE LA CÁPSULA DE GAS EN SENTIDO CONTRARIO DE LAS
AGUJAS DEL RELOJ HASTA QUE YA NO OIGA MÁS EL ESCAPE DE GAS CO2.
4. Cargando y Descargando los BBs
.
a
e
e
ilustración 8
ilustración 9 illustration 10
ilustración 11
4A. Cargando BBs
• Ponga el arma de aire “EN SEGURO” (ON SAFE) (vea Paso 2).
• Apunte el Arma de aire en una dirección segura.
• Remueva el cargador de CO2 presionando del botón para soltar el cargador de CO2.
• Tire hacia abajo el cobertor del cargador (ilustración 9).
• Localice el elevador de municiones (ilustración 10). Jala el seguidor de municiones hasta que se trabe en su lugar.
• Inserte 19 municiones de acero en el puerto de carga a le frente de la cargador
del arma (ilustración 10).
• Deslice la tapa cobertora hacia arriba e inserte el cargador lleno en la pistola
de aire.
• Su arma de aire ya está cargada y lista para ser disparada después de leer
completamente este manual, incluyendo la sección 9 de seguridad.
PRECAUCIÓN
USE SOLAMENTE BBS DE ACERO DE CALIBRE .177 (4,5 MM). NO INTENTE REUSAR BBS QUE HAN
SIDO DISPARADOS O QUE ESTÁN DEFORMADOS. NO USE PERDIGONES, DARDOS, BALERO DE
BOLAS, U OTROS OBJETOS EXTRAÑOS PORQUE ELLOS LE PUEDEN CAUSAR LESIONES A USTED O
A ALGUIEN MÁS O PUEDEN DAÑAR Y/O ATASCAR EL ARMA DE AIRE.
31
OPERACIÓN
ES
4B. Descargando los BBs
• Ponga la pistola de aire “SIN SEGURO” – OFF SAFE (ver Paso 2).
• Jale el gatillo para disparar hasta que la pistola de aire ya no dispare más.
• Ponga la pistola de aire “EN SEGURO” – ON SAFE.
• Quite el cargador.
NOTA: La pistola debe de estar cargado con CO2 cuando se sigan estos pasos,
pero recuerde, no guarde su pistola con una cápsula de CO2 dentro de él.
ADVERTENCIA: NUNCA ASUMA QUE PORQUE EL ARMA DE AIRE
NO DISPARA MÁS UN PROYECTIL Y/O EL CARGADOR SE HA QUITADO DE LA
MONTURA DEL AGARRADOR QUE EL PROYECTIL NO ESTÁ METIDO EN EL CAÑÓN.
SIEMPRE TRATE AL ARMA DE AIRE COMO SI ESTUVIERA CARGADA Y CON EL
MISMO RESPETO QUE TRATARÍA A UN ARMA DE FUEGO.
PRECAUCIÓN
¡SOLAMENTE DISPARE BBS DE ACERO!
NOTA: Use únicamente municiones de acero nuevas calibre .177 (4.5mm).
Nota: Se invalidará la Garantía si usa otro tipo de munición que no sea la
especificada para esta arma.
4C. Destrabando una munición atascada
IMPORTANTE: El disparar el arma de aire con muy poca presión de gas
restante puede causar que un BB se atore en el cañón.
• Descargue todas las municiones (ver Paso 4B).
• Ponga el seguro de su arma de aire.
• Retire el cargador de municiones presionando el botón del seguro
del cargador y jalando hacia abajo hasta que salga totalmente de la
empuñadura.
• Inserte una baqueta calibre .177/4.5 mm por el frente del cañón y
cuidadosamente empuje la munición atascada hasta la recámara. El cañón
podría dañarse e invalidarse la garantía si la medida de la baqueta utilizada
no es la apropiada.
• Sostenga de manera vertical su arma de aire y sacúdala hasta que la
munición caiga fuera de su arma.
• Si usted no es capaz de destrabar la munición siguiendo este procedimiento,
no intente nada más. Llame al Teléfono de su centro de servicio
(479) 646-4210 y consulte con el departamento técnico.
NOTA: Muchos factores afectan la función y velocidad del arma de aire, incluyendo
la marca del proyectile, lubricación, condición del cañón y la temperatura.
PRECAUCIÓN
SU SOPORTE DEBE DE SER INSPECCIONADO POR DESGASTE ANTES Y DESPUÉS DE CADA
USO. DESCONTINÚE SU USO SI LA SUPERFICIE DEL SOPORTE MUESTRA SEÑALES DE FALLA.
SIEMPRE PONGA EL SOPORTE EN UN LUGAR QUE SERÁ SEGURO SI EL SOPORTE FALLA.
DESCONTINÚE EL USO DEL SOPORTE SI EL PROYECTIL REBOTA.
32
A
ES
OPERACIÓN
Usted y otros con usted deben siempre usar lentes para disparar para proteger
sus ojos.
Siempre apunte su pistola de aire en una DIRECCIÓN SEGURA. Cuando esté
seguro de su blanco y soporte, y el área alrededor del blanco esté despejada
entonces usted está listo para disparar.
No dispare a las superficies duras o a las superficies de agua. Los proyectiles
pueden rebotar y pegarle a alguien o a algo que usted no intentaba pegar.
No dispare a superficies frágiles tales como vidrios o espejos.
Siempre escoja su blanco cuidadosamente. Solamente se deben de usar blancos
que no se puedan penetrar o que no causen rebotes.
Su soporte debe de revisarse de desgastes antes y después de cada uso.
Remplace su soporte si la superficie está gastada o dañada, o si un rebote ocurre.
La pistola de aire está apuntando correctamente cuando del punto de mira está
en posición exactamente de la mira de atrás. La parte de arriba de la hoja del
punto de mira debe de estar
al mismo nivel con la parte de
arriba del agujero en la mira
de atrás. El blanco debe de
parecer como que descansa
en la parte de arriba del punto
de mira.
s,
•
•
5. Apuntando y Disparando con Seguridad
•
•
•
•
•
2. Jale hacia atrás la
palanca de carga.
1. Desasegurar
FIRE
3. Accionar
el gatillo
Ajuste de Mira
1. Empuje y
sostenga
2. Ajustar
33
OPERACIÓN
CUIDADO
ES
6. Uso y Manejo de las Cápsulas de CO2
Es posible que ciertas condiciones puedan afectar una cápsula CO2, lo cual puede
impactar su función apropiada. Estas condiciones incluyen el uso, mantenimiento
y almacenamiento a temperaturas que son más altas o bajas que las temperaturas
al aire libre (60°-80° F/16°-27° C). Otra condición puede ser cuando el arma se
dispara rápidamente.
1. Las temperaturas altas pueden aumentar la presión en la cápsula de CO2 y
también dentro del arma, causando presión de manejo más alta que lo estándar.
Este exceso de presión puede causar malfuncionamiento del arma o daño
permanente. Las temperaturas máximas de almacenamiento o de operación
nunca deben de exceder 122° F (50° C). Esta temperatura puede ser lograda
si deja el arma directamente bajo la luz del sol en un día soleado. Aunque, para
asegurar la apropiada operación del arma, no la exponga a temperaturas altas
o a luz del sol directa por períodos largos de tiempo. De otra manera, la cápsula
de CO2 se podría recalentar y explotar, lo cual dañaría el arma de aire y causar
lesiones o muerte a las personas alrededor de ella.
2. El disparo rápido y consecutivo puede producir una disminución de la
temperatura del arma, como también de la cápsula de CO2. Esto puede resultar
en velocidades bajas del proyectil y puede aún bajar la presión del gas lo
suficiente como para que la pistola no llegue a disparar. Esta condición puede
ser especialmente aparente cuando se dispara en un clima frío y puede ser
evitado permitiendo más tiempo entre los disparos. Ésto permite que el gas
aumente en temperatura y presión y produzca las velocidades normales.
3. Durante disparo rápido, la velocidad de la boca de cada disparo disminuirá.
Ésto puede afectar la precisión del disparo y obtendrá menos disparos por cada
cápsula CO2.
4. El cuidado se debe de ejercer para asegurar que el arma no se dispara con
una cápsula de CO2 que está baja en presión. Aquí hay algunos indicadores de
presión insuficiente:
A) El sonido del disparo no es tan fuerte como cuando la cápsula está llena.
B) El proyectil pega el blanco, pero en una posición más baja que la que pegaría
con una cápsula CO2 llena (eso es que la velocidad del disparo ha caído).
PRECAUCIÓN
NUNCA INTENTE REUSAR UNA CÁPSULA DE CO2 PARA CUALQUIER PROPÓSITO.
PRECAUCIÓN
SIEMPRE REVISE PARA ASEGURAR QUE EL ARMA DE AIRE ESTÁ DESCARGADA CUANDO
LA AGARRE DE DONDE ESTABA GUARDADA O DE OTRA PERSONA.
34
8
e
r.
ES
OPERACIÓN
ADVERTENCIA: LAS CÁPSULAS CO2 PUEDEN EXPLOTAR A
TEMPERATURAS ARRIBA DE 122° F. NO LAS MUTILE O INCINERE. NO LAS EXPONGA
AL CALOR O GUARDE LAS CÁPSULAS CO2 A TEMPERATURAS ARRIBA DE 122° F.
7. Manteniendo Su Arma de Aire
Con cuidado e inspecciones de rutina su arma de aire puede proveer muchas
sesiones de disparo para que disfrute. El abuso, negligencia y exposición continua a
los elementos impedirá el funcionamiento de cualquier arma de aire. Para asegurar
la función apropiada continua, aplique de 1 a 2 gotas de aceite RWS Resorte de
Cilindro (Spring Cylinder) hasta que todas las partes tales como el seguidor BB, el
botón perforador de la cápsula de gas y la bisagra del gatillo (1,000 tiros).
a
PRECAUCIÓN
r
ANTES DE CUALQUIER CUIDADO O MANTENIMIENTO, SIEMPRE ASEGÚRESE QUE SU ARMA
DE AIRE COMPRIMIDO ESTÉ “EN SEGURO” (ON SAFE) Y DESCARGADO. MANTÉNGALO
APUNTANDO HACIA UNA DIRECCIÓN SEGURA. ES MUY IMPORTANTE MANTENER
APROPIADAMENTE SU ARMA DE AIRE COMPRIMIDO.
a
LOS ACEITES QUE CONTIENEN ÁCIDO O RESINA PUEDEN DAÑAR EL SELLO DE LA
RECÁMARA, EL SELLO DE COMPRESIÓN, Y POSIBLEMENTE EL ACABADO DE ARMA DE
AIRE COMPRIMIDO.
a
PRECAUCIÓN
ADVERTENCIA: UN ARMA DE AIRE COMPRIMIDO QUE NO SE MANEJE
APROPIADAMENTE PUEDE SER PELIGROSA. DEBE DE MANTENERSE SEGURA DEL
USO DE ALGUIEN HASTA QUE SE REPARE O DESTRUYA. NO TRATE DE DESARMAR
EL ARMA DE AIRE COMPRIMIDO. ES DIFÍCIL DE REENSAMBLAR Y EL DESAMBLAJE
Y REENSAMBLAJE INAPROPIADO PUEDE CAUSAR LESIONES O LA MUERTE.
8. Solución de
Problemas
Función de disparo
inadecuado
El arma de aire
no funciona
Baja
velocidad
Cápsula CO2 está vacía
Cápsula CO2 está defectuosa
Temperaturas extremas
Proyectiles incorrectos
35
INSTRUCCIONES DE SEGURIDAD
ES
9. Repasando la Seguridad
•
•
•
•
•
•
•
•
•
•
•
•
•
•
•
•
Siempre apunte hacia una DIRECCIÓN SEGURA. Siempre mantenga la boca
del arma de aire apuntando hacia una DIRECCIÓN SEGURA.
Siempre mantenga su dedo fuera del gatillo y fuera del guardamonte hasta que
esté listo para disparar.
Nunca apunte el arma de aire a cualquier cosa que no intente disparar.
Siempre trate al arma de aire como si está cargada y con el mismo respeto que
una arma de fuego.
Nunca mire al cañón de un arma de aire.
Siempre mantenga el arma de aire “EN SEGURO” – ON SAFE hasta que esté
listo para disparar.
Siempre esté listo para ver si el arma de aire está “EN SEGURO” – ON SAFE y
descargada cuando la agarre de otra persona o del lugar en donde
estaba guardada.
Use solamente el tamaño apropiado y tipo de proyectil como está marcado en
el arma de aire.
Nunca reuse la munición.
No dispare a las superficies duras o a la superficie de agua. El BB puede
rebotar y golpear a alguien o a algo que no intentaba golpear.
No dispare a objetos frágiles como las ventanas.
Ponga el soporte en un lugar que será seguro si falla el soporte.
Su soporte debe de revisarse por desgaste antes y después de cada uso.
Todos los soportes están sujetos a desgastes y con el tiempo fallarán.
Remplace su soporte si la superficie se desgasta o daña o si ocurre un rebote.
No intente desarmar o modificar su arma de aire. Las reparaciones no
autorizadas o las modificaciones de la función de su arma de aire en cualquier
manera pueden ser inseguras y anularán su garantía.
Antes de guardar su arma de aire, asegúrese que está descargada, que no
tiene la cápsula CO2 y que tiene el “SEGURO” – ON SAFE.
Siempre guarde su arma de aire en un lugar seguro lejos de usuarios no
autorizados y separadas de las municiones.
10. Reparación/Servicio/Garantía
No regrese producto defectuoso o dañado al vendedor. Si su arma de aire
necesita reparación, llame a Umarex USA al (479) 646-4210 y pregunte por
el Departamento de Servicio o visite www.umarexusa.com. ¡NO INTENTE
DESARMARLA! Su arma de aire requiere herramientas y partes especiales
para repararla. Cualquier desarme o modificación no hecha por Umarex USA
invalidará la garantía.
ADVERTENCIA: NO EMPUÑE O MUESTRE ESTE PRODUCTO EN
PÚBLICO – PUEDE CONFUNDIR A LAS PERSONAS Y PUEDE SER UN CRIMEN. LA
POLICÍA U OTROS PUEDEN PENSAR QUE ES UN ARMA DE FUEGO. NO CAMBIE LA
COLORACIÓN Y MARCAS PARA HACERLA VER MÁS COMO UN ARMA DE FUEGO.
ÉSO ES PELIGROSO Y PUEDE SER UN CRIMEN.
36
CUIDADO
ES
PRECAUCIÓN
LOS COMPONENTES DE SU ARMA DE AIRE COMPRIMIDO FUERON FABRICADOS
Y CONFECCIONADOS PARA PROPORCIONAR ÓPTIMAS FUNCIONES. CUALQUIER
MODIFICACIÓN O ALTERACIÓN PUEDE CAUSAR UN MALFUNCIONAMIENTO, INVALIDARÁ
SU GARANTÍA Y PUEDE HACER QUE SEA INSEGURO SU USO. CUALQUIER CAMBIO EN SU
FUNCIÓN (TALES COMO UNA FUERZA DE JALE BAJA DEL GATILLO O UN RECORTAMIENTO
DE RECORRIDO DEL GATILLO), INDICA POSIBLES MODIFICACIONES, ALTERACIONES
Y/O USO. TALES ARMAS DE AIRE COMPRIMIDO DEBEN DE SER INSPECCIONADAS,
REEMPLAZADAS O APROPIADAMENTE REPARADAS POR SOLAMENTE EL PERSONAL
CALIFICADO DE UMAREX PARA ASEGURAR QUE SU FUNCIÓN NO HA SIDO AFECTADA.
GARANTÍA LIMITADA DE 90 DÍAS
Este producto está garantizado al consumidor minorista por 90 días de la fecha
de compra por defectos de material y confección y no es transferible.
LO QUE TIENE COBERTURA: Partes reemplazables y mano de obra.
LO QUE NO TIENE COBERTURA: Los cargos de envío a Umarex USA por
producto defectuoso y daños causados por abuso o incumplimiento en realizar
el mantenimiento normal y también cualquier otro cargo. Daños resultantes
o cargos incidentales, incluyendo daños a la propiedad. Algunos estados no
permiten la exclusión o limitación de los daños incidentales o resultantes, por lo
tanto, las limitaciones o exclusiones no se pueden aplicar a usted.
RECLAMOS DE GARANTÍAS: Los Reclamos de Garantías y Reparaciones son
solamente para los clientes de Estados Unidos y Canadá. Llame a Umarex USA
(479) 646-4210 y pregunte por el Departamento de Servicio. Si se determina que
es necesaria una devolución, se le dará un Número de Devolución Autorizado.
Escriba este número en negritas en la caja y devuelva el producto prepagado
a Umarex USA (a los clientes canadienses se les proporcionará una dirección
de una Instalación Canadiense de Reparaciones autorizada). Se debe incluir
en el paquete su nombre, dirección, número de teléfono y una nota explicando
el defecto encontrado. Para realizar una devolución debe traer la copia de la
factura fechada original de caja. Clientes de EEUU, incluyan un cheque por
pagar a Umarex USA por la cantidad que les proporcionó el departamento de
servicios de Umarex USA para cubrir los gastos de envío y manejo.
GARANTÍAS IMPLICADAS: Cualquier garantía implicada incluyendo las
garantías implicadas de comerciabilidad y adaptabilidad por cualquier
propósito, están limitadas en duración de 90 días después de la fecha de
compra. ALGUNOS ESTADOS NO PERMITEN LIMITACIONES EN CUANTO
A LA DURACIÓN DE UNA GARANTÍA IMPLICADA, POR LO TANTO, LAS
LIMITACIONES ANTERIORES NO SE PUEDEN APLICAR A USTED. A LA
MEDIDA QUE CUALQUIER ESTIPULACIÓN DE ESTA GARANTÍA ESTÉ
PROHIBIDA POR LEY FEDERAL, ESTATAL O MUNICIPAL LA CUAL NO
SE PUEDE INVALIDAR, NO SERÁ APLICABLE. ESTA GARANTÍA LE DA
DERECHOS ESPECÍFICOS Y USTED PUEDE TAMBIÉN TENER OTROS
DERECHOS QUE VARÍAN DE ESTADO A ESTADO Y DE PAÍS A PAÍS.
37
NOTES
C
S
C
C
V
P
L
D
LEGENDS C96 Specifications
Power source
CO2
Number of shots
19 BBs
Caliber/Ammo
.177 cal. (4.5 mm) steel BB
Velocity
380 fps (116 m/s)
Weight
1.75 lbs (0.79 kg)
Length
11.5 in. (29.2 cm)
Danger distance
300 yards (274 m)
Caractéristiques du LEGENDS C96
Systéme
CO2
Chargeur du Capacité
19 BBs
Calibre / Projectiles
4,5 mm (0,177 cal.) projectile “BB” en acier
Vélocité
116 m/s (380 fps)
Poids
0,79 kg (1,75 lbs)
Longueur
29,2 cm (11,5 in.)
Distance Dangereuse
274 m (300 yds)
Especificaciones de LEGENDS C96
Fuente de Poder
CO2
Capacidad
19 BBs
Calibre / Munición
.177 cal. (4.5 mm) BBs de acero
Velocidad
380 fps (116 m/s)
Peso
1.75 lbs (0.79 kg)
Longitud
11.5 in. (29.2 cm)
Distancia de Peligro
300 yardas (274 m)
j
pro
STEEL BB
.17
vélocité
ci té de cou
powered
ou t
e i l l e de C
O2
19
B
pa
CO 2
7 ( 4 , 5 mm)
ps
ca
12 g
r
380 fps
VELOCITY
a l i me n t é
i l e BB en a
c ie
ect
ROUNDS
capacity
amovible
We reserve the right to make color and design changes and technical improvements.
No responsibility is accepted for printing errors or incorrect information.
Sauf modifications de la couleur et du design ainsi que des améliorations techniques, erreurs d’impression et erreur.
Toutes les données sont fournies sans garantie.
Nos reservamos el derecho para realizar cambios al color y diseño y mejoras técnicas.
No se acepta responsabilidad por errores de impresión o información incorrecta.
© UMAREX USA
© 2013
7700 Chad Colley Boulevard, Fort Smith, Arkansas 72916 USA
Phone: 1-479-646-4210 www.UmarexUSA.com
07R13