1
77-255
IntelliSensor™ Pro
Multi-depth Stud Finder
INSTRUCTION
MANUAL
CALIB
READ RATING
Y
38mm
109F Manual (B/E/F)
1
17/2/05, 3:38 PM
IntelliSensor™ Pro (77-255)
The Stanley® IntelliSensorTM Pro uses electronic
signals to locate the position of studs, joists or
live AC wires through drywall and other common
wall materials. Once the edge of the stud has been
detected, the IntelliSensorTM Pro LCD display gives
visual and audio indications that allow you to
easily pinpoint the stud’s edge position. A pencil
line allows you to quickly note the location of the
stud edges.
The IntelliSensorTM Pro allows the user to locate
wood and metal studs up to 1-1/2 inch for metal
and wood stud.
The IntelliSensor TM Pro provides automatic
calibration, auto shut off and heavy duty ABS
construction.
Depth detection selected by side button for 1/2
inch, 1 inch and 1-1/2 inch.
Important: Read all instructions prior to operating
the IntelliSensorTM Pro and DO NOT remove any
labels from the tool.
2
109F Manual (B/E/F)
2
17/2/05, 3:38 PM
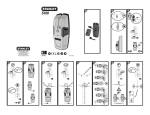
ILLUSTRATION 1
Indicator Mark
Live Wire LED
CALIBRATING
READY
LCD
Depth Detection
Mode Indicator
38mm
ON
ON Button / Depth
Detection mode selection
3
109F Manual (B/E/F)
3
17/2/05, 3:38 PM
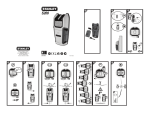
ILLUSTRATION 2
Unit is
Calibrating
CALIBRATING
READY
Calibration
complete
Ready to scan
Live Wire
Indicator
Graphic
Low Battery
Indicator
ILLUSTRATION 3
A
B
C
38mm
A = Wood or metal stud depth detection up to 1/2”
B = Wood or metal stud depth detection up to 1”
C = Wood or metal stud depth detection up to 1-1/2”
4
109F Manual (B/E/F)
4
17/2/05, 3:38 PM
Operating Instructions
Battery Replacement
Open the battery door on back
of unit and connect a 9-volt
battery (not included) to clip.
Place battery back into case
and snap battery door on.
Recommend to replace a new
9 volt battery when low battery Battery Door
ILLUSTRATION 4
indicator is on.
Calibration
Calibrate the unit on wall before scanning
for wood or metal stud.
Note:
While
calibrating,
the
IntelliSensorTM Pro must not be placed
directly over a stud, dense material such as
metal, wet or newly painted areas as this
will prevent the unit from calibrating
properly. If this is done over wood or metal
stud the unit will give no indication when
moved away from the area. Move to a
different location and try again.
Calibrating
Hold the IntelliSensorTM Pro flat against the
surface, making firm contact. Press and hold
the “ON” button. All indicators on the LCD
are displayed while the unit goes through
its’ 1 to 3 second calibration cycle. The word
“CALIBRATING” will apear on LCD
(illustration 2) while the unit is calibrating
to surface. Following the completion of
calibration the unit will beep, and the word
“READY” will be shown on LCD
(illustration 5). The LED light will then
109F Manual (B/E/F)
5
17/2/05, 3:38 PM
illuminate the keypad depth mode (1/2”
depth default).
IMPORTANT: The unit cannot be moved
before calibration is
complate
and
“READY” appears on
the LCD and LED
illuminates.
ILLUSTRATION 5
READY
USAGE
Selecting Depth Detection
1. Depress and hold “ON” button once (1x)
to select to 1/2 ” read depth detection.
The 1/2”mode LED will illuminate
(illustration 3). The unit will then
calibrate, followed by a beep and a
“READY” displayed on the LCD.
2. “Double-click” / Depress and hold ON
button twice (2x) to select to 1” read
depth detection. The 1” mode LED will
illuminate (illustration 3). The unit will
then calibrate , followed by a beep and
a “READY” diplayed on the LCD.
3. “Triple-click”/ Depress “ON” button
three times (3x) to select 1-1/2” read
depth detection. The 1-1/2” mode LED
will illuminate (illustration 3). The unit
will then calibrate, followed by a beep
and a “READY” displayed on the LCD.
IMPORTANT: Unit will automatically shutoff if ON button is released following steps
1,2,3 above.
109F Manual (B/E/F)
6
17/2/05, 3:38 PM
Detecting Wood Studs
1. Slide the unit across the surface in a
straight line. The closer the unit is to the
stud the more bars will be shown as
illustration 6. When the stud edge is
detected the Wood indicator and the
edge bar will be shown as illustration 7
and the unit will sound a continuous
beep.
2. Use indicator graphic (illustration 2&7)
and indicator mark (illustration 1) to
locate and define stud edge.
3. Continue sliding past the stud. When the
indicator turns off and the unit stops
beeping the other edge has been
detected.
4. Double check stud location by coming
back from the other direction. Make
additional markings.
5. The midpoint of the marks indicates the
stud center.
READY
READY
ILLUSTRATION 6
ILLUSTRATION 7
7
109F Manual (B/E/F)
7
17/2/05, 3:38 PM
Detecting Live Wires
The live wire red LED lens (illustration 1) will
illuminate, warning when in the proximity
(typically within 4-18” distance) from a live
wire. The LCD screen will then display a live
wire icon (illustration 2) on the LCD defining
full detection. Maximum depth detection of
2”.
Static electricity charges that can develop
on drywall and other surfaces will spread
the voltage detection area many inches to
each side of the actual electrical wire. To
aid in locating the wire position, scan
holding the unit 1/2 inch away from the wall
surface or place other hand on surface
approximately 12 inches from sensor.
Warning: shielded wires or live wires
in metal conduits, casings, metalized
walls or thick, dense walls, will not be
detected. Always turn AC power off
when working near wiring.
The IntelliSensor™ Pro is designed to detect
110 volts (for USA version) and 230 volts
for (European version) AC in live electrical
wires. It will also detect the presence of live
wires having greater than 230 volts.
8
109F Manual (B/E/F)
8
17/2/05, 3:38 PM
Cautions on Operating
You should always use caution when
nailing, cutting or drilling in walls, ceilings
and floors that may contain wiring or pipes
near the surface. Shielded, dead or nonpowered wiring will not be detected
as live wires. Always remember that studs
or joists are normally spaced 16 inches or
24 inches apart and are 1-1/2 inches in
width. To avoid surprises, be aware that
anything closer together or of a different
width may be an additional stud, joist or fire
break.
When working near AC electrical
wires, always turn off the power.
Operating Tips
IMPORTANT SAFETY NOTICE
Insure proper detection of live wires
ALWAYS hold the IntelliSensorTM Pro in the
handle area only. Grasp between fingers and
thumb while maintaining contact with your
palm.
Conventional Construction
Doors and windows are commonly
constructed with additional studs and
headers for added stability. The
IntelliSensorTM Pro detects the edge of
these double studs and solid headers and
emits and holds an audio signal as it crosses
over them.
9
109F Manual (B/E/F)
9
17/2/05, 3:38 PM
Surface Differences
Wallpaper — There will be no difference
in the function of the stud sensor on surfaces
covered with wallpaper or fabric unless the
coverings contain metallic foil or fibers.
Plaster and Lath — Unless the plaster and
lath is exceptionally thick or has metal mesh
in it there will be no problem with the unit
functioning properly.
Ceiling or Textured Surfaces — When
dealing with a rough surface such as a
sprayed ceiling, use a piece of cardboard
when scanning the surface. Run through
the calibration technique described earlier
WITH the piece of cardboard between the
stud sensor and the surface. Also, it is
particularly important in this application to
remember to keep your free hand away from
the unit.
Specifications
Utilizing the procedure of scanning and marking
from two sides, IntelliSensorTM Pro will find the
stud center typically within 1/8” accuracy for
wood and 1/4” accuracy for metal.
When measuring a wood or metal stud, it is
recommended the IntelliSensorTM Pro to be used
at 30-50% relative humidity.
Battery
: 9 volt (not
included)
Shock Resistance
: up to 6 feet
Operating Temperature : +32˚F to +120˚F
(0˚C to +49˚C)
Storage Temperature : -4˚F to +150˚F
(-20˚C to +66˚C)
10
109F Manual (B/E/F)
10
17/2/05, 3:38 PM
Warranty
The Stanley Works warrants the IntelliSensorTM
Pro against defects in material and workmanship
for one year from the date of purchase. Deficient
products will be repaired or replaced at Stanley’s
discretion if sent to:
The Stanley Works
Customer Service
Repair Department
480 Myrtle Street
New Britain, CT 06053
Stanley’s liability under this warranty is limited
to repair or replacement of the unit. Any attempt
to repair the product by other than factory
authorized personnel will void this warranty.
Calibration, batteries and maintenance are the
responsibility of the user. Where permitted by law,
Stanley is not responsible for incidental or
consequential damages. Agents of Stanley cannot
change this warranty. Stanley is not responsible
for damage resulting from wear, abuse or
alteration of this product. The user is expected to
follow ALL operating instructions.
This warranty may provide you with additional
rights that vary by state, province or nation.
11
109F Manual (B/E/F)
11
17/2/05, 3:38 PM
WARNING: Protect Your Eyes Wear Safety Goggles
AVERTISSEMENT: Protégez vos yeux, portez des
lunettes de sécurité.
ADVERTENCIA: Protéjase los ojos, use gafas de
seguridad
One Year Warranty
Garantie de un an
Garantía de un año
©2004 Stanley Tools Product Group of
The Stanley Works, New Britain, CT 06053
T5363
12
109F Manual (B/E/F)
12
17/2/05, 3:38 PM
77-255
IntelliSensor™ Pro
Detector de parales de
profundidad múltiple
MANUAL DE
INSTRUCCIONES
CALIB
READ RATING
Y
38mm
13
109F Manual (B/E/F)
13
17/2/05, 3:38 PM
IntelliSensor™ Pro (77-255)
El IntelliSensor™ Pro de Stanley® usa señales
electrónicas para ubicar la posición de parales,
vigas o cables de CA energizados a través de pirca
(drywall) u otros materiales de pared comunes.
Una vez que el borde del paral ha sido detectado,
la Pantalla de Cristal Líquido (LCD) del
IntelliSensor™ Pro produce señales visuales y
sonoras que le permiten localizar con precisión
la posición del borde del paral. Una línea trazada
a lápiz le permite marcar rápidamente la ubicación
de los bordes del paral.
El IntelliSensor™ Pro le permite al usuario ubicar
parales de madera y de metal hasta de 1-1/2 pul.
para parales de metal o de madera.
El IntelliSensor™ Pro le proporciona calibración
automática, apagado automático y construcción
extrafuerte de ABS.
La detección de profundidad se selecciona
mediante el botón lateral a 1/2, 1 y 1-1/2
pulgadas.
Importante: Lea todas las instrucciones antes de
operar el IntelliSensor™ Pro y NO REMUEVA
ninguna etiqueta de la herramienta.
14
109F Manual (B/E/F)
14
17/2/05, 3:38 PM
ILUSTRACIÓN 1
Marca indicadora
LLED de cable
energizado
CALIBRATING
READY
LCD
Indicador de
modalidad de
detección de
profundidad
38mm
PRENDIDO
Botón de PRENDIDO /
Selección de modalidad de
detección de profundidad
15
109F Manual (B/E/F)
15
17/2/05, 3:38 PM
ILUSTRACIÓN 2
La unidad se
está calibrando
CALIBRATING
READY
Calibración
terminada
Listo para
escanear
ICable
energizado
Gráfica del
indicador
Indicador de
batería baja
ILUSTRACIÓN 3
A
B
C
38mm
A= Detección de profundidad de paral de madera o metal hasta
1/2 pul.
B= Detección de profundidad de paral de madera o metal hasta
1 pul.
C= Detección de profundidad de paral de madera o metal hasta
1–1/2 pul.
16
109F Manual (B/E/F)
16
17/2/05, 3:38 PM
Instrucciones de operación
Reemplazo de batería:
Abra la compuerta de la batería en el dorso
de la unidad y conecte una
batería de 9 voltios (no incluida)
en el gancho. Coloque la batería
dentro de caja y cierre la
compuerta en posición. Se
recomienda reemplazar la
batería de 9 voltios cuando el
indicador de la batería se
Compuerta de la batería
prenda.
ILUSTRACIÓN 4
Calibración
Calibre la unidad en la pared antes de
escanear para parales de madera o de
metal.
Nota: Mientras lo está calibrando, el
Intellisensor™ Pro no deberá ser puesto
directamente sobre el paral, materiales
densos tales como metal, áreas mojadas o
recién pintadas ya que esto evitará que la
unidad sea calibrada apropiadamente. Si
esto es hecho sobre madera o metal, la
unidad no dará ninguna indicación cuando
es retirada del área. Muévala a una
ubicación diferente y trate de nuevo.
Calibrando
Sostenga el IntelliSensor™ Pro plano contra
la superficie, haciendo contacto firme.
Oprima y sostenga el botón de “ON”
(Encendido). Todos los indicadores de la
pantalla LCD son mostrados mientras que
la unidad pasa a través de su ciclo de
calibración de 1 a 3 segundos. La palabra
17
109F Manual (B/E/F)
17
17/2/05, 3:38 PM
“CALIBRATING” (Calibrando) aparecerá en
la pantalla LCD (Ilustración 2) mientras que
la unidad se está calibrando a la superficie.
Después de terminada la calibración, la
unidad hará un biip y la palabra “READY”
(Listo) aparecerá en la pantalla LCD
(Ilustración 5). La luz LED iluminará la
modalidad de profundidad en el teclado (la
profundidad 1/2 pul. es el valor por omisión).
IMPORTANTE: La unidad no puede ser
movida antes de que termine de calibrarse
y la palabra “READY”
(Listo) aparezca en las
pantallas LCD y se
ilumine el LED.
READY
ILUSTRACIÓN 5
USO
Selección de la profundidad de
detección
1. Oprima y sostenga el botón “ON” una
vez (1 x) para seleccionar lectura de
detección de profundidad de 1/2 pul. El
LED de modalidad de 1/2 pul. se
iluminará (ilustración 3). La unidad
entonces se calibrará, seguido de un biip
y la palabra “READY” (Listo) aparecerá
en la pantalla LCD.
2. Oprima dos veces / Oprima y sostenga
el botón de ON dos veces (2x) para
seleccionar la lectura de detección de
profundidad de 1 pul. El LED de
modalidad de 1 pul. se iluminará
(ilustración 3). La unidad entonces se
calibrará, seguido de un biip y la palabra
18
109F Manual (B/E/F)
18
17/2/05, 3:38 PM
“READY” (Listo) aparecerá en la pantalla
LCD.
3. Oprima tres veces / Oprima el botón
“ON” tres veces (3x) para seleccionar
lectura de detección de profundidad de
1–1/2 pul. El LED de modalidad de 1–1/
2 pul. se iluminará (ilustración 3). La
unidad entonces se calibrará, seguido de
un biip y la palabra “READY” (Listo)
aparecerá en la pantalla LCD.
IMPORTANTE: La unidad se apagará
automáticamente si el botón ON es soltado
después de los pasos 1, 2, 3 mencionados
arriba.
Detectando parales de madera
1. Deslice la unidad sobre la superficie en
línea recta. Entre más cerca del paral
esté la unidad, más barras aparecerán
como en la ilustración 6. Cuando el borde
del paral es detectado, el indicador de
madera y la barra del borde aparecerán
tal como se muestra en la ilustración 7 y
la unidad emitirá un “biip” continuo.
2. Use la gráfica del indicador (ilustración
2 & 7) y la marca del indicador
(ilustración 1) para ubicar y definir el
borde del paral.
3. Continúe deslizando la unidad hasta
pasar el paral. Cuando el indicador se
apague y la unidad pare de sonar, el otro
borde ha sido detectado.
4. Revise nuevamente la ubicación del
paral regresando en la dirección
opuesta. Haga marcas adicionales.
19
109F Manual (B/E/F)
19
17/2/05, 3:38 PM
5. El punto intermedio entre las marcas
indica el centro del paral.
READY
READY
ILUSTRACIÓN 6
ILUSTRACIÓN 7
Detectando cables energizados
El lente rojo LED de cable energizado
(ilustración 1) se iluminará, advirtiendo la
proximidad de un cable energizado
(típicamente dentro de una distancia de 4 a
18 pulgadas). La pantalla LCD entonces
mostrará el icono de cable energizado
(ilustración 2) en la pantalla LCD definiendo
una detección completa. La máxima
profundidad de detección es de 2 pul.
Cargas de electricidad estática que se
pueden desarrollar sobre pirca (drywall) y
otras superficies, ampliarán el área de
detección de voltaje muchas pulgadas hacia
cada lado del cable eléctrico. Para ayudar a
localizar la posición del cable, escaneé
sujetando la unidad retirada 12,7 mm (_ pul.)
de la superficie de la pared o coloque la otra
mano sobre la superficie a
aproximadamente 30 cm (12 pul.) del sensor.
Advertencia: cables blindados o cables
energizados en conductos metálicos,
cajas, paredes metalizadas, paredes
gruesas o densas, no serán detectados.
Siempre desconecte la energía de CA
cuando esté trabajando cerca de
cables.
20
109F Manual (B/E/F)
20
17/2/05, 3:38 PM
El IntelliSensor™ Pro fue diseñado para
detectar 110 voltios CA (para la versión
Americana) y 230 voltios CA (para la versión
Europea) en cables eléctricos energizados.
También detectará la presencia de cables
energizados con más de 230 voltios.
Precauciones en la operación
Usted siempre deberá tener precaución al
clavar, cortar o perforar paredes, cielos
rasos y pisos que puedan contener cables o
tuberías cerca de la superficie. Cables
blindados, muertos o no energizados no
serán detectados como cables
energizados. Siempre recuerde que los
parales o vigas están normalmente
espaciados a 40 ó 61 cm (16 ó 24 pulgadas)
entre sí y son de 3,8 cm (1-1/2 pul.) de ancho.
Para evitar sorpresas, esté consciente de
que cualquier cosa que esté menos
espaciada o que tenga un ancho diferente
puede ser un paral, viga o pared contra
incendio adicionales.
Cuando esté trabajando cerca de
cables eléctricos CA, siempre
desconecte la energía.
Consejos de operación
AVISO IMPORTANTE
SEGURIDAD
DE
Asegure la detección apropiada de cables
energizados SIEMPRE agarre el
IntelliSensor™ Pro sólo por el área del
mango. Agárrelo entre los dedos y el pulgar
21
109F Manual (B/E/F)
21
17/2/05, 3:38 PM
manteniendo contacto con la palma de su
mano.
Construcción convencional
Las puertas y ventanas son comúnmente
construidas con parales y travesaños
adicionales para mayor estabilidad. El
IntelliSensor™ Pro detecta el borde de estos
parales dobles y travesaños sólidos, emite
y mantiene una señal sonora a medida que
cruza sobre ellos.
Diferencias de superficie
Papel de Pared – No habrá ninguna
diferencia en el funcionamiento del sensor
de parales sobre superficies cubiertas con
papel de pared o tela a menos que
contengan lámina o fibra de aluminio.
Yeso y Listón – A menos que el yeso y el
listón sean excepcionalmente gruesos o
tengan malla de metal dentro, la unidad no
tendrá ningún problema para trabajar
apropiadamente.
Cielos Rasos o Superficies con Textura –
Cuando esté tratando con una superficie
áspera, tal como un cielo raso atomizado,
use un pedazo de cartón al escanear la
superficie. Revise la técnica de calibración
descrita anteriormente CON EL CARTÓN
entre el sensor de parales y la superficie.
También, es particularmente importante en
este tipo de uso recordarse de mantener su
mano libre alejada de la unidad.
22
109F Manual (B/E/F)
22
17/2/05, 3:38 PM
Especificaciones
Utilizando el procedimiento de escaneo y
haciendo marcas a los dos lados, el IntelliSensor™
Pro encontrará el centro del paral con una
precisión de 3,17 mm (1/8 pul) sobre madera y de
6,36 mm (1/4 pul.) sobre metal.
Al medir un paral de madera o de metal, se
recomienda que el IntelliSensor™ Pro sea usado
a una humedad relativa del 30 al 50%.
Batería
: 9 voltios (no es incluida)
Resistencia
al impacto
: hasta 1,82 m (6 pies)
Temperatura : +32 °F a +120°F
de operación (0 °C a +49 °C)
Temperatura : -4 °F a +150 °F
de almacenaje (-20 °C a +66 °C)
Garantía
La Stanley Works garantiza el IntelliSensor™ Pro
contra defectos en material y mano de obra
durante un año a partir de la fecha de la compra.
Los productos deficientes serán reparados o
reemplazados a la discreción de Stanley si son
enviados a:
The Stanley Works
Customer Service
Repair Department
480 Myrtle Street
New Britain, CT 06053
La responsabilidad de Stanley bajo esta garantía
está limitada a la reparación o al reemplazo de la
unidad. Cualquier intento de reparar este producto
por persona diferente al personal autorizado por
23
109F Manual (B/E/F)
23
17/2/05, 3:38 PM
la fábrica anulará esta garantía. La calibración,
las baterías y el mantenimiento son la
responsabilidad del usuario. Donde sea permitido
por la ley, Stanley no es responsable por daños
incidentales o consecuentes. Los agentes de
Stanley no pueden cambiar esta garantía. Stanley
no es responsable por daños como resultado de
desgaste, abuso o alteración de este producto. El
usuario está supuesto a seguir TODAS las
instrucciones de operación.
Esta garantía podrá darle derechos adicionales
los cuales varían de acuerdo al estado, la provincia
o la nación.
WARNING: Protect Your Eyes Wear Safety Goggles
AVERTISSEMENT: Protégez vos yeux, portez des
lunettes de sécurité.
ADVERTENCIA: Protéjase los ojos, use gafas de
seguridad
One Year Warranty
Garantie de un an
Garantía de un año
©2004 Stanley Tools Product Group of
The Stanley Works, New Britain, CT 06053
T5363
24
109F Manual (B/E/F)
24
17/2/05, 3:38 PM
77-255
IntelliSensor™ Pro
Detector de parales de
profundidad múltiple
MANUAL DE
INSTRUCCIONES
CALIB
READ RATING
Y
38mm
25
109F Manual (B/E/F)
25
17/2/05, 3:38 PM
IntelliSensor™ Pro (77-255)
Le détecteur Stanley® IntelliSensor™ Pro utilise
des signaux électroniques pour trouver la position
des montants, solives ou câbles électriques sous
tension dans les murs de plâtre et autres
matériaux communs pour murs. Une fois le bord
du montant détecté, l’écran à cristaux liquides du
IntelliSensor™ Pro donne des indications visuelles
et audio qui vous permettent de localiser
facilement la position du bord du montant. Une
ligne au crayon à papier vous permet de
rapidement noter l’emplacement des bords du
montant.
Le détecteur IntelliSensor™ Pro permet à
l’utilisateur de trouver les montants de bois et
métalliques jusqu’à une profondeur de 3,81 cm
(1-1/2 po).
Le détecteur IntelliSensor™ Pro présente
l’étalonnage automatique, l’arrêt automatique et
une construction très robuste de plastique ABS.
La profondeur de détection peut être réglée au
moyen d’un bouton sur le côté à 1,27, 2,54 et 3,81
cm (1/2, 1 et 1-1/2 po).
Important : Lisez toutes les instructions avant
d’utiliser le détecteur IntelliSensor™ Pro et
N’ENLEVEZ AUCUNE étiquette de l’outil.
26
109F Manual (B/E/F)
26
17/2/05, 3:38 PM
ILLUSTRATION 1
Marque de repère
Voyant de câble
sous tension
CALIBRATING
READY
Écran à cristaux
liquides
38mm
Indicateur du
mode de
profondeur de
détection
MARCHE
Bouton de MARCHE /
Sélection du mode de
profondeur de détection
27
109F Manual (B/E/F)
27
17/2/05, 3:38 PM
ILLUSTRATION 2
L’unité
s’étalonne.
CALIBRATING
READY
Étalonnage fini
Prêt à détecter
Câble sous
tension
Indicateur de
niveau bas de
pile
ILLUSTRATION 3
A
Graphique
indicateur
B
C
38mm
A = Profondeur de détection de montant de bois ou métallique
jusqu’à 12,7 mm (1/2 po)
B = Profondeur de détection de montant de bois ou métallique
jusqu’à 25,4 mm (1 po)
C = Profondeur de détection de montant de bois ou métallique
jusqu’à 38,1 mm (1-1/2 po)
28
109F Manual (B/E/F)
28
17/2/05, 3:38 PM
Instructions de fonctionnement
Remplacement de la pile
Ouvrez la porte du compartiment de pile au
dos de l’unité et connectez une pile de 9 V
(pas comprise) au connecteur.
Placez la pile dans le boîtier et
enclenchez la porte du
compartiment de pile pour la
fermer. Il vous est recommandé
de remplacer la pile par une
neuve de 9 V quand l’indicateur
Porte du
de niveau bas de pile est allumé.
compartiment
de pile
ILLUSTRATION 4
Étalonnage
Étalonnez l’unité sur un mur avant d’essayer
de détecter des montant de bois ou
métalliques.
Remarque : Pendant l’étalonnage, le
détecteur InteIliSensor™ Pro ne doit pas être
placé directement sur un montant, une
matière dense comme du métal, des
surfaces mouillées ou récemment peintes
car cela empêchera l’unité d’être
correctement étalonnée. Si cela est réalisé
sur un montant de bois ou métallique, l’unité
ne donnera aucune indication quand elle
sera éloignée de la zone. Déplacez-la et
essayez de nouveau.
Étalonnage
Tenez le détecteur InteIliSensor™ Pro à plat
contre la surface, en réalisant un contact
ferme. Appuyez sur et tenez enfoncé le
bouton de marche “ON”. Tous les
indicateurs de l’écran à cristaux liquides
29
109F Manual (B/E/F)
29
17/2/05, 3:38 PM
sont allumés pendant que l’unité exécute
son cycle d’étalonnage de 1 à 3 secondes.
Le mot “CALIBRATING” (étalonnage)
apparaîtra sur l’écran (illustration 2) pendant
que l’unité s’étalonne par rapport à la
surface. Quand l’étalonnage sera terminé,
l’unité émettra un bip et le mot “READY”
(prêt) sera affiché sur l’écran (illustration 5).
Le voyant illuminera alors le mode de
profondeur du clavier (12,7 mm (1/2 po) de
profondeur par défaut).
IMPORTANT L’unité ne peut pas être
bougée avant d’avoir
finie son étalonnage,
affichée le mot
“READY” sur son écran
et allumée son voyant.
READY
ILLUSTRATION 5
EMPLOI
Choisir la profondeur de détection
1. Appuyez une fois sur et tenez enfoncé
le bouton de marche “ON” pour choisir
la profondeur de détection de 12,7 mm
(1/2 po). Le voyant du mode de 12,7 mm
(1/2 po) sera allumé (illustration 3).
L’unité alors s’étalonnera, puis émettra
un bip et finalement affichera “READY”
(prête) sur l’écran.
2. “Cliquetez” / appuyez deux fois sur et
tenez enfoncé le bouton de marche “ON”
pour choisir la profondeur de détection
de 25,4 mm (1 po). Le voyant du mode
de 24,5 mm (1 po) sera allumé
(illustration 3). L’unité alors s’étalonnera,
30
109F Manual (B/E/F)
30
17/2/05, 3:39 PM
puis émettra un bip et finalement
affichera “READY” (prête) sur l’écran.
3. “Cliquetez” / appuyez trois fois sur et
tenez enfoncé le bouton de marche “ON”
pour choisir la profondeur de détection
de 38,1 mm (1-1/2 po). Le voyant du
mode de 38,1 mm (1-1/2 po) sera allumé
(illustration 3). L’unité alors s’étalonnera,
puis émettra un bip et finalement
affichera “READY” (prête) sur l’écran.
IMPORTANT: L’unité s’éteindra
automatiquement si le bouton de marche
“ON” est relâché à la suite des étapes 1, 2,
et 3 ci-dessus.
Détection des montants de bois
1. Glissez l’unité sur la surface en suivant
une ligne droite. Le plus près du montant
se trouvera l’unité le plus de barres
seront allumées comme montré dans
l’illustration 6. Quand le bord du montant
sera détecté, l’indicateur de bois et la
barre de bord seront allumés comme
montrés dans l’illustration 7 et l’unité
émettra un bip continu.
2. Servez-vous du graphique indicateur
(illustrations 2 et 7) et de la marque de
repère (illustration 1) pour trouver et
définir le bord du montant.
3. Continuez de glisser le détecteur au-delà
du montant. Quand l’indicateur
s’éteindra et l’unité arrêtera d’émettre
un bip, l’autre bord aura été détecté.
4. Vérifiez de nouveau l’emplacement du
montant en repassant dans l’autre sens.
31
109F Manual (B/E/F)
31
17/2/05, 3:39 PM
Faites d’autres marques.
5. Le point milieu des marques indiquera
le centre du montant.
READY
READY
ILLUSTRATION 6
ILLUSTRATION 7
Détection de câble sous tension
Le voyant rouge de câble sous tension
(illustration 1) s’illuminera, avertissant de
la proximité (habituellement de 10 à 46 cm
(4 à 18 po) d’un câble sous tension. L’écran
affichera alors un icône de câble sous
tension (illustration 2) sur l’écran indiquant
la détection complète. La profondeur
maximale de détection est de 50,8 mm (2
po).
Des charges d’électricité statique qui
peuvent se développer sur les murs de plâtre
et autres surfaces élargiront la zone de
détection de tension de plusieurs
centimètres de chaque côté du fil sous
tension. Pour aider à situer la position du
fil, balayez en tenant l’unité à 12,7 mm (1/2
po) de la surface du mur ou placez l’autre
main sur la surface à environ 30,48 cm (12
po) du détecteur.
Avertissement : Les fils blindés,
contenus dans des conduits
métalliques, à enveloppe métallique ou
se trouvant dans les murs métallisés,
épais ou denses ne seront pas
détectés. Coupez toujours le courant
32
109F Manual (B/E/F)
32
17/2/05, 3:39 PM
quand vous travaillez près de câbles.
Le détecteur IntelliSensor™ Pro est conçu
pour détecter les courants de 110 V (pour
version américaine) et de 230 V (pour version
européenne) dans les câbles électriques
sous tension. Il détectera aussi la présence
de câbles sous tension transportant plus de
230 V.
Précautions à l’emploi
Vous devriez toujours faire attention quand
vous clouez dans, coupez ou percez les murs,
plafonds et sols qui pourraient contenir du
câblage ou des conduits près de la surface.
Les câbles blindés, non utilisés ou sans
tension ne seront pas détectés en tant
que câbles sous tension. Souvenez-vous
toujours que les montants ou solives sont
normalement séparés de 40,64 ou 60,96 cm
(16 ou 24 po) et sont d’une largeur de 3,81
cm (1-1/2 po). Pour éviter les surprises,
sachez que tout ce qui se trouve plus
rapproché ou d’une largeur différente peut
être un montant supplémentaire, une autre
solive ou un pare-feu.
Quand vous travaillez près de câbles
électriques sous tension, coupez toujours le
courant.
Conseils d’emploi
AVIS DE SÉCURITÉ IMPORTANT
Pour assurez le bonne détection de câbles
sous tension, tenez TOUJOURS le détecteur
IntelliSensor™ Pro par la zone de poignée
33
109F Manual (B/E/F)
33
17/2/05, 3:39 PM
seulement. Saisissez-le entre les doigts et
le pouce tout en maintenant le contact de
votre paume.
Construction conventionnelles
Les portes et fenêtres sont communément
construites au moyen des montant et
boutisses additionnels pour en accroître la
stabilité. Le détecteur IntelliSensor™ Pro
détecte le bord de ces montants doubles et
boutisses massives, émet et maintient un
signal audio à mesure qu’il passe sur eux.
Différences entre les surfaces
Papier peint – Il n’y aura aucune différence
dans les fonctions du détecteur de montant
sur les surfaces couvertes de papier peint
ou de tissu à moins qu’ils ne contiennent
du papier ou des fibres métalliques.
Plâtre et latte – À moins que le plâtre ou
les lattes ne soient exceptionnellement
épais ou contiennent de la maille
métallique, il n’y aura aucun problème avec
une unité fonctionnant correctement.
Plafond et surfaces à texture – Quand vous
avez à faire à des surfaces irrégulières
comme un plafond crépis, utilisez un
morceau de carton quand vous balayez la
surface. Exécutez la technique d’étalonnage
décrite auparavant AVEC le morceau de
carton entre le détecteur et la surface.
Aussi, il est particulièrement important dans
ce cas de vous souvenir de garder votre main
libre éloignée de l’unité.
34
109F Manual (B/E/F)
34
17/2/05, 3:39 PM
Fiche technique
En utilisant la procédure de balayage et marquage
des deux côtés, le détecteur IntelliSensor™ Pro
trouvera le centre du montant typiquement avec
une précision de 3,17 mm (1/8 po) pour le bois et
de 6,35 mm (1/4 po) pour le métal.
Quand vous mesurez un montant de bois ou
métallique, il vous est recommandé d’utiliser le
détecteur IntelliSensor™ Pro à un taux d’humidité
entre 30 et 50°.
Pile
: 9 V (pas comprise)
Résistance aux
chutes
: jusqu’à 1,83 m (6 pi)
Température de : 0 à +49 °C
fonctionnement (+32 à +120 °F)
Température
: -20 à +66 °C
d’entreposage (-4 à +150 °F)
Garantie
Stanley Works garantit le détecteur
IntelliSensor™ Pro contre les défauts de
matériaux et de main d’œuvre pendant un an à
partir de la date d’achat. Les produits défectueux
seront réparés ou remplacés selon le choix de
Stanley s’ils sont envoyés à :
The Stanley Works
Customer Service
Repair Department
480 Myrtle Street
New Britain, CT 06053, USA
La responsabilité de Stanley sous cette garantie
est limitée à la réparation ou au remplacement
35
109F Manual (B/E/F)
35
17/2/05, 3:39 PM
de l’unité. Toute tentative de réparation du produit
par une personne autre que le personnel d’usine
agréé annulera cette garantie. L’étalonnage, les
piles et l’entretien sont à la charge de l’utilisateur.
Où permis par la loi, Stanley ne pourra pas être
tenu responsable des dégâts accidentels ou
conséquents. Les agents de Stanley ne peuvent
pas changer cette garantie. Stanley ne pourra pas
être tenu responsable des dégâts dus à l’usure,
l’abus ou aux modifications de ce produit.
L’utilisateur est supposé suivre TOUTES les
instructions de fonctionnement.
Cette garantie peut vous donner d’autres droits
variant selon l’état, la province ou la nation.
WARNING: Protect Your Eyes Wear Safety Goggles
AVERTISSEMENT: Protégez vos yeux, portez des
lunettes de sécurité.
ADVERTENCIA: Protéjase los ojos, use gafas de
seguridad
One Year Warranty
Garantie de un an
Garantía de un año
©2004 Stanley Tools Product Group of
The Stanley Works, New Britain, CT 06053
T5363
85-109-601
36
109F Manual (B/E/F)
36
17/2/05, 3:39 PM