1
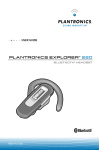
User Guide
Stylish Bluetooth Headset with Multipoint Technology
®
650E
TABLE OF CONTENTS
Package Contents & Features
3
Charging
4
Pairing
5
Powering
7
Adjusting Fit
8
Using Your Headset
9
Multipoint
11
Indicator Lights
12
Optional Accessories
12
Troubleshooting
13
Product Specifications
13
Technical Assistance
14
Warranty
14
Regulatory Notices
15
WELCOME
Thank you for purchasing a Plantronics headset.
Let us provide you with the best possible service and technical support. After
reviewing this user guide, if you need additional assistance or have any product
questions, please contact:
• Plantronics Technical Assistance Center at 866-363-BLUE (2583)
• www.plantronics.com/support
Please refer to the separate Safety Instructions booklet for important product
safety information prior to installation or use of product.
REGISTER YOUR PRODUCT ONLINE
Visit www.plantronics.com/productregistration to register your product online
so we can provide you with the best possible service and technical support.
PACKAGE CONTENTS & FEATURES
PLANTRONICS DISCOVERY 650E
TM
Indicator light
Call control button (on/off)
Volume/mute button
Microphone
Ear loop
Soft gel ear tips
small
medium
large
Headset
charging
pocket
PLANTRONICS DISCOVERY 650E
ACCESSORIES
AAA
battery
AC charger
AAA
battery
charger
3
CHARGING
PLANTRONICS Discovery 650E
Before using, you must first charge your headset.
1 hour = minimum charge
3 hours = full charge
Option A: Using the included AC charger
The indicator light glows red continuously while
charging and turns off when fully charged.
1. Plug the AC charger into the base of the charging
pocket and connect it to your power source.
2. Insert the headset into the charging pocket.
Option B: Using a AAA battery
One AAA battery recharges the headset to full
capacity.
1. Twist the bottom of the AAA battery charger
counterclockwise and release the battery holder.
2. Insert the battery into the AAA battery holder.
3. Slide the battery holder back into the battery
charger and turn clockwise.
4. Snap battery charger onto charging pocket.
Ensure that the indentation on the battery
charger connector aligns with the shirt clip on
the charging pocket.
5. Insert the headset into the charging pocket.
A
B
CAUTION
Only replace with a non-rechargeable AAA battery.
DISCONNECTING COMPONENTS
To separate components, grasp both the battery charger and the charging pocket
with the shirt clip facing you. Bend the components back and they will snap apart.
NOTE Do not twist the components apart.
PAIRING
This headset now comes with QuickPair technology so pairing with your Bluetooth
phone is even easier. Follow the instructions below to pair your phone with your
headset for the first time.
TM
QUICKPAIR FEATURE INSTRUCTIONS
SETTINGS
Time and Date
Phone Settings
Bluetooth
Sound Settings
Network Services
BLUETOOTH
BLUETOOTH
Discover/
Search
6XXPlantronics
Security
Reset Settings
PASSKEY
0000
Step One:
Prepare Phone—
Turn on Bluetooth
Step Two:
Prepare Headset—
Pairing Mode
Step Three:
Pairing—
Headset Passkey
Add Headset to Phone
For most phones, go
to Settings/Tools menu
and select Bluetooth or
Connectivity and select
“On.” (Or see the user
guide for your phone.)
Begin with headset turned
off. Turn headset on (hold
call control button for at
least four seconds) and it
will automatically go into
pairing mode, flashing red
and blue.
For most phones, go to
Settings/Tools > Bluetooth >
Search or Add a Device, then
Select “6XXPlantronics.”
For passkey enter 0000.
Headset will flash blue
when paired successfully.
It is now powered on and
ready to use.
NOTE: Normally you only need to pair the headset and handset once. If the headset
has been previously paired with another device, follow pairing instructions on the
next page.
PAIRING
1.
2.
3.
If headset has been previously paired with another device, please follow these
instructions for pairing a second time. Be sure the headset is fully charged. For
set up and pairing instructions with other Bluetooth devices, please consult your
Bluetooth device user guide or visit www.plantronics.com/easytopair–an online,
interactive pairing guide for phones and headsets.
Begin with headset turned off.
1. Press and hold down the call
control button for 10 seconds until
the headset status indicator begins
to flash red then blue.
The headset is now in pairing
mode for the next 120 seconds.
2. While the headset is flashing,
use the phone menu to search
for Bluetooth devices and select
“6XXPlantronics.”
3. When prompted for a passkey,
enter 0000. Headset will flash
blue when paired successfully.
To Disable Online and Standby
Indicator Lights
When purchased the headset will have the online and standby indicator lights enabled.
To disable these indicators, press the volume up button while turning the headset
ON. To re-enable both indicator lights, turn the headset off; then press the volume up
button again while turning the headset ON.
NOTE: This process only disables online and standby indicator lights when headset is
connected to mobile phone. All other indicator lights, such as low battery, will continue
to function.
POWERING
1. Turn on the headset by pressing
and holding the call control button
until the indicator light glows blue.
If you are wearing the headset,
you will hear a beep when the
power turns on. The indicator light
will flash blue every 5 seconds
when the power is on.
2. Turn off the headset by pressing the
call control button for 6-8 seconds
until the indicator light glows red
or until you hear the beep. The
indicator light remains unlit when
the power is off.
CHARGE LEVEL INDICATION
When the headset is turned on, the
indicator light will briefly show the
headset charge level.
3 red flashes = greater than 2/3 battery charge
2 red flashes = 1/3 to 2/3 battery charge
1 red flash = less than 1/3 battery charge
ADJUSTING FIT
Right ear
R
L
N
Left ear
1.
2.
The Plantronics Discovery 650E
headset comes with three soft gel ear
tips and an optional ear loop.
1. The medium-sized ear tip is preinstalled and aligned for wearing
on the right ear (R).
2. For left ear wearing, twist the ear
tip counterclockwise.
3. Place the headset into your ear and
check to see that it fits comfortably.
If the headset is either too tight
or too loose, remove the mediumsized ear tip from the headset by
turning the ear tip to the centre
or neutral position.
3.
4.
4. In the neutral position, the ear tip
can easily be removed by pulling
the ear tip directly away from the
headset.
Next, select the ear tip size that
fits most comfortably in your ear.
Hold the ear tip with the elongated
edge pointing down toward the
neutral position and then push
the ear tip onto the headset.
NOTE Choose an ear tip that is large
enough such that it will not enter the
ear canal. Do not insert the ear tip
into the ear canal as it may become
lodged in the ear canal. The ear tip
should rest against the entrance to
the ear canal.
USING THE OPTIONAL EAR LOOP
The ear loop may be attached to the
headset to improve stability.
1. Remove the ear tip from the
headset by turning the ear tip to
the center or neutral position and
pulling the ear tip away from the
headset.
2. Attach the ear loop between the ear
tip and the headset.
3. Replace the ear tip.
USING YOUR HEADSET
ANSWERING/
ENDING/MAKING
CALLS
ADJUSTING
VOLUME
To answer or end a call, briefly press
the call control button.
To make a call, enter number on
your phone, press send, and the call
is automatically transferred to the
headset; no need to press the call
control button.
NOTE When answering a call, wait
until you hear a ring from the headset
itself (not the ring from your phone),
before pressing the call control button.
To increase listening volume, press
the upper end (+) of the volume/mute
button. To decrease listening volume,
press the lower end (-).
WARNING: Do not use headphones/
headsets at high volumes for an
extended period of time. Doing so can
cause hearing loss. Always listen at
moderate levels. See www.plantronics.
com for more information on headsets
and hearing.
AUTO ANSWER
Removing the headset from the
pocket will automatically answer
the call. Returning the headset to the
charging pocket will end the call.
MUTE A CALL
To turn the mute on while on a call,
press both sides of the volume/mute
button simultaneously until you hear
a beep.
To turn the mute off, press both
buttons again.
USING YOUR HEADSET
ADDITIONAL FEATURES
Redialing last number
To activate last number redial, double
press the call control button. You will
hear a high tone after each press.
Using voice dialing
With the headset on, press and hold
the call control button for 2 seconds
to activate voice dialing.
NOTE To use voice activated dialing,
the voice dialing feature must
be enabled on your phone. See
your Bluetooth phone manual for
instructions.
Switching a call from phone to
headset
To switch an active call from your
phone to your headset, press the call
control button for 3 seconds.
Switching a call from headset to phone
To switch an active call from your
headset to your phone, press and hold
the call control button until you hear
a tone.
Rejecting a call
When receiving an incoming call,
press and hold the call control button
for 2 seconds to reject the call.
MOVING OUT OF RANGE
As the headset moves more than 33 feet (10 meters) away from the Bluetooth device
or encounters interference:
• Audio quality will degrade
• A beep will be heard in the headset when the connection drops between headset
and Bluetooth device
• When out of range, only the power off function will operate
If any of the above occur, move closer to your Bluetooth device to improve the
connection between the two devices.
10
MULTIPOINT
USING MULTIPOINT (MORE THAN ONE
BLUETOOTH DEVICE)
Plantronics Discovery 650 supports
multipoint technology, which permits
simultaneous connections with two
different Bluetooth audio devices.
TO PAIR ANOTHER BLUETOOTH DEVICE
Repeat the previous pairing steps with
the new device.
INITIATE A CALL The headset will
assume you wish to initiate a call
on the device recently used.
To use the second device initiate the call
using the controls on the second device.
The second device forms the link with
the headset.
ANSWER A CALL An incoming call
on either device will ring through the
headset. In most cases, the ring tone
from the device will transfer through
to the headset, allowing the user to
determine which device is ringing.
In some cases, however, the headset
applies a ring tone to the incoming call.
In either case, the user will be able
to determine which device is ringing
through the distinct ring tone.
To answer the call, press the call
control button.
TO ANSWER A CALL ON ONE DEVICE
WHILE TALKING ON THE OTHER
There is no function for placing one
call on hold while answering another.
Therefore, to answer the second call,
the first call must be terminated.
Terminate the first call by pressing
the call control button once.
Wait for the beep and then answer
the second call by pressing the call
control button again. If you choose
not to answer the second call, and
you have voice mail on the second
device, the call will go to voice mail.
11
INDICATOR LIGHTS
Headset Status
Powering on
Headset Indicator Light
Blue light appears and flashes every
6 seconds.
Power on
Blue light flashes every 5 seconds.
Powering off
Red light appears and goes off.
Power off —
Charging battery Red light glows continuously.
Battery fully charged
Red light goes off.
Low battery
Red light flashes.
Pairing mode
Red then blue light flashes for 120 seconds.
Missed call Purple light flashes every 5 seconds.
Press any button to cancel.
Ringing
Purple light flashes rapidly.
Headset in pocket
Online indicator (OLI)
Headset vibrates to indicate incoming call.
Blue light flashes every 10 seconds.
OPTIONAL ACCESSORIES
AVAILABLE FOR PURCHASE
73646-01
Vehicle power adapter
FOR USE WITH
MOTOROLA
73649-01
AAA battery charger
73647-01
Soft gel ear tips
and ear loop
69519-05
USB headset charger
FOR USE
WITH PALM
FOR USE
WITH NOKIA
FOR USE WITH
SONY ERICSSON
73650-01
4-pack charge adapter kit
73651-01
Mini USB charger
To order, please contact your Plantronics supplier or go to www.plantronics.com.
12
TROUBLESHOOTING
PROBLEM
My headset does not work
with my phone.
SOLUTION
Headset was not in pairing mode when mobile
phone menu selections were made. See page 5 and
6 “Pairing”.
Incorrect menu selections were made on your mobile
phone. See page 5 and 6 “Pairing”.
I did not enter my
passkey.
Your phone did not locate the headset.
Repeat the pairing process on page 5 and 6.
Incorrect menu selections were made on your mobile
phone. Repeat the pairing process on page 5 and 6.
Callers cannot hear me.
Mute is turned on. Press both sides of the volume/
mute button simultaneously.
I cannot hear caller/
dialing tone.
The headset is not turned on. Press the call control
button for approximately 10 seconds until you hear
a beep or see the indicator light glow blue to turn
headset on.
Your headset is out of range. Move the headset
closer to the phone or Bluetooth device.
Your headset battery is drained. Charge your battery
using the AC charger or AAA battery. See page 4
“Charging”.
The listening volume is too low. Press the volume/
mute button to increase the sound heard in the
headset.
PRODUCT SPECIFICATIONS
Talk time*
Up to 5 hours
Standby time*
Approximately 70 hours /Up to 170 Hours with AAA Charger
Charge time
3 hours
Range
Bluetooth standard 33 feet (10 meters)
Power requirements
5V DC – 180 mA
Battery type
Lithium Ion
Version
Bluetooth 1.2
Supports Bluetooth Hands-Free and Headset Profiles.
*Performance may vary by device.
13
TECHNICAL ASSISTANCE
Visit our Web site at www.plantronics.com/support for technical support including
frequently asked questions, compatibility and accessibility information. The
Plantronics Technical Assistance Center (TAC) is also ready to assist you on
866-363-BLUE (2583).
WARRANTY
LIMITED WARRANTY
• This warranty covers defects in materials and workmanship of products
manufactured, sold or certified by Plantronics which were purchased and used
in the United States.
• The warranty lasts for one year from the date of purchase of the products.
• This warranty extends to you only if you are the end user with the original
purchase receipt.
• We will at our option, repair or replace the products that do not conform to
the warranty. We may use functionally equivalent reconditioned/refurbished/
remanufactured/pre-owned or new products or parts.
• To obtain service in the U.S., contact Plantronics at (866) 363-BLUE (2583).
• THIS IS PLANTRONICS’ COMPLETE WARRANTY FOR THE PRODUCTS.
• This warranty gives you specific legal rights, and you may also have other rights
that vary from state to state. Please contact your dealer or our service center
for the full details of our limited warranty, including items not covered by this
limited warranty.
14
REGULATORY NOTICES
EXPOSURE TO RF RADIATION
The internal wireless radio operates within the guidelines found in radio frequency
safety standards and recommendations, which reflect the consensus of the
scientific community. Independent studies have shown that the internal wireless
radio is safe for use by consumers. Visit www.plantronics.com for more information.
NOTE: Modifications not expressly approved by Plantronics, Inc. could void the user's
authority to operate the equipment.
FCC REQUIREMENTS PART 15
This device complies with Part 15 of the FCC Rules. Operation is subject to the
following two conditions:
1. This device may not cause harmful interference, and
2. This device must accept any interference received, including interference that
may cause undesired operation.
This equipment has been tested and found to comply with the limits for a Class
B digital device, pursuant to Part 15 of the FCC Rules. These limits are designed
to provide reasonable protection against harmful interference in a residential
installation. This equipment generates, uses and can radiate radio frequency
energy and, if not installed and used in accordance with the instructions, may cause
harmful interference to radio communications.
However, there is no guarantee that interference will not occur in a particular
installation. If this equipment does cause harmful interference to radio or television
reception which can be determined by turning the radio or television off and on, the
user is encouraged to try to correct interference by one or more of the following
measures:
1. Reorient or relocate the receiving antenna.
2. Increase the separation between the equipment and receiver.
3. Connect the equipment into an outlet on another circuit.
4. Consult the dealer or an experienced radio/TV technician for help.
EXPOSURE TO RADIO FREQUENCY
RADIATION
This device and its antenna must not be co-located or operated in conjunction with
any other antenna or transmitter. To comply with FCC RF exposure requirements,
only use supplied antenna. Any unauthorised modification to the antenna or device
could void the user’s authority to operate this device.
15
Plantronics Inc
345 Encinal Street
Santa Cruz, CA 95060 USA
Tel: (800) 544-4660
www.plantronics.com
© 2006 Plantronics, Inc. All rights reserved. Plantronics, the logo design, Plantronics
Discovery, QuickPair, and Sound Innovation are trademarks or registered trademarks of
Plantronics, Inc. The Bluetooth® word mark and logos are owned by the Bluetooth SIG, Inc.
and any use of such marks by Plantronics, Inc. is under license. All other trademarks are the
property of their respective owners.
Patents U.S. 5,210,791
Patents Pending.
72448-08 (12-06)
16
Guía del usuario
Auricular Bluetooth –con tecnologia multipunto
®
650E
17
CONTENIDO
Contenido del paquete y funciones
19
Carga 20
Emparejamiento 21
Encendido 23
Ajuste 24
Uso del auricular 25
Multipunto
27
Luces indicadoras 28
Accesorios optativos 28
Solución de problemas 29
Especificaciones del producto 29
Asistencia técnica 30
Garantía 30
Avisos sobre normativa 31
BIENVENIDO
Gracias por comprar un auricular Plantronics.
Permítanos proporcionarle el mejor servicio y asistencia técnica posibles. Después
de leer este manual, si necesita ayuda adicional o tiene cualquier pregunta acerca
del producto, póngase en contacto con:
• Centro de asistencia técnica de Plantronics, llamando al 866-363-BLUE (2583)
• www.plantronics.com/support
Antes de empezar, lea el folleto de información sobre seguridad que se
proporciona con el producto.
REGISTRE SU PRODUCTO POR
INTERNET
Visite www.plantronics.com/productregistration y registre su producto por Internet
para que podamos proporcionarle el mejor servicio y asistencia técnica posibles.
18
CONTENIDO DEL PAQUETE Y
FUNCIONES
DISCOVERY 650E DE PLANTRONICS
TM
Luz indicadora
Botón de control de llamada
(encendido/apagado)
Botón de volumen/silencio
Micrófono
Gancho de sujeción
Auriculares de gel suaves
pequeños
medianos
grandes
Paquete de
carga de
auriculares
ACCESORIOS DEL PLANTRONICS
DISCOVERY 650E
Batería
AAA
Cargador de CA
Cargador
de baterías
AAA
19
CARGA
Discovery 650E de PLANTRONICS
Antes de utilizar el auricular, es necesario cargarlo.
1 hora = carga mínima; 3 horas = carga completa
Opción A: con el cargador de CA incluido
La luz indicadora roja brilla continuamente durante la
carga y se apaga al terminar la carga.
1. Conecte el cargador de CA a la base del estuche
de carga y a la fuente de alimentación.
2. Coloque el auricular en el estuche de carga.
Opción B: con una batería AAA
Una batería AAA sirve para recargar el auricular a su
capacidad completa.
1. Gire la parte inferior del cargador de baterías AAA
hacia la izquierda y libere el soporte de la batería.
2. Inserte la batería en el soporte para baterías AAA.
3. Vuelva a colocar el soporte en el cargador de
baterías y gírelo hacia la derecha.
4. Encaje el cargador de baterías en el estuche
cargador. Asegúrese de alinear la muesca del
conector del cargador de baterías con la pinza del
estuche de carga.
5. Coloque el auricular en el estuche de carga.
A
B
PRECAUCIÓN
Use siempre baterías AAA no recargables de repuesto.
DESCONEXIÓN DE LOS COMPONENTES
TPara separar los componentes, sujete tanto el cargador de baterías como el
estuche de carga con el clip dirigido hacia usted. Doble los componentes hacia
atrás para separarlos.
NOTA no gire los componentes para separarlos.
20
EMPAREJAMIENTO
El auricular incluye ahora la tecnología QuickPair , para que el emparejamiento con
su teléfono Bluetooth sea aún más fácil. Siga las instrucciones siguientes la primera
vez que desee emparejar su teléfono con los auriculares.
TM
INSTRUCCIONES PARA USAR LA
FUNCIÓN QUICKPAIR
SETTINGS
Time and Date
Phone Settings
Bluetooth
Sound Settings
Network Services
BLUETOOTH
BLUETOOTH
Discover/
Search
6XXPlantronics
Security
Reset Settings
PASSKEY
0000
Paso uno:
Prepare el teléfono:
active el Bluetooth
Paso dos:
Prepare el auricular:
modo de emparejamiento
Paso tres:
Emparejamiento: agregue
Headset Passkey
el auricular al teléfono
En la mayoría de los
celulares, vaya al menú
Ajustes/Herramientas,
seleccione Bluetooth
o Conectividad y, a
continuación“Activado”
(o bien, consulte el
manual de su teléfono).
Comience con el audífono
apagado. Encienda el
auricular (mantenga
presionado el botón de
control de llamadas
durante al menos
cuatro segundos);
el auricular pasará
automáticamente al
modo de emparejamiento
y empezará a parpadear
en rojo y en azul.
En la mayoría de los
teléfonos, vaya a Ajustes/
Herramientas > Bluetooth >
Buscar o Agregar dispositivo
y, a continuación, seleccione
“6XXPlantronics” . Como
clave, escriba 0000. El
audífono parpadeará
en azul cuando se haya
conectado correctamente.
Ahora está todo listo
para usarse.
NOTA: normalmente sólo es necesario emparejar el auricular y el teléfono una vez.
Si había emparejado antes el teléfono con otro dispositivo, siga las instrucciones
de emparejamiento normales que se describen a continuación. Para ver una guía
interactiva de emparejamiento en línea, visite www.plantronics.com/EasytoPair.
21
EMPAREJAMIENTO
1.
2.
3.
Si había emparejado antes el teléfono con otro dispositivo, siga estas instrucciones
para emparejarlo de nuevo. Asegúrese de que el auricular esté completamente
cargado. Si necesita instrucciones para configurar y emparejar el auricular con
otros dispositivos Bluetooth, además de los teléfonos celulares, consulte el manual
del usuario del dispositivo Bluetooth.
Comience con el audífono apagado.
1. Mantenga oprimido el botón de
control de llamadas durante 10
segundos, hasta que el indicador
de estado del auricular empiece
a parpadear primero en rojo y
luego en azul. En ese momento
y durante 120 segundos, el
auricular se encuentra en modo
de emparejamiento.
2. Mientras el auricular parpadea,
use el menú del teléfono para
buscar dispositivos Bluetooth y
seleccione “6XXPlantronics”.
3. Cuando el sistema le pida la
contraseña, escriba 0000. El
audífono parpadeará en azul
cuando se haya conectado
correctamente.
PARA DESACTIVAR LAS LUCES
INDICADORAS DE USO Y EN ESPERA
El auricular viene de fábrica con las luces indicadoras de uso y en espera activadas.
Si desea desactivarlas, presione el botón de subir el volumen mientras enciende
el auricular. Para volver a activar las dos luces indicadoras, apague el auricular;
después, presione de nuevo el botón de subir el volumen mientras vuelve a encender
el auricular.
NOTA: este proceso sólo desactiva las luces indicadoras de uso y en espera si el
auricular está conectado a un teléfono celular. Todas las demás luces indicadoras,
como la de batería baja, seguirán funcionando.
22
ENCENDIDO
1. Para encender el auricular,
mantenga oprimido el botón de
control de llamadas hasta que la
luz indicadora cambie a azul. Si
lleva puesto el auricular, oirá un
sonido cuando se encienda. Una
vez encendido, la luz indicadora
parpadeará en azul cada
5 segundos.
2. Para apagar el auricular, oprima
el botón de control de llamadas
durante 6-8 segundos hasta que
se encienda la luz indicadora roja
o hasta que escuche el pitido.
La luz indicadora permanecerá
apagada mientras el dispositivo
esté apagado.
INDICACIÓN DEL NIVEL DE CARGA
Al encender el auricular, la luz
indicadora muestra brevemente el
nivel de carga del auricular.
3 flashes rojos = más de 2/3 de carga restante
2 flashes rojos = de 1/3 a 2/3 de carga restante
1 flash rojo = menos de 1/3 de carga restante
23
AJUSTE
Oreja derecha
R
L
N
Oreja izquierda
1.
2.
El auricular Discovery 650E de
Plantronics incluye tres auriculares
de gel blandos y un gancho de
sujeción optativo.
1. El auricular de tamaño mediano
viene preinstalado y alineado para
llevarse en la oreja derecha (R).
2. Si desea llevarlo en la oreja
izquierda, gire el auricular hacia
la izquierda.
3. Colóquese el auricular y
compruebe si se siente cómodo.
Si lo siente muy apretado o muy
3.
4.
flojo, quite el auricular de tamaño
mediano, girándolo a la posición
central o neutral.
4. En esa posición, puede quitar
fácilmente los auriculares tirando
de ellos.
A continuación, seleccione el tamaño
que le resulte más cómodo para la
oreja. Sostenga el auricular con el
borde alargado apuntando
hacia abajo, hacia la posición
neutra, y presione para montarlo
en la diadema.
USO DEL GANCHO DE SUJECIÓN
OPTATIVO
Se puede acoplar un gancho de
sujeción al auricular para mejorar la
estabilidad.
1. Quite el auricular de la diadema,
girándolo a la posición central
o neutra y tirando de él para
desmontarlo.
2. Acople el gancho entre el
auricular y la diadema.
3. Vuelva a colocar el extremo
de plástico.
24
USO DEL AURICULAR
CONTESTAR,
COLGAR O
MARCAR
Para contestar o terminar una
llamada, oprima brevemente el botón
de control de llamadas.
Para llamar, marque el número
en el teléfono y oprima el botón de
enviar. La llamada se transferirá
automáticamente al auricular sin
necesidad de oprimir el botón de
control de llamadas.
NOTA: al contestar una llamada,
espere a oír el timbre del auricular (no
del teléfono) antes de oprimir el botón
de control de llamadas.
AJUSTE DEL
VOLUMEN
Para subir el volumen de escucha,
oprima la parte superior (+) del botón
de volumen/silencio. Para disminuirlo,
pulse el extremo inferior (-).
ADVERTENCIA: no use nunca los
audífonos o auriculares a un volumen
alto durante periodos prolongados.
Esto puede causar pérdida de
audición. Use siempre un volumen
moderado.
RESPUESTA
AUTOMÁTICA
Al retirar el auricular del
estuche, la llamada se contestará
automáticamente. Para colgar, vuelva
a colocar el auricular en el estuche
de carga.
PARA
SILENCIAR EL
MICRÓFONO
Para activar la función Silencio
durante una llamada, presione
ambos lados del botón de volumen/
silencio de manera simultánea hasta
que oiga un sonido.
Para desactivar la función Silencio,
vuelva a presionar ambos botones.
25
USO DEL AURICULAR
OTRAS FUNCIONES
Volver a marcar el último número
Para activar la función de volver a
marcar el último número, oprima dos
veces el botón de control de llamadas.
Cada vez que oprima un botón,
escuchará un tono agudo.
Uso de la marcación por voz
Con el auricular encendido, mantenga
oprimido el botón de control de
llamadas durante 2 segundos para
activar la marcación por voz.
NOTE: para utilizar la marcación
por voz, esta función debe estar
activada en el teléfono. Consulte las
instrucciones en el manual de su
teléfono Bluetooth.
Rechazar una llamada
Al recibir una llamada entrante,
mantenga oprimido el botón de
control de llamadas durante 8 si
desea rechazar la llamada.
Pasar una llamada del teléfono
al auricular
Para pasar una llamada activa del
teléfono al auricular, presione el
botón de control de llamada durante
tres segundos.
Pasar una llamada del auricular
al teléfono
Para pasar una llamada activa del
auricular al teléfono, mantenga
oprimido el botón de control de
llamadas hasta que escuche un tono.
AURICULAR FUERA DEL ALCANCE
Si el auricular se aleja más de 10 metros del dispositivo Bluetooth o si hay
interferencias:
• Disminuirá la calidad del sonido.
• Se escuchará un pitido en el auricular cuando se pierda la conexión entre el
auricular y el dispositivo Bluetooth .
• Si está fuera del alcance, sólo funcionará el botón de apagado.
En cualquiera de los casos anteriores, acérquese al dispositivo Bluetooth.
26
MULTIPUNTO
MULTIPUNTO CONECTIVIDAD
MULTIPOINT (MÁS DE UN DISPOSITIVO
BLUETOOTH)
El auricular Discovery 650 de
Plantronics es compatible con la
tecnología multipunto, que permite
establecer conexiones simultáneas
con dos dispositivos de audio
Bluetooth distintos.
PARA EMPAREJAR EL AURICULAR
CON OTRO DISPOSITIVO BLUETOOTH
repita los pasos de emparejamiento
anteriores con el nuevo dispositivo.
PARA HACER UNA LLAMADA
El auricular presupondrá que desea
iniciar la llamada con el último
dispositivo utilizado.
Para usar el otro dispositivo, inicie la
llamada usando los controles de ese
dispositivo. El segundo dispositivo
establecerá un enlace con el
auricular.
PARA CONTESTAR UNA LLAMADA
Las llamadas entrantes que se
reciban en cualquiera de los
dispositivos sonarán en el auricular.
En la mayoría de los casos, el tono del
timbre del dispositivo se transmitirá
a través del auricular de manera
que el usuario pueda determinar
qué dispositivo está sonando. Sin
embargo, en algunos casos, el
auricular aplicará un tono de timbre
a la llamada entrante. En cualquier
caso, el usuario puede determinar
qué dispositivo está sonando por los
distintos tonos de timbre.
Para responder a la llamada, presione
el botón de control de llamada.
PARA CONTESTAR UNA LLAMADA DE
UN DISPOSITIVO MIENTRAS HABLA
POR EL OTRO No se puede poner
una llamada en espera mientras
se contesta otra. Por lo tanto, para
responder a una segunda llamada,
debe poner fin a la primera.
Finalice la primera llamada
presionando el botón de control de
llamada una vez.
Espere hasta escuchar un sonido y, a
continuación, responda a la segunda
llamada presionando de nuevo el
botón de control de llamada. Si decide
no esponder a la segunda llamada
y dispone de un buzón de voz en el
segundo dispositivo, la llamada se
desviará al buzón de voz.
27
LUCES INDICADORAS
Estado del auricular
Durante el encendido
Luz indicadora del auricular
Se enciende una luz azul que parpadea cada 6 segundos.
Encendido
La luz azul parpadea cada 5 segundos.
Durante el apagado
Se prende y se apaga una luz roja.
Apagado
—
Batería cargando La luz roja se ilumina.
Batería totalmente cargada
La luz roja se apaga.
Batería baja
La luz roja parpadea una vez por segundo.
Modo de emparejamiento
La luz parpadea primero en rojo y luego en azul durante 120 segundos.
Llamada perdida
Se enciende una luz morada que parpadea cada 5 segundos.
Para apagarla, oprima cualquier botón.
Timbre
Se enciende una luz morada que parpadea rápidamente.
Auricular en el estuche
El auricular vibra para indicar que hay una llamada entrante.
Indicador de uso (OLI)
La luz azul parpadea cada 10 segundos.
ACCESORIOS OPTATIVOS
DISPONIBLES PARA COMPRA
73646-01
Cargador de baterías AAA
MOTOROLA
73649-01
Cargador de
baterías AAA
69519-05
Cargador USB para el auricular
WITH PALM
WITH NOKIA
73650-01
Kit adaptador para
carga de 4 baterías
73647-01
Auriculares de
gel blando y gancho
para la oreja
SONY ERICSSON
73651-01
Minicargador USB
Para hacer un pedido, póngase en contacto con su proveedor de Plantronics o
vaya a www.plantronics.com.
28
SOLUCIÓN DE PROBLEMAS
PROBLEMA
El auricular no
funciona con mi
teléfono.
SOLUCIÓN
El auricular no estaba en modo de emparejamiento cuando
seleccionó las opciones de menú del teléfono celular.
Consulte “Emparejamiento”, en las páginas 21 y 22.
Seleccionó una opción incorrecta en el menú de su celular.
Consulte “Emparejamiento”, en las páginas 21 y 22.
No ingresé mi clave. El teléfono no pudo localizar el auricular. Repita el proceso
de emparejamiento de las páginas 21 y 22.
Seleccionó una opción incorrecta en el menú de su
celular. Repita el proceso de emparejamiento de las
páginas 21 y 22.
La otra persona no
me oye.
La función Silencio está activada. Presione ambos lados del
botón de volumen/silencio de manera simultánea.
No puedo oír el tono El auricular no está encendido. Oprima el botón de
de llamada o a la
control de llamadas durante aproximadamente
persona que llama. 10 segundos, hasta que escuche un pitido o vea que
se enciende la luz indicadora azul.
El auricular está fuera de alcance. Acérquese al teléfono
o al dispositivo Bluetooth.
La batería del auricular está agotada. Cargue la batería
con el cargador de AC o de baterías AAA. Consulte la
página 20 “Carga”.
El volumen de escucha es demasiado bajo. Oprima el
botón de volumen/silencio para aumentar el volumen
de escucha del auricular.
ESPECIFICACIONES DEL PRODUCTO
Tiempo de conversación* Tiempo en espera* Tiempo de carga Alcance Requisitos de alimentación
Tipo de batería Versión Hasta 5 horas
Aproximadamente 70 horas /Hasta 170 horas
en espera con el cargador AAA
3 horas
estándar de Bluetooth: 10 metros
5 V CC – 180 mA
Iones de litio
Bluetooth 1.2
Admite las funciones de auriculares y manos libres de Bluetooth.
* El rendimiento puede variar de un dispositivo a otro.
29
ASISTENCIA TÉCNICA
Visite nuestro sitio Web en www.plantronics.com/support para obtener asistencia
técnica, consultar las preguntas más frecuentes, y obtener información sobre
compatibilidad y accesibilidad. Si necesita ayuda, también está disponible el
Centro de asistencia técnica (TAC), en el teléfono 866-363-BLUE (2583).
GARANTÍA
GARANTÍA LIMITADA
• Esta garantía cubre los defectos de materiales y mano de obra de los productos
fabricados, vendidos o certificados por Plantronics que se adquieran y se utilicen
en Estados Unidos.
• La garantía tiene una vigencia de un año a partir de la fecha de compra del
producto.
• Esta garantía sólo es válida para el usuario final en posesión de la factura de
compra original.
• Los productos que no cumplan con esta garantía podrán, a criterio nuestro,
repararse o sustituirse. Para ello, podrán utilizarse piezas o productos que
funcionen de forma equivalente. Estas piezas o productos podrán ser nuevos,
de segunda mano, refabricados, renovados o reacondicionados.
• Si necesita servicio en EE.UU., póngase en contacto con Plantronics llamando
al (866) 363-BLUE (2583).
• ESTA ES LA GARANTÍA COMPLETA QUE OFRECE PLANTRONICS PARA
SUS PRODUCTOS.
• Esta garantía le otorga derechos legales específicos, a los que se pueden
añadir otros derechos que varían de una jurisdicción a otra. Si desea obtener
más información sobre nuestra garantía limitada y los artículos que no están
cubiertos por esta garantía, póngase en contacto con su distribuidor o con el
centro de servicio.
30
AVISOS SOBRE NORMATIVAS
EXPOSICIÓN A RADIACIÓN DE
RADIOFRECUENCIA
La radio inalámbrica interna cumple las normas y recomendaciones de seguridad
de radiofrecuencia estándar, que reflejan el consenso de la comunidad científica.
En algunos estudios independientes se ha demostrado que la radio inalámbrica
interna no presenta riesgos para los consumidores.
NOTA: toda modificación que no sea expresamente autorizada por Plantronics, Inc.
podría anular el derecho del usuario a utilizar el equipo.
REQUISITOS DE LA FCC PARTE 15
Este dispositivo cumple con la parte 15 de las Reglas de la FCC. Su uso está sujeto
a las dos condiciones siguientes:
1. Este dispositivo no puede causar interferencias nocivas y
2. Este dispositivo debe aceptar todas las interferencias recibidas, incluidas
aquéllas que puedan causar un funcionamiento no deseado.
Este equipo se comprobó y se confirmó que cumple con los límites establecidos
para un dispositivo digital de clase B, de acuerdo con la parte 15 de las Reglas de
la FCC. Estos límites tienen como finalidad proporcionar una protección razonable
contra las interferencias nocivas en una instalación residencial. Este equipo genera,
usa y puede radiar energía de radiofrecuencia. Si no se instala y se usa según las
instrucciones, puede causar interferencias nocivas a las comunicaciones por radio.
Sin embargo, no se garantiza que no vayan a producirse interferencias en una
determinada instalación. Si este equipo causa interferencias nocivas con la
recepción de señales de radio o televisión (lo cual puede determinarse apagando y
volviendo a prender el aparato), el usuario puede adoptar algunas de las medidas
siguientes para intentar corregir las interferencias:
1. Reoriente o reubique la antena receptora.
2. Aumente la separación entre el equipo y el receptor.
3. Conecte el equipo a una toma de corriente que esté en otro circuito.
4. Consulte a su distribuidor o pida ayuda a un técnico de radio/TV con experiencia.
EXPOSICIÓN A RADIACIÓN DE
RADIOFRECUENCIA
Este dispositivo y su antena no deben colocarse ni utilizarse conjuntamente con
ninguna otra antena o transmisor. Para cumplir con los requisitos de exposición a
RF de la FCC, use únicamente la antena suministrada. Cualquier modificación no
autorizada de la antena o el dispositivo podría anular la autorización del usuario
para usar este dispositivo.
31
Plantronics Inc
345 Encinal Street
Santa Cruz, CA 95060 USA
Tel: (800) 544-4660
www.plantronics.com
© 2006 Plantronics, Inc. Todos los derechos reservados. Plantronics, el diseño del logotipo, Plantronics
Discovery, QuickPair, y Sound Innovation son marcas comerciales o registradas de Plantronics, Inc. El nombre y
los logotipos de Bluetooth® son propiedad de Bluetooth SIG, Inc. y Plantronics, Inc. los utiliza bajo licencia. Todas
las demás marcas registradas son propiedad de sus respectivos propietarios.
Patentes en EE.UU. 5,210,791
Patentes en trámite.
72448-08 (12-06)