1
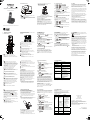
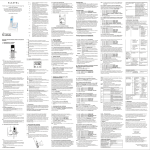
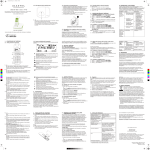
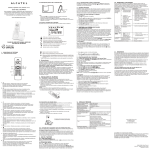
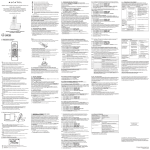
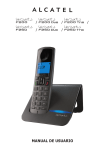
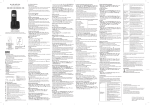
1.2. Vista general de la estación base
F370
F370
F370
Para mantener nuestro compromiso de cumplimiento y conservación
medioambiental, incluimos miniguías en nuestros envases.
www.alcatel-home.com
6.2. Llamada desde la lista de llamadas
3.2. Conexión de la estación base
1. Conecte un extremo del cable de la línea telefónica en la toma
telefónica situada en la parte inferior de la base.
2. Enchufe el extremo corto del adaptador de alimentación a la
toma de alimentación situada en la parte inferior de la base.
3. Co necte el enchufe de alimentación a la toma de la base.
4. Conecte el extremo largo del adaptador de alimentación a una
toma de corriente de pared.
5. Conecte el otro extremo del cable de línea telefónica a la
7.
6. Use siempre los cables que se adjuntan en la caja.
Pulse
en la estación base para buscar su auricular. Sonará
durante aproximadamente 60 segundos.
Pulse y mantenga pulsado
en la estación base durante
aproximadamente cinco segundos; la estación base entrará
en modo registro y estará preparada para registrar el
auricular.
1.
CONOCIENDO SU TELÉFONO
3.3. Conexión de los cargadores (para los modelos
Dúo/Trío)
Enchufe el adaptador de alimentación a una toma de corriente.
1.1. Vista general del auricular
Si dispone de una línea de banda ancha
Si conecta su teléfono a una línea con conexión de banda
ancha, deberá insertar un microfiltro entre el teléfono y la línea
telefónica; en caso contrario puede tener interferencias entre el
teléfono y la banda ancha que puede ocasionarle problemas.
En una casa con banda ancha, cada teléfono debe disponer de un
1.3. Iconos y símbolos de la pantalla
La pantalla LCD le ofrece información sobre el estado actual del
teléfono.
microfiltro conectado, no sólo uno en el punto telefónico al que
está conectado su módem. Si necesita más microfiltros de banda
ancha, póngase en contacto con su operador de banda ancha.
4.
4.1.1. Marcación preparatoria
Introduzca el número de teléfono y pulse
o
el número. Pulse
para borrar la entrada.
para marcar
4.1.2. Marcación directa
o
para coger línea e introduzca el número de
Pulse
teléfono.
4.1.3. Marcación desde las teclas de memoria directas
En modo inactivo o desconectado, pulse y mantenga pulsado
/
/
para marcar el número de memoria directa. Tiene que
guardar el número en la tecla relacionada en primer lugar. Véase
la sección 7.4 para tener una referencia.
4.1.4. Llamada desde la lista de rellamadas
Pulse
para acceder a la lista de rellamadas y pulse
para
seleccionar el número de rellamada que desee. Pulse
o
para marcar al número de rellamada que haya seleccionado.
4.2. UTILIZAR EL MODO MANOS LIBRES
En cualquier momento se puede pulsar la tecla
el modo manos libres.
En modo inactivo: Púlselo para acceder al menú principal
En modo submenú: Púlselo para confirmar la selección
Durante una llamada: Púlselo para acceder al Intercomunicador
/Agenda/Lista de rellamadas/Lista de llamadas
5.
para activar
7.
En modo inactivo: Púlselo para acceder a la lista de la agenda
8.
Durante una llamada: Púlselo para encender/apagar el altavoz.
En modo inactivo/modo premarcación/lista de remarcación/
Lista de llamadas/entrada de agenda: Púlselo para realizar
una llamada con el altavoz
Durante una llamada: Púlselo para responder a una llamada
con el altavoz
,
9. TECLADO ALFANUMÉRICO,
Tecla * en modo inactivo: Púlselo y manténgalo pulsado para
activar o desactivar el bloqueo del teclado
Tecla # en modo inactivo: Púlselo y manténgalo pulsado para
encender/apagar el timbre
Tecla # en modo lista de llamadas: Púlselo para revisar el
número de la persona que llama si es aplicable
Tecla 0 en modo premarcación/edición de número: Púlselo y
manténgalo pulsado para insertar una pausa
Tecla 1, 2, 3 en modo inactivo/desconexión: Púlselo
y manténgalo pulsado para marcar el número directo
almacenado en la memoria
10.
En modo inactivo/marcación previa: Púlselo para hacer una
llamada
En lista de rellamadas/Lista de llamadas/Entrada de agenda:
Púlselo para hacer una llamada a la entrada seleccionada de
la lista
Al sonar: Púlselo para responder a una llamada
Cuando se
Es necesario un prefijo Insertar el prefijo de
conecta a un de marcación.
marcación
PBX, no hay
conexión
o hay una
conexión
incorrecta
tras el
marcado.
Problema
Causa
Soluciones
Aparece
"SIN
SEÑAL".
a. Reducir la señal.
b. Conectar la estación
base a la corriente
eléctrica.
Durante una llamada:
para seleccionar el volumen 1-5. Se muestra la
Pulse
configuración actual. Cuando finalice la llamada, permanecerá la
configuración en el último nivel seleccionado.
a. Estación base sin
señal.
b. Estación base no
conectada a la
corriente eléctrica.
La llamada Servicio no activado,
no funciona. operador erróneo o
configuración errónea.
Compruebe la suscripción
a la red.
No hay
pantalla.
Recargue la batería.
el número de memoria directa
1. Pulse
para seleccionar CONF TELEF..
y
para seleccionar MEM. DIRECTA.
y
y
3. Pulse
para seleccionar la tecla de memoria directa
desde TECLA 1, TECLA 2 y TECLA 3.
4. Pulse
e introduzca el número a guardar.
2. Pulse
5. Pulse
Nota: Pulse y mantenga pulsado
número guardado.
,
o
para llamar al
7.5. Configurar código de área
1. Pulse
2. Pulse
para seleccionar CONF BASE.
y
para seleccionar COD DE AREA.
y
e introduzca el código de 2 o 3 digitos.
4. Pulse
Batería gastada.
11. SEGURIDAD
En el caso de que se produzca un riesgo eléctrico, el adaptador
de alimentación funciona como dispositivo de aislamiento de
alimentación de la corriente alterna. Por lo tanto, como precaución,
debería instalarse cerca del electrodoméstico y con un fácil acceso.
Para desconectar el dispositivo de la alimentación primaria, el
adaptador de alimentación debe retirarse de la toma de la
corriente alterna.
En caso de que falle el adaptador de alimentación, debe
sustituirse por un modelo idéntico.
En caso de que el adaptador de alimentación no esté conectado
o si hay una falla en la alimentación eléctrica, no funcionarán los
teléfonos que usen auriculares inalámbricos. Por lo que usted
será incapaz de hacer o recibir llamadas en caso de alguna
emergencia.
Se recomienda que evite usar este dispositivo durante tormentas
En modo inactivo:
1. Pulse
para acceder a la agenda.
O
Pulse
y
para seleccionar el elemento del menú
principal AGENDA y posteriormente pulse
para acceder a
la agenda.
2. Pulse
para seleccionar AÑADIR.
3. Pulse
para introducir el nombre.
4. Pulse
para introducir el número.
5. Pulse
y
para seleccionar el tono de llamada que
desee para la entrada de la agenda.
para guardar la entrada de la agenda.
6. Pulse
En modo inactivo/marcación previa: Púlselo para insertar un
flash
Durante una llamada: Púlselo para marcar un flash
Soluciones
! No use el teléfono para avisar de una fuga de gas si se
encuentra en las cercanías de dicha fuga!
En modo inactivo: Púlselo para acceder a la lista de llamadas
En modo menú: Púlselo para desplazarse por los elementos
del menú
En lista de agenda/lista de rellamadas/lista de llamadas:
Púlselo para desplazarse por la lista
Durante una llamada: Púlselo para subir el volumen
Al sonar: Púlselo para subir el volumen del timbre
6.
a. El cable de conexión a. Compruebe las
de la estación base
conexiones.
no está conectado.
Desenchufe y vuelva
a enchufarlo a la
corriente eléctrica.
Compruebe que
el cable de línea
b. El cable del
telefónica se ha
adaptador no está
conectado a la
conectado a la
estación base y a la
estación base.
toma telefónica.
b. Compruebe el enchufe
c. La línea está
de la estación base
ocupada ya que se
y el enchufe de
corriente alterna
está empleando
otro auricular.
(retírelo y vuelva a
enchufarlo).
d. Cable de conexión c. Espere a que la línea
incorrecto.
esté desocupada.
d. Use el cable de
conexión original.
Ésta es la razón por la que recomendamos que disponga
asimismo de un teléfono convencional – uno que no requiera
alimentación eléctrica—como medida preventiva.
5.
Durante una llamada: Púlselo para finalizar una llamada y
volver a la pantalla inactiva
En modo edición/premarcación: Púlselo para volver al menú
anterior
En modo edición/premarcación: Púlselo y manténgalo pulsado
para volver a la pantalla inactiva
En modo inactivo: Púlselo y manténgalo pulsado para
encender/apagar el auricular
Causa
No hay
tono de
marcación
al pulsar la
tecla
Existen 5 niveles (VOLUMEN 1 a VOLUMEN 5) para elegir entre
los volúmenes del auricular y del manos libres.
3. Pulse
En modo edición/premarcación: Púlselo para borrar un
carácter/dígito
En modo edición/premarcación: Púlselo y manténgalo pulsado
para borrar todos los caracteres/dígitos
Durante una llamada: Púlselo para silenciar/dar volumen al
micrófono
En modo inactivo: Púlselo para intercomunicarse con otro
auricular
Al sonar: Púlselo para suprimir el volumen del auricular
En modo inactivo: Púlselo para acceder a la lista de
remarcación
En modo menú: Púlselo para desplazarse por los elementos
del menú
En lista de agenda/lista de rellamadas/lista de llamadas:
Púlselo para desplazarse por la lista
Durante una llamada: Púlselo para bajar el volumen
Al sonar: Púlselo para bajar el volumen del timbre
Problema
7.3. Ajuste del volumen del auricular y del manos
libres
En modo menú principal: Púlselo para volver a la pantalla inactiva
En modo submenú: Púlselo para volver al nivel anterior
En modo submenú: Púlselo y manténgalo pulsado para volver
a la pantalla inactiva
4.
Si tiene cualquier problema con el teléfono, rogamos intente
probar las sugerencias que se enumeran debajo.
Como norma general, si se produce un problema, retire las pilas de
todos los auriculares de su instalación durante aproximadamente
1 minuto; posteriormente desconecte y vuelva a conectar la
alimentación a la base y vuelva a instalar las pilas del auricular.
el volumen del timbre
para seleccionar CONF. TELEF.
y
2. Pulse
para seleccionar CONF. TIMBRE.
y
3. Pulse
para seleccionar VOL TIMBRE.
y
4. Pulse
para seleccionar el volumen del timbre
y
que desee (un total de 6 volúmenes de timbre incluyendo
VOLUMEN OFF).
Nota: Se reproducirá el volumen del timbre respectivo durante
su selección.
.
Si se selecciona VOLUMEN OFF, aparecerá el ícono
5. Pulse
2.
3.
10. PROBLEMAS Y SOLUCIONES
USO DEL TELÉFONO
4.1. Hacer una llamada
1.
la melodía del timbre para llamadas
internas/externas
1. Pulse
Si dispone de servicio de banda ancha,
se necesita un microfiltro (no incluido).
FAVOR DE LEER ESTE MANUAL ANTES DE UTILIZAR SU TELÉFONO
CONFIGURACIÓN DEL TELÉFONO
1. Pulse
para seleccionar CONF TELEF..
y
2. Pulse
Toh selecta CONF. TIMBRE.
y
3. Pulse
para seleccionar TIMBRE INT o TIMBRE
y
EXT.
4. Pulse
para seleccionar la melodía del timbre que
y
desee.
Nota: La melodía del timbre respectiva se reproducirá mientras
busca en la lista de melodías.
5. Pulse
1.
GUÍA DEL USUARIO
En modo inactivo:
1. Pulse
para acceder a la lista de llamadas.
O
Pulse
y
para seleccionar LISTA LLAM.
2. Pulse
para seleccionar la entrada que desee.
3. Pulse
o
.
AGENDA PRIVADA
El teléfono puede guardar hasta 50 entradas privadas de agenda
con nombres y números. Cada entrada de la agenda puede
tener un máximo de 20 dígitos para el número de teléfono y
12 caracteres para el nombre. Asimismo puede seleccionar
diferentes tonos de llamada para las entradas de la agenda.
Las entradas de la agenda se almacenan alfabéticamente por
nombre.
5.1. Añadir una nueva entrada a la agenda
2.
Precauciones
Como para toda conexión de radio, la calidad de las
comunicaciones depende de la posición de la base, del teléfono,
así como de su entorno.
El teléfono inalámbrico DECT debe mantenerse alejado de toda
fuente de excesivo calor (radiadores, luz solar, etc.) y protegido
contra las vibraciones y el polvo.
Advertencia: no dejar nunca que el teléfono entre en
contacto con el agua u otros líquidos o aerosoles.
Para reducir los riesgos de interferencias y optimizar la calidad de
la recepción, se recomienda evitar, en particular, instalar la base
a proximidad inmediata de: ventanas, objetos metálicos grandes,
superficies de hormigón armado, televisores, equipos de sonido,
miniteles, lámparas halógenas, tubos fluorescentes, centrales
de alarma, hornos de microondas, placas eléctricas halógenas,
computadoras, etc. En caso de utilizar el teléfono en una línea
provista de un módem ADSL, utilizar un filtro ADSL.
Para limpiar el teléfono, utilizar un paño antiestático ligeramente
humedecido con agua.
3.
INSTALACIÓN DEL TELÉFONO
3.1. Instalación y carga de las pilas
1. Deslice hacia abajo la tapa para abrir el compartimento de las
pilas.
2. Coloque las 2 pilas recargables AAA que se adjuntan tal y
como se indica. Preste atención especial a la dirección de la
polaridad.
3. Vuelva a deslizar hacia arriba la tapa del compartimento de
las pilas.
4. Coloque el auricular en la base y cárguelo durante 15 horas
antes de usar el teléfono por primera vez.
El auricular emitirá un pitido cuando se coloque
adecuadamente en la base del cargador.
Notas:
1. Use únicamente las pilas recargables NiMH que se adjuntan.
2. En caso de que no vaya a utilizar el auricular durante un
período prolongado de tiempo, desconéctelo y retire las pilas
para evitar posibles fugas.
5.2. Llamada desde la agenda
En modo inactivo:
1. Pulse
para acceder a la agenda.
O
y
para seleccionar el elemento del menú
Pulse
principal AGENDA y posteriormente pulse
para acceder a
la agenda.
2. Pulse
o
para marcar la entrada de la agenda
seleccionada.
8.
Registro
El auricular y la estación base ya están registrados previamente.
Se pueden registrar hasta 5 auriculares en una sola estación
base.
Si por cualquier motivo, el auricular no estuviera registrado en la
parpadea, incluso cuando el auricular
estación base (el ícono
está cerca de la estación base), registre el auricular según el
siguiente procedimiento.
1. Pulse y mantenga pulsado
en la estación base durante unos
cinco segundos; la estación base entra en modo registro.
2. Pulse
para seleccionar REGISTRO.
y
3. Pulse
y se le solicita que introduzca el PIN del sistema de
4 dígitos (el PIN por defecto es 0000).
4. Introduzca el PIN del sistema de 4 dígitos.
5. Pulse
Si el registro del auricular se ha realizado con éxito, oirá un
tono de confirmación y el ícono de
dejará de parpadear. El
auricular se ubicará de forma automática en el siguiente número
de auricular disponible. Este número de auricular aparece en
la pantalla del auricular en modo en espera. Si el registro del
auricular no se ha realizado con éxito, todavía parpadeará el
ícono .
eléctricas.
No intente abrir la batería ya que contiene sustancias químicas.
En caso de fuga, evite el contacto con la piel, ojos, nariz y
boca. En caso de que se produzca el contacto, limpie bien la
zona afectada durante unos veinte minutos con agua del grifo
y busque atención médica urgente. Limpie el producto con un
papel absorbente o un paño seco y póngase en contacto con su
distribuidor para sustituir las baterías.
12. MEDIO AMBIENTE
Este símbolo indica que el electrodoméstico
electrónico no operativo debe recogerse de forma
separada y no mezclarse con los residuos domésticos.
Este electrodoméstico ha sido diseñado y fabricado
con materiales y componentes de gran calidad que
pueden reciclarse y reutilizarse. Los electrodomésticos eléctrico y
electrónicos pueden contener piezas que son necesarias para que
el sistema funcione debidamente pero que pueden convertirse
en un riesgo sanitario y medioambiental si no se manejan y se
eliminan de forma adecuada. Por consiguiente, rogamos no tire el
electrodoméstico inoperativo como si fuera un residuo doméstico.
En caso de que sea el propietario del electrodoméstico, debe
depositarlo en el punto apropiado local de recolección o dejarlo
con el distribuidor cuando adquiera uno nuevo.
- En caso de que sea un usuario profesional, rogamos siga las
instrucciones del fabricante.
- Si el electrodoméstico está alquilado o se ha dejado a su
cuidado, por favor, póngase en contacto con su proveedor de
servicios.
Deseoso de conservar el medio ambiente, ATLINKS ha equipado
este electrodoméstico con un dispositivo de alimentación que
ofrece una mayor eficiencia energética. Las ventajas incluyen no
sólo un consumo muy bajo de energía, sin también un formato
más compacto que las unidades de alimentación convencionales
6.
MOSTRAR A LA PERSONA QUE LLAMA
(DEPENDIENTE DE RED)
Esta propiedad está disponible si dispone de una suscripción
al Servicio de Identificación de llamadas con su proveedor de
servicios telefónicos. El teléfono puede almacenar hasta 20
llamadas recibidas con información sobre fecha/hora en la Lista
de llamadas. El número aparecerá en la pantalla LCD cuando
suene el teléfono. Si el número se corresponde con una de
las entradas de la Agenda privada, aparecerá el nombre de
la persona que llama almacenado en la agenda privada de
forma alternativa al teléfono. El auricular sonará con la melodía
asociada con esa entrada de la agenda.
Si el número de la persona que llama está desactivado para
enviar la información de la persona que llama, aparecerá en
pantalla “PRIVADO”.
Si no se dispone del número de la persona que llama, aparecerá
"FUERA ÁREA”.
En modo en espera, si se reciben tres llamadas sin responder,
aparecerá “3 LLAM NUEV”.
9.
DETALLES TÉCNICOS
Alcance en campo abierto
Cobertura interna
Duración de la batería del
auricular (valores medios)
Número de auriculares
Modo Intercomunicador
Llamada a tres
(1 correspondiente externo
+ 2 correspondientes
internos)
1. Pulse
para acceder a la lista de llamadas.
O
Pulse
y
para seleccionar LISTA LLAM.
2. Pulse
para seleccionar la entrada que desee.
3. Pulse
para ver el número de la persona que llama si es
aplicable.
que se empleaban en la gama anterior.
Las baterías usadas del teléfono (si dispone de las mismas) deben
eliminarse según la normativa de protección medioambiental
actual, Cumpla con la formativa local.
Lleve a su distribuidor las baterías o deshágase de ellas en un
centro de reciclaje aprobado.
¡Ayúdenos a proteger el medio ambiente en el que vivimos!
Conexión eléctrica/
Use únicamente los adaptadores
Adaptador a la corriente de que se adjuntan con el teléfono
la base/Cargador
Precaución: El voltaje de red se
clasifica como riesgo según los
criterios de este estándar.
www.alcatel-home.com
Conexión telefónica
6.1. Ver la lista de llamadas
Todas las llamadas que se reciben se guardan en la Lista de
llamadas con la última llamada en la parte superior de la lista.
Cuando la lista está llena, se sustituye la llamada más Antigua
por una nueva llamada. Las llamadas sin responder que no
se hayan leído aparecen marcadas con un ícono s situado en el
centro de la línea inferior de la pantalla.
Hasta 300 metros*
Hasta 50 metros*
10 horas en uso **
100 horas en espera**
Hasta 5
Sí
Sí
Pilas
Temperatura operativa
Electrodoméstico diseñado
para la conexión a una línea
telefónica analógica clase TNV3
(telecommunications network
voltage).
AAA – 1.2 V – 400 mA
Use únicamente las pilas que se
adjuntan con el teléfono.
El uso de cualquier otro tipo de
pilas presenta riesgo de explosión.
Se debe deshacer de las baterías
usadas cumpliendo con la
normativa actual de protección
medioambiental.
De 5 °C a 40 °C
* Los valores pueden variar según el entorno.
** Dependiendo de la carga inicial de las pilas.
ATLINKS Europe
22 quai Gallieni
92150 Suresnes- France
© ATLINKS 2015 - Reproducción prohibida.
El fabricante se reserva el derecho de modificar sin previo aviso
las características de sus productos para introducir mejoras
técnicas o cumplir con nuevas regulaciones oficiales.
ALCATEL y ATLINKS son marcas registradas.
El logotipo y el nombre de ALCATEL son marcas registradas de
ALCATEL LUCENT utilizadas bajo licencia por ATLINKS.
F370/F370 Duo/Trio LA
A/W N.º: 10001165 Rev.0 (SP)
Impreso en China
1.2. Base Station Overview
5. Plug the other end of the telephone line cord in to the
1. Press
to select HS SETTINGS.
and
2. Press
to select RING SETUP.
and
3. Press
to select RING VOLUME.
and
4. Press
to select the desired ringer volume (a
and
total of 6 ringer volume levels including VOLUME OFF).
Note: The respective ringer volume will be played during your
selection.
icon will display.
If VOLUME OFF is selected,
5. Press
6. Always use the cables provided in the box.
F370
F370
7.2. Set the Ringer Volume
F370
In Keeping with our evironmental preservation and compliance
commitment, we include mini-guides in our packaging.
www.alcatel-home.com
7.3. Adjust Earpiece and Handsfree Volume
There are 5 levels (VOLUME 1 to VOLUME 5) to choose from for
each of earpiece and handsfree volume.
If you have broadband service,
a micro-filter (not included) is required.
1.
Press
on the base station to page your handset. It will
ring for approximately 60 seconds.
Press and hold
on the base station for about five seconds,
the base station is entered into registration mode and allows
handset registration.
User’s Guide
BEFORE TO USE YOUR PHONE, PLEASE READ ALL THIS USER'S GUIDE
1.
KNOWING YOUR PHONE
1.1. Handset Overview
1.3. Display Icons and Symbols
The LCD display gives you information on the current status of
the telephone.
3.3. Connecting the Charger(s) (for Duo/Trio models)
Plug the power adapter into mains socket.
If you have a Broadband line
If you connect your telephone to a line with a broadband
connection, you will need to insert a micro-filter between the
telephone and the telephone line, otherwise you may get
interference between the telephone and the broadband, which
could cause problems.
In a home with broadband, every telephone must have a microfilter connected, not just the one at the telephone point that your
modem is connected to. If you need more broadband microfilters, contact your broadband supplier.
4.
USING YOUR PHONE
4.1.1. Preparatory Dialing
Enter the phone number and press
Press
to clear the entry.
or
to dial the number.
4.1.3. Dial from Direct Memory Keys
/
/
to dial the
In idle or off hook mode, press and hold
direct memory number. You have to store number to the related
key first. See section 7.4 for reference.
when the handset is in range of the base.
out of range of the base or not registered to
when an intercom is in progress.
there is an incoming internal call.
Indicate a call is in progress.
Indicate that handsfree is being used.
During a call, you can press
and normal handset use.
Steadily on when an alarm is set.
Flash when the alarm time set before reaches.
5.
Indicate that the keypad is locked.
Indicate when there are received new Voice Message
Waiting (VMWI) not yet read.
Disappear when all the voice messages have been read.
(Network service dependent)
Indicate that the ringer is switched off.
1.
M
Y
You can store three direct access numbers into digit KEY 1, KEY
2 and KEY 3, which will be convenient for you to dial to these
numbers directly.
1. Press
to select HS SETTINGS.
and
2. Press
to select DIRECT MEM.
and
3. Press
to select any one from KEY 1, KEY 2
and
and KEY 3.
4. Press
and then enter the number you would like to store,
or edit the number existed before.
5. Press
Note: Press and hold
,
or
to call the stored number.
to alternate between handsfree
In the event of an electrical hazard, the mains adapter acts as
AC power isolating device. It should therefore, as a precaution,
be installed close to the appliance and be easily accessible. To
disconnect the device from the primary power source, the mains
adapter must be removed from the AC socket.
If the mains adapter fails, it must be replaced by an identical model.
If not connected to the mains power or if there is a mains power
failure, telephones that use cordless handsets will not work.
You will then be unable to make or receive calls in the event of
an emergency.
This is why we recommend that you also keep a conventional
telephone – one that doesn’t require a power supply – as a backup.
! Do not use your telephone to notify a gas leak when
standing in the vicinity of the leak.
It is recommended that you avoid using this device during
electrical storms.
Do not attempt to open the batteries, as they contain chemical
substances. In the event of leakage, avoid contact with the skin,
eyes, nose and mouth. In the event of contact, rinse the affected
part for about twenty minutes with running water and seek
urgent medical attention. Clean the product with absorbent paper
or a dry cloth and contact your reseller for replacement batteries.
12. ENVIRONMENT
REGISTRATION
Your handset and base station is pre-registered. Up to five
handsets can be registered to a single base station.
If for some reason, the handset is not registered to the base
station
flashes even when the handset is near the base station),
register your handset according to the following procedure.
1. Press and hold
the base station is entered into registration mode.
2. Press
to select REGISTRATION.
and
3. Press
and you are requested to enter the 4-digit system
PIN (default PIN is 0000).
4. Enter the 4-digit system PIN.
5. Press
If the handset registration is successful, you will hear a
confirmation tone and the
will stop flashing. The handset will
automatically be allocated the next available handset number.
This handset number is shown in the handset display in standby
mode. If the handset registration is unsuccessful, the
will still
flash.
This symbol means that your inoperative electronic
appliance must be collected separately and not mixed
with the household waste.
This appliance has been designed and manufactured
with high quality materials and components that can be recycled
and reused. Electrical and electronic appliances are liable to
contain parts that are necessary in order for the system to work
properly but which can become a health and environmental
hazard if they are not handled or disposed of in the proper way.
Consequently, please do not throw out your inoperative appliance
with the household waste.
If you are the owner of the appliance, you must deposit it at the
appropriate local collection point or leave it with the vendor when
buying a new appliance.
- If you are a professional user, please follow your supplier's
instructions.
- If the appliance is rented to you or left in your care, please
contact your service provider.
Keen to preserve the environment, ATLINKS has equipped
this appliance with a switching power supply, offering better
energy efficiency. The advantages include not only very low
electricity consumption, but also a more compact format than the
conventional power supply units used by the previous range.
PRIVATE PHONEBOOK
Your phone can store up to 50 private phonebook entries
with names and numbers. Each phonebook entry can have a
maximum of 20 digits for the phone number and 12 characters
for the name. You can also select different ringtones for your
phonebook entries. Phonebook entries are stored alphabetically
by name.
The used batteries from your telephone (if it has batteries)
must be disposed of in compliance with current environmental
protection regulations. Comply with your local regulations.
Return your batteries to your reseller or dispose of them at an
approved recycling centre.
Indicate when the battery is fully charged.
Whole icon flashes when the battery performs initial
charging.
Internal block icon flashes when the battery is in final
charging stage.
In idle mode: Press to access the main menu
In sub-menu mode: Press to confirm the selection
During a call: Press to access Intercom/Phonebook/Redial
List/Call List
C
4.1.4. Call from the Redial List
to select the desired
to access the redial list and press
Press
redial number.
or
Press
to dial out to the selected redial number.
4.2. Handset Speakerphone
7.4. Store Direct Memory Access Number
8.
4.1. Make a Call
4.1.2. Direct Dialing
or
to take the line and enter the phone number.
Press
Steadily on
Flash when
the base.
Steadily on
Flash when
During a call:
to select volume 1-5. The current setting is shown.
Press
When you end the call, the setting will remain at the last selected
level.
11. SAFETY
Help us protect the environment in which we live!
CM
MY
CY
Indicate when the battery needs charging.
Flash when low battery power level is detected.
2.
CMY
K
3.
4.
In main menu mode: Press to go back to idle screen
In sub-menu mode: Press to go back to previous level
In sub-menu mode: Press and hold to go back to idle screen
In editing/predialing mode: Press to clear a character/digit
In editing/predialing mode: Press and hold to delete all the
characters/digits
During a call: Press to mute/unmute the microphone
In idle mode: Press to intercom another handset
In ringing: Press to suppress handset ringer
In idle mode: Press to access the call list
In menu mode: Press to scroll up the menu items
In Phonebook list/Redial list/Call List: Press to scroll up the
list
During a call: Press to increase the volume
In ringing: Press to increase the ringer volume
In idle mode: Press to access the redial list
In menu mode: Press to scroll down the menu items
In Phonebook list/Redial list/Call List: Press to scroll down
thelist
During a call: Press to decrease the volume
In ringing: Press to decrease the ringer volume
5.
6.
7.
During a call: Press to end a call and go back to idle screen
In menu/editing mode: Press to go back to previous menu
In menu/editing mode: Press and hold to go back to idle
screen
In idle mode: Press and hold to power off the handset
In idle mode: Press and hold to power on/off the handset
In idle/predialing mode: Press to insert a flash
During a call: Press to dial a flash
Indicate when more characters are existed before the text
currently displayed.
Indicate when more characters are existed after the text
currently displayed.
Indicate when new call.
Turn off when new call has been read.
Scroll up/down the menu items/Phonebook list/Redial list/
Call List.
2.
PRECAUTIONS
The signal quality will depend on the location and environment
of the base and handset.
Position your F370 away from sources of excessive heat
(radiators, direct sunlight, etc.) and protect it from vibrations
and dust. Never allow your telephone to come into contact
with water or other liquids, or with aerosols. To reduce the risk
of interference and optimize reception, take particular care not
to install the base in the immediate vicinity of windows, large
metal objects, reinforced concrete, televisions, music centres,
VCR or DVD players, halogen lamps or heating devices,
fluorescent lighting, burglar alarms, microwave ovens,
computers, etc.
This telephone requires an electrical power supply in order to
function.
To clean your F370 , use an antistatic cloth lightly
moistened with water.
NB: Your F370 is a DECT™* standard appliance designed to
receive and transmit telephone calls. It is designed for
connection to the public telecommunications network.
During a call: Press to turn on/off the speakerphone
In Idle mode/Predialing mode/Redial list/Call List/Phonebook
entry: Press to make a call with speakerphone
During ringing: Press to answer a call with speakerphone
9. ALPHANUMERIC KEYPAD,
,
* key in idle mode: Press and hold to enable or disable the
keypad lock
# key in idle mode: Press and hold to turn on/off the ringer
# key in call list mode: Press to review caller’s number if
applicable
0 key in predialing/number editing mode: Press and hold to
insert a pause
1, 2, 3 key in idle/off hook mode: Press and hold to dial the
stored direct memory number
In idle:
1. Press
OR
Press
2.
3.
4.
5.
6.
to access the phonebook.
and
to select PHONEBOOK main menu item
and then press
to access the phonebook.
Press
to select ADD.
Press
to enter the name.
Press
to enter the number.
Press
and
to select the desired ringtone for your
phonebook entry.
Press
to store the phonebook entry.
5.2. Call from the Phonebook
In idle:
1. Press
to access the phonebook.
OR
and
to select PHONEBOOK main menu item
Press
and then press
to access the phonebook.
2. Press
or
to dial out to the selected phonebook entry.
6.
9.
TECHNICAL DETAILS
Free Field Range
Indoor Range
Handset Battery Life
(average values)
Number of Handsets
Intercom Mode
Three-Way Conference
(1 outside correspondent +
2 internal correspondents)
Electrical Connection/Base
Mains Adaptor/Charger
Telephone Connection
Batteries
CALLER DISPLAY (NETWORK DEPENDENT)
This feature is available if you have subscribed the Caller Line
Identification service with your telephone service provider. Your
phone can store up to 20 received calls with date/time information in
the Call List. The number will be shown on the LCD when the phone
is ringing. If the number matches with one of the entries in your
Private Phonebook, the caller’s name stored in the private phonebook
will be displayed alternatively with the number. The handset will ring
with the melody associated with that phonebook entry.
Operating Temperature
Up to 300 metres*
Up to 50 metres*
10 hours talk time**
100 hours standby**
Up to 5
Yes
Yes
Only use the adaptors supplied with
the telephone
Caution: The network voltage is
classified as a hazard by the criteria
of this standard.
Appliance designed for
connection to a TNV3 class
(telecommunications network
voltage) analogue telephone line.
AAA – 1.2 V – 400 mA
Only use the batteries supplied with
the telephone.
Use any other type of battery
presents a risk of explosion.
Used batteries must be disposed
of in compliance with current
environmental protection
regulations.
From 5°C to 40°C
* Values may vary according to environment.
** Depending on initial battery charge.
If the caller number is disabled to send caller information,
“WITHHELD” will display.
If the caller number is not provided, “OUT OF AREA” will display.
In standby, if three unanswered calls are received, “3 NEW
CALLS” will be displayed.
In idle mode: Press to access the phonebook list
8.
5.1. Add a New Phonebook Entry
3.
INSTALLING YOUR PHONE
3.1. Installing and Charging the Batteries
1. Slide down to open the battery compartment cover.
2. Place the 2 supplied AAA rechargeable batteries as indicated.
Pay extra attention to direction of polarity.
3. Slide the battery compartment cover back.
4. Put the handset on the base and charge for 15 hours before
using the handset for the frist time. The handset will give a
beep when it is properly placed on the base or charger.
Notes:
1. Use only the supplied NiMH rechargeable batteries.
2. If the handset will not be used for a long time, disconnect and
remove the batteries to prevent possible leakage.
6.1. View the Call List
All received calls are saved in Call List with the latest call putting
at the top of the list. When the call list is full, the oldest call will
be replaced by a new call. The unanswered call which has not
been read is marked with a
at the centre of the bottom line of
the display.
1. Press
OR
Press
2. Press
3. Press
In idle/predialing mode: Press to make a call
In Redial list/Call List/Phonebook entry: Press to make a call
to the selected entry in the list
During ringing: Press to answer a call
and
to select CALL LIST.
to select the desired entry.
to view the caller’s number if applicable.
If you have difficulty with your phone, please try the suggestions
listed below.
As a general rule, if a problem occurs, remove the batteries
from all the handsets in your installation for about 1 minute,
then disconnect and reconnect the power supply to the base and
reinstall the handset batteries.
Problem
Cause
Solutions
No dialing
tone when
pressing
key
a. The connection
cord of the base
station is not
plugged in.
a. Check the
connections. Unplug
and plug back in the
mains. Check that the
telephone line cord
has been plugged into
the base station and
the phone socket.
b. Check the base
station plug and the
AC plug (remove and
plug-in).
c. Wait until the line is
unoccupied.
6.2. Call from the Call List
In idle:
1. Press
OR
Press
2. Press
10.
to access the call list.
10. TROUBLESHOOTING
7.
to access the call list.
and
or
b. The adapter cord
is not plugged in
correctly in the
base station.
c. The line is busy, as
another handset is
used.
d. Wrong connection
cord.
to select CALL LIST.
to dial out to the selected phonebook entry.
PHONE SETTINGS
7.1. Set the Ringer Melody for Internal/External Calls
1. Press
2. Press
1. Plug one end of the telephone line cord into the telephone
jack on base bottom.
2. Plug the small end of power adapter into a power jack on
base bottom.
3. Connect the power supply plug to the base jack.
4. Plug the large end of power adapter into a wall power outlet.
to select HS SETTINGS.
to select RING SETUP.
and
to select INT RING or EXT RING.
and
4. Press
to select the desired ringer melody from
and
the melody list.
Note: The respective ringer melody will be played while browsing
the melody list.
5. Press
3. Press
3.2. Connecting the Base Station
and
www.alcatel-home.com
ATLINKS Europe
22 quai Gallieni
92150 Suresnes- France
© ATLINKS 2015 - Reproduction prohibited.
The Manufacturer reserves the right to modify the specifications
of its products in order to make technical improvements or
comply with new regulations.
ALCATEL and ATLINKS are registered trademarks.
The Alcatel logo and Alcatel name are trademarks of Alcatel Lucent
and used under licence by ATLINKS.
d. Use the original
connection cord.
"OUT OF
RANGE" is
displayed.
a. Base station out of
range.
b. Base station is
not connected to
mains.
a. Reduce the range.
The call
does not
work.
Service not activated
or wrong operator.
Check your Subscription
with network.
No display.
Empty battery.
Recharge battery.
b. Connect base station
to mains.
The store where you bought your telephone can also provide you
with information and after-sales support.
F370/F370 Duo/Trio LA
A/W N.º: 10001165 Rev.0 (EN)
Printed in China