1
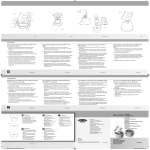
P74388ea-B_F8E467ea_man 10-11-2003 14:51 Page 1
In-car iPod™ holder
Support pour iPod™ pour la voiture
iPod™ Autohalterung
Soporte iPod™ para vehículos
Porta iPod™ per auto
Belkin TuneDok
User Guide
Guide de l’utilisateur
Benutzerhandbuch
Guía del usuario
Manuale utente
T7420ZM/A
F8E467ea
P74388ea-B_F8E467ea_man 10-11-2003 14:51 Page 2
Contents
English
2
Français
4
Deutsch
6
Español
8
Italiano
10
P74388ea-B_F8E467ea_man 10-11-2003 14:51 Page 2
™
EN How to Set Up the In-car iPod holder
For automobiles:
To insert the iPod into the In-car iPod holder:
1. Insert the In-car iPod holder flexible cup into the small, rigid cup.
1. Make sure the suction cup is clear of dust
or dirt. If necessary, wipe it with a damp
cloth.
2. Push the three snaps through the corresponding holes
in the bottom of the flexible cup. Make sure the two are
firmly connected.
2. Take off anything that may be connected
to the dock connector.
3. Insert the In-car iPod holder cups into your car’s
cup holder. Ensure that the arm of the cup holder
rests on top of the smaller cup’s rim (Fig. 1).
The smaller cup keeps your
In-car iPod holder firmly in place.
To adjust the position of the iPod cradle:
1. Hold the In-car iPod holder flexible cup in one hand, and
the iPod cradle in the other.
3. Lay the dock connector end of the iPod
into the bottom of the iPod cradle and
gently push the iPod onto the suction cup.
4. Insert the Auto Kit connector into the dock
connector of the iPod through the iPod
cradle’s bottom opening (Fig. 4).
Fig. 1
2. Twist the cradle clockwise to lower it, or counterclockwise to raise it (Fig. 2).
Do not raise the cradle above the red line that’s printed on the In-car iPod
holder stem, as it will make the In-car iPod holder unstable.
3. Place the In-car iPod holder into your car’s cup holder.
4. Turn the iPod cradle toward you and make sure that its position allows you to
see and reach your iPod comfortably; adjust if necessary.
For safety, always make sure that the In-car
iPod holder is securely resting inside your car’s
Fig. 4
To use In-car iPod holder as a desk stand:
1. Hold the cradle firmly in one hand, and the rubber
base in the other. Completely unscrew the Holder
from the rubber cup.
2. Flip the base upside down.
To attach the cable
of the Belkin Auto Kit:
3. Insert the screw into the opening on the bottom
of the base, and twist clockwise. Make sure to turn
the screw until the red marker is fully inserted into
the base.
1. Turn the In-car iPod holder
upside down.
2. On the underside, toward the front of
the iPod cradle, you’ll find a cable snap.
4. Adjust the height and angle to your liking.
3. Thread the Auto Kit cable through
here so it stays in place when you take
your iPod out of
the In-car iPod holder (Fig. 3).
Fig. 5
Fig. 2
2
Fig. 3
3
P74388ea-B_F8E467ea_man 10-11-2003 14:51 Page 4
FR Comment installer votre Support pour iPod™ pour la voiture
Pour les voitures :
Pour insérer l’iPod dans le Support pour iPod pour la voiture :
1. Insérez le godet souple du Support pour iPod pour la voiture
dans le petit godet rigide.
2. Poussez les trois saillies dans les trous correspondants au fond
du godet souple. Assurez-vous qu’ils sont fixés fermement.
3. Insérez les godets du Support pour iPod pour la voiture
dans le porte-gobelet de votre voiture. Assurez-vous que
le support du porte-gobelet repose sur le rebord du plus
petit godet (Fig. 1). Le petit gobelet maintient votre
Support pour iPod pour la voiture fermement en place.
Pour ajuster la positition du support pour iPod :
Fig. 1
1. Tenez le godet flexible du Support pour iPod pour la voiture dans une main et
le support de l’iPod dans l’autre.
2. Tournez le support dans le sens des aiguilles d’une montre pour l’abaisser et
dans le sens contraire pour le remonter. (Fig. 2). Ne remontez pas le support
au-delà de la ligne rouge apparaîssant sur la tige du Support pour iPod pour la
voiture. Le montage risque alors d’être instable.
3. Insérez le Support pour iPod pour la voiture dans le porte-gobelet de votre
voiture.
4. Tournez le support pour iPod vers vous, et assurez-vous que votre iPod est à
votre portée. Ajustez la position au besoin.
Pour brancher le câble du Kit Auto de Belkin :
1. Retournez à l’envers le Support
pour iPod pour la voiture.
2. Au dos, vers l’avant du support, vous
trouverez une attache pour câble.
3. Insérez-y le câble du Kit Auto de façon
à ce qu’il soit maintenu fermement en
place lorsque vous retirez votre iPod du
Support pour iPod pour
la voiture. (Fig. 3).
1. Assurez-vous que la ventouse est exempte
de poussières et de saletés. Nettoyez-la
avec un chiffon humide au besoin.
2. Retirez tout ce qui pourrait être branché au
connecteur pour station d’accueil.
3. Placez l’iPod avec son connecteur vers le
bas sur le support pour iPod, et appuyez
sur l’iPod pour le fixer avec la ventouse.
4. Insérez le connecteur du Kit Auto dans le
connecteur pour station d’accueil du iPod,
à travers l’ouverture du support (Fig. 4).
Assurez-vous que le Support pour iPod pour
la voiture est bien en place dans le portegobelet de votre voiture.
Fig. 4
Pour utiliser le Support pour iPod pour la voiture comme support
de bureau :
1. Tenez le support fermement dans une main et la
base en caoutchouc dans l’autre. Dévissez
complètement le Support du godet en
caoutchouc.
2. Retournez la base.
3. Insérez la vis dans l’ouverture du dessous de la
base, et tournez dans le sens des aiguilles d’une
montre. Assurez-vous de bien visser jusqu’à ce
que la marque rouge soit entièrement insérée
dans la base.
4. Ajustez ensuite la hauteur et l’angle à votre guise.
Fig. 5
Fig. 2
4
Fig. 3
5
P74388ea-B_F8E467ea_man 10-11-2003 14:51 Page 6
DE Installieren der iPod™ Autohalterung
Für Autos:
iPod in die Autohalterung einsetzen:
1. Setzen Sie den elastischen Becher der iPod Autohalterung in den kleinen, starren Becher ein.
2. Drücken Sie die drei Klemmen in die entsprechenden
Öffnungen im Boden des elastischen Bechers. Die Becher
müssen fest miteinander verbunden sein.
3. Setzen Sie das iPod Bechermodul in den
Becherhalter des Autos ein. Stellen Sie sicher, dass
der Arm der Becherhalterung auf der Einfassung
des kleineren Bechers aufliegt (Abb. 1).
Der kleinere Becher sorgt für eine feste
Verankerung der iPod Autohalterung.
Abb. 1
Position des iPod Cradles einstellen:
1. Halten Sie den flexiblen Becher der iPod Halterung in der einen und das
Cradle in der anderen Hand.
2. Drehen Sie das Cradle im Uhrzeigersinn nach unten bzw. gegen den
Uhrzeigersinn nach oben (Abb. 2). Das Cradle darf nicht über die rote Linie auf
dem Fuß der Halterung gedreht werden, da die iPod Autohalterung sonst
instabil wird.
3. Setzen Sie die iPod Autohalterung in den Becherhalter des Autos ein.
4. Drehen Sie das iPod Cradle in Ihre Richtung. Die Position muss so eingestellt
werden, dass Sie den iPod sehen und bequem erreichen können.
Belkin Autoset-Kabel anschließen:
1. Überprüfen Sie den Saugbecher auf
Sauberkeit. Entfernen Sie ggf. Staub und
Verunreinigungen mit einem feuchten Tuch.
2. Lösen Sie alle Kabel vom Dock-Anschluss.
3. Setzen Sie den iPod mit dem DockAnschluss nach unten in die Unterseite des
iPod-Cradles ein, und drücken Sie den iPod
vorsichtig in den Saugbecher.
4. Führen Sie den Autoset-Anschluss durch die
Öffnung an der Cradle-Unterseite, und
verbinden Sie ihn mit dem Dock-Anschluss
des iPod (Abb. 4).
Achten Sie zu Ihrer Sicherheit stets darauf, dass
die iPod Autohalterung fest verankert ist.
Abb. 4
iPod Autohalterung als
Schreibtischständer verwenden:
1. Halten Sie den Cradle mit einer Hand und den
Gummifuß mit der anderen Hand fest. Schrauben
Sie die Halterung vollständig vom Gummifuß ab.
2. Drehen Sie den Gummifuß auf den Kopf.
1. Drehen Sie die iPod
Autohalterung auf den Kopf.
3. Setzen Sie die Schraube in die Öffnung auf der
Fußunterseite ein, und drehen Sie sie im
Uhrzeigersinn. Die Schraube muss so lange gedreht
werden, bis die rote Markierung vollständig vom
Fuß überdeckt wird.
2. Vorne an der Unterseite des iPod
Cradle befindet ein kleiner Kabelclip.
3. Ziehen Sie das Autoset-Kabel durch
den Clip, damit es nicht verrutscht,
wenn Sie den iPod aus der iPod
Autohalterung nehmen (Abb. 3).
4. Stellen Sie Höhe und Winkel nach Belieben ein.
Abb. 5
Abb. 2
6
Abb. 3
7
P74388ea-B_F8E467ea_man 10-11-2003 14:51 Page 8
ES Cómo instalar el soporte iPod™ para vehículos
Para automóviles:
Para instalar el iPod en el soporte iPod para vehículos:
1. Inserte el vaso flexible del soporte iPod para vehículos en el vaso rígido
pequeño.
2. Introduzca los tres salientes de ajuste en los orificios
correspondientes del fondo del vaso flexible. Asegúrese
de que los dos elementos estén firmemente conectados.
3. Inserte los vasos del soporte iPod en el soporte para
vasos de su vehículo. Asegúrese de que el brazo
del soporte para vasos esté apoyado en la parte
superior del borde del vaso de menor tamaño (Fig. 1).
El vaso de menor tamaño mantiene firmemente
en su sitio su soporte iPod para vehículos.
Para regular la posición de la base del iPod:
Fig. 1
1. Sujete el vaso flexible del soporte iPod para vehículos en una mano y la base
del iPod en la otra.
2. Gire la base en el sentido de las agujas de reloj para bajarla o en el sentido
contrario para elevarla (Fig. 2). No eleve la base por encima de la línea roja
impresa en la parte baja del soporte iPod para vehículos, ya que esto desestabilizaría el soporte iPod.
3. Coloque el soporte iPod para vehículos en el soporte para vasos de su vehículo.
4. Gire la base del iPod hacia usted y asegúrese de que esta posición le permita
ver y alcanzar su iPod cómodamente; regúlela si es necesario.
Para conectar el cable del Juego
para Automóvil de Belkin:
Para mayor seguridad, asegúrese siempre de
que el soporte del iPod para vehículos esté
asentado firmemente en el soporte de su coche.
Fig. 4
Para emplear el soporte iPod para
vehículos como soporte para escritorio:
1. Sujete la base con una mano y la pieza de goma
con la otra. Desenrosque completamente el
soporte de la pieza de goma.
2. Invierta la pieza de goma.
1. Invierta el soporte iPod para vehículos.
2. En la cara inferior, hacia la parte frontal
de la base del iPod, encontrará un saliente
de ajuste para el cable.
3. Pase el cable del Juego para Automóvil
por dicho saliente de forma que
permanezca firme en su sitio cuando
extraiga su iPod del soporte iPod
para vehículos (Fig. 3).
3. Inserte el tornillo en la apertura de la parte inferior
de la base y atorníllelo en el sentido de las agujas
del reloj. Asegúrese de atornillar hasta que la
marca roja haya sido introducida completamente
en la base.
4. Regule la altura y el ángulo a su gusto.
Fig. 5
Fig. 2
8
1. Asegúrese de que la ventosa de succión
esté limpia de polvo o suciedad. En caso
necesario, límpiela con un paño húmedo.
2. Retire cualquier elemento que pueda estar
insertado en el conector de acoplamiento.
3. Coloque el extremo del conector de
acoplamiento del iPod en la parte inferior
de la base del iPod y presione suavemente
el iPod en la ventosa de succión.
4. Inserte el conector del Juego para
Automóvil en el conector de acoplamiento
del iPod a través de la apertura de la parte
interior de la base del iPod (Fig. 4).
Fig. 3
9
P74388ea-B_F8E467ea_man 10-11-2003 14:51 Page 10
IT Istruzioni per l’installazione del porta iPod™ per auto
Per vetture:
1. Inserire il contenitore flessibile del porta iPod per auto
nel piccolo contenitore rigido.
2. Spingere i tre dentini di arresto attraverso i rispettivi
fori sul fondo del contenitore flessibile. Accertarsi che
i due elementi siano collegati saldamente.
3. Inserire il contenitore flessibile del porta iPod per
auto nel portabicchieri della vettura. Accertarsi che
il braccio del portabicchieri poggi sopra il bordo più
piccolo del contenitore (fig. 1).
Il contenitore più piccolo ha lo scopo di mantenere
il porta iPod per auto in posizione.
Per inserire l’iPod nel porta iPod per auto:
Fig. 1
Per regolare la posizione dell’alloggiamento dell’iPod:
1. Tenere il contenitore flessibile del porta iPod per auto con una mano e
l’alloggiamento iPod con l’altra.
2. Ruotare l’alloggiamento in senso orario per abbassarlo o in senso antiorario
per alzarlo (fig. 2). Non sollevare l’alloggiamento oltre la linea rossa stampata
nel porta iPod per auto per evitare di renderlo instabile.
3. Inserire il porta iPod per auto nel portabicchieri della vettura.
4. Ruotare l’alloggiamento dell’iPod verso di sé ed accertarsi che la sua posizione
consenta di vedere e raggiungerlo comodamente, regolarlo se necessario.
Per collegare il cavo del kit per auto Belkin:
1. Ribaltare il porta iPod per auto
2. Sul lato inferiore, verso la parte
anteriore dell’alloggiamento,
si trova il dentino d’arresto di un cavo.
3. Far passare il cavo del kit per auto
attraverso quest’ultimo in modo
da mantenerlo in posizione quando
si estrae l’iPod dal porta iPod per auto.
(fig. 3)
1. Accertarsi che il contenitore di aspirazione
non presenti polvere o sporco.
Se necessario, pulirlo con un panno umido.
2. Estrarre tutto quanto possa essere collegato
al connettore di base.
3. Appoggiare l’estremità del connettore di
base dell’iPod nel fondo dell’alloggiamento
e spingere delicatamente l’iPod nel
contenitore di aspirazione.
4. Inserire il connettore del kit per auto nel
connettore della base dell’iPod attraverso
l’apertura sul fondo dell’alloggiamento
dell’iPod (fig. 4).
Per motivi di sicurezza, accertarsi sempre che
il porta iPod per auto sia appoggiato
saldamente in quello della vettura.
Fig. 4
Per usare il porta iPod da tavolo
come supporto da tavolo:
1. Tenere l’alloggiamento fermamente con una mano
e la base di gomma con l’altra. Svitare
completamente il supporto dal contenitore
di gomma.
2. Ribaltare la base.
3. Inserire la vite nel foro sul fondo della base e
girare in senso orario. Accertarsi di girare la vite
fino a inserire completamente la tacca rossa nella
base.
4. Regolare in altezza e angolazione come si
preferisce.
Fig. 5
Fig. 2
10
Fig. 3
11
P74388ea-B_F8E467ea_man 10-11-2003 14:51 Page 12
Belkin Corporation Manufacturer’s 3-Year Product Warranty
3 Options:
Belkin Corporation warrants this product against defects in materials and workmanship for three years. If a defect is discovered, Belkin will, at its option, repair
or replace the product at no charge provided it is returned during the warranty
period, with transportation charges prepaid, to the authorised Belkin dealer from
whom you purchased the product. Proof of purchase may be required. This warranty does not apply if the product has been damaged by accident, abuse, misuse, or misapplication; if the product has been modified without the written permission of Belkin; or if any Belkin serial number has been removed or defaced.
THE WARRANTY AND REMEDIES SET FORTH ABOVE ARE EXCLUSIVE IN LIEU OF
ALL OTHERS, WHETHER ORAL OR WRITTEN, EXPRESSED OR IMPLIED. BELKIN
SPECIFICALLY DISCLAIMS ANY AND ALL IMPLIED WARRANTIES, INCLUDING,
WITHOUT LIMITATION, WARRANTIES OF MERCHANTABILITY AND FITNESS FOR A
PARTICULAR PURPOSE.
No Belkin dealer, agent, or employee is authorised to make any modification,
extension, or addition to this warranty.
BELKIN IS NOT RESPONSIBLE FOR SPECIAL, INCIDENTAL, OR CONSEQUENTIAL
DAMAGES RESULTING FROM ANY BREACH OF WARRANTY, OR ANY OTHER LEGAL
THEORY, INCLUDING BUT NOT LIMITED TO, LOST PROFITS, DOWNTIME, GOODWILL, DAMAGE TO OR REPROGRAMMING OR REPRODUCING, ANY PROGRAM OR
DATA STORED IN OR USED WITH BELKIN PRODUCTS.
Large Rubber Base
For large-diameter
cup holder
Small Rubber Base
For smaller-diameter
cup holders
Some states do not allow the exclusion or limitation of incidental or consequential damages or exclusion of implied warranties, so the above limitations or
exclusions may not apply to you. This warranty gives you specific legal rights,
and you may also have other rights that vary from state to state.
12
13
Small Rubber Base
with Adapter Cup
For VW Jetta and Golf
expanding cup holders
P74388ea-B_F8E467ea_man 10-11-2003 14:51 Page 14
belkin.com
Belkin Corporation
501 West Walnut Street
Compton • CA • 90220 • USA
Tel: 310.898.1100
Fax: 310.898.1111
Belkin Components, Ltd.
Express Business Park • Shipton Way
Rushden • NN10 6GL • United Kingdom
Tel: +44 (0) 1933 35 2000
Fax: +44 (0) 1933 31 2000
Belkin Components B.V.
Starparc Building • Boeing Avenue 333
1119 PH Schiphol-Rijk • The Netherlands
Tel: +31 (0) 20 654 7300
Fax: +31 (0) 20 654 7349
Belkin GmbH
Hanebergstrasse 2 •
80637 München • Germany
Tel: +49 (0) 89 143 4050
Fax: +49 (0) 89 143 405 100
Tech Support
US: 310.898.1100 ext. 2263
800.223.5546 ext. 2263
Europe: 00 800 223 55 460
© 2003 Belkin Corporation. All rights reserved. All trade names are registered trademarks of
respective manufacturers listed. iPod is a trademark of Apple Computer, Inc.
P74388ea-B