1
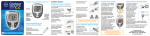
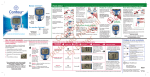
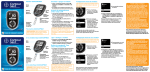
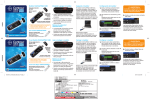
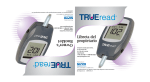
Your CONTOUR TS Meter:
Display
Button
(Scroll)
Orange
Test Strip Port
Your
Contour TS
Test Strip:
Sample Tip: The
end of the test
strip where the
blood is drawn in.
Button
(On/Off,
Memory
Recall,
Set)
Gray Electrode
End: This end
(with the gray
end facing up) is
inserted into the
orange test strip
port on the meter.
Need Help? Call toll free
1-800-348-8100
www.bayerdiabetes.com/us
Inserting the Test Strip:
Remove a test strip from the bottle and
firmly snap the lid closed. Never
store test strips outside the bottle!
Hold the test strip
with the gray end
facing up and
insert it into the
orange test strip
port. No coding
required!
A test strip with a
flashing blood
drop will appear
letting you know
the meter is ready
to test.
Testing Your Blood:
Getting the Blood Drop:
Press the lancing
device firmly
against the puncture site and press
the release button.
Test immediately
after you have
formed a blood
drop. Only 0.6 µL
is needed for a
test.
Suggested Actual Drop Size
Hold the meter
with the orange
test strip port
pointing down
or toward
you. Immediately
touch the tip
of the test strip to the drop of blood.
The blood is drawn into the test strip
through the tip.
Hold the tip of the
test strip in the
blood drop until
the meter beeps
and the 8 second
countdown begins. Make sure
the orange test
strip port is pointing down.
Your test result is displayed and automatically stored in the meter memory.
To turn your meter off, simply
remove the test
strip. Carefully
dispose of the
used test strip.
Error Codes and Symbols:
WHAT YOU SEE
WHAT IT MEANS WHAT YOU SHOULD DO
Low
Battery.
Replace the battery as soon as
possible.
Temperature outof-range.
Move to an area
that is within the
operating range
for the meter:
41°F–113°F. Let
the meter and
test strips adjust
to this temperature for twenty
minutes before
testing.
www.bayerdiabetes.com/us
Refer to your User Guide for complete troubleshooting and error information, or call Bayer
Diabetes Care Customer Service: 1-800-348-8100 (24 hours/day)
WHAT YOU SEE
WHAT IT MEANS WHAT YOU SHOULD DO
The test
strip has
not filled
enough
to give an
accurate
result.
Remove the test
strip and repeat
the test using a
new test strip.
The meter
is sensing
a used test
strip.
Remove the
test strip and
retest using a
new test strip.
Wait until you
see the flashing
blood drop in
the display before adding the
blood sample.
Bayer HealthCare LLC
Mishawaka, IN 46544 USA
WHAT YOU SEE
E5
E6
E8
E9
E10
E11
E12
E13
WHAT IT MEANS WHAT YOU SHOULD DO
Test strip
not inserted
correctly.
Remove the test
strip and insert it
properly.
Potential
software
or hardware issue.
Remove the test
strip and retest
using a new
test strip. If you
continue to have
problems, contact Customer
Service.
Wrong test Remove the
strip.
test strip and
retest using a
CONTOUR TS
Test Strip.
WHAT YOU SEE
WHAT IT MEANS WHAT YOU SHOULD DO
• Wash your
hands and the
test site. Repeat the test
using a new
or
test strip.
Test result • If your result
is “LO”
is still “HI” or
(below 10 “LO,” contact
mg/dL).
your physician
or healthcare
professional
immediately.
Test result
is “HI”
(above 600
mg/dL)
CAUTION: Glucose levels above 250 mg/dL
or below 50 mg/dL may indicate a potentially serious medical condition.
© 2007 Bayer
50184363 Rev. 5/07
Quick Reference
Guide
Only Use With
CONTOUR ® TS Blood Glucose Meter
and CONTOUR™ TS Test Strips
(Read your User Guide and
Lancing Device insert for
complete instructions before
performing a blood glucose test.)
Su Medidor CONTOUR TS:
Pantalla
Botón
(Desplazamiento)
Abertura
Naranja para
Tiras Reactivas
Su Tira
Reactiva
CONTOUR TS:
Punta para Obtener la Muestra:
Extremo de la tira
reactiva donde se
absorbe la sangre.
Botón
(Encendido/
Apagado,
Recuperación de
Memoria,
Ajuste)
Terminal Gris de
Electrodo: Este
terminal (con el
extremo gris hacia
arriba) se inserta en
la abertura naranja
para tiras reactivas
del medidor.
¿Necesita Ayuda? Llame gratis al
1-800-348-8100
www.bayerdiabetes.com/us
Inserción de la Tira Reactiva:
Saque una tira reactiva del frasco y cierre
firmemente la tapa. Nunca almacene
las tiras reactivas afuera de su frasco.
Sostenga la tira
reactiva con el
extremo gris hacia
arriba e insértela en
la abertura naranja
para tiras reactivas.
¡No se necesita
codificación!
Aparecerá una tira
reactiva con una
gota de sangre
que parpadea, lo
que le indica que
el medidor está
listo para realizar
la prueba.
Medición de la Glucosa en
la Sangre:
Obtención de la Gota de Sangre:
Presione firmemente
el dispositivo sobre
el lugar de punción
y presione el botón
disparador.
Realice la prueba
inmediatamente
después de obtener
una gota de sangre.
Sólo se requieren
0.6 µL para una
prueba.
Tamaño de gota sugerido
Mantenga el
medidor con la
abertura naranja
para tiras reactivas
hacia abajo o de
frente a usted.
Aplique inmediatamente la
punta de la tira
reactiva a la gota de sangre. La tira reactiva
absorbe la sangre a través de la punta.
Mantenga la punta
de la tira reactiva
en la gota de sangre hasta que el
medidor emita un
sonido y comience
la cuenta regresiva
de 8 segundos.
Asegúrese de que
la abertura naranja
para tiras reactivas se
encuentre hacia abajo o de frente a usted
cuando lea el resultado de la prueba.
El resultado de la medición aparece en
pantalla y se almacena automáticamente
en la memoria del medidor.
Para apagar el medidor, sólo necesita
retirar la tira reactiva. Elimine como
corresponda la tira
reactiva utilizada.
Códigos y Símbolos
de Error:
LO QUE APARECE
LO QUE SIGNIFICA
Batería
Baja.
LO QUE DEBE HACER
Cambie la batería
tan pronto como
sea posible.
Temperatu- Traslade el medira fuera de dor a un área
que se encuentre
rango.
dentro de su rango de operación:
41 °F a 113 °F.
Antes de realizar la medición,
espere 20 minutos para que
el medidor y las
tiras reactivas se
ajusten a esta
temperatura.
www.bayerdiabetes.com/us
Consulte su Guía del Usuario para obtener información completa sobre errores y soluciones, o bien comuníquese
con el Servicio al Cliente de Bayer Diabetes Care llamando al 1-800-348-8100 (atención las 24 horas)
LO QUE APARECE
LO QUE SIGNIFICA
LO QUE DEBE HACER
La tira
reactiva
no tiene
suficiente
sangre para
realizar una
medición
exacta.
Saque la tira reactiva y repita la
medición usando
una nueva.
El medidor
detecta una
tira reactiva
usada.
Saque la tira reactiva y repita la
medición usando
una nueva. Espere que aparezca
en pantalla una
gota de sangre
que parpadea
para aplicar la
muestra de
sangre.
Bayer HealthCare LLC
Mishawaka, IN 46544 USA
LO QUE APARECE
E5
E6
E8
E9
E10
E11
E12
E13
LO QUE SIGNIFICA
LO QUE DEBE HACER
La tira
reactiva no
se insertó
correctamente.
Posible
problema
de software
o hardware.
Saque la tira reactiva e insértela
correctamente.
Saque la tira reactiva y repita la
medición usando
una nueva. Si los
problemas persisten, comuníquese
con Servicio al
Cliente.
Tira reactiva Saque la tira reacincorrecta. tiva y repita la
medición usando
una Tira Reactiva
CONTOUR TS.
LO QUE APARECE
LO QUE SIGNIFICA
LO QUE DEBE HACER
El resultado • Lávese las manos
de la medi- y el sitio del cual
ción es “HI” obtendrá la muestra. Repita la
(superior a
600 mg/dl) medición usando una nueva
o
tira reactiva.
El resultado • Si el resultado
vuelve a ser “HI”
de la
o “LO”, comunímedición
quese con su
es “LO”
médico o profe(inferior a
sional de aten10 mg/dl).
ción médica de
inmediato.
PRECAUCIÓN: Niveles de glucosa superiores a
250 mg/dl o inferiores a 50 mg/dl pueden indicar
una condición médica potencialmente grave.
© 2007 Bayer
50184363 Rev. 5/07
Sistema de Control de glucosa
en sangre
Guía de Referencia
Rápida
NO NECESITA
CÓDIGO
TM
Sólo Usar con el Medidor de
Glucosa en la Sangre CONTOUR ® TS
y las Tiras Reactivas CONTOUR™ TS
(Lea la Guía del Usuario y el inserto
del Dispositivo de Punción para
obtener instrucciones completas
antes de realizar la medición de
glucosa en la sangre.)