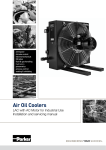
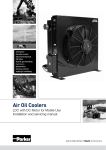
1
The Professional Choice – in Fluid Management LAC With AC motor - optimized for industrial use Installation and servicing manual SE GB DE FR ES OILTECH LAC AIR OIL COOLER | Installation and servicing manual A Oiltech B LAC C 1 D 2 B 1/2 A C 1/2 A D A A 3 B A D 5 The Professional Choice – in Fluid Management 6 OILTECH LAC AIR OIL COOLER | Installation and servicing manual 1) 2) 3) 4) 7 1= 2= 3= 4= Blå / Blue / Blau / Bleu / Azul Gul/grön / Yellow/green / Gelb/grün / Jaune/vert / Amarillo/verde Svart / Black / Schwarz / Noir / Negro Brun / Brown / Braun / Marron / Maron U1 = Svart / Black / Schwarz / Noir / Negro 8 U2 = Grön / Green / Grün / Vert / Verde V1 = Blå / Blue / Blau / Bleu / Azul V2 = Vit / White / Weiß / Blanc / Blanco W1 = Brun / Brown / Braun / Marron / Maron W2 = Gul / Yellow / Gelb / Jaune / Amarillo Y-koppling (3x400 V) / Y-connection (3x400 V) / Y-Anschluss (3x400 V) / Connexion en Y (3x400 V) / Conexión en Y (3x400 V) U1 = Svart / Black / Schwarz / Noir / Negro 9 U2 = Grön / Green / Grün / Vert / Verde V1 = Blå / Blue / Blau / Bleu / Azul V2 = Vit / White / Weiß / Blanc / Blanco W1 = Brun / Brown / Braun / Marron / Maron W2 = Gul / Yellow / Gelb / Jaune / Amarillo D-koppling (3x230 V) / D-connection (3x230 V) / D-Anschluss (3x230 V) / Connexion en D (3x230 V) / Conexión en D (3x230 V) 10 Y-koppling Y-connection Y-Anschluss Connexion en Y Conexión en Y D-koppling D-connection D-Anschluss Connexion en D Conexión en D OLAER GROUP | Olaer | Oiltech | OilAir | FCH OILTECH LAC AIR OIL COOLER | Installation and servicing manual 11 12 13 14 15 A 15 B The Professional Choice – in Fluid Management 16 17 OILTECH LAC AIR OIL COOLER | Installation and servicing manual B E H G F D A C Komponentförteckning A B C D E F G H I Kylelement Pluggar och gummistålbrickor Fötter Fläkthus Fläktenhet* Motorfäste Fläktgaller Elmotor Fläktenhet med ytterrotormotor * Utförandet, fast eller löst nav, varierar med kylarmodell. I A D B C C Part list Liste des composants A B C D E F G H I Cooler matrix Plugs and rubber steel washers Support Fan housing Fan unit* Motor attachment Fan guard Electric motor Fan unit with outer rotor motor A B C D E F G H I Radiateur Bouchons et joints à lèvres Pieds Caisson ventilateur Hélice complète* Support moteur Grille ventilateur Moteur électrique Unité ventilateur avec moteur à rotor externe * The design, fixed or detachable hub depends on type of cooler. * La conception, moyeu fixe ou non fixe, varie suivant le modèle d’échangeur. Komponentenverzeichnis Lista de componentes A B C D E F G H I Kuhlelement Stopfen und Gummistahlscheiben Fuße Luftergehäuse Luftereinheit* Motorhalterung Schutzgitter Elektromotor Luftereinheit mit Außenrotormotor A B C D E F G H I Radiador Tapón ciego con junta metalbuna Patas Caja del ventilador Ventilador completo* Suporte del motor Rejilla de protección Motor eléctrico Unidad compacta moto-ventilador * Die Ausfuhrung mit starrer oder loser Nabe hängt vom Kuhlermodell ab. * El asiento del ventilador, fijo o desmontable, dependerá del tipo de intercambiador. OLAER GROUP | Olaer | Oiltech | OilAir | FCH OILTECH LAC AIR OIL COOLER | Installation and servicing manual C F D E B A G Tillval Sonderzubehör Equipamientos opcionales A B C D E Stenskydd Dammskydd S-Bypass ventil, enpassage* T-Bypassventil, tvåpassage* Termokontakt A B C D E Steinschutz Staubschutz S-Bypassventil, Einzeldurchlauf* T-Bypassventil, Doppeldurchlauf* Termokontakt A B C D E Rejilla protectora para piedras Filtro antipolvo S-Válvula by-pass, un paso* T-Válvula bypass, dos pasos* Termocontacto * Kan fås som tryckstyrd eller temperatur- och tryckstyrd bypass. * Mit Drucksteuerung oder Temperaturund Drucksteuerung lieferbar. * Disponible como by-pass controlado por presión o por temperatura y presión. Tillbehör Zubehör F G F G Lyftöglor Vibrationsdämpare Hebeösen Vibrationsdämpfer Options Équipements en option A B C D E Stone guard Dust guard S-Bypass valve, single-pass? T-Bypass valve, two pass* Thermo contact A B C D E * Pressure controlled or temperature and pressure controlled by-pass available. * Disponible comme bypass commandé par pression ou par température et pression. Grille de protection Filtre antipoussière S-Valve by-pass, 1-passe* T-Valve by-pass, 2-passes* Thermocontact Options Accessoires F G F G Lifting eye Vibration dampener Anneaux de levage Patins antivibratoires The Professional Choice – in Fluid Management Accesorios F G Cáncamos de elevación Silent blocs OILTECH LAC AIR OIL COOLER | Installation and servicing manual | Svenska Inledning Säkerhetsföreskrifter Beskrivning Installation Handhavande Förebyggande underhåll Underhåll Tekniska data Försäkran om överensstämmelse The Professional Choice – in Fluid Management 1 2 2 2 3 3 4 4 5 6 SE Introduction Safety instructions Description Installation Handling Preventive maintenance Maintenance Technical specification Declaration of conformity 7 7 7 8 9 9 9 10 11 GB Einleitung Sicherheitsvorschriften Beschreibung Installation Bedienung Vorbeugende Wartung Wartung Technische Daten Übereinstimmungserklärung 12 12 13 13 14 14 15 16 17 DE Introduction Consignes de sécurité Description Installation Consignes d’emploi Entretien préventif Entretien Caractéristiques techniques Déclaration de conformité 18 18 19 19 20 20 21 22 23 FR Introducción Instrucciones de seguridad Descripción Instalación Modo de empleo Mantenimiento preventivo Mantenimiento Características técnicas Declaración de conformidad 24 24 25 25 26 26 27 28 29 ES 2 OILTECH LAC AIR OIL COOLER | Installation and servicing manual | Svenska Inledning Denna anvisning är avsedd att vara ett hjälpmedel vid installation, användning och underhåll av Oiltech LAC-serie av luftoljekylare. Förvara anvisningen så att den alltid finns till hands. Ersätt omedelbart en förlorad anvisning. Läs igenom anvisningen och varningstexterna noggrant och se till att förstå innehållet innan du använder luftoljekylaren. På så sätt får du ut mesta möjliga av din luftoljekylare och felaktig användning undviks. Endast för ändamålet utbildad personal får installera, handha och underhålla luftoljekylaren. Oiltech AB förbehåller sig rätten till tekniska ändringar. Avsedd användning LAC-serie av luftoljekylare är avsedd för kylning av olja i hydraulsystem i industriella applikationer. Garanti och reklamation Vid haveri, kontakta Oiltech AB. Oiltech AB ansvarar inte för luftoljekylaren efter egenhändiga reparationer och/eller modifieringar. Säkerhetsföreskrifter Installatör och brukare ska känna till, förstå och beakta varningar eller upplysningar som anges på dekaler, skyltar och i denna anvisning. Varningsnivåer och uppmärksamhetstexter... ...gällande personlig säkerhet Uppmärksamhetstexter som har med personlig säkerhet att göra är klassade i tre nivåer, enligt nedan, beroende på hur allvarliga följderna av en olycka kan bli. Övergripande föreskrifter Lyft Varning Kläm-/krossrisk. För att undvika personskador vid lyft är det viktigt att använda rätt lyftmetod. Kontrollera att den lyftanordning och de lyftdon som används är felfria och godkända för luftoljekylarens vikt. Installation Fara Risk för elchock. Elektrisk anslutning får endast utföras av behörig elektriker! Drift, handhavande och underhåll Varning Risk för personskada. Koppla bort drivkällan för motorn innan underhåll. Varning Risk för personskada. Se till att systemet är trycklöst innan bortkoppling av hydraulslangar och hydraulanslutningar. Varning Risk för allvarlig brännskada. Vid drift kan luftoljekylaren bli mycket varm. Vidrör ej luftoljekylaren förrän den har svalnat. Försiktighet Klämrisk. Luftoljekylaren kan styras via en termokontakt. Fläkten startar då automatiskt vid uppnådd inkopplingstemperatur. Var försiktig vid vistelse nära roterande komponenter. Försiktighet Risk för förgiftning. Förbrukad olja skall lämnas på där för avsedd depå för att inte orsaka skada på person, egendom eller miljö. Fara anger att en olycka kommer att inträffa om föreskriften inte följs. Olyckan leder till allvarlig personskada eller möjligen dödsfall. Viktigt Statisk elektricitet. Fläktar alstrar statisk elektricitet. Undvik känslig utrustning (elektronik m.m.) i luftoljekylarens omedelbara närhet. Antistatiska fläktar finns att beställa. Anm! Använd hörselskydd vid vistelse under en längre tid i närheten av en luftoljekylare i drift. Varning anger att en olycka kan komma att inträffa om föreskriften inte följs. Olyckan kan leda till allvarlig personskada eller möjligen dödsfall. Försiktighet anger att en olycka kan komma att inträffa om föreskriften inte följs. Olyckan kan leda till personskada. ...gällande övrig säkerhet Uppmärksamhetstexter som har med övrig säkerhet (egendom, process eller omgivning) och handhavande att göra är klassade enligt följande: Viktigt anger att en olycka kan komma att inträffa om föreskriften inte följs. Olyckan kan leda till skada på egendom, process eller omgivning. ...gällande tilläggsinformation Tilläggsinformation markeras enligt följande: Anm! Anger extra information som kan underlätta förståelse för, eller utförande av, ett visst moment. Varningsdekal Nedanstående varningsdekal är fäst på luftoljekylaren vid leverans. Ersätt skadad eller saknad dekal omedelbart. • Varning! Heta ytor! Använd hörselskydd! Roterande fläkt! (art.nr. 500029 - 70x30 mm alt. art.nr. 5000291 - 120x50 mm) Se Bild 1. Beskrivning LAC luftoljekylare består i huvudsak av ett kylelement, en växelströmsmotor, en fläkt, ett fläkthus och ett fläktgaller. Kylelementet ansluts till hydraulsystemet via hydraulslangar. Små luftoljekylare är utrustade med enfas eller trefas ytterrotormotor. Större kylare är utrustade med en vanlig trefas asynkron innerrotormotor som uppfyller kraven enligt IEC 60072 och IEC 60034. OLAER GROUP | Olaer | Oiltech | OilAir | FCH OILTECH LAC AIR OIL COOLER | Installation and servicing manual | Svenska Normal omgivningstemperatur för elmotorn: -20 °C - +40 °C. Elmotorn ansluts till fast nät enligt Elektrisk anslutning. För mer information, se motorskylt. Elmotorn är utrustad med motorkonsol på större luftoljekylare. Luftoljekylaren kan utrustas med en termokontakt för temperaturlarm. Fläkten startar då automatiskt vid uppnådd inkopplingstemperatur. Ljudtrycksnivån kan uppgå till 50-92 LpA dB(A) vid 1 m avstånd under normala driftsförhållanden. Olämplig placering, eller drift under extrema förhållanden, kan orsaka förhöjd ljudtrycksnivå och sämre kyleffekt. För generella driftsfakta, se Tekniska data. Märkskylt Luftoljekylarens märkskylt är placerad på fläkthuset. Se Bild 2. På märkskylten finns information om: A - Artikelnummer B - Artikelbenämning C - Serienummer D - Leveransdatum (år och vecka, t.ex. 0818, d.v.s. år 08 och vecka 18). Ersätt skadad eller saknad skylt omedelbart. Installation Lyft Varning Kläm-/krossrisk. För att undvika personskador vid lyft är det viktigt att använda rätt lyftmetod. Kontrollera att den lyftanordning och de lyftdon som används är felfria och godkända för luftoljekylarens vikt. Alla luftoljekylare från och med storlek 033 är förberedda för lyftöglor. Lyftöglor finns att beställa som tillbehör från Oiltech. Montering Försiktighet Risk för personskador. Se till att luftoljekylaren alltid är ordentligt fastsatt. Luftoljekylaren kan monteras i vilket läge som helst, stående på luftoljekylarens fötter är dock att föredra. För att uppnå god luftgenomströmning och därmed bästa möjliga kyleffekt och lägsta möjliga ljudtrycksnivå, lämna ett utrymme motsvarande åtminstone halva elementhöjden (A) fritt framför och bakom luftoljekylaren. Se Bild 3. Olämplig placering av luftoljekylaren, eller drift under extrema förhållanden, kan orsaka förhöjd ljudtrycksnivå och sämre kyleffekt. Anslutning av kylelement Använd hydraulslangar både till och från kylelementet. Se till att kopplingar och slangar är dimensionerade efter systemets tryck, flöde, temperatur och olja. Anslut hydraulslangar till kylelementet enligt följande. Se Bild 4 alt. Bild 5. The Professional Choice – in Fluid Management ABCD- 3 Inlopp. Utlopp för modell enpassage. Utlopp för modell tvåpassage. Anslutning för termokontakt. Dimensioner på anslutningar beror på kylelementets storlek. Flödesschema. Se Bild 6. Viktigt Kylelementet är dimensionerat för maximalt dynamiskt arbetstryck 14 bar. Undvik tryckstötar när luftoljekylaren installeras i systemets returledning. Om detta inte är möjligt, installera luftoljekylaren i ett separat kylsystem. Elektrisk anslutning Fara Risk för elchock. Elektrisk anslutning får endast utföras av behörig elektriker! Innan inkoppling av motorn till elnätet, jämför uppgifterna på motorns märkskylt med nätets spänning och frekvens. Motorn skall installeras i enlighet med allmänt gällande regler och elsäkerhetsföreskrifter och måste installeras av en behörig elektriker. Försiktighet Var noggrann vid inkoppling. Felaktig inkoppling, skadade kablar, etc. kan ge upphov till strömförande komponenter och fel rotationsriktning på motor och fläkt. • Anslutning av enfas ytterrotormotor. Anslut fasen till L (blå), nollan till N (svart) och skyddsjord till PE (gul/ grön). Se Bild 7. • Anslutning av trefas ytterrotormotor. Se Bild 8 alt. Bild 9. • Anslutning av trefas innerrotormotor. Se Bild 10. Exempel gäller för motor 220-240 V D/380-420 V Y. Rotationsriktningen för trefasmotorer ändras genom att byta plats på två anslutna faser. Om luftoljekylaren är utrustad med termokontakt för temperaturlarm, använd relä vid högre belastning än vad som är tillåtet för termokontakten. Anm! Oiltech AB rekommenderar att använda överströmsskydd för elmotor. Storleken på detta skydd, avsäkringen, varierar beroende på typ av fläkt samt på luftflöde genom kylaren. Kontakta Oiltech för rätt val av överströmsskydd. Anm! Vissa motorer är försedda med pluggade hål som kan användas som utlopp för eventuellt kondensvatten. Handhavande Innan första start Försiktighet Kontrollera att luftoljekylaren är ordentligt fastsatt och korrekt ansluten. OILTECH LAC AIR OIL COOLER | Installation and servicing manual | Svensk 4 Oiltech AB rekommenderar att: 1 luftoljekylaren körs igenom med samma vätska som används i själva systemet, 2 oljan filtreras innan den körs igenom kylaren. Se Tekniska data för rekommenderade vätskekombinationer. Innan start Försiktighet Se till att enheten kan startas utan risk för skada på person, egendom eller miljö. Kontrollera att: • luftoljekylarens alla delar inte är skadade • luftoljekylaren är rätt ansluten • fläkten roterar fritt (använd handkraft) • alla hydrauliska anslutningar är åtdragna • fläkthusets insida är fri från föremål som kan slungas iväg och orsaka skador på person eller egendom. Vid start Kontrollera att: • fläktens rotationsriktning och luftflöde överensstämmer med indikering på dekal på fläkthuset • inga onormala ljud och vibrationer förekommer • luftoljekylaren inte läcker Under drift Varning Risk för allvarlig brännskada. Vid drift kan luftoljekylaren bli mycket varm. Vidrör ej luftoljekylaren förrän den har svalnat. Maximalt tillåten oljetemperatur i kylelementet är 120° C. Kylelementet är dimensionerat för maximalt dynamiskt arbetstryck 14 bar. Överbelasta inte motorn, se märkskylt på elmotorn. Anm! Använd hörselskydd vid vistelse under en längre tid i närheten av en driftsatt luftoljekylare. Förebyggande underhåll De viktigaste underhållsåtgärderna är de förebyggande åtgärderna som brukaren utför med jämna intervaller. Kontrollera att: • inga onormala ljud och vibrationer förekommer • luftoljekylaren är ordentligt fastsatt • kylelementet är rent, smuts försämrar kyleffekten • luftoljekylaren är fri från skador, byt ut trasiga komponenter • luftoljekylaren inte läcker, åtgärda eventuellt läckage • varningsdekal är i gott skick, ersätt skadad eller saknad dekal omedelbart. Årligen Kontrollera den elektriska installationen. Får endast utföras av behörig elektriker. Rengöring Varning Risk för personskada. Koppla bort drivkällan för motorn innan rengöring. Varning Risk för allvarlig brännskada. Vid drift kan luftoljekylaren bli mycket varm. Vidrör ej luftoljekylaren förrän den har svalnat. Luftoljekylare Vid yttre rengöring av luftoljekylaren, med t.ex. vatten, demontera alla elanslutningar. Beakta elmotorns kapslingsklass. Kylelement Kylelementets luftlameller rengörs enklast med tryckluft. Vid behov, använd högtryckstvätt med avfettningsmedel. Vid högtrycksspolning måste strålen föras parallellt med lamellerna. Se Bild 11. Fläkthus Demontera kylelementet vid invändig rengöring av fläkthuset. Insidan av fläkthuset rengörs enklastmed tryckluft. Vid behov, använd avfettningsmedel. Blås med tryckluft från elmotorsidan genom fläktgallret. Underhåll Oiltech AB ansvarar inte för konsekvenser efter egenhändigt, av kunden, utförda reparationer eller modifieringar. Demontering av kylelement Varning Risk för allvarlig brännskada. Vid drift kan luftoljekylaren bli mycket varm. Vidrör ej luftoljekylaren förrän den har svalnat. Varning Risk för personskada. Koppla bort drivkällan för motorn innan underhåll. 1 2 3 4 5 6 Stäng av systemet. Koppla bort drivkällan för motorn. Se till att systemet är trycklöst. Stäng av oljetillförseln. Koppla bort hydraulslangarna från kylelementet. Skruva loss skruvarna med brickor som fäster kylelementet fläkthuset. Se Bild 12. 7 Lyft bort kylelementet. Montering av kylelement 1 Lyft kylelementet på plats. 2 Skruva fast kylelementet i fläkthuset. Se Bild 12. 3 Anslut hydraulslangarna till kylelementet. Se Bild 4 alt. Bild 5. 4 Koppla till drivkällan för motorn. 5 Utför åtgärder enligt Innan start och Vid start. Demontering av elmotor och fläkt Varning Risk för allvarlig brännskada. Vid drift kan luftoljekylaren bli mycket varm. Vidrör ej luftoljekylaren förrän den har svalnat. OLAER GROUP | Olaer | Oiltech | OilAir | FCH OILTECH LAC AIR OIL COOLER | Installation and servicing manual | Svenska Varning Risk för personskada. Koppla bort drivkällan för motorn innan underhåll. Anm! Vissa modeller har fast nav, se Bild 14, andra modeller har löst nav, se Bild 15 A och Bild 15 B. Fläkten är på modell LAC-033 och större, balanserad tillsammans med navet vid leverans. 1 2 3 4 Stäng av systemet. Koppla bort drivkällan för motorn. Säkra motorn. Skruva loss skruvarna med brickor som fäster motorfästet i fläkthuset. Se Bild 13. Om luftoljekylaren är försedd med motorkonsol, skruva loss skruvarna med brickor som håller motorkonsolen till fötterna. 5 Skruva loss skruven med bricka som fäster fläkten med nav i motoraxeln. Se Bild 14. Dra försiktigt loss fläkten med nav från motoraxeln. Använd avdragare vid behov. 6 Skruva loss skruvarna som fäster motorn i motorfästet. Se Bild 16. Om luftoljekylaren är försedd med motorkonsol, skruva loss skruvarna med brickor som håller motorn till motorkonsolen. 7 Lyft bort motorn. Vid ytterligare demontering av fläkten, märk upp alla delarna för att säkerställa korrekt återmontering, framförallt med avseende på balans och rotationsriktning. Se Bild 17. Montering av elmotor och fläkt Anm! Vissa modeller har fast nav, se Bild 14, andra modeller har löst nav, se Bild 15 A och Bild 15 B. Fläkten är på modell LAC-033 och större, balanserad tillsammans med navet vid leverans. 1 Om luftoljekylaren är försedd med motorkonsol, skruva fast motorn i motorkonsolen. 2 Skruva fast motorn i motorfästet. Se Bild 16. 3 Passa in spåret i navet mot krysskilen på motorn. Använd etanol i navet som smörjning och tryck fast fläkten med nav på motoraxeln. Knacka eventuellt försiktigt med t.ex. en gummiklubba. Applicera Loctite® på skruven och skruva fast fläkten med navet i motor axeln. Se Bild 14. 4 Kontrollera att fläkten sitter fast på motoraxeln och inte glappar. 5 Lyft motorfästet med fläkten, fläktgallret, motorn och eventuell motorkonsol på plats för montering i fläkthuset. 6 Justera in fläktgallret och motorn och skruva fast motorfästet i fläkthuset. Se Bild 13. Skruva fast eventuell motorkonsol. 7 Kontrollera att fläkten är centrerad och roterar fritt (använd handkraft). Vid behov justera placeringen av fläktgallret och motorn. 8 Se till att alla skruvar är åtdragna. 9 Koppla till drivkällan för motorn. 10 Utför åtgärder enligt Innan start och Vid start. The Professional Choice – in Fluid Management 5 Tekniska data Kylelement Maximalt statiskt arbetstryck Maximalt dynamiskt arbetstryck Värmeöverföringstolerans Maximalt tillåten oljetemperatur i kylelementet Maximal kyleffekt 21 bar 14 bar* ±6% 120 °C 160 kW * Testat enligt ISO/DIS 10771-1 Vätskekombinationer Mineralolja (enligt DIN 51524) Olja/vattenemulsion (enligt CETOP RP 77H) Vattenglykol (enligt CETOP RP 77H) Fosfatester (enligt CETOP RP 77H) HL/HLP HFA, HFB HFC HFD-R Material Kylelement Fläkthus Fläktblad/nav Fläktgaller Övriga delar Ytbehandling Aluminium Stål Glasfiberförstärkt polypropylen/ aluminium Stål Stål Elektrostatisk pulverlackering 3-fas motor 3-fas asynkronmotorer enligt IEC 60034-1 och IEC 640072 enligt DIN 57530/VDE 0530 Isolationsklass Temperaturstegring Kapslingsklass F B IP 55 1-fas motor Isolationsklass Temperaturstegring Kapslingsklass B B IP 44 3-fas motor LAC 004 Märkspänning Isolationsklass Temperaturstegring Kapslingsklass 230/400 V 50/60 Hz B B IP 44 Varianter av LAC luftoljekylare kan ha andra material och ytbehandlingar. The Professional Choice – in Fluid Management EC Declaration Of Conformity Manufacturer Oiltech AB Product LAC Air Oil Cooler Oiltech AB declares under sole responsibility that the product above-to which this declaration relates is in conformity with the Machinery Directive 98/37/EC. The product complies with the requirements of: - Safety of machinery – Basic concepts, general principles for design, EN ISO 12100-1 and EN ISO 12100-2. - Safety of machinery – Safety requirements for fluid power systems and their components – Hydraulics, EN 982. - Safety of machinery – Safety distance to prevent danger zones being reached by the upper limbs, EN 294. - Electric motors used on the product comply with the Low Voltage Directive (LVD) 73/23/EEC of 19 February 1973, modified by the Directive 93/68/EEC of 22 July 1993 and the Electromagnetic Compatibility Directive (EMC) 89/336/EEC amended by Directive 91/263/EEC, Directive 92/31/EEC and Directive 93/68/EEC. The above is valid for a complete product delivered by Oiltech and a complete product is CEmarked by Oiltech. If the product is not delivered complete by Oiltech the product is also not CE-marked by Oiltech and must not be put into service until the product has been declared in conformity with the requirements of the relevant directives and standards. Certificate of incorporation If the product is to be incorporated in a machinery the product must not be put into service until the machinery into which it has been incorporated has been declared in conformity with the provisions of the relevant directive and standards. Lidingö in September, 2008 OILTECH AB Mats Lindberg Technical Manager OILTECH AB | Postbox 10012 | SE-181 10 Lidingö | Sweden | www.oiltech.se | [email protected] | Phone: +46 (0)8-636 07 00 | Fax: +46 (0)8-767 97 56 | Org. no: 556107-9954 OLAER GROUP | Olaer | Oiltech | OilAir | FCH OILTECH LAC AIR OIL COOLER | Installation and servicing manual | English Introduction The purpose of this manual is to serve as a reference guide for installation, maintenance and operation of the LAC series of air oil coolers. Keep the manual at hand. A lost manual should be replaced as soon as possible. For optimum performance and in order to prevent incorrect use, please read this manual carefully and observe all safety precautions prior to putting the air oil cooler into service. Installation and maintenance work should only be carried out by qualified personnel. Oiltech/Olaer reserve the right to make technical alternations without notice. Use The LAC-series of air oil coolers is designed to cool hydraulic fluids in systems for industrial applications. Warranty and claims In the event of breakdown, consult your local Olaer office. Olaer/Oiltech shall not be held responsible for any consequences due to modification and/or variation made by the customer. Safety instructions The installation contractor as well as the user should be aware of, understand and observe all safety precautions in this manual, including any information mentioned on labels fixed to the product. Definition of Safety Warning Levels… …concerning personal safety All precautions concerning personal safety are classified as per below, depending on how severe the consequences of an incident could be. Danger This alerts you to an action or procedure that, if performed improperly, will produce bodily harm or death. Caution This alerts you to an action or procedure that, if performed improperly, is likely to produce bodily harm or death. Precaution This alerts you to an action or procedure that, if performed improperly, is likely to cause an accident with physical harm. …concerning other safety issues Notifications concerning other safety issues (property, process or environment) and maintenance work are classified as follows. Important This alerts you to an action or procedure that, if performed improperly, is likely to result in damages to the product, process or environment. ...concerning additional information Additional information is marked as follows: The Professional Choice – in Fluid Management 7 Note! This alerts you to important information related to the text in a paragraph. Overall instructions Lifting Caution Risk of bodily injury. To prevent physical harm when lifting unit, ensure correct lifting technique. Make sure that all lifting devices are free from damage and approved for the weight of the air oil cooler. Installation Danger Electrical shock hazard. All electrical con- nections must be made by a qualified electrician! Operation, handling and maintenance Caution Risk of bodily injury. Disconnect the motor power supply prior to maintenance. Caution Risk of bodily injury. Before disconnecting the hydraulic hoses and connections, make sure the system is depressurized. Caution Risk of severe burns. This indicates danger from high temperature surfaces. The air oil cooler could become extremely hot during operation. Always make sure the cooler is cool before touching. Precaution Risk of bodily injury. If the air oil cooler is fitted with a thermo contact, the fan will start automatically when the preset temperature has been reached. Be careful when standing close to rotating units. Precaution This indicates a toxic hazard. To prevent bodily injury, damage to property or environment, used fluid should be collected and taken to a special depôt. Important! Static electricity. Fans generate static electricity. Do not put sensitive devices (electronics etc.) in the immediate vicinity of the air oil cooler. Antistatic fans are available on request. Note! Use hearing protection when standing close to an operating air oil cooler for long periods of time. Warning label The warning label shown below is fitted to the air oil cooler at delivery. Always replace a damaged or missing label. • Caution! High temperature surface! Use hearing protection! Rotating fan! (P/N 500029 - 70x30 mm or P/N 5000291 - 120x50 mm) See Figure 1. Description Principally the LAC air oil cooler consists of a cooler matrix, an AC-motor, a fan, a fan housing and a fan guard. The cooler matrix is fitted to the hydraulic system with hydraulic hoses. OILTECH LAC AIR OIL COOLER | Installation and servicing manual | English 8 Small air oil coolers are equipped with a single phase or three phase outer-rotor motor. Larger air oil coolers are equipped with a standard three phase asynchronous inner rotor motor according to IEC 60072 and IEC 60034. Normal ambient temperature for the electric motor: -20 °C - +40 °C. Connect the electrical motor to the electricity supply system according to Electrical connection. See the rating plate for further information. The electric motor on large air oil coolers is equipped with a motor bracket. The air oil cooler can be provided with a thermo contact. The fan will then start automatically when the preset temperature has been reached. The acoustic pressure level could reach 50-92 LpA dB(A) at 1 m distance normal operating conditions. Inappropriate locatation, or operation under extreme conditions, could generate increase in acoustic pressure level and reduced cooling capacity. For general operating data, see Technical data. Identification plate The identification plate is fitted on the fan housing. See Figure 2. The identification plate contains the following information: A - Part number B - Designation C - Serial number D - Date of delivery (year and week, e.g. 0818, i.e. year 08 and week 18). Replace a damaged or missing type plate as soon as possible. Installation Lifting Caution Risk of bodily injury. To prevent physical harm when lifting the unit, ensure correct lifting technique. Make sure that all lifting devices are free from damage and approved for the weight of the air oil cooler. Air oil coolers as from size 033 are prepared for installation of lifting eyes. Lifting eyes are available from Oiltech/Olaer on request. Mounting Precaution Risk of bodily harm. Make sure that the air oil cooler is securely fixed. The air oil cooler can be mounted in any position. However, an upright installation standing on its feet is recommended. A free space corresponding to a minimum of half the height of the matrix (A) should be available in front of and behind the air oil cooler to allow for good air flow, i.e. optimal cooling capacity as well as low acoustic pressure level. See Figure 3. Inappropriate location of the air oil cooler or operation under extreme conditions could generate increased acoustic pressure level and reduce cooling capacity. Connection of cooler matrix Connect the cooler matrix using flexible hydraulic hoses both to and from the cooler. Make sure that all connections and hoses are sized according to the system pressure, flow, temperature and fluid. Connect the cooler matrix as illustrated below. See Figure 4 or Figure 5. A - Inlet. B - Outlet for single-pass. C - Outlet for two-pass. D - Thermo contact connection. Dimensions on connections are cooler matrix size dependent. Connection chart, see Figure 6. Important The cooler matrix is designed for maximum dynamic working pressure 14 bar. When the cooler is installed in a return line, there should be no pressure spikes. If this is not possible, an offline cooling system should be used. Electrical connection Danger Risk of electrical shock. All electrical connections must be made by a qualified electrician! Prior to connecting the motor to the electricity supply system, make sure the information on the motor label corresponds to the line voltage and frequency. The motor should be installed according to general and electrical safety rules and should be made by a qualified electrician. Precaution Be careful when connecting. Improperly made connections, damaged cables, etc. could cause components to become live or result in the incorrect direction of rotation of the electric motor. • Connection of a single phase outer rotor motor: Connect the live to L (blue), neutral to N (black) and ground to PE (yellow/green). See Figure 7. • Connection of three phase outer rotor motor. See Figure 8 or Figure 9. • Connection of three phase inner rotor motor. See Figure 10. Example for motor: 220-240 V D/380-420 V Y. The direction of rotation of three phase motors is altered by changing connection of two phases. If the cooler is fitted with a thermo contact, use a relay if the current load exceeds the maximum load for the thermo contact. Note! A motor overload protection is recommended. The size of the overload protection/fuse, depends on fan size and air flow across the cooler. Contact Oiltech/Olaer concerning motor protection/fuse size. OLAER GROUP | Olaer | Oiltech | OilAir | FCH OILTECH LAC AIR OIL COOLER | Installation and servicing manual | English Note! Some motors are fitted with plugged holes, which can be used for draining condensed water. Handling 9 • that the air oil cooler is free from damage, replace damaged components • that the air oil cooler is free from leaks • that warning labels are in good condition, replace any damaged/missing label immediately. Prior to initial start-up Precaution Check that the air oil cooler is securely fixed and correctly connected. We recommend that you proceed as follows prior to start-up: 1 Run the air oil cooler with the system fluid. 2 Filter the fluid before passing through the cooler. See Technical specification for recommended fluid compatibility. Prior to start up Precaution Do not start the air oil cooler if there is a risk of damage to person, property or environment. Check: • that all air oil cooler parts are free from damages • that the air oil cooler is correctly connected • that the fan rotates freely (use hand force) • that all hydraulic connections are tight • that the inside of the fan housing is free from objects that could be thrown around and cause bodily injury or damage to property. At start-up Check: • that the direction of rotation of the fan and the air flow correspond to indications on the fan housing • that the air oil cooler is free from abnormal noise and vibrations, • that the air oil cooler is free from leaks During operation Caution Risk of severe burns. The air oil cooler could become extremely hot during operation. Make sure that the air oil cooler is cool before touching. Maximum permitted fluid temperature in the cooler matrix is 120 °C. Do not overload the electric motor. See label on electric motor rating plate. The cooler matrix is designed for maximum allowed dynamic working pressure 14 bar. Note! Use hearing protection when standing in the immediate vicinity of an operating air oil cooler for long periods of time. Preventive maintenance Preventive maintenance work must be carried out at regular intervals. Make sure: • that there is no abnormal noise or vibrations • that air oil cooler is securely fixed • that the cooler matrix is clean, debris will reduce the cooling capacity The Professional Choice – in Fluid Management Annually: Check the electrical installation. This may only be made by a qualified electrician. Cleaning Danger Risk of bodily injury. Prior to cleaning, disconnect all motor power supplies. Caution Risk of severe burns. The air oil cooler could become extremely hot during operation. Make sure the air oil cooler is cool before touching. Air oil cooler When cleaning the exterior of the cooler, for instance using water, disconnect all power supplies. Be aware of the electric motor protection standard. Cooler matrix The air fins of the matrix can be cleaned by blowing through with compressed air. If necessary a highpressure washing system and degreasing agent can be used. When using a high-pressure washing system point the jet parallel to the air fins. See Figure 11. Fan housing Remove the cooler matrix when cleaning the inside of the fan housing. To clean the inside of the fan housing, use compressed air. If necessary a degreasing agent can be used. Blow with compressed air from the electric motor side through the fan guard. Maintenance Olaer/Oiltech shall not be held responsible for any consequences due to repair and/or modification made by the customer. Dismounting the cooler matrix Caution Risk of severe burns. The air oil cooler could become extremely hot during operation. Make sure the air oil cooler is cool before touching. 1 2 3 4 5 Caution Risk of bodily injury. Disconnect the motor power supply prior to maintenance. Turn off the system. Disconnect the electric motor power supply. Make sure that the system is depressurized. Turn off the oil supply. Disconnect the flexible hydraulic hoses from the cooler matrix. 6 Unscrew the screws with washers fixing the cooler matrix to the fan housing. See Figure 12. 7 Remove the cooler matrix. 10 OILTECH LAC AIR OIL COOLER | Installation and servicing manual Mounting of the cooler matrix 1 Locate the cooler matrix. 2 Fit the cooler matrix to the fan housing. See Figure 12. 3 Connect the flexible hydraulic hoses to the cooler matrix. See Figure 4 and Figure 5. 4 Connect the electric motor power supply 5 Proceed to Prior to start-up and At start-up. Removing the electric motor and the fan Caution Risk of severe burns. The air oil cooler could become extremely hot during operation. Make sure the air oil cooler is cool before touching. Caution Risk of bodily harm. Prior to maintenance, disconnect the electric motor power supply. Note! Some fan hubs are fixed, see Figure 14, and some are detachable, see Figure 15 A and Figure 15 B. The fan is balanced together with the hub as from size LAC-033. 1 Turn off the system. 2 Disconnect the electric motor power supply. 3 Secure the electric motor. 4 Unscrew the screws with washer fixing the motor attachment to the fan housing, see Figure 13. If the air oil cooler is fitted with a motor bracket, unscrew the screws with washers fixing the motor bracket to the feet. 5 Unscrew the screw with washer fixing the fan to the motor shaft. See Figure 14. Pull with care the fan and hub from the motor shaft. Use a pulley if required. 6 Unscrew the screws fixing the motor to the motor attachment. See Figure 16. If the air oil cooler is fitted with motor bracket, unscrew the screws with washers fixing the motor to the motor bracket. 7 Remove the motor. If further dismounting of the fan is required, label all details to ensure correct mounting, first of all with regard to balance and direction of rotation. See Figure 17. Mounting of the electric motor and fan Note! Some fan hubs are fixed, see Figure 14, and some are detachable, see Figure 15 A and Figure 15 B. The fan is balanced together with the hub as from size LAC-033. 1 If the air oil cooler is fitted with motor bracket, fit the motor to the motor bracket. 2 Secure the electric motor to the motor attachment. See Figure 16. 3 Fit the hub in the groove against the key on the motor. Lube the hub with ethanol and secure the fan/hub to the motor shaft. If required, knock carefully with e.g. a rubber mallet. Use Loctite® on the screw and secure the fan/hub on the motor shaft with screws. See Figure 14. 4 Make sure that the fan is fitted to the motor shaft without too much play. 5 Place the motor attachment with fan, fan guard, motor and bracket, if any, in the fan housing. 6 Adjust the fan guard and motor and secure the motor attachment in the fan housing with screws. | English See Figure 13. Secure the bracket with screws. 7 Make sure that the fan is centered and rotates freely (using hand force). If required, adjust the location of the fan guard and motor. 8 Check the screws for tightness. 9 Connect the electric motor power supply. 10 Proceed to Prior to start-up and At start-up. Technical specification Cooler matrix Maximum static working pressure Maximum dynamic working pressure Heat transfer allowance Maximum fluid temperature in the cooler matrix Maximum cooling capacity 21 bar 14 bar* ±6% 120 °C 160 kW * Tested according to ISO/DIS 10771-1 Fluid compatibility Mineral oil (according to DIN 51524) Oil/water emulsion (according to CETOP RP 77H) Water glycol (according to CETOP RP 77H) Phosfatester (according to CETOP RP 77H) HL/HLP HFA, HFB HFC HFD-R Material Cooler matrix Fan housing Fan blades/hub Aluminium Steel Glass fibre reinforced polypropylene/ aluminium Fan guard Steel Other parts Steel Surface treatment Electrostatic powder coated 3-phase motor 3-phase asynchronous motors in accordance with IEC 60034-1 and IEC 60072 in accordance with DIN 57530/VDE 0530 Insulation class F Rise of temperature B Protection class IP 55 1-phase motor Insulation class Rise of temperature Protection class 3-phase motor LAC 004 Rated voltage Insulation class Rise of temperature Protection class B B IP 44 230/400V 50/60 Hz B B IP 44 LAC air oil coolers could have different material and surface treatments. OLAER GROUP | Olaer | Oiltech | OilAir | FCH The Professional Choice – in Fluid Management EC Declaration Of Conformity Manufacturer Oiltech AB Product LAC Air Oil Cooler Oiltech AB declares under sole responsibility that the product above-to which this declaration relates is in conformity with the Machinery Directive 98/37/EC. The product complies with the requirements of: - Safety of machinery – Basic concepts, general principles for design, EN ISO 12100-1 and EN ISO 12100-2. - Safety of machinery – Safety requirements for fluid power systems and their components – Hydraulics, EN 982. - Safety of machinery – Safety distance to prevent danger zones being reached by the upper limbs, EN 294. - Electric motors used on the product comply with the Low Voltage Directive (LVD) 73/23/EEC of 19 February 1973, modified by the Directive 93/68/EEC of 22 July 1993 and the Electromagnetic Compatibility Directive (EMC) 89/336/EEC amended by Directive 91/263/EEC, Directive 92/31/EEC and Directive 93/68/EEC. The above is valid for a complete product delivered by Oiltech and a complete product is CEmarked by Oiltech. If the product is not delivered complete by Oiltech the product is also not CE-marked by Oiltech and must not be put into service until the product has been declared in conformity with the requirements of the relevant directives and standards. Certificate of incorporation: If the product is to be incorporated in a machinery the product must not be put into service until the machinery into which it has been incorporated has been declared in conformity with the provisions of the relevant directive and standards. Lidingö in August, 2008 OILTECH AB Mats Lindberg Technical Manager OILTECH AB | Postbox 10012 | SE-181 10 Lidingö | Sweden | www.oiltech.se | [email protected] | Phone: +46 (0)8-636 07 00 | Fax: +46 (0)8-767 97 56 | Org. no: 556107-9954 OLAER GROUP | Olaer | Oiltech | OilAir | FCH 12 OILTECH LAC AIR OIL COOLER | Installation and servicing manual Einleitung Diese Anleitung bezieht sich auf die LAC Baureihe von Öl/Luftkü̈hlern. Sie soll als Hilfsmittel bei Installation, Einsatz und Wartung des Öl/Luftkühlers dienen. Diese Anweisung ist so zu verwahren, dass sie jederzeit verfügbar ist. Wenn sie verloren geht, ist sie sofort zu ersetzen. Anweisungen und Warntexte sind sorgfältig zu lesen und entsprechend zu beachten, bevor der Öl/Luftkühler zum Einsatz kommt. Damit wird sichergestellt, dass der Öl/Luftkü̈hler optimal genutzt und eine fehlerhafte Benutzung ausgeschlossen wird. Zu diesem Zweck darf nur geschultes Personal den Öl/ Luftkü̈hler installieren, bedienen und warten. Oiltech/Olaer behält sich technische Änderungen vor. Einsatzbereiche Der LAC Öl/Luftkühler ist für die Kühlung von Hydraulikflüssigkeit in Systemen für industrielle Anlagen vorgesehen. Garantie und Reklamationen Im Störungsfall, wenden Sie sich bitte an Ihren Olaer Partner. Oiltech/Olaer haftet nicht für Folgeschäden, die durch eigenmächtige Reparaturen und/oder Veränderungen durch den Kunden entstehen. | Deutsch Wichtig weist darauf hin, dass ein Unfall sich ereignen kann, wenn diese Vorschriften nicht beachtet werden. Ein solcher Unfall kann zu Beschädigungen an Gegenständen, Prozessen und Umfeld führen. ...und Zusatzangaben Die Zusatzangaben werden wie folgt gekennzeichnet: Hinweis! Bezieht sich auf Zusatzinformationen, die das Verständnis fü̈r einen bestimmten Teilbereich oder den Umgang damit erleichtern. Übergeordnete Vorschriften Anheben Warnung Quetschgefahr. Damit beim Anheben Verletzungen verhindert werden, ist das richtige Hebeverfahren anzuwenden. Sicherstellen, dass die verwendeten Hebevorrichtungen und -geräte keine Fehler aufweisen und fü̈r das Gewicht des Öl/Luftkü̈hler zugelassen sind. Installation Sicherheitsvorschriften Installateure und Anwender mü̈ssen Warnungen und Hinweise auf Schildern, Aufklebern, sowie diese Anweisungen lesen und beachten. Warnstufen und Hinweistexte ...zur persönlicher Sicherheit Hinweistexte zur persönlichen Sicherheit sind in die drei nachstehend beschriebenen Stufen unterteilt, die sich an den möglichen ernsthaften Folgen eines Unfalls orientieren. Gefahr Elektroschock. Elektrische Anschlüsse dü̈rfen nur von einem entsprechend ausgebildeten Elektriker ausgeführt werden! Betrieb, Bedienung und Wartung Warnung Verletzungsgefahr! Vor Wartungsarbeiten den Motorantrieb abschalten und entsprechend vom Stromnetz absperren. Warnung Verletzungsgefahr! Vor dem Lösen von Hydraulikanschlüssen und Hydraulikschläuchen sicherstellen, dass kein Druck mehr in der Anlage vorhanden ist. Gefahr weist darauf hin, dass ein Unfall sich ereignen wird, wenn diese Vorschriften nicht beachtet werden. Ein solcher Unfall führt zu ernsthaften Verletzungen oder sogar zu Todesfällen. Warnung weist darauf hin, dass ein Unfall sich ereignen kann, wenn diese Vorschriften nicht beachtet werden. Ein solcher Unfall kann zu ernsthaften Verletzungen oder sogar zu Todesfällen fü̈hren. Vorsicht weist darauf hin, dass ein Unfall sich ereignen kann, wenn diese Vorschriften nicht beachtet werden. Ein solcher Unfall kann zu Verletzungen fü̈hren. ...und sonstigen Sicherheit Hinweistexte zur sonstigen Sicherheit (Gegenstände, Prozesse oder Umfeld) und Bedienung sind wie folgt unterteilt. Warnung Ernsthafte Verbrennungsgefahr! Im Betrieb kann der Öl/Luftkü̈hler sehr heiß werden. Daher sollte er erst berührt werden, wenn er sich abgekühlt hat. Vorsicht Quetschgefahr! Der Öl/Luftkühler lässt sich ü̈ber einen Thermokontakt regeln. Das Lüfterrad läuft dann bei Erreichen der Einschalttemperatur automatisch an. In der Nähe sich drehender Komponenten äußerst vorsichtig vorgehen. Vorsicht Vergiftungsgefahr! Verbrauchtes Öl ist in der dafür vorgesehenen Entsorgungsanlage zu entsorgen, damit es nicht zu Verletzungen oder Schäden an Gegenständen oder Umwelt kommt. Wichtig Statische Elektrizität! Das Lü̈fterrad kann statische Ladung durch Luftreibung erzeugen. Bringen Sie keine empfindlichen Geräte (Elektronik usw.) in die unmittelbare Nähe des Öl/Luftkühlers. Antistatische Lüfterräder können separat bestellt werden. OLAER GROUP | Olaer | Oiltech | OilAir | FCH OILTECH LAC AIR OIL COOLER | Installation and servicing manual | Deutsch Hinweis! Beim längerem Aufenthalt in der Nähe des Öl/ Luftkü̈hlers im Betrieb ist Gehörschutz zu tragen. 13 Installation Anheben Warnaufkleber Der nachstehend definierte Aufkleber ist bei Lieferung am Öl/Luftkühler angebracht. Ein beschädigter oder fehlender Aufkleber ist sofort zu ersetzen. • Warnung! Heiße Oberflächen! Gehörschutz tragen! Rotierendes Lüfterrad! (Art.-Nr. 500029 – 70 x 30 mm oder Art.-Nr. 5000291 – 120 x 50 mm) Siehe Abb. 1. Beschreibung Der LAC Öl/Luftkü̈hler LAC besteht im Wesentlichen aus einem Kühlelement, einem Wechselstrommotor, einem Lü̈fterrad, einem Lü̈ftergehäuse und einem Schutzgitter. Das Kühlelement wird ü̈ber Hydraulikschläuche an die Hydraulikanlage angeschlossen. Kleine Kühlern sind mit einem einphasigen oder dreiphasigen Außenrotormotor ausgestattet. Große Kü̈hlern sind mit einem normalen dreiphasigen, asynchronen Innenrotormotor ausgestattet, der den Anforderungen gemäß IEC 60072 und IEC 60034 entspricht. Normale Umgebungstemperatur des Elektromotors: -20 °C – +40 °C. Der Elektromotor wird den Anweisungen entsprechend an das Stromnetz angeschlossen. Siehe Elektrischer Anschluss. Für weitere Motordaten, siehe Typenschild. Je nach Motorgröße ist der Öl/Luftkü̈hler mit einer Motorkonsole ausgestattet. Der Öl/Luftkü̈hler lässt sich dann über einen Thermokontakt regeln. Das Lü̈fterrad läuft dann bei Erreichen der Einschalttemperatur automatisch an. Der Schalldruckpegel im Abstand von 1 m kann zwischen 50 und 92 LpA dB(A) liegen unter normalen Betriebsbedingungen. Eine unvorteilhafte Anbringung, oder Betrieb unter extremen Betriebsbedingungen, kann einen hohen Schalldruckpegel und eine verringerte Kühlleistung verursachen. Für allgemeine Angaben, siehe Technische Daten. Typenschild Das Typenschild des Öl/Luftkü̈hlers befindet sich am Lüftergehäuse. Siehe Abb. 2. Das Typenschild enthält Angaben zu: A - Artikelnummer B - Artikelbezeichnung C - Seriennummer D - Lieferdatum (Jahr und Kalenderwoche, z.B. 0818, also Jahr 2008 und KW 18). Ein beschädigtes oder fehlendes Typenschild ist sofort zu ersetzen. The Professional Choice – in Fluid Management Warnung Quetschgefahr! Damit beim Anheben Verletzungen verhindert werden, ist das richtige Hebeverfahren zu verwenden. Sicherstellen, dass die verwendeten Hebevorrichtungen und -geräte keine Fehler aufweisen und für das Gewicht des Öl/Luftkühlers zugelassen sind. Alle Öl/Luftkü̈hler ab Größe 033 sind für Hebeösen vorbereitet. Hebeösen sind als Zubehör von Oiltech/Olaer zu bestellen. Montage Vorsicht Verletzungsgefahr! Sicherstellen, dass der Öl/Luftkühler immer ordnungsgemäß befestigt ist. Der Öl/Luftkü̈hler kann in jeder Position montiert werden, die stehende Anbringung auf den Füßen ist jedoch zu bevorzugen. Der Abstand zur nächsliegende Wand hinten und vor dem Kühler sollte die halbe Höhe des Kühlelements (A) nicht unterschreiten, damit eine optimale Kühlleistung durch gute Luftversorgung erzielt wird. Siehe Abb. 3. Eine unvorteilhafte Anbringung, oder Betrieb unter extremen Betriebsbedingungen, kann einen hohen Schalldruckpegel und eine verringerte Kühlleistung verursachen. Anschluss des Kühlelements Benutzen Sie Hydraulikschläuche auf der Ein- und Austrittsseite des Kühlelements. Sicherstellen, dass Anschlüsse und Schläuche an Druck, Durchsatz, Temperatur und Flüssigkeit der Anlage angepasst sind. Hydraulikschläuche wie folgt an das Kühlelement anschließen: Siehe Abb. 4 bzw. Abb. 5. ABCD- Eintritt. Austritt für Einzeldurchlauf. Austritt für Doppeldurchlauf. Anschluss für Thermokontakt. Die Größe der Anschlüsse hängt von der Größe des Kühlelements ab. Schaltplan siehe Abb. 6. Wichtig Das Kühlelement ist auf einen maximalen dynamischen Betriebsdruck von 14 bar ausgelegt. Druckstöße sind bei der Installation des Öl/Luftkühlers in der Rücklaufleitung des Systems zu meiden. Falls dies nicht möglich ist, installieren Sie den Kühler in einen getrennten Kreislauf. 14 OILTECH LAC AIR OIL COOLER | Installation and servicing manual | Deutsch Elektrischer Anschluss Gefahr Elektroschock! Elektrische Installationen und Anschlüsse dürfen nur von einem entsprechend ausgebildeten Elektriker ausgeführt werden! Vor dem Anschluss des Motors an das Stromnetz sind die Angaben auf dem Typenschild des Motors mit der Spannung und Frequenz des Netzes zu vergleichen. Der Motor ist gemäß den allgemein gültigen Vorschriften und Elektrosicherheitsbestimmungen von einem ausgebildeten Elektriker zu installieren. Vorsicht Beim Anschluss ist sehr vorsichtig zu arbeiten! Falsche Anschlüsse, beschädigte Kabel etc. können dazu führen, dass Komponenten unter Strom gesetzt werden und der Motor und Lüfterrad sich in die falsche Richtung drehen. • Anschluss des einphasigen Außenrotormotors. Die Phase an L (blau), Nullleiter an N (schwarz) und Schutzerdung n PE (gelb/grun) anschließen. Siehe Abb. 7. • Anschluss des dreiphasigen Außenrotormotors. Siehe Abb. 8 bzw. Abb. 9. • Anschluss des dreiphasigen Innenrotormotors. Siehe Abb. 10. Beispiel Elektromotor 220-240 V D/380-420 V Y. Die Drehrichtung des Dreiphasenmotors wird geändert, indem die angeschlossenen Phasen ausgetauscht werden. Ist der Öl/Luftkühler mit einem Thermokontakt ausgestattet, sollte ein Relais verwendet werden, falls die Strombelastung über die für den Termokontakt zulässigen Wert liegt. Hinweis! Oiltech/Olaer empfiehlt den Einsatz eines Überlastungsschutzes für den Elektromotor. Die Grösse dieses Schutzes, Absicherung, varieert gemäss Typ des Ventilators und Luftdurchflussmenge. Oiltech/Olaer steht mit Beratung gern zur Verfügung. Hinweis! Einige Motoren sind mit abgedeckten Löchern versehen, die als Auslauf für eventuell auftretendes Kondenswasser dienen können. Bedienung Vor dem ersten Start Vorsicht Verletzungsgefahr! Überprüfen, ob der Öl/Luftkühler ordnungsgemäß angeschlossen und befestigt ist. Oiltech/Olaer empfiehlt folgende Vorgehensweise vor der Inbetriebnahme des Öl/Luftkühlers: 1 Öl/Luftkühler mit derselben Flüssigkeit wie im sonstigen System durchspülen. 2 Die Flüssigkeit vor dem Durchlauf des Kühlers filtern. Empfohlene Flüssigkeitskombinationen siehe Technische Daten. Vor dem Start Vorsicht Der Öl/Luftkühler nicht in Betrieb nehmen, wenn Gefahr von Schäden und Verletzungen an Personen, Material oder Umwelt hoch ist. Folgendes ist zu überprüfen: • Alle Teile des Öl/Luftkühlers müssen unbeschädigt sein. • Das Öl/Luftkühler muss ordnungsgemäß angeschlossen sein. • Das Lüfterrad muss frei rotieren können (mit der Hand bewegen). • Alle hydraulischen Anschlüsse müssen gut angezogen sein. • Die Innenseite des Lüftergehäuses ist frei von Gegenständen, die weggeschleudert werden und Personen verletzen oder Dinge beschädigen können. Beim Start Folgendes ist zu überprüfen: • Drehrichtung des Lüfterrads und Luftdurchsatz müssen mit den Angaben auf dem Aufkleber am Lüftergehäuse übereinstimmen. • Es dürfen keine ungewöhnlichen Geräusche oder Vibrationen vorkommen. • Keine Leckage vorkommen Im Betrieb Warnung Ernsthafte Verbrennungsgefahr! Im Betrieb kann der Öl/Luftkühler sehr heiß werden. Daher sollte er erst berührt werden, wenn er sich abgekühlt hat. Die maximal zulässige Öltemperatur im Kühlelement beträgt 120 °C. Den Elektromotor nicht überlasten, siehe Typenschild des Elektromotors. Das Kühlelement ist auf einen maximalen dynamischen Betriebsdruck von 14 Bar ausgelegt. Hinweis! Beim längerem Aufenthalt in der Nähe des Öl/Luftkühlers im Betrieb ist Gehörschutz zu tragen. Vorbeugende Wartung Die wichtigsten Wartungsmaßnahmen dienen der Vorbeugung und sind vom Anwender in regelmäßigen Abständen durchzuführen. Folgendes ist zu überprüfen: • Es dürfen keine ungewöhnlichen Geräusche oder Vibrationen vorkommen. OLAER GROUP | Olaer | Oiltech | OilAir | FCH OILTECH LAC AIR OIL COOLER | Installation and servicing manual | Deutsch • Der Öl/Luftkühler ist ordnungsgemäß befestigt. • Das Kühlelement ist sauber, Verunreinigungen verschlechtern die Kühlleistung. • Der Öl/Luftkühler ist unbeschädigt, defekte Teile sind auszutauschen. • Der Öl/Luftkühler darf nicht undicht sein. Eventuelle Leckage ist zu beheben. • Der Warnaufkleber muss sich in einem guten Zustand befinden. Ist er beschädigt oder entfernt worden, ist er sofort zu ersetzen. Jährliche Maßnahmen: Elektroanlage überprüfen. Dies darf nur von einem entsprechend ausgebildeten Elektriker ausgeführt werden! Reinigung Warnung Verletzungsgefahr! Vor der Reinigung den Motorantrieb abschalten. Warnung Ernsthafte Verbrennungsgefahr! Im Betrieb kann der Öl/Luftkühler sehr heiß werden. Kühlelement vor der Reinigung abkühlen lassen. Öl/Luftkühler Bei äußeren Reinigungsarbeiten, z.B. mit Wasser, trennen Sie den Kühler von der Stromversorgung. Dabei die Schutzart des Motors beachten. Kühlelement Die Luftlamellen können mit Druckluft gereinigt werden. Wenn notwendig, Hochdruckwaschanlage und ein Entfettungsmittel verwenden. Beim Einsatz einer Hochdruckwaschanlage muss der Strahl vorsichtig parallel zu den Luftlamellen gehalten werden. Siehe Abb. 11. Lüftergehäuse Das Kühlelement zur Innenreinigung des Lüftergehäuses abnehmen. Das Innere des Lüftergehäuses wird nur mit Druckluft gereinigt. Bei Bedarf kann ein Entfetter eingesetzt werden. Die Druckluft von der Elektromotorseite durch das Schutzgitter einleiten. Wartung Olaer/Oiltech haftet nicht für Folgeschäden, die durch Reparatur und/oder Modifikation bei der Anwender entstehen. Demontage des Kühlelements Warnung Ernsthafte Verbrennungsgefahr! Im Betrieb kann der Öl/Luftkühler sehr heiß werden. Daher sollte er erst berührt werden, wenn er sich abgekühlt hat. Warnung Verletzungsgefahr! Vor Wartungsarbeiten den Motorantrieb abschalten. 1 Anlage abschalten. 2 Den Motorantrieb abschalten. 3 Sicherstellen, dass sich kein Druck mehr in der Anlage befindet. The Professional Choice – in Fluid Management 15 4 Die Ölzufuhr schliessen. 5 Die Hydraulikschläuche vom Kühlelement abnehmen. 6 Die Schrauben samt Unterlegscheiben abschrauben, mit denen das Kühlelement am Lüftergehäuse befestigt ist. Siehe Abb. 12. 7 Das Kühlelement abnehmen. Montage des Kühlelements 1 Das Kühlelement anbringen. 2 Das Kühlelement am Lüftergehäuse anschrauben. Siehe Abb. 12. 3 Die Hydraulikschläuche am Kühlelement anschließen. Siehe Abb. 4 bzw. Abb. 5. 4 Den Motorantrieb einschalten. 5 Maßnahmen gemäß Anweisungen Vor dem Start und Beim Start durchführen. Demontage von Elektromotor und Lüfterrad Warnung Ernsthafte Verbrennungsgefahr! Im Betrieb kann der Öl/Luftkühler sehr heiß werden. Daher sollte er erst berührt werden, wenn er sich abgekühlt hat. Warnung Verletzungsgefahr! Vor Wartungsarbeiten den Motorantrieb abschalten. Hinweis! Einige Modelle haben eine starre Nabe. Siehe Abb. 14. Andere Modelle haben eine lose Nabe. Siehe Abb. 15 A und Abb. 15 B. Das Lüfterrad ist ab Grösse LAC-033 bei Lieferung mit der Nabe ausgewuchtet. 1 2 3 4 Anlage abschalten. Den Motorantrieb abschalten. Den Motor sichern. Die Schrauben samt Unterlegscheiben abschrauben, mit denen die Motorhalterung am Lüftergehäuse befestigt ist, siehe Abb. 13. Wenn der Öl/Luftkühler mit einer Motorkonsole ausgestattet ist, sind die Schrauben samt Unterlegscheiben zu entfernen, mit denen die Motorkonsole an den Fü̈ßen befestigt ist. 5 Die Schraube samt Unterlegscheibe abschrauben, mit denen das Lüfterrad mit Nabe an der Motorwelle befestigt ist, siehe Abb. 14. Das Lüfterrad mit Nabe vorsichtig von der Motorwelle abziehen. Bei Bedarf einen Abzieher verwenden. 6 Die Schrauben abschrauben, mit denen der Motor an der Motorhalterung befestigt ist. Siehe Abb. 16. Wenn der Öl/Luftkühler mit einer Motorkonsole ausgestattet ist, sind die Schrauben samt Unterlegscheiben zu entfernen, mit denen der Motor an der Motorkonsole befestigt ist. 7 Den Motor abnehmen. Bei einer weiteren Zerlegung des Lüfterrads sind alle Teile zur Sicherstellung der korrekten Montage zu kennzeichnen, vor allen Dingen unter den Aspekten Auswuchtung und Drehrichtung. Siehe Abb. 17. 16 OILTECH LAC AIR OIL COOLER | Installation and servicing manual | Deutsch Montage von Elektromotor und Lüfterrad Hinweis! Einige Modelle haben eine starre Nabe. Siehe Abb. 14. Andere Modelle haben eine lose Nabe. Siehe Abb. 15 A und Abb. 15 B. Das Lufterrad ist ab Größe LAC-033 bei Lieferung mit der Nabe ausgewuchtet. 1 Wenn das Öl/Luftkühler mit einer Motorkonsole ausgestattet ist, den Motor an der Motorkonsole anschrauben. 2 Den Motor an der Motorhalterung anschrauben. Siehe Abb. 16. 3 Das Lüfterrad wird auf der Motorwelle derart montiert, dass die in der Lüfterradnabe angebrachte Nut auf die mit einer Passfeder versehene Motorwelle entsprechend justiert und aufgesetzt wird. Bei der Montage des Lüfterrads empfehlen wir Schmiermittel z.B. Äthanol zu verwenden. Wenn erforderlich, ist die Lüfterradnabe vorsichtig mit einem Gummihammer an der Motorwelle zu fixieren. Loctite® auf die Shraube auftragen und das Lüfterrad mit der Nabe an der Motorwelle festschrauben. Siehe Abb. 14. 4 Überprüfen, ob das Lüfterrad fest an der Motorwelle sitzt und kein Spiel hat. 5 Die Motorhalterung mit Lüfterrad, Schutzgitter, Motor und eventuell Motorkonsole zur Montage im Lüftergehäuse anheben. 6 Schutzgitter und Motor ausrichten und die Motorhalterung am Lüftergehäuse anschrauben. Siehe Abb. 13. Eine eventuell vorhandene Motorkonsole anschrauben. 7 Überprüfen, ob das Lüfterrad zentriert ist und sich frei dreht (mit der Hand drehen). Bei Bedarf die Anbringung von das Schutzgitter und Motor ändern. 8 Sicherstellen, dass alle Schrauben angezogen sind. 9 Den Motorantrieb einschalten. 10 Maßnahmen gemäß Anweisungen Vor dem Start und Beim Start durchführen. Technische Daten Kühlelement Maximaler statischer Betriebsdruck Maximaler dynamischer Betriebsdruck Kühlleistungstoleranz Maximale Öltemperatur im Klelement Maximale Kühlleistung 21 Bar 14 Bar* ±6% 120 °C 160 kW * Gemäß ISO/DIS 10771-1 geprüft Kompatibilität der Betriebsmedien Mineralöl (gemäß DIN 51524) Öl-/Wasseremulsion (gemäß CETOP RP 77H) Wasserglykol (gemäß CETOP RP 77H) Phosphorsäureester (gemäß CETOP RP 77H) HL/HLP HFA, HFB HFC HFD-R Kompatibilität der Betriebsmedien Mineralöl Öl-/Wasseremulsion Wasserglykol Phosphorsäureester HL/HLP gemäß DIN 51524 HFA, HFB gemäß CETOP RP 77H HFC gemäß CETOP RP 77H HFD-R gemäß CETOP RP 77H Material Kühlelement Lüftergehäuse Lüfterrad/Nabe Schutzgitter Sonstige Teile Oberflächenschutz Aluminium Stahl Glasfaserverstärktes Polypropylen/ Aluminium Stahl Stahl Im Magnetpulververfahren aufgebrachte Pulverschicht Dreiphasen-Motor Dreiphasen-Asynchronmotor gem. IEC 60034-1 und IEC 60072 gem. DIN 57530/VDE 0530 Isolationsklasse F Temperaturanstieg B Schutzklasse IP 55 Einphasen-Motor Isolationsklasse Temperaturanstieg Schutzklasse Dreiphasen-Motor LAC 004 Nennspannung Isolationsklasse Temperaturanstieg Schutzart B B IP 44 230/400V 50/60 Hz B B IP 44 Varianten des Öl/Luftkühlers LAC können aus anderen Materialien hergestellt und anderen Oberflächenbehandlungen versehen sein. OLAER GROUP | Olaer | Oiltech | OilAir | FCH The Professional Choice – in Fluid Management EG-Übereinstimmungserklärung Hersteller Oiltech AB Produkt LAC Öl/Luftkühler Oiltech AB erklärt hiermit alleinverantwortlich, dass das obige Produkt, auf das sich diese Erklärung bezieht, der Maschinenrichtlinie 98/37/EC entspricht. Das Produkt erfüllt die Anforderungen der folgenden Standards und Richlinien: - Maschinensicherheit – Basiskonzepte, allgemeine Konstruktionsgrundsätze, EN ISO 12100-1 und EN ISO 12100-2. - Maschinensicherheit – Sicherheitsanforderungen für mit Flüssigkeiten arbeitende Leistungsanlagen und ihre Komponenten – Hydraulik, EN 982. - Maschinensicherheit – Sicherheitsabstände zur Verhinderung von Gefahren in Zonen, die von den oberen Gliedmaßen erreciht werden, EN 294. - Die für das Produkt verwendeten Elektromotoren entsprechen der Niederspannungsrichtlinie (LVD) 73/23/EEC vom 19. Februar 1973, geändert in der Richtlinie 93/68/EEC vom 22. Juli 1993, und der Richtlinie zur elektromagnetischen Kompatitilität (EMC) 89/336/EEC, die durch die Richtlinien 91/263/EEC, 92/31/EEC und 93/68/EEC geändert wurde. Die obigen Angaben gelten für ein komplettes, von Oiltech geliefertes Produkt. Ein komplettes Produkt hat eine CE-Kennzeichnung von Oiltech. Wenn das Produkt nicht komplett von Oiltech geliefert wird, hat es auch keine CEKennzeichnung von Oiltech und darf daher erst in Betrieb genommen werden, wenn es geprüft und gemäß den Anforderungen der jeweiligen Richtlinien und Standards zugelassen wurde. Einbauzertifikat Wenn das Produkt in eine Maschinenanlage eingebaut werden soll, darf es erst in Betrieb genommen werden, wenn die Maschinenanlage, in die es eingebaut werden soll, geprüft und gemäß den Vorschriften der jeweiligen Richtlinien und Standards zugelassen wurde. Lidingö in September, 2008 OILTECH AB Mats Lindberg Technischer Direktor OILTECH AB | Postbox 10012 | SE-181 10 Lidingö | Sweden | www.oiltech.se | [email protected] | Phone: +46 (0)8-636 07 00 | Fax: +46 (0)8-767 97 56 | Org. no: 556107-9954 OLAER GROUP | Olaer | Oiltech | OilAir | FCH 18 OILTECH LAC AIR OIL COOLER | Installation and servicing manual Introduction La présente notice d’utilisation concerne les échangeurs air/huile série LAC. Elle est indispensable à l’installation, à l’utilisation et à l’entretien des échangeurs air/huile. Conserver toujours cette notice à portée de main. Remplacer immédiatement une notice perdue. Lire attentivement la notice et les textes d’avertissement avant d’utiliser l’échangeur. Cela vous permettra de tirer un meilleur profit de maximum de votre appareil et d’en éviter une utilisation incorrecte. Seul, un personnel qualifié et spécifiquement formé est autorisé à installer, à manipuler et à entretenir l’échangeur. Oiltech/Olaer se réserve le droit de modifications techniques. Utilisation prévue Les échangeurs air/huile de la série LAC sont destinés au refroidissement du fluide hydraulique dans les systèmes d’application industrielles. Garantie et réclamations Dans le cas d’une éventuelle avarie, contacter Oiltech/Olaer. La responsabilité de Oiltech/Olaer concernant le produit cesse dès lors que des réparations et/ou des modifications ont été effectuées sur celui-ci par l’utilisateur lui-même. Consignes de sécurité Les installateurs et les utilisateurs doivent connaître, comprendre et respecter les avertissements et les informations indiqués sur les autocollants, les panneaux et dans la présente notice d’utilisation. Niveaux d’avertissement et des textes de mise en garde ...relatifs à la sécurité personnelle Danger indique qu’un accident va se produire en cas de non-respect de la consigne. Cet accident entraînera de graves blessures corporelles voire même mortelles. Avertissement indique qu’un accident peut se produire en cas de non-respect de la consigne. Cet accident peut entraîner de graves blessures corporelles voire même mortelles. Prudence indique qu’un accident peut se produire en cas de non-respect de la consigne. Cet accident peut entraîner des blessures corporelles. | Français ...relatifs aux informations complémentaires Les informations complémentaires sont indiquées comme suit: Remarque! Indique une information complémentaire susceptible de faciliter la compréhension ou l’exécution d’une certaine opération. Consignes générales Levage Avertissement Risque de pincement/d’écrasement. Pour éviter les blessures corporelles lors des levages, l’utilisation de la méthode de levage correcte est impérative. Contrôler que le dispositif de levage et les outils de levage utili sés sont en bon état et homologués pour le poids de l’échangeur air/huile. Installation Danger Risque d’électrocution. La connexion électrique doit être exclusivement effectuée par un électricien agréé! Fonctionnement, manipulation et entretien Avertissement Risque de blessures corporelles. Déconnecter la source d’entraînement du moteur avant toute intervention d’entretien. Avertissement Risque de blessures corporelles. S’assurer que le système est purgé de toute pression avant la déconnexion des raccords et des flexibles hydrauliques. Avertissement Risque de brûlures graves. Pendant le fonctionnement du système, l’échangeur peut devenir très chaud. Ne pas toucher l’échangeur avant qu’il n’ait refroidi. Prudence Risque de pincement. L’échangeur peut être commandé via un thermocontact. Dans ce cas, le ventilateur démarre automatiquement dès que la température de mise en circuit est atteinte. Soyez prudent lorsque vous séjournez près des composants en rotation. Prudence Risque d’intoxication. Déposer l’huile usée dans un endroit prévu à cet effet afin de prévenir tout risque de dommages aux personnes, aux biens ou à l’environnement. Les textes de mise en garde relatifs aux autres aspects de la sécurité (biens, procédé ou environnement) et à la manipulation de l’échangeur, sont classés comme suit. Important Électricité statique. Les ventilateurs génèrent de l’électricité statique. Éviter de placer les équipements sensibles (électroniques etc.) à proximité immédiate de l’échangeur. Des ventilateurs antistatiques sont disponibles sur commande. Important indique qu’un accident peut se produire en cas de nonrespect de la consigne. Cet accident peut entraîner des dommages aux biens, au procédé ou à l’environnement. Remarque! Pour tout séjour prolongé à proximité d’un échangeur en fonctionnement, utiliser toujours un casque anti-bruit. ...relatifs aux autres aspects de la sécurité OLAER GROUP | Olaer | Oiltech | OilAir | FCH OILTECH LAC AIR OIL COOLER | Installation and servicing manual | Français Autocollant d’avertissement L’autocollant ci-dessous et apposé sur l’échangeur à la livraison. Remplacer immédiatement un autocollant endommagé ou manquant. • Avertissement! Surfaces très chaudes! Utiliser un casque antibruit! Ventilateur en rotation! (référence 500029 70x30 mm ou référence 5000291 - 120x50 mm) Voir Figure 1. Description L'échangeur air/huile LAC se compose principalement d'un radiateur, d'un moteur à courant alternatif, d'un ventilateur, d'un caisson, et d'une grille de protection. La connexion du radiateur au système hydraulique s'effectue au moyen des flexibles hydrauliques. Les petits échangeurs sont dotés d'un moteur monophasé ou triphasé à rotor externe. Les grands échangeurs sont dotés d'un moteur triphasé asynchrone à rotor interne suivant CEI 60072 et conforme à la norme CEI 60034. La température ambiante normale pour le moteur électrique est de -20 °C à +40 °C. Pour la connexion au secteur du moteur électrique, voir Connecion électrique. Pour les caractéristiques du moteur, se référer à la plaque signalétique du moteur L'échangeur est en fonction de la taille du moteur équipé d'une console pour moteur. L'échangeur air/huile peut être commandé via un thermocontact. Dans ce cas, le ventilateur démarre automatiquement dès que la température de mise en circuit est atteinte. La pression acoustique peut, suivant la taille de l'échangeur, atteindre jusqu'à 50-92 LpA dB(A) à une distance de 1 m dans des conditions normales. Un emplacement inadéquat, ou un travail dans des conditions extrémes peut entraîner un pression acoustique élevé et une capacité de refroidissement réduite. Pour une information plus détailllée, voir les Caractéristiques techniques. Plaque signalétique La plaque signalétique de l’échangeur air/huile est placée sur le caisson, voir Figure 2. La plaque signalétique contient les informations suivantes: ABCD- La référence du produit La désignation du produit Le numéro de série La date de livraison (année et semaine, par ex. 0818, c’est-à-dire l’année 08 et la semaine 18). Remplacer immédiatement une plaque endommagée ou manquante. The Professional Choice – in Fluid Management 19 Installation Levage Avertissement Risque de pincement/d’écrasement. Pour éviter les blessures corporelles lors des levages, l’utilisation de la méthode de levage appropriée est impérative. Contrôler que le dispositif de levage et les outils de levage utilisés sont en bon état et homologués pour le poids de l’échangeur air/huile. Tous les échangeurs air/huile à partir de la taille 033 sont équipés d’anneaux de levage. Les anneaux de levage sont disponibles sur commande comme accessoires auprès de Oiltech/Olaer. Montage Prudence Risque de blessures corporelles. S’assurer que l’échangeur est toujours correctement fixé. L’échangeur peut être monté dans une quelconque position mais la position débout sur ses pieds est toutefois recommandée. Laisser un espace libre correspondant à au moins la moitié de la hauteur du radiateur (A) devant et derrière l’échangeur pour assurer une capacité de refroidissement optimale par une bonne circulation d’air et pour réduire la pression acoustique. Voir Figure 3. Un emplacement inadéquat de l’échangeur peut entraîner une pression acoustique élevée et une capacité de refroidissement réduite. Connexion du radiateur Utiliser des flexibles hydrauliques vers et à partir du radiateur. S’assurer que les raccords et les flexibles sont dimensionnés suivant la pression, le débit, la température et le fluide du système. Connecter les flexibles hydrauliques au radiateur comme suit. Voir Figure 4 ou Figure 5. ABCD- Entrée. Sortie pour modèle 1 passe. Sortie pour 2 passes. Connexion pour thermocontact. Les dimensions des connexions dépendent de la taille du radiateur. Schéma de montage, voir Figure 6. Important Le radiateur est dimensionné pour une pression dynamique de service maximale de 14 bars. Eviter les chocs de pression lorsque l’échangeur est installé dans la conduite de retour du système. Si cela n’est pas possible, installer l’échangeur dans un système de refroidissement séparé. 20 OILTECH LAC AIR OIL COOLER | Installation and servicing manual Connexion électrique Danger Risque d’électrocution. La connexion électrique doit être exclusivement effectuée par un électricien agréé. Avant la connexion du moteur au réseau électrique, contrôler que les données sur la plaque signalétique du moteur correspondent à la tension et à la fréquence du réseau. L’installation du moteur doit être effectuée conformément à la réglementation et aux prescriptions de sécurité électriques en vigueur et exclusivement par un électricien agréé. Prudence Effectuer la connexion avec un maximum de soins. Une connexion incorrecte, des câbles défectueux etc. peuvent résulter en des éléments conducteurs de courant et un sens de rotation incorrect du moteur et du ventilateur. • Connexion d’un moteur monophasé à rotor externe. Connecter la phase sur L (bleu), le neutre sur N (noir) et la terre de protection sur PE (jaune/ vert). Voir Figure 7. • Connexion d’un moteur triphasé à rotor externe. Voir Figure 8 ou Figure 9. • Connexion d’un moteur triphasé à rotor interne. Voir Figure 10. Pour changer le sens de rotation des moteurs triphasés, intervertir deux phases d’entrée. Pour les échangeurs air/huile équipés d’un thermocontact, utilisez un relais si le thermocontact est soumis à une charge supérieure à sa charge maximale. Remarque! Oiltech/Olaer recommande l’utilisation d'un protection contre surcharge moteur. La taille de la protection, fusible, varie selon le type de ventilateur et le débit d'air à travers l'échangeur. Contactez Oiltech/Olaer pour la protection contre la surcharge moteur. Remarque! Certains moteurs sont munis de trous obturés possibles à utiliser comme évacuations pour une éventuelle eau de condensation. Consignes d’emploi Avant la mise en service initiale Avertissement Contrôler que l’échangeur air/huile est bien fixé et correctement connecté. Oiltech/Olaer recommande d’effectuer les préparatifs suivants avant la mise en service initiale de l’échangeur. 1 Effectuer un cycle de fonctionnement utilisant le même fluide que celui utilisé dans le système. 2 Le fluide doit être filtré avant son passage dans l’échangeur. Pour les combinaisons recommandées de fluides, voir les Caractéristiques techniques. | Français Avant le démarrage Avertissement Assurez-vous que l’échangeur air/huile peut être démarré sans risque de blessures corporelles, propriété ou environnement. Contrôler que: • toutes les pièces de l’échangeur sont en bon état • l'échangeur soit correctement connecté • le ventilateur tourne librement (procéder à la main) • tous les raccords hydrauliques sont correctement serrés • l’intérieur du caisson est exempt d’objets pouvant être projetés et causer des dommages corporels ou matériels. Lors du démarrage Contrôler que: • le sens de rotation et le débit du ventilateur correspondent aux indications de l’autocollant sur le caisson • il n’y a pas de bruits anormaux et de vibrations • l’échangeur n’a pas de fuites Pendant le fonctionnement Avertissement Risque de brûlures graves. Pendant le fonctionnement du système, l’échangeur peut devenir très chaud. Ne pas toucher l’échangeur avant qu’il n’ait refroidi. La température maximale admissible du fluide dans le radiateur est de 120 °C. Le radiateur est dimensionné pour une pression dynamique de service maximale de 14 bars. Ne pas surcharger le moteur électrique, voir la plaque signalétique sur le moteur. Remarque! Pour tout séjour prolongé à proximité d’un échangeur en marche, utiliser un casque anti-bruit. Entretien préventif Les plus importantes procédures d’entretien sont les mesures préventives effectuées par l’utilisateur à des intervalles réguliers. Contrôler que: • il n’y a pas de bruits anormaux ou de vibrations • l’échangeur est correctement fixé • le radiateur est propre; les impuretés altèrent l’effet de refroidissement • l’échangeur n’est pas endommagé; remplacer tout composant défectueux • l’échangeur n’a pas de fuites; réparer toute fuite éventuelle • les autocollants d’avertissement sont en bon état; remplacer immédiatement un autocollant endommagé ou manquant. Tous les ans: Contrôler l’installation électrique. Cette intervention doit être exclusivement effectuée par un électricien qualifié et agréé. OLAER GROUP | Olaer | Oiltech | OilAir | FCH OILTECH LAC AIR OIL COOLER | Installation and servicing manual | Français Nettoyage Avertissement Risque de blessures corporelles. Déconnecter toujours la source d’entraînement du moteur avant le nettoyage. Avertissement Risque de brûlures graves. Pendant le fonctionnement du système, l'échangeur peut devenir très chaud. Ne pas toucher l'échangeur avant qu'il n’ait refroidi. Echangeur air/huile Pour le nettoyage externe de l’échangeur avec de l’eau par ex., démonter toutes les connexions électriques. Observer la norme de protection du moteur électrique. Radiateur Le nettoyage des ailettes s’effectue le plus simplement avec de l’air comprimé. Si besoin est, utiliser un équipement haute pression et un dégraissant. Lors du lavage haute pression appliquer le jet en parallèle avec les lamelles. Voir Figure 11. Caisson ventilateur Pour le nettoyage de l’intérieur du caisson, démonter le radiateur. Utiliser de préférence de l’air comprimé. Si besoin est, utiliser un dégraissant. Diriger l’air comprimé à travers la grille et en partant du côté du moteur électrique. Entretien La responsabilité d'Olaer/Oiltech n'est pas engagée en cas d'interventions ou de modifications sur l'échangeur effectué par l’utilisateur. Démontage du radiateur Avertissement Risque de brûlures graves. Pendant le fonctionnement du système, l’échangeur peut devenir très chaud. Ne pas toucher l’échangeur avant qu’il n’ait refroidi. Avertissement Risque de blessures corporelles. Déconnecter la source d’entraînement du moteur avant toute intervention d’entretien. 1 2 3 4 5 6 Arrêter le système. Déconnecter la source d’entraînement du moteur. S’assurer que le système est purgé de toute pression. Couper l'alimentation en huile. Déconnecter les flexibles hydrauliques du radiateur. Dévisser les vis avec rondelles qui fixent le radiateur au caisson. Voir Figure 12. 7 Déposer le radiateur. Montage du radiateur 1 Mettre en place le radiateur. 2 Fixer le radiateur au caisson avec les vis. Voir Figure 12. 3 Connecter les flexibles hydrauliques au radiateur. Voir Figure 4 ou Figure 5. The Professional Choice – in Fluid Management 21 4 Connecter la source d’entraînement du moteur. 5 Effectuer les procédures selon Avant le démarrage et Lors du démarrage. Démontage du moteur électrique et du ventilateur Avertissement Risque de brûlures graves. Pendant le fonctionnement du système, l’échangeur peut devenir très chaud. Ne pas toucher l’échangeur avant qu’il n’ait refroidi. Avertissement Risque de blessures corporelles. Déconnecter la source d’entraînement du moteur avant toute intervention d’entretien. Remarque! Certains modèles sont équipés d’un moyeu fixe. Voir Figure 14. D’autres modèles ont un moyeu non fixe. Voir Figure 15 A et Figure 15 B. A la livraison, les ventilateurs à partir de la taille LAC-033, sont équilibrés avec le moyeu. 1 2 3 4 Arrêter le système. Déconnecter la source d’entraînement du moteur. Sécuriser le moteur. Dévisser les vis qui fixent le moteur à son support. Voir Figure 13. Si l’échangeur est équipé d’une console de moteur, dévisser les vis avec rondelles qui fixent la console aux pieds de l’échangeur. 5 Dévisser la vis avec rondelle qui fixe le ventilateur avec le moyeu dans l’arbre du moteur. Voir Figure 14. Retirer prudemment le ventilateur avec le moyeu de l’arbre moteur. Utiliser un extracteur si besoin. 6 Dévisser les vis qui fixent le moteur à son support. Voir Figure 16. Si l’échangeur est équipé d’une console de moteur, dévisser les vis avec rondelles qui fixent le moteur à la console. 7 Déposer le moteur. Si le ventilateur doit être démonté, marquer toutes les pièces pour assurer un remontage correct, surtout du point de vue équilibre et sens de rotation. Voir Figure 17. Montage du moteur électrique et du ventilateur Remarque! Certains modèles sont équipés d’un moyeu fixe. Voir Figure 14. D’autres modèles ont un moyeu non fixe. Voir Figure 15 A et Figure 15 B. A la livraison, les ventilateurs à partir de la taille LAC-033, sont équilibrés avec le moyeu. 1 Si l’échangeur est équipé d’une console de moteur, fixer le moteur à la console à l’aide des vis. 2 Fixer le moteur au support moteur à l’aide des vis. Voir Figure 16. 3 Adapter la rainure dans le moyeu par rapport à la clavette longitudinale sur le moteur. Utiliser de l’alcooléthylique pour lubrifier l’intérieur du moyeu et fixer le ventilateur avec le moyeu sur l’arbre du 22 4 5 6 7 8 9 10 OILTECH LAC AIR OIL COOLER | Installation and servicing manual moteur en poussant. Frapper éventuellement légèrement avec un maillet en caoutchouc par ex. Appliquer du Loctite® sur la vis et fixer le ventilateur avec le moyeu à l’arbre du moteur. Voir Figure 14. Contrôler que le ventilateur est bien fixé sur l’arbre du moteur et qu’il ne présente pas de jeu. Mettre en place le support moteur avec le ventilateur, la grille, le moteur et l’éventuelle console de moteur pour montage dans le caisson. Ajuster la grille et le moteur et fixer le support moteur au caisson à l’aide des vis. Voir Figure 13. Fixer l’éventuelle console de moteur à l’aide des vis. Contrôler que le ventilateur est bien centré et tourne librement (procéder à la main). Ajuster si besoin le positionnement de la grille et du moteur. S’assurer que toutes les vis sont bien serrées. Connecter la source d’entraînement du moteur. Effectuer les procédures selon Avant le démarrage et Lors du démarrage. | Français Caractéristiques techniques Radiateur Pression statique de service maximale Pression dynamique de service maximale Tolérance de transfert de chaleur Température maximale du fluide Capacité de refroidissement maxi 21 bars 14 bars* ±6% 120 °C 160 kW * Testé conformément à ISO/DIS 10771-1 Compatibilité du fluide Huile minérale (suivant DIN 51524) Émulsion huile/eau (suivant CETOP RP 77H) Eau/glycol (suivant CETOP RP 77H) Ester phosphate (suivant CETOP RP 77H) HL/HLP HFA, HFB HFC HFD-R Matériaux Radiateur Aluminium Caisson de ventilateur Acier Hélices/moyeu Polypropylène renforcé fibre de verre/ Aluminium Grille de ventilateur Acier Autres pièces Acier Revêtement Décapage électronique et peinture poudre Moteur triphasé Moteurs asynchrones triphasés conformes à CEI 60034-1 et CEI 60072 selon DIN 57530/VDE 0530 Classe d’isolement F Élévation de température B Norme de protection IP 55 Moteur monophasé Classe d’isolement Élévation de température Norme de protection Moteur triphasé LAC 004 Tension nominale Classe d’isolement Élévation de température Norme de protection B B IP 44 230/400 V 50/60 Hz B B IP 44 Certaines versions des échangeurs air/huile LAC peuvent utiliser d’autres matériaux et revêtements. OLAER GROUP | Olaer | Oiltech | OilAir | FCH The Professional Choice – in Fluid Management Déclaration de conformité CE Fabricant Oiltech AB Produit Echangeur air/huile type LAC. Oiltech AB déclare sous sa responsabilité exclusive que le produit ci-dessus auquel réfère la présente Déclaration est conforme à la Directive Machines 98/37/CE. Le produit satisfait aux dispositions des normes et directives suivantes: - Sécurité des machines – Notions fondamentales, principes généraux de conception, EN ISO 12100-1 et EN ISO 12100-2. - Sécurité des machines – Exigences de sécurité pour les systèmes hydrauliques et leurs composants – Hydrauliques, EN 982. - Sécurité des machines – Distances de sécurité pour empêcher l’atteinte des zones dangereuses par les membres supérieurs, EN 294. - Les moteurs électriques utilisés sur le produit satisfont aux dispositions de la Directive Basse Tension 73/23/CEE du 19 février 1973, modifiée par la Directive 93/68/CEE du 22 juillet 1993 et de la Directive Compatibilité Electromagnétique 89/336/CEE, complétée par la Dirctive 91/263/CEE, la Directive 92/31/CEE et la Directive 93/68/CEE. Ce qui précède concerne un produit complet livré par Oiltech et un produit complet est marqué CE par Oiltech. Se le produit n’est pas livré complet par Oiltech, il n’est pas marqué CE par Oiltech et ne doit pas être mis en service avant d’avoir été déclaré conforme aux dispositions des directives et normes pertinentes. Certificat d’incorporation Si le produit doit être incorporé dans une machinerie, il ne doit pas être mis en service avant que la machinerie dans laquelle il doit être incorporé n’ait été déclarée conforme aux dispositions des directives et normes pertinentes. Lidingö au mois de septembre, 2008 OILTECH AB Mats Lindberg Reponsable Technique OILTECH AB | Postbox 10012 | SE-181 10 Lidingö | Sweden | www.oiltech.se | [email protected] | Phone: +46 (0)8-636 07 00 | Fax: +46 (0)8-767 97 56 | Org. no: 556107-9954 OLAER GROUP | Olaer | Oiltech | OilAir | FCH 24 OILTECH LAC AIR OIL COOLER | Installation and servicing manual | Español Introducción El presente manual de uso concierne a los intercambiadores aire/aceite serie LAC. Es indispensable para la instalación, uso y mantenimiento de los mismos. Conserve siempre este manual a mano y no dude en pedir uno a su distribuidor en caso de pérdida. Lea detenidamente este manual y los textos de advertencia del mismo antes de utilizar el intercambiador. Esto le permitirá sacar el máximo provecho al intercambiador y evitará un uso incorrecto del mismo. El intercambiador aire/aceite será instalado, manipulado y utilizado solamente por personal cualificado para ello. Oiltech/Olaer se reserva el derecho de realizar modificaciones técnicas sin previo aviso. Uso previsto Los intercambiadores aire/aceite de la serie LAC están destinados al enfriamiento de fluidos hidráulicos pertenecientes a un sistema de aplicación industrial. Garantía y reclamaciónes En caso de avería, contacte con Oiltech/Olaer. La responsabilidad de Oiltech/Olaer concerniente al producto cesa en el momento en que el usuario realice por si mismo las reparaciones o modificaciones en el intercambiador. Instrucciónes de seguridad Los instaladores y usuarios deben conocer, comprender y respetar las advertencias e informaciónes incluídas en este manual de uso e indicadas en las etiquetas fijadas en el equipo. Definición de niveles de seguridad ...relativos a la seguridad del personal Los textos e advertencia y peligro relativos a la seguridad del personal, están en función de la gravedad de los posibles accidentes. Se clasifican en tres niveles: Peligro Alerta que una acción o procedimiento realizado incorrectamente provocará graves heridas corporales o, incluso, la muerte. Advertencia Alerta que una acción o procedimiento realizado incorrectamente puede provocar graves heridas corporales o, incluso, la muerte. Precaución Alerta que una acción o procedimiento realizado incorrectamente puede provocar un accidente con heridas corporales. ...relativos a otros aspectos de seguridad Las indicaciones de seguridad concernientes a otros aspectos de seguridad (propiedad, proceso, medio ambiente) y a la manipulación del intercambiador están clasificadas como sigue: Importante Alerta que una acción o procedimiento realizado incorrectamente puede provocar daños en el equipo, al proceso o al medio ambiente. ...relativos a las infórmaciones complementarias Las informaciones complementarias están indicadas como sigue. Nota! Este tipo de alertas indican informaciones complementarias susceptibles de facilitar la comprensión o ejecución de una operación. Consignas generales Elevación/Transporte Advertencia Riesgo de caída. Para evitar daños corporales en la elevación, es básico utilizar un método de elevación correcto. Controlar que el dispositivo de elevación y las herramientas de uso estén en buen estado y homologados para la elevación del peso del intercambiador. Instalación Peligro de electrocución. La conexión eléctrica debe ser efectuada exclusivamente por personal eléctrico cualificado! Funcionamiento, manipulación y mantenimiento Advertencia Riesgo de heridas corporales. Desconectar de la fuente eléctrica el motor antes de cuaquier manipulación. Advertencia Riesgo de heridas corporales. Asegurarse de que el sistema esté despresurizado antes de la desconexión de los rácords y los flexibles hidráulicos. Advertencia Riesgo de quemaduras graves. Indica peligro por alta temperatura superficial. Mientras el sistema está en funcionamiento el intercambiador puede estar muy caliente. No tocar el intercambiador hasta que se haya enfriado. Precaución Riesgo de atrapamiento. El intercambiador puede funcionar por la acción de un termostato. En estos casos el ventilador puede ponerse en funcionamiento automáticamente en cuanto se ha alcanzado la temperatura de consigna. Prudencia con los elementos de rotación. Precaución Riesgo de intoxicación. Desechar el aceite usado en un contenedor adecuado y previsto para tal efecto con el fin de prevenir cualquier riesgo para las personas o el medio ambiente. Importante Electricidad estática. Los ventiladores generan electricida estática. Evitar colocar cerca del intercambiador equipos especialmente sensibles (electrónicos, etc.). Los ventiladores antiestáticos están disponibles bajo pedido. OLAER GROUP | Olaer | Oiltech | OilAir | FCH OILTECH LAC AIR OIL COOLER | Installation and servicing manual | Español Nota! Para un trabajo prolongado cerca de un intercambiador en funcionamiento, se deben utilizar protectores auditivos. Etiqueta de advertencia La etiqueta especificada abajo es colocada sobre el intercambiador en la entrega. Remplácela de inmediato en el caso de pérdida y/o rotura. • Peligro! Alta temperatura en superficie! Usar protecto res auditivos! Ventilador en rotación! (referencia 500029-70x30 mm o bien referencia 5000291-120x50 mm) Ver fig 1. Descripción El intercambiador aire/aceite serie LAC se compone principalmente de un radiador, un motor de corriente alterna, un ventilador, una caja del ventilador y de una rejilla de protección para el ventilador. La conexión del radiador al sistema hidráulico se realiza a través de rácords, tuberías o flexibles hidráulicos. Los pequeños intercambiadores están dotados con un motor monofásico o trifásico con rotor externo. Los grandes intercambiadores están dotados de un motor trifásico asíncrono con rotor interno siguiendo CEI 60072 y conforme a la norma CEI 60034. Límite de temperaturas para el correcto funcionamiento del motor: -20 ºC a + 40 ºC. Para la conexión del motor eléctrico, ver Conexiónado eléctrico. Referente a las características del motor, ver la placa del motor. En función del tamaño del motor el intercambiador está equipado con consola para el motor. El intercambiador puede estar controlado por un termocotacto. En este caso el ventilador se pone en marcha automáticamente cuando se alcanza la temperatura de consigna. El nivel de potencia acústica puede estar entre 50-92 LpA dB(A) a una distancia de 1 m bajo condiciones de trabajo normales. Un emplazamiento inadecuado puede provocar un nivel de potencia acústica elevada y reducir la capacidad de refrigeración. Para información mas amplia, ver Características técnicas. Placa del fabricante La placa del fabricante está colocada sobre la caja que contiene el ventilador. Ver fig 2. La placa del fabricante contiene la siguiente información: ABCD- Referencia del producto. Descripción del producto. Número de serie. Fecha de entrega (año y semana, p.e. 0818, es decir año 08 semana 18). Remplace de inmediato una placa perdida o rota. The Professional Choice – in Fluid Management 25 Instalación Elevación/Transporte Advertencia Riesgo de caída. Para evitar daños corporales en la elevación, es básico utilizar un método de elevación correcto. Controlar que el dispositivo de elevación y las herramientas de uso estén en buen estado y homologados para la elevación del peso del intercambiador. Todos los intercambiadores aire/aceite a partir del modelo 033 están preparados para llevar cáncamos de elevación. Los cáncamos de elevación están disponibles bajo pedido como accesorios de Oiltech/Olaer. Montaje Precaución Riesgo de heridas corporales. Asegurarse de que el intercambiador esté correctamente sujeto. El intercambiador puede ser montado en cualquier posición, aunque se recomienda el montaje sobre las patas del mismo. Para conseguir una buena circulación de aire y con ello una capacidad de refrigeración máxima y un nivel de potencia acústica mínima, dejar un espacio libre correspondiente a, al menos, la mitad de la altura del radiador (A) en la parte frontal y posterior del intercambiador. Ver fig 3. Un emplazamiento inadecuado del intercambiador puede provocar un nivel de potencia acústica elevada y reducir la capacidad de refrigeración. Conexión del radiador Utilizar flexibles hidráulicos para las conexiones de entrada y salida del radiador. Asegurarse de que los rácords y los flexibles estén dimensionados y sean adecuados a la presión, el caudal, la temperatura y el fluido del sistema. Conectar los flexibles hidráulicos al radiador como sigue. Ver fig 4 o fig 5. A - Entrada B - Salida para modelo 1 paso. C - Salida para modelo 2 pasos. D - Conexión para termocontacto. Las dimensiones de las conexiones dependen del tamaño del radiador. Diagrama de circuito. Ver fig 6. Importante El radiador está diseñado para una presión dinámica de servicio máxima de 14 bar. Evitar los picos de presión cuando el intercambiador esté conectado en la línea de retorno. Si esto no es posible instalar un sistema de enfriamiento autónomo. OILTECH LAC AIR OIL COOLER | Installation and servicing manual 26 Conexionado eléctrico Peligro Riesgo de electrocución. La conexión eléctrica debe ser realizada por personal eléctrico cualificado. Antes de la conexión del motor a la fuente eléctrica, controlar que los datos de la placa del motor correspondan a la tensión y a la frecuencia de la fuente. La instalación del motor debe ser efectuada conforme a la normativa vigente sobre seguridad eléctrica y exclusivamente por personal cualificado. Precaución Efectuar la conexión con cuidado. Una conexión incorrecta, cables defectuosos, etc. pueden resultar en componentes cargadas eléctricamente o provocar un sentido incorrecto de giro del motor eléctrico y del ventilador. • Conexión de un motor monofásico con rotor externo. Conectar la fase sobre L (azul), el neutro sobre N (negro) y la toma tierra sobre PE (amarillo/verde). Ver fig 7. • Conexión de un motor trifásico con rotor externo. Ver fig 8 o fig 9. • Conexión de motor trifásico con rotor interno. Ver fig 10. Ejemplo para motor: 220-240 V D/380-420 V Y Para cambiar el sentido de rotación de los motores trifásicos, invertir dos fases de entrada. Para los intercambiadores aire/aceite equipados con un termocontacto, utilizar un relé si la corriente excede la corriente máxima permitida en el termocontacto. Nota! Oiltech/Olaer recomienda el uso de un relé de sobrecarga, fusible, para el motor. El tamaño depende del tipo de ventilador y del caudal a través del intercambiador. Contacte con Oiltech/Olaer. Nota! Ciertos motores vienen equipados con agujeros taponados para poder ser usados como drenajes de agua de condensación. Modo de empleo Antes de la puesta en marcha inicial Advertencia Controlar que el intercambiador aire/aceite esté correctamente fijado y conectado eléctricamente. Oiltech/Olaer recomienda de: 1 Realizar un ciclo de funcionamiento utilizando el mismo fluido del sistema. 2 Filtrar el aceite antes de su paso por el intercambiador. Para conocer la compatibilidad de los fluídos recomendados, ver las Características técnicas. | Español Antes de la puesta en marcha Advertencia Asegurarse de que el intercambiador puede ponerse en marcha sin causar daños a personas, propiedades o medio ambiente. Controlar que: • Todas las piezas del intercambiador estén en buen estado. • El intercambiador esté correctamente conectado • El ventilador gire libremente (comprobarlo con la mano). • Las conexiones hidráulicas estén conectadas correctamente. • El interior de la caja del ventilador esté exenta de objetos que puedan ser proyectados y provocar daños corporales o materiales. No sobrecargar el motor en la puesta en marcha en frío o por una viscosidad demasiado alta. Contactar con nosotros cuando vayan a utilizar aceites con una viscosidad por encima de 100 cSt (p.e. aceites lubrificantes). En el momento de la puesta en marcha Controlar que: • El sentido de rotación y el caudal del ventilador corresponden a las indicaciones de la caja del ventilador. • No existan ruidos anormales o vibraciones. • El intercambiador no tenga fugas. Durante el funcionamiento Advertencia Riesgo de quemaduras graves. Mientras el sistema está en funcionamiento el intercambiador puede estar muy caliente. No tocar el intercambiador hasta que haya podido enfriarse. La temperatura máxima permitida del radiador es de 120 ºC. No sobrecargar el motor eléctrico, ver la placa del motor. El radiador está diseñado para una presión dinámica de servicio máxima de 14 bar. Nota! Para un trabajo prolongado cerca de un intercambiador en funcionamiento, se deben utilizar cascos o tapones antiruido. Mantenimiento preventivo El mantenimiento preventivo es efectivo si se realiza a intervalos regulares. Controlar que: • No existan ruidos anormales o vibraciones. • El intercambiador esté correctamente fijado. • El radiador esté limpio, las impurezas ó suciedad reducen la capacidad de refrigeración. • El intercambiador no esté dañado. Remplazar cualquier pieza dañada. • El intercambiador no tenga fugas. • Las etiquetas de alerta y seguridad estén en buen OLAER GROUP | Olaer | Oiltech | OilAir | FCH OILTECH LAC AIR OIL COOLER | Installation and servicing manual | Español esta do, remplazar de inmediato las etiquetas dañadas o perdidas. Anualmente: Controlar la instalación eléctrica. Esta intervención debe ser efectuada exclusivamente por personal eléctrico cualificado. Limpieza Advertencia Riesgo de heridas corporales. Desconectar siempre el motor de la fuente de alimentación antes de proceder a la limpieza. Advertencia Riesgo de quemaduras graves. Indica peligro por alta temperatura superficial. Mientras el sistema está en funcionamiento el intercambiador puede estar muy caliente. No tocar el intercambiador hasta que se haya enfriado. Intercambiador Para la limpieza externa del intercambiador por ejemplo con agua desmontar todas las conexiones eléctricas. Observar las normativas de protección del motor eléctrico. Radiador La limpieza de las aletas del radiador se realiza simplemente con aire comprimido. Si es necesario, utilizar un equipo de alta presión y un desengrasante. Para el lavado a alta presión, realizarlo en posición paralela a la aletas. Ver fig 11. Caja del ventilador Para limpiar el interior de la caja del ventilador, utilizar preferentemente el aire comprimido. Si es necesario puede usarse un desengrasante. Dirigir el aire comprimido a través de la rejilla del ventilador partiendo del motor eléctrico. Mantenimiento Oiltech/Olaer no se responsabilizará de ninguna reparación o modificación, efectuada por el usuario. Desmontaje del radiador Advertencia Riesgo de quemaduras graves. Mientras el sistema está en funcionamiento el intercambiador puede estar muy caliente. No tocar el intercambiador hasta que haya podido enfriarse. Advertencia Riesgo de heridas corporales. Desconectar siempre el motor de la fuente de alimentación antes de proceder a su mantenimiento. 1 Parar el sistema. 2 Desconectar la fuente de alimentación eléctrica del motor. 3 Asegurarse de que el sistema esté despresurizado. 4 Cortar el suministro de aceite The Professional Choice – in Fluid Management 27 5 Desconectar las tuberías hidráulicas del radiador. 6 Desatornillar los tornillos con arandelas que fijan el soporte del motor a la caja. Ver fig 12. 7 Extraer el radiador. Montaje del radiador 1 Colocar el radiador en su posición. 2 Fijar el radiador a la caja con los tornillos con arandelas. Ver fig 12. 3 Conectar los conexiones hidráulicas al radiador. Ver fig 4 o fig 5. 4 Conectar el motor a la fuente de alimentación eléctrica. 5 Efectuar los procesos de Antes de puesta en marcha inicial y Momento de puesta en marcha. Desmontaje del motor eléctrico y del ventilador Advertencia Riesgo de quemaduras graves. Mientras el sistema está en funcionamiento el intercambiador puede estar muy caliente. No tocar el intercambiador hasta que haya podido enfriarse. Advertencia Riesgo de heridas corporales. Desconectar siempre el motor de la fuente de alimentación antes de proceder a la limpieza. Nota! Algunos asientos de los ventiladores son fijos. Ver fig 14. En otros modelos el asiento es desmontable. Ver fig 15 A y fig 15 B. A la entrega el ventilador, a partir del tamaño LAC-033, está alineado con el asiento. 1 Parar el sistema. 2 Desconectar la fuente de alimentación eléctrica del motor. 3 Asegurar el motor eléctrico. 4 Desatornillar los tornillos con arandelas que fijan el soporte del motor a la caja del ventilador. Ver fig 13. Si el intercambiador está equipado con una consola motor, desatornillar los tornillos con arandelas que fijan la consola a las patas del intercambiador. 5 Desatornillar el tornillo con arandela que fija el ventilador con el eje del motor. Ver fig 14. Retirar pruden temente el ventilador con el asiento del acoplamiento del motor. Utilizar un extractor si es necesario. 6 Desatornillar los tornillos que fijan el motor de la rejilla de protección. Ver fig 16. Si el intercambiador está equipado de un soporte para el motor, desatornillarlo del soporte. 7 Quitar el motor. Si el ventilador debe ser desmontado, marcar todas las piezas para asegurar un correcto montaje, sobre todo respecto al equilibrio y sentido de rotación. Ver fig 17. 28 OILTECH LAC AIR OIL COOLER | Installation and servicing manual | Español Montaje del motor eléctrico y del ventilador Nota! Algunos asientos de los ventiladores son fijos. Ver fig 14. En otros modelos el asiento es desmontable. Ver fig 15 A y fig 15 B. A la entrega el ventilador, a partir del tamaño LAC-033, está alineado con el asiento. 1 Si el intercambiador viene equipado con consola de motor, fijar el motor a la consola con los tornillos. 2 Fijar el motor a la rejilla de protección. Ver fig 16. 3 Adaptar la ranura del asiento a la chaveta longitudinal del motor. Utilizar alcohol etílico para lubricar el interior del asiento y fijar el asiento del ventilador sobre el eje del motor presionando. Si se cree necesario aplicar algunos golpecitos con una maza de caucho. Aplicar Loctite® sobre el tornillo y fijar el asiento del ventilador sobre el eje del motor. Ver fig 14. 4 Controlar que el ventilador esté bien fijado sobre el eje del motor y que no tenga ningún juego. 5 Colocar en su sitio el soporte del motor con su ventilador, la rejilla de protección del motor y, en el caso que haya, la consola del motor para el montaje en la caja. 6 Ajustar la rejilla de protección y el motor y fijar el soporte del motor a la caja con tornillos. Ver fig 13. Si existe, fijar la consola del motor a las patas del intercambiador con tornillos. 7 Controlar que el ventilador esté bien centrado y gira bien (con la mano). Ajustar si se cree necesario la posición de la rejilla y del motor. 8 Asegurarse de que los tornillos estén bien apretados. 9 Conectar la fuente de alimentación eléctrica al motor. 10 Efectuar los procesos de Antes de puesta en marcha inicial y Momento de puesta en marcha Características técnicas Radiador Presión estática máxima de servicio Presión dinámica de servicio máxima Tolerancia de transferencia de calor Temperatura máxima permitida del radiator Capacidad de refrigeración máxima 21 bar 14 bar +/- 6 % 120 ºC 160 kW * Probado de conformidad con ISO/DIS 10771-1 Compatibilidad de fluido Aceite mineral (siguiendo DIN 51524) Emulsión aceite/agua (siguiendo CETOP RP 77H) Agua/Glycol (siguiendo CETOP RP 77H) Éster fosfatos (siguiendo CETOP RP 77H) HL/HLP HFA, HFB HFC HFD-R Materiales Radiador Caja del ventilador Hélices/asiento ventilador Aluminio Acero Polipropileno reforzado con fibra de vidrio/aluminio Rejilla de protección Acero Otras piezas Acero Revestimiento Pintado mediante polvo electrostático Motor trifásico Motor asíncrono trifásico de conformidad con CEI 60034-1 e CEI 60072 según DIN 57530/VDE 0530 Clase de aislamiento F Aumento de temperatura B Clase de protección IP 55 Motor momofásico Clase de aislamiento Aumento de temperatura Clase de protección B B IP 44 Motor trifásico LAC 004 Tensión nominal Clase de aislamiento Aumento de temperatura Clase de protección 230/400 V 50/60 Hz B B IP 44 Ciertas versiones de intercambiadores aire/aceite LAC pueden utilizar otros materiales y revestimientos OLAER GROUP | Olaer | Oiltech | OilAir | FCH The Professional Choice – in Fluid Management EC Declaration Of Conformity Manufacturer Oiltech AB Product LAC Air Oil Cooler Oiltech AB declares under sole responsibility that the product above-to which this declaration relates is in conformity with the Machinery Directive 98/37/EC. The product complies with the requirements of: - Safety of machinery – Basic concepts, general principles for design, EN ISO 12100-1 and EN ISO 12100-2. - Safety of machinery – Safety requirements for fluid power systems and their components – Hydraulics, EN 982. - Safety of machinery – Safety distance to prevent danger zones being reached by the upper limbs, EN 294. - Electric motors used on the product comply with the Low Voltage Directive (LVD) 73/23/EEC of 19 February 1973, modified by the Directive 93/68/EEC of 22 July 1993 and the Electromagnetic Compatibility Directive (EMC) 89/336/EEC amended by Directive 91/263/EEC, Directive 92/31/EEC and Directive 93/68/EEC. The above is valid for a complete product delivered by Oiltech and a complete product is CE-marked by Oiltech. If the product is not delivered complete by Oiltech the product is also not CE-marked by Oiltech and must not be put into service until the product has been declared in conformity with the requirements of the relevant directives and standards. Certificate of incorporation: If the product is to be incorporated in a machinery the product must not be put into service until the machinery into which it has been incorporated has been declared in conformity with the provisions of the relevant directive and standards. Lidingö in August, 2008 OILTECH AB Mats Lindberg Technical Manager OILTECH AB | Postbox 10012 | SE-181 10 Lidingö | Sweden | www.oiltech.se | [email protected] | Phone: +46 (0)8-636 07 00 | Fax: +46 (0)8-767 97 56 | Org. no: 556107-9954 OLAER GROUP | Olaer | Oiltech | OilAir | FCH Olaer Industry Olaer Mobile Olaer Energy Olaer Oil & Gas Olaer Special Pr oduc t ion / © Mic c e R y l a nd e r Ag e nc y The Professional Choice – in Fluid Management The Olaer Group develops, manufactures and markets products and systems in five business areas. Global perspective and local entrepreneurial flair The Olaer Group is a global player specialising in innovative, efficient system solutions for temperature optimisation and energy storage. The Group develops, manufactures and markets products and systems for a number of different sectors, e.g. the aircraft, engineering, steel and mining industries, as well as for sectors such as oil and gas, contracting and transport, farming and forestry, renewable energy, etc. All over the world, our products operate in the most diverse environments and applications. One constantly repeated demand in the market is for optimal energy storage and temperature optimisation. We work at a local level with a whole world as our workplace – local entrepreneurial flair and a global perspective go hand in hand. Our local presence, long experience and a wealth of knowledge combine with our cutting-edge expertise to give you the best possible conditions for making a professional choice. OILTECH AB | Postbox 10012 | SE-181 10 Lidingö | Sweden | www.oiltech.se | [email protected] | Phone: +46 (0)8-636 07 00 | Fax: +46 (0)8-767 97 56 AUSTRALIA Olaer FCH. Tel: +61 2 9981 6888. AUSTRIA Olaer Austria GmbH. Tel: +43 7229 80306. BELGIUM S.A. Olaer Benelux, Tel: +32 2 466 15 15. CZECH REPUBLIC Olaer CZ s.r.o. Tel: +42 5 47125 601-8. DENMARK Oiltech DK. Tel: +45 86 69 20 38. FINLAND Oiltech Hydraulics OY. Tel: +358 9 413 755 00. FRANCE Olaer Industries S.A. Tel: +33 1 41 19 17 00. GERMANY Olaer Industries GmbH. Tel: +49 6842 9204-0. HOLLAND Olaer Nederland B.V. Tel: +31 76 5412453. INDIA FCH India. Tel: +91 802 6533587. ITALY Olaer Italiana S.p.A. Tel: +39 011 991 85 11. KOREA Hyundai Olaer Hydraulic Co. Tel: +82 31 499 0897. NORWAY Oiltech AS. Tel: +47 64 91 11 80. POLAND Oiltech Polska. Tel: +48 22 6738162. SOUTH AFRICA FCH c/o Rolton Products CC. Tel: +27 11 474 3095. SPAIN Olaer-Oiltech Iberica SAU. Tel: +34 933 368 900. SWEDEN Oiltech AB. Tel: +46 8 636 07 00. SWITZERLAND Olaer (Schweiz) AG. Tel: +41 26 492 70 00. UK FCH Ltd. Tel: +44 1244 535515. 20009201 USA Oil Air Hydraulics Inc. Tel: +1 713 937 89 00.