Transcript
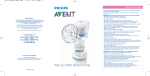
18
1
2(fold out page)
closer to nature®
double electric breast pump
US
2. PROTEJA
instructions
please read and retain this important
information for future reference
ES
FEED
EXPRES
S
extractor sacaleche eléctrico doble
closer to nature®
SYSTEM
EPARE
PR
instrucciones
conserve estas instrucciones para poder
consultarles en el futuro ya que incluyen
información importante
3. PREPARE
3. PREPARE
4. ALIMENTE
Distributed by Mayborn USA Inc,
PO Box 5003, Westport, CT 06881-5003
Copyright© Mayborn USA Inc. 2010
TOMMEE TIPPEE and CLOSER TO NATURE
are registered trademarks.
Model 1092 Made in China Leaflet # 522663
™
EXPRESSABLES
PROTEC
T
™
EXPRESSABLES
PROTEJA
ALIMENTE
EXTRAIG
A
SISTEMA
2. PROTECT
1. EXPRESS
EPARE
PR
1. EXTRAIGA
Attention, consult
ACCOMPANYING
DOCUMENTS
TYPE B
APPLIED PART
www.tommeetippee.com
KEEP AWAY
FROM SUNLIGHT
Classified as CLASS II ME EQUIPMENT
Symbol IEC 60417 – 5172
4. FEED
See pack for detailed explanations of system
KEEP DRY
4
3 (fold out page)
5
US
A
closer to nature® double electric breast pump
B
9
parts guide
guía de
componentes
2
1
3
10
1
For hygiene reasons this product cannot be returned once opened unless faulty.
parts to be washed, cleaned and sterilized
5
2
3
6
4
IMPORTANT SAFEGUARDS, SAVE THESE INSTRUCTIONS.
FOR HOUSEHOLD USE ONLY.
7
The intended use of the Tommee Tippee Electric Breast Pump is to express milk from the breast of lactating women.
Researched and developed by specialists and breastfeeding experts to express milk for storage and later use.
18
7
PARTS GUIDE (see image A)
12 & 13
6
17
14
1.
2.
3.
4.
5.
6.
7.
8.
9.
10.
11.
18
8
20
4
Silicone insert
Horn
Upper pump body
Lower pump body
Release tabs
Diaphragm
Diaphragm cap
Valve
Air tube
Single to double connector
Motor unit
12.
13.
14.
15.
16.
17.
18.
19.
20.
21.
22.
5 oz bottle
9 oz bottle
Horn hygiene cover (combines as bottle stand for 5 oz bottle only)
Air tube socket
Electric adapter socket (from mains)
Milk storage lid
2oz & 4oz milk storage pods and tray
Bottle bag (holds 4x 9oz bottles with milk storage lids)
Breast pads
Battery
Adapter
MOTOR FUNCTION (see image D)
1a.
1b.
1c.
2.
3.
4.
5.
6.
7.
8.
17
22
8
C
19
parts to be wiped clean only (and NOT submerged in water)
12
11
11
9
13
22
DISASSEMBLING THE ELECTRIC BREAST PUMP
1. Unscrew bottle from lower pump body.
2. Pull off valve.
3. Pull air tube from upper pump body and motor unit.
4. Press release tabs to release upper pump body and pull apart.
5. Pull out diaphragm cap and diaphragm.
6. Pull horn from lower pump body.
IT IS NOT ESSENTIAL TO TAKE THE SILICONE INSERT OUT OF THE HORN FOR CLEANING unless milk or dirt has become trapped inside. If so, unclip lip from
horn and pull apart.
10
14
CLEANING, STERILIZING AND MAINTENANCE
19
21
•
D
15
Expressing time
Expressing level
Battery charge indicator (displayed when operating from batteries)
Slide open digital display panel to power on - level one
Slide close to power off (Automatic shut off after 45 minutes)
Slide open to restart
Level two touch pad
Level three touch pad
Level four touch pad
Level five touch pad
motor function
16
•
•
•
•
•
•
•
•
1c
1a
1b
2/3/4
5
6
Before use ensure the breast pump has been disassembled, washed and sterilized.
The parts to be sterilized are : silicone insert, horn, upper pump body, lower pump body, diaphragm, diaphragm cap, valve, bottle, horn hygiene
cover, and milk storage lid or milk storage pods if required (as shown in image B). These components are suitable for sterilization by steam (electric
and microwave), boiling, or cold water tablet/ liquid solution. Follow the sterilizer manufacturer’s instructions.
Do not sterilize: single to double connector, air tube, motor unit and adapter. Wipe clean only with a damp cloth (as shown in image C).
Always wash the product immediately after use to remove milk residue.
Wash all products to be sterilized in warm soapy water and rinse in clean water or use a dishwasher.
Do not clean with solvents or harsh chemicals.
Do not allow product to come into contact with oil based foods (e.g. oil/ tomato based sauces) as staining will occur.
Inspect the air tube before and after each use for condensation. Allow to air dry before next use.
To clean the valve, rub gently between your fingers in warm soapy water – do not insert objects as damage could result.
Routine maintenance includes cleaning. No other servicing is required.
7
8
6
7
ASSEMBLING THE DOUBLE ELECTRIC BREAST PUMP
2
1
3
10. To switch off slide the digital display panel down.
11. Once you have completely finished pumping, unplug the breast pump.
12. You do not need to sterilize your pump parts until you are ready to use it again, but it is recommended to clean immediately after use to remove
milk residue.
13. Cover and store the expressed milk for later use.
5
4
USING THE DOUBLE ELECTRIC BREAST PUMP AS A SINGLE ELECTRIC BREAST PUMP
6
8
7
•
9
To use the breast pump for single pumping, slide the connector switch to the left for expressing from the left breast, or to the right for expressing
from the right breast.
The second horn does not need to be connected for single pumping.
•
WARNING!
•
•
•
•
•
•
•
•
Wash your hands thoroughly before handling the pump.
Wash and sterilize your breast pump before using. Follow instructions in section for CLEANING, STERILIZING AND MAINTENANCE.
1. Make sure the silicone inserts are securely attached to both horns. Clip lip over end of cup first, then push tube through funnel, ensuring lip is fully
clipped over the other side also.
2. Push both horns onto the lower pump body as far as they will go.
3. Push diaphragm down into lower pump body as far as it will go and push diaphragm cap over the top as far as it will go until it is sealed.
4. Push upper pump body and lower pump body together. They will click into place.
5. Push valve onto lower pump body.
6. Screw bottle onto lower pump body.
7. Connect air tube onto upper pump body and the air tube socket of the motor unit. This is on the LEFT of the two sockets on the motor unit.
8. Plug the electric adapter into the electric adapter socket of the motor unit. This is on the RIGHT.
9. Plug the electric adapter into the mains power supply.
•
•
INSTALLING THE BATTERY FOR THE FIRST TIME
1.
2.
3.
4.
5.
ELECTRO MAGNETIC COMPATIBILITY
Before first use, the battery must be charged for at least 3 hours.
To install, remove screw, slide open the battery cover to remove.
Insert the battery as indicated inside the battery compartment and push the cover back into place until it clicks shut.
Secure with screw.
Battery will recharge when plugged in at the mains and the digital display panel is closed.
2
The Tommee Tippee Double Electric Breast Pump (DEBP) complies with the requirements of applicable EMC standards. Other electronic equipment
exceeding the limits defined in such EMC standards such as mobile telephones & wireless devices, could affect the operation of the device.
MODEL 1092 needs special precautions regarding EMC and needs to be installed and put into service according to the EMC information provided in the
ACCOMPANYING DOCUMENTS.
Portable and mobile RF communications equipment can affect MODEL 1092.
4
3
1
The battery must be removed from the appliance before it is scrapped.
The appliance must be disconnected from the supply mains when removing the battery.
The battery is to be disposed of safely.
If the supply cord is damaged, it must be replaced by the manufacturer, in order to avoid a hazard.
Do not immerse motor unit, single to double connector and air tube in water or clean with wet sponge or cloth.
Keep all components out of reach of children.
Children should be supervised to ensure that they do not play with the appliance.
This appliance is not intended for use by persons (including children) with reduced physical, sensory or mental capabilities, or lack of experience and
knowledge, unless they have been given supervision or instruction concerning use of the appliance by a person responsible for their safety.
The use of accessories, transducers and cables other than those specified with the exception of transducers and cables sold by the manufacturer of
the MODEL 1092 as replacement parts for internal components may result in increased EMISSIONS or decreased IMMUNITY of the MODEL 1092.
MODEL 1092 should not be used adjacent to or stacked with other equipment.
ADAPTER
2
Input: 100-240VAC 50/60Hz 400mA
Output: DC 9.5V 1.2A
KEEP DRY
Environmental conditions for transport and storage of the unit.
• an ambient temperature of -10°C to +40°C.
• a relative humidity range of 30% to 70%.
• an atmospheric pressure range of 700 hPa to 1060hPa.
Help the environment by disposing of your product responsibly. The product and batteries must not be disposed of in the domestic waste as they contain substances
which can be damaging to the environment and health. Please use designated collection points or recycling facilities when disposing of the item or batteries.
CAUTION :
Don't immerse in water.
Don't discard or leave the battery near heat source. May explode if disposed into fire.
Don't connect the positive and negative terminal directly.
Don't strike, throw or trample the battery.
Never disassemble the cell.
Battery pack Model: 455068P (2S1P) can only use on the double Breast Pump
KEEP AWAY FROM SUNLIGHT
HELPFUL ADVICE
•
For replacement Lithium Ion Polymer batteries 455068P (2SIP), contact www.tommeetippee.com, or use the recommended Mains Adapter (PSU) S01563C
DEBP (522663) conforms to the requirements of IEC 60601-1-2 (EMC). Adapter (501513A) conforms to the requirement of UL 60601-1
USING THE DOUBLE ELECTRIC BREAST PUMP
2
1
3
•
•
•
•
•
•
•
•
•
6
5
4
2
7
8
3
9
02:00
10
•
4
3
There should be no pain using your breast pump. If you feel pain, try using the pump more gently. Then examine your breasts. If there are any red
or hot areas contact your breastfeeding advisor as soon as possible.
Suction onto the breast can be broken by inserting your finger between the breast and the horn.
Do not continue to use the pump once your milk has stopped flowing.
Remember you are only trying to express milk from just behind the nipple – strong suction is not necessary.
The best time to use your breast pump is after the first feed of the day (unless otherwise advised by your breastfeeding advisor).
Be comfortable and relax, eg. Watch the TV or have your favorite music playing.
Wash all breastfeeding equipment after use and before sterilization.
Do not place furniture or other obstructions on the adapter cords and be sure to position them so that nobody can trip over them.
Keep adapter cords away from hot surfaces such as radiators and central heating pipes.
Always position the adapter and cord well out of reach of your baby and any young children. Be careful not to position the adapter where a child
might try to step on it.
Never use the Tommee Tippee breast pump adapter with any other equipment. Nor should you use any other adapters with your Tommee Tippee
breast pump.
The adapter converts your AC power to a safe low DC voltage.
•
fl oz
TROUBLESHOOTING
ml
1. Ensure that the breast pump parts that come into contact with the breast or milk have been cleaned and sterilized. Wash your hands before touching
the breast pump or your breasts and avoid touching inside the breast pump or the milk protection pod. Find a comfortable chair where you can relax.
2. Ensure the connector switch is in the central position for double expressing.
3. BEFORE placing the breast pump on the breast, switch on to level 1 by sliding the digital display panel up on the motor. The time will commence on the
digital display panel.
4. Place both horns over the breast.
5. Ensure the horn has a good seal to the breast. IF AIR CAN GET IN THERE WILL BE LOW OR NO SUCTION.
6. Once your milk starts to flow freely after approximately one minute, we recommend you press the level 2 touch pad. The pad LED will light up green to
show you are on level 2.
7. To increase the expression level, press level 3 touch pad. If expressing is uncomfortable at this level, switch back to the lower level by touching the level 2
touch pad.
8. If you would like to express faster than level 3, press level 4 or 5 touch pad until you find the expression level that suits you to achieve maximum comfort.
9. Do not fill higher than the maximum level indicated on the bottle.
IF THERE IS LOW OR NO SUCTION:
Make sure all connections are secure. Make sure the silicone inserts on the horns form a complete seal around both breasts. Check the valve is clean
and not damaged. Make sure the air tube is securely fitted to the upper pump body and the motor unit. Check there is no kink in the air tube. Make
sure the diaphragm is assembled correctly and the cap is firmly in place . Check the connector is in the central position.
IF PUMP WILL NOT TURN ON:
Make sure the pump is plugged in correctly. Make sure it is switched on and the display lights up. If using the battery, make sure it is installed
correctly and is fully charged.
WARRANTY
The adapter and motor unit have a warranty period of 12 months from date of purchase. The battery has a warranty period of 6 months from date of
purchase. The manufacturer is not liable for any wear and tear or any damage caused by incorrect or inappropriate usage or use by unauthorized
persons. Use by more than one person will invalidate the warranty and may present a health risk.
8
9
closer to nature® bottle & nipple
USING THE MILK PROTECTION PODS AND TRAY For use with the Tommee Tippee® closer to nature® breast pumps
HOW TO USE
1. Ensure pod is clean and sterilized.
2. Remove lid and place milk protection pod inside the bottle.
3. Screw bottle onto bottle neck adapter and continue to follow assembly of breast pump instructions.
4. When the breast pump is fully assembled and in use, the smaller pod will hold up to 2 oz and the larger pot will hold up to 4 oz.
5. IF USING THE SMALLER POD : Once you have expressed 2 oz stop pumping, place lid on storage pod and remove from bottle.
IF USING THE LARGER POD : Once you have expressed 4 oz stop pumping, place lid on storage pod and remove from bottle.
6. Place pod in the tray and transport to either refrigerator or freezer for storage. See STORAGE OF BREAST MILK guide below.
7. If you want to continue expressing, either insert another clean and sterilized pod or express directly into the bottle of the breast pump.
8. Thaw frozen milk placing the pod into the bottle filled with warm water.
Before using your closer to nature bottles or nipples, please ensure that you read these instructions thoroughly.
Please keep this instruction sheet for future reference as it includes important information.
FOR YOUR CHILD’S SAFETY AND HEALTH
WARNING!
for best results
make sure this valve
Always use this product with adult supervision. Do not leave baby alone with drinking equipment due to
can open
the risk of choking, baby falling or if the product has disassembled.
Never use feeding nipples as a pacifier. Continuous and prolonged sucking of fluids will cause tooth decay.
Tooth decay in young children can occur even when non-sweetened fluids are used. This can occur if the baby is allowed to use the bottle for long
periods through the day and particularly through the night, when saliva flow is reduced or if it is used as a pacifier.
Always check food temperature before feeding. Do not heat in a microwave. Always stir heated food to ensure even heat distribution and test the
temperature before serving. For your child’s safety – Always check food temperature before feeding by testing on a sensitive part of your skin. For
example on the inside of your wrist.
When making up a feed follow the formula milk manufacturer’s instructions and allow the freshly boiled water to cool before pouring it into the bottle.
QUICK START GUIDE
CLEANING
•
•
•
•
•
•
•
•
•
STORAGE OF BREAST MILK
a. Refrigerate expressed milk immediately. If you express more than once a day, you can add the amounts so long as you put it back in the
refrigerator each time.
b. Store milk in the refrigerator for up to 24 hours, or in the freezer for 3 months.
c. You will notice that stored milk separates out into layers. Shake to remix thoroughly before feeding.
d. When freezing milk, allow space at the top of the bottle for expansion. It is easiest to freeze milk in individual feed quantities of 60-125ml (2-4ozs)
e. Thaw frozen milk in the refrigerator or by standing the bottle in warm water until it has reached body temperature.
f. If you want to take expressed milk with you when you are out, make sure it stays cold or frozen until needed.
Method of storing milk
Use within
REMEMBER
Refrigerated before freezing
Defrosted before feeding
Refrigerated at 0-4˚C/32-39˚F
Room temperature <25˚C/<77˚F
Once frozen
Refrigerated at 5-10˚C/41-50˚F
Refreezing
24 hours
12 hours
6 days
6 hours
6 months
3 days
NEVER
• Never defrost or heat milk in a microwave
• Never refreeze breast milk
• Once defrosted, the milk should be kept in the refrigerator
and used within 12 hours
• Do not boil breast milk
• Throw away any leftover milk after a feed
Before first use, clean the product.
Clean before each use.
Always was the product immediately after use.
Wash in hot soapy water and rinse in clean water or use a sterilizer after washing.
Do not clean with solvents or harsh chemicals.
Top rack dishwasher safe.
Do not allow product to come into contact with oil based foods (e.g. oil/tomato based sauces) as staining will occur.
Do not turn the nipple inside out for cleaning. Damage could result.
Do not use a bottle brush. Only the nipple and spout cleaner of the closer nature Bottle & Nipple Brush is suitable.
TAKE EXTRA CARE WHEN CLEANING THE SENSITIVE ANTI-COLIC NIPPLE VALVE
In order to ensure optimum venting the nipple valve is manufactured using a thinner silicone than the nipple itself and therefore care needs to be
taken during cleaning to ensure no damage is caused. Do not use a bottle brush or any other implement to clean the anti-colic valve as this may split
and damage it. However, performance of the nipple may be affected if the anti-colic valve is not cleaned thoroughly after each use. Ensure valve is
flushed with warm water during cleaning.
USING MILK PROTECTION PODS AS A SIPPY CUP
STERILIZING
1. If milk has been chilled, remove lid and place in warm water to heat to temperature required. Always check food temperature before
feeding. Sit baby upright.
2. Hold cup up to baby’s mouth and gently tip to allow baby to sip from cup.
Before first use place in boiling water for 5 minutes. This is to ensure hygiene.
Suitable for steam sterilization.
• After each use disassemble all parts of the bottle.
• Wash thoroughly with hot soapy water.
• Rinse all components using fresh water.
• After rinsing, re-assemble the nipple and screw ring.
• Place all components including the nipple and screw ring assembly in the sterilizer. The closer to nature microwave or electric sterilizer are
suitable. After sterilization the nipple can then be picked up using the screw ring as normal.
FOR YOUR CHILD’S SAFETY AND HEALTH
WARNING!
Always use this product with adult supervision. Accidents have occurred when babies have been left alone with drinking equipment due to the baby
falling or if the product has disassembled. Always check food temperature before feeding. Heating in a microwave oven may produce localized high
temperatures. Take extra care when microwave heating. Always stir heated food to ensure even heat distribution and test the temperature before serving.
CLEANING
•
•
•
•
•
Before first use, clean the product.
Clean before each use.
Always wash the product immediately after use.
Wash in warm soapy water and rinse in clean water or use a dishwasher. Do not clean with solvents or harsh chemicals.
Do not allow product to come into contact with oil based foods (e.g. oil/tomato based sauces) as staining will occur.
ASSEMBLY OF YOUR NIPPLE AND SCREW RING
•
STERILIZING
•
Due to the larger size of Tommee Tippee’s nipple and screw ring, care needs to be taken during assembly to ensure that the nipple is in the correct
position (shown below).
The best method of assembly of the nipple and screw ring is to carefully pull the nipple through the ring in different directions to ensure the
silicone lip fully clips’ over the edge of the screw ring. The area where the nipple and screw ring meet should be flush.
•
Suitable for sterilization by steam (electric and microwave), boiling or cold water tablet/liquid solution.
STORAGE AND USE
•
•
•
•
•
Inspect before each use. Throw away at the first signs of damage or weakness.
Do not store or leave in direct sunlight or near a source of heat.
Do not store with or allow to come into contact with solvents or harsh chemicals.
Not suitable for use in a conventional oven or a combination microwave oven with the grill feature switched on.
Keep all components not in use out of reach of children.
STORAGE AND USE
Inspect before each use and pull the feeding nipple in all directions. Throw away at the first signs of damage or weakness. Do not leave a feeding
nipple in direct sunlight or heat, or leave in disinfectant (“sterilizing solution”) for longer than recommended, as this may weaken the nipple. Do not
store with or allow to come into contact with solvents or harsh chemicals. Not suitable for use in a grill or a microwave oven with the grill feature
switched on. Keep all components not in use out of reach of children. For safety and hygiene reasons it is recommended the feeding nipple is
replaced at least every 2 months. Do not heat in a microwave. This product is for home use, and is not suitable for use in the presence of a
FLAMMABLE ANAESTHETIC MIXTURE WITH AIR or WITH OXYGEN OR NITROUS OXIDE.
11
10
Guidance and manufacturer’s declaration – electromagnetic emissions
Guidance and manufacturer’s declaration – electromagnetic immunity
The MODEL 1092 is intended for use in the electromagnetic environment specified below.
The customer or the user of the MODEL 1063 should assure that it is used in such an environment.
The MODEL 1092 is intended for use in the electromagnetic environment specified below.
The customer or the user of the MODEL 1092 should assure that it is used in such an environment.
Emissions
Compliance
Electromagnetic environment-guidance
RF emissions
CISPR 11
Group 1
The MODEL 1092 uses RF energy only for its internal function. Therefore, its RF emissions
are very low and are not likely to cause any interference in nearby electronic equipment.
RF emissions
CISPR 11
Class B
The MODEL 1092 is suitable for use in all establishments, including domestic
establishments and those directly connected to the public low-voltage power
supply network that supplies buildings used for domestic purposes.
Harmonic emissions
IEC 61000-3-2
Class A
Voltage fluctuations/
flicker emissions IEC 61000-3-3
Complies
Immunity test
IEC 60601 test level
Compliance level
Electromagnetic environment-guidance
Conducted RF
IEC 61000-4-6
3 Vrms
150 kHz to 80 MHz
3 Vrms
Portable and mobile RF communications equipment should be used
no closer to any part of the MODEL 1092, including cables, than the
recommended separation distance calculated from the equation
applicable to the frequency of the transmitter.
Recommended separation distance
Radiated RF
IEC 61000-4-3
3 V/m
80 MHz to 2.5 GHz
3 V/m
d = 1,2 P
d = 1,2 P
80 MHz to 800 MHz
d = 2,3 P
800 MHz to 2,5 GHz
where P is the maximum output power rating of the transmitter in
watts (W) according to the transmitter manufacturer and d is the
recommended separation. Distance in metres (m).
Field strengths from fixed RF transmitters, as determined by an
electromagnetic site survey,a should be less than the compliance
level in each frequency range.b
Guidance and manufacturer’s declaration – electromagnetic immunity
Interference may occur in the vicinity of
equipment marked with the following symbol:
The MODEL 1092 is intended for use in the electromagnetic environment specified below.
The customer or the user of the MODEL 1092 should assure that it is used in such an environment.
NOTE 1 At 80 MHz and 800 MHz, the higher frequency range applies.
NOTE 2 These guidelines may not apply in all situations. Electromagnetic propagation is affected by absorption and
reflection from structures, objects and people.
Immunity test
IEC 60601 test level
Compliance level
Electromagnetic environment-guidance
Electrostatic
discharge (ESD)
IEC 61000-4-2
±6 kV contact
±8 kV air
±6 kV contact
±8 kV air
Floors should be wood, concrete or ceramic tile. If floors are covered with
synthetic material, the relative humidity should be at least 30 %.
Electrical fast
transient/burst
IEC 61000-4-4
±2 kV for power
supply lines
±2 kV for power
supply lines
Mains power quality should be that of a
typical commercial or hospital environment.
Surge
IEC 61000-4-5
±1 kV line(s)
and neutral
±1 kV line(s)
and neutral
Mains power quality should be that of a
typical commercial or hospital environment.
Voltage dips,
short interruptions
and voltage
variations on
power supply
input lines
IEC 61000-4-11
<5 % UT
(>95 % dip in UT)
for 0,5 cycle
40 % UT
(60 % dip in UT)
for 5 cycles
70 % UT
(30 % dip in UT)
for 25 cycles
<5 % UT
(>95 % dip in UT)
for 5s
<5 % UT
(>95 % dip in UT)
for 0,5 cycle
40 % UT
(60 % dip in UT)
for 5 cycles
70 % UT
(30 % dip in UT)
for 25 cycles)
<5 % UT
(>95 % dip in UT)
for 5s
Mains power quality should be that of a typical commercial or hospital
environment. If a dips or an interruption of mains power occurs,
the current of the MODEL 1063 may be dropped off from normal level,
it may be necessary to use uninterruptible power supply or a battery.
3 A/m
3 A/m
Power frequency magnetic fields should be at levels characteristic
of a typical location in a typical commercial or hospital environment.
Power frequency
(50/60 Hz)
magnetic field
IEC 61000-4-8
a. Field strengths from fixed transmitters, such as base stations for radio (cellular/cordless) telephones and land mobile radios, amateur radio, AM and
FM radio broadcast and TV broadcast cannot be predicted theoretically with accuracy. To assess the electromagnetic environment due to fixed RF
transmitters, an electromagnetic site survey should be considered. If the measured field strength in the location in which the MODEL 1063 is used
exceeds the applicable RF compliance level above, the MODEL 1063 should be observed to verify normal operation. If abnormal performance is
observed, additional measures may be necessary, such as re-orienting or relocating the MODEL 1063.
b. Over the frequency range 150 kHz to 80 MHz, field strengths should be less than 3 V/m.
Recommended separation distances between
portable and mobile RF communications equipment and the MODEL 1092
The MODEL 1092 is intended for use in an electromagnetic environment in which radiated RF disturbances are controlled. The customer or the user of
the MODEL 1092 can help prevent electromagnetic interference by maintaining a minimum distance between portable and mobile RF communications
equipment (transmitters) and the MODEL 1092 as recommended below, according to the maximum output power of the communications equipment.
Rated maximum output power
of transmitter
Separation distance according to frequency of transmitter
m
W
150 kHz to 80 MHz
80 MHz to 800 MHz
800 MHz to 2.5 GHz
d = 1,2 P
d = 1,2 P
d = 2,3 P
0.01
0.12
0.12
0.23
0.1
0.38
0.38
0.73
1
1.2
1.2
2.3
10
3.8
3.8
7.3
100
12
12
23
NOTE UT is the a.c. mains voltage prior to application of the test level
For transmitters rated at a maximum output power not listed above, the recommended separation distance d in metres (m)
can be estimated using the equation applicable to the frequency of the transmitter, where P is the maximum output power
rating of the transmitter in watts (W) according to the transmitter manufacturer.
NOTE 1 At 80 MHz and 800 MHz, the separation distance for the higher frequency range applies.
NOTE 2 These guidelines may not apply in all situations. Electromagnetic propagation is affected by absorption and reflection
from structures, objects and people.
12
13
ES
Extractor sacaleche eléctrico doble closer to nature®
B
Por razones de higiene, no puede devolver el producto una vez que ha sido abierto a menos que esté defectuoso.
componentes que deben lavarse, limpiarse y esterilizarse
2
1
3
6
4
7
PRECAUCIONES IMPORTANTES. GUARDE ESTAS
INSTRUCCIONES. SÓLO PARA USO DOMÉSTICO.
El sacaleche eléctrico Tommee Tippee está concebido para extraer leche del pecho materno durante la lactancia.
Investigado y desarrollado por especialistas y expertos en lactancia para extraer la leche para almacenarla y usarla
más tarde.
GUÍA DE COMPONENTES (véase el diagrama A)
12 & 13
17
14
18
8
1.
2.
3.
4.
5.
6.
7.
8.
9.
10.
11.
12.
Suplemento de silicona
Copa
Cuerpo superior del extractor
Cuerpo inferior del extractor
Lengüetas de desprendimiento
Diafragma
Tapa del diafragma
Válvula
Tubo de aire
Conector de único a doble
Unidad de motor
Biberón de 5oz / 147,5ml
13. Biberón de 9oz / 265,5ml
14. Tapa higiénica de la copa (también puede usarse como soporte sólo
para el biberón de 5oz / 147,5ml)
15. Enchufe para el tubo de aire
16. Enchufe para el adaptador eléctrico (de red)
17. Tapa para almacenamiento de la leche
18. Potes de almacenamiento para leche y soporte
19. Bolso para biberones (con capacidad para 4 biberones de 9oz /
265,5ml con tapas para el almacenamiento de la leche)
20. Almohadillas para lactancia
21. Batería
22. Adaptador
FUNCIONES DEL MOTOR (véase el diagrama D)
C
19
componentes que solamente deben frotarse con un paño
(NO deben sumergirse en agua) 11
22
9
1a. Tiempo de extracción
1b. Nivel de extracción
1c. Indicador de carga de la batería (visualizado cuando funciona a baterías)
1d. Icono del adaptador (cuando funciona con alimentación eléctrica)
2. Deslice el panel de visualización para abrirlo y encender el extractor - nivel uno
3. Deslícelo para cerrarlo y apagar el extractor (quite de potencia automático a los 45 minutos)
4. Deslícelo para abrirlo y volver a comenzar
5. Nivel dos de la almohadilla táctil
6. Nivel tres de la almohadilla táctil
7. Nivel cuatro de la almohadilla táctil
8. Nivel cinco de la almohadilla táctil
CÓMO DESARMAR EL EXTRACTOR SACALECHE ELÉCTRICO DOBLE
1. Desenrosque el biberón del cuerpo inferior del extractor.
2. Retire la válvula.
3. Saque el tubo de aire del cuerpo superior del extractor y la unidad de motor.
4. Presione las lengüetas de desprendimiento para soltar el cuerpo superior del extractor y sepárelo.
5. Extraiga la tapa del diafragma y el diafragma.
6. Saque la copa del cuerpo inferior del extractor.
NO ES ESENCIAL QUITAR EL SUPLEMENTO DE SILICONA DE LA COPA A FINES DE LIMPIEZA a menos que haya quedado leche o suciedad atrapada en su
interior. Si esto sucede, desenganche el reborde de la copa y quite el suplemento.
10
LIMPIEZA, ESTERILIZACIÓN Y MANTENIMIENTO
D
•
funciones del motor
1c
1a
1b
2/3/4
5
6
Antes de usar el extractor sacaleche, compruebe que ha sido desarmado, lavado y esterilizado. Los componentes que deben esterilizarse son: el
suplemento de silicona, la copa, el cuerpo superior del extractor, el cuerpo inferior del extractor, el diafragma, la tapa del diafragma, la válvula, el
biberón, la cubierta de higienización de la copa y la tapa para almacenamiento de la leche o los potes de almacenamiento para la leche si es necesario,
(véase el diagrama B). Estos componentes son aptos para esterilización por vapor (eléctrica y en microondas), por ebullición o con una solución de líquido
o tabletas y agua fría. Siga las instrucciones del fabricante del esterilizador.
No esterilizar: el conector de único a doble, el tubo de aire, la unidad de motor y el adaptador. Únicamente frotar con un paño humedecido, (véase el
diagrama C).
Estos componentes son aptos para esterilización por vapor (eléctrica y en microondas), por ebullición o con una solución de líquido o tabletas y agua fría.
Siga las instrucciones del fabricante del esterilizador.
Lave siempre el producto inmediatamente después de usarlo para eliminar los residuos de leche.
Lávelo con agua jabonosa caliente y enjuáguelo con agua limpia o utilice un lavaplatos.
No lo limpie con solventes ni sustancias químicas agresivas.
No permita que el producto entre en contacto con alimentos con una base de aceite (por ejemplo, salsas con una base de aceite o tomate), ya que
podrían mancharlo.
Inspeccione el tubo de aire antes y después de cada uso por si tiene condensación. Deje secar al aire antes del siguiente uso.
Para limpiar la válvula, frote suavemente con los dedos en agua jabonosa tibia; no inserte objetos en su interior porque podría causar daños.
El mantenimiento de rutina incluye la limpieza. No requiere ningún otro cuidado periódico.
•
•
•
•
•
•
•
•
•
•
7
8
14
15
CÓMO ARMAR EL EXTRACTOR SACALECHE ELÉCTRICO DOBLE
2
1
3
6
8
7
8. Si desea extraer leche más rápido que en el nivel 3, presione el nivel 4 o 5 de la almohadilla táctil hasta que encuentre el nivel de extracción de leche
adecuado para su máxima comodidad.
9. No llene el biberón por encima del nivel máximo indicado en el mismo.
10. Para apagar, deslice el panel de visualización digital hacia abajo.
11. Una vez que haya terminado de extraer leche por completo, desenchufe el extractor sacaleche.
12. No es necesario que esterilice los componentes del extractor hasta que esté lista para volver a usarlo, pero se recomienda limpiarlo inmediatamente
después de usarlo para eliminar los residuos de leche.
5
4
9
CÓMO USAR EL EXTRACTOR SACALECHE ELÉCTRICO DOBLE COMO SI FUERA SIMPLE
•
•
Lávese bien las manos antes de manipular el extractor.
Lave y esterilice el extractor sacaleche antes de usarlo. Siga las instrucciones de la sección sobre LIMPIEZA, ESTERILIZACIÓN Y MANTENIMIENTO.
1. Compruebe que los suplementos de silicona estén asegurados firmemente en ambas copas. Asegure primero el reborde sobre el extremo de la
copa, después empuje el tubo por el embudo, comprobando que el reborde también quede asegurado completamente sobre el otro lado.
2. Empuje ambas copas sobre el cuerpo inferior del extractor, tan adentro como sea posible.
3. Empuje el diafragma en el cuerpo inferior del extractor, tan abajo como sea posible, y coloque la tapa del diafragma sobre la parte superior hasta
que forme un cierre hermético.
4. Empuje el cuerpo superior del extractor y el cuerpo inferior del extractor para unirlos. Se encajarán y darán un chasquido.
5. Empuje la válvula sobre el cuerpo inferior del extractor.
6. Enrosque el biberón en el cuerpo inferior del extractor.
7. Conecte el tubo de aire en el cuerpo superior del extractor y en el enchufe del tubo de aire de la unidad de motor. Éste se encuentra a la IZQUIERDA
de los dos enchufes en la unidad de motor.
8. Enchufe el adaptador eléctrico en el enchufe del adaptador eléctrico de la unidad de motor. Éste se encuentra a la DERECHA.
9. Enchufe el adaptador eléctrico en un tomacorriente eléctrico.
CÓMO INSTALAR LA BATERÍA POR PRIMERA VEZ
1.
2.
3.
4.
5.
2
Antes de usar la batería por primera vez, debe cargarla durante un mínimo de 3 horas.
Para instalarla, quite el tornillo y deslice la tapa del compartimento de la batería para quitarla.
Inserte la batería en la dirección indicada dentro del compartimento de la batería y vuelva a empujar la tapa en su lugar hasta que se cierre con un chasquido.
Fíjela con el tornillo.
La batería se recargará cuando sea enchufada a la red eléctrica y el panel de visualización digital esté cerrado.
3
1
Para usar el extractor sacaleche para un solo pecho, deslice el conector hacia la izquierda para extraer leche del pecho izquierdo, o hacia la derecha
para extraer leche del pecho derecho.
La segunda copa no necesita conectarse para extraer leche de un solo pecho.
¡ADVERTENCIA!
•
•
•
•
•
•
•
Si el cable eléctrico está dañado, el fabricante deben cambiarlo para evitar los riesgos.
No sumerja la unidad de motor en agua ni la limpie con una esponja o un paño húmedos.
Mantenga todos los componentes fuera del alcance de los niños.
Vigile a los niños para asegurarse de que no jueguen con este aparato.
Este aparato no es apto para ser usado por personas (incluyéndose a los niños) que tengan alguna disminución de las capacidades físicas, sensoriales
o mentales, o que carezcan de la experiencia y los conocimientos necesarios, a no ser que sean supervisadas por una persona responsable de su
seguridad o que tal persona les enseñe cómo usarlo.
La utilización de accesorios, transductores y cables diferentes de los especificados (con excepción de los transductores y cables que vende el
fabricante del MODELO 1092 como repuestos de componentes internos) puede conllevar a un aumento de las EMISIONES o una reducción de la
INMUNIDAD del MODELO 1092.
MODELO 1092 no deben ser utilizados adyacentes a ni amontonados con otro equipo.
COMPATIBILIDAD ELECTROMAGNÉTICA (CEM)
El extractor sacaleche eléctrico doble Tommee Tippee (DEBP) cumple los requisitos de las normas de CEM correspondientes. Otros aparatos electrónicos que
superen los límites definidos en tales normas de CEM, como los teléfonos celulares y dispositivos inalámbricos, podrían afectar el funcionamiento del dispositivo.
El MODELO 1092 requiere precauciones especiales sobre CEM y debe instalarse y ponerse en funcionamiento de acuerdo con la información de CEM
suministrada en los DOCUMENTOS COMPLEMENTARIOS;
Los equipos de comunicaciones por radiofrecuencia portátiles y celulares pueden afectar al MODELO 1092.
ADAPTADOR
4
MANTENER SECO
Condiciones ambientales para el transporte y almacenamiento de la unidad.
• una temperatura ambiente de entre -10°C y +40°C
• una humedad relativa de entre el 30% y el 70%
• una presión atmosférica de entre 700 hPa y 1060hPa.
Entrada: CA 120V 50/60Hz 100mA
Salida: CC 5V 800mA
2
Ayude al medio ambiente desechando su producto en forma responsable. El producto y las baterías no deben eliminarse junto con los residuos domésticos
ya que contienen sustancias que pueden perjudicar el medio ambiente y la salud. Haga uso de los centros de recogida o las instalaciones de reciclado
designados cuando deseche el artículo o las pilas.
MANTENER ALEJADO DE LA LUZ SOLAR
CONSEJOS ÚTILES
•
CUIDADO:
No sumergir en agua.
No desechar ni dejar la batería cerca de una fuente de calor. Puede explotar si se desecha arrojándola al fuego.
No conectar el polo positivo y el negativo en forma directa.
No golpear la batería, ni arrojarla o aplastarla con el pie.
Nunca desarme la celda.
La batería modelo 455068P (2S1P) sólo puede ser usada en el extractor sacaleche doble.
Para obtener baterías de polímero de iones de litio de repuesto 455068P (2SIP), póngase en contacto con www.tommeetippee.com, o utilice el
adaptador eléctrico recomendado (fuente de energía) 501513A . El sacaleche eléctrico doble (522663) cumple los requisitos de la norma IEC 60601-1-2 (CEM)
El adaptador (501513A) cumple los requisitos de la norma UL 60601-1
MODO DE EMPLEO DEL EXTRACTOR SACALECHE ELÉCTRICO DOBLE
2
5
1
4
3
•
•
•
•
•
•
•
•
•
•
6
2
•
No debería sentir dolor cuando usa su extractor sacaleche. Si siente dolor, intente usar el extractor con más suavidad. Luego examínese los pechos. Si
hay alguna zona rojiza o caliente, póngase en contacto con su asesor de lactancia lo antes posible.
La succión sobre el pecho puede interrumpirse insertando un dedo entre el pecho y la copa.
No siga usando el extractor una vez que ha dejado de salir leche.
Recuerde que sólo intenta extraer leche de justo detrás del pezón; no es necesaria una succión intensa.
El mejor momento para usar su extractor sacaleche es después de la primera toma del día (a menos que su asesor de lactancia le aconseje otra cosa).
Póngase cómoda y relájese, por ejemplo, mire la TV o escuche su música favorita.
Lave todo el equipo de lactancia después de usarlo y antes de esterilizarlo.
No coloque muebles u otras obstrucciones sobre los cables del adaptador y asegúrese de ubicarlos de manera que nadie pueda tropezarse con ellos.
Mantenga los cables del adaptador alejados de las superficies calientes como por ejemplo radiadores y tuberías de la calefacción central.
Siempre coloque el adaptador y el cordón fuera del alcance de su bebé y cualquier criatura pequeña. Tenga cuidado para no colocar el adaptador
donde un niño podría pisarlo.
Nunca use el adaptador del extractor sacaleche Tommee Tippee con ningún otro equipo. Tampoco use ningún otro adaptador con su extractor
sacaleche Tommee Tippee.
El adaptador convierte su potencia CA en un bajo voltaje CC seguro.
RESOLUCIÓN DE PROBLEMAS
7
3
8
9
02:00
10
4
3
fl oz
SI NO HAY SUCCIÓN O HAY POCA SUCCIÓN:
Compruebe que todas las conexiones estén bien colocadas. Verifique que los suplementos de silicona de las copas formen un cierre hermético
completo alrededor de ambos pechos. Verifique que la válvula esté limpia y que no esté dañada. Compruebe que el tubo de aire esté conectado en
forma segura al cuerpo superior del extractor y la unidad de motor. Compruebe que el tubo de aire no esté doblado. Compruebe que el diafragma
esté armado correctamente y que la tapa esté colocada firmemente en su lugar. Verifique que el conector esté en la posición central.
ml
1. Compruebe que los componentes del extractor sacaleche que entran en contacto con el pecho o la leche hayan sido limpiados y esterilizados. Lávese
las manos antes de tocar el extractor sacaleche o los pechos y evite tocar el interior del extractor sacaleche o el pote de protección para la leche.
Busque una silla cómoda que le permita relajarse.
2. Compruebe que el conector esté en la posición central para una extracción doble.
3. ANTES de colocar el extractor sacaleche sobre el pecho, enciéndalo al nivel 1 deslizando el panel de visualización digital en dirección ascendente
sobre el motor. El tiempo comenzará a correr en el panel de visualización digital.
4. Coloque ambas copas sobre los pechos.
5. Compruebe que la copa quede adherida herméticamente al pecho. SI PUEDE ENTRAR AIRE NO HABRÁ SUCCIÓN O ÉSTA SERÁ ESCASA
6. Una vez que comience a fluir libremente la leche después de aproximadamente un minuto, recomendamos que presione el nivel 2 de la almohadilla
táctil. El LED de la almohadilla se iluminará de color verde para indicar que está en el nivel 2.
7. Para aumentar el nivel de extracción, pulse el nivel 3 de la almohadilla táctil. Si en este nivel la extracción es incómoda, vuelva al nivel más bajo
tocando el nivel 2 de la almohadilla táctil.
SI EL EXTRACTOR NO SE ENCIENDE:
Compruebe que el extractor está enchufado correctamente. Compruebe que está encendido y que las luces de visualización se encienden. Si usa la
batería, verifique que está colocada como corresponde y que está completamente cargada.
GARANTÍA
El adaptador y la unidad de motor tienen un periodo de garantía de 12 meses a partir de la fecha de compra. La batería tiene un periodo de garantía
de 6 meses a partir de la fecha de compra. El fabricante no se responsabiliza por ningún tipo de desgaste ni por daños causados por el uso incorrecto
o inadecuado o en caso de que lo utilicen personas no autorizadas. En caso de que más de una persona utilice el producto, la garantía quedará
anulada, pudiendo causar al mismo tiempo un riesgo para la salud.
16
17
CÓMO USAR LOS POTES DE PROTECCIÓN PARA LECHE MATERNA Y EL SOPORTE Para usar con los extractores
sacaleche Tommee Tippee® closer to nature®
MÉTODO DE EMPLEO
1. Compruebe que el pote esté limpio y esterilizado.
2. Quite la tapa y coloque el pote de protección para leche dentro del biberón.
3. Enrosque el biberón en el adaptador para la boca del biberón y continúe de acuerdo con las instrucciones de armado del extractor sacaleche.
4. Cuando el extractor sacaleche está armado por completo y en uso, el pote más pequeño puede contener hasta 2 oz/59 ml y el más grande,
hasta 4 oz/118 ml.
5. SI USA EL POTE MÁS PEQUEÑO: Una vez que ha extraído 2oz/59 ml, deje de extraer la leche, coloque la tapa en el pote de almacenamiento y
quítelo del biberón. SI USA EL POTE MÁS GRANDE: Una vez que ha extraído 4oz/118 ml, deje de extraer la leche, coloque la tapa en el pote de
almacenamiento y quítelo del biberón.
6. Coloque el pote en el soporte y llévelo a la nevera o el congelador para su almacenamiento. Consulte la guía de ALMACENAMIENTO DE LA
LECHE MATERNA debajo.
7. Si desea seguir extrayendo leche, inserte otro pote limpio y esterilizado o extraiga la leche directamente hacia el biberón del extractor sacaleche.
8. Descongele la leche congelada colocando el pote en el biberón lleno de agua caliente.
GUÍA DE INICIO RÁPIDO
Lea atentamente estas instrucciones antes de usar biberones o tetinas closer to nature.
Conserve estas instrucciones para poder consultarlas en el futuro ya que incluyen información importante.
PARA LA SEGURIDAD Y SALUD DE SU BEBÉ
¡ADVERTENCIA!
para mejores resultados
se asegura de que esta
valvula puede abrir
Utilice siempre este producto bajo supervisión de un adulto. No deje al bebé solo con el biberón ya que si el producto se
desarmara o si el bebé sufriera una caída, podría ahogarlo. Nunca utilice las tetinas como chupete.
La succión continua y prolongada de líquidos puede causar caries. Los niños pequeños pueden sufrir daños incluso cuando se usan líquidos sin endulzar. Esto puede
suceder si se deja que el niño use el biberón por periodos prolongados durante el día, y sobre todo por la noche, cuando el flujo de saliva se reduce, o si se usa la tetina
como si fuera un chupete. Siempre compruebe la temperatura de la comida antes de ofrecérsela al niño. No la caliente en el microondas. Siempre revuelva o agite la
comida caliente para garantizar que el calor se distribuya uniformemente, y haga una prueba de la temperatura antes de servirla.
Por la seguridad de su hijo: Antes de ofrecerle la comida, siempre compruebe su temperatura sobre una parte sensible de la piel, por ejemplo, en la parte interior de la
muñeca. Cuando prepare una toma, siga las instrucciones del fabricante de la fórmula de leche y deje enfriar el agua recién hervida antes de verterla en el biberón.
LIMPIEZA
•
•
•
•
•
•
•
ALMACENAMIENTO DE LA LECHE MATERNA
a. Refrigere de inmediato la leche extraida. Si extrae leche más de una vez al día, puede añadir la nueva a la vieja siempre que vuelva a poner la
leche en la nevera cada vez.
b. Guarde la leche en la nevera durante un máximo de 24 horas, o en el congelador durante 3 meses.
c. Notará que la leche guardada se separa formando capas. Sacúdala para volver a mezclarla completamente antes de dar el biberón.
d. Si congela la leche, deje espacio en la parte superior del biberón para que la leche pueda expandirse. Lo más fácil es congelar la leche en las
cantidades de tomas individuales, de entre 2 y 4ozs/59 y 118 ml.
e. Descongele la leche congelada en la nevera o coloque el biberón en agua caliente hasta que alcance la temperatura del cuerpo.
f. Si desea llevarse la leche extraida cuando sale, asegúrese de que se mantenga fría o congelada hasta que la necesite.
Método de almacenamiento de la leche
biberón y tetina closer to nature®
Usar dentro de las
Refrigerada antes de congelar
Descongelada antes de la toma
Refrigerada a 0-4˚C/32-39˚F
A temperatura ambient <25˚C/<77˚F
Una vez congelada
Refrigerada a 5-10˚C/41-50˚F
Recongelada
24 horas
12 horas
8 días
6 horas
6 meses
3 días
JAMÁS
•
•
Limpie el producto antes de usarlo por primera vez.
Límpiela antes de cada uso.
Lave el producto inmediatamente después de cada uso.
Lávela con agua jabonosa caliente y enjuáguela con agua o utilice un esterilizador después del lavado.
No la limpie con solventes ni sustancias químicas agresivas.
Puede lavarse en la parte superior del lavaplatos.
No permita que el producto entre en contacto con alimentos con una base de aceite (por ejemplo, salsas con una base de aceite o tomate), ya que
podrían mancharlo.
No ponga la tetina del revés para limpiarla ya que podría dañarla.
No utilice un cepillo de limpieza de biberones. Sólo el limpiador para tetinas y picos del cepillo de limpieza de biberones y tetinas closer to
nature es apto para tal fin.
TENGA SUMO CUIDADO AL LIMPIAR LA VÁLVULA ANTICÓLICO SENSIBLE DE LA TETINA
Para permitir una perfecta eliminación de aire, la válvula de la tetina está hecha de una silicona más delgada que la tetina en general, y por lo tanto deberá tener
cuidado al limpiarla para no causar daños. No use un cepillo de limpieza de biberones ni ningún otro utensilio para limpiar la válvula anticólico ya que podría rasgarla o
dañarla. Por otro lado, si no se limpia correctamente la válvula anticólico después de cada uso, el funcionamiento de la tetina puede verse afectado. Cerciórese de
enjuagar la válvula con abundante agua tibia durante la limpieza.
PARA RECORDAR
• Nunca descongele o caliente la leche en el microondas
• Nunca vuelva a congelar la leche materna
• Una vez descongelada, la leche debería conservarse en la
nevera y usarse dentro de las 12 horas
• No hierva la leche materna
• Deseche cualquier resto de leche que quede después
de una toma
CÓMO USAR LOS POTES DE PROTECCIÓN PARA LA LECHE COMO TACITA ENTRENADORA
1. Si la leche ha sido refrigerada, quite la tapa y coloque el pote en agua caliente para calentarla a la temperatura necesaria. Compruebe siempre
la temperatura de los alimentos antes de la toma. Siente al bebé en posición vertical.
2. Acerque la tacita a la boca del bebé e inclínela suavemente para permitir que el bebé beba de la taza.
ESTERILIZACIÓN
•
•
•
•
•
Desarme todos los componentes del biberón después de cada uso.
Lávelo minuciosamente con agua jabonosa caliente.
Enjuague todos los componentes con agua limpia.
Después de enjuagarlos, vuelva a colocar la tetina en la rosca.
Coloque todos los componentes, incluyendo la tetina colocada en la rosca, en el esterilizador. Se pueden usar esterilizadores eléctricos o para
microondas closer to nature. Una vez terminada la esterilización, puede extraer la tetina con ayuda de la rosca y puede usarla como de costumbre.
POR LA SALUD Y LA SEGURIDAD DE SU HIJO
¡ADVERTENCIA!
Utilice siempre este producto bajo supervisión de un adulto. Se han producido accidentes por dejar al bebé solo con el equipo de bebida debido a
que el producto se desarmó o el bebé sufrió una caída.
Siempre compruebe la temperatura de la comida antes de ofrecérsela al niño. El calentamiento en microondas puede producir altas temperaturas
localizadas. Tenga sumo cuidado cuando caliente la comida en el microondas. Siempre revuelva o agite la comida caliente para garantizar que el
calor se distribuya uniformemente, y haga una prueba de la temperatura antes de servirla.
LIMPIEZA
•
•
•
•
•
•
Limpie el producto antes de usarlo por primera vez.
Límpielo antes de cada uso.
Lave el producto inmediatamente después de cada uso.
Lávelo con agua jabonosa caliente y enjuáguelo con agua limpia o utilice un lavaplatos.
No lo limpie con solventes ni sustancias químicas agresivas.
No permita que el producto entre en contacto con alimentos con una base de aceite (por ejemplo, salsas con una base de aceite o tomate)
ya que podrían mancharlo.
COLOCACIÓN DE LA TETINA EN LA ROSCA
•
•
Debido al tamaño mayor de la nueva tetina Tommee Tippee y de su rosca, deberá tener cuidado durante el armado para cerciorarse de que la
tetina esté en la posición correcta, (mostrada debajo).
El mejor método para colocar la tetina en la rosca es tirar de la tetina con cuidado, en distintas direcciones, para que vaya pasando por la rosca,
hasta que esté segura de que el reborde de silicona se engancha en el borde de la rosca. La zona de encuentro entre la tetina y la rosca deberá
estar al mismo nivel.
ESTERILIZACIÓN
•
Apto para todos los métodos de esterilización.
ALMACENAMIENTO Y USO
•
•
•
•
•
Inspeccione el producto antes de cada uso. Deséchelo ante el primer indicio de daño o debilidad.
No la guarde ni la deje expuesta al sol directo o cerca de una fuente de calor.
No la guarde con sustancias químicas ni solventes agresivos ni permita que la taza entre en contacto con ellos.
No es apta para usarse en un horno convencional ni de microondas combinado con el grill encendido.
Mantenga todos los componentes que no están en uso fuera del alcance de los niños.
ALMACENAMIENTO Y USO
Antes de cada uso, inspeccione la tetina y tire de ella en todas direcciones. Deséchela ante el primer indicio de daño o debilidad.
No deje la tetina expuesta a la luz solar directa o el calor, ni la deje en desinfectante (“solución de esterilización”) por más tiempo que el que se recomienda, ya
que esto podría debilitar la tetina. No la guarde con sustancias químicas ni solventes agresivos ni permita que la tetina entre en contacto con ellos.
No es apta para usarse en un horno con grill ni de microondas con el grill encendido. Mantenga todos los componentes que no están en uso fuera del alcance
de los niños. Por motivos de higiene y seguridad, se recomienda cambiar la tetina al menos cada 2 meses. No calentar en microondas.