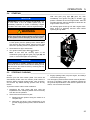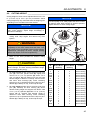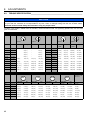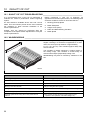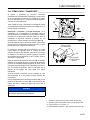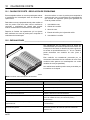
1
4273092-ES-RevA Safety, Operation and Maintenance Manual Manual de seguridad, funcionamiento y mantenimiento AR522™ 68131 – AR522-T4I, Kubota® V2403-M-DI, 4WD, ROPS WARNING WARNING: If incorrectly used this machine can cause severe injury. Those who use and maintain this machine should be trained in its proper use, warned of its dangers and should read the entire manual before attempting to set up, operate, adjust or service the machine. ADVERTENCIA ADVERTENCIA: Si se usa de forma incorrecta, esta máquina puede causar graves lesiones. Cualquier persona que use y mantenga esta máquina debe estar entrenada en su uso correcto, instruida de sus peligros y deberá leer todo el manual antes de tratar de instalar, operar, ajustar o revisar la máquina. When Performance Matters.™ ES Spain FOREWORD This manual contains safety and operating instructions for your new Jacobsen machine. This manual should be stored with the equipment for reference during operation. The serial plate is located on the left rear frame rail. Jacobsen recommends you record these numbers below for easy reference. Before you operate your machine, you and each operator you employ should read the manual carefully in its entirety. By following the safety, operating, and maintenance instructions, you will prolong the life of your equipment, and maintain its maximum efficiency. If additional information is Jacobsen Dealer. ® A Textron Company CHARLOTTE, NC YEAR OF PRODUCTION: needed, contact your Proposition 65 Warning This product contains or emits chemicals known to the State of California to cause cancer and birth defects or other reproductive harm. © 2013, Jacobsen, A Textron Company/Textron Innovations Inc. “All rights reserved, including the right to reproduce this material or portions thereof in any form.” LITHO IN U.S.A. 9-2014 2 MADE IN U.S.A. CONTENTS CONTENTS CONTENTS SAFETY 1.1How to Operate Safely . . . . . . . . . . . . . . . . . . . . 4 1.2 Important Safety Notes . . . . . . . . . . . . . . . . . 7 SPECIFICATIONS 2.1 Product Identification . . . . . . . . . . . . . . . . . . 8 2.2 V2403-M-DI Engine . . . . . . . . . . . . . . . . . . . 8 2.3 Mower . . . . . . . . . . . . . . . . . . . . . . . . . . . . . . 8 2.4 Weights and Dimensions . . . . . . . . . . . . . . . 8 2.5 Cutting Units . . . . . . . . . . . . . . . . . . . . . . . . . 9 2.6 Accessories . . . . . . . . . . . . . . . . . . . . . . . . . 9 2.7 Support Literature . . . . . . . . . . . . . . . . . . . . . 9 2.8 Declaration of Conformity . . . . . . . . . . . . . . 10 2.9 Vibration Level . . . . . . . . . . . . . . . . . . . . . . 13 DECALS CONTROLS 4.1 Icons . . . . . . . . . . . . . . . . . . . . . . . . . . . . . . 4.2 Controls . . . . . . . . . . . . . . . . . . . . . . . . . . . . 4.3 Control Panel . . . . . . . . . . . . . . . . . . . . . . . 4.4 Operator Alerts . . . . . . . . . . . . . . . . . . . . . . 18 19 21 22 OPERATION 5.1 Daily Inspection . . . . . . . . . . . . . . . . . . . . . 5.2 Interlock System . . . . . . . . . . . . . . . . . . . . . 5.3 Operating Procedures . . . . . . . . . . . . . . . . . 5.4 Starting . . . . . . . . . . . . . . . . . . . . . . . . . . . . 5.5 Stopping / Parking . . . . . . . . . . . . . . . . . . . 5.6 To Drive / Transport . . . . . . . . . . . . . . . . . . 5.7 Mowing . . . . . . . . . . . . . . . . . . . . . . . . . . . . 5.8 Mowing Speed . . . . . . . . . . . . . . . . . . . . . . 5.9 Hillside Operation . . . . . . . . . . . . . . . . . . . . 5.10 Towing / Trailering . . . . . . . . . . . . . . . . . . . 5.11 Daily Maintenance . . . . . . . . . . . . . . . . . . . 23 23 24 25 25 26 26 26 27 29 30 7.14 7.15 7.16 7.17 7.18 7.19 7.20 7.21 7.22 Electrical System . . . . . . . . . . . . . . . . . . . . 37 Radiator . . . . . . . . . . . . . . . . . . . . . . . . . . . 38 Roll Over Protective Structure (ROPS) . . . . 38 Tires . . . . . . . . . . . . . . . . . . . . . . . . . . . . . . 38 Wheel Mounting Procedure . . . . . . . . . . . . 39 Inspecting Blades . . . . . . . . . . . . . . . . . . . . 39 Sharpening Blades . . . . . . . . . . . . . . . . . . . 40 Care and Cleaning . . . . . . . . . . . . . . . . . . . 40 Storage . . . . . . . . . . . . . . . . . . . . . . . . . . . . 41 ADJUSTMENTS 8.1 General . . . . . . . . . . . . . . . . . . . . . . . . . . . . 42 8.2 Mow Speed . . . . . . . . . . . . . . . . . . . . . . . . . 42 8.3 Belt . . . . . . . . . . . . . . . . . . . . . . . . . . . . . . . 42 8.4 Neutral Adjustment . . . . . . . . . . . . . . . . . . . 43 8.5 Forward / Reverse Speed . . . . . . . . . . . . . . 43 8.6 Steering Toe-In . . . . . . . . . . . . . . . . . . . . . . 44 8.7 Traction Control System Calibration . . . . . . 44 8.8 Cutting Height . . . . . . . . . . . . . . . . . . . . . . . 45 8.9 Torque Specification . . . . . . . . . . . . . . . . . . 46 PROBLEM SOLVING 9.1 General . . . . . . . . . . . . . . . . . . . . . . . . . . . . 47 9.2 Controller Lamps . . . . . . . . . . . . . . . . . . . . . 48 9.3 Electrical Circuits . . . . . . . . . . . . . . . . . . . . 49 QUALITY OF CUT 10.1 Quality of Cut Troubleshooting . . . . . . . . . . 50 10.2 Washboarding . . . . . . . . . . . . . . . . . . . . . . . 50 10.3 Step Cutting . . . . . . . . . . . . . . . . . . . . . . . . 51 10.4 Scalping . . . . . . . . . . . . . . . . . . . . . . . . . . . 52 10.5 Stragglers . . . . . . . . . . . . . . . . . . . . . . . . . . 53 10.6 Streaks . . . . . . . . . . . . . . . . . . . . . . . . . . . . 54 10.7 Windrowing . . . . . . . . . . . . . . . . . . . . . . . . . 55 10.8 Mismatched Cutting Units . . . . . . . . . . . . . . 56 NOTES MAINTENANCE & LUBRICATION CHARTS 6.1 General . . . . . . . . . . . . . . . . . . . . . . . . . . . . 31 6.2 Maintenance Chart . . . . . . . . . . . . . . . . . . . 31 6.3 Lubrication Chart . . . . . . . . . . . . . . . . . . . . 32 MAINTENANCE 7.1 General . . . . . . . . . . . . . . . . . . . . . . . . . . . . 33 7.2 Engine . . . . . . . . . . . . . . . . . . . . . . . . . . . . . 33 7.3 Engine Oil . . . . . . . . . . . . . . . . . . . . . . . . . . 33 7.4 Air Filter . . . . . . . . . . . . . . . . . . . . . . . . . . . 34 7.5 Fuel . . . . . . . . . . . . . . . . . . . . . . . . . . . . . . . 34 7.6 Fuel System . . . . . . . . . . . . . . . . . . . . . . . . 34 7.7 Battery . . . . . . . . . . . . . . . . . . . . . . . . . . . . 35 7.8 Jump Starting . . . . . . . . . . . . . . . . . . . . . . . 35 7.9 Charging Battery . . . . . . . . . . . . . . . . . . . . . 35 7.10 Muffler and Exhaust . . . . . . . . . . . . . . . . . . 36 7.11 Hydraulic Hoses . . . . . . . . . . . . . . . . . . . . . 36 7.12 Hydraulic Oil . . . . . . . . . . . . . . . . . . . . . . . . 36 7.13 Hydraulic Filter . . . . . . . . . . . . . . . . . . . . . . 37 3 1 1 SAFETY SAFETY 1.1 HOW TO OPERATE SAFELY ! WARNING EQUIPMENT OPERATED INCORRECTLY OR WITHOUT TRAINING CAN BE DANGEROUS. Know the location and correct operation of controls. Operators without experience must receive instruction from another person that knows the correct operation of the equipment before you operate the mower. Only use parts, accessories and attachments approved by Jacobsen. SAFE OPERATION a a Read the Operator’s Manual and other training material. If the operator or technician can not read this manual, the owner is responsible to describe this material to the operators and technicians. Manuals in additional languages may be available on the Jacobsen or RansomesJacobsen website. Read all of the instructions for this mower carefully. Know the controls and the correct operation of the equipment. b Children or persons who do not understand these instructions must not use the mower. The local regulations can limit the age of the operator. c Never use a mower near persons, including children or animals. d Remember that the operator or owner is responsible for accidents or hazards that occur to other persons or their property. e Never carry passengers. f Never allow persons to operate or service the mower or its attachments without correct instructions. g d Inspect the mower before you operate the mower. Check the tire pressure, engine oil level, the radiator coolant level and the air cleaner indicator. Fuel is flammable. Use caution when you add the fuel to the mower. e Operate the mower in daylight or in good artificial light. Use caution when you operate the mower during bad weather. Never operate the mower with lightning in the area. f Inspect the area to select the accessories and attachments that are needed to correctly and safely do the job. Only use parts, accessories and attachments approved by Jacobsen. g Be careful of holes in the terrain and other hazards that are not visible. h Inspect the area where the equipment is operated. Remove all objects you can find before you operate. Be careful of obstructions above the ground (low tree limbs, electrical wires) and also underground obstacles (sprinklers, pipes, tree roots). Enter a new area carefully. Look for possible hazards. i Inspect the cutting system before you start the mower. Make sure the blades are free to rotate. When you rotate one blade, other blades can rotate. Do not operate equipment while tired, sick or after you use alcohol or drugs. PREPARATION OPERATION a When you operate the mower, wear correct clothing, slip resistant work shoes or boots, work gloves, hard hat, safety glasses and hearing protection. Long hair, loose clothing or jewelry can be caught in moving parts. a Never operate the engine without enough ventilation or in an enclosed area. The carbon monoxide in the exhaust fumes can increase to dangerous levels. b Do not operate the equipment with the Interlock System disconnected or the system does not operate correctly. Do not disconnect or prevent the operation of any switch. b Never carry passengers. Keep other persons or animals away from the mower. c Disengage all drives and engage the parking brake before you start the engine. Only start the engine with the operator in the seat. Never start the engine with persons near the mower. c 4 Never operate equipment that is not in correct order or without decals, guards, shields, deflectors or other protective devices fastened. DO NOT operate the cutting unit without the discharge chute or mulching plate installed. SAFETY d Keep your legs, arms and body inside the operator compartment while the mower is in operation. Keep your hands and feet away from the cutting units. 1 – Stop the engine and remove the key. p When you hit an object or mower starts to cause the vibration that is not normal, inspect the mower for damage and make repairs. q Decrease the throttle setting before you stop the engine. r Do not use this equipment for uses that the mower was not made for. e Do not use on the slopes greater than the safe slope limit for the equipment. f To guard against over turning or loss of control: – Operate the mower up and down on the face of slopes (vertically), but not across the face (horizontally). ROPS – Do not start or stop suddenly on slopes. a – Decrease the speed when you operate on slopes or when you must turn. Use caution when you change direction. Turf condition can change the mower stability. The ROPS is a safety device. Keep the ROPS in the vertical and locked position. Always use the seat belt when you operate the mower. Make sure the seat belt can be released quickly in an emergency. b – Use caution when you operate the mower near drop-offs, ditches or embankments. – Be careful of holes in the terrain and other hazards that are not visible. Only operate the mower with the ROPS in the folded position on flat and level surfaces when necessary. Do not operate the mower with the ROPS in the folded position on slopes, near sharp edges or near water. There is no roll over protection with the ROPS in the folded position. g When you drive in the reverse direction, look behind you and down to make sure the path is clear. Do not operate the cutting units when you drive in the reverse direction. c Check for clearance before you drive below objects. Do not contact tree branches, electrical wires or other objects with the ROPS. h Use caution when you go near corners, trees or other objects that can prevent a clear view. d Do not use the seat belt with the ROPS in the folded position. i Equipment must meet the current regulations to be driven on the public roads. e Inspect the ROPS for damage. Keep the ROPS hardware fastened. j Before you move across or operate on the paths or roads, turn off the PTO switch, lift the mowers and travel at decreased speed. Look for traffic. f Do not weld, drill, change or bend the ROPS. Replace a damaged ROPS. Do not try to correct a damaged ROPS. k Stop the blades when the mower is on any surface that is not grass. g Do not remove the ROPS from the mower. h Jacobsen must approve any changes to the ROPS. l Do not release the cut grass in the direction of persons or allow persons near the mower while in operation. m Do not operate the mower with damaged guards or without safety devices in position. n Do not change the engine governor setting or overspeed the engine. Never change or tamper with adjusters that are closed with a seal for the engine speed control. o Before you leave the operator compartment, for any reason: – Disengage all the drives and lower attachments to the ground. – Engage the parking brake. SAFE HANDLING OF FUELS a The fuel and the fuel vapors are flammable. Use caution when you add the fuel to the mower. The fuel vapors can cause an explosion. b Never use the containers that are not approved to keep or transfer fuel. c Never keep the mower or fuel containers near an open flame or any device that can cause the ignition of fuel or fuel vapors. d Never fill the fuel containers inside a vehicle or on a truck or trailer with a plastic liner. Always put the fuel container on the ground away from your vehicle before you fill the container. 5 1 SAFETY e Refuel the mower before you start the engine. When the engine is in operation or while the engine is hot, never remove the fuel cap or add fuel to the mower. j Be careful and wear gloves when you check or service the cutting unit blades. Replace any damaged blades, do not try to correct a damaged blade. f Refuel outdoors only and do not smoke when you add fuel. Extinguish all types of ignition. k g The fuel nozzle must touch the rim of the fuel tank when you add fuel to the mower. Do not use a device to lock the fuel nozzle in the open position. Keep your hands and feet away from parts that move. Do not adjust the mower with the engine in operation, unless the adjustment needs the engine in operation. l Do not over fill the fuel tank. Leave at least 1 inch (2.5 cm) below the filler neck. Carefully release the pressure from components with stored energy. m To prevent injury from the hot, high pressure oil, never use your hands to check for oil leaks. Use the paper or cardboard to find leaks. n The hydraulic fluid pressure can have enough force to enter your skin. If hydraulic fluid has entered your skin, a doctor must remove the hydraulic fluid surgically within a few hours or gangrene can occur. o When you service the hydraulic system, make sure the hydraulic fittings, tubes and hoses are tightened to the correct torque. Make sure the hydraulic system is in good condition before you start the engine. p Keep the mower and the engine clean. q Never allow persons to service the mower or its attachments without correct instructions. Allow the engine to become cool before storage and always remove the ignition key. r When the mower is parked, put into storage or left without an operator, lower the cutting device unless a positive mechanical lock is used. Keep all nuts, bolts and screws tight to make sure the equipment is in safe condition. s Replace worn or damaged parts for safety. Replace damaged or worn decals. Only use parts, accessories and attachments approved by Jacobsen. t To decrease the fire hazard, remove materials that burn from the engine, muffler, battery tray and fuel tank area. u Disconnect the battery and controller connectors before you weld on this mower. h i Always tighten the fuel tank cap and container cap after you add fuel. j If the fuel spills on your clothing, change your clothing immediately. MAINTENANCE AND STORAGE a Before you clean, adjust or repair this equipment, push PTO switch to the OFF position, lower the cutting unit to the ground, engage the parking brake, stop the engine and remove the key. b Make sure the mower is parked on a solid and level surface. c Never work on a mower that is lifted only by the jack. Always use the jack stands. d e f g h i 6 When you put the mower on a trailer or put the mower in storage, close the fuel valve. Do not keep fuel near flames or drain the fuel inside a building. Disconnect the battery before you service the mower. Always disconnect the negative battery cable before the positive battery cable. Always connect the positive battery cable before the negative battery cable. Charge the battery in an area with good airflow. The battery can release hydrogen gas that is explosive. To prevent an explosion, keep any device that can cause sparks or flames away from the battery. Disconnect the battery charger from the power supply before you connect or disconnect the battery charger to the battery. Wear protective clothing and use insulated tools when you service the battery. WHEN YOU PUT THE MOWER ON A TRAILER a Be careful when you load or unload the mower on a trailer. Trailer must be wider than the mower and can carry the weight of the mower. b Use a full-width ramp to load or unload the mower on a trailer. c Use straps, chains, cables or ropes to fasten the mower to the trailer. Both front and rear straps must be sent down and toward sides of trailer. d Make sure that all latches are correctly fastened. SAFETY 1.2 1 IMPORTANT SAFETY NOTES ________________________________________________ This safety alert symbol is used to alert you to potential hazards. DANGER - Indicates an imminently hazardous situation which, if not avoided, WILL result in death or serious injury. WARNING - Indicates a potentially hazardous situation which, if not avoided, COULD result in death or serious injury. CAUTION - Indicates a potentially hazardous situation which, if not avoided, MAY result in minor or moderate injury and property damage. It may also be used to alert against unsafe practices. NOTICE - Indicates a potentially hazardous situation which, if not avoided, MAY result in property damage. It may also be used to alert against unsafe practices. For pictorial clarity, some illustrations in this manual may show shields, guards, or plates, open or removed. Under no circumstances should this equipment be operated without these devices securely fastened in place. ! WARNING The Interlock System on this mower prevents the mower from starting unless the brake lever is engaged, PTO switch is off and traction pedal is in neutral. The system will stop the engine if the operator leaves the seat without engaging the parking brake or setting the PTO switch off. NEVER operate mower unless the Interlock System is working. ! WARNING 1. Before leaving the operator’s position for any reason: a. Return traction pedal to Neutral. b. Disengage all drives. c. Lower all implements to the ground. d. Engage parking brake. e. Stop engine and remove the ignition key. 2. Keep hands, feet, and clothing away from moving parts. Wait for all movement to stop before you clean, adjust, or service the machine. 3. Keep the area of operation clear of all bystanders and pets. 4. Never carry passengers, unless a seat is provided for them. 5. Never operate mowing equipment without the discharge deflector securely fastened in place. By following all instructions in this manual, you will prolong the life of your machine and maintain its maximum efficiency. Adjustments and maintenance should always be performed by a qualified technician. If additional information or service is needed, contact your Authorized Jacobsen Dealer who is kept informed of the latest methods to service this equipment and can provide prompt and efficient service. 7 2 2 2.1 SPECIFICATIONS SPECIFICATIONS PRODUCT IDENTIFICATION_________________________________________________ 68131.............................. AR522-T4I, 5 Gang 4WD with ROPS An identification plate, like the one shown, listing the serial number, is attached to the frame of the mower and is located on the operator’s right just over the rear axle. Always provide the serial number of the unit when ordering replacement parts or requesting service information. 2.2 Note: Actual sustained horsepower will likely be lower than listed in specifications due to operating limitations and environmental factors Bore ................................ 3.43 in. (8.7 cm) Stroke.............................. 4.03 in. (10.24 cm) Displacement .................. 148 in3 (2434 cm3) Torque ............................. 117 ft. lbs. (158 Nm) @ 1600 rpm Fuel: Type .......................... No. 2 Diesel, Low or Ultra-Low C XXXX kW 6813101651 D Sulfur Rating ....................... Min. Cetane rating 45 Capacity.................... 17 U.S. gal. (65 liters) Governor Setting: High Idle ................... 2920 rpm Low Idle .................... 1000 rpm Lubrication: Capacity.................... 10 U.S. qts.(9.5 liter) Type.......................... SAE 10W30 API Classification ..... CJ-4 Air Filter .......................... Donaldson, dual element dry type with evacuator valve and service indicator. Alternator ........................ 45 Amp Speed: Mow ......................... 0 - 7 mph (0 - 11 kph) Transport .................. 0 - 12 mph (0 -19.3 kph) Reverse ................... 0 - 5 mph (0 - 8.1 kph) Production ...................... 6.4 acres/hr. @ 7 mph Hydraulic System: Capacity.......................... 14 U.S. gal. (37.85 liter) Fluid Type ....................... GreensCare 68 Cooling ........................... Oil Cooler Return Line Filter ............ 10 micron Steering ......................... Hydrostatic power steering WEIGHTS AND DIMENSIONS ________________________________________________ Dimensions: Inches Length............................................................130 Height - Top of ROPS .....................................83 Width - Mow.....................................................98 Width - Transport .............................................98 8 kg B 36.5 11524WILMARBLVD, CHARLOTTE,NC28273 1-800-848-1636 (US) MOWER _________________________________________________________________ Tires: Front ........................ 26.5 x 14 - 12: (6 ply) Rear ......................... 22.5 x 10 - 8 Tire Pressure: Front ......................... 16 psi (1.10 BAR) Rear .......................... 12 psi (0.83 BAR) Battery: Type .......................... 12V, 600 Cold Cranking Amps Group ........................ BCI 24 Service Brake ................. Dynamic braking through traction circuit. Parking Brake ................. Integrated in wheel motor, hydraulic release 2.4 A 1674 A Textron Company V2403-M-DI ENGINE _______________________________________________________ Make ............................... Kubota Model .............................. V2403-M-DI Diesel, 4 cycle, liquid cooled Horsepower .................... 48.9 Hp (36.5 kW) @ 2700 rpm 2.3 ® PRODUCT OF U.S.A. (cm) (330.2) (210.8) (248.6) (248.9) Weight: Lbs. (kg) Full fluids, decks raised, less operator. Overall ........................................................ 3691 (1674) Fuel tank empty, decks raised, less operator. Overall ........................................................ 3569 (1619) SPECIFICATIONS 2.5 CUTTING UNITS ___________________________________________________________ Overall cutting Width ....... 90 in. (254 cm) Number of cutting units: .. Five - three front, two rear. 2.6 2 Height of Cut................... .3/4 to 5-1/4 in. (1.9 to 13.3 cm) in 1/4 in. (0.6 cm) increments ACCESSORIES____________________________________________________________ Refer to the Parts Catalog and contact your Jacobsen Dealer for a complete listing of accessories and attachments. ! CAUTION Use of other than Jacobsen authorized parts and accessories may cause personal injury or damage to the equipment. Replacement 2-Post ROPS with Seat Belt ....... 67844 Canopy / Sunshade ........ ................................. 68127 Hood Locking Latch ........ ................................. 1004049 Ball Cage ........................ 4265201/ 4265202 2.7 Standard Blade ............... ................................. 4163106 High Lift Blade ................ ................................. 4137186 Low Lift Blade ................. ................................. 4124087 SUPPORT LITERATURE ____________________________________________________ Contact your Jacobsen Dealer for a complete listing of literature. Safety, Operation, & Maintenance Manual........ 4273092 Parts Manual ................... ................................. 4273091 Engine Parts Catalog ...... ................................. 4273093 Service & Repair Manual ................................. TBD 9 2 2.8 SPECIFICATIONS DECLARATION OF CONFORMITY ____________________________________________ DECLARATION OF CONFORMITY ▪ ДЕКЛАРАЦИЯ ЗА СЪОТВЕТСТВИЕ ▪ PROHLÁŠENÍ O SHODĚ ▪ OVERENSSTEMMELSESERKLÆRING ▪ CONFORMITEITSVERKLARING ▪ VASTAVUSDEKLARATSIOON ▪ VAATIMUSTENMUKAISUUSVAKUUTUS ▪ DECLARATION DE CONFORMITE ▪ KONFORMITÄTSERKLÄRUNG ▪ ΔΗΛΩΣΗ ΣΥΜΜΟΡΦΩΣΗΣ ▪ MEGFELELŐSÉGI NYILATKOZAT ▪ DICHIARAZIONE DI CONFORMITÀ ▪ ATBILSTĪBAS DEKLARĀCIJA ▪ ATITIKTIES DEKLARACIJA ▪ DIKJARAZZJONI TAL-KONFORMITÀ ▪ DEKLARACJA ZGODNOŚCI ▪ DECLARAÇÃO DE CONFORMIDADE ▪ DECLARAŢIE DE CONFORMITATE ▪ VYHLÁSENIE O ZHODE ▪ IZJAVA O SKLADNOSTI ▪ DECLARACIÓN DE CONFORMIDAD ▪ DEKLARATION OM ÖVERENSSTÄMMELSE ▪ SAMRÆMISYFIRLÝSING ▪ KONFORMITETSERKLÆRING ▪ 符合性声明 ▪ SAMRÆMISYFIRLÝSING ▪ 適合宣言 ▪ 적합성 선언서 ▪ UYGUNLUK BEYANI ▪ ДЕКЛАРАЦІЯ ПРО ВІДПОВІДНІСТЬ Business name and full address of the manufacturer ▪ Търговско име и пълен адрес на производителя ▪ Obchodní jméno a plná adresa výrobce ▪ Producentens firmanavn og fulde adresse ▪ Bedrijfsnaam en volledig adres van de fabrikant ▪ Tootja ärinimi ja täielik aadress ▪ Valmistajan toiminimi ja täydellinen osoite ▪ Nom commercial et adresse complète du fabricant ▪ Firmenname und vollständige Adresse des Herstellers ▪ Επωνυμία και ταχυδρομική διεύθυνση κατασκευαστή ▪ A gyártó üzleti neve és teljes címe ▪ Ragione sociale e indirizzo completo del fabbricante ▪ Jacobsen, A Textron Company Uzņēmuma nosaukums un pilna ražotāja adrese ▪ Verslo pavadinimas ir pilnas gamintojo adresas ▪ Isem kummerċjali u indirizz sħiħ tal-fabbrikant ▪ 11524 Wilmar Blvd. Nazwa firmy i pełny adres producenta ▪ Nome da empresa e endereço completo do fabricante ▪ Charlotte, NC 28273, USA Denumirea comercială şi adresa completă a producătorului ▪ Obchodný názov a úplná adresa výrobcu ▪ Naziv podjetja in polni naslov proizvajalca ▪ Nombre de la empresa y dirección completa del fabricante ▪ Tillverkarens företagsnamn och kompletta adress ▪ Fyrirtækisheiti og fullt heimilisfang framleiðanda ▪ Firmanavn og full adresse for produsenten ▪ 制造商的商业名称和完整地址 ▪ Nafn fyrirtækis og fullt heimilisfang framleiðanda ▪ 商号およびメーカーの正式住所 ▪ 제조자의 상호명 및 주소 ▪ İmalatçının ticari ünvanı ve açık adresi ▪ Фірмове найменування і повна адреса виробника Product Code ▪ Код на продукта ▪ Kód výrobku ▪ Produktkode ▪ Productcode ▪ Toote kood ▪ Tuotekoodi ▪ Code produit ▪ Produktcode ▪ Κωδικός προϊόντος ▪ Termékkód ▪ Codice prodotto ▪ Produkta kods ▪ Produkto kodas ▪ Kodiċi tal-Prodott ▪ Kod produktu ▪ Código do Produto ▪ Cod produs ▪ Kód výrobku ▪ Oznaka proizvoda ▪ Código de producto ▪ Produktkod ▪ Vörunúmer ▪ Produktkode ▪ 产品代码 ▪ Framleiðslunúmer ▪ 製品コード ▪ 제품 코드 ▪ Ürün Kodu ▪ Код виробу 68131 Machine Name ▪ Наименование на машината ▪ Název stroje ▪ Maskinnavn ▪ Machinenaam ▪ Masina nimi ▪ Laitteen nimi ▪ Nom de la machine ▪ Maschinenbezeichnung ▪ Ονομασία μηχανήματος ▪ Gépnév ▪ Denominazione della macchina ▪ Iekārtas nosaukums ▪ Mašinos pavadinimas ▪ Isem tal-Magna ▪ Nazwa urządzenia ▪ Nome da Máquina ▪ Numele echipamentului ▪ Názov stroja ▪ Naziv stroja ▪ Nombre de la máquina ▪ Maskinens namn ▪ Heiti tækis ▪ Maskinnavn ▪ 机器名称 ▪ Nafn vélar ▪ 機械名 ▪ 기기 명칭 ▪ Makine Adı ▪ Назва машини AR522 4WD Designation ▪ Предназначение ▪ Označení ▪ Betegnelse ▪ Benaming ▪ Nimetus ▪ Tyyppimerkintä ▪ Pažymėjimas ▪ Bezeichnung ▪ Χαρακτηρισμός ▪ Megnevezés ▪ Funzione ▪ Apzīmējums ▪ Lithuanian ▪ Denominazzjoni ▪ Oznaczenie ▪ Designação ▪ Specificaţie ▪ Označenie ▪ Namen stroja ▪ Descripción ▪ Beteckning ▪ Merking ▪ Konstruksjon ▪名称 ▪ Útnefning ▪ 用途 ▪ 지정 ▪ Tanımı ▪ Позначення Lawnmower, Article 12, Item 32 Serial Number ▪ Сериен номер ▪ Sériové číslo ▪ Serienummer ▪ Serienummer ▪ Seerianumber ▪ Valmistusnumero ▪ Numéro de série ▪ Seriennummer ▪ Σειριακός αριθμός ▪ Sorozatszám ▪ Numero di serie ▪ Sērijas numurs ▪ Serijos numeris ▪ Numru Serjali ▪ Numer seryjny ▪ Número de Série ▪ Număr de serie ▪ Sériové číslo ▪ Serijska številka ▪ Número de serie ▪ Serienummer ▪ Raðnúmer ▪ Serienummer ▪序列号 ▪ Raðnúmer ▪ シリアル番号 ▪ 일련 번호 ▪ Seri Numarası ▪ Серійний номер 6813101651-6813102500 Engine ▪ Двигател ▪ Motor ▪ Motor ▪ Motor ▪ Mootor ▪ Moottori ▪ Moteur ▪ Motor ▪ Μηχανή ▪ Modulnév ▪ Motore ▪ Dzinējs ▪ Variklis ▪ Saħħa Netta Installata ▪ Silnik ▪ Motor ▪ Motor ▪ Motor ▪ Motor ▪ Motor ▪ Motor ▪ Vél ▪ Motor ▪ 发动机 ▪ Aflvél ▪ エンジン ▪ 엔진 ▪ Motor ▪ Двигун Kubota V2403-M-E3B Diesel Net Installed Power ▪ Нетна инсталирана мощност ▪ Čistý instalovaný výkon ▪ Installeret nettoeffekt ▪ Netto geïnstalleerd vermogen ▪ Installeeritud netovõimsus ▪ Asennettu nettoteho ▪ Puissance nominale nette ▪ Installierte Nettoleistung ▪ Καθαρή εγκατεστημένη ισχύς ▪ Nettó beépített teljesítmény ▪ Potenza netta installata ▪ Paredzētā tīkla jauda ▪ Grynoji galia ▪ Wisa’ tal-Qtugħ ▪ Moc zainstalowana netto ▪ Potência instalada ▪ Puterea instalată netă ▪ Čistý inštalovaný výkon ▪ Neto vgrajena moč ▪ Potencia instalada neta ▪ Nettoeffekt ▪ Nettóafl vélar ▪ Netto installert kraft ▪ 装机净功率 ▪ Netuppsetningarorka ▪ 搭載する正味出力 ▪ 정미 출력 ▪ Net Kurulu Güç ▪ Корисна встановлена потужність 36.5 kW @ 2700 RPM Cutting Width ▪ Широчина на рязане ▪ Šířka řezu ▪ Skærebredde ▪ Maaibreedte ▪ Lõikelaius ▪ Leikkuuleveys ▪ Largeur de coupe ▪ Schnittbreite ▪ Μήκος μισινέζας ▪ Vágási szélesség ▪ Larghezza di taglio ▪ Griešanas platums ▪ Pjovimo plotis ▪ Tikkonforma mad-Direttivi ▪ Szerokość cięcia ▪ Largura de Corte ▪ Lăţimea de tăiere ▪ Šírka záberu ▪ Širina reza ▪ Anchura de corte ▪ Klippbredd ▪ Skurðbreidd ▪ Klippebredde ▪ 剪草宽度 ▪ Breidd sláttar ▪ 刈り取り幅 ▪ 절단 폭 ▪ Kesme Genişliği ▪ Ширина різання 228,6 cm Conforms to Directives ▪ В съответствие с директивите ▪ Splňuje podmínky směrnic ▪ Er i overensstemmelse med direktiver ▪ Voldoet aan de richtlijnen ▪ Vastab direktiividele ▪ Direktiivien mukainen ▪ Conforme aux directives ▪ Entspricht Richtlinien ▪ Ακολουθήστε πιστά τις Οδηγίες ▪ Megfelel az irányelveknek ▪ Conforme alle Direttive ▪ Atbilst direktīvām ▪ Atitinka direktyvų reikalavimus ▪ Valutazzjoni tal-Konformità ▪ Dyrektywy związane ▪ Cumpre as Directivas ▪ Respectă Directivele ▪ Je v súlade so smernicami ▪ Skladnost z direktivami ▪ Cumple con las Directivas ▪ Uppfyller direktiv ▪ Samræmist tilskipunum ▪ I samsvar med direktiv ▪ 符合指令 ▪ Í samræmi við reglugerðir ▪ 適合指令 ▪ 규정 준수 ▪ Şu Yönergelere Uymaktadır ▪ Відповідає директиві 2004/108/EC 2006/42/EC 2000/14/EC, 2005/88/EC 2006/66/EC Conformity Assessment ▪ Оценка за съответствие ▪ Hodnocení plnění podmínek ▪ Overensstemmelsesvurdering ▪ Conformiteitsbeoordeling ▪ Vastavushindamine ▪ Vaatimustenmukaisuuden arviointi ▪ Evaluation de conformité ▪ Konformitätsbeurteilung ▪ Διαπίστωση Συμμόρφωσης ▪ Megfelelőség-értékelés ▪ Valutazione della conformità ▪ Atbilstības novērtējums ▪ Atitikties įvertinimas ▪ Livell tal-Qawwa tal-Ħoss Imkejjel ▪ Ocena zgodności ▪ Avaliação de Conformidade ▪ Evaluarea conformităţii ▪ Vyhodnotenie zhodnosti ▪ Ocena skladnosti ▪ Evaluación de conformidad ▪ Bedömning av överensstämmelse ▪ Samræmismat ▪ Konformitetsvurdering ▪ 符合性评估 ▪ Samræmismat ▪ 適合性評価 ▪ 적합성 평가 ▪ Uygunluk Değerlendirmesi ▪ Оцінка відповідності 2006/42/EC Annex VIII Measured Sound Power Level ▪ Измерено ниво на звукова мощност ▪ Naměřený akustický výkon ▪ Målte lydstyrkeniveau ▪ Gemeten geluidsniveau ▪ Mõõdetud helivõimsuse tase ▪ Mitattu äänitehotaso ▪ Niveau de puissance sonore mesuré ▪ Gemessener Schalldruckpegel ▪ Σταθμισμένο επίπεδο ηχητικής ισχύος ▪ Mért hangteljesítményszint ▪ Livello di potenza sonora misurato ▪ Izmērītais skaņas jaudas līmenis ▪ 104 dB(A) ± 0.71 LWA Išmatuotas garso stiprumo lygis ▪ Livell tal-Qawwa tal-Ħoss Iggarantit ▪ Moc akustyczna mierzona ▪ Nível sonoro medido ▪ Nivelul măsurat al puterii acustice ▪ Nameraná hladina akustického výkonu ▪ Izmerjena raven zvočne moči ▪ Nivel de potencia sonora medido ▪ Uppmätt ljudeffektsnivå ▪ Mælt hljóðaflsstig ▪ Målt lydeffektnivå ▪ 测得声功率级 ▪ Mældur hljóðstyrkur ▪ 音出力レベル測定値 ▪ 측정된 음향 파워 레벨 ▪ Ölçülen Ses Gücü Düzeyi ▪ Виміряний рівень звукової потужності Guaranteed Sound Power Level ▪ Гарантирано ниво на звукова мощност ▪ Garantovaný akustický výkon ▪ Garanteret lydstyrkeniveau ▪ Gegarandeerd geluidsniveau ▪ Garanteeritud helivõimsuse tase ▪ Taattu äänitehotaso ▪ Niveau de puissance sonore garanti ▪ Garantierter Schalldruckpegel ▪ Εγγυημένο επίπεδο ηχητικής ισχύος ▪ Szavatolt hangteljesítményszint ▪ Livello di potenza sonora garantito ▪ Garantētais skaņas jaudas līmenis ▪ Garantuotas garso stiprumo lygis ▪ Livell tal-Qawwa tal-Ħoss Iggarantit ▪ Moc akustyczna gwarantowana ▪ Nível sonoro farantido ▪ Nivelul garantat al puterii acustice ▪ Garantovaná hladina akustického výkonu ▪ Zajamčena raven zvočne moči ▪ Nivel de potencia sonora garantizado ▪ Garanterad ljudeffektsnivå ▪ Hljóðaflsstig sem ábyrgð er tekin á ▪ Garanter lydeffektnivå ▪ 保证声功率级 ▪ Tryggður hljóðstyrkur ▪ 音出力保証レベル ▪ 보장된 음향 파워 레벨 ▪ Garantili Ses Gücü Düzeyi ▪ Гарантований рівень звукової потужності 105 dB(A) LWA Conformity Assessment Procedure (Noise) ▪ Оценка за съответствие на процедурата (Шум) ▪ Postup hodnocení plnění podmínek (hluk) ▪ Procedure for overensstemmelsesvurdering (Støj) ▪ Procedure van de conformiteitsbeoordeling (geluid) ▪ Vastavushindamismenetlus (müra) ▪ Vaatimustenmukaisuuden arviointimenettely (Melu) ▪ Procédure d’évaluation de conformité (bruit) ▪ Konformitätsbeurteilungsverfahren (Geräusch) ▪ Διαδικασία Αξιολόγησης Συμμόρφωσης (Θόρυβος) ▪ Megfelelőség-értékelési eljárás (Zaj) ▪ Procedura di valutazione della conformità (rumore) ▪ Atbilstības novērtējuma procedūra (troksnis) ▪ Atitikties įvertinimo procedūra (garsas) ▪ Proċedura tal-Valutazzjoni tal-Konformità (Ħoss) ▪ Procedura oceny zgodności (poziom hałasu) ▪ Processo de avaliação de conformidade (nível sonoro) Procedura de evaluare a conformităţii (zgomot) ▪ Postup vyhodnocovania zhodnosti (hluk) ▪ Postopek za ugotavljanje skladnosti (hrup) ▪ Procedimiento de evaluación de conformidad (ruido) ▪ Procedur för bedömning av överensstämmelse (buller) ▪ Samræmismatsaðferð (hávaði) ▪ Prosedyre for konformitetsvurdering (støy) ▪ 符合性评估程序 (噪声)▪ Aðgerð fyrir samræmismat (Hávaði) ▪ 適合性評価の手順 (騒音)▪ 적합성 평가 절차 ( 소음 ) ▪ Uygunluk Değerlendirme Prosedürü (Gürültü) ▪ Регламент оцінки відповідності (шум) 2000/14/EC Annex VI, Part 1 10 SPECIFICATIONS UK Notified Body for 2000/14/EC ▪ Нотифициран орган в Обединеното кралство за 2000/14/ЕО ▪ Úřad certifikovaný podle směrnice č. 2000/14/EC ▪ Det britiske bemyndigede organ for 2001/14/EF ▪ Engels adviesorgaan voor 2000/14/EG ▪ Ühendkuningriigi teavitatud asutus direktiivi 2000/14/EÜ mõistes ▪ Direktiivin 2000/14/EY mukainen ilmoitettu tarkastuslaitos Isossa-Britanniassa ▪ Organisme notifié concernant la directive 2000/14/CE ▪ Britische benannte Stelle für 2000/14/EG ▪ Κοινοποιημένος Οργανισμός Ηνωμένου Βασιλείου για 2000/14/ΕΚ ▪ 2000/14/EK – egyesült királyságbeli bejelentett szervezet ▪ Organismo Notificato in GB per 2000/14/CE ▪ 2000/14/EK AK reģistrētā organizācija ▪ JK notifikuotosios įstaigos 2000/14/EC ▪ Korp Notifikat tar-Renju Unit għal 2000/14/KE ▪ Dopuszczona jednostka badawcza w Wielkiej Brytanii wg 2000/14/WE ▪ Entidade notificada no Reino Unido para 2000/14/CE ▪ Organism notificat în Marea Britanie pentru 2000/14/CE ▪ Notifikovaný orgán Spojeného kráľovstva pre smernicu 2000/14/ES ▪ Britanski priglašeni organ za 2000/14/ES ▪ Cuerpo notificado en el Reino Unido para 2000/14/CE ▪ Anmält organ för 2000/14/EG i Storbritannien ▪ Tilkynntur aðili í Bretlandi fyrir 2000/14/EC ▪ Britisk teknisk for 2000/14/EF ▪ 英国 2000/14/EC 认证机构 ▪ Bretland Upplýsingar fyrir 2000/14/EB ▪ UK (英国)公認機関、2000/14/EC ▪ 2000/14/EC 에 대한 영국 인증 기관 ▪ 2000/14/EC için BK Onaylı Kuruluş ▪ Британський уповноважений орган для 2000/14/EC 2 Number: 1088 Sound Research Laboratories Limited Holbrook House, Little Waldingfield Sudbury, Suffolk CO10 0TH Operator Ear Noise Level ▪ Оператор на нивото на доловим от ухото шум ▪ Hladina hluku v oblasti uší operátora ▪ Støjniveau i førers ørehøjde ▪ Geluidsniveau oor bestuurder ▪ Müratase operaatori kõrvas ▪ Melutaso käyttäjän korvan kohdalla ▪ Niveau de bruit à hauteur des oreilles de l’opérateur ▪ Schallpegel am Bedienerohr ▪ Επίπεδο θορύβου σε λειτουργία ▪ A kezelő fülénél mért zajszint ▪ Livello di potenza sonora all’orecchio dell’operatore ▪ Trokšņa līmenis pie operatora auss ▪ Dirbančiojo su mašina patiriamo triukšmo lygis ▪ Livell tal-Ħoss fil-Widna tal-Operatur ▪ 90 dB(a) ± 0.71 Leq (2006/42/EC) Dopuszczalny poziom hałasu dla operatora ▪ Nível sonoro nos ouvidos do operador ▪ Nivelul zgomotului la urechea operatorului ▪ Hladina hluku pôsobiaca na sluch operátora ▪ Raven hrupa pri ušesu upravljavca ▪ Nivel sonoro en el oído del operador ▪ Ljudnivå vid förarens öra ▪ Hávaðastig fyrir stjórnanda ▪ Støynivå ved operatørens øre ▪ 操作员耳旁噪声级 ▪ Hljóðstyrkur fyrir stjórnanda ▪ オペレータが感じる騒音レベル ▪ 사용자 청각 소음 레벨 ▪ Operatör Kulak Gürültü Düzeyi ▪ Рівень шуму, що впливає на оператора Harmonised standards used ▪ Използвани хармонизирани стандарти ▪ Použité harmonizované normy ▪ Brugte harmoniserede standarder ▪ Gebruikte geharmoniseerde standaards ▪ Kasutatud ühtlustatud standardid ▪ Käytetyt yhdenmukaistetut standardit ▪ Normes harmonisées utilisées ▪ Angewandte harmonisierte Normen ▪ Εναρμονισμένα πρότυπα που χρησιμοποιήθηκαν ▪ Harmonizált szabványok ▪ Standard armonizzati applicati ▪ Izmantotie saskaņotie standarti ▪ Panaudoti suderinti standartai ▪ Standards armonizzati użati ▪ Normy spójne powiązane ▪ Normas harmonizadas usadas ▪ Standardele armonizate utilizate ▪ Použité harmonizované normy ▪ Uporabljeni usklajeni standardi ▪ Estándares armonizados utilizados ▪ Harmoniserade standarder som används ▪ 所采用的协调标准 ▪ Samstilltir staðlar notaðir ▪ 整合規格 ▪ 적용되는 조화 표준 ▪ Kullanılan uyumlu standartlar ▪ Використані гармонізовані стандарти BS EN ISO 20643 BS EN ISO 5349-1 BS EN ISO 5349-2 BS EN ISO 5395-3 Technical standards and specifications used ▪ Използвани технически стандарти и спецификации ▪ Použité technické normy a specifikace ▪ Brugte tekniske standarder og specifikationer ▪ Gebruikte technische standaards en specificaties ▪ Kasutatud tehnilised standardid ja spetsifikatsioonid ▪ Käytetyt tekniset standardit ja eritelmät ▪ Spécifications et normes techniques utilisées ▪ Angewandte technische Normen und Spezifikationen ▪ Τεχνικά πρότυπα και προδιαγραφές που χρησιμοποιήθηκαν ▪ Műszaki szabványok és specifikációk ▪ Standard tecnici e specifiche applicati ▪ B71.4 Izmantotie tehniskie standarti un specifikācijas ▪ Panaudoti techniniai standartai ir techninė informacija ▪ Standards u speċifikazzjonijiet tekniċi użati ▪ ISO 2631-1 Normy i specyfikacje techniczne powiązane ▪ Normas técnicas e especificações usadas ▪ Standardele tehnice şi specificaţiile utilizate ▪ SAE J1194 Použité technické normy a špecifikácie ▪ Uporabljeni tehnični standardi in specifikacije ▪ Estándares y especificaciones técnicas utilizadas ▪ Tekniska standarder och specifikationer som används ▪ Samræmdir staðlar sem notaðir eru ▪ Benyttede ▪ harmoniserte standarder ▪ 所采用的技术标准和规范 ▪ Tæknistaðlar og -kröfur notaðar ▪ 技術規格および仕様書 ▪ 적용되는 기술 표준 및 규격 ▪ Kullanılan teknik standartlar ve şartnameler ▪ Використані технічні стандарти і умови The place and date of the declaration ▪ Място и дата на декларацията ▪ Místo a datum prohlášení ▪ Sted og dato for erklæringen ▪ Plaats en datum van de verklaring ▪ Deklaratsiooni väljastamise koht ja kuupäev ▪ Vakuutuksen paikka ja päivämäärä ▪ Lieu et date de la déclaration ▪ Ort und Datum der Erklärung ▪ Τόπος και ημερομηνία δήλωσης ▪ A nyilatkozat kelte (hely és idő) ▪ Luogo e data della dichiarazione ▪ Deklarācijas vieta un datums ▪ Deklaracijos vieta ir data ▪ Il-post u d-data tad-dikjarazzjoni ▪ Miejsce i data wystawienia deklaracji ▪ Local e data da declaração ▪ Locul şi data declaraţiei ▪ Miesto a dátum vyhlásenia ▪ Kraj in datum izjave ▪ Lugar y fecha de la declaración ▪ Plats och datum för deklarationen ▪ Tæknistaðlar og tæknilýsingar sem notaðar eru ▪ Benyttede tekniske standarder og spesifikasjoner ▪ Staður og dagsetning yfirlýsingar ▪ Sted og dato for erklæringen ▪ 声明的地点与日期 ▪ Staður og dagsetning yfirlýsingarinnar ▪ 宣言場所および日付 ▪ 선언 장소 및 일자 ▪ Beyan yeri ve tarihi ▪ Місце і дата укладення декларації Jacobsen, A Textron Company 11524 Wilmar Blvd. Charlotte, NC 28273, USA September 2nd, 2014 11 2 SPECIFICATIONS Signature of the person empowered to draw up the declaration on behalf of the manufacturer, holds the technical documentation and is authorised to compile the technical file, and who is established in the Community. Подпис на човека, упълномощен да състави декларацията от името на производителя, който поддържащ техническата документация и е оторизиран да изготви техническия файл и е регистриран в общността. Podpis osoby oprávněné sestavit prohlášení jménem výrobce, držet technickou dokumentaci a osoby oprávněné sestavit technické soubory a založené v rámci Evropského společenství. Underskrift af personen, der har fuldmagt til at udarbejde erklæringen på vegne af producenten, der er indehaver af dokumentationen og er bemyndiget til at udarbejde den tekniske journal, og som er baseret i nærområdet. Handtekening van de persoon die bevoegd is de verklaring namens de fabrikant te tekenen, de technische documentatie bewaart en bevoegd is om het technische bestand samen te stellen, en die is gevestigd in het Woongebied. Ühenduse registrisse kantud isiku allkiri, kes on volitatud tootja nimel deklaratsiooni koostama, kes omab tehnilist dokumentatsiooni ja kellel on õigus koostada tehniline toimik. Sen henkilön allekirjoitus, jolla on valmistajan valtuutus vakuutuksen laadintaan, jolla on hallussaan tekniset asiakirjat, joka on valtuutettu laatimaan tekniset asiakirjat ja joka on sijoittautunut yhteisöön. Signature de la personne habilitée à rédiger la déclaration au nom du fabricant, à détenir la documentation technique, à compiler les fichiers techniques et qui est implantée dans la Communauté. Unterschrift der Person, die berechtigt ist, die Erklärung im Namen des Herstellers abzugeben, die die technischen Unterlagen aufbewahrt und berechtigt ist, die technischen Unterlagen zusammenzustellen, und die in der Gemeinschaft niedergelassen ist. Υπογραφή ατόμου εξουσιοδοτημένου για την σύνταξη της δήλωσης εκ μέρους του κατασκευαστή, ο οποίος κατέχει την τεχνική έκθεση και έχει την εξουσιοδότηση να ταξινομήσει τον τεχνικό φάκελο και ο οποίος είναι διορισμένος στην Κοινότητα. A gyártó nevében meghatalmazott személy, akinek jogában áll módosítania a nyilatkozatot, a műszaki dokumentációt őrzi, engedéllyel rendelkezik a műszaki fájl összeállításához, és aki a közösségben letelepedett személy. Firma della persona autorizzata a redigere la dichiarazione a nome del fabbricante, in possesso Della documentazione tecnica ed autorizzata a costituire il fascicolo tecnico, che deve essere stabilita nella Comunità. Tās personas paraksts, kura ir pilnvarota deklarācijas sastādīšanai ražotāja vārdā, kurai ir tehniskā dokumentācija, kura ir pilnvarota sagatavot tehnisko reģistru un kura ir apstiprināta Kopienā. Asmuo, kuris yra gana žinomas, kuriam gamintojas suteikė įgaliojimus sudaryti šią deklaraciją, ir kuris ją pasirašė, turi visą techninę informaciją ir yra įgaliotas sudaryti techninės informacijos dokumentą. Il-firma tal-persuna awtorizzata li tfassal id-dikjarazzjoni f’isem il-fabbrikant, għandha d-dokumentazzjoni teknika u hija awtorizzata li tikkompila l-fajl tekniku u li hija stabbilita fil-Komunità. Podpis osoby upoważnionej do sporządzenia deklaracji w imieniu producenta, przechowującej dokumentację techniczną, upoważnioną do stworzenia dokumentacji technicznej oraz wyznaczonej ds. wspólnotowych. Assinatura da pessoa com poderes para emitir a declaração em nome do fabricante, que possui a documentação técnica, que está autorizada a compilar o processo técnico e que está estabelecida na Comunidade. Semnătura persoanei împuternicite să elaboreze declaraţia în numele producătorului, care deţine documentaţia tehnică, este autorizată să compileze dosarul tehnic şi este stabilită în Comunitate. Podpis osoby poverenej vystavením vyhlásenia v mene výrobcu, ktorá má technickú dokumentáciu a je oprávnená spracovať technické podklady a ktorá je umiestnená v Spoločenstve. Podpis osebe, pooblaščene za izdelavo izjave v imenu proizvajalca, ki ima tehnično dokumentacijo in lahko sestavlja spis tehnične dokumentacije, ter ima sedež v Skupnosti. Firma de la persona responsable de la declaración en nombre del fabricante, que posee la documentación técnica y está autorizada para recopilar el archivo técnico y que está establecido en la Comunidad. Undertecknas av den som bemyndigad att upprätta deklarationen å tillverkarens vägnar, innehar den tekniska dokumentationen och är bemyndigad att sammanställa den tekniska informationen och som är etablerad i gemenskapen. Undirskrift aðilans sem hefur umboð til að gera yfirlýsinguna fyrir hönd framleiðandans, hefur undir höndum tæknigögnin og hefur leyfi til að taka saman tækniskýrsluna, og er viðurkenndur innan evrópska efnahagssvæðisins. Signaturen til personen som har fullmakt til å utferdige erklæringen på vegne av produsenten, er i besittelse av den tekniske dokumentasjonen, har autorisasjon til å utarbeide den tekniske filen og som har tilhold i EU. 获得授权代表制造商起草声明者的签名,此人保留技术文档并获授权编译技术文件,且是社区中获得认可者。 Undirskrift starfsmanns sem hefur heimild til að rita yfirlýsinguna fyrir hendi framleiðandans, hefur umsjón með tæknigögnum og hefur heimild til að setja saman tæknilega skýrslu og sem er tengdur inn í samfélagið. メーカーを代表して宣言書を起草し、技術文書を保有し技術ファイルを編集する権限を有し、地域において確固たる地位を築いている人物の署名。 제조자를 대신하여 선언서를 작성하도록 위임받은 서명자는 기술 문서를 보유하고 기술 자료 수집의 허가를 받았으며 지역 공동체 내에 속해 있습니다 İmalatçı adına beyanı hazırlama yetkisi olan, teknik dokümantasyonu elinde bulunduran ve teknik dosyayı derleme yetkisine sahip, Topluluk içinde yerleşik kişinin imzası. Підпис особи, що уповноважена укласти декларацію від імені виробника, має технічну документацію, уповноважена укласти технічний паспорт і має добру репутацію в суспільстві. Certificate Number ▪ Номер на сертификат ▪ Číslo osvědčení ▪ Certifikatnummer ▪ Certificaatnummer ▪ Sertifikaadi number ▪ Hyväksyntänumero ▪ Numéro de certificat ▪ Bescheinigungsnummer ▪ Αριθμός Πιστοποιητικού ▪ Hitelesítési szám ▪ Numero del certificato ▪ Sertifikāta numurs ▪ Sertifikato numeris ▪ Numru taċ-Ċertifikat ▪ Numer certyfikatu ▪ Número do Certificado ▪ Număr certificat ▪ Číslo osvedčenia ▪ Številka certifikata ▪ Número de certificado ▪ Certifikatsnummer ▪ Númer skírteinis ▪ Sertifikatnummer ▪ 证书编号 ▪ Skírteinisnúmer ▪ 認証番号 ▪ 인증 번호 ▪ Sertifika Numarası ▪ Номер сертифіката GB BE United Kingdom Belgium JP KR Japan 12 BG CH Bulgaria Switzerland LI LT Korea Liechenstein Lithuania 2006/42/EC Annex II 1.A.2 Christian D. Clifford Senior Engineering Manager Ransomes Jacobsen Limited West Road, Ransomes Europark, Ipswich, IP3 9TT, England 2006/42/EC Annex II 1.A.10 Derek Mookhoek Director of Engineering Jacobsen, A Textron Company 11524 Wilmar Blvd, Charlotte, NC 28273, USA 4273092 Rev B CN CY CZ DE DK EE ES FI FR GR HU IS IT China Cyprus Czech Republic Germany Denmark Estonia Spain Finland France Greece Hungary Iceland Italy LV MT NL NO PL PT RO RU SE SI SK TR UA Latvia Malta Poland Portugal Romania Russia Sweden Slovenia Slovakia Turkey Ukrain Netherlands Norway SPECIFICATIONS 2.9 2 VIBRATION LEVEL_________________________________________________________ When the machine was tested for hand/arm vibration levels, the operator was seated in the normal operating position with both hands on the steering mechanism. The engine was running and the cutting device was rotating with the machine stationary. The Machinery Safety Directive 2006/42/EC By compliance to: The Lawnmower Standard BS EN ISO 5395-3 Referenced to Hand/Arm: BS EN ISO 20643:2008 Information Supplied for Physical Agents Directive 2002/44/EC By reference to: Hand/Arm Standards: BS EN ISO 5349-1 (2001) BS EN ISO 5349-2 (2001) AR522 Hand/Arm Acceleration Level 68131 AR522 Maximum Left Hand or Right Hand Accelerations m/s2 Mean Value of X, Y, Z Aeq 0.773 ± 1.4 When the machine was tested for Whole Body vibration levels, the operator was seated in the normal operating position with both hands on the steering mechanism. The cutting device was rotating with the machine driven in a straight line at 6 Km/hr on a level freshly cut lawn. The Machinery Safety Directive 2006/42/EC By compliance to: Whole Body EN1032:2003 Information Supplied for Physical Agents Directive 2002/44/EC By reference to: Whole Body Standards BS EN ISO 2631-1 (1997) AR522 Whole Body Acceleration Level 68131 AR522 Maximum Seat Pad Accelerations m/s2 Mean Value of X, Y, Z Aeq 0.221 ± 0.168 13 3 3 DECALS DECALS Familiarize yourself with the following decals. They are critical to the safe operation of the machine. REPLACE DAMAGED DECALS IMMEDIATELY. DANGER Serious injury or death can result from blade contact or from objects being thrown very long distances. • • • Do not operate machine with discharge chute or guards flipped up or removed. Do not operate machine with bent or damaged components or with cutting units in the raised position. Keep yourself and others away from the mower when in operation. 81 43 6 41 4181861 4181864 IMPORTANT DANGER DO NOT USE STARTING ASSIST FLUIDS To avoid injury when working with battery: Use of starting assist fluids in the air intake system may be potentially explosive or cause a “runaway” engine condition. This could result in serious engine damage. 1. Always connect the black (-) ground last and remove it first. 2. Keep sparks and flames away, and avoid contact with acid. To avoid injury when jumping battery: 1. Connect positive (+) terminal to positive (+) terminal. 4181862 WARNING Radiator is under pressure. Remove cap slowly to avoid personal injury. 14 2. Connect negative (-) terminal on good battery to frame of vehicle that has dead battery. DECALS 3 Familiarize yourself with the following decals. They are critical to the safe operation of the machine. REPLACE DAMAGED DECALS IMMEDIATELY. 4181865 • Read operator's manual. Do not allow untrained operators to use machine. • Keep shields in place and hardware securely fastened. • Keep hands, feet, and clothing away from moving parts. • Before you clean, adjust, or repair this equipment, disengage all drives, engage parking brake, and stop engine. • Never carry passengers. • Keep bystanders away. • Do not use on slopes greater than 20°. 4181860 To prevent injury to you or others, do not operate this unit with guards removed. 5002952 15 3 DECALS ! WARNING This structure's proctective capability may be impaired by structural damage, overturn, or alteration. If any of these conditions occur, this structure must be replaced. 5003597 4199140 Warning To prevent burns, do not touch muffler or muffler shield. Temperatures may exceed 150° F (66° C). CUT HEIGHT W/ 1/2 SPACERS IMPORTANT This machine uses GreensCare 68, a biodegradable hydraulic fluid. (Order 5003103 for 5 gal. pail) CUT HEIGHT W/ 1/4 SPACER 5-1/4 5 4-3/4 4-1/2 4-1/4 4 Use of 10W30 is an approved alternate fluid. Use will compromise all biodegradable properties of GreensCare 68 hydraulic fluid. 3-3/4 3-1/2 3-1/4 3 2-3/4 2-1/2 4108880 2-1/4 2 1-3/4 1-1/2 1-1/4 3/4 1 4133609 16 DECALS 3 Familiarize yourself with the following decals. They are critical to the safe operation of the machine. REPLACE DAMAGED DECALS IMMEDIATELY. 3008521 Traction Pedal ReverseForward 3008682 Tow Valve Normal Operation (Closed) Vehicle can be towed (Open) 17 4 4 4.1 CONTROLS CONTROLS ICONS ___________________________________________________________________ Read Manual Engine Run Start Off PTO ON OFF Engine Throttle High Low Hour Meter Parking Brake Mowers Lower Raise Cruise Control Lock Unlock Fuel Work Lights Oil Level Switch Travel On Off/Test Forward Reverse D Warning Lights Coolant Temperature Hydraulic Oil Level Engine Oil Glow Pressure Plug Hydraulic Oil Filter Battery Charge ! WARNING Never attempt to drive the mower unless you have read the Safety, Operation, & Maintenance Manual and know how to operate all controls correctly. Familiarize yourself with the icons shown above and what they represent. Learn the location and purpose of all the controls and gauges before operating this mower. 18 CONTROLS 4.2 4 CONTROLS_______________________________________________________________ A B C D E F G H J K L M N P R S T Tilt Steering Lever Mow Speed Stop Traction Pedal - Forward Traction Pedal - Reverse Seat Adjustment Hydraulic Oil Cap/Dipstick Air Cleaner Indicator Fuel Cap Alarm Controller / Fuses Horn Switch Glow Plug Light Mower Lift Lever PTO Switch Light Switch Traction Control Switch Engine Throttle U V W Ignition Switch Combination Gauge Brake Switch M P E F P V N R S T L W U B C D A J E F H K G 19 4 CONTROLS A. Tilt Steering Lever Pull lever up to release steering column. Tilt column up or down to position desired. Release lever to lock steering column in place. ! CAUTION Never adjust steering while mower is moving. Stop unit and set parking brake before adjusting. B. Mow Speed Stop Limits forward speed while mowing. To operate at lower travel speed while mowing, rotate lever so it contacts stop screw (B1) on floor board when forward travel pedal is pressed. To travel at full speed, set lever in position shown (B3). Stop screw (B2) can be adjusted to set specific mow speeds. See Section 8.2. C. Traction Pedal - Forward Press front of pedal down for forward travel. Release pedal to slow mower and stop. D. Traction Pedal - Reverse Press rear of pedal down for reverse travel. Release pedal to slow mower and stop. Allow mower to come to a complete stop before reversing directions. B1 B3 B2 C D Transport Speed Mow Speed Figure 4A E. Seat Adjustment Pull left side lever out to adjust seat forward or backward. To adjust spring tension under seat turn adjusting knob on front of seat. F. Hydraulic Oil Cap / Dipstick Fill to mark on dipstick using clean hydraulic fluid while machine is cool. Do not overfill. G. Air Cleaner Indicator Indicates condition of air cleaner on engine. Clean or replace air filter when red band appears in clear window of indicator. See Section 7.4. 20 H. Fuel Cap Fill fuel tank with No. 2 diesel fuel, minimum Cetane Rating of 45. See Section 5.11. J. Alarm The alarm, along with the warning lights on the combination gauge (V), sounds to alert the operator to conditions requiring immediate attention. See Section 4.4. K. Controller / Fuses The controller is located under the rear hood directly behind the operator’s seat. It is equipped with lights to aid in monitoring and problem solving the electrical system of the mower. Two spade type fuses are located on the controller. To replace fuses remove the access panel. ! CAUTION Service to the electrical system must be performed by a trained technician. Before replacing fuses turn mower off and remove key from ignition. CONTROLS 4.3 4 CONTROL PANEL _________________________________________________________ L. Horn Switch This switch is used sound the horn. M. Warning Lights When ignition switch (U) is turned to RUN position, glow plug light indicates that the glow plugs are energized. Wait until light goes out to start the engine. S. Traction Control Press and release switch to enable controller traction control system. This system reduces down pressure on decks by pulsing the lift circuit, transferring weight to mower. Reducing down pressure improves traction, but may cause decks to float up creating an uneven cut. Light on switch will be on when system is active. Press and release switch again to deactivate traction control. This will reduce traction, but improves deck contact with ground. N. Mower Lift lever The mower lift lever raises and lowers the mowers and operates in either automatic or manual mode. Push lever forward to lower mowers, pull back to raise mowers. Manual Mode - Set mow switch (Q) in its OFF (down) position. In this position all mowers will raise or lower while pressure is applied to the lift lever. Automatic Mode - Set mow switch (Q) in its ON (up) position. In automatic mode the mowers will lower and start automatically with a momentary forward movement of the lift lever. In this mode mowers will only raise to a “crosscut” position with a momentary backward movement of the lift lever. To raise mowers to their transport position, hold lever until mowers are fully raised. NOTICE While in an Automatic Mode lift or lower cycle, which lasts approximately 3 seconds, moving the lift lever in the opposite direction will turn all mowers off, and manual mode will start for the position selected. P. PTO Switch The PTO switch is a 2-position knob type switch used to engage and disengage the mowers. It also sets the mower lift lever (P) in manual or automatic mode. Set PTO switch in its disengaged (down) position when starting the mower. When the PTO switch is in the engaged (UP) position, the traction control system is automatically enabled, and the lift lever is placed in Automatic Mode. The traction control system is automatically enabled when the PTO switch is placed in the engaged (UP) position. Press and release traction control switch to cancel traction control. T. Engine Throttle Controls engine speed. Run machine at full throttle during normal machine operation. U. Ignition Switch The ignition switch has three positions. OFF- RUN (ON) - START. In the RUN position the controller program is running and input and output circuits are being monitored. See Section 5.4 and Section 9.2. V. Combination Gauge Used to display fuel level, operating hours, and indicate mower alerts. See Section 4.4. W. Parking Brake Switch To engage parking brake, slide lock forward and depress top of switch. Parking brake light on combination gauge (V) will turn on. Normal reel operation is disabled with parking brake engaged. To disengage parking brake, depress rear of switch. Parking brake light on combination gauge will turn off. NOTE: Mower will not start with parking brake switch in the Disengaged position. R. Light Switch Controls operation of work lights. Press front of switch to turn lights on. Press rear portion of switch to turn lights off. 21 4 4.4 CONTROLS OPERATOR ALERTS_______________________________________________________ Hydraulic Oil Filter Light: Red oil filter light indicates the hydraulic filter needs to be replaced. Return mower to service area as soon as possible and replace filters. The Combination gauge displays operating hours, fuel level, and has lights to alert operator to mower conditions. E Hydraulic Oil Level Light: Red hydraulic oil level light indicates a low fluid level in the hydraulic tank. Shut mower down immediately. Visually inspect mower for obvious signs of leaks around connections, hoses, and hydraulic components. Return mower to service area for maintenance. F ! CAUTION Hydraulic fluid is under pressure. Shut mower down and allow fluid to cool before checking fluid level, or adding oil to hydraulic tank. P Engine Oil Pressure Light: Red engine oil pressure light indicates low engine oil pressure. Shut down unit immediately. Inspect oil level in engine. If oil light remains on with oil at proper level, shut off engine and tow or trailer mower back to a service area. NEVER operate engine with oil light on, severe damage to the engine can occur. Figure 4B 4.4.1 Indicator Lights ___________________ The combination gauge has six indicator lights to indicate system functions. Coolant Temperature Light: Red coolant temperature light indicates that coolant temperature is above 230° F (110° C). Shut down unit immediately. Remove debris such as leaves and grass clippings that may be restricting air flow through rear screen and radiator. If engine continues to run hot, return mower to a service area. ! CAUTION Diesel engine coolant is under pressure. Turn engine off and allow fluid to cool before checking fluid level or adding coolant to radiator. 22 P Parking Brake Light: Red parking brake light indicates the parking brake switch is engaged. Do not depress traction pedal with parking brake engaged. Battery Light: Red battery light indicates battery voltage has dropped below 11.5 volts for one minute. Return mower to service area and inspect battery and battery charging systems. OPERATION 5 5 OPERATION 5.1 DAILY INSPECTION ________________________________________________________ 2. Check the fuel supply, radiator coolant level, crankcase oil and air cleaner indicator. All fluids must be at the full level mark with engine cold. ! CAUTION The daily inspection should be performed only when the engine is OFF and all fluids are cold. Lower mowers to the ground, engage the parking brake, stop engine, and remove ignition key. 3. Make sure all mowers are adjusted to the same cutting height. 4. Visually check tires for proper inflation. 5. Test the interlock system. 1. Perform a visual inspection of the entire unit, look for signs of wear, loose hardware, and missing or damaged components. Check for fuel or oil leaks to ensure connections are tight and hoses and tubes are in good condition. 5.2 Note: For more detailed maintenance information, adjustments and maintenance/lube charts, see the Sections 6, 7, and 8. INTERLOCK SYSTEM ______________________________________________________ 3. Refer to the chart below for each test and follow the check (4) marks across the chart. Shut engine off between each test. 1. The interlock system prevents the engine from starting unless the parking brake switch is ON, the traction pedal is in neutral and the PTO switch is OFF. The system also stops the engine if the operator leaves the seat with the PTO switch ON, traction pedal out of NEUTRAL, or parking brake switch OFF. Test 1: Represents normal starting procedure. The operator is seated, parking brake switch is ON, the operator’s feet are off the pedals, and the PTO switch is OFF. The engine should start. Test 2: The engine must not start if the PTO switch is ON. ! WARNING Test 3: The engine must not start if the parking brake switch is OFF. Never operate equipment with the Interlock System disconnected or malfunctioning. Do not disconnect or bypass any switch. Test 4: The engine must not start if the traction pedal is pressed. 2. Perform each of the following tests to insure the interlock system is functioning properly. Stop the test and have the system inspected and repaired if any of the tests fail as listed below: Test 5: Start the engine in the normal manner then turn PTO switch ON and lift your weight off the seat. H Test 6: Start the engine in the normal manner then turn parking brake switch OFF and lift your weight off the seat. H l the engine does not start in test 1; l the engine does start during tests 2,3 or 4; l the engine continues to run during tests 5 or 6. Interlock System Check Test Operator Seated Yes No Parking Brake Switch Traction Pedal in Neutral On Yes Off 1 4 4 4 2 4 4 4 3 4 4 4 5 4 H 6 4 H 4 No PTO Switch On 4 4 4 4 4 Off Yes 4 4 4 4 4 Engine Starts No 4 4 4 4 4 H 4 4 H H Lift your weight off seat. The cutting units must stop rotating within seven (7) seconds. 23 5 OPERATION 5.3 OPERATING PROCEDURES_________________________________________________ ! WARNING A Roll Over Protection Structure (ROPS) is included with this mower. Seat belts must be worn whenever operating a mower with a ROPS. Always keep seat belt snugly adjusted. DO NOT use seat belts on a mower without a ROPS. If the mower is overturning, hold onto the steering wheel. Do not attempt to jump out or leave the seat. ! CAUTION To prevent injury, always wear safety glasses, leather work shoes or boots, a hard hat, and ear protection. 1. Under no circumstances should the engine be started without the operator seated on the mower. Never start the engine with operator or bystanders standing behind a discharge chute. 2. Never run the engine in an enclosed area. 3. Keep hands and feet away from moving parts and cutting units. If possible, do not make adjustments with the engine running. 4. Do not operate mower or attachments with loose, damaged or missing components. Whenever possible mow when grass is dry. 5. First mow in a test area to become thoroughly familiar with the operation of the mower and control levers. 6. Study the area to determine the best and safest operating procedure. Consider the height of the grass, type of terrain, and condition of the surface. Each condition will require certain adjustments or precautions. 7. Be aware of mower discharge direction and never direct discharge of material toward bystanders. Never allow anyone near the machine while in operation. The owner/operator is responsible for injuries inflicted to bystanders and/or damage to their property. ! CAUTION Before mowing, pick up all debris such as rocks, toys, and wire which can be thrown by the machine. Enter a new area cautiously. Always operate at speeds that allow you to have complete control of the mower. 8. Use discretion when mowing near gravel areas (roadway, parking areas, cart paths, etc.). Stones discharged from the implement may cause serious injuries to bystanders and/or damage the equipment. 24 9. Always turn PTO switch OFF to stop blades when not mowing. 10. Disengage the drive motors, raise the mowers and slow down when crossing paths or roadways. Look out for traffic. 11. Stop and inspect the equipment for damage immediately after striking an obstruction, or if the machine begins to vibrate abnormally. Have the equipment repaired before resuming operation. ! WARNING Before you clean, adjust, or repair this equipment, always disengage all drives, lower implements to the ground, engage parking brake, stop engine, and remove key from ignition switch to prevent injuries. 12. Slow down and use extra care on hillsides. Read Section 5.9. Use caution when operating near drop offs. 13. Look behind and down before backing up to be sure the path is clear. Use care when approaching blind corners, shrubs, trees or other objects that may obscure vision. 14. Never use your hands to clean cutting units. Use a brush to remove grass clippings from blades. Blades are extremely sharp and can cause serious injuries. OPERATION 5.4 5 STARTING________________________________________________________________ NOTICE IMPORTANT: Do not use starting assist fluids. Use of such fluids in the air intake system may be potentially explosive or cause a “Runaway” engine condition and could result in serious engine damage. ! WARNING Wait until glow plug light (M) goes out, then immediately turn ignition key (U) to “START” ( ) position. Release as soon as engine starts. Allow 30 seconds between start-up attempts to allow time for engine starter motor to cool. All warning lights should go off after engine starts. Allow engine to gradually become warm before operating at high RPM. To prevent injuries, sit in the seat, engage parking brake, place traction pedal in Neutral, and PTO switch in OFF position before attempting to start the engine. M P E F P V 1. Sit in operator’s seat, make sure the PTO switch (P) is OFF (down) and the parking brake switch (W) is ON. Remove feet from pedals. Always use the seat belt when operating mowers equipped with a ROPS. 2. Set throttle lever (T) to half throttle. 3. Turn ignition switch (U) to RUN ( ) position. Note: At this time the warning lights on the combination gauge (V) and glow plug light (M) will come on. Check that lights are operating. NOTICE Do not hold key in “START” position for more than 10 seconds at a time. After 10 seconds the starting circuit will shut down and must be reset by returning the key to the OFF position. 5.5 T W U Figure 5A STOPPING / PARKING ______________________________________________________ To stop: Remove your foot from traction pedal. The mower will automatically brake when the traction pedal returns to Neutral. Always engage parking brake, shut off engine, and remove key before leaving operator seat for any reason. 3. Engage parking brake, stop the engine, and always remove the ignition key. If an emergency arises and the mower must be parked in the area of operation, follow the guidelines outlined by the grounds superintendent. If the mower is parked on an incline, chock or block the wheels. To park the mower under normal conditions: 1. Disengage the PTO switch (Q) then raise the implements in the transport position and move away from the area of operation. 2. Select a flat and level area to park. a. Release traction pedal to bring the mower to a complete stop. b. Disengage all drives, lower implements to the ground, engage parking brake, reduce throttle to idle. 25 5 5.6 OPERATION TO DRIVE / TRANSPORT____________________________________________________ Read and follow all safety notes contained in this manual when driving or transporting mower. When operating in reverse look behind you to ensure you have a clear path. Important: If this mower is driven on public roads, it must comply with federal, state and local ordinances. Contact local authorities for regulations and equipment requirements. 5.7 To prevent serious injuries, keep hands, feet, and clothing away from cutting unit when the blades are moving. NEVER use your hands to clean cutting units. Use a brush to remove grass clippings from blades. Blades can be sharp and could cause injuries. DO NOT operate mowers without rear discharge chutes or mulching plate installed. To mow: 1. Set PTO switch to its ON (Up) position. This also sets the mower lever to automatic mode and automatically enables the Traction Control System. [See 4.3]. 2. Press mower lever forward momentarily to lower mowers. Mowers will begin turning automatically when cutting units have lowered. Important: The mow switch should be OFF while transporting mower. 3. To lift mowers, pull mower lever back and release. Mowers will stop turning and raise to their crosscut position. To lift mowers to their transport position continue to hold lever until mowers are completely raised. 4. To cancel traction control, press and release traction control switch (S). [See 4.3]. Always mow with the engine at full throttle. To install mulching plate: An optional mulching plate can be used instead of the rear discharge chute. Do not operate mower without rear discharge chute or mulching plate installed. 1. Place PTO switch in OFF (down) position, lower mowers to the ground, engage parking brake and stop engine. 2. Remove three nuts securing discharge chute to mower housing. 3. Remove discharge chute and assemble mulching plate. Secure with three nuts removed previously. Store the discharge chute in a safe location for future use. MOWING SPEED __________________________________________________________ Cutting quality is better at speeds well below the transport speed of the mower. An initial mow speed of 6 to 7 MPH (10 to 11 kph) is set at the factory and should be satisfactory for most cutting conditions. Local turf conditions, however, may respond better to a different speed. If an adjustment is needed, refer to Section 8.2. 26 Set PTO switch to OFF. Pull mower lever back. Hold lever until mowers are up and lift arms are in their fully raised (transport) position. MOWING_________________________________________________________________ ! WARNING 5.8 To raise mowers to their transport position: OPERATION 5.9 5 HILLSIDE OPERATION _____________________________________________________ ! WARNING To minimize the possibility of overturning, the safest method for operating on hills and terraces is to travel up and down the face of the slope (vertically), not across the face (horizontally). Avoid unnecessary turns, travel at reduced speeds, and stay alert for hidden hazards. 15.7° Maximum 28% ! CAUTION Do not operate this mower on slopes greater than 15.7° or a 28% grade. 2. Activate traction control (S) as required to improve weight distribution between decks and mower. [See 4.3]. 3. If the mower tends to slide or the tires begin to mark the turf, angle mower into a less steep grade until traction is regained or tire marking stops. 4. If mower continues to slide or mark the turf, the grade is too steep for safe operation. Do not make another attempt to climb, and back down slowly. 5. When descending a steep slope, always lower implements to the ground to reduce the risk of mower overturning. Correct tire pressure is essential for maximum traction. Front.......................... 16 psi (1.10 BAR) Rear .......................... 12 psi (0.86 BAR) eg r 45 ees ° Figure 5B ° /2 -1 43 42° 4° / -1 ° 40 -3/4 ° 8 3 -3/4 % 36 5° 95 0% 3 9 5% ° 8 0% 33 ° 8 5% 31 4° 7 % / 8-3 2° 70 % 2 / 65 % 6-1 ° 2 0 6 % 1/4 24- /4° 55 % 50 21-3 ° /4 45% 19-1 ° 40% -3/4 6 1 % 35 14° 30% 25% 11-1/4° 20% 8-1/2° 15% 5-3/4° 10% 2-3/4° 5% 0° 0% General Slope of Roadway Embankment - 45° Steepest Grass Area - 31° Slope of Average Roof - 19-1/4° 2nd Class Highway Maximum Grade - 4-1/2° Toll Road or Freeway - 1-3/4° Degrees are shown to nearest 1/4° D 1. Always mow with the engine at full throttle, but reduce forward speed to maintain the proper cutting frequency. 15.7° Maximum 28% G r 10 ade 0% The mower has been designed for good traction and stability under normal mowing conditions. Use caution when operating on slopes, especially when the grass is wet. Wet grass reduces traction and steering control. Figure 5C 27 5 OPERATION How to calculate a slope: B Tools Required: Level (A), either 1 yard, or 1 meter long. Tape measure (B). A With the level (A) positioned horizontally, measure the distance (C) with tape measure (B). Use the chart to calculate either the slope angle or the % grade of the slope (D). C D Figure 5D Height (C) Inches with 1 Yard Level (A) Result (D) Millimeters with 1 Meter Level (A) Slope in Degrees Slope Grade % 4.8 8.3 100 5.7 10.0 150 8.5 15 9.5 16.7 11.3 20.0 11.8 20.8 3 6 200 7.5 9 225 12.7 22.5 250 14 25.0 275 15.4 27.5 15.5 27.8 16.7 30.0 17.0 30.6 18.0 32.5 18.4 33.3 19.3 35.0 19.9 36.1 20.6 37.5 21.3 38.9 21.8 40.0 22.6 41.7 23.0 42.5 24 44.4 10 300 11 325 12 350 13 375 14 400 15 425 16 18 475 25.4 47.5 500 26.6 50.0 29.1 55.6 600 31.0 60.0 34.8 69.4 800 38.7 80.0 39.8 83.3 900 42.0 90 1000 45.0 100 20 25 30 36 28 OPERATION 5 5.10 TOWING / TRAILERING _____________________________________________________ If the mower experiences problems and must be shut down and removed from the area, it should be loaded onto a trailer for transport. If a trailer is not available, the unit can be towed slowly for short distances. Use care when loading and unloading mower. Fasten mower to trailer to prevent mower from rolling or shifting during transport. Long Distance Trailering / Transport. If the mower is to be trailered on the highway, before strapping to trailer, close fuel shut off valve and inflate tires to maximum pressure listed on side of tire. Reduce tire pressure to normal after removing from trailer. [See 5.9]. Before towing, open tow valve. The tow valve permits moving the mower without starting the engine and prevents possible damage to hydraulic components. Brake released for towing. B Brake engaged (Normal operation) Figure 5F The tow valve (A) is located on the hydraulic drive pump beneath the operators seat. Remove cover from floor in front of operator’s seat. To open valve, use a wrench or insert a pin or small screw driver into the small hole in the valve stem. Turn the valve counterclockwise 90°. Rotate brake release lever (B) counter clockwise. Brake release lever is located under floor panel, near right front axle mount. To release the brakes, turn steering wheel for right hand turn (clockwise) until resistance is felt. Before towing make sure cutting units are raised. If they cannot be raised, remove them from the mower. Close tow valve (A) completely, rotate brake release lever (B) clockwise, and replace floor panel after towing. NOTICE Do not exceed 2 MPH (3.2 KPH) while towing. Long distance towing is not recommended. A LF006 Figure 5E 29 5 OPERATION 5.11 DAILY MAINTENANCE _____________________________________________________ Important: For more detailed maintenance information, adjustments and maintenance/lubrication charts, see Sections 6, 7, and 8. 1. Park the mower on a flat, level surface. Fully lower the implements to the ground, engage parking brake, stop the engine and remove key from ignition switch. 2. Grease and lubricate all points if required. To prevent fires, wash the cutting units and mower after each use. a. Use only fresh water for cleaning your equipment. b. Do not use high pressure spray. c. Do not spray water directly at the instrument panel, or any electrical components. d. Do not spray water into the cooling air intake or the engine air intake. NOTICE Do not wash a hot or running engine. Use compressed air to clean the mower, engine and radiator fins to reduce the potential for corrosion and moisture contamination. 3. Fill mower’s fuel tank at the end of each operating day to full mark on fuel gauge. Always use clean, fresh #2 diesel fuel. Minimum Cetane Rating 45. 4. Handle fuel with care - it is highly flammable. Use an approved container; the spout must fit inside the fuel filler neck. Avoid using cans and funnels to transfer fuel. ! WARNING 6. Never overfill or allow the tank to become empty. 7. Inspect hydraulic hoses and tubes daily. Look for wet hoses or oil spots and replace worn or damaged hoses and tubes before operating the machine. ! WARNING To prevent serious injury from hot, high pressure oil, never use your hands to check for oil leaks; use paper or cardboard. Hydraulic fluid escaping under pressure can have sufficient force to penetrate skin. If fluid is injected into the skin, it must be surgically removed within a few hours by a doctor familiar with this form of injury or gangrene may result. 8. Check the engine oil and hydraulic oil at the start of each day, before starting the engine. If the oil level is low, remove the oil filler cap and add oil as required. Do not overfill. ! WARNING To prevent serious bodily injury from hot coolant or steam blow-out, never attempt to remove the radiator cap while the engine is running. Stop the engine and wait until it is cool. Even then, use extreme care when removing the cap. Do not pour cold water into a hot radiator. Do not operate engine without a proper coolant mixture. Install cap and tighten securely. 9. After engine has cooled, check coolant level. Radiator should be full and recovery bottle should be up to the cold mark. Never remove the fuel cap from the fuel tank, or add fuel, when the engine is running or while the engine is hot. 10. Park machine in designated area. Engage parking brake and remove key. Place key in a secure location to prevent unauthorized use of equipment. Do not smoke when handling fuel. Never fill or drain the fuel tank indoors. 11. Check the engine oil and hydraulic oil at the start and end of each day. If the oil level is low, remove the oil filler cap and add oil as required. Do not overfill. Do not spill fuel. Clean spilled fuel immediately. Never handle or store fuel containers near an open flame or any device that may create sparks and ignite the fuel or fuel vapors. Be sure to reinstall and tighten fuel cap securely. 5. Store fuel according to local, state or federal ordinances and recommendations from your fuel supplier. 30 MAINTENANCE & LUBRICATION CHARTS 6 6 MAINTENANCE & LUBRICATION CHARTS 6.1 GENERAL ________________________________________________________________ 2. Lubricate with grease that meets or exceeds NLGI Grade 2 LB specifications. Apply grease with a manual grease gun and fill slowly until grease begins to seep out. Do not use compressed air. ! WARNING Before you clean, adjust, or repair this equipment, disengage all drives, lower implements to the ground, engage parking brake, stop engine and remove key from ignition switch to prevent injuries. 3. For smooth operation of pivot points and other friction points, apply several drops of SAE 30 oil every 50 hours or as required. 4. Remove wheels and repack bearings once a year. 1. Always clean grease fittings before and after lubrication. 6.2 MAINTENANCE CHART_____________________________________________________ Recommended Service and Lubrication Intervals Every 8-10 Hours Every 50 Hours Every 100 Hours Air Cleaner AR Battery Charge I**** Belt I-A* Cooling System Every 250 Hours Every 500 Hours I Engine Oil Filter Fuel Lines and Clamps Every 1000 Hours Yearly See Section R 7.4 I-A R 8.3 R R***** 7.2 R* R***** 7.3 R 7.6 L Grease Fittings - F2 L I*** Hydraulic Oil FIlters I II 7.12 R* R-AR 7.13 I IV 7.10 I-C/AR 7.15 7.17 I* I-A L I* A - Add or Adjust 6.3 R** Wheel Bearings Wiring II 7.11 I-A Steering System 6.3 I-A Muffler and Exhaust Tires III I Grease Fittings - F1 Radiator Screens 7.15 R* Fuel Filter and Lubricant Type 7.9 I-C-A Engine Oil Hydraulic Hoses Tubes Hydraulic Oil Every 400 Hours C - Clean I I 7.14 I - Inspect * Indicates initial service for new machines. ** Or yearly, whichever comes first. L- Lubricate R - Replace AR - As Required I Pack bearings with NLGI Grade 2 (Service Class GB) II Manual grease gun with NLGI Grade 2 (Service Class LB). III Engine Oil - See Section 7.3 *** Inspect visible hoses and tubes for leaks or oil marks. **** Inspect electrolyte level. See 7.7 IV Jacobsen Hydraulic Oil - SAE 10W30 or Greens Care 68 ***** Engine oil and filter intervals must be shortened if improper diesel fuel is used. 31 6 6.3 MAINTENANCE & LUBRICATION CHARTS LUBRICATION CHART _____________________________________________________ 4 4 4 3 3 5 5 3 1 5 4 3 1 2 5 5 4 3 2 1 5 2 1 3 5 2 6 5 3 5 3 5 2 7 Grease Fittings F1 - 50 Hours (Every Week) 12 1 2 3 4 5 6 7 8 9 10 12 F2 - 100 Hours 12 Mower Pivot (5) Lift Arm Pivot (5) Lift Cylinders (10) Caster Pivot and Caster Wheels (10) Mower Rear Roller (10) Axle Pivot Traction Pedal Pivot Ball Joint (2) Steering Pivot (2) Steering Cylinder (2) 11 U-joint Driveshaft (3) 8 8 10 9 9 10 32 11 MAINTENANCE 7 7 MAINTENANCE 7.1 GENERAL ________________________________________________________________ ! WARNING Before you clean, adjust, or repair this equipment, disengage all drives, lower implements to the ground, engage parking brake, stop engine, and remove key from ignition switch to prevent injuries Make sure the mower is parked on a solid and level surface. Never work on a mower that is supported only by the jack. Always use jack stands. 1. Adjustment and maintenance should always be performed by a qualified technician. If proper adjustments cannot be made, contact an Authorized Jacobsen Dealer. 2. Inspect the equipment on a regular basis, establish a maintenance schedule and keep detailed records. b. Keep all moving parts properly adjusted and lubricated. c. Replace worn or damaged parts before operating the machine. d. Keep all fluids at their proper levels. e. Keep shields in place and all hardware securely fastened. f. Keep tires properly inflated. 3. Do not wear jewelry or loose fitting clothing when making adjustments or repairs. 4. Use the illustrations in the Parts Catalog as reference for the disassembly and reassembly of components. 5. Recycle or dispose of all hazardous materials (batteries, fuel, lubricants, anti-freeze, etc.) according to local, state, or federal regulations. a. Keep the equipment clean. 7.2 ENGINE _________________________________________________________________ IMPORTANT: A separate Engine Manual, prepared by the engine manufacturer, is supplied with this mower. Read the Engine Manual carefully until you are familiar with the operation and maintenance of the engine. Proper attention to the engine manufacturer’s directions will assure maximum service life of the engine. To order replacement Engine manuals contact the engine manufacturer. The proper break-in of a new engine can make a considerable difference to the performance and life of the engine. During the break-in period, Jacobsen recommends the following: 1. During the first 50 hours of operation, a new engine should be allowed to reach an operating temperature of at least 140°F (60°C) prior to operation at full load. consumption is not uncommon during the initial break-in period. 3. Change engine oil and oil filter element after first 50 hours of operation. 4. Check and adjust fan and alternator belts. 5. Refer to Section 6.2 and Engine Manual for specific maintenance intervals. If the injection pump, injectors or the fuel system require service, contact an authorized Jacobsen Dealer. NOTICE The mower is designed to operate and cut most efficiently at the preset governor setting. Do not change the engine governor settings or overspeed the engine. 2. Check the engine oil level twice daily during the first 50 hours of operation. Higher than normal oil 7.3 ENGINE OIL ______________________________________________________________ Check the engine oil at the start of each day, before starting the engine. If the oil level is low, remove oil filler cap, and add oil as required. Above 77°F (25°C) SAE 30W 10W40 or SAE10W30/ Perform initial oil change after first 50 hours of operation and every 400 hours thereafter. See Engine Manual. 32 to 77°F (0 to SAE 20W or SAE 10W30/ 25°C) 10W40 Use only engine oils with API classification CJ-4. Below 32°F (0°C) SAE10W 10W40 or SAE 10W30/ 33 7 7.4 MAINTENANCE AIR FILTER_______________________________________________________________ Check the service indicator daily. If red band appears in the window (B) replace the element. Do not remove the element for inspection or cleaning. Unnecessary removal of the filter increases the risk of injecting dust and other impurities into the engine. 4. Reassemble cap making sure it seals completely around the filter housing. Dust evacuator must be facing down. 5. Check all hoses and air ducts. Tighten hose clamps. When service is required, first clean the outside of the filter housing, then remove the old element as gently as possible and discard. B 1. Carefully clean the inside of the filter housing without allowing dust into the air intake. 2. Inspect the new element. Do not use a damaged element and never use an incorrect element. A 3. Assemble the new element and make sure it seats properly. Reset the indicator by depressing button (A). 7.5 Figure 7A FUEL ____________________________________________________________________ Handle fuel with care - it is highly flammable. Only use an approved container. The spout must fit inside the fuel filler neck. Avoid using cans and funnels to transfer fuel. ! WARNING Never remove the fuel cap from the fuel tank, or add fuel, when the engine is running or while the engine is hot. Do not smoke when handling fuel. Never fill or drain the fuel tank indoors. Fill the fuel tank to within 1 in. (2.5 cm) below the filler neck. Use clean, fresh, #2, low or ultra low sulfur Diesel fuel, minimum Cetane Rating 45. Refer to Engine Manual for additional information. Check fuel lines and clamps every 50 hours. Replace fuel lines and clamps at the first sign of damage. Store fuel according to local, state or federal ordinances and recommendations from your fuel supplier. Never overfill or allow the tank to become empty. Clean spilled fuel immediately. Never handle or store fuel containers near an open flame or any device that may create sparks and ignite the fuel or fuel vapors. Be sure to reinstall and tighten fuel cap securely. 7.6 FUEL SYSTEM ____________________________________________________________ Refer to Section 6.2 for specific maintenance intervals. To change fuel filter: Before replacing any filter, thoroughly clean the filter housing and the area around the filter. Dirt must not be allowed to enter into fuel system. 1. Close fuel valve on tank, then remove and discard the existing filter. Bleed the fuel system after the fuel filter and lines have been removed, or the fuel tank has become empty. See Engine Manual. 34 2. Apply a light coat of oil to the gasket and hand tighten new filter. 3. Fill fuel tank. Open fuel valve on tank and bleed the filter. See Engine Manual. MAINTENANCE 7.7 BATTERY ________________________________________________________________ Make absolutely certain the ignition switch is OFF position and the key has been removed before servicing the battery. ! CAUTION Always use insulated tools, wear protective glasses or goggles and protective clothing when working with batteries. You must read and obey all the battery manufacturer’s instructions. Tighten cables securely to battery terminals and apply a light coat of silicone dielectric grease to terminals and cable ends to prevent corrosion. Keep vent caps and terminal covers in place. Check the electrolyte level every 100 hours. Keep the cable ends, battery and battery posts clean. Always disconnect battery cables from battery and controller connectors before performing and welding operation on the mower. 7.8 Verify battery polarity before connecting or disconnecting the battery cables. 1. When installing the battery, always assemble the RED, positive (+) battery cable first and the ground, BLACK, negative (-) cable last. 2. When removing the battery, always remove the ground, BLACK, negative (-) cable first and the RED, positive (+) cable last. 3. Make sure battery is properly installed and secured to the battery tray. ! WARNING Battery posts, terminals, and related accessories contain lead and lead compounds, chemicals known to the State of California to cause cancer and other reproductive harm. Wash your hands after handling. JUMP STARTING __________________________________________________________ Before attempting to “jump start” the mower, check the condition of the discharged battery. Section 7.7. ! WARNING Batteries generate explosive hydrogen gas. To reduce the chance of an explosion, avoid creating sparks near battery. Always connect the negative jumper cable to the frame of the mower with the discharged battery, away from the battery. 7.9 7 When connecting jumper cables: 1. Stop the engine on vehicle with good battery. 2. Connect RED jumper cable to the positive (+) terminal on the good battery and to the positive (+) terminal on the “discharged” battery. 3. Connect the BLACK jumper cable from the negative (-) terminal on the good battery to the frame of mower with discharged battery. After cables have been connected, start the engine on the vehicle with the good battery then start the mower. CHARGING BATTERY _____________________________________________________ ! WARNING Charge battery in a well ventilated area. Batteries generate explosive gases. To prevent an explosion, keep any device that may create sparks or flames away from the battery. To prevent injury, stand away from battery when the charger is turned on. A damaged battery could explode. 2. Whenever possible, remove the battery from the mower before charging. If battery is not sealed, check that the electrolyte liquid covers the plates in all the cells. 3. Make sure the charger is OFF, then connect the charger to the battery terminals as specified in the charger’s manual. 4. Always turn the charger OFF before disconnecting charger from the battery terminals. 1. Refer to Section 7.7. Read the Battery and Charger’s manual for specific instructions. 35 7 MAINTENANCE 7.10 MUFFLER AND EXHAUST __________________________________________________ ! WARNING Exhaust fumes contain carbon monoxide that is toxic and can be fatal when inhaled. NEVER operate an engine without proper ventilation. To protect from carbon monoxide poisoning, inspect the complete exhaust system regularly and always replace a defective muffler. If you notice a change in the color or sound of the exhaust, stop the engine immediately. Identify the problem and have the system repaired. Torque all exhaust manifold hardware evenly. Tighten or replace exhaust clamps. 7.11 HYDRAULIC HOSES _______________________________________________________ ! WARNING To prevent serious injury from hot, high pressure oil, never use your hands to check for oil leaks. Use paper or cardboard. Hydraulic fluid escaping under pressure can have sufficient force to penetrate skin. If fluid is injected into the skin it must be surgically removed within a few hours by a doctor familiar with this form of injury or gangrene may result. 1. Always lower implements to ground, disengage all drives, engage parking brake, stop engine and remove key before inspecting or disconnecting hydraulic lines or hoses. 2. Check visible hoses and tubes daily. Look for wet hoses or oil spots. Replace worn or damaged hoses and tubes before operating the machine. 3. The replacement tube or hoses must be routed in the same path as the existing hose. Do not move clamps, brackets and ties to a new location. 4. Thoroughly inspect all tubes, hoses and connections every 250 hours. IMPORTANT: The hydraulic system can be permanently damaged if the oil becomes contaminated. Before disconnecting any hydraulic component, clean the area around the fittings and the hose ends to keep impurities out of the system. a. Before disconnecting any hydraulic component, tag or mark the location of each hose then clean the area around the fittings. b. As you disconnect the component, be prepared to assemble plugs or caps to the hose ends and open ports. This will keep impurities out of the hydraulic system and also prevent oil spills. c. Make sure “O” rings are clean and hose fittings are properly seated before tightening. d. Keep the hose from twisting. Twisted hoses can cause couplers to loosen as the hose flexes during operation, resulting in oil leaks. e. Kinked or twisted hoses can restrict the oil flow, causing the system to malfunction and the oil to overheat and also lead to hose failure. 7.12 HYDRAULIC OIL __________________________________________________________ Refer to Section 6.2 for specific maintenance intervals. Drain and replace the hydraulic oil after a major component failure, or if you notice the presence of water or foam in the oil, or a rancid odor (indicating excessive heat). Always replace hydraulic filter when oil filter light stays on or when changing oil. To change hydraulic oil: 1. Clean the area around the oil cap to prevent impurities from entering and contaminating the system. 2. Remove drain plug from bottom of tank. 36 3. After oil has drained, install drain plug and fill with hydraulic oil. 4. Purge air from system. a. Operate all mower functions for about 5 minutes to purge air out of the system and stabilize the oil level. During this time, the oil level alarm may sound. b. Once the level has stabilized and the air is purged, fill the tank to the full mark on dipstick. Start engine and check that oil alarm remains off. MAINTENANCE 7 7.13 HYDRAULIC FILTER _______________________________________________________ The hydraulic system is protected by a 10 micron return line filter. Flow though the filters is monitored during operation. When pressure drop across the filters is too high the hydraulic oil filter warning light will come on. To ensure continued protection to the hydraulic system, replace filter as soon as possible after light comes on. NOTICE During cold weather the warning light may come on until oil has warmed up to operating temperature. Wait until oil has warmed up and light goes out before operating mower. To replace hydraulic filter: 1. Remove the old filter. 2. Install new filter. Hand tighten only. 3. Operate engine at idle speed with hydraulic system in Neutral for five minutes. The oil level alarm may sound during this time. 4. Check hydraulic oil level in reservoir and fill to full mark on dipstick. 7.14 ELECTRICAL SYSTEM _____________________________________________________ ! CAUTION Always turn the ignition switch OFF and remove the negative battery cable (BLACK) before inspecting or working on the electrical system. NOTICE General precautions that can be taken to reduce electrical problems are listed below. For factory assistance with troubleshooting controller problems, please note the controller hardware revision and software version located on the lower right corner of the controller. Controllers with equal or greater revision levels will be backward compatible. 1. Make certain all terminals and connections are clean and properly secured. Circuits are protected by a circuit breaker, fuses and relays mounted on or near the controller. 2. Check the interlock system, fuses and circuit breakers regularly. If the interlock does not function properly and the problem cannot be corrected, contact an authorized Jacobsen Dealer. 3. Keep the wire harness and all individual wires away from moving parts to prevent damage. 4. Make sure the seat switch harness is connected to the main wire harness. 5. Check the battery and battery charging circuit. 6. Do not wash or pressure spray around electrical connections and components. The electrical system is monitored and controlled by the electronic controller (C) located behind the operator’s area. The controller is equipped with two banks of LED’s which can be used when troubleshooting the electrical system. See Section 9.2. CIRCUIT BREAKER CB1 50 A CIRCUIT BREAKER FUSES F1 20 A ALTERNATOR, GAUGES, SWITCHES F2 20 A LIGHTS RELAYS K1 GLOW PLUG K2 STARTER Figure 7B 37 7 MAINTENANCE 7.15 RADIATOR _______________________________________________________________ ! WARNING To prevent serious bodily injury from hot coolant or steam blow-out, never attempt to remove the radiator cap while the engine is running. Stop the engine and wait until it is cool. Even then, use extreme care when removing the cap. ! CAUTION Do not pour cold water into a hot radiator. Do not operate engine without a proper coolant mixture. Install cap and tighten securely. Check coolant level daily. Radiator should be full and recovery bottle should be up to the cold mark. Drain and refill annually. Remove the radiator cap, open the engine block drain and the radiator drain. Empty and clean the recovery bottle. Mix clean water with ethylene glycol based anti-freeze for the coldest ambient temperature. Read and follow the instructions on the anti-freeze container and Engine Manual. Keep radiator and hydraulic oil cooler air passages clean. Use compressed air (30 psi maximum) to clean the fins. To clean radiator: 1. Use a blow gun to clean the radiator and oil cooler fins. NOTICE A sliding panel located under the frame can be loosened and pulled back to allow dirt and debris to fall through frame. 2. Check and tighten the fan belt. Replace clamps and hoses every two years. 3. If you have to add coolant more than once a month, or add more than one quart at a time, have a Jacobsen Dealer check the cooling system. 7.16 ROLL OVER PROTECTIVE STRUCTURE (ROPS)________________________________ A Roll Over Protective Structure (ROPS), designed for this mower, is included with this mower as standard equipment. Inspect it periodically and follow operating procedures. ! CAUTION Do not loosen or remove bolts, do not weld, drill, modify, bend, or straighten a damaged structure. 1. The seat, the seat belt, mounting hardware, and any accessories within the ROPS, should be inspected regularly and all damaged parts replaced immediately. 2. Once the ROPS has been subjected to any form of impact it should be replaced. 3. Check and re-torque all hardware. All replacement components used for the ROPS must be as specified in the Parts Catalog. 7.17 TIRES ___________________________________________________________________ 1. Keep tires properly inflated to prolong tire life. Check inflation pressure while the tires are cool. Inspect tread wear. 2. Check pressure every 50 hours or once a month. Use an accurate, low pressure tire gauge. 3. Keep tires inflated to: Front - 16 psi (1.11 BAR) Rear - 12 psi (0.86 BAR) 38 ! CAUTION Unless you have the proper training, tools and experience, DO NOT attempt to mount a tire on a rim. Improper mounting can produce an explosion which may result in serious injury. MAINTENANCE 7 7.18 WHEEL MOUNTING PROCEDURE ____________________________________________ ! WARNING Make sure the mower is parked on a solid and level surface. Never work on a mower that is supported only by the jack. Always use jack stands. If only the front or rear of the mower is raised, place chocks in front of and behind the wheels that are not raised. 1. Remove dirt, grease and oil from stud thread. Do not lubricate threads. 2. Position wheel on hub and inspect to insure full contact between mounting surface of wheel and hub or brake drum. 3. Finger tighten all hardware, then torque hardware in criss-cross order; always tighten nuts in the top position. 4. Check and re-torque daily until torque is maintained at 85-95 ft.lbs. (115-128 Nm). 7.19 INSPECTING BLADES ______________________________________________________ 1. Every 50 hours of operation or whenever mower is removed from mower, carefully examine the blades to make sure they are in good operating condition. Blades showing any bends (G), grooves (H) or cracks (J) must be replaced. ! CAUTION Use care when checking blades to avoid pinching hands and fingers between blade ends. G H J HR025 Figure 7C ! WARNING Never attempt to straighten, weld, or repair a damaged blade. Always replace a damaged blade. 2. Any of the above conditions can cause a piece of the blade to break away and be hurled from the mower, causing very serious injury to bystanders or property damage. 3. A bent blade could have a microscopic crack (G) that can grow and allow a piece of the blade to break. Bent blades will also create vibration and other stress on the machinery. 4. Dust or sand particles can wear a dangerous groove in the blade (H) between the air vanes and the flat portion of the blade that will rapidly grow and produce a crack (J), permitting a piece of the vane to break off. 39 7 MAINTENANCE 7.20 SHARPENING BLADES_____________________________________________________ 1. Place a wooden block between the blade and mower housing to stop the blade from moving. ! WARNING The mower blades can develop sharp edges. Use caution whenever servicing and handling. 2. When dressing or sharpening the blade, do not follow the original pattern of grind as shown in (A). Grind new cutting edges at an angle as shown in (B). If the maximum total loss of the blade reaches 1/2 in., (1.3 cm), do not sharpen further. Replace blade. ! WARNING 3. Make sure an equal amount of material is removed from both sides of blade to prevent having an unbalanced blade. An unbalanced blade will cause excessive vibration and may damage the mower. 4. Use a blade balancer to check the blade after sharpening. 5. Torque center mounting screw holding blade to 75 to 90 ft. lb. (100 to 120 Nm). A Maximum 1/2 in. (1.3 cm) B Re-sharpening the blade beyond the allowable 1/2 in. (1.3 cm) may allow the blade tip to break off and be thrown from the mower. Such an incident can cause very serious injury to bystanders and/or property damage. HR024 Figure 7D 7.21 CARE AND CLEANING _____________________________________________________ Clean the mower and implements after each use. Keep the equipment clean. Do not wash equipment with engine running. Serious engine damage may result. Whenever possible, clean the equipment using compressed air. NOTICE Do not wash any portion of the equipment while it is hot. Do not use high pressure spray or steam. Use cold water and automotive cleaners. 1. Use compressed air to clean engine and radiator fins. 2. Use only fresh water when washing your equipment. NOTICE Use of salt water or effluent water has been known to encourage rust and corrosion of metal parts, resulting in premature deterioration or failure. Damage of this nature is not covered by the factory warranty. 3. Do not spray water directly at the instrument panel, ignition switch, controller or any other electrical components, or at bearing housings and seals. 4. Clean all plastic or rubber trim with a mild soap solution or use commercially available vinyl/rubber cleaners. 40 5. To maintain the original high luster of the fiberglass, periodically wax with a good grade of One-Step cleaner wax. Repair damaged metal surfaces and use Jacobsen touch-up paint. Wax the equipment for maximum paint protection. ! CAUTION Clean grass and debris from cutting units, drives, muffler and engine to prevent fires. ! WARNING NEVER use your hands to clean cutting units. Use a brush to remove grass clippings from blades. Blades are extremely sharp and can cause serious injuries. MAINTENANCE 7 7.22 STORAGE ________________________________________________________________ General After Storage 1. Wash the mower thoroughly and lubricate. Repair and paint damaged or exposed metal. 1. Check and reinstall battery 2. Inspect the mower, tighten all hardware, replace worn or damaged components. 3. Check the radiator coolant level. 3. Drain and refill radiator. 2. Check or service fuel filter and air cleaner. 4. Check oil level in the engine crankcase and hydraulic system. 4. Clean the tires thoroughly and store the mower so the load is off the tires. If mower is not on jack stands, check tires at regular intervals and re-inflate as necessary. 5. Fill the fuel tank with fresh fuel. Bleed the fuel system. 5. Keep the machine and all its accessories clean, dry and protected from the elements during storage. Never store equipment near an open flame or spark which could ignite fuel or fuel vapors. 7. Remove all oil from the blades. Adjust cutting height. Battery 1. Remove, clean and store battery in upright position on a non-conductive surface (wood) in a cool, dry place. To prevent accelerated discharge, do not store battery on concrete or steel surface. 2. Check and recharge battery every 60 to 90 days while in storage. 6. Make certain that the tires are properly inflated. 8. Start and operate the engine at 1/2 throttle. Allow enough time for the engine to become properly warmed and lubricated. ! WARNING Never operate the engine without proper ventilation, exhaust fumes can be fatal when inhaled. 3. Store batteries in a cool, dry place. To reduce the self discharge rate, room temperature should not be above 80°F (27°C) or fall below 20°F (-7°C) to prevent electrolyte from freezing. Engine 1. While the engine is warm, remove drain plug, drain the oil from the crankcase, and change oil filter. Install drain plug and refill with fresh oil. Torque drain plug to 22 ft. lb. (30 Nm). 2. Clean exterior of engine. Paint exposed metal or apply a light coat of rust preventative oil. 3. Add a fuel conditioner or biocide to prevent gelling or bacterial growth in fuel. See your local fuel supplier. Cutting Units 1. Wash the cutting units thoroughly, then repair and paint any damaged or exposed metal. 2. Lubricate all fittings and friction points. 3. Apply a light coat of rust preventative oil to the sharpened edges of the blades. ! CAUTION To prevent personal injury and damage to the cutting edges, handle the blades with extreme care. 41 8 8 ADJUSTMENTS ADJUSTMENTS 8.1 GENERAL________________________________________________________________ ! WARNING To prevent injury, lower implements to the ground, disengage all drives, engage parking brake, stop engine and remove key from ignition switch before making any adjustments or performing maintenance. Make sure the mower is parked on a solid and level surface. Never work on a mower that is supported only by the jack. Always use jack stands. If only the front or rear of the mower is raised, place chocks in front of and behind the wheels that are not raised. 1. Adjustments and maintenance should always be performed by a qualified technician. If proper 8.2 adjustment cannot be made, contact an authorized Jacobsen Dealer. 2. Replace, do components. not adjust, worn or damaged 3. Do not wear jewelry or loose fitting clothing when making adjustments or repairs. ! CAUTION Be careful to prevent entrapment of the hands and fingers between moving and fixed components of the machine. 4. Do not change governor settings or over speed the engine. MOW SPEED _____________________________________________________________ Cutting quality is better at speeds well below the transport speed of the mower. An initial mow speed of five to six mph is set at the factory and should be satisfactory for most cutting conditions. Local turf conditions, however, may respond better to a different speed. A To set mow speed, loosen jam nut (A) and adjust stop screw up to reduce speed, down to increase speed. Tighten nut to hold adjustment in place. LF002 Figure 8A 8.3 BELT ____________________________________________________________________ Inspect and adjust new belt after first ten hours of operation. Adjust every 100 hours thereafter. B Adjust alternator pulley so belt deflects 1/4 to 5/16 in. (0.6 - 0.8 cm) with a 20 lb. push at midpoint between pulleys. See Engine manual. If tension is incorrect, loosen alternator mounting bolts (B) and adjust alternator until proper belt tension is achieved. 1/4 TO 5/16 IN. (0.6 TO 0.8 CM) LF012 Figure 8B 42 ADJUSTMENTS 8.4 8 NEUTRAL ADJUSTMENT ___________________________________________________ Neutral adjustment can only be made at the drive pump. The Neutral adjustment is preset at the factory on all new mowers and replacement pumps. Further adjustment is not required unless the pump has been disassembled for repair or service. To adjust Neutral: 1. Disconnect traction pedal linkage from pump. 6. Connect traction linkage. When connecting linkage at traction pedal make sure pointer on traction pedal bracket is centered over Neutral switch (M -Figure 8D). 7. Start engine and check operation of traction pedal. Wheels must not turn when pedal returns to Neutral and lamp 5 on controller should light, see Section 9.2. 2. Place mower securely on jack stands so All wheels are raised off ground. F 3. Check that tow valve (H) is closed 4. Engage parking brake and set mow switch to OFF. Make sure Neutral switch at traction pedal is closed. (Figure 8D - M). Distance between the sensing portion of switch and metal pointer (M) must be between 1/16 and 1/8 in. (0.15 and 0.3 cm). 5. Loosen screws (G) holding pump lever bracket just enough so it can be moved. Start engine, disengage parking brake, and observe wheels. Adjust bracket (F) in slotted holes until wheels do not turn. Turn off engine and tighten bracket in place. G H LF014 Figure 8C 8.5 FORWARD / REVERSE SPEED ______________________________________________ To adjust forward speed: 2. Start engine and check reverse travel speed with engine at full throttle. Reverse speed should measure 5 mph (8 kph). 1. Make sure drive pump has been set to Neutral and engine throttle is adjusted correctly. Rotate the traction pedal mow speed stop to the transport position. 3. Stop engine. To adjust reverse speed, loosen nut on reverse travel stop bolt (L). Slide bolt forward in slotted hole to increase speed, back to reduce speed. Tighten nut to hold adjustment in place. 2. Start engine and check forward travel speed with engine at full throttle. Forward transport speed should measure 12 mph (19.3 kph). 4. Start engine and check speed. Repeat procedure until 5 mph (8 kph) reverse speed is attained. Forward and reverse speeds are adjusted at the traction pedal. Set forward speed before adjusting reverse. 3. Stop engine. To adjust forward speed, disconnect eye bolt (K) from pedal and loosen jam nut. Turn eye bolt in to reduce speed, out to increase speed. Tighten jam nut to hold adjustment in place and connect eye bolt. J 4. With traction pedal in Neutral, check position of Neutral switch (J). Adjust switch up or down so pointer (M) on traction pedal bracket is centered over it. When adjusted correctly lamp 5 on controller will light when ignition switch is turned to on. 5. Start engine and check forward speed. Repeat procedure until 12 mph (19.3 kph) forward transport speed is attained. To adjust reverse speed: K L M Figure 8D 1. Set forward speed. 43 8 ADJUSTMENTS 8.6 STEERING TOE-IN _________________________________________________________ 1. Turn wheels to straight ahead position. P 2. Loosen jam nuts (N) on both sides of tie rod (M). N S 3. Turn tie rod (S) to provide proper toe-in. Toe-in must not exceed +1/16 in. (+0.15 cm) (P). Re tighten jam nuts. 4. After adjusting tie rod, adjust steering cylinder by threading the rod (T) in or out of ball joint so spindle arm (R) clears the stop on the axle by 3/4 ± 1/16 in. (1.9 ± 0.15 cm) (U) when cylinder is fully extended. N T P +0 to1/16” R (+0 to 0.15 cm) U 3/4 ± 1/16 in. (1.9 ± 0.15 cm) Figure 8E 8.7 TRACTION CONTROL SYSTEM CALIBRATION _________________________________ The Traction Control System (TCS) will need to be calibrated when a system component has been replaced or the system is not working correctly. System components include controller, lift valve, lift cylinders, or hoses. 1. Allow hydraulic system to become properly warmed up. An operator must be in the seat during the calibration procedure. ! WARNING Never operate the engine without proper ventilation; exhaust fumes can be fatal when inhaled. While warming up the hydraulic system for the calibration procedure, the cutting unit blades will be turning. Make certain that the area under and around the cutting units is clean and any debris that can be thrown from the machine is cleared away. Keep bystanders away from unit. a. Start engine and move throttle to full position. parking brake switch ON and traction pedal in Neutral. 3. Fully lower cutting units. Verify all five decks are all the way down. 4. Press and hold TCS switch for 5 seconds. Horn will beep when controller enters calibration mode. NOTICE Do not release switch until horn stops for both starting and finishing the calibration procedure. Do not rush through steps 5 and 6. System will not be properly calibrated if decks do not start to raise in step 5 and are not fully lowered during step 6. 5. Tap the lift lever to raise position and wait for 3 to 5 seconds. Repeat if required until cutting units just begin to raise. 6. Tap the lift lever to lower position and wait until decks stop moving. Repeat, tapping joystick if required until front decks are on the ground. b. Release the parking brake. c. Turn PTO switch ON. 7. Press and hold TCS switch until horn beeps. System is now calibrated. d. Fully lower cutting units to the ground. e. Engage traction control system. f. Allow unit to run for 5 minutes with these settings. 2. System must be calibrated with the engine running, operator in seat, PTO switch in OFF position, 44 NOTICE To cancel calibration mode, turn keyswitch to the OFF position. ADJUSTMENTS 8.8 8 CUTTING HEIGHT _________________________________________________________ Cutting height for decks can be adjusted from 3/4 to 5-1/4 in. (1.9-13.3 cm) in 1/4 in. (0.6 cm) increments. Actual cutting height may vary somewhat from the heights given depending on turf conditions and other factors. NOTICE NOTICE For best quality of cut, always place the same number of spacers under deck housing on all three spindles. Adjust all decks to same cutting height. When cutting undulating areas, lower cutting heights may cause scalping. Adjust height accordingly to prevent turf damage. C A F D 1. Park the mower on a flat, level surface. Fully lower cutting units. Stop engine and remove key from ignition. B ! WARNING To prevent serious injury, lower deck until it is resting completely on the front casters and rear roller. This will prevent it from accidentally lowering while making adjustments. Disengage all drives, engage parking brake, stop engine, and remove ignition key. D E 2. Refer to the chart provided for desired cutting height. ! CAUTION Use proper lifting techniques when lifting or lowering deck housings. The deck housing assemblies weigh approximately 50 lbs (23 kg). 3. To lower height of cut, remove all three snap lock pins (A). Lift outer spindle shaft (B) slightly and remove 1/2 in. (1.3 cm) spacers (D) and/or 1/4 in (0.6 cm) spacer (E) from bottom one at a time until desired height is obtained. Carefully remove blocks and lower deck housings (C). Place remaining spacers on top of spindle and insert snap lock pins. Washer (F) is always on top, under snap lock pin. 4. To raise height of cut, remove all three snap lock pins (A). Carefully lift deck housing (C) above desired cutting height and support with blocks. Add 1/2 in. (1.3 cm) spacers (D) and/or 1/4 in. (0.6 cm) spacer (E) as required until desired height is obtained. Lower deck housing. Place remaining spacers on top of spindle and insert snap lock pins. Washer (F) is always on top, under snap lock pin. Figure 8F Height 1/2” Spacers of Below Mower Cut Housing 3/4 0 1 0 1-1/4 1 1-1/2 1 1-3/4 2 2 2 2-1/4 3 2-1/2 3 2-3/4 4 3 4 3-1/4 5 3-1/2 5 3-3/4 6 4 6 4-1/4 7 4-1/2 7 4-3/4 8 5 8 5-1/4 9 1/2” Spacers Above Mower Housing 9 9 8 8 7 7 6 6 5 5 4 4 3 3 2 2 1 1 0 1/4” Spacer Location Above Housing Below Housing Above Housing Below Housing Above Housing Below Housing Above Housing Below Housing Above Housing Below Housing Above Housing Below Housing Above Housing Below Housing Above Housing Below Housing Above Housing Below Housing Above Housing 45 8 ADJUSTMENTS 8.9 TORQUE SPECIFICATION___________________________________________________ NOTICE All torque values included in these charts are approximate and are for reference only. Use of these torque values is at your sole risk. Jacobsen is not responsible for any loss, claim, or damage arising from the use of these charts. Extreme caution should always be used when using any torque value. Jacobsen uses Grade 5 Plated bolts as standard, unless otherwise noted. For tightening plated bolts, use the value given for lubricated. AMERICAN NATIONAL STANDARD FASTENERS SIZE UNITS SIZE GRADE 5 UNITS GRADE 8 Lubricated Dry GRADE 5 Lubricated Dry GRADE 8 Lubri- Dry Lubri- cated #6-32 in-lb (Nm) – 20 (2.3) #8-32 in-lb (Nm) – 24 (2.7) #10-24 in-lb (Nm) – 35 (4.0) #10-32 in-lb (Nm) – 40 (4.5) #12-24 in-lb (Nm) – 1/4-20 in-lb (Nm) 1/4-28 in-lb (Nm) 5/16-18 – Dry cated – 7/16-14 ft-lb (Nm) 37 (50.1) 50 (67.8) 53 (71.8) 70 (94.9) – 30 (3.4) 7/16-20 ft-lb (Nm) 42 (56.9) 55 (74.6) 59 (80.0) 78 (105) – 45 (5.1) 1/2-13 ft-lb (Nm) 57 (77.2) 75 (101) 80 (108) 107 (145) – 50 (5.7) 1/2-20 ft-lb (Nm) 64 (86.7) 85 (115) 90 (122) 120 (162) 50 (5.7) – 65 (7.3) 9/16-12 ft-lb (Nm) 82 (111) 109 (148) 115 (156) 154 (209) 75 (8.4) 100 (11.3) 107 (12.1) 143 (16.1) 9/16-18 ft-lb (Nm) 92 (124) 122 (165) 129 (174) 172 (233) 85 (9.6) 115 (13.0) 120 (13.5) 163 (18.4) 5/8-11 ft-lb (Nm) 113 (153) 151 (204) 159 (215) 211 (286) in-lb (Nm) 157 (17.7) 210 (23.7) 220 (24.8) 305 (34.4) 5/8-18 ft-lb (Nm) 128 (173) 170 (230) 180 (244) 240 (325) 5/16-24 in-lb (Nm) 173 (19.5) 230 (26.0) 245 (27.6) 325 (36.7) 3/4-10 ft-lb (Nm) 200 (271) 266 (360) 282 (382) 376 (509) 3/8-16 ft-lb (Nm) 23 (31.1) 31 (42.0) 32 (43.3) 44 (59.6) 3/4-16 ft-lb (Nm) 223 (302) 298 404 315 (427) 420 (569) 3/8-24 ft-lb (Nm) 26 (35.2) 35 (47.4) 37 (50.1) 50 (67.8) 7/8-14 ft-lb (Nm) 355 (481) 473 (641) 500 (678) 668 (905) METRIC FASTENERS SIZE UNITS 4.6 Lubricated 8.8 Dry Lubricated 10.9 Dry Lubricated Non Critical Fasteners into Aluminum 12.9 Dry Lubricated Dry M4 Nm (in-lb) – – – – – – 3.83 (34) 5.11 (45) 2.0 (18) M5 Nm (in-lb) 1.80 (16) 2.40 (21) 4.63 (41) 6.18 (54) 6.63 (59) 8.84 (78) 7.75 (68) 10.3 (910 4.0 (35) M6 Nm (in-lb) 3.05 (27) 4.07 (36) 7.87 (69) 10.5 (93) 11.3 (102) 15.0 (133) 13.2 (117) 17.6 (156) 6.8 (60) M8 Nm (in-lb) 7.41 (65) 9.98 (88) 19.1 (69) 25.5 (226) 27.3 (241) 36.5 (323) 32.0 (283) 42.6 (377) 17.0 (150) M10 Nm (ft-lb) 14.7 (11) 19.6 (14) 37.8 (29) 50.5 (37) 54.1 (40) 72.2 (53) 63.3 (46) 84.4 (62) 33.9 (25) M12 Nm (ft-lb) 25.6 (19) 34.1 (25) 66.0 (48) 88.0 (65) 94.5 (70) 125 (92) 110 (81) 147 (108) 61.0 (45) M14 Nm (ft-lb) 40.8 (30) 54.3 (40) 105 (77) 140 (103) 150 (110) 200 (147) 175 (129) 234 (172) 94.9 (70) 46 PROBLEM SOLVING 9 9 PROBLEM SOLVING 9.1 GENERAL ________________________________________________________________ The problem solving chart below lists basic problems that may occur during start-up and operation. For more detailed information regarding the hydraulic and electrical systems contact your area Jacobsen Dealer. Symptoms Possible Causes Action Engine will not start. 1. Parking brake switch OFF, traction 1. Check interlock system and start-up procedure. pedal not in Neutral, or mow switch ON. 2. Glow plug has not timed out. 2. Reset ignition switch and allow glow plug to time out before cranking engine. 3. Battery low on charge or defective. 3. Inspect condition connections. 4. Fuel tank empty or dirty. 4. Fill with fresh fuel. Change fuel filter. Bleed fuel lines. 5. Fuse blown. 5. Replace fuse. 6. Relay defective. 6. Test and replace relay. of battery and battery 7. Neutral switch on traction pedal 7. Adjust or replace switch. out of adjustment or defective. Engine hard to start 1. Fuel level low, fuel or fuel filter dirty. 1. Fill with fresh fuel. Change fuel filter. Bleed fuel or runs poorly. lines. Engine stops. 2. Air cleaner dirty. 2. Inspect and replace air filter. 3. Injectors, fuel pump. 3. See Engine Manual. 4. Engine problem. 4. See Engine Manual. 1. Fuel tank empty. 1. Fill with fresh fuel and bleed fuel lines. 2. Interlocks not set before leaving 2. Turn parking brake switch ON and set mow operator’s seat. switch to OFF. Engine overheating. 1. Coolant level low. 1. Inspect and add coolant. 2. Air intake restricted. 2. Clean air intake at radiator. 3. Water pump belt broken or loose. 3. Tighten or replace belt. Battery not holding 1. Loose or charge. terminals. Battery light on. Decks cut unevenly. corroded battery 1. Inspect and clean terminals. 2. Low electrolyte. 2. Refill to correct level. 3. Alternator belt loose or broken. 3. Tighten or replace belt. 4. Charging system defective. 4. See Engine Manual. 1. Height of correctly. Cut not 2. Engine speed too low. adjusted Inspect height of cut adjustment. Same number of spacers below deck housing on all spindles. Check engine speed. Run engine at full throttle. 3. Mow speed not adjusted for turf Adjust mow speed for best cut. conditions. 47 9 PROBLEM SOLVING 9.2 CONTROLLER LAMPS _____________________________________________________ The controller is a solid state device that monitors and controls electrical functions. The controller receives input signals from various switches and sensors throughout the machine and transmits output signals to operate relays, solenoids and warning lights. It controls and resets timers and contains built in logic to control certain machine functions. Each input and output signal is displayed through lamps located on top of the controller. A closed input switch indicates an active circuit and will turn an input lamp on. An open switch an inactive circuit and will turn a lamp off. Outputs are active when their lights are on. example, to start the mower the Mow Switch must be OFF (lamp 8 off) while the Neutral Start Switch (lamp 12), Brake Switch (lamp 6) and Fuel Valve Hold Coil (lamp 27) must be ON. NOTICE For factory assistance with troubleshooting controller problems, please note the controller hardware revision and software version located on the lower right corner of the controller. [SEE 7.14] Controllers with equal or greater revision levels will be backward compatible. It is important to note that in some cases a lamp or group of lamps must be on or off for a condition to be true. For Controller Functions by Lamp Number Lamp On - Circuit is active Lamp Off - Circuit is inactive INPUTS Lamp Circuit Circuit Program Select (1, 3 and 4 are not used) 19 Hydraulic Filter Light 5 Brake Switch 20 Hydraulic Oil Level Light 6 Seat Switch 21 Not Used 7 Traction Control Switch 22 Glowplug Light 8 Mow Switch 23 Lower Solenoid 9 Joystick - Lower 24 Raise Solenoid 10 Joystick - Raise 25 Glowplug Relay 11 Hydraulic Oil Level Switch 26 Start Relay 12 Neutral Switch 27 Fuel Solenoid - Hold 13 Not Used 28 Not Used 14 Keyswitch - Glowplug 29 Audible Alarm 15 Keyswitch - Start 30 Mow Solenoid 16 1,2,3,4 Joystick Active 31 Fuel Solenoid - Pull 17 Hydraulic Filter Switch 32 Power-Ignition 18 Engine Oil Pressure Switch 33 Power-Lights OUTPUTS 19 20 21 22 23 24 25 26 27 28 29 30 31 32 33 Lamp 1 2 3 4 5 6 7 8 9 10 11 12 13 14 15 16 17 18 INPUTS 48 OUTPUTS Lamp PROBLEM SOLVING 9.3 9 ELECTRICAL CIRCUITS ____________________________________________________ When troubleshooting the mower using the controller always check that Program Select (2) lamp is on. This indicates that the controller has power and the program is active. NOTICE The controller requires a minimum of six volts to operate. Individual circuits can be tested by operating an input switch, checking for the required input signal and looking for a corresponding output. Keep in mind that not all switches are located on the instrument panel. The traction pedal and reel lift limit are controlled by small proximity switches mounted on the frame of the mower. If an input lamp does not light, an inactive condition is indicated. This could be caused by a fuse, faulty switch or poor connection. 49 10 10 QUALITY OF CUT QUALITY OF CUT 10.1 QUALITY OF CUT TROUBLESHOOTING _______________________________________ It is recommended that a “test cut” be performed to evaluate the mower’s performance before beginning repairs. Before performing a “test cut” to diagnose cut appearance and mower performance, the following items should be verified to ensure an accurate “test cut.” An area should be available where “test cuts” can be made. This area should provide known and consistent turf conditions to allow accurate evaluation of the mower’s performance. 1. Mowing (Ground) Speed Another “test cut” should be performed after the completion of the repairs and/or adjustments to verify the mower’s performance. 4. Roller and Roller Bearing Condition 2. Blade Sharpness 3. Height-of-Cut (HOC) 5. Blade Speed 10.2 WASHBOARDING _________________________________________________________ Washboarding is a cyclical pattern of varying cutting heights, resulting in a wave-like cut appearance. In most cases, the wave tip-to-tip distance is approximately 6—8 in. (15—20 cm). Color variation (light-to-dark) may also be noticed. This condition is usually caused by a rocking motion in the cutting unit(s). This condition is found mostly on mowers with multiple (suspended) cutting units. Washboarding may also be caused by variations in the turf. TN0159 NOTE: Arrow indicates direction of travel. Probable Cause Remedy Mowing (ground) speed is too fast. Reduce mowing (ground) speed. Grass build-up on roller. Clean the roller and scraper. Roller is out of round. Replace roller. Mowing in the same direction. Change mowing direction regularly. Cutting units have too much or too little weight on them. Use traction control switch to transfer weight on or off cutting units. Insufficient engine speed, not set to specification. Check/adjust engine speed. Hydraulic system and/or rotary drive motor performance is reduced. Check hydraulic system performance (pump output, motor operation, valve operation, relief valve settings, etc.). 50 QUALITY OF CUT 10 10.3 STEP CUTTING____________________________________________________________ Step cutting occurs when grass is cut taller on one side of a cutting unit than the other or on one side of mower to the other. This is usually caused by mechanical wear or an incorrect roller or deck caster adjustment. TN0221 NOTE: Arrow indicates direction of travel. Probable Cause Remedy HOC (height-of-cut) settings are different from one side of a cutting unit to the other or from one cutting unit to another. Check HOC adjustment of cutting units. Worn roller bearings or deck caster wheels. Check/replace roller bearings and/or deck caster wheels. Cutting unit movement is restricted. Check/remove cutting unit movement restriction. Variations in turf density Change mowing direction. Machine ride height is uneven side to side. Check/adjust proper tire inflation pressure. Cutting unit height is uneven side to side. Check/adjust for even mower weight distribution. 51 10 QUALITY OF CUT 10.4 SCALPING _______________________________________________________________ Scalping is a condition in which areas of grass are cut noticeably shorter than the surrounding areas, resulting in a light green or even brown patch. This is usually caused by an excessively low height-of-cut setting and/or uneven turf. TN0222 NOTE: Arrow indicates direction of travel. Probable Cause Remedy HOC (height-of-cut) settings are lower than normal. Check and adjust the HOC settings. Turf too uneven for the mower to follow. Change mowing direction. Cutting too much grass at one time. Mow more often. Mowing (ground) speed is too fast. Reduce mowing (ground) speed. 52 QUALITY OF CUT 10 10.5 STRAGGLERS ____________________________________________________________ Stragglers are scattered blades of uncut or poorly cut grass. TN0223 NOTE: Arrow indicates direction of travel. Probable Cause Remedy Dull cutting blade(s). Sharpen blade(s). Mowing (ground) speed is too fast. Reduce mowing (ground) speed. Grass is too tall. Mow more often. Mowing in the same direction. Change mowing direction regularly. 53 10 QUALITY OF CUT 10.6 STREAKS ________________________________________________________________ A streak is a line of uncut grass. This is usually caused by a damaged blade. TN0224 NOTE: Arrow indicates direction of travel. Probable Cause Remedy Damaged blade(s). Replace blade(s). Turning too aggressively. Cutting units don’t overlap during turns or on side hills. Turn less aggressively to allow cutting units to overlap. Change mowing direction or pattern on side hills. Tire mats down grass before it is cut. Check/adjust tire inflation pressure. Wet grass is matted down before it is cut. Cut when grass is dry. 54 QUALITY OF CUT 10 10.7 WINDROWING ____________________________________________________________ Windrowing is the deposit of clippings concentrated at one end of cutting unit(s) or between cutting units, forming line(s) in the direction of travel. TN0225 NOTE: Arrow indicates direction of travel. Probable Cause Remedy Grass is too tall. Mow more often. Mowing while grass is wet. Mow when grass is dry. Grass built up on roller. Clean rollers and scrapers. Grass collecting on mower or cutting unit frame. Clear cutting unit(s) discharge deflector. 55 10 QUALITY OF CUT 10.8 MISMATCHED CUTTING UNITS ______________________________________________ Mismatched cutting units is a pattern of varying cutting heights, resulting in a stepped cut appearance, usually due to mismatched HOC (height-of-cut) adjustment from one cutting unit to another. TN1278 NOTE: Arrow indicates direction of travel. Probable Cause Remedy HOC inconsistent from one cutting unit to another. Check/adjust HOC on cutting units to same height. Difference in rotary cutting unit speeds. Check operation of rotary cutting motor(s) and repair/replace as necessary. Difference in mower ride height side to side. Check/adjust tire inflation pressure. Check/adjust for even mower weight distribution. 56 NOTES 11 11 NOTES 57 PRÓLOGO Este manual contiene instrucciones de seguridad, funcionamiento y de los controles de su nueva máquina Jacobsen. Este manual debe guardarse con el equipo para poder consultarlo si es necesario. Antes de utilizar la máquina es necesario que usted y los operarios que usen la máquina lean cuidadosamente el manual. Si se siguen las instrucciones de seguridad, funcionamiento y mantenimiento se prolongará la vida del equipo y será más eficaz. La placa de datos está situada en la guía trasera izquierda del bastidor. Jacobsen aconseja anotar los números para tener a mano su referencia. ® A Textron Company CHARLOTTE, NC YEAR OF PRODUCTION: Si necesita más información póngase en contacto con su distribuidor Jacobsen. Avertencia - Proposición 65 Este producto contiene o emite productos químicos que, según el estado de California, pueden producir cáncer, defectos de nacimiento y otros daños reproductivos. © 2013, Jacobsen, A Textron Company/Textron Innovations Inc. “Reservados todos los derechos, incluido el derecho para reproducir este material o porciones del mismo en cualquier forma.” IMPRESO EN EE.UU. 9-2014 es-2 MADE IN U.S.A. ÍNDICE ÍNDICE 1 SEGURIDAD Cómo trabajar de modo seguro.............................. 4 Avisos importantes sobre seguridad ......................7 2 ESPECIFICACIONES Identificación del producto ......................................8 Motor V2403-M-DI ..................................................8 Cortacésped ...........................................................8 Pesos y dimensiones ..............................................8 Unidades de corte ..................................................9 Accesorios ..............................................................9 Información de apoyo .............................................9 Declaración de conformidad .................................10 Nivel de vibracion .................................................13 3 ETIQUETAS 4 CONTROLES Iconos ...................................................................18 Controles .............................................................. 19 Panel de control ....................................................21 Avisos al operario .................................................22 5 FUNCIONAMIENTO Inspección diaria ...................................................23 Sistema de interbloqueo .......................................23 Procedimientos de funcionamiento ......................24 Puesta en marcha ................................................25 Parada / Aparcamiento .........................................25 Conducción / Transporte ......................................26 Corte .....................................................................26 Velocidad de corte ................................................26 Maniobras en pendientes .....................................27 Remolcado / Transporte .......................................29 Mantenimiento diario ............................................30 6 7 CUADROS DE MANTENIMIENTO Y LUBRICACIÓN Generalidades ......................................................31 Cuadro de mantenimiento ....................................31 Cuadro de lubricación ...........................................32 Sistema eléctrico ..................................................37 Radiador ...............................................................38 Estructura de protección antivuelco (ROPS) ........38 Neumáticos ...........................................................38 Montaje de las ruedas ..........................................39 Revisión de las cuchillas .......................................39 Afilado de las cuchillas .........................................40 Cuidados y limpieza ..............................................40 Almacenamiento ...................................................41 8 AJUSTES Generalidades ......................................................42 Velocidad de corte ................................................42 Correa ...................................................................42 Ajuste de punto muerto .........................................43 Velocidad de marcha hacia delante / marcha atrás .........................................................43 Convergencia de la dirección ...............................44 Calibración del sistema de control de tracción .....44 Altura de corte ......................................................45 Especificaciones del par de torsión ......................46 9 RESOLUCIÓN DE PROBLEMAS Generalidades ......................................................47 Lámparas del controlador .....................................48 Circuitos eléctricos ................................................49 10 CALIDAD DE CORTE Calidad de corte - resolucion de problemas .........50 Ondulaciones ........................................................50 Corte en capas .....................................................51 Escalpado ............................................................. 52 Montones dispersos ..............................................53 Lineas ...................................................................54 Acumulacion .........................................................55 Unidades de corte desajustadas ..........................56 11 NOTAS MANTENIMIENTO Generalidades ......................................................33 Motor ....................................................................33 Aceite de motor ....................................................33 Filtro de aire ..........................................................34 Combustible ..........................................................34 Sistema de combustible .......................................34 Batería ..................................................................35 Arranque por conexión directa .............................35 Recarga de la batería ...........................................35 Escape y silenciador .............................................36 Mangueras hidráulicas .........................................36 Aceite hidráulico ...................................................36 Filtro hidráulico .....................................................37 es-3 1 SEGURIDAD 1Seguridad 1.1 CÓMO TRABAJAR DE MODO SEGURO ___________________________________ ! ADVERTENCIA UN APARATO MANIPULADO INCORRECTAMENTE O SIN FORMACIÓN PUEDE SER PELIGROSO. Familiarícese con el emplazamiento y el funcionamiento correcto de los controles. Los operarios sin experiencia deben recibir instrucciones de otra persona que conozcan bien el funcionamiento del cortacésped antes de manejarlo. Utilice solo piezas, accesorios y herramientas aprobados por Jacobsen. plataforma de descarga lateral, NO accione la unidad de corte sin instalar primero la tolva de descarga. FUNCIONAMIENTO SEGURO a Lea el manual del operario y cualquier otro apoyo didáctico. Si el operario o el técnico no puede leer este manual, el propietario será responsable de explicarle la información contenida en este manual. En la página web de Jacobsen o RansomesJacobsen encontrará manuales en otros idiomas. d Inspeccione el cortacésped antes de utilizarlo. Compruebe la presión de los neumáticos, el nivel de aceite del motor, el nivel de refrigerante del radiador y el depurador del aire. El combustible es inflamable. Tenga cuidado cuando añada combustible al cortacésped. a Lea atentamente todas las instrucciones de este cortacésped. Familiarícese con los controles y el uso seguro del equipo. e b No deben utilizar el cortacésped ni niños ni personas que no entiendan las instrucciones. Los reglamentos locales pueden restringir la edad del operario. Maneje el cortacésped a la luz del día o con buena iluminación artificial. Tenga cuidado al utilizar el cortacésped con mal tiempo. Absténgase de hacerlo en caso de tormenta con relámpagos. f Inspeccione el terreno para determinar qué accesorios y herramientas son necesarios para realizar el trabajo de modo apropiado y seguro. Utilice solo piezas, accesorios y herramientas aprobados por Jacobsen. g Tenga cuidado con los baches y otros accidentes poco visibles del terreno. h Inspeccione el área donde va a utilizar el equipo. Retire todos los objetos que encuentre antes de comenzar. Esté atento a las obstrucciones por encima de la cabeza (ramas de árboles bajas, cables eléctricos) y también a los obstáculos subterráneos (regadores, tubos, raíces de árboles). Entre en una nueva zona con precaución. Busque posibles peligros. i Inspeccione el sistema de corte antes de arrancar el cortacésped. Asegúrese de que las cuchillas pueden girar libremente. La rotación de una cuchilla puede hacer que lo hagan las demás. c Nunca utilice el cortacésped cerca de animales o personas (mucho menos niños). d Recuerde que el operario o propietario es el responsable de los accidentes o peligros sufridos por las personas o su propiedad. e No lleve nunca pasajeros. f No permita nunca que nadie utilice ni repare el cortacésped o sus accesorios sin conocer las instrucciones. g No conduzca la máquina si está cansado, enfermo con bajo la influencia de drogas o alcohol. PREPARACIÓN a b c es-4 Para conducir el cortacésped, lleve siempre ropa adecuada, zapatos o botas de trabajo antideslizantes, guantes de trabajo, casco, gafas de seguridad y protección en los oídos. El cabello largo, la ropa suelta o las joyas pueden enredarse en las piezas en movimiento. No utilice el aparato con el sistema de interbloqueo desconectado o el sistema no funcionará correctamente. No desconecte ni entorpezca el funcionamiento de ningún interruptor. Nunca manipule equipo que no funcione en perfecto estado o sin etiquetas, protectores, deflectores o cualquier otro dispositivo de protección bien instalado. Si trabaja con una FUNCIONAMIENTO a No encienda nunca el motor si no hay una ventilación adecuada o si está en un sitio cerrado. El monóxido de carbono de los gases de escape puede alcanzar niveles peligrosos. b No lleve nunca pasajeros. Aleje a las personas y animales del cortacésped. c Desactive todas las transmisiones y eche el freno de estacionamiento antes de encender el motor. No arranque el motor hasta estar sentado en el asiento. Nunca arranque el motor si hay personas cerca del cortacésped. SEGURIDAD d Mientras el cortacésped esté en movimiento, mantenga las piernas, brazos y el cuerpo dentro de la cabina. Aleje las manos y los pies de las unidades de corte. e No utilice esta máquina en pendientes que excedan el límite de seguridad. f Para evitar vuelcos y pérdidas de control: – Maniobre el cortacésped por las pendientes en sentido vertical, nunca horizontalmente. – No arranque pendientes. – Aminore la velocidad cuando trabaje en pendientes o haga giros rápidos. Tenga cuidado al cambiar de dirección. El estado del césped puede alterar la estabilidad del cortacésped. ni pare repentinamente 1 p Si golpea un objeto o el cortacésped vibra de forma anómala, inspecciónelo para ver si tiene daños y repárelos. q Reduzca el valor del acelerador antes de detener el motor. r No utilice la máquina para otros fines a los previstos. ROPS a El ROPS es un dispositivo de seguridad. Manténgalo en posición vertical y bloqueado. Abrochése el cinturón de seguridad siempre que conduzca el cortacésped. Asegúrese de poder desabrocharlo rápidamente en caso de emergencia. b Conduzca solo el cortacésped con el ROPS plegado en superficies llanas y niveladas si fuera necesario. No conduzca el cortacésped con el ROPS plegado en pendientes ni cerca de aristas afiladas ni del agua. No existe protección antivuelco con la estructura ROPS plegada. en – Tenga cuidado al trabajar cerca de descensos, zanjas o terraplenes. – Tenga cuidado con los baches y otros accidentes poco visibles del terreno. g Cuando se desplace marcha atrás, mire hacia atrás y abajo para comprobar que el camino está despejado. No accione las unidades de corte al avanzar marcha atrás. c Compruebe las distancias siempre que vaya a pasar por debajo de objetos. Evite que el ROPS choque con ramas, cables eléctricos y otros objetos. h Tenga cuidado al acercarse a esquinas, árboles y demás elementos que puedan obstruirle la visión. d Nunca se abroche el cinturón de seguridad con el ROPS plegado. i Para poder circular por carreteras públicas, los vehículos deben cumplir con las normas vigentes. e Inspeccione el ROPS en busca de daños. Mantenga los tornillos del ROPS bien apretados. j Antes de cruzar o trabajar por caminos o carreteras, desactive el interruptor PTO, levante el cortacésped y circule a menor velocidad. Esté atento al tráfico. f No suelde, taladre, altere ni doble el ROPS. Cambie el ROPS cuando esté dañado. No intente reparar un ROPS dañado. g No desmonte el ROPS del cortacésped. k Detenga las cuchillas cuando el cortacésped atraviese superficies que no sean de hierba. h Jacobsen debe aprobar realizado al ROPS. l No proyecte la hierba cortada hacia las personas ni permita que nadie se acerque al cortacésped. MANIPULACIÓN SEGURA DE COMBUSTIBLES m No utilice el cortacésped con protecciones en mal estado o sin los dispositivos de seguridad instalados. n No cambie los ajustes del regulador del motor ni lo haga funcionar a velocidad excesiva. Munca cambie ni manipule los ajustadores que están cerrados con un sello para el control de velocidad del motor. o Antes de abandonar por cualquier motivo la cabina del operario: – Desactive todas las transmisiones y baje los accesorios al suelo. – Ponga el freno de estacionamiento. – Apague el motor y extraiga la llave. cualquier cambio a El combustible y los vapores de combustible son inflamables. Tenga cuidado cuando añada combustible al cortacésped. Los vapores de combustible pueden causar explosiones. b Nunca utilice contenedores que no sean aptos para almacenar o transferir combustible. c Nunca almacene el cortacésped ni depósitos de combustible cerca de una llama viva, ni ningún dispositivo que pueda prender el combustible o los gases de combustible. d No llene los contendores de combustible dentro de un vehículo o en un remolque con un revestimiento de plástico. Antes de llenar el contenedor, deposítelo siempre en el suelo, lejos del vehículo. e Añada combustible antes de arrancar. Nunca quite el tapón de combustible ni añada combustible al cortacésped cuando el motor esté en marcha o caliente. es-5 1 SEGURIDAD f Reabastezca de combustible al aire libre únicamente y no fume mientras lo hace. Extinga cualquier elemento combustible. k Aleje las manos y los pies de las piezas en movimiento. No ajuste el cortacésped con el motor en marcha, salvo que sea necesario. g Cuando añada combustible al cortacésped, la boquilla de combustible debe tocar el borde del contenedor. No utilice ningún elemento para mantener abierta la boquilla del surtidor. l Libere con cuidado la presión de los componentes con energía almacenada. m Para no hacerse daño con el aceite caliente a alta presión, no utilice nunca las manos al comprobar fugas de aceite. Utilice mejor papel o cartón. n El líquido hidráulico puede tener la presión suficiente para penetrar en la piel. Si le ocurre esto, acuda a un médico para que le extraiga quirúrgicamente el líquido hidráulico en pocas horas. De lo contrario podría gangrenarse. o Cuando ponga a punto el sistema hidráulico, asegúrese de que los sistemas de fijación, los tubos y las mangueras hidráulicas estén apretadas en su torque correcto. Compruebe que el sistema hidráulico esté en buen estado antes de arrancar el motor. p Mantenga limpios el cortacésped y el motor. q Asegúrese de que el cortacésped esté aparcado sobre una base sólida y llana. Deje que se enfríe antes de almacenar la máquina y retire siempre la llave de contacto. r Nunca trabaje en un cortacésped que sólo esté levantado por un gato. Utilice siempre soportes para gatos. Mantenga apretadas todas las tuercas, los pernos y los tornillos para estar seguro de que la máquina está en perfectas condiciones para trabajar. s Por motivos de seguridad, reemplace las piezas desgastadas o dañadas. Cambie las etiquetas gastadas o dañadas. Utilice solo piezas, accesorios y herramientas aprobados por Jacobsen. h No llene en exceso el depósito de combustible. Dejar un espacio de por lo menos 25 mm por debajo del cuello de llenado. i Cuando haya añadido el combustible, apriete el tapón del depósito y del contenedor. j Si se derrama combustible en la ropa, cámbiese inmediatamente. MANTENIMIENTO Y ALMACENAMIENTO a b c Antes de limpiar, ajustar o reparar este equipo, desactive el interruptor PTO, baje la unidad de corte y hasta el suelo, ponga el freno de estacionamiento, pare el motor y quite la llave de contacto. d No permita nunca que nadie repare el cortacésped o sus accesorios sin conocer las instrucciones. e Si piensa estacionar el cortacésped, almacenarlo o salir de él, baje el dispositivo de corte o utilice un bloqueo mecánico. t Cierre la válvula de combustible siempre que vaya a transportarlo en un remolque o almacenarlo. Aleje el combustible de las llamas y vacíe el combustible en el interior de un edificio. Para evitar riesgos de incendio, retire cualquier material combustible del motor, del silenciador, de la bandeja de la batería y de la zona del depósito de combustible. u Desconecte la batería antes de reparar el cortacésped. Desconecte siempre el cable de batería negativo antes que el cable positivo. Y viceversa: conecte siempre el cable de batería positivo antes que el negativo. Desconecte los conectores del controlador y la batería antes de realizar cualquier trabajo de soldadura en este cortacésped. PARA TRANSPORTAR EL CORTACÉSPED EN UN REMOLQUE f g h Cargue la batería en una zona bien ventilada. La batería puede liberar gas hidrógeno explosivo. Para evitar explosiones, mantenga alejada la batería de las llamas. i Desconecte el cargador de la batería del suministro eléctrico antes de conectar o desconectar el cargador a la batería. Para hacer la puesta a punto de la batería, lleve ropa de protección y utilice herramentas aisladas. j es-6 Cuando inspeccione o ponga a punto las cuchillas de la unidad de corte, tenga precaución y lleve guantes. Cambie las cuchillas dañadas, no intente repararlas. a Tenga cuidado al cargar o descargar el cortacésped en el remolque. El remolque debe ser más ancho que el cortacésped y ser capaz de transportar su peso. b Utilice una rampa de gran anchura para cargar o descargar el cortacésped en un remolque. c Enganche el cortacésped al remolque con ayuda de correas, cables o cadenas. Las correas de la parte delantera y trasera deben pasarse por abajo y los laterales del remolque. d Asegúrese de que todos los pestillos estén bien echados. SEGURIDAD 1.2 1 AVISOS IMPORTANTES SOBRE SEGURIDAD Este símbolo de seguridad sirve para alertarle de posibles peligros. PELIGRO: Indica una situación de peligro que, de no evitarse, PROVOCARÍA la muerte o lesiones personales. ADVERTENCIA: Indica una situación de peligro que, de no evitarse, PODRÍA provocar la muerte o lesiones personales. PRECAUCIÓN: Indica una situación de peligro que, de no evitarse, podría provocar dańos personales o materiales. Esta etiqueta también seńala procedimientos de trabajo poco seguros. IMPORTANTE: Conduzca a la velocidad de crucero solo cuando se encuentre en vías públicas. No seleccione esta velocidad para zonas de hierba, carreteras sin asfaltar ni caminos de tierra. Es posible que en algunas ilustraciones de este manual aparezca el aparato sin sus dispositivos de seguridad y protección para que se vea con más claridad. Pero recuerde que no debe utilizar el equipo sin estos dispositivos instalados. ADVERTENCIA El sistema de interbloqueo de este cortacésped impide que se ponga en marcha sin que a) el freno de estacionamiento esté echado, b) el interruptor del cortacésped esté en posición OFF, c) el pedal de tracción esté en punto muerto, d) el operario esté sentado en el asiento. El sistema detendrá el motor si el operario abandona su asiento a) sin poner el freno de estacionamiento o b) sin haber situado el interruptor del cortacésped en posición OFF. NUNCA utilice el cortacésped sin tener activado el sistema de interbloqueo. ADVERTENCIA 1. Antes de abandonar por cualquier motivo la posición del operario: a. b. c. d. e. Ponga el pedal de tracción en punto neutro. Desactive todas las transmisiones Baje al suelo todos los accesorios. Ponga el freno de estacionamiento. Apague el motor y quite la llave de contacto. 2. Mantenga las manos, los pies y la ropa lejos de las piezas en movimiento. Espere a que no haya ninguna pieza en movimiento antes de limpiar, ajustar o reparar la máquina. 3. Mantenga a las personas y animales alejados de la zona de trabajo. 4. No transporte nunca pasajeros. 5. Nunca utilice la máquina sin utilizar un deflector de hierba bien instalado. Si sigue todas las instrucciones de este manual, conseguirá prolongar la vida de su máquina y mantener su máxima eficacia. Los ajustes y las tareas de mantenimiento deben ser realizadas siempre por técnicos cualificados. Si necesita mantenimiento o más información, póngase en contacto con su distribuidor Jacobsen. Nadie mejor que él conoce los métodos de mantenimiento más recientes para la máquina y podrá prestarle el servicio necesario. es-7 2 2 2.1 ESPECIFICACIONES ESPECIFICACIONES IDENTIFICACIÓN DEL PRODUCTO ____________________________________ 68131.............................. AR522-T4I, 5 unidades, 4WD con ROPS 11524WILMAR BLVD, CHARLOTTE, NC 28273 ® En el chasis del cortacésped hay una placa de identificación, como la mostrada, que indica el número de serie a la derecha del operario, encima del eje trasero. PRODUCT OF U.S.A. 1674 kg Indicar siempre el número de serie de la unidad al pedir piezas de recambio o solicitar información sobre servicio. 2.2 Nota: La potencia sostenida real puede ser inferior a la citada en las especificaciones debido a las limitaciones de funcionamiento y factores ambientales. Bore ................................ 3.43 in. (87 mm) Stroke.............................. 4.03 in. (102.4 mm) Displacement .................. 148 in3 (2434 cm3) Torque ............................. 117 ft. lbs. (158 Nm) @ 1600 rpm Combustible: Tipo ........................... Gasóleo #2 con contenido bajo o muy bajo en azufre kW 6813101651 Potencia.................... Mínimo cetano 45 Capacidad ................ 65 litros Reglaje Regulador: Ralentí alto ............... 2920 rpm Ralentí bajo .............. 1000 rpm Lubricación Capacidad ................ 9,5 litros Tipo........................... SAE 10W30 Clasificación API....... CJ-4 Filtro de aire.................... Donaldson, tipo seco con válvula de evacuación e indicador de servicio Alternador ....................... 45 A Velocidad: Corte......................... 0 - 11 km/h Transporte ................ 0 -19,3 km/h Marcha atrás ............ 0 - 8,1 km/h Producción...................... 6,4 acres/h a 11 km/h Sistema hidráulico: Capacidad ...................... 37,85 litros Tipo líquido ..................... GreensCare 68 Refrigeración .................. Refrigerador de aceite Filtro Manguito Retorno .. 10 micrones Dirección......................... Dirección asistida hidróstatica PESOS Y DIMENSIONES ___________________________________________________ Dimensiones: cm Longitud ........................................................................330,2 Altura - Encima del ROPS ............................................210,8 Anchura - Corte ............................................................248,6 Anchura - Transporte ....................................................248,9 es-8 XXXX CORTACÉSPED ___________________________________________________________ Neumáticos: Delanteros ................ 26,5 x 14 - 12: (6 capas) Traseros.................... 22,5 x 10 - 8 Presión de los neumáticos: Delanteros ................ 16 psi Traseros.................... 12 psi Batería: Tipo ........................... 12V, 600 A arranque en frío Grupo ........................ BCI 24 Frenos: Servicio .....................Frenado dinámico, circuito tracción Estacionamiento ....... Integrado en el motor de las ruedas, mecanismo hidráulico 2.4 36.5 1-800-848-1636 (US) MOTOR V2403-M-DI________________________________________________________ Make ............................... Kubota Model .............................. V2403-M-DI Diesel, 4 cycle, liquid cooled Horsepower .................... 48.9 Hp (36.5 kW) @ 2700 rpm 2.3 A Textron Company Peso: kg Todos los fluidos, plataformas levantadas, sin operario. Total .........................................................................1674 Depósito de combustible vacío, plataformas levantadas, sin operario. Total .................................................... 1619 ESPECIFICACIONES 2.5 UNIDADES DE CORTE______________________________________________________ Anchura corte total .......... 254 cm Número de unidades de corte ........................... Cinco - tres delante, dos detrás 2.6 2 Altura de corte ................ 19 a 13,3 cm en incrementos de 0,6 cm ACCESORIOS_____________________________________________________________ Consultar el Catálogo de piezas y ponerse en contacto con su distribuidor Jacobsen para recibir una lista completa de accesorios y herramientas. ! PRECAUCIÓN El uso de piezas y accesorios no autorizados por Jacobsen pueden causar lesiones personales o daños al equipo y anularán la garantía. Sustitución ROPS 2-postes con cinturón de seguridad................................. 67844 Capota/Toldo ................... ................................. 68127 Lengüeta Bloqueo Capó . ................................. 1004049 Jaula ............................... ....................4265201/ 4265202 2.7 Cuchilla estándar ............ ................................. 4163106 Cuchilla de elevación alta ................................. 4137186 Cuchilla de elevación baja ................................ 4124087 INFORMACIÓN DE APOYO __________________________________________________ Ponerse en contacto con su distribuidor Jacobsen para recibir una lista de información. Manual de seguridad, funcionamiento y mantenimiento.............. ................................. 4273092 Manual de piezas ............ ................................. 4273091 Catálogo de piezas del motor ........................... 4273093 Manual de reparación y mantenimiento ............ (Por determinar) es-9 2 ESPECIFICACIONES 2.8 DECLARACIÓN DE CONFORMIDAD __________________________________________ DECLARATION OF CONFORMITY ▪ ДЕКЛАРАЦИЯ ЗА СЪОТВЕТСТВИЕ ▪ PROHLÁŠENÍ O SHODĚ ▪ OVERENSSTEMMELSESERKLÆRING ▪ CONFORMITEITSVERKLARING ▪ VASTAVUSDEKLARATSIOON ▪ VAATIMUSTENMUKAISUUSVAKUUTUS ▪ DECLARATION DE CONFORMITE ▪ KONFORMITÄTSERKLÄRUNG ▪ ΔΗΛΩΣΗ ΣΥΜΜΟΡΦΩΣΗΣ ▪ MEGFELELŐSÉGI NYILATKOZAT ▪ DICHIARAZIONE DI CONFORMITÀ ▪ ATBILSTĪBAS DEKLARĀCIJA ▪ ATITIKTIES DEKLARACIJA ▪ DIKJARAZZJONI TAL-KONFORMITÀ ▪ DEKLARACJA ZGODNOŚCI ▪ DECLARAÇÃO DE CONFORMIDADE ▪ DECLARAŢIE DE CONFORMITATE ▪ VYHLÁSENIE O ZHODE ▪ IZJAVA O SKLADNOSTI ▪ DECLARACIÓN DE CONFORMIDAD ▪ DEKLARATION OM ÖVERENSSTÄMMELSE ▪ SAMRÆMISYFIRLÝSING ▪ KONFORMITETSERKLÆRING ▪ 符合性声明 ▪ SAMRÆMISYFIRLÝSING ▪ 適合宣言 ▪ 적합성 선언서 ▪ UYGUNLUK BEYANI ▪ ДЕКЛАРАЦІЯ ПРО ВІДПОВІДНІСТЬ Business name and full address of the manufacturer ▪ Търговско име и пълен адрес на производителя ▪ Obchodní jméno a plná adresa výrobce ▪ Producentens firmanavn og fulde adresse ▪ Bedrijfsnaam en volledig adres van de fabrikant ▪ Tootja ärinimi ja täielik aadress ▪ Valmistajan toiminimi ja täydellinen osoite ▪ Nom commercial et adresse complète du fabricant ▪ Firmenname und vollständige Adresse des Herstellers ▪ Επωνυμία και ταχυδρομική διεύθυνση κατασκευαστή ▪ A gyártó üzleti neve és teljes címe ▪ Ragione sociale e indirizzo completo del fabbricante ▪ Jacobsen, A Textron Company Uzņēmuma nosaukums un pilna ražotāja adrese ▪ Verslo pavadinimas ir pilnas gamintojo adresas ▪ Isem kummerċjali u indirizz sħiħ tal-fabbrikant ▪ 11524 Wilmar Blvd. Nazwa firmy i pełny adres producenta ▪ Nome da empresa e endereço completo do fabricante ▪ Charlotte, NC 28273, USA Denumirea comercială şi adresa completă a producătorului ▪ Obchodný názov a úplná adresa výrobcu ▪ Naziv podjetja in polni naslov proizvajalca ▪ Nombre de la empresa y dirección completa del fabricante ▪ Tillverkarens företagsnamn och kompletta adress ▪ Fyrirtækisheiti og fullt heimilisfang framleiðanda ▪ Firmanavn og full adresse for produsenten ▪ 制造商的商业名称和完整地址 ▪ Nafn fyrirtækis og fullt heimilisfang framleiðanda ▪ 商号およびメーカーの正式住所 ▪ 제조자의 상호명 및 주소 ▪ İmalatçının ticari ünvanı ve açık adresi ▪ Фірмове найменування і повна адреса виробника Product Code ▪ Код на продукта ▪ Kód výrobku ▪ Produktkode ▪ Productcode ▪ Toote kood ▪ Tuotekoodi ▪ Code produit ▪ Produktcode ▪ Κωδικός προϊόντος ▪ Termékkód ▪ Codice prodotto ▪ Produkta kods ▪ Produkto kodas ▪ Kodiċi tal-Prodott ▪ Kod produktu ▪ Código do Produto ▪ Cod produs ▪ Kód výrobku ▪ Oznaka proizvoda ▪ Código de producto ▪ Produktkod ▪ Vörunúmer ▪ Produktkode ▪ 产品代码 ▪ Framleiðslunúmer ▪ 製品コード ▪ 제품 코드 ▪ Ürün Kodu ▪ Код виробу 68131 Machine Name ▪ Наименование на машината ▪ Název stroje ▪ Maskinnavn ▪ Machinenaam ▪ Masina nimi ▪ Laitteen nimi ▪ Nom de la machine ▪ Maschinenbezeichnung ▪ Ονομασία μηχανήματος ▪ Gépnév ▪ Denominazione della macchina ▪ Iekārtas nosaukums ▪ Mašinos pavadinimas ▪ Isem tal-Magna ▪ Nazwa urządzenia ▪ Nome da Máquina ▪ Numele echipamentului ▪ Názov stroja ▪ Naziv stroja ▪ Nombre de la máquina ▪ Maskinens namn ▪ Heiti tækis ▪ Maskinnavn ▪ 机器名称 ▪ Nafn vélar ▪ 機械名 ▪ 기기 명칭 ▪ Makine Adı ▪ Назва машини AR522 4WD Designation ▪ Предназначение ▪ Označení ▪ Betegnelse ▪ Benaming ▪ Nimetus ▪ Tyyppimerkintä ▪ Pažymėjimas ▪ Bezeichnung ▪ Χαρακτηρισμός ▪ Megnevezés ▪ Funzione ▪ Apzīmējums ▪ Lithuanian ▪ Denominazzjoni ▪ Oznaczenie ▪ Designação ▪ Specificaţie ▪ Označenie ▪ Namen stroja ▪ Descripción ▪ Beteckning ▪ Merking ▪ Konstruksjon ▪名称 ▪ Útnefning ▪ 用途 ▪ 지정 ▪ Tanımı ▪ Позначення Lawnmower, Article 12, Item 32 Serial Number ▪ Сериен номер ▪ Sériové číslo ▪ Serienummer ▪ Serienummer ▪ Seerianumber ▪ Valmistusnumero ▪ Numéro de série ▪ Seriennummer ▪ Σειριακός αριθμός ▪ Sorozatszám ▪ Numero di serie ▪ Sērijas numurs ▪ Serijos numeris ▪ Numru Serjali ▪ Numer seryjny ▪ Número de Série ▪ Număr de serie ▪ Sériové číslo ▪ Serijska številka ▪ Número de serie ▪ Serienummer ▪ Raðnúmer ▪ Serienummer ▪序列号 ▪ Raðnúmer ▪ シリアル番号 ▪ 일련 번호 ▪ Seri Numarası ▪ Серійний номер 6813101651-6813102500 Engine ▪ Двигател ▪ Motor ▪ Motor ▪ Motor ▪ Mootor ▪ Moottori ▪ Moteur ▪ Motor ▪ Μηχανή ▪ Modulnév ▪ Motore ▪ Dzinējs ▪ Variklis ▪ Saħħa Netta Installata ▪ Silnik ▪ Motor ▪ Motor ▪ Motor ▪ Motor ▪ Motor ▪ Motor ▪ Vél ▪ Motor ▪ 发动机 ▪ Aflvél ▪ エンジン ▪ 엔진 ▪ Motor ▪ Двигун Kubota V2403-M-E3B Diesel Net Installed Power ▪ Нетна инсталирана мощност ▪ Čistý instalovaný výkon ▪ Installeret nettoeffekt ▪ Netto geïnstalleerd vermogen ▪ Installeeritud netovõimsus ▪ Asennettu nettoteho ▪ Puissance nominale nette ▪ Installierte Nettoleistung ▪ Καθαρή εγκατεστημένη ισχύς ▪ Nettó beépített teljesítmény ▪ Potenza netta installata ▪ Paredzētā tīkla jauda ▪ Grynoji galia ▪ Wisa’ tal-Qtugħ ▪ Moc zainstalowana netto ▪ Potência instalada ▪ Puterea instalată netă ▪ Čistý inštalovaný výkon ▪ Neto vgrajena moč ▪ Potencia instalada neta ▪ Nettoeffekt ▪ Nettóafl vélar ▪ Netto installert kraft ▪ 装机净功率 ▪ Netuppsetningarorka ▪ 搭載する正味出力 ▪ 정미 출력 ▪ Net Kurulu Güç ▪ Корисна встановлена потужність 36.5 kW @ 2700 RPM Cutting Width ▪ Широчина на рязане ▪ Šířka řezu ▪ Skærebredde ▪ Maaibreedte ▪ Lõikelaius ▪ Leikkuuleveys ▪ Largeur de coupe ▪ Schnittbreite ▪ Μήκος μισινέζας ▪ Vágási szélesség ▪ Larghezza di taglio ▪ Griešanas platums ▪ Pjovimo plotis ▪ Tikkonforma mad-Direttivi ▪ Szerokość cięcia ▪ Largura de Corte ▪ Lăţimea de tăiere ▪ Šírka záberu ▪ Širina reza ▪ Anchura de corte ▪ Klippbredd ▪ Skurðbreidd ▪ Klippebredde ▪ 剪草宽度 ▪ Breidd sláttar ▪ 刈り取り幅 ▪ 절단 폭 ▪ Kesme Genişliği ▪ Ширина різання 228,6 cm Conforms to Directives ▪ В съответствие с директивите ▪ Splňuje podmínky směrnic ▪ Er i overensstemmelse med direktiver ▪ Voldoet aan de richtlijnen ▪ Vastab direktiividele ▪ Direktiivien mukainen ▪ Conforme aux directives ▪ Entspricht Richtlinien ▪ Ακολουθήστε πιστά τις Οδηγίες ▪ Megfelel az irányelveknek ▪ Conforme alle Direttive ▪ Atbilst direktīvām ▪ Atitinka direktyvų reikalavimus ▪ Valutazzjoni tal-Konformità ▪ Dyrektywy związane ▪ Cumpre as Directivas ▪ Respectă Directivele ▪ Je v súlade so smernicami ▪ Skladnost z direktivami ▪ Cumple con las Directivas ▪ Uppfyller direktiv ▪ Samræmist tilskipunum ▪ I samsvar med direktiv ▪ 符合指令 ▪ Í samræmi við reglugerðir ▪ 適合指令 ▪ 규정 준수 ▪ Şu Yönergelere Uymaktadır ▪ Відповідає директиві 2004/108/EC 2006/42/EC 2000/14/EC, 2005/88/EC 2006/66/EC Conformity Assessment ▪ Оценка за съответствие ▪ Hodnocení plnění podmínek ▪ Overensstemmelsesvurdering ▪ Conformiteitsbeoordeling ▪ Vastavushindamine ▪ Vaatimustenmukaisuuden arviointi ▪ Evaluation de conformité ▪ Konformitätsbeurteilung ▪ Διαπίστωση Συμμόρφωσης ▪ Megfelelőség-értékelés ▪ Valutazione della conformità ▪ Atbilstības novērtējums ▪ Atitikties įvertinimas ▪ Livell tal-Qawwa tal-Ħoss Imkejjel ▪ Ocena zgodności ▪ Avaliação de Conformidade ▪ Evaluarea conformităţii ▪ Vyhodnotenie zhodnosti ▪ Ocena skladnosti ▪ Evaluación de conformidad ▪ Bedömning av överensstämmelse ▪ Samræmismat ▪ Konformitetsvurdering ▪ 符合性评估 ▪ Samræmismat ▪ 適合性評価 ▪ 적합성 평가 ▪ Uygunluk Değerlendirmesi ▪ Оцінка відповідності 2006/42/EC Annex VIII Measured Sound Power Level ▪ Измерено ниво на звукова мощност ▪ Naměřený akustický výkon ▪ Målte lydstyrkeniveau ▪ Gemeten geluidsniveau ▪ Mõõdetud helivõimsuse tase ▪ Mitattu äänitehotaso ▪ Niveau de puissance sonore mesuré ▪ Gemessener Schalldruckpegel ▪ Σταθμισμένο επίπεδο ηχητικής ισχύος ▪ Mért hangteljesítményszint ▪ Livello di potenza sonora misurato ▪ Izmērītais skaņas jaudas līmenis ▪ 104 dB(A) ± 0.71 LWA Išmatuotas garso stiprumo lygis ▪ Livell tal-Qawwa tal-Ħoss Iggarantit ▪ Moc akustyczna mierzona ▪ Nível sonoro medido ▪ Nivelul măsurat al puterii acustice ▪ Nameraná hladina akustického výkonu ▪ Izmerjena raven zvočne moči ▪ Nivel de potencia sonora medido ▪ Uppmätt ljudeffektsnivå ▪ Mælt hljóðaflsstig ▪ Målt lydeffektnivå ▪ 测得声功率级 ▪ Mældur hljóðstyrkur ▪ 音出力レベル測定値 ▪ 측정된 음향 파워 레벨 ▪ Ölçülen Ses Gücü Düzeyi ▪ Виміряний рівень звукової потужності Guaranteed Sound Power Level ▪ Гарантирано ниво на звукова мощност ▪ Garantovaný akustický výkon ▪ Garanteret lydstyrkeniveau ▪ Gegarandeerd geluidsniveau ▪ Garanteeritud helivõimsuse tase ▪ Taattu äänitehotaso ▪ Niveau de puissance sonore garanti ▪ Garantierter Schalldruckpegel ▪ Εγγυημένο επίπεδο ηχητικής ισχύος ▪ Szavatolt hangteljesítményszint ▪ Livello di potenza sonora garantito ▪ Garantētais skaņas jaudas līmenis ▪ Garantuotas garso stiprumo lygis ▪ Livell tal-Qawwa tal-Ħoss Iggarantit ▪ Moc akustyczna gwarantowana ▪ Nível sonoro farantido ▪ Nivelul garantat al puterii acustice ▪ Garantovaná hladina akustického výkonu ▪ Zajamčena raven zvočne moči ▪ Nivel de potencia sonora garantizado ▪ Garanterad ljudeffektsnivå ▪ Hljóðaflsstig sem ábyrgð er tekin á ▪ Garanter lydeffektnivå ▪ 保证声功率级 ▪ Tryggður hljóðstyrkur ▪ 音出力保証レベル ▪ 보장된 음향 파워 레벨 ▪ Garantili Ses Gücü Düzeyi ▪ Гарантований рівень звукової потужності 105 dB(A) LWA Conformity Assessment Procedure (Noise) ▪ Оценка за съответствие на процедурата (Шум) ▪ Postup hodnocení plnění podmínek (hluk) ▪ Procedure for overensstemmelsesvurdering (Støj) ▪ Procedure van de conformiteitsbeoordeling (geluid) ▪ Vastavushindamismenetlus (müra) ▪ Vaatimustenmukaisuuden arviointimenettely (Melu) ▪ Procédure d’évaluation de conformité (bruit) ▪ Konformitätsbeurteilungsverfahren (Geräusch) ▪ Διαδικασία Αξιολόγησης Συμμόρφωσης (Θόρυβος) ▪ Megfelelőség-értékelési eljárás (Zaj) ▪ Procedura di valutazione della conformità (rumore) ▪ Atbilstības novērtējuma procedūra (troksnis) ▪ Atitikties įvertinimo procedūra (garsas) ▪ Proċedura tal-Valutazzjoni tal-Konformità (Ħoss) ▪ Procedura oceny zgodności (poziom hałasu) ▪ Processo de avaliação de conformidade (nível sonoro) Procedura de evaluare a conformităţii (zgomot) ▪ Postup vyhodnocovania zhodnosti (hluk) ▪ Postopek za ugotavljanje skladnosti (hrup) ▪ Procedimiento de evaluación de conformidad (ruido) ▪ Procedur för bedömning av överensstämmelse (buller) ▪ Samræmismatsaðferð (hávaði) ▪ Prosedyre for konformitetsvurdering (støy) ▪ 符合性评估程序 (噪声)▪ Aðgerð fyrir samræmismat (Hávaði) ▪ 適合性評価の手順 (騒音)▪ 적합성 평가 절차 ( 소음 ) ▪ Uygunluk Değerlendirme Prosedürü (Gürültü) ▪ Регламент оцінки відповідності (шум) 2000/14/EC Annex VI, Part 1 es-10 ESPECIFICACIONES UK Notified Body for 2000/14/EC ▪ Нотифициран орган в Обединеното кралство за 2000/14/ЕО ▪ Úřad certifikovaný podle směrnice č. 2000/14/EC ▪ Det britiske bemyndigede organ for 2001/14/EF ▪ Engels adviesorgaan voor 2000/14/EG ▪ Ühendkuningriigi teavitatud asutus direktiivi 2000/14/EÜ mõistes ▪ Direktiivin 2000/14/EY mukainen ilmoitettu tarkastuslaitos Isossa-Britanniassa ▪ Organisme notifié concernant la directive 2000/14/CE ▪ Britische benannte Stelle für 2000/14/EG ▪ Κοινοποιημένος Οργανισμός Ηνωμένου Βασιλείου για 2000/14/ΕΚ ▪ 2000/14/EK – egyesült királyságbeli bejelentett szervezet ▪ Organismo Notificato in GB per 2000/14/CE ▪ 2000/14/EK AK reģistrētā organizācija ▪ JK notifikuotosios įstaigos 2000/14/EC ▪ Korp Notifikat tar-Renju Unit għal 2000/14/KE ▪ Dopuszczona jednostka badawcza w Wielkiej Brytanii wg 2000/14/WE ▪ Entidade notificada no Reino Unido para 2000/14/CE ▪ Organism notificat în Marea Britanie pentru 2000/14/CE ▪ Notifikovaný orgán Spojeného kráľovstva pre smernicu 2000/14/ES ▪ Britanski priglašeni organ za 2000/14/ES ▪ Cuerpo notificado en el Reino Unido para 2000/14/CE ▪ Anmält organ för 2000/14/EG i Storbritannien ▪ Tilkynntur aðili í Bretlandi fyrir 2000/14/EC ▪ Britisk teknisk for 2000/14/EF ▪ 英国 2000/14/EC 认证机构 ▪ Bretland Upplýsingar fyrir 2000/14/EB ▪ UK (英国)公認機関、2000/14/EC ▪ 2000/14/EC 에 대한 영국 인증 기관 ▪ 2000/14/EC için BK Onaylı Kuruluş ▪ Британський уповноважений орган для 2000/14/EC 2 Number: 1088 Sound Research Laboratories Limited Holbrook House, Little Waldingfield Sudbury, Suffolk CO10 0TH Operator Ear Noise Level ▪ Оператор на нивото на доловим от ухото шум ▪ Hladina hluku v oblasti uší operátora ▪ Støjniveau i førers ørehøjde ▪ Geluidsniveau oor bestuurder ▪ Müratase operaatori kõrvas ▪ Melutaso käyttäjän korvan kohdalla ▪ Niveau de bruit à hauteur des oreilles de l’opérateur ▪ Schallpegel am Bedienerohr ▪ Επίπεδο θορύβου σε λειτουργία ▪ A kezelő fülénél mért zajszint ▪ Livello di potenza sonora all’orecchio dell’operatore ▪ Trokšņa līmenis pie operatora auss ▪ Dirbančiojo su mašina patiriamo triukšmo lygis ▪ Livell tal-Ħoss fil-Widna tal-Operatur ▪ 90 dB(a) ± 0.71 Leq (2006/42/EC) Dopuszczalny poziom hałasu dla operatora ▪ Nível sonoro nos ouvidos do operador ▪ Nivelul zgomotului la urechea operatorului ▪ Hladina hluku pôsobiaca na sluch operátora ▪ Raven hrupa pri ušesu upravljavca ▪ Nivel sonoro en el oído del operador ▪ Ljudnivå vid förarens öra ▪ Hávaðastig fyrir stjórnanda ▪ Støynivå ved operatørens øre ▪ 操作员耳旁噪声级 ▪ Hljóðstyrkur fyrir stjórnanda ▪ オペレータが感じる騒音レベル ▪ 사용자 청각 소음 레벨 ▪ Operatör Kulak Gürültü Düzeyi ▪ Рівень шуму, що впливає на оператора Harmonised standards used ▪ Използвани хармонизирани стандарти ▪ Použité harmonizované normy ▪ Brugte harmoniserede standarder ▪ Gebruikte geharmoniseerde standaards ▪ Kasutatud ühtlustatud standardid ▪ Käytetyt yhdenmukaistetut standardit ▪ Normes harmonisées utilisées ▪ Angewandte harmonisierte Normen ▪ Εναρμονισμένα πρότυπα που χρησιμοποιήθηκαν ▪ Harmonizált szabványok ▪ Standard armonizzati applicati ▪ Izmantotie saskaņotie standarti ▪ Panaudoti suderinti standartai ▪ Standards armonizzati użati ▪ Normy spójne powiązane ▪ Normas harmonizadas usadas ▪ Standardele armonizate utilizate ▪ Použité harmonizované normy ▪ Uporabljeni usklajeni standardi ▪ Estándares armonizados utilizados ▪ Harmoniserade standarder som används ▪ 所采用的协调标准 ▪ Samstilltir staðlar notaðir ▪ 整合規格 ▪ 적용되는 조화 표준 ▪ Kullanılan uyumlu standartlar ▪ Використані гармонізовані стандарти BS EN ISO 20643 BS EN ISO 5349-1 BS EN ISO 5349-2 BS EN ISO 5395-3 Technical standards and specifications used ▪ Използвани технически стандарти и спецификации ▪ Použité technické normy a specifikace ▪ Brugte tekniske standarder og specifikationer ▪ Gebruikte technische standaards en specificaties ▪ Kasutatud tehnilised standardid ja spetsifikatsioonid ▪ Käytetyt tekniset standardit ja eritelmät ▪ Spécifications et normes techniques utilisées ▪ Angewandte technische Normen und Spezifikationen ▪ Τεχνικά πρότυπα και προδιαγραφές που χρησιμοποιήθηκαν ▪ Műszaki szabványok és specifikációk ▪ Standard tecnici e specifiche applicati ▪ B71.4 Izmantotie tehniskie standarti un specifikācijas ▪ Panaudoti techniniai standartai ir techninė informacija ▪ Standards u speċifikazzjonijiet tekniċi użati ▪ ISO 2631-1 Normy i specyfikacje techniczne powiązane ▪ Normas técnicas e especificações usadas ▪ Standardele tehnice şi specificaţiile utilizate ▪ SAE J1194 Použité technické normy a špecifikácie ▪ Uporabljeni tehnični standardi in specifikacije ▪ Estándares y especificaciones técnicas utilizadas ▪ Tekniska standarder och specifikationer som används ▪ Samræmdir staðlar sem notaðir eru ▪ Benyttede ▪ harmoniserte standarder ▪ 所采用的技术标准和规范 ▪ Tæknistaðlar og -kröfur notaðar ▪ 技術規格および仕様書 ▪ 적용되는 기술 표준 및 규격 ▪ Kullanılan teknik standartlar ve şartnameler ▪ Використані технічні стандарти і умови The place and date of the declaration ▪ Място и дата на декларацията ▪ Místo a datum prohlášení ▪ Sted og dato for erklæringen ▪ Plaats en datum van de verklaring ▪ Deklaratsiooni väljastamise koht ja kuupäev ▪ Vakuutuksen paikka ja päivämäärä ▪ Lieu et date de la déclaration ▪ Ort und Datum der Erklärung ▪ Τόπος και ημερομηνία δήλωσης ▪ A nyilatkozat kelte (hely és idő) ▪ Luogo e data della dichiarazione ▪ Deklarācijas vieta un datums ▪ Deklaracijos vieta ir data ▪ Il-post u d-data tad-dikjarazzjoni ▪ Miejsce i data wystawienia deklaracji ▪ Local e data da declaração ▪ Locul şi data declaraţiei ▪ Miesto a dátum vyhlásenia ▪ Kraj in datum izjave ▪ Lugar y fecha de la declaración ▪ Plats och datum för deklarationen ▪ Tæknistaðlar og tæknilýsingar sem notaðar eru ▪ Benyttede tekniske standarder og spesifikasjoner ▪ Staður og dagsetning yfirlýsingar ▪ Sted og dato for erklæringen ▪ 声明的地点与日期 ▪ Staður og dagsetning yfirlýsingarinnar ▪ 宣言場所および日付 ▪ 선언 장소 및 일자 ▪ Beyan yeri ve tarihi ▪ Місце і дата укладення декларації Jacobsen, A Textron Company 11524 Wilmar Blvd. Charlotte, NC 28273, USA September 2nd, 2014 es-11 2 ESPECIFICACIONES Signature of the person empowered to draw up the declaration on behalf of the manufacturer, holds the technical documentation and is authorised to compile the technical file, and who is established in the Community. Подпис на човека, упълномощен да състави декларацията от името на производителя, който поддържащ техническата документация и е оторизиран да изготви техническия файл и е регистриран в общността. Podpis osoby oprávněné sestavit prohlášení jménem výrobce, držet technickou dokumentaci a osoby oprávněné sestavit technické soubory a založené v rámci Evropského společenství. Underskrift af personen, der har fuldmagt til at udarbejde erklæringen på vegne af producenten, der er indehaver af dokumentationen og er bemyndiget til at udarbejde den tekniske journal, og som er baseret i nærområdet. Handtekening van de persoon die bevoegd is de verklaring namens de fabrikant te tekenen, de technische documentatie bewaart en bevoegd is om het technische bestand samen te stellen, en die is gevestigd in het Woongebied. Ühenduse registrisse kantud isiku allkiri, kes on volitatud tootja nimel deklaratsiooni koostama, kes omab tehnilist dokumentatsiooni ja kellel on õigus koostada tehniline toimik. Sen henkilön allekirjoitus, jolla on valmistajan valtuutus vakuutuksen laadintaan, jolla on hallussaan tekniset asiakirjat, joka on valtuutettu laatimaan tekniset asiakirjat ja joka on sijoittautunut yhteisöön. Signature de la personne habilitée à rédiger la déclaration au nom du fabricant, à détenir la documentation technique, à compiler les fichiers techniques et qui est implantée dans la Communauté. Unterschrift der Person, die berechtigt ist, die Erklärung im Namen des Herstellers abzugeben, die die technischen Unterlagen aufbewahrt und berechtigt ist, die technischen Unterlagen zusammenzustellen, und die in der Gemeinschaft niedergelassen ist. Υπογραφή ατόμου εξουσιοδοτημένου για την σύνταξη της δήλωσης εκ μέρους του κατασκευαστή, ο οποίος κατέχει την τεχνική έκθεση και έχει την εξουσιοδότηση να ταξινομήσει τον τεχνικό φάκελο και ο οποίος είναι διορισμένος στην Κοινότητα. A gyártó nevében meghatalmazott személy, akinek jogában áll módosítania a nyilatkozatot, a műszaki dokumentációt őrzi, engedéllyel rendelkezik a műszaki fájl összeállításához, és aki a közösségben letelepedett személy. Firma della persona autorizzata a redigere la dichiarazione a nome del fabbricante, in possesso Della documentazione tecnica ed autorizzata a costituire il fascicolo tecnico, che deve essere stabilita nella Comunità. Tās personas paraksts, kura ir pilnvarota deklarācijas sastādīšanai ražotāja vārdā, kurai ir tehniskā dokumentācija, kura ir pilnvarota sagatavot tehnisko reģistru un kura ir apstiprināta Kopienā. Asmuo, kuris yra gana žinomas, kuriam gamintojas suteikė įgaliojimus sudaryti šią deklaraciją, ir kuris ją pasirašė, turi visą techninę informaciją ir yra įgaliotas sudaryti techninės informacijos dokumentą. Il-firma tal-persuna awtorizzata li tfassal id-dikjarazzjoni f’isem il-fabbrikant, għandha d-dokumentazzjoni teknika u hija awtorizzata li tikkompila l-fajl tekniku u li hija stabbilita fil-Komunità. Podpis osoby upoważnionej do sporządzenia deklaracji w imieniu producenta, przechowującej dokumentację techniczną, upoważnioną do stworzenia dokumentacji technicznej oraz wyznaczonej ds. wspólnotowych. Assinatura da pessoa com poderes para emitir a declaração em nome do fabricante, que possui a documentação técnica, que está autorizada a compilar o processo técnico e que está estabelecida na Comunidade. Semnătura persoanei împuternicite să elaboreze declaraţia în numele producătorului, care deţine documentaţia tehnică, este autorizată să compileze dosarul tehnic şi este stabilită în Comunitate. Podpis osoby poverenej vystavením vyhlásenia v mene výrobcu, ktorá má technickú dokumentáciu a je oprávnená spracovať technické podklady a ktorá je umiestnená v Spoločenstve. Podpis osebe, pooblaščene za izdelavo izjave v imenu proizvajalca, ki ima tehnično dokumentacijo in lahko sestavlja spis tehnične dokumentacije, ter ima sedež v Skupnosti. Firma de la persona responsable de la declaración en nombre del fabricante, que posee la documentación técnica y está autorizada para recopilar el archivo técnico y que está establecido en la Comunidad. Undertecknas av den som bemyndigad att upprätta deklarationen å tillverkarens vägnar, innehar den tekniska dokumentationen och är bemyndigad att sammanställa den tekniska informationen och som är etablerad i gemenskapen. Undirskrift aðilans sem hefur umboð til að gera yfirlýsinguna fyrir hönd framleiðandans, hefur undir höndum tæknigögnin og hefur leyfi til að taka saman tækniskýrsluna, og er viðurkenndur innan evrópska efnahagssvæðisins. Signaturen til personen som har fullmakt til å utferdige erklæringen på vegne av produsenten, er i besittelse av den tekniske dokumentasjonen, har autorisasjon til å utarbeide den tekniske filen og som har tilhold i EU. 获得授权代表制造商起草声明者的签名,此人保留技术文档并获授权编译技术文件,且是社区中获得认可者。 Undirskrift starfsmanns sem hefur heimild til að rita yfirlýsinguna fyrir hendi framleiðandans, hefur umsjón með tæknigögnum og hefur heimild til að setja saman tæknilega skýrslu og sem er tengdur inn í samfélagið. メーカーを代表して宣言書を起草し、技術文書を保有し技術ファイルを編集する権限を有し、地域において確固たる地位を築いている人物の署名。 제조자를 대신하여 선언서를 작성하도록 위임받은 서명자는 기술 문서를 보유하고 기술 자료 수집의 허가를 받았으며 지역 공동체 내에 속해 있습니다 İmalatçı adına beyanı hazırlama yetkisi olan, teknik dokümantasyonu elinde bulunduran ve teknik dosyayı derleme yetkisine sahip, Topluluk içinde yerleşik kişinin imzası. Підпис особи, що уповноважена укласти декларацію від імені виробника, має технічну документацію, уповноважена укласти технічний паспорт і має добру репутацію в суспільстві. Certificate Number ▪ Номер на сертификат ▪ Číslo osvědčení ▪ Certifikatnummer ▪ Certificaatnummer ▪ Sertifikaadi number ▪ Hyväksyntänumero ▪ Numéro de certificat ▪ Bescheinigungsnummer ▪ Αριθμός Πιστοποιητικού ▪ Hitelesítési szám ▪ Numero del certificato ▪ Sertifikāta numurs ▪ Sertifikato numeris ▪ Numru taċ-Ċertifikat ▪ Numer certyfikatu ▪ Número do Certificado ▪ Număr certificat ▪ Číslo osvedčenia ▪ Številka certifikata ▪ Número de certificado ▪ Certifikatsnummer ▪ Númer skírteinis ▪ Sertifikatnummer ▪ 证书编号 ▪ Skírteinisnúmer ▪ 認証番号 ▪ 인증 번호 ▪ Sertifika Numarası ▪ Номер сертифіката GB BE United Kingdom Belgium JP KR Japan Korea Liechenstein Lithuania es-12 BG CH Bulgaria Switzerland LI LT 2006/42/EC Annex II 1.A.2 Christian D. Clifford Senior Engineering Manager Ransomes Jacobsen Limited West Road, Ransomes Europark, Ipswich, IP3 9TT, England 2006/42/EC Annex II 1.A.10 Derek Mookhoek Director of Engineering Jacobsen, A Textron Company 11524 Wilmar Blvd, Charlotte, NC 28273, USA 4273092 Rev B CN CY CZ DE DK EE ES FI FR GR HU IS IT China Cyprus Czech Republic Germany Denmark Estonia Spain Finland France Greece Hungary Iceland Italy LV MT NL NO PL PT RO RU SE SI SK TR UA Latvia Malta Poland Portugal Romania Russia Sweden Slovenia Slovakia Turkey Ukrain Netherlands Norway ESPECIFICACIONES 2.9 2 NIVEL DE VIBRACION ______________________________________________________ Cuando se comprobó la máquina para los niveles de vibración en manos/brazos, el operario estaba sentado en la posición normal de trabajo con ambas manos en el mecanismo de dirección. El motor estaba en marcha y la unidad de corte estaba girando con la máquina estacionada. Directiva de seguridad de maquinaria 2006/42/EC Según: Los reglamentos sobre cortacéspedes BS EN ISO 5395-3 Referentes a manos/brazos: BS EN ISO20643:2008 Información suministrada para la Directiva sobre agentes físicos 2002/44/EC Según: Estándares sobre manos/brazos: BS EN ISO 5349-1 (2001) BS EN ISO 5349-2 (2001) 68131 AR522 AR522 Manos/brazos: Aceleraciones máximas en mano izquierda o mano derecha m/s2 Nivel de Valor medio de X, Y, Z Aeq aceleración 0,773 ± 1,4 Cuando se comprobó la máquina para los niveles de vibración del cuerpo entero, el operario estaba sentado en la posición normal de trabajo con ambas manos en el mecanismo de dirección. La unidad de corte estaba girando con la máquina conducida en línea recta a 6 km/h sobre una superficie de césped recién cortado. Directiva de seguridad de maquinaria 2006/42/EC Según: Cuerpo entero EN1032:2003 Información suministrada para la Directiva sobre agentes físicos 2002/44/EC Según: Estándares sobre cuerpo entero BS EN ISO 2631-1 (1997) AR522 Cuerpo entero Nivel de aceleración 68131 AR522 Aceleraciones máximas cojín de asiento m/s2 Valor medio de X, Y, Z Aeq 0,221 ± 0,168 es-13 3 3 ETIQUETAS ETIQUETAS Familiarícese con los símbolos, son críticos para el buen funcionamiento de la máquina. CAMBIE LAS ETIQUETAS DAÑADAS INMEDIATAMENTE. PELIGRO Pueden producirse graves heridas o la muerte por contacto con las cuchillas o por objetos lanzados a largas distancias. • • 1 38 4 16 4 • No utilice la máquina con el conducto de descarga o las protecciones levantadas o quitadas. No utilice la máquina con componentes doblados o dañados ni con las unidades de corte levantadas. Manténgase alejado del cortacésped cuando esté funcionando. 4181861 IMPORTANTE NO UTILICE LIQUIDOS DE AYUDA DE PUESTA EN MARCHA. El uso de líquidos de ayuda de puesta en marcha en el sistema de entrada de aire podría provocar explosiones o un estado de embalamiento del motor. Esto podría dañar gravemente el motor. 4181864 PELIGRO Para evitar lesiones cuando se trabaje con la batería: 1. Conectar siempre el cable de tierra negro (-) el último y quitarlo el primero. 2. Mantenerse alejado de las chispas y llamas, y evitar el contacto con el ácido. Para evitar lesión cuando se arranque la batería: 4181862 ADVERTENCIA El radiador esta a presión. Quitar la tapa lentamente para evitar lesiones corporales. es-14 1. La borna positiva (+) a la borna positiva (+). 2. Conectar la borna negativa (-) de la batería activa a la carrocería del vehículo con la batería agotada. ETIQUETAS 3 Familiarícese con los símbolos, son críticos para el buen funcionamiento de la máquina. CAMBIE LAS ETIQUETAS DAÑADAS INMEDIATAMENTE. 4181865 • Lea el Manual del Operador. No permita utilizar la máquina a operadores no formados. • Mantenga las protecciones en su lugar y todo el equipo bien sujeto. • Mantenga las manos, los pies y la ropa lejos de las piezas en movimiento. • Antes de limpiar, ajustar o reparar este equipo desconecte las transmisiones, ponga el freno de estacionamiento y apague el motor. • No lleve nunca pasajeros. • Manténgase alejado de los peatones. • No utilice esta máquina en pendientes superiores a 20°. 4181860 Para evitar herirse o herir a otras personas, no maneje esta unidad con las protecciones quitadas. 5002952 es-15 3 ETIQUETAS Familiarícese con los símbolos, son críticos para el buen funcionamiento de la máquina. CAMBIE LAS ETIQUETAS DAÑADAS INMEDIATAMENTE. ! WARNING This structure's proctective capability may be impaired by structural damage, overturn, or alteration. If any of these conditions occur, this structure must be replaced. 5003597 4199140 Advertencia Para evitar quemaduras no toque el silenciador ni su protección. La temperatura puede sobrepasar los 66° C. CUT HEIGHT W/ 1/2 SPACERS IMPORTANT This machine uses GreensCare 68, a biodegradable hydraulic fluid. (Order 5003103 for 5 gal. pail) CUT HEIGHT W/ 1/4 SPACER 5-1/4 5 4-3/4 4-1/2 4-1/4 4 Use of 10W30 is an approved alternate fluid. Use will compromise all biodegradable properties of GreensCare 68 hydraulic fluid. 3-3/4 3-1/2 3-1/4 3 2-3/4 2-1/2 4108880 2-1/4 2 1-3/4 1-1/2 1-1/4 3/4 1 4133609 es-16 ETIQUETAS 3 3008521 Pedal de tracción Marcha atrás Hacia delante 3008682 Válvula de remolque Funcionamiento normal (cerrada) El vehículo puede remolcarse (abierta) es-17 4 CONTROLES 4 CONTROLES 4.1 ICONOS __________________________________________________________ Leer el manual Contador horario Combustible Motor START RUN ON (Conectado) (Funcionamiento) (Encendido) PTO Conectado Desconectado Acelerador del motor Alto Bajo Freno de estacionamiento Unidades de corte Bajar Subir Control de crucero Bloqueado Desbloqueado Luces de trabajo Interruptor de nivel de aceite Conectado Desconectado/ Prueba Recorrido Hacia delante Marcha atrás D Temperatura del refrigerante Nivel de aceite hidráulico Luces de advertencia Filtro de aceite Bujía hidráulico Presión de aceite del motor Carga de la batería ! ADVERTENCIA No trate nunca de conducir el cortacésped a menos que haya leído el Manual de Seguridad y Funcionamiento y saber como operar todos los controles correctamente. Familiarícese con los iconos indicados anteriormente y lo que representan. Conozca la situación y uso de todos los controles y marcas antes de operar este cortacésped. es-18 CONTROLES 4.2 4 CONTROLES _____________________________________________________________ A B C D E F G H J K L M Palanca de dirección de inclinación Tope de velocidad de corte Dirección hacia delante (Pedal de Tracción) Dirección marcha atrás (Pedal de Tracción) Ajuste del asiento Tapa/varilla de aceite hidráulico Indicador del limpiador de aire Tapa de combustible Alarma Controlador/fusibles Interruptor de claxon Luz de la bujía N P R S T U V W Palanca de elevación del cortacésped Interruptor PTO Interruptor de luces Interruptor de control de tracción Acelerador del motor Interruptor de encendido Panel indicador Interruptor de freno M P E F P V N R S T L W U B C D A J E F H K G es-19 4 CONTROLES A. Palanca de dirección de inclinación Levantar la palanca para soltar la columna de dirección. Suba o baje la columna a la posición deseada. Suelte la palanca para asegurar la columna en su lugar. H. Tapa de combustible Llenar el depósito de combustible con diesel N 2, cetano mínimo 45. Sección Section 5.11. ! PRECAUCIÓN No ajuste nunca el volante con el cortacésped en movimiento. Parar la unidad y poner el freno de estacionamiento antes de hacer el ajuste. B. Tope de velocidad de corte Limita la velocidad hacia delante al cortar. Para operar a una velocidad de carrera baja mientras se siega, girar la palanca para que entre en contacto con el tornillo (B1) en la placa del suelo cuando se aprieta el pedal de dirección de carrera. Para viajar a velocidad máxima, ajustar la palanca en la posición mostrada (B3). El tornillo de tope (B2) se puede ajustar a velocidades específicas de corte. Ver Sección 8.2. C. Dirección hacia delante (Pedal de Tracción) Apriete la parte delantera del pedal para viajar hacia adelante. Soltar el pedal para desacelerar el cortacésped y parar. D. Dirección marcha atrás (Pedal de Tracción) Pise la parte trasera del pedal para desplazarse marcha atrás. Soltar el pedal para desacelerar el cortacésped y parar. Dejar que el cortacésped se pare completamente antes de cambiar de dirección. B1 B3 B2 C D Velocidad de transporte Velocidad de corte Figura 4A E. Ajuste del asiento Tire hacia afuera de la palanca para ajustar el asiento hacia delante o hacia atrás. Para ajustar la tensión del muelle bajo del asiento, girar el botón de ajuste delante del asiento. F. Tapa / varilla de aceite hidráulico Llenar hasta la marca en la varilla con líquido hidráulico limpio con el motor frío. No llene demasiado. es-20 G. Indicador del limpiador de aire Indica la condición del limpiador de aire en el motor. Limpiar o cambiar el filtro de aire cuando aparece la banda roja en la ventana transparente del indicador. Ver Sección 7.4. J. Alarma La alarma, con las luces de advertencia en el panel indicador (V), suena para avisar al operario de las condiciones que necesitan atención inmediata. Ver Sección 4.4. K. Controlador/fusibles El controlador se encuentra debajo del capó trasero directamente detrás del asiento del operario. Cuenta con luces para facilitar la supervisión del sistema eléctrico del cortacésped y la resolución de los problemas. Hay dos fusibles planos en el controlador. Para cambiar los fusibles, quite el panel de acceso. ! PRECAUCIÓN El servicio al sistema eléctrico sólo lo debe hacer un electricista capacitado. Antes de cambiar los fusibles apagar el cortacésped y quitar la llave de contacto. CONTROLES 4.3 4 PANEL DE CONTROL ______________________________________________________ L. Interruptor de claxon Este botón hace sonar el claxon. R. Interruptor de luces Controla el funcionamiento de las luces de trabajo. Pulse la parte delantera del interruptor para encender las luces. Pulse la parte trasera del interruptor para apagarlas. M. Luces de advertencia Si gira el interruptor de encendido (U) en la posición RUN (Funcionamiento), se enciende la luz de la bujía, indicando que esta recibe energía. Espere a que se apague la luz para arrancar el motor. S. Control de tracción Pulse y libere este interruptor para activar el sistema de control de tracción del controlador. El sistema reduce la presión de las plataformas emitiendo impulsos al circuito de elevación y transfiriendo el peso al cortacésped. Reducir la presión mejora la tracción pero puede hacer que las plataformas se eleven, creando un corte desigual. La luz del interruptor se encenderá cuando el sistema esté activo. N. Palanca de elevación del cortacésped La palanca de elevación del cortacésped sube y baja los cortacéspedes y funciona en modo automático o manual. Empujarla hacia delante para bajar los cortacéspedes y hacia atrás para subirlos. Pulse y vuelva a liberar el interruptor para desactivar el control de tracción; la tracción será menor, pero mejorará el contacto de la plataforma con el suelo. Modo Manual - Poner el interruptor de segado (Q) en posición APAGADO (desactivado). En esta posición los cortacéspedes subirán o bajarán según la presión aplicada a la palanca de elevación. Modo Automático - Poner el interruptor de segado (Q) en posición CONECTADO (arriba). En modo automático los cortacéspedes arrancarán automáticamente con un movimiento momentáneo hacia delante de la palanca de elevación. En este modo los cortacéspedes sólo subirán a una posición de “corte cruzado” con un movimiento momentáneo hacia atrás de la palanca de elevación. Para subir los cortacéspedes a su posición de transporte, mantener la palanca hasta que estos estén completamente levantados. AVISO Mientras se está en modo automático, el ciclo de bajada o subida dura unos 3 segundos aproximadamente. Si se mueve la palanca de elevación en la dirección opuesta, se apagarán todos los cortacéspedes y el modo manual se iniciará para la posición seleccionada. P. Interruptor PTO El interruptor PTO es un botón de dos posiciones que permite activar o desactivar el cortacésped. También ajusta la palanca de elevación de cortacésped (P) en el modo manual o automático. Ajustar el interruptor PTO en la posición DESCONECTADO (centro) cuando arranque el cortacésped. Cuando el interruptor PTO está en posición CONECTADO (superior), el sistema de control de tracción se activa automáticamente y la palanca de elevación se sitúa en modo automático. El sistema de control de tracción se activa automáticamente cuando el interruptor PTO se sitúa en posición conectada (superior). Pulse y libere este interruptor para cancelar el control de tracción. T. Acelerador del motor Controla la velocidad del motor. Utilice el tractor con el acelerador al máximo durante el funcionamiento normal. U. Interruptor de encendido El contacto tiene tres posiciones. DESC.FUNCIONAMIENTO-CON-ARRANQUE. En la posición de FUNCIONAMIENTO funciona el programa controlador y los circuitos de entrada y salida están controlados. Ver Sección 5.4 y Section 9.2. V. Panel indicador Muestra el nivel de combustible, las horas de funcionamiento y las alertas del cortacésped. Ver Sección 4.4. W. Interruptor del freno de estacionamiento Para habilitar el freno de estacionamiento, deslizar el bloqueo hacia adelante y presionar la parte superior del interruptor. Se encenderá la luz del freno de estacionamiento en el panel indicador (V). Cuando el freno de estacionamiento está activado, se deshabilita el funcionamiento normal del molinete. Para quitar el freno de estacionamiento, presionar la parte trasera del interruptor. Se apagará la luz de freno de estacionamiento en el panel indicador. NOTA: El cortacésped no comenzará si el interruptor del freno de estacionamiento se encuentra en la posición desactivada. es-21 4 CONTROLES 4.4 AVISOS AL OPERARIO _____________________________________________________ El panel indicador muestra las horas de funcionamiento y el nivel de combustible, además de una serie de luces que informan al operario del estado del cortacésped. E Luz del filtro de aceite hidráulico: La luz roja del filtro de aceite indica que es necesario cambiar el filtro hidráulico. Lleve el cortacésped a la zona de servicio lo antes posible y sustituya los filtros. Luz de nivel de aceite hidráulico: La luz roja de nivel de aceite hidráulico indica que el nivel de líquido en el depósito hidráulico es bajo. Apague el cortacésped inmediatamente. Revisar visualmente el cortacésped en cuanto a seales evidentes de fugas alrededor de las conexiones, manguitos y componentes hidráulicos. Llevar el cortacésped a la zona de servicio para mantenimiento. F ! PRECAUCIÓN P El líquido hidráulico está bajo presión. Apagar el cortacésped y dejar que el líquido se enfríe antes de revisar el nivel o aadir aceite al depósito. Luz indicadora de presión de aceite del motor: La luz roja de presión del aceite del motor indica que la presión del aceite del motor es baja. Apague la máquina inmediatamente. Revise el nivel de aceite en el motor. Si la luz de aceite sigue encendida cuando el nivel de aceite es el correcto, apague el motor y remolque el cortacésped a la zona de servicio. NUNCA haga funcionar el motor con la luz del aceite iluminada, ya que el motor puede sufrir graves daos. Figura 4B 4.4.1 Luces indicadoras_________________ El panel indicador incluye seis luces que informan sobre las funciones del sistema. Luz de temperatura del refrigerante: La luz roja de temperatura del refrigerante indica que la temperatura del refrigerante es superior a 230° F (110° C). Apague la máquina inmediatamente. Quite las hojas y los recortes de hierba que puedan restringir el flujo de aire a través de la pantalla trasera y del radiador. Si el motor continúa caliente, lleve el cortacésped a la zona de servicio. ! PRECAUCIÓN El refrigerante del motor diesel está a presión. Apague el motor y deje que se enfríe el líquido antes de revisar el nivel o aadir refrigerante al radiador. es-22 P Luz de freno de estacionamiento: Si se enciende la luz roja del freno de estacionamiento indica que el freno está echado. No pise el pedal de tracción con el freno de estacionamiento echado. Luz de la batería: La luz roja de la batería seala que la tensión de la batería ha descendido por debajo de los 11,5 voltios en un minuto. Lleve el cortacésped a la zona de servicio y revise la batería y los sistemas de carga. FUNCIONAMIENTO 5 5 FUNCIONAMIENTO 5.1 INSPECCIÓN DIARIA ________________________________________________ 2. ! PRECAUCIÓN La inspección diaria debe realizarse con el motor apagado y los líquidos estén fríos. Baje las unidades de corte al suelo, ponga el freno de estacionamiento, pare el motor y retire la llave de contacto. 1. Realice una inspección visual de toda la unidad, busque signos de desgaste, piezas sueltas y componentes extraviados o dañados. Compruebe si hay fugas de combustible o aceite y asegúrese de que las conexiones estén bien apretadas, y que los tubos y mangueras estén en buen estado. 5.2 3. 4. 5. Compruebe el suministro de combustible, el nivel del refrigerante del radiador, el indicador de aceite del cigüeñal y el indicador del filtro de aire. Con el motor en frío, los líquidos deben estar en la marca lleno. Asegúrese de que todas las unidades de corte estén ajustadas a la misma altura de corte. Compruebe el aire de los neumáticos. Compruebe el sistema de interbloqueo. Nota: Para obtener información más detallada sobre mantenimiento, ajustes y cuadros de mantenimiento/lubricación, consulte los apartados 6, 7 y 8. SISTEMA DE INTERBLOQUEO _______________________________________________ 1. Este sistema impide que el motor arranque a menos que esté puesto el freno de estacionamiento, el pedal de tracción esté en punto neutro y el interruptor PTO,“DESCONECTADO”. El sistema también para el motor si el operario abandona su asiento con el interruptor PTO CONECTADO, si el pedal de tracción no está en PUNTO NEUTRO o si el freno de estacionamiento está QUITADO. 3. Consulte el cuadro siguiente para cada una de las pruebas y siga las marcas () de comprobación del cuadro. Apague el motor entre una prueba y otra. Prueba 1: Representa el procedimiento normal de encendido. El operario está sentado, el freno de estacionamiento puesto, los pies fuera de los pedales y el interruptor PTO “DESCONECTADO“. El motor debe encenderse. Prueba 2: El motor no debe arrancar si el interruptor PTO está CONECTADO. ! ADVERTENCIA No utilice nunca el equipo si el sistema de interbloqueo está desconectado o funciona incorrectamente. No desconecte ni derive ningún interruptor. 2. Realice cada una de las siguientes comprobaciones para verificar si el sistema de interbloqueo funciona correctamente. Detenga las pruebas y haga que inspeccionen o reparen el sistema si alguna de las pruebas enumeradas a continuación falla: ? el motor no se enciende en la prueba 1; ? El motor se enciende durante las pruebas 2,3 o 4; ?El motor continúa funcionando en las pruebas 5 o 6 . Prueba 3: El motor no debe arrancar si el freno de estacionamiento no está puesto. Prueba 4: El motor no debe arrancar si el pedal de tracción está pisado. Prueba 5: Arranque el motor como de costumbre y a continuación CONECTADO el interruptor PTO y levántese del asiento sin abandonarlo completamente. Prueba 6: Encienda el motor de modo normal, quite el freno de estacionamiento y levántese del asiento. Comprobación del sistema de interbloqueo Prueba Operador sentado Sí No Freno de estacionamiento Puesto Quitado Pedal de tracción en punto muerto Sí 1 2 3 4 5 6 No Interruptor PTO Conectado Desconectado Sí 4 Arranca el motor No Levantarse del asiento. Las unidades de corte deben dejar de girar en siete (7) segundos. es-23 5 FUNCIONAMIENTO 5.3 PROCEDIMIENTOS DE FUNCIONAMIENTO ____________________________________ ! ADVERTENCIA Con este cortacésped hay incluida una Estructura de Protección contra Vuelco (ROPS). Los cinturones de seguridad se deberán llevar puestos siempre que se instale un ROPS en el tractor. Llevar siempre el cinturón bien ajustado. NO usar los cinturones en un tractor sin un ROPS. Si se ha instalado un ROPS y el cortacésped vuelca, agarrarse al volante. No tratar de saltar ni moverse del asiento. ! PRECAUCIÓN Para ayudar a prevenir lesiones, llevar siempre gafas de seguridad, zapatos o botas de trabajo de piel, un casco duro, y protección en los oídos. 1. En ningún caso debe ponerse en marcha el motor sin que el conductor esté sentado. No encienda el motor si el operador o peatones están detrás de una manguera de descarga. 8. Sea prudente cuando trabaje cerca de zonas con grava (carreteras, aparcamientos, etc.). Las piedras lanzadas por las herramientas pueden lesionar gravemente a los transeúntes o dañar el equipo. 2. No encienda nunca el motor en una zona cerrada. 9. Desconecte siempre el interruptor PTO para detener las cuchillas cuando no se esté cortando césped. 3. Aleje las manos y los pies de las piezas en movimiento y de las unidades de corte. Si es posible, no realice ajustes con el motor en funcionamiento. 4. No poner en funcionamiento el cortacésped o los accesorios con componentes sueltos, dañados o extraviados. Siempre que sea posible, corte césped que esté seco. 5. Primero, corte césped en una zona de prueba para familiarizarse completamente con el funcionamiento del cortacésped y de las palancas de mandos. 6. Examine el área para determinar el procedimiento de trabajo mejor y más seguro. Considere la altura de la hierba, el tipo de terreno y el estado de la superficie. Cada situación requerirá realizar determinados ajustes o tomar ciertas precauciones. 7. Nunca dirija la descarga de material hacia los transeúntes, ni permita que nadie se acerque a la máquina mientras esté trabajando. El propietario u operador es responsable de las lesiones producidas a los transeúntes, daños materiales o ambas cosas. ! PRECAUCIÓN Antes de cortar, recoger toda la basura como piedras, juguetes y alambres que pueda tirar la máquina. Entrar en una nueva área con precaución. Operar siempre a velocidades que permitan el control total del cortacésped. es-24 10. Desactive los motores y suba las unidades de corte cuando cruce caminos o carreteras. Tenga precaución con el tráfico. 11. Pare y compruebe si el equipo está dañado inmediatamente después de golpear un obstáculo o si la máquina comienza a vibrar anormalmente. Haga que le reparen el equipo antes de reanudar el trabajo. ! ADVERTENCIA Para evitar lesiones, antes de limpiar, ajustar o reparar el equipo, desactive siempre todas las transmisiones, baje las unidades de corte al suelo, ponga el freno de estacionamiento, pare el motor y retire la llave de contacto. 12. Reduzca la velocidad y preste especial atención cuando conduzca por pendientes. Lea la Sección 5.10. Sea prudente cuando trabaje cerca de desprendimientos. 13. Mire atrás y al suelo antes de recular para asegurarse de que el camino está libre. Tenga cuidado cuando se aproxime a esquinas donde no llegan bien las herramientas, arbustos, árboles u otros objetos que pueden impedir la visión. 14. Nunca limpie las unidades de corte con las manos. Utilice un cepillo para retirar los restos de hierba de los rodillos. Las cuchillas son extremadamente afiladas y pueden provocar graves lesiones. FUNCIONAMIENTO 5.4 5 PUESTA EN MARCHA ______________________________________________________ AVISO 4. IMPORTANTE: No utilice líquidos de ayuda al encendido. Su uso en el sistema de admisión podría provocar explosiones o un estado de embalamiento del motor y, como consecuencia, dañarlo seriamente. Esperar hasta que se apague la luz del indicador de bujía incandescente (M), entonces cambiar la llave de contacto (U) inmediatamente a la posición START (Encendido) ( ). Soltar en cuanto arranque el motor. Esperar 30 segundos cuando se trate de arrancar, para que el motor de arranque se pueda enfriar. Se deberán apagar todas las luces de advertencia una vez que arranque el motor. ! ADVERTENCIA Dejar que el motor se enfríe antes de operar a altas revoluciones. Para evitar heridas, siéntese en el asiento, ponga el freno de estacionamiento, ponga el pedal de tracción en punto muerto y el interruptor PTO en OFF (Desconectado) antes de encender el motor. 1. Sentarse en el asiento del operador, comprobar que el interruptor PTO (P) esta en OFF (Desconectado) (abajo) y el freno de estacionamiento (W) está puesto. Retirar el pie de los pedales. Usar siempre el cinturón de seguridad al operar los cortacéspedes equipados con ROPS. 2. Ajustar la palanca del acelerador (T) a medio acelerador. 3. Poner el contacto (U) en ON (Conectado) ( ). Nota: En este momento se iluminarán las luces de advertencia (V, M) en el panel de instrumentos. Comprobar que funcionen las luces. M P F V T AVISO W U No mantener la llave en la posición START (Encendido) más de 10 segundos cada vez. A los 10 segundos el circuito de encendido se cierra y debe ajustarse OFF poniendo la llave de encendido en (Desconectado). 5.5 E P Figura 5A PARADA / APARCAMIENTO _________________________________________________ Para parar: Retire el pie del pedal de tracción. El cortacésped frenará automáticamente cuando el pedal esté en punto muerto. Ponga siempre el freno de estacionamiento, apage el motor y quite la llave antes de abandonar el asiento. Para aparcar el cortacésped en condiciones normales: 1. Desenganche el interruptor PTO (Q) y levantar y bloquear los accesorios en la posición de transporte y alejarse del área de operación. 2. Seleccione una zona lisa y llana para aparcar. a. 3. Ponga el freno de estacionamiento, pare el motor y retire siempre la llave de contacto. Si surge una emergencia y el cortacésped debe estar aparcado en el área de trabajo, siga las instrucciones ofrecidas por el encargado del campo. Si el cortacésped es aparcado en un desnivel, inmovilice o bloquee las ruedas. Suelte el pedal de tracción para que se pare el cortacésped completamente. b. Desactive todas las transmisiones, baje los accesorios al suelo, eche el freno de estacionamiento y haga funcionar el motor al ralentí. es-25 5 FUNCIONAMIENTO 5.6 CONDUCCIÓN / TRANSPORTE ______________________________________________ Lea y haga caso de los avisos de seguridad que contiene este manual cuando conduzca o transporte el cortacésped. Cuando maniobre hacia atrás mire detrás de Ud. para asegurarse de que el camino esté libre. IMPORTANTE: Si se conduce en carreteras públicas, el cortacésped debe cumplir las disposiciones y leyes locales. Póngase en contacto con los organismos locales para que le informen de las disposiciones y requisitos pertinentes. 5.7 Para subir las unidades de corte a la posición de transporte: Poner el interruptor PTO en OFF (Desconectado) (centro). Tirar de la palanca de las unidades de corte hacia detrás. Mantener la palanca hasta que se levanten las unidades de corte y los brazos de elevación en su posición elevada (transporte). IMPORTANTE: El interruptor de corte debe estar en OFF (Desconectado) (centro) al transportar el cortacésped. CORTE __________________________________________________________________ girar y se elevarán a la posición de corte en cruz. Para levantar los cortacéspedes a la posición de transporte, continuar sujetando la palanca hasta que los cortacéspedes estén completamente levantados. ! ADVERTENCIA Para evitar lesiones graves, mantener las manos, pies y ropa alejados de la unidad de corte cuando las cuchillas estén en movimiento. No limpiar NUNCA los cortacéspedes con las manos. Usar un cepillo para retirar los recortes de hierba de las cuchillas. Las cuchillas están extremadamente afiladas y pueden causar lesiones graves. NO opere los cortacéspedes sin las mangueras de secarga trasera o la placa compactadora instaladas. Para cortar: 1. Poner el interruptor PTO en CONECTADO (arriba). La palanca del cortacésped se sitúa en modo automático y se activa automáticamente el sistema de control de tracción. [Ver 4.3] 2. Empujar la palanca del cortacésped hacia adelante momentáneamente para bajar los cortacéspedes. Estos comenzarán a girar automáticamente cuando se levanten las unidades de corte. 3. Para levantar los cortacéspedes, tirar de la palanca hacia atrás y soltar. Los cortacéspedes dejarán de 5.8 Cortar siempre con el acelerador a máxima velocidad. Para instalar la placa compactadora: Puede utilizarse una placa compactadora en lugar de la manga de descarga trasera. No maneje el cortacésped sin la manga de descarga trasera o la placa compactadora instaladas. 1. Ponga el interruptor PTO en OFF (Desconectado) (abajo), baje las unidades de corte al suelo, ponga el freno de estacionamiento y pare el motor. 2. Quite las tres tuercas que sujetan la manga de descarga al bastidor del cortacésped. 3. Quite la manga de descarga y monte la placa compactadora. Fíjela con las tres tuercas quitadas anteriormente. Guarde la manga de descarga en lugar seguro. VELOCIDAD DE CORTE ____________________________________________________ La calidad de corte es mejor a velocidades menores a la de transporte. En fábrica se ajusta a una velocidad de corte de 10-11 km/h, que debe ser suficiente para la mayoría de condiciones de corte. Las condiciones locales de la hierba puede responder mejor a la diferente velocidad. Si se necesita algún ajuste, consulte Sección 8.2. es-26 4. Para cancelar el control de tracción, pulse y libere el interruptor de control de tracción (S). [Ver 4.3] FUNCIONAMIENTO 5.9 5 MANIOBRAS EN PENDIENTES_______________________________________________ ! ADVERTENCIA Para evitar vuelcos, el método más seguro para trabajar en pendientes y desniveles es conducir en sentido vertical, nunca horizontalmente. Evite giros innecesarios, circule a poca velocidad y esté alerta de los posibles peligros ocultos. 15.7° Máximo 28% ! PRECAUCIÓN No maniobre este cortacésped en pendientes de más de 15,7° o un 28% de desnivel. El cortacésped ha sido diseado para ofrecer buena tracción y estabilidad en condiciones de corte de césped normales. Tenga cuidado al trabajar en pendientes, especialmente cuando el césped esté mojado. El césped mojado reduce la tracción y el control de la dirección. 2. Active el control de tracción (S) lo necesario para mejorar la distribución de peso entre las plataformas y el cortacésped. [Ver 4.3]. 3. Si el cortacésped tiende a resbalar o los neumáticos marcan el césped, coloque el cortacésped en una pendiente menos inclinada hasta que se vuelva a recuperar la tracción o los neumáticos dejen de marcar el césped. 4. Si el cortacésped continúa resbalando o marcando el césped, la pendiente es demasiado inclinada y no se puede maniobrar la máquina con seguridad. No vuelva a intentar subir y baje despacio. 5. Cuando descienda una pendiente empinada, baje siempre el grupo de herramientas de corte al suelo para que el riesgo de que vuelque el cortacésped sea menor. ra d os Figura 5B Los grados se muestran al 0,25° más cercano ° 45 G 0° ,5 43 42° ° 5 ,2 ° 40 ,75 8 3 ,75° % 36 5° 95 0% 3 9 5% ° 8 0% 33 8 5% 1° 3 7 % 75° 0 8 7 % 2 , 0° 5 65 % 6 2 , 5° 60 % 24,2 ° 55 % 5 50 21,7 ° 45% 9,25 1 % ° 40 16,25 35% 14° 30% 11,25° 25% 20% 8,50° 15% 5,75° 10% 2,75° 5% 0° 0% Pendiente general de arcén de carretera - 45° Zona de hoerba con más pendiente - 31° Pendiente de tejado medio - 19,25° Grado máximo de autovía - 4,50° Autopista de peaje - 1,75° Po rc 10 ent 0% aje 1. Corte el césped siempre con el motor a toda marcha pero reduzca la velocidad de avance para mantener la frecuencia de corte adecuada. 15.7° Máximo 28% Figura 5C Para conseguir la máxima tracción es imprescindible que la presión de los neumáticos sea la correcta. Delante...................... 16 psi (1.10 bar) Detrás ....................... 12 psi (0.86 bar) es-27 5 FUNCIONAMIENTO Cómo calcular una pendiente: B Herramientas necesarias: Nivel (A), 1 yarda o 1 metro de longitud. Cinta métrica (B). A Con el nivel (A) colocado horizontalmente, mida la distancia (C) con cinta métrica (B). Utilice el cuadro para calcular el ángulo de la pendiente o el % de desnivel (D). C D Figura 5D Altura (C) Pulgadas con nivel de 1 yarda (A) Resultado (D) Milímetros con nivel de 1 metro (A) Pendiente en grados Porcentaje de pendiente 4.8 8.3 100 5.7 10.0 150 8.5 15 9.5 16.7 200 11.3 20.0 11.8 20.8 225 12.7 22.5 250 14 25.0 275 15.4 27.5 15.5 27.8 300 16.7 30.0 17.0 30.6 325 18.0 32.5 18.4 33.3 350 19.3 35.0 19.9 36.1 375 20.6 37.5 21.3 38.9 400 21.8 40.0 22.6 41.7 425 23.0 42.5 24 44.4 475 25.4 47.5 500 26.6 50.0 29.1 55.6 31.0 60.0 34.8 69.4 38.7 80.0 39.8 83.3 3 6 7.5 9 10 11 12 13 14 15 16 18 20 600 25 800 30 36 es-28 900 42.0 90 1000 45.0 100 FUNCIONAMIENTO 5 5.10 REMOLCADO / TRANSPORTE _______________________________________________ Si debido a problemas es necesario interrumpir temporalmente la actividad del cortacésped y llevarlo fuera de la zona de trabajo tendrá que ser cargado en un trailer. Si no se dispusiese de uno, puede ser remolcado despacio a lo largo de cortas distancias. A Tener cuidado al cargar y descargar el cortacésped. Sujetar el cortacésped al remolque para evitar que se balancee o se mueva durante el transporte. Remolcado / transporte a lasrgas distancias. Si el cortacésped va a transportarse en autopista, cierre la válvula de paso de combustible e infle las ruedas al máximo permitido en el lateral del neumático antes de subir el cortacésed al remolque. Reduzca la presión de los neumáticos a lo normal al bajarlo del remolque. [Ver 5.9] Antes de arrastralo, abrir la válvula de arrastre. Esta válvula permite mover el cortacésped sin arrancar el motor y evita el posible daño a los componentes hidráulicos. La válvula de remolque (A) se encuentra en la bomba motriz debajo del capotaje. Quite la cubierta del suelo enfrente del asiento del operador. Para abrirla, introduzca un pasador en el orificio de la válvula y gírela en el sentido de las agujas del reloj solamente un giro completo. Girar la válvula 90° a la izquierda. Rotar la palanca de liberación del freno (B) en sentido contrario a las agujas del reloj. La palanca de liberación del freno se encuentra debajo del panel del suelo, cerca de la parte derecha del eje frontal. Para liberar los frenos, gire el volante de dirección hacia la derecha (en el sentido de las agujas del reloj) hasta que sienta resistencia. LF006 Figura 5E Freno quitado para remolcado B Freno puesto (funcionamiento normal) Figura 5F Antes de arrastrar comprobar que las unidades de corte está levantadas. Si no se pueden levantar, retirarlas del cortacésped. Cierre completamente la válvula de remolque (A), gire la palanca de liberación del freno (B) en el sentido de las agujas del reloj y sustituya el panel del suelo tras el remolcado. AVISO No exceder 3,2 km/h mientras se arrastra. No se recomienda el arrastre a larga distancia. I Guarnecer cojinetes NLGI Grado 2 (Clase Servicio GB) II Pistola engrase manual NLGI Grado 2 (Clase Servicio LB) III Aceite de motor - ver sección 7.7 IV Aceite hidráulico Jacobsen - SAE 10W30 o GreensCare 68 es-29 5 FUNCIONAMIENTO 5.11 MANTENIMIENTO DIARIO___________________________________________________ IMPORTANTE: Para conocer más detalles acerca de las operaciones de mantenimiento, ajustes y cuadros de mantenimiento y lubricación, consulte el Manual de Piezas y Mantenimiento. 1. Aparque el cortacésped en una superficie llana y lisa. Baje completamente al suelo el grupo de herramientas de corte, ponga el freno de estacionamiento, pare el motor y retire la llave de contacto. 2. Engrase y lubrique todos los puntos si es necesario. Para evitar incendios, lave las unidades de corte y el cortacésped después de cada utilización. a. Use sólo agua limpia para limpiar su equipo. b. No utilice sprays de alta presión. c. No rocíe agua directamente en el panel de mandos ni en ningún componente eléctrico. d. No rocíe agua en la entrada de aire de refrigeración o en la entrada de aire del motor. AVISO No lave el motor mientras esté caliente o funcionando. Utilice aire comprimido para limpiar el cortacésped, el motor y las aletas del radiador para reducir el riesgo de contaminación por corrosión y humedad. 3. Almacene el combustible de acuerdo con las normativas locales y las recomendaciones de su proveedor. 6. No llene demasiado el depósito de combustible ni deje que se vacíe. 7. Inspeccione los tubos y mangueras hidráulicas todos los días. Compruebe si hay mangueras mojadas o manchas de aceite y sustituya cualquier manguera y tubo desgastado o dañado antes de poner en funcionamiento la máquina. ! ADVERTENCIA Para evitar que el aceite a alta presión y caliente provoque graves lesiones, nunca compruebe con las manos las posibles fugas de aceite, utilice papel o cartón. El escape de líquido hidráulico presurizado puede penetrar la piel. En el caso de que esto ocurra, la lesión debe ser operada en las horas siguientes por un cirujano especializado en este tipo de lesiones o, de lo contrario, la herida podría gangrenarse. 8. Llene el depósito de combustible al final de cada operación diaria hasta el máximo del cuello del tubo de llenado. Utilice combustible diesel nº 2 nuevo. Tasa mínima de cetano 45. 4. 5. Manipule con cuidado el combustible, es muy inflamable. Utilice un contenedor adecuado de modo que la espita quepa en el cuello del tubo de llenado de combustible. Evite la utilización de latas y embudos para transferir el combustible. ! ADVERTENCIA Nunca retire el tapón del depósito de combustible, o añada combustible, con el motor en marcha o caliente. No fume mientras manipule combustible. Nunca llene o drene el depósito en espacios cerrados. No derrame combustible. Limpie cualquier derrame inmediatamente. Nunca manipule o almacene contenedores con combustible cerca de llamas o de ningún dispositivo que pudiera lanzar chispas y hacer prender el combustible o los vapores que éste despide. Asegúrese de reinstalar y apretar el tapón de llenado de combustible. es-30 Compruebe el aceite del motor y el aceite hidráulico al inicio de la jornada todos los días, antes de encender el motor. Si el nivel de aceite es bajo, retire el tapón del depósito de aceite y añada lo necesario. No sobrepase el límite. ! ADVERTENCIA Para evitar heridas graves producidas por refrigerante caliente o vapor, no quite nunca el tapón del radiador con el motor en funcionamiento. Pare el motor y espere a que se enfríe. Incluso entonces, tenga mucho cuidado al quitar el tapón. No vierta agua fría en un radiador caliente. No encienda el motor sin una mezcla correcta de refrigerante. Ponga el tapón y apriételo. 9. Compruebe el nivel de refrigerante cuando se haya enfriado el motor. El radiador debe estar lleno y la botella de recuperación debe estar llena hasta la marca de frío. 10. Aparque la máquina en la zona desiganda. Ponga el freno de estacionamiento y quite la llave. Guarde la llave en lugar seguro para que no se utilice el equipo de modo no autorizado. 11. Compruebe el aceite del motor y el aceite hidráulico al inicio de la jornada todos los días. Si el nivel de aceite es bajo, retire el tapón del depósito de aceite y añada lo necesario. No sobrepase el límite. CUADROS DE MANTENIMIENTO Y LUBRICACIÓN 6 6 CUADROS DE MANTENIMIENTO Y LUBRICACIÓN 6.1 GENERALIDADES 2. Use grasa que cumpla o supere las especificaciones NLGI Grado 2 LB. Ponga grasa con una pistola manual y llene despacio hasta que la grasa comience a subir. No use pistolas de aire comprimido. 3. Para un buen funcionamiento de los puntos de pivote y de fricción, aplique varias gotas de aceite SAE 30 cada 50 horas o según sea necesario. ! ADVERTENCIA Antes de limpiar, ajustar o reparar el equipo, desactive las transmisiones, baje al suelo el grupo de herramientas de corte, ponga el freno de estacionamiento, pare el motor y retire la llave de contacto. 1. 6.2 Limpie siempre el accesorio engrasador antes y después de lubricar. 4. Quite las ruedas y guarnezca los cojinetes una vez al año. CUADRO DE MANTENIMIENTO ______________________________________________ Intervalos de servicio y de lubricación recomendados Cada 8-10 horas Cada 50 horas Filtro de aire I-A* Sistema de enfriamiento Aceite del motor Cada 1000 horas Anual mente Ver sección R 7.4 I 7.2 R* R***** 7.3 R 7.6 Puntos de engrase - F2 L I*** Filtros Aceite Hidráulico 7.15 R***** L I III 6.3 II 6.3 II 7.11 I-A R** 7.12 R* R-AR 7.13 Escape y silenciador Pantallas del radiador 8.3 R* Puntos de engrase - F1 tubos R R I Tipo de lubricante 7.9 I-A Manguitos y Abrazaderas Combustible Filtro de combustible I IV 7.10 I-C/AR 7.15 I-A I* 7.17 I-A Cojinetes Ruedas Cableado Cada 500 horas I-C-A Filtro de aceite de motor Sistema de dirección Cada 400 horas I**** Correa Neumáticos Cada 250 horas AR Carga Batería Manguitos y hidráulicos Aceite hidráulico Cada 100 horas L I* I I 7.14 A - Añadir o ajustar C - Limpiar I - Revisar L - Lubricar R - Cambiar AR - Según Necesidad * ** *** Indica revisión inicial para nuevas máquinas. O cada dos años, lo que suceda primero. Revisar manguitos y tubos visibles sobre fugas o marcas de aceite. ***** Utilice el combustible diésel recomendado; de lo contrario, acortará la vida útil del aceite de motor y de los filtros. es-31 6 CUADROS DE MANTENIMIENTO Y LUBRICACIÓN 6.3 CUADRO DE LUBRICACIÓN ________________________________________________ 4 4 4 3 3 5 5 3 1 5 4 3 1 2 5 5 4 3 2 1 5 2 1 3 5 2 6 5 3 5 3 5 2 7 Accesorios de engrase F1 - 50 horas (cada semana) 1 2 3 4 Pivote del cortacésped (5) Pivote del brazo de elevación (5) Cilindros Elevación (10) Pivote direccional y ruedas con pivote (10) 5 Rodillo trasero del cortacésped (10) 6 Pivote eje 7 Pivote Pedal Tracción 8 Unión Bola (2) 9 Pivote Dirección (2) 10 Cilindro de dirección (2) 12 12 12 F2 - 100 horas 8 8 10 9 9 10 es-32 11 Eje motor unión (3) MANTENIMIENTO 7 7 MANTENIMIENTO 7.1 GENERALIDADES ! ADVERTENCIA Al objeto de evitar lesiones, antes de limpiar, ajustar o reparar el equipo, desactive todas las transmisiones, baje al suelo el grupo de herramientas de corte, ponga el freno de estacionamiento, pare el motor y retire la llave de contacto. Asegúrese de que el cortacésped está aparcado sobre una superficie sólida y llana. Nunca trabaje en un cortacésped que sólo esté apoyado sobre un gato. Utilice siempre soportes para gatos. 1. 2. Los ajustes y las tareas de mantenimiento siempre deben ser acometidas por un técnico cualificado. Si no es posible realizar los ajustes deseados, póngase en contacto con un distribuidor Jacobsen autorizado. Revisar el equipo regularmente, establecer u programa de mantenimiento y mantener los registros detallados. a. 7.2 5. c. Cambiar las piezas gastadas o dañadas antes de operar la máquina. d. Mantener todos los líquidos a los niveles correspondientes. e. Mantener las protecciones en su lugar y todo el equipo bien sujeto. f. Mantener las llantas debidamente infladas. No llevar joyas ni ropa suelta al hacer ajustes o reparaciones. Usar las ilustraciones en el Catálogo de Piezas como referencia para desmontar y volver a montar los componentes. Reciclar o tirar todos los materiales peligrosos (baterías, combustible, lubricantes, anti congelante, etc.) conforme a las normativas locales, estatales o federales. MOTOR __________________________________________________________________ El adecuado rodaje al que es sometido un motor nuevo puede repercutir considerablemente en su rendimiento y vida útil. Durante el período de rodaje, Jacobsen recomienda lo siguiente: 7.3 4. Mantener todas las piezas móviles debidamente ajustadas y lubricadas. Mantener el equipo limpio. IMPORTANTE: Con el cortacésped se suministra un Manual del motor preparado por el fabricante del motor. Lea el manual detenidamente hasta saber cómo funciona y cuáles son sus requisitos de mantenimiento. Si presta atención y sigue las instrucciones del fabricante conseguirá la máxima vida útil del motor. Para solicitar más manuales póngase en contacto con el fabricante. 1. 3. b. Durante las primeras 50 horas de funcionamiento, se debe dejar que el nuevo motor alcance una temperatura de funcionamiento de al menos 60°C antes de que ruede a toda marcha. 2. Compruebe el nivel de aceite del motor dos veces todos los días durante estas 50 primeras horas. Durante el periodo inicial de rodaje no es extraño que el consumo de aceite sea mayor del habitual. 3. Cambie el aceite del motor y el filtro de aceite después de las 50 horas iniciales. 4. Compruebe y ajuste las correas del ventilador y el alternador. 5. Consulte en la Sección 6.2 y en el Manual del motor los intervalos de mantenimiento específicos. Si fuera necesario poner en servicio la bomba de inyección, los inyectores o el sistema de combustible, póngase en contacto con un distribuidor Jacobsen autorizado. AVISO El cortacésped ha sido diseñado para funcionar y cortar eficazmente con los actuales valores del regulador. No cambie los valores ni sobrepase la velocidad del motor. ACEITE DE MOTOR ________________________________________________________ Compruebe el aceite del motor al inicio de cada jornada de trabajo y antes de arrancar el motor. Si está bajo, retire el tapón del tubo de llenado y añada el aceite necesario. El primer cambio de aceite debe hacerse después de las primeras 50 horas de funcionamiento; posteriormente cada 100 horas. Consulte el Manual del Motor. Use aceites para motor con clasificación API CD/CE. Más de 25°C SAE 30W o SAE 10W30/10W40 0 a 25°C SAE 20W o SAE 10W30/10W40 Menos de 0°C SAE 10W o SAE 10W30/10W40 es-33 7 MANTENIMIENTO 7.4 FILTRO DE AIRE __________________________________________________________ Compruebe el indicador de mantenimiento diariamente. Si en la ventana (B) aparece la banda roja reemplace el filtro. 4. No extraiga el filtro para inspeccionarlo o limpiarlo. Si se extrae innecesariamente se incrementa el riesgo de que penetre polvo y demás impurezas en el motor. Vuelva a montar el tapón asegurándose de que se asiente completamente alrededor del alojamiento del filtro. El evacuador de polvo debe mirar hacia abajo. 5. Compruebe todas las mangueras y conductos de aire. Apriete las mordazas de las mangueras. Cuando necesite cambiarlo, primeramente limpie la parte exterior del alojamiento del filtro; después extraiga el filtro viejo tan cuidadosamente como pueda y deshágase de él. 1. Con cuidado, limpie la parte interior del alojamiento del filtro sin dejar que entre polvo en la admisión de aire. 2. Inspeccione el nuevo filtro. No utilice un filtro dañado y nunca uno que no sea adecuado. 3. Monte el filtro y asegúrese que se asiente correcto. Reponga el indicador apretando el botón (A). 7.5 B A Figura 7A COMBUSTIBLE ___________________________________________________________ Manipule el combustible con cuidado, es muy inflamable. Use un contenedor adecuado para que la espita quepa en el cuello del tubo de llenado. Evite la utilización de latas y embudos para transferir el combustible. ! ADVERTENCIA No retire el tapón del depósito de combustible ni añada combustible con el motor en marcha o caliente. • Llene el depósito del combustible hasta una altura de 25 mm del fondo del cuello del tubo de llenado. • Utilice combustible diesel nº 2 limpio y nuevo. Tasa mínima de cetano 45. Consulte más datos en el Manual del motor. • Compruebe los tubos de combustible y las mordazas cada 50 horas. Sustitúyalas al menor signo de daño. No fume al manipular combustible. No llene o drene el depósito en espacios cerrados. • Almacene el combustible siguiendo las ordenanzas locales y estatales y las recomendaciones del proveedor de combustible. No derrame combustible. Limpie cualquier vertido inmediatamente. • Nunca llene en exceso o permita que el depósito se vacíe completamente. No manipule o almacene contenedores con combustible cerca de llamas o dispositivos que lancen chispas y prender el combustible o los vapores que éste despide. Asegúrese de volver a instalar y de apretar el tapón. 7.6 SISTEMA DE COMBUSTIBLE _______________________________________________ Consulte en la Sección 6.2 los intervalos específicos de mantenimiento. Antes de sustituir cualquier filtro, limpie concienzudamente el alojamiento del filtro y la zona que le rodea. No permita que entre suciedad en el sistema de combustible. Purgar el sistema de combustible después de quitar el filtro de combustible y los manguitos, o quando se vacíe completamente el depósito de combustible. Ver Manual del Motor. Para cambiar el filtro de combustible: es-34 1. Cerrar la válvula de combustible en el depósito; quitar y tirar el filtro existente. 2. Poner una ligera capa de aceite en la junta y apretar el nuevo filtro con la mano. 3. Llenar el depósito de combustible. Abrir la válvula de combustible en el depósito y purgar el filtro. Ver Manual del Motor. MANTENIMIENTO 7.7 BATERÍA _________________________________________________________________ Esté absolutamente seguro de que el interruptor de encendido esté en OFF (Desconectado) y que se haya retirado la llave de contacto antes de poner en servicio la batería. ! PRECAUCIÓN Utilice siempre herramientas aislantes, gafas protectoras y ropa adecuada cuanto trabaje con baterías. Debe leer y obedecer todas las instrucciones del fabricante de la batería. Apriete los cables a los terminales de la batería y aplique una ligera capa de grasa dieléctrica de silicona en los terminales y en los extremos de los cables para prevenir la corrosión. Mantenga en su sitio los tapones respiraderos y las cubiertas de los terminales. Compruebe el nivel del electrolito cada 100 horas. Mantenga limpios los extremos de los cables, la batería y los bornes. 7.8 Verifique la polaridad de la batería antes de conectar o desconectar los cables. 1. Cuando instale la batería, monte siempre el cable positivo (+) ROJO en primer lugar y el cable negativo (-) NEGRO de tierra en último lugar. 2. Cuando extraiga la batería, retire siempre primero el cable negativo (-) NEGRO de tierra, y segundo el positivo (+) ROJO. 3. Asegúrese de que la batería está perfectamente instalada y asegurada a la bandeja de la batería. ! ADVERTENCIA Las baterías, bornas de las baterías, terminales y accesorios contienen plomo y compuestos de plomo, agentes químicos que según el estado de California provocan cancer y daños reproductivos. Lávese las manos después de trabajar con ellas. ARRANQUE POR CONEXIÓN DIRECTA________________________________________ Antes de intentar arrancar por conexión directa el motor, compruebe el estado de la batería descargada. Sección 4.7. Cuando conecte los cables de puente: 1. Pare el motor del vehículo con batería en buen estado. 2. Conecte el cable de puente ROJO al terminal positivo (+) de la batería en buen estado y al terminal positivo (+) de la batería “descargada”. 3. Conecte el cable de puente NEGRO del terminal negativo (-) de la batería en buen estado al bastidor del cortacésped con la batería descargada. ! ADVERTENCIA Las baterías generan gas hidrógeno explosivo. Para que el riesgo de explosiones sea menor, evite lanzar chispas cerca de la batería. Conecte siempre el cable del puente negativo al bastidor del cortacésped con la batería descargada y lejos de la batería. 7.9 7 Una vez conectados los cables, arranque el motor del vehículo con la batería en buen estado y seguidamente arranque el cortacésped. RECARGA DE LA BATERÍA _________________________________________________ 2. Cargue la batería en una zona bien ventilada. Recuerde que las baterías generan gases explosivos. Para evitar explosiones, mantenga alejada la batería de las llamas. Siempre que pueda, extraiga la batería del cortacésped antes de cargarla. Si no está sellada, compruebe que los electrolitos cubren las placas en todas las celdas. 3. Para evitar lesiones, aléjese de la batería cuando se conecte el cargador. Una batería dañada podría explotar. Asegúrese de que el cargador está desconectado, seguidamente conéctelo a los terminales de la batería siguiendo las instrucciones del manual del cargador. 4. Siempre desconecte el cargador antes de desconectar el cargador de los terminales de la batería. ! ADVERTENCIA 1. Consulte la Sección 4.7. Lea en el Manual de la batería y el cargador instrucciones específicas sobre cómo manipularlos. es-35 7 MANTENIMIENTO 7.10 ESCAPE Y SILENCIADOR __________________________________________________ ! ADVERTENCIA Los humos de escape contienen monóxido de carbono tóxico y pueden ser fatales sin son inhalados. NUNCA arranque un motor sin la adecuada ventilación. Para protegerse del monóxido de carbono, inspeccione todo el sistema de escape regularmente y sustituya siempre el silenciador si está dañado. Si advierte un cambio de color y de sonido del escape, pare el motor inmediatamente. Averigüe cuál es el problema y mande el equipo a reparar. Apriete los componentes del colector del escape regularmente. Apriete o sustituya las abrazaderas del escape. 7.11 MANGUERAS HIDRÁULICAS ________________________________________________ ! ADVERTENCIA Para evitar graves lesiones provocadas por aceite caliente altamente presurizado, nunca compruebe con las manos las fugas de aceite, utilice papel o cartón. Los escapes de líquido hidráulico presurizado pueden penetrar en la piel. Si es inyectado en la piel deberá ser tratado quirúrgicamente por un médico especializado en este tipo de lesiones o podría engangrenarse la herida. 1. 2. 3. 4. Baje siempre al suelo el grupo de herramientas de corte, desactive todas las transmisiones, ponga el freno de estacionamiento, pare el motor y retire la llave de contacto antes de inspeccionar o desconectar las tuberías y mangueras hidráulicas. Compruebe el estado de los tubos y las mangueras diariamente. Busque mangueras mojadas o manchas de aceite. Sustituya las mangueras y tubos desgastados o dañados antes de poner en funcionamiento la máquina. El tubo o manguera nuevo debe colocarse en el mismo sitio que el retirado, no coloque las mordazas, abrazaderas o uniones en un sitio distinto al original. Inspeccione detenidamente todos los tubos, mangueras y conexiones cada 250 horas. IMPORTANTE: El sistema hidráulico puede quedar permanentemente dañado si se contamina el aceite. Antes de desconectar cualquier componente hidráulico, limpie la zona alrededor de los accesorios y de los extremos de las mangueras para limpiar de impurezas el sistema. a. Antes de conectar cualquier componente hidráulico, etiquete o marque la ubicación de cada manguera y, a continuación, limpie la zona alrededor de los accesorios. b. Cuando desconecte el componente, esté preparado para montar los insertos o tapones en los extremos de las mangueras y en los puertos abiertos. Con ello se evitará la entrada de impurezas en el sistema hidráulico y el derrame de aceite. c. Asegúrese de que las juntas tóricas estén limpias y de que los accesorios de las mangueras estén correctamente asentados antes de apretarlos. d. No retuerza la manguera. Las mangueras retorcidas pueden hacer que los acopladores se aflojen conforme flexan las mangueras durante el funcionamiento provocando, así pues, fugas de aceite. e. Las mangueras retorcidas o ensortijadas pueden restringir el flujo de aceite, con el consiguiente mal funcionamiento del sistema, excesivo calentamiento del aceite y fallo de las mangueras. 7.12 ACEITE HIDRÁULICO ______________________________________________________ Consulte en la Sección 6.2 los intervalos específicos de mantenimiento. 3. Drene y reemplace el aceite hidráulico si ha tenido lugar un fallo de componentes grave, si advierte la presencia de agua o espuma en el aceite o si nota un olor rancio (lo que indica un calor excesivo). 4. Sustituya siempre el filtro hidráulico cuando cambie el aceite. Para cambiar el aceite hidráulico: 1. 2. Limpie la zona alrededor del tapón del aceite para evitar que entren impurezas en el sistema y lo contaminen. Retire el inserto de drenaje en la parte inferior del depósito principal. es-36 Después de drenar el aceite, instale el inserto de drenaje y llene el depósito con aceite hidráulico Jacobsen. Purgue el aire del sistema. a. Para evitar que los carretes se sobrecalienten, desconecte los motores de los carretes. b. Opere todas las funciones del cortacésped durante unos 5 minutos para sacar el aire del sistema y estabilizar el nivel de aceite. Durante este tiempo puede sonar la alarma del nivel de aceite. c. Una vez estabilizado el nivel y sacado el aire, llenar el depósito hasta la marca en la varilla. Arrancar el motor y revisar que no está activada la alarma de aceite. MANTENIMIENTO 7 7.13 FILTRO HIDRÁULICO_______________________________________________________ El sistema hidráulico está protegido por dos filtros de 10 micrones. El caudal por los filtros está controlado durante la operación. Cuando la pérdida de presión por los filtros es demasiado alta, se ilumina la luz de advertencia del filtro de aceite hidráulico. Para asegurar la protección continuada al sistema hidráulico, cambiar los dos filtros lo antes posible una vez encendida la luz. AVISO Para cambiar los filtros hidráulicos: 1. Quite los filtros viejos. 2. Instale nuevos filtros. Apriete sólo con la mano. 3. Opere el motor en ralentí con el sistema hidráulico en punto muerto durante cinco minutos. Mientras tanto puede sonar la alarma de nivel de aceite. 4. Revise el nivel de aceite hidráulico en el depósito y llene hasta la marca en la varilla. En clima frío se puede encender la luz de advertencia hasta que se caliente el aceite a la temperatura de operación. Esperar hasta que se haya calentado el aceite y apagado la luz antes de operar el cortacésped. 7.14 SISTEMA ELÉCTRICO ______________________________________________________ AVISO ! PRECAUCIÓN Para facilitar la resolución de problemas relacionados con el controlador en fábrica, anote la revisión de hardware del controlador y la versión de software situada en la esquina derecha del controlador. Los controladores con los mismos niveles de revisión o superiores son compatibles. Desconecte siempre el interruptor de encendido y retire el cable negativo de la batería (NEGRO) antes de inspeccionar o trabajar en el sistema eléctrico. A continuación se enumeran las precauciones que deben tomarse para reducir posibles problemas eléctricos: 1. Asegúrese de que todos los terminales y conexiones están limpias y correctamente fijadas. 2. Compruebe regularmente el sistema de interbloqueo y los disyuntores de circuito. Si el sistema no funciona correctamente y no se puede corregir el problema, póngase en contacto con un distribuidor Jacobsen autorizado. 3. Aleje el mazo de cables y todos los cables individuales de las piezas móviles para evitar daños. 4. Asegúrese de que el mazo del interruptor del asiento está conectado al mazo de cables principal. 5. Compruebe la batería y su circuito de carga. 6. No lave o rocíe a presión alrededor de las conexiones y componentes eléctricos. El sistema eléctrico está dirigido y controlado por el controlador electrónico (C) situado detrás del área del operario. El controlador está equipado con cuatro grupos de LEDs que se pueden usar para encontrar las averías en el sistema eléctrico, ver la Sección 5.2. Los circuitos están protegidos por un disyuntor, fusibles y relés montados junto al controlador. F1 F2 C K1 K2 Versión software Software Version Revisión hardware Hardware Revision CB1 DISYUNTOR DE CIRCUITO CB1 DISYUNTOR DE CIRCUITO DE 50 A FUSIBLES F1 ALTERNADOR, INDICADORES, INTERRUPTORES 20 A F2 LUCES 20 A RELES K1 BUJIA K2 MOTOR DE ARRANQUE Figura 7B es-37 7 MANTENIMIENTO 7.15 RADIADOR _______________________________________________________________ ! ADVERTENCIA Para evitar lesiones graves a causa de estallidos de vapor o refrigerante caliente, nunca intente retirar el tapón del radiador con el motor funcionando. Pare el motor y espere a que se enfríe. Incluso entonces, tenga mucho cuidado cuando retire el tapón. Mezclar agua limpia con anticongelante de glicol de etileno para la temperatura ambiente más fría. Leer y seguir las instrucciones en el contenedor de anti congelante y Manual del Motor Mantener limpias las entradas de aire del radiador y refrigerante de aceite hidráulico. Usar aire comprimido (30 psi máximo) para limpiar las aletas. Para limpiar el radiador: ! PRECAUCIÓN 1. No vierta agua fría en el radiador si está caliente. No arranque el motor sin una adecuada mezcla de refrigerante. Instale el tapón y apriételo. AVISO Un panel deslizante situado debajo del bastidor se puede aflojar y tirar hacia detrás para dejar que la suciedad y basura se desprenda del bastidor. Revisar el nivel del refrigerante diariamente. El radiador deberá estar lleno y la botella de recuperación hasta la marca Frío. Vaciar y rellenar anualmente. Quitar la tapa del radiador, abrir el tapón de vaciado del bloque del motor y vaciar el radiador. Vaciar y limpiar la botella de recuperación. Usar una pistola de aire para limpiar el radiador y las aletas del refrigerante. 2. Revisar y apretar la correa del ventilador. Cambiar las abrazaderas y manguitos cada dos años. 3. Si se debe añadir refrigerante más de una vez al mes, o añadir más de un litro cada vez, un Distribuidor de Jacobsen deberá revisar el sistema refrigerante. 7.16 ESTRUCTURA DE PROTECCIÓN ANTIVUELCO (ROPS)__________________________ Disponemos de un sistema de protección antivuelco (ROPS), concebido para este cortacésped como accesorio opcional. Si el cortacésped está equipado con esta unidad, se deberá revisar periódicamente y seguir los procedimientos de operación descritos en el Manual de seguridad y funcionamiento. ! PRECAUCION No aflojar ni quitar los pernos; no soldar, taladrar, modificar, doblar ni enderezar una estructura dañada. 1. Revisar regularmente el asiento, el cinturón de seguridad, equipo de montura y cualquier otro accesorio en el ROPS. Cambiar inmediatamente cualquier pieza dañada. 2. Una vez que el ROPS haya sufrido cualquier forma de impacto, se deberá cambiar. 3. Revisar y ajustar el par en todo el equipo. Todos los componentes de recambio usados para el ROPS se deben especificar en el Catálogo de Piezas. 7.17 NEUMÁTICOS ____________________________________________________________ 1. Mantenga los neumáticos correctamente inflados para prolongar su vida útil. Compruebe la presión de inflado cuando los neumáticos estén fríos. Inspeccione el desgaste de la pisada. 2. Revisar la presión cada 50 horas o una vez al mes. Usar un medidor exacto de presión baja de llanta. 3. Mantener los neumáticos inflados a: Delanteros - 111 kPa Traseros - 86 kPa es-38 ! PRECAUCIÓN A menos que haya recibido la formación adecuada y posea las herramientas y la experiencia idónea, NO intente montar un neumático en la llanta. Un montaje incorrecto puede dar lugar a una explosión y provocar graves lesiones. MANTENIMIENTO 7 7.18 MONTAJE DE LAS RUEDAS _________________________________________________ ! ADVERTENCIA Asegúrese de que el cortacésped esté aparcado sobre una base sólida y llana. Nunca trabaje en un cortacésped que sólo esté apoyado sobre un gato. Utilice siempre soportes para gatos. Si sólo está elevada la parte delantera o trasera del cortacésped, coloque bloques delante y detrás de las ruedas que estén apoyadas en el suelo. 1. Limpie la suciedad, la grasa y el aceite de la rosca de los pernos sin cabeza. No lubrique las roscas. 2. Coloque la rueda en el cubo y preste atención para que la superficie de la rueda esté totalmente en contacto con el cubo o el tambor del freno. 3. Apriete con los dedos todos los componentes y aplique par de torsión en orden cruzado; apriete siempre las tuercas en la posición superior. 4. Compruebe y vuelva a apretar diariamente hasta que el par de torsión se mantenga entre 115 -128 Nm. 7.19 REVISIÓN DE LAS CUCHILLAS ______________________________________________ 1. Hay que revisar las cuchillas cada 50 horas de funcionamiento o cuando se quite el cortacésped del cortacésped para comprobar que estén en buen estado. Las cuchillas torcidas (G), ranuradas (H) o agrietadas (J) deben cambiarse. ! PRECAUCIÓN Tenga cuidado al comprobar las cuchillas para evitar que los dedos o las manos queden enganchados entre los bordes. G H J HR025 Figura 7C ! ADVERTENCIA No enderecer, suelde o repare una cuchilla dañada. Cambie siempre las cuchillas dañadas. 2. Cualquiera de las condiones citadas arriba puede hacer que se rompa y salte un trozo de la cuchilla y provoque graves heridas a los peatones o daños a la propiedad. 3. Una cuchilla torcida puede tener una grieta microscópica (G) que puede hacerse grande y hacer que se rompa parte de la cuchilla. Las cuchillas torcidas también crean vibración y presión en la maquinaria. 4. El polvo o las partículas de arena pueden desgastar una ranura en la cuchilla (H) entre las burbujas de aire y la porción plana de la cuchilla que provocarán una grieta (J) y harán que se rompa. es-39 7 MANTENIMIENTO 7.20 AFILADO DE LAS CUCHILLAS ______________________________________________ 1. Ponga un bloque de madera entre la cuchilla y el bastidor del cortacésped para impedir que se mueva la cuchilla. ! ADVERTENCIA Las cuchillas del cortacésped pueden tener los bordes afilados. Tenga cuidado al repararlas o manejarlas. 3. Asegúrese de quitar la misma cantidad de material de los dos lados de la cuchilla para que no quede desequilibrada. Una cuchilla desequilibrada podría causar excesiva vibración y podría dañar el cortacésped. 4. Utilice un equilibrador de cuchilla para comprobar la cuchilla después de afilarla. 5. Apriete el tornillo de montaje central que sujeta la cuchilla de 100 a 120 Nm. 2. Al retocar o afilar la cuchilla, no siga el patrón original como se muestra en (A). Afile los bordes de corte en ángulo como se muestra en (B). Si la pérdida total máxima de la cuchilla alcanza mm, no la afile más, cámbiela. A 13 ! ADVERTENCIA Máximo 13 mm B Volver a afilar la cuchilla más de 13 mm puede hacer que se rompa la punta y que salte. Esto podría provocar graves heridas a los peatones y/o daños a la propiedad. HR024 Figura 7D 7.21 CUIDADOS Y LIMPIEZA ____________________________________________________ Lave el cortacésped y las herramientas después de cada utilización. Mantenga limpio el equipo. 4. Limpie todas las piezas de plástico o goma con una solución jabonosa suave o con los limpiadores para goma y vinilo disponibles en el mercado. AVISO 5. Para mantener el lustre original de la fibra de vidrio, encere periódicamente con cera One-Step. No lave nada del equipo si está caliente. No utilice rociadores de alta presión. Use agua fría y limpiadores para automóviles. 1. 2. Limpie con aire comprimido el motor y las aletas del radiador. Puede adquirir nuestra pistola de aire comprimido especial a través de un distribuidor Jacobsen. Use sólo agua fría para limpiar el equipo. Repare las superficies metálicas dañadas y utilice pintura para retoques Jacobsen. Aplique una capa de cera al equipo para proteger la pintura. ! PRECAUCIÓN Limpie la hierba y los restos de las unidades de corte, las transmisiones, los silenciadores y el motor para evitar posibles incendios. AVISO Se ha observado que el uso de agua salada o agua de efluente favorece el óxido y corrosión de las partes metálicas, causando un deterioro prematuro o avería. Los desperfectos de esta naturaleza no están cubiertos por la garantía de fábrica. 3. No rocíe agua directamente al panel de instrumentos, el interruptor de encendido, el controlador o cualquier otro componente eléctrico, ni tampoco sobre los alojamientos de los cojinetes y juntas. es-40 ! ADVERTENCIA NUNCA limpie con las manos las unidades de corte. Utilice un cepillo para retirar los restos de hierba de las cuchillas. Las cuchillas pueden estar extremadamente afiladas y causar graves lesiones. MANTENIMIENTO 7 7.22 ALMACENAMIENTO________________________________________________________ Generalidades Unidades de corte 1. Lave el cortacésped a fondo y lubríquelo. Repare y pinte el metal dañado o desnudo. 1. Lave a fondo las unidades de corte y repare y pinte cualquier pieza metálica dañada o desnuda. 2. Inspeccione el cortacésped, apriete todos los elementos, sustituya los componentes desgastados o dañados. 2. Lubrique todos los accesorios y puntos de fricción. 3. Aplique una ligera capa de aceite anticorrosión en los bordes afilados de las cuchillas. 3. Drene y rellene el radiador. 4. Limpie a fondo los neumáticos y almacene el cortacésped de manera que la carga no esté sobre los neumáticos. Si el cortacésped no está sobre soportes para gatos, compruebe los neumáticos a intervalos regulares e ínflelos según sea necesario. 5. Mantenga limpia y seca la máquina y todos sus accesorios; proteja el equipo de las inclemencias del tiempo cuando lo almacene. Nunca guarde equipo cerca de llamas o chispas que podrían prender el combustible o los gases que éste despide. ! PRECAUCIÓN Para evitar que se produzcan lesiones y daños en los bordes de corte, manipule las cuchillas con sumo cuidado. Tras el almacenamiento 1. Compruebe y reinstale la batería. 2. Compruebe o instale un nuevo filtro de combustible y un limpiador de aire. 3. Compruebe el nivel del refrigerante del radiador. 4. Compruebe el nivel de aceite en el cárter del motor y en el sistema hidráulico. 5. Llene el depósito de combustible con combustible nuevo. Purgue el sistema de combustible. 6. Asegúrese de que los neumáticos están correctamente inflados. 7. Retire todo el aceite de los carretes y de la cuchilla fija. Ajuste la cuchilla fija y la altura de corte. Batería 1. Quite, limpie y guarde la batería en una superficie no conductora (madera) y en lugar fresco y seco. Para evitar una descarga prematura, no guarde la batería sobre superficies de cemento ni acero. 2. Compruebe y recargue la batería cada 60 ó 90 días mientras esté almacenada. 3. Almacene las baterías en un lugar seco y fresco. Para reducir la tasa de autodescarga, la temperatura ambiente no debe ser mayor que 27°C o menor que -7°C al objeto de evitar que se congele el electrolito. Motor 1. Con el motor caliente, retire el inserto de drenaje, drene el aceite del cárter y cambie el filtro de aceite. Apretar el tapón de vaciado a 30 Nm. 2. Limpie el exterior del motor. Pinte el metal desnudo o aplique una ligera capa de aceite anticorrosión. 3. Añada acondicionador de aceite o biocida para evitar que se gele o se desarrollen bacterias en el combustible. Consulte a su proveedor de combustible. 8. Arranque y deje funcionar el motor a medio gas. Deje pasar tiempo suficiente para que el motor se caliente y lubrique adecuadamente. ! ADVERTENCIA Nunca arranque un motor sin la adecuada ventilación; la inhalación de gases de escape puede ser fatal. es-41 8 AJUSTES 8 AJUSTES 8.1 GENERALIDADES ____________________________________________________ 1. Los ajustes y las tareas de mantenimiento deben ser realizadas siempre por un técnico cualificado. Si no puede realizar los ajustes correctamente, póngase en contacto con un distribuidor autorizado Jacobsen. 2. Cambie, no ajuste, los componentes desgastados y dañados. 3. El pelo largo, las joyas o la ropa suelta pueden trabarse en las partes móviles. ! ADVERTENCIA Para evitar lesiones, antes de ajustar, limpiar o reparar este equipo, baje los accesorios al suelo, desconecte todos los mandos, ponga el freno de estacionamiento, apague el motor y quite la llave del interruptor de encendido. Asegúrese de que el cortacésped esté aparcado en una superficie sólida y llana. No trabaje nunca en un cortacésped que esté suejto sólamente por un gato. Utilice siempre soportes para gato. Si sólo esta subida la parte delantera o trasera del cortacésped, ponga calzos delante y detrás de las ruedas que no estén subidas. 8.2 Para ajustar la velocidad de corte, aflojar la contratuerca (A) y ajustar el tornillo de parada hacia arriba para reducir la velocidad, hacia abajo para aumentarla. Apretar la tuerca para mantener el ajuste en su lugar. 4. No modifique los valores del regulador ni sobrepase la velocidad de régimen de la máquina. A LF002 Figura 8A CORREA_________________________________________________________________ Revisar y ajustar la correa al cabo de las primeras diez horas de operación. Después ajustar cada 100 horas. Ajustar la polea del alternador para que la correa tenga una holgura de 6-8mm, con 10 kg apretar en el centro entre las poleas. Consultar el manual del motor. Si la tensión es incorrecta, aflojar los pernos de la montura del alternador (B) y ajustar éste hasta obtener la tensión correcta de la correa. es-42 Evite que las manos y los dedos queden atrapados entre componentes en movimiento y componentes fijos. VELOCIDAD DE CORTE ____________________________________________________ La calidad de corte es mejor a velocidades muy por debajo de la velocidad de transporte del cortacésped. En fábrica se ajusta un velocidad de corte inicial de siete a nueve kph, lo que debe ser suficiente para la mayoría de condiciones de corte. Sin embargo, las condiciones del césped local pueden responder mejor a una velocidad diferente. 8.3 ! PRECAUCIÓN AJUSTES 8.4 AJUSTE DE PUNTO MUERTO _______________________________________________ El ajuste de punto muerto sólo se puede hacer en la bomba de dirección. El ajuste de punto muerto está pre ajustado en fábrica en todos los nuevos cortacéspedes y bombas de recambio. No es necesario ningún otro ajuste a menos que la bomba se haya desmontado para reparación o revisión. 6. 7. Para el ajuste de punto muerto: 1. 2. 3. 4. 5. 8.5 3. 4. 5. F G H LF014 Figura 8B VELOCIDAD DE MARCHA HACIA DELANTE / MARCHA ATRÁS ___________________ Para ajustar la velocidad hacia delante: 2. Conectar la unión de tracción. Al conectar la unión en el pedal de tracción, comprobar que el puntero en la abrazadera del pedal de tracción está centrada sobre el interruptor de punto muerto (Figura 3E - M). Arrancar el motor y revisar la operación en el pedal de tracción. Las ruedas no deben girar cuando el pedal vuelva al punto muerto y se debe iluminar la lámpara 5 en el controlador, ver Sección 5.2. Desconectar la unión del pedal de tracción de la bomba. Colocar el cortacésped sobre un gato para que Todas las ruedas estén elevadas del terreno. Revisar que la válvula de remoque (H) esté cerrada. Poner el freno de estacionamiento y ajustar el interruptor de corte en punt muerto. Comprobar que este interruptor esté cerrado en el pedal de tracción. (Figura 3E - M). La distancia entre el interruptor y el indicador metálico (M) debe estar entre 1,5 y 3 mm. Aflojar los tornillos (G) que sujetan la abrazadera de la palanca de la bomba sólo lo suficiente para que se pueda mover. Arrancar el motor y observar las ruedas. Ajustar la abrazadera (F) en los orificios acanalados hasta que las ruedas no giren. Apagar el motor y apretar la abrazadera en su lugar. Las velocidades de dirección y reversa están ajustadas en el pedal de tracción. Ajustar la velocidad de dirección antes de ajustar la reversa. 1. 8 Comprobar que la bomba de dirección se ha ajustado en punto muerto y el acelerador del motor está ajustado correctamente. Arrancar el motor y revisar la velocidad de dirección con el motor en el acelerador completamente abierto y el cortacésped en dirección a dos ruedas (2WD). La velocidad de transporte hacia adelante deberá medir 16 km/h. Parar el motor. Para ajustar la velocidad, desconectar la argolla (K) del pedal y aflojar la contratuerca. Meter la argolla para reducir la velocidad, y sacarla para aumentarla. Apretar la contratuerca para mantener el ajuste en su lugar y conectar la argolla. Con el pedal de tracción en punto muerto, revisar la posición del interruptor de punto muerto (J). Ajustar el interruptor arriba o abajo para que el puntero (M) en la abrazadera del pedal de tracción esté centrado por encima. Cuando el ajuste sea correcto la lámpara 5 en el controlador se iluminará cuando se ponga en marcha el contacto. Arrancar el motor y revisar la velocidad. Repetir el procedimiento hasta llegar a una velocidad de transporte de 16 km/h. Para ajustar la velocidad marcha atrás: 1. 2. 3. 4. Ajustar la velocidad hacia delante. Arrancar el motor y comprobar la velocidad de reversa con el acelerador completamente abierto. La velocidad en reversa deberá indicar 5,6 km/h. Parar el motor. Para ajustar la velocidad, aflojar la tuerca en el perno de parada de carrera reversa (L). Introducir el perno de dirección en el orificio acanalado para aumentar la velocidad, hacia atrás para reducir la velocidad Arrancar el motor y revisar la velocidad. Repetir el procedimiento hasta llegar a una velocidad en reversa de 5,6 km/h. J K L M Figura 8C es-43 8 AJUSTES 8.6 CONVERGENCIA DE LA DIRECCIÓN _________________________________________ 1. Poner las ruedas en dirección hacia delante. 2. Aflojar las contratuercas (N) a ambos lados en el tirante (M). 3. Girar el tirante (S) para que se pueda remolcar correctamente. El remolque no debe exceder 1,5 mm (P). Apretar de nuevo las contratuercas. 4. Una vez ajustado el tirante, ajustar el cilindro de dirección enroscando o desenroscando la barra (T) de la unión de bola para que el husillo (R) quite la parada en el eje en 19 ± 1,5 mm (U) cuando el cilindro esté totalmente extendido. P S N N T +0 a 1,5 mm R U 19 ± 1,5 mm Figura 8D 8.7 CALIBRACIÓN DEL SISTEMA DE CONTROL DE TRACCIÓN ______________________ El sistema de control de tracción (TCS) debe calibrarse cuando se cambia un componente del sistema o cuando el sistema no funcikona correctamente. Entre los componentes del sistema se incluyen el controlador, la válvula de elevación, los cilindros de elevación o las tuberías. 1. 3. 4. AVISO Deje que el sistema hidráulico se caliente lo suficiente. Durante el procedimiento de calibración debe haber un operador sentado en el asiento. ! ADVERTENCIA No encienda nunca el motor sin la ventilación adecuada, ya que inhalar los humos del escape puede ser mortal. Mientras se caliente el sistema hidráulico para el procedimiento de calibración, las cuchillas de la unidad de corte girarán. Asegúrese de que la zona de debajo de alrededor de las unidades de corte esté libre se duciedad que pueda ser arrojada desde la máquina. Aleje a los peatones de la unidad. No suelte el interruptor hasta que deje de sonar el claxon al empezar y acabar el procedimiento de calibración. 5. 6. es-44 Golpee ligeramente la palanca de elevación hasta la posición de subida y espere de 3 a 5 segundos. Repita si es necesario hasta que las unidades de corte comiencen a subir. Golpee ligeramente la palanca de elevación hasta la posición de bajada y espere hasta que las cubiertas dejen de moverse. Repita golpeando levemente la palanca si es necesario hasta que las cubiertas delanteras estén en el suelo. AVISO a. 2. Encienda el motor y mueva el acelerador hasta velocidad máxima. b. Quite el freno de estacionamiento. c. Active el interruptor PTO. d. Baje las unidades de corte al suelo. e. Active el sistema de control de tracción. f. Deje que la unidad funcione 5 minutos con estos ajustes. El sistema debe calibrarse con el motor funcionando, el operador sentado, el interruptor PTO en OFF (Desconectado), el freno de estacionamiento puesto y el pedal de tracción en punto muerto. Baje totalmente las unidades de corte. Compruebe que las cinco plataformas estén bajadas. Pulse y mantenga pulsado el interruptor TCS durante 5 segundos. El claxon sonará cuando el controlador entre en modo de calibración. No se precipite durante los pasos 5 y 6. El sistema no se calibrará correctamente si las cubiertas no comienzan a subir en el paso 5 y no están totalmente bajadas en el paso 6. 7. Pulse y mantenga pulsado el interruptor TCS hasta que suene el claxon. El sistema estará ahora calibrado. AVISO Para cancelar el modo de calibración, ponga el interruptor de llave en OFF (Desconectado). AJUSTES 8.8 ALTURA DE CORTE________________________________________________________ La altura de corte de las cubiertas puede ajustarse de 19 a 133 mm en incrementos de 6 mm. La altura de corte real puede variar de las alturas dadas dependiendo de las condiciones del césped y de otros factores. AVISO Al cortar en zonas onduladas, las alturas de corte bajas pueden hacer que se pele el césped. Ajuste la altura para evitarlo. 1. AVISO Para obtener el mejor corte, ponga el mismo número de espaciadores bajo el bastidor de la cubierta en los tres husillos. Ajuste las cubiertas a la misma altura. C D Aparque el cortacésped en una zona llana y nivelada. Baje las unidades de corte. Ponga calzos bajo los bastidores de las cubiertas para sujetarlas por todos los lados. B D Baje la cubierta hasta que descanse sobre las ruedas delanteras y el rodillo trasero para evitar graves heridas. Esto impedirá que se bajen accidentalmente al realizar ajustes. Desactive las transmisiones, ponga el freno de estacionamiento, pare el motor y quite la llave de encendido. Utilice técnicas apropiadas de elevación al subir o bajar los bastidores de las cubiertas. Los bastidores de las cubiertas pesan aproximadamente 23 kg. 4. E Consulte el cuadro adjunto para las alturas de corte deseadas. ! PRECAUCIÓN 3. A F ! ADVERTENCIA 2. 8 Para disminuir la altura de corte: quite los tres pasadores de fijación (A). Saque el eje del husillo exterior (B) ligeramente y quite los espaciadores de 13 mm (D) y/o el espaciador de 6 mm (E) de la parte inferior de uno en uno hasta obtener la altura deseada. Quite los calzos cuidadosamente y baje los bastidores de las cubiertas (C). Ponga los espaciadores restantes encima del husillo y meta los pasadores de fijación. La arandela (F) está siempre encima, bajo el pasador de fijación. Para aumentar la altura de corte: quite los tres pasadores de fijación (A). Suba cuidadosamente el bastidor de la cubierta (C) por encima de la altura de corte deseada y sujételo con calzos. Ponga los espaciadores de 13 mm (D) y/o el espaciador de 6 mm (E) hasta que obtener la altura deseada. Baje el bastidor de la cubierta. Ponga los espaciadores restantes encima del husillo y meta los pasadores de fijación. La arandela (F) está siempre encima, bajo el pasador de fijación. Figura 8E Altura Espaciadores Espaciadores de de 13 mm bajo de 13 mm corte el bastidor del encima del bas(mm) cortacésped tidor del cortacésped 19 0 9 25 0 9 31 1 8 37 1 8 43 2 7 50 2 7 56 3 6 62 3 6 68 4 5 75 4 5 81 5 4 87 5 4 93 6 3 100 6 3 106 7 2 112 7 2 118 8 1 125 8 1 133 9 0 Ubicación de los espaciadores de 6 mm Sobre el bastidor Bajo el bastidor Sobre el bastidor Bajo el bastidor Sobre el bastidor Bajo el bastidor Sobre el bastidor Bajo el bastidor Sobre el bastidor Bajo el bastidor Sobre el bastidor Bajo el bastidor Sobre el bastidor Bajo el bastidor Sobre el bastidor Bajo el bastidor Sobre el bastidor Bajo el bastidor Sobre el bastidor es-45 8 AJUSTES 8.9 ESPECIFICACIONES DEL PAR DE TORSIÓN ___________________________________ AVISO Los valores de par de torsión de estas tablas son aproximados y sólo sirven como referencia. La utilización de estos valores no es responsabilidad nuestra. Jacobsen no se hace responsable de ninguna pérdida, reclamación o daño surgido por la utilización de estas tablas. Tenga siempre especial cuidado al utilizar valores de par de torsión. Jacobsen utiliza pernos metalizados Grado 5 de serie, a menos que se cite lo contrario. Para tensar pernos metalizados, utilice el valor dado para los lubricados. FIJADORES ESTANDAR NACIONALES AMERICANOS TAMAÑO UNIDA DES GRADO 5 TAMAÑO GRADO 8 Lubricado Seco Lubricado UNIDA DES Seco GRADO 5 GRADO 8 Lubricado Seco Lubricado Seco #6-32 in-lb (Nm) – 20 (2,3) – – 7/16-14 ft-lb (Nm) 37 (50,1) 50 (67,8) 53 (71,8) 70 (94,9) #8-32 in-lb (Nm) – 24 (2,7) – 30 (3,4) 7/16-20 ft-lb (Nm) 42 (56,9) 55 (74,6) 59 (80,0) 78 (105) #10-24 in-lb (Nm) – 35 (4,0) – 45 (5,1) 1/2-13 ft-lb (Nm) 57 (77,2) 75 (101) 80 (108) 107 (145) #10-32 in-lb (Nm) – 40 (4,5) – 50 (5,7) 1/2-20 ft-lb (Nm) 64 (86,7) 85 (115) 90 (122) 120 (162) #12-24 in-lb (Nm) – 50 (5,7) – 65 (7,3) 9/16-12 ft-lb (Nm) 82 (111) 109 (148) 115 (156) 154 (209) 1/4-20 in-lb (Nm) 75 (8,4) 100 (11,3) 107 (12,1) 143 (16,1) 9/16-18 ft-lb (Nm) 92 (124) 122 (165) 129 (174) 172 (233) 1/4-28 in-lb (Nm) 85 (9,6) 115 (13,0) 120 (13,5) 163 (18,4) 5/8-11 ft-lb (Nm) 113 (153) 151 (204) 159 (215) 211 (286) 5/16-18 in-lb (Nm) 157 (17,7) 210 (23,7) 220 (24,8) 305 (34,4) 5/8-18 ft-lb (Nm) 128 (173) 170 (230) 180 (244) 240 (325) 5/16-24 in-lb (Nm) 173 (19,5) 230 (26,0) 245 (27,6) 325 (36,7) 3/4-10 ft-lb (Nm) 200 (271) 266 (360) 282 (382) 376 (509) 3/8-16 ft-lb (Nm) 23 (31,1) 31 (42,0) 32 (43,3) 44 (59,6) 3/4-16 ft-lb (Nm) 223 (302) 298 404 315 (427) 420 (569) 3/8-24 ft-lb (Nm) 26 (35,2) 35 (47,4) 37 (50,1) 50 (67,8) 7/8-14 ft-lb (Nm) 355 (481) 473 (641) 500 (678) 668 (905) FIJADORES METRICOS TAMAÑO 4,6 UNIDA DES 8,8 10,9 Fijadores no críticos para el aluminio 12,9 Lubricado Seco Lubricado Seco Lubricado Seco Lubricado Seco – – 3,83 (34) 5,11 (45) Nm (in-lb) – – – – M5 Nm (in-lb) 1,80 (16) 2,40 (21) 4,63 (41) 6,18 (54) 6,63 (59) 8,84 (78) 7,75 (68) 10,3 (910 4,0 (35) M6 Nm (in-lb) 3,05 (27) 4,07 (36) 7,87 (69) 10,5 (93) 11,3 (102) 15,0 (133) 13,2 (117) 17,6 (156) 6,8 (60) M8 Nm (in-lb) 7,41 (65) 9,98 (88) 19,1 (69) 25,5 (226) 27,3 (241) 36,5 (323) 32,0 (283) 42,6 (377) 17,0 (150) M10 Nm (ft-lb) 14,7 (11) 19,6 (14) 37,8 (29) 50,5 (37) 54,1 (40) 72,2 (53) 63,3 (46) 84,4 (62) 33,9 (25) 88,0 (65) 94,5 (70) SALIDAS 125 (92) 110 (81) 147 (108) 61,0 (45) 140 (103) 150 (110) 200 (147) 175 (129) 234 (172) 94,9 (70) M12 Nm (ft-lb) 25,6 (19) ENTRADAS 34,1 (25) 66,0 (48) M14 Nm (ft-lb) 40,8 (30) 54,3 (40) Lámpara 1 2 3 4 5 6 7 8 9 10 11 12 13 14 15 16 17 18 105 (77) es-46 19 20 21 22 23 24 25 26 27 28 29 30 31 32 33 M4 2,0 (18) RESOLUCIÓN DE PROBLEMAS 9 9 RESOLUCIÓN DE PROBLEMAS 9.1 GENERALIDADES _________________________________________________________ En el siguiente cuadro se enumeran los problemas más comunes que pueden ocurrir durante el arranque y funcionamiento. Para más información detallada acerca de los sistemas hidráulico y eléctrico, póngase en contacto con el distribuidor Jacobsen de su zona. Síntomas Posibles Causas El motor no arranca. Es difícil arrancar el motor o marcha mal. El motor se para. El motor se sobrecalienta. Acción 1. El freno de estacionamiento está puesto, el pedal de tracción no está en punto muerto o el interruptor de corte está puesto. 1. Revisar el sistema auxiliar del operario y el proceso de arranque. 2. La bujía no se ha desconectado. 2. Restablecer el contacto y dejar que se apague la bujía incandescente antes de arrancar el motor. 3. Batería baja de carga o defectuosa. 3. Revisar la condición de la batería y las conexiones. 4. Depósito de gasolina vacío o sucio. 4. Llenar con combustible nuevo. Cambiar el filtro de combustible. Purgar los manguitos de combustible. 5. Fusible fundido. 5. Cambiar el fusible. 6. Relé defectuoso. 6. Probar y cambiar el relé. 7. Interruptor de punto muerto en el pedal de tracción desajustado o defectuoso. 7. Ajustar o cambiar el interruptor. 1. Nivel de combustible bajo, combustible o filtro sucio. 1. Llenar con combustible nuevo y purgar los manguitos de combustible. 2. Limpiador de aire sucio. 2. Revisar y cambiar el filtro de aire. 3. Inyectores, bomba de combustible. 3. Consultar el manual del motor. 4. Problema con el motor. 4. Consultar el manual del motor. 1. El depósito de combustible está vacío. 1. Llenar el depósito de combustible y purgar los manguitos. 2. El dispositivo no está ajustado antes de levantarse del asiento del operario. 2. Poner el freno de estacionamiento y el interruptor de corte en OFF (DESCONECTADO). 1. Nivel de refrigerante bajo. 1. Revisar y añadir refrigerante. 2. Entrada de aire atascada. 2. Limpiar la entrada de aire en el radiador. 3. Correa de la bomba de agua rota o suelta. 3. Apretar o cambiar la correa. La batería no mantiene carga. 1. Bornas en la batería sueltas u oxidadas. 1. Revisar y limpiar las bornas. Se ilumina la luz de la batería. 2. Electrolito bajo. 2. Rellenar al nivel correcto. 3. Correa del alternador floja o rota. 3. Apretar o cambiar la correa. Las cubiertas cortan por igual. no 4. Sistema de carga defectuoso. 4. Consultar el manual del motor. 1. La cuchilla fija al carrete no está ajustada correctamente. 1. Revisar el ajuste de la cuchilla fija. 2. Velocidad del motor demasiado baja. 2. Revisar la velocidad del motor. Funcionar el motor con el acelerador abierto. 3. La velocidad de corte no está ajustada para las condiciones del césped. 3. Ajustar la velocidad de corte al mejor corte. es-47 9 RESOLUCIÓN DE PROBLEMAS 9.2 LÁMPARAS DEL CONTROLADOR ___________________________________________ El controlador es una unidad sólida que dirige y controla las funciones eléctricas. El controlador recibe la señales de entrada desde diversos interruptores y sensores de la máquina y transmite señales de salida para operar los relés, solenoides y luces de advertencia. Controla y reajusta los contadores y contiene lógica incluida para controlar ciertas funciones de la máquina. Cada señal de entrada y salida aparece por las lámparas situadas encima del controlador. Un interruptor de entrada cerrado indica un circuito activo e iluminará una lámpara, un interruptor abierto un circuito inactivo y apagará una lámpara. Las salidas son activas cuando se iluminen sus luces. Es importante recordar que en algunos casos una lámpara o grupo de lámparas debe estar iluminado o apagado para que una condición sea fiel. Por ejemplo, para arrancar el cortacésped debe estar apagado el Interruptor de corte (lámpara 8 apagada) mientras que deben estar puestos el interruptor de arranque de punto muerto (lámpara 12), el interruptor de freno (Lámpara 6) y el solenoide de mantenimiento de la válvula de combustible (lámpara 27). AVISO Para facilitar la resolución de problemas relacionados con el controlador en fábrica, anote la revisión de hardware del controlador y la versión de software situada en la esquina derecha del controlador [VER 7.14]. Los controladores con los mismos niveles de revisión o superiores son compatibles. Funciones del controlador por Número de Lámpara Lampara encendida - Circuito activo Lámpara apagada - Circuito inactivo ENTRADAS Lámpara Circuito SALIDAS Lámpara Circuito Selección programa (1, 3 y 4 no se usan) 19 Luz de filtro hidráulico 5 Interruptor de freno 20 Luz de nivel de aceite hidráulico 6 Interruptor de asiento 21 No usado 7 Interruptores de nivel de carrete 22 Luz de bujía Bajar solenoide 1,2,3,4 8 Interruptor de corte 23 9 Mando - Bajar 24 Subir solenoide 10 Mando - Subir 25 Relé de bujía 11 Interruptor de nivel de aceite hidráulico 26 Relé de puesta en marcha Solenoide de combustible - Mantener 12 Interruptor de punto muerto 27 13 No usado 28 Solenoide 4WD 14 Llave de contacto - Bujía 29 Alarma sonora 15 Llave de contacto - Puesta en marcha 30 Solenoide de corte Solenoide de combustible - Tirar 16 Mando activo 31 17 Interruptor de filtro hidráulico 32 Corriente - Encendido 18 Interruptor de presión de aceite del motor 33 Corriente - Luces es-48 RESOLUCIÓN DE PROBLEMAS 9.3 9 CIRCUITOS ELÉCTRICOS ___________________________________________________ Al tratar de averiguar un problema en la máquina usando el controlador, comprobar siempre que la lámpara de programa activo (2) esté conectada. Esta indica que el controlador tiene potencia y el programa está activo. AVISO El controlador necesita un mínimo de seis voltios para operar. Si una lámpara de entrada no se ilumina, indica una condición inactiva. Esto podría ser causado por un fusible, interruptor averiado o mala conexión. Las conexiones eléctricas de las solenoides en las válvulas hidráulicas también están equipadas con pequeñas lámparas indicadoras. Cuando se iluminan estas lámparas indican, que la señal de salida ha llegado a la conexión. Si las lámparas no se iluminan, revisar los cables entre éstas y el conector. Los circuitos individuales se pueden probar operando un interruptor de entrada, revisando la señal de entrada necesaria y buscando la salida correspondiente. Recordar que no todos los interruptores se encuentran en el panel de instrumentos. El pedal de tracción, límite de elevación de carrete y frenos están controlados por pequeños interruptores de láminas instalados en el bastidor del cortacésped. es-49 10 10 CALIDAD DE CORTE CALIDAD DE CORTE 10.1 CALIDAD DE CORTE - RESOLUCION DE PROBLEMAS Es aconsenjable realizar un corte de prueba para evaluar el rendimiento del cortacésped antes de comenzar las reparaciones. Debe haber una zona preparada donde poder realizar el corte de prueba. Esta zona debe ofrecer condiciones conocidas y consistentes de césped para permitir evaluar correctamente el rendimiento del cortacésped. Después de finalizar las reparaciones y/o los ajustes debe realizarse otro corte de prueba para comprobar el rendimiento del cortacésped. Antes de realizar un corte de prueba para comprobar la apariencia del corte y el rendimiento del cortacésped hay que verificar los siguientes puntos para garantizar un corte de prueba correcto: 1. Velocidad de corte. 2. Afilado de la cuchilla. 3. Altura de corte. 4. Estado del rodillo y del cojinete del rodillo. 5. Velocidad de la cuchilla 10.2 ONDULACIONES __________________________________________________________ Las ondulaciones son un patrón cíclico de alturas de corte alternadas que forman una apariencia de ondas. En la mayoría de los casos, la distancia de punta a punta de las ondas es aproximdamente de 15 - 20 cm. También puede observarse una variación de color (claro a oscuro). Esta condición es normalmente provocada por un movimiento balanceante de las unidades de corte. Esta condición suele aparecer en cortacéspedes con varias unidades de corte (suspendidas). Las ondulaciones también pueden estar provocadas por los cambios en el césped. TN0159 Nota: La flecha indica la dirección de recorrido. Causa probable Remedio La velocidad de corte es demasiado rápida. Reducir la velocidad de corte. Hay acumulación de hierba en el rodillo. Limpiar el rodillo y el raspador. El rodillo está fuera de giro. Cambiar el rodillo. El corte tiene la misma dirección. Cambiar la dirección de corte frecuentemente. Las unidades de corte tienen demasiado o poco peso en ellas. Usar el interruptor de transferencia de peso para poner o quitar peso a las unidades de corte (ver el Manual de piezas y mantenimiento). Poca velocidad del motor, no ajustado según las especificaciones. Comprobar/ajustar la velocidad del motor (ver el Manual de piezas y mantenimiento). Rendimiento del sistema hidráulico y/o del motor de accionamiento giratorio. Comprobar el rendimiento del sistema hidráulico (funcionamiento de la bomba, del motor, de la válvula, ajustes de la válvula de liberación, etc.). es-50 CALIDAD DE CORTE 10 10.3 CORTE EN CAPAS _________________________________________________________ El corte en capas se produce cuando el césped se corta más en un lado de la unidad de corte o del cortacésped que en otro. Normalmente se provocado por un desgaste mecánico o un ajuste incorrecto del rodillo o de la ruedecilla de la plataforma. TN0221 Nota: La flecha indica la dirección de recorrido. Causa probable Remedio El ajuste de altura de corte es distinto en un lado y en otro de la unidad de corte o del cortacésped. Comprobar el ajuste de altura de corte de las unidades de corte. Los cojinetes del rodillo delantero están desgastados. Comprobar/cambiar los cojinetes del rodillo y/o las ruedecillas de la plataforma. El movimiento del carrete de corte está restringido. Comprobar/eliminar la obstrucción del movimiento del carrete de corte. Hay variaciones en la densidad del césped. Cambiar la dirección de corte. La altura de conducción de la máquina es irregular de un lado a otro. Comprobar/ajustar la presión de los neumáticos (ver el Manual de piezas y mantenimiento). La altura de la unidad de corte es irregular de un lado a otro. Comprobar/ajustar la distribución regular del peso. es-51 10 CALIDAD DE CORTE 10.4 ESCALPADO _____________________________________________________________ El escalpado es una condición por la que algunas zonas del césped son mucho más cortas que otras, lo cual provoca que haya zonas con menos césped o totalmente peladas. Esto es normalmente provocado por un ajuste de altura de corte excesivamente bajo y/o un césped irregular. TN0222 Nota: La flecha indica la dirección de recorrido. Causa probable Remedio Los ajustes de altura de corte son más bajos de lo normal. Comprobar y ajustar los ajustes de altura de corte (ver el Manual de piezas y mantenimiento). El césped es demasiado irregular para que pueda seguirlo el cortacésped. Cambiar la dirección de corte. Se corta demasiado césped de una vez. Cortar más frecuentemente. La velocidad de corte es demasiado rápida. Reducir la velocidad de corte. es-52 CALIDAD DE CORTE 10 10.5 MONTONES DISPERSOS ___________________________________________________ Los montones dispersos son zonas de césped sin cortar o mal cortado. TN0223 Nota: La flecha indica la dirección de recorrido. Causa probable Remedio La cuchilla fija está mal ajustada. Cambiar el ajuste del carrete a la cuchilla fija para la altura de corte deseada (ver el Manual de piezas y mantenimiento). Las cuchillas de corte están desafiladas. Afilar o cambiar las cuchillas (ver el Manual de piezas y mantenimiento). El césped está demasiado alto. Cortar más frecuentemente. Se corta en la misma dirección. Cambiar la dirección de corte con regularidad. es-53 10 CALIDAD DE CORTE 10.6 LINEAS __________________________________________________________________ Una línea es una hilera de césped sin cortar. Esto es normalmente provocado por una cuchilla fija agrietada o doblada. TN0224 Nota: La flecha indica la dirección de recorrido. Causa probable Remedio La cuchilla está dañada. Cambiar la cuchilla. El giro es demasiado agresivo. Las cuchillas de corte no solapan en los giros o en las cuestas. Girar menos agresivamente para que las unidades de corte puedan solapar. Cambiar la dirección o el patrón de corte en las cuestas. Hay marcas de neumático debajo del césped antes de cortarlo. Comprobar/ajustar la presión de inflado de los neumáticos (ver el Manual de piezas y mantenimiento). El césped mojado se aplana antes de cortarlo. Cortar cuando el césped esté seco. es-54 CALIDAD DE CORTE 10 10.7 ACUMULACION ___________________________________________________________ La acumulación se produce al amontonarse recortes en un extremo de las unidades de corte o entre ellas y formarse líneas en la dirección de recorrido. TN0225 Nota: La flecha indica la dirección de recorrido. Causa probable Remedio El césped está demasiado alto. Cortar más frecuentemente. Se corta con el césped mojado. Cortar cuando el césped esté seco. Se acumula césped en el rodillo. Limpiar los rodillos y los raspadores. Se recoge césped en el cortacésped o en el bastidor de la unidad de corte. Limpiar el deflector de descarga de las unidades de corte. es-55 10 CALIDAD DE CORTE 10.8 UNIDADES DE CORTE DESAJUSTADAS ______________________________________ El patrón de unidades de corte desajustadas forma varias alturas de corte que provocan una apariencia de corte en capas, normalmente debido a un ajuste incorrecto de la altura de corte de una a otra unidad de corte. Nota: La flecha indica la dirección de recorrido. Causa probable Remedio La altura de corte es inconsistente de una unidad de corte a otra. Comprobar/ajustar la altura de corte de las unidades de corte. Hay diferencia en las velocidades de las unidades de corte giratorias. Comprobar el funcionamiento de los motores de las unidades de corte giratorias y reparar/cambiar si es necesario. Hay diferencia entre la altura de conducción del cortacésped de un lado al otro. Comprobar/ajustar la presión de inflado de los neumáticos (ver el Manual de piezas y mantenimiento). Comprobar/ajustarla distribución de peso del cortacésped. es-56 NOTAS 11 11 NOTAS es-57 Europa y resto del mundo excepto América Ransomes Jacobsen Limited West Road, Ransomes Europark, Ipswich, IP3 9TT, Inglaterra Número de registro de empresa en Inglaterra 1070731 www.ransomesjacobsen.com América Jacobsen, A Textron Company 11108 Quality Drive, Charlotte, NC 28273, EE.UU. www.Jacobsen.com When Performance Matters.™