1
6563 Airtex Installation Guide 8.5x14-b:Layout 1 4/7/09 10:27 AM Page 1
X91216
FLOAT ARM
INSTALLATION
1
The float arm assembly is shipped
loose and must be properly
mounted to the fuel level sender
before installing the pump module
into the fuel tank.
STEP 1
MAKE SURE IT’S YOUR FUEL PUMP!
• Check related fuel system components such
as fuel filter, relays, vehicle wiring and
connectors, chassis grounds, fuel pressure
regulator and fuel itself – contaminated fuel
is a leading cause of fuel pump failure
• Manufacturer’s warranty does not cover
units returned due to misdiagnosis,
vehicle electrical issues, or contamination
STEP 5
REMOVE VEHICLE REAR SEAT AND FUEL
PUMP COVER TO ACCESS FUEL PUMP
• Consult repair manual for proper procedures
• Clean outside of tank
IDENTIFY COMPONENTS
NOTICE: Handle the fuel pump
module, fuel level sender, and float
arm assembly carefully. Any damage,
bending or distortion will adversely
affect the accuracy of the fuel
level readings.
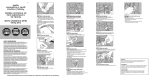
The following components will be
referenced during the assembly
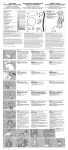
process (Figure 1):
1. Fuel pump module
2. Fuel level sender
3. Pivot hole
4. Float arm assembly
5. Float arm retaining clip
3
2
INSTALL NEW TANK SEAL (IF
APPLICABLE)
• Consult repair manual for proper procedures
4
5
Figure 1
Bomba de
Combustible Guía
de Instalación Rápida
Fuel Pump
Quick Installation Guide
ASSEMBLE FLOAT ARM
1. Insert the float arm into the pivot hole of the fuel level sender
(Figure 2).
2. Carefully push on the float arm until it snaps into the fuel level
sender. The float arm will now be in place (Figure 3).
STEP 6
STEP 2
REMOVE OLD FUEL PUMP
• Consult repair manual for proper procedures
RELIEVE SYSTEM FUEL PRESSURE
• Consult repair manual for proper procedures
STEP 9
STEP 10
RE-INSTALL FUEL PUMP COVER AND REAR
SEAT
• Consult repair manual for proper procedures
INSTALL FLOAT ARM RETAINING CLIP
Position the float arm retaining clip over the float arm as shown
(Figure 4) and push it into the fuel level sender housing until it snaps
into place (Figure 5).
STEP 11
REPLACE VEHICLE FUEL FILTER
• Clogged fuel filter will significantly shorten
fuel pump life
• Clogged fuel filter may cause low fuel
pump pressure
SAFETY INFORMATION
Repair procedures, tools, and parts to service motor vehicles,
and the experience of the person performing the work make
it impossible to describe all ways or conditions under which
motor vehicles are or may be serviced, or to provide
cautionary statements regarding hazards that may result.
Standard and accepted safety precautions and equipment
should be used when handling toxic or flammable materials.
Safety goggles, other protection, and appropriate clothing
(long-sleeve shirt, trousers and safety shoes) are required.
Make sure your work area is well ventilated and not exposed
to heat, electricity, or open flames. No smoking! Clean up
spills immediately and have a Class B or C fire extinguisher
readily accessible. Consult appropriate repair manuals for any
required special tools.
STEP 7
STEP 3
DISCONNECT THE BATTERY
• Disconnect negative battery cable to reduce
possibility of sparks or engine starting
CLEAN INSIDE OF FUEL TANK
• Fuel contamination is leading cause of fuel
pump failure
• New fuel pump strainer is not a substitute
for cleaning the tank
• Contact local Radiator/Fuel Tank Repair
shop for tank cleaning assistance
• Manufacturer’s warranty does not cover
failure due to contamination
Figure 2
Figure 3
FILL GAS TANK WITH CLEAN FUEL
• Clean fuel is critical to ensure proper fuel
pump operation
INFORMACIÓN DE SEGURIDAD
En vista de los procedimientos, herramientas y piezas de
reparación necesarios para dar servicio a los vehículos
motorizados, así como la experiencia de la persona que
realiza el trabajo, resulta imposible describir todas las maneras
o condiciones bajo las cuales se da o puede darse servicio a
los vehículos motorizados o proporcionar enunciados de
precaución con respecto a los peligros que podrían resultar.
Deben usarse precauciones y equipos de seguridad estándar y
aceptados al manejar materiales tóxicos o inflamables. Se
requieren anteojos de seguridad, otra protección y ropa
apropiada (camisa de mangas largas, pantalones y calzado de
seguridad). Cerciórese de que su área de trabajo esté bien
ventilada y no expuesta al calor, electricidad o llamas abiertas.
¡Prohibido fumar! Limpie inmediatamente todos los derrames
y tenga fácilmente accesible un extintor de incendios Clase B
o C. Consulte los manuales de reparación apropiados para
cualesquier herramientas especiales.
STEP 12
STEP 4
EMPTY FUEL FROM GAS TANK
• Drain fuel into approved containers and
dispose of per local codes or regulations
STEP 8
INSPECT/REPLACE VEHICLE
WIRING/HOSES
AS NEEDED
• Damaged or faulty vehicle wiring is a
leading cause of misdiagnosis and
premature fuel pump failure
• Wire harness must be replaced if included
with new fuel pump
• Other replacement harnesses available
for purchase
• Replace worn or deteriorated hoses
and fittings
STEP 13
Figure 4
Figure 5
START ENGINE AND CHECK FOR LEAKS OR
PROBLEMS
• Reconnect battery cable
• Key may need to be cycled on and off several
times to build proper fuel system pressure
• Check for leaks
• All fuel pumps are tested at point of
manufacture to ensure proper operation
when installed
6563 Airtex Installation Guide 8.5x14-b:Layout 1 4/7/09 10:27 AM Page 2
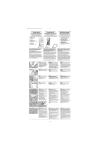
INSTALACIÓN DEL
BRAZO DEL FLOTADOR
1
El conjunto de brazo del flotador se
envía desarmado y debe montarse
correctamente al transmisor de nivel
de combustible antes de instalar el
módulo de la bomba dentro del
tanque de combustible.
PASO 2
ALIVIE LA PRESIÓN DEL SISTEMA DE
COMBUSTIBLE
• Consulte el manual de reparación para los
procedimientos correctos
PASO 6
QUITE LA BOMBA DE COMBUSTIBLE VIEJA
• Consulte el manual de reparación para los
procedimientos correctos
TO VALIDATE WARRANTY
1.
2.
3.
4.
Replace vehicle fuel filter.
Replace damaged vehicle fuel pump wiring or connector.
Replace fuel pump filter/strainer (where applicable).
Clean and flush the inside of the fuel tank.
PASO 3
PARA HACER VÁLIDA LA GARANTÍA
1. Cambiar el filtro de combustible del vehículo.
2. Cambiar el cableado o el conectador dañado de la bomba de
gasolina del vehículo.
3. Cambiar el filtro/cedazo de la bomba de gasolina
(cuando aplique).
4. Lavar el interior del tanque de gasolina.
DESCONECTE LA BATERÍA
• Desconecte el cable negativo de la batería
para reducir la posibilidad de chispas o
arranque del motor
PASO 7
LIMPIE EL INTERIOR DEL TANQUE DE
COMBUSTIBLE
• La contaminación del combustible es la causa
principal de fallas de la bomba de combustible
• Un colador de bomba de combustible nuevo no
es sustituto de la limpieza del tanque
• Comuníquese con el taller local de Reparación
de Radiador/Tanque de Combustible para ayuda
de limpieza
• La garantía del fabricante no cubre fallas
debido a contaminación
IDENTIFIQUE LOS
3
COMPONENTES
AVISO: Maneje con cuidado el módulo
de bomba de combustible, transmisor
de nivel de combustible y brazo del
flotador. Cualquier daño, doblez o
distorsión afectará adversamente la
4
exactitud de las lecturas del nivel de
combustible.
Se hace referencia a los siguientes
componentes durante el montaje
(Figura 1):
1. Módulo de bomba
de combustible
2. Transmisor de nivel de combustible
3. Agujero de pivote
4. Conjunto de brazo del flotador
5. Lengüeta de retén del brazo del flotador
ARME EL BRAZO DEL
FLOTADOR
1. Inserte el brazo del flotador en
el agujero de pivote del
transmisor de nivel de
combustible (Figura 2).
2. Empuje cuidadosamente el
brazo del flotador hasta que se
enganche dentro en el
transmisor de nivel de
combustible. Ahora el brazo del
flotador estará en posición
(Figura 3).
2
5
PASO 9
INSTALE LA BOMBA DE COMBUSTIBLE
NUEVA Y EL COLADOR NUEVO
• Se requiere un colador nuevo para validar
la garantía
Figura 1
INSTALE LA LENGÜETA DE
RETÉN DEL BRAZO DEL
FLOTADOR
Posicione la lengüeta de retén del
brazo del flotador sobre dicho
brazo como se muestra (Figura 4)
y empújelo dentro de la caja del
transmisor de nivel de combustible
hasta que se enganche en posición
(Figura 5).
PASO 10
REINSTALE LA TAPA DE LA BOMBA DE
COMBUSTIBLE Y EL ASIENTO TRASERO
• Consulte el manual de reparación para los
procedimientos correctos
PASO 11
REINSTALE EL TANQUE DE COMBUSTIBLE
• Consulte el manual de reparación para los
procedimientos correctos
PASO 4
VACÍE EL COMBUSTIBLE DEL TANQUE
DE COMBUSTIBLE
• Drene el combustible en envases aprobados y
deseche de acuerdo con los códigos o
reglamentos locales
PASO 8
INSPECCIONE/REEMPLACE EL
ALAMBRADO/MANGUERAS DEL
VEHÍCULO SEGÚN NECESIDAD
• El alambrado dañado o deficiente del vehículo es
una causa principal de diagnóstico erróneo y falla
prematura de la bomba de combustible
• Debe reemplazarse el arnés de alambrado si se
incluye con la bomba de combustible nueva
• Hay otros arneses de reemplazo disponibles
para compra
• Reemplace las mangueras y guarniciones
desgastadas o deterioradas
PASO 1
¡CERCIÓRESE DE QUE SEA LA BOMBA DE COMBUSTIBLE!
• Compruebe los componente relacionados del sistema de
combustible, entre ellos, filtro de combustible, relés, alambrado del
vehículo y conectores, puestas a tierra del chasis, regulador de
presión de combustible y el combustible mismo – el combustible
contaminado es una causa principal de fallas de la bomba de
combustible
• La garantía del fabricante no cubre las unidades devueltas
debido a diagnóstico erróneo, problemas eléctricos del vehículo
o contaminación
PASO 12
Figura 2
Figura 3
REEMPLACE EL FILTRO DE COMBUSTIBLE DEL
VEHÍCULO
• Un filtro de combustible obturado reducirá
significativamente la vida de la bomba de combustible
• Un filtro de combustible obturado podrá ocasionar
presión baja de la bomba de combustible
PASO 5
QUITE EL ASIENTO TRASERO DEL
VEHÍCULO Y LA TAPA DE LA BOMBA DE
COMBUSTIBLE PARA ACCESO A LA
BOMBA DE COMBUSTIBLE
• Consulte el manual de reparación para los
procedimientos correctos
• Limpie el exterior del tanque
PASO 13
LLENE EL TANQUE DE GASOLINA CON
COMBUSTIBLE LIMPIO
• El combustible limpio es imprescindible para asegurar
la operación correcta de la bomba de combustible
Figura 4
Figura 5