1
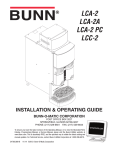
HV-3
Liquid Coffee Dispenser
Distribuidor de Café Líquido
INSTALLATION & OPERATING GUIDE
MANUAL DE INSTALACIÓN Y OPERACIÓN
43868.0000B
12/10 © 2010
CONTENTS
User Notices..............................................................3
Electrical Requirements.............................................4
Plumbing Requirements............................................4
Initial Set-up..............................................................4
Electrical Hook-up......................................................5
Plumbing Hook-up.....................................................5
Leveling the Dispenser...............................................5
Drip Tray Installation..................................................6
Introduction...............................................................7
Installing Concentrate BIBs........................................7
Operating Controls & Interface..................................7
Initial Fill & Heat.........................................................8
Rinse Procedure........................................................9
BIB Empty Lockout Feature........................................9
Brew Temperature Lockout Feature............................9
Operating the Dispenser...........................................10
Filling Cambros or other large containers................10
Draining the Hot Water............................................10
Cleaning & Preventive Maintenance.........................11
Troubleshooting.......................................................12
ÍNDICE
Avisos a los usuarios...................................................... 15
Requisitos eléctricos....................................................... 17
Especificaciones de tuberías........................................... 17
Ajuste inicial.................................................................... 17
Conexiones eléctricas..................................................... 18
Conexiones de tuberías................................................... 18
Nivelación del distribuidor.............................................. 18
Instalación de la bandeja de goteo.................................. 19
Introducción.................................................................... 20
Instalación de la bolsa-caja de café concentrado............ 20
Interfaz y controles de operación.................................... 20
Llenado y calentamiento iniciales.................................... 21
Procedimiento de enjuague............................................. 22
Función de bloqueo de BIB vacío.................................... 22
Función de bloqueo por temperatura de percolación...... 22
Operación del distribuidor............................................... 23
Rellenado de cambros y otros recipientes grandes......... 23
Drenaje del agua caliente................................................ 23
Limpieza y mantenimiento preventivo............................. 24
Localización y resolución de problemas.......................... 25
2
43868 112310
USER NOTICES
Carefully read and follow all notices on the equipment and in this manual. They were written for your protection. All notices are to be kept in good condition. Replace any unreadable or damaged labels.
As directed in the International Plumbing Code of the
International Code Council and the Food Code
Manual of the Food and Drug Administration (FDA),
this equipment must be installed with adequate
backflow prevention to comply with federal, state
and local codes. For models installed outside the
U.S.A., you must comply with the applicable Plumbing /Sanitation Code for your area.
00656.0001
! CAUTION
00986.0002
00824.0000
Do not connect to a
circuit operating at
more than 150 volts
to ground.
Artwork for P/N: 00656.0001
Artwork Rev: A
Drawn: REF
Date: 04/22/10
To reduce the risk of electric shock,
do not remove or open cover.
No user-serviceable parts inside.
Authorized service personnel only.
Disconnect power before servicing.
27508.0000
37881.0000
Optional Field Wiring
120/208 V, 37.6 A, 7820 W
1PH, 3-Wire + GND, 60HZ
Moving Parts.
Risk Of Electrical Shock.
Do not operate
unit with this
panel removed.
Disconnect power before
servicing unit.
27442.0000
120/240 V, 43.2 A, 10400 W
1PH, 3-Wire + GND, 60HZ
FOR USE ON INDIVIDUAL BRANCH CIRCUIT ONLY
CHARGE
120/208Y V, 32.8 A, 12000 W
3PH, 4-Wire + GND, 60HZ
Type R134A, Amount 13 oz (368.6 gm)
Design Pressures:
High 276 psi (19 bar) (1.9 MPa)
Low 88 psi (6 bar) (0.61 MPa)
N
TERMINAL
BLOCK
FROM POWER SOURCE
FOR 3-PHASE OPERATION
CONNECT INPUT WIRING TO
L1,L2,L3 & N AS SHOWN.
(LOCALIZADO DEBAJO
DEL DISPENSADOR)
(LOCALIZADO DEBAJO
L3
DEL DISPENSADOR)
40054.0000
3
TO MACHINE
L1
WHI
FILTRO DE AIRE
LIMPIAR
SEMANALMENTE!
RECORDATORIO!
LIMPIAR EL FILTRO DE
AIRE SEMANALMENTE
L2
33461.0004
RED
(LOCATED UNDER THE DISPENSER)
L1
(LOCATED UNDER THE DISPENSER)
BLU
AIR FILTER
CLEAN WEEKLY!
RED
REMINDER!
CLEAN AIR FILTER
WEEKLY
BLK
TO MACHINE
BLU
37280.0000
BLK
WARNING: HOT LIQUIDS
WHI
28181.0004
L2
L3
N
FROM POWER SOURCE
FOR SINGLE PHASE OPERATION
MOVE BLU WIRE INTO
TERMINAL BLOCK WITH BLACK
WIRE, CONNECT INPUT WIRING
TO L1, L2 & N AS SHOWN.
37947.0002
43868 112310
ELECTRICAL REQUIREMENTS
CAUTION: The dispenser must remain disconnected from power source until specified in Electrical Hook-Up.
The HV-3 is shipped configured for 3 Phase operation. The internal terminal block must be rewired for 208/240V
– 1Phase applications, (see Optional Field Wiring Diagram).
FIELD WIRING TERMINAL BLOCK DIAGRAM
L1
L2
L3
N
TERMINAL
BLOCK
FROM POWER SOURCE
WHI
BLU
L1
RED
BLK
TO MACHINE
WHI
BLU
RED
BLK
TO MACHINE
L2
L3
N
FROM POWER SOURCE
Fig 1
Fig 2
For all 208 - 240 Volt Connections: Use No. 6 AWG Wires suitable for 90°C (194 °F)
1. Unit is shipped wired for 3 Phase / 5 wire operation.
2. For 208 - 240V / 1 Phase / 3 Wire: Move the Blue Heater wire to the Top Black Terminal as shown.
3. Unit requires120 Vac from L1 to N.
PLUMBING REQUIREMENTS
The dispenser may be connected to a cold or hot water system (180°F Max.) with operating pressure between
20 and 90 psi (138 and 620 kPa) from a 1/2” or larger supply line. Install a regulator in the line when pressure
is greater than 90 psi (620 kPa) to reduce it to 50 psi (345 kPa). The dispenser is set up to deliver to 6 Oz./sec.
(177.4 ml/sec) and requires a water supply that can deliver a minimum of 3 gpm (11.4 lpm) at the inlet valve. A
shut-off valve should be installed in the line before the dispenser.
The HV-3 is supplied with a Dual Water Filter Kit, see instructions in the kit for proper assembly and mounting.
Use a 3/8” or larger FDA approved flexible hose from water supply line to the filters and from the filters to the
inlet of the dispenser. Use copper tubing for hot water installations, per local plumbing codes.
NOTE: The water level sensors in this machine do not work with de-ionized water and may cause the unit to overflow.
RO (Reverse Osmosis) water supply systems may need to be treated to restore free ions to the water.
As directed in the International Plumbing Code of the International Code Council and the Food Code
Manual of the Food and Drug Administration (FDA), this equipment must be installed with adequate
backflow prevention to comply with federal, state and local codes. For models installed outside the
U.S.A., you must comply with the applicable Plumbing /Sanitation Code for your area.
INITIAL SET-UP
NOTE: The HV-3 dispenser weighs approximately 180 lbs. (82 kg). Use more than one person when lifting or
moving the dispenser.
1.
2.
3.
4.
Cut the straps and remove the box and foam packing.
Locate and remove the information packets and tube kits from top of packaging and set aside.
Set dispenser on the counter where it is to be used. CAUTION: DO NOT LIFT ON THE DOOR.
Confirm the dispenser is level on the counter (See LEVELING THE DISPENSER).
4
43868 120710
PLUMBING HOOK-UP
1. Flush the water line to remove any debris or foreign material.
2. Securely attach the water line to the inlet tube on the water filter system.
3. Turn on the water supply and check for leaks.
NOTE - Water pipe connections and fixtures directly connected to a potable water supply shall be sized, installed
and maintained in accordance with federal, state and local codes.
ELECTRICAL HOOK-UP
CAUTION: Improper electrical installation will damage electronic components.
1. An electrician must provide electrical service as specified in conformance with all local, state and federal
electrical codes.
2. Using a voltmeter, check the voltage and color-coding of each conductor at the electrical source.
LEVELING THE DISPENSER
Proper leveling of the dispenser is required to insure proper drainage of condensation from the refrigeration
unit.
1. Set the dispenser on a level counter top.
2. Use the (6) adjustable legs to level the dispenser.
3. Once the unit is level, adjust the front three legs out another 1/16” to create a slight tilt towards the rear of
the dispenser. (See Fig. below)
1/16"
LEVEL
5
43868 120710
DRIP TRAY INSTALLATION
Unscrew the middle and right front legs (Fig. 1) - just enough to allow the mounting bracket to slide under the
legs, (~1/8”).
Caution: The HV-3 is very heavy. Use wood blocks to hold the machine up while working underneath it!
1. Insert the bracket between the legs and the base of the machine and retighten the legs, (Fig. 2).
Fig. 1
Fig. 2
2. Insert the Drip Tray onto the mounting bracket, (Fig. 3). Make sure the drain fitting is still protruding through
the hole.
Fig. 3
Optional Drip Tray Drain
A separate drain tube (not supplied) may be attached to fitting in the bottom of the tray, if desired. Note: Drill
a ¼” hole in the center of the fitting, before attaching the drain hose. Direct the other end of this hose into a
permanent drain.
Alternate Evaporator Drain
For locations where the Drip Tray is not desired, connect a separate drain hose (not supplied) to the Evaporator
Drain Fitting and direct the other end of this hose into a permanent drain.
CAUTION: FAILURE TO INSTALL THE DRIP TRAY OR ALTERNATE EVAPORATOR DRAIN WILL RESULT IN WATER
DRIPPING ON TO THE COUNTER AND/OR FLOOR UNDER THE DISPENSER.
6
43868 112310
INTRODUCTION
Always follow the Manufacturer’s recommendations for proper Storage and Shelf Life. The product Flavor
Profile is extended by the refrigerated cabinet featured in the HV-3. This dispenser is designed to operate at
ambient temperatures from 32°F (0°C) minimum to 104°F (40°C) maximum.
INSTALLING CONCENTRATE BIBS
NOTE: Concentrate must be fully thawed prior to use, (refer to THAWING instructions on the box).
1. Shake the BIB ten times, then remove the plastic wrapper.
2. Remove the dosing tube and position the red ring into the opening of the box (refer to Instructions on the
box).
3. Lift the metal retainer bar in the cabinet and insert the doser tube into the doser chamfer of the doser coil.
4. Make sure the doser tube is fully inserted into the doser coil.
OPERATING CONTROLS AND INTERFACE
1. Master ON/OFF Switch: Disconnects AC Power to the dispenser.
CAUTION: If switched OFF - Remove coffee product and store in a refrigerator.
2. Hot Water Handle: Pull and Hold to dispense hot water manually.
3. Door Interlock Switch: Unit will not dispense product if the door is open.
4. LCD Display: Displays status, programming menus and fault messages.
5. Volume Selection: Rotate dial to the desired volume prior to dispensing product.
6. Dispense Switches (A-B-C): Push and Release to dispense the desired product.
(These also double as programming switches in the Set-Up mode).
7. Function Selector Switch: Allows the user to set the dispenser into different dispensing modes.
a. RINSE: Dispenses hot water only - Flushes the mix chamber and dispense tip.
b. RUN: Normal dispense mode - Dispenses mixed product (concentrate and water).
c. SANITIZE: Raises water temperature to 205°F and dispenses 5 gallons of hot water, (refer Sanitizing the
Dispenser).
8. Empty BIB displays (A, B & C). Light up to indicate when a BIB is Empty and need to be replaced.
9. Hidden Set-Up / Programming switches.
a. Press and hold the Right switch for 10 seconds to enter in the Set-Up mode.
b. Use the Right switch to scroll down and the Left switch to scroll up through the menu screens.
4
6
1
5
9
7
8
3
7
43868 120710
INITIAL FILL & HEAT
1. Confirm the water supply is on.
2. Connect the dispenser to the power source.
3. Turn the Master ON/OFF Switch ON and select RUN on the Function Selector Switch. The LCD will display
“Tank Filling – Please Wait!” and water will begin flowing into the tank.
4. Once the tank is full the dispenser will start heating the water and display “Heating – Select Flavor”. Dispenser
models with product chillers will also begin to cool the cabinet at this time.
5. The LCD will display “Ready Select Flavor” when the tank temperature reaches the preset Ready
Temperature.
Note: The time required to heat the water initially will vary depending on the AC Power and the temperature of
the incoming water. While the tank is heating, the dispenser may be readied for use as described in Programming
Functions & Basic Operations.
3
8
43868 112310
RINSING THE DISPENSER
Daily rinsing of the mix chambers and dispense tips is essential for proper maintenance and optimum performance
of the dispenser.
4
1
Rinse Procedure:
1. Select Rinse on the Function Selector switch.
2. Place a 2 Liter (1/2 Gal) container under the dispense tip.
3. Press and hold any of the dispense switches until the water flow stops automatically, approximately 10 sec.
The Rinse Alarm message will go away, when the Rinse procedure has been satisfied.
4. Select Run on the Function Selector switch to return to normal dispense mode.
BIB EMPTY LOCKOUT FEATURE
The HV-3 will Lockout dispensing product if the Empty BIB Sensor for that product does not detect concentrate
in the doser tube. The unit will turn on the LED associated with the Empty BIB and display a “RIGHT, MIDDLE or
LEFT BIB EMPTY - Replace Now” message on the LCD. Replacing the BIB will eliminate the Empty BIB Message
and turn off the LED.
BREW TEMPERATURE LOCKOUT FEATURE
The dispenser is preset to not dispense product if the hot water is not up to the preset READY temperature. The
dispenser will display “HEATING – Please Wait” and not allow dispensing until the tank temperature reaches the
preset READY temperature. Contact your Sara Lee Service Agent (1-800-756-4357) if you wish to disable this
feature.
9
43868 120710
OPERATING THE DISPENSER
The Cabinet door must be closed & latched and the Function Selector Switch set to RUN to dispense coffee.
To Dispense Coffee
1. Select the desired volume (1, 2 or 3) using the rotary switch.
2. Place the appropriate container under the dispense tip.
3. Press and release the desired flavor switch to dispense product. The LCD will display “DISPENSING PRODUCT”
“PRESS ANY SWITCH TO STOP”. Note: Pressing any switch after starting a dispense cycle - will abort that
dispense and halt the flow of product.
4. Remove the container and serve accordingly.
To Dispense Hot Water
1. Place container under the hot water dispenser tip.
2. Pull and Hold the Hot Water handle until the water reaches the desired level, then release.
3. Remove the container.
NOTE: For large containers that will not fit under the dispense tip, a short 3/8” diameter NSF approved hose may
be used.
FILLING CAMBROS OR OTHER LARGE CONTAINERS
The dispenser is designed primarily for containers that will fit under the dispense tip. However, it may be
used to fill larger containers (up to 10 Gal) using the Dispense Hose (#43402.0000) supplied with the HV-3.
Care must be taken to insure that the mixed product flows freely from the dispense tip into the container. Insure
that the outlet of the hose is below the dispense tip and that the mixed product flows freely into the container.
The dispense hose should not run full or back up into the dispense tip. Failure to follow these directions can alter
the mix ratio and/or cause flooding of the product cabinet.
NOTE: Recovery time will be dependent on the temperature of the supply water and the supply voltage to the
dispenser.
DRAINING THE HOT WATER TANK
CAUTION: The dispenser must be disconnected from the power source throughout these steps.
1. Disconnect the dispenser from the power source.
2. Shut off and disconnect the incoming water supply.
3. Remove the lower right access panel.
4. Pull out drain tube to empty into a sink or a container with a minimum of 18 gallon capacity.
5. Make sure drain clamp is closed. Then, remove drain plug.
6. Direct tube into sink or container and open drain clamp. Continue draining tank until ALL of the water is out.
CAUTION: The water may be very hot as it drains out of the tank. Make sure the hose is directed away from the
body.
7. Close drain clamp, insert drain plug, place drain tube back into machine, and replace the access panel.
Note: The dispenser must be refilled using the Initial Fill & Heat steps before reconnecting the power source.
10
43868 112310
HV-3
CLEANING & PREVENTATIVE MAINTENANCE
LIMPIEZA Y MANTENIMIENTO PREVENTIVO
DAILY RINSING & CLEANING:
1. Select “Rinse” on the function selector switch (see
Fig 1).
2. Place a 1/2 gal (2 liter) container under the hose or
dispense nozzle.
3. Press and hold “A” button flavor selection switch for
approximately 10 seconds or until the hot water is clear
or has no concentrate coloring in it. Discard this solution
(see Fig 2).
4. Wipe splash panels, dispense nozzle, door and cabinet
with a clean sanitary cloth.
WEEKLY CLEANING & SANITIZING:
1. Open the product cabinet and remove all concentrate
boxes.
2. Use the provided brush to clean the inside of the product coil in the cabinet (see Fig 3).
3. Place an empty 5 gallon container under the dispense
hose or nozzle.
4. Select “Sanitize” on the function selector switch. This
will raise the temperature of the water in the tank to 205
F (96 C). Note that sanitizing will not begin until the water
has reached the 205 F (96 C) (See Fig 1).
5. Once 205F (96 C) is achieved, push any dispense button. This will automatically begin a 5 gallon rinse/sanitizing of the system, (this will take approximately 3.5 minutes) (See Fig 4).
6. Empty the 5 gal container and repeat step five.
7. Wipe all splash panels; dispense nozzle, door, and
cabinet with a clean sanitary cloth.
Figure 1
Figure 2
Figure 3
ENJUAGUE Y LIMPIEZA DIARIO
1. Seleccione la función enjuagar en el selector de funciones, ver Fig 1.
2. Coloque un envase de medio galón (2 litro) bajo de la
boquilla de dispensar.
3. Presione y mantenega presionado el botón de sabor
“A” durante aproximadamente 10 segundos o hasta que
el agua caliente dispense clara o no tenga color del concentrado en ella. Desechar esta agua dispensada, ver Fig
2.
4. Limpie los paneles, la boquilla de dispensar la puerta
y gabinete con un paño para desinfectar.
LIMPIAR Y DESINFECTAR SEMANALMENTE
1. Abra el gabinete donde están los productos y retire las
tres cajas de concentrados.
2. Use el cepillo para limpiar el interior de la bobina, ver
Fig 3.
3. Coloque un envase de 5 galónes bajo de la manguera
de dispensar o la boquilla.
4. Seleccione la función de desinfectar, esto elevara la
temperatura del agua en el tanque hasta 205 F (96C).
Nota: El proceso de desinfectar no comenzará hasta que
el agua ha alcanzado los 205 F (96 C), ver Fig 1.
5. Una vez 205F (96 C) se logren, presione cualquier
botón de dispensar, esto automáticamente inicia un enjuague y desinfectante de 5 galones al sistema, (esto
tomará aproximadamente 3.5 minutos), ver Fig 4.
6. Vacíe el recipiente de los 5 galones y repita el paso 5.
7. Limpie los paneles, la boquilla de dispensar, puerta y
gabinete con un paño para desinfectar.
Figure 4
RELOADING FOR NEXT USE:
1. Reinstall all concentrate boxes (see Fig 5).
2. Close the dispenser door and select RUN on the Function Selector Switch.
REGRESA EL PRODUCTO AL DISPENSARIO
1. Volver a colocar los tres cajas en el Gabinete, ver Fig 5.
2. Cierra la puerta del dispensador y seleccione la función de RUN en el selector de funciones.
Figure 5
43560.0000A 10/10 © 2010 Sara Lee Corporation
Weekly: REFRIGERATION AIR FILTER
Semanal: FILTRO DE AIRE PARA REFRIGERACIÓN
1.
2.
3.
4.
1. Quite el filtro de parte inferior del dispensador.
2. Lave el filtro en una solución de detergente suave.
3. Utilice un cepillo de cerdas suaves para eliminar todo
el polvo y la grasa.
4. Vuelva a instalar el filtro en el dispensador.
Remove the screen filter from the bottom of the dispenser.
Wash the screen in a mild detergent solution.
Use a soft bristled brush to remove all dust and grease.
Reinstall the screen.
11
43868 112310
TROUBLESHOOTING
A troubleshooting guide is provided to suggest probable causes and remedies for the most likely problems
encountered. If the problem remains after exhausting the troubleshooting steps, contact your local Technical
Service provider at 1-800-756-4357.
• Only qualified service personnel should perform inspection, testing, and repair of electrical equipment.
• Shorting the terminals or the application of external voltages to electronic components may result in component
or circuit board failure.
• Intermittent operation of electronic circuit boards is unlikely. board failure will normally be permanent. If an
intermittent condition is encountered, the cause will likely be a switch contact or a loose wire connection at
a terminal or crimp.
• Solenoid removal requires interrupting the water supply to the valve. Damage may result if solenoids are
energized for more than ten minutes without a supply of water.
• The use of two wrenches is recommended whenever plumbing fittings are tightened or loosened. This will
help avoid twists and kinks in the tubing.
• Make certain that all plumbing connections are sealed and all electrical connections are tight and isolated.
• This dispenser is heated at all times. Keep away from combustibles.
WARNING:
• Exercise extreme caution when servicing electrical equipment.
• Disconnect the brewer from the power source when servicing, except when electrical tests are specified.
• Follow recommended service procedures.
• Replace all protective shields or safety notices.
Screen Displayed
Possible Cause
Troubleshooting Procedures
NO DISPLAY
No Power to the Dispenser
Check Master ON/OFF Switch
Check Power Cord & Circuit Breaker
Service Required
HEATING
Please Wait!
Water temp is below the preset
READY temp
Wait for water temp to rise
Check Ready Temp. threshhold setting
Service Required
RINSE REQUIRED
Rinse Alarm Time Interval has
expired
Rinse Dispenser, see Rinse Procedure
Replace BIB, see Loading the Concentrate
XXXX BIB EMPTY
Replace BIB Now
Concentrate BIB is empty.
BIB not properly loaded.
Replace BIB, see Loading the Concentrate
Nozzle must be fully seated in doser coil.
OVERFLOW
FAULT
1. Refill valve stuck open
Service Required
2. Faulty refill probe
Service Required
3. Faulty overflow switch
Service Required
12
43868 112310
TROUBLESHOOTING (Continued)
Screen Displayed
Possible Cause
HEATING TIME
TOO LONG
1. Tank Heater failure
2. Heater Contactor failure
CHECK HEATING
CIRCUIT
FILL TIME
TOO LONG
Troubleshooting Procedures
3. Tank Temp. sensor failure
Service Required
Service Required
Service Required
1. Water shut off to dispenser
Check water supply valve
2. Water filters plugged/clogged
CHECK WATER
SUPPLY
Replace filters
3. Inlet Solenoid Valve failure
Service Required
TANK SENSOR
OUT OF RANGE
1. Tank Temperature Sensor Probe wire(s)
broken or disconnected
Service Required
CHECK FOR BAD
CONNECTIONS
CHECK WIRE
FOR SHORTS
2. Tank Temperature Sensor Probe
wire(s) shorted to housing, or to each
other.
Service Required
COOL TEMP SENSOR
OUT OF RANGE
1. Cold Sensor wire(s) shorted to housing,
or to each other.
Service Required
CHECK FOR BAD
CONNECTIONS
2. Product cabinet temperature too high.
Service Required
3. Product cabinet temperature too low.
CHECK WIRE FOR
SHORTS
Service Required
EVAP TEMP SENSOR
OUT OF RANGE
1. Evaporator temperature too high or too
low.
Service Required
CHECK FOR BAD
CONNECTIONS
2. Corresponding Evaporator Sensor Probe
wire(s) broken or disconnected.
Service Required
CHECK WIRE FOR
SHORTS
3. Corresponding Temperature Sensor
Probe wire(s) shorted to housing, or
to each other.
Service Required
13
43868 112310
TROUBLESHOOTING (Continued)
Screen Displayed
COOLER FAULT!
EVAP TEMP TOO HI
CHECK EVAP FAN
CHK EVAP SENSOR
COOLING TIME
TOO LONG
CHECK AIR FILTER
CHECK COOLING UNIT
JUMPER FAULT!
CONFIG NOT VALID
Possible Cause
Troubleshooting Procedures
1. Cabinet door left open.
Close cabinet door
2. Cabinet circulating fan failure
Service Required
3. Ice build up on evaporator coils
Service Required
4. Evaporator sensor failure
Service Required
1. Air intake filter clogged
Clean Air Filter
2. Wiring failure
Check wiring harness for breaks,
shorts, open connectors
3. Compressor failure
Service Required
1. Invalid wire harness configuation
Service Required
CHECK J-18
ON CONTROL BOARD
14
43868 120710
AVISOS AL USUARIO
Lea con cuidado y observe todos los avisos incluidos en el equipo y en este manual. Se han escrito para su protección.
Todos los avisos deben mantenerse en buenas condiciones. Reemplace las etiquetas ilegibles o dañadas.
As directed in the International Plumbing Code of the
International Code Council and the Food Code
Manual of the Food and Drug Administration (FDA),
this equipment must be installed with adequate
backflow prevention to comply with federal, state
and local codes. For models installed outside the
U.S.A., you must comply with the applicable Plumbing /Sanitation Code for your area.
Este equipo debe instalarse de acuerdo al Código Internacional de
Plomería del International Code Council (Consejo Internacional de
Códigos) y el Manual de Códigos de Alimentos de la Administración
de Alimentos y Medicamentos de EE.UU. (FDA). Para los modelos
instalados fuera de EE.UU., debe cumplirse el código sanitario y de
plomería aplicable.
00656.0001
Advertencia
Artwork for P/N: 00656.0001
Artwork Rev: A
Drawn: REF
Date: 04/22/10
Moving Parts.
Risk Of Electrical Shock.
Do not operate
unit with this
panel removed.
Disconnect power before
servicing unit.
Partes móviles
Riesgo de descarga eléctrica.
No opere la unidad
si este panel se ha
retirado
Desconecte la electricidad
antes de efectuarle servicios a
la unidad.
27442.0000
CHARGE
WARNING: HOT LIQUIDS
Type R134A, Amount 13 oz (368.6 gm)
Design Pressures:
High 276 psi (19 bar) (1.9 MPa)
Low 88 psi (6 bar) (0.61 MPa)
37280.0000
ADVERTENCIA Líquido caliente
33461.0004
CARGA
Tipo R134A
Cantidad 13 onzas (386,6gm)
Presiones de diseño:
Alta 276 (19 bar) (1.9 MPa)
Baja 88 (6 bar) (0.61 MPa)
00824.0000
•
•
•
•
•
ADVERTENCIA
NO SOBRECARGUE EL CIRCUITO.
CONECTE SIEMPRE A TIERRA EL ARMAZÓN O EL ENCHUFE DEL ADAPTADOR.
NO DEFORME EL ENCHUFE O EL CORDÓN.
RESPETE LOS CÓDIGOS ELÉCTRICOS NACIONALES Y LOCALES.
NO LO ACERQUE A LOS COMBUSTIBLES.
DE NO CUMPLIR CON LO ANTERIOR SE PUEDEN PRODUCIR RIESGOS DE
DAÑOS EN LOS EQUIPOS, INCENDIOS O DESCARGAS ELÉCTRICAS.
00986.0002
LEA TODO EL MANUAL DE OPERACIÓN ANTES DE USAR ESTE PRODUCTO.
15
43868 112310
AVISOS A LOS USUARIOS (continuación)
¡ADVERTENCIA!
Para reducir el riesgo de descargas
eléctricas, no retire o abra la tapa.
Adentro no hay partes que pueda
reparar el usuario.
Sólo personal de mantenimiento
autorizado.
Desconecte la unidad del suministro eléctrico antes de repararla.
To reduce the risk of electric shock,
do not remove or open cover.
No user-serviceable parts inside.
Authorized service personnel only.
Disconnect power before servicing.
37881.0000
REMINDER!
CLEAN AIR FILTER
WEEKLY
AIR FILTER
CLEAN WEEKLY!
(LOCATED UNDER THE DISPENSER)
FILTRO DE AIRE
LIMPIAR
SEMANALMENTE!
Do not connect to a
circuit operating at
more than 150 volts
to ground.
27508.0000
PRECAUCIÓN
No conecte la unidad a
un circuito que funcione a
más de 150 V con respecto
a tierra.
(LOCATED UNDER THE DISPENSER)
RECORDATORIO!
LIMPIAR EL FILTRO DE
AIRE SEMANALMENTE
! CAUTION
(LOCALIZADO DEBAJO
DEL DISPENSADOR)
(LOCALIZADO DEBAJO
DEL DISPENSADOR)
40054.0000
Cableado in-situ opcional
Optional Field Wiring
120/208 V c.a., 37,6 A, 7820 W
Monofásico trifilar + tierra, 60HZ
120/208 V, 37.6 A, 7820 W
1PH, 3-Wire + GND, 60HZ
120/240 V, 43.2 A, 10400 W
1PH, 3-Wire + GND, 60HZ
FOR USE ON INDIVIDUAL BRANCH CIRCUIT ONLY
120/240 V c.a., 43,2 A, 10400 W
Monofásico trifilar + tierra, 60HZ
120/208Y V, 32.8 A, 12000 W
3PH, 4-Wire + GND, 60HZ
120/208 V c.a., 32,8 A, 12000 W
Monofásico trifilar + tierra, 60HZ
28181.0004
L1
L2
TERMINAL
BLOCK
N
FROM POWER SOURCE
FOR 3-PHASE OPERATION
CONNECT INPUT WIRING TO
L1,L2,L3 & N AS SHOWN.
L2
L3
L2
L3
N
FROM POWER SOURCE
DEL SUMINISTRO ELÉCTRICO
FOR SINGLE PHASE OPERATION
MOVE BLU WIRE INTO
TERMINAL BLOCK WITH BLACK
WIRE, CONNECT INPUT WIRING
TO L1, L2 & N AS SHOWN.
PARA OPERACIÓN TRIFÁSICA
CONECTE EL CABLEADO DE
ENTRADA A L1,L2,L3 Y N
COMO SE MUESTRA
37947.0002
16
L1
L2
BLA
ROJ
NEG
BARRAL DE
TERMINALES
AZU
A LA MÁQUINA
BLA
ROJ
NEG
L1
N
AZU
A LA MÁQUINA
WHI
BLU
L1
RED
BLK
BLU
L3
TO MACHINE
WHI
RED
BLK
TO MACHINE
L3
N
DEL SUMINISTRO ELÉCTRICO
PARA OPERACIÓN MONOFÁSICA
MUEVA EL CABLE AZUL AL
BLOQUE DE TERMINALES CON CABLE
NEGRO Y CONECTE EL CABLEADO
DE ENTRADA A L1,L2 Y N
COMO SE MUESTRA
43868 112310
REQUISITOS ELÉCTRICOS
PRECAUCIÓN: El distribuidor debe quedar desconectado del suministro eléctrico hasta que se especifique en Conexiones
eléctricas.
El HV-3 se entrega configurado para operación trifásica. El bloque de terminales interno debe recablearse para aplicaciones
monofásicas de 208/240 V (consulte el diagrama de cableado opcional en el terreno).
DIAGRAMA DE CABLEADO DEL BLOQUE DE TERMINALES
L1
L2
L3
DEL SUMINISTRO ELÉCTRICO
L1
L2
BLA
ROJ
NEG
BARRAL DE
TERMINALES
N
AZU
A LA MÁQUINA
BLA
AZU
ROJ
NEG
A LA MÁQUINA
L3
N
DEL SUMINISTRO ELÉCTRICO
PARA OPERACIÓN TRIFÁSICA
PARA OPERACIÓN MONOFÁSICA
Para todas las conexiones CONECTE
de 208 -EL240
V: Use DE
cables del estándar
americano
Nº 6 para
CABLEADO
MUEVA
EL CABLE AZUL
AL el calibre de los conductores
adecuados
para
90°C (195°F)
ENTRADAeléctricos
A L1,L2,L3(AWG)
YN
BLOQUE
DE TERMINALES
CON CABLE
COMO SE MUESTRA
1. La unidad se entrega para operación
trifásica pentafilar. NEGRO Y CONECTE EL CABLEADO
DE ENTRADA A L1,L2 Y N
2. Para 208 - 240 V monofásica / trifilar: Mueva el cable azul del
calentador hacia el terminal negro superior como se
COMO SE MUESTRA
muestra en la figura.
3. La unidad requiere VCA de L1 a N.
ESPECIFICACIONES DE LAS TUBERÍAS
El distribuidor se puede conectar a un sistema de agua fría o caliente (80°C máx.) con presión de funcionamiento entre
20 y 90 psi (138 y 620 kPa) con una tubería de suministro de 1/2”o de mayor diámetro. Instale un regulador de presión
en la tubería cuando la presión sea mayor que 620 kPa (90 lb/pulg2) para reducirla a 345 kPa (50 lb/pulg2). El distribuidor
está ajustado para suministrar 177,4 ml/s (6 onzas/seg.) y requiere un suministro de agua que pueda entregar un mínimo
de 11,4 l/min (3,0 gal/min) en la válvula de entrada. Se debe instalar una válvula de paso en la tubería antes del distribuidor.
El HV-3 se suministra con un filtro doble de agua, vea las instrucciones en el kit para el armado y montaje adecuado.
Use una manguera flexible aprobada por la FDA de 3/8” o más grande desde la tubería de suministro de agua a los filtros y
de los filtros a la entrada del distribuidor.Utilice la tubería de cobre para instalaciones de agua caliente, según los códigos
locales de plomería.
NOTA: Los sensores de nivel de agua de esta máquina no funcionan con agua desionizada y pueden causar el rebose de
la unidad. Es posible que sea necesario tratar los sistemas de suministro de agua RO (ósmosis inversa) para restaurar
los iones libres del agua.
Este equipo debe instalarse de acuerdo con el Código Internacional de Plomería del Consejo Internacional de
Códigos (International Code Council) y el Manual de Códigos de Alimentos de la Administración de Alimentos
y Medicamentos de los EE.UU. (FDA). Para los modelos instalados fuera de EE.UU., debe cumplirse el código
sanitario y de plomería aplicable de su área.
AJUSTE INICIAL
NOTA: El distribuidor HV-3 pesa unas 180 libras (82 kg). Para levantar o mover el distribuidor, se necesita más de una
persona.
1. Corte los flejes y retire la caja y el empacado de espuma.
2. Localice y retire los paquetes de información y los juegos de tuberías de la parte de arriba del empacado y póngalos
a un lado.
3. Coloque el distribuidor en el mostrador donde se vaya a usar. PRECAUCIÓN: NO LEVANTAR POR LA PUERTA.
4. Verifique que el distribuidor esté nivelado sobre el mostrador (consulte NIVELACIÓN DEL DISTRIBUIDOR).
17
43868 120710
CONEXIÓN DE TUBERÍAS
1. Haga pasar agua para lavar la tubería y quitar cualquier desecho o material extraño.
2. Conecte firmemente la tubería de agua a la conexión de entrada abocinada de 3/8", en la parte inferior derecha del
distribuidor.
3. Abra el suministro de agua y compruebe que no haya pérdidas.
NOTA - Las conexiones y accesorios de las tuberías de agua conectados directamente al suministro de agua potable se
deben dimensionar, instalar y mantener de acuerdo a los códigos federales, estatales y locales.
CONEXIONES ELÉCTRICAS
PRECAUCIÓN: Una instalación eléctrica inapropiada dañará los componentes electrónicos.
1. Un electricista debe proporcionar el servicio eléctrico según se especifica en los todos los códigos eléctricos locales,
estatales y federales.
2. Usando un voltímetro, compruebe el voltaje y el código de color de cada conductor del suministro eléctrico.
NIVELACIÓN DEL DISTRIBUIDOR
Se requiere la correcta nivelación del distribuidor para asegurar el drenaje adecuado de la condensación proveniente de
la unidad de refrigeración.
1. Coloque el distribuidor en un mostrador nivelado.
2. Use las (6) patas ajustables para nivelar el distribuidor.
3. Una vez nivelada la unidad, ajuste las tres patas delanteras hacia afuera otros 1.5 mm (1/16”) para crear una ligera
pendiente hacia la parte trasera del distribuidor. (Vea la Fig. 1 abajo)
1/16"
LEVEL
18
43868 120710
INSTALACIÓN DE LA BANDEJA DE GOTEO
1. Desenrosque las patas delanteras central y derecha (Fig.1) - lo suficiente para permitir que el soporte de
montaje se deslice por debajo de ellas (~ 3 mm (1/8”).
Precaución: El HV-3 es muy pesado. ¡Use bloques de madera para sostener la máquina levantada cuando
trabaje debajo de ella!
2. Inserte el soporte entre las patas y la base de la máquina y vuelva a apretar las patas (Fig. 2).
CONEXIÓN DE DRENAJE
SOPORTE DE MONTAJE
Fig. 1
Fig. 2
3. Inserte la bandeja de goteo en el soporte de montaje (Fig. 3). Asegúrese de que la conexión de drenaje
sobresalga a través del orificio.
VISTA LATERAL
VISTA ANTERIOR
Fig. 3
Drenaje opcional de la bandeja de goteo
Es posible conectar un tubo de drenaje por separado (no suministrado) a la conexión del fondo de la bandeja,
si así se desea. Nota: Perfore un orificio de ¼” en el centro de la conexión, antes de conectar la manguera de
drenaje. Dirija el otro extremo de esta manguera a un sistema de desagüe permanente.
Drenaje alternativo del evaporador
En los lugares en que no se desea usar la bandeja de goteo, conecte una manguera de drenaje por separado (no
suministrada) a la conexión de drenaje del evaporador y dirija el otro extremo de esta manguera a un sistema
de desagüe permanente.
PRECAUCIÓN: SI NO SE INSTALA LA BANDEJA DE GOTEO O EL DRENAJE ALTERNATIVO DEL EVAPORADOR,
PUEDE PRODUCIRSE GOTEO DE AGUA SOBRE EL MOSTRADOR Y/O EL PISO DEBAJO DEL DISTRIBUIDOR.
19
43868 112310
INTRODUCCIÓN
Siga siempre las recomendaciones de almacenamiento y de tiempo de conservación del fabricante. El gabinete refrigerado
que ofrece el HV-3 extiende el perfil de sabor del producto. Este distribuidor está diseñado para funcionar a temperaturas
ambiente de 32°F (0°C) mínimo a 104°F (40°C) máximo.
INSTALACIÓN DE LA BOLSA-CAJA DE CAFÉ CONCENTRADO
NOTA: El concentrado debe estar completamente descongelado antes de su uso, (consulte las instrucciones de descongelación
en la caja).
1. Agitar la BIB diez veces, luego retire la envoltura de plástico.
2. Retire el tubo dosificador y posiciónelo en el anillo rojo en la abertura de la caja (consulte las instrucciones en la caja).
3. Levante la barra de retención de metal en el gabinete e inserte el tubo dosificador en el chaflán de la bobina dosificadora
4. Asegúrese de que el tubo dosificador esté totalmente insertado en la bobina del dosificador.
INTERFAZ Y CONTROLES DE OPERACIÓN
1. Interruptor principal de encendido (ON/OFF): Desconecta la alimentación de CA del distribuidor.
PRECAUCIÓN: Si se desconecta - Retire el producto de café y guárdelo en un refrigerador.
2. Palanca de agua caliente: Tire y retenga la palanca para distribuir agua caliente manualmente.
3. Interruptor de interbloqueo de la puerta: La unidad no distribuye el producto si la puerta está abierta.
4. Pantalla LCD: Muestra el estado, los menús de programación y mensajes de falla.
5. Selección de volumen: Gire el cuadrante al volumen deseado antes de distribuir el producto.
6. Interruptores de distribución (A-B-C): Presione y suelte los interruptores para distribuir el producto deseado.
(También cumplen la función de interruptores de programación en el modo de ajuste).
7. Conmutador selector de funciones: Permite al usuario ajustar el distribuidor en diferentes modos de distribución.
a. RINSE (ENJUAGUE): Distribuye solamente agua caliente – Lava la cámara de mezcla y la punta de distribución.
b. RUN (MARCHA): Modo de distribución normal – Distribuye producto mezclado (concentrado y agua).
c. DESINFECTAR: Aumentar la temperatura del agua a 96 ° C y dispensar 5 galones de agua caliente, (ver Desinfección
del distribuidor).
8. Pantalla indicadora de nivel en las BIB (A, B y C). Luz para indicar cuando una BIB está vacía y cuando necesita ser
reemplazada.
9. Configuración Oculta/ Botones de programación.
a. Presione y retenga el interruptor derecho por 10 seg. para entrar al modo de ajuste.
b. Use el interruptor derecho para desplazarse hacia abajo y el izquierdo para desplazarse hacia arriba por las pantallas
de menú.
4
6
1
5
9
7
8
3
20
43868 120710
LLENADO Y CALENTAMIENTO INICIALES
1. Confirme que el suministro de agua esté abierto.
2. Conecte el distribuidor al suministro eléctrico.
3. Coloque el interruptor de encendido maestro en posición ON y seleccione RUN en el conmutador selector de funciones.
Aparece en la pantalla LCD “Tank Filling – Please Wait!” (Llenándose el tanque - Espere) y comienza a fluir agua al
tanque.
4. Una vez que se llena el tanque, el distribuidor comienza a calentar el agua y aparece “Heating – Select Flavor” (Calentando
- Seleccionar sabor). Los modelos de distribuidores con enfriadores de producto comenzarán en este momento a
enfriar el gabinete.
5. Aparece en la LCD “Ready Select Flavor” (Listo para elegir sabor) cuando el tanque alcanza la temperatura de listo
prefijada.
Nota: El tiempo necesario para calentar inicialmente el agua variará de acuerdo al suministro de CA y a la temperatura
del agua de suministro. Mientras el tanque se calienta, el distribuidor puede prepararse para su uso como se describe en
Funciones de programación y operaciones básicas.
3
21
43868 112310
PROCEDIMIENTO DE ENJUAGUE
El lavado diario de las cámaras de mezcla y las boquillas de distribución es esencial para el mantenimiento
adecuado y un rendimiento óptimo del distribuidor.
4
1
Procedimiento de enjuague:
1. Seleccione Rinse (Enjuague) en el conmutador selector de funciones.
2. Coloque un recipiente de 2 litros (1/2 galón) debajo de la boquilla de distribución.
3. Pulse y mantenga pulsado cualquiera de los interruptores de distribución hasta que el flujo de agua se detenga
automáticamente, aproximadamente a los 10 seg. El mensaje de alarma de enjuague desaparece cuando se
satisface el procedimiento de enjuague.
4. Seleccione Run en el conmutador selector de funciones.
Función de bloqueo de BIB vacía
El HV-3 se bloqueará y no distribuirá el producto si el sensor de la BIB para ese producto no detecta concentrado
en el tubo dosificador. La unidad encenderá la luz asociada con el BIB que esta vacía y mostrará en la pantalla
LCD el mensaje “BIB DERECHA, CENTRAL o IZQUIERDA VACÍA - Cambiar ahora” LCD. La sustitución de la BIB
vacía eliminará el mensaje y se apagará la luz.
Función de bloqueo por temperatura de percolación
El distribuidor está configurado para no dispensar el producto si el agua caliente no está a la temperatura
preestablecida. La pantalla indicará “CALENTANDO - por favor espere” y no se permitirá dispensar hasta que
la temperatura del tanque alcanza la temperatura preestablecida. Contacte a un agente de servicio de Sara Lee
(1-800-756-4357) si desea desactivar esta función.
22
43868 120710
OPERACIÓN DEL DISTRIBUIDOR
Para distribuir café, la puerta del gabinete debe estar cerrada y bloqueada, y el conmutador selector de funciones
debe estar colocado en RUN.
Para distribuir café
1. Seleccione el volumen deseado (1, 2 ó 3) usando el conmutador rotativo.
2. Coloque un recipiente apropiado debajo de la boquilla de distribución.
3. Pulse y suelte el interruptor de sabor deseado para distribuir el producto. Aparece en la pantalla LCD “DISPENSING
PRODUCT” “PRESS ANY SWITCH TO STOP” (Distribuyendo producto. Pulse cualquier interruptor para parar). Nota:
Al pulsar cualquier interruptor después de iniciar un ciclo de distribución se aborta la misma y se detiene el flujo de
producto.
4. Retire el recipiente y sirva según corresponda.
Para distribuir agua caliente
1. Coloque el recipiente debajo de la boquilla de distribución de agua caliente.
2. Mantenga presionada la palanca de agua caliente hasta que el agua alcance el nivel deseado.
3. Retire el recipiente.
NOTA: Para los recipientes grandes que no caben debajo de la boquilla de distribución, puede usarse una manguera corta
de 3/8” de diámetro aprobada por NSF.
LLENADO DE CAMBROS U OTROS RECIPIENTES GRANDES
El distribuidor está diseñado principalmente para los envases que quepan bajo la boquilla de distribución, Sin embargo
puede ser utilizado para llenar recipientes de mayor tamaño (hasta 40 l (10 Gal)), utilizando la manguera de distribución
(# 43402.0000) suministrada con el HV-3.
Se debe tener cuidado para asegurar que el producto mezclado fluya libremente de la boquilla dosificadora hasta el
recipiente. Asegúrese de que la salida de la manguera está por debajo de la boquilla dosificadora y que el producto mezclado
fluye libremente dentro del contenedor. La manguera debe estar derecha desde la punta de la boquilla del distribuidor hasta
el contenedor para que el liquido fluya correctamente y mezcle bien el producto. El incumplimiento de estas instrucciones
puede alterar la relación de mezcla y / o causar la inundación el gabinete del producto.
NOTA: El tiempo de recuperación depende de la temperatura del agua de suministro y del voltaje aplicado al distribuidor.
DRENAJE DEL TANQUE DE AGUA CALIENTE
PRECAUCIÓN: Se debe desconectar el distribuidor del suministro eléctrico siguiendo estos pasos.
1. Desconecte el distribuidor del suministro eléctrico.
2. Cierre la llave de paso y desconecte el suministro de agua.
3. Quite el panel de acceso inferior delantero.
4. Saque el tubo de drenaje para vaciarlo en un fregadero o en un recipiente con una capacidad mínima de 60 l (18
galones).
5. Asegúrese que la abrazadera del drenaje esté cerrada. Luego, quite el tapón del drenaje.
6. Dirija el tubo hacia el fregadero o recipiente y abra la abrazadera de drenaje. Continúe drenando el tanque hasta que
haya salido TODA el agua.
PRECAUCIÓN: El agua que drena del tanque puede estar muy caliente. Asegúrese de que la manguera no esté apuntada
hacia su cuerpo.
7. Cierre la abrazadera de drenaje, introduzca el tapón de drenaje, vuelva a colocar el tubo de drenaje en la máquina y
reinstale el panel de acceso inferior.
Nota: El distribuidor debe volverse a llenar usando los pasos de Llenado y calentamiento iniciales antes de volver a conectar
el suministro eléctrico.
23
43868 112310
HV-3
CLEANING & PREVENTATIVE MAINTENANCE
LIMPIEZA Y MANTENIMIENTO PREVENTIVO
DAILY RINSING & CLEANING:
1. Select “Rinse” on the function selector switch (see
Fig 1).
2. Place a 1/2 gal (2 liter) container under the hose or
dispense nozzle.
3. Press and hold “A” button flavor selection switch for
approximately 10 seconds or until the hot water is clear
or has no concentrate coloring in it. Discard this solution
(see Fig 2).
4. Wipe splash panels, dispense nozzle, door and cabinet
with a clean sanitary cloth.
WEEKLY CLEANING & SANITIZING:
1. Open the product cabinet and remove all concentrate
boxes.
2. Use the provided brush to clean the inside of the product coil in the cabinet (see Fig 3).
3. Place an empty 5 gallon container under the dispense
hose or nozzle.
4. Select “Sanitize” on the function selector switch. This
will raise the temperature of the water in the tank to 205
F (96 C). Note that sanitizing will not begin until the water
has reached the 205 F (96 C) (See Fig 1).
5. Once 205F (96 C) is achieved, push any dispense button. This will automatically begin a 5 gallon rinse/sanitizing of the system, (this will take approximately 3.5 minutes) (See Fig 4).
6. Empty the 5 gal container and repeat step five.
7. Wipe all splash panels; dispense nozzle, door, and
cabinet with a clean sanitary cloth.
Figure 1
Figure 2
Figure 3
ENJUAGUE Y LIMPIEZA DIARIO
1. Seleccione la función enjuagar en el selector de funciones, ver Fig 1.
2. Coloque un envase de medio galón (2 litro) bajo de la
boquilla de dispensar.
3. Presione y mantenega presionado el botón de sabor
“A” durante aproximadamente 10 segundos o hasta que
el agua caliente dispense clara o no tenga color del concentrado en ella. Desechar esta agua dispensada, ver Fig
2.
4. Limpie los paneles, la boquilla de dispensar la puerta
y gabinete con un paño para desinfectar.
LIMPIAR Y DESINFECTAR SEMANALMENTE
1. Abra el gabinete donde están los productos y retire las
tres cajas de concentrados.
2. Use el cepillo para limpiar el interior de la bobina, ver
Fig 3.
3. Coloque un envase de 5 galónes bajo de la manguera
de dispensar o la boquilla.
4. Seleccione la función de desinfectar, esto elevara la
temperatura del agua en el tanque hasta 205 F (96C).
Nota: El proceso de desinfectar no comenzará hasta que
el agua ha alcanzado los 205 F (96 C), ver Fig 1.
5. Una vez 205F (96 C) se logren, presione cualquier
botón de dispensar, esto automáticamente inicia un enjuague y desinfectante de 5 galones al sistema, (esto
tomará aproximadamente 3.5 minutos), ver Fig 4.
6. Vacíe el recipiente de los 5 galones y repita el paso 5.
7. Limpie los paneles, la boquilla de dispensar, puerta y
gabinete con un paño para desinfectar.
Figure 4
RELOADING FOR NEXT USE:
1. Reinstall all concentrate boxes (see Fig 5).
2. Close the dispenser door and select RUN on the Function Selector Switch.
REGRESA EL PRODUCTO AL DISPENSARIO
1. Volver a colocar los tres cajas en el Gabinete, ver Fig 5.
2. Cierra la puerta del dispensador y seleccione la función de RUN en el selector de funciones.
Figure 5
43560.0000A 10/10 © 2010 Sara Lee Corporation
Weekly: REFRIGERATION AIR FILTER
Semanal: FILTRO DE AIRE PARA REFRIGERACIÓN
1.
2.
3.
4.
1. Quite el filtro de la parte inferior del distribuidor.
2. Lave el filtro en una solución de detergente suave.
3. Utilice un cepillo de cerdas suaves para eliminar todo
el polvo y la grasa.
4. Vuelva a instalar el filtro en el distribuidor.
Remove the screen filter from the bottom of the dispenser.
Wash the screen in a mild detergent solution.
Use a soft bristled brush to remove all dust and grease.
Reinstall the screen.
24
43868 112310
Localización y resolución de problemas
Se suministra la guía de localización y solución de problemas para sugerir probables causas y soluciones a los problemas
típicamente encontrados. Si el problema persiste después de agotar los pasos de localización y solución de problemas,
comuníquese con el Departamento de Servicio Técnico de Bunn-O-Matic.
• Solamente personal de servicio técnico calificado debe realizar la inspección, prueba y reparación de equipamiento
eléctrico.
• Cortocircuitar las terminales o aplicar voltajes externos a los componentes electrónicos pude resultar en fallas de los
componentes o tarjetas de circuito impreso.
• El funcionamiento intermitente de las tarjetas de circuitos electrónicos es un hecho poco probable. Las fallas en estas
tarjetas suelen ser permanentes. De ocurrir intermitencias, la causa probablemente es el contacto de un interruptor o
una conexión floja en un terminal o engarce.
• El desmontaje del solenoide requiere la interrupción del suministro de agua a la válvula. Pueden ocurrir daños si los
solenoides se activan por más de diez minutos sin suministro de agua.
• Se aconseja usar dos llaves inglesas para apretar o aflojar las conexiones de tuberías. Esto ayudará a evitar los giros
y torcimientos en la tubería.
• Asegúrese que todas las conexiones de la tubería estén selladas y las conexiones eléctricas estén firmes y aisladas.
• Este distribuidor está caliente todo el tiempo. Manténgalo alejado de los combustibles.
ADVERTENCIA:
• Tenga extremo cuidado cuando esté reparando equipos eléctricos.
• Desconecte la cafetera del suministro eléctrico cuando se esté reparando, excepto cuando se especifiquen pruebas
eléctricas.
• Siga los procedimientos de servicio recomendados.
• Vuelva a poner todos los protectores o avisos de seguridad.
Pantalla mostrada
Causa posible
Procedimientos de localización y solución de
problemas
NO HAY NADA EN LA
PANTALLA
No llega alimentación eléctrica al
distribuidor
Verifique el interruptor principal de encendido
(ON/OFF)
Verifique el cable de alimentación y el disyuntor
Se requiere servicio
CALENTANDO
ESPERE
La temperatura del agua está por
debajo de la temperatura READY
preajustada
Espere que aumente la temperatura del agua
Verifique el ajuste de umbral de temperatura de
lista
Se requiere servicio
SE REQUIRE
ENJAUGUE
Expiró el intervalo de la alarma de
enjuague
Enjuague el distribuidor, vea Procedimiento de
Enjuague
Reemplace la BIB, vea Carga de concentrado
La BIB de concentrado está vacía.
BIB mal conectada.
Reemplace la BIB, vea Carga de concentrado
La boquilla debe estar completamente asentada en
el serpentín dosificador.
1. Válvula de rellenado atascada
abierta.
2. Sonda de rellenado defectuosa
Se requiere servicio
3. Interruptor d e d e s b o r d e
defectuoso
Se requiere servicio
XXXX BIB VACÍA
REEMPL BIB PRONTO
FALLA DE REBOSE
25
Se requiere servicio
43868 112310
Localización y solución de problemas (Continuación)
Pantalla mostrada
Causa posible
TPO CALENT MUY
LARGO
Procedimientos de localización y solución de
problemas
1. Falla del calentador de tanque
Se requiere servicio
2. Falla del triac
Se requiere servicio
3. Falla del sensor de temp del tanque
Se requiere servicio
1. Corte de agua en el distribuidor
Verifique la válvula del suministro de agua
2. Filtros de agua tapados/obstruidos
Reemplace los filtros
VERIF SUMINST AGUA
3. Falla de la válvula de solenoide de
entrada
Se requiere servicio
SENSOR TQUE FUERA
RANGO
1. Los cables de sonda del sensor de
temperatura correspondiente están
rotos o desconectados.
Se requiere servicio
2. Los cables de sonda del sensor de
temperatura correspondiente están en
cortocircuito con la carcasa o entre sí.
Se requiere servicio
SENSOR DE TEMPERATURA DE ENFRIAMIENTO FUERA DE RANGO
1. Los cables de sonda del sensor de frío
correspondiente están en cortocircuito
con la carcasa, o entre sí.
Se requiere servicio
VERIF SI HAY MALAS
CONEX
2. Temperatura del gabinete de producto
demasiado alta.
Se requiere servicio
VERIF CORTOS EN
CABLES
3. Temperatura del gabinete de producto
demasiado alta.
Se requiere servicio
1. Temperatura del evaporador demasiado
SENSOR DE TEMP. DE
alta o baja.
EVAP. FUERA DE RANGO
Se requiere servicio
2. Los cables de sonda del sensor de
temperatura correspondiente están
rotos o desconectados.
3. Los cables de sonda del sensor de
temperatura correspondiente están en
cortocircuito con la carcasa o entre sí.
Se requiere servicio
VERIF CTO CALENT
TPO RELLENO MUY
LARGO
VERIF SI HAY MALAS
CONEX
VERIF CORTOS EN
CABLES
VERIF SI HAY MALAS
CONEX
VERIF CORTOS EN
CABLES
26
Se requiere servicio
43868 112310
Localización y solución de problemas (Continuación)
Pantalla mostrada
Causa posible
FALLA ENFR!
TEMP EVAP MUY ALTA
VERIF VENTIL EVAP
VERIF SENSOR EVAP
TPO ENFR MUY LARGO
VERIF FILTRO AIRE
VERIF UNIDAD ENFR
FALLA PUENTE
CONFIG NO VÁL
Procedimientos de localización y solución de
problemas
1. La puerta del armario abiertas.
Cierre la puerta del gabinete
2. Falla del ventilador de circulación del
gabinete.
3. Acumulación de hielo en los serpentines del
evaporador
4. Falla del sensor del evaporador
Se requiere servicio
1. Filtro de entrada de aire tapado
Limpie el filtro de aire
2. Falla del cableado
3. Falla del compresor
Revise el mazo de cables para detectar
cortes, cortocircuitos y conectores
abiertos
Se requiere servicio
1. Configuración del cableado no válida
Se requiere servicio
Se requiere servicio
Se requiere servicio
VERIF J-18 EN TARJ
CTRL
27
43868 120710