1
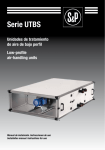
Serie UTBS
Unidades de tratamiento
de aire de bajo perfil
Low-profile
air-handling units
Manual de instalación. Instrucciones de uso
Installation manual. Instructions for use
1
ESPAÑOL
ESPAÑOL
INDICE
1. GENERALIDADES . . . . . . . . . . . . . . . . . . . . . . . . . . . . . . . . . . . . . . . . . . . . . . . . . . . . . 3
2. NORMAS DE SEGURIDAD Y MARCADO “CE” . . . . . . . . . . . . . . . . . . . . . . . . . . . . . . . 3
3. NORMAS GENERALES . . . . . . . . . . . . . . . . . . . . . . . . . . . . . . . . . . . . . . . . . . . . . . . . . 3
4. ETIQUETADO DE LA UNIDAD . . . . . . . . . . . . . . . . . . . . . . . . . . . . . . . . . . . . . . . . . . . . 4
5. MANIPULACIÓN . . . . . . . . . . . . . . . . . . . . . . . . . . . . . . . . . . . . . . . . . . . . . . . . . . . . . . 5
6. INSTALACIÓN 5
6.1. GENERALIDADES . . . . . . . . . . . . . . . . . . . . . . . . . . . . . . . . . . . . . . . . . . . . . 5
6.2. IDENTIFICACIÓN DE PARTES DEL EQUIPO . . . . . . . . . . . . . . . . . . . . . . . . 6
6.3. LUGAR DE EMPLAZAMIENTO . . . . . . . . . . . . . . . . . . . . . . . . . . . . . . . . . . . 6
6.4. ESPACIO PARA MANTENIMIENTO . . . . . . . . . . . . . . . . . . . . . . . . . . . . . . . 6
6.5. ENSAMBLAJE DE MÓDULOS . . . . . . . . . . . . . . . . . . . . . . . . . . . . . . . . . . . 8
6.5.1. UNIÓN DE TEJADILLOS . . . . . . . . . . . . . . . . . . . . . . . . . . . . . . . 8
6.5.2. ENSAMBLAJE DE JUNTAS FLEXIBLES . . . . . . . . . . . . . . . . . . . 9
6.5.3. ENSAMBLAJE DE UNIDADES EN PARALELO . . . . . . . . . . . . . . 9
6.6. CONEXIÓN ELÉCTRICA DEL EQUIPO . . . . . . . . . . . . . . . . . . . . . . . . . . . . 10
6.6.1. CONEXIÓN DE LOS MOTORES . . . . . . . . . . . . . . . . . . . . . . . . 11
6.6.2. CONEXIÓN DE LA BATERÍA ELÉCTRICA . . . . . . . . . . . . . . . . . 11
6.7. CONEXIÓN DE SENSORES DE PRESIÓN . . . . . . . . . . . . . . . . . . . . . . . . 13
6.7.1. ENSUCIAMIENTO DE FILTROS . . . . . . . . . . . . . . . . . . . . . . . . . 13
6.7.2. CONTROL EN VENTILADORES . . . . . . . . . . . . . . . . . . . . . . . . . 13
6.8. CONEXIÓN DEL EQUIPO A LA RED HIDRÁULICA . . . . . . . . . . . . . . . . . . 14
6.9. CONEXIÓN DEL EQUIPO A LA RED DE CONDUCTOS . . . . . . . . . . . . . . 15
6.10. RED DE DESAGÜE . . . . . . . . . . . . . . . . . . . . . . . . . . . . . . . . . . . . . . . . . 15
6.11. INSTALACIÓN DE CAJAS CON COMPUERTAS. . . . . . . . . . . . . . . . . . . . 16
7. PROCEDIMIENTO DE PUESTA EN MARCHA . . . . . . . . . . . . . . . . . . . . . . . . . . . . . . . 16
8. OPERACIONES DE EMERGENCIA . . . . . . . . . . . . . . . . . . . . . . . . . . . . . . . . . . . . . . . 17
9. MANTENIMIENTO PREVENTIVO . . . . . . . . . . . . . . . . . . . . . . . . . . . . . . . . . . . . . . . . 18
9.1. BATERÍAS DE INTERCAMBIO TÉRMICO . . . . . . . . . . . . . . . . . . . . . . . . . 18
9.2. RED DE DESAGÜE . . . . . . . . . . . . . . . . . . . . . . . . . . . . . . . . . . . . . . . . . . 18
9.3. MOTORES . . . . . . . . . . . . . . . . . . . . . . . . . . . . . . . . . . . . . . . . . . . . . . . . . 18
9.4. VENTILADORES . . . . . . . . . . . . . . . . . . . . . . . . . . . . . . . . . . . . . . . . . . . . . 19
9.5. FILTROS . . . . . . . . . . . . . . . . . . . . . . . . . . . . . . . . . . . . . . . . . . . . . . . . . . . 19
9.5.1. SUSTITUCIÓN DE FILTRO EN EQUIPO PRINCIPAL
Y RECUPERADOR PARALELO Y DE DOBLE ALTURA. . . . . . . 19
9.5.2. SUSTITUCIÓN DE FILTROS EN RECUPERADORES
EN LÍNEA . . . . . . . . . . . . . . . . . . . . . . . . . . . . . . . . . . . . . . . . . . 20
9.6. BATERÍAS . . . . . . . . . . . . . . . . . . . . . . . . . . . . . . . . . . . . . . . . . . . . . . . . . . 20
9.7. COMPUERTAS . . . . . . . . . . . . . . . . . . . . . . . . . . . . . . . . . . . . . . . . . . . . . . 20
9.8. SILENCIADOR. . . . . . . . . . . . . . . . . . . . . . . . . . . . . . . . . . . . . . . . . . . . . . . 21
9.8.1. MÓDULO DE MEZCLAS . . . . . . . . . . . . . . . . . . . . . . . . . . . . . . 21
9.8.2. CAJA DE MEZCLA 2 VÍAS CON BANCADA Y TEJADILLO . . . . 22
9.9. HUMECTADOR . . . . . . . . . . . . . . . . . . . . . . . . . . . . . . . . . . . . . . . . . . . . . . 22
9.10. RECUPERADOR . . . . . . . . . . . . . . . . . . . . . . . . . . . . . . . . . . . . . . . . . . . . 23
10. RECICLAJE . . . . . . . . . . . . . . . . . . . . . . . . . . . . . . . . . . . . . . . . . . . . . . . . . . . . . . . 23
2
• Le agradecemos la confianza que ha depositado en nosotros mediante la compra de este
aparato. Usted ha adquirido un producto de calidad que ha sido totalmente fabricado según las reglas técnicas de seguridad reconocidas y conformes a las normas de la CE.
• Lea atentamente el contenido del presente libro de instrucciones, pues contiene indicaciones importantes para su seguridad durante la instalación, el uso y el mantenimiento de este
producto. Consérvelo para consultas posteriores.
• Rogamos compruebe el perfecto estado del aparato al desembalarlo, ya que cualquier
defecto de origen que presente está amparado por la garantía S&P.
• El personal responsable del montaje, de la puesta en marcha y del mantenimiento, debe
leer estas instrucciones de uso y familiarizarse con ellas antes de empezar.
2. NORMAS DE SEGURIDAD Y MARCADO “CE”
• Los técnicos de S&P están firmemente comprometidos con la investigación y desarrollo de
productos cada vez más eficientes y que cumplan con las normas de seguridad en vigor.
• Las normas y recomendaciones que se indican a continuación, reflejan las normas vigentes, preferentemente en materia de seguridad y por lo tanto se basan principalmente en
el cumplimiento de las normas de carácter general. Por consiguiente, recomendamos a
todas las personas expuestas a riesgos que se atengan escrupulosamente a las normas
de prevención de accidentes en vigor en su país
• S&P queda exento de cualquier responsabilidad por eventuales daños causados a personas y objetos derivados de la falta de cumplimiento de las normas de seguridad, así como
de posibles modificaciones en el producto. El sello CE y la correspondiente declaración de
conformidad, atestiguan la conformidad con las normas comunitarias aplicables.
3. NORMAS GENERALES
• Se ha realizado el análisis de los riesgos del producto como está previsto en la Directiva
de Máquinas. Este manual contiene la información destinada a todo el personal expuesto,
con el fin de prevenir posibles daños a personas y/o objetos a causa de una defectuosa
manipulación o mantenimiento. Todas las intervenciones de mantenimiento (correctivo y
preventivo) deben ser realizadas con la máquina parada y la corriente eléctrica desconectada.
• Para evitar el peligro de posible arranque accidental, ponga carteles de advertencia en el
cuadro eléctrico central y en la consola de control con el siguiente mensaje:
”Atención: control desconectado para operaciones de mantenimiento”
• Antes de conectar el cable de alimentación eléctrica a los motores, verifique que la tensión
de línea corresponde a la indicada en la placa de características de la unidad.
• Verifique periódicamente las etiquetas del producto. Si con el paso del tiempo son ilegibles,
deben ser sustituidas.
3
ESPAÑOL
1. GENERALIDADES
4. ETIQUETADO DE LA UNIDAD
ESPAÑOL
• La unidad está provista de diversos pictogramas de señalización que no deben ser eliminados. Las señales se dividen en:
PICTOGRAMA / ETIQUETA
SIGNIFICADO
Señalización del registro de acceso a
los ventiladores. Indica la obligatoriedad de desconectar el equipo y esperar, pues hay partes en movimiento y
existe el peligro de enganchar alguna
parte del cuerpo.
Indicación del sentido del aire en la
unidad.
Indicación de entrada y salida del fluido del intercambiador térmico de agua
fría.
Indicación de entrada y salida del fluido del intercambiador térmico de agua
caliente.
Placa de características de la unidad.
En ella se indica
- Modelo
- Código
- Número de serie
- Año de fabricación
- Potencia útil de motores instalados
- Intensidad máxima absoluta del
motor (A)
- Potencia batería eléctrica instalada.
- Alimentación
4
• A la recepción del equipo, se desembalará la unidad comprobando la integridad de ésta,
cualquier desperfecto puede ser indicativo de un daño en el equipo. Se repasará y comprobará que no falte ningún elemento.
• Si la unidad presenta algún daño o el envío no es completo, anotar las incidencias en el
albarán de entrega y enviar una reclamación a la compañía que realizó el envío. Asimismo
hacer constar cualquier incidencia a S&P.
• El climatizador se suministra dividido en módulos. El traslado de cada uno de los módulos
hasta su lugar de implantación definitiva solo podrá realizarse en la posición de montaje
salvo autorización expresa del fabricante.
• Los aparatos se deberán transportar con correas de elevación. El equipo posee unas cantoneras agujereadas para su carga y descarga.
6. INSTALACIÓN
6.1. GENERALIDADES
• El empleado encargado de la recepción del equipo deberá asegurarse que las características del suministro eléctrico disponible están de acuerdo con los datos eléctricos que hay
en la placa de características de la unidad.
• Antes de implantar el equipo en su lugar definitivo, se comprobará que el lugar donde se
va a ubicar el equipo es lo suficientemente resistente como para poder soportar el peso de
éste.
• No se instalarán estos equipos, bajo ningún concepto, en entornos inflamables o explosivos, en entornos cargados de vapores de aceite, de aire salino o corrosivos.
• La instalación de los equipos puede ser peligrosa, debido al material usado, a las presiones
en el sistema y a los componentes eléctricos. Es por ello que sólo personal de servicio
entrenado y cualificado debe instalar, servir o reparar los equipos.
• Se tendrá la precaución, cuando se hagan operaciones en el interior del equipo, de interrumpir la corriente eléctrica en el seccionador principal, para impedir los posibles accidentes con las partes móviles del equipo que puedan ponerse en marcha imprevisiblemente,
así como para impedir un contacto directo o indirecto con cualquier parte activa.
• En la instalación del equipo se deberá nivelar para un buen ajuste de los diferentes módulos, un perfecto evacuado de condensados y una buena apertura de los registros.
• Para comprobar el perfecto estado del ventilador se revisará el centrado del aro de aspiración haciendo girar la turbina a mano.
5
ESPAÑOL
5. MANIPULACIÓN
6.2. IDENTIFICACIÓN DE PARTES DEL EQUIPO
ESPAÑOL
El módulo principal puede estar compuesto por tres secciones diferenciadas: filtro, baterías y
ventiladores, pudiendo no estar alguna de las dos primeras. En la figura siguiente se identifican los componentes principales del módulo principal.
6.3. LUGAR DE EMPLAZAMIENTO
• Evitar la instalación del aparato en zonas próximas a fuentes de calor y zonas húmedas
dónde la unidad pueda entrar en contacto con el agua.
• Se aconseja emplazar la unidad en una ubicación dónde la instalación sea de fácil acceso.
Prever un espacio suficiente para el mantenimiento, el conexionado y la evacuación de
condensados.
6.4. ESPACIO PARA MANTENIMIENTO
• El instalador debe prever unos espacios libres de obstrucción y poder acceder libremente
al aparato para su mantenimiento. El espacio requerido dependerá del lado de la unidad
dónde se haga la extracción. El equipo está provisto de unos registros laterales para poder
acceder a los filtros o a los ventiladores. Para extraer las baterías se debe sacar el panel
lateral. Tanto los filtros como los ventiladores se pueden extraer por cualquier lado de la
unidad.
6
ESPAÑOL
Modelo
A (mm)
B (mm)
UTBS-2
750
360
UTBS-3
1100
410
UTBS-5
1500
410
UTBS-8
1900
500
• Para el montaje en techo y suelo, se deberá suspender de las cuatro escuadras existentes
en cada módulo como sigue:
MONTAJE EN TECHO
MONTAJE EN SUELO
ATENCIÓN! Debido a la longitud y el peso de los aparatos, se deberá suspender
cada módulo por separado.
7
Ningún obstáculo deberá impedir o reducir el paso de aire en aspiración.
POSICIÓN MONTAJE
ESPAÑOL
6.5. ENSAMBLAJE DE MÓDULOS
Los bastidores de los módulos disponen de escuadras en las cuatro esquinas cuya función
es la sujeción del equipo al techo y la sujeción de diferentes módulos entre si. Si el equipo
está formado por diferentes módulos se suministrará un kit de unión compuesto por 4 juegos
de tornillos, arandelas, tuercas y junta de estanqueidad.
6.5.1. UNIÓN DE TEJADILLOS
Si ha pedido un climatizador para ir a la intemperie, el equipo llevará incorporado un tejadillo
anti-lluvia. En caso que el climatizador esté formado por uno o más módulos, la unión de los
tejadillos se deberá realizar poniendo masilla en las uniones , cómo indica la figura:
8
Si ha pedido juntas flexibles en las terminaciones de las unidades, se le suministrarán por
separado.
6.5.3. ENSAMBLAJE DE UNIDADES EN PARALELO
Cuándo se hayan pedido equipos para instalar en paralelo, en el caso de tener módulo recuperador o módulo free-cooling, el equipo vendrá provisto de escuadras para unir los módulos.
Para fijar dichas escuadras se deberá acceder al equipo por el interior:
- Situar la escuadra sobre el perfil de aluminio y atornillar con dos tornillos autotaladrantes (1)
- Colocar burlete (2)
- Proceder a la unión de los módulos fijando las dos escuadras mediante un tornillo
M8, arandelas y una tuerca (3)
9
ESPAÑOL
6.5.2. ENSAMBLAJE DE JUNTAS FLEXIBLES
Ejemplo de unión de módulos en paralelo:
ESPAÑOL
6.6. CONEXIÓN ELÉCTRICA DEL EQUIPO
• La instalación debe ser realizada por personal calificado.
• Se instalarán cables cuya sección cumpla las directivas actuales e impidan un calentamiento de éstos y una caída de tensión superior a la permitida. Se cumplirá la normativa vigente
y en todo momento se seguirán los criterios del proyectista.
• Antes de realizar la conexión de los cables, se comprobará que la instalación eléctrica esté
desconectada y que no haya tensión entre los cables.
• Una vez instalado, el aparato debe cumplir con las Directivas siguientes:
- Directiva de Baja Tension 2006/95/CE
- Directiva de Máquinas 2006/42/CE
- Directiva de Compatibilidad Electromegnética 2004/108/CE
• Realizadas estas operaciones hay que verificar el apriete de todas las conexiones eléctricas (un cable mal apretado puede ocasionar daños irreparables).
• Verificar que la puesta a tierra se ha efectuado correctamente y que las protecciones térmicas y de sobre-intensidad han sido reguladas conforme a los valores establecidos en la
placa de características.
• Como medida de seguridad si el ventilador se quedara sin tensión se deberán realizar los
enclavamientos necesarios para que todos los demás elementos eléctricos queden sin
tensión.
10
ESPAÑOL
6.6.1. CONEXIÓN DE LOS MOTORES
• Para realizar el conexionado de los motores:
- En los equipos la caja de conexiones de los motores está orientada hacia el lado
del registro de inspección para facilitar su acceso.
• Pasar la manguera por los pasacables instalados en la unidad:
6.6.2. CONEXIÓN DE LA BATERÍA ELÉCTRICA
• Utilizar la batería eléctrica únicamente para recalentar el aire limpio. El ensuciamiento de las
resistencias eléctricas aumenta el riesgo de incendio. Se recomienda la utilización de un
filtro de aire encima de la batería.
• La conexión eléctrica deberá prever un dispositivo de control del caudal de aire. La batería
deberá ponerse en marcha cuando se alcance el caudal de aire mínimo o bien cuando la
velocidad del aire dentro de la batería sea superior a 1,5m/s.
• La instalación eléctrica no debe permitir que se pueda poner en marcha la batería si el ventilador está parado. La batería eléctrica debe ponerse en marcha después o bien al mismo
tiempo que el ventilador.
• La instalación eléctrica no debe permitir que se pueda parar el ventilador cuando la batería
esté en funcionamiento. El ventilador debe permanecer parado después del paro y el enfriamiento de la batería.
• No tocar la batería eléctrica cuando esté en funcionamiento.
• En caso de que uno de los dispositivos de protección eléctrica de la instalación se accionara, desenchufar el aparato y verificar la instalación antes de ponerla en marcha de nuevo.
11
En el esquema adjunto se muestra como conectar las resistencias de la batería eléctrica:
Conexionado electrico BE-2 15 kw 1 etapa catalogo
ESPAÑOL
Conexionado electrico BE-2 7,5 kw 2 etapas catalogo
12
ESPAÑOL
Conexionado electrico BE-3 24 kw 1 etapa catalogo
Conexionado electrico BE-3 24 kw 2 etapas catalogo
13
Conexionado electrico BE-5 18 kw 2 etapas catalogo
ESPAÑOL
Conexionado electrico BE-5 12 kw 3 etapas catalogo
14
ESPAÑOL
Conexionado electrico BE-8 22,5 kw 2 etapas catalogo
Conexionado electrico BE-8 15 kw 3 etapas catalogo
15
6.7. CONEXIÓN DE SENSORES DE PRESIÓN
ESPAÑOL
6.7.1. ENSUCIAMIENTO DE FILTROS
Para controlar el ensuciamiento de los filtros el equipo dispone de 2 tomas de presión a cada
lado de los filtros con el fin de conectar un presostato. En el apartado 9.5. se muestra una
tabla con los valores recomendados para la sustitución de los filtros.
6.7.2. CONTROL EN VENTILADORES
• El equipo dispone de 3 tomas de presión para controlar el ventilador a caudal constante o
a presión constante. Para poder hacer un control a caudal constante se necesitará entrar
el factor K, adjunto en la tabla siguiente:
UTBS-2
K=69
UTBS-3
K=84
UTBS-5
K=84
UTBS-8
K=104
16
- Presión máxima admisible : 31,62 bar
- Temperatura máxima: 150ºC
• En los intercambiadores con conexiones roscadas el apriete se realizará sujetando el colector de la batería con la herramienta necesaria para impedir que se transmita el esfuerzo al
colector, pues éste se podría dañar.
• En la tabla siguiente se especifica una relación del tipo de rosca para cada modelo de humectador:
MODELO
ROSCA
UTBS-2 (2,4 y 6 filas)
35x1,5 ( 1”3/8)
UTBS-3 (2,4 y 6 filas)
35x1,5 ( 1”3/8)
UTBS-5 (2,4 y 6 filas)
35x1,5 ( 1”3/8)
UTBS-8 (2,4 y 6 filas)
42x1,5 (1”5/8)
• Las baterías de agua trabajan a contracorriente del paso del aire para proporcionar las
prestaciones correctas. De esta manera, la entrada del fluido se debe conectar en el colector situado en el lado de la salida del aire y la salida del fluido en el colector situado en
el lado de la entrada del aire, como indican las siguientes figuras:
17
ESPAÑOL
6.8. CONEXIÓN DEL EQUIPO A LA RED HIDRÁULICA
ESPAÑOL
• Se aconseja colocar elementos indispensables para el buen funcionamiento de la instalación, haciendo mención especial en los siguientes apartados:
- Filtro en la entrada al equipo que retenga partículas en suspensión.
- Se colocarán purgadores de aire en cada uno de los puntos altos de la instalación
para mantener una buena circulación de agua.
- Es aconsejable que la instalación hidráulica no se quede nunca sin agua (instalar
una válvula de llenado automático, presostatos que den señal de alarma y corten
la tensión del equipo, etc.)
- Se comprobará que el caudal de agua que circula por el equipo sea el idóneo.
- Se deben instalar llaves de corte de paso total en cada una de conexiones hidráulicas, de forma tal que permitan aislar el equipo en caso de necesidad (limpieza de
filtros, reparaciones, sustituciones, etc.) sin obligar al vaciado de todo el circuito.
- Se colocarán manguitos anti-vibratorios en la entrada y la salida del equipo, de tal
forma que no se transmitan vibraciones que provoquen la rotura de las baterías de
intercambio por exceso de tensiones en los circuitos.
6.9. CONEXIÓN DEL EQUIPO A LA RED DE CONDUCTOS
• El equipo nunca servirá como soporte o estructura portante de los conductos.
• La conexión del equipo a los conductos de aire se debe realizar mediante conexiones
flexibles para evitar la transmisión de vibraciones a la instalación.
• Se comprobará que la entrada y la impulsión de aire no estén obstruidas o haya algún obstáculo que impida la buena circulación de éste. Si no se reúnen estos requisitos la eficiencia
del sistema se verá afectada.
6.10. RED DE DESAGÜE
• Es imprescindible instalar un sifón con una diferencia de cotas superior a la presión disponible en mm.c.a. que suministra el ventilador, para facilitar el desagüe de condensados de
la bandeja.
• La red de desagüe tendrá una pendiente mínima de un 2 %.
18
• El proceso de fabricación de los paneles incluye la impregnación con agentes químicos con un olor penetrante típico. A fin de evitar su transmisión a los locales habitados
se recomienda el funcionamiento continuo de la bomba de recirculación de agua durante 24 horas SIN QUE FUNCIONE EL VENTILADOR, para lavar los paneles y posteriormente evacuar el agua de lavado antes de proceder a la puesta en marcha normal.
6.11. INSTALACIÓN DE CAJAS CON COMPUERTAS
• Verificar que el giro de estas se realiza suavemente y sin atascos en todo su recorrido.
• En compuertas con mando manual apretar lo suficientemente el mando para impedir que
la compuerta pueda cerrarse durante el funcionamiento del equipo, impidiendo la circulación de aire.
• En caso de que la caja de mezclas vaya comandada por servomotor, se procederá a
conexionar según las instrucciones del fabricante. Sin embargo, antes de instalar el servomotor se deben quitar los mandos manuales de las compuertas.
7. PROCEDIMIENTO DE PUESTA EN MARCHA
• Antes de proceder a la puesta en marcha se deberán cerrar todos los paneles de acceso
al equipo.
• Se comprobará que la toma de tierra está bien conectada.
• En primer lugar se pondrá en funcionamiento la bomba de circulación de agua. Esperar
varios minutos hasta comprobar que el caudal de circulación permanece constante y no
hay variaciones de caudal. Comprobar que se han arrastrado las burbujas de aire hasta los
puntos de purgado y que éstas se han eliminado.
• Se comprobará que las presiones de la instalación no superen las permitidas por las baterías de intercambio.
• Mantener al menos durante 2 horas funcionando la bomba de circulación. Desconectar
la bomba y proceder a desmontar el filtro de la instalación. Para ello cerrar las válvulas de
corte necesarias para impedir el vaciado del circuito y limitar la entrada de aire al mismo.
Proceder a la limpieza del filtro.
• Se observarán detenidamente las partículas que ha retenido el filtro, comprobando que el
origen de dichas partículas no obstruirá de nuevo el filtro (es el caso de cascarilla de tuberías de hierro, depósitos calcáreos, etc.).
• Volver a colocar el filtro, purgar de nuevo la instalación y conectar de nuevo la bomba de
circulación. Esperar de nuevo varios minutos hasta comprobar que el caudal de circulación
permanece constante y no hay variaciones de caudal. En caso de no haber una buena
circulación de agua, volver a realizar las operaciones anteriormente descritas.
• Antes de poner el equipo bajo tensión comprobar que no hay ningún elemento que impida
el giro de las compuertas reguladoras, si éstas son de actuación mediante servomotor.
19
ESPAÑOL
MUY IMPORTANTE:
• Si las compuertas son de actuador manual, asegurar mediante el apriete del mando manual que no se pueden cerrar por la actuación del aire o cualquier otro elemento durante el
funcionamiento del equipo.
ESPAÑOL
• Conectar el interruptor general de fuerza externo a la unidad, manteniendo en posición
de paro el interruptor de mando de ésta. Realizado esto comprobar que la tensión en los
bornes eléctricos de entrada del equipo corresponden con las establecidas en la placa de
características (la tensión mínima admitida será de un 10 % inferior a la nominal indicada
en la placa de características).
• No se pondrá en marcha el ventilador si la red de conductos no está completamente cerrada, pues la conexión del ventilador sin carga puede provocar sobre-intensidades que
podrían deteriorar el motor. Este mismo efecto se puede producir si la presión estática
solicitada es mayor que las pérdidas de carga producida en la red de conductos. Para
solucionar este caso actuar sobre las compuertas de regulación de caudal cerrándolas, de
forma que se produzca una mayor pérdida de carga.
• Conectar el interruptor de mando externo y detenerlo instantes después.
• Comprobar que el sentido de giro de los motores coincide con el establecido por el fabricante (observar el sentido de giro marcado en el ventilador). Si el sentido de giro no es el
correcto intercambiar dos de las fases de fuerza. Para realizar esta operación desconectar
el interruptor de mando del equipo y el interruptor de fuerza y una vez realizado esto, intercambiar las fases.
• Comprobado el sentido de giro, y si no se ha observado ningún ruido extraño, volver a
conectar el equipo.
• Se comprobará mediante un tacómetro las revoluciones de giro del ventilador y del motor.
• Con el equipo en marcha comprobar las intensidades absorbidas por cada elemento eléctrico, comprobando que la intensidad no sobrepasa los valores límites de cada uno. Se
comprobará así mismo que no hay desfases entre las intensidades que circulan por cada
línea, salvo que componentes eléctricos monofásicos lo provoquen.
• Se comprobará la intensidad total absorbida por todo el equipo, comprobando también
que no hay desfases entre las corrientes de las diferentes líneas.
8. OPERACIONES DE EMERGENCIA
• En caso de que se observe alguna anomalía del equipo detener el funcionamiento del mismo mediante el dispositivo de paro de emergencia.
• Estas operaciones de emergencia serán, en general, debidas a algún problema con el
circuito eléctrico, en cuyo caso tendremos problemas con los motores, y, por tanto, tendremos que desconectar la corriente eléctrica para localizar la avería, que podrá ser interna
al equipo (cortacircuitos, etc.) o externa al mismo (problemas de suministro, variación de
tensión, etc.).
• En caso de incendio se debe neutralizar el mismo con el uso de extintores apropiados.
Estos extintores deben ser adecuados para usarlos sobre elementos eléctricos.
20
• El Mantenimiento Preventivo es un programa de control preestablecido que se sigue periódicamente para evitar un paro del equipo no programado.
• En todo momento será aplicable el Reglamento de Instalaciones Técnicas complementarias en los Edificios en cuanto a la aplicación de normas de mantenimiento, salvo justificación técnica.
• Es de vital importancia y en función de las necesidades de funcionamiento del equipo, realizar un listado con aquellos elementos imprescindibles para una pronta solución de averías.
En función de este listado se valorará el stock necesario de repuesto para poder realizar
reparaciones rápidas.
• El personal dedicado al mantenimiento debe disponer de un programa de formación específico.
• Antes de empezar las operaciones de mantenimiento de la unidad desconectar el interruptor general del equipo. Una descarga eléctrica puede causar daños personales.
• En estas operaciones deberemos tener en cuenta los siguientes aspectos:
9.1. BATERÍAS DE INTERCAMBIO TÉRMICO
• Al comenzar cada temporada (verano e invierno) comprobar que las aletas de las baterías
no estén obstruidas por polvo, pelusa u otros cuerpos extraños que impidan la circulación
de aire y disminuyan el rendimiento de la batería.
• Limpiar con cuidado la batería con aire a presión o incluso en equipos con bandeja de
recogida de condensados con agua a presión y detergentes no abrasivos, para no dañar
las aletas.
• Peinar las aletas que lo necesiten.
• Asegurarse de que no existan fugas del fluido primario (agua o vapor) por los codos y colectores.
• Si los equipos van a estar largos periodos sin funcionar y la instalación no contiene glycol,
es conveniente vaciar la instalación hidráulica (se evitarán congelaciones en invierno).
9.2. RED DE DESAGÜE
• Comprobar mensualmente el estado de la bandeja de recogida de condensados verificando su limpieza y verificando que no quede agua estancada.
• Comprobar el estado del sifón verificando que no hay obstrucciones que impidan la libre
circulación del agua de condensados
9.3. MOTORES
• Se comprobará que el consumo eléctrico no haya aumentado.
• Comprobar periódicamente que las conexiones eléctricas hacen buen contacto para evitar
averías.
• En general, se vigilarán periódicamente los tornillos de sujeción del ventilador, motor, bancada, los cuales podrían dar lugar a averías y ruidos si se aflojaran.
21
ESPAÑOL
9. MANTENIMIENTO PREVENTIVO
9.4. VENTILADORES
ESPAÑOL
• Se limpiará de suciedad los álabes y rodetes de los ventiladores trimestralmente pues esta
puede producir, además de una disminución de caudal un desequilibrado y ruidos molestos.
• Se comprobarán periódicamente los caudales de los ventiladores.
9.5. FILTROS
• Para asegurarnos la eficacia de los filtros es preciso controlar la pérdida de carga que se
produce en los mismos (indicativo de su grado de suciedad). En la tabla siguiente se indican los máximos valores, recomendados, en la pérdida de carga para la sustitución de los
filtros.
Filtro
G4
F5
F6
F7
F8
F9
P. Carga
(Pa)
150
200
200
200
225
225
• Aún no produciéndose la pérdida de carga máxima permitida los filtros se revisarán mensualmente comprobando la estanqueidad del conjunto filtro y portafiltro.
• No es recomendable el lavado de filtros, pues nunca se conseguirá la eficacia de partida y
lo que se puede producir es un deterioro de los mismos. Aunque el lavado o la aspiración
en sentido contrario a la circulación habitual del aire puedan conseguir un acabado óptimo
es aconsejable tener un juego de filtros siempre como repuesto. Bajo ningún concepto se
permitirá el funcionamiento del equipo sin filtros pues esto podría afectar el ensuciamiento
de elementos vitales del equipo y, por tanto, un deterioro de los mismos y una pérdida de
eficiencia.
9.5.1. SUSTITUCIÓN DE FILTRO EN EQUIPO PRINCIPAL Y RECUPERADOR
PARALELO Y DE DOBLE ALTURA
Para extraer el filtro se debe abrir el registro de inspección correspondiente y proceder a su
extracción deslizando el filtro hacia el exterior. Los filtros de alta eficacia (a partir de F7) estan
provistos de un sistema de anclaje mediante manecillas. Para poder extraer facilmente el filtro
se deben girar la manecillas superior e inferior y deslizar el filtro. Reponer el filtro y repetir la
operación a la inversa. Este mismo sistema de anclaje se encuentra en los módulos de filtración y los módulos recuperadores de calor paralelos y de doble altura.
22
Para extraer el filtro se debe abrir el registro de inspección correspondiente, desatornillando
los tornillos que lo sujetan. Se liberará la palanca tirando de ella hacia abajo e inmediatamente el filtro caerá por su peso. Retirar el filtro deslizándolo hacia el exterior. Reponer el filtro y
repetir la operación a la inversa.
9.6. BATERÍAS
Si se detecta cualquier anomalía en las baterías y tienen que ser extraídas, desatornillar los
tornillos del panel donde van ubicadas, extraer el panel y retirar las baterías. Las baterías van
instaladas con un sistema de guías que facilitan su extracción e introducción en el equipo:
9.7. COMPUERTAS
• Verificar que el giro de estas se realiza suavemente y sin atascos en todo su recorrido.
• En compuertas con mando manual apretar lo suficientemente el mando para impedir que
la compuerta pueda cerrarse durante el funcionamiento del equipo, impidiendo la circulación de aire.
23
ESPAÑOL
9.5.2. SUSTITUCIÓN DE FILTROS EN RECUPERADORES EN LÍNEA
9.8. SILENCIADORES
ESPAÑOL
• Para extraer el conjunto de los bafl es se debe desmontar el panel lateral correspondiente,
desatornillando los tornillos que lo sujetan.
9.8.1. MÓDULO DE MEZCLAS
• Módulo de 2 vías: Se envía siempre con una posición fija de las compuertas, si no coincide
con las necesidades de la instalación, cambiar el panel frontal tal y como se indica.
• Módulo de 3 vías (A+B) (Mezcla): Cuando va intercalado entre dos módulos se tienen que
quitar los paneles frontales tal y como se indica. (B)
A
sacar el panel
B
sacar el panel
24
• Siempre se indica que de serie lo fabricaremos a derechas y en caso de que sea a izquierdas, el cliente tendrá que cambiar de posición el panel frontal con la compuerta.
9.9. HUMECTADOR
• El humidificador evaporativo es una sección concebida para aumentar el contenido de
vapor de agua del aire tratado por evaporación natural del agua en fase líquida. El caudal
de aire a humidificar atraviesa un panel de celulosa ondulado con impregnaciones químicas
que le da rigidez, esponjosidad y propiedades anti-incrustantes, que está continuamente
mojado por un sistema de recirculación de agua.
• Comprobar que la bandeja de recogida de agua mantiene el nivel adecuado.
• Comprobar la buena distribución de agua por todos los paneles comprobando el conjunto
de tubos y válvulas de PVC.
• Los paneles de celulosa no pueden soportar temperaturas de aire superiores a 60ºC, temperatura a partir de la cual empieza a tostarse y existen riesgos de combustión. Asegurarse
de que esto no pueda suceder y en su caso prever un sistema de alarma si se produce
este hecho.
• Se comprobará que el riego de los paneles tenga un exceso de agua que cae a la bandeja
sin que rebose por las chapas de cerramiento del sistema de riego.
• Se deberá ajustar el caudal de agua de la bomba observando periódicamente el estado
de los paneles (en su cara de entrada de aire). Se puede reducir si no aparecen depósitos
minerales blanquecinos en su superficie o, por el contrario, aumentarlo si se observan depósitos de cal.
• Su vida operativa (contando con suministro de agua potable normal con valores de pH en
torno a 7) depende fundamentalmente del correcto funcionamiento del sistema de purga
continua y desconcentración de sales minerales. Si no se opera adecuadamente, los paneles habrá que sustituirles en breve plazo por bloquearse los canales de paso de aire por
los depósitos calizos.
• La recuperación de los paneles puede intentarse mediante su inmersión en una disolución
de ácido acético débil (15-20%) o en vinagre de vino.
• Asimismo en los periodos largos de inactividad es imprescindible vaciar y limpiar totalmente la bandeja.
25
ESPAÑOL
9.8.2. CAJA DE MEZCLA 2 VÍAS CON BANCADA Y TEJADILLO
9.10. RECUPERADOR
ESPAÑOL
Para extraer el recuperador se debe abrir el registro de inspección correspondiente, desatornillando los tornillos que lo sujetan. Deslizar el intercambiador para proceder a su extracción.
¡¡¡ATENCIÓN!!! Sostener con una mano el intercambiador durante esta operación para evitar
su caída por gravedad (riesgo de daños en el
intercambiador y riesgo de accidente para el
técnico que realiza la operación).
Para extraer el intercambiador de su ubicación,
deslícelo por sus guías, tirando de los ángulos
y no de las aletas del intercambiador, para no
dañarlo.
Limpie el intercambiador con aire comprimido o con un aspirador y lávelo con detergente
no agresivo. El mantenimiento periódico recomendado es de una vez por cada estación en
funcionamiento.
10. RECICLAJE
La normativa de la CEE y el compromiso que debemos adquirir con las futuras generaciones,
nos obligan al reciclado de materiales; le rogamos que no olvide depositar todos los elementos sobrantes del embalaje en los correspondientes contenedores de reciclaje, así como de
llevar los aparatos sustituidos al Gestor de Residuos más próximos.
26
ENGLISH
1. OVERVIEW . . . . . . . . . . . . . . . . . . . . . . . . . . . . . . . . . . . . . . . . . . . . . . . . . . . .
2. SAFETY STANDARDS AND “EC” MARKING . . . . . . . . . . . . . . . . . . . . . . . . . . .
3. GENERAL STANDARDS . . . . . . . . . . . . . . . . . . . . . . . . . . . . . . . . . . . . . . . . . . .
4. UNIT LABELING . . . . . . . . . . . . . . . . . . . . . . . . . . . . . . . . . . . . . . . . . . . . . . . . .
5. HANDLING . . . . . . . . . . . . . . . . . . . . . . . . . . . . . . . . . . . . . . . . . . . . . . . . . . . .
6. INSTALLATION . . . . . . . . . . . . . . . . . . . . . . . . . . . . . . . . . . . . . . . . . . . . . . . . . .
6.1. OVERVIEW . . . . . . . . . . . . . . . . . . . . . . . . . . . . . . . . . . . . . . . . . . . . .
6.2. IDENTIFICATION OF PARTS OF THE UNIT . . . . . . . . . . . . . . . . . . . .
6.3. INSTALLATION SITE . . . . . . . . . . . . . . . . . . . . . . . . . . . . . . . . . . . . . .
6.4. MAINTENANCE SPACE . . . . . . . . . . . . . . . . . . . . . . . . . . . . . . . . . . .
6.5. ASSEMBLING THE MODULES . . . . . . . . . . . . . . . . . . . . . . . . . . . . . .
6.5.1. COVER SEAMS . . . . . . . . . . . . . . . . . . . . . . . . . . . . . . . . . .
6.5.2. ASSEMBLING FLEXIBLE CONNECTIONS . . . . . . . . . . . . .
6.5.3. ASSEMBLING UNITS SIDE BY SIDE . . . . . . . . . . . . . . . . .
6.6. ELECTRICAL CONNECTION . . . . . . . . . . . . . . . . . . . . . . . . . . . . . . .
6.6.1. CONNECTING THE MOTORS . . . . . . . . . . . . . . . . . . . . . . .
6.6.2. CONNECTING THE ELECTRICAL HEATER . . . . . . . . . . . .
6.7. CONNECTING THE PRESSURE SENSORS . . . . . . . . . . . . . . . . . . . .
6.7.1. DIRTY FILTERS . . . . . . . . . . . . . . . . . . . . . . . . . . . . . . . . . .
6.7.2. FAN CONTROLS . . . . . . . . . . . . . . . . . . . . . . . . . . . . . . . . .
6.8. CONNECTING THE UNIT TO THE WATER NETWORK . . . . . . . . . . .
6.9. CONNECTING THE UNIT TO THE DUCT SYSTEM . . . . . . . . . . . . .
6.10. DRAINAGE SYSTEM . . . . . . . . . . . . . . . . . . . . . . . . . . . . . . . . . . . .
6.11. INSTALLING DAMPERS BOXES . . . . . . . . . . . . . . . . . . . . . . . . . . . .
7. START-UP PROCEDURE . . . . . . . . . . . . . . . . . . . . . . . . . . . . . . . . . . . . . . . . . .
8. EMERGENCY OPERATIONS . . . . . . . . . . . . . . . . . . . . . . . . . . . . . . . . . . . . . .
9. PREVENTIVE MAINTENANCE . . . . . . . . . . . . . . . . . . . . . . . . . . . . . . . . . . . . . .
9.1. HEAT EXCHANGER COILS . . . . . . . . . . . . . . . . . . . . . . . . . . . . . . . .
9.1.1. DX COILS . . . . . . . . . . . . . . . . . . . . . . . . . . . . . . . . . . . . . .
9.2. DRAINAGE SYSTEM . . . . . . . . . . . . . . . . . . . . . . . . . . . . . . . . . . . . .
9.3. MOTORS . . . . . . . . . . . . . . . . . . . . . . . . . . . . . . . . . . . . . . . . . . . . . .
9.4. FANS . . . . . . . . . . . . . . . . . . . . . . . . . . . . . . . . . . . . . . . . . . . . . . . . . .
9.5. FILTERS . . . . . . . . . . . . . . . . . . . . . . . . . . . . . . . . . . . . . . . . . . . . . . .
9.5.1. REPLACING THE FILTER IN THE MAIN UNIT
AND SIDE-BY-SIDE OR STACKED RECOVERY UNIT. . . . .
9.5.2. REPLACING FILTERS FOR IN-LINE RECOVERY MODULES
9.6. COILS . . . . . . . . . . . . . . . . . . . . . . . . . . . . . . . . . . . . . . . . . . . . . . . . .
9.7. DAMPERS . . . . . . . . . . . . . . . . . . . . . . . . . . . . . . . . . . . . . . . . . . . . .
9.8. SILENCER . . . . . . . . . . . . . . . . . . . . . . . . . . . . . . . . . . . . . . . . . . . . . .
9.8.1. MIXING MODULE . . . . . . . . . . . . . . . . . . . . . . . . . . . . . . . .
9.8.1. MIXING BOX 2 WAY WITH BASE AND ROOF. . . . . . . . . . .
28
28
28
29
29
30
30
30
31
31
33
33
33
34
35
36
36
41
41
41
42
43
43
44
44
45
45
46
46
46
46
47
47
47
48
48
48
49
49
50
9.9. RECOVERY UNIT . . . . . . . . . . . . . . . . . . . . . . . . . . . . . . . . . . . . . . . . 50
10. RECYCLING . . . . . . . . . . . . . . . . . . . . . . . . . . . . . . . . . . . . . . . . . . . . . . . . . . . 51
27
ENGLISH
TABLE OF CONTENTS
1. OVERVIEW
• We appreciate the trust you have placed in us by purchasing this device. You have purchased a high-quality product that has been manufactured in strict compliance with recognized technical regulations regarding safety, and in accordance with EC standards.
• Read this instruction booklet carefully, since it contains important information for your safety
during the installation, use and maintenance of this product.
• Keep this booklet in case you need to consult it in the future.
• We ask that you make sure the equipment is in perfect condition when you unpack it, since
any existing defect is covered by the S&P warranty.
ENGLISH
• Technicians responsible for installing, start-up and maintenance must read the instructions
and be familiar with them before starting work.
2. SAFETY STANDARDS AND “EC” MARKING
• S&P engineers are firmly committed to research and development to achieve products with
improved efficiency that complies with current safety standards.
• The standards and recommendations indicated below reflect current standards in the field
of safety, and therefore are based primarily on meeting standards of a general nature.
Consequently, we recommend that all personnel exposed to risks adhere strictly to local
regulations in force regarding hazard prevention.
• S&P is in no way responsible for any damage or injury caused to persons or objects resulting from failure to comply with safety standards, and any possible modifications to the product. The EC seal and statement of conformity serve as proof of the product’s compliance
with applicable European Community standards.
3. GENERAL STANDARDS
• Product risks have been analysed pursuant to the provisions of the Machinery Directive.
This manual contains information intended for all personnel exposed to hazards, with the
goal of preventing personal injuries or damage to objects resulting from mishandling or
improper maintenance. All maintenance service work (corrective and preventive) must be
performed with the equipment stopped and disconnected.
• To avoid danger of possible accidental start up ensure that the equipment is electrically isolated and locked. If this is not possible, warning signs should be placed on main distribution
console that state:
“WARNING: controls disconnected for maintenance”
• Before connecting the power cable to the motors, make sure that the voltage on the line
matches the voltage indicated on the unit’s identification plate.
28
4. UNIT LABELING
• The unit comes with a variety of labels that must not be removed. Herewith sample labels
and meaning:
ICON / LABEL
MEANING
Indicates direction of airflow in the unit.
Indicates the inlet/outlet for the cold
water heat exchanger.
Indicates the inlet/outlet for the hot
water heat exchanger.
Unit identification plate. This indicates:
- Model
- Code
- Serial number
- Date of manufacture
- Output power of installed motors (Kw)
- Maximum absorbed current of motor (A)
- Power of installed electric heater
- Electrical supply
5. HANDLING
• When unit received, unpack and make sure the packaging is intact; any defect may indicate
damage to the equipment. Review it carefully to make sure that no parts are missing.
• If there is any damage to the unit or the shipment is not complete, write down the problems
on the delivery slip and send a claim to the carrier. Also report any problems to S&P.
• The climate control unit is supplied in separate modules. Each module may be moved to its
final point of installation only in the position which will be installed, except when expressly
authorised by the manufacturer.
• Components should be transported using appropriate hoist and slings. The equipment has
corner lugs for loading and unloading.
29
ENGLISH
Signing on fan access door. Indicates
that the equipment must be disconnected, followed by a waiting period,
since there are moving parts that
constitute danger to entry.
6. INSTALLATION
6.1. OVERVIEW
• The technician responsible for equipment receipt must ensure that the characteristics of the
existing power supply agree with the electrical data on the unit’s identification plate.
• Before installing the equipment in its final position, make sure that the place where it will be
located is strong enough to support its weight.
• Under no circumstances should these units be installed in flammable or explosive environments, in environments that contain oil vapours, salt air, or corrosive environments.
ENGLISH
• Equipment installation can present hazards due to the material used, pressures in the system and the electrical components. For this reason, only trained and qualified service personnel may install service or repair the equipment.
• As a precaution, when performing operations inside the equipment, shut off the power at a
main breaker. This serves to prevent any accidents involving the equipment’s moving parts,
which can start accidentally, well as to prevent any direct or indirect contact with live parts.
• When installing the unit, it must be levelled to allow for a good fit between the different
modules, perfect condensate drainage and proper opening of the doors.
• To test whether the fan is in perfect condition, check the centering of the intake ring by
turning the impeller by hand.
6.2. IDENTIFICATION OF PARTS OF THE UNIT
The main module may consist of three different sections: filter, coils and fans. However, one of
the first two sections may not be included. The following illustration identifies the main components of the main module.
30
6.3. INSTALLATION SITE
• Avoid installing the unit in areas near heat sources or in damp areas where the unit might
come in contact with water.
• It is recommended that the unit be installed in a place that is easily accessible for the installation. Provide sufficient room for maintenance, connection and drainage of condensate.
• The installer should leave sufficient unobstructed space to allow free access to the unit for
maintenance. The amount of space needed will depend on which side of the unit is performing the extraction. The unit is equipped with some side access doors for access to the
filters and fans. To remove the coils, the side panel must be removed. Both the filters and
the fans can be removed from either side of the unit.
Model
A (mm)
B (mm)
UTBS-2
750
360
UTBS-3
1100
410
UTBS-5
1500
410
UTBS-8
1900
500
31
ENGLISH
6.4. MAINTENANCE SPACE
• For ceiling and floor-mounted applications, the unit must be suspended from the four angle
brackets on each module, as follows:
CEILING MOUNTED
FLOOR MOUNTED
ENGLISH
WARNING! Due to the length and weight of the units, each module must be
suspended separately.
There should be nothing blocking or restricting the intake of air.
MOUNTING POSITION
32
6.5. ASSEMBLING THE MODULES
ENGLISH
The module frames have mounting brackets on each corner that are used to secure the equipment to the ceiling and to join the various modules to one another. If the unit is made up of
different modules, it will be supplied with a joining kit with 4 sets of bolts, washers, nuts and
a sealing gasket.
6.5.1. COVER SEAMS
If you have ordered a climate control unit for outdoor usage, the equipment will come equipped with a rain-proof cover. If the climate control unit is made up of one or more modules, the
seams between the covers must be sealed as shown in the illustration:
6.5.2. ASSEMBLING FLEXIBLE CONNECTIONS
• If you have ordered flexible connections for the ends of the units, they will be supplied separately.
33
6.5.3. ASSEMBLING UNITS SIDE BY SIDE
If you have ordered equipment for side-by-side installation of a heat recovery module or free
cooling module, the equipment will be supplied with joining brackets to join the modules together. To attach these brackets, the equipment must be accessed from the inside:
- Place the bracket over the aluminium strip and tighten with the two self-drilling
screws (1))
- Insert packing strip (2)
- Join the modules together by securing the two brackets using an M8 bolt, washers
and a nut (3))
ENGLISH
Example of joining modules side by side:
34
6.6. ELECTRICAL CONNECTION
• Before putting the unit in place, make sure that the nominal supply voltage matches
that listed on the unit’s identification plate.
• It should be installed with cables whose cross-section meets current regulations
and prevents overheating and voltage drops that exceed permissible limits. Current
regulations must be obeyed, and the designer’s instructions must be followed at all
times.
• The installer must keep the following points in mind when performing the electrical
connections:
- An external control must be installed that operates the equipment.
- An emergency shut-off switch must be installed in the most accessible place
in order to stop the equipment in the event of a problem.
- The motors must be connected following the instructions in the wiring schematics for the terminal boxes for the various motors. The equipment has
glands on the sides where the power is connected for running power cables
to the motors.
- A power outlet, fuse or “U” curve thermo-magnetic breaker must be installed
for each fan, which will protect each power line in the even of a short circuit.
- The general power line must have a fuse or “U” curve thermo-magnetic
breaker that will protect the mains power in the event of a short circuit.
- Interlocked contactors with a thermal relay are recommended for use to
protect against over-current.
• The instructions in current regulations regarding the protection of electrical lines
against defects and direct and indirect contact must be obeyed at all times.
• After these steps are performed, check to make sure all electrical connections are
secure (loose wiring connections can cause irreparable damage).
• Check to make sure the electrical resistance between earth and any electrical terminal is greater than 1 megohms. If it is not, do not start up the unit until the electrical
short has been located and repaired.
• As a safety measure, if there is no power to the fan, the necessary interlocks must
be performed so that all other electrical components are also de-energised.
35
ENGLISH
• Before connecting the cables, make sure that the electricity is turned off and that
there is no voltage present in any of them.
6.6.1. CONNECTING THE MOTORS
ENGLISH
• To connect the motors:
- On the UTBS-2 and UTBS-3 units, the motor terminal box faces the side with the
inspection door to make it easier to access.
• Run the sleeve through the cable gland installed on the unit:
6.6.2. CONNECTING THE ELECTRICAL HEATER
• Use the electric heater to heat clean air. Fire risk is increased when the electric heater gets
dirty, therefore it is recommended to place an air filter before the heating element.
• The electrical installer must provide airflow control device, so that, the electrical heater operates when the minimum airfl ow is reached, or when the air speed over the heater is more
than 1.5 m/s.
• The electric heater should operate if the fan is off. The electrical heater should operate after,
or at the same time as the fan is activated.
• The fan must stay off after the stop and cooling of the coil.
• Do not touch the heater when it is working.
• In case that one of the control devices was activated, switch off the unit and verify the installation before restarting.
36
The attached schematic shows how to connect the resistors to the electrical heater:
Wiringelectrico
diagramBE-2
BE-2 15
15 kw
kW11etapa
step catalogo
Conexionado
STANDARD:
ENGLISH
A: HEATER ELEMENT 2,5 kW
B: THERMAL PROTECTION R/A
C: THERMAL PROTECTION R/M
Sample of connection
with regulator:
D: CONTROL TTC-2000
E: SWITCH
F: CONTACTOR
G: LINE PROTECTION
H: DUCT SENSOR TEMPERATURE
(ACCESSORIES)
Wiringelectrico
diagramBE-2
BE-2 7,5
7,5 kw
kW 22 etapas
steps catalogo
Conexionado
STANDARD:
A: HEATER ELEMENT 2,5 kW
B: THERMAL PROTECTION R/A
C: THERMAL PROTECTION R/M
Sample of connection
with regulator:
D: REGULATOR TTC-2000
E: SWITCH
F: CONTACTOR
G: LINE PROTECTION
H: DUCT SENSOR TEMPERATURE
(ACCESSORIES)
37
Wiringelectrico
diagram BE-3
BE-3 24
24 kw
kW11etapa
step catalogo
Conexionado
STANDARD:
A: HEATER ELEMENT 4,0 kW
B: THERMAL PROTECTION R/A
C: THERMAL PROTECTION R/M
ENGLISH
Sample of connection
with regulator:
D: REGULATOR TTC-40 F
E: SWITCH
F: CONTACTOR
G: LINE PROTECTION
H: DUCT SENSOR TEMPERATURE
(ACCESSORIES)
Wiring
diagramBE-3
BE-324
24kw
kW2 2etapas
steps catalogo
Conexionado
electrico
STANDARD:
A: HEATER ELEMENT 4,0 kW
B: THERMAL PROTECTION R/A
C: THERMAL PROTECTION R/M
Sample of connection
with regulator:
D: REGULATOR TTC-40 F
E: SWITCH
F: CONTACTOR
G: LINE PROTECTION
H: DUCT SENSOR TEMPERATURE
(ACCESSORIES)
38
Wiringelectrico
diagramBE-5
BE-518
18kW
steps catalogo
Conexionado
kw 22 etapas
STANDARD:
ENGLISH
A: HEATER ELEMENT 6,0 kW
B: THERMAL PROTECTION R/A
C: THERMAL PROTECTION R/M
Sample of connection
with regulator:
D: REGULATOR TTC-40 F
D1: REGULATOR TT-S4
E: SWITCH
F:CONTACTOR
G: LINE PROTECTION
H: DUCT SENSOR TEMPERATURE
(ACCESSORIES)
Wiring diagram BE-5 12 kW 3 steps
Conexionado electrico BE-5 12 kw 3 etapas catalogo
STANDARD:
A: HEATER ELEMENT 4,0 kW
B: THERMAL PROTECTION R/A
C: THERMAL PROTECTION R/M
Sample of connection
with regulator:
D: REGULATOR TTC-40 F
D1: REGULATOR TT-S4
E: SWITCH
F:CONTACTOR
G: LINE PROTECTION
H: DUCT SENSOR TEMPERATURE
(ACCESSORIES)
39
Wiring electrico
diagram BE-8
kW2 2etapas
steps catalogo
Conexionado
BE-522,5
18 kw
STANDARD:
A: HEATER ELEMENT 6,0 kW
B: THERMAL PROTECTION R/A
C: THERMAL PROTECTION R/M
ENGLISH
Sample of connection
with regulator:
D: REGULATOR TTC-40 F
D1: REGULATOR TT-S4
E: SWITCH
F:CONTACTOR
G: LINE PROTECTION
H: DUCT SENSOR TEMPERATURE
(ACCESSORIES)
Wiring diagram BE-8 15 kW 3 steps
Conexionado electrico BE-5 12 kw 3 etapas catalogo
STANDARD:
A: HEATER ELEMENT 4,0 kW
B: THERMAL PROTECTION R/A
C: THERMAL PROTECTION R/M
Sample of connection
with regulator:
D: REGULATOR TTC-40 F
D1: REGULATOR TT-S4
E: SWITCH
F:CONTACTOR
G: LINE PROTECTION
H: DUCT SENSOR TEMPERATURE
(ACCESSORIES)
40
6.7. CONNECTING THE PRESSURE SENSORS
6.7.1. DIRTY FILTERS
The equipment is equipped with 2 pressure taps on each side of the filters so that a pressure
switch can be installed to control dirt levels in the filters. Section 9.5 presents a table with the
values recommended for filter replacement.
• The unit has 3 pressure taps to maintain the fan at a constant airflow or constant pressure.
To be able to control the fans at constant airflow, factor K shown in the following table must
be entered:
UTBS-2
K=69
UTBS-3
K=84
UTBS-5
K=84
UTBS-8
K=104
It is important between the two pressure taps there is the
filtration step, because the airflow varies by fouling of filters.
Air
direction
41
ENGLISH
6.7.2. FAN CONTROLS
6.8. CONNECTING THE UNIT TO THE WATER NETWORK
- Maximum pressure : 31,62 bar
- Maximum temperature: 150ºC
• For heat exchangers with threaded connections, secure the coil manifold with the appropriate tool when tightening the threads. This will prevent the force from being transmitted to the
manifold, which can damage it.
ENGLISH
• The following table gives a list of the types of thread for each humidifier:
MODEL
THREAD
UTBS-2 (2, 4 or 6 -pipes)
35x1,5 ( 1”3/8)
UTBS-3 (2, 4 or 6 -pipes)
35x1,5 ( 1”3/8)
UTBS-5 (2, 4 or 6 -pipes)
35x1,5 ( 1”3/8)
UTBS-8 (2, 4 or 6 -pipes)
42x1,5 (1”5/8)
• The water coils must run counter to the flow of air to provide the correct performance. This
means that the fluid inlet must be connected on the manifold located on the air outlet side,
and the fluid outlet must be connected on the manifold situated on the air intake side, as
shown in the following illustrations:
42
6.9. CONNECTING THE UNIT TO THE DUCT SYSTEM
• Never use the unit as a support or weight-bearing structure for ductwork.
• Connect the unit to the air ducts using flexible connectors to prevent vibrations from being
transmitted to the duct system.
• Check to make sure air intake and flow are not being blocked and that there are no obstacles impeding good air circulation. Failure to do so will affect the efficiency of the system.
6.10. DRAINAGE SYSTEM
• A siphon must be installed with pressure head difference in mmWG greater than the pressure provided by the fan, to facilitate draining condensate from the tray.
• The drainage system should have a minimum slope of 2%.
43
ENGLISH
• We suggest having all the elements needed for the installation on hand, mentioning the
following devices in particular:
- Unit intake pre-filter that traps suspended particulate matter.
- Bleed valves should be fitted at each of the high points in the installation to maintain
good water circulation.
- It is recommended to keep water in the hydraulic system at all times (install an
auto-filler valve and pressure switches that send an alarm and shut off power to
the equipment, etc.)
- Check to make sure that the flow of water circulating through the unit is appropriate.
- Shut-off valves must be installed at each connection on the water line to allow the
unit to be isolated if necessary (to clean filters, make repairs, replace parts etc.) and
avoid the need to completely drain the water circuit.
- Anti-vibration bellows should be installed at the inlet and outlet from the unit to
prevent the transmission of vibrations that could result in damage to the heat exchanger coils due to excess stress on the circuits.
VERY IMPORTANT:
• The panel manufacturing process impregnates them with chemical agents that have
a characteristic strong odour. To prevent this odour from being transmitted to occupied spaces, it is recommended that the water recirculation pump be allowed to
run continuously for 24 hours WITHOUT RUNNING THE FAN to wash off the panels.
Afterwards, drain the rinse water before commencing normal start-up.
6.11. INSTALLING DAMPER BOXES
ENGLISH
• Make sure that these can be rotated with gentle pressure, with no binding anywhere in their
range of motion.
• For manually controlled damper boxes, tighten the control sufficiently to prevent the
damper from closing while the unit is running, blocking off the circulation of air.
• If the mixing box is controlled by a servomotor, connect it according to the manufacturer’s
instructions. However, the lever should be removed before installing the servomotor.
7. START-UP PROCEDURE
• All access panels on the unit must be closed before starting.
• Make sure that the earth connection is securely connected.
• First turn on the water circulation pump. Wait several minutes to make sure the flow of
circulation remains steady and that there is no variation in the flow. Make sure that any air
bubbles have been drawn to the bleed points and that they have been bled off.
• Make sure that the pressures in the unit do not exceed the maximum pressure for the exchanger coils.
• Continue to run the circulation pump for at least 2 hours. Turn off the pump and then remove the filter from the unit. To do so, close the appropriate shut-off valves to prevent the
water line from emptying, and to prevent air from getting in. Then clean the filter.
• Take a careful look at the particles trapped in the filter. Make sure that these particles are
not coming from a source that will clog the filter again (such as pipe scale from iron pipes,
hard water deposits, etc.).
• Re-insert the filter, bleed the air from the system and turn the circulation pump on again.
Wait several more minutes to make sure that the flow of water remains steady and there is
no variation in the flow. If good water circulation is not achieved, repeat the steps described
above.
• Before turning on the power to the unit, check to make sure that nothing is hindering the
movement of the regulator dampers if these are operated using a servomotor.
• If the damper are manually operated, make sure by manually tightening the control that
they cannot be closed due to the force of air or anything else while the unit is running.
44
• Turn on the external main power switch to the unit, keeping the control switch in the off
position. After that, check to make sure the input voltage at the unit’s electrical terminals
matches the one indicated on the identification plate (the minimum voltage will be 10%
below the rated voltage indicated on the identification plate).
• Do not start up the fan if the duct network is not completely closed, since turning on the
fan with no load can cause over-currents that cause wear to the motor. This can also occur
if the static pressure demanded is greater than the pressure losses that occur in the duct
network. To fix this, close the flow regulator dampers so that there is a greater pressure
loss.
• Make sure that the motors are rotating in the direction set by the manufacturer (note the
direction of rotation marked on the fan). If the direction of rotation is incorrect, swap the
power phases. To do so, disconnect the unit control switch and the main switch and then
swap the phases.
• Once you’ve checked the direction of rotation, if you have not noted any strange noises,
you may turn the unit on again.
• Test fan and motor rotation speed using a tachometer.
• Make sure that the unit receives adequate air flow, or else its performance will be seriously
compromised.
• With the unit running, test the current drawn by each electrical component, checking to
make sure that the current does not exceed the limits for each component. Also make sure
there are no phase lags between the currents circulating on each line, except when singlephase electrical components cause this.
• Test the total current drawn by the unit as a whole, also checking to make sure there are no
phase lags between the currents on the different lines.
8. EMERGENCY OPERATIONS
• If any problems are noted on the unit, turn it off using the emergency shut-off device.
• These emergency operations will generally be the result of some problem with the electrical
circuit, in which case you may have problems with the motors. You will therefore need to
disconnect the power to locate the fault, which may be inside the unit (short circuit) or external to it (problems with the power supply, voltage variations, etc.).
• In the event of fire, it must be extinguished using suitable extinguishers. Extinguishers
should be appropriate for use on electrical fires.
9. PREVENTIVE MAINTENANCE
• Preventive maintenance is a preset programme of checks that is followed regularly to prevent equipment breakdowns.
45
ENGLISH
• Turn on the external control switch and stop it a few seconds later.
• The supplemental Building Facility Technical Regulations are applicable at all times to maintenance standards, except when justified otherwise for technical reasons.
• The maintenance supervisor should keep a copy of the preventive maintenance recommendations given below on file, making as many copies as needed for use.
• According to the equipment’s operating needs, it is crucial to make a list of those elements
that are needed to quickly resolve equipment faults. This list will serve to determine the
spare parts inventory needed to be able to perform repairs quickly.
• A maintenance log should record each component serviced during maintenance, as well as
activities performed or repairs made.
• Maintenance staff must have access to a specific training programme.
ENGLISH
• Before starting maintenance operations on the unit, turn off the unit’s main switch. Electrical
shock can cause personal injury.
• Keep the following in mind when performing maintenance operations:
9.1. WATER COILS
• We recommend cleaning the coils once a year.
• Don’t use abrasive cleaner.
• Brush off the fins that need it.
• Make sure that there is no leakage from pipework.
• If the coils are not used, please drain the water to avoid damage.
9.1.1 DX COILS
• We recommend cleaning the coils once a year.
• Don’t use the abrasive cleaner.
• Make sure that there is the leakage from pipework.
9.2. DRAINAGE SYSTEM
• We recommend checking periodically the condensate drip tray and clean it.
• We recommend checking the siphon.
9.3. MOTORS
• Check the power consumption has not increased.
• Periodically check the electrical connections are making good contact; this will prevent
breakdowns.
• We recommend checking the fan mounting periodically.
46
9.4. FANS
• Every three months, clean the dirt from the fan blades and bearings, since dirt can not only
reduce airflow but also lead to unbalanced operation and increase noise.
• Periodically, test the airflow on each fan.
9.5. FILTERS
Filter
G4
F5
F6
F7
F8
F9
Pressure
Loss (Pa)
150
200
200
200
225
225
• Even if the maximum pressure loss has not been reached, filters should be inspected each
month to make sure that the filter and filter housing are sealed.
• It is not recommended that filters be washed, since they will never recover their initial efficiency and doing so can produce wear on the filters. Although washing or vacuuming in
the opposite direction from normal air circulation can achieve an optimal finish, it is recommended that you always have a set of replacement filters on hand. Under no circumstances
should the unit be run without filters, since this can introduce dirt into vital components of
the unit and lead to equipment wear and loss of efficiency.
9.5.1. REPLACING THE FILTER IN THE MAIN UNIT AND SIDE-BY-SIDE
OR STACKED RECOVERY UNIT.
To remove the filter, open the inspection door, and remove the filter by pulling it out. For the
high efficiency filters (F7 to F9), an easy fixing system is used to assure higher tightness. Turn
handle and remove the filter. This system is found on the filter modules and side-by-side or
stacked heat recovery modules too.
47
ENGLISH
• To make sure that the filters are working properly, the pressure loss across the filter must
be monitored precisely (since this is an indicator of dirt levels). The following table indicates
the maximum recommended values for pressure loss before filter replacement.
9.5.2. REPLACING FILTERS FOR IN-LINE RECOVERY MODULES
To remove the filter, open the inspection door by pulling it out. Turn the handle and remove
the filter.
ENGLISH
9.6. COILS
If you detect any problem in the coils and they need to be removed, loosen the bolts from the
panel where they are located, remove the panel and extract the coils. The coils are installed in
slod for easy slide in and slide out.
9.7. DAMPERS
• Make sure that the damper can open and close unrestrictedly and the (way) is unobstructed.
• For manually controlled dampers fix the handle firmly to prevent the damper close while the
unit is running.
48
9.8. SILENCERS
ENGLISH
• To remove the baffles unscrew the corresponding side panel.
9.8.1. MIXING MODULE
• Air 2 inlet section: Is sent with a fixed position of the dampers. If not coincide with the needs
of the installation, change the frontal panel as shown.
• Air 3 inlet section (A+B): When it is installed between two modules will have to r emove the
front panels as shown. (B)
A
remove panel
B
remove panel
49
9.8.2. MIXING BOX 2 WAY WITH BASE AND ROOF
• It is always indicated the damper is standard fix on the right handed. For left handed the
customer has to change the panel.
ENGLISH
9.9.RECOVERY UNIT
To remove the heat exchanger open the inspection door and pull it out.
50
10. RECYCLING
In accordance with EEC Standards and our responsibility for future generations, we are obliged to recycle all the materials we can. Therefore, please deposit all waste material and
packaging in their corresponding recycling containers and hand in the replaced units to the
nearest handler of this type of waste product.
51
ENGLISH
WARNING!!! Support the heat exchanger with
your hand while performing this step to prevent it from falling due to its own weight (there
is a risk of damage to the heat exchanger and
a risk of accident to the technician performing
the operation).
To remove the heat exchanger from its location,
slide it along its guides, pulling at the corners
and not on the fins, in order to prevent damage.
Clean the heat exchanger using compressed
air or a vacuum cleaner and wash it using mild
detergent. It is recommended that periodic
maintenance be performed once per season of
operation.
Ref.: 9023027900
Recycled
paper