1
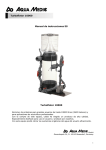
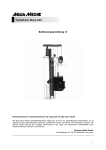
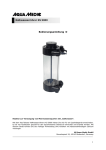
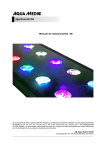
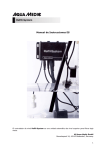
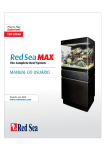
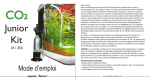
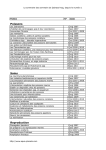
Ocean Light LED Control
Bedienungsanleitung D
Mit dem Kauf des Ocean Light LED Control haben Sie sich für ein Qualitätsprodukt entschieden. Es
ist von Fachleuten speziell für den aquaristischen Gebrauch entwickelt und erprobt worden.
AB Aqua Medic GmbH
Gewerbepark 24, 49143 Bissendorf, Germany
__________________________________________________________________________________________
1
Programmierbare Lichtsteuerung für die Aqua Medic Ocean Light LED
1.
Technische Daten
- 24 Volt Sicherheitsspannung
- Abmessungen: 11,0 x 5,0 x 1,9 cm
2.
Auspacken
Prüfen Sie die Lichtsteuerung nach dem Auspacken auf etwaige
Beanstandungen wenden Sie sich bitte unverzüglich an Ihren Fachhändler.
3.
Lieferumfang
•
Ocean Light LED Control
Beschädigungen.
Bei
Als Zubehör erhältlich: Y-Kabel zum Anschluss mehrerer Ocean Light LED‘s an ein Steuergerät.
Abb. 1: Y-Kabel für Ocean Light LED
4.
Installation
4.1. Programmeinstellung
Die Ocean Light LED Control darf nur an der dafür vorgesehenen Steckerbuchse (Abb. 2, Nr. 1) einer
Ocean Light LED eingesetzt werden.
Abb. 2: 1 = Steckerbuchse für Ocean Light LED Control
Tasten:
M:
OK:
+
-
Menü
Bestätigen
Nach oben
Nach unten
Als Erstes bitte den Batterieschalter in der Rückseite der Ocean Light LED Control nach oben schieben
(ON), um den Dimmer zu starten.
2
1. Das Display ist während der Bedienung beleuchtet, wenn der Controller an einer Ocean Light LED
angeschlossen ist. Auf dem Bildschirm erscheint zunächst die Zeitanzeige.
2. Drücken Sie “M” (Menü), dann erscheinen vier Einstelloptionen:
Time:
Manual:
Fixed Mode:
Setting Mode:
Zur Echtzeiteinstellung
Zur manuellen Einstellung
Feste Einstellung von Sonnenauf- und -untergangszeiten
Hier kann ein automatisches Programm gemäß den Wünschen des Benutzers
eingestellt werden.
1. Durch Drücken der “M”-Taste (Menü) erreicht man das Menü mit den Punkten „Time“, “Manual,
“Fixed Mode” oder “Setting Mode”. Drücken Sie “OK”, um den mit den +/- Tasten angewählten
Punkt zu bestätigen.
2. Zuerst muss die Echtzeit eingestellt werden. Benutzen Sie “+” oder “-“, um mit dem Cursor “Time”
auszuwählen, dann drücken Sie “OK”, um die Einstellung zu sichern. Anschließend benutzen Sie
wieder “+” oder “-“, um die Echtzeit einzugeben und drücken anschließend OK zur Bestätigung.
3. Im Menüpunkt „Manual“ sind folgende Einstellungen möglich:
Linie 1: Für weiße LEDs
Linie 2: Für blaue LEDs
000%: Sie können die Helligkeit zwischen 1% und 100% wählen, 0% bedeutet Helligkeit aus.
ON:
Schalter ein oder aus.
Drücken Sie “+” oder “ –“, um Linie 1 oder 2 auszuwählen und bestätigen Sie mit OK. Der Cursor
springt zu der ausgewählten Position. Drücken Sie M, um zum nächsten Schritt der Einstellung zu
gelangen und bestätigen Sie wieder mit OK.
4. Im Menüpunkt „Fixed Mode“ sind folgende Einstellungen möglich:
Wenn ON ausgewählt und mit OK bestätigt wurde, dann geht das Licht nach folgendem Zeitplan
automatisch an:
Weißer Kanal (1)
09:00
09:30
20:00
20:30
bis
bis
bis
bis
09:30,
20:00,
20:30,
09:00,
0% bis 100%
100% bis 100%
100% bis 0%
0% bis 0%
Blauer Kanal (2)
08:30
09:00
20:30
21:00
bis
bis
bis
bis
09:00,
20:30,
21:00,
08:30,
5% bis 100%
100% bis 100%
100% bis 5%
5% bis 5%
Wählen Sie den „Setting Mode“ und drücken OK zur Bestätigung.
5. Kanal 1 oder Kanal 2 (1 ist für weiß, 2 ist für blau) auswählen.
Es gibt fünf Programme im Setting Mode:
00:00 bis 00:00, für die Zeiteinstellung
000% bis 000%, zur Einstellung der Helligkeit
Beispiel: Stellen Sie 6:00 bis 6:30, 0% bis 100% ein, geht das Licht um 6:00 an und steigt innerhalb
von 30 Minuten auf 100% Helligkeit an. Das bedeutet, dass die Helligkeit jede Minute um 3,33%
steigt. Um 6:30 sind 100% erreicht.
Stellt man 6:00 bis 8:00, 1% bis 100% (oder 100% bis 1%) ein, erhöht oder verringert sich die
Helligkeit um 0,83% pro Minute.
3
Solch eine Einstellung kann den Sonnenauf- und -untergang simulieren.
Wenn das Licht nicht ständig heller werden soll, können Sie 6:00 bis 18:00, 70% bis 70% einstellen.
Dann wird es bei 70% für 12 Stunden leuchten.
Wenn Sie 21:00 bis 5:00, 0% bis 0% einstellen, dann ist das Licht von 21:00 bis 5:00 am nächsten
Morgen aus.
Will man das Licht nachts als Mondlicht laufen lassen, sollte man maximal 5% während der
Dunkelphase wählen. Die Zooxanthellen der Korallen sollen nachts nicht zur Photosynthese angeregt
werden.
Wenn alle Programme eingestellt sind, drücken Sie M, um das Programm zu verlassen. Alle
Programme sind jetzt gespeichert. Wenn der Dimmer an ist, wird nur die Zeit angezeigt.
Hinweise:
1. Jede Einstellzeit bezieht sich auf die letzte Einstellung, z. B. wenn die erste Einstellung von 06:00
bis 07:00 ist, dann kann die nächste Einstellung erst ab 07:00 beginnen. Es kann keine Uhrzeit
vor 07:00 eingestellt werden.
2. Der Dimmer speichert die Einstellungen, selbst wenn er nicht an die Steckdose angeschlossen ist.
Wenn der Dimmer wieder eingeschaltet wird, arbeitet er mit den zuletzt gespeicherten
Einstellungen.
5.
Garantie
AB Aqua Medic GmbH gewährt eine 12-monatige Garantie ab Kaufdatum auf alle Material- und
Verarbeitungsfehler des Gerätes. Als Garantienachweis gilt der Original-Kaufbeleg. Während dieser
Zeit werden wir das Produkt kostenlos durch Einbau neuer oder erneuerter Teile instand setzen
(ausgenommen Frachtkosten). Im Fall, dass während oder nach Ablauf der Garantiezeit Probleme
mit Ihrem Gerät auftreten, wenden Sie sich bitte an Ihren Fachhändler.
Diese Garantie gilt nur für den Erstkäufer. Sie deckt nur Material- und Verarbeitungsfehler, die bei
bestimmungsgemäßem Gebrauch auftreten. Sie gilt nicht bei Schäden durch Transporte oder
unsachgemäße Behandlung, Fahrlässigkeit, falschen Einbau sowie Eingriffen und Veränderungen, die
von nicht autorisierten Stellen vorgenommen wurden.
AB Aqua Medic GmbH haftet nicht für Folgeschäden, die durch den Gebrauch des Gerätes entstehen.
AB Aqua Medic GmbH - Gewerbepark 24 - 49143 Bissendorf/Germany
- Technische Änderungen vorbehalten – Stand 06/2014
4
Ocean Light LED Control
Operation manual ENG
In purchasing this Ocean Light LED Control, you have selected a top quality product. It has been
specifically designed for aquarium use and has been tested by experts.
AB Aqua Medic GmbH
Gewerbepark 24, 49143 Bissendorf, Germany
__________________________________________________________________________________________
5
Programmable light control for Aqua Medic Ocean Light LED
1.
Technical Data
- safety tension 24 V
- dimensions: 11 x 5 x 1.9 cm
2.
Unpacking
On unpacking, please check the light control immediately for any damages. In case of any complaints,
please contact your dealer directly.
3.
Included in shipment
•
Ocean Light LED Control
A Y-cable for connecting several Ocean Light LED’s to one control unit is available as accessory.
Pict. 1: Y-cable for Ocean Light LED
4.
Installation
4.1. Program setting
The Ocean Light LED Control may only be used on the designated socket (pict. 2, No. 1) of an Ocean
Light LED.
Pict. 2: 1 = socket for Ocean Light LED Control
Buttons:
M:
OK:
+
-
menu
confirm
up
down
First of all, please move the battery switch up on the back side of the Ocean Light LED Control (ON)
to start the dimmer.
6
1. The light is still on when the controller is connected to an Ocean Light LED. The time appears on
the display.
2. Press “M” (menu), then four setting options appear:
Time:
Manual:
Fixed Mode:
Setting Mode:
for setting the real time
for manual adjustment
fixed program of sunrise and sunset
An automatic program according to the user's needs can be adjusted.
5. Press the “M”-button (menu) again to choose “Time“, “Manual”, “Fixed Mode” or “Setting Mode”.
Press “OK” to confirm the selected version chosen by the +/- buttons.
6. First of all, set the real time. Use “+” or “-“ to move cursor to choose “Time”, press “OK” to enter
the setting. Then use “+” or “-“ to adjust the real time and press “OK” to confirm.
7. Following settings are possible in the menu “Manual”:
Line 1:
Line 2:
000%:
ON:
for white LEDs
for blue LEDs
You can set the brightness from 1% to 100%, 0% means brightness off.
switch on or off
Press “+” or “–“ to select line 1 or 2 and confirm by “OK”. The cursor will go to the chosen position.
Press “M” to move to the next step for setting and press “OK” to confirm.
8. Following settings are possible in the menu “Fixed Mode”:
If ON was chosen and confirmed by OK, then the light turns on automatically according to the
following schedule:
White channel (1)
09:00
09:30
20:00
20:30
to
to
to
to
09:30,
20:00,
20:30,
09:00,
0% to 100%
100% to 100%
100% to 0%
0% to 0%
Blue channel (2)
08:30
09:00
20:30
21:00
to
to
to
to
09:00,
20:30,
21:00,
08:30,
5% to 100%
100% to 100%
100% to 5%
5% to 5%
Choose the “Setting Mode” and press “OK” to confirm.
5. Choose channel 1 or channel 2 (1 is for white, 2 is for blue).
There are five programs in the Setting Mode:
00:00 to 00:00 for time period setting
000% to 000% for adjustment of the brightness
For example: If you set 6:00 to 6:30, 0% to 100%, then the light will light up from 6:00 and in 30
minutes will go up to 100% brightness. This means that the brightness will increase about 3,33 %
every minute. At 6:30, 100% are reached.
If you set 6:00 to 8:00, 1% to 100% (or 100% to 1%), the brightness will increase or decrease by
0,83% every minute.
This kind of setting can simulate the sunrise and sunset.
If the light shall not get constantly brighter, set 6:00 to 18:00, 70% to 70%. Then it will light up at
70% for 12 hours.
7
If you set 21:00 to 5:00, 0% to 0%, then the light is off from 21:00 to 5:00 the next morning.
If the light should work as a moonlight at night, you should select maximum 5% during the dark
phase. The zooxanthellae of corals should not be encouraged for photosynthesis at night.
After all programs are set, press M to exit. All programs are saved now. If the dimmer is on, only
the time is displayed.
Hints:
1. Each setting time refers to the last setting, e. g. if the first setting is 06:00 to 07:00, then the
next setting can only start at 07:00. No time before 07:00 can be set.
2. The dimmer saves the settings, even if it is unplugged. If the dimmer is switched on again, it
works with the last saved settings.
5.
Garantie
Should any defect in material or workmanship be found within 12 months of the date of purchase AB
Aqua Medic GmbH undertakes to repair or, at our option, replace the defective part free of charge –
always provided the product has been installed correctly, is used for the purpose that was intended
by us, is used in accordance with the operating instructions and is returned to us carriage paid. The
warranty term is not applicable on the all consumable products.
Proof of Purchase is required by presentation of an original invoice or receipt indicating the dealer’s
name, the model number and date of purchase, or a Guarantee Card if appropriate. This warranty
may not apply if any model or production number has been altered, deleted or removed,
unauthorised persons or organisations have executed repairs, modifications or alterations, or damage
is caused by accident, misuse or neglect.
We regret we are unable to accept any liability for any consequential loss. Please note that the
product is not defective under the terms of this warranty where the product, or any of its component
parts, was not originally designed and / or manufactured for the market in which it is used. These
statements do not affect your statutory rights as a customer.
If your AB Aqua Medic GmbH product does not appear to be working correctly or appears to be
defective please contact your dealer in the first instance.
Before calling your dealer please ensure you have read and understood the operating instructions. If
you have any questions your dealer cannot answer please contact us.
Our policy is one of continual technical improvement and we reserve the right to modify and adjust
the specification of our products without prior notification.
AB Aqua Medic GmbH - Gewerbepark 24 - 49143 Bissendorf/Germany
- Technical changes reserved – 06/2014
8
Ocean Light LED Control
Mode d’emploi F
En choisissant le Ocean Light Led Control vous avez effectué un achat de qualité. L’appareil a été
développé et testé par des spécialistes pour l’usage aquariophile.
AB Aqua Medic GmbH
Gewerbepark 24, 49143 Bissendorf, Allemagne
__________________________________________________________________________________________
9
Commande d’éclairage programmable pour le système Aqua Medic Ocean Light LED
1.
Données techniques
- 24 Volt tension de sécurité
- Dimensions: 11,0 x 5,0 x 1,9 cm
2.
Déballage
Vérifiez les éléments du colis après le déballage à la recherche d’éventuels dommages. En cas de
réserves veuillez vous adresser à votre revendeur.
3.
Contenu du colis:
•
Ocean Light LED Control
Disponibles comme accessoires: cable Y pour le raccordement de plusieurs Ocean Light LED sur une
seule unité de commande.
Photo 1: Cable Y pour Ocean Light LED
4.
Installation
4.1. Réglage de la programmation
Le Ocean Light LED Control ne peut être utilisé qu’avec le boîtier de raccordement (Photo 2, Nr. 1)
d’un Ocean Light LED.
Photo 2: 1 = Boîtier de raccordement pour Ocean Light LED Control
Touches:
M:
OK:
+
-
Menu
Confirmation
Pour augmenter
Pour diminuer
Veuillez d’abord abaisser le commutateur de la batterie situé à l’arrière du Ocean Light LED Control,
afin de démarrer le dimmeur.
10
1. L’écran est éclairé durant l’utilisation, lorsque le Controller est raccordé à un Ocean Light LED.
L’heure s’affiche alors sur l’écran.
2. Appuyez sur “M” (Menü), ensuite apparaissent quatre positions de réglage:
Time (Temps):
Manual (Manuel):
Fixed Mode (Mode fixe):
Setting Mode (Mode réglage):
Pour le réglage de l’heure exacte
Pour le réglage manuel
Réglage fixe des heures de lever et de coucher du soleil
Ici vous pouvez régler une programmation automatique en fonction
de vos souhaits personnels.
9. Par une pression sur la touche “M” (Menü/Menu)) on atteint le menu avec les points
,,Time/Temps“, “Manual/Manuel’’, “Fixed Mode/Mode fixe” ou “Setting Mode/Mode réglage”.
Appuyez sur “OK”, afin de confirmer les points choisis avec les touches +/- .
10.
Il faut d’abord régler l’horaire réel. Utilisez les touches “+” ou “-“, afin de choisir “Time” avec
le curseur, puis appuyez sur “OK”, afin de sécuriser le réglage. Utilisez ensuite de nouveau les
touches “+” ou “-“, afin d’introduire l’heure réelle et appuyez ensuite sur OK pour confirmation.
11.
Sous la touche „Manual/Manuel“ les réglages suivant sont possibles:
Ligne 1:
Ligne 2:
000%:
ON:
Pour LED blanches
Pour LED bleues
Vous pouvez choisir l’intensité lumineuse entre 1% et 100%, 0% signifie pas de
luminosité.
Interrupteur sur marche ou arrêt.
Appuyez sur “+” ou “ –“, pour choisir la Ligne 1 ou la Ligne 2 et confirmez avec OK. Le curseur se
met sur la position sélectionnée. Appuyez sur M, pour atteindre la prochaine étape de réglage et
confirmez de nouveau avec OK.
12.
Dans le menu „Fixed Mode/Mode fixe“ les réglages suivants sont possibles:
En choisissant ON et après confirmation par OK, l’éclairage se déroule selon le plan horaire suivant:
Canal Blanc (1)
09:00
09:30
20:00
20:30
à
à
à
à
09:30,
20:00,
20:30,
09:00,
0% à 100%
100% à 100%
100% à 0%
0% à 0%
Canal Bleu (2)
08:30
09:00
20:30
21:00
à
à
à
à
09:00,
20:30,
21:00,
08:30,
5% à 100%
100% à 100%
100% à 5%
5% à 5%
Choisir „Setting Mode/Mode réglage“ et appuyer sur OK pour confirmation.
5. Choisir Canal 1 ou Canal 2 (1 correspond à blanc, 2 correspond à bleu).
Le Setting Mode/Mode Réglage comprend cinq programmes:
00:00 à 00:00, pour le réglage de l’heure
000% à 000%, pour le réglage de l’intensité lumineuse
Exemple: Si vous réglez sur 6:00 à 6:30, 0% à 100%, la lumière s’allume à 6:00 et la luminosité
passe à 100 % en l’espace de 30 minutes. Ceci signifie que l’intensité lumineuse augment de 3,33%
chaque minute. A 6:30 on atteint 100%.
En réglant de 6:00 à 8:00, 1% à 100% (ou 100% à 1%), l’intensité lumineuse diminue ou augmente
de 0,83% par minute.
11
Un tel réglage peut simuler le lever et le coucher du soleil.
Si l’intensité lumineuse ne doit pas augmenter en permanence, vous pouvez régler ainsi de 6:00 à
18:00, 70% à 70%. Dans ce cas l’éclairage durera 12 heures à 70 %.
Si vous réglez de 21:00 à 5:00, 0% à 0%, dans ce cas l’éclairage sera éteint de 21:00 à 5:00 du
matin. Si on désire simuler la lune durant la nuit, il faut choisir 5 % au maximum durant la phase
sombre. Les zooxanthelles des coraux ne doivent pas être inciter à la photosynthèse durant la nuit.
Lorsque tous les programmes sont réglés, appuyez sur M, afin de quitter le programme. Tous les
programmes sont maintenant réglés. Lors du fonctionnement du dimmeur, seule l’heure est affichée.
Conseils:
1. Chaque horaire installé est en rapport avec le dernier réglage, p. ex. le premier réglage va de
06:00 à 07:00, alors le prochain ne peut commencer qu’à partir de 07:00. Aucun horaire ne
pourra être installé avant 07:00.
2. Le dimmeur enregistre le réglage, même s’il n’est pas relié à la prise courant. Lorsque le dimmeur
est de nouveau remis en marche, il fonctionne avec le réglage installé précédemment.
5. Garantie
AB Aqua Medic GmbH donne une garantie d’une année à partir de la date d’achat sur tous les défauts
de matériau et de fabrication de l’appareil. La facture originale de l’achat sert de preuve pour la
garantie. Durant cette période nous remettrons le produit en état par mise en place d’éléments neufs
ou rénovés (sauf frais de transport). En cas de problème avec votre appareil durant ou après la durée
de la garantie, veuillez vous adresser à votre revendeur. La garantie ne vaut que pour le premier
acheteur. Elle ne couvre que les défauts de matériel et de fabrication pouvant survenir lors de
l’utilisation normale. Elle n’est pas valable lors de dommages dus au transport ou à une utilisation
non adaptée, ou à la négligeance, à une mauvaise installation ou à des manipulations et des
modifications, effectuées par des par des personnes non autorisées.
AB Aqua Medic GmbH n’est pas responsable des dégats collatéraux pouvant résulter de l’utilisation
de l’appareil.
AB Aqua Medic GmbH - Gewerbepark 24 - 49143 Bissendorf/Allemagne
- Sous réserve de modifications techniques – Date 06/2014
12
Ocean Light LED Control
Manual de instrucciones ES
Con la compra de Ocean Light LED Control, usted ha elegido un product de máxima calidad. Ha sido
diseñado especificamente para su uso en acuarios y ha sido testado por expertos.
AB Aqua Medic GmbH
Gewerbepark 24, 49143 Bissendorf, Germany
__________________________________________________________________________________________
13
Controlador de luz programable para Aqua Medic Ocean Light LED
1.
Datos Técnicos
- tensión de seguridad de 24 V
- medidas: 11 x 5 x 1.9 cm
2.
Desembalando
Una vez desembalado, por favor compruebe el controlador de luz inmediatamente para observer
daños. En caso de cualquier problema, por favor, póngase en contacto con su vendedor directamente.
3.
Incluido en el embalaje
•
Ocean Light LED Control
Un cable Y-cable para conectar varias Ocean Light LED’s a una unidad de control está disponible
como un accesorio.
Dib. 1: Y-cable para Ocean Light LED
4.
Instalación
4.1. Configuración del programa
Ocean Light LED Control puede ser empleado unicamente en su enchufe asignado (Dib. 2, No. 1) de
una Ocean Light LED.
Dib. 2: 1 = enchufe de la Ocean Light LED Control
Botones:
M:
OK:
+
-
menú
confirmar
mas
menos
Antes de nada, por favor mueva el interruptor de encendido de la unidad hacia arriba, está situado
en el panel trasero del Ocean Light LED Control (ON), para arrancar el controlador.
14
1. La luz se active cuando el controlador se conecta a una Ocean Light LED. La hora aparece en la
pantalla.
2. Pulse (Menú) "M", a continuación aparecen cuatro opciones de configuración:
Time:
Manual:
Fixed Mode:
Setting Mode:
para ajustar la hora real
para ajuste manual
programa fijo de la salida y la puesta del sol
Se puede ajustar un programa automático de acuerdo con las necesidades del
usuario.
1. Presione el pulsador “M” (menú) para seleccionar “Time”, “Manual”, “Fixed Mode” o “Setting
Mode”. Presione “OK” para confirmar la versión seleccionada elegida con los botones +/-.
2. Antes de nada, programe la hora real. Use “+” o “-” para mover el cursor para elegir “Time”,
presione “OK” para aceptar el cambio. Entonces use “+” o “-” para ajustar el horario real y
presione “OK” para confirmar.
3. Los siguientes ajustes son posibles en el menú “Manual”:
Line 1:
Line 2:
000%:
ON:
para LEDs blancos
para LEDs azules
Usted puede elegir el brillo desde un 1% a un 100%, 0% significa brillo apagado.
cambia entre on y off
Presione “+” o “–” para seleccionar line 1 o 2 y confirme mediante “OK”. El cursor pasará a la posición
elegida. Pulse el botón "M" para seguir al siguiente paso a configurar y pulse "OK" para confirmar.
4. Los siguientes ajustes son posibles en el menú “Fixed Mode”:
Si está seleccionado ON y confirmado mediante OK, entonces la luz se encenderá automaticamente
de acuerdo con la siguiente agenda:
Canal blanco (1)
09:00
09:30
20:00
20:30
a
a
a
a
09:30,
20:00,
20:30,
09:00,
0% a 100%
100% a 100%
100% a 0%
0% a 0%
Canal azul (2)
08:30
09:00
20:30
21:00
a
a
a
a
09:00,
20:30,
21:00,
08:30,
5% a 100%
100% a 100%
100% a 5%
5% a 5%
Seleccione “Setting Mode” y presione “OK” para confirmar.
5. Seleccione canal 1 o canal 2 (1 es pala blanco, 2 es para azul).
Hay cinco programas para el Setting Mode:
00:00 a 00:00 para el ajuste del tiempo
000% a 000% para el ajuste del brillo
Por ejemplo: Si usted programa de 6:00 a 6:30, 0% a 100%, entonces la luz iluminará desde las
6:00 y en 30 minutos alcanzará un 100% de brillo. Esto significa que la intensidad se incrementará
alrededor de un 3,33 % cada minuto. A las 6:30, se habrá llegado a un 100%.
Si usted programa de 6:00 a 8:00, 1% a 100% (o 100% a 1%), el brillo se incrementará o decrecerá
un 0.83 % cada minuto.
Este tipo de programación sirve para similar el amanecer y el anochecer.
15
Si la luz no debe estar constantemente a su máxima potencia, ajuste de 06:00 - 18:00, 70% a 70%.
Entonces se enciende al 70% durante 12 horas.
Si establece 21:00 - 05:00, 0% a 0%, entonces la luz estará apagada de 21:00 - 05:00 de la mañana
siguiente.
Si la luz debe funcionar como una luz de la luna durante la noche, hay que seleccionar un máximo
del 5% durante la fase oscura. No debe fomentarse la fotosíntesis de las zooxantelas de los corales
por la noche.
Después se establecen todos los programas, pulse M para salir. Todos los programas se guardarán
entonces. Si el controlador está activado, sólo se muestra la hora.
Consejos:
1.
Cada programación de tiempos se refiere a la última configuración, ej. si el primer valor
es 06:00 - 07:00, entonces el siguiente valor sólo se podrá iniciar a partir de las 07:00.
No se puede programar una actividad antes de las 07:00.
2.
El controlador guarda la configuración, incluso si está desconectado. Si el controlador se
conecta de nuevo, funciona con la última configuración guardada.
5. Garantía
Ante defectos en el material o mano de obra AB Aqua Medic Gmbh garantiza durante 12 meses a
partir de la fecha de la compra, repara ó sustituye las partes defectuosas de forma gratuita, siempre
que dicho producto se haya instalado correctamente, se está usando para lo que ha sido diseñado,
se usa conforme al manual de instrucciones y nos sea devuelto a portes pagados. No cubre la garantía
las partes consumibles.
Se requerirá la factura o ticket de compra original donde se indique el nombre del distribuidor, el
número de modelo y la fecha de la compra, ó una tarjeta de garantía oficial. Esta garantía no se
aplicará sobre los productos en los que se haya alterado el modelo o número de producto, eliminado
o borrado, haya sido reparado, modificado ó alterado por personal no autorizado, o el daño se ha
causado por accidente o negligencia. No nos responsabilizamos de pérdidas. Por favor, asegúrese de
que el producto no está defectuoso, bajo los términos de la garantía donde el producto o alguno de
sus componentes no sean los originales ó se están usando para el propósito que se fabricaron.
Si su producto Ab Aqua Medic parece estar defectuoso, pónganse en contacto con su distribuidor
primeramente.
Antes de ponerse en contacto, por favor asegúrese de que ha leído y entendido todos los términos
del manual. Si usted tiene alguna pregunta que su vendedor no puede responder, por favor, póngase
en contacto con nosotros.
Nuestra política es una de mejora continua técnica y reservamos el derecho de modificar y ajustar
la especificación de nuestros productos sin la notificación previa.
AB Aqua Medic GmbH - Gewerbepark 24 - 49143 Bissendorf/Germany
- Cambios técnicos reservados – 06/2014
16