1
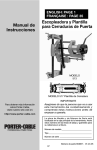
360PWS Workstop
Operating Instructions Manual
Manual de instrucciones de operación
ENGLISH
ESPAÑOL
Table of Contents
Introduction..................................................................................................................3
Installation & Assembly Guide................................................................................4
360PWS Workstop Parts List....................................................................................5
360PWS Mechanical Drawing.................................................................................6
CAUTION:
Is used when your action or lack of action may cause serious
injury.
Vise Data
Use this to fill out information about your vise for quick reference.
Purchase Date:
Purchase Order:
Purchased From:
Delivery Date:
Serial No.:
________ -________-________
________________________
________________________
________________________
________________________
Note:
Make sure to register your warranty online at kurtworkholding.com
2
ENGLISH | Table of Contents
Introduction
Thank you for purchasing a Kurt workstop.
Versatile, quick mounting workstops will work above jaws when
gang mounting vises and space for a workstop does not exist. This
Kurt workstop permits fast, accurate positioning on repetitive work.
It can be used with your AngLock precision vise for accurate parts
production.
Introduction | ENLGISH
3
Installation & Assembly Guide
This workstop is a precision tool and must be handled carefully. You
will need a set of Hex wrenches to install it properly.
Begin by following the steps listed.
1. Using one of the ½ -13 SHCS, attach item 3 (Body Clamp) to the
vise with the 45-degree angle down and in towards the body of
the vise. Do not tighten the SHCS at this time.
2. Using the other ½-13 SHCS, attach item 5 (Pivot Body Clamp) to
the vise with the 45-degree angle down and in towards the body
of the vise as shown in fig. 3. Then insert item 6 (Pivot Stop Collar)
into item 5 as shown in fig. 1. Do not tighten the SHCS at this time.
3. With both the Body Clamps in place, you can slide item 1
(Mounting Rod) though the clamps. Tighten the SHCS finger tight
at this time.
4. With item 4 (Rod Clamp) in hand, you can install the two 10-24
x7/8 SHCS. Take note of the threads in the rod clamp so you are
sure that the screw is installed from the correct end. Finger tight
only.
5. Slide the Rod Clamp on to the mounting rod on the side you wish
to use the stop.
6. With the Rod Clamp in place, tighten slightly so it does not rotate
on the mounting rod. Slide the Stop Rod into the Rod Clamp and
slightly tighten the SHCS.
7. With the Stop Rod in place you can install the last two SCH screws
(item 9: 10-24 x 5/8) into the end of the Stop Rod. (It enters from
the side with the flat on it.) Then install item 11 (5/16-18 x 1.00), the
SHSS into the other hole perpendicular to item 9. This acts as the
stop point for the workstop.
NOTE: The installation is done by assembly the unit on the backside of
the vise (the end opposite the handle).
4
ENGLISH | Installation & Assebly Guide
360PWS Parts List
ITEM# PART #
DESCRIPTION
QTY.
1
360WS-1
Mounting Rod
1
2
360PWS-2
Stop Rod
1
3
360PWS-3
Body Clamp
1
4
360WS-4
Rod Clamp
1
5
360PWS-5
Pivot Body Clamp
1
6
360PWS-6
Pivot Stop Collar
1
7
00-1422
1/2-13 x 1-3/4
2
8
00-1224
10-24 x 1/2
1
9
00-1226
10-24 x 5/8
1
10
00-1229
10-24 x 7/8
2
11
01-1694
5/16 x 1.00 (oval point)
1
360PWS Parts List | ENLGISH
5
360PWS Mechanical Drawing
6
ENGLISH | 360PWS Mechanical Drawing
Maintenance Log/Notes:
Maintenance Log / Notes | ENLGISH
7
Maintenance Log/Notes:
8
ENGLISH | Maintenance Log / Notes
Thank you for your purchase!
If you have any feedback or questions.
Please contact us at:
[email protected]
or
1-877-226-7823
Like, Tweet, and Subscribe to us!
All Kurt Manufacturing Company industrial workholding products and parts with the
exceptions noted below, are warranted against defects in material and workmanship
for the life of the product or part. (The life of the product is defined as that point in
time when such item no longer functions due to normal wear and tear.) Failure to
properly maintain and/or properly operate the product or part that has been worn
out, abused heated ground or otherwise altered, used for a purpose other than that
for which it was intended, or used in a manner in consistent with any instructions
regarding its use. The sole obligation of Kurt Manufacturing Company, Inc. (Kurt)
and the purchaser’s SOLE AND EXCLUSIVE REMEDY hereunder, shall be limited
to the replacement or repair of any Kurt product or part (by an authorized Kurt
technician) which are returned to Kurt Manufacturing Company’s place of business,
transportation, shipping and postal charges prepaid, and there determined by Kurt
Manufacturing Company to be covered by the warranty contained herein.
THE LIMITED WARRANTY DESCRIBED HEREIN IS MADE EXPRESSLY IN LIEU OF ANY
OTHER EXPRESSED OR IMPLIED WARRANTIES, INCLDING ANY IMPLIED WARRANTY OF
MERCHANTABLITY OR FITNESS FOR A PARTICULAR PURPOSE. KURT MANUFACTURING
COMPANY IS NOT RESPONSIBLE FOR THE IMPROPER USE OF ITS PRODUCTS.
KURT SHALL NOT BE LIABLE FOR ANY DIRECT, INDIRECT, INCIDENTAL SPECIAL OR
CONSEQUENTIAL DAMAGES, INCLUDING BUT NOT LIMITED TO, LOSS OF USE, REVENUE
OR PROFIT.
KURT ASSUMES NO LIABILITY FOR, AND MAKES NO WARRANTY REGARDING ANY
PURCHASE ITEMS WHERE THE MANUFACTURER OF SUCH ITEM EXTENDS A SEPARATE
WARRANTY.
9445 East River Road NW
Minneapolis, MN 55433
Troubleshooting
Maintenance Log/Notes
Tips
kurtworkholding.com
Phone: 877-226-7823
Fax: 877-226-7828
Manual Revision: 02.17.2012
360PWS Workstop
Manual de instrucciones de operación
ESPAÑOL
Tabla de contenido
Introducción............................................................................................................... 13
Guía de instalación y ensablaje........................................................................... 14
360PWS Workstop Parts List................................................................................. 15
360PWS Workstop Mechanical............................................................................ 16
PRECAUCIÓN:
Se utiliza cuando la acción o falta de acción puede causar
lesiones graves.
Vise Datos
Utilice esta opción para rellenar la información sobre el tornillo de
banco para referencia rápida
Fecha de compra:
Orden de compra:
Adquirido en:
Fecha de entrega:
Serial No.:
______ -_______ -_______
______________________
______________________
______________________
______________________
Note:
Make sure to register your warranty online at kurtworkholding.com
12
ESPAÑOL | Tabla de contenido
Introducción
Muchas gracias por comprar un tope de posicionamiento Kurt.
Los versátiles topes de posicionamiento de montaje rápido
funcionarán sobre mordazas cuando no existan prensas de
montaje en grupo ni espacio para topes de trabajo. Este tope
de posicionamiento Kurt permite la colocación rápida y exacta en
trabajos repetitivos. Se puede utilizar con la prensa de precisión
AngLock para la producción de piezas con exactitud.
Introducción | ESPAÑOL
13
Guía de instalación y de la Asamblea
Este workstop es una herramienta de precisión y deben ser manejados
con cuidado. Usted necesitará un juego de llaves hexagonales para
instalarlo correctamente.
Comience siguiendo los pasos indicados
1. Utilizando uno de los tornillos ½ -13 SHCS, fije el componente 3
(Abrazadera del cuerpo) a la prensa con el ángulo de 45
grados hacia abajo y en dirección hacia el cuerpo de la prensa. No apriete
el SHCS todavía.
2. Utilizando el otro tornillo ½-13 SHCS, fije el componente 5 (Abrazadera de
cuerpo de pivote) a la prensa con el ángulo
de 45 grados hacia abajo y en dirección hacia el cuerpo de la prensa
según se muestra en la fig. 3. Después introduzca el componente 6
(Collarín de tope de pivote) en el componente
5 según se muestra en la fig.1. No apriete el SHCS todavía.
3. Cuando la abrazadera del cuerpo esté en posición, puede
deslizar el componente 1 (Barra de montaje) a través de las abrazaderas.
En este punto, apriete con la fuerza de la mano
el tornillo SHCS.
4. Con el componente 4 (Abrazadera de barra) en la mano, puede instalar
los dos tornillos 10-24 x7/8 SHCS. Observe las roscas en la abrazadera
de barra y asegúrese de que el tornillo esté instalado desde el extremo
correcto. Apriete con la fuerza de
la mano solamente.
5. Deslice la abrazadera de barra en la barra de montaje en el lado donde
desee utilizar el tope.
6. Cuando la abrazadera de barra esté en la debida posición,
apriete levemente los tornillos para que ésta no gire en la barra de
montaje. Deslice la barra de tope en la abrazadera de barra
y apriete levemente el SHCS.
7. Cuando la barra de tope esté en posición se puede instalar los últimos
dos tornillos SCH (componente 9: 10-24 x 5/8) en
el extremo de la barra de tope. (Ésta entra desde el lado con
la sección plana en ella). Después instale el componente 11 (5/16-18 x
1.00), el SHSS en el otro orificio perpendicular al componente Éste actúa
como el punto de tope para el tope de posicionamien to.
NOTA: La instalación se realiza mediante el ensamblaje de la unidad
en la parte trasera de la prensa (el extremo opuesto al mango).
14
ESPAÑOL |Guía de instalación y de la asamblea
360PWS Lista De Piezas
ARTÍCULO # DE PIEZA
DESCRIPCIÓN
CAN.
1
360WS-1
Barra de mortaje
1
2
360PWS-2
Barra de tope
1
3
360PWS-3
Abrazadera de cuerpo
1
4
360WS-4
Abrazadera de barra
1
5
360PWS-5
Abrazadera de cuerpo de pivote
1
6
360PWS-6
Collarin de parade de pivote
1
7
00-1422
1/2-13 x 1-3/4
2
8
00-1224
10-24 x 1/2
1
9
00-1226
10-24 x 5/8
1
10
00-1229
10-24 x 7/8
2
11
01-1694
5/16 x 1.00 (punto ovalado)
1
360PWS Lista De Piezas
| ESPAÑOL
15
360PWS Dibujo
16
ESPAÑOL |
360PWS Dibujo
Registro de Mantenimiento / Notas:
Registro de Mantenimiento / Notas | ESPAÑOL
17
Registro de Mantenimiento / Notas:
18
ESPAÑOL |Registro de Mantenimiento / Notas
¡Muchas gracias!
Si tiene algún comentario o preguntas.
comuníquese con nosotros en
[email protected]
o
877-226-7823
Al igual que, Tweet, y suscribirse a nosotros!
Todos los productos y piezas industriales para sujeción de piezas de trabajo de
Kurt Manufacturing Company con las excepciones indicadas más adelante, están
garantizados contra defectos de fabricación y materiales durante toda la vida útil del
producto de la pieza. (La vida útil del producto se define como el punto en el tiempo
en el que dicho producto ya no funciona debido al desgaste normal debido al uso).
La falta de mantenimiento apropiado y/o el uso erróneo del producto o pieza que se
haya gastado, abusado, calentado, desbastado o modificado de otra manera, utilizado
para un propósito diferente al original, o utilizado de manera incoherente con las
instrucciones respecto a su uso. La única obligación de Kurt Manufacturing Company,
Inc. (Kurt) y la ÚNICA Y EXCLUSIVA COMPENSACIÓN del comprador en virtud del
presente documento, habrá de estar limitada al reemplazo o reparación de cualquier
producto o pieza de Kurt (realizada por un técnico autorizado de Kurt) siempre que
sean devueltos al local comercial de Kurt Manufacturing Company, con los gastos
de transporte, envío y porte postal pagados previamente, y que Kurt Manufacturing
Company determine que están cubiertos por la garantía incluida en el presente
documento.
LA GARANTÍA LIMITADA QUE SE DESCRIBE EN EL PRESENTE DOCUMENTO SE
OTORGA EXPRESAMENTE EN VEZ DE CUALESQUIERA OTRAS GARANTÍAS EXPRESAS
O IMPLÍCITAS, INCLUSO CUALQUIER GARANTÍA IMPLÍCITA DE COMERCIABILIDAD O
IDONEIDAD PARA UN PROPÓSITO PARTICULAR. KURT MANUFACTURING COMPANY
NO ES RESPONSABLE DEL USO INDEBIDO DE SUS PRODUCTOS. KURT NO HABRÁ DE
SER RESPONSABLE POR DAÑOS DIRECTOS, INDIRECTOS, INCIDENTES, ESPECIALES
O CONSECUENTES, INCLUIDOS ENTRE OTROS, LA PÉRDIDA DE USO, INGRESO O
UTILIDADES.
KURT NO ASUME NINGUNA RESPONSABILIDAD POR, NI OTORGA GARANTÍA ALGUNA
PARA, NINGÚN ARTÍCULO COMPRADO EN EL CUAL EL FABRICANTE DE DICHO
ARTÍCULO EMITA UNA GARANTÍA POR SEPARADO.
9445 East River Road NW
Minneapolis, MN 55433
Phone: 877-226-7823
Fax: 877-226-7828
Troubleshooting Tips
kurtworkholding.com
Manual Revision: 02.17.2012