1
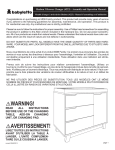
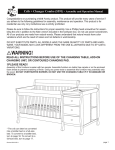
Nifty
Changing Table
Product Code: U0350
I nstruc tio ns
revised 270813
Nifty
Changing Table
Instruction manual
PERSONS REQUIRED
ASSEMBLY TIME
45
Tools required
– Stubby Screwdriver
– Phillips head screwdriver
– PENCIL
Congratulations and
thank you for purchasing
an Ubabub product.
As for our entire line of
clearly modern nursery
furniture, during the design
and production of this
product we have selected
materials that are either
recyclable or derived from
sustainable practices.
!
WARNING!
Contents
Contents & Hardware
3
Warning, Care & Maintenance
4
A Prepare front
and end panels
7
B
Prepare side rails
with shelves
8
C Install shelves position
9
D Front panel position
10
E
Base plate assembly
11
F
Furniture Anti-tip kit Installation 12
G Finished assembly
14
Restraint System
15
READ ALL INSTRUCTIONS BEFORE USE OF THE CHANGING TABLE, ADD-ON CHANGING UNIT, OR CHANGING PAD.
2
Contents
2 x Top Rails
Front Panel
Top Shelf
End Panel
2 x Lower Shelves
2 x Mid Rails
2 x Leg Rails
Hardware
12 x Connector Pin 12 x Locking Cam 16 x Support Pin 4 X Base Plate 16 x 15mm screws
3
WARNING!
FALL HAZARD
TO PREVENT DEATH OR SERIOUS
INJURY, ALWAYS KEEP CHILD WITHIN
ARM’S REACH.
READ ALL INSTRUCTIONS BEFORE ASSEMBLING THIS
PRODUCT. KEEP THE MANUAL FOR FUTURE USE.
WARNING!
• Read all instructions before use of the changing table.
• Do not use changing table if it is damaged or broken.
• This product is not intended to be used as a changing table
without adult supervision. Use of the product without this may
result in death or serious injury to your child from falling.
Follow all instruction on attaching and using the changing
table.
• The maximum weight of the child for which the changing table
is intended is 30 lbs.
• Stop using the changing table when the child is able to sit up
or roll over.
• As with all infant and baby furniture, it is important to check
fasteners, screws and bolts periodically for tightness. Parents
should ensure a safe environment for their child by checking
the furniture regularly before placing the child in the product.
• When using this product, always secure the child with the
safety strip.
4
WARNING!
FALL HAZARD
To prevent death or
serious injury, always
keep child within arm’s
reach. Never leave child
unattended and always
use restraining system.
Storage:
• Solid woods exchange moisture with the air adjusting to major
changes in room temperature and humidity. Therefore, it is
best to place your furniture away from heating or airconditioning vents.
• Sunlight is not friendly to solid wood furniture and prolonged
direct exposure to harsh sunlight can discolor the finish. Be
careful not to place your furniture in direct sunlight for extended
periods of time. As with all your fine furniture, blot up spills
immediately.
Care and Cleaning:
• Do not scratch or chip the finish. Do not use abrasive chemicals
for cleaning. Clean with mild soap on a soft rag. Rinse and dry
thoroughly. If you ever refinish this furniture, be sure to use only
a non-toxic finish specified for children’s products. If you choose
to refinish this furniture, the warranty will be voided.
5
ONE YEAR LIMITED WARRANTY:
We will replace any missing parts at the time
of purchase or any defective item within
a one year period from the date of original
purchase. Please keep your receipt so that
we may process your warranty request. This
warranty only covers new units with original
packaging and ownership, and is not transferable. It does not cover any used, secondhand or demo models.
This warranty does not cover any damaged
or defective parts that result from installation
and assembly, normal wear and tear, abuse,
negligence, improper use or alteration to the
finish, design, and hardware. The specific
legal rights of this warranty may vary from
state to state. Some states do not allow any
exclusion or limitation of incidental damages.
Some states do not allow limitation on how
long an implied warranty lasts.
Registering your product is even easier than
before. You can register your product on our
website at: www.themdbfamily.com
IF YOU WOULD LIKE TO ORDER
REPLACEMENT OR MISSING PARTS
PLEASE VISIT US AT:
WWW.THEMDBFAMILY.COM
OR YOU CAN CONTACT US BY MAIL:
MDB FAMILY
855 WASHINGTON BLVD.
MONTEBELLO, CA 90640
6
A
Step 1
Prepare front and end panels
Clear floor space.
Step 2Lay end panel on the ground with the screw holes facing up.
Using a screwdriver insert connecting pins to the six points
per panel as per diagram.
Step 3
Repeat on front panel.
Front Panel
End Panel
7
B
Prepare side rails with shelves
Step 1Select a leg rail and insert a support pin into the hole situated above the locking
cam hole on the end of the leg rail, then repeat for other end of leg rail.
Step 2
Repeat on other leg rail.
Step 3Select a lower shelf and align with the recessed slots of the leg rails
and install shelf into both leg rails as per diagram.
Step 4Select a mid rail and insert a support pin into the hole situated above the locking
cam hole on the end of the mid rail, then repeat for other end of mid rail.
Step 5
Repeat on other mid rail.
Step 6Select a lower shelf and align with the recessed slots of the mid rails
and install shelf into both mid rails as per diagram.
Step 7Select a top rail and insert support pins into the two holes,
situated above and below the centre locking cam hole
on the end of the top rail, then repeat for other end of top rail.
Step 8
Repeat on other top rail.
Step 9Select top shelf and align with the recessed slots of the top rails
and install shelf into both top rails as per diagram.
Leg Rails
8
Mid Rails
Top Rails
C
Install shelves position
Step 1Lay End panel on the ground with the slots, holes
and connecting pins facing up.
Step 2Select lower shelf joined to leg rails.
Step 3 Align with the bottom edge of the end panel,
align the shelf, connecting pin and support pin,
then slide the leg rails, including lower shelf onto
the end panel until it fits tightly to the end
panel as per diagram.
Step 4Insert Locking Cams on both
rails.
Step 5
Align the Locking Cams and connecting
pins. Insert the connecting pins to the
rails. Make sure connecting pins are
passing through the Locking Cams.
Insert the Locking Cam nut. Use
screwdriver to turn Locking Cam nuts
clockwise until tight.
Step 6Select lower shelf joined to mid rails.
Step 7 Align with the middle slot
of the end panel, align the
shelf, connecting pin and
support pin, then slide the
mid rails, including lower shelf
onto the end panel until it fits tightly
to the end panel as per diagram.
Step 8
Repeat steps 4 & 5.
5.1
Step 9
Select Top shelf joined to top rails.
Insert the
connecting pins
to the rails.
Step 10 Align with the top slot of the end panel,
align the shelf, connecting pin and support pins,
then slide the top rails, including top shelf onto
the end panel until it fits tightly to the end panel
as per diagram.
Step 11
Repeat steps 4 & 5.
5.2
Insert the
Locking Cam
nut.
5.3
x6
Use screwdriver to turn Locking
Cam nuts clockwise until tight.
9
D
Step 1
Front panel position
Select Front panel, with connecting pins facing the rest of the unit.
Step 2Align connecting pins, support pins and shelves, slowly install front panel checking
that all of the pins, support pins and shelves are connecting properly.
Step 3
Once the front panel is tightly fit against all of the rails.
Step 4
Insert Locking Cams on both rails.
Step 5
Align the Locking Cams and connecting pins. Insert the connecting pins to the
rails. Make sure connecting pins are passing through the Locking Cams. Insert the
Locking Cam nuts.
Step 6
Use screwdriver to turn Locking Cam nuts clockwise until tight.
Step 7
Repeat for all six, cam lock points as per diagram.
5.1
Insert the
connecting pins
to the rails.
5.2
Insert the
Locking Cam
nut.
5.3
Use screwdriver to turn Locking
Cam nuts clockwise until tight.
10
x6
E
Step 1
Base plate assembly
Select a base plate and four screws.
Step 2Install a base plate into one of the recessed areas where
the leg rails meet the end panels as per diagram.
Step 3Using a screwdriver install the four screws into the pre-drilled holes
securing the base plate to both the end panel and leg rails.
Step 4
Repeat steps 2 to 4 on each of the corners.
Step 5
Using two adults, carefully position the change table onto the legs.
11
F
!!! IMPORTANT !!!
Furniture Anti-Tipping Kit
Installation
Serious or fatal crushing can occur when furniture tips over on children. To help prevent tipover, follow the steps below to install this anti-tipping strap.
WARNING
Serious or fatal crushing injuries can occur
from furniture tip-over. To help prevent
tip-over:
Place heaviest item in the lowest drawers.
Unless specifically designed to accommodate,
do not set TVs or other heavy objects on
top of this product.
Never allow children to climb or hang on
drawers, doors, or shelves.
Never open more than one drawer at a time.
(OR)
Do not defeat or remove the drawer interlock
system.
Use of tip-over restraints may only reduce,
but not eliminate, the risk of tip-over.
This is permanent label. Do not attempt to remove!
Hardware
Strap
Shorter screw
12
Longer screw
2 x Washer
Assembly Instructions
1
Locate a 2” x 4” stud behind
the wall, and make a mark.
2
Install the strap on the wall with
long screw and washer.
2” x 4” wall stud
3
Install the other end of strap on the back of changing table with short screw and
washer into the wood framing of the changing table.
13
G
Finished assembly
Step 1
Check all Locking cams and screws for tension, adjust if required.
Step 2
Clean all surfaces prior to use.
KEEP THIS MANUAL
IN A SAFE PLACE FOR
FUTURE REFERENCE.
CHANGER PAD IS NOT INCLUDED, SOLD SEPARATELY.
29.5” X 19.625” X 1” CHANGER PAD IS RECOMMENDED.
THE RECOMMENDED MAXIMUM WEIGHT OF THE OCCUPANT
IS 30LBS ON CHANGING TABLE.
READ ALL INSTRUCTIONS BEFORE USING THE PRODUCT.
KEEP THE INSTRUCTIONS FOR FUTURE USE.
14
Restraint System
WARNING:
During the diaper changing process, be sure always to keep one hand on the
baby to prevent the baby from falling off the changing pad. Falling from the
changing pad could cause severe injury or even death to the baby.
Step 1
Step 2
Place a baby on the pad with his/her
bottom on the top of the diaper. Safely
secure the baby on the pad with the
safety straps and buckle on the pad.
This helps prevent the baby from falling
off the pad, which can result in severe
injury or even death of the baby.
Remove the dirty diaper from the
baby.
Step 3
Step 4
Push the baby’s legs forward and create
a cavity under the baby’s bottom. Clean
the baby.
Reattach the new diaper to a clean and
happy baby!
15
Made in China
Nifty
Mesa para cambiar pañales
Código de producto: U0350
I NSTRUCCION ES
revisado 270813
17
Nifty
Mesa para cambiar
pañales
Manual de instrucciones
Permítanos extenderle
una felicitación y nuestro
agradecimiento por adquirir un
producto Ubabub.
Al igual que en toda nuestra
moderna línea de muebles
para la habitación de su
bebé, durante el diseño y
producción de este producto
hemos seleccionado materiales
reciclables o producidos
mediante un proceso sostenible.
!
¡ADVERTENCIA!
PERSONAS
REQUERIDAS
TIEMPO DE
ENSAMBLAJE
45
MINUTOS
HERRAMIENTAS REQUERIDAS
- DESTORNILLADOR CON MANGO ANCHO
- DESTORNILLADOR TIPO PHILLIPS
- LÁPIZ
Contenido
Contenido y herramientas
19
Advertencias, cuidado y
mantenimiento
20
A Preparación de los paneles
frontal y trasero
23
B
Preparación de las barandillas
laterales y estantes
24
C Colocación e instalación
de los estantes
26
D Colocación del panel frontal
28
EEnsamblaje de la placa base
29
F
30
Instalación del kit antivuelco
G Finalización del ensamblaje
32
Sistema de sujeción
33
LEA TODAS LAS INSTRUCCIONES ANTES DE USAR LA
MESA, LA UNIDAD ADICIONAL O LA ALMOHADILLA PARA
CAMBIAR PAÑALES.
18
Contenido
2 barandillas superiores
Panel frontal
Estante superior
Panel trasero
2 estantes inferiores
2 barandillas de en medio
2 barandillas con patas
Herramientas
12 pines de
conexión
12 válvulas de
cierre
16 pines de
soporte
4 placas base
16 tornillos de
15 mm
19
¡ADVERTENCIA!
RIESGO DE CAÍDAS
PARA EVITAR LESIONES GRAVES
O MUERTE, SIEMPRE TENGA A SU
BEBÉ AL ALCANCE DE LA MANO.
LEA TODAS LAS INSTRUCCIONES ANTES DE ENSAMBLAR
ESTE PRODUCTO. GUARDE ESTE MANUAL PARA
CONSULTARLO EN EL FUTURO.
¡ADVERTENCIA!
• Lea todas las instrucciones antes de usar la mesa para cambiar
pañales.
• No use la mesa para cambiar pañales si está dañada o rota.
• Este producto no debe ser usado como una mesa para cambiar
pañales sin la supervisión de un adulto. Sin dicha supervisión, su
bebé puede sufrir lesiones graves o morir debido a una caída. Siga
todas las instrucciones sobre sujeción y uso de la mesa para cam
biar pañales.
• Esta mesa para cambiar pañales fue diseñada para ser usada con
bebés que tengan un peso máximo de 13.6 kg (30 lbs).
• Deje de usar la mesa para cambiar pañales cuando su bebé pueda
sentarse o rodar.
• Al igual que con todo su mobiliario para bebés, es importante
revisar periódicamente que todas las sujeciones y tornillos estén
apretados con firmeza. Los padres deben asegurarse de que el
producto sea seguro para sus bebés revisándolo periódicamente
antes de colocar a sus bebés en el producto.
• Cuando use este producto, siempre sujete a su bebé con la cinta
de seguridad.
20
¡ADVERTENCIA!
RIESGO DE CAÍDAS
Para evitar lesiones
graves o muerte, siempre tenga a su bebé al
alcance de la mano.
Nunca deje a su bebé
sin supervisión y
siempre use el sistema
de sujeción.
Almacenamiento:
• La humedad de los muebles de madera sólida está influida por cambios
sustanciales en la temperatura de la habitación y en la humedad del aire. Por lo
tanto, recomendamos que coloque el mueble lejos de ventilas o aperturas de
calefacción o aire acondicionado.
• La luz del sol no es favorable para los muebles de madera sólida, ya que la
exposición directa y prolongada a la luz del sol (particularmente, cuando la luz de
sol es muy fuerte) puede ocasionar que se descolore el acabado. No coloque su
mueble directamente frente a la luz solar por períodos prolongados.Al igual que
con todos sus muebles finos, limpie de inmediato cualquier derrame o humedad.
Limpieza y cuidados:
• No raye o dañe el acabado. No utilice productos químicos abrasivos para limpiar
el mueble. Limpie con jabón suave y un paño suave. Humedezca y luego seque
por completo la madera. Si desea alguna vez retocar el acabado del producto,
utilice un acabado no tóxico adecuado para productos infantiles. Si elige retocar el
acabado del producto, la garantía quedará anulada.
21
GARANTÍA LIMITADA DE UN AÑO:
Reemplazaremos cualquier pieza faltante al
momento de la compra o cualquier pieza
defectuosa durante un período de un año
tras la fecha de la compra original. Guarde
su factura de compra para que podamos procesar su solicitud de garantía. Esta garantía
únicamente cubre unidades nuevas con empaquetado original a los dueños originales, y
no es transferible. No cubre modelos usados,
de segunda mano o de demostración.
La garantía no cubre piezas dañadas o defectuosas originadas por la instalación y
ensamblaje incorrectos, uso y desgaste normal, abuso, negligencia, uso inadecuado o
alteración del acabado, diseño o piezas del
producto. Los derechos legales específicos
de esta garantía pueden variar dependiendo
del estado. Algunos estados no permiten la
exclusión o limitación de los daños incidentales. Otros estados no permiten que se limite
la duración de la garantía implícita.
Registrar su producto es ahora más fácil que
nunca. Puede registrar su producto en nuestro
sitio web: www.themdbfamily.com
SI DESEA PEDIR PIEZAS DE REEMPLAZO O
FALTANTES, VISÍTENOS EN:
WWW.THEMDBFAMILY.COM
O CONTÁCTENOS POR CORREO POSTAL:
MDB FAMILY
855 WASHINGTON BLVD.
MONTEBELLO, CA 90640
EE. UU.
22
A
Paso 1
Preparación de los paneles
frontal y trasero
Haga espacio en el piso y límpielo.
Coloque el panel trasero en el piso con los orificios para tornillos hacia arriba. Use
Paso 2
un destornillador para insertar los pines de conexión en los seis puntos del panel
que indica el diagrama.
Paso 3
Repita la operación con el panel frontal.
Panel frontal
Panel trasero
23
B
Preparación de las barandillas
laterales y estantes
Seleccione una de las barandillas con patas e inserte un pin de soporte en el
Paso 1
orificio situado encima del orificio para las válvulas de cierre, en un extremo de
la barandilla, y repita la operación en el otro extremo.
Repita la operación en la otra barandilla con patas.
Paso 2
Seleccione un estante inferior, alinéelo con las ranuras cóncavas de ambas
Paso 3
barandillas con patas, e insértelo en ambas barandillas como indica el
diagrama.
Seleccione un estante de en medio e inserte un pin de soporte en el orificio
Paso 4
situado encima del orificio para las válvulas de cierre, en un extremo de la
barandilla, y repita la operación en el otro extremo.
Repita la operación en la otra barandilla de en medio.
Paso 5
Paso 6
Seleccione otro estante inferior, alinéelo con las ranuras cóncavas de ambas
barandillas de en medio, e insértelo en ambas barandillas como indica el
diagrama.
Paso 7
Seleccione una barandilla superior e inserte pines de soporte en los dos orificios
situados encima y debajo del orificio central para las válvulas de cierre, en un
extremo de la barandilla, y repita la operación en el otro extremo.
Paso 8
Repita la operación en la otra barandilla superior.
Paso 9
Seleccione el estante superior, alinéelo con las ranuras cóncavas de ambas
barandillas superiores, e insértelo en ambas barandillas como indica el
diagrama.
24
Barandillas
con patas
Barandillas de
en medio
Barandillas
superiores
25
C
Colocación e instalación de los
estantes
Paso 1Coloque el panel trasero en el piso con las ranuras, orificios y pines de conexión
hacia arriba.
Paso 2Seleccione el estante inferior unido a las barandillas con patas.
Paso 3Alinee el estante con el extremo inferior del panel trasero, alinee el estante con el
pin de conexión y el pin de soporte, y deslice las barandillas con patas –incluyendo
el estante inferior– hacia el panel trasero hasta que quede sujeto con firmeza al
panel como indica el diagrama.
Paso 4Inserte las válvulas de cierre en ambas barandillas.
Paso 5Alinee las válvulas de cierre y los pines de conexión. Inserte los pines de conexión
a las barandillas. Asegúrese de que los pines de conexión pasen a través de las
válvulas. Inserte las tuercas de las válvulas de cierre. Use un destornillador para
apretar las tuercas de las válvulas de cierre en dirección de las manecillas del reloj
hasta que queden firmes.
Paso 6Seleccione el estante inferior unido a las barandillas de en medio.
Paso 7Alinee el estante con la ranura de en medio del panel trasero, alinee el estante
con el pin de conexión y el pin de soporte, y deslice las barandillas de en medio
–incluyendo el estante inferior– hacia el panel trasero hasta que quede sujeto con
firmeza al panel como indica el diagrama.
Paso 8Repita los pasos 4 y 5.
Paso 9Seleccione el estante superior unido a las barandillas superiores.
Paso 10Alinee el estante con la ranura superior del panel trasero, alinee el estante con el
pin de conexión y el pin de soporte, y deslice las barandillas superiores –incluyendo
el estante superior– hacia el panel trasero hasta que quede sujeto con firmeza al
panel como indica el diagrama.
Paso 11Repita los pasos 4 y 5.
26
5.1
5.2
Inserte los pines
de conexión a las
barandillas.
Inserte la
tuerca de la
válvula de
cierre.
x6
5.3
Use un destornillador
para apretar las tuercas
de las válvulas de
cierre en dirección de
las manecillas del reloj
hasta que queden
firmes.
27
D
Colocación del panel frontal
Paso 1Seleccione el panel frontal con los pines de conexión de cara al resto de la
unidad.
Paso 2Alinee los pines de conexión, pines de soporte y estantes, e instale lentamente
el panel frontal verificando que todos los pines de conexión y de apoyo y los
estantes estén sujetos correctamente.
Paso 3Verifique que el panel frontal esté sujetado con firmeza a todas las barandillas.
Paso 4Inserte las válvulas de cierre en ambas barandillas.
Paso 5Alinee las válvulas de cierre y los pines de conexión. Inserte los pines de
conexión a las barandillas. Asegúrese de que los pines de conexión pasen a
través de las válvulas. Inserte las tuercas de las válvulas de cierre.
Paso 6Use un destornillador para apretar las tuercas de las válvulas de cierre en
dirección de las manecillas del reloj hasta que queden firmes.
Paso 7Repita la operación hasta completar los seis orificios de las válvulas de cierre
como indica el diagrama.
5.1
5.2
Inserte los pines
de conexión a las
barandillas.
Inserte la
tuerca de la
válvula de
cierre.
5.3
Use un destornillador
para apretar las tuercas
de las válvulas de
cierre en dirección de
las manecillas del reloj
hasta que queden
firmes.
28
x6
E
Ensamblaje de la placa base
Paso 1
Seleccione una placa base y cuatro tornillos.
Paso 2
Instale la placa base en una de las áreas en los extremos donde las barandillas
con patas están sujetas al panel trasero como indica el diagrama.
Paso 3
Con ayuda de un destornillador, inserte los cuatro tornillos a los orificios
pretaladrados asegurando la placa base al panel trasero y las barandillas con
patas.
Paso 4
Repita los pasos 2 y 4 en cada esquina.
Paso 5
Finalmente, dos adultos deben levantar cuidadosamente la mesa para cambiar
pañales y asentarla sobre las patas.
29
F
¡IMPORTANTE!
Instalación del kit antivuelco
Pueden ocurrir aplastamientos graves o incluso fatales cuando los muebles se vuelcan
encima de niños o bebés. Para ayudar a prevenir los vuelcos, siga los pasos que se indican
a continuación para instalar los sujetadores antivuelco.
ADVERTENCIA
Pueden ocurrir aplastamientos graves o
incluso fatales cuando los muebles se
vuelcan. Para ayudar a prevenir los vuelcos:
Coloque los objetos más pesados en el estante
inferior.
No coloque televisiones u otros objetos pesados
encima de este producto, a menos de que estén
específicamente diseñadas para su integración.
No permita que los niños suban o se cuelguen de
cajones, puertas o estantes.
Nunca abra más de un cajón a la vez.
(O)
No desinstale o retire el sistema de entrecerrado de
los cajones.
El uso de los sujetadores antivuelco puede únicamente
reducir, pero no eliminar el riesgo de vuelcos.
Este sello es de carácter permanente. No intente retirarlo.
Herramientas
Sujetador
Tornillo corto
30
Tornillo largo
2 arandelas
Instrucciones de ensamblaje
1
Ubique una viga de 5 cm (2 pulgadas) por 10 cm (4 pulgadas)
detrás de la pared, y márquela.
2
Instale el sujetador en la pared
con un tornillo largo y una
arandela.
Viga de 5 cm (2 pulgadas)
por 10 cm (4 pulgadas)
3
Instale el otro extremo del sujetador al reverso de la mesa para cambiar pañales
insertando el tornillo corto y una arandela en la cubierta de madera de la mesa para
cambiar pañales.
31
G
Finalización del ensamblaje
Paso 1Revise que todas las válvulas de cierre tengan la tensión correcta y ajústelas de
ser necesario.
Paso 2Limpie todas las superficies antes de usar la mesa para cambiar pañales.
GUARDE ESTE MANUAL
EN UN LUGAR SEGURO
PARA
CONSULTARLO
EN EL FUTURO.
NO SE INCLUYE LA ALMOHADILLA PARA CAMBIAR PAÑALES; SE
VENDE POR SEPARADO. SE RECOMIENDA LA ALMOHADILLA DE
74.9 CM (29.5 PULGADAS) X 49.85 CM (19.625 PULGADAS) X 2.5 CM
(1 PULGADA).
EL PESO MÁXIMO RECOMENDADO DEL OCUPANTE DE LA MESA
PARA CAMBIAR PAÑALES ES 13.6 KG (30 LBS).
LEA TODAS LAS INSTRUCCIONES ANTES DE USAR EL PRODUCTO.
GUARDE LAS INSTRUCCIONES PARA CONSULTARLAS EN EL
FUTURO.
32
Sistema de sujeción
¡ADVERTENCIA!
Durante el proceso del cambio de pañales, asegúrese de siempre tener una
mano sobre el bebé para evitar que el bebé se caiga de la almohadilla para
cambiar pañales. Una caída de la almohadilla para cambiar pañales puede
ocasionar lesiones graves o incluso la muerte a su bebé.
Paso 1
Paso 2
Coloque al bebé en la almohadilla
con las nalgas encima del pañal.
Sujete al bebé a la almohadilla con las
cintas de seguridad y ciérrelas. Esto
ayuda a evitar que su bebé se caiga
de la almohadilla, algo que podría
ocasionarle lesiones graves o incluso
la muerte.
Retire el pañal sucio.
Paso 3
Paso 4
Levante las piernas del bebé y cree un
espacio debajo de las nalgas del bebé.
Limpie al bebé.
Póngale el pañal limpio y su bebé
quedará limpio y contento.
33
34
35
Hecho en China