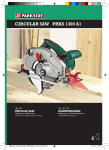
1
SIERRA CIRCULAR RECARGABLE
SEGA CIRCOLARE A BATTERIA PHKSA 18-LI A1
SIERRA CIRCULAR RECARGABLE
SEGA CIRCOLARE A BATTERIA
Traducción del manual de instrucciones original
Traduzione delle istruzioni d’uso originali
SERRA CIRCULAR COM BATERIA
CORDLESS CIRCULAR SAW
Tradução do manual de instruções original
Translation of original operation manual
AKKU-HANDKREISSÄGE
Originalbetriebsanleitung
IAN 102867
Antes de empezar a leer abra la página que contiene las imágenes y, en seguida, familiarícese con todas
las funciones del dispositivo.
Prima di leggere aprire la pagina con le immagini e prendere confidenza con le diverse funzioni
dell'apparecchio.
Antes de começar a ler abra na página com as imagens e, de seguida, familiarize-se com todas as
funções do aparelho.
Before reading, unfold the page containing the illustrations and familiarise yourself with all functions of
the device.
Klappen Sie vor dem Lesen die Seite mit den Abbildungen aus und machen Sie sich anschließend mit allen
Funktionen des Gerätes vertraut.
ES
IT / MT
PT
GB / MT
DE / AT / CH
Traducción del manual de instrucciones original
Traduzione delle istruzioni d’uso originali
Tradução do manual de instruções original
Translation of original operation manual
Originalbetriebsanleitung
Página
Pagina
Página
Page
Seite
1
15
29
43
55
A
B
C
Índice
ES
Introducción . . . . . . . . . . . . . . . . . . . . . . . . . . . . . . . . . . . . . . . . . . . . . . . . . . . . . 2
Uso previsto . . . . . . . . . . . . . . . . . . . . . . . . . . . . . . . . . . . . . . . . . . . . . . . . . . . . . . . . . . . . . . . . 2
Equipamiento . . . . . . . . . . . . . . . . . . . . . . . . . . . . . . . . . . . . . . . . . . . . . . . . . . . . . . . . . . . . . . . 2
Volumen de suministro . . . . . . . . . . . . . . . . . . . . . . . . . . . . . . . . . . . . . . . . . . . . . . . . . . . . . . . . 2
Características técnicas . . . . . . . . . . . . . . . . . . . . . . . . . . . . . . . . . . . . . . . . . . . . . . . . . . . . . . . 2
Indicaciones generales de seguridad para las herramientas eléctricas . . . . . . . . 3
1. Seguridad en el lugar de trabajo . . . . . . . . . . . . . . . . . . . . . . . . . . . . . . . . . . . . . . . . . . . . . 3
2. Seguridad eléctrica . . . . . . . . . . . . . . . . . . . . . . . . . . . . . . . . . . . . . . . . . . . . . . . . . . . . . . . . 3
3. Seguridad personal . . . . . . . . . . . . . . . . . . . . . . . . . . . . . . . . . . . . . . . . . . . . . . . . . . . . . . . . 4
4. Uso y manejo de la herramienta eléctrica . . . . . . . . . . . . . . . . . . . . . . . . . . . . . . . . . . . . . . . 4
5. Uso y manejo de la herramienta inalámbrica . . . . . . . . . . . . . . . . . . . . . . . . . . . . . . . . . . . . 5
6. Asistencia técnica. . . . . . . . . . . . . . . . . . . . . . . . . . . . . . . . . . . . . . . . . . . . . . . . . . . . . . . . . . 5
Indicaciones de seguridad específicas para las sierras circulares manuales . . . . . . . . . . . . . . . 5
Indicaciones de seguridad para cargadores . . . . . . . . . . . . . . . . . . . . . . . . . . . . . . . . . . . . . . . 7
Indicaciones de seguridad para hojas de sierra circular . . . . . . . . . . . . . . . . . . . . . . . . . . . . . . 7
Accesorios/equipos adicionales originales . . . . . . . . . . . . . . . . . . . . . . . . . . . . . . . . . . . . . . . . 8
Antes de la puesta en marcha . . . . . . . . . . . . . . . . . . . . . . . . . . . . . . . . . . . . . . . 8
Carga de la batería (consulte la fig. C) . . . . . . . . . . . . . . . . . . . . . . . . . . . . . . . . . . . . . . . . . . . 8
Colocación de la batería en el aparato/extracción de la batería. . . . . . . . . . . . . . . . . . . . . . . 8
Comprobación del estado de la batería . . . . . . . . . . . . . . . . . . . . . . . . . . . . . . . . . . . . . . . . . . 8
Comprobación de la cubierta de protección . . . . . . . . . . . . . . . . . . . . . . . . . . . . . . . . . . . . . . . 8
Puesta en funcionamiento . . . . . . . . . . . . . . . . . . . . . . . . . . . . . . . . . . . . . . . . . . 9
Montaje/cambio de la hoja de sierra . . . . . . . . . . . . . . . . . . . . . . . . . . . . . . . . . . . . . . . . . . . . 9
Tope paralelo . . . . . . . . . . . . . . . . . . . . . . . . . . . . . . . . . . . . . . . . . . . . . . . . . . . . . . . . . . . . . . . 9
Conexión de la aspiración de virutas. . . . . . . . . . . . . . . . . . . . . . . . . . . . . . . . . . . . . . . . . . . . . 9
Manejo . . . . . . . . . . . . . . . . . . . . . . . . . . . . . . . . . . . . . . . . . . . . . . . . . . . . . . . . . 9
Encendido y apagado . . . . . . . . . . . . . . . . . . . . . . . . . . . . . . . . . . . . . . . . . . . . . . . . . . . . . . . . 9
Ajuste del ángulo de corte . . . . . . . . . . . . . . . . . . . . . . . . . . . . . . . . . . . . . . . . . . . . . . . . . . . . . 9
Ajuste de la profundidad de corte . . . . . . . . . . . . . . . . . . . . . . . . . . . . . . . . . . . . . . . . . . . . . . . 9
Manipulación de la sierra circular manual . . . . . . . . . . . . . . . . . . . . . . . . . . . . . . . . . . . . . . . 10
Encendido y apagado del láser . . . . . . . . . . . . . . . . . . . . . . . . . . . . . . . . . . . . . . . . . . . . . . . . 10
Consejos y trucos . . . . . . . . . . . . . . . . . . . . . . . . . . . . . . . . . . . . . . . . . . . . . . . . . . . . . . . . . . . 10
Mantenimiento y limpieza . . . . . . . . . . . . . . . . . . . . . . . . . . . . . . . . . . . . . . . . . 10
Desecho . . . . . . . . . . . . . . . . . . . . . . . . . . . . . . . . . . . . . . . . . . . . . . . . . . . . . . . . 10
Garantía . . . . . . . . . . . . . . . . . . . . . . . . . . . . . . . . . . . . . . . . . . . . . . . . . . . . . . . 11
Asistencia técnica . . . . . . . . . . . . . . . . . . . . . . . . . . . . . . . . . . . . . . . . . . . . . . . . 11
Importador . . . . . . . . . . . . . . . . . . . . . . . . . . . . . . . . . . . . . . . . . . . . . . . . . . . . . 11
Traducción de la Declaración de conformidad original . . . . . . . . . . . . . . . . . . 12
Solicitud de una batería de repuesto . . . . . . . . . . . . . . . . . . . . . . . . . . . . . . . . 13
Pedido por Internet . . . . . . . . . . . . . . . . . . . . . . . . . . . . . . . . . . . . . . . . . . . . . . . . . . . . . . . . . . 13
Pedido por teléfono . . . . . . . . . . . . . . . . . . . . . . . . . . . . . . . . . . . . . . . . . . . . . . . . . . . . . . . . . 13
PHKSA 18-Li A1
1
Introducción
ES
Felicidades por la compra de su aparato
nuevo. Ha adquirido un producto de alta
calidad. Las instrucciones de uso forman
parte del producto y contienen indicaciones importantes acerca de la seguridad,
el uso y el desecho de este aparato.
Antes de usar el producto, familiarícese con todas
las indicaciones de manejo y de seguridad. Utilice
el producto únicamente como se describe y para los
ámbitos de aplicación indicados. Entregue todos los
documentos cuando transfiera el producto a terceros.
Uso previsto
La sierra circular manual (en lo sucesivo, el "aparato")
sirve para realizar cortes longitudinales, transversales y
en inglete sobre una base fija en maderas, tableros de
aglomerado, plásticos y materiales constructivos ligeros. La utilización de la máquina para otros fines o su
transformación se considerará contraria al uso previsto
y elevará considerablemente el riesgo de accidentes.
Esta herramienta no es apta para el uso industrial.
Equipamiento
Figura A:
Bloqueo de encendido
Interruptor de encendido/apagado
Escala de profundidad de corte
Botón de desencastre de la batería
Tecla de estado de la batería /
pantalla LED de la batería
Batería
Tornillo de fijación
Bloqueo de husillo
Placa base
Alojamiento del tope paralelo
Figura B:
Interruptor de encendido/
apagado y restablecimiento del láser
Mango adicional
Etiqueta de advertencia del láser
Abertura de salida del láser
Escala de ángulo de corte
Tornillo de mariposa
para la preselección del ángulo de corte
Tornillo de mariposa
para el alojamiento del tope paralelo
Tope paralelo
2
Cubierta de protección
Brida tensora
Tornillo tensor
Palanca de retroceso para la cubierta de protección
Hoja de sierra
Expulsor de virutas
Adaptador para la aspiración de polvo
Llave Allen
Figura C:
Cargador
LED de control rojo
LED de control verde
Volumen de suministro
1 sierra circular recargable
1 cargador rápido de la batería
1 tope paralelo
1 adaptador para la aspiración de polvo
1 llave Allen SW 6
1 hoja de sierra premontada
1 instrucciones de uso
Características técnicas
Sierra circular recargable: PHKSA 18-Li A1
Tensión nominal:
18 V
Velocidad de ralentí: n0 3800 min-1
Hoja de sierra:
1 x Ø 150 mm x Ø 16 mm,
18 dientes
Máx. profundidad de
corte:
90°: 48 mm
45°: 36 mm
Batería: PAP 18 A1
Tipo:
ION-LITIO
Tensión nominal:
18 V
Capacidad:
1,5 Ah
Cargador rápido de la batería: PLG 18 A1
ENTRADA/Input:
Tensión nominal:
230 - 240 V ~, 50 Hz
Consumo de potencia: 40 W
SALIDA/Output:
Tensión nominal:
18 V
Corriente de carga:
1,8 A
Duración de carga:
60 min aprox.
T2A
Fusible/s:
2A
Clase de protección: II /
PHKSA 18-Li A1
Información sobre ruidos y vibraciones:
Medición de ruidos según la norma EN 60745.
Valores típicos del nivel sonoro con ponderación
A de la herramienta eléctrica:
Nivel de presión sonora:
77 dB(A)
Nivel de potencia sonora: 88 dB(A)
Incertidumbre K:
3 dB
Utilice protección auditiva.
Valores típicos de la aceleración ponderada:
Vibración manual/del brazo ah,W = 2,5 m/s2
Incertidumbre K = 1,5 m/s2
INDICACIÓN
► El nivel de vibraciones especificado en estas
instrucciones de uso se ha calculado según
un proceso de medición estandarizado en
la norma EN 60745 y puede utilizarse para
la comparación de aparatos. El valor de
emisión de vibraciones especificado también
puede utilizarse para realizar una valoración
preliminar de la exposición.
¡ADVERTENCIA!
► El nivel de vibraciones se modifica en función
del uso de la herramienta eléctrica y, en
algunos casos, puede superar los valores
especificados en estas instrucciones. Por este
motivo, la carga de las vibraciones puede
estar infravalorada si se utiliza la herramienta eléctrica regularmente de esta manera.
Intente que la carga de las vibraciones sea lo
más baja posible. Ejemplos de medidas para
reducir la carga de las vibraciones son el uso
de guantes al manejar la herramienta y la
limitación del tiempo de trabajo. Para ello,
deben tenerse en cuenta todas las partes del
ciclo de funcionamiento (por ejemplo, los
momentos en los que la herramienta eléctrica
está desconectada y los momentos en los
que está conectada pero funciona sin carga).
PHKSA 18-Li A1
Indicaciones generales
de seguridad para las
herramientas eléctricas
ES
¡ADVERTENCIA!
► Lea detenidamente todas las indicaciones
de seguridad y las instrucciones. El incumplimiento de las indicaciones de seguridad
y de las instrucciones especificadas puede
provocar una descarga eléctrica, un incendio
y/o lesiones graves.
Conserve todas las indicaciones de seguridad
y las instrucciones para el futuro.
El término "herramienta eléctrica" utilizado en las
indicaciones de seguridad se refiere a las herramientas eléctricas de accionamiento eléctrico (con
cable de red) y a las de accionamiento por batería
(sin cable de red).
1. Seguridad en el lugar de trabajo
a) Mantenga limpia y bien iluminada la zona de
trabajo. El desorden y la falta de iluminación en
el lugar de trabajo pueden provocar accidentes.
b) No trabaje con la herramienta eléctrica en un
entorno potencialmente explosivo en el que
haya líquidos, gases o polvos inflamables.
Las herramientas eléctricas generan chispas que
pueden incendiar el polvo o los vapores.
c) Mantenga a los niños y a otras personas
alejados durante el manejo de herramientas
eléctricas. Si se distrae, podría perder el control del aparato.
2. Seguridad eléctrica
a) La clavija de conexión de la herramienta eléctrica debe encajar en la base de enchufe. No
debe modificarse la clavija de ninguna forma.
No utilice adaptadores con las herramientas
eléctricas con toma de tierra. El uso de clavijas
sin manipular conectadas a una base de enchufe
correcta reduce el riesgo de descarga eléctrica.
b) Evite el contacto físico con cualquier superficie
que esté conectada a tierra, como tubos, sistemas de calefacción, cocinas y neveras. Si
su cuerpo hace contacto con la toma a tierra,
existe mayor riesgo de descarga eléctrica.
3
ES
c) Mantenga el aparato alejado de la lluvia o
de humedades. La penetración de agua en un
aparato eléctrico aumenta el riesgo de descarga
eléctrica.
d) No utilice el cable para otros usos, p. ej.,
para transportar y colgar la herramienta
eléctrica o para tirar de la clavija de red y
extraerla de la base del enchufe. Mantenga
el cable apartado del calor, del aceite, de
los bordes cortantes o de las piezas móviles
del aparato. Un cable dañado o enredado
aumenta el riesgo de descarga eléctrica.
e) Si desea utilizar la herramienta eléctrica al
aire libre, utilice exclusivamente los alargadores de cable homologados para su uso en
exteriores. Su uso reduce el riesgo de descarga eléctrica.
f) Si no puede evitarse el uso de la herramienta
eléctrica en un entorno húmedo, utilice un
interruptor diferencial residual. Su uso reduce
el riesgo de descarga eléctrica.
3. Seguridad personal
a) Esté siempre atento, preste atención a lo que
hace y proceda con sensatez a la hora de
trabajar con una herramienta eléctrica. No
utilice ninguna herramienta eléctrica si se
siente cansado o se encuentra bajo la influencia de drogas, alcohol o medicamentos. Un
solo momento de distracción mientras utiliza
la herramienta eléctrica puede causar lesiones
graves.
b) Utilice siempre un equipo de protección
individual y gafas de protección. El uso de
un equipo de protección individual, como,
por ejemplo, mascarilla antipolvo, calzado de
seguridad antideslizante, casco o protecciones
auditivas según el tipo de herramienta eléctrica
en cuestión, reduce el riesgo de lesiones.
c) Evite que el aparato pueda ponerse en marcha accidentalmente. Asegúrese de que la
herramienta eléctrica esté apagada antes de
conectarla a la red eléctrica o a la batería,
asirla o transportarla. Si transporta la herramienta eléctrica con los dedos en el interruptor
o conecta el aparato ya encendido a la red
eléctrica, puede provocar accidentes.
4
d) Antes de encender la herramienta eléctrica,
retire las herramientas de ajuste o las llaves.
Las herramientas o llaves que se encuentren
dentro del alcance de la pieza giratoria del
aparato pueden producir lesiones.
e) Evite mantener una postura corporal
forzada. Colóquese sobre una base firme y
mantenga el equilibrio en todo momento. Así
podrá controlar mejor la herramienta eléctrica,
especialmente en situaciones inesperadas.
f) Utilice ropa adecuada. No lleve ropa ancha
ni joyas. Mantenga el pelo, la ropa y los
guantes lejos de las piezas móviles. La ropa
holgada, las joyas o el pelo suelto pueden
quedar atrapados en las piezas móviles.
g) Si se admite el montaje de dispositivos de
aspiración y de acumulación de polvo, asegúrese de que estén conectados y cerciórese
de que se utilicen correctamente. El uso de
un dispositivo de aspiración de polvo puede
reducir los riesgos causados por el polvo.
4. Uso y manejo
de la herramienta eléctrica
a) No sobrecargue el aparato. Utilice la herramienta eléctrica adecuada para el trabajo en
cuestión. De esta manera, trabajará mejor y de
forma más segura dentro del rango de trabajo
indicado.
b) No utilice ninguna herramienta eléctrica con
el interruptor averiado. Una herramienta que
no pueda encenderse o apagarse es peligrosa
y debe repararse.
c) Extraiga la clavija de la base de enchufe y/o
retire la batería antes de realizar cualquier
ajuste en el aparato, cambiar los accesorios
o abandonar el aparato. Estas medidas de
seguridad evitan que la herramienta eléctrica
se encienda de forma accidental.
d) Guarde las herramientas eléctricas que no
vaya a utilizar fuera del alcance de los niños.
No deje que utilicen el aparato personas que
no estén familiarizadas con su manejo o que
no hayan leído estas indicaciones. Las herramientas eléctricas son peligrosas cuando están
en manos de personas inexpertas.
PHKSA 18-Li A1
e) Mantenga las herramientas eléctricas en
perfecto estado. Compruebe que las piezas
móviles funcionen correctamente y no se
atasquen y asegúrese de que ninguna pieza
se haya roto ni esté dañada de forma que
el funcionamiento del aparato pueda verse
afectado. Encargue la reparación de las
piezas dañadas antes de utilizar el aparato.
Muchos accidentes se deben al mal estado de
las herramientas.
f) Mantenga las herramientas de corte limpias
y afiladas, ya que así se atascan menos y son
más fáciles de guiar.
g) Utilice la herramienta eléctrica, los accesorios, las herramientas de ajuste, etc. según
lo dispuesto en estas indicaciones. Tenga en
cuenta las condiciones de trabajo y los procedimientos que deban seguirse. El uso de las
herramientas eléctricas para aplicaciones distintas a las previstas puede causar situaciones
peligrosas.
¡CUIDADO! ¡RIESGO DE EXPLOSIÓN!
No recargue nunca las baterías no
recargables.
Proteja la batería del calor, p. ej.,
también de la radiación solar prolongada, el fuego, el agua y la humedad.
Existe peligro de explosión.
6. Asistencia técnica
a) Encargue exclusivamente la reparación de su
herramienta eléctrica al personal cualificado
especializado y solo con recambios originales.
De esta forma, se garantiza que la seguridad
del aparato no se vea afectada.
Indicaciones de seguridad específicas
para las sierras circulares manuales
Indicaciones de seguridad para todas las sierras
Método de serrado
5. Uso y manejo de la herramienta
inalámbrica
a) Cargue las baterías solo en cargadores
recomendados por el fabricante. Utilizar un
cargador con una batería que no le corresponde entraña peligro de incendios.
a)
¡PELIGRO! No coloque las manos
dentro de la zona de serrado ni toque
la hoja de sierra. Coloque la otra
mano en el mango adicional o en la carcasa
del motor. Si sujeta la sierra con ambas manos,
no podrá lesionarlas con la hoja de sierra.
b) Utilice en las herramientas eléctricas tan solo
las baterías indicadas. El uso de otras baterías
puede provocar lesiones y peligro de incendios.
b) No coloque las manos bajo la pieza de trabajo.
La cubierta de protección no podrá protegerle
de la hoja de sierra bajo la pieza de trabajo.
c) Mantenga la batería que no utilice alejada
de grapas, monedas, llaves, clavos, tornillos
u otros pequeños objetos de metal que puedan provocar un puenteado de los contactos. Un cortocircuito entre los contactos de la
batería puede provocar quemaduras o fuego.
c) Ajuste la profundidad de corte al grosor de
la pieza de trabajo. La sierra solo debería
sobresalir algo menos de la altura de un diente
de sierra completo bajo la pieza de trabajo.
d) En caso de uso incorrecto, puede derramarse
líquido de la batería. Evite el contacto con
dicho líquido. En caso de contacto involuntario, lavar con agua. Si el líquido entra en
contacto con los ojos, contacte a un médico
como medida adicional. El líquido derramado
de la batería puede causar irritación cutánea o
quemaduras.
PHKSA 18-Li A1
d) No sujete nunca la pieza de trabajo que
pretenda serrar en la mano ni la mantenga
sobre las piernas. Fije la herramienta en una
superficie de trabajo estable. Es importante
fijar bien la herramienta para minimizar el
riesgo de contacto físico, del atasco de la hoja
de sierra o de la pérdida de control.
e) Sujete la herramienta eléctrica exclusivamente
por los mangos aislados si pretende utilizarla
para trabajos en los que la herramienta pueda
entrar en contacto con conexiones eléctricas
5
ES
ES
ocultas. El contacto con cables conductores de
electricidad también somete las piezas metálicas
de la herramienta eléctrica a la tensión eléctrica
y provoca una descarga eléctrica.
f) Utilice siempre un tope o una guía recta para
los bordes al serrar longitudinalmente. De esta
manera, podrá mejorar la precisión de corte y
reducir el riesgo de que la sierra se atasque.
g) Utilice siempre hojas de sierra con el tamaño
correcto y con el orificio de fijación adecuado
(p. ej., con forma de estrella o redondo).
Las hojas de sierra que no encajen en las piezas
de montaje no girarán de forma concéntrica y
provocarán una pérdida de control.
h) No utilice nunca arandelas o tornillos dañados
o inadecuados para la hoja de sierra. Los
tornillos y arandelas de la hoja de sierra se han
diseñado especialmente para esta sierra con el fin
de obtener el máximo rendimiento y seguridad.
Indicaciones de seguridad adicionales para
todas las sierras
Causas de retrocesos e indicaciones de seguridad
▯ El retroceso es la reacción repentina causada por
un enganche, atasco o alineación incorrecta de
la hoja de sierra, lo que provoca un salto incontrolado de la sierra y su desplazamiento fuera
de la pieza de trabajo y en dirección al usuario.
▯ Si la hoja de sierra se engancha o se atasca en
un espacio de corte estrecho, queda bloqueada,
por lo que la fuerza del motor hace retroceder
el aparato en dirección al usuario.
▯ Si la hoja de sierra se gira o alinea de forma incorrecta durante el proceso de corte, los dientes
del extremo posterior de la hoja de sierra pueden
quedar enganchados en la superficie de la pieza
de trabajo, lo que provoca la salida de la hoja
de sierra del espacio de corte y su retroceso en
dirección al usuario.
El retroceso es consecuencia de un uso incorrecto
o inadecuado de la sierra, que puede evitarse
con el cumplimiento de las siguientes medidas de
precaución.
a) Sujete la sierra firmemente con ambas manos
y mantenga los brazos en una posición en
la que puedan contrarrestar la fuerza de
retroceso. Colóquese siempre a un lado de
6
la hoja de sierra y no esté nunca en la misma
línea que esta. Si se produce un retroceso, la
sierra circular puede saltar hacia atrás, aunque
el usuario puede controlar la fuerza de retroceso mediante el cumplimiento de las medidas de
precaución adecuadas.
b) Si la hoja de sierra se atasca o desea interrumpir el trabajo, apague la sierra y sujétela
sin separarla de la pieza de trabajo hasta
que la hoja se detenga. No intente nunca
retirar la sierra de la pieza de trabajo ni tirar
de ella hacia atrás mientras la hoja de sierra
esté en movimiento. De lo contrario, puede
producirse un retroceso. Averigüe la causa
del atasco de la hoja de sierra y solucione el
problema.
c) Si desea volver a encender la sierra dentro
de la pieza de trabajo, centre la hoja de sierra
en el espacio de corte y compruebe que los
dientes no estén enganchados en la pieza de
trabajo. Si la sierra está atascada, al volver a
encenderla, es posible que se salga de la pieza
de trabajo o que provoque un retroceso.
d) Fije bien los tableros grandes para evitar el
riesgo de retroceso por un atasco en la hoja
de sierra. Los tableros grandes pueden llegar
a doblarse por su propio peso. Por este motivo,
deben fijarse bien en ambos lados, tanto en las
inmediaciones del espacio de corte como en el
borde.
e) No utilice hojas de sierra romas ni dañadas.
Las hojas de sierra con dientes romos o mal
alineados causan una fricción más elevada,
atascos en la hoja de sierra y retrocesos por
la estrechez excesiva del espacio de corte.
f) Antes de proceder al serrado, asegúrese de
que los ajustes de profundidad de corte y de
ángulo de corte estén bien fijados. Si durante
el serrado se modifican dichos ajustes, pueden
producirse atascos y retrocesos con la hoja de
sierra.
g) Proceda con especial cautela al serrar en las
paredes existentes u otras zonas ocultas.
La hoja de sierra podría atascarse en objetos
ocultos y causar un retroceso.
PHKSA 18-Li A1
Función de la cubierta de protección inferior
a) Antes de cada uso, compruebe que la cubierta
de protección inferior se cierre sin problemas.
No utilice la sierra si la cubierta de protección
inferior no puede moverse libremente ni se
cierra inmediatamente. No fije ni inmovilice
la cubierta de protección inferior cuando esté
abierta. Si la sierra cayera al suelo accidentalmente, la cubierta de protección inferior podría
doblarse. Abra la cubierta de protección inferior
con la palanca de retroceso y asegúrese de que
se mueva libremente y de que no entre en contacto con la sierra ni con ninguna otra pieza en
ninguno de los ángulos y profundidades de corte.
b) Compruebe el funcionamiento del resorte de
la cubierta de protección inferior. Encomiende
la reparación del aparato antes de usarlo si
la cubierta de protección inferior y el resorte
no funcionan correctamente. Las piezas dañadas, los restos incrustados o la acumulación de
virutas pueden retardar el funcionamiento de la
cubierta de protección inferior.
c) Solo debe abrirse la cubierta de protección inferior con la mano para realizar cortes especiales,
como "Cortes de inmersión y cortes en ángulo".
Abra la cubierta de protección inferior con la palanca de retroceso y suéltela en cuanto la hoja de
sierra penetre en la pieza de trabajo. Para el resto
de trabajos de serrado, la cubierta de protección
inferior debe funcionar de forma automática.
d) No pose la sierra sobre el banco de trabajo
ni sobre el suelo si la hoja de sierra no está
cubierta por la cubierta de protección inferior. Si la hoja de sierra continúa girando sin
protección, desplazará la sierra en dirección
contraria a la dirección de corte y serrará lo
que encuentre en su camino. Tenga siempre en
cuenta el tiempo de detención de la sierra.
Indicaciones de seguridad para
cargadores
■ Este aparato puede ser utilizado por niños a partir
de 8 años y por personas cuyas facultades físicas,
sensoriales o mentales sean reducidas o carezcan
de los conocimientos y de la experiencia necesaria siempre que sean vigilados o hayan sido
instruidos correctamente sobre el uso seguro del
PHKSA 18-Li A1
aparato y hayan comprendido los peligros que
entraña. Los niños no deben jugar con el aparato.
Los niños no deben realizar las tareas de limpieza
y mantenimiento del aparato sin supervisión.
El cargador solo está indicado para usarse
en interiores.
¡ADVERTENCIA!
■ No ponga en funcionamiento el aparato si el
cable, el cable de red o la clavija de red están
dañados. Un cable de red dañado supone un
peligro de muerte por descarga eléctrica.
Instrucciones complementarias:
■ No utilice discos abrasivos.
■ Utilice exclusivamente hojas de sierra con un
diámetro que se corresponda con las especificaciones de la sierra.
■ Al procesar madera o materiales que generen
polvo perjudicial para la salud, debe conectarse
el aparato a un dispositivo de aspiración adecuado y de eficacia probada.
■ Para serrar madera, utilice una máscara de
protección antipolvo.
■ Utilice exclusivamente las hojas de sierra
recomendadas.
■ Use siempre protección auditiva.
■ Evite el sobrecalentamiento de las puntas de
los dientes de la sierra.
■ Al serrar plásticos, evite que se fundan.
Indicaciones de seguridad para hojas
de sierra circular
Utilice guantes de seguridad.
Utilice protección respiratoria.
Utilice gafas de seguridad.
Utilice protección auditiva.
¡CUIDADO! ¡RIESGO DE EXPLOSIÓN!
No recargue nunca las baterías no
recargables.
7
ES
ES
Accesorios/
equipos adicionales originales
■ Utilice exclusivamente los accesorios y equipos
adicionales especificados en las instrucciones
de uso y compatibles con el aparato.
¡ADVERTENCIA!
Protéjase de la radiación láser:
El aparato contiene un láser de clase
2 y se entrega con una etiqueta de
advertencia del láser .
► No oriente nunca el láser hacia las personas
o bien hacia los animales.
► No mire nunca directamente al rayo láser.
El láser podría dañar los ojos.
► No dirija el rayo láser hacia materiales altamente reflectantes. Peligro por la luz reflectante.
► Queda prohibido cualquier ajuste para
aumentar la potencia del láser. Existe peligro
de lesiones.
► No nos hacemos cargo de los daños derivados por la manipulación del dispositivo
láser, así como por incumplimiento de las
indicaciones de seguridad.
¡CUIDADO!
Si se realizan otras operaciones de ajuste o de
manejo o cualquier otro procedimiento distinto
al indicado, pueden producirse radiaciones
peligrosas.
Antes de la puesta en marcha
Carga de la batería (consulte la fig. C)
¡CUIDADO!
■ Nunca cargue la batería con una temperatura ambiental de menos de 10°C o superior a
los 40°C.
♦ Coloque la batería en el cargador
(consulte la fig. C).
♦ Introduzca la clavija de red en la base de enchufe. El LED de control rojo se ilumina.
♦ El LED de control verde señala que el proceso
de carga ha finalizado y que la batería está
lista para su uso.
♦ Coloque la batería en el aparato.
■ Nunca cargue una batería una segunda vez
justo después del proceso de carga rápida.
Existe el peligro de que la batería se sobrecargue y así se reduce la duración de la batería
y del cargador .
♦ Entre cada carga consecutiva apague el cargador durante al menos 15 minutos. Para ello,
extraiga la clavija de red.
Colocación de la batería en el
aparato/extracción de la batería
Colocar la batería:
♦ Encastre la batería en el mango.
Retirar la batería:
♦ Pulse el botón de desencastre y retire la
batería .
Comprobación del estado de la batería
♦ Pulse la tecla de estado de la batería para
comprobar el estado de la batería (consulte
también la figura principal). El estado o la carga
restante se muestra en la pantalla LED de la
batería como se indica a continuación:
♦ ROJO/NARANJA/VERDE =
carga/potencia máxima
ROJO/NARANJA = carga/potencia media
ROJO = carga baja, recargue la batería
► Retire la clavija de red antes de sacar la batería del cargador o introducirla en él.
Comprobación de la cubierta de
protección
INDICACIÓN
♦ Deslice la palanca de retroceso para la cubierta
de protección hasta el tope.
La cubierta de protección debe moverse sin
atascarse y volver automáticamente a la posición
inicial al soltar la palanca de retroceso para la
cubierta de protección .
► Tres aparatos, tres baterías compatibles.
Son intercambiables.
(Consulte el apartado Solicitud de una batería
de repuesto)
8
PHKSA 18-Li A1
Puesta en funcionamiento
Montaje/cambio de la hoja de sierra
¡Cambie exclusivamente la hoja de sierra
la batería desconectada!
con
La escotadura derecha de la placa base es
para el ajuste del ángulo de corte de 0°. La
escotadura izquierda de la placa base es para
el ajuste del ángulo de corte de 45°.
1. Ajuste la profundidad de corte (con el tornillo
de fijación ) en la posición mínima de 0 mm.
2. Retraiga la cubierta de protección por medio
de la palanca de retroceso y pose el aparato.
3. Accione el bloqueo de husillo (hasta que
encastre) y utilice la llave Allen para aflojar
el tornillo tensor . A continuación, retire el
tornillo tensor y la brida tensora (consulte
también la fig. A).
Fig. B: Anchura de corte de 3 cm
♦ Vuelva a apretar el tornillo de mariposa
.
Conexión de la aspiración de virutas
♦ Coloque el adaptador para la aspiración de
polvo en el expulsor de virutas .
De forma opcional en función del diámetro de
la aspiración de polvo y virutas.
♦ Conecte una aspiración de polvo y virutas
autorizada.
Manejo
Fig. A: Cambio de la hoja de sierra
4. Retire la hoja de sierra .
5. Monte la hoja de sierra
la manera descrita.
en orden inverso de
6. Accione el bloqueo de husillo
encastre) y utilice la llave Allen
el tornillo tensor .
(hasta que
para apretar
¡ADVERTENCIA!
► La flecha de la hoja de sierra debe coincidir
con la flecha de dirección de giro (dirección
de marcha marcada en el aparato).
■ Asegúrese de que la hoja de sierra sea apta
para la velocidad de la herramienta.
Tope paralelo
♦ Afloje el tornillo de mariposa y coloque el
tope paralelo en el alojamiento del tope
paralelo .
♦ Ajuste la anchura de corte deseada por medio
de la escala en el tope paralelo y de las
escotaduras de la placa base (consulte
también la fig. B).
PHKSA 18-Li A1
Encendido y apagado
Encendido:
♦ Desplace el bloqueo de encendido hacia la
izquierda o la derecha y manténgalo pulsado.
♦ Pulse el interruptor de encendido/apagado .
Una vez la máquina esté en marcha, podrá
volver a soltar el bloqueo de encendido .
Apagado:
♦ Suelte el interruptor de encendido/apagado .
Ajuste del ángulo de corte
Puede determinar el ángulo de corte con la escala
de ángulo de corte .
■ Afloje el tornillo de mariposa para la preselección del ángulo de corte, ajuste el ángulo
deseado en la escala de ángulo de corte y
vuelva a apretar el tornillo de mariposa .
Ajuste de la profundidad de corte
INDICACIÓN
► Seleccione una profundidad de corte de
forma que sea aprox. 3 mm mayor que el
grosor del material. Con esto, podrá realizar
un corte limpio.
9
ES
ES
♦ Afloje el tornillo de fijación , ajuste la profundidad de corte deseada en la escala de profundidad de corte y vuelva a apretar el tornillo
de fijación .
Manipulación de la sierra circular
manual
1. Encienda el aparato de la manera indicada en
el apartado "Encendido y apagado" y colóquelo
con el extremo frontal de la placa base sobre
el material.
2. Alinee la máquina en relación con el tope
paralelo o con una línea marcada.
3. Sujete la máquina con ambas manos sobre los
mangos y sierre con una presión moderada.
Encendido y apagado del láser
Encendido:
♦ Pulse el interruptor de encendido/apagado y
restablecimiento del láser
.
Apagado:
♦ Pulse el interruptor de encendido/apagado y
restablecimiento del láser
.
INDICACIÓN
► ¡SOBRECARGA Y RESTABLECIMIENTO! En
caso de sobrecarga, el aparato se apaga.
♦ Apague el láser. Pulse el interruptor de
encendido/apagado y restablecimiento del
láser
.
► El restablecimiento automático solo se efectúa con el láser apagado.
Consejos y trucos
■ Podrá evitar los desgarros en los extremos de
corte de superficies delicadas, p. ej., tableros
de aglomerado revestidos o puertas, con solo
pegar una cinta adhesiva en la línea de corte.
Además, este método tiene la ventaja añadida
de que la cinta adhesiva puede marcarse mejor
que la superficie lisa. Un procedimiento aún
más eficaz para evitar los desgarros es fijar
una madera fina para serrarla a la vez que la
pieza de trabajo.
10
Mantenimiento y limpieza
¡ADVERTENCIA! ¡PELIGRO DE LESIONES! Antes de realizar cualquier
trabajo en el aparato, apáguelo y
retire la batería.
La sierra circular manual inalámbrica está libre de
mantenimiento.
■ El aparato debe estar siempre limpio, seco y sin
restos de aceite ni grasas lubricantes.
■ Evite que pueda penetrar cualquier líquido en
el interior de los aparatos.
■ Utilice un paño seco para la limpieza de la carcasa. No utilice nunca gasolina, disolventes o productos de limpieza que puedan atacar el plástico.
■ Si una batería de ion-litio se guarda durante
un periodo de tiempo prolongado, debe comprobarse el estado de carga con regularidad.
El estado de carga óptimo está entre el 50 % y
el 80 %. El lugar de almacenamiento óptimo es
un lugar fresco y seco.
INDICACIÓN
► Los recambios no especificados (p. ej., escobillas
de carbón o interruptores) pueden solicitarse a
través de nuestro servicio de asistencia técnica.
Desecho
El embalaje consta de materiales ecológicos que pueden desecharse a través de
los centros de reciclaje locales.
¡No deseche las herramientas
eléctricas con la basura doméstica!
Según la Directiva europea 2012/19/EU, las herramientas eléctricas usadas deben recogerse por
separado para someterse a un reciclaje ecológico.
¡No deseche las baterías con la
basura doméstica!
Las baterías defectuosas o agotadas deben reciclarse según la directiva 2006/66/EC. Deseche
la batería y/o el aparato a través de los puntos
de recogida disponibles.
En su ayuntamiento o administración local puede
informarse acerca de las posibilidades de eliminación de herramientas eléctricas y baterías usadas.
PHKSA 18-Li A1
Garantía
Este aparato tiene 3 años de garantía desde
la fecha de compra. El aparato ha sido
fabricado cuidadosamente y examinado en
profundidad antes de su entrega. Guarde
el comprobante de caja como justificante de
compra. Si necesitara hacer uso de la garantía, póngase en contacto por teléfono con su
punto de servicio habitual. Este es el único
modo de garantizar un envío gratuito.
La garantía cubre los defectos de fabricación o
del material, pero no los daños de transporte, las
piezas sujetas a desgaste ni los daños sufridos por
las piezas frágiles (p. ej., interruptores o pilas). Este
producto ha sido diseñado exclusivamente para el
uso particular y no para el uso industrial. En caso
de manipulación indebida e incorrecta, uso de la
fuerza y apertura del aparato por personas ajenas
a nuestros centros de asistencia técnica autorizados, la garantía pierde su validez. Sus derechos
legales no se ven limitados por esta garantía. La
duración de la garantía no se prolonga por hacer
uso de ella. Este principio rige también para las
piezas sustituidas y reparadas. Si después de la
compra del aparato, se detecta la existencia de
daños o de defectos al desembalarlo, deben
notificarse de inmediato o, como muy tarde, dos
días después de la fecha de compra. Cualquier
reparación que se realice una vez finalizado el
plazo de garantía está sujeta a costes.
Asistencia técnica
ES
¡ADVERTENCIA!
► Encomiende exclusivamente la reparación
del aparato al servicio de asistencia técnica o a un electricista especializado y solo
con los recambios originales. De esta forma
garantizará que la seguridad del aparato no
se vea afectada.
► Deje siempre que el fabricante del aparato, o su servicio de atención al cliente,
cambien el enchufe o el cable de corriente.
De esta forma garantizará que la seguridad
del aparato no se vea afectada.
Servicio España
Tel.: 902 59 99 22
(0,08 EUR/Min. + 0,11 EUR/llamada
(tarifa normal))
(0,05 EUR/Min. + 0,11 EUR/llamada
(tarifa reducida))
E-Mail: [email protected]
IAN 102867
Disponibilidad de la línea de atención al
cliente:
de lunes a viernes de 8.00 a 20.00 h (CET)
Importador
KOMPERNASS HANDELS GMBH
BURGSTRASSE 21
44867 BOCHUM
GERMANY
www.kompernass.com
PHKSA 18-Li A1
11
ES
Traducción de la Declaración
de conformidad original
En virtud del presente documento, nosotros,
KOMPERNASS HANDELS GMBH, responsable
de los documentos: Semi Uguzlu, BURGSTR. 21,
44867 BOCHUM, GERMANY, declaramos que este
producto cumple con lo dispuesto por las siguientes
normas, documentos normativos y directivas CE:
Directiva de máquinas
(2006/42/EC)
Directiva de baja tensión CE
(2006/95/EC)
Compatibilidad electromagnética
(2004/108/EC)
Directiva sobre las restricciones a la utilización de determinadas sustancias peligrosas
en aparatos eléctricos y electrónicos
(2011/65/EU)
Normas armonizadas aplicadas:
EN 60745-1: 2009 + A11: 2010
EN 60745-2-5: 2010
EN 62233: 2008
EN 55014-1/ A2: 2011
EN 55014-2/ A2: 2008
EN 60335-1: 2010
EN 60335-2-29/ A2: 2010
EN 62233: 2008
EN 61000-3-2/ A2: 2009
EN 61000-3-3: 2013
EN 60825-1: 2007
Denominación de la máquina:
Sierra circular recargable PHKSA 18-Li A1
Año de fabricación: 07-2014
Número de serie: IAN 102867
Bochum, 20/06/2014
Semi Uguzlu
- Responsable de calidad Reservado el derecho de realizar modificaciones
técnicas en relación con el desarrollo tecnológico.
12
PHKSA 18-Li A1
Solicitud de una batería de repuesto
Si desea solicitar una batería de repuesto para su aparato, puede hacerlo cómodamente por Internet en
www.kompernass.com o por teléfono.
El precio de la batería de repuesto es de 20 € con IVA y envío incluidos. No obstante, es posible que se
agoten rápidamente debido a las existencias limitadas.
¡Tres aparatos y tres baterías
compatibles intercambiables!
Pedido por Internet
Para solicitar una batería de repuesto a través de la tienda de accesorios:
■ Acceda a la página www.kompernass.com en su navegador.
■ En la parte inferior derecha, haga clic en la bandera correspondiente para seleccionar el país y el
idioma deseados.
■ Haga clic ahora en la pestaña "Tienda de accesorios" y seleccione la batería de repuesto adecuada
para su aparato en la sección "Topseller".
■ Tras añadir la batería de repuesto a la cesta de la compra, haga clic en la pestaña "Comprar" y siga
las instrucciones mostradas en la pantalla para finalizar el proceso de pedido.
INDICACIÓN
► Es posible que, en algunos países, no pueda realizarse el pedido de recambios por Internet. En tal
caso, póngase en contacto con la línea de asistencia técnica.
■ La promoción se limita a una batería por cliente/aparato y a una vigencia de un mes tras el periodo
de la oferta. Tras esto, podrá solicitarse la batería de repuesto como recambio bajo otras condiciones.
Pedido por teléfono
Servicio España
Tel.: 902 59 99 22
(0,08 EUR/Min. + 0,11 EUR/llamada (tarifa normal))
(0,05 EUR/Min. + 0,11 EUR/llamada (tarifa reducida))
Para garantizar el procesamiento rápido de su pedido, tenga a mano el número de artículo del aparato
(p. ej., IAN 102867) para todas sus consultas. Podrá consultar el número de artículo en la placa de
características o en la portada de estas instrucciones de uso.
PHKSA 18-Li A1
13
ES
14
PHKSA 18-Li A1
Indice
Introduzione . . . . . . . . . . . . . . . . . . . . . . . . . . . . . . . . . . . . . . . . . . . . . . . . . . . . 16
Uso conforme . . . . . . . . . . . . . . . . . . . . . . . . . . . . . . . . . . . . . . . . . . . . . . . . . . . . . . . . . . . . . . 16
Dotazione . . . . . . . . . . . . . . . . . . . . . . . . . . . . . . . . . . . . . . . . . . . . . . . . . . . . . . . . . . . . . . . . . 16
Volume della fornitura . . . . . . . . . . . . . . . . . . . . . . . . . . . . . . . . . . . . . . . . . . . . . . . . . . . . . . . 16
Dati tecnici . . . . . . . . . . . . . . . . . . . . . . . . . . . . . . . . . . . . . . . . . . . . . . . . . . . . . . . . . . . . . . . . 16
IT
MT
Indicazioni generali di sicurezza per elettroutensili . . . . . . . . . . . . . . . . . . . . 17
1. Sicurezza del luogo di lavoro . . . . . . . . . . . . . . . . . . . . . . . . . . . . . . . . . . . . . . . . . . . . . . . 17
2. Sicurezza elettrica . . . . . . . . . . . . . . . . . . . . . . . . . . . . . . . . . . . . . . . . . . . . . . . . . . . . . . . . 17
3. Sicurezza delle persone. . . . . . . . . . . . . . . . . . . . . . . . . . . . . . . . . . . . . . . . . . . . . . . . . . . . 18
4. Uso e trattamento dell'elettroutensile . . . . . . . . . . . . . . . . . . . . . . . . . . . . . . . . . . . . . . . . . . 18
5. Uso e trattamento dell'utensile ricaricabile. . . . . . . . . . . . . . . . . . . . . . . . . . . . . . . . . . . . . . 18
6. Assistenza . . . . . . . . . . . . . . . . . . . . . . . . . . . . . . . . . . . . . . . . . . . . . . . . . . . . . . . . . . . . . . 19
Indicazioni di sicurezza specifiche per seghe circolari manuali. . . . . . . . . . . . . . . . . . . . . . . . 19
Avvertenze di sicurezza per il caricabatterie . . . . . . . . . . . . . . . . . . . . . . . . . . . . . . . . . . . . . . 20
Avvertenze sulla sicurezza per lame per sega circolare . . . . . . . . . . . . . . . . . . . . . . . . . . . . . 21
Accessori originali / apparecchi addizionali . . . . . . . . . . . . . . . . . . . . . . . . . . . . . . . . . . . . . . 21
Prima della messa in funzione. . . . . . . . . . . . . . . . . . . . . . . . . . . . . . . . . . . . . . 21
Carica del pacco batteria (vedere Fig. C) . . . . . . . . . . . . . . . . . . . . . . . . . . . . . . . . . . . . . . . . 21
Inserimento / rimozione del pacco batteria dall'apparecchio . . . . . . . . . . . . . . . . . . . . . . . . . 22
Controllo del livello di carica della batteria . . . . . . . . . . . . . . . . . . . . . . . . . . . . . . . . . . . . . . . 22
Verifica della cappa di protezione . . . . . . . . . . . . . . . . . . . . . . . . . . . . . . . . . . . . . . . . . . . . . . 22
Messa in funzione . . . . . . . . . . . . . . . . . . . . . . . . . . . . . . . . . . . . . . . . . . . . . . . . 22
Montaggio / sostituzione della lama . . . . . . . . . . . . . . . . . . . . . . . . . . . . . . . . . . . . . . . . . . . . 22
Battuta parallela . . . . . . . . . . . . . . . . . . . . . . . . . . . . . . . . . . . . . . . . . . . . . . . . . . . . . . . . . . . . 22
Collegamento dell'aspiratore per trucioli . . . . . . . . . . . . . . . . . . . . . . . . . . . . . . . . . . . . . . . . . 23
Funzionamento . . . . . . . . . . . . . . . . . . . . . . . . . . . . . . . . . . . . . . . . . . . . . . . . . . 23
Accensione e spegnimento. . . . . . . . . . . . . . . . . . . . . . . . . . . . . . . . . . . . . . . . . . . . . . . . . . . . 23
Impostazione dell'angolo di taglio . . . . . . . . . . . . . . . . . . . . . . . . . . . . . . . . . . . . . . . . . . . . . . 23
Impostazione della profondità di taglio . . . . . . . . . . . . . . . . . . . . . . . . . . . . . . . . . . . . . . . . . . 23
Come manovrare la sega circolare manuale . . . . . . . . . . . . . . . . . . . . . . . . . . . . . . . . . . . . . . 23
Attivazione e disattivazione laser . . . . . . . . . . . . . . . . . . . . . . . . . . . . . . . . . . . . . . . . . . . . . . . 23
Consigli e suggerimenti . . . . . . . . . . . . . . . . . . . . . . . . . . . . . . . . . . . . . . . . . . . . . . . . . . . . . . 23
Manutenzione e pulizia . . . . . . . . . . . . . . . . . . . . . . . . . . . . . . . . . . . . . . . . . . . 24
Smaltimento . . . . . . . . . . . . . . . . . . . . . . . . . . . . . . . . . . . . . . . . . . . . . . . . . . . . 24
Garanzia . . . . . . . . . . . . . . . . . . . . . . . . . . . . . . . . . . . . . . . . . . . . . . . . . . . . . . . 25
Assistenza . . . . . . . . . . . . . . . . . . . . . . . . . . . . . . . . . . . . . . . . . . . . . . . . . . . . . . 25
Importatore. . . . . . . . . . . . . . . . . . . . . . . . . . . . . . . . . . . . . . . . . . . . . . . . . . . . . 25
Traduzione della dichiarazione di conformità originale . . . . . . . . . . . . . . . . . 26
Ordinazione di una batteria di ricambio . . . . . . . . . . . . . . . . . . . . . . . . . . . . . 27
Ordinazione online . . . . . . . . . . . . . . . . . . . . . . . . . . . . . . . . . . . . . . . . . . . . . . . . . . . . . . . . . 27
Ordinazione telefonica . . . . . . . . . . . . . . . . . . . . . . . . . . . . . . . . . . . . . . . . . . . . . . . . . . . . . . 27
PHKSA 18-Li A1
15
Introduzione
IT
MT
Congratulazioni per l'acquisto del nuovo
apparecchio. È stato scelto un prodotto
di alta qualità. Il manuale di istruzioni è
parte integrante del presente prodotto.
Esso contiene importanti indicazioni per
la sicurezza, l'uso e lo smaltimento. Prima
di utilizzare il prodotto, familiarizzarsi con tutte le
indicazioni relative ai comandi e alla sicurezza.
Utilizzare l'apparecchio solo come descritto e per
i campi d'impiego indicati. In caso di cessione del
prodotto a terze persone, consegnare anche tutta
la relativa documentazione.
Uso conforme
La sega circolare manuale (di seguito "apparecchio")
è idonea a praticare tagli longitudinali e trasversali,
tagli obliqui con supporto fisso in legno massiccio,
pannelli truciolari, plastica e metalli leggeri.
Qualunque altro impiego o modifica della macchina
è da considerarsi non conforme alla destinazione
d'uso prevista e può comportare gravi rischi di
infortunio. Non adatta all'uso commerciale.
Dotazione
Figura A:
Blocco di accensione
Interruttore ON/OFF
Scala della profondità di taglio
Tasto di sbloccaggio per pacco batteria
Tasto livello batteria / LED display batteria
Pacco batteria
Vite di fissaggio
Arresto del mandrino
Piastra di base
Supporto per battuta parallela
Figura B:
Interruttore ON/OFF/RESET laser
Maniglia supplementare
Targhetta di avviso laser
Foro di uscita del raggio laser
Scala dell'angolo di taglio
Vite ad alette per la preselezione dell'angolo
di taglio
Vite ad alette per supporto per battuta parallela
Battuta parallela
16
Cappa di protezione
Flangia di serraggio
Vite di arresto
Leva per cappa di protezione
Lama
Uscita trucioli
Adattatore per aspirazione polvere
Brugola
Figura C:
Caricabatterie
LED di controllo rosso
LED di controllo verde
Volume della fornitura
1 sega circolare a batteria
1 apparecchio per la carica rapida della batteria
1 battuta parallela
1 adattatore per aspirazione polvere
1 chiave a brugola SW 6
1 lama (premontata)
1 manuale di istruzioni
Dati tecnici
Sega circolare a batteria: PHKSA 18-Li A1
Tensione nominale:
18 V
Numero di giri vuoto: n0 3800 min-1
Lama della sega:
1x Ø 150 mm x Ø 16 mm,
18 denti
Max. profondità
sezione:
90°: 48 mm
45°: 36 mm
Batteria: PAP 18 A1
Tipo:
IONI DI LITIO
Tensione nominale:
18 V
Capacità:
1,5 Ah
Apparecchio per la carica rapida della
batteria: PLG 18 A1
INGRESSO / Input:
Tensione nominale:
230 - 240 V ~, 50 Hz
Assorbimento di potenza: 40 W
USCITA / Output:
Tensione nominale:
18 V
Corrente di carica:
1,8 A
Tempo di carica:
circa 60 min
T2A
Fusibile (interno):
2A
Classe di protezione: II /
PHKSA 18-Li A1
Informazioni sul rumore e sulle vibrazioni:
Valore di misurazione dei rumori determinato secondo EN 60745. Valori tipici del livello di rumore
dell'elettroutensile classificato A:
Livello di pressione sonora:
77 dB(A)
Livello di potenza sonora:
88 dB(A)
Fattore di convergenza K:
3 dB
Indossare i paraorecchie!
Accelerazione misurata tipica:
Vibrazione mano/braccio ah,w = 2,5 m/s2
Fattore di convergenza K = 1,5 m/s2
AVVISO
► Il livello di vibrazioni indicato nelle presenti
istruzioni è stato misurato secondo un procedimento di misurazione conforme alla norma
EN 60745 e può venire usato per un confronto
tra vari apparecchi. Il coefficiente di emissione
delle vibrazioni può anche venire usato per
una stima introduttiva dell'esposizione.
AVVERTENZA!
► Il livello di vibrazioni cambia in base all'uso
dell'elettroutensile e in alcuni casi può essere
superiore al valore indicato nelle presenti
istruzioni. La sollecitazione da vibrazioni
potrebbe risultare sottostimata se l'elettroutensile viene utilizzato regolarmente in tal
modo. Cercare di ridurre il più possibile la
sollecitazione da vibrazioni. Provvedimenti
adeguati per la riduzione della sollecitazione
da vibrazioni sono l'uso di guanti nell'utilizzo
dell'elettroutensile e la limitazione della durata
d'impiego. Occorre tenere in considerazione
tutte le componenti del ciclo di esercizio (per
esempio i tempi nei quali l'elettroutensile è
spento e i tempi in cui è acceso ma funziona
senza subire carichi).
PHKSA 18-Li A1
Indicazioni generali
di sicurezza per
elettroutensili
AVVERTENZA!
► Leggere tutte le indicazioni di sicurezza
e le istruzioni. L'errata applicazione delle
indicazioni di sicurezza può causare scosse
elettriche, incendi e / o gravi lesioni.
Conservare le indicazioni di sicurezza e le
istruzioni per il futuro.
Il termine "elettroutensile" utilizzato nelle indicazioni
relative alla sicurezza si riferisce a elettroutensili
collegabili alla rete elettrica (con cavo di rete) e
a elettroutensili a batteria (senza cavo di rete).
1. Sicurezza del luogo di lavoro
a) Mantenere l'area di lavoro pulita e ben illuminata. Il disordine e la scarsa illuminazione dell'area di lavoro potrebbero dare luogo a infortuni.
b) Non lavorare con elettroutensili in ambienti
a rischio di esplosione, in cui siano presenti
liquidi, gas o polveri infiammabili. Gli elettroutensili generano scintille che possono incendiare
la polvere o i vapori.
c) Tenere lontani i bambini e altre persone durante
l'uso dell'elettroutensile. In caso di distrazione, si
potrebbe perdere il controllo dell'apparecchio.
2. Sicurezza elettrica
a) La spina dell'elettroutensile deve essere idonea
all'inserimento nella presa. La spina non deve
venire assolutamente modificata. Non utilizzare adattatori insieme a elettroutensili con messa a terra. Le spine non modificate e le prese
idonee riducono il rischio di scosse elettriche.
b) Evitare il contatto corporeo con superfici conduttive, come tubi, termosifoni, stufe e frigoriferi.
Quando il corpo è a diretto contatto con la terra
sussiste un maggiore pericolo di scosse elettriche.
c) Tenere gli elettroutensili lontano dalla pioggia o dall'umidità. La penetrazione di acqua
in un apparecchio elettrico aumenta il rischio di
scosse elettriche.
d) Non utilizzare il cavo elettrico per scopi non
conformi, come ad es. per trasportare l'elettroutensile, per appenderlo o per scollegare
la spina dalla presa. Tenere il cavo lontano
dal calore, dall'olio, da angoli acuminati o da
17
IT
MT
IT
MT
parti dell'apparecchio in movimento. I cavi o
le spine danneggiati o ingarbugliati aumentano
il rischio di scosse elettriche.
e) Se si lavora all'aperto con un elettroutensile,
utilizzare solo una prolunga adatta anche
per esterni. L'utilizzo di una prolunga idonea
all'uso esterno riduce il rischio di scosse elettriche.
f) Se è inevitabile l'uso dell'elettroutensile in un
ambiente umido, utilizzare un salvavita. L'uso
di un circuito di sicurezza per correnti di guasto
evita il rischio di scosse elettriche.
3. Sicurezza delle persone
a) Prestare sempre attenzione controllando le
operazioni in corso e procedere con cura
quando si lavora con un elettroutensile. Non
utilizzare l'elettroutensile se non si è concentrati o riposati a sufficienza, o se si è sotto
l'influsso di droghe, alcol o farmaci. Un solo
momento di disattenzione nell'uso dell'elettroutensile può dare luogo a gravi lesioni.
b) Indossare attrezzatura di protezione personale
e sempre occhiali di protezione. L'uso di un'attrezzatura di protezione personale come mascherina
antipolvere, scarpe antiscivolo, casco protettivo o
protezione per l'udito, a seconda dell'uso e dell'impiego dell'elettroutensile, riduce il rischio di lesioni.
c) Evitare l'accensione involontaria. Accertarsi che
l'elettroutensile sia spento prima di collegarlo
all'alimentazione e/o alla batteria, sollevarlo
o movimentarlo. Se si tiene il dito sull'interruttore
ON/OFF mentre si sposta l'elettroutensile o si
collega l'apparecchio alla rete elettrica con l'interruttore su ON, si possono verificare infortuni.
d) Rimuovere gli utensili di regolazione o le chiavi
per dadi prima di accendere l'elettroutensile. Un
utensile o una chiave lasciati in una parte dell'apparecchio in movimento possono provocare lesioni.
e) Evitare posizioni innaturali. Provvedere a
una posizione sicura e mantenere sempre l'equilibrio. In tal modo si può controllare meglio l'elettroutensile, soprattutto in situazioni impreviste.
f) Indossare un abbigliamento idoneo. Non indossare abiti ampi o gioielli. Tenere lontani i capelli, gli abiti e i guanti dalle parti in movimento.
Gli abiti ampi e pendenti, i gioielli o i capelli
lunghi possono impigliarsi nelle parti mobili.
g) Se è possibile montare aspiratori per polvere
e trucioli, accertarsi che siano collegati e
18
vengano utilizzati correttamente. L'uso di un
aspiratore per polvere può ridurre i pericoli
associati alla polvere.
4. Uso e trattamento
dell'elettroutensile
a) Non sovraccaricare l'apparecchio. Utilizzare
l'elettroutensile idoneo al proprio lavoro. Con
l'elettroutensile adatto si lavora meglio e con maggiore sicurezza nell'intervallo di potenza indicato.
b) Non utilizzare elettroutensili con interruttore
difettoso. Un elettroutensile che non si riesce
più a spegnere o ad accendere è pericoloso
e dev'essere riparato.
c) Staccare la spina dalla presa di corrente e/o
rimuovere la batteria prima di eseguire impostazioni dell'apparecchio, sostituire gli accessori o riporre l'apparecchio. Questa misura precauzionale
impedisce l'avvio involontario dell'elettroutensile.
d) Conservare gli elettroutensili non utilizzati fuori
della portata dei bambini. Non consentire l'uso
dell'apparecchio a persone inesperte o che non
hanno letto le presenti istruzioni. Gli elettroutensili
sono pericolosi se utilizzati da persone inesperte.
e) Trattare gli elettroutensili con cura. Controllare
che le parti mobili dell'apparecchio funzionino
perfettamente e non si inceppino, che non vi
siano elementi rotti o danneggiati al punto da
compromettere la funzione dell'elettroutensile.
Fare riparare le parti danneggiate prima di
utilizzare l'apparecchio. Molti infortuni derivano
da una cattiva manutenzione degli elettroutensili.
f) Mantenere gli utensili di taglio ben affilati e
puliti. Gli utensili di taglio trattati con cura e
con angoli di taglio affilati si inceppano meno
spesso e sono più facili da controllare.
g) Utilizzare elettroutensili, accessori, utensili,
ecc. conformi a queste istruzioni. Tenere conto delle condizioni di lavoro e dell'attività da
eseguire. L'uso di elettroutensili per applicazioni diverse da quelle previste può dare luogo a
situazioni di pericolo.
5. Uso e trattamento dell'utensile
ricaricabile
a) Caricare le batterie solo nei caricabatterie
che vengono consigliati dal costruttore. Se un
caricabatterie adatto a un determinato tipo di
batteria viene utilizzato con batterie diverse, vi
è pericolo di incendio.
PHKSA 18-Li A1
b) Utilizzare solo le batterie appositamente
previsti per gli elettroutensili. L'uso di altre batterie
può dare luogo a lesioni e al rischio di incendio.
c) Tenere la batteria non utilizzata lontano
da graffette, monete, chiavi, chiodi, viti o
altra minuteria in metallo, poiché tali oggetti
potrebbero provocare un cortocircuito fra
i contatti. Un cortocircuito fra i contatti della
batteria può dare luogo a ustioni o incendio.
d) In caso di utilizzo scorretto, potrebbe fuoriuscire del liquido dalla batteria. Evitare il
contatto con questo liquido. In caso di contatto
accidentale, sciacquare con acqua. Se il liquido giunge negli occhi, consultare un medico.
Il liquido che fuoriesce dalla batteria potrebbe
comportare irritazioni della pelle o ustioni.
ATTENZIONE!
PERICOLO DI ESPLOSIONE!
Non caricare mai pile non ricaricabili.
Proteggere la batteria dal calore, ad
esempio anche dall'esposizione ai
raggi solari continuativa, dal fuoco,
dall'acqua e dall'umidità.
Sussiste pericolo di esplosione.
6. Assistenza
a) Fare riparare l'elettroutensile solo da personale qualificato specializzato e solo con
ricambi originali. In tal modo si garantisce la
sicurezza dell'elettroutensile.
Indicazioni di sicurezza specifiche
per seghe circolari manuali
Indicazioni di sicurezza per tutte le seghe
Funzionamento della sega
a)
PERICOLO! Non avvicinare mai le
mani alla sega e alla lama. Con
l'altra mano sostenere la maniglia
supplementare o il carter del motore. Se si
sostiene la sega con tutte e due le mani è possibile il rischio di lesioni causate dalla lama.
b) Non introdurre mai le mani sotto il pezzo in
lavorazione. La cappa di protezione non è
sufficiente a proteggere dalla sega nella zona
sotto il pezzo in lavorazione.
PHKSA 18-Li A1
c) Regolare la profondità di taglio in base allo
spessore del pezzo in lavorazione. Sotto il
pezzo in lavorazione dovrebbe essere visibile
solo l'altezza totale di un dente.
d) Non tenere mai il pezzo da segare nella mano
o sulla gamba. Fissare il pezzo a un supporto
stabile. È importante fissare bene il pezzo per
ridurre al minimo il rischio di contatto con il corpo,
blocco della sega o perdita di controllo.
e) Quando si eseguono lavori nei quali l'utensile
potrebbe urtare cavi elettrici nascosti, afferrare sempre l'elettroutensile dalle superfici
isolate del manico. In caso di contatto con i
cavi sotto tensione, la tensione viene trasmessa
anche alle parti metalliche dell'elettroutensile e
provoca una scossa elettrica.
f) Per il taglio longitudinale usare sempre una
battuta o una guida rettilinea per i bordi.
Ciò migliora la precisione del taglio e riduce il
rischio che la sega si blocchi.
g) Utilizzare sempre lame della giusta misura e
con il foro di appoggio adatto (per es. a stella
o circolare). Le lame che non sono adatte ai
pezzi di montaggio della sega girano in modo
irregolare e provocano la perdita di controllo.
h) Non utilizzare mai lame con rondelle o viti
danneggiate o non adatte. Le rondelle e le viti
della lama sono state create appositamente per
questa sega, per una prestazione e sicurezza
d'uso ottimali.
Ulteriori istruzioni di sicurezza per tutte le seghe
Cause del contraccolpo e rispettive istruzioni
di sicurezza
▯ Un contraccolpo è la reazione improvvisa a
una lama che si incastra, si blocca o è centrata
male e comporta che una sega non controllata
si sollevi e si sposti dal pezzo in lavorazione in
direzione dell'operatore;
▯ se la lama si incastra o si blocca nella fessura
che si chiude, si arresta e la forza del motore
provoca un contraccolpo dell'apparecchio in
direzione dell'operatore;
▯ se la lama si sposta o è centrata male, i denti del
bordo posteriore della lama possono incastrarsi
nella superficie del pezzo in lavorazione, di
modo che la lama esce dall'apposita fessura e
la sega salta in direzione dell'operatore.
19
IT
MT
IT
MT
Un contraccolpo è la conseguenza di un uso improprio o erroneo della sega Lo si può evitare adottando
idonee misure preventive, come descritto di seguito:
a) tener ferma la sega con due mani e portare
le braccia in una posizione in cui si possono
assorbire le forze del contraccolpo. Sostenere la sega sempre lateralmente, non metterla
mai in linea con il corpo. In caso di contraccolpo la sega può saltare all'indietro, ma l'operatore adottando misure preventive idonee può
controllare le forze del contraccolpo.
b) Se la lama si blocca oppure se si interrompe
il lavoro, spegnere la sega e aspettare che si
fermi completamente prima di allontanarla
dal materiale in lavorazione. Quando la
sega è ancora in lavorazione non cercare
mai di toglierla dal pezzo in lavorazione o di
estrarla tirandola indietro perché potrebbe
verificarsi un contraccolpo. Cercare ed eliminare la causa del blocco della lama.
c) Per riavviare una sega che è inserita nel pezzo in lavorazione centrare la lama nell'apposita fessura e verificare che i denti della sega
non siano incastrati nel pezzo in lavorazione.
Se la lama si blocca, nel momento in cui viene
riavviata può uscire dal pezzo in lavorazione e
provocare un contraccolpo.
d) Sostenere i pannelli di grosse dimensioni per
evitare il rischio di un contraccolpo a causa
di una lama che si incastra. I pannelli di grosse dimensioni possono deformarsi a causa del
peso proprio. I pannelli devono essere sostenuti
da entrambi i lati, sia nelle vicinanze della fessura della sega che sui bordi.
e) Non utilizzare lame spuntate o danneggiate.
Le lame con denti spuntati o danneggiati a causa
della fessura troppo stretta provocano un maggiore attrito, un blocco della sega e il contraccolpo.
f) Prima di cominciare a segare fissare bene le
impostazioni dell'angolo e della profondità
di taglio. Se durante l'uso della sega si modificano le impostazioni, la lama può bloccarsi e
provocare un contraccolpo.
g) Usare la massima cautela quando si sega in
pareti esistenti o in altre zone non visibili. La
lama che entra in oggetti non visibili mentre si
sega può bloccarsi e provocare un contraccolpo.
20
Funzione della cappa di protezione inferiore
a) Prima dell'uso verificare sempre che la cappa
di protezione inferiore sia perfettamente
chiusa. Non utilizzare la sega se la cappa
di protezione inferiore non si muove liberamente e non si chiude subito. Non fissare mai
né legare la cappa di protezione inferiore
in posizione di apertura. Se la sega cade
accidentalmente a terra è probabile che la
cappa di protezione inferiore si deformi. Aprire
la cappa di protezione con l'apposita leva e
assicurarsi che si muova liberamente e che in
tutte le angolazioni e le profondità di taglio non
vada a contatto con la lama o con altre parti.
b) Verificare il funzionamento della molla per la
cappa di protezione inferiore. Se la cappa di
protezione inferiore e la molla non funzionano
perfettamente, fare eseguire la manutenzione
dell'apparecchio. Le parti danneggiate, gli strati
collosi o gli accumuli di trucioli provocano un
intervento ritardato della cappa di protezione.
c) Aprire a mano la cappa di protezione inferiore
solo per tagli particolari, come i "tagli angolari
e a immersione". Aprire la cappa di protezione
inferiore con l'apposita leva e lasciarla libera appena la lama entra nel pezzo in lavorazione. Per
tutti gli altri tagli la cappa di protezione inferiore
deve funzionare automaticamente.
d) Non appoggiare la sega sul banco di lavoro
o sul pavimento se la cappa di protezione inferiore non è ben chiusa sulla lama. Una lama
non protetta che continua a girare muove la
sega in senso contrario alla direzione di taglio
e sega tutto ciò che urta. Fare quindi attenzione
al movimento inerziale della sega.
Avvertenze di sicurezza per il
caricabatterie
■ Questo apparecchio può essere utilizzato dai
bambini di almeno 8 anni di età e da persone
con capacità fisiche, sensoriali o mentali ridotte
o insufficiente esperienza o conoscenza, solo
se sorvegliati o istruiti sull'uso sicuro dell'apparecchio e qualora ne abbiano compreso i pericoli
associati. I bambini non devono giocare con
l'apparecchio. La pulizia e la manutenzione a
cura dell'utente non devono essere eseguite da
bambini, a meno che non siano sorvegliati.
PHKSA 18-Li A1
Il caricabatterie è indicato solo per l'uso in
ambienti interni.
AVVERTIMENTO!
■ Non operare l’apparecchio in caso di danni al
cavo, al cavo di alimentazione o alla presa di
rete. I cavi di rete danneggiati costituiscono un
pericolo di morte a causa di scossa elettrica.
Accessori originali /
apparecchi addizionali
■ Utilizzare solo accessori e apparecchi originali indicati nel manuale o il cui supporto è
compatibile con l'apparecchio.
AVVISO! Proteggersi dalle radiazioni laser:
Istruzioni integrative:
■ non utilizzare mole di rettifica.
■ Utilizzare solo lame di diametro corrispondente
ai dati riportati sulla sega.
■ Per lavorare legno o materiali che durante la
lavorazione producono polvere, occorre collegare l'apparecchio a un dispositivo aspiratore
adatto, testato.
■ Durante la segatura del legno indossare una
maschera di protezione antipolvere.
■ Utilizzare solo le lame consigliate.
■ Indossare sempre un paraorecchi!
■ Evitare un surriscaldamento delle punte dei
denti di sega.
■ Durante la segatura della plastica, evitare di
fondere la plastica.
Avvertenze sulla sicurezza per lame
per sega circolare
Indossare guanti di protezione!
L'apparecchio contiene un laser di classe
2 e viene fornito con una targhetta di
avviso laser .
► Non dirigere mai il laser contro persone o
animali.
► Non guardare mai direttamente nel laser.
Il laser può provocare danni agli occhi.
► Non dirigere il raggio laser su materiali fortemente riflettenti. Pericolo proveniente dalla
luce riflessa.
► Qualsiasi impostazione volta a rafforzare il raggio laser è proibita. Sussiste il pericolo di lesioni!
► Non si assume alcuna responsabilità per i danni
derivanti da manipolazione del dispositivo laser
o mancata osservanza delle norme di sicurezza.
ATTENZIONE!
Se si utilizzano dispositivi di comando o regolazione ovvero procedimenti diversi da quelli qui
indicati, ciò potrebbe provocare una pericolosa
esposizione all'irradiazione.
Prima della messa in funzione
Indossare una mascherina!
Carica del pacco batteria (vedere Fig. C)
ATTENZIONE!
Indossare occhiali di protezione!
► Staccare sempre la spina dalla presa prima
di prelevare o inserire il pacco batteria
dal o nel caricabatterie .
Indossare paraorecchie!
AVVISO
ATTENZIONE! PERICOLO
DI ESPLOSIONE!
Non caricare mai pile non ricaricabili.
PHKSA 18-Li A1
► Tre apparecchi - tre batterie compatibili.
Intercambiabili!
(vedi capitolo Ordine batteria di ricambio)
■ Non caricare il pacco batteria se la temperatura ambiente è al di sotto di 10° C o al di
sopra di 40° C.
21
IT
MT
♦ Inserire il pacco batteria
(vedere Fig. C).
IT
MT
nel caricabatterie
♦ Inserire la spina di rete nella presa. Il LED di
controllo rosso si accende.
♦ Il LED di controllo verde segnala che il procedimento di carica è concluso e che il pacco
batteria è pronto per l'uso.
♦ Inserire il pacco batteria
nell'apparecchio.
■ Non caricare mai per la seconda volta il pacco
batteria subito dopo un procedimento di carica rapida. Sussiste il pericolo di sovraccarico del
pacco batteria e conseguente riduzione della
durata utile della batteria e del caricabatterie .
♦ Spegnere il caricabatterie per almeno 15 minuti
fra due procedimenti di carica consecutivi scollegando la spina dalla presa di corrente.
Messa in funzione
Montaggio / sostituzione della lama
Sostituire la lama
staccato!
solo con il pacco batterie
1. Impostare la profondità di taglio (con vite di
arresto ) sulla posizione minima, 0 mm.
2. Ruotare indietro la cappa di protezione con
l'ausilio dell'apposita leva e appoggiare
l'apparecchio.
3. Azionare l'arresto del mandrino (fino a sentire
uno scatto) e allentare la vite di arresto con
la chiave a brugola. . Rimuovere ora la vite di
arresto e la flangia di serraggio (vedere
anche Fig. A).
Inserimento / rimozione del pacco
batteria dall'apparecchio
Inserimento del pacco batteria:
♦ Far innestare il pacco batteria
nella maniglia.
Rimozione del pacco batteria:
♦ Premere il tasto di sbloccaggio
il pacco batteria .
e rimuovere
Controllo del livello di carica della
batteria
♦ Premere per controllare il livello di carica della
batteria il Tasto livello batteria (vedi anche
figura principale). Il livello o la potenza residua
viene visualizzato nel LED display batteria
nel modo seguente:
♦ ROSSO / ARANCIONE / VERDE= carica/
potenza massima
ROSSO / ARANCIONE= carica/potenza
intermedia
ROSSO = carica debole – ricaricare la batteria
Verifica della cappa di protezione
♦ Tirare la leva per la cappa di protezione
fino alla battuta.
La cappa di protezione deve poter venire spostata senza che si incastri, e quando si sgancia la
leva per la cappa di protezione stessa, quest'ultima deve ritornare nella posizione iniziale.
22
Fig. A: Cambio della lama
4. Rimuovere la lama .
5. Inserire la lama in sequenza inversa a quella
precedentemente descritta.
6. Azionare l'arresto del mandrino (fino a sentire
uno scatto) e serrare la vite di arresto con la
chiave a brugola .
AVVERTENZA!
► La freccia sulla lama deve coincidere con
la freccia della direzione di rotazione (direzione della corsa, indicata sull'apparecchio).
■ Assicurarsi che la lama
di giri dell'utensile.
sia adatta al numero
Battuta parallela
♦ Allentare la vite ad alette e inserire la battuta
parallela nell'apposito supporto .
♦ Con l'aiuto della scala regolare la larghezza
di taglio desiderata sulla battuta parallela e
sulle rientranze presenti nella piastra di base
(vedere anche Fig. B).
PHKSA 18-Li A1
La rientranza destra nella piastra di base serve
per l'impostazione dell'angolo di taglio 0°. La
rientranza sinistra nella piastra di base serve
per l'impostazione dell'angolo di taglio 45°.
Impostazione della profondità di taglio
AVVISO
► Scegliere la profondità di taglio più grande di
circa 3 mm rispetto allo spessore del materiale. In tal modo si ottiene un taglio più pulito.
♦ Svitare le viti di arresto , regolare la profondità
di taglio desiderata sull'apposita scala e
serrare di nuovo la vite di arresto .
Come manovrare la sega circolare
manuale
Fig. B: Larghezza di taglio 3 cm
♦ Stringere di nuovo la vite ad alette
.
1. Accendere l'apparecchio come descritto in "Accensione e spegnimento" e posizionarlo con il bordo
anteriore della piastra di base sul materiale.
Collegamento dell'aspiratore per
trucioli
2. Allineare la macchina sulla battuta parallela
oppure su una linea precedentemente tracciata.
♦ Infilare l'adattatore per l'aspirazione della
polvere sull'uscita trucioli .
A scelta a seconda del diametro dell'aspirazione
della polvere e dei trucioli.
♦ Collegare un aspiratore per polvere e trucioli
omologato.
3. Sostenere la macchina con tutte e due le mani
sulla maniglia e segare esercitando una moderata pressione..
Attivazione e disattivazione laser
Accensione:
Funzionamento
♦ premere l'interruttore ON/OFF/RESET
.
laser
Accensione e spegnimento
Spegnimento:
Accensione:
♦ premere il blocco di accensione verso sinistra
o destra e tenerlo premuta.
♦ Premere l'interruttore ON/OFF . Dopo l'avviamento della macchina, è possibile rilasciare
nuovamente il blocco di accensione .
Spegnimento:
♦ rilasciare l'interruttore ON/OFF .
♦ premere l'interruttore ON/OFF/RESET
laser
.
Impostazione dell'angolo di taglio
È possibile definire l'angolo di taglio con la scala
dell'angolo di taglio .
■ Svitare la vite ad alette della preselezione
dell'angolo di taglio, impostare l'angolo di taglio
desiderato sull'apposita scala e serrare di
nuovo la vite ad alette .
PHKSA 18-Li A1
AVVISO
► SOVRACCARICO E RESET! L'apparecchio si
spegne automaticamente in caso di sovraccarico.
♦ Spegnere il laser. Premere l'interruttore
ON/OFF/RESET laser
.
► Solo con il laser spento avviene un reset
automatico.
Consigli e suggerimenti
■ Per evitare il distacco del bordo di taglio sulle superfici delicate, per es. truciolati rivestiti o porte,
incollare un nastro crespo. Ciò ha inoltre il vantaggio che sul nastro crespo è più facile tracciare
delle linee rispetto a una superficie liscia. Per evitare con maggiore efficacia il distacco dei bordi
di taglio utilizzare un legno sottile bloccato, da
segare insieme al materiale in lavorazione.
23
IT
MT
Manutenzione e pulizia
ATTENZIONE! PERICOLO DI LESIONI!
Prima di qualsiasi lavoro sull'apparecchio, spegnere l'apparecchio e
rimuovere la batteria.
IT
MT
La sega circolare manuale a batteria non necessita
di manutenzione.
■ L'apparecchio dev'essere sempre pulito, asciutto
ed esente da olio o grassi lubrificanti.
■ Impedire la penetrazione di liquidi all'interno
degli apparecchi.
■ Per la pulizia dell'alloggiamento, utilizzare un
panno asciutto. Non utilizzare mai benzina,
solventi o detergenti in grado di attaccare la
plastica.
■ Se una batteria agli ioni di litio dovesse essere
stoccata per un tempo più lungo, è necessario
controllare regolarmente il livello di carica. Il
livello di carica ottimale è compreso tra il 50%
e l'80%. Il clima di stoccaggio ottimale è fresco
e asciutto.
AVVISO
Smaltimento
L'imballaggio è composto di materiali ecocompatibili che possono venire
smaltiti tramite gli appositi centri di
raccolta e riciclaggio.
Non smaltire gli elettroutensili insieme
ai normali rifiuti domestici!
In base alla direttiva europea 2012/19/EU, gli
apparecchi elettrici usati devono essere raccolti
separatamente e inviati a un centro per il riciclaggio
ecologico.
Non smaltire le batterie assieme ai
normali rifiuti domestici!
Le batterie difettose o esauste devono essere
riciclate in base alla direttiva 2006/66/EC.
Riconsegnare la batteria e/o l'apparecchio
presso gli appositi centri di raccolta.
Per le possibilità di smaltimento relative agli elettroutensili/batterie usati, informarsi presso il municipio
o l'amministrazione comunale di residenza.
► I pezzi di ricambio non indicati (come ad es.
spazzole di carbone, interruttori) possono
essere ordinati tramite la nostra hotline di
assistenza.
24
PHKSA 18-Li A1
Garanzia
Questo apparecchio è garantito per tre anni
a partire dalla data di acquisto. L'apparecchio
è stato prodotto con cura e debitamente collaudato prima della consegna. Conservare
lo scontrino come prova di acquisto. Nei casi
contemplati dalla garanzia, mettersi in comunicazione telefonicamente con il centro di assistenza più vicino. Solo in tal modo è possibile
garantire una spedizione gratuita della merce.
La garanzia vale solo per difetti del materiale o di
fabbricazione, ma non per i danni da trasporto,
danni alle parti soggette a usura o alle parti fragili,
come per es. interruttori o batterie. Il prodotto è
destinato esclusivamente all'uso domestico e non a
quello commerciale. La garanzia decade in caso di
impiego improprio o manomissione, uso della
forza e interventi non eseguiti dalla nostra filiale di
assistenza autorizzata. Questa garanzia non costituisce alcun limite ai diritti legali del consumatore. Il
periodo di garanzia non viene prolungato da interventi in garanzia. Ciò vale anche per le parti sostituite e riparate. I danni e difetti eventualmente
presenti già all'atto dell'acquisto devono venire
comunicati immediatamente dopo il disimballo, e
comunque entro e non oltre due giorni dalla data
di acquisto. Le riparazioni eseguite dopo la scadenza del periodo di garanzia sono a pagamento.
Assistenza
AVVERTENZA!
► Far riparare gli apparecchi dal centro di
assistenza o da un elettricista specializzato
e solo con pezzi di ricambio originali. In
tal modo si garantisce la sicurezza dell'apparecchio.
► are eseguire sempre la sostituzione della
spina o del cavo dal produttore dell'apparecchio o dal relativo centro di assistenza.
In tal modo si garantisce la sicurezza dell'apparecchio.
Assistenza Italia
Tel.: 02 36003201
E-Mail: [email protected]
IAN 102867
Assistenza Malta
Tel.: 80062230
E-Mail: [email protected]
IAN 102867
Raggiungibilità della hotline:
dal lunedì al venerdì, dalle 8.00 alle 20.00 (CET)
Importatore
KOMPERNASS HANDELS GMBH
BURGSTRASSE 21
44867 BOCHUM
GERMANY
www.kompernass.com
PHKSA 18-Li A1
25
IT
MT
Traduzione della dichiarazione
di conformità originale
IT
MT
La KOMPERNASS HANDELS GMBH, responsabile della documentazione: Sig. Semi Uguzlu,
BURGSTR. 21, 44867 BOCHUM, GERMANY,
dichiara con la presente che questo prodotto è
conforme alle seguenti norme, ai documenti
normativi e alle direttive CE:
Direttiva macchine (2006/42/EC)
Direttiva CE Bassa tensione (2006 / 95 / EC)
Compatibilità elettromagnetica
(2004 / 108 / EC)
Direttiva sulla restrizione dell'uso
di sostanze pericolose
(2011 / 65 / EU)
Norme armonizzate utilizzate:
EN 60745-1: 2009 + A11: 2010
EN 60745-2-5: 2010
EN 62233: 2008
EN 55014-1/ A2: 2011
EN 55014-2/ A2: 2008
EN 60335-1: 2010
EN 60335-2-29/ A2: 2010
EN 62233: 2008
EN 61000-3-2/ A2: 2009
EN 61000-3-3: 2013
EN 60825-1: 2007
Denominazione della macchina:
Sega circolare a batteria PHKSA 18-Li A1
Anno di produzione: 07 - 2014
Numero di serie: IAN 102867
Bochum, 20/06/2014
Semi Uguzlu
- Direttore qualità Con riserva di modifiche tecniche volte al miglioramento del prodotto.
26
PHKSA 18-Li A1
Ordinazione di una batteria di ricambio
Se si desidera ordinare una batteria di ricambio per il proprio apparecchio, lo si può fare o comodamente in
Internet al sito www.kompernass.com o telefonicamente.
Il prezzo della batteria di ricambio ammonta a 20 €, IVA e spedizione comprese. Per via delle scorte
limitate, questo articolo potrebbe essere esaurito entro breve tempo.
IT
MT
Tre dispositivi – tre batterie compatibili.
Intercambiabili!
Ordinazione online
Per ordinare una batteria di ricambio attraverso il negozio di accessori:
■ richiamare con il proprio browser il sito www.kompernass.com.
■ Cliccare in basso a destra sulla relativa bandiera per selezionare il paese e la lingua desiderati.
■ Ora cliccare sulla rubrica "Negozio di accessori" e selezionare poi alla rubrica (i prodotti più venduti)
la batteria di ricambio adatta al proprio apparecchio.
■ Dopo aver inserito la batteria di ricambio nel carrello, cliccare sul pulsante "Cassa" e seguire le indicazioni sullo schermo per completare l'ordinazione.
AVVISO
► L'ordinazione online di pezzi di ricambio in alcuni paesi non è possibile. In questo caso si prega di
contattare l'hotline per l'assistenza.
■ L'iniziativa promozionale è limitata a una batteria per cliente / apparecchio nonché a un periodo di un
mese dopo il termine dell'iniziativa. In seguito la batteria di ricambio può venire ordinata anche dopo
tale data ma ad altre condizioni.
Ordinazione telefonica
Assistenza Italia
Tel.: 02 36003201
Assistenza Malta
Tel.: 80062230
Raggiungibilità della hotline: dal lunedì al venerdì, dalle 8.00 alle 20.00 (CET)
Per garantire una rapida evasione dell'ordine si prega di tenere a portata di mano, per ogni richiesta che
si desidera presentare, il codice di articolo dell'apparecchio (per es. IAN 102868). Il codice di articolo è
indicato sulla targhetta di modello nonché sulla pagina di copertina di questo manuale di istruzioni.
PHKSA 18-Li A1
27
28
PHKSA 18-Li A1
Índice
Introdução . . . . . . . . . . . . . . . . . . . . . . . . . . . . . . . . . . . . . . . . . . . . . . . . . . . . . . 30
Utilização correta . . . . . . . . . . . . . . . . . . . . . . . . . . . . . . . . . . . . . . . . . . . . . . . . . . . . . . . . . . . 30
Equipamento . . . . . . . . . . . . . . . . . . . . . . . . . . . . . . . . . . . . . . . . . . . . . . . . . . . . . . . . . . . . . . 30
Conteúdo da embalagem . . . . . . . . . . . . . . . . . . . . . . . . . . . . . . . . . . . . . . . . . . . . . . . . . . . . 30
Dados técnicos . . . . . . . . . . . . . . . . . . . . . . . . . . . . . . . . . . . . . . . . . . . . . . . . . . . . . . . . . . . . . 30
Indicações gerais de segurança para ferramentas elétricas . . . . . . . . . . . . . 31
1. Segurança no local de trabalho . . . . . . . . . . . . . . . . . . . . . . . . . . . . . . . . . . . . . . . . . . . . . 31
2. Segurança elétrica . . . . . . . . . . . . . . . . . . . . . . . . . . . . . . . . . . . . . . . . . . . . . . . . . . . . . . . . 31
3. Segurança de pessoas. . . . . . . . . . . . . . . . . . . . . . . . . . . . . . . . . . . . . . . . . . . . . . . . . . . . . 32
4. Utilização e conservação da ferramenta elétrica . . . . . . . . . . . . . . . . . . . . . . . . . . . . . . . . 32
5. Utilização e conservação da ferramenta com acumulador . . . . . . . . . . . . . . . . . . . . . . . . . 33
6. Assistência técnica . . . . . . . . . . . . . . . . . . . . . . . . . . . . . . . . . . . . . . . . . . . . . . . . . . . . . . . . 33
Indicações de segurança específicas do aparelho para serras circulares . . . . . . . . . . . . . . . . 33
Indicações de segurança para carregadores . . . . . . . . . . . . . . . . . . . . . . . . . . . . . . . . . . . . . 35
Indicações de segurança para lâminas de serra circular . . . . . . . . . . . . . . . . . . . . . . . . . . . . 35
Acessórios/aparelhos adicionais originais . . . . . . . . . . . . . . . . . . . . . . . . . . . . . . . . . . . . . . . 35
PT
Antes da colocação em funcionamento . . . . . . . . . . . . . . . . . . . . . . . . . . . . . . 36
Carregar conjunto de acumulador (ver fig. C) . . . . . . . . . . . . . . . . . . . . . . . . . . . . . . . . . . . . . 36
Colocar / retirar conjunto de acumuladores do aparelho . . . . . . . . . . . . . . . . . . . . . . . . . . . . 36
Verificar o estado do acumulador . . . . . . . . . . . . . . . . . . . . . . . . . . . . . . . . . . . . . . . . . . . . . . 36
Verificar cobertura de proteção . . . . . . . . . . . . . . . . . . . . . . . . . . . . . . . . . . . . . . . . . . . . . . . . 36
Colocação em funcionamento . . . . . . . . . . . . . . . . . . . . . . . . . . . . . . . . . . . . . . 37
Montar / substituir a lâmina de serra . . . . . . . . . . . . . . . . . . . . . . . . . . . . . . . . . . . . . . . . . . . 37
Encosto paralelo. . . . . . . . . . . . . . . . . . . . . . . . . . . . . . . . . . . . . . . . . . . . . . . . . . . . . . . . . . . . 37
Ligar o dispositivo de aspiração de aparas . . . . . . . . . . . . . . . . . . . . . . . . . . . . . . . . . . . . . . . 37
Operação . . . . . . . . . . . . . . . . . . . . . . . . . . . . . . . . . . . . . . . . . . . . . . . . . . . . . . 37
Ligar e desligar. . . . . . . . . . . . . . . . . . . . . . . . . . . . . . . . . . . . . . . . . . . . . . . . . . . . . . . . . . . . . 37
Ajustar o ângulo de corte. . . . . . . . . . . . . . . . . . . . . . . . . . . . . . . . . . . . . . . . . . . . . . . . . . . . . 37
Ajustar a profundidade de corte . . . . . . . . . . . . . . . . . . . . . . . . . . . . . . . . . . . . . . . . . . . . . . . 38
Manuseamento da serra circular . . . . . . . . . . . . . . . . . . . . . . . . . . . . . . . . . . . . . . . . . . . . . . . 38
Ligar e desligar o laser . . . . . . . . . . . . . . . . . . . . . . . . . . . . . . . . . . . . . . . . . . . . . . . . . . . . . . . 38
Dicas e truques . . . . . . . . . . . . . . . . . . . . . . . . . . . . . . . . . . . . . . . . . . . . . . . . . . . . . . . . . . . . . 38
Manutenção e limpeza . . . . . . . . . . . . . . . . . . . . . . . . . . . . . . . . . . . . . . . . . . . . 38
Eliminação . . . . . . . . . . . . . . . . . . . . . . . . . . . . . . . . . . . . . . . . . . . . . . . . . . . . . . 38
Garantia . . . . . . . . . . . . . . . . . . . . . . . . . . . . . . . . . . . . . . . . . . . . . . . . . . . . . . . 39
Assistência Técnica . . . . . . . . . . . . . . . . . . . . . . . . . . . . . . . . . . . . . . . . . . . . . . . 39
Importador . . . . . . . . . . . . . . . . . . . . . . . . . . . . . . . . . . . . . . . . . . . . . . . . . . . . . 39
Tradução da Declaração de Conformidade original . . . . . . . . . . . . . . . . . . . . 40
Encomenda de acumulador sobresselente . . . . . . . . . . . . . . . . . . . . . . . . . . . . 41
Encomenda online . . . . . . . . . . . . . . . . . . . . . . . . . . . . . . . . . . . . . . . . . . . . . . . . . . . . . . . . . . 41
Encomenda telefónica . . . . . . . . . . . . . . . . . . . . . . . . . . . . . . . . . . . . . . . . . . . . . . . . . . . . . . . 41
PHKSA 18-Li A1
29
Introdução
PT
Parabéns pela compra do seu novo
apare-lho. Optou por um produto de
elevada qualidade. O manual de instruções faz parte deste produto. Este contém
instruções importantes para a segurança,
utilização e eliminação. Antes de utilizar
o produto, familiarize-se com todas as instruções
de operação e segurança. Utilize o produto apenas
como descrito e nas áreas de aplicação indicadas.
Ao transferir o produto para terceiros, entregue
todos os respetivos documentos.
Utilização correta
A serra circular (a seguir designada "Aparelho") é
adequada para serrar no sentido longitudinal, transversal, fazer cortes em meia-esquadria numa base
firme de madeira maciça, placas de aglomerado de
madeira, plástico e materiais leves. Qualquer outra
utilização ou alteração desta máquina é considerada
não adequada e acarreta consigo perigos de acidente
graves. Não é adequada para uso comercial.
Equipamento
Figura A:
Bloqueio de ativação
Interruptor LIGAR/DESLIGAR
Escala de profundidade de corte
Botão de desbloqueio para conjunto
de acumuladores
Botão estado do acumulador/
LED do visor do acumulador
Conjunto de acumuladores
Parafuso de fixação
Bloqueio do veio
Placa base
Alojamento do encosto paralelo
Figura B:
Interruptor LIGAR/DESLIGAR/REPOR Laser
Punho adicional
Placa de aviso de laser
Orifício de saída do raio laser
Escala de ângulo de corte
Parafuso de orelhas para pré-seleção do
ângulo de corte
Parafuso de orelhas para alojamento do
encosto paralelo
Encosto paralelo
30
Cobertura de proteção
Flange de fixação
Parafuso de aperto
Alavanca retrátil para cobertura de proteção
Lâmina de serra
Saída de aparas
Adaptador para aspiração de poeiras
Chave Allen
Figura C:
Carregador
LED de controlo vermelho
LED de controlo verde
Conteúdo da embalagem
1 Serra circular com bateria
1 Carregador rápido de acumulador
1 Encosto paralelo
1 Adaptador para aspiração de poeiras
1 Chave Allen SW 6
1 Lâmina de serra (pré-montada)
1 Manual de instruções
Dados técnicos
Serra circula com bateria: PHKSA 18-Li A1
Tensão nominal:
18 V
Rotação ao ralenti: n0 3800 min-1
Lâmina de serra:
1x Ø 150 mm x Ø 16 mm,
18 dentes
Profundidade
máx. de corte:
90°: 48 mm
45°: 36 mm
Acumulador: PAP 18 A1
Tipo:
IÕES DE LÍTIO
Tensão nominal:
18 V
Capacidade:
1,5 Ah
Carregador rápido de acumulador PLG 18 A1
ENTRADA / Input:
Tensão nominal:
230 - 240 V ~, 50 Hz
Consumo de energia: 40 W
SAÍDA / Output:
Tensão nominal:
18 V
Corrente de
carregamento:
1,8 A
Duração do
carregamento:
aprox. 60 min
Fusível (interior):
2A
Classe de proteção: II /
T2A
PHKSA 18-Li A1
Informações sobre ruído e vibração:
Valor de medição para ruído, determinado de
acordo com a Norma EN 60745. Por norma,
o nível de ruído, avaliado com A, da ferramenta
elétrica é:
Nível de pressão acústica:
77 dB(A)
Nível de potência acústica: 88 dB(A)
Incerteza K:
3 dB
Usar proteção auditiva!
Aceleração ponderada, de forma típica:
Vibração de mão/braço ah,W = 2,5 m/s2
Incerteza K = 1,5 m/s2
NOTA
► Os níveis de vibração indicados nestas
instruções foram medidos de acordo com um
processo de medição normalizado pela norma EN 60745 e podem ser utilizados para
a comparação de aparelhos. O valor da
emissão de vibração indicado também pode
ser utilizado para uma avaliação preliminar
do período de suspensão.
AVISO!
► O nível de vibração altera-se de acordo com
a utilização da ferramenta elétrica e pode,
em alguns casos, exceder o valor indicado
nestas instruções. O grau de vibração pode
ser subestimado, caso a ferramenta seja
utilizada frequentemente desta forma. Tente
manter a pressão exercida por vibrações tão
baixa quanto possível. Podem ser tomadas
medidas para reduzir a pressão exercida
pela vibração, como por exemplo, o uso de
luvas ao utilizar a ferramenta e a limitação
do tempo de trabalho. Ao mesmo tempo
todas as partes do ciclo de serviço têm de
ser tidas em conta (por exemplo, os períodos, nos quais a ferramenta elétrica está
desligada e aqueles, nos quais está ligada,
mas funciona sem pressão).
PHKSA 18-Li A1
Indicações gerais
de segurança para
ferramentas elétricas
AVISO!
► Leia todas as indicações de segurança e
instruções. A inobservância das indicações
de segurança e instruções pode causar choque
elétrico, incêndio e/ou ferimentos graves.
Guarde todas as indicações de segurança
e instruções para futuras consultas.
O conceito "ferramenta elétrica", utilizado nas
indicações de segurança, refere-se a ferramentas
elétricas operadas por rede elétrica (com cabo
de alimentação elétrica) e a ferramentas elétricas
operadas por acumuladores (sem cabo de alimentação elétrica).
1. Segurança no local de trabalho
a) Mantenha o seu local de trabalho limpo e bem
iluminado. Desarrumação e áreas de trabalho
pouco iluminadas podem causar acidentes.
b) Não trabalhe com a ferramenta elétrica em
ambientes potencialmente explosivos, onde
se encontram líquidos, gases ou poeiras inflamáveis. Ferramentas elétricas originam faíscas
que podem inflamar poeiras e vapores.
c) Durante a utilização da ferramenta elétrica,
mantenha crianças e outras pessoas afastadas.
Em caso de distração pode perder o controlo
do aparelho.
2. Segurança elétrica
a) A ficha de ligação da ferramenta elétrica
tem de ser adequada à tomada. A ficha
não pode, de forma alguma, ser alterada.
Não utilize quaisquer fichas de adaptadores
juntamente com ferramentas elétricas com
proteção de ligação à terra. Fichas inalteradas
e tomadas adequadas reduzem o risco de
choque elétrico.
b) Evite o contacto físico com superfícies ligadas
à terra, como tubos, aquecedores, fogões e
frigoríficos. Existe um risco maior de choque
elétrico se o seu corpo estiver ligado à terra.
31
PT
PT
c) Mantenha as ferramentas elétricas afastadas
de chuva ou humidade. A infiltração de água
num aparelho elétrico aumenta o risco de
choque elétrico.
d) Retire as ferramentas de ajuste ou a chave de
parafusos antes de ligar a ferramenta elétrica. Uma ferramenta ou uma chave numa parte
rotativa do aparelho pode causar ferimentos.
d) Não utilize o cabo para um fim diferente do
previsto, p. ex. para transportar a ferramenta
elétrica ou puxar a ficha da tomada. Mantenha o cabo afastado de calor, óleo, arestas
afiadas ou partes do aparelho móveis. Cabos
danificados ou enrolados aumentam o risco de
choque elétrico.
e) Evite uma postura corporal incorreta. Assegure uma posição estável e mantenha sempre
o equilíbrio. Desta forma, consegue controlar
melhor a ferramenta elétrica em situações
inesperadas.
e) Se trabalhar com uma ferramenta elétrica ao
ar livre, utilize apenas extensões que também
sejam adequadas para exterior. A utilização
de uma extensão adequada para o exterior
diminui o risco de choque elétrico.
f) Se não for possível evitar a utilização da
ferramenta elétrica num ambiente húmido,
utilize um disjuntor diferencial residual. A
utilização de um disjuntor diferencial residual
reduz o risco de choque elétrico.
3. Segurança de pessoas
a) Esteja sempre atento, preste atenção ao que
está a fazer e utilize a ferramenta elétrica de
forma sensata. Não utilize o aparelho se estiver
desconcentrado, com sono ou sob influência de
drogas, álcool ou medicamentos. Um momento
de distração durante a utilização da ferramenta
elétrica pode causar ferimentos graves.
b) Use o equipamento de proteção pessoal e
sempre óculos de proteção. O uso do equipamento de proteção pessoal, como máscaras de
proteção antipoeiras, calçado de segurança
antiderrapante, capacete de proteção ou
proteção auditiva, de acordo com o tipo de
aplicação da ferramenta elétrica, reduz o risco
de ferimentos.
c) Evite uma colocação em funcionamento involuntária. Certifique-se de que a ferramenta
elétrica se encontra desligada antes de a
ligar à fonte de alimentação e / ou ao acumulador, elevar ou transportar. Se, durante o
transporte da ferramenta elétrica, tiver o dedo
no interruptor ou ligar o aparelho a uma fonte
de alimentação quando este já se encontra
ligado, poderão ocorrer acidentes.
32
f) Use vestuário adequado. Não use roupas largas ou joias. Mantenha o cabelo, vestuário e
luvas afastados das peças móveis. Vestuário
solto, joias ou cabelos compridos podem ser
recolhidos pelas peças móveis.
g) Se existir a possibilidade de montar dispositivos de aspiração ou de recolha de pó,
certifique-se de que são ligados e utilizados
corretamente. A utilização de um dispositivo
de aspiração pode reduzir eventuais perigos
devido a poeiras.
4. Utilização e conservação da
ferramenta elétrica
a) Não sobrecarregue o aparelho. Utilize a
ferramenta elétrica apropriada para o seu
trabalho. Com a ferramenta elétrica adequada,
trabalhará melhor e de forma mais segura na
respetiva área de trabalho.
b) Não utilize qualquer ferramenta elétrica,
cujo interruptor esteja avariado. Uma ferramenta elétrica que não se consegue ligar nem
desligar constitui perigo e tem de ser reparada.
c) Retire a ficha da tomada e / ou o acumulador antes de realizar ajustes no aparelho,
substituir acessórios ou se não estiver a utilizar
o aparelho. Esta medida de segurança impede
o arranque involuntário do aparelho.
d) Guarde as ferramentas elétricas que não
estão a ser utilizadas fora do alcance das
crianças. Não autorize a utilização do aparelho por pessoas que não estejam familiarizadas com o mesmo ou que não tenham lido
estas instruções. As ferramentas elétricas são
perigosas, caso sejam utilizadas por pessoas
inexperientes.
PHKSA 18-Li A1
e) Faça uma manutenção cuidadosa das ferramentas elétricas. Verifique se as peças móveis
funcionam corretamente e não se encontram
encravadas, se estão partidas ou danificadas
a ponto de interferir no bom funcionamento
da ferramenta elétrica. Antes de utilizar o
aparelho, as peças danificadas devem ser
reparadas. Muitos acidentes ocorrem devido
à má manutenção das ferramentas elétricas.
f) Mantenha as ferramentas de corte afiadas e
limpas. Ferramentas de corte bem conservadas
e afiadas encravam muito menos e são mais
fáceis de conduzir.
g) Utilize a ferramenta elétrica, os acessórios,
as ferramentas de aplicação, etc., de acordo
com estas instruções. Tenha em consideração
as condições de trabalho e a atividade a
exercer. A utilização de ferramentas elétricas
para outras utilizações diferentes das previstas
pode levar a situações perigosas.
5. Utilização e conservação da
ferramenta com acumulador
a) Carregue os acumuladores apenas em carregadores, que sejam aconselhados pelo fabricante. Se um carregador adequado a um tipo
específico de acumuladores for utilizado com
outros acumuladores, há perigo de incêndio.
b) Utilize, nas ferramentas elétricas, apenas os
acumuladores previstos para as mesmas.
A utilização de outros acumuladores pode
causar ferimentos e perigo de incêndio.
c) Mantenha o acumulador não utilizado afastado de clipes, moedas, chaves, pregos,
parafusos ou de outros pequenos objetos de
metal, que possam causar uma conexão dos
contactos. Um curto-circuito entre os contactos
do acumulador pode ter como consequência
queimaduras ou fogo.
d) Se o acumulador for utilizado de forma incorreta, é possível que saia líquido do mesmo.
Evite o contacto com este. Se houver eventual
contacto, lave com água. Se o líquido entrar em
contacto com a vista, contacte além disso um
médico. O líquido do acumulador vertido pode
provocar irritações ou queimaduras na pele.
PHKSA 18-Li A1
ATENÇÃO! PERIGO DE EXPLOSÃO!
Nunca carregue pilhas que não
sejam recarregáveis.
Proteja o acumulador contra o calor,
p. ex. também contra radiação solar
permanente, fogo, água e humidade.
Há perigo de explosão.
PT
6. Assistência técnica
a) A sua ferramenta elétrica só pode ser reparada por técnicos especializados e com peças
de substituição de origem. Desta forma, é
garantida a segurança da ferramenta elétrica.
Indicações de segurança específicas
do aparelho para serras circulares
Indicações de segurança para todas as serras
Procedimento com a serra
a)
PERIGO! As suas mãos não devem
entrar em contacto com a área da
serra e a lâmina da serra. Com a
sua segunda mão segure no punho adicional
ou na estrutura do motor. Se ambas as mãos
segurarem na serra, as mesmas não alcançam
a lâmina da serra e, deste modo, não estão
sujeitas a ferimentos.
b) Não meta as mãos por baixo da peça de
trabalho. Por baixo da peça de trabalho, a
cobertura de proteção não o pode proteger
da lâmina de serra.
c) Adapte a profundidade de corte à espessura
da peça de trabalho. Deverá ser visível menos
de uma altura completa de um dente abaixo da
peça de trabalho.
d) Nunca segure a peça a serrar com a mão
nem a apoie por cima da perna. Fixe a peça
de trabalho numa base estável. É importante
fixar bem a peça de trabalho, para minimizar
o perigo de contacto físico, encravamento da
lâmina da serra ou perda de controlo.
e) Segure a ferramenta elétrica apenas pelas
superfícies isoladas do punho quando realizar trabalhos em que a ferramenta de corte
possa atingir cabos elétricos invisíveis. O con-
33
PT
tacto com um cabo condutor de tensão coloca
as peças metálicas da ferramenta elétrica sob
tensão e pode conduzir a um choque elétrico.
f) Na execução de cortes longitudinais utilize
sempre um apoio ou um encosto em aresta
reto. Assim melhora a precisão do corte e diminui a possibilidade da lâmina de serra encravar.
g) Utilize sempre a lâminas de serra no tamanho
correto e com um orifício de montagem adequado (p. ex. em forma de estrela ou redonda). As lâminas de serra que não se adequam
às peças de montagem da serra funcionam de
modo irregular e levam à perda de controlo.
h) Nunca utilize arruelas planas ou parafusos
danificados ou inadequados para a lâmina
de serra. As arruelas planas e os parafusos
para a lâmina de serra foram especialmente
concebidos para a sua serra, para providenciar
um desempenho e uma segurança durante o
funcionamento excelentes.
Outras indicações de segurança para todas
as serras
Contragolpe - Causas e respetivas indicações
de segurança
▯ Um contragolpe é uma reação repentina, devido
a uma lâmina de serra encravada, presa ou desalinhada, que provoca a elevação descontrolada da serra, fazendo com que se solte da peça
de trabalho em direção à pessoa que a opera;
▯ Se a lâmina de serra ficar presa ou encravada
na fenda da serra, esta bloqueia e a força
do motor empurra o aparelho na direção da
pessoa que o está a operar;
▯ Se a lâmina de serra torcer ou desalinhar durante
o corte da serra, os dentes do gume traseiro da
lâmina de serra podem encravar na superfície da
peça de trabalho, fazendo com que a lâmina de
serra se movimente para fora da fenda da serra e
a serra salte na direção da pessoa que a opera.
Um contragolpe é a consequência de uma utilização errada ou incorreta da serra. Este pode ser
impedido por medidas de segurança adequadas,
tal como descrito de seguida.
a) Segure bem na serra com ambas as mãos e
posicione os seus braços numa posição em que
consiga suportar as forças de um contragolpe.
Mantenha-se sempre na lateral em relação à lâ-
34
mina de serra e nunca de frente para a mesma.
Em caso de um contragolpe, a serra circular
pode saltar para trás, no entanto, o operador
consegue dominar as forças do contragolpe,
caso sejam tomadas as medidas adequadas.
b) Caso a lâmina de serra encrave ou interrompa o trabalho, desligue a serra e mantenha-a
quieta na peça de trabalho, até que a lâmina
de serra pare completamente. Nunca tente
remover a serra da peça de trabalho ou
puxá-la para trás enquanto a lâmina de serra
estiver em movimento, caso contrário pode
ocorrer um contragolpe. Encontre e elimine
a causa do encravamento da folha de serra.
c) Caso pretenda voltar a colocar a serra que
se encontra presa na peça de trabalho, em
funcionamento, centre a lâmina de serra na
fenda e verifique se os dentes da serra não
se encontram encravados. Se a lâmina de serra estiver encravada, esta pode movimentar-se
para fora da peça de trabalho ou causar um
contragolpe, caso a serra volte a ser colocada
em funcionamento.
d) Apoie as placas grandes, de modo a diminuir
o risco de um contragolpe devido a uma folha
de serra encravada. As placas grandes podem
dobrar devido ao seu próprio peso. As placas
devem ser apoiadas em ambos os lados, tanto
na proximidade da fenda da serra, como na
extremidade.
e) Não utilize lâminas de serra gastas ou danificadas. Lâminas de serra com dentes desgastados ou incorretamente alinhados provocam,
devido a uma fenda da serra demasiado
estreita, uma fricção elevada, o encravamento
da lâmina de serra e um contragolpe.
f) Antes de começar a serrar, fixe as posições
relativamente à profundidade de corte e ao
ângulo de corte. Se, durante o corte, as posições definidas se alterarem, a lâmina de serra
pode encravar e provocar um contragolpe.
g) Tenha especial cuidado ao serrar em paredes existentes ou outras áreas de pouca visibilidade. A lâmina de serra submergida pode
bloquear ao encontrar objetos escondidos e
provocar um contragolpe.
PHKSA 18-Li A1
Função da cobertura de proteção inferior
a) Verifique, antes de qualquer utilização, se a
cobertura de proteção inferior fecha corretamente. Não utilize a serra, se a cobertura de
proteção inferior não se movimentar livremente
e não fechar de imediato. Nunca prenda ou
fixe a cobertura de proteção inferior na posição aberta. Se a serra cair acidentalmente,
é possível que a cobertura de proteção inferior
fique torcida. Abra a cobertura de proteção
com a alavanca retrátil e certifique-se de que
se movimenta livremente sem entrar em contacto
com a lâmina de serra ou outras peças durante a
realização de cortes angulares e de profundidade.
b) Verifique a posição da mola para a cobertura
de proteção inferior. Providencie a manutenção do aparelho antes de o utilizar, caso a
cobertura de proteção inferior e a mola não
funcionem de forma correta. Peças danificadas,
depósitos ou acumulações viscosos de aparas
fazem com que a cobertura de proteção inferior funcione com retardamento.
c) Abra a cobertura de proteção inferior
manualmente apenas em caso de cortes especiais, como "cortes de imersão e ângulo".
Abra a cobertura de proteção inferior com a
alavanca retrátil e solte-a, logo que a lâmina
de serra imerja na peça de trabalho. Em todos
os outros trabalhos, a cobertura de proteção
inferior deve funcionar automaticamente.
d) Não coloque a serra em cima da bancada ou
no chão sem que a cobertura de proteção inferior cubra a lâmina de serra. Uma lâmina de
serra desprotegida, ou em rotação, movimenta a
serra no sentido oposto ao da direção de corte
e serra tudo que lhe aparece à frente. Tenha em
consideração o período de retardamento da serra.
Indicações de segurança para
carregadores
■ Este aparelho pode ser utilizado por crianças
com idades superiores a 8 anos, bem como por
pessoas com capacida de experiência e/ou
conhecimento, caso sejam vigiadas ou instruídas
sobre a utilização segura do aparelho e compreendam os perigos daí resultantes. As crianças
não podem brincar com o aparelho. A limpeza
e a manutenção pelo utilizador não podem ser
realizadas por crianças não vigiadas.
PHKSA 18-Li A1
O carregador é adequado apenas para o
funcionamento em espaços interiores.
AVISO!
■ Não utilize o aparelho com o cabo, cabo de
rede ou ficha de rede danificados. Cabos
de rede danificados põem em risco a vida
devido a choques elétricos.
PT
Instruções complementares:
■ Não utilize discos abrasivos.
■ Utilize apenas lâminas de serra com diâmetros
de acordo com as inscrições da serra.
■ Durante o processamento de madeira ou materiais, em que sejam originadas poeiras prejudiciais à saúde, o aparelho deve ser ligado a um
dispositivo de aspiração testado e adequado.
■ Enquanto serra madeira, use uma máscara de
proteção contra poeiras.
■ Utilize apenas lâminas de serra recomendadas.
■ Use sempre uma proteção auditiva.
■ Evite um sobreaquecimento das pontas dos
dentes da serra.
■ Ao serrar plástico, evite um derretimento do mesmo.
Indicações de segurança para lâminas
de serra circular
Usar luvas de proteção!
Usar proteção respiratória!
Usar óculos de proteção!
Usar proteção auditiva!
ATENÇÃO! PERIGO DE EXPLOSÃO!
Nunca carregue pilhas que não sejam
recarregáveis.
Acessórios/
aparelhos adicionais originais
■ Utilize apenas acessórios e aparelhos
adicionais indicados no manual de instruções
ou cuja montagem seja compatível com o
aparelho.
35
AVISO! Proteja-se de radiação laser:
♦ Coloque o conjunto de acumuladores
carregador (ver fig. C).
no
♦ Insira a ficha na tomada. O LED de controlo
vermelho acende-se.
PT
O aparelho possui um laser de classe 2
e é fornecido com uma placa de aviso
de laser .
► Nunca direcione o laser para pessoas ou
animais.
► Nunca olhe diretamente para o laser.
O laser pode provocar danos oculares.
► Não direcione o raio laser para materiais extremamente refletores. Perigo devido à luz refletida.
► Não é permitido qualquer ajuste para o
aumento da intensidade do raio laser. Existe
perigo de ferimentos!
► Não é assumida qualquer responsabilidade
por danos resultantes de manipulação do
dispositivo de laser, bem como da inobservância das indicações de segurança.
♦ O LED de controlo verde indica-lhe que o
processo de carregamento terminou e o conjunto
de acumuladores está pronto a ser colocado.
♦ Coloque o conjunto de acumuladores
aparelho.
no
■ Nunca carregue o conjunto de acumuladores
uma segunda vez, logo após ter terminado
o processo de carregamento rápido. Existe
perigo do conjunto de acumuladores ficar
sobrecarregado e dessa forma a vida útil do
acumulador e do carregador é reduzida.
♦ Desligue o carregador entre processos de
carregamento sucessivos durante pelo menos
15 minutos. Para isso, retire a ficha da tomada.
Colocar / retirar conjunto de
acumuladores do aparelho
Colocar conjunto de acumuladores:
ATENÇÃO!
Caso utilize outros dispositivos de comando ou de
ajuste que não os aqui indicados ou sejam realizados outros procedimentos, isto poderá conduzir
a uma exposição perigosa de radiação.
Antes da colocação em
funcionamento
Carregar conjunto de acumulador
(ver fig. C)
ATENÇÃO!
► Retire sempre a ficha de rede antes de colocar ou retirar o conjunto de acumuladores
do carregador .
NOTA
► Três aparelhos - três acumuladores compatíveis.
Substituíveis entre eles!
(ver capítulo Encomenda de acumulador
sobresselente)
■ Nunca carregue o conjunto de acumuladores ,
se a temperatura ambiente for inferior a 10 °C
ou superior a 40 °C.
36
♦ Encaixe o conjunto de acumuladores
no punho.
Retirar conjunto de acumuladores:
♦ Carregue no botão de desbloqueio
o conjunto de acumuladores .
e retire
Verificar o estado do acumulador
♦ Carregue no botão estado do acumulador ,
para verificar o estado do acumulador (ver figura principal). O estado ou a atividade restante
é indicado no LED do visor do acumulador
da seguinte forma:
♦ VERMELHO / LARANJA / VERDE =
carga / atividade máxima
VERMELHO / LARANJA =
carga / atividade média
VERMELHO = carga fraca – carregar acumulador
Verificar cobertura de proteção
♦ Desloque a alavanca retrátil para a cobertura
de proteção até ao encosto.
A cobertura de proteção tem de estar deslocável sem empenar e ao soltar a alavanca retrátil
para a cobertura de proteção tem de voltar
para a posição de partida por impulso próprio.
PHKSA 18-Li A1
Colocação em funcionamento
Montar / substituir a lâmina de serra
Substituir a lâmina de serra apenas com o
conjunto de acumuladores retirado!
1. Ajuste a profundidade de corte (através do parafuso de fixação ) para a posição mínima,
0 mm.
da escala do encosto paralelo e dos entalhes
na placa base (ver também fig. B).
O entalhe direito na placa base é para o ajuste
do ângulo de corte 0°. O entalhe esquerdo na
placa base é para o ajuste do ângulo de corte
45°.
PT
2. Desloque a cobertura de proteção para trás
com ajuda da alavanca retrátil e pouse o
aparelho.
3. Acione o bloqueio do veio (até que este
encaixe) e solte, com a chave Allen , o
parafuso de aperto . Agora retire o parafuso
de aperto e a flange de fixação (ver
também fig. A).
Fig. B: Largura de corte 3 cm
♦ Volte apertar o parafuso de orelhas
.
Ligar o dispositivo de aspiração de
aparas
♦ Encaixe o adaptador para aspiração de
poeiras na saída de aparas .
Opcionalmente consoante o diâmetro da
aspiração de poeiras e aparas.
♦ Ligue um dispositivo de poeiras e de aparas
permitido.
Fig. A: Substituir a lâmina de serra
4. Retirar a lâmina de serra .
5. A montagem da lâmina de serra deverá
ser realizada na sequência inversa, conforme
descrito.
6. Acione o bloqueio do veio (até que este
encaixe) e aperte, com a chave Allen , o
parafuso de aperto .
AVISO!
► A seta na lâmina de serra tem de coincidir
com a seta de direção (sentido de funcionamento, assinalado no aparelho).
Operação
Ligar e desligar
Ligar:
♦ Prima o bloqueio de ativação para a
esquerda e mantenha-o premido.
♦ Acione o interruptor LIGAR/DESLIGAR .
Depois da máquina começar a trabalhar, pode
voltar a soltar o bloqueio de ativação .
Desligar:
♦ Solte o interruptor LIGAR/DESLIGAR
.
Ajustar o ângulo de corte
■ Certifique-se de que a lâmina de serra é
adequada para a rotação da ferramenta.
Pode determinar o ângulo de corte com a escala
do ângulo de corte .
Encosto paralelo
■ Solte o parafuso de orelhas da pré-seleção
do ângulo de corte, ajuste o ângulo desejado
na escala do ângulo de corte e volte a
apertar o parafuso de orelhas .
♦ Solte o parafuso de orelhas e coloque o encosto paralelo no respetivo alojamento .
♦ Ajuste a largura de corte desejada com a ajuda
PHKSA 18-Li A1
37
Ajustar a profundidade de corte
NOTA
► Selecionar a profundidade de corte aprox.
3 mm superior à espessura do material.
Assim obtém um corte limpo.
PT
♦ Solte o parafuso de fixação , ajuste a
profundidade de corte desejada, na escala de
profundidade de corte , e volte a apertar o
parafusos de fixação .
Manuseamento da serra circular
1. Ligue o aparelho – como descrito em «Ligar e desligar» – e coloque em cima do material juntamente
com a extremidade dianteira da placa base .
2. Alinhe a máquina no encosto paralelo ou
na linha desenhada.
3. Segure a máquina nos punhos, com ambas as
mãos, e serre exercendo uma pressão moderada.
Ligar e desligar o laser
Ligar:
♦ Carregue no interruptor LIGAR/DESLIGAR/
REPOR Laser
.
Desligar:
♦ Carregue no interruptor LIGAR/DESLIGAR/
.
REPOR Laser
NOTA
► SOBRECARGA E REPOR! O aparelho desliga-se em caso de operação de sobrecarga.
♦ DESLIGUE o laser. Carregue no interruptor
LIGAR/DESLIGAR/REPOR Laser
.
► Apenas com o laser desligado tem lugar um
repor automático.
Dicas e truques
■ Um rasgue da aresta de corte, em caso de
superfícies sensíveis como, p. ex., aglomerados
revestidos ou portas, pode ser evitado colocando fita de papel em cima da linha de corte. Isto
tem como vantagem adicional, a facilidade de
desenhar em cima da fita de papel, o que não
acontece com as superfícies lisas. Uma forma
ainda mais eficaz para evitar um rasgue da aresta
de corte, é realizando o corte juntamente com
uma tira fina de madeira.
38
Manutenção e limpeza
AVISO! PERIGO DE FERIMENTOS!
Antes de realizar quaisquer trabalhos
no aparelho, desligue-o e retire o
acumulador.
A serra circular de acumuladores não necessita de
manutenção.
■ O aparelho deve estar sempre limpo, seco e
livre de óleos ou lubrificantes.
■ Não podem entrar quaisquer líquidos para o
interior dos aparelhos.
■ Utilize um pano seco para limpar a estrutura.
Nunca utilize benzina, solventes ou detergentes
agressivos para o plástico.
■ Se for necessário guardar um acumulador de
iões de lítio durante um período longo de tempo, o estado de carga tem de ser controlado
regularmente. O estado de carga ideal situa-se
entre 50 % e 80 %. O clima de armazenamento ideal é fresco e seco.
NOTA
► Peças sobresselentes não especificadas (como
p. ex. escovas de carvão, interruptores) podem
ser encomendadas através da nossa linha
direta de Assistência Técnica.
Eliminação
A embalagem é composta por materiais
recicláveis que pode depositar nos
ecopontos locais.
Não deite ferramentas elétricas no
lixo doméstico!!
Em conformidade com a Diretiva Europeia
2012/ 19/EU, as ferramentas elétricas usadas têm
de ser recolhidas separadamente e submetidas a
reciclagem adequada.
Não deite fora acumuladores no lixo
doméstico!!
Acumuladores avariados ou usados têm
de ser reciclados em conformidade com a
diretiva 2006/66/EC. Devolva o conjunto
de acumuladores e /ou o aparelho nos
pontos de recolha disponibilizados.
PHKSA 18-Li A1
Relativamente a possibilidades de eliminação para
ferramentas elétricas/conjunto de acumuladores,
informe-se junto da sua administração municipal
ou local.
Garantia
Este aparelho tem uma garantia de 3 anos
a contar da data de compra. Este aparelho
foi fabricado com o maior cuidado e testado
escrupulosamente antes da sua distribuição.
Guarde o talão de compra como comprovativo da compra. Caso deseje acionar a garantia, telefone para o seu serviço de Assistência
Técnica. Apenas deste modo pode ser garantido um envio gratuito do seu produto.
A garantia abrange apenas defeitos de material ou
de fabrico e não inclui danos durante o transporte,
peças de desgaste ou danos em peças frágeis,
p. ex. interruptores ou acumuladores. O produto
foi concebido apenas para uso privado e não
para uso comercial. A garantia extingue-se em
caso de utilização incorreta, uso de força e intervenções que não tenham sido efetuadas pela
nossa Filial de Assistência Técnica autorizada.
Os seus direitos legais não são limitados por esta
garantia. O período de garantia não é prolongado pelo acionamento da mesma. Isto também se
aplica a peças substituídas e reparadas. Danos e
defeitos que possam eventualmente existir no momento da compra devem ser imediatamente comunicados, após retirar o aparelho da embalagem,
o mais tardar dois dias após a data de compra.
Expirado o período da garantia, quaisquer reparações necessárias estão sujeitas a pagamento.
PHKSA 18-Li A1
Assistência Técnica
AVISO!
► Mande reparar os seus aparelhos apenas
no Serviço de Assistência Técnica ou por
um eletricista especializado e somente
com peças de substituição originais. Desta
forma, é garantida a segurança do aparelho.
► A substituição da ficha ou do cabo de
ligação à rede deve ser efetuada sempre
pelo fabricante do aparelho ou pelo seu
serviço de apoio ao cliente. Desta forma, é
garantida a segurança do aparelho.
Assistência Portugal
Tel.: 70778 0005 (0,12 EUR/Min.)
E-Mail: [email protected]
IAN 102867
Horário de atendimento da linha de apoio:
Segunda a sexta das 8:00 horas – 20:00 horas
(HEC)
Importador
KOMPERNASS HANDELS GMBH
BURGSTRASSE 21
44867 BOCHUM
GERMANY
www.kompernass.com
39
PT
Tradução da Declaração de
Conformidade original
PT
Nós, a KOMPERNASS HANDELS GMBH,
responsável pela documentação: Sr. Semi Uguzlu,
BURGSTR. 21, 44867 BOCHUM, GERMANY,
declaramos que este produto cumpre os seguintes
documentos normativos, normas e diretivas
comunitárias:
Diretiva de máquinas
(2006 / 42 / EC)
Diretivas de baixa tensão CE
(2006 / 95 / EC)
Compatibilidade eletromagnética
(2004 / 108 / EC)
Diretiva RoHS
(2011 / 65 / EU)
Normas harmonizadas aplicadas:
EN 60745-1: 2009 + A11: 2010
EN 60745-2-5: 2010
EN 62233: 2008
EN 55014-1/ A2: 2011
EN 55014-2/ A2: 2008
EN 60335-1: 2010
EN 60335-2-29/ A2: 2010
EN 62233: 2008
EN 61000-3-2/ A2: 2009
EN 61000-3-3: 2013
EN 60825-1: 2007
Designação de tipo da máquina:
Serra circular com bateria PHKSA 18-Li A1
Ano de fabrico: 07 - 2014
Número de série: IAN 102867
Bochum, 20.06.2014
Semi Uguzlu
- Gestor de qualidade Reservado o direito a alterações técnicas no
âmbito da evolução técnica.
40
PHKSA 18-Li A1
Encomenda de acumulador sobresselente
Se pretender encomendar um acumulador sobresselente para o seu aparelho, poderá fazê-lo confortavelmente na Internet em www.kompernass.com ou pelo telefone.
O preço do acumulador sobresselente é de 20 € incl. IVA e envio. Este artigo pode esgotar depois de
pouco tempo devido a quantidade de stock limitada.
PT
Três aparelhos – três baterias compatíveis. Intercambiâveis!
Encomenda online
Para encomendar um acumulador sobresselente através da loja de acessórios:
■ Consulte, com o seu browser de Internet, a página www.kompernass.com.
■ Clique na respetiva bandeira em baixo à direita, para selecionar o país e a língua desejados.
■ Clique agora no separador "Loja de acessórios" e selecione em seguida na rubrica "Artigos mais
vendidos" o acumulador sobresselente adequado ao seu aparelho.
■ Depois de ter colocado o acumulador sobresselente no cesto de compras, clique no botão "Caixa"
e siga as instruções indicadas no ecrã para concluir o processo de encomenda.
NOTA
► A encomenda de peças sobresselentes em determinados países não pode ser realizada online.
Neste caso contacte a linha direta de Assistência Técnica.
■ A ação está limitada a um acumulador por cliente / aparelho, bem como a um prazo de um mês
depois do período de promoção. Posteriormente, o acumulador poderá continuar a ser encomendado
como peça sobresselente sob outras condições.
Encomenda telefónica
Assistência Portugal
Tel.: 70778 0005 (0,12 EUR/Min.)
Para garantir um processamento rápido da sua encomenda, tenha à mão para todos os pedidos o
número de artigo (p. ex. IAN 102867) do aparelho. O número do artigo pode ser encontrado na
chapa de identificação ou na folha da capa deste manual.
PHKSA 18-Li A1
41
42
PHKSA 18-Li A1
Contents
Introduction . . . . . . . . . . . . . . . . . . . . . . . . . . . . . . . . . . . . . . . . . . . . . . . . . . . . . 44
Intended use . . . . . . . . . . . . . . . . . . . . . . . . . . . . . . . . . . . . . . . . . . . . . . . . . . . . . . . . . . . . . . . 44
Features . . . . . . . . . . . . . . . . . . . . . . . . . . . . . . . . . . . . . . . . . . . . . . . . . . . . . . . . . . . . . . . . . . 44
Package contents . . . . . . . . . . . . . . . . . . . . . . . . . . . . . . . . . . . . . . . . . . . . . . . . . . . . . . . . . . . 44
Technical data . . . . . . . . . . . . . . . . . . . . . . . . . . . . . . . . . . . . . . . . . . . . . . . . . . . . . . . . . . . . . 44
General Power Tool Safety Warnings . . . . . . . . . . . . . . . . . . . . . . . . . . . . . . . 45
1. Work area safety . . . . . . . . . . . . . . . . . . . . . . . . . . . . . . . . . . . . . . . . . . . . . . . . . . . . . . . . . 45
2. Electrical safety . . . . . . . . . . . . . . . . . . . . . . . . . . . . . . . . . . . . . . . . . . . . . . . . . . . . . . . . . . 45
3. Personal safety . . . . . . . . . . . . . . . . . . . . . . . . . . . . . . . . . . . . . . . . . . . . . . . . . . . . . . . . . . . 46
4. Power tool use and care . . . . . . . . . . . . . . . . . . . . . . . . . . . . . . . . . . . . . . . . . . . . . . . . . . . 46
5. Use and handling of the cordless power tool . . . . . . . . . . . . . . . . . . . . . . . . . . . . . . . . . . . 46
6. Service . . . . . . . . . . . . . . . . . . . . . . . . . . . . . . . . . . . . . . . . . . . . . . . . . . . . . . . . . . . . . . . . . 47
Appliance-specific safety instructions for circular saws . . . . . . . . . . . . . . . . . . . . . . . . . . . . . . 47
Safety guidelines for battery chargers . . . . . . . . . . . . . . . . . . . . . . . . . . . . . . . . . . . . . . . . . . . 48
Safety information for circular saw blades . . . . . . . . . . . . . . . . . . . . . . . . . . . . . . . . . . . . . . . . 49
Genuine accessories/auxiliary equipment . . . . . . . . . . . . . . . . . . . . . . . . . . . . . . . . . . . . . . . . 49
GB
MT
Before initial use . . . . . . . . . . . . . . . . . . . . . . . . . . . . . . . . . . . . . . . . . . . . . . . . . 49
Charging the battery (see Fig. C) . . . . . . . . . . . . . . . . . . . . . . . . . . . . . . . . . . . . . . . . . . . . . . . 49
Attaching/disconnecting the battery pack to/from the appliance . . . . . . . . . . . . . . . . . . . . . . 49
Checking the battery charge level . . . . . . . . . . . . . . . . . . . . . . . . . . . . . . . . . . . . . . . . . . . . . . 50
Checking the blade guard . . . . . . . . . . . . . . . . . . . . . . . . . . . . . . . . . . . . . . . . . . . . . . . . . . . . 50
Initial use . . . . . . . . . . . . . . . . . . . . . . . . . . . . . . . . . . . . . . . . . . . . . . . . . . . . . . . 50
Fitting/changing the saw blade . . . . . . . . . . . . . . . . . . . . . . . . . . . . . . . . . . . . . . . . . . . . . . . . 50
Rip fence . . . . . . . . . . . . . . . . . . . . . . . . . . . . . . . . . . . . . . . . . . . . . . . . . . . . . . . . . . . . . . . . . 50
Connecting the sawdust extraction device . . . . . . . . . . . . . . . . . . . . . . . . . . . . . . . . . . . . . . . . 50
Operation . . . . . . . . . . . . . . . . . . . . . . . . . . . . . . . . . . . . . . . . . . . . . . . . . . . . . . 51
Switching on and off . . . . . . . . . . . . . . . . . . . . . . . . . . . . . . . . . . . . . . . . . . . . . . . . . . . . . . . . 51
Setting the cutting angle . . . . . . . . . . . . . . . . . . . . . . . . . . . . . . . . . . . . . . . . . . . . . . . . . . . . . . 51
Setting the cutting depth . . . . . . . . . . . . . . . . . . . . . . . . . . . . . . . . . . . . . . . . . . . . . . . . . . . . . . 51
Working with the circular saw . . . . . . . . . . . . . . . . . . . . . . . . . . . . . . . . . . . . . . . . . . . . . . . . . 51
Switching the laser on and off . . . . . . . . . . . . . . . . . . . . . . . . . . . . . . . . . . . . . . . . . . . . . . . . . 51
Tips and tricks . . . . . . . . . . . . . . . . . . . . . . . . . . . . . . . . . . . . . . . . . . . . . . . . . . . . . . . . . . . . . . 51
Maintenance and cleaning. . . . . . . . . . . . . . . . . . . . . . . . . . . . . . . . . . . . . . . . . 51
Disposal . . . . . . . . . . . . . . . . . . . . . . . . . . . . . . . . . . . . . . . . . . . . . . . . . . . . . . . . 52
Warranty . . . . . . . . . . . . . . . . . . . . . . . . . . . . . . . . . . . . . . . . . . . . . . . . . . . . . . . 52
Service . . . . . . . . . . . . . . . . . . . . . . . . . . . . . . . . . . . . . . . . . . . . . . . . . . . . . . . . . 53
Importer . . . . . . . . . . . . . . . . . . . . . . . . . . . . . . . . . . . . . . . . . . . . . . . . . . . . . . . 53
Translation of the original Conformity Declaration . . . . . . . . . . . . . . . . . . . . . 53
Ordering a replacement battery . . . . . . . . . . . . . . . . . . . . . . . . . . . . . . . . . . . . 54
Online ordering . . . . . . . . . . . . . . . . . . . . . . . . . . . . . . . . . . . . . . . . . . . . . . . . . . . . . . . . . . . . 54
Telephone ordering . . . . . . . . . . . . . . . . . . . . . . . . . . . . . . . . . . . . . . . . . . . . . . . . . . . . . . . . . 54
PHKSA 18-Li A1
43
Introduction
GB
MT
Congratulations on the purchase of your
new appliance. You have selected a high
quality product. The operating instructions
are part of this product. They contain
important information on safety, usage
and disposal. Before using the product,
familiarise yourself with all handling and safety
instructions. Use the product only as described and
for the range of applications specified. Hand over
all documents when the product is passed on to a
third party.
Intended use
This hand-held circular saw (hereinafter "appliance")
is designed for longitudinal, cross and mitre cuts in
firmly supported solid wood, chip board, plastics
and lightweight construction materials. Any other
usage of or modification to the appliance is deemed
to be improper and carries the risk of serious
personal injury. Not for commercial use.
Features
Figure A:
Safety lock-out
ON/OFF switch
Cutting depth scale
Release button for battery pack
Battery charge level button/battery display LED
Battery pack
Locking screw
Spindle lock
Base plate
Rip fence slot
Figure B:
ON/OFF/RESET switch laser
Auxiliary handle
Laser warning label
Laser exit opening
Cutting angle scale
Wing screw for cutting angle preselector
Wing screw for rip fence slot
Rip fence
44
Blade guard
Clamping flange
Clamping screw
Release lever for the blade guard
Saw blade
Chip ejector
Vacuum adapter for dust extraction
Allen key
Figure C:
Charger
Red control LED
Green control LED
Package contents
1 cordless circular saw
1 rapid battery charger
1 rip fence
1 vacuum adapter for dust extraction
1 SW 6 Allen key
1 saw blade (pre-assembled)
Operating instructions
Technical data
Cordless circular saw: PHKSA 18-Li A1
Rated voltage:
18 V
Idle speed:
n0 = 3800 min-1
Saw blade:
1x Ø 150 mm x Ø 16 mm,
18 teeth
Max. cutting depth:
90°: 48 mm
45°: 36 mm
Battery: PAP 18 A1
Type:
LITHIUM ION
Rated voltage:
18 V
Capacity:
1.5 Ah
Rapid battery charger: PLG 18 A1
INPUT:
Rated voltage:
230 - 240 V ~, 50 Hz
Power consumption:
40 W
OUTPUT:
Rated voltage:
18 V
Charging current:
1.8 A
Charging time:
approx. 60 min
T2A
Fuse (internal):
2A
Protection class:
II /
PHKSA 18-Li A1
Noise and vibration data:
Noise measurement value determined in accordance
with EN 60745. The A-rated noise level of the
power tool is typically as follows:
Sound pressure level:
77 dB(A)
Sound power level:
88 dB(A)
Uncertainty K:
3 dB
Wear ear protection!
Weighted acceleration, typically:
Hand/arm vibration ah,W = 2.5 m/s2
Uncertainty K = 1.5 m/s2
NOTE
► The vibration level specified in these instructions has been measured in accordance
with a standardised measuring procedure
specified in EN 60745 and can be used to
make equipment comparisons. The specified
vibration emission value can also be used to
make an initial exposure estimate.
WARNING!
► The vibration level varies in accordance with
the use of the power tool and may be higher
than the value specified in these instructions
in some cases. There is a risk of underestimation of the vibration load if the power tool is
used regularly in this manner. Try to keep the
vibration loads as low as possible. Measures
to reduce the vibration load are, e.g. wearing
gloves and limiting the working time. Wherein
all states of operation must be included (e.g.
times when the power tool is switched off and
times where the power tool is switched on but
running without load).
General Power Tool
Safety Warnings
WARNING!
► Read all safety warnings and all instructions.
Failure to follow the warnings and instructions
may result in electric shock, fire and/or serious
injury.
Save all warnings and instructions for future
reference.
The term "power tool" in the warnings refers to your
mains-operated (corded) power tool or batteryoperated (cordless) power tool.
1. Work area safety
a) Keep work area clean and well lit. Cluttered
or dark areas invite accidents.
b) Do not operate power tools in explosive
atmospheres, such as in the presence of flammable liquids, gases or dust. Power tools create
sparks which may ignite the dust or fumes.
c) Keep children and bystanders away while
operating a power tool. Distractions can cause
you to lose control.
2. Electrical safety
a) Power tool plugs must match the outlet. Never
modify the plug in any way. Do not use any
adapter plugs with earthed (grounded) power
tools. Unmodified plugs and matching outlets
will reduce risk of electric shock.
b) Avoid body contact with earthed or grounded
surfaces, such as pipes, radiators, ranges and
refrigerators. There is an increased risk of electric
shock if your body is earthed or grounded.
c) Do not expose power tools to rain or wet
conditions. Water entering a power tool will
increase the risk of electric shock.
d) Do not abuse the cord. Never use the cord for
carrying, pulling or unplugging the power tool.
Keep cord away from heat, oil, sharp edges
or moving parts. Damaged or entangled cords
increase the risk of electric shock.
PHKSA 18-Li A1
45
GB
MT
e) When operating a power tool outdoors, use
an extension cord suitable for outdoor use.
Use of a cord suitable for outdoor use reduces
the risk of electric shock.
f) If operating a power tool in a damp location
is unavoidable, use a residual current device
(RCD) protected supply. Use of an RCD
reduces the risk of electric shock.
3. Personal safety
GB
MT
a) Stay alert, watch what you are doing and
use common sense when operating a power
tool. Do not use a power tool while you are
tired or under the influence of drugs, alcohol
or medication. A moment of inattention while
operating power tools may result in serious
personal injury.
b) Use personal protective equipment. Always
wear eye protection. Protective equipment such
as dust mask, non-skid safety shoes, hard hat,
or hearing protection used for appropriate
conditions will reduce personal injuries.
4. Power tool use and care
a) Do not force the power tool. Use the correct
power tool for your application. The correct
power tool will do the job better and safer at
the rate for which it was designed.
b) Do not use the power tool if the switch does
not turn it on and off. Any power tool that cannot be controlled with the switch is dangerous
and must be repaired.
c) Disconnect the plug from the power source
and/or the battery pack from the power tool
before making any adjustments, changing
accessories, or storing power tools. Such
preventive safety measures reduce the risk of
starting the power tool accidentally.
d) Store idle power tools out of the reach of
children and do not allow persons unfamiliar
with the power tool or these instructions to
operate the power tool. Power tools are
dangerous in the hands of untrained users.
c) Prevent unintentional starting. Ensure the switch
is in the off -position before connecting to power
source and/or battery pack, picking up or
carrying the tool. Carrying power tools with your
finger on the switch or energising power tools that
have the switch on invites accidents.
e) Maintain power tools. Check for misalignment
or binding of moving parts, breakage of parts
and any other condition that may affect the
power tool’s operation. If damaged, have the
power tool repaired before use. Many accidents are caused by poorly maintained power
tools.
d) Remove any adjusting key or wrench before
turning the power tool on. A wrench or a key
left attached to a rotating part of the power tool
may result in personal injury.
f) Keep cutting tools sharp and clean.
Properly maintained cutting tools with sharp
cutting edges are less likely to bind and are
easier to control.
e) Do not overreach. Keep proper footing and
balance at all times. This enables better control
of the power tool in unexpected situations.
g) Use the power tool, accessories and tool bits
etc. in accordance with these instructions, taking into account the working conditions
and the work to be performed. Use of the
power tool for operations different from those
intended could result in a hazardous situation.
f) Dress properly. Do not wear loose clothing or
jewellery. Keep your hair, clothing and gloves
away from moving parts. Loose clothes, jewellery or long hair can be caught in moving parts.
g) If devices are provided for the connection of
dust extraction and collection facilities, ensure
these are connected and properly used.
Use of dust collection can reduce dust-related
hazards.
46
5. Use and handling of the cordless
power tool
a) Charge the rechargeable battery unit using
only the charger recommended by the manufacturer. Chargers are often designed for a
particular type of rechargeable battery unit.
There is the danger of fire if other types of
rechargeable battery units are used.
PHKSA 18-Li A1
b) Only the rechargeable battery units supplied
are to be used with the power tools. The use
of other rechargeable battery units may result
in injury or a fire hazard.
c) When they are not being used, store rechargeable battery units away from paper clips, coins,
keys. nails, screws or other small metal objects
that could cause the contacts to be bridged.
Short-circuiting the contacts of a rechargeable
battery unit may result in burns or fire.
d) Fluid may leak out of rechargeable battery
units if they are misused. If this happens, avoid
contact with the fluid. If accidental contact
occurs, rinse the affected area with water.
Seek additional medical help if any of the
fluid gets into your eyes. Escaping battery
fluid may cause skin irritation or burns.
CAUTION! RISK OF EXPLOSION!
Never charge non-rechargeable
batteries!
Protect the battery against heat, e. g.,
against continuous intense sunlight,
fire, water and moisture.
Danger of explosion.
c) Adjust the cutting depth to the thickness of the
workpiece. Less than a full tooth of the blade
teeth should be visible below the workpiece.
d) Never hold piece being cut in your hands
or across your leg. Secure the workpiece to
a stable platform. It is important to support
the work properly to minimise body exposure,
blade binding, or loss of control.
e) Hold the power tool by insulated gripping
surfaces only, when performing an operation
where the cutting tool may contact hidden
wiring. Contact with a "live" wire will also make
exposed metal parts of the power tool "live"
and could give the operator an electric shock.
f) When ripping, always use a rip fence or
straight edge guide. This improves the accuracy
of cut and reduces the chance of blade binding.
g) Always use saw blades with correct size and
shape (diamond versus round) of arbour
holes. Blades that do not match the mounting
hardware of the saw will run eccentrically, causing loss of control.
h) Never use damaged or incorrect blade
washers or bolts. The blade washers and bolt
were specially designed for your saw, for optimum performance and safety of operation.
Further safety instructions for all saws
Kickback causes and related warnings
6. Service
a) Have your power tool serviced by a qualified
repair person using only identical replacement parts. This will ensure that the safety of
the power tool is maintained.
Appliance-specific safety instructions
for circular saws
Safety instructions for all saws
Cutting procedures
a)
DANGER! Keep hands away from
cutting area and the blade. Keep
your second hand on auxiliary
handle, or motor housing. If both hands are
holding the saw, they cannot be cut by the blade.
b) Do not reach underneath the workpiece. The
guard cannot protect you from the blade below
the workpiece.
PHKSA 18-Li A1
▯ A kickback is a sudden reaction to a pinched,
bound or misaligned saw blade, causing an
uncontrolled saw to lift up and out of the workpiece toward the operator;
▯ when the blade is pinched or bound tightly
by the kerf closing down, the blade stalls and
the motor reaction drives the unit rapidly back
toward the operator;
▯ if the blade becomes twisted or misaligned in
the cut, the teeth at the back edge of the blade
can dig into the top surface of the wood causing
the blade to climb out of the kerf and jump
back toward the operator.
Kickback is the result of saw misuse and/or incorrect operating procedures or conditions and can
be avoided by taking proper precautions as given
below.
47
GB
MT
GB
MT
a) Maintain a firm grip with both hands on the
saw and position your arms to resist kickback
forces. Position your body to either side of the
blade, but not in line with the blade. Kickback
could cause the saw to jump backwards, but kickback forces can be controlled by the operator, if
proper precautions are taken.
b) When blade is binding, or when interrupting
a cut for any reason, release the trigger and
hold the saw motionless in the material until
the blade comes to a complete stop. Never
attempt to remove the saw from the work or
pull the saw backwards while the blade is in
motion or kickback may occur. Investigate and
take corrective actions to eliminate the cause of
blade binding.
c) When restarting a saw in the workpiece, centre
the saw blade in the kerf and check that saw
teeth are not engaged into the material. If saw
blade is binding, it may walk up or kickback from
the workpiece as the saw is restarted.
d) Support large panels to minimise the risk of
blade pinching and kickback. Large panels tend
to sag under their own weight. Supports must be
placed under the panel on both sides, near the
line of cut and near the edge of the panel.
e) Do not use dull or damaged blades.
Unsharpened or improperly set blades produce
narrow kerf causing excessive friction, blade
binding and kickback.
f) Blade depth and bevel adjusting locking levers
must be tight and secure before making cut.
If blade adjustment shifts while cutting, it may
cause binding and kickback.
g) Use extra caution when sawing into existing
walls or other blind areas. The protruding blade
may cut objects that can cause kickback.
Lower guard function
a) Check lower guard for proper closing before
each use. Do not operate the saw if lower
guard does not move freely and close instantly.
Never clamp or tie the lower guard into the
open position. If saw is accidentally dropped,
lower guard may be bent. Raise the lower guard
with the retracting handle and make sure it moves
freely and does not touch the blade or any
other part, in all angles and depths of cut.
48
b) Check the operation of the lower guard spring.
If the guard and the spring are not operating
properly, they must be serviced before use. Lower
guard may operate sluggishly due to damaged
parts, gummy deposits, or a build-up of debris.
c) Lower guard may be retracted manually only
for special cuts such as "plunge cuts" and
"compound cuts". Raise lower guard by retracting
handle and as soon as blade enters the material,
the lower guard must be released. For all other sawing, the lower guard should operate automatically.
d) Always observe that the lower guard is covering the blade before placing saw down on
bench or floor. An unprotected, coasting blade
will cause the saw to walk backwards, cutting
whatever is in its path. Be aware of the time it
takes for the blade to stop after switch is released.
Safety guidelines for battery chargers
■ This appliance may be used by children aged
8 years and above and by persons with limited
physical, sensory or mental capabilities or lack of
experience and knowledge, provided that they are
under supervision or have been told how to use the
appliance safely and are aware of the potential risks.
Children must not use the appliance as a plaything.
Cleaning and user maintenance tasks may not be
carried out by children unless they are supervised.
This charger is suitable for indoor use only.
WARNING!
■ Do not operate the appliance with a damaged cable, supply cord or mains plug. A
damaged power cord causes danger to life
by electric shock.
Supplementary notes
■ Do not use any grinding discs.
■ Use only saw blades with diameters corresponding to the label on the saw.
■ When sawing wood or other materials which may
create dusts that are hazardous to health, always
connect a suitable, certified vacuum extractor device.
■ Wear a dust mask when sawing wood.
■ Use only the recommended saw blades.
■ Always wear ear protectors.
PHKSA 18-Li A1
■ Do not allow the teeth of the saw blade to overheat.
■ When sawing plastic, avoid melting the plastic.
Safety information for
circular saw blades
Wear protective gloves!
CAUTION!
If operating and adjustment equipment is used or
procedures other than those specified here are
carried out, this may result in hazardous radiation
exposure.
Before initial use
Wear respiratory protection!
Charging the battery (see Fig. C)
CAUTION!
Wear protective glasses!
Wear hearing protection!
► Always unplug the appliance before you
remove the battery pack from or connect
the battery pack to the charger .
NOTE
CAUTION! RISK OF EXPLOSION!
Never charge non-rechargeable
batteries!
Genuine accessories/
auxiliary equipment
■ Only use the accessories and additional
equipment that are specified in the operating instructions and are compatible with the appliance.
WARNING!
Protect yourself from laser radiation!
LASER RADIATION
DO NOT STARE INTO BEAM
CLASS 2 LASER PRODUCT
P max.: < 1 mW
λ: 650 nm
EN 60825-1: 2007
This appliance contains a Class 2 laser
and will be delivered with a laser
warning label .
► NEVER direct the laser beam at people or animals.
► NEVER look directly into the laser beam. The
laser beam can cause serious eye damage.
► Do NOT direct the laser beam at strongly
reflective material. Reflected laser beams are
also dangerous.
► Any adjustment intended to increase the
intensity of the laser beam is forbidden.
There is a risk of personal injury!
► No liability will be accepted for damage resulting from manipulation of the laser equipment or
from disregarding these safety instructions.
PHKSA 18-Li A1
► Three appliances - three compatible batteries.
Interchangeable!
(see chapter ordering a replacement battery)
■ Never charge the battery pack when the
ambient temperature is below 10°C or above
40°C.
♦ Connect the battery pack
charger (see Fig. C).
to the battery
♦ Insert the mains plug into the mains power socket.
The red control LED lights up.
♦ The green control LED indicates that the
charging process is complete and the battery
pack is ready.
♦ Insert the battery pack
ance.
back into the appli-
■ Never recharge a battery pack again
immediately after rapid charging. This could
overcharge the battery pack , thus reducing
the lifespan of the battery and charger .
♦ Switch off the charger for at least 15 minutes
between successive charging sessions. Also
disconnect the power plug from the mains
power socket.
Attaching/disconnecting the battery
pack to/from the appliance
Inserting the battery pack:
♦ Allow the battery pack
handle.
to click into the
49
GB
MT
Removing the battery pack:
♦ Press the release button
battery pack .
and remove the
Checking the battery charge level
♦ Press the battery charge level button to
check the status of the battery (see also main
diagram). The status/remaining charge will be
shown on the battery display LED as follows:
GB
MT
♦ RED/ORANGE/GREEN = maximum charge/
power
RED/ORANGE = medium charge/power
RED = low charge – charge the battery
Checking the blade guard
♦ Pull back on the release lever for the blade
guard as far as the stop.
The blade guard must move freely without jamming and must spring back into its starting position
automatically when you let go of the release lever
for the blade guard .
Initial use
6. Press the spindle lock button (until it engages)
and use the Allen key to tighten the clamping
screw .
WARNING!
► The arrow on the saw blade must correspond to the arrow showing the direction
of rotation (running direction shown on the
appliance).
■ Ensure that the saw blade is suitable for the
rotational speed of the tool.
Rip fence
♦ Loose the wing screw and insert the rip
fence into the rip fence slot .
♦ Set the desired cut width with the help of the
scale on the rip fence and the cut out in the
base plate (see also Fig. B).
The right-hand recess in the base plate is for a
cutting angle of 0°. The left-hand recess in the
base plate is for a cutting angle of 45°.
Fitting/changing the saw blade
Always remove the battery pack before changing
the saw blade !
1. Set the cutting depth (using the locking screw )
to the minimum position, 0 mm.
2. Swing the blade guard back using the
release lever and put the appliance down.
3. Press the spindle lock button (until it engages)
and use the Allen key to release the clamping
screw . Now remove the clamping screw
and the clamping flange (see also Fig. A).
Fig. B: Cutting width 3 cm
♦ Retighten the wing screw .
Connecting the sawdust extraction
device
♦ Attach the dust extraction adapter to the chip
ejector .
Optional depending on the diameter of the dust
and sawdust extractor.
♦ Connect an approved dust and chip extraction
device.
Fig. A Changing the saw blade
4. Remove saw blade.
5. Fitting a saw blade is carried out in the reverse
order.
50
PHKSA 18-Li A1
Operation
NOTE
Switching on and off
► OVERLOAD AND RESET! The appliance
switches off in case of overload operation.
Switching on:
♦ Push the safety lock-out to the left or right
and keep it pressed.
♦ Press the ON/OFF switch . Once the saw is
running, you can release the safety lock-out .
Switching off:
♦ Release the ON/OFF switch .
Setting the cutting angle
You can select the cutting angle using the cutting
angle scale .
■ Release the wing screw on the cutting angle
preselector, set the desired cutting angle on the
cutting angle scale and then retighten the
wing screw .
♦ Switch OFF the laser. Press the laser ON/
OFF/RESET switch
.
► An automatic reset is only possible once the
laser is turned off.
Tips and tricks
■ Avoid damaging the cutting edge of sensitive
materials, e.g. coated chip boards or doors,
by sticking masking tape along the cutting line.
Another benefit of this is that it is easier to mark
a line on the tape than on a shiny surface. An
even more effective method of protecting the
cutting edges is to clamp a thin piece of wood
along the cutting line (this wood is also sawn).
Setting the cutting depth
Maintenance and cleaning
NOTE
► Select a cutting depth of approx. 3 mm more
than the thickness of the material. This ensures
that you achieve a clean cut.
WARNING! RISK OF INJURY!
Switch the power tool off and remove
the battery before starting any work on
the power tool.
♦ Release the locking screw , set the desired
cutting depth on the cutting depth scale and
then retighten the locking screw .
The cordless hand-held circular saw is
maintenance-free.
Working with the circular saw
■ The appliance must always be kept clean, dry
and free from oil or grease.
1. Switch on the appliance – as described in
"Switching on and off" – and then place it with the
front edge of the base plate on the material.
2. Align the machine using the guide fence
by using a marked line.
or
3. Hold the machine in both hands using the handles
and saw by exerting an even pressure.
Switching the laser on and off
Switching on:
♦ Press the laser ON/OFF/RESET switch
PHKSA 18-Li A1
■ Use a soft, dry cloth to clean the housing.
Never use petrol, solvents or cleansers which
can damage plastic.
■ If a lithium-ion battery is to be stored for an
extended period, the charge level should be
checked regularly. The optimum charge level
is between 50% and 80%. Optimum storage
conditions are cool and dry.
NOTE
.
Switching off:
♦ Press the laser ON/OFF/RESET switch
■ Never allow fluids to get into the appliance.
.
► Replacement parts not listed (such as carbon
brushes, switch) can be ordered via our
service hotline.
51
GB
MT
Disposal
The packaging is made from environmentally friendly material and can be disposed
of at your local recycling plant.
Do not dispose of power tools in
normal domestic waste!
GB
MT
European Directive 2012/19/EU requires that
worn-out power tools be collected separately and
recycled in an environmentally compatible manner.
Do not dispose of batteries in your
normal domestic waste!
Defective or worn-out rechargeable batteries must
be recycled according to Directive 2006/66/EC.
Take the battery pack and/or appliance to available
collection facilities.
Please consult your local authorities regarding suitable
disposal of worn out power tools/battery packs.
52
Warranty
You are provided a 3-year warranty on this
appliance, valid from the date of purchase.
This appliance has been manufactured with
care and inspected meticulously prior to
delivery. Please retain your receipt as proof
of purchase. In the event of a warranty claim,
please contact your Customer Service unit by
telephone. This is the only way to guarantee
free return of your merchandise.
The warranty only covers claims for material and
manufacturing defects, not for damage sustained
during carriage, components subject to wear and
tear or damage to fragile components such as
switches or batteries. This appliance is intended
solely for private use and not for commercial
deployment. The warranty shall be deemed void in
the case of misuse or improper handling, use of
force or interventions which were not carried out
by one of our authorised Service centres. Your
statutory rights are not restricted by this warranty.
The warranty period is not extended in consequence
of repairs carried out under the warranty. This also
applies to replaced and repaired components. Any
damage or defects present at the time of purchase
must be reported immediately after unpacking, but
no later than two days after the date of purchase.
Repairs carried out after expiry of the warranty
period shall be subject to charge.
PHKSA 18-Li A1
Service
WARNING!
► Have the power tool repaired by the Service
centre or a qualified electrician and only
using genuine replacement parts.
This will ensure the ongoing safety of the
appliance.
► Always ensure that the power plug or the
mains cable is replaced only by the manufacturer of the appliance or by that party's
approved Customer Service unit. This will
ensure the ongoing safety of the appliance.
Service Great Britain
Tel.: 0871 5000 720 (£ 0.10/Min.)
E-Mail: [email protected]
IAN 102867
Service Malta
Tel.: 80062230
E-Mail: [email protected]
IAN 102867
Hotline availability:
Monday to Friday 08:00 - 20:00 (CET)
Importer
KOMPERNASS HANDELS GMBH
BURGSTRASSE 21
44867 BOCHUM
GERMANY
www.kompernass.com
Translation of the original
Conformity Declaration
We, KOMPERNASS HANDELS GMBH, Custodian
of Documents: Mr. Semi Uguzlu, BURGSTR. 21,
44867 BOCHUM, GERMANY, hereby declare
that this product complies with the following
standards, normative documents and EC directives:
Machinery Directive
(2006/42/EC)
EC Low Voltage Regulations
(2006/95/EC)
EMC (Electromagnetic Compatibility)
(2004/108/EC)
RoHS Directive
(2011/65/EU)
Applied harmonised standards:
EN 60745-1: 2009 + A11: 2010
EN 60745-2-5: 2010
EN 62233: 2008
EN 55014-1/ A2: 2011
EN 55014-2/ A2: 2008
EN 60335-1: 2010
EN 60335-2-29/ A2: 2010
EN 62233: 2008
EN 61000-3-2/ A2: 2009
EN 61000-3-3: 2013
EN 60825-1: 2007
Type designation of machine:
Cordless circular saw PHKSA 18-Li A1
Year of manufacture: 07 - 2014
Serial number: IAN 102867
Bochum, 20/06/2014
Semi Uguzlu
- Quality Manager The right to effect technical changes in the context
of further development is reserved.
PHKSA 18-Li A1
53
GB
MT
Ordering a replacement battery
If you want to order a replacement battery for your appliance, you can do so easily via the Internet on
www.kompernass.com or by telephone.
The price of the replacement battery is €20, including VAT and shipping. Due to limited stocks, this item
may sell out quickly.
GB
MT
Three appliances - three compatible
batteries. Interchangeable!
Online ordering
To order a replacement battery from the Accessories Shop:
■ Use your Internet browser to visit www.kompernass.com.
■ Click on the corresponding flag on the right hand side at the bottom of the page to select the desired
country and language.
■ Click on the tab "Accessory Shop" and then select the appropriate replacement battery under the
heading "Topseller".
■ After you have placed the rechargeable battery in the shopping basket, click the "Checkout" button
and follow the on-screen instructions to complete the ordering process.
NOTE
► Online ordering of replacement parts is not possible in all countries. In this case, please contact the
Service hotline.
■ The promotion is limited to one battery per customer/appliance and also to a timeline of one month
after the promotion period. Thereafter the replacement battery can be ordered as a replacement part
under other conditions.
Telephone ordering
Service Great Britain
Tel.: 0871 5000 720 (£ 0.10/Min.)
Service Malta
Tel.: 80062230
To ensure that your order is processed swiftly, have the article number of your appliance to hand
(e.g. IAN 102867) in case of questions. The article number can be found on the label or the title
page of these instructions.
54
PHKSA 18-Li A1
Inhaltsverzeichnis
Einleitung . . . . . . . . . . . . . . . . . . . . . . . . . . . . . . . . . . . . . . . . . . . . . . . . . . . . . . . 56
Bestimmungsgemäßer Gebrauch . . . . . . . . . . . . . . . . . . . . . . . . . . . . . . . . . . . . . . . . . . . . . . . 56
Ausstattung . . . . . . . . . . . . . . . . . . . . . . . . . . . . . . . . . . . . . . . . . . . . . . . . . . . . . . . . . . . . . . . . 56
Lieferumfang . . . . . . . . . . . . . . . . . . . . . . . . . . . . . . . . . . . . . . . . . . . . . . . . . . . . . . . . . . . . . . . 56
Technische Daten . . . . . . . . . . . . . . . . . . . . . . . . . . . . . . . . . . . . . . . . . . . . . . . . . . . . . . . . . . . 56
Allgemeine Sicherheitshinweise für Elektrowerkzeuge . . . . . . . . . . . . . . . . . . 57
1. Arbeitsplatz-Sicherheit . . . . . . . . . . . . . . . . . . . . . . . . . . . . . . . . . . . . . . . . . . . . . . . . . . . . . 57
2. Elektrische Sicherheit . . . . . . . . . . . . . . . . . . . . . . . . . . . . . . . . . . . . . . . . . . . . . . . . . . . . . . 57
3. Sicherheit von Personen . . . . . . . . . . . . . . . . . . . . . . . . . . . . . . . . . . . . . . . . . . . . . . . . . . . . 58
4. Verwendung und Behandlung des Elektrowerkzeugs . . . . . . . . . . . . . . . . . . . . . . . . . . . . . 58
5. Verwendung und Behandlung des Akkuwerkzeugs . . . . . . . . . . . . . . . . . . . . . . . . . . . . . . . 59
6. Service . . . . . . . . . . . . . . . . . . . . . . . . . . . . . . . . . . . . . . . . . . . . . . . . . . . . . . . . . . . . . . . . . 59
Gerätespezifische Sicherheitshinweise für Handkreissägen . . . . . . . . . . . . . . . . . . . . . . . . . . . 59
Sicherheitshinweise für Ladegeräte . . . . . . . . . . . . . . . . . . . . . . . . . . . . . . . . . . . . . . . . . . . . . 61
Sicherheitshinweise für Kreissägeblätter . . . . . . . . . . . . . . . . . . . . . . . . . . . . . . . . . . . . . . . . . . 61
Originalzubehör / -zusatzgeräte . . . . . . . . . . . . . . . . . . . . . . . . . . . . . . . . . . . . . . . . . . . . . . . 61
DE
AT
CH
Vor der Inbetriebnahme . . . . . . . . . . . . . . . . . . . . . . . . . . . . . . . . . . . . . . . . . . 62
Akku-Pack laden (siehe Abb. C) . . . . . . . . . . . . . . . . . . . . . . . . . . . . . . . . . . . . . . . . . . . . . . . . 62
Akku-Pack ins Gerät einsetzen / entnehmen . . . . . . . . . . . . . . . . . . . . . . . . . . . . . . . . . . . . . . 62
Akkuzustand prüfen . . . . . . . . . . . . . . . . . . . . . . . . . . . . . . . . . . . . . . . . . . . . . . . . . . . . . . . . . 62
Schutzhaube prüfen . . . . . . . . . . . . . . . . . . . . . . . . . . . . . . . . . . . . . . . . . . . . . . . . . . . . . . . . . 62
Inbetriebnahme . . . . . . . . . . . . . . . . . . . . . . . . . . . . . . . . . . . . . . . . . . . . . . . . . 63
Sägeblatt montieren / wechseln . . . . . . . . . . . . . . . . . . . . . . . . . . . . . . . . . . . . . . . . . . . . . . . . 63
Parallelanschlag . . . . . . . . . . . . . . . . . . . . . . . . . . . . . . . . . . . . . . . . . . . . . . . . . . . . . . . . . . . . 63
Spanabsaugung anschließen . . . . . . . . . . . . . . . . . . . . . . . . . . . . . . . . . . . . . . . . . . . . . . . . . . 63
Bedienung . . . . . . . . . . . . . . . . . . . . . . . . . . . . . . . . . . . . . . . . . . . . . . . . . . . . . . 63
Ein- und ausschalten . . . . . . . . . . . . . . . . . . . . . . . . . . . . . . . . . . . . . . . . . . . . . . . . . . . . . . . . . 63
Schnittwinkel einstellen . . . . . . . . . . . . . . . . . . . . . . . . . . . . . . . . . . . . . . . . . . . . . . . . . . . . . . . 63
Schnitttiefe einstellen . . . . . . . . . . . . . . . . . . . . . . . . . . . . . . . . . . . . . . . . . . . . . . . . . . . . . . . . 64
Handhabung der Handkreissäge . . . . . . . . . . . . . . . . . . . . . . . . . . . . . . . . . . . . . . . . . . . . . . . 64
Laser ein- und ausschalten . . . . . . . . . . . . . . . . . . . . . . . . . . . . . . . . . . . . . . . . . . . . . . . . . . . . 64
Tipps und Tricks . . . . . . . . . . . . . . . . . . . . . . . . . . . . . . . . . . . . . . . . . . . . . . . . . . . . . . . . . . . . 64
Wartung und Reinigung . . . . . . . . . . . . . . . . . . . . . . . . . . . . . . . . . . . . . . . . . . . 64
Entsorgung . . . . . . . . . . . . . . . . . . . . . . . . . . . . . . . . . . . . . . . . . . . . . . . . . . . . . 64
Garantie . . . . . . . . . . . . . . . . . . . . . . . . . . . . . . . . . . . . . . . . . . . . . . . . . . . . . . . 65
Service . . . . . . . . . . . . . . . . . . . . . . . . . . . . . . . . . . . . . . . . . . . . . . . . . . . . . . . . . 65
Importeur . . . . . . . . . . . . . . . . . . . . . . . . . . . . . . . . . . . . . . . . . . . . . . . . . . . . . . 65
Original-Konformitätserklärung . . . . . . . . . . . . . . . . . . . . . . . . . . . . . . . . . . . . 66
Ersatz-Akku Bestellung . . . . . . . . . . . . . . . . . . . . . . . . . . . . . . . . . . . . . . . . . . . 67
Online-Bestellung . . . . . . . . . . . . . . . . . . . . . . . . . . . . . . . . . . . . . . . . . . . . . . . . . . . . . . . . . . . 67
Telefonische Bestellung . . . . . . . . . . . . . . . . . . . . . . . . . . . . . . . . . . . . . . . . . . . . . . . . . . . . . . . 67
PHKSA 18-Li A1
55
DE
AT
CH
Einleitung
Schutzhaube
Wir beglückwünschen Sie zum Kauf Ihres
neuen Gerätes. Sie haben sich damit für ein
hochwertiges Produkt entschieden. Die
Bedienungsanleitung ist Teil dieses Produkts.
Sie enthält wichtige Hinweise für Sicherheit,
Gebrauch und Entsorgung. Machen Sie sich
vor der Benutzung des Produkts mit allen Bedien- und
Sicherheitshinweisen vertraut. Benutzen Sie das
Produkt nur wie beschrieben und für die angegebenen Einsatzbereiche. Händigen Sie alle Unterlagen
bei Weitergabe des Produkts an Dritte mit aus.
Spannflansch
Spannschraube
Rückziehhebel für Schutzhaube
Sägeblatt
Spanauswurf
Adapter für Staubabsaugung
Innensechskantschlüssel
Abbildung C:
Ladegerät
Bestimmungsgemäßer Gebrauch
Rote Kontroll-LED
Die Handkreissäge (nachfolgend „Gerät“ genannt)
ist zum Sägen von Längs- und Querschnitten,
Gehrungsschnitten bei fester Auflage in Vollholz,
Spanplatten, Kunststoff und Leichtbaustoffen geeignet.
Jede andere Verwendung oder Veränderung der
Maschine gilt als nicht bestimmungsgemäß und
birgt erhebliche Unfallgefahren. Nicht zum gewerblichen Gebrauch.
Grüne Kontroll-LED
Ausstattung
Abbildung A:
Einschaltsperre
EIN-/AUS-Schalter
Schnitttiefenskala
Entriegelungstaste für Akku-Pack
Taste Akkuzustand/Akku-Display-LED
Akku-Pack
Feststellschraube
Spindelarretierung
Grundplatte
Parallelanschlagaufnahme
Abbildung B:
EIN-/AUS-/RESET-Schalter Laser
Zusatzgriff
Laserwarnschild
Laseraustrittsöffnung
Schnittwinkelskala
Flügelschraube für Schnittwinkelvorwahl
Flügelschraube für Parallelanschlagaufnahme
Parallelanschlag
56
Lieferumfang
1 Akku-Handkreissäge
1 Akku-Schnellladegerät
1 Parallelanschlag
1 Adapter zur Staubabsaugung
1 Innensechskantschlüssel SW 6
1 Sägeblatt (vormontiert)
1 Betriebsanleitung
Technische Daten
Akku-Handkreissäge: PHKSA 18-Li A1
Nennspannung:
18 V
Leerlaufdrehzahl:
n0 3800 min-1
Sägeblatt:
1x Ø 150 mm x Ø 16 mm,
18 Zähne
Max. Schnitttiefe:
90°: 48 mm
45°: 36 mm
Akku: PAP 18 A1
Typ:
LITHIUM-IONEN
Nennspannung:
18 V
Kapazität:
1,5 Ah
Akku-Schnellladegerät: PLG 18 A1
EINGANG / Input:
Nennspannung:
230 - 240 V ~, 50 Hz
Leistungsaufnahme:
40 W
AUSGANG / Output:
Nennspannung:
18 V
Ladestrom:
1,8 A
Ladedauer:
ca. 60 min
Sicherung (innen):
Schutzklasse:
2A
II /
T2A
PHKSA 18-Li A1
Geräusch- und Vibrationsinformationen:
Messwert für Geräusch ermittelt entsprechend
EN 60745. Der A-bewertete Geräuschpegel des
Elektrowerkzeugs beträgt typischerweise:
Schalldruckpegel:
77 dB(A)
Schallleistungspegel:
88 dB(A)
Unsicherheit K:
3 dB
Gehörschutz tragen!
Bewertete Beschleunigung, typischerweise:
Hand-/Armvibration ah,W = 2,5 m/s2
Unsicherheit K = 1,5 m/s2
HINWEIS
► Der in diesen Anweisungen angegebene
Schwingungspegel ist entsprechend einem in
EN 60745 genormten Messverfahren gemessen worden und kann für den Gerätevergleich
verwendet werden. Der angegebene Schwingungsemissionswert kann auch zu einer
einleitenden Einschätzung der Aussetzung
verwendet werden.
WARNUNG!
► Der Schwingungspegel wird sich entsprechend
dem Einsatz des Elektrowerkzeugs verändern
und kann in manchen Fällen über dem in
diesen Anweisungen angegebenen Wert
liegen. Die Schwingungsbelastung könnte
unterschätzt werden, wenn das Elektrowerkzeug regelmäßig in solcher Weise verwendet
wird. Versuchen Sie, die Belastung durch
Vibrationen so gering wie möglich zu halten.
Beispielhafte Maßnahmen zur Verringerung
der Vibrationsbelastung sind das Tragen von
Handschuhen beim Gebrauch des Werkzeugs und die Begrenzung der Arbeitszeit.
Dabei sind alle Anteile des Betriebszyklus
zu berücksichtigen (beispielweise Zeiten, in
denen das Elektrowerkzeug abgeschaltet ist,
und solche, in denen es zwar eingeschaltet
ist, aber ohne Belastung läuft).
PHKSA 18-Li A1
Allgemeine
Sicherheitshinweise
für Elektrowerkzeuge
WARNUNG!
► Lesen Sie alle Sicherheitshinweise und
Anweisungen. Versäumnisse bei der Einhaltung der Sicherheitshinweise und Anweisungen können elektrischen Schlag, Brand und/
oder schwere Verletzungen verursachen.
Bewahren Sie alle Sicherheitshinweise und
Anweisungen für die Zukunft auf.
Der in den Sicherheitshinweisen verwendete Begriff
„Elektrowerkzeug“ bezieht sich auf netzbetriebene
Elektrowerkzeuge (mit Netzkabel) und auf akkubetriebene Elektrowerkzeuge (ohne Netzkabel).
1. Arbeitsplatz-Sicherheit
a) Halten Sie Ihren Arbeitsbereich sauber und
gut beleuchtet. Unordnung und unbeleuchtete
Arbeitsbereiche können zu Unfällen führen.
b) Arbeiten Sie mit dem Elektrowerkzeug nicht in
explosionsgefährdeter Umgebung, in der sich
brennbare Flüssigkeiten, Gase oder Stäube
befinden. Elektrowerkzeuge erzeugen Funken, die
den Staub oder die Dämpfe entzünden können.
c) Halten Sie Kinder und andere Personen während
der Benutzung des Elektrowerkzeugs fern. Bei
Ablenkung können Sie die Kontrolle über das
Gerät verlieren.
2. Elektrische Sicherheit
a) Der Anschlussstecker des Elektrowerkzeuges
muss in die Steckdose passen. Der Stecker
darf in keiner Weise verändert werden.
Verwenden Sie keine Adapterstecker gemeinsam mit schutzgeerdeten Elektrowerkzeugen.
Unveränderte Stecker und passende Steckdosen
verringern das Risiko eines elektrischen Schlages.
b) Vermeiden Sie Körperkontakt mit geerdeten
Oberflächen, wie von Rohren, Heizungen,
Herden und Kühlschränken. Es besteht ein
erhöhtes Risiko durch elektrischen Schlag, wenn
Ihr Körper geerdet ist.
57
DE
AT
CH
c) Halten Sie Elektrowerkzeuge von Regen oder
Nässe fern. Das Eindringen von Wasser in ein
Elektrogerät erhöht das Risiko eines elektrischen
Schlages.
d) Zweckentfremden Sie das Kabel nicht, um
das Elektrowerkzeug zu tragen, aufzuhängen
oder um den Stecker aus der Steckdose zu
ziehen. Halten Sie das Kabel fern von Hitze,
Öl, scharfen Kanten oder sich bewegenden
Geräteteilen. Beschädigte oder verwickelte Kabel
erhöhen das Risiko eines elektrischen Schlages.
DE
AT
CH
e) Wenn Sie mit einem Elektrowerkzeug im
Freien arbeiten, verwenden Sie nur Verlängerungskabel, die auch für den Außenbereich
zugelassen sind. Die Anwendung eines für den
Außenbereich geeigneten Verlängerungskabels
verringert das Risiko eines elektrischen Schlages.
f) Wenn der Betrieb des Elektrowerkzeuges in
feuchter Umgebung nicht vermeidbar ist, verwenden Sie einen Fehlerstromschutzschalter.
Der Einsatz eines Fehlerstromschutzschalters vermindert das Risiko eines elektrischen Schlages.
3. Sicherheit von Personen
a) Seien Sie stets aufmerksam, achten Sie darauf,
was Sie tun und gehen Sie mit Vernunft an die
Arbeit mit einem Elektrowerkzeug. Benutzen
Sie kein Elektrowerkzeug, wenn Sie müde sind
oder unter dem Einfluss von Drogen, Alkohol
oder Medikamenten stehen. Ein Moment der
Unachtsamkeit beim Gebrauch des Elektrowerkzeuges kann zu ernsthaften Verletzungen führen.
b) Tragen Sie persönliche Schutzausrüstung und
immer eine Schutzbrille. Das Tragen persönlicher
Schutzausrüstung wie Staubmaske, rutschfeste
Sicherheitsschuhe, Schutzhelm oder Gehörschutz,
je nach Art und Einsatz des Elektrowerkzeuges,
verringert das Risiko von Verletzungen.
c) Vermeiden Sie eine unbeabsichtigte Inbetriebnahme. Vergewissern Sie sich, dass das
Elektrowerkzeug ausgeschaltet ist, bevor Sie es
an die Stromversorgung und / oder den Akku
anschließen, es aufnehmen oder tragen. Wenn
Sie beim Tragen des Elektrowerkzeuges den Finger
am Schalter haben oder das Gerät bereits eingeschaltet an die Stromversorgung anschließen, kann
dies zu Unfällen führen.
58
d) Entfernen Sie Einstellwerkzeuge oder Schraubenschlüssel, bevor Sie das Elektrowerkzeug
einschalten. Ein Werkzeug oder Schlüssel, der
sich in einem drehenden Geräteteil befindet,
kann zu Verletzungen führen.
e) Vermeiden Sie eine abnormale Körperhaltung.
Sorgen Sie für einen sicheren Stand und halten
Sie jederzeit das Gleichgewicht. Dadurch können Sie das Elektrowerkzeug in unerwarteten
Situationen besser kontrollieren.
f) Tragen Sie geeignete Kleidung. Tragen Sie
keine weite Kleidung oder Schmuck. Halten
Sie Haare, Kleidung und Handschuhe fern
von sich bewegenden Teilen. Lockere Kleidung,
Schmuck oder lange Haare können von sich
bewegenden Teilen erfasst werden.
g) Wenn Staubabsaug- und -auffangeinrichtungen montiert werden können, vergewissern
Sie sich, dass diese angeschlossen sind und
richtig verwendet werden. Die Verwendung
einer Staubabsaugung kann Gefährdungen
durch Staub verringern.
4. Verwendung und Behandlung des
Elektrowerkzeugs
a) Überlasten Sie das Gerät nicht. Verwenden
Sie für Ihre Arbeit das dafür bestimmte
Elektrowerkzeug. Mit dem passenden Elektrowerkzeug arbeiten Sie besser und sicherer im
angegebenen Leistungsbereich.
b) Benutzen Sie kein Elektrowerkzeug, dessen
Schalter defekt ist. Ein Elektrowerkzeug, das
sich nicht mehr ein- oder ausschalten lässt, ist
gefährlich und muss repariert werden.
c) Ziehen Sie den Stecker aus der Steckdose
und / oder entfernen Sie den Akku, bevor Sie
Geräteeinstellungen vornehmen, Zubehörteile wechseln oder das Gerät weglegen. Diese
Vorsichtsmaßnahme verhindert den unbeabsichtigten Start des Elektrowerkzeuges.
d) Bewahren Sie unbenutzte Elektrowerkzeuge
außerhalb der Reichweite von Kindern auf.
Lassen Sie Personen das Gerät nicht benutzen,
die mit diesem nicht vertraut sind oder diese
Anweisungen nicht gelesen haben. Elektrowerkzeuge sind gefährlich, wenn sie von
unerfahrenen Personen benutzt werden.
PHKSA 18-Li A1
e) Pflegen Sie Elektrowerkzeuge mit Sorgfalt.
Kontrollieren Sie, ob bewegliche Teile einwandfrei funktionieren und nicht klemmen, ob Teile
gebrochen oder so beschädigt sind, dass die
Funktion des Elektrowerkzeuges beeinträchtigt ist. Lassen Sie beschädigte Teile vor dem
Einsatz des Gerätes reparieren. Viele Unfälle
haben ihre Ursache in schlecht gewarteten
Elektrowerkzeugen.
f) Halten Sie Schneidwerkzeuge scharf und
sauber. Sorgfältig gepflegte Schneidwerkzeuge
mit scharfen Schneidkanten verklemmen sich
weniger und sind leichter zu führen.
g) Verwenden Sie Elektrowerkzeug, Zubehör,
Einsatzwerkzeuge usw. entsprechend diesen
Anweisungen. Berücksichtigen Sie dabei die
Arbeitsbedingungen und die auszuführende
Tätigkeit. Der Gebrauch von Elektrowerkzeugen
für andere als die vorgesehenen Anwendungen
kann zu gefährlichen Situationen führen.
5. Verwendung und Behandlung des
Akkuwerkzeugs
a) Laden Sie die Akkus nur in Ladegeräten auf,
die vom Hersteller empfohlen werden. Für
ein Ladegerät, das für eine bestimmte Art von
Akkus geeignet ist, besteht Brandgefahr, wenn
es mit anderen Akkus verwendet wird.
b) Verwenden Sie nur die dafür vorgesehenen
Akkus in den Elektrowerkzeugen. Der Gebrauch
von anderen Akkus kann zu Verletzungen und
Brandgefahr führen.
c) Halten Sie den nicht benutzten Akku fern von
Büroklammern, Münzen, Schlüsseln, Nägeln,
Schrauben oder anderen kleinen Metallgegenständen, die eine Überbrückung der Kontakte
verursachen könnten. Ein Kurzschluss zwischen
den Akkukontakten kann Verbrennungen oder
Feuer zur Folge haben.
d) Bei falscher Anwendung kann Flüssigkeit aus
dem Akku austreten. Vermeiden Sie den Kontakt damit. Bei zufälligem Kontakt mit Wasser
abspülen. Wenn die Flüssigkeit in die Augen
kommt, nehmen Sie zusätzlich ärztliche Hilfe
in Anspruch. Austretende Akkuflüssigkeit kann
zu Hautreizungen oder Verbrennungen führen.
PHKSA 18-Li A1
VORSICHT! EXPLOSIONSGEFAHR!
Laden Sie nicht aufladbare Batterien
niemals auf.
Schützen Sie den Akku vor Hitze, z. B.
auch vor dauernder Sonneneinstrahlung, Feuer, Wasser und Feuchtigkeit.
Es Besteht Explosionsgefahr.
6. Service
a) Lassen Sie Ihr Elektrowerkzeug nur von qualifiziertem Fachpersonal und nur mit OriginalErsatzteilen reparieren. Damit wird sichergestellt, dass die Sicherheit des Elektrowerkzeugs
erhalten bleibt.
Gerätespezifische Sicherheitshinweise
für Handkreissägen
Sicherheitshinweise für alle Sägen
Sägeverfahren
a)
GEFAHR! Kommen Sie mit Ihren Händen nicht in den Sägebereich und
an das Sägeblatt. Halten Sie mit
Ihrer zweiten Hand den Zusatzgriff oder das
Motorgehäuse. Wenn beide Hände die Säge
halten, können diese vom Sägeblatt nicht
verletzt werden.
b) Greifen Sie nicht unter das Werkstück. Die
Schutzhaube kann Sie unter dem Werkstück
nicht vor dem Sägeblatt schützen.
c) Passen Sie die Schnitt-Tiefe an die Dicke des
Werkstücks an. Es sollte weniger als eine volle
Zahnhöhe unter dem Werkstück sichtbar sein.
d) Halten Sie das zu sägende Werkstück niemals
in der Hand oder über dem Bein fest. Sichern
Sie das Werkstück an einer stabilen Aufnahme.
Es ist wichtig, das Werkstück gut zu befestigen, um
die Gefahr von Körperkontakt, Klemmen des Sägeblattes oder Verlust der Kontrolle zu minimieren.
e) Fassen Sie das Elektrowerkzeug nur an den
isolierten Griffflächen an, wenn Sie Arbeiten
ausführen, bei denen das Einsatzwerkzeug
verborgene Stromleitungen treffen kann. Kontakt mit einer spannungsführenden Leitung setzt
59
DE
AT
CH
DE
AT
CH
auch die Metallteile des Elektrowerkzeugs unter
Spannung und führt zu einem elektrischen Schlag.
f) Verwenden Sie beim Längsschneiden immer einen
Anschlag oder eine gerade Kantenführung. Dies
verbessert die Schnittgenauigkeit und verringert die
Möglichkeit, dass das Sägeblatt klemmt.
g) Verwenden Sie immer Sägeblätter in der richtigen Größe und mit passender Aufnahmebohrung (z.B. sternförmig oder rund). Sägeblätter,
die nicht zu den Montageteilen der Säge passen,
laufen unrund und führen zum Verlust der Kontrolle.
h) Verwenden Sie niemals beschädigte oder
falsche Sägeblatt-Unterlegscheiben oderschrauben. Die Sägeblatt-Unterlegscheiben
und - schrauben wurden speziell für Ihre Säge
konstruiert, für optimale Leistung und Betriebssicherheit.
Weitere Sicherheitshinweise für alle Sägen
Rückschlag - Ursachen und entsprechende
Sicherheitshinweise
▯ Ein Rückschlag ist die plötzliche Reaktion
infolge eines hakenden, klemmenden oder
falsch ausgerichteten Sägeblattes, die dazu
führt, dass eine unkontrollierte Säge abhebt und
sich aus dem Werkstück heraus in Richtung der
Bedienperson bewegt;
▯ wenn sich das Sägeblatt in dem sich schließenden Sägespalt verhakt oder verklemmt, blockiert
es, und die Motorkraft schlägt das Gerät in
Richtung der Bedienperson zurück;
▯ wird das Sägeblatt im Sägeschnitt verdreht oder
falsch ausgerichtet, können sich die Zähne der
hinteren Sägeblattkante in der Oberfläche des
Werkstücks verhaken, wodurch sich das Sägeblatt
aus dem Sägespalt herausbewegt und die Säge in
Richtung der Bedienperson zurückspringt.
Ein Rückschlag ist die Folge eines falschen oder
fehlerhaften Gebrauchs der Säge. Er kann durch
geeignete Vorsichtsmaßnahmen, wie nachfolgend
beschrieben, verhindert werden.
a) Halten Sie die Säge mit beiden Händen fest
und bringen Sie Ihre Arme in eine Stellung,
in der Sie die Rückschlagkräfte abfangen
können. Halten Sie sich immer seitlich des
Sägeblattes, nie das Sägeblatt in eine Linie
mit Ihrem Körper bringen. Bei einem Rück-
60
schlag kann die Kreissäge rückwärts springen,
jedoch kann die Bedienperson durch geeignete
Vorsichtsmaßnahmen die Rückschlagkräfte
beherrschen.
b) Falls das Sägeblatt verklemmt oder Sie die
Arbeit unterbrechen, schalten Sie die Säge
aus und halten Sie sie im Werkstoff ruhig,
bis das Sägeblatt zum Stillstand gekommen
ist. Versuchen Sie nie, die Säge aus dem
Werkstück zu entfernen oder sie rückwärts zu
ziehen, solange das Sägeblatt sich bewegt,
sonst kann ein Rückschlag erfolgen. Ermitteln
und beheben Sie die Ursache für das Verklemmen des Sägeblattes.
c) Wenn Sie eine Säge, die im Werkstück steckt,
wieder starten wollen, zentrieren Sie das
Sägeblatt im Sägespalt und überprüfen Sie,
ob die Sägezähne nicht im Werkstück verhakt
sind. Klemmt das Sägeblatt, kann es sich aus
dem Werkstück heraus bewegen oder einen
Rückschlag verursachen, wenn die Säge erneut
gestartet wird.
d) Stützen Sie große Platten ab, um das Risiko
eines Rückschlags durch ein klemmendes
Sägeblatt zu vermindern. Große Platten können sich unter ihrem Eigengewicht durchbiegen.
Platten müssen auf beiden Seiten abgestützt
werden, sowohl in der Nähe des Sägespalts als
auch an der Kante.
e) Verwenden Sie keine stumpfen oder beschädigten Sägeblätter. Sägeblätter mit stumpfen
oder falsch ausgerichteten Zähnen verursachen
durch einen zu engen Sägespalt eine erhöhte
Reibung, Klemmen des Sägeblattes und Rückschlag.
f) Ziehen Sie vor dem Sägen die Schnitt-Tiefenund Schnitt-Winkeleinstellungen fest. Wenn
sich während des Sägens die Einstellungen
verändern, kann sich das Sägeblatt verklemmen
und ein Rückschlag auftreten.
g) Seien Sie besonders vorsichtig beim Sägen
in bestehende Wände oder andere nicht
einsehbare Bereiche. Das eintauchende Sägeblatt kann beim Sägen in verborgene Objekte
blockieren und einen Rückschlag verursachen.
PHKSA 18-Li A1
Funktion der unteren Schutzhaube
a) Überprüfen Sie vor jeder Benutzung, ob die
untere Schutzhaube einwandfrei schließt.
Verwenden Sie die Säge nicht, wenn die
untere Schutzhaube nicht frei beweglich ist
und sich nicht sofort schließt. Klemmen oder
binden Sie die untere Schutzhaube niemals
in geöffneter Position fest. Sollte die Säge
unbeabsichtigt zu Boden fallen, kann die untere
Schutzhaube verbogen werden. Öffnen Sie die
Schutzhaube mit dem Rückziehhebel und stellen
Sie sicher, dass sie sich frei bewegt und bei allen Schnitt-Winkeln und -Tiefen weder Sägeblatt
noch andere Teile berührt.
b) Überprüfen Sie die Funktion der Feder für die
untere Schutzhaube. Lassen Sie das Gerät vor
dem Gebrauch warten, wenn untere Schutzhaube und Feder nicht einwandfrei arbeiten.
Beschädigte Teile, klebrige Ablagerungen oder
Anhäufungen von Spänen lassen die untere
Schutzhaube verzögert arbeiten.
c) Öffnen Sie die untere Schutzhaube von Hand
nur bei besonderen Schnitten, wie „Tauch- und
Winkelschnitten“. Öffnen Sie die untere Schutzhaube mit dem Rückziehhebel und lassen Sie diesen los, sobald das Sägeblatt in das Werkstück
eintaucht. Bei allen anderen Sägearbeiten soll
die untere Schutzhaube automatisch arbeiten.
d) Legen Sie die Säge nicht auf der Werkbank
oder dem Boden ab, ohne dass die untere
Schutzhaube das Sägeblatt bedeckt. Ein ungeschütztes, nachlaufendes Sägeblatt bewegt
die Säge entgegen der Schnittrichtung und
sägt, was ihm im Weg ist. Beachten Sie dabei
die Nachlaufzeit der Säge.
Das Ladegerät ist nur für den Betrieb im
Innenbereich geeignet.
WARNUNG!
■ Betreiben Sie das Gerät nicht mit beschädigtem Kabel, Netzkabel oder Netzstecker.
Beschädigte Netzkabel bedeuten Lebensgefahr durch elektrischen Schlag.
Ergänzende Anweisungen:
■ Verwenden Sie keine Schleifscheiben.
■ Verwenden Sie nur Sägeblätter mit Durchmessern
entsprechend den Aufschriften auf der Säge.
■ Beim Bearbeiten von Holz oder Materialien, bei
denen gesundheitsgefährdender Staub entsteht,
ist das Gerät an eine passende, geprüfte
Absaugvorrichtung anzuschließen.
■ Tragen Sie beim Sägen von Holz eine Staubschutzmaske.
■ Verwenden Sie nur empfohlene Sägeblätter.
■ Tragen Sie immer einen Gehörschutz.
■ Vermeiden Sie ein Überhitzen der Sägezahnspitzen.
■ Vermeiden Sie beim Sägen von Kunststoff ein
Schmelzen des Kunststoffs.
Sicherheitshinweise
für Kreissägeblätter
Schutzhandschuhe tragen!
Atemschutz tragen!
Schutzbrille tragen!
Sicherheitshinweise für Ladegeräte
■ Dieses Gerät kann von Kindern ab 8 Jahren
und darüber sowie von Personen mit verringerten physischen, sensorischen oder mentalen
Fähigkeiten oder Mangel an Erfahrung und
Wissen benutzt werden, wenn sie beaufsichtigt
oder bezüglich des sicheren Gebrauchs des
Gerätes unterwiesen wurden und die daraus
resultierenden Gefahren verstehen. Kinder
dürfen nicht mit dem Gerät spielen. Reinigung
und Benutzer-Wartung dürfen nicht von Kindern
ohne Beaufsichtigung durchgeführt werden.
PHKSA 18-Li A1
Gehörschutz tragen!
VORSICHT! EXPLOSIONSGEFAHR!
Laden Sie nicht aufladbare Batterien
niemals auf.
Originalzubehör / -zusatzgeräte
■ Benutzen Sie nur Zubehör und Zusatzgeräte,
die in der Bedienungsanleitung angegeben
sind bzw. deren Aufnahme mit dem Gerät
kompatibel ist.
61
DE
AT
CH
WARNUNG! Schützen Sie sich vor
Laserstrahlung:
LASERSTRAHLUNG
NICHT IN DEN STRAHL BLICKEN
LASER KLASSE 2
P max.: < 1 mW
λ: 650 nm
EN 60825-1: 2007
DE
AT
CH
Das Gerät enthält einen Klasse 2 Laser
und wird mit einem Laserwarnschild
ausgeliefert.
► Richten Sie den Laser nie auf Personen oder Tiere.
► Blicken Sie nie direkt in den Laser. Der Laser
kann Augenschäden hervorrufen.
► Richten Sie den Laserstrahl nicht auf stark reflektierende Materialien. Gefahr durch reflektierendes Licht.
► Jede Einstellung zur Verstärkung des Laserstrahls
ist verboten. Es besteht Verletzungsgefahr!
► Für Schäden durch Manipulation an der Lasereinrichtung sowie Nichtbefolgen der Sicherheitshinweise wird keine Haftung übernommen.
Wenn andere als die hier angegebenen Bedienungs- oder Justiereinrichtungen benutzt, oder
andere Verfahrensweisen ausgeführt werden,
kann dies zu gefährlicher Strahlungsexposition
führen.
Vor der Inbetriebnahme
Akku-Pack laden (siehe Abb. C)
VORSICHT!
► Ziehen Sie immer den Netzstecker, bevor
Sie den Akku-Pack aus dem Ladegerät
nehmen bzw. einsetzen.
HINWEIS
► Drei Geräte - drei kompatible Akkus.
Untereinander austauschbar!
(siehe Kapitel Ersatz-Akku Bestellung)
■ Laden Sie den Akku-Pack nie, wenn die
Umgebungstemperatur unterhalb 10 °C oder
oberhalb 40 °C liegt.
62
♦ Die grüne Kontroll-LED signalisiert Ihnen,
dass der Ladevorgang abgeschlossen und der
Akku-Pack einsatzbereit ist.
♦ Schieben Sie den Akku-Pack
ein.
in das Gerät
■ Laden Sie einen Akku-Pack niemals unmittelbar nach dem Schnell-Ladevorgang ein zweites
Mal auf. Es besteht die Gefahr, dass der AkkuPack überladen und dadurch die Lebensdauer von Akku und Ladegerät verringert wird.
♦ Schalten Sie das Ladegerät zwischen aufeinanderfolgenden Ladevorgängen für mindestens 15
Minuten ab. Ziehen Sie dazu den Netzstecker.
Akku-Pack ins Gerät
einsetzen / entnehmen
Akku-Pack einsetzen:
♦ Lassen Sie den Akku-Pack
einrasten.
in den Griff
Akku-Pack entnehmen:
VORSICHT!
♦ Stecken Sie den Akku-Pack
(siehe Abb. C).
♦ Stecken Sie den Netzstecker in die Steckdose.
Die rote Kontroll-LED leuchtet.
♦ Drücken Sie die Entriegelungstaste
entnehmen Sie den Akku-Pack .
und
Akkuzustand prüfen
♦ Drücken Sie zum Prüfen des Akkuzustands die
Taste Akkuzustand (siehe auch Hauptabbildung). Der Zustand bzw. die Restleistung wird in
der Akku-Display-LED wie folgt angezeigt:
♦ ROT / ORANGE / GRÜN = maximale Ladung /
Leistung
ROT / ORANGE = mittlere Ladung / Leistung
ROT = schwache Ladung – Akku aufladen
Schutzhaube prüfen
♦ Ziehen Sie den Rückziehhebel für Schutzhaube
bis zum Anschlag.
Die Schutzhaube muss ohne zu klemmen bewegbar sein und bei loslassen des Rückziehhebels
für die Schutzhaube selbst in die Ausgangsposition zurückspringen.
in das Ladegerät
PHKSA 18-Li A1
Inbetriebnahme
Sägeblatt montieren / wechseln
Sägeblatt
wechseln!
nur bei gezogenem Akku-Pack
1. Setzen Sie die Schnitttiefe (mittels Feststellschraube ) auf die minimalste Position, 0 mm.
2. Schwenken Sie die Schutzhaube mit Hilfe
des Rückziehhebels zurück und stellen Sie
das Gerät ab.
♦ Stellen Sie die gewünschte Schnittbreite mit Hilfe
der Skala auf dem Parallelanschlag und den
Aussparungen in der Grundplatte ein (siehe
auch Abb. B).
Die rechte Aussparung in der Grundplatte ist
für die Schnittwinkeleinstellung 0°. Die linke
Aussparung in der Grundplatte ist für die
Schnittwinkeleinstellung 45°.
3. Betätigen Sie die Spindelarretierung (bis sie
einrastet) und lösen Sie mit dem Innensechskantschlüssel die Spannschraube . Nehmen
Sie jetzt die Spannschraube und den Spannflansch ab (siehe auch Abb. A).
Abb. B: Schnittbreite 3 cm
♦ Ziehen Sie die Flügelschraube
DE
AT
CH
wieder fest.
Spanabsaugung anschließen
Abb. A: Sägeblatt wechseln
4. Sägeblatt abnehmen.
5. Einbau des Sägeblattes entsprechend in umgekehrter Reihenfolge wie beschrieben vornehmen.
6. Betätigen Sie die Spindelarretierung (bis sie
einrastet) und ziehen Sie mit dem Innensechskantschlüssel die Spannschraube fest.
WARNUNG!
► Der Pfeil auf dem Sägeblatt muss mit dem
Drehrichtungspfeil (Laufrichtung, am Gerät
markiert) übereinstimmen.
■ Stellen Sie sicher, dass das Sägeblatt für die
Drehzahl des Werkzeuges geeignet ist.
Parallelanschlag
♦ Lösen Sie die Flügelschraube
und setzen
Sie den Parallelanschlag in die Parallelanschlagaufnahme ein.
PHKSA 18-Li A1
♦ Stecken Sie den Adapter zur Staubabsaugung
auf den Spanauswurf .
Wahlweise je nach Durchmesser von der Staubund Spanabsaugung.
♦ Schließen Sie eine zugelassene Staub- und
Spanabsaugung an.
Bedienung
Ein- und ausschalten
Einschalten:
♦ Drücken Sie die Einschaltsperre nach links
oder rechts und halten diese gedrückt.
♦ Betätigen Sie den EIN-/AUS-Schalter . Nachdem die Maschine angelaufen ist, können Sie
die Einschaltsperre wieder loslassen.
Ausschalten:
♦ Lassen Sie den EIN-/AUS-Schalter los.
Schnittwinkel einstellen
Sie können den Schnittwinkel mit der Schnittwinkelskala bestimmen.
■ Lösen Sie die Flügelschraube der Schnittwinkelvorwahl, stellen Sie den gewünschten Winkel an
der Schnittwinkelskala ein und ziehen Sie die
Flügelschraube wieder fest.
63
Schnitttiefe einstellen
HINWEIS
► Die Schnitttiefe ca. 3 mm größer als die
Materialstärke wählen. Dadurch erzielen Sie
einen sauberen Schnitt.
♦ Lösen Sie die Feststellschraube , stellen Sie
die gewünschte Schnitttiefe an der Schnitttiefenskala ein und ziehen Sie die Feststellschraube wieder fest.
Handhabung der Handkreissäge
DE
AT
CH
1. Gerät – wie unter »Ein- und ausschalten« beschrieben – einschalten und mit der vorderen Kante
der Grundplatte auf das Material setzen.
2. Richten Sie die Maschine am Parallelanschlag
oder an einer aufgezeichneten Linie aus.
3. Halten Sie die Maschine mit beiden Händen an
den Griffen und sägen Sie mit mäßigem Druck.
Laser ein- und ausschalten
Einschalten:
♦ Drücken Sie den EIN- /AUS- /RESET- Schalter
Laser
.
Ausschalten:
♦ Drücken Sie den EIN- /AUS- /RESET- Schalter
Laser
.
HINWEIS
► ÜBERLASTUNG UND RESET! Das Gerät
schaltet bei Überlastbetrieb ab.
♦ Schalten Sie den Laser AUS. Drücken Sie den
.
EIN- /AUS- /RESET- Schalter Laser
► Nur bei ausgeschaltetem Laser erfolgt ein
automatischer Reset.
Tipps und Tricks
■ Ein Ausreißen der Schnittkante bei empfindlichen
Oberflächen, z.B. beschichteten Spanplatten
oder Türen, vermeiden Sie, indem Sie ein Kreppband auf die Schnittlinie kleben. Dies hat ferner
den Vorteil, dass sich auf dem Kreppband auch
besser anzeichnen lässt als auf einer glatten
Oberfläche. Noch wirkungsvoller vermeiden Sie
ein Ausreißen der Schnittkante durch ein aufgespanntes dünnes Holz, das mitgesägt wird.
64
Wartung und Reinigung
WARNUNG! VERLETZUNGSGEFAHR!
Schalten Sie vor allen Arbeiten am
Gerät das Gerät aus und entnehmen
Sie den Akku.
Die Akku-Handkreissäge ist wartungsfrei.
■ Das Gerät muss stets sauber, trocken und frei
von Öl oder Schmierfetten sein.
■ Es dürfen keine Flüssigkeiten in das Innere der
Geräte gelangen.
■ Verwenden Sie zum Reinigen des Gehäuses ein
trockenes Tuch. Verwenden Sie niemals Benzin,
Lösungsmittel oder Reiniger, die Kunststoff
angreifen.
■ Soll ein Lithium-Ionen-Akku längere Zeit gelagert werden, muss regelmäßig der Ladezustand
kontrolliert werden. Der optimale Ladezustand
liegt zwischen 50 % und 80 %. Das optimale
Lagerungsklima ist kühl und trocken.
HINWEIS
► Nicht aufgeführte Ersatzteile (wie z. B.
Kohlebürsten, Schalter) können Sie über
unsere Service - Hotline bestellen.
Entsorgung
Die Verpackung besteht aus umweltfreundlichen Materialien, die Sie über die örtlichen
Recyclingstellen entsorgen können.
Werfen Sie Elektrowerkzeuge nicht
in den Hausmüll!
Gemäß Europäischer Richtlinie 2012/19/EU
müssen verbrauchte Elektrowerkzeuge getrennt
gesammelt und einer umweltgerechten Wiederverwertung zugeführt werden.
Werfen Sie Akkus nicht in den
Hausmüll!
Defekte oder verbrauchte Akkus müssen gemäß
Richtlinie 2006/66/EC recycelt werden. Geben
Sie Akku-Pack und / oder das Gerät über die ange-
PHKSA 18-Li A1
botenen Sammeleinrichtungen zurück.
Über Entsorgungsmöglichkeiten für ausgediente
Elektrowerkzeuge / Akku-Pack informieren Sie sich
bitte bei Ihrer Gemeinde- oder Stadtverwaltung.
Garantie
Sie erhalten auf dieses Gerät 3 Jahre Garantie
ab Kaufdatum. Das Gerät wurde sorgfältig
produziert und vor Anlieferung gewissenhaft
geprüft. Bitte bewahren Sie den Kassenbon
als Nachweis für den Kauf auf. Bitte setzen
Sie sich im Garantiefall mit Ihrer Servicestelle
telefonisch in Verbindung. Nur so kann eine
kostenlose Einsendung Ihrer Ware gewährleistet werden.
Die Garantieleistung gilt nur für Material- oder
Fabrikationsfehler, nicht aber für Transportschäden,
Verschleißteile oder für Beschädigungen an
zerbrechlichen Teilen, z. B. Schalter oder Akkus.
Das Produkt ist lediglich für den privaten und nicht
für den gewerblichen Gebrauch bestimmt. Bei
missbräuchlicher und unsachgemäßer Behandlung,
Gewaltanwendung und bei Eingriffen, die nicht von
unserer autorisierten Service-Niederlassung
vorgenommen wurden, erlischt die Garantie. Ihre
gesetzlichen Rechte werden durch diese Garantie
nicht eingeschränkt. Die Garantiezeit wird durch
die Gewährleistung nicht verlängert. Dies gilt auch
für ersetzte und reparierte Teile. Eventuell schon
beim Kauf vorhandene Schäden und Mängel
müssen sofort nach dem Auspacken gemeldet
werden, spätestens aber zwei Tage nach
Kaufdatum. Nach Ablauf der Garantiezeit anfallende Reparaturen sind kostenpflichtig.
Service
WARNUNG!
► Lassen Sie Ihre Geräte von der Servicestelle
oder einer Elektrofachkraft und nur mit
Original-Ersatzteilen reparieren. Damit wird
sichergestellt, dass die Sicherheit des Gerätes
erhalten bleibt.
► Lassen Sie den Austausch des Steckers
oder der Netzleitung immer vom Hersteller
des Gerätes oder seinem Kundendienst
ausführen. Damit wird sichergestellt, dass die
Sicherheit des Gerätes erhalten bleibt.
Service Deutschland
Tel.: 0800 5435 111 (Kostenfrei aus dem
dt. Festnetz/Mobilfunknetz)
E-Mail: [email protected]
IAN 102867
Service Österreich
Tel.: 0820 201 222 (0,15 EUR/Min.)
E-Mail: [email protected]
IAN 102867
Service Schweiz
Tel.: 0842 665566 (0,08 CHF/Min.,
Mobilfunk max. 0,40 CHF/Min.)
E-Mail: [email protected]
IAN 102867
Erreichbarkeit Hotline:
Montag bis Freitag von 8:00 Uhr – 20:00 Uhr (MEZ)
Importeur
KOMPERNASS HANDELS GMBH
BURGSTRASSE 21
44867 BOCHUM
GERMANY
www.kompernass.com
PHKSA 18-Li A1
65
DE
AT
CH
OriginalKonformitätserklärung
DE
AT
CH
Wir, KOMPERNASS HANDELS GMBH, Dokumentenverantwortlicher: Herr Semi Uguzlu, BURGSTR. 21,
44867 BOCHUM, DEUTSCHLAND, erklären hiermit,
dass dieses Produkt mit den folgenden Normen,
normativen Dokumenten und EG-Richtlinien
übereinstimmt:
Maschinenrichtlinie
(2006 / 42 / EC)
EG-Niederspannungsrichtlinie
(2006 / 95 / EC)
Elektromagnetische Verträglichkeit
(2004 / 108 / EC)
RoHS Richtlinie
(2011 / 65 / EU)
Angewandte harmonisierte Normen:
EN 60745-1: 2009 + A11: 2010
EN 60745-2-5: 2010
EN 62233: 2008
EN 55014-1/ A2: 2011
EN 55014-2/ A2: 2008
EN 60335-1: 2010
EN 60335-2-29/ A2: 2010
EN 62233: 2008
EN 61000-3-2/ A2: 2009
EN 61000-3-3: 2013
EN 60825-1: 2007
Typbezeichnung der Maschine:
Akku-Handkreissäge PHKSA 18-Li A1
Herstellungsjahr: 07 - 2014
Seriennummer: IAN 102867
Bochum, 20.06.2014
Semi Uguzlu
- Qualitätsmanager Technische Änderungen im Sinne der Weiterentwicklung sind vorbehalten.
66
PHKSA 18-Li A1
Ersatz-Akku Bestellung
Wenn Sie einen Ersatz-Akku für Ihr Gerät bestellen möchten, so können Sie dies entweder bequem im Internet unter
www.kompernass.com oder telefonisch abwickeln.
Der Preis des Ersatz-Akkus beträgt 20 € inkl. MwSt. und Versand. Dieser Artikel kann aufgrund begrenzter
Vorratsmenge nach kurzer Zeit ausverkauft sein.
DE
AT
CH
Drei Geräte - drei kompatible Akkus.
Untereinander austauschbar!
Online-Bestellung
Um einen Ersatz-Akku über den Zubehör-Shop zu bestellen:
■ Rufen Sie mit Ihrem Internetbrowser die Seite www.kompernass.com auf.
■ Klicken Sie rechts unten auf die entsprechende Flagge, um das gewünschte Land und die Sprache
auszuwählen.
■ Klicken Sie jetzt auf den Reiter „Zubehör-Shop“ und wählen anschließend unter der Rubrik „Topseller“
den passenden Ersatz-Akku zu Ihrem Gerät aus.
■ Nachdem Sie den Ersatz-Akku in den Warenkorb gelegt haben, klicken Sie auf die Schaltfläche
„Kasse“ und befolgen die auf dem Bildschirm angezeigten Anweisungen, um den Bestellvorgang
abzuschließen.
HINWEIS
► Die Bestellung von Ersatzteilen kann in einigen Ländern nicht online vorgenommen werden. Kontaktieren Sie in diesem Fall bitte die Service-Hotline.
■ Die Aktion ist begrenzt auf einen Akku pro Kunde / Gerät, sowie auf eine Laufzeit von einem Monat
nach dem Aktionszeitraum. Danach kann der Ersatzakku als Ersatzteil zu anderen Konditionen weiterhin bestellt werden.
Telefonische Bestellung
Service Deutschland
Tel.: 0800 5435 111 (Kostenfrei aus dem dt. Festnetz/Mobilfunknetz)
Um eine schnelle Bearbeitung Ihrer Bestellung zu gewährleisten, halten Sie bitte für alle Anfragen die
Artikelnummer (z.B. IAN 102867) des Gerätes bereit. Die Artikelnummer entnehmen Sie bitte dem
Typenschild oder dem Titelblatt dieser Anleitung.
PHKSA 18-Li A1
67
68
PHKSA 18-Li A1
KOMPERNASS HANDELS GMBH
BURGSTRASSE 21
44867 BOCHUM
DEUTSCHLAND / GERMANY
www.kompernass.com
Estado de las informaciones · Versione delle informazioni · Estado
das informações · Last Information Update · Stand der Informationen:
10 / 2014 · Ident.-No.: PHKSA18-LiA1-072014-3
IAN 102867
5