1
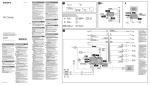
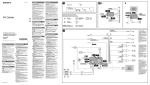
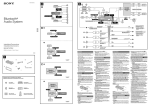
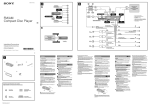
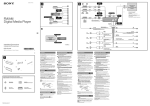
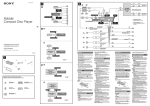
4-168-228-11(1) A Source selector (not supplied) Selector de fuente (no suministrado) * 1 FRONT AUDIO OUT SUB OUT (MONO) FM/AM Digital Radio CD Player XA-C40 *2 FRONT AUDIO OUT SUB OUT (MONO) REAR AUDIO OUT Supplied with the CD changer Suministrado con el cambiador de CD REMOTE IN*3 L *1 BUS AUDIO IN from car antenna (aerial) desde la antena del automóvil *1 RCA pin cord (not supplied) *2 Supplied with XA-C40 *3 Separate adaptor may be required. R BUS IN REAR FRONT AUDIO OUT REAR AUDIO OUT Fuse (10 A) Fusible (10 A) *1 Cable con terminales RCA (no suministrado) *2 Suministrado con el XA-C40 *3 Puede requerirse un adaptador independiente BUS CONTROL IN B 3 AMP REM Blue/white striped Con rayas azules y blancas Left Izquierdo White/black striped Con rayas blancas y negras Gray Gris Right Derecho BUS CONTROL IN 1 Max. supply current 0.3 A Corriente máx. de alimentación de 0,3 A White Blanco BUS AUDIO IN Black Negro Gray/black striped Con rayas grises y negras Blue Azul ANT REM Max. supply current 0.1 A Corriente máx. de alimentación de 0,1 A Light blue Azul celeste ATT Orange/white striped Con rayas naranjas y blancas ILLUMINATION Green Verde Left Izquierdo Installation/Connections Instalación/Conexiones Purple Morado Right Derecho BUS AUDIO IN CDX-GT700HD Green/black striped Con rayas verdes y negras Red Rojo 2 4 5 6 Yellow Amarillo 7 Purple/black striped Con rayas moradas y negras ©2009 Sony Corporation Printed in Thailand Source selector* Selector de fuente* BUS CONTROL IN * not supplied no suministrado ×2 C BUS CONTROL IN Equipment used in illustrations (not supplied) Equipo utilizado en las ilustraciones (no suministrado) * not supplied no suministrado • The numbers in the list are keyed to those in the instructions. • The bracket and the protection collar are attached to the unit before shipping. Before mounting the unit, use the release keys to remove the bracket from the unit. For details, see “Removing the protection collar and the bracket ()” on the reverse side of the sheet. • Keep the release keys for future use as they are also necessary if you remove the unit from your car. Caution Handle the bracket carefully to avoid injuring your fingers. Power amplifier Amplificador de potencia Satellite radio tuner (XM/SIRIUS)* Sintonizador de radio por satélite (XM/SIRIUS)* Rear speaker Altavoz posterior INPUT 1 Active subwoofer Altavoz potenciador de graves activo CD changer Cambiador de CD Catch Note Before installing, make sure that the catches on both sides of the bracket are bent inwards 2 mm (3/32 in). If the catches are straight or bent outwards, the unit will not be installed securely and may spring out. BUS AUDIO IN Connection example Source selector* Selector de fuente* XA-C40 Notes (-A) • Be sure to connect the ground (earth) lead before connecting the amplifier. • The alarm will only sound if the built-in amplifier is used. BUS CONTROL IN * not supplied no suministrado • This unit does not support the XM radio tuner XMDSON100. • You cannot connect two or more satellite radio tuners (XM/SIRIUS) to the XA-C40 at the same time. • When you use a satellite radio tuner, be sure to connect to the INPUT 1 terminal of the XA-C40. Connection diagram To a metal surface of the car First connect the black ground (earth) lead, then connect the yellow and red power supply leads. To the power antenna (aerial) control lead or power supply lead of antenna (aerial) booster Notes • It is not necessary to connect this lead if there is no power antenna (aerial) or antenna (aerial) booster, or with a manually-operated telescopic antenna (aerial). • When your car has a built-in FM/AM antenna (aerial) in the rear/side glass, see “Notes on the control and power supply leads.” To AMP REMOTE IN of an optional power amplifier This connection is only for amplifiers. Connecting any other system may damage the unit. Parts Iist Satellite radio tuner (XM/SIRIUS)* Sintonizador de radio por satélite (XM/SIRIUS)* Front speaker Altavoz frontal • This unit is designed for negative ground (earth) 12 V DC operation only. • Do not get the leads under a screw, or caught in moving parts (e.g. seat railing). • Before making connections, turn the car ignition off to avoid short circuits. • Connect the yellow and red power supply leads only after all other leads have been connected. • Run all ground (earth) leads to a common ground (earth) point. • Be sure to insulate any loose unconnected leads with electrical tape for safety. • The use of optical instruments with this product will increase eye hazard. Notes on the power supply lead (yellow) • When connecting this unit in combination with other stereo components, the connected car circuit’s rating must be higher than the sum of each component’s fuse. • When no car circuits are rated high enough, connect the unit directly to the battery. BUS AUDIO IN ×4 Notes on satellite radio tuner (-C) Cautions XA-C40 Tips (-B) • When connecting only a single CD changer or other optional device, connect directly to this unit. • For connecting two or more CD changers or other optional devices, the source selector XA-C40 (not supplied) is necessary. To the interface cable of a car telephone To a car’s illumination signal Be sure to connect the black ground (earth) lead to a metal surface of the car first. To the +12 V power terminal which is energized in the accessory position of the ignition switch Notes • If there is no accessory position, connect to the +12 V power (battery) terminal which is energized at all times. Be sure to connect the black ground (earth) lead to a metal surface of the car first. • When your car has a built-in FM/AM antenna (aerial) in the rear/side glass, see “Notes on the control and power supply leads.” To the +12 V power terminal which is energized at all times Be sure to connect the black ground (earth) lead to a metal surface of the car first. Precauciones • Esta unidad ha sido diseñada para alimentarse solamente con cc de 12 V de masa negativa. • No coloque los cables debajo de ningún tornillo, ni los aprisione con partes móviles (p. ej. los raíles del asiento). • Antes de realizar las conexiones, desactive el encendido del automóvil para evitar cortocircuitos. • Conecte los cables de entrada de alimentación amarillo y rojo solamente después de haber conectado los demás. • Conecte todos los cables de conexión a masa a un punto común. • Por razones de seguridad, asegúrese de aislar con cinta aislante los cables sueltos que no estén conectados. • El uso de instrumentos ópticos con este producto aumenta el riesgo de sufrir daños oculares. Notas sobre el cable de fuente de alimentación (amarillo) • Cuando conecte esta unidad en combinación con otros componentes estéreo, la capacidad nominal del circuito conectado del automóvil debe ser superior a la suma del fusible de cada componente. • Si no hay circuitos del automóvil con capacidad nominal suficientemente alta, conecte la unidad directamente a la batería. Lista de componentes • Los números de la lista corresponden a los de las instrucciones. • La unidad se comercializa con el soporte y el marco de protección ya colocados. Antes de montarla, utilice las llaves de liberación para extraer el soporte de la misma. Para obtener más información, consulte “Extracción del marco de protección y del soporte ()”. • Conserve las llaves de liberación para utilizarlas en el futuro, ya que también las necesitará si retira la unidad del automóvil. Precaución Tenga mucho cuidado al manipular el soporte para evitar posibles lesiones en los dedos. Notes on the control and power supply leads • The power antenna (aerial) control lead (blue) supplies +12 V DC when you turn on the tuner. • When your car has built-in FM/AM antenna (aerial) in the rear/side glass, connect the power antenna (aerial) control lead (blue) or the accessory power supply lead (red) to the power terminal of the existing antenna (aerial) booster. For details, consult your dealer. • A power antenna (aerial) without a relay box cannot be used with this unit. Memory hold connection When the yellow power supply lead is connected, power will always be supplied to the memory circuit even when the ignition switch is turned off. Notes on speaker connection • Before connecting the speakers, turn the unit off. • Use speakers with an impedance of 4 to 8 ohms, and with adequate power handling capacities to avoid its damage. • Do not connect the speaker terminals to the car chassis, or connect the terminals of the right speakers with those of the left speaker. • Do not connect the ground (earth) lead of this unit to the negative (–) terminal of the speaker. • Do not attempt to connect the speakers in parallel. • Connect only passive speakers. Connecting active speakers (with built-in amplifiers) to the speaker terminals may damage the unit. • To avoid a malfunction, do not use the built-in speaker leads installed in your car if the unit shares a common negative (–) lead for the right and left speakers. • Do not connect the unit’s speaker leads to each other. Note on connection If speaker and amplifier are not connected correctly, “FAILURE” appears in the display. In this case, make sure the speaker and amplifier are connected correctly. Enganche Nota Antes de instalar la unidad, compruebe que los enganches de ambos lados del soporte están doblados hacia adentro 2 mm. Si no lo están o están doblados hacia afuera, la unidad no se instalará correctamente y puede saltar. Ejemplo de conexión Notas (-A) • Asegúrese de conectar primero el cable de conexión a masa antes de realizar la conexión del amplificador. • La alarma sonará solamente si se utiliza el amplificador integrado. Sugerencia (-B) • Cuando conecte un solo cambiador de CD u otro dispositivo opcional, hágalo directamente a esta unidad. • Para conectar dos o más cambiadores de CD u otros dispositivos opcionales, se precisa el selector de fuente XA-C40 (no suministrado). Notas sobre el sintonizador de radio por satélite (-C) • Esta unidad no es compatible con el sintonizador de radio XM XMDSON100. • No es posible conectar más de un sintonizador de radio por satélite (XM/SIRIUS) al modelo XA-C40 simultáneamente. • Cuando utilice un sintonizador de radio por satélite, asegúrese de conectarlo al terminal INPUT 1 del XA-C40. Diagrama de conexión A una superficie metálica del automóvil Conecte primero el cable de conexión a masa negro, y después los cables amarillo y rojo de entrada de alimentación. Al cable de control de la antena motorizada o al cable de fuente de alimentación del amplificador de señal de la antena Notas • Si no se dispone de antena motorizada ni de amplificador de antena, o se utiliza una antena telescópica accionada manualmente, no será necesario conectar este cable. • Si el automóvil dispone de una antena de FM/AM integrada en el cristal trasero o lateral, consulte “Notas sobre los cables de control y de fuente de alimentación”. A AMP REMOTE IN de un amplificador de potencia opcional Esta conexión es solamente para amplificadores. La conexión de cualquier otro sistema puede dañar la unidad. Al cable de interfaz de un teléfono para automóvil A una señal de iluminación del automóvil Asegúrese de conectar primero el cable de conexión a masa negro a una superficie metálica del automóvil. Al terminal de alimentación de +12 V que recibe energía en la posición de accesorios del interruptor de la llave de encendido Notas • Si no hay posición de accesorios, conéctelo al terminal de alimentación (batería) de +12 V que recibe energía sin interrupción. Asegúrese de conectar primero el cable de conexión a masa negro a una superficie metálica del automóvil. • Si el automóvil dispone de una antena de FM/AM integrada en el cristal trasero o lateral, consulte “Notas sobre los cables de control y de fuente de alimentación”. Al terminal de alimentación de +12 V que recibe energía sin interrupción Asegúrese de conectar primero el cable de conexión a masa negro a una superficie metálica del automóvil. Notas sobre los cables de control y de fuente de alimentación • El cable de control de la antena motorizada (azul) suministrará cc de + 12V cuando conecte la alimentación del sintonizador. • Si el automóvil dispone de una antena de FM/AM integrada en el cristal trasero o lateral, conecte el cable de control de antena motorizada (azul) o el cable de entrada de alimentación auxiliar (rojo) al terminal de alimentación del amplificador de antena existente. Para obtener más información, consulte a su distribuidor. • Con esta unidad no es posible utilizar una antena motorizada sin caja de relé. Conexión para protección de la memoria Si conecta el cable de entrada de alimentación amarillo, el circuito de la memoria recibirá siempre alimentación, aunque apague el interruptor de la llave de encendido. Notas sobre la conexión de los altavoces • Antes de conectar los altavoces, desconecte la alimentación de la unidad. • Utilice altavoces con una impedancia de 4 a 8 Ω con la capacidad de potencia adecuada para evitar que se dañen. • No conecte los terminales de altavoz al chasis del automóvil, ni conecte los terminales del altavoz derecho con los del izquierdo. • No conecte el cable de conexión a masa de esta unidad al terminal negativo (–) del altavoz. • No intente conectar los altavoces en paralelo. • Conecte solamente altavoces pasivos. Si conecta altavoces activos (con amplificadores integrados) a los terminales de altavoz, puede dañar la unidad. • Para evitar fallas de funcionamiento, no utilice los cables de altavoz integrados instalados en el automóvil si la unidad comparte un cable negativo común (–) para los altavoces derecho e izquierdo. • No conecte los cables de altavoz de la unidad entre sí. Nota sobre la conexión Si el altavoz y el amplificador no están conectados correctamente, aparecerá “FAILURE” en la pantalla. Si es así, compruebe la conexión de ambos dispositivos. 2 1 A TOYOTA Face the hook inwards. size 5 × max. 8 mm (7/32 × max. 5/16 in) dimension Tamaño 5 × 8 mm máx. to dashboard/center console al tablero o consola central Bracket Soporte 1 2 size 5 × max. 8 mm (7/32 × max. 5/16 in) dimension Tamaño 5 × 8 mm máx. to dashboard/center console al tablero o consola central El gancho debe encontrarse en la parte interior. B NISSAN size 5 × max. 8 mm (7/32 × max. 5/16 in) dimension Tamaño 5 × 8 mm máx. Bracket Soporte size 5 × max. 8 mm (7/32 × max. 5/16 in) dimension Tamaño 5 × 8 mm máx. Bracket Soporte 3 Dashboard Tablero Bracket Soporte Existing parts supplied with your car Piezas existentes suministradas con su automóvil Existing parts supplied with your car Piezas existentes suministradas con su automóvil 182 mm 53 m A m Claws Uñas Precautions • Choose the installation location carefully so that the unit will not interfere with normal driving operations. • Avoid installing the unit in areas subject to dust, dirt, excessive vibration, or high temperatures, such as in direct sunlight or near heater ducts. • Use only the supplied mounting hardware for a safe and secure installation. Mounting angle adjustment Adjust the mounting angle to less than 45°. Removing the protection collar and the bracket Before installing the unit, remove the protection collar and the bracket from the unit. 1 Remove the protection collar . Pinch both edges of the protection collar , then 2 pull it out. Remove the bracket . Insert both release keys together between the unit and the bracket until they click. Pull down the bracket , then pull up the unit to separate. Mounting example Installation in the dashboard Notes • Bend these claws outward for a tight fit, if necessary (-2). • Make sure that the 4 catches on the protection collar are properly engaged in the slots of the unit (-3). Mounting the unit in a Japanese car You may not be able to install this unit in some makes of Japanese cars. In such a case, consult your Sony dealer. Note To prevent malfunction, install only with the supplied screws . How to detach and attach the front panel Precauciones Before detaching the front panel, be sure to press . Press , then slide the front panel to the right, and gently pull out the left end of the front panel. • Elija cuidadosamente el lugar de montaje de forma que la unidad no interfiera con las funciones normales de conducción. • Evite instalar la unidad donde pueda quedar sometida a polvo, suciedad, vibraciones excesivas o altas temperaturas como, por ejemplo, a la luz solar directa o cerca de conductos de calefacción. • Para realizar una instalación segura y firme, utilice solamente elementos de instalación suministrados. -B To attach Ajuste del ángulo de montaje Before installing the unit, detach the front panel. -A To detach Place the hole of the front panel onto the spindle on the unit, then lightly push the left side in. Ajuste el ángulo de montaje a menos de 45°. Extracción del marco de protección y del soporte Warning if your car’s ignition has no ACC position Be sure to set the Auto Off function. For details, see the supplied Operating Instructions. The unit will shut off completely and automatically in the set time after the unit is turned off, which prevents battery drain. If you do not set the Auto Off function, press and hold until the display disappears each time you turn the ignition off. RESET button When the installation and connections are completed, be sure to press the RESET button with a ball-point pen, etc., after detaching the front panel. B Antes de instalar la unidad, retire el marco de protección y el soporte de la misma. 1 Retire el marco de protección . 2 Apriete ambos bordes del marco de protección y, a continuación, tire de él hacia fuera. Retire el soporte . Inserte ambas llaves de liberación entre la unidad y el soporte hasta que encajen. Presione el soporte y, a continuación, levante la unidad para separar ambos elementos. Ejemplo de montaje Forma de extraer e instalar el panel frontal Antes de instalar la unidad, extraiga el panel frontal. -A Para extraerlo Antes de extraer el panel frontal, cerciórese de presionar . Presione y, a continuación, deslice el panel frontal hacia la derecha y tire suavemente de su extremo izquierdo. -B Para instalarlo Coloque el orificio del panel frontal en el eje de la unidad y, a continuación, presione ligeramente el lado izquierdo hacia adentro. Advertencia: si el encendido del automóvil no dispone de una posición ACC Asegúrese de ajustar la función de desconexión automática. Para obtener más información, consulte el manual de instrucciones suministrado. La unidad se apagará completa y automáticamente en el tiempo establecido después de que se desconecte la unidad, lo que evita que se desgaste la batería. Si no ha ajustado la función de desconexión automática, mantenga presionado cada vez que apague el interruptor de encendido, hasta que la pantalla desaparezca. Instalación en el tablero Notas • Si es necesario, doble estos ganchos hacia fuera para que encaje firmemente (-2). • Compruebe que los 4 enganches del marco de protección estén bien fijados en las ranuras de la unidad (-3). Montaje de la unidad en un automóvil japonés Es posible que no pueda instalar esta unidad en algunos automóviles japoneses. En tal caso, consulte a su distribuidor Sony. Nota Para evitar que se produzcan fallas de funcionamiento, realice la instalación solamente con los tornillos suministrados . Botón RESET Una vez finalizada la instalación y las conexiones, desmonte el panel frontal y presione el botón RESET con un bolígrafo o un objeto similar.