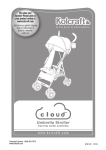
Download Escape™ Series Instruction Sheet Hoja de instrucciones
Transcript
S52-R3.qxd
10/20/2005
9:15 AM
Page 1
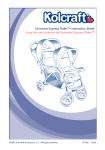
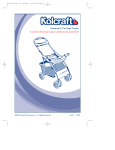
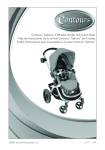
Escape™ Series Instruction Sheet
Hoja de instrucciones de Escape™ Series
©2005 Kolcraft® Enterprises, Inc. All Rights Reserved.
S52-R3
10/05
S52-R3.qxd
10/20/2005
9:15 AM
Page 2
WARNING
Avoid serious injury from falling or sliding out. Always use Restraint
System. Your child's safety depends on you. Proper stroller use cannot be
assured unless you follow these instructions. DO NOT USE STROLLER
UNTIL YOU READ AND UNDERSTAND THESE INSTRUCTIONS.
IMPORTANT SAFETY INFORMATION:
How to Keep Your Child Safe While Using this Stroller
• NEVER LEAVE YOUR CHILD UNATTENDED WHILE IN STROLLER.
Accidents can happen quickly while your back is turned. You must
always keep your child in view while your child is in the stroller,
even when sleeping. Do not use this product as a bed. Your child
may become tangled in straps or pads and suffocate.
• Always use restraint system to keep child from standing up or
falling out of the stroller.
• Always lock the stroller open before allowing your child in or near
the stroller. This prevents injuries caused by stroller collapsing.
• Only use this stroller with children who weigh less than 40 lbs.
(18.14 kg). Use by larger children may damage the stroller, or
cause a hazardous unstable condition to exist.
• Use this stroller in the reclined position until child can sit up
unassisted.
• Always set the wheel brakes when stroller is not moving, especially
on an incline. This prevents the stroller from rolling away.
What to Avoid While Using this Stroller
• Always balance the weight of the stroller evenly. To prevent the
stroller from becoming unstable or tipping:
• Do not place parcels or accessory items on the stroller canopy,
seat, or over the handle.
• Do not put more than 10 lbs. (4.54 kg) in the basket.
• Do not allow children to play with or hang onto the stroller.
• Never use this stroller on stairways or escalators.
• DO NOT lift by tray or toy bar (select models).
• This is not an exercise stroller! Do not use this product while
running, jogging, in-line skating or participating in other athletic
activities.
• DO NOT put child in basket.
2
S52-R3.qxd
10/20/2005
9:15 AM
Page 3
How to Use this Stroller with Your Infant Car Seat
• AVOID SERIOUS INJURY FROM FALLS:
• This product is only to be used with certain Infant Car Seats. See
below for list of compatible Infant Car Seats.
• When using this product with your Infant Car Seat, infant must
always be secured in the car seat with the car seats harness.
• To ensure your Infant Car Seat is properly installed on the stroller,
make sure it is:
• Facing the person pushing the stroller.
• Tightly secured to the stroller with the red restraint straps.
• If at any time your Infant Car Seat does not secure properly to the
stroller, or if you have questions about assembly or use of the
stroller, Do Not use this product. Call Kolcraft at 1-800-453-7673.
• Make sure the stroller is fully unfolded and securely latched before
attaching your Infant Car Seat. This prevents finger pinching and
injuries caused by stroller collapsing.
• Only transport infants that are within the size and weight
limitations of your Infant Car Seat, as described in the instruction
manual provided by the Infant Car Seat manufacturer.
• THE FOLLOWING INFANT CAR SEATS CAN BE USED IN THIS
STROLLER’S SEAT:
•Britax®
Handle with Care®
•Century® 535/580/590 Series
•Century® Assura® Series
•Century® Avanta™ Series
•Century® Vanté™5
•Combi® Tyro™
®
•Combi Connection™
•Cosco®
Arriva® Series
•Cosco® Designer®
•Cosco® Eddie Bauer®
Opus® 35®
•Cosco® Eddie Bauer®
Caress
•Cosco® Turn-A-Bout®
•Evenflo®
On-My-Way™
•Graco® Snug Ride™ Series
•Kolcraft® Secura
•Kolcraft® Infant Rider®
•Safety 1st® Designer® 22™
• If your Infant Car Seat is not one of the models listed above, DO
NOT use your infant car seat with this stroller. Other Infant Car
Seat models will not fit properly and may result in serious injury to
your child.
• DO NOT USE THE FOLLOWING CAR SEATS WITH THIS STROLLER!
This list is not inclusive.
•Baby
•Cosco®
•Fisher
•Britax®
Trend® Latch-Loc
Baby Safe™
•Britax® Companion
TM
•Century® Smart Fit Series
•Cosco® TLC
•Evenflo®
Dream Ride®
Cozy Carry™
•Evenflo® Discovery™
•Evenflo® Portabout™
•Evenflo® Embrace
•All
Price® Stay in View™
Gerry® Infant Car Seats
•Peg Perego Primo Viaggio
TM
sco®, EvenFlo®, Fisher Price®, Graco®, Peg Perego and Safety 1st® are trademarks of
their respective owners. They are not associated with Kolcraft Enterprises, Inc. and no
approval by them is to be implied.
3
S52-R3.qxd
10/20/2005
9:15 AM
Page 4
ADVERTENCIA
Evite daños serios causados por caídas o al deslizarse del asiento. Siempre
use el sistema de cinturones. La seguridad de su hijo/a depende de usted.
No se puede asegurar un uso apropiado de la carriola a menos que usted
siga estas instrucciones. NO USE LA CARRIOLA HASTA QUE USTED HAYA
LEIDO Y COMPRENDIDO ESTAS INSTRUCCIONES.
INFORMACIÓN IMPORTANTE DE SEGURIDAD:
Cómo mantener a su hijo seguro mientras utiliza ésta carriola
• NUNCA DEJE A SU NIÑO SOLO EN LA CARRIOLA. Pueden ocurrir
accidentes repentinamente mientras usted se encuentra de espaldas.
Debe mantener a su niño siempre a la vista minetras esté en la
carriola, aunque esté durmiendo. No utilice esté producto como
cama. Su niño pudiera quedar atrapado entre las correas o sofocarse
con los colchoncitos.
• Siempre use el sistema de sujeción para evitar que su niño se pare en
la carriola o se caiga.
• Siempre asegure la carriola en posición desplegada antes de permitir
que su niño se acerque a ella o se monte en ella. Esto evitará que se
cierre súbitamente y cause lesión al niño.
• El uso de esta carriola es sólo para niños que pesen menos de 40 libras
(18.14 kg). La carriola puede sufrir daños o se puede producir una
situación peligrosa de inestabilidad si se usa para niños más pesados.
• Use esta carriola en la posicion reclinable hasta que el niño pueda
sentarse sin ayuda.
• Siempre ponga el freno de las ruedas cuando la carriola no esté en
movimiento, especialmente cuando está en una superficie inclinada.
Esto evitará que la carriola ruede accidentalmente.
Qué debe evitar mientras utiliza ésta carriola
• Siempre mantenga el peso de la carriola repartido por igual. Para
evitar que la carriola esté inestable o se voltée:
• No coloque paquetes ni accesorios sobre la sombrilla, los asientos o
la manija.
• No ponga objetos que pesen más de 10 libras (4.54 kg) en la
canasta.
• No permita que los niños jueguen con la carriola o se cuelguen de ella.
• Nunca utilice esta carriola en escaleras o escaleras automáticas.
• No levante la carriola por la charola o los juguetes (modelos selectos).
• ¡Esta carriola no está diseñada para hacer ejercicio! No debe ser utilizada
para correr, trotar, patinar o participar en otras actividades atléticas.
• No ponga su niño en la canasta.
4
S52-R3.qxd
10/20/2005
9:15 AM
Page 5
Cómo utilizar esta carriola con el asiento infantil para auto
• EVITE DAÑOS SERIOS CAUSADOS POR CAÍDAS O AL DESLIZARSE
DEL ASIENTO:
• Esté producto es para ser usado solamente con ciertos asientos
infantiles. Vea la lista de los Asientos de Automóvil para Niños
compatibles abajo.
• Para usar esté producto con su asiento infantil para auto, el niño
siempre debe estar asegurado en el asiento con los cinturones de
seguridad.
• Para asegurarse que el asiento Infantil de auto este bien instalado
en la carriola asegure que:
• Se encuentre de frente a la persona empujando la carriola.
• Este apretado a segurado a la carriola con los cinturones rojos de
seguridad.
• Si su asiento infantil no se encuentra bien asegurado a la base o si
tiene alguna duda sobre el ensamblaje o uso del portaasientos,
NO USE ESTE PRODUCTO. Llame a Kolcraft al 1-800-453-7673.
• Asegure que el porta asientos esta desplegado y fijo antes de
asegurar su asiento infantil. Esto evitará daños a los dedos y heridas
causadas por un plegamiento inesperado.
• Transporte únicamente niños del tamaño y peso límite especificados
en su asiento infantil, como se describe en el manual de instrucciones
de su fabricante.
• LOS SIGUIENTES ASIENTOS DE AUTO PARA NIÑO PUEDEN SER
USADOS EN ESTE PORTAASIENTOS DE ESTA CARRIOLA:
•Britax®
Handle with Care®
•Century® 535/580/590 Series
•Century® Assura® Series
•Century® Avanta™ Series
•Century® Vanté™5
•Combi® Tyro™
•Combi
Connection™
•Cosco Arriva® Series
•Cosco® Designer®
•Cosco® Eddie Bauer®
Opus® 35®
•Cosco® Eddie Bauer®
Caress
®
®
•Cosco®
Turn-A-Bout®
•Evenflo On-My-Way™
•Graco® Snug Ride™ Series
•Kolcraft® Secura
•Kolcraft® Infant Rider®
•Safety 1st® Designer® 22™
®
• Si su asiento infantil para auto no es ninguno de los modelos
anteriores, NO USE este asiento infantil para auto en la parte trasera
de esta carriola. Otros modelos de asientos de auto no se ajustarán
correctamente y pueden causar lesiones graves a su niño.
• NO USE LOS SIGUIENTES MODELOS DE ASIENTOS INFANTILES EN
LA PORTAASIENTOS. Esta lista no es inclusiva ni esta completa.
•Baby
•Cosco®
•Fisher
•Britax®
Trend® Latch-Loc
Baby Safe™
•Britax® Companion
TM
•Century® Smart Fit Series
®
•Cosco TLC
•Evenflo®
Dream Ride®
Cozy Carry™
•Evenflo® Discovery™
•Evenflo® Portabout™
•Evenflo® Embrace
•All
Price® Stay in View™
Gerry® Infant Car Seats
•Peg Perego Primo Viaggio
TM
Baby Trend®, Britax®, Century®, Combi®, Cosco®, EvenFlo®, Fisher Price®, Graco®, Peg
Perego y Safety 1st® son marcas registradas de sus respectivos dueños. No están asociados con Kolcraft Enterprises, Inc. y no existe ninguna aprobación implícita.
5
S52-R3.qxd
10/20/2005
9:15 AM
Page 6
Parts List
Lista de piezas
Front Wheel
Assembly (2)
Montaje de la
rueda frontal (2)
Front Tray
Charola
Music On The Move ™
Parent Tray
(Select Models)
(Modelos selectos)
Stroller Frame
Estructura de la
carriola
Toys
Juguetes
(Select Models)
(Modelos selectos)
Rear Wheels (2)
Ruedas traseras (2)
Rear Brake Assemblies
Unidades de freno trasero
Parent Tray
Charola para adultos
(Select Models)
(Modelos selectos)
Washers (2) Cotter Pins (2)
Arandelas (2) Pasadores (2)
Hub Caps (2)
Tapón del cubos (2)
How to Assemble Your Stroller / Cómo ensamblar su carriola
To Open Stroller
2
Para abrir carriola
any cardboard inserts or plastic ties
1 Remove
used to protect the product during shipment.
Remueva cualquier inserción de cartón o
plástico para proteger el producto durante el
envío.
2 Release the locking latch.
Suelte el seguro.
3
making sure both side locks snap into
3 Unfold,
place.
Despliegue la carriola como se indica.
Cerciórese de que ambos seguros entren en
su sitio.
6
S52-R3.qxd
10/20/2005
9:15 AM
Page 7
To Assemble Rear Wheels
Para ensamblar las ruedas traseras
1 Turn stroller over as shown.
Coloque la carriola orientada como se
muestra en el dibujo.
2 Position rear break assemblies as shown, with
red brake levers pointing towards stroller handle.
1&2
Coloque el freno trasero en la posición que
se muestra, con las palancas del freno orientadas hacia el mango de la carriola.
Push rear break assemblies onto rear leg
3 tubes
at the same time.
Inserte ambas unidades de freno en los
tubos de las patas traseras simultáneamente.
Tab locks into hole
Asegurar lengüetas
4
Make sure plastic tabs on rear break assem4 bly
lock into holes on rear legs as shown.
Asegúrese de que las lengüetas plásticas de
las unidades de freno queden aseguradas en
los agujeros de las patas traseras, como se
muestra en el dibujo.
Slide a wheel onto the axle than slide a
5 washer
onto the axle.
Deslize la rueda sobre el eje. Deslize la
arandela sobre el eje.
5
Fit straight part of cotter pin through hole on
6 axle
as shown.
Ajuste la parte derecha del pasador por el
agujero del eje, como se muestra.
7 Line up each of the tabs in the hub cap with
the slots in the wheel, snap hub cap into
place.
6
Alinée las lengüetas de cada uno de los
tapones protectores con las ranuras de la
rueda y presione hasta que queden bien asegurados.
Repeat for second side.
Repita estos mismos pasos en el otro lado.
7
S52-R3.qxd
10/20/2005
9:15 AM
Page 8
To Assemble Front Wheels
Para ensamblar las ruedas delanteras
front wheel assembly as shown. Tab must
1 Align
be facing away from stroller (towards you).
1
Alinée la unidad de las ruedas delanteras
como se muestra en el dibujo. La lengüeta
debe estar orientada en dirección opuesta a
la carriola (orientada hacia usted).
front wheel assembly onto stroller leg
2 Push
until it snaps into place.
Tab
Lengüeta
Empuje la unidad de las ruedas en la pata de la
carriola hasta que quede bien ajustada en el lugar.
Repeat for other front wheel. Tug firmly on
each wheel assembly to be sure wheels are
securely in place.
2
Repita la operación con las otras ruedas. Empuje
la unida de las ruedas contra el pasador hasta que
queda bien ajustada en su lugar.
NOTE: To remove, squeeze tab
and pull wheel off.
NOTA: Para quitar, apriete la lengüeta y
saque las ruedas.
To Attach Parent Tray
Para instalar la charola para adultos
(select models)
(modelos selectos)
WARNING
ADVERTENCIA
Do not place more than 3 lbs. (1.36
kg) in this tray to avoid tipping!
Do not place hot liquids in this tray.
Hot liquids can burn your child.
No ponga más de 1.36 kg (3 libras) de
peso en esta charola para evitar
volcaduras. No coloque liquidos
calientes en esta bandeja. Liquidos
calientes pueden quemar a su niño.
1 To assemble, fit parent tray underneath one hand fold.
Para ensamblar ajuste la charola para adultos bajo
el mango.
1
2
Push front of parent tray over canopy wire. Align
2 tray
holes with posts on handle and snap on.
Presione sobre el alambre de la sombrilla. Alinée
los hoyos de la charola con los postes del mango
y asegúrela.
To remove parent tray, pull each side up and out. For
cleaning, parent tray is top rack dishwasher safe.
Para remover la charola para adultos tire hacia
arriba y hacia afuera a ambos lados de la charola.
Puede lavarse en la bandeja superior del
lavaplatos.
8
S52-R3.qxd
10/20/2005
9:15 AM
Page 9
To Attach Music On The Move™
Parent Tray (select models)
WARNING
• Loud volume can damage your child’s
hearing. When turning on music,
gradually adjust the volume to a
comfortable listening level so child is not
startled.
• Do not place more than 3 lbs. (1.36 kg)
in this tray to avoid tipping!
• Do not place hot liquids in this tray.
Hot liquids can burn your child.
Para situar la charola para adultos
Music On The Move™ (modelos selectos)
ADVERTENCIA
• Si el volumen está demasiado alto, puede dañar
los oídos de su bebé. Cuando conecte la
música, ajuste el volumen gradualmente hasta
un nivel confortable, de manera que su bebé no
se asuste.
• No ponga más de 1.36 kg (3 lbs.) de peso en
esta charola para evitar volcaduras.
• No coloque liquidos calientes en esta bandeja
liquidos calientes pueden quemar a su niño.
To assemble the Music On The Move™
1 parent
tray, align tray holes with posts on
handle and snap on.
1
Para ensamblar Music On The Move™ alinee
los hoyos de la charola con los postes del
mango y asegúrela.
2 To remove the Music On The Move™ parent
tray, pull each side up and out.
Para remover Music On The Move™ tire hacia
arriba y hacia afuera a ambos lados de la charola.
To Install Batteries Into Music On
Para instalar las pilas en Music On The
The Move™ Parent Tray (select models) Move™ (modelos selectos)
Requires 4 “AA” Batteries (Not Included)
1
Requiere 4 Pilas “AA” (No Incluidas)
1 Lift up the foam padding in the bottom of the unit.
Eleve el colchón de espuma en la base de la unidad.
Note: Foam is used to reduce skipping &
eliminate sliding of your portable unit. If
your player does not fit inside, remove foam.
2
Nota: se utiliza espuma para reducir el
movimiento y el deslizamiento en su unidad
portatil. Si su reproductor no cabe dentro,
remueva la espuma.
Use a phillips screwdriver to remove the
2 battery
door.
3
Use un destornillador phillips para
desatornillar la puerta de la batería.
3 Place batteries in the battery compartment as shown.
Sitúe las baterías en el compartimiento como
se muestra.
Screw the battery door back onto the unit
4 and
replace the foam.
Atornille de nuevo la portezuela de las
baterías y sitúe la espuma.
9
S52-R3.qxd
10/20/2005
9:15 AM
Page 10
To Attach Front Tray
Para instalar la charola
1 Position front tray over stroller frame.
Sitúe la charola sobre el marco de la carriola.
1
front tray over buttons on rails to
2 Snap
secure.
2
Asegúrese de encajar sobre el botón para
asegurarla.
To Attach Toys to Tray
Para montar los juguetes en la
charola (modelos selectos)
(select models)
1 Align toys with grooves under the tray.
Alinée los juguetes con las ranuras bajo la
charola.
2
2 Snap toys on bottom part of tray first.
1
Primero, encaje los juguetes hacia abajo de
la charola.
Push down on top of toys until it locks into
place.
Empuje arriba de los juguetes hasta que
estén asegurados en su lugar.
How to Properly Use Your New Stroller / Cómo usar su nuevo carriola correctamente
Para usar los frenos
To Operate Brakes
Unlock
Quitar
1
2
Lock
Poner
Push levers on both rear wheels down to lock.
Para poner los frenos empuje pedales hacia abajo.
1
2
Pull levers up to unlock.
Para quitar los frenos tire de los pedales hacia
arriba.
10
S52-R3.qxd
10/20/2005
9:15 AM
Page 11
To Recline Seat
Para reclinar el asiento
WARNING
To avoid finger entrapment or pinching,
do not adjust the seat back while child
is in the stroller.
ADVERTENCIA
Para evitar heridas en los dedos, no
ajuste el respaldo del asiento con el niño
dentro.
1 To recline seat back, loosen belt.
2
Tighten
Apriete
Para reclinar el asiento, suelte el cinturón.
2 To raise seat back, tighten belt.
Para subir el asiento, apriete el cinturón.
To Secure Child In Stroller
Para asegurar al niño en la carriola
WARNING
ADVERTENCIA
Avoid serious injury from falling or
sliding out. Always use restraint
system.
Evite daños serios causados por
caídas o al deslizarse del asiento.
Use siempre el sistema de cinturónes.
1 Lock both foot brakes to keep stroller from rolling.
Asegure los dos frenos de pie para evitar que
la carriola ruede accidentalmente.
3
2 Place crotch strap between child’s legs.
Coloque la correa de la entrepierna entre las
piernas del niño.
restraint system to fit snugly around
3 Adjust
child’s waist.
Ajuste adecuadamente el sistema de
cinturones alrededor de la cintura del niño.
fasten restraint system buckles - push
4 To
together. Be sure both buckles are fastened
4
to secure child safely.
Para abrochar la hebilla del sistema de
cinturones ensártela en el otro extremo del
cinturón. Asegure que las dos hebillas estén
abrochados para segurar el niño.
unsnap restraint system buckles - press
5 To
tabs to release.
5
Para desabrochar la hebilla del sistema de
cinturones, presione las lengüetas.
11
S52-R3.qxd
10/20/2005
9:15 AM
Page 12
Car Seat Restraint Storage
Para guardar el cinturón de seguridad
belts for the Infant Car Seat are red
1 Restraint
and are located in the small pockets on each
side of the stroller seat.
Los cinturones de seguridad son rojos y se
encuentran en los bolsillos pequeñòs de cada
lado del asiento para auto.
Store
Ca
Restr r Seat
a
HER int
E
CAUTION: When not using your red infant
car seat restraint belts, store them inside
pocket. Failure to store restraint belts may
cause strangulation.
1
PRECAUCIÓN: Cuando no se usen, guarde
los cinturones rojos de seguridad en los
bolsillos. Si no los guarda puede haber
peligro de estrangulación
To Use Infant Car Seat
•Britax®
Handle with Care®
•Century® 535/580/590 Series
•Century® Assura® Series
•Century® Avanta™ Series
•Century® Vanté™5
•Combi® Tyro™
®
•Combi Connection™
Para usar el asiento de auto
•Cosco®
Arriva® Series
•Cosco Designer®
•Cosco® Eddie Bauer®
Opus® 35®
•Cosco® Eddie Bauer®
Caress
•Cosco® Turn-A-Bout®
•Evenflo® On-My-Way™
®
•Graco®
Snug Ride™ Series
•Kolcraft Secura
•Kolcraft® Infant Rider®
•Safety 1st® Designer® 22™
®
Above is a list of car seats that will fit on the
Escape™ / Escape™ 400.
Arriba hay una lista de los asientos para auto
que se ajustan en Escape™ / Escape™ 400.
1 Recline stroller seat first and push canopy back.
Recline primero el asiento y empuje la
sombrilla hacia atrás.
2 Place car seat in seating area of stroller so
2
that child is facing handle of stroller. Make
sure the car seat is resting against front tray
and that the car seat is level. Your child’s
head should be slightly above their knees.
Coloque el asiento de auto en el areá del
asiento de la carriola de forma que el niño
esté de frente al mango de la carriola.
Asegure que el asiento de auto esté
descansando contra la charola y que se
encuentre nivelado. La cabeza de su niño
debe estar un poco más alta que las rodillas.
12
S52-R3.qxd
10/20/2005
9:15 AM
Page 13
NOTE: Your Infant Car Seat may have a level
indicator. It is not necessary for use with this
stroller and the indicator may fall outside the
recommended area. The level indicator is for
use while the Infant Car Seat is in an automobile.
NOTA: puede que su asiento infantil para auto
tenga un indicador de nivel. No es necesario
utilizarlo con esta carriola y el indicador puede
estar fuera del área recomendada. El indicador
de nivel se utiliza mientras el asiento infantil
para auto está en un automóvil.
Thread RED infant car seat restraint belts
3 located
in the side pocket through the clips
3
on the top of the car seat. NOTE: Peg
Perego does not have clips. Secure belt over
lowest point of car seat.
Pase los tirantes ROJOS del asiento infantil
de auto por los clips de la parte superior del
asiento de auto. NOTA: Peg Perego no
tiene clips. Asegure el cinturón sobre el
punto más bajo del asiento de auto.
belt as much as you can to secure
4 Tighten
infant car seat (see TO SECURE INFANT CAR
SEAT section). Fasten buckle.
Apriete el cinturón lo más fuerte posible para
asegurar el asiento de auto (vea la sección
PARA ASEGURAR AL NIÑO EN EL ASIENTO
PORTATIL). Abroche la hebilla.
ensure your Infant Car Seat is secure, pull
5 To
up on shell of car seat by child’s feet. Infant
Car Seat should not move more than 1/4 of
an inch. If it becomes loose, repeat Step 3.
DO NOT use this product with your Infant Car
Seat if it moves more than 1/4”. Serious injury
or death may result from poor installation.
Para asegurar que su asiento de auto está
bien instalado, jale el asiento de auto hacia
arriba por la base, cerca de los pies del niño.
El asiento no debe tener más de ¼ de
pulgada (½ cm.) de juego. Si se afloja, repita
el paso 3. NO USE este producto con su
asiento de auto para niño si tiene más de ½
cm. de juego. Una mala instalación puede
causar lesiones serias y hasta la muerte.
13
S52-R3.qxd
10/20/2005
9:15 AM
Page 14
Para asegurar el asiento infantil
To Secure Infant Car Seat
1
2
Asegure los dos frenos de pie para evitar
que la carriola ruede.
2
3
3
Lock both foot brakes to keep stroller from
rolling.
To fasten car seat restraint belts - open up
loop of the restraint belt. Adjust belt until
the buckles almost touch.
Para abrochar los cinturones del asiento de
auto, abrá el lazo del cinturón de ajuste.
Ajuste el cinturón hasta que las hebillas casi
se toquen.
3
Pull end tab of restraint belt to set. Push
buckles together to secure.
Estire de la lengueta del final de ajuste en el
cinturón para ajutarla. Estire de las hebillas
para asegurar.
4
4
To unsnap Restraint Belt - press tabs.
Para desabrochar la hebilla del cinturón del
asiento, presione las lengüetas.
14
S52-R3.qxd
10/20/2005
9:15 AM
Page 15
To Operate Music On The Move™
Parent Tray (select models)
Cómo utilizar Music On The Move™
(modelos selectos)
1
1
Connect the Music On The Move plug to the
headphone jack of your personal sound
system (radio, cassette, CD, MP3 or mini disk
player).
Conecte el conector de Music On The Move
al conector de su sistema personal de sonido
(radio, casette, CD, MP3 o reproductor de
mini discos).
NOTE: If your portable system has separate
“phone” and “line out” jacks, be sure to
plug into only the “phone” jack.
NOTA: Si su sistema portátil tiene un conector
de “phone” y “line out”, esté seguro que
nomas lo enchufe en el conector de “phone”.
2
Turn on Music On The Move by locating the
power switch as shown. A red light will indicate that the power is on. Be sure to turn off
unit after use so not to drain the batteries.
Conecte Music On The Move localizando el
interruptor de sonido como se muestra. Una
luz roja indicará que está encendido.
Asegúrese de apagar la unidad después de
usarla para no agotar las baterías.
2
To avoid startling your child, adjust volume
on your personal sound system to its lowest
level. Turn on your personal sound system
and slowly increase volume to a comfortable
listening level for you and your child.
Para evitar asustar al niño, ajuste el volumen
de su sistema personal de sonido a su nivel
más bajo. Conecte su sistema personal de
sonido y aumente lentamente el volumen a
un nivel de escucha cómodo para usted y su
niño.
NOTE: If sound cuts out or becomes
distorted, check your personal sound systems
battery level. If battery level is okay and
sound is still distorted, replace Music On The
Move’s batteries.
NOTA: Si el sonido se corta o suena distorsionado, compruebe el nivel de las baterías
de su sistema de sonido personal. Si los niveles de las baterías son normales pero el
sonido continúa distorsionado, cambie las
baterías de Music On The Move.
DO NOT leave Music On The Move in a hot
car or outside in the rain.
NO deje Music On The Move en un
automovil caliente o fuera en la lluvia.
15
S52-R3.qxd
10/20/2005
9:15 AM
Page 16
Para doblar a carriola
To Fold Stroller
1
BEFORE FOLDING: Lock brakes.
ANTES DE DOBLAR: Ponga los frenos.
2
3
Close canopy.
Cierre el toldo.
3
Push red button on handle with thumb, then
press red lever under handle.
Oprima el botón rojo con el dedo pulgar, y
luego presione la palanca roja en el mango.
NOTE: If 1-Hand Fold feature does not
operate properly, pull up latches on frame to
fold.
NOTA: Si el mecanismo para plegar con una sola
mano no funciona adecuadamente, hace para
arriba los pestillos en el marco para plegarla.
4 Fold as shown.
Doble como se muestra.
4
NOTE: Fold stroller so wheels face in. This
will allow the stroller to stand on its own.
DO NOT allow the front wheels to face out,
as stroller could fall over.
NOTA: pliegue la carriola de manera tal que
las ruedas calcen encima del cuadro. NO
permita que las ruedas se presionen contra
el cuadro ya que esto podría dañarlas.
Engage locking latch.
Ponga el seguro.
Care & Maintenance / Cuidado & Manteniniento
• To keep your stroller running smoothly and
avoid squeaking wheels use a silicone or
graphite based lubricant. It is important to
get it into the axle and the wheel assembly.
• Clean metal parts with a damp cloth and
wipe dry.
• Clean woven fabric or vinyl parts with mild
soap and water solution.
• Dry wet stroller with a soft cloth to prevent
rusting.
• When storing stroller, never stack other items
on top of it; this may damage the stroller.
• Periodically check for worn parts, loose
screws, torn materials or stitching.
• Replace any damaged parts immediately.
• Utilice un lubricante ligero con silicona o grafito
para que su carriola se deslice suavemente y
para evitar que las ruedas rechinen. Es
importante el aceitar eje y las ruedas.
• Limpie las partes de metal con un trapo
húmedo y luego séquelas.
• Limpie la tela tejida o las partes de vinilo con
jabón suave y agua.
• Seque la carriola con un trapo suave cuando se
haya mojado para evitar de que se oxide.
• Cuando guarde la carriola, nunca ponga otros
objetos encima de ella, ya que esto podría dañarla.
• Revise periódicamente para ver si tiene partes
gastadas, tornillos flojos, materiales rotos o
partes descosidas.
• Cambie inmediatamente cualquier parte dañada.
16
S52-R3.qxd
10/20/2005
9:15 AM
Page 17
Limited Warranty / Garantía limitada
Kolcraft® warrants this product to be free of defects in materials and workmanship, as
follows: For a period of ONE YEAR from the date of purchase, Kolcraft will repair or
replace, at its option, the defective product. If you have a problem or are not satisfied
with this product, please contact the Consumer Service Department at Kolcraft.
REPAIR OR REPLACEMENT AS PROVIDED UNDER THIS WARRANTY IS THE EXCLUSIVE
REMEDY OF THE CONSUMER. KOLCRAFT SHALL NOT BE LIABLE FOR ANY
INCIDENTAL OR CONSEQUENTIAL DAMAGES FOR BREACH OF ANY EXPRESS OR
IMPLIED WARRANTY ON THIS PRODUCT, EXCEPT TO THE EXTENT REQUIRED BY
APPLICABLE LAW. ANY IMPLIED WARRANTY OF MERCHANTABILITY OR FITNESS FOR
A PARTICULAR PURPOSE ON THIS PRODUCT IS LIMITED TO THE DURATION OF THIS
WARRANTY.
Some states do not allow the exclusion or limitation of warranties set forth above, so the
above exclusions may not apply to you. This warranty gives you specific legal rights, and
you may also have other rights which vary from state to state. We sincerely thank you for
your purchase of this Kolcraft product.
To obtain warranty service, please call Kolcraft’s Consumer Service Department at
1-800-453-7673 in U.S. and Canada, 1-910-944-9345 outside U.S. and Canada or contact
us via email at [email protected]
If the product is returned to Kolcraft’s Consumer Service Department for repair or
replacement, it must be shipped prepaid and adequately insured.
For further information visit www.kolcraft.com
RECALL WEBSITE : HELP KEEP YOUR CHILD SAFE. Check www.recall.gov to see if any
products you use with your child or any of your child's toys have been recalled.
Kolcraft® garantiza que este producto estará libre de defectos en materiales y fabricación
de la siguiente manera: Por un período de UN AÑO después de la fecha de compra,
Kolcraft reparará o reemplazará, a su opción, el producto defectuoso. Si usted tiene un
problema o no está satisfecho con este producto, por favor diríjase al Departamento de
Servicio al Consumidor de Kolcraft.
LA REPARACIÓN O EL REEMPLAZO SEGÚN SE DISPONE EN ESTA GARANTÍA ES EL
REMEDIO EXCLUSIVO DE CONSUMIDOR. KOLCRAFT NO SE HARÁ RESPONSABLE DE
NINGÚN DAÑO INCIDENTAL O EMERGENTE POR VIOLACIÓN DE CUALQUIER
GARANTÍA EXPRESA O IMPLÍCITA DE ESTE PRODUCTO, SALVO EN LA MEDIDA
REQUERIDA POR LA LEY APLICABLE. CUALQUIER GARANTÍA IMPLÍCITA DE
COMERCIABILIDAD O IDONEIDAD PARA UN FIN EN PARTICULAR DE ESTE PRODUCTO
ESTÁ LIMITADA EN DURACIÓN AL TÉRMINO DE ESTA GARANTÍA.
Algunos estados no permiten la exclusión o limitación de garantías según se dispone
anteriormente, de manera que es posible que las antedichas exclusiones no sean
aplicables a usted. Esta garantía le otorga derechos legales específicos y es posible que
también disponga de otros derechos, los cuales pueden variar de un estado a otro. Le
agradecemos sinceramente por haber comprado este producto Kolcraft.
Para obtener servicio de garantía, llame al Departamento de Servicio al Consumidor de
Kolcraft al 1-800-453-7673 en Estados Unidos y Canada; fuera de Estados Unidos y
Canada: 1-910-944-9345 o envianos un mensaje por correo electrónico a
[email protected].
Si el producto se devuelve al Departamento de Servicio al Consumidor de Kolcraft para
ser arreglado o reemplazado, debe mandarse con el flete pagado y debidamente
asegurado.
Para mayor información visítenos en www.kolcraft.com
SITIO DE WEB DE HACER VOLVER : MANTENGA A SU HIJO SEGURO. Compruebe
www.recall.gov para ver si cualquiera de los productos que utiliza con su hijo o cualquiera
de sus juguetes han sido retirados.
17
S52-R3.qxd
10/20/2005
9:15 AM
Page 18
Personal Record Card / Tarjeta de registro personal
Once in a while, we are less than perfect and one of our products reaches a customer with
a problem. In most cases, we can solve your problem with replacement parts. Please
contact us before you return one of our products to the store. Once a product is returned,
it cannot be resold. The materials and the energy used to make it are wasted.
Please fill in the information in the space provided and attach a copy of your purchase
receipt. You will need this information to obtain warranty service.
You can find the Model Number and Date of Manufacture on a sticker located on the rear
stroller leg.
Ocasionalmente no logramos la perfección y uno de nuestros productos presenta algún
problema al llegar al cliente. En la mayor parte de los casos podemos resolver el problema
con piezas de reemplazo. Sírvase ponerse en contacto con nosotros antes de devolver uno
de nuestros productos a la tienda. Una vez que se devuelve un producto, no se pude
volver a vender. Se desperdician los materiales y la energía que se usó en su fabricación.
Por favor escriba la información en el espacio provisto y adjunte una copia de su recibo de
compra. Usted necesitará esta información para obtener los servicios incluidos en la
garantía.
Usted puede encontrar el número del modelo y la fecha de fabricación en una etiqueta
situada en la parte trasera de la pata de la carriola.
Please direct any comments, questions or replacement part requests to:
Favor de remitir cualquier comentario, preguntas o pedidos de piezas de
respuesto a:
Kolcraft® Enterprises, Inc. Consumer Service Department
10832 NC Highway 211East
Aberdeen, NC 28315
1-800-453-7673 in U.S. & Canada, 1-910-944-9345 outside U.S. & Canada
Eastern Standard Time, 8 am-5:45 pm Monday - Thursday, 8 am-3:30 pm Friday
1-800-453-7673 en los Estados Unidos y en Canada, 1-910-944-9345 fuera de los Estados
Unidos y Canada tiempo estándar del este, 8 am-5:45 pm Lunes - Jueves, 8 am-3:30 pm
Viernes
fax / fax: 910-944-3490
e-mail / correo electrónico: [email protected]
Model / Style Number:
Número de Modelo/Estilo: _________________________
Date of Manufacture:
Fecha de fabricación: ______________________________
Date of Purchase:
Fecha de compra: _________________________________
18
S52-R3.qxd
10/20/2005
9:15 AM
Page 19
Replacement Parts List / Lista de piezas de repuesto
Circle the Part You Need
Replacement parts may look slightly
different than what is shown below.
Marque con un círculo el repuesto
que necesita
Las piezas de recambio se pueden ver
ligeramente diferentes de como se
muestran abajo.
Front Wheel Assembly
Montaje de la rueda
delantera
$13.00
Front Tray
Charola
$13.00
Parent Tray
Charola para adultos
$12.00
Music On The
Move™ Parent Tray
$20.00
Washer, Cotter Pin &
Hub Cap
Arandela, pasador y
tapón del cubo
FREE
Gratis
Rear Wheel
Rueda trasera
$10.00
Toys
Juguetes
$6.00
Rear Brake Assemblies
Unidades de freno trasero
$11.00
Basket
Cesta
$13.00
19
Canopy & Seat Pad
Sombrilla y Colchón para el asiento
$38.00
S52-R3.qxd
10/20/2005
9:15 AM
Page 20
Replacement Parts Order Form / Formulario para ordenar piezas de repuesto
Complete the following form. Your
model number and date of manufacture
must be included on the form to ensure
proper replacement parts.
Complete el siguiente formulario. Debe
incluir en el formulario el número de su
modelo y fecha de fabricación para
asegurarse de que obtenga las piezas de
repuesto adecuadas.
Model Number - No de modelo
Date of Manufacture - Fecha de fabricación
Total - Total:
Shipping & Handling* - Gastos de envío*:
$5.00
Sales Tax** - Impuestos**:
Total Due - Total a pagar:
*$15.00 outside the continental U.S.
*U.S. $15,00 para fuera de continente de EE.UU
**NC 7%
❑ Check or money order (in US dollar) enclosed (payable to Kolcraft
Enterprises, Inc.)
Cheque o giro adjunto (a nombre de Kolcraft Enterprises, Inc.)
❑ Charge to credit card
Cobrar a la tarjeta de crédito
❑ Visa
❑ Mastercard
Account# - Cuenta No:
Expiration Date - Fecha de vencimiento:
Signature - Firma:
Ship to - Enviar a:
Name - Nombre
Address - Dirección
City, State, Zip - Ciudad, Estado, Código postal
(
)
Telephone - Teléfono
Email Address - Correo electrónico
20
/


