1
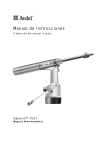
Manual de Instrucciones
TY
PE
07
53
Tr a d u c c i ó n d e l m a n u a l o r i g i n a l
753 MkII type
7530-07532
M á q u i n a H i d ro - n e u m á t i c a
Índice
Normas de Seguridad
4
Especificaciones
Especificaciones para la máquina tipo 0753 Mk II
Especificaciones para el Intensificador 07531
5
5
Uso previsto
Dimensiones de la máquina
6
7
Puesta en servicio
Suministro de aire
Cursor mecánico
Cursor
Carga y recarga de la máquina
Procedimiento de funcionamiento
Identificación y orientación de los muelles
Equipos de colocación
Boquillas
Selección de boquillas
Tablas de selección de boquillas
Mandriles y muelles
Tablas de selección Chobert® y Grovit®
Tablas de selección Briv®
Tipos de cabeza de mandril y longitud 'P'
Tablas de selección Avlug®, Avsert®,
Avtronic® y Rivscrew®
Servicio de la máquina
Diario / Semanal
Datos de seguridad de la grasa de litio Moly EP 3735
Kit de mantenimiento
8
9
10
10-11
11
12
13
14
15-16
17
17-18
19-20
20
21
Mantenimiento
Desmontaje de la 07530-02200 Mk II
Desmontaje de la 07532-02200 Mk II
Montaje general y lista de piezas de la
07530-02200 Mk II
Montaje general y lista de piezas de la
07532-02200 Mk II
Intensificador 07531-02200
Información de recambios
de válvula piloto 07005-00590
24-25
26-27
28-29
30-31
32-33
34-35
Cebado
Datos del aceite
36
Datos de seguridad del aceite Hyspin VG 32 y AWS 32 36
Procedimiento de cebado
36
Diagnóstico de averías
Síntoma, causa posible y solución
37
22
22
23
Garantía
Las máquinas de colocación de Avdel poseen una garantía de 12 meses frente a defectos
originados por componentes defectuosos o por mano de obra, iniciándose el periodo de
garantía a partir de la fecha de entrega confirmada por la factura o nota de envío.
La garantía es aplicable al usuario / comprador cuando la venta se realice a través de un
distribuidor autorizado, y únicamente con el propósito adecuado. La garantía quedará
invalidada si no se lleva a cabo el servicio, el mantenimiento y el funcionamiento de la
máquina de instalación de acuerdo a las instrucciones contenidas en los manuales de
servicio e instrucciones.
En caso de fallo o defecto, queda a la elección de Avdel el llevar a cabo la reparación o la
sustitución de los componentes defectuosos.
La política de Avdel es la de desarrollo y mejora continua del producto, reservándose el derecho de cambiar las especificaciones de cualquier producto sin previo aviso.
3
Normas de Seguridad
Este manual de instrucciones debe ser leído con una atención particular teniendo en cuenta las siguientes reglas
de seguridad, por cualquier persona que instale, haga funcionar o que repare esta máquina.
1
No la usen para otro propósito que no sea aquel para el que está diseñada.
2
La máquina manual y el intensificador han sido verificados como elementos por separado para ser luego combinados. Sólo deben ser
utilizados juntos, y bajo ninguna circunstancia serán utilizados con ningún otro propósito.
3
No utilizar con esta máquina ningún otro equipo más que el recomendado y suministrado por Avdel.
4
Cualquier modificación realizada por el cliente en la máquina, las boquillas, accesorios o en cualquier equipo suministrado por Avdel o por
sus representantes, será de entera responsabilidad del cliente. Avdel aconsejará gustosamente sobre cualquier modificación propuesta.
5
La máquina debe mantenerse en condiciones seguras de trabajo en todo momento y debe ser examinada a intervalos regulares en
cuanto a funcionalidad y existencia de posibles daños por personal con formación adecuada. Cualquier operación de desmontaje será
únicamente llevada a cabo por personal con conocimiento en los procedimientos de Avdel. No desmontar esta máquina / herramienta sin
consultar previamente las instrucciones de mantenimiento. Sírvanse contactar con Avdel en cuanto a sus necesidades de formación.
6
La máquina debe funcionar, en todo momento, de acuerdo con la legislación vigente en Seguridad y Salud. Cualquier pregunta referente a
la utilización correcta de la máquina y a la seguridad del operario, deberá estar dirigida a Avdel.
7
Las precauciones que deben observarse cuando se use esta máquina, deben ser explicadas por el cliente a todos los operarios.
8
Antes de intentar ajustar, adaptar o retirar una boquilla, debe desconectarse siempre la línea de aire de la entrada de la
herramienta/máquina.
9
No hacer funcionar una herramienta/máquina que esté dirigida hacia cualquier persona o personas.
10 Adoptar siempre una posición de apoyo firme y estable antes de hacer funcionar la máquina.
11 Asegurarse de que los orificios de escape no se encuentran bloqueados ni tapados y de que las mangueras estén siempre en buen
estado.
12 La presión de trabajo no deberá superar los 7 bar - 100 lbf/in2.
13 La combinación de remache, mandril, diámetro de agujero y espesor de la placa estarán de acuerdo con las especificaciones de Avdel.
14 No hacer funcionar la máquina si no tiene montada la boquilla completa a menos que se indique específicamente en contra.
15 Cuando se utilice la máquina, se recomienda la utilización de gafas de seguridad, tanto por parte del operario como de cualquier persona
que se encuentre en las proximidades, a fin de protegerse de la proyección de cualquier remache, en el caso de que éste saliera
despedido al aire. Se recomienda la utilización de guantes en el caso de que la aplicación incluya bordes o esquinas afiladas.
16 Prestar especial atención para evitar posibles enredos de ropas, corbatas, cabellos, trapos, con las partes móviles de la máquina, las
cuales deberán mantenerse secas y limpias para favorecer en lo posible el agarre.
17 Cuando se transporte la máquina de un emplazamiento a otro, mantener las manos alejadas del gatillo para evitar que se produzca un
arranque inadvertido.
18 Deberá evitarse un contacto excesivo con el aceite hidráulico. Para minimizar la posibilidad de erupciones, deberá tenerse la precaución
de lavarse minuciosamente.
I M P O R TA N T E
Con el empleo correcto y normal de los mandriles se producirá un pequeño desgaste y generación de marcas en los
mismos. Deberán examinarse éstos de forma regular en cuanto a una aparición excesiva de marcas de desgaste, con
atención especial al diámetro de la cabeza, a la zona de sujeción de las mordazas en el mandril, o a picaduras
destacables en el vástago, así como cualquier deformación en el mandril. Los mandriles que fallan durante su uso
pueden llegar a salir despedidos con fuerza de la máquina. Es responsabilidad del cliente asegurarse que se
sustituyen los mandriles antes de que se produzca cualquier nivel excesivo de desgaste, y siempre antes de llegar al
número máximo recomendado de colocaciones. Sírvanse contactar con su representante de Avdel, quien le indicará
cuál es esa cifra midiendo el esfuerzo de carga de su aplicación con una máquina de verificación calibrada. Dichas
máquinas pueden también comprarse con el número de pieza 07900-09080, suministrada con toda la información
necesaria para las pruebas contenida en este manual.
4
Especificaciones
Especificaciones de la Máquina Modelo 0753 Mk II
Presión de aire
Mínima - Máxima
5 - 7 bar (70 - 100 lbf/in2)
Volumen de aire libre requerido
a 5,1 bar / 75 lbf/in2
2,6 litros (,09 ft3)
Carrera
Mínima
30 mm (1,18 in)
2
Fuerza de tracción
a 5,5 bar / 80 lbf/in
3,89 kN (875 lbf)
Tiempo del ciclo
Aproximadamente
1 segundo
Nivel de ruido
Menos de
70 dB(A)
Peso
Pistola
1,2 kg (2,64 lb)
Vibración
Menos de
2,5 m/s2 (8 ft/s2)
Especificaciones del Intensificador 07531
Presión de aire
Indice de intensificación
Mínima - Máxima
5 - 7 bar (70 - 100 lbf/in2)
32:1
5
U s o P re v i s t o
La máquina neumática 0753 Mk II ha sido diseñada para colocar remaches de repetición Avdel® (excepto Avlug® 1/16”), lo que la
hace ideal para el montaje por lotes o de líneas continuas en una amplia gama de aplicaciones en todas las industrias.
La máquina manual y el intensificador han sido verificados como elementos por separado para ser luego combinados. Sólo deben ser
utilizados juntos, y bajo ninguna circunstancia serán utilizados con ningún otro propósito. Véase "Puesta en servicio" en la Página 46
para los detalles acerca de la conexión.
Ambos modelos, tanto el 07530 Mk II como el 07532 Mk II son máquinas ligeras portátiles. La única diferencia entre ellas estriba en
la ubicación de la entrada de la manguera. La entrada superior de la máquina 07532 Mk II permite su suspensión desde una pletina
adicional, ver el dibujo en la página siguiente. Se muestran los números de pieza para realizar un pedido de una máquina completa,
incluyendo el intensificador y todas las mangueras, pero sin el equipamiento de la boquilla.
El número de la pistola para el modelo 07530 MkII es 07530-02200 y para el modelo 07532 MkII es 07532-02200. Véase el montaje
general en las páginas 66-69.
Ambos modelos colocarán los mismos remaches y ambos son capaces de colocar la mayoría de los remaches de repetición, tal
como se muestra en la tabla siguiente.
Ambos modelos utilizan el mismo equipo de colocación. Para la selección de componentes compatibles para el tipo y tamaño de
remache utilizado en su aplicación, referirse a la sección de equipos de colocación del manual (ver páginas 51-60). Las dimensiones
de las boquillas se muestran en las página 52.
2,4 mm
3,2 mm
4,0 mm
CHOBERT®
●
●
●
●
GROVIT®
●
●
●
●
AVLUG®
●
●
BRIV®
●
●
●
●
2,5 mm
2,8 mm
3 mm
3,5 mm
4 mm
RIVSCREW®
●
●
●
●
AVTRONIC®
●
AVSERT®
6
DIAMETRO DEL REMACHE
TIPO DE
REMACHE
4,8 mm
6,4 mm
6 mm
M2.5
4-40
UNC
M3
6-32
UNC
●
●
●
●
Uso Previsto
Dimensiones de la maquina - modelo 07530 Mk II
475
18.70
Referencia 07530-02100
338
13.30
50
1.96
07
53
60
2.36
163 140
6.41 5.51
51
2
98
3.85
28
1.10
130
5.12
420
16.54
200
7.87
Dimensiones de la maquina - modelo 07532 Mk II
Referencia 07532-02100
130
5.12
420
16.54
200
7.87
07
53
60
2.36
163 140
6.41 5.51
50
1.96
98
3.85
28
1.10
475
18.70
51
2
338
13.30
Las dimensiones indicadas en negrilla son milímetros. Las otras dimensiones son en pulgadas.
7
Puesta en Servicio
Suministro de aire
Todas las máquinas funcionan con aire comprimido, a una presión óptima de 5,5 bar. Recomendamos la utilización de reguladores de
presión y de sistemas automáticos de lubrificación/filtro en el suministro de aire principal. Para asegurar una vida máxima de la máquina y
un mantenimiento mínimo de ésta, dichos sistemas deberán instalarse a menos de 3 metros de la máquina (ver diagrama a continuación).
Las mangueras de suministro de aire deben tener una mínima presión nominal efectiva de trabajo del 150% de la presión máxima
producida en el sistema o de 10 bar, la que sea más alta de ellas. Las mangueras de aire deben ser resistentes al aceite, tener un exterior
resistente a la abrasión y deben estar blindadas cuando las condiciones de funcionamiento puedan originar que se dañen. Todas las
mangueras de aire DEBEN tener un diámetro interior mínimo de 6,4 milímetros o 1/4 de pulgada.
Leer los detalles relativos al servicio de mantenimiento diario en la página 60.
PE
ÁXIMO
SM
O
TR
PUNTO DE CONEXIÓN
DE LA LÍNEA PRINCIPAL
141
12 6
6 8 10
0 2 4
3M
E
TY
07
53
LLAVE DE CORTE (UTILIZADA
DURANTE EL MANTENIMIENTO DEL
FILTRO/REGULADOR O DE
LAS UNIDADES DE LUBRICATIÓN
LLAVE DE PURGADO
DE LA LÍNEA PRINCIPAL
VASO DE
LUBRICACIÓN
REGULADOR DE
PRESION Y FILTRO
(PURGAR A DIARIO)
Síganse los pasos siguientes en el momento de la conexión de la máquina al intensificador y al suministro de aire principal:
•
Empujar el extremo de la manguera hidráulica grande desde la máquina hacia el conector de liberación rápida del extremo del
intensificador.
•
Sobre la cara frontal del intensificador:
• Empujar la línea neumática azul (4mm de diámetro exterior) hacia el acoplamiento del reductor que se encuentra situado en el
conector pasamuros del lado izquierdo.
• Empujar la línea neumática negra (4mm de diámetro exterior) hacia la mordaza de plástico del conector pasamuros del lado derecho.
•
Colocar una manguera neumática entre el conector macho situado en la parte posterior del intensificador y el suministro principal de aire.
8
Puesta en Servicio
TY
PE
07
53
Cursor Mecánico
EXTREMO BAJO PRESIÓN
DE MUELLE
CAÑÓN
CURSOR
BOQUILLA
Como referencia, existen tres tipos diferentes de cursor mecánico:
•
•
•
07271-01100
07279-05843
07279-05845
Utilizado para mandriles estándar y mandriles de Ø4,0mm desechables
Utilizado para mandriles de Ø3,2mm desechables
Utilizado para mandriles de Ø4,8mm desechables
La diferencia entre los cursores anteriores se encuentra en el diámetro interno del tapón final.
TAPÓN FINAL
Éstos se encuentran codificados con colores, ver abajo:
ORO
PLATA
9
Puesta en Servicio
Cursor
IMPORTANTE
Si no se coloca correctamente, el cursor no permitirá la alimentación de los remaches.
Aunque la máquina se suministra con el cursor colocado correctamente, recomendamos que se compruebe su orientación antes de
instalar el equipo de colocación. El extremo del cursor, de forma ligeramente cóncava, y sometido a la presión de un muelle, deberá
apuntar hacia la parte frontal de la máquina tal como se muestra en la ilustración siguiente.
Cuando se coloque en la posición correcta, el cursor se deslizará fácilmente hacia fuera del cañón cuando se empuje un mandril hacia
su centro y sea luego tirado de nuevo hacia atrás.
Para invertir la orientación del cursor, seguir los pasos siguientes:
Los números de componentes en negrilla se refieren al montaje
general y a la lista de componentes para la máquina modelo 0753002200 Mk II de las páginas 66-67. Para la máquina modelo 0753202200 Mk II, el procedimiento es el mismo pero los números de pieza
deben tomarse del montaje general y de la lista de piezas de las
páginas 68-69.
CURSOR
EXTREMO BAJO
PRESION DE MUELLE
CAÑON
•
Retirar la abrazadera 47 y deslizar la tapa final 38.
•
Utilizando una llave Allen, retirar el tornillo 44 asegurándose de
purgar cualquier cantidad de aire que hubiera quedado atrapado,
y retirar el segundo tornillo 44.
•
Retirar del tapón posterior 46.
•
Retirar del conjunto del émbolo de mordazas 14 junto con las
mordazas 9.
•
Levantar, extrayéndolos, el muelle 13 y el aprietamordazas 8.
•
Insertar un mandril en el agujero del extremo posterior del cañón 25 hasta que salga por la parte delantera del mismo, tirando
entonces conjuntamente del mandril y del cursor por la parte frontal.
•
Volver a montar los componentes en orden inverso al de desmontaje.
•
Introducir el Cursor Mecánico 5 por la parte delantera del cañón, en posición correcta.
BOQUILLA
Carga y Recarga de la Máquina
IMPORTANTE
Los procedimientos para la carga de la máquina y para el ajuste del equipo de colocación en la máquina son
íntegros.
Cuando se realice el pedido de una máquina o sistema completo, se servirán habitualmente todos los equipos de colocación
requeridos para el remache que se deba colocar.
Para identificar los componentes del equipo de colocación o para seleccionar los elementos correctos, véase la sección sobre
equipos de colocación, en las páginas 51-59.
Si se le ha suministrado una boquilla, mandriles y muelle, puede proceder a cargar la máquina y a colocar el equipo de colocación tal
como se muestra en la página siguiente.
Los números de componentes en negrilla se refieren al montaje general y a la lista de componentes para la máquina modelo 07530-02200
Mk II de las páginas 66-67. Para la máquina modelo 07532-02200 Mk II, el procedimiento es el mismo pero los números de pieza deben
tomarse del montaje general y de la lista de piezas de las páginas 68-69.
10
Puesta en Servicio
Carga de la máquina
•
Conectar el suministro de aire a la máquina.
•
Abrir las mordazas 9 que sujetan el mandril, desconectando el interruptor de mordazas (componentes 26 y 30).
•
Roscar la boquilla seleccionada al cañón 25 de la máquina.
•
Insertar un mandril por la parteacabada en punta de la tira de remaches a través de la tira de papel.
•
Deslizar el muelle en el mandril asegurando la orientación correcta, tal como se muestra en la tabla de la página 50.
•
Agarrando el extremo trasero del mandril, rasgar la tira de papel que cubre los remaches.
•
Abrir la boquilla ya sea girando el anillo exterior de la boquilla de apertura rápida o bien empujando hacia afuera los extremos de la
boquilla, tal como se ilustra abajo a la izquierda.
•
Insertar el mandril, muelle del mandril y remaches previamente montados, en la boquilla, hasta que el primer remache a colocar
sobresalga de la boquilla.
•
Cerrar la boquilla y ajustar de forma que el primer remache sobresalga de 1,5 mm a 3 mm (1/16" a 1/8"), tal como se muestra en la
ilustración abajo a la derecha.
•
Cerrar las mordazas para asegurarse que el mandril ha quedado sujeto, conectando el interruptor de mordazas (elementos 26 y 30).
1.5mm - 3mm
(1/16" - 1/8")
Recarga de la máquina
•
Abrir las mordazas 9 de la máquina.
•
Abrir la boquilla y tirar del mandril vacío y del muelle del mandril hacia afuera de la máquina.
•
Recargar la máquina siguiendo las instrucciones mencionadas arriba, empezando con el paso.
P ro c e d i m i e n t o d e F u n c i o n a m i e n t o
IMPORTANTE
Deberá verificar que la orientación del cursor y del equipo de colocación es correcta antes de intentar
hacer funcionar la máquina.
•
Introducir en el taladro de las piezas a remachar el remache que sobresale de la boquilla, asegurándose de que se sostiene la máquina en
ángulo recto a la aplicación.
•
Accionar el gatillo sin soltarlo; el remache es empujado sobre la cabeza del mandril y queda instalado en la aplicación.
•
Sacar la máquina.
•
Liberar el gatillo. El siguiente remache aparecerá automáticamente a través de la boquilla, listo para su colocación.
Los números de componentes en negrilla se refieren al montaje general y a la lista de componentes para la máquina modelo 07530-02200
Mk II de las páginas 66-67. Para la máquina modelo 07532-02200 Mk II, el procedimiento es el mismo pero los números de pieza deben
tomarse del montaje general y de la lista de piezas de las páginas 68-69.
11
Puesta en Servicio
IDENTIFICACION Y COLOCACION DEL MUELLE EN EL MANDRIL
REMACHE
NOMBRE
BOQUILLA
TAMAÑO
(VEASE SECCION DE EQUIPO DE COLOCACION)
TAMAÑO
MANDRIL
CONJUNTO DE MANDRIL/MUELLE
DE MANDRIL Y REMACHE
MUELLE DEL MANDRIL
2,4mm
BRIV ®
CABEZA DEL MANDRIL
CONICA ESTANDAR
TODOS
2,4mm
ACCESO LIMITADO & ACCESO
LIMITADO DE APERTURA RÁPIDA
TODOS
3,2mm
TODAS
TODOS
4,0mm
TODAS
TODOS
4,8mm
TODAS
TODOS
6,4mm
ESTANDAR
TODOS EXCEPTO
a
3
SOBREMEDIDA
CHOBERT ®
AVLUG ®
GROVIT ®
2,4mm
TODAS EXCEPTO
CONICAS ESTANDAR,
ACCESO LIMITADO
TODOS
2,4mm
CONICAS ESTANDAR,
ACCESO LIMITADO
TODOS
TODAS
TODOS
TODAS
TODOS EXCEPTO
a
3
SOBREMEDIDA
TODAS
a
3
SOBREMEDIDA
3,2mm
4,0mm
4,0mm
CHOBERT ®
GROVIT ®
4,8mm
TODOS EXCEPTO
a
2
SOBREMEDIDA
TODAS
a
2
SOBREMEDIDA
TODAS
TODOS
TODAS
TODOS
TODAS
TODOS
TODAS
TODOS
6 x 32
UNC
TODAS
TODOS
2.5mm
TODAS
TODOS
2.8mm
TODAS EXCEPTO
ACCESO LIMITADO
TODOS
2.8mm
ACCESO LIMITADO
TODOS
4,8mm
CHOBERT ®
TODAS
6,4mm
2.8mm
RIVSCREW ®
3mm
3.5mm
4mm
2.5mm
AVSERT ®
4 x 40
UNC
3mm
AVTRONIC ®
12
CASQUILLO
MUELLE
MANDRIL
Equipos de Colocación
En las máquinas de remachado de repetición tales como el modelo 0753 MkII, el equipo de colocación está formado siempre por tres
elementos: una boquilla, un mandril y un muelle del mandril. Todos estos tres componentes son los que corresponden al remache que
se debe colocar y al tamaño del taladro de las piezas a remachar.
I M P O R TA N T E
Para evitar tener que desmontar por completo la máquina, es esencial comprobar la orientación del cursor
antes de fijar el equipo de colocación a la máquina. Véase la sección "CURSOR" en la página 47.
Es esencial que se incorpore el equipo de colocación correcto a la máquina, para asegurar tanto la
colocación efectiva del remache como el funcionamiento SEGURO de la máquina.
LEER LAS INSTRUCCIONES DE SEGURIDAD de la página 42 atentamente.
Para identificar la combinación correcta del equipo de colocación a incorporar a la máquina, seleccionar en primer lugar la boquilla a partir
de la lectura de la siguiente sección, pasando entonces a la sección del mandril para la selección tanto del número de pieza del propio
mandril como el del muelle del mandril. Las ilustraciones de los mandriles y muelles de mandriles se encuentran en la página 50.
Para fijar el equipo de colocación, síganse los procedimientos de "Carga de la Máquina" que aparecen en la página 47-48.
Boquillas
I M P O R TA N T E
La elección de la boquilla incorrecta podría originar la colocación incorrecta del remache o una
fijación no satisfactoria.
Las boquillas se pueden clasificar según siete formas básicas diferentes, tal como se presenta en la página siguiente, aunque las
dimensiones internas variarán según el remache al que estén destinadas. Las dimensiones exactas a las que se refieren letras en las
ilustraciones de la página siguiente, vienen indicadas en las "Tablas de selección de boquillas" de las páginas 53-54.
Para una forma en particular, pueden existir diferentes opciones de acabados de puntas que facilitan el acceso o mejora la colocación
de los remaches.
Plana
•
•
Acabado de punta normal de todas las boquillas.
Apta para todas las aplicaciones sin limitación de acceso.
Cóncava o Universal
•
•
Diseñada para su utilización con remaches de cabeza universal Chobert®.
También puede ser utilizada con remaches Briv® para obtener la fijación más segura. Observar que en este caso, se reduce el
espesor máximo de agarre de los remaches Briv® en aproximadamente 0,4 mm (0,015").
Apriete
•
•
UNICAMENTE para su utilización con remaches Briv®.
Proporciona un mayor fijación que una boquilla plana pero menos que una universal o cóncava, y no se produce reducción del
rango de espesores del remache.
Cónica
•
•
Disponible tal como se muestra en las "Tablas de Selección de Boquillas".
Permite una mayor accesibilidad que una punta plana y sirve para el mismo rango de espesores.
Con formación de cabeza
•
•
UNICAMENTE para su utilización con remaches Rivscrew®.
Deforma las cabezas de los remaches para conseguir un mejor apriete.
13
Equipos de Colocación
S e l e c c i ón d e u n a B o q u i l l a s
•
Dar la relación del nombre, tamaño y material del remache a colocar.
•
Buscar este remache en la primera columna de las tablas de selección de boquillas
de la página 52 si se utilizan unidades de medida imperiales (pulgadas) o las de la
página 53 si se utilizan unidades de medida métricas.
•
Mirando hacia la derecha en la tabla, observar qué boquillas están disponibles.
UNICAMENTE aquellas que se indican son las disponibles.
•
Seleccionar la más apta para su aplicación tomando como referencia el dibujo
respectivo de la boquilla. Si su aplicación no posee ninguna restricción de acceso,
deberá seleccionar la forma estándar con forma de la punta plana, con o sin
apertura rápida.
ESTANDAR
'B'
28,6
1,125
'E'
33,5
1,32
'D'
PLANA CONCAVA
APRIETE
CONICA
Disponible en cuatro formas de punta diferentes
para poder colocar todos los remaches (excepto
Rivscrew). Apta para aquellas aplicaciones sin
ninguna o pocas restricciones de acceso.
CURVADA LARGA
LARGA
ACCESO LIMITADO
'B'
28,6
1,125
'B'
'B'
'F'
33,5
1,32
33,5
1,32
'D'
'E'
20,5
0,81
'D'
'E'
'E'
28,6
1,125
41,4
1,63
'D'
'F'
Ø
mm
3.2 mm ,620
4,0 mm ,690
4,8 mm ,720
PLANA
PLANA
APRIETE
CONCAVA
in.
15,7
17,5
18,3
APRIETE
Apta para la colocación de la mayoría de los
remaches.
Permite una mayor acceso en aquellas
aplicaciones sin ninguna restricción de acceso.
Disponible según se indica en la TABLA DE
SELECCION DE BOQUILLAS.
Permite una mayor penetración en las
aplicaciones con acceso limitado.
Los mandriles deben ser curvados a mano para
seguir la forma de la boquilla.
DE APERTURA RÁPIDA, ESTANDAR
DE APERTURA RÁPIDA, LARGA
'B'
PLANA
Disponibles según se indica en la TABLA DE
SELECCION DE BOQUILLAS.
Permite el acceso en aplicaciones de acceso
extremadamente limitado.
DE APERTURA RÁPIDA, ACCESO LIMITADO
'B'
'B'
28.6
1.25
28,6
1,25
'E'
34
1.34
'D'
'E'
34
1,34
'D'
'E'
28,6
1,25
PLANA
RIVSCREW (FC)
PLANA
37,1
1,46
'D'
PLANA
Disponibles tal como se muestra al dorso en la TABLA DE SELECCION DE BOQUILLAS. Con forma de trabajo equivalentes a las Estándar y de
Acceso Limitado indicadas arriba, incorporan una leva para facilitar y acelerar la apertura de la boquilla y el procedimiento de recarga.
Las dimensiones indicadas en negrita son milimetros. Las otras dimensiones son en pulgadas.
14
Equipos de colocación
Seleccion de Boquillas - Unidades Imperiales
La columna del "Nº DE REF." está referenciada con las columnas de "Nº DE REF." en la sección del mandril. Dicho número identifica
tanto el mandril como el muelle del mandril requerido para una boquilla en particular con un remache específico.
Nº
DE
REF.
REMACHE
BOQUILLA
DIMENSIONES
'B'
'D'
'E'
# ESTANDAR - CÓNCAVA
07150-03203
,36
1,33
,24
1
ACCESO LIMITADO, APERTURA RÁPIDA
07177-03003
,20
1,18
,16
,16
3
ACCESO LIMITADO
07274-01000
,22
1,07
,16
2,30
,16
4
CURVADA LARGA - PLANA
07150-05003
,41
2,28
,16
,41
1,18
,20
5
# ESTANDAR - CÓNCAVA
07150-03204
,41
1,22
,32
07170-03104
,41
1,19
,20
5
ESTANDAR APERTURA RÁPIDA - PLANA
07170-04600
,41
1,18
,20
LARGA - PLANA
07150-04004
,41
2,18
,20
6
# LARGA - CÓNCAVA
07150-04204
,41
2,22
,30
6
CURVADA LARGA - PLANA
07150-05004
,41
2,12
,20
6
LARGA APERTURA RÁPIDA - PLANA
07170-05000
,41
2,18
,20
7
ESTANDAR - PLANA
07150-03005
,48
1,30
,24
7
# ESTANDAR - CÓNCAVA
07150-03205
,48
1,35
,41
7
ESTANDAR - CONICA
07150-03105
,44
1,30
,24
7
ESTANDAR APERTURA RÁPIDA - PLANA
07170-04700
,48
1,30
,24
8
LARGA - PLANA
07150-04005
,48
2,30
,24
8
# LARGA - CÓNCAVA
07150-04205
,48
2,35
,42
8
CURVADA LARGA - PLANA
07150-05005
,48
2,23
,24
8
LARGA APERTURA RÁPIDA - PLANA
07170-05100
,48
2,30
,24
9
ESTANDAR - PLANA
07150-03006
,56
1,18
,33
9
# ESTANDAR - CÓNCAVA
07150-03206
,56
1,24
,47
9
ESTANDAR - CONICA
07150-03106
,56
1,18
,33
9
ESTANDAR APERTURA RÁPIDA - PLANA
07170-04800
,56
1,18
,33
10
LARGA - PLANA
07150-04006
,56
2,30
,33
10
# LARGA - CÓNCAVA
07150-04206
,56
2,39
,48
10
CURVADA LARGA - PLANA
07150-05006
,56
2,21
,33
10
LARGA APERTURA RÁPIDA - PLANA
07170-05200
,56
2,30
,33
11
ESTANDAR - PLANA
07150-03008
,64
1,18
,39
11
ESTANDAR APERTURA RÁPIDA - PLANA
07170-04900
,64
1,18
,39
12
LARGA - PLANA
07150-04008
,64
2,18
,39
12
LARGA APERTURA RÁPIDA - PLANA
07170-05300
,64
2,18
,39
13
ESTANDAR - CONICA
07170-03103
,36
1,30
,15
14
ACCESO LIMITADO, APERTURA RÁPIDA
07177-03003
,20
1,18
,16
14
DE ACCESO LIMITADO
07274-01000
,22
1,07
,16
-
-
-
-
-
-
15
ESTANDAR - PLANA
07150-03004
,41
1,18
,20
15
ESTANDAR - APRIETE
07170-03004
,41
1,20
,30
3,2 mm BRIV®
15
ESTANDAR - CONICO
07170-03104
,41
1,19
,20
16
LARGA - PLANA
07150-04004
,41
2,18
,20
Aleación de Aluminio,
Bronce, Acero
16
LARGA - APRIETE
07170-03204
,41
2,18
,30
16
CURVADA LARGA - PLANA
07150-05004
,41
2,12
,20
16
CURVADA LARGA - APRIETE
07170-03304
,41
2,12
,30
-
-
-
-
-
-
17
ESTANDAR - PLANA
07150-03005
,48
1,30
,24
17
ESTANDAR - APRIETE
07170-03005
,48
1,32
,41
18
LARGA - PLANA
07150-04005
,48
2,30
,24
18
LARGA - APRIETE
07170-03205
,48
2,30
,41
18
CURVADA LARGA - PLANA
07150-05005
,48
2,23
,24
18
CURVADA LARGA - APRIETE
07170-03305
,48
2,23
,41
19
ESTANDAR - PLANA
07150-03005
,48
1,30
,24
19
ESTANDAR - APRIETE
07170-03005
,48
1,32
,41
20
LARGA - PLANA
07150-04005
,48
2,30
,24
20
LARGA - APRIETE
07170-03205
,48
2,30
,41
20
CURVADA LARGA - PLANA
07150-05005
,48
2,23
,24
20
CURVADA LARGA - APRIETE
07170-03305
,48
2,23
,41
21
ESTANDAR - PLANA
07150-03006
,56
1,18
,33
21
ESTANDAR - APRIETE
07170-03006
,56
1,20
,47
22
LARGA - PLANA
07150-04006
,56
2,30
,33
22
LARGA - APRIETE
07170-03206
,56
2,30
,47
22
CURVADA LARGA - PLANA
07150-05006
,56
2,21
,33
22
CURVADA LARGA - APRIETE
07170-03306
,56
2,21
,47
23
ESTANDAR - PLANA
07150-03006
,56
1,18
,33
23
ESTANDAR - APRIETE
07170-03006
,56
1,20
,47
24
LARGA - PLANA
07150-04006
,56
2,30
,33
24
LARGA - APRIETE
07170-03206
,56
2,30
,47
24
CURVADA LARGA - PLANA
07150-05006
,56
2,21
,33
24
CURVADA LARGA - APRIETE
07170-03306
,56
2,21
,47
25
ESTANDAR APERTURA RÁPIDA
07170-05600
,64
1,21
,52
25
ESTANDAR - PLANA
07170-05800
,64
1,21
,52
26
LARGA APERTURA RÁPIDA
07170-05700
,64
2,19
,52
26
LARGA - PLANA
07170-05900
,64
2,19
,52
27
ESTANDAR - PLANA
07150-03003
,36
1,30
,16
27
ESTANDAR - CONICA
07150-03103
,36
1,30
,16
27
ESTANDAR APERTURA RÁPIDA - PLANA
07170-04500
,36
1,30
,16
28
LARGA - PLANA
07150-04003
,41
2,30
,16
28
CURVADA LARGA - PLANA
07150-05003
,41
2,28
,16
-
-
-
-
-
29
ESTANDAR - PLANA
07150-03004
,41
1,18
,20
29
ESTANDAR - CONICA
07170-03104
,41
1,19
,20
29
ESTANDAR APERTURA RÁPIDA - PLANA
07170-04600
,41
1,18
,20
30
LARGA - PLANA
07150-04004
,41
2,18
,20
30
CURVADA LARGA - PLANA
07150-05004
,41
2,12
,20
30
LARGA APERTURA RÁPIDA - PLANA
07170-05000
,41
2,18
,20
31
ESTANDAR - PLANA
07150-03003
,36
1,30
,16
-
-
-
-
-
-
32
ESTANDAR - PLANA
07150-03004
,41
1,18
,20
32
ESTANDAR APERTURA RÁPIDA - PLANA
07170-04600
,41
1,18
,20
33
ESTANDAR - PLANA
07150-03003
,36
1,30
,16
33
ACCESO LIMITADO, APERTURA RÁPIDA
07271-08000
,41
1,18
,16
34
LARGA - PLANA
07150-04003
,41
2,30
,16
-
-
-
-
-
-
35
ESTANDAR - PLANA
07271-05600
,36
1,30
,16
36
ACCESO LIMITADO, APERTURA RÁPIDA
07271-08100
,40
1,18
,16
3/16" CHOBERT®
& GROVIT
1/4" CHOBERT®
2,4 mm BRIV®
Unicamente Bronce
4,0 mm BRIV
®
Aleación de Aluminio,
Bronce, Acero
4,0 mm BRIV®
Unicamente
Acero inoxidable
4,8 mm BRIV
®
Aleación de Aluminio,
Bronce, Acero
®
4,8 mm BRIV
Unicamente
Acero inoxidable
6 mm BRIV®
Aleación de Aluminio,
Acero
3/32" AVLUG®
1/8" AVLUG®
2,5 mm, 4-40 UNC
AVSERT®
3,0 mm, 6-32 UNC
AVSERT®
2,5 mm AVTRONIC®
2,8 mm AVTRONIC®
ESTANDAR - PLANA
07150-03003
,36
1,30
,16
1
ESTANDAR APERTURA RÁPIDA - PLANA
07170-04500
,36
1,30
,16
2
ESTANDAR - CONICA
07170-03103
,36
1,30
4
LARGA - PLANA
07150-04003
,41
5
ESTANDAR - PLANA
07150-03004
5
ESTANDAR - CONICA
6
DIMENSIONES
'B'
'D'
'E'
1
5/32" CHOBERT®
& GROVIT
1
BOQUILLA
NUMERO
DE PIEZA
1/8" CHOBERT®
& GROVIT
NUMERO
DE PIEZA
Nº
DE
REF.
TIPO Y FORMA
DE LA PUNTA
3/32" CHOBERT®
& GROVIT
TIPO Y FORMA
DE LA PUNTA
37
LARGA - PLANA
07271-05900
,41
2,30
,16
-
-
-
-
-
-
2,8 mm RIVSCREW®
38
ESTANDAR APERTURA RÁPIDA - FC
07271-03000
,41
1,18
,24
-
-
-
-
-
-
3,0 mm RIVSCREW®
39
ESTANDAR APERTURA RÁPIDA - FC
07271-03000
,41
1,18
,24
-
-
-
-
-
-
3,5 mm RIVSCREW®
40
ESTANDAR APERTURA RÁPIDA - FC
07271-03500
,41
1,18
,24
-
-
-
-
-
-
4,0 mm RIVSCREW®
41
ESTANDAR APERTURA RÁPIDA - FC
07271-04000
,41
1,18
,25
-
-
-
-
-
-
# Estas boquillas son aptas para colocar remaches Chobert® de cabeza alomada. Cuando se utilizan con el remache Briv® equivalentes en
tamaño, se alcanza la fijación más segura. Observar que cuando se utilicen remaches Briv®, el espesor máximo se reduce en
aproximadamente 0,4 mm (0,015").
15
Equipos de Colocación
Seleccion de Boquillas - Unidades Metricas
REMACHE
BOQUILLA
TIPO Y FORMA
DE LA PUNTA
NUMERO
DE PIEZA
DIMENSIONES
'B'
'D'
'E'
Nº
DE
REF.
1
ESTANDAR - PLANA
07150-03003
9,14 33,02 4,06
1
ESTANDAR APERTURA RÁPIDA - PLANA
07170-04500
9,14 33,02 4,06
2
ESTANDAR - CONICA
07170-03103
4
LARGA - PLANA
5
5
6
Nº
DE
REF.
BOQUILLA
TIPO Y FORMA
DE LA PUNTA
NUMERO
DE PIEZA
DIMENSIONES
'B'
'D'
'E'
1
# ESTANDAR - CÓNCAVA
07150-03203
9,14 33,78 6,10
1
ACCESO LIMITADO, APERTURA RÁPIDA
07177-03003
5,08 29,97 4,06
9,14 33,02 4,06
3
ACCESO LIMITADO
07274-01000
5,59 27,18 4,06
07150-04003
10,41 58,42 4,06
4
CURVADA LARGA - PLANA
07150-05003 10,41 57,91 4,06
ESTANDAR - PLANA
07150-03004
10,41 29,97 5,08
5
# ESTANDAR - CÓNCAVA
07150-03204 10,41 30,99 8,13
ESTANDAR - CONICA
07170-03104
10,41 30,23 5,08
5
ESTANDAR APERTURA RÁPIDA - PLANA
07170-04600 10,41 29,97 5,08
LARGA - PLANA
07150-04004
10,41 55,37 5,08
6
# LARGA - CÓNCAVA
07150-04204 10,41 56,39 7,62
6
CURVADA LARGA - PLANA
07150-05004
10,41 53,85 5,08
6
LARGA APERTURA RÁPIDA - PLANA
07170-05000 10,41 55,37 5,08
7
ESTANDAR - PLANA
07150-03005
12,19 33,02 6,10
7
# ESTANDAR - CÓNCAVA
07150-03205 12,19 34,29 10,41
7
ESTANDAR - CONICA
07150-03105
11,18 33,02 6,10
7
ESTANDAR APERTURA RÁPIDA - PLANA
07170-04700 12,19 33,02 6,10
8
LARGA - PLANA
07150-04005
12,19 58,42 6,10
8
# LARGA - CÓNCAVA
07150-04205 12,19 59,69 10,67
8
CURVADA LARGA - PLANA
07150-05005
12,19 56,64 6,10
8
LARGA APERTURA RÁPIDA - PLANA
07170-05100 12,19 58,42 6,10
9
ESTANDAR - PLANA
07150-03006
14,22 29,97 8,38
9
# ESTANDAR - CÓNCAVA
07150-03206 14,22 31,50 11,94
9
ESTANDAR - CONICA
07150-03106
14,22 29,97 8,38
9
ESTANDAR APERTURA RÁPIDA - PLANA
07170-04800 14,22 29,97 8,38
10
LARGA - PLANA
07150-04006
14,22 58,42 8,38
10
# LARGA - CÓNCAVA
07150-04206 14,22 60,71 12,19
10
CURVADA LARGA - PLANA
07150-05006
14,22 56,13 8,38
10
LARGA APERTURA RÁPIDA - PLANA
07170-05200 14,22 58,42 8,38
11
ESTANDAR - PLANA
07150-03008
16,26 29,97 9,91
11
ESTANDAR APERTURA RÁPIDA - PLANA
07170-04900 16,26 29,97 9,91
12
LARGA - PLANA
07150-04008
16,26 55,37 9,91
12
LARGA APERTURA RÁPIDA - PLANA
13
ESTANDAR - CONICA
07170-03103
9,14 33,02 3,81
14
ACCESO LIMITADO, APERTURA RÁPIDA
07177-03003
14
DE ACCESO LIMITADO
07274-01000
5,59 27,18 4,06
-
-
-
15
ESTANDAR - PLANA
07150-03004
10,41 29,97 5,08
15
ESTANDAR - APRIETE
07170-03004 10,41 30,48 7,62
3,2 mm BRIV®
15
ESTANDAR - CONICA
07170-03104
10,41 30,23 5,08
16
LARGA - PLANA
07150-04004 10,41 55,37 5,08
Aleación de Aluminio,
Bronce, Acero
16
LARGA - APRIETE
07170-03204
10,41 55,37 7,62
16
CURVADA LARGA - PLANA
07150-05004 10,41 53,85 5,08
16
CURVADA LARGA - APRIETE
07170-03304
10,41 53,85 7,62
-
-
17
ESTANDAR - PLANA
07150-03005
12,19 33,02 6,10
17
ESTANDAR - APRIETE
07170-03005 12,19 33,53 10,41
18
LARGA - PLANA
07150-04005
12,19 58,42 6,10
18
LARGA - APRIETE
07170-03205 12,19 58,42 10,41
18
CURVADA LARGA - PLANA
07150-05005
12,19 56,64 6,10
18
CURVADA LARGA - APRIETE
07170-03305 12,19 56,64 10,41
19
ESTANDAR - PLANA
07150-03005
12,19 33,02 6,10
19
ESTANDAR - APRIETE
07170-03005 12,19 33,53 10,41
20
LARGA - PLANA
07150-04005
12,19 58,42 6,10
20
LARGA - APRIETE
07170-03205 12,19 58,42 10,41
20
CURVADA LARGA - PLANA
07150-05005
12,19 56,64 6,10
20
CURVADA LARGA - APRIETE
07170-03305 12,19 56,64 10,41
21
ESTANDAR - PLANA
07150-03006
14,22 29,97 8,38
21
ESTANDAR - APRIETE
07170-03006 14,22 30,48 11,94
22
LARGA - PLANA
07150-04006
14,22 58,42 8,38
22
LARGA - APRIETE
07170-03206 14,22 58,42 11,94
22
CURVADA LARGA - PLANA
07150-05006
14,22 56,13 8,38
22
CURVADA LARGA - APRIETE
07170-03306 14,22 56,13 11,94
23
ESTANDAR - PLANA
07150-03006
14,22 29,97 8,38
23
ESTANDAR - APRIETE
07170-03006 14,22 30,48 11,94
24
LARGA - PLANA
07150-04006
14,22 58,42 8,38
24
LARGA - APRIETE
07170-03206 14,22 58,42 11,94
24
CURVADA LARGA - PLANA
07150-05006
14,22 56,13 8,38
24
CURVADA LARGA - APRIETE
07170-03306 14,22 56,13 11,94
25
ESTANDAR APERTURA RÁPIDA
07170-05600
16,33 30,65 13,14
25
ESTANDAR - PLANA
07170-05800 16,33 30,65 13,14
26
LARGA APERTURA RÁPIDA
07170-05700
16,33 55,65 13,14
26
LARGA - PLANA
07170-05900 16,33 55,65 13,14
27
ESTANDAR - PLANA
07150-03003
9,14 33,02 4,06
27
ESTANDAR - CONICA
27
ESTANDAR APERTURA RÁPIDA - PLANA
07170-04500
9,14 33,02 4,06
28
LARGA - PLANA
28
CURVADA LARGA - PLANA
07150-05003
10,41 57,91 4,06
-
-
29
ESTANDAR - PLANA
07150-03004
10,41 29,97 5,08
29
ESTANDAR - CONICA
07170-03104 10,41 30,23 5,08
29
ESTANDAR APERTURA RÁPIDA - PLANA
07170-04600
10,41 29,97 5,08
30
LARGA - PLANA
07150-04004 10,41 55,37 5,08
30
CURVADA LARGA - PLANA
07150-05004
10,41 53,85 5,08
30
LARGA APERTURA RÁPIDA - PLANA
07170-05000 10,41 55,37 5,08
31
ESTANDAR - PLANA
07150-03003
9,14 33,02 4,06
-
-
32
ESTANDAR - PLANA
07150-03004
10,41 29,97 5,08
32
ESTANDAR APERTURA RÁPIDA - PLANA
07170-04600 10,41 29,97 5,08
33
ESTANDAR - PLANA
07150-03003
9,14 33,02 4,06
33
ACCESO LIMITADO, APERTURA RÁPIDA
07271-08000 10,41 29,97 4,06
34
LARGA - PLANA
07150-04003
10,41 58,42 4,06
-
-
35
ESTANDAR - PLANA
07271-05600
9,14 33,02 4,06
36
ACCESO LIMITADO, APERTURA RÁPIDA
3/32" CHOBERT®
& GROVIT
CHOBERT®
1/8"
& GROVIT
5/32" CHOBERT®
& GROVIT
CHOBERT®
3/16"
& GROVIT
1/4" CHOBERT®
BRIV®
2,4 mm
Unicamente Bronce
4,0 mm BRIV®
Aleación de Aluminio,
Bronce, Acero
4,0 mm BRIV®
Unicamente
Acero inoxidable
4,8 mm BRIV®
Aleación de Aluminio,
Bronce, Acero
4,8 mm BRIV®
Unicamente
Acero inoxidable
6 mm BRIV®
Aleación de Aluminio,
Acero
3/32"
AVLUG®
1/8" AVLUG®
2,5 mm, 4-40 UNC
AVSERT®
3,0 mm, 6-32 UNC
AVSERT®
2,5 mm AVTRONIC®
2,8 mm AVTRONIC®
07170-05300 16,26 55,37 9,91
-
07150-03103
5,08 29,97 4,06
-
-
-
-
-
-
9,14 33,02 4,06
07150-04003 10,41 58,42 4,06
-
-
-
-
-
-
-
-
-
-
-
-
07271-08100 10,16 29,97 4,06
37
LARGA - PLANA
07271-05900
10,41 58,42 4,06
-
-
-
-
-
-
2,8 mm RIVSCREW®
38
ESTANDAR APERTURA RÁPIDA - FC
07271-03000
10,41 29,97 6,10
-
-
-
-
-
-
3,0 mm RIVSCREW®
39
ESTANDAR APERTURA RÁPIDA - FC
07271-03000
10,41 29,97 6,10
-
-
-
-
-
-
3,5 mm RIVSCREW®
40
ESTANDAR APERTURA RÁPIDA - FC
07271-03500
10,41 29,97 6,10
-
-
-
-
-
-
4,0 mm RIVSCREW®
41
ESTANDAR APERTURA RÁPIDA - FC
07271-04000
10,41 29,97 6,35
-
-
-
-
-
-
# Estas boquillas son aptas para colocar remaches Chobert® de cabeza alomada. Cuando se utilizan con el remache Briv® equivalentes en
tamaño, se alcanza la fijación más segura. Observar que cuando se utilicen remaches Briv®, el espesor máximo se reduce en
aproximadamente 0,4 mm (0,015").
16
Equipos de colocación
Mandriles y Muelles del Mandril
Los mandriles y muelles del mandril, mostrados en la página 50, necesitan ser seleccionados de forma que se adapten al tipo y tamaño
de remache, así como al tamaño del agujero de aplicación. La utilización del mandril incorrecto podría incrementar el riesgo de rotura y el
desgaste de la cabeza del mandril. Pueden producirse problemas de alimentación si se utiliza el muelle de mandril incorrecto.
IMPORTANTE
LEER LAS INSTRUCCIONES DE SEGURIDAD de la página 42 cuidadosamente.
Con el empleo correcto y normal de los mandriles se producirá un pequeño desgaste y generación de marcas en
los mismos. Deberán examinarse éstos de forma regular en cuanto a una aparición excesiva de marcas y desgaste,
con atención especial al diámetro de la cabeza, a la zona de sujeción de las mordazas en el mandril, o a picaduras
destacables en el vástago, así como cualquier deformación en el mandril. Los mandriles que fallan durante su uso
pueden llegar a salir despedidos con fuerza de la máquina. Es responsabilidad del cliente asegurarse que se
sustituyen los mandriles antes de que se produzca cualquier nivel excesivo de desgaste, y siempre antes de llegar
al número máximo recomendado de colocaciones. Sírvanse contactar con su representante de Avdel, quien le
indicará cuál es esa cifra midiendo el esfuerzo de carga de su aplicación con una máquina de verificación
calibrada. Dichas máquinas pueden también comprarse con el número de pieza 07900-09080, suministrada con
toda la información necesaria para las pruebas.
CHOBERT® y GROVIT® - Unidades Imperiales
Para la selección del mandril o del muelle del mandril, seguir las instrucciones de la página 57.
Nº
DE TALADRO
Ø
REF.
CABEZA
Según Rec. 1,84
1
REMACHE
1
2
-
-
Según Rec. 1,84
MANDRIL ESTANDAR - VERDE
P
Nº PIEZA
# Nº PIEZA
MAX. MANDRIL C.C.
MANDRIL
4,22
07150-06003
07150-08003
TALADRO
P
Ø
CABEZA
MAX.
1,88
1,80
+,04
MANDRIL 1a SOBREMEDIDA - AMARILLO
P
Nº PIEZA
# Nº PIEZA
MAX. MANDRIL C.C.
MANDRIL
4,42
07150-06303
-
P
MAX.
-
07150-06803
Nº DE PIEZA
DE MUELLE
-
-
-
-
+,09
1,93
-
-
07150-08103
1,98
07150-06803
07150-06003
4,22
07150-08003
1,80
+,04
1,88
07150-06303
4,42
-
-
07170-06873
-
-
-
-
+,09
1,93
-
-
07150-08103
1,98
07170-06873
07150-06003
4,22
07150-08003
1,80
+,04
1,88
07150-06303
4,42
-
-
07170-06903
-
-
-
-
+,09
1,93
-
-
07150-08103
1,98
07170-06903
®
2,4 mm CHOBERT
& GROVIT®
2
3
3
CHOBERT®
3,2 mm
& GROVIT®
4,0 mm CHOBERT®
& GROVIT®
2,4 mm CHOBERT®
& GROVIT®
3,2 mm CHOBERT®
& GROVIT®
4,0 mm CHOBERT®
& GROVIT®
4,8 mm CHOBERT®
& GROVIT®
6,4 mm CHOBERT®
-
-
07150-07003
4,22
07150-09003
1,80
+,09
1,93
-
-
07150-09103
1,98
07150-07803
5
Según Rec. 2,24
07150-06004
5,49
07150-08004
2,29
+,10
2,34
07150-06104
6,02
07150-08104
2,49
07150-06804
6
Según Rec. 2,24
07150-07004
5,49
07150-09004
2,29
+,10
2,34
07150-07104
6,02
07150-09104
2,49
07150-07804
7
Según Rec. 2,72
07150-06005
6,20
07150-08005
2,54
+,20
2,92
07150-06105
7,21
07150-08105
2,95
07170-06875
-
-
-
-
-
-
-
-
-
-
-
07150-07005
6,20
07150-09005
2,54
+,20
2,92
07150-07105
7,21
07150-09105
2,95
07170-07875
7
8
9
10
-
-
Según Rec. 2,72
-
-
Según Rec. 3,35
-
-
Según Rec. 3,35
-
-
-
-
-
-
-
-
-
-
-
-
-
07150-06006
6,27
07150-08006
2,59
+,35
3,71
07150-06106
8,13
07150-08106
3,30
07170-06876
-
-
-
-
-
-
-
-
-
-
-
07150-07006
6,27
07150-09006
2,59
+,35
3,71
07150-07106
8,13
07150-09106
3,30
07170-07876
-
-
-
-
-
-
-
-
-
-
-
11
Según Rec. 4,67
07150-06008
6,81
07150-08008
2,79
+,30
4,98
07150-06108
8,38
07150-08108
3,40
07150-06808
12
Según Rec. 4,67
07150-07008
6,81
07150-09008
2,79
+,30
4,98
07150-07108
8,38
07150-09108
3,40
07150-07808
10
REMACHE
Según Rec. 1,84
Según Rec. 1,84
9
6,4 mm CHOBERT®
-
4
8
4,8 mm CHOBERT®
& GROVIT®
-
Nº
DE TALADRO
Ø
REF.
CABEZA
1
1,93
+,09
a
MANDRIL 2 SOBREMEDIDA - AZUL
P
Nº PIEZA
# Nº PIEZA
MAX. MANDRIL C.C.
MANDRIL
4,70
07150-06103
-
a
TALADRO
P
Ø
CABEZA
MAX.
-
MANDRIL 3 SOBREMEDIDA - ROJO
P
Nº PIEZA
# Nº PIEZA
MAX. MANDRIL C.C.
MANDRIL
-
P
MAX.
-
Nº DE PIEZA
DE MUELLE
07150-06803
1
-
-
-
-
-
-
-
-
-
-
-
-
-
2
+,09
1,93
07150-06103
4,70
-
-
-
-
-
-
-
-
07170-06873
2
-
-
-
-
-
-
-
-
-
-
-
-
-
3
+,09
1,93
07150-06103
4,70
-
-
-
-
-
-
-
-
07170-06903
3
-
-
-
-
-
-
-
-
-
-
-
-
-
4
+,09
1,93
07150-07103
4,70
-
-
-
-
-
-
-
-
07150-07803
5
+,25
2,49
07150-06204
6,81
07150-08204
2,79
+,35
2,59
07150-06304
7,32
07150-08304
3,00
07150-06804
6
+,25
2,49
07150-07204
6,81
07150-09204
2,79
+,35
2,59
07150-07304
7,32
07150-09304
3,00
07150-07804
7
+,38
3,10
07150-06205
8,13
07150-08205
3,30
-
-
-
-
-
-
07170-06875
7
-
-
-
-
-
-
+,63
3,35
07150-06305
9,45
07150-08305
3,81
07150-06805
8
+,38
3,10
07150-07205
8,13
07150-09205
3,30
-
-
-
-
-
-
07170-07875
8
-
-
-
-
-
-
+,63
3,35
07150-07305
9,45
07150-09305
3,81
07150-07805
9
-
-
-
-
-
-
-
-
-
-
-
-
-
9
+,60
3,96
07150-06206
9,45
07150-08206
3,81
-
-
-
-
-
-
07150-06806
10
-
-
-
-
-
-
-
-
-
-
-
-
-
10
+,60
3,96
07150-07206
9,45
07150-09206
3,81
-
-
-
-
-
-
07150-07806
11
-
-
-
-
-
-
-
-
-
-
-
-
-
12
-
-
-
-
-
-
-
-
-
-
-
-
-
# C.C.: Mandril de Cono Corto, ver páginas 57-58 para explicación.
17
Equipos de colocación
En las tablas que aparecen abajo a derecha e izquierda, y en las 4 páginas siguientes, aparecen listados los números de pieza de todos los
mandriles y muelles de mandril disponibles por remache o por grupo de remaches, por ejemplo es el caso de los Chobert® y Grovit® en estas
páginas.
Mientras que los tamaños de los remaches se muestran siempre en sus unidades específicas, cada tabla ha sido reproducida dos veces para
ofrecer las dimensiones en unidades imperiales en la página de la izquierda, y en unidades métricas en la página de la derecha. Estas tablas de
"Selección de Mandriles" se relacionan, mediante la columna de "Nº de Ref.", con las tablas de "Selección de Boquillas" de las páginas 53-54.
El diámetro de la cabeza del mandril es el que controla, cuando se tira de él, la expansión del cuerpo del remache.
A pesar de que existen diferentes formas de cabezas que se adaptan a diferentes tipos de remaches (ver ilustración en página 58), son
necesarios progresivos tamaños de cabezas para reflejar las tolerancias de fabricación en el diámetro del agujero de su aplicación de forma
que el remache se expanda siempre lo suficiente como para llenar el agujero.
Una cabeza de mandril demasiado grande podría someter a una sobretensión al mandril, y los mandriles que fallan durante su uso podrían salir
forzados de la máquina.
Las tablas de selección se encuentran dispuestas en cuatro secciones de "tamaño de mandril", que abarcan desde "estándar" a
a
"3 sobremedida", cada uno de ellos codificado según un color al igual que las cabezas del mandril.
C h o b e r t ® y G ro v i t ® - U n i d a d e s M e t r i c a s
Nº
DE TALADRO
Ø
REF.
CABEZA
Según Rec. 1,84
1
REMACHE
1
2
2,4 mm CHOBERT®
& GROVIT®
2
3
3
®
3,2 mm CHOBERT
& GROVIT®
4,0 mm CHOBERT®
& GROVIT®
REMACHE
2,4 mm CHOBERT®
& GROVIT®
3,2 mm CHOBERT®
& GROVIT®
4,0 mm CHOBERT®
& GROVIT®
4,8 mm CHOBERT®
& GROVIT®
6,4 mm CHOBERT®
-
-
Según Rec. 1,84
-
-
07150-06803
Nº DE PIEZA
DE MUELLE
-
-
-
-
+,09
1,93
-
-
07150-08103
1,98
07150-06803
07150-06003
4,22
07150-08003
1,80
+,04
1,88
07150-06303
4,42
-
-
07170-06873
-
-
-
-
+,09
1,93
-
-
07150-08103
1,98
07170-06873
07150-06003
4,22
07150-08003
1,80
+,04
1,88
07150-06303
4,42
-
-
07170-06903
-
-
-
-
+,09
1,93
-
-
07150-08103
1,98
07170-06903
4,22
07150-09003
1,80
+,09
1,93
-
-
07150-09103
1,98
07150-07803
5
Según Rec. 2,24
07150-06004
5,49
07150-08004
2,29
+,10
2,34
07150-06104
6,02
07150-08104
2,49
07150-06804
6
Según Rec. 2,24
07150-07004
5,49
07150-09004
2,29
+,10
2,34
07150-07104
6,02
07150-09104
2,49
07150-07804
7
Según Rec. 2,72
07150-06005
6,20
07150-08005
2,54
+,20
2,92
07150-06105
7,21
07150-08105
2,95
07170-06875
-
-
-
-
-
-
-
-
-
-
-
07150-07005
6,20
07150-09005
2,54
+,20
2,92
07150-07105
7,21
07150-09105
2,95
07170-07875
7
8
9
10
-
-
Según Rec. 2,72
-
-
Según Rec. 3,35
-
-
Según Rec. 3,35
-
-
-
-
-
-
-
-
-
-
-
-
-
07150-06006
6,27
07150-08006
2,59
+,35
3,71
07150-06106
8,13
07150-08106
3,30
07170-06876
-
-
-
-
-
-
-
-
-
-
-
07150-07006
6,27
07150-09006
2,59
+,35
3,71
07150-07106
8,13
07150-09106
3,30
07170-07876
-
-
-
-
-
-
-
-
-
-
-
11
Según Rec. 4,67
07150-06008
6,81
07150-08008
2,79
+,30
4,98
07150-06108
8,38
07150-08108
3,40
07150-06808
12
Según Rec. 4,67
07150-07008
6,81
07150-09008
2,79
+,30
4,98
07150-07108
8,38
07150-09108
3,40
07150-07808
Nº
DE TALADRO
Ø
REF.
CABEZA
1
1,93
+,09
a
MANDRIL 2 SOBREMEDIDA - AZUL
P
Nº PIEZA
# Nº PIEZA
MAX. MANDRIL C.C.
MANDRIL
4,70
07150-06103
-
a
TALADRO
P
Ø
CABEZA
MAX.
-
MANDRIL 3 SOBREMEDIDA - ROJO
P
Nº PIEZA
# Nº PIEZA
MAX. MANDRIL C.C.
MANDRIL
-
P
MAX.
-
Nº DE PIEZA
DE MUELLE
07150-06803
1
-
-
-
-
-
-
-
-
-
-
-
-
-
2
+,09
1,93
07150-06103
4,70
-
-
-
-
-
-
-
-
07170-06873
2
-
-
-
-
-
-
-
-
-
-
-
-
-
3
+,09
1,93
07150-06103
4,70
-
-
-
-
-
-
-
-
07170-06903
3
-
-
-
-
-
-
-
-
-
-
-
-
-
4
+,09
1,93
07150-07103
4,70
-
-
-
-
-
-
-
-
07150-07803
5
+,25
2,49
07150-06204
6,81
07150-08204
2,79
+,35
2,59
07150-06304
7,32
07150-08304
3,00
07150-06804
6
+,25
2,49
07150-07204
6,81
07150-09204
2,79
+,35
2,59
07150-07304
7,32
07150-09304
3,00
07150-07804
7
+,38
3,10
07150-06205
8,13
07150-08205
3,30
-
-
-
-
-
-
07170-06875
7
-
-
-
-
-
-
+,63
3,35
07150-06305
9,45
07150-08305
3,81
07150-06805
8
+,38
3,10
07150-07205
8,13
07150-09205
3,30
-
-
-
-
-
-
07170-07875
8
-
-
-
-
-
-
+,63
3,35
07150-07305
9,45
07150-09305
3,81
07150-07805
9
-
-
-
-
-
-
-
-
-
-
-
-
-
9
+,60
3,96
07150-06206
9,45
07150-08206
3,81
-
-
-
-
-
-
07150-06806
10
-
-
-
-
-
-
-
-
-
-
-
-
-
10
+,60
3,96
07150-07206
9,45
07150-09206
3,81
-
-
-
-
-
-
07150-07806
11
-
-
-
-
-
-
-
-
-
-
-
-
-
12
-
-
-
-
-
-
-
-
-
-
-
-
-
# C.C.: Mandril de Cono Corto, ver páginas 56-57 para explicación.
18
P
MAX.
-
07150-07003
10
6,4 mm
Según Rec. 1,84
MANDRIL 1a SOBREMEDIDA - AMARILLO
P
Nº PIEZA
# Nº PIEZA
MAX. MANDRIL C.C.
MANDRIL
4,42
07150-06303
-
Según Rec. 1,84
9
CHOBERT®
-
TALADRO
P
Ø
CABEZA
MAX.
1,88
1,80
+,04
4
8
4,8 mm CHOBERT®
& GROVIT®
-
MANDRIL ESTANDAR - VERDE
P
Nº PIEZA
# Nº PIEZA
MAX. MANDRIL C.C.
MANDRIL
4,22
07150-06003
07150-08003
Equipos de colocación
Para encontrar el número de pieza correcto de un mandril para una aplicación particular, léanse las instrucciones indicadas abajo tras haber recogido la
información tal como se indica en el ejemplo siguiente. Las respuestas para el ejemplo se muestran en letras itálicas en gris.
NOMBRE DEL REMACHE
TAMAÑO DEL REMACHE
HOJA TECNICA
TAMAÑO DEL AGUJERO DE APLICACION
ESPACIO TRAS LA APLICACION
"Nº DE REF." DE LA TABLA DE SELECCION DE BOQUILLAS
•
•
•
•
•
•
•
•
Chobert®
3,2 mm
Series 1125
3,39 mm
infinito
5 (estándar plana)
ejemplo
Restar el tamaño mínimo de agujero recomendado (Según Rec.) en la hoja técnica de los remaches del tamaño del agujero de aplicación real.
por ejemplo, 3,39 mm - 3,26 mm = 0,13 mm.
Pasar a la página de la "Tabla de Selección" de su remache, seleccionando las tablas de dimensiones métricas o imperiales (páginas 55 a 59),
por ejemplo, página 55.
Observando la sección de ‘Mandril Estándar - Verde’, podrá encontrar el tamaño que requiere de remache en la columna de la izquierda. por ejemplo,
Chobert® & Grovit® 3,2 mm.
Si se seleccionó una boquilla que pueda colocar el remache, se está ya en condiciones de encontrar una línea en la sección de remaches con el
mismo "Nº de Ref." que el de la tabla de "Selección de Boquillas", por ejemplo: 5.
Esta es la línea de "Nº de Ref." en la cual se encontrará tanto el número de pieza del mandril como el del muelle del mandril. Esta línea continúa
hacia la segunda mitad de la tabla para los mandriles de "2a" y "3a" sobremedida.
Buscar a lo largo de esa línea las columnas de "tamaño de agujero" y seleccionar aquel que sea igual o más aproximado por arriba a la cifra
calculada en el paso 1. Puede ahora realizarse la lectura del número de pieza del mandril contiguo al "tamaño del agujero", por ejemplo, 0715006104.
Para el caso único de los Chobert® y Grovit®, la mayoría de los mandriles también se encuentran disponibles en una versión de "cono corto" (véase
ilustración de página 58). Los mandriles de cono corto se utilizan para minimizar la posibilidad de que la cabeza del mandril entre en contacto con
una obstrucción posterior. Ello ocasionaría que la cara inferior de la cabeza del remache no se asentara adecuadamente sobre la superficie de
aplicación, originando una falta de sujección en la unión.
Sea cual sea el tamaño del mandril elegido, también se necesitará comprobar que la cifra "P" para el mandril es la adecuada. "P" es el espacio
requerido para la cabeza del mandril en la parte posterior de la aplicación ADEMAS de la longitud que el remache sobresalga a través de la
aplicación, tal como se muestra en el dibujo de la página 58.
Puede leerse el número de pieza correspondiente al muelle del mandril en la columna del lado derecho de la tabla, por ejemplo: 07150-06804.
En todos los casos, se alcanzará el grado de fijación satisfactorio de la unión si el tamaño del agujero de la aplicación es lo más parecido
posible al siguiente valor de condición de sobredimensión de agujero, cuando será más seguro seleccionar el mayor tamaño de mandril
para obtener una sujección mayor. RECUERDE que ello incrementará el esfuerzo de carga y reducirá la vida del mandril.
BRIV® - Unidades Imperiales
Para la selección del mandril o del muelle del mandril, seguir las instrucciones mencionadas arriba.
a
Nº
DE
REF.
TALADRO
Ø
CABEZA
MANDRIL ESTANDAR - VERDE
Nº PIEZA
MANDRIL
P
MAX.
TALADRO
13
Según Rec.
,072
07150-06013
,119
+,004
,076
07150-06113
,123
07170-06873
14
Según Rec.
,072
07150-06013
,119
+,004
,076
07150-06113
,123
07170-06903
15
Según Rec.
,092
07271-06414
,120
+,005
,097
07271-06514
,126
07150-06814
16
Según Rec.
,092
07271-07414
,120
+,005
,097
07271-07514
,126
07150-07814
17
Según Rec.
,110
07150-06015
,136
+,005
,115
07150-06115
,142
07170-06875
18
Según Rec.
,110
07150-07015
,136
+,005
,115
07150-07115
,142
07170-07875
19
Según Rec.
,120
07170-06805
,126
+,005
,124
07170-06825
,132
07170-06875
Unicamente Acero inoxidable
20
Según Rec.
,120
07170-07805
,126
+,005
,124
07170-07825
,132
07170-07875
3/16" BRIV®
21
Según Rec.
,141
07150-06016
,157
+,005
,146
07150-06116
,164
07170-06876
Aleación de Aluminio, Bronce, Acero
22
Según Rec.
,141
07150-07016
,157
+,005
,146
07150-07116
,164
07170-07876
23
Según Rec.
,150
07170-06806
,150
+,005
,1535
07170-06826
,156
07170-06876
Unicamente Acero inoxidable
24
Según Rec.
,150
07170-07806
,150
+,005
,1535
07170-07826
,156
07170-07876
6 mm BRIV®
25
Según Rec.
,179
07150-06018
,165
+,005
,183
07150-06118
,171
07150-06846
26
Según Rec.
,179
07150-07018
,165
+,005
,183
07150-07118
,171
07150-07846
REMACHE
3/32" BRIV®
Unicamente Bronce
1/8" BRIV®
Aleación de Aluminio, Bronce, Acero
5/32" BRIV®
Aleación de Aluminio, Bronce, Acero
5/32" BRIV®
3/16" BRIV®
Aleación de Aluminio, Acero
REMACHE
a
MANDRIL 2 SOBREMEDIDA - AZUL
Ø
Nº PIEZA
CABEZA
MANDRIL
07150-06213
,079
Nº
DE
REF.
TALADRO
13
+,008
14
+,008
,079
15
+,010
16
MANDRIL 1 SOBREMEDIDA - AMARILLO
Ø
Nº PIEZA
P
CABEZA
MANDRIL
MAX.
Nº DE PIEZA
DE MUELLE
a
MANDRIL 3 SOBREMEDIDA - ROJO
Ø
Nº PIEZA
CABEZA
MANDRIL
-
P
MAX.
,126
TALADRO
07150-06213
,126
-
-
,102
07271-06614
,133
-
+,010
,102
07271-07614
,133
17
+,010
,120
07150-06215
18
+,010
,120
19
-
20
Nº DE PIEZA
DE MUELLE
P
MAX.
-
07170-06873
-
-
07170-06903
-
-
-
07150-06814
-
-
-
-
07150-07814
,149
-
-
-
-
07170-06875
07150-07215
,149
-
-
-
-
07170-07875
-
-
-
-
-
-
-
-
-
-
-
-
-
-
-
-
-
21
+,010
,151
07150-06216
,170
+,012
,153
07150-06316
,173
07170-06876
22
+,010
,151
07150-07216
,170
+,012
,153
07150-07316
,173
07170-07876
23
-
-
-
-
-
-
-
-
-
Unicamente Acero inoxidable
24
-
-
-
-
-
-
-
-
-
6 mm BRIV®
25
+,010
,189
07150-06218
,177
-
-
-
-
07150-06846
26
+,010
,189
07150-07218
,177
-
-
-
-
01750-07846
3/32" BRIV®
Unicamente Bronce
1/8" BRIV®
Aleación de Aluminio, Bronce, Acero
5/32" BRIV®
Aleación de Aluminio, Bronce, Acero
5/32" BRIV®
Unicamente Acero inoxidable
3/16" BRIV®
Aleación de Aluminio, Bronce, Acero
3/16" BRIV®
Aleación de Aluminio, Acero
-
19
Equipos de colocación
Tipos de Cabezas de Mandril y Longitud “P”
Los mandriles para Briv® de acero inoxidable se identifican fácilmente gracias a una "V" grabada en las cabezas de los mismos.
Cuando se utilicen boquillas curvas, los mandriles deberán ser curvados a mano para adaptarlos a la curvatura de la boquilla, asegurando
de esta manera una alimentación correcta de los remaches.
P
P
DE CONO CORTO
(UNICAMENTE
CHOBERT® & GROVIT®)
CHOBERT®, GROVIT®,
AVSERT®, AVTRONIC®
P
P
BRIV®
(ACERO INOXIDABLE)
BRIV®
P
P
RIVSCREW®
AVLUG®
BRIV® - Unidades Metricas
TALADRO
Ø
CABEZA
MANDRIL ESTANDAR - VERDE
Nº PIEZA
MANDRIL
P
MAX.
TALADRO
2,4 mm BRIV®
Unicamente Bronce
13
Según Rec.
1,83
07150-06013
3,02
+,10
1,93
07150-06113
3,12
07170-06873
14
Según Rec.
1,83
07150-06013
3,02
+,10
1,93
07150-06113
3,12
07170-06903
3,2 mm BRIV®
15
Según Rec.
2,34
07271-06414
3,05
+,13
2,46
07271-06514
3,20
07150-06814
16
Según Rec.
2,34
07271-07414
3,05
+,13
2,46
07271-07514
3,20
07150-07814
17
Según Rec.
2,79
07150-06015
3,45
+,13
2,92
07150-06115
3,61
07170-06875
18
Según Rec.
2,79
07150-07015
3,45
+,13
2,92
07150-07115
3,61
07170-07875
19
Según Rec.
3,05
07170-06805
3,20
+,13
3,15
07170-06825
3,35
07170-06875
20
Según Rec.
3,05
07170-07805
3,20
+,13
3,15
07170-07825
3,35
07170-07875
21
Según Rec.
3,58
07150-06016
3,99
+,13
3,71
07150-06116
4,17
07170-06876
Aleación de Aluminio, Bronce, Acero
22
Según Rec.
3,58
07150-07016
3,99
+,13
3,71
07150-07116
4,17
07170-07876
4,8 mm BRIV®
23
Según Rec.
3,81
07170-06806
3,81
+,13
3,90
07170-06826
3,96
07170-06876
Unicamente Acero inoxidable
24
Según Rec.
3,81
07170-07806
3,81
+,13
3,90
07170-07826
3,96
07170-07876
6 mm BRIV®
25
Según Rec.
4,54
07150-06018
4,18
+,13
4,65
07150-06118
4,34
07150-06846
26
Según Rec.
4,54
07150-07018
4,18
+,13
4,65
07150-07118
4,34
07150-07846
Aleación de Aluminio, Bronce, Acero
4,0 mm BRIV®
Aleación de Aluminio, Bronce, Acero
4,0 mm BRIV®
Unicamente Acero inoxidable
4,8 mm BRIV®
Aleación de Aluminio, Acero
REMACHE
2,4 mm BRIV®
Unicamente Bronce
3,2 mm BRIV®
Aleación de Aluminio, Bronce, Acero
4,0 mm BRIV
®
Aleación de Aluminio, Bronce, Acero
4,0 mm BRIV
®
Unicamente Acero inoxidable
4,8 mm BRIV
®
Aleación de Aluminio, Bronce, Acero
4,8 mm BRIV®
Unicamente Acero inoxidable
6 mm BRIV®
Aleación de Aluminio, Acero
20
MANDRIL 1a SOBREMEDIDA - AMARILLO
Ø
Nº PIEZA
P
CABEZA
MANDRIL
MAX.
Nº
DE
REF.
REMACHE
a
MANDRIL 2 SOBREMEDIDA - AZUL
P
Ø
Nº PIEZA
CABEZA
MANDRIL
MAX.
MANDRIL 3a SOBREMEDIDA - ROJO
Ø
Nº PIEZA
CABEZA
MANDRIL
Nº DE PIEZA
DE MUELLE
Nº
DE
REF.
TALADRO
13
+,20
2,01
07150-06213
3,20
-
-
-
-
07170-06873
14
+,20
2,01
07150-06213
3,20
-
-
-
-
07170-06903
15
+,25
2,59
07271-06614
3,38
-
-
-
-
07150-06814
16
+,25
2,59
07271-07614
3,38
-
-
-
-
07150-07814
17
+,25
3,05
07150-06215
3,78
-
-
-
-
07170-06875
18
+,25
3,05
07150-07215
3,78
-
-
-
-
07170-07875
19
-
-
-
-
-
-
-
-
-
20
-
-
-
-
-
-
-
-
-
21
+,25
3,84
07150-06216
4,32
+,30
3,85
07150-06316
4,39
07170-06876
22
+,25
3,84
07150-07216
4,32
+,30
3,85
07150-07316
4,39
07170-07876
23
-
-
-
-
-
-
-
-
-
24
-
-
-
-
-
-
-
-
-
25
+,25
4,79
07150-06218
4,49
-
-
-
-
07150-06846
26
+,25
4,79
07150-07218
4,49
-
-
-
-
07150-07846
TALADRO
P
MAX.
Nº DE PIEZA
DE MUELLE
Equipos de colocación
AVLUG®, AVSERT®, AVTRONIC® y RIVSCREW® - Unidades Imperiales & Unidades Metricas
Para la selección del mandril o del muelle del mandril, seguir las instrucciones de la página 56.
a
MANDRIL 1 SOBREMEDIDA - AMARILLO
Ø
Nº PIEZA
P
CABEZA
MANDRIL
MAX.
Nº
DE
REF.
TALADRO
Ø
CABEZA
MANDRIL ESTANDAR - VERDE
Nº PIEZA
MANDRIL
P
MAX.
TALADRO
27
Según Rec.
,076
07150-06603
,353
+,005
,081
07150-06703
,478
07150-06803
28
Según Rec.
,076
07150-07603
,353
+,003
,079
07150-07703
,368
07150-07803
29
Según Rec.
,098
07150-06604
,593
-
-
-
-
07150-06804
30
Según Rec.
,098
07150-07604
,593
-
-
-
-
07150-07804
31
Según Rec.
,0725
07150-06003
,145
-
-
-
-
07150-06803
32
Según Rec.
,088
07150-06004
,185
-
-
-
-
07150-06804
33
Según Rec.
,070
07170-06025
,140
+,003
,073
07170-06125
,140
07150-06803
34
Según Rec.
,070
07170-07025
,140
+,003
,073
07170-07125
,140
07150-07803
35
Según Rec.
,079
07170-06028
,150
+,003
,082
07170-06128
,150
07170-06528
36
Según Rec.
,079
07170-06028
,150
+,003
,082
07170-06128
,150
07170-06873
37
Según Rec.
,079
07170-07028
,150
+,003
,082
07170-07128
,150
07170-07528
2,8 mm RIVSCREW®
38
Según Rec.
* ,065
07271-06030
,127
-
-
-
-
07271-06630
3,0 mm RIVSCREW®
39
Según Rec.
* ,065
07271-06030
,127
-
-
-
-
07271-06630
3,5 mm RIVSCREW®
40
Según Rec. * ,0825
07271-06035
,132
-
-
-
-
07271-06635
4,0 mm RIVSCREW®
41
Según Rec.
* ,103
07271-06140
,150
-
-
-
-
07271-06640
TALADRO
Ø
CABEZA
MANDRIL 3 SOBREMEDIDA - ROJO
Nº PIEZA
MANDRIL
P
MAX.
REMACHE
3/32" AVLUG®
1/8" AVLUG
Nº DE PIEZA
DE MUELLE
®
2,5 mm, 4-40 UNC
AVSERT®
3,0 mm, 6-32 UNC
AVSERT®
2,5 mm AVTRONIC
®
2,8 mm AVTRONIC®
* Se trata de dimensiones entre planos
a
MANDRIL 2 SOBREMEDIDA - AZUL
Nº PIEZA
P
MANDRIL
MAX.
a
Nº
DE
REF.
TALADRO
Ø
CABEZA
27
-
-
-
-
-
-
-
-
-
28
-
-
-
-
-
-
-
-
-
29
-
-
-
-
-
-
-
-
-
30
-
-
-
-
-
-
-
-
-
31
-
-
-
-
-
-
-
-
-
32
-
-
-
-
-
-
-
-
-
33
+,006
,076
07170-06225
,140
-
-
-
-
07150-06803
34
+,006
,076
07170-07225
,140
-
-
-
-
07150-07803
35
+,006
,085
07170-06228
,150
-
-
-
-
07170-06528
36
+,006
,085
07170-06228
,150
-
-
-
-
07170-06873
37
+,006
,085
07170-07228
,150
-
-
-
-
07170-07528
2,8 mm RIVSCREW®
38
-
-
-
-
-
-
-
-
-
3,0 mm RIVSCREW®
39
-
-
-
-
-
-
-
-
-
3,5 mm RIVSCREW®
40
-
-
-
-
-
-
-
-
-
4,0 mm RIVSCREW®
41
-
-
-
-
-
-
-
-
-
REMACHE
3/32" AVLUG®
1/8" AVLUG
Nº DE PIEZA
DE MUELLE
®
2,5 mm, 4-40 UNC
AVSERT®
3,0 mm, 6-32 UNC
AVSERT®
2,5 mm AVTRONIC®
2,8 mm AVTRONIC®
Nº
DE
REF.
REMACHE
TALADRO
a
MANDRIL ESTANDAR - VERDE
Nº PIEZA
MANDRIL
07150-06603
P
MAX.
8,97
TALADRO
MANDRIL 1 SOBREMEDIDA - AMARILLO
Ø
Nº PIEZA
P
CABEZA
MANDRIL
MAX.
07150-06703
12,14
2,06
07150-06803
Nº DE PIEZA
DE MUELLE
27
Ø
CABEZA
Según Rec.
1,93
28
Según Rec.
1,93
07150-07603
8,97
+,10
2,01
07150-07703
9,35
07150-07803
29
Según Rec.
2,49
07150-06604
15,06
-
-
-
-
07150-06804
30
Según Rec.
2,49
07150-07604
15,06
-
-
-
-
07150-07804
31
Según Rec.
1,84
07150-06003
3,68
-
-
-
-
07150-06803
32
Según Rec.
2,24
07150-06004
4,70
-
-
-
-
07150-06804
33
Según Rec.
1,78
07170-06025
3,56
+,07
1,85
07170-06125
3,56
07150-06803
34
Según Rec.
1,78
07170-07025
3,56
+,07
1,85
07170-07125
3,56
07150-07803
35
Según Rec.
2,01
07170-06028
3,81
+,07
2,08
07170-06128
3,81
07170-06528
36
Según Rec.
2,01
07170-06028
3,81
+,07
2,08
07170-06128
3,81
07170-06873
37
Según Rec.
2,01
07170-07028
3,81
+,07
2,08
07170-07128
3,81
07170-07528
2,8 mm RIVSCREW®
38
Según Rec.
* 1,65
07271-06030
3,23
-
-
-
-
07271-06630
3,0 mm RIVSCREW®
39
Según Rec.
* 1,65
07271-06030
3,23
-
-
-
-
07271-06630
3,5 mm RIVSCREW®
40
Según Rec.
* 2,10
07271-06035
3,35
-
-
-
-
07271-06635
4,0 mm RIVSCREW®
41
Según Rec.
* 2,62
07271-06140
3,81
-
-
-
-
07271-06640
TALADRO
Ø
CABEZA
MANDRIL 3a SOBREMEDIDA - ROJO
Nº PIEZA
MANDRIL
P
MAX.
2,4 mm AVLUG®
3,2 mm AVLUG
+,10
®
2,5 mm, 4-40 UNC
AVSERT®
3,0 mm, 6-32 UNC
AVSERT®
2,5 mm AVTRONIC®
2,8 mm AVTRONIC®
* Se trata de dimensiones entre planos
a
MANDRIL 2 SOBREMEDIDA - AZUL
P
Nº PIEZA
MAX.
MANDRIL
Nº
DE
REF.
TALADRO
Ø
CABEZA
27
-
-
-
-
-
-
-
-
-
28
-
-
-
-
-
-
-
-
-
29
-
-
-
-
-
-
-
-
-
30
-
-
-
-
-
-
-
-
-
31
-
-
-
-
-
-
-
-
-
32
-
-
-
-
-
-
-
-
-
33
+,15
1,93
07170-06225
3,56
-
-
-
-
07150-06803
34
+,15
1,93
07170-07225
3,56
-
-
-
-
07150-07803
35
+,15
2,16
07170-06228
3,81
-
-
-
-
07170-06528
36
+,15
2,16
07170-06228
3,81
-
-
-
-
07170-06873
37
+,15
2,16
07170-07228
3,81
-
-
-
-
07170-07528
2,8 mm RIVSCREW®
38
-
-
-
-
-
-
-
-
-
3,0 mm RIVSCREW®
39
-
-
-
-
-
-
-
-
-
3,5 mm RIVSCREW®
40
-
-
-
-
-
-
-
-
-
4,0 mm RIVSCREW®
41
-
-
-
-
-
-
-
-
-
REMACHE
2,4 mm AVLUG®
3,2 mm AVLUG®
2,5 mm, 4-40 UNC
AVSERT®
3,0 mm, 6-32 UNC
AVSERT®
2,5 mm AVTRONIC®
2,8 mm AVTRONIC®
Nº DE PIEZA
DE MUELLE
21
Servicio de la Máquina
Debe llevarse a cabo un servicio regular de mantenimiento y debe efectuarse una inspección a fondo, anualmente o cada 500.000
ciclos, si se efectúan antes.
I M P O R TA N T E
El empresario es responsable de asegurarse de que las instrucciones del mantenimiento de la
máquina se den al personal apropiado.
El operario no debe estar implicado en el mantenimiento o reparación de la máquina a no ser que
esté adiestrado adecuadamente.
Diariamente
•
•
•
•
•
Diariamente, antes de usar la máquina o cuando se ponga en servicio por primera vez, verter unas pocas gotas de aceite lubricante limpio en la
entrada de aire del intensificador, si no está adaptado ningún lubrificador en el suministro de aire. Si la máquina está en uso continuado, la
manguera de aire debe ser desconectada del suministro de aire principal y la máquina ser lubrificada cada dos o tres horas.
Comprobar si hay fugas de aire o de aceite. Si están dañados, las mangueras y los acoplamientos deben ser sustituidos por elementos nuevos.
Si no hay filtro en el regulador de presión, purgar la línea de aire para eliminar la suciedad o agua acumulada, antes de conectar la manguera de
aire al intensificador. Si hay un filtro, purgarlo.
Comprobar que el equipo de colocación es correcto.
Comprobar de forma regular en los mandriles signos de desgaste o daños, controlando el número de operaciones de colocación (léanse las
Instrucciones de seguridad de las páginas 42).
Semanalmente
•
•
•
Llevar a cabo en su totalidad los procedimientos “Diarios” tal como se ha descrito anteriormente.
Retirar, inspeccionar, limpiar y engrasar las mordazas (véase “Cilindro de Mordazas” en la sección de “Mantenimiento”, página 62).
Comprobar que el nivel de aceite en el depósito del intensificador se encuentra aproximadamente a 12mm por debajo de la placa de
cubierta transparente.
Datos de Seguridad de la Grasa de Litio Moly EP 3753
Se puede realizar el pedido de la grasa como un componente único, siendo el número de pieza el mostrado para el kit de
mantenimiento, pàgina 61.
Primeros Auxilios
PIEL:
Como la grasa es completamente resistente al agua, se elimina mejor con un limpiador cutáneo emulsificante aprobado.
INGESTION:
Asegurarse de que la persona beba 30ml de leche de Magnesia, preferiblemente en una taza de leche.
OJOS:
Irritante pero no peligrosa. Irrigar con agua y buscar atención médica.
Incendio
PUNTO DE INFLAMACION: Por encima de 220°C.
No está clasificada como inflamable.
Medios extintores apropiados: CO2, Halon o rociado de agua si es aplicado por un operario experimentado.
Medio Ambiente
Recoger para quemar o desechar en un lugar apropiado.
Manipulación
Usar crema de barrera o guantes resistentes al aceite.
Almacenaje
Lejos del calor y de agentes oxidantes.
22
Servicio de la Máquina
Kit de Manteniminento
Para el servicio de mantenimiento o reparación completa, recomendamos el kit de mantenimiento (referencia 07900-05300).
KIT DE MANTENIMIENTO
REFERENCIA
07900-00157
07900-00006
07900-00446
07900-00603
07900-00520
07900-00521
07900-00602
07900-00595
07900-00434
07900-00237
07900-00012
07900-00008
DESCRIPCION
ALICATES DEL ANILLO ELASTICO DE RETENCION
ESPATULA
EXTRACTOR
MORDAZAS DE TORNILLO DE BANCO
VARILLA 3/8"
VARILLA 1/4"
PUNTA PARA EL MONTAJE DEL ANILLO TORICO
LLAVE FIJA 18 mm
LLAVE FIJA 32 mm
LLAVE FIJA B.S.W. 3/8" x 5/16"
LLAVE FIJA 9/16" x 5/8"
LLAVE FIJA 7/16" x 1/2"
Cantidad REFERENCIA
1
1
1
1
1
1
1
1
1
1
1
1
07900-00352
07900-00710
07900-00725
07900-00243
07900-00488
07900-00013
07900-00617
07900-00469
07900-00488
07900-00351
07900-00224
07900-00225
07992-00020
DESCRIPCION
Cantidad
GANCHO DE EXTRACCION JUNTA HERMETICA
LLAVE FIJA DE EXTRACCIÓN TUERCA CAÑÓN
BALA
DESTORNILLADOR
LLAVE FIJA INTENSIFICADORA
LLAVE ALLEN 1/8"
PACK 50 ml LOCTITE MULTI-GASKET 574
LLAVE ALLEN 2,5 mm
LLAVE FIJA (MK1) DE INTENSIFICADOR
LLAVE ALLEN 3 mm
LLAVE ALLEN 4 mm
LLAVE ALLEN 5 mm
LATA 80 g GRASA DE LITIO MOLY EP 3753
1
1
1
1
1
1
1
1
1
1
1
1
1
Nota: las medidas de las llaves fijas se refieren a la separación “entre caras” a menos que se indique específicamente lo contrario.
23
Mantenimiento
Cada 500.000 ciclos la máquina deberá ser desmontada por completo, sustituyéndose los componentes que se encuentren
desgastados, dañados, o cuyo cambio se recomiende. Todos los anillos tóricos y juntas deberán ser reacondicionados y lubricados
con grasa de litio Moly EP 3753 antes de montarse.
IMPORTANTE
Las instrucciones de seguridad se encuentran en la página 42.
El empresario es responsable de asegurarse que las instrucciones de mantenimiento se den al personal apropiado.
El operario no debe estar implicado en el mantenimiento o reparación de la máquina a no ser que sea adiestrado
apropiadamente.
La línea de aire debe desconectarse antes de que se intente hacer algún servicio de mantenimiento o un desmontaje, a no ser que se
haya indicado expresamente otra cosa.
Se recomienda que cualquier operación de desmontaje sea llevada a cabo en condiciones de limpieza.
El desmontaje de las máquinas 07530 Mk II y 07532 Mk II se cubre por separado. Para el modelo 07530 Mk II véanse los
procedimientos de desmontaje indicados abajo, y para el modelo 07532 Mk II véanse los procedimientos de desmontaje de las páginas
64-65. Los números de componentes en negrilla se refieren al despiece general y a las listas de componentes para el modelo
respectivo de las páginas 66-69.
Antes de desmontar la máquina, será necesario retirar el equipo de colocación.
Para un mantenimiento completo de la máquina, se recomienda desmontar los subconjuntos en el orden indicado abajo, después de
haber desconectado la manguera hidráulica de la unidad intensificadora y la línea de aire del gatillo de la válvula intensificadora,
separando así la unidad de pistola de la unidad intensificadora.
Desmontaje de la 07530-02200 MKII
Para desmontar la máquina 07532-02200 Mk II, véanse las páginas 64-65.
CILINDRO DE MORDAZAS
•
•
•
•
•
•
•
•
Hacer bascular el clip 47 hacia arriba y extraer la tapa final 38.
Utilizando una llave Allen*, extraer un tornillo 44, asegurándose de que se elimina cualquier resto de aire que estuviera atrapado en el
cilindro de las mordazas. Retirar el segundo tornillo 44.
Extraer, tirando, el tapón posterior 46.
Extraer los componentes conjunto del émbolo de mordazas 14, el muelle 13, las mordazas 9 y el alojamiento aprietamordazas 8.
Retirar el tapón de la parte posterior del conjunto del émbolo utilizando una llave Allen* y una varilla introducida a través de la ranura
mayor de la torreta.
Limpiar vaciando la torreta mediante un punzón o varilla de 4,7 mm (3/16”) y volver a colocar el tapón utilizando un sellante no
endurecedor, por ejemplo Loctite Multi-gasket 574*.
Retirar el anillo tórico 10 de la junta del émbolo.
Utilizando una llave Allen*, retirar los cinco tornillos de fijación de las molduras del asa 34, 39 y las tuercas 33 del asa de la máquina.
Sujetar el cañón 25 en un tornillo de banco utilizando mordazas blandas* para evitar daños.
Utilizando una llave tubular*, desatornillar la tuerca del cañón 7, impidiendo que gire el cañón 25 mediante la utilización de una llave fija.
Desconectar el tubo de mordazas en acordeón 12 del bloque de interruptor 28, y tirar del cilindro de mordazas 6 de la máquina.
Retirar el anillo tórico 4, la lámina de rozamiento 15 y el muelle de retorno del cañón 16.
•
•
La longitud libre del muelle 13 deberá ser de 38,1 mm (1,5”). Sustituir si es necesario.
Recubrir las mordazas con grasa de Litio Moly antes del montaje.
•
Volver a montar en orden inverso al seguido para el desmontaje.
•
•
•
•
PISTON HIDRAULICO
•
•
•
•
•
•
•
•
•
•
•
Extraer el cilindro de mordazas 6 tal como se ha indicado anteriormente.
Agarrar el cuerpo 19 en el tornillo de banco utilizando mordazas blandas* para evitar daños, y soltar el limitador de carrera 17.
Agarrar el cañón 25 en el tornillo de banco con mordazas blandas, y tirar del cuerpo 19 del cañón 25 (una pequeña cantidad de aceite
hidráulico será expulsado del interior del cuerpo).
Retirar el pistón hidráulico 18 con cuidado a fin de no dañar la superficie del diámetro interior del cuerpo.
Extraer el retén 3.
El retén 1 es difícil de extraer sin ser dañado, pero puede permanecer en su lugar durante la limpieza (suponiendo que no quede afectada
por dicho proceso). Si, sin embargo, se hace necesaria la sustitución del retén 1, proceder de la manera siguiente:
Utilizando una espátula*, extraer el retén 1 del cuerpo 19 haciendo palanca, prestando especial atención para no dañar la cavidad y los
diámetros interiores del cuerpo. El retén extraído 1 DEBE ser sustituido.
Para sustituir el retén 1, desatornillar el conjunto de manguera hidráulica 22 y colocar un nuevo conjunto de tapón de purga 2,
atornillándolo para conseguir presentar el nivel de superficie interior con el diámetro interior.
Desatornillar la base de purgado existente hasta que la cara interior quede al mismo nivel que el diámetro interior. Con ello se conseguirá
un conducto uniforme para la inserción del nuevo retén 1 a través de la parte posterior del cuerpo.
Asegurarse de que el retén se encuentra bien engrasado y en la dirección correcta, con el extremo abierto del mismo enfrentado a las
mordazas posteriores.
Completar la operación de montaje en orden inverso al seguido para el desmontaje.
* Se refiere a componentes incluidos en el kit de mantenimiento 0753 Mk II. Para la lista completa, véase la página 61.
Los números de componentes en negrilla se refieren a los montajes generales y a la lista de componentes de las páginas 66-67.
24
Mantenimiento
Desmontaje de la 07530-02200 Mk II
CONJUNTO DE GATILLO
•
•
•
•
•
•
•
Para realizar el desmontaje / servicio del conjunto, retirar las tapas de la máquina tal como se ha descrito anteriormente.
Desconectar todas las mangueras de aire del conjunto, con cuidado para no dañarlas. Retirar el conjunto.
Utilizando una llave fija*, desatornillar el retenedor 49 y extraerlo. Con precaución para mantener el muelle 50.
Abrir mediante palanca el anillo tórico 53 cuidando de no dañar los asientos del eje 54 y del retenedor 49.
Limpiar y volver a montar utilizando un nuevo anillo tórico 53.
Comprobar la longitud del muelle 50, que debe ser de 12,7 mm (0,5”) de longitud libre - sustituir si es necesario.
Montar en orden inverso al seguido para el desmontaje.
VÁLVULA DE MARCHA / PARO DE MORDAZAS
•
•
•
•
•
•
•
•
•
•
La unidad ha sido diseñada para que se requiera un mínimo de mantenimiento durante la vida de la máquina.
Si es necesario desmontar la válvula, se procederá como sigue:
Desconectar las mangueras de aire del conjunto, con precaución para no dañarlas. Retirar el conjunto.
Utilizando una llave Allen*, aflojar el tornillo 27 del conjunto de apriete al cañón 25 y extraer el conjunto.
Utilizando un destornillador*, retirar cuidadosamente la arandela Star-lock de cromo 26 del eje válvula 29 y desechar la arandela.
Extraer el eje válvula 29 del bloque interruptor 28.
Teniendo cuidado para no dañar el eje válvula 29, retirar los anillos tóricos 31.
Limpiar el eje válvula y volver a colocar anillos tóricos 31 nuevos, utilizando la punta de montaje* e introduciéndolo en el bloque
interruptor 28, observando su orientación.
Colocar la arandela Star-lock de cromo 26 nueva, mediante fijación en tornillo de banco con mordazas blandas, para impedir daños. NO
EMPLEAR UNA FUERZA EXCESIVA.
Completar el montaje en orden inverso al seguido para el desmontaje.
VÁLVULA ANTIRRETORNO DE PRESIÓN DE MORDAZAS
•
•
•
La válvula antirretorno 21 se encuentra situada en el asa de la máquina.
Para retirar / sustituir la válvula antirretorno 21, presionar el conector rápido y retirar el tubo de plástico azul 23 desde los dos extremos.
Cuando se sustituya la válvula antirretorno 21, observar su orientación.
ASA Y TAPA FINAL
•
Limpiar e inspeccionar las molduras por si existieran grietas u otros daños.
CURSOR
•
Limpiar y aplicar aceite al conjunto de cursor 5 de forma ocasional, utilizando un poco de aceite ligero.
I M P O R TA N T E
Revisar la máquina diariamente y semanalmente.
El cebado es SIEMPRE necesario después de que se haya desmontado la máquina y como paso previo
a la puesta en marcha.
* Se refiere a componentes incluidos en el kit de mantenimiento 0753 Mk II. Para la lista completa, véase la página 61.
Los números de componentes en negrilla se refieren a los montajes generales y a la lista de componentes de las páginas 66-67.
25
Mantenimiento
Desmontaje de la 07532-02200 Mk II
Para desmontar la máquina 07530-02200 Mk II, véanse las páginas 62-63.
CILINDRO DE MORDAZAS
•
•
•
Hacer bascular el clip 54 hacia arriba y extraer la tapa final 45.
Utilizando una llave Allen*, extraer un tornillo de cabeza 51, asegurándose de que se elimina cualquier resto de aire que estuviera
atrapado en el cilindro de las mordazas. Retirar el segundo tornillo de cabeza 51.
Empujar el tapón posterior 53 contra el muelle 20 y liberarlo rápidamente para permitir que el tapón posterior 53 caiga.
Extraer los componentes conjunto del émbolo de mordazas 21, el muelle 20, las mordazas 16 y el alojamiento aprietamordazas
15.
Retirar el tapón de la parte posterior del conjunto del émbolo utilizando una llave Allen* y una varilla introducida a través de la
ranura mayor de la torreta.
Limpiar vaciando la torreta mediante un taladro de 4,7 mm (3/16”) y volver a colocar el tapón utilizando un sellante no
endurecedor, por ejemplo Loctite Multi-gasket 574*.
Retirar el anillo tórico 17 de la junta del émbolo.
Utilizando una llave Allen*, retirar los cinco tornillos de fijación de las molduras del asa 41, 46 y las tuercas 40 del asa de la
máquina.
Sujetar el cañón 31 en un tornillo de banco utilizando mordazas blandas* para evitar daños.
Utilizando una llave tubular*, desatornillar la tuerca del cañón 14, impidiendo que gire el cañón 31 mediante la utilización de una
llave fija.
Desconectar el tubo de mordazas en acordeón 19 del bloque de interruptor 35, y tirar del cilindro de mordazas 12 de la
máquina.
Retirar el anillo tórico 10, la lámina de rozamiento 22 y el muelle de retorno del cañón 13.
•
•
La longitud libre del muelle 20 deberá ser de 38,1 mm (1,5”). Sustituir si es necesario.
Recubrir las mordazas con grasa de Litio Moly antes del montaje.
•
Volver a montar en orden inverso al seguido para el desmontaje.
•
•
•
•
•
•
•
•
•
PISTON HIDRAULICO
•
•
•
•
•
•
•
•
•
•
•
Extraer el cilindro de mordazas 12 tal como se ha indicado anteriormente.
Agarrar el cuerpo 25 en el tornillo de banco utilizando mordazas blandas* para evitar daños, y soltar el limitador de carrera 23.
Agarrar el cañón 31 en el tornillo de banco con mordazas blandas, y tirar del cuerpo 25 del cañón 31 (una pequeña cantidad de
aceite hidráulico será expulsado del interior del cuerpo).
Retirar el pistón hidráulico 24 con cuidado a fin de no dañar la superficie del diámetro interior del cuerpo.
Extraer el retén 9.
El retén 1 es difícil de extraer sin ser dañado, pero puede permanecer en su lugar durante la limpieza (suponiendo que no quede
afectada por dicho proceso). Si, sin embargo, se hace necesaria la sustitución del retén 1, proceder de la manera siguiente:
Utilizando una espátula*, extraer la junta 1 del cuerpo 25 haciendo palanca, prestando especial atención para no dañar la
cavidad y los diámetros interiores del cuerpo. El retén extraído 1 DEBE ser sustituido.
Para sustituir el retén 1, desconectar el conjunto de manguera hidráulica 63 y todos los conductos de aire asociados.
Desatornillar el acoplador 6 de autocierre, retirar la platina de suspensión 4, desatornillar la manguera superior del adaptador 2 y
colocar un nuevo conjunto de tapón de purga 30, atornillándolo para conseguir presentar el nivel de superficie interior con el
diámetro interior.
Desatornillar la base de purgado existente hasta que la cara interior quede al mismo nivel que el diámetro interior. Con ello se
conseguirá un conducto uniforme para la inserción del nuevo retén 1 a través de la parte posterior del cuerpo.
Asegurarse de que el retén se encuentra bien engrasado y en la dirección correcta, con el extremo abierto del retén enfrentado a
las mordazas posteriores.
Completar la operación de montaje en orden inverso al seguido para el desmontaje.
* Se refiere a componentes incluidos en el kit de mantenimiento 0753 Mk II. Para la lista completa, véase la página 61.
Los números de componentes en negrilla se refieren a los montajes generales y a la lista de componentes de las páginas 68-69.
26
Mantenimiento
Desmontaje de la 07532-02200 Mk II
CONJUNTO DE GATILLO
•
•
•
•
•
•
•
Para realizar el desmontaje / servicio del conjunto, retirar las tapas de la máquina tal como se ha descrito anteriormente.
Desconectar todas las mangueras de aire del conjunto, con cuidado para no dañarlas. Retirar el conjunto.
Utilizando una llave fija*, desatornillar el retenedor 56 y extraerlo. Tenga cuidado en conservar el muelle 57.
Abrir mediante palanca el anillo tórico 60 cuidando de no dañar los asientos del eje 61 y del retenedor 56.
Limpiar y volver a montar utilizando un nuevo anillo tórico 60.
Comprobar la longitud del muelle 57, que debe ser de 12,7 mm (0,5”) de longitud libre - sustituir si es necesario.
Montar en orden inverso al seguido para el desmontaje.
VÁLVULA DE MARCHA / PARO DE MORDAZAS
•
•
•
•
•
•
•
•
•
•
La unidad ha sido diseñada para que se requiera un mínimo de mantenimiento durante la vida de la máquina.
Si es necesario desmontar la válvula, se procederá como sigue:
Desconectar las mangueras de aire del conjunto, con precaución para no dañarlas. Retirar el conjunto.
Utilizando una llave Allen*, aflojar el tornillo 34 del conjunto de apriete al cañón 31 y extraer el conjunto.
Utilizando un destornillador*, retirar cuidadosamente la arandela Star-lock de cromo 33 del eje válvula 36 y desechar la arandela.
Extraer el eje válvula 36 del bloque interruptor 35.
Teniendo cuidado para no dañar el eje válvula 36, retirar los anillos tóricos 38.
Limpiar el eje válvula y volver a colocar anillos tóricos 38 nuevos, utilizando la punta de montaje* e introduciéndolo en el bloque interruptor 35,
observando su orientación.
Colocar la arandela Star-lock de cromo nueva 33, mediante fijación en tornillo de banco con mordazas blandas, para impedir daños. NO
EMPLEAR UNA FUERZA EXCESIVA.
Completar el montaje en orden inverso al seguido para el desmontaje.
VÁLVULA ANTIRRETORNO DE PRESIÓN DE MORDAZAS
•
•
•
La válvula antirretorno 26 se encuentra situada en el asa de la máquina.
Para retirar / sustituir la válvula antirretorno 26, presionar el acoplamiento de mamparo y retirar el tubo de plástico azul 27 desde los dos
extremos.
Cuando se sustituya la válvula antirretorno 26, observar su orientación.
ASA Y TAPA FINAL
•
Limpiar e inspeccionar las molduras por si existieran grietas u otros daños.
CURSOR
•
Limpiar y aplicar aceite al conjunto de cursor 11 de forma ocasional, utilizando un poco de aceite ligero.
I M P O R TA N T E
Revisar la máquina diariamente y semanalmente.
El cebado es SIEMPRE necesario después de que se haya desmontado la máquina y como paso previo
a la puesta en marcha.
* Se refiere a componentes incluidos en el kit de mantenimiento 0753 Mk II. Para la lista completa, véase la página 61.
Los números de componentes en negrilla se refieren a los montajes generales y a la lista de componentes de las páginas 68-69.
27
28
54
53
49
31
50
SECCION X-X
32
25
24
20
51
30
29
28
52
DETALLE DE LA VÁLVULA
DEL GATILLO
48
26
27
60
X
X
23
1
2
20
3
4
22
21
19
40
41
39
33
18
5
34
33
17
6
16
7
34
33
34
33
36
W
14
9
44
43
44
12
SECCION W-W
13
10
45
46
45
11
DETALLES SOBRE LA CUBIERTA
DE LA EMPUÑADURA
15
8
39
33
35
47
38
37
W
Montaje general de la máquina base 07530-02200 Mk II
REFERENCIA
07003-00237
07530-00500
07003-00236
07003-00167
07271-01100
07530-02207
07530-02205
07530-00208
07151-00403
07003-00113
07005-01972
07530-02211
07154-00404
07530-02800
07530-00206
07490-03002
07530-00204
07530-00203
07530-02202
07003-00142
07005-01973
07008-00423
07005-01083
07007-00017
07530-02201
07004-00058
07001-00404
07530-02301
COMPONENTE
1
2
3
4
5
6
7
8
9
10
11
12
13
14
15
16
17
18
19
20
21
22
23
24
25
26
27
28
DESCRIPCION
RETÉN (MÓVIL)
ANILLO TÓRICO
CURSOR
CILINDRO DE MORDAZAS
TUERCA CAÑÓN
APRIETAMORDAZAS
MORDAZAS
ANILLO TÓRICO
CONECTOR RÁPIDO ACODADO
TUBO DE MORDAZAS EN ACORDEÓN
MUELLE
CONJUNTO ÉMBOLO MORDAZAS
LÁMINA DE ROZAMIENTO
MUELLE RETORNO DEL CAÑÓN
LIMITADOR DE CARRERA
ÉMBOLO
CUERPO
JUNTA METALOPLASTICA BSP 1/8”
VÁLVULA ANTIRRETORNO
CONJUNTO DE MANGUERA HIDRÁULICA
TUBO AZUL 4 MM O/D
TAPA GUARDAPOLVO
CAÑÓN
ARANDELA CROMO STARLOCK 1/8”
TORNILLO PRISIONERO M5 X 6 LARGO
BLOQUE INTERRUPTOR
CONJUNTO BASE PARA PURGADO (COMPONENTES 56 A 59)
RETÉN (ESTÁTICO)
1
1
1
1
1
1
1
1
2
1
1
1
1
1
1
1
1
1
1
2
1
1
60mm
1
1
1
1
1
1
1
2
2
1
2
29
30
31
32
33
34
35
36
37
38
39
40
41
42
43
44
45
46
47
48
49
50
51
52
53
54
55
56
57
58
59
60
CANTIDAD RECAMBIOS COMPONENTE
07003-00142
07003-00194
07001-00442
07530-00501
07530-00310
07003-00113
07001-00504
07002-00153
07530-02213
07530-02220
07007-00300
07220-00803
07125-00215
07530-02311
07005-01357
07003-00022
07241-00208
07530-02302
07004-00059
07003-00121
07005-01571
07002-00134
07001-00401
07530-02210
07007-01504
07007-01503
07530-02603
07001-00262
07530-02601
07530-02602
REFERENCIA
DESCRIPCION
MANGUITO DE MORDAZAS DE AIRE
ARANDELA NEGRA STARLOCK 1/8”
ANILLO TÓRICO
CONECTOR ACODADO
TUERCA HEXAGONAL M4
TORNILLO ALLEN M4 X 10 LARGO
ETIQUETA
ETIQUETA MARCA CE
ETIQUETA SÍMBOLO LIBRO
TAPA FINAL
TORNILLO ALLEN M4 X 22 LARGO
MOLDURA ASA (DERECHA)
MOLDURA ASA (IZQUIERDA)
NO UTILIZADO
ANILLO TÓRICO
TORNILLO ALLEN M4 X 6 LARGO
ARANDELA PLÁSTICA M4
TAPÓN POSTERIOR
ABRAZADERA
BOTÓN DEL GATILLO
RETENEDOR
MUELLE
ALOJAMIENTO DEL GATILLO
CONECTOR RÁPIDO
ANILLO TÓRICO
EJE
NO UTILIZADO
● JUNTA METALOPLÁSTICA
● JUNTA METALOPLÁSTICA
● TORNILLO
● TAPÓN
TAPÓN CIEGO
LISTA DE COMPONENTES 07530-02200
1
1
1
1
1
1
2
2
1
1
1
1
1
1
1
1
1
1
1
2
2
5
3
2
1
1
1
2
1
1
1
1
-
2
-
3
-
CANTIDAD RECAMBIOS
Lista de piezas para la máquina base 07530-02200 Mk II
29
30
55
60
56
57
39
SECCION X-X
7
32
31
38
X
1
30
3
2
58
X
5
3
4
29
7
9
8
28
27
12
41
40
24
26
11
25
10
47
48
36
6
46
40
63
35
37
DETALLE DE LA VÁLVULA
DEL GATILLO
61
33
34
68
3
13
23
14
22
15
46
40
42
43
W
21
16
20
19
51
18
SECCION W-W
51
50
17
52
53
52
DETALLES SOBRE LA CUBIERTA
DE LA EMPUÑADURA
41
40
41
40
54
45
44
W
Montaje general de la máquina base 0 7 5 3 2 - 0 2 2 0 0 M k I I
REFERENCIA
07003-00237
07532-00203
07003-00142
07532-02202
07532-00205
07005-00759
07005-01357
07005-01325
07003-00236
07003-00167
07271-01100
07530-02207
07490-03002
07530-02205
07530-00208
07151-00403
07003-00113
07005-01972
07530-02211
07154-00404
07530-02800
07530-00206
07530-00204
07530-00203
07530-02202
07005-01973
07005-01083
07532-02215
07005-01084
07530-00500
07530-02201
07007-00017
07004-00058
07001-00404
07530-02301
COMPONENTE
1
2
3
4
5
6
7
8
9
10
11
12
13
14
15
16
17
18
19
20
21
22
23
24
25
26
27
28
29
30
31
32
33
34
35
CAÑÓN
TAPA GUARDAPOLVO
ARANDELA STARLOCK DE CROMO 1/8”
TORNILLO ALLEN M5 x 6
BLOQUE INTERRUPTOR
CONJUNTO DE TAPÓN DE PURGA (COMPONENTES 64 A 67)
RETÉN (ESTÁTICO)
MANGUERA SUPERIOR DEL ADAPTADOR
JUNTA METALOPLÁSTICA 1/8” BSP
PLATINA DE SUSPENSIÓN
TORNILLO ALLEN
CONECTOR RÁPIDO (HEMBRA)
CONECTOR RÁPIDO
CONECTOR RECTO DE PRESIÓN
RETÉN (DINÁMICO)
ANILLO TÓRICO
CURSOR
CILINDRO DE MORDAZAS
MUELLE DE RETORNO DEL CAÑÓN
TUERCA CAÑÓN
APRIETAMORDAZAS
MORDAZAS
ANILLO TÓRICO
CONECTOR RÁPIDO
TUBO DE MORDAZAS EN ACORDEÓN
MUELLE
CONJUNTO DE ÉMBOLO DE MORDAZAS
LÁMINA DE ROZAMIENTO
LIMITADOR DE CARRERA
ÉMBOLO
CUERPO
VÁLVULA ANTIRRETORNO
TUBO DE PLÁSTICO AZUL DE 4 mm O/D
TAPÓN DE SELLADO
TUBO DE PLÁSTICO NEGRO DE 4 mm O/D
DESCRIPCION
1
1
1
1
1
1
220 mm
1
350 mm
1
1
4
1
1
1
3
2
1
1
1
1
1
1
1
2
1
1
1
1
1
1
1
1
1
1
2
1
1
2
2
1
36
37
38
39
40
41
42
43
44
45
46
47
48
49
50
51
52
53
54
55
56
57
58
59
60
61
62
63
64
65
66
67
68
CANTIDAD RECAMBIOS COMPONENTE
07008-00414
07003-00142
07003-00194
07001-00442
07530-00501
07530-00310
07003-00022
07241-00208
07003-00113
07001-00504
07002-00153
07530-02213
07530-02220
07007-00300
07220-00803
07125-00215
07530-02311
07530-02302
07004-00059
07003-00121
07005-01571
07002-00134
07001-00401
07530-02210
07007-01504
07007-01503
07530-02603
07001-00262
07532-02208
07532-02209
REFERENCIA
DESCRIPCION
CARRETE DE MORDAZAS DE AIRE
ARANDELA NEGRA STARLOCK 1/8”
ANILLO TÓRICO
CONECTOR ACODADO
TUERCA HEXAGONAL M4
TORNILLO ALLEN M4 x 10
ETIQUETA
ETIQUETA MARCA CE
ETIQUETA SÍMBOLO LIBRO
TAPA FINAL
TORNILLO ALLEN M4 x 22
MOLDURA ASA (DERECHA)
MOLDURA ASA (IZQUIERDA)
NO UTILIZADO
ANILLO TÓRICO
TORNILLO ALLEN M4 x 6
ARANDELA DE PLÁSTICO M4
TAPÓN POSTERIOR
CLIP
BOTÓN DEL GATILLO
RETENEDOR
MUELLE
ALOJAMIENTO DEL GATILLO
NO UTILIZADO
ANILLO TÓRICO
EJE
NO UTILIZADO
CONJUNTO DE MANGUERA HIDRÁULICA
● JUNTA METALOPLÁSTICA
● JUNTA METALOPLÁSTICA
● TORNILLO
● TAPÓN
TAPÓN CIEGO
LISTA DE COMPONENTES 07532-02200
1
1
1
1
1
2
1
1
1
2
2
1
1
1
1
1
1
1
1
2
2
5
3
1
1
1
1
2
1
1
1
1
-
-
2
-
3
-
CANTIDAD RECAMBIOS
Lista de piezas para la máquina base 07532-02200 MkII
31
Intensificador 07531-02200 - Mantenimiento
Instrucciones de desmontaje
•
•
•
•
•
•
•
•
•
•
•
•
•
•
•
•
•
•
•
•
•
•
•
•
•
•
•
Cuando se desmonte el conjunto del intensificador, desconectar en primer lugar la manguera del suministro de aire que va al
conector 22 de entrada al intensificador.
Utilizando una llave Allen*, aflojar los cuatro tornillos 27 y extraer la placa de protección 24.
Desconectar la manguera del gatillo (componente 22 en la página 66 o componente 29 en la página 68) de la válvula
intensificadora 43 ó 48 presionando el conector rápido y retirando la manguera.
Extraer la placa de cubierta 4 y la junta de estanqueidad 35, retirando los tornillos 37 y las arandelas 36, utilizando una llave
Allen*.
Asegurarse que la junta de estanqueidad no se encuentra dañada para asegurar una hermeticidad adecuada al volver a montar.
Invertir el conjunto intensificador y vaciar el aceite del depósito en un recipiente.
Retirar el conector rápido 32 junto con el conector 31 y las juntas estancas 33 utilizando una llave fija.
Retirar la válvula piloto 43 ó 48 extrayendo los tornillos con una llave Allen, teniendo la precaución de retener el anillo tórico 21
situado en el cuerpo del intensificador.
Extraer el tornillo 19 utilizando una llave Allen*, y extraer la cubierta del silenciador 16, el silenciador de espuma 15, el
espaciador 18 y la placa de retención 20.
Extraer el tubo de plástico 41 de 6 mm de los conectores de vacío 42.
Desde la base del intensificador introducir una llave Allen* de 3 mm a través de los dos agujeros y desatornillar los conectores de
vacío 42. Observar:
• Debe actuarse con precaución puesto que los conectores de vacío se encuentran anclados y sellados en su ubicación
mediante Loctite 574.
• Si hubiera dificultad para moverlos, podrán taladrarse los conectores de vacío utilizando una broca de 3/16” ó de 4,7 mm.
Para volver a montar los conectores de vacío 42, deberá seguirse el procedimiento siguiente:• Empapar los conectores de vacío con una imprimación adecuada, por ejemplo Perma Bond A905.
• Colocar una gota de Loctite 574 en el agujero taladrado del intensificador.
• Desde la base del intensificador, introducir la llave Allen* a través del agujero. Asegurarse de que la llave Allen* esté libre de
Loctite 574 antes de introducirla en el conector de vacío.
• Girar la llave Allen al tiempo que se aplica Loctite 574 a la base del conector de vacío.
• Atornillar el conector de vacío en el intensificador, asegurándose de que hay suficiente Loctite 574 en la base del
acoplamiento, de forma que la rosca no sea visible.
Utilizando un destornillador, retirar cuidadosamente el anillo interno de retención 14. Limpiar e inspeccionar la ranura por si
existieran indicios de daños.
Utilizando el extractor*, insertar el extremo macho roscado en la tapa final 12 y retirarla, junto con la camisa del cilindro del
intensificador 28 y los anillos tóricos 10 y 13.
Introducir la varilla* a través del orificio del conector por la parte frontal del cuerpo del intensificador, y golpear suavemente hacia
afuera la varilla del émbolo 9 y el conjunto de émbolo.
Utilizando una llave Allen*, desatornillar los dos tornillos 25 y extraer la tapa final 12 de la camisa del cilindro del intensificador
28.
Retirar el tapón de la junta estanca 7 con una llave fija*.
Insertar la varilla* a través del orificio del conector en la parte frontal del cuerpo del intensificador, y empujar hacia afuera el
alojamiento de la junta estanca 5 y los anillos tóricos y collarines estancos asociados.
Extraer el conjunto de alojamiento de válvula 34 del cuerpo principal con una llave fija*. Limpiar utilizando una pistola de aire de
baja presión.
Extraer la varilla del émbolo 9 del émbolo de aire 11 del intensificador, sujetando los primeros 20 mm (3/4") de la varilla en un
tornillo de banco con mordazas blandas, prestando especial cuidado para no dañar o marcar la superficie de trabajo.
Desatornillar la contratuerca 17 con una llave fija*.
Montar en orden inverso al seguido para el desmontaje, observando lo siguiente:
Limpiar todos los componentes y renovar los anillos tóricos.
Lubrificar todas las juntas con grasa de litio Moly.
El conjunto de alojamiento de válvula 34 debe ser colocado de nuevo utilizando un adhesivo de relleno para roscas.
Montar el conjunto del émbolo utilizando una tuerca 17 nueva.
La tapa final 12 debe ajustarse correctamente en el interior del anillo de retención 14. La máquina no debe ponerse en marcha si
la tapa final no ha sido colocada.
I M P O R TA N T E
El cebado es SIEMPRE necesario después de que se haya desmontado la máquina y como paso previo
a la puesta en marcha.
* Se refiere a componentes incluidos en el kit de mantenimiento 0753 Mk II. Para la lista completa, véase la página 61.
Los números de componentes indicados en negrillas se refieren a la ilustración y lista de componentes que aparecen en la página contigua.
32
Intensificador 07531-02200
1
3
5
2
4
37
36
6
9
7
8
11
13
10
12
15
14
16
Nota
unidades no
* Algunas
incluyen estos componentes
35
33
34
17
6
18
38
(La conexión requerida se
consigue a través de
puertos internos)
19
39
'B'
40
20
32
31
41
*
21
22
30
29
42
*
28
27
26
46
45
44
47
24
25
48
VISTA SECCIÓN "B"
23
'A'
43
49
50
54
52
51
VISTA VÁLVULA FESTO
53
VISTA SECCIÓN "A"
VISTA VÁLVULA COMPAIR
LISTA DE COMPONENTES 07531-02200
COMPONENTE
1
2
3
4
5
6
7
8
9
10
11
12
13
14
15
16
17
18
19
20
21
22
23
24
25
26
27
REFERENCIA
07003-00037
07240-00211
07001-00418
07240-00210
71420-02006
07003-00153
71420-02007
71420-02300
71420-02008
07003-00182
07531-00202
07531-00204
07003-00183
07004-00069
07240-00213
07240-00214
07002-00017
07240-00215
07001-00417
07240-00216
07003-00042
07005-00041
07003-00065
07240-00220
07001-00375
07003-00238
07001-00396
DESCRIPCION
JUNTA ESTANCA
TORNILLO DE LLENADO
TORNILLO DE PURGA
PLACA DE CUBIERTA
ALOJAMIENTO DE LA JUNTA DE ESTANQUEIDAD
ANILLO TÓRICO
TAPÓN DE JUNTA ESTANCA
CONJUNTO CUERPO
VARILLA DE ÉMBOLO
ANILLO TÓRICO
EMBOLO NEUMÁTICO
TAPA FINAL
ANILLO TÓRICO
ANILLO DE RETENCIÓN
SILENCIADOR DE ESPUMA
CUBIERTA DEL SILENCIADOR
TUERCA
ESPACIADOR
TORNILLO
PLACA DE RETENCIÓN
ANILLO TÓRICO
CONECTOR
ARANDELA
PLACA DE PROTECCIÓN
TORNILLO
ANILLO TÓRICO
TORNILLO
CANTIDAD
1
1
1
1
1
2
1
1
1
1
1
1
1
1
1
1
1
1
1
1
1
1
1
1
2
1
4
COMPORECAMBIOS NENTE
1
1
1
1
1
1
1
1
1
1
-
28
29
30
31
32
33
34
35
36
37
38
39
40
41
42
43
44
45
46
47
48
49
50
51
52
53
54
REFERENCIA
DESCRIPCION
07531-00201
07003-00337
07003-00336
07005-00406
07005-00759
07003-00142
07240-00400
07240-00209
07002-00073
07001-00554
07007-01504
07240-00217
07531-00205
07005-00596
07245-00103
07005-00590
07005-01431
07005-00668
07005-00670
07005-01084
07005-01524
07001-00176
07007-00292
07005-00647
07005-01085
07005-00855
07007-01503
RECUBRIMIENTO AISLANTE DEL INTENSIFICADOR
COLLARÍN ESTANCO
COLLARÍN ESTANCO
CONECTOR
CONECTOR RÁPIDO
JUNTA ESTANCA
CONJUNTO ALOJAMIENTO VÁLVULA
JUNTA DE ESTANQUEIDAD
ARANDELA
TORNILLO
ETIQUETA
ETIQUETA
ETIQUETA
* TUBO PLÁSTICO 6 MM
* CONECTOR DE VACÍO
VÁLVULA COMPAIR
CONECTOR DE PASAMUROS
TAPÓN M5
ANILLO DE ESTANQUEIDAD M5
TUBO PLÁSTICO 4 MM (150 mm)
VÁLVULA FESTO
TORNILLO
TAPA GUARDAPOLVO BSP 1/4”
CONECTOR
TUBO PLÁSTICO 6 MM (150 mm)
UNIÓN DE PASAMUROS
ETIQUETA
CANTIDAD
1
1
2
1
1
2
1
1
4
4
1
1
2
2
1
1
1
1
1
3
1
1
1
1
RECAMBIOS
1
2
1
1
1
1
1
1
-
33
Válvula Piloto 07005-00590 - Mantenimiento
Instrucciones de Desmontaje
Obsérvese que estas instrucciones para el servicio se refieren a la válvula Compair en el caso de que se incorpore.
El mantenimiento de la válvula se limita a la extracción/sustitución de los anillos tóricos.
•
Extraer los tornillos 24 y retirar el conjunto piloto.
•
Extraer el émbolo 11 y desechar los anillos tóricos 3, 10, 4 y 5.
•
Retirar los tornillos 26 y 21 y extraer las tapas finales 22 y 25.
•
Sacar los émbolos 12 y 18 y extraer los anillos tóricos 7 y 9 de los émbolos.
•
Separar el eje 16 del cuerpo, prestando especial atención para no dañar la superficie del eje, y extraer las arandelas de
posicionamiento 14
y 17, el anillo tórico 8, los espaciadores 15 y el anillo tórico 6 de cada extremo del cuerpo de la válvula.
•
Extraer los cinco anillos tóricos 4 de interfaz .
•
Desechar TODOS los anillos tóricos extraídos.
•
Limpiar todos los componentes con parafina o con bencina mineral. NO UTILIZAR DISOLVENTES. Secar todos los componentes.
•
Poner una ligera capa de grasa CENTOPLEX 2 en el cuerpo de la válvula 23, cuerpo de la válvula piloto 19, tapas finales 22 y 25 y
todos los nuevos anillos tóricos.
•
Colocar nuevos anillos tóricos 10, 4 y 5 en el émbolo 11 e introducir en el cuerpo de la válvula piloto.
•
Colocar nuevos anillos tóricos 3, 10 y 6 en el cuerpo de la válvula piloto, colocar la tapa superior 20 en posición y asegurar el
conjunto de la válvula piloto para mantener el cuerpo 23 de la válvula con los tornillos 24. Asegurarse de que el alojamiento de
estanqueidad se encuentre mirando hacia arriba con el G1/4 en la parte inferior. Asegurarse de que la orientación del émbolo 11 es la
correcta.
•
Con el cuerpo de válvula principal 23 en la misma posición, colocar la arandela verde 17 en el lado izquierdo del conjunto de la válvula.
•
Empezando desde el lado derecho de la válvula, montar alternativamente los anillos tóricos 8 y los espaciadores 15 (6 juntas estancas
y 5 espaciadores) y completar finalmente el conjunto apilado con la arandela blanca de posicionamiento 14.
•
Poner una ligera capa de grasa CENTOPLEX 2 en el eje 16, suministrada con el kit de mantenimiento, y deslizar el eje a través del
conjunto de anillos tóricos/espaciadores.
•
Colocar los anillos tóricos 9 y 7 a los émbolos respectivos 18 y 12, colocar los anillos tóricos 6 en el extremo del cuerpo de válvula
principal 23.
•
Insertar los émbolos en las tapas finales 25 y 22 y montar las tapas finales a la válvula, teniendo cuidado de posicionar los ejes de
émbolo en los agujeros de los extremos del eje 16.
•
Asegurar los conjuntos de tapas finales al cuerpo de válvula principal 23 con los tornillos 26 y 21.
•
Colocar los anillos tóricos 4 de interfaz en sus alojamientos del cuerpo de válvula principal.
•
Si la conexión del tubo a la válvula ha sido dañado, sustituir el manguito de plástico 1 y levantar el anillo tórico 1 del cartucho 27.
•
Colocar el nuevo anillo tórico 1 e insertar el manguito de plástico 2 en el cartucho.
I M P O R TA N T E
El cebado es SIEMPRE necesario después de que se haya desmontado la máquina y como paso previo
a la puesta en marcha.
Los números de componentes indicados en negrillas se refieren a la ilustración y lista de números de componentes que aparecen
en la página contigua.
34
Válvula Piloto 07005-00590 - Información sobre recambios
1
20
18
2
27
10
3
19
4
10
11
6
5
6
12
4
13
VISTAON
SEGÚN
“A”'A'
VIEW
ARROW
9
26
17
25
16
15
8
23
24
14
7
22
ANILLOS
TORICOS
DE
INTERFACE
'O' RINGS
INTERFAZ
21
'A'
LISTA DE COMPONENTES DE LA VALVULA 07005-00590
COMPONENTE
REFERENCIA
1
2
3
4
5
6
7
8
9
10
11
12
13
14
07005-00599
07005-00598
07003-00204
07003-00103
07003-00042
07003-00121
08005-00127
07003-00105
07003-00178
07003-00017
07005-00590
-
DESCRIPCION
• ANILLO TORICO
MANGUITO DE PLASTICO
• ANILLO TORICO
• ANILLO TORICO
• ANILLO TORICO
• ANILLO TORICO
• ANILLO TORICO
• ANILLO TORICO
• ANILLO TORICO
• ANILLO TORICO
† EMBOLO
† EMBOLO
CONJUNTO DE VALVULA
† ARANDELA
CANTIDAD RECAMBIOS
1
6
1
4
1
6
1
2
1
1
1
-
COMPONENTE
REFERENCIA
15
16
17
18
19
20
21
22
23
24
25
26
27
-
DESCRIPCION
† ESPACIADOR
† EJE
† ARANDELA
† EMBOLO
† CUERPO
† CUBIERTA SUPERIOR
† TORNILLO
† TAPA FINAL
† CUERPO
† TORNILLO
† TAPA FINAL
† TORNILLO
† CARTUCHO
CANTIDAD RECAMBIOS
5
1
1
1
1
1
2
1
1
2
1
2
1
-
*
El conjunto de estos componentes constituye un kit de mantenimiento para la válvula, junto con un tubo de grasa Centoplex 2, pudiéndose
solicitar el juego a Avdel, con referencia 07005-01538.
†
No disponible como recambio
35
Cebado
El cambio de aceite es SIEMPRE necesario después de desmontar la máquina y antes de hacerla funcionar. Es necesario ajustar la
carrera después de un uso considerable, cuando la carrera es insuficiente y los remaches no son colocados completamente mediante
una actuación del gatillo.
Detalles del Aceite
El aceite recomendado para cebado es Hyspin VG32 y AWS 32, disponible en contenedores de 0,5 litros (número de pieza 0799200002) o en contenedores de un galón (número de pieza 07992-00006). Sírvanse consultar los datos de seguridad que aparecen a
continuación.
Datos de Seguridad del Aceite Hyspin VG 32 y AWS 32
Primeros auxilios
PIEL:
Lavar a fondo con jabón y agua tan pronto como sea posible. El contacto casual no requiere ninguna atención inmediata. El contacto en un
plazo corto no requiere una atención inmediata.
INGESTION:
Pídase la atención médica inmediatamente. NO se debe inducir a vomitar.
OJOS:
Irrigar inmediatamente con agua durante varios minutos. Aunque NO ES un irritante primario, puede ocurrir una irritación menor a continuación del
contacto.
Incendio
Medios extintores apropiados: CO2, polvo seco, espuma o niebla de agua. NO usar chorros de agua.
Medio ambiente
ELIMINACION DE RESIDUOS: A través de un contratista autorizado en un lugar permitido. Pueden se incinerados. El producto usado puede
ser enviado para su recuperación.
DERRAME: Impedir la entrada en desagües, cloacas y cursos de agua. Embeberlo con material absorbente.
Manipulación
Usar protección de ojos, guantes impermeables (p.e. de PVC) y un delantal de plástico. Usarlo en una área bien ventilada.
Almacenaje
Sin precauciones especiales.
Procedimiento de Cebado
I M P O R TA N T E
NO ACCIONAR EL GATILLO MIENTRAS SE ESTÉ EXTRAYENDO EL TORNILLO DE PURGA.
Todas las operaciones deberán llevarse a cabo sobre un banco limpio, con las manos limpias y en una zona limpia.
Asegurarse de que el aceite nuevo se encuentra perfectamente limpio y libre de burbujas de aire.
DEBEN tomarse precauciones en todo momento, de forma que se asegure que ninguna materia extraña se introduce en
la máquina, de lo contrario pueden producirse graves daños.
•
•
•
•
•
•
•
•
Retirar el tornillo 2 y la junta estanca 1 de la placa de cubierta de plástico 4 en el depósito del intensificador.
Verter aceite de cebado en el depósito hasta aproximadamente 12 mm (1/2”) de la parte superior.
Sustituir el tornillo 2 y la junta estanca 1.
Conectar la unidad intensificadora al suministro de aire. Extraer el tornillo del depósito.
Con la unidad de pistola incorporada a la unidad intensificadora y sostenida por debajo del nivel de ésta, desatornillar dos vueltas
el tornillo de purga 58 del conjunto del tapón de purga 2 en la máquina 07530 Mk II, o el tornillo de purga 66 del conjunto del
tapón de purga 30 en la máquina 07532 Mk II y permitir que fluya el aceite fuera de la máquina.
Cuando el aceite fluya libremente y sin contener burbujas de aire, apretar el tornillo de purga.
Llenar el depósito de la unidad intensificadora con aceite de cebado.
Someter a la máquina a ciclos de operaciones hasta que cualquier burbuja de aire presente en el aceite sea expulsada hacia el
depósito de aceite.
Los números de componentes en negrilla se refieren a los montajes generales y a las listas de componentes de las páginas 66-71.
36
Diagnóstico de averías
SINTOMA
POSIBLE CAUSA
REMEDIO
R E F. P Á G I N A
La máquina no coloca
Baja presión de aire.
Incrementar presión de aire.
remache.
Falta de lubricación.
Lubrificar la máquina a través de la entrada
de aire.
Elevado esfuerzo de carga.
Comprobar agarre remache y tamaño del
agujero de la aplicación.
Comprobar las medidas correctas del mandril.
Mordazas rotas o desgastadas.
Mordazas nuevas.
Mordazas desconectadas.
Conectar mordazas.
Aire en el sistema hidráulico.
Ver "Procedimiento de cambio de aceite".
Deslizamiento del
Mordazas desgastadas o sucias.
Limpiar o renovar según sea necesario.
mandril - Mordazas no
Presión/volumen de aire insuficiente.
Incrementar la presión/volumen de aire.
agarran mandril.
Interruptor de mordazas no operativo.
Reemplazar interruptor.
Fugas de aire a las mordazas.
Renovar los anillos tóricos del émbolo 8.
Mandril roto, sin alcanzar mordazas.
Sustituir mandril.
Válvula antirretorno defectuosa.
Sustituir válvula antirretorno.
Mordazas no sueltan
Mordazas o aprietamordazas sucios.
Limpiar y lubricar.
mandril.
Interruptor de mordazas defectuoso.
Sustituir anillos tóricos.
No se alimentan
Mordazas no conectadas.
Conectar mordazas.
remaches a través de la
Mordazas desgastadas.
Renovar mordazas.
boquilla.
Orientación incorrecta del cursor.
Recolocar, asegurando la orientación
36
correcta.
Cursor incorrecto
Colocar cursor correcto
Boquilla incorrecta.
Colocar boquillas correctas.
Muelle del mandril no incorporado.
Colocar el muelle del mandril correcto.
Ajustar el espacio a 1,5 mm - 3 mm (1/16" -
10
Espacio incorrecto entre la cabeza del remache 1/8"). Ver "Carga de la Máquina".
y las boquillas una vez cargada la máquina.
Excesivo desgaste de
Cursor con tacto pegajoso.
Limpiar y lubrificar cursor.
Muelle exterior débil alrededor del cursor.
Renovar cursor.
Incorporado muelle del mandril incorrecto.
Colocar muelle del mandril correcto.
Esfuerzo de carga elevado.
Comprobar tamaño y espesor del agujero de
mordazas.
Alimentación de más de
aplicación y la capacidad de agarre del remache.
Deslizamiento mandril.
un remache a la vez.
Comprobar según "Deslizamiento de
mandril", punto 2.
Espacio incorrecto entre la cabeza del remache Ajustar el espacio a 1,5 mm - 3 mm (1/16" y las boquillas una vez cargada la máquina.
1/8"). Ver "Carga de la Máquina".
10
Otros síntomas o fallos deberán ser indicados a su distribuidor o centro de reparaciones local autorizado de Avdel.
37
Notas
38
Declaración de Conformidad
Nosotros, Avdel UK Limited; Watchmead Industrial Estate, Welwyn Garden City, Hertfordshire, AL7 1LY declaramos bajo
nuestra única responsabilidad que el producto:
Modelo tipo 0753 MkII modelos 07530 - 07532
Máquina manual nº de serie
................................................
Intensificador nº de serie...............................................
Al que se refiere esta declaración cumple con las siguientes normas:
EN ISO 12100 - parte 1 & 2
BS EN ISO 8662 - parte 6
BS EN ISO 3744
BS EN ISO 11202
BS EN 982
ISO EN 792 - parte 13-2000
BS EN 983
Siguiendo las disposiciones de la Directiva de Máquinas 2006/42/EC.
A. Seewraj - Director de diseño de productos - Herramientas de automatización
Fecha de emisión
Esta caja contiene una máquina con alimentación que está en
conformidad con la Directiva de Máquinas 2006/42/EC.
La ‘Declaración de Conformidad’ se encuentra en el interior.
39
Since 1936
2010
AUSTRALIA
Infastec (Australia) Pty Ltd.
891 Wellington Road
Rowville
Victoria 3178
Tel: +61 3 9765 6400
Fax: +61 3 9765 6445
[email protected]
GERMAN
Avdel Deutschland GmbH
Rotenburger Str. 28
30659 Hannover
Tel: +49 (0) 511 7288 0
Fax: +49 (0) 511 7288 133
[email protected]
CANADA
Avdel Canada Limited
1030 Lorimar Drive
Mississauga
Ontario L5S 1R8
Tel: +1 905 364 0664
+800 268 9947
Fax: +1 905 364 0678
+800 594 7661
[email protected]
INDIA
Infastech Fastening Technologies
India Private Limited
Plot No 0Z-14, Hi Tech SEZ,
SIPCOT Industrial Growth Center,
Oragadam, Sriperumbudur Taluk,
Kanchipuram District,
602105 Tamilnadu
Tel: +91 44 4711 8001
Fax: +91 44 4711 8009
info-in@infastech. com
T
CHINA
Infastech (China) Ltd
RM 1708, 17/F.,
Nanyang Plaza,
57 Hung To Rd., Kwun Tong
Hong Kong
Tel: +852 2950 0631
Fax: +852 2950 0022
[email protected]
FRANCE
Avdel France S.A.S.
Bat. Le Monet Paris Nord 2
9 Allée des Impressionistes
CS 59328 Villepinte
95941 Roissy CDG Cedex
Tel: +33 (0) 149 909500
Fax: +33 (0) 149 909550
[email protected]
T
ITALY
Avdel Italia S.r.L.
Viale Lombardia 51/53
20861 Brugherio (MB)
Tel: +39 039 2879911
Fax: +39 039 2873079
[email protected]
JAPAN
Infastech Kabushiki Kaisha
Center Minami SKY,
3-1 Chigasaki-Chuo, Tsuzuki-ku,
Yokohama-city,
Kanagawa Prefecture
Japan 224-0032
Tel: +81 45 947 1200
Fax: +81 45 947 1205
[email protected]
Manual No.
Issue
Change Note No.
07900-00724
B5
13/112
MALAYSIA
Infastech (Malaysia) Sdn Bhd
Lot 63 Persiaran Bunga
Tanjung 1,
Senawang Industrial Park
70400 Seremban
Negeri Sembilan
Tel: +606 676 7168
Fax: +606 676 7101
[email protected]
SINGAPORE
Infastech (Singapore) Pte Ltd.
31 Kaki Bukit Road 3
#05-03/06 Techlink
Singapore, 417818
Tel: +65 6372 5653
Fax: +65 6744 5643
[email protected]
SOUTH KOREA
Infastech (Korea) Ltd.
32-9, Jik-dong,
Gwangju-si, Gyeonggi-do
Korea, 464-090
Tel: +82 31 661 6342
+82 31 798 6340
Fax: +82 31 798 6342
[email protected]
SPAIN
Avdel Spain S.A
C/ Puerto de la
Morcuera, 14
Poligono Industrial Prado
Overa
Ctra. de Toledo, km 7,8
28919 Leganés (Madrid)
Tel: +34 91 3416767
Fax: +34 91 3416740
[email protected]
TAIWAN
Infastech/Tri-Star Limited
No 269-7, Baodong Rd,
Guanmiao Dist.
Tainan City
Taiwan, R.O.C. 71841
Tel: +886 6 596 5798 (ext 201)
Fax: +886 6 596 5758
[email protected]
THAILAND
Infastech Thai Co., Ltd
64/132 Moo 4 Tambon
Pluakdaeng
Amphur Pluakdaeng Rayong
21140 Thailand
Tel: +66 (0) 38 656360
Fax: +66 (0) 38 656346
info-th@infastech. com
UNITED KINGDOM
Avdel UK Limited
Pacific House
2 Swiftfields
Watchmead Industrial Estate
Welwyn Garden City
Hertfordshire AL7 1LY
Tel: +44 (0) 1707 292000
Fax: +44 (0) 1707 292199
[email protected]
USA
Avdel USA LLC
614 NC Highway 200 South
Stanfield, North Carolina 28163
Tel: +1 704 888 7100
Fax: +1 704 888 0258
[email protected]
Infastech (Decorah) LLC
1304 Kerr Drive
Decorah, IA 52101
Tel: +1 563 383 4216
Fax: +1 563 387 3540
www.avdel-global.com
www.infastech.com
AV™, Aut osert ® (equipment), Avbolt ®, Avdel ®, Avdelmate ®, Avdel TX2000 ®, Avdelok ®, Avex ®, Avibulb®, Avinox®, Avinut ®, Avlug ®, Avmatic ®,
Avplas®, Avseal ®, Avsert ®, Avtainer ®, Avtronic ®, Briv ®, Bulbex ®, Chobert ®, Eurosert ®, Fastriv ®, Finsert ®, Genesis ®, Grovit ®, Hemlok®, Hexsert ®,
Holding your world together ®, Hydra ®, Infalok ®, Interlock ®, Klamp-Tite ®, Klamptite KTR ®, Kvex ®, Maxlok ®, Monobolt ®, Monob ulb®, Neobolt ®,
Nutsert ®, Nutsert SQ ®, Portariv ®, Rivmatic ®, Rivscrew ®, Speed Fastening ®, Squaresert ®, Stavex ®, Supersert® , Thin Sheet Nutsert ®, Titan ®,
T- Lok ®, TLR ®, TSN ®, TX2000 ®, Versa- Nut ®, Viking ® and Viking 360 ® are trademarks of Avdel UK Limited. eRiv™, Infastech ®, NeoSpeed ® and
Our Technology, Your Success™ are trademarks of Infastech Intellectual Properties Pte Ltd. The names and logos of other companies
mentioned herein may be trademarks of their respective owner s.
This document is for informational purposes only. Infastech makes no warranties, expressed or implied, in this document.
Data shown is subject to change without prior notice as a result of continuous product development and improvement policy.
Your local Avdel representative is at your disposal should you need to confirm latest information.
© 2012 Infastech
Since 1922
Instruction Manual
TY
PE
07
53
Original Instruction
0753 MkII type
07530-07532
H y d ro - P n e u m a t i c P o w e r To o l
Contents
Safety Rules
4
Specifications
Specification for 0753 MkII Type Tool
Specification for 07531 Intensifier
5
5
Intent of Use
Tool Dimensions
6
7
Putting into Service
Air Supply
Mechanical Cursors
Cursor
Loading and Re-loading the Tool
Operating Procedure
Mandrel Follower Springs Identification
and Orientation
8
9
10
10-11
11
12
Nose Assemblies
Nose Jaws
Selecting a Nose Jaw
Nose Jaw Selection Tables
Mandrels and Mandrel Follower Springs
Chobert® and Grovit® Selection Tables
Briv® Selection Tables
Mandrel Head Types and 'P' Length
Avlug®, Avsert®, Avtronic® and Rivscrew®
Selection Tables
13
14
15-16
17
17-18
19-20
20
21
Servicing the Tool
Daily / Weekly
Moly Lithium Grease EP 3735 Safety Data
Service Kit
Maintenance
Dismantling 07530-02200 MkII
Dismantling 07532-02200 MkII
General Assembly and Parts List 07530-02200 MkII
General Assembly and Parts List 07532-02200 MkII
Intensifier 07531-02200
Pilot valve 07005-00590 Spares Information
24-25
26-27
28-29
30-31
32-33
34-35
Priming
Oil Details
Hyspin VG 32 and AWS 32 Oil Safety Data
Priming Procedure
36
36
36
Fault Diagnosis
Symptom, Possible Cause & Remedy
37
22
22
23
LIMITED WARRANTY
Avdel makes the limited warranty that its products will be free of defects in workmanship and materials
which occur under normal operating conditions. This Limited Warranty is contingent upon: (1) the product
being installed, maintained and operated in accordance with product literature and instructions, and (2)
confirmation by Avdel of such defect, upon inspection and testing. Avdel makes the foregoing limited
warranty for a period of twelve (12) months following Avdel’s delivery of the product to the direct purchaser
from Avdel. In the event of any breach of the foregoing warranty, the sole remedy shall be to return the
defective Goods for replacement or refund for the purchase price at Avdel’s option. THE FOREGOING
EXPRESS LIMITED WARRANTY AND REMEDY ARE EXCLUSIVE AND ARE IN LIEU OF ALL OTHER WARRANTIES
AND REMEDIES. ANY IMPLIED WARRANTY AS TO QUALITY, FITNESS FOR PURPOSE, OR MERCHANTABILITY
ARE HEREBY SPECIFICALLY DISCLAIMED AND EXCLUDED BY AVDEL.
Avdel UK Limited policy is one of continuous product development and improvement and we reserve the right to change the specification of any product without prior notice.
3
Safety Rules
This instruction manual must be read with particular attention to the following safety rules, by any person
installing, operating, or servicing this tool.
1
Do not use outside the design intent.
2
The Hand Tool and Intensifier have been tested as separate items and combined. They must only be used together and under no
circumstances for any other purposes.
3
Do not use equipment with this tool/machine other than that recommended and supplied by Avdel UK Limited.
4
Any modification undertaken by the customer to the tool/machine, nose assemblies, accessories or any equipment supplied by Avdel UK
Limited or their representatives, shall be the customer’s entire responsibility. Avdel UK Limited will be pleased to advise upon any
proposed modification.
5
The tool/machine must be maintained in a safe working condition at all times and examined at regular intervals for damage and function
by trained competent personnel. Any dismantling procedure shall be undertaken only by personnel trained in Avdel UK Limited procedures.
Do not dismantle this tool/machine without prior reference to the maintenance instructions. Please contact Avdel UK Limited with your
training requirements.
6
The tool/machine shall at all times be operated in accordance with relevant Health and Safety legislation. In the U.K. the “Health and
Safety at Work etc. Act 1974” applies. Any question regarding the correct operation of the tool/machine and operator safety should be
directed to Avdel UK Limited.
7
The precautions to be observed when using this tool/machine must be explained by the customer to all operators.
8
Always disconnect the airline from the tool/machine inlet before attempting to adjust, fit or remove a nose assembly.
9
Do not operate a tool/machine that is directed towards any person(s) or the operator.
10 Always adopt a firm footing or a stable position before operating the tool/machine.
11 Ensure that vent holes do not become blocked or covered and that hoses are always in good condition.
12 The operating pressure shall not exceed 7 bar (100 lbf/in2).
13 The combination of fastener, mandrel, hole size and sheet thickness shall be in accordance with Avdel UK Limited
Specifications.
14 Do not operate the tool if it is not fitted with a complete nose assembly unless specifically instructed otherwise.
15 When using the tool, the wearing of safety glasses is required both by the operator and others in the vicinity to protect against fastener
ejection, should a fastener be placed ‘in air’. We recommend wearing gloves if there are sharp edges or corners on the application.
16 Take care to avoid entanglement of loose clothes, ties, long hair, cleaning rags etc. in the moving parts of the tool which should be kept
dry and clean for best possible grip.
17 When carrying the tool from place to place keep hands away from the trigger/lever to avoid inadvertent startup.
18 Excessive contact with hydraulic oil should be avoided. To minimize the possibility of rashes, care should be taken to wash thoroughly.
I M P O R TA N T
While a small amount of wear and marking will naturally occur through normal and correct use of mandrels, they must
be regularly examined for excessive wear and marking, with particular attention to the head diameter, the tail jaw
gripping area of the shank or heavy pitting of the shank and any mandrel distortion. Mandrels which fail during use
could forcibly exit the tool. It is the customer's responsibility to ensure that mandrels are replaced before any
excessive levels or wear and always before the maximum recommended number of placings. Contact your Avdel
representative who will let you know what that figure is by measuring the broach load of your application with a
calibrated test tool. These tools can also be purchased under Part Number 07900-09080, supplied with all necessary
information for testing in this manual.
4
Specifications
S p e c i f i c a t i o n f o r 0 7 5 3 M k I I Ty p e To o l
Air Pressure
Minimum - Maximum
5-7 bar (70-100 lbf/in2)
Free Air Volume Required
@ 5.1 bar /75 lbf/in2
2.6 litres (0.09 ft3)
Stroke
Minimum
30.0 mm (1.18 in)
2
Pull Force
@ 5.5 bar /80 lbf/in
3.89 kN (875 lbf)
Cycle time
Approximately
1 second
Noise Level
Less than
70 dB(A)
Weight
Pistol
1.2 kg (2.64 lb)
Vibration
Less than
2.5 m/s2 (8 ft/s2)
Specification for 07531 Intensifier
Air Pressure
Intensification Ratio
Minimum - Maximum
5-7 bar (70-100 lbf/in2)
32:1
5
Intent of Use
The pneumatic 0753 MkII type tool is designed to place Avdel® speed fasteners (except 1/16” Avlug®) making it ideal for batch or flowline assembly in a wide variety of applications throughout all industries.
The Hand Tool and Intensifier have been tested as separate items and combined. They must only be used together and for no other
purposes. Refer to "Putting into Service" on page 8 for connection details.
Both models, the 07530 MkII and 07532 MkII are hand-held lightweight tools. Their only difference lies in the location of the hose entry.
The top entry on the 07532 MkII tool allows suspension from an added mounting plate, see drawing opposite. Part numbers are shown
to order a complete tool including the intensifier and all hoses but no nose equipment.
The pistol number for the 07530 MkII model is 07530-02200 and is 07532-02200 for the 07532 MkII model. See the general
assemblies on pages 28-31.
Both models will place the same fasteners and both will place most repetition fasteners, as shown in the table below.
Both models make use of the same nose equipment. Reference must be made to the Nose Equipment section of the manual when
selecting compatible components for the type and size of fastener used in your application (see pages 13-21). Nose jaw dimensions
are shown on page 14.
FASTENER SIZE
FASTENER NAME
3/32"
1/8"
5/32"
3/16"
CHOBERT®
●
●
●
●
GROVIT®
●
●
●
●
AVLUG®
●
●
BRIV®
●
●
●
●
2.5mm
2.8mm
3mm
3.5mm
4mm
6mm
M2.5
4-40
UNC
M3
6-32
UNC
●
●
RIVSCREW®
●
AVTRONIC®
●
AVSERT®
6
1/4"
●
●
●
●
●
Intent of Use
To o l D i m e n s i o n s - 0 7 5 3 0 M k I I M o d e l
475
18.70
Part Number 07530-02100
338
13.30
50
1.96
07
53
60
2.36
163 140
6.41 5.51
51
2
98
3.85
28
1.10
130
5.12
420
16.54
200
7.87
To o l D i m e n s i o n s - 0 7 5 3 2 M k I I M o d e l
Part Number 07532-02100
130
5.12
420
16.54
200
7.87
07
53
60
2.36
163 140
6.41 5.51
50
1.96
98
3.85
28
1.10
475
18.70
51
2
338
13.30
Dimensions shown in bold are millimetres. Other dimensions are in inches.
7
Putting into Service
Air Supply
All tools are operated with compressed air at an optimum pressure of 5.5 bar. We recommend the use of pressure regulators and
automatic oiling/filtering systems on the main air supply. To ensure maximum tool life and minimum tool maintenance they should be fitted
within 3 metres of the tool (see diagram below).
Air supply hoses should have a minimum working effective pressure rating of 150% of the maximum pressure produced in the system or 10
bar, whichever is the highest. Air hoses should be oil resistant, have an abrasion resistant exterior and should be armoured where operating
conditions may result in hoses being damaged. All air supply hoses MUST have a minimum bore diameter of 6.4 millimetres or 1/4 inch.
Read daily servicing details page 22.
PE
AXIMUM
SM
E
TR
TAKE OFF POINT
FROM MAIN SUPPLY
141
12 6
6 8 10
0 2 4
3M
E
TY
07
53
STOP COCK
(USED DURING MAINTENANCE
OF FILTER/REGULATOR
OR LUBRICATION UNITS)
MAIN SUPPLY
DRAIN POINT
LUBRICATOR
PRESSURE REGULATOR
AND FILTER
(DRAIN DAILY)
Follow the steps below when connecting the tool to the intensifier and main air supply:
•
•
Push the end of the large hydraulic hose from the tool into the quick release connector on the end of the intensifier.
On the front face of the intensifier:
Push the blue pneumatic (4mm OD) line into the reducer fitting which is located in the left hand bulkhead connector.
Push the black pneumatic (4mm OD) line into the plastic collet of the right hand bulkhead connector.
•
•
•
8
Fit a pneumatic hose between the male connector at the rear of the intensifier and main air supply.
Putting into Service
TY
PE
07
53
Mechanical Cursors
SPRING
LOADED END
TOOL
BARREL
CURSOR
NOSE
JAWS
For reference there are three different mechanical cursor types:
•
•
•
07271-01100
07279-05843
07279-05845
Used for Standard mandrels and 5/32” Disposable mandrels
Used for 1/8” Disposable mandrels
Used for 3/16” Disposable mandrels
The difference in the above assemblies is the internal diameter of the End Plug.
END PLUG
These are colour coded see below:
GOLD
SILVER
9
Putting into Service
Cursor
IMPORTANT
If fitted incorrectly, the cursor will not allow feeding of the fasteners.
While the cursor will be fitted the correct way round when the tool is supplied, we recommend that you check its orientation before
fitting the nose equipment. The sprung loaded, slightly concave, end of the cursor should point towards the front of the tool as shown
in the illustration.
When fitted the correct way round, the cursor will easily slide out of the barrel when a mandrel is pushed into its centre then pulled
back.
To reverse the orientation of the cursor, follow these steps:
Item numbers in bold refer to the general assembly and parts list for
the 07530-02200 MkII type on pages 28-29. For the 07532-02200
MkII type, the procedure is the same but the part numbers must be
taken from the general assembly and parts list on pages 30-31.
CURSOR
SPRING
LOADED END
TOOL
BARREL
•
Remove the clip 47 and slide off end cap 38.
•
Using an Allen Key, remove one cap head screw 44 ensuring that
any trapped air is exhausted. remove the second cap head screw
44.
•
Pull out rear plug 46.
•
Pull out tail jaw piston assembly 14 together with jaws 9.
•
Lift out spring 13 and jaw housing 8.
•
Insert a mandrel into the hole in the rear end of barrel 25 until it protrudes through the front of the barrel, then pull out the mandrel
and cursor together through the front.
•
Reassemble components in reverse order.
•
Insert Mechanical Cursor Assembly 5 into the front of the barrel, correct way round.
NOSE
JAWS
L o a d i n g a n d R e l o a d i n g t h e To o l
IMPORTANT
The procedure for loading the tool and for fitting the nose equipment to the tool is integral.
When ordering a complete tool or system you will normally be supplied with all the nose equipment required for the fastener to be
placed.
To identify nose equipment components or to select the correct elements, read the nose equipment section, on pages 13-21.
If you have been supplied with a nose jaw, mandrels and mandrel follower springs proceed with loading the tool and fitting the nose
equipment as shown overleaf.
Item numbers in bold refer to the general assembly and parts list for the 07530-02200 MkII type on pages 28-29. For the 07532-02200 MkII
type, the procedure is the same but the part numbers must be taken from the general assembly and parts list on pages 30-31.
10
Putting into Service
Loading the Tool
•
Connect the air supply to the tool.
•
Open tail jaws 9 which grip the mandrel, by switching off the tail jaw switch (items 26 and 30).
•
Screw selected nose jaws onto barrel 25 of the tool.
•
Insert a mandrel into the tail end of the fasteners through the paper pod.
•
Slide the mandrel follower spring onto the mandrel ensuring correct orientation, as shown in the table on page 12.
•
Gripping the tail end of the mandrel, tear off the paper pod from around the fasteners.
•
Open the nose jaws either by rotating the outer ring on Cam operated jaws or by pushing outwards on the jaw ends, as illustrated
below left.
•
Insert the previously assembled mandrel, mandrel follower spring and fasteners into the nose jaws until the first fastener to be placed
is protruding from the nose jaw.
•
Close the nose jaws and adjust so that the first fastener protrudes by 1.5mm - 3mm (1/16” to 1/8”), as shown in the illustration
below right.
•
Close the tail jaws to ensure the mandrel is gripped, by switching on the tail jaw switch (items 26 and 30).
1.5mm - 3mm
(1/16" - 1/8")
Reloading the Tool
•
Open tail jaws 9 of tool.
•
Open the nose jaws and pull the empty mandrel and mandrel follower spring out of the tool.
•
Reload the tool by following the above instructions, starting at stage.
O p e r a t i n g P ro c e d u r e
IMPORTANT
You must check that the cursor orientation and the nose equipment are correct before attempting to operate the tool.
•
Push the fastener, protruding from the nose jaws, fully into the application holes ensuring that the tool is held square.
•
Operate the trigger without releasing - the mandrel head is pulled through the fastener, forming the fastener into the application.
•
Remove the tool.
•
Release the trigger. The next fastener will be automatically presented through the nose jaws, ready for placing.
Item numbers in bold refer to the general assembly and parts list for the 07530-02200 MkII type on pages 28-29. For the 07532-02200 MkII
type, the procedure is the same but the part numbers must be taken from the general assembly and parts list on pages 30-31.
11
Putting into Service
MANDREL FOLLOWER SPRINGS IDENTIFICATION AND ORIENTATION
FASTENER
NAME
NOSE JAW
SIZE
(SEE NOSE EQUIPMENT SECTION)
MANDREL
SIZE
MANDREL/MANDREL FOLLOWER SPRING
AND FASTENER ASSEMBLY
MANDREL FOLLOWER SPRING
3/32"
MANDREL HEAD
STANDARD TAPERED
FERRULE
ALL
SPRING
BRIV ®
3/32"
LIMITED ACCESS &
LIMITED ACCESS CAM OPERATED
ALL
1/8"
ALL
ALL
5/32"
ALL
ALL
3/16"
ALL
ALL
6mm
STANDARD
ALL
EXCEPT 3rd
OVERSIZE
3/32"
ALL EXCEPT
STANDARD TAPERED,
LIMITED ACCESS
ALL
3/32"
STANDARD TAPERED,
LIMITED ACCESS
ALL
1/8"
ALL
ALL
5/32"
ALL
ALL EXCEPT
3rd
OVERSIZE
5/32"
ALL
3rd
OVERSIZE
3/16"
ALL
ALL EXCEPT
2nd
OVERSIZE
3/16"
ALL
2nd
OVERSIZE
1/4"
ALL
ALL
ALL
ALL
ALL
ALL
ALL
ALL
6 x 32
UNC
ALL
ALL
2.5mm
ALL
ALL
2.8mm
ALL EXCEPT
LIMITED ACCESS
ALL
2.8mm
LIMITED ACCESS
ALL
CHOBERT ®
AVLUG ®
GROVIT ®
CHOBERT ®
GROVIT ®
CHOBERT ®
2.8mm
RIVSCREW ®
3mm
3.5mm
4mm
2.5mm
AVSERT ®
4 x 40
UNC
3mm
AVTRONIC ®
12
MANDREL
Nose Assemblies
On speed fastening tools such as 0753 MkII type, the nose equipment always consists of three elements: a nose jaw, a mandrel and a
mandrel follower spring. All three items are matched to the fastener being placed and to the hole size in the application.
I M P O R TA N T
To avoid complete dismantling of the tool it is essential to check the orientation of the cursor before fitting
the nose equipment to the tool. See ‘CURSOR’ section on page 10.
It is essential that the correct nose equipment is fitted to the tool to ensure both effective placing of the
fastener and SAFE operation of the tool. READ THE SAFETY INSTRUCTIONS page 4 carefully.
To identify the correct combination of nose equipment to fit your tool first select a nose jaw by reading the section below then read the
mandrel section to select part numbers both for the mandrel itself and for the mandrel follower spring. Mandrels and mandrel follower
springs are illustrated on page 12.
To fit the nose equipment, follow the ‘Loading the Tool’ procedure page 11.
Nose Jaws
I M P O R TA N T
The wrong nose jaw could result in an incorrectly placed fastener or incorrect clench.
Nose Jaws can be categorised into 7 different basic shapes as illustrated opposite, even though internal dimensions will vary
according to the fastener it is intended for. Exact dimensions referring to the letters in the illustrations opposite are indicated in the
‘Nose Jaw Selection Tables’ on pages 15-16.
For a particular shape, there may be several options of end form giving access benefits or fastener placing enhancement.
Flat
•
•
Normal end form of all nose jaws.
Suitable on all applications with no access restrictions.
Universal
•
•
Designed for use with universal head Chobert® fasteners.
Can also be used with Briv® fasteners to obtain the highest possible clench. Note this reduces the maximum grip range of the
Briv® fastener by approximately 0.015” (0.4mm).
Recessed
•
•
For use with Briv® fasteners ONLY.
It gives a higher clench than a flat end form but less than a universal end form, with no reduction of the grip range of the fastener.
Tapered
•
•
Available as shown in the ‘Nose Jaw Selection Tables’.
Allows greater accessibility than a flat end form and places the same range.
Head Forming
•
•
For use with Rivscrew® fasteners ONLY.
Deforms the head of the fastener to achieve good clench.
13
Nose Assemblies
Selecting a Nose Jaw
•
List the name, size and material of the fastener to be placed.
•
Look for this fastener in the first column of the nose jaw selection tables on page 15
if you use imperial measurements and on page 16 if you use metric units.
•
Looking right across the table, take note of which nose jaws are available. ONLY
those shown are available.
•
Select which is most suitable for your application by referring to the respective nose
jaw drawing. If your application has no access restriction, you should select the
standard shape with a flat end form with or without a cam.
STANDARD
'B'
28.6
1.125
'E'
33.5
1.32
FLAT
'D'
UNIVERSAL RECESSED TAPERED
Available in 4 different end forms to place all
fasteners (except Rivscrew). Suitable on
applications with no or little access restriction.
LONG
LONG CURVED
LIMITED ACCESS
'B'
28.6
1.125
'B'
'B'
'F'
33.5
1.32
'E'
1/8
5/32
3/16
UNIVERSAL
'E'
'E'
28.6
1.125
RIVET
Ø
FLAT
'D'
33.5
1.32
'D'
20.5
0.81
'D'
41.4
1.63
'F'
mm
.620
.690
.720
in.
15.7
17.5
18.3
FLAT
RECESSED
RECESSED
FLAT
Available to place most of the fasteners.
Allows more penetration into applications
with no other access restriction.
Available as shown in NOSE JAW SELECTION TABLE.
Allows more penetration into applications
with restricted access.
Mandrels must be curved by hand to follow
the shape of the jaw.
Available as shown in NOSE JAW SELECTION TABLE.
Allows access into very restrictive applications.
STANDARD CAM OPERATED
LONG CAM OPERATED
LIMITED ACCESS CAM OPERATED
'B'
'B'
'B'
28.6
1.25
28.6
1.25
'E'
34
1.34
'D'
'E'
34
1.34
'D'
'E'
28.6
1.25
FLAT
HEAD FORMING (HF)
FLAT
37.1
1.46
'D'
FLAT
Available as shown in NOSE JAW SELECTION TABLE overleaf. Equivalent functions to the Standard and Limited Access above with the
addition of a cam to ease and speed up the nose jaw opening thus the pod reloading procedure.
Dimensions shown in bold are millimetres. Other dimensions are in inches.
14
Nose Assemblies
Nose Jaw Selection - Imperial
The ‘REF Nº’ column cross references with the ‘REF Nº’ columns in the mandrel section. It identifies both the mandrel and mandrel
follower spring required for a particular nose jaw with a specific fastener.
FASTENER
REF.
Nº
NOSE JAW
DIMENSIONS
'B'
'D'
'E'
TYPE AND
END FORM
PART Nº
1
STANDARD - FLAT
07150-03003
.36
1.30
.16
1
STD. CAM OPERATED - FLAT
07170-04500
.36
1.30
.16
2
STANDARD - TAPERED
07170-03103
.36
1.30
4
LONG - FLAT
07150-04003
.41
5
STANDARD - FLAT
07150-03004
5
STANDARD - TAPERED
6
REF.
Nº
NOSE JAW
DIMENSIONS
'B'
'D'
'E'
TYPE AND
END FORM
PART Nº
1
# STANDARD - UNIVERSAL
07150-03203
.36
1.33
.24
1
LTD. ACCESS CAM OPERATED
07177-03003
.20
1.18
.16
.16
3
LIMITED ACCESS
07274-01000
.22
1.07
.16
2.30
.16
4
LONG CURVED - FLAT
07150-05003
.41
2.28
.16
.41
1.18
.20
5
# STANDARD - UNIVERSAL
07150-03204
.41
1.22
.32
07170-03104
.41
1.19
.20
5
STD. CAM OPERATED - FLAT
07170-04600
.41
1.18
.20
LONG - FLAT
07150-04004
.41
2.18
.20
6
# LONG - UNIVERSAL
07150-04204
.41
2.22
.30
6
LONG CURVED - FLAT
07150-05004
.41
2.12
.20
6
LONG CAM OPERATED - FLAT
07170-05000
.41
2.18
.20
7
STANDARD - FLAT
07150-03005
.48
1.30
.24
7
# STANDARD - UNIVERSAL
07150-03205
.48
1.35
.41
7
STANDARD - TAPERED
07150-03105
.44
1.30
.24
7
STD. CAM OPERATED - FLAT
07170-04700
.48
1.30
.24
8
LONG - FLAT
07150-04005
.48
2.30
.24
8
# LONG - UNIVERSAL
07150-04205
.48
2.35
.42
8
LONG CURVED - FLAT
07150-05005
.48
2.23
.24
8
LONG CAM OPERATED - FLAT
07170-05100
.48
2.30
.24
9
STANDARD - FLAT
07150-03006
.56
1.18
.33
9
# STANDARD - UNIVERSAL
07150-03206
.56
1.24
.47
9
STANDARD - TAPERED
07150-03106
.56
1.18
.33
9
STD. CAM OPERATED - FLAT
07170-04800
.56
1.18
.33
10
LONG - FLAT
07150-04006
.56
2.30
.33
10
# LONG - UNIVERSAL
07150-04206
.56
2.39
.48
10
LONG CURVED - FLAT
07150-05006
.56
2.21
.33
10
LONG CAM OPERATED - FLAT
07170-05200
.56
2.30
.33
11
STANDARD - FLAT
07150-03008
.64
1.18
.39
11
STD. CAM OPERATED - FLAT
07170-04900
.64
1.18
.39
12
LONG - FLAT
07150-04008
.64
2.18
.39
12
LONG CAM OPERATED - FLAT
07170-05300
.64
2.18
.39
13
STANDARD - TAPERED
07170-03103
.36
1.30
.15
14
LTD. ACCESS CAM OPERATED
07177-03003
.20
1.18
.16
14
LIMITED ACCESS
07274-01000
.22
1.07
.16
-
-
-
-
-
-
15
STANDARD - FLAT
07150-03004
.41
1.18
.20
15
STANDARD - RECESSED
07170-03004
.41
1.20
.30
1/8" BRIV®
15
STANDARD - TAPERED
07170-03104
.41
1.19
.20
16
LONG - FLAT
07150-04004
.41
2.18
.20
Al. Alloy,
Brass, Steel
16
LONG - RECESSED
07170-03204
.41
2.18
.30
16
LONG CURVED - FLAT
07150-05004
.41
2.12
.20
16
LONG CURVED - RECESSED
07170-03304
.41
2.12
.30
-
-
-
-
-
-
5/32" BRIV®
17
STANDARD - FLAT
07150-03005
.48
1.30
.24
17
STANDARD - RECESSED
07170-03005
.48
1.32
.41
Al. Alloy,
Brass, Steel
18
LONG - FLAT
07150-04005
.48
2.30
.24
18
LONG - RECESSED
07170-03205
.48
2.30
.41
18
LONG CURVED - FLAT
07150-05005
.48
2.23
.24
18
LONG CURVED - RECESSED
07170-03305
.48
2.23
.41
19
STANDARD - FLAT
07150-03005
.48
1.30
.24
19
STANDARD - RECESSED
07170-03005
.48
1.32
.41
20
LONG - FLAT
07150-04005
.48
2.30
.24
20
LONG - RECESSED
07170-03205
.48
2.30
.41
20
LONG CURVED - FLAT
07150-05005
.48
2.23
.24
20
LONG CURVED - RECESSED
07170-03305
.48
2.23
.41
3/16" BRIV®
21
STANDARD - FLAT
07150-03006
.56
1.18
.33
21
STANDARD - RECESSED
07170-03006
.56
1.20
.47
Al. Alloy,
Brass, Steel
22
LONG - FLAT
07150-04006
.56
2.30
.33
22
LONG - RECESSED
07170-03206
.56
2.30
.47
22
LONG CURVED - FLAT
07150-05006
.56
2.21
.33
22
LONG CURVED - RECESSED
07170-03306
.56
2.21
.47
23
STANDARD - FLAT
07150-03006
.56
1.18
.33
23
STANDARD - RECESSED
07170-03006
.56
1.20
.47
24
LONG - FLAT
07150-04006
.56
2.30
.33
24
LONG - RECESSED
07170-03206
.56
2.30
.47
24
LONG CURVED - FLAT
07150-05006
.56
2.21
.33
24
LONG CURVED - RECESSED
07170-03306
.56
2.21
.47
6mm BRIV®
25
STD. CAM OPERATED
07170-05600
.64
1.21
.52
25
STANDARD - FLAT
07170-05800
.64
1.21
.52
Al. Alloy, Steel
26
LONG CAM OPERATED
07170-05700
.64
2.19
.52
26
LONG - FLAT
07170-05900
.64
2.19
.52
27
STANDARD - FLAT
07150-03003
.36
1.30
.16
27
STANDARD - TAPERED
07150-03103
.36
1.30
.16
27
STD. CAM OPERATED - FLAT
07170-04500
.36
1.30
.16
28
LONG - FLAT
07150-04003
.41
2.30
.16
28
LONG CURVED - FLAT
07150-05003
.41
2.28
.16
-
-
-
-
-
29
STANDARD - FLAT
07150-03004
.41
1.18
.20
29
STANDARD - TAPERED
07170-03104
.41
1.19
.20
29
STD. CAM OPERATED - FLAT
07170-04600
.41
1.18
.20
30
LONG - FLAT
07150-04004
.41
2.18
.20
30
LONG CURVED - FLAT
07150-05004
.41
2.12
.20
30
LONG CAM OPERATED - FLAT
07170-05000
.41
2.18
.20
31
STANDARD - FLAT
07150-03003
.36
1.30
.16
-
-
-
-
-
-
32
STANDARD - FLAT
07150-03004
.41
1.18
.20
32
STD. CAM OPERATED - FLAT
07170-04600
.41
1.18
.20
33
STANDARD - FLAT
07150-03003
.36
1.30
.16
33
LTD. ACCESS CAM OPERATED
07271-08000
.41
1.18
.16
34
LONG - FLAT
07150-04003
.41
2.30
.16
-
-
-
-
-
-
35
STANDARD - FLAT
07271-05600
.36
1.30
.16
36
LTD. ACCESS CAM OPERATED
07271-08100
.40
1.18
.16
3/32" CHOBERT®
& GROVIT
1/8" CHOBERT®
& GROVIT
5/32" CHOBERT®
& GROVIT
3/16" CHOBERT®
& GROVIT
1/4" CHOBERT®
3/32" BRIV®
Brass only
5/32" BRIV®
St.Steel only
3/16" BRIV®
St.Steel only
3/32" AVLUG®
1/8" AVLUG®
2.5mm, 4-40 UNC
AVSERT®
3.0mm, 6-32 UNC
AVSERT®
2.5mm AVTRONIC®
2.8mm AVTRONIC®
37
LONG - FLAT
07271-05900
.41
2.30
.16
-
-
-
-
-
-
2.8mm RIVSCREW®
38
STD. CAM OPERATED - HF
07271-03000
.41
1.18
.24
-
-
-
-
-
-
3.0mm RIVSCREW®
39
STD. CAM OPERATED - HF
07271-03000
.41
1.18
.24
-
-
-
-
-
-
3.5mm RIVSCREW®
40
STD. CAM OPERATED - HF
07271-03500
.41
1.18
.24
-
-
-
-
-
-
4.0mm RIVSCREW®
41
STD. CAM OPERATED - HF
07271-04000
.41
1.18
.25
-
-
-
-
-
-
# These nose jaws are suitable for placing Chobert® rivets with a Universal Head Form. When used on the equivalent size of Briv®, the
highest possible clench is achieved. Note when using Briv® fasteners, the maximum grip is reduced by approximately 0.015" (0.4mm).
possible clench is achieved. Note that when using Briv fasteners, the maximum grip is reduced by approximately 0.015” (0.4 mm).
15
Nose Assemblies
Nose Jaw Selection - Metric
FASTENER
REF.
Nº
NOSE JAW
TYPE AND
END FORM
PART Nº
DIMENSIONS
'B'
'D'
'E'
1
STANDARD - FLAT
07150-03003
9.14 33.02 4.06
1
STD. CAM OPERATED - FLAT
07170-04500
9.14 33.02 4.06
2
STANDARD - TAPERED
07170-03103
4
LONG - FLAT
5
5
6
REF.
Nº
NOSE JAW
TYPE AND
END FORM
PART Nº
DIMENSIONS
'B'
'D'
'E'
1
# STANDARD - UNIVERSAL
07150-03203
9.14 33.78 6.10
1
LTD. ACCESS CAM OPERATED
07177-03003
5.08 29.97 4.06
9.14 33.02 4.06
3
LIMITED ACCESS
07274-01000
5.59 27.18 4.06
07150-04003
10.41 58.42 4.06
4
LONG CURVED - FLAT
07150-05003 10.41 57.91 4.06
STANDARD - FLAT
07150-03004
10.41 29.97 5.08
5
# STANDARD - UNIVERSAL
07150-03204 10.41 30.99 8.13
STANDARD - TAPERED
07170-03104
10.41 30.23 5.08
5
STD. CAM OPERATED - FLAT
07170-04600 10.41 29.97 5.08
LONG - FLAT
07150-04004
10.41 55.37 5.08
6
# LONG - UNIVERSAL
07150-04204 10.41 56.39 7.62
6
LONG CURVED - FLAT
07150-05004
10.41 53.85 5.08
6
LONG CAM OPERATED - FLAT
07170-05000 10.41 55.37 5.08
7
STANDARD - FLAT
07150-03005
12.19 33.02 6.10
7
# STANDARD - UNIVERSAL
07150-03205 12.19 34.29 10.41
7
STANDARD - TAPERED
07150-03105
11.18 33.02 6.10
7
STD. CAM OPERATED - FLAT
07170-04700 12.19 33.02 6.10
8
LONG - FLAT
07150-04005
12.19 58.42 6.10
8
# LONG - UNIVERSAL
07150-04205 12.19 59.69 10.67
8
LONG CURVED - FLAT
07150-05005
12.19 56.64 6.10
8
LONG CAM OPERATED - FLAT
07170-05100 12.19 58.42 6.10
9
STANDARD - FLAT
07150-03006
14.22 29.97 8.38
9
# STANDARD - UNIVERSAL
07150-03206 14.22 31.50 11.94
9
STANDARD - TAPERED
07150-03106
14.22 29.97 8.38
9
STD. CAM OPERATED - FLAT
07170-04800 14.22 29.97 8.38
10
LONG - FLAT
07150-04006
14.22 58.42 8.38
10
# LONG - UNIVERSAL
07150-04206 14.22 60.71 12.19
10
LONG CURVED - FLAT
07150-05006
14.22 56.13 8.38
10
LONG CAM OPERATED - FLAT
07170-05200 14.22 58.42 8.38
11
STANDARD - FLAT
07150-03008
16.26 29.97 9.91
11
STD. CAM OPERATED - FLAT
07170-04900 16.26 29.97 9.91
12
LONG - FLAT
07150-04008
16.26 55.37 9.91
12
LONG CAM OPERATED - FLAT
07170-05300 16.26 55.37 9.91
13
STANDARD - TAPERED
07170-03103
9.14 33.02 3.81
14
LTD. ACCESS CAM OPERATED
07177-03003
14
LIMITED ACCESS
07274-01000
5.59 27.18 4.06
-
-
-
15
STANDARD - FLAT
07150-03004
10.41 29.97 5.08
15
STANDARD - RECESSED
07170-03004 10.41 30.48 7.62
1/8" BRIV®
15
STANDARD - TAPERED
07170-03104
10.41 30.23 5.08
16
LONG - FLAT
07150-04004 10.41 55.37 5.08
Al. Alloy,
Brass, Steel
16
LONG - RECESSED
07170-03204
10.41 55.37 7.62
16
LONG CURVED - FLAT
07150-05004 10.41 53.85 5.08
16
LONG CURVED - RECESSED
07170-03304
10.41 53.85 7.62
-
-
5/32" BRIV®
17
STANDARD - FLAT
07150-03005
12.19 33.02 6.10
17
STANDARD - RECESSED
07170-03005 12.19 33.53 10.41
Al. Alloy,
Brass, Steel
18
LONG - FLAT
07150-04005
12.19 58.42 6.10
18
LONG - RECESSED
07170-03205 12.19 58.42 10.41
18
LONG CURVED - FLAT
07150-05005
12.19 56.64 6.10
18
LONG CURVED - RECESSED
07170-03305 12.19 56.64 10.41
19
STANDARD - FLAT
07150-03005
12.19 33.02 6.10
19
STANDARD - RECESSED
07170-03005 12.19 33.53 10.41
20
LONG - FLAT
07150-04005
12.19 58.42 6.10
20
LONG - RECESSED
07170-03205 12.19 58.42 10.41
20
LONG CURVED - FLAT
07150-05005
12.19 56.64 6.10
20
LONG CURVED - RECESSED
07170-03305 12.19 56.64 10.41
3/16" BRIV®
21
STANDARD - FLAT
07150-03006
14.22 29.97 8.38
21
STANDARD - RECESSED
07170-03006 14.22 30.48 11.94
Al. Alloy,
Brass, Steel
22
LONG - FLAT
07150-04006
14.22 58.42 8.38
22
LONG - RECESSED
07170-03206 14.22 58.42 11.94
22
LONG CURVED - FLAT
07150-05006
14.22 56.13 8.38
22
LONG CURVED - RECESSED
07170-03306 14.22 56.13 11.94
23
STANDARD - FLAT
07150-03006
14.22 29.97 8.38
23
STANDARD - RECESSED
07170-03006 14.22 30.48 11.94
24
LONG - FLAT
07150-04006
14.22 58.42 8.38
24
LONG - RECESSED
07170-03206 14.22 58.42 11.94
24
LONG CURVED - FLAT
07150-05006
14.22 56.13 8.38
24
LONG CURVED - RECESSED
07170-03306 14.22 56.13 11.94
6mm BRIV®
25
STD. CAM OPERATED
07170-05600
16.33 30.65 13.14
25
STANDARD - FLAT
07170-05800 16.33 30.65 13.14
Al. Alloy, Steel
26
LONG CAM OPERATED
07170-05700
16.33 55.65 13.14
26
LONG - FLAT
07170-05900 16.33 55.65 13.14
27
STANDARD - FLAT
07150-03003
9.14 33.02 4.06
27
STANDARD - TAPERED
27
STD. CAM OPERATED - FLAT
07170-04500
9.14 33.02 4.06
28
LONG - FLAT
28
LONG CURVED - FLAT
07150-05003
10.41 57.91 4.06
-
-
29
STANDARD - FLAT
07150-03004
10.41 29.97 5.08
29
STANDARD - TAPERED
07170-03104 10.41 30.23 5.08
29
STD. CAM OPERATED - FLAT
07170-04600
10.41 29.97 5.08
30
LONG - FLAT
07150-04004 10.41 55.37 5.08
30
LONG CURVED - FLAT
07150-05004
10.41 53.85 5.08
30
LONG CAM OPERATED - FLAT
07170-05000 10.41 55.37 5.08
31
STANDARD - FLAT
07150-03003
9.14 33.02 4.06
-
-
32
STANDARD - FLAT
07150-03004
10.41 29.97 5.08
32
STD. CAM OPERATED - FLAT
07170-04600 10.41 29.97 5.08
33
STANDARD - FLAT
07150-03003
9.14 33.02 4.06
33
LTD. ACCESS CAM OPERATED
07271-08000 10.41 29.97 4.06
34
LONG - FLAT
07150-04003
10.41 58.42 4.06
-
-
35
STANDARD - FLAT
07271-05600
9.14 33.02 4.06
36
LTD. ACCESS CAM OPERATED
3/32" CHOBERT®
& GROVIT
1/8" CHOBERT®
& GROVIT
5/32" CHOBERT®
& GROVIT
3/16" CHOBERT®
& GROVIT
1/4" CHOBERT®
3/32" BRIV®
Brass only
5/32" BRIV®
St.Steel only
3/16" BRIV®
St.Steel only
3/32" AVLUG®
1/8" AVLUG®
2.5mm, 4-40 UNC
AVSERT®
3.0mm, 6-32 UNC
AVSERT®
2.5mm AVTRONIC®
2.8mm AVTRONIC®
-
07150-03103
5.08 29.97 4.06
-
-
-
-
-
-
9.14 33.02 4.06
07150-04003 10.41 58.42 4.06
-
-
-
-
-
-
-
-
-
-
-
-
07271-08100 10.16 29.97 4.06
37
LONG - FLAT
07271-05900
10.41 58.42 4.06
-
-
-
-
-
-
2.8mm RIVSCREW®
38
STD. CAM OPERATED - HF
07271-03000
10.41 29.97 6.10
-
-
-
-
-
-
3.0mm RIVSCREW®
39
STD. CAM OPERATED - HF
07271-03000
10.41 29.97 6.10
-
-
-
-
-
-
3.5mm RIVSCREW®
40
STD. CAM OPERATED - HF
07271-03500
10.41 29.97 6.10
-
-
-
-
-
-
4.0mm RIVSCREW®
41
STD. CAM OPERATED - HF
07271-04000
10.41 29.97 6.35
-
-
-
-
-
-
# These nose jaws are suitable for placing Chobert® rivets with a Universal Head Form. When used on the equivalent size of Briv®, the
highest possible clench is achieved. Note that when using Briv® fasteners, the maximum grip is reduced by approximately 0.015" (0.4mm).
possible clench is achieved. Note that when using Briv fasteners, the maximum grip is reduced by approximately 0.015” (0.4 mm).
16
Nose Assemblies
Mandrels and Mandrel Follower Springs
Mandrels and mandrel follower springs, illustrated on page 12 need to be selected to suit the fastener type and size as well as the size
of the hole in the application. Use of the wrong mandrel could increase the risk of breakage and the wear of the mandrel head.
Feeding problems could occur if the wrong mandrel follower spring is used.
I M P O R TA N T
READ THE SAFETY INSTRUCTIONS page 4 carefully.
While a small amount of wear and marking will naturally occur through normal and correct use of mandrels, they
must be regularly examined for excessive wear and marking, with particular attention to the head diameter, the
tail jaw gripping area of the shank or heavy pitting of the shank and any mandrel distortion. Mandrels which fail
during use could forcibly exit the tool. It is the customer’s responsibility to ensure that mandrels are replaced
before any excessive levels of wear and always before the maximum recommended number of placings. Contact
your Avdel representative who will let you know what that figure is by measuring the broach load of your
application with our calibrated measuring tool. These tools can also be purchased under part number 0790009080, supplied with all necessary information for testing.
C h o b e r t ® a n d G ro v i t ® - I m p e r i a l
For mandrel or mandrel follower spring selection, follow instructions on page 19.
FASTENER
REF.
Nº
1
1
2
3/32" CHOBERT®
& GROVIT®
2
3
3
1/8" CHOBERT®
& GROVIT®
5/32" CHOBERT®
& GROVIT®
3/16" CHOBERT®
& GROVIT®
1/4" CHOBERT®
FASTENER
1/8" CHOBERT®
& GROVIT®
5/32" CHOBERT®
& GROVIT®
3/16" CHOBERT®
& GROVIT®
1/4" CHOBERT®
HEAD
Ø
AS REC. .0725
-
-
AS REC. .0725
-
-
AS REC. .0725
-
-
STANDARD MANDREL - GREEN
P
P
MANDREL
# S/R MANDREL
MAX.
MAX.
PART Nº
PART Nº
.166
.071
07150-06003
07150-08003
HOLE
SIZE
1ST OVERSIZE MANDREL - YELLOW
P
P
MANDREL
# S/R MANDREL
MAX.
MAX.
PART Nº
PART Nº
.174
07150-06303
-
SPRING
PART Nº
+.0015
HEAD
Ø
.074
-
-
-
-
+.0035
.076
-
-
07150-08103
.078
07150-06803
07150-06003
.166
07150-08003
.071
+.0015
.074
07150-06303
.174
-
-
07170-06873
-
-
-
-
+.0035
.076
-
-
07150-08103
.078
07170-06873
07150-06003
.166
07150-08003
.071
+.0015
.074
07150-06303
.174
-
-
07170-06903
-
-
-
-
+.0035
.076
-
-
07150-08103
.078
07170-06903
07150-06803
4
AS REC. .0725
07150-07003
.166
07150-09003
.071
+.0035
.076
-
-
07150-09103
.078
07150-07803
5
AS REC.
.088
07150-06004
.216
07150-08004
.090
+.004
.092
07150-06104
.237
07150-08104
.098
07150-06804
6
AS REC.
.088
07150-07004
.216
07150-09004
.090
+.004
.092
07150-07104
.237
07150-09104
.098
07150-07804
7
AS REC.
.107
07150-06005
.244
07150-08005
.100
+.008
.115
07150-06105
.284
07150-08105
.116
07170-06875
7
-
-
-
-
-
-
-
-
-
-
-
-
-
8
AS REC.
.107
07150-07005
.244
07150-09005
.100
+.008
.115
07150-07105
.284
07150-09105
.116
07170-07875
8
-
-
-
-
-
-
-
-
-
-
-
-
-
9
AS REC.
.132
07150-06006
.247
07150-08006
.102
+.014
.146
07150-06106
.320
07150-08106
.130
07170-06876
9
-
-
-
-
-
-
-
-
-
-
-
-
-
10
AS REC.
.132
07150-07006
.247
07150-09006
.102
+.014
.146
07150-07106
.320
07150-09106
.130
07170-07876
10
-
-
-
-
-
-
-
-
-
-
-
-
-
11
AS REC.
.184
07150-06008
.268
07150-08008
.110
+.012
.196
07150-06108
.330
07150-08108
.134
07150-06808
12
AS REC.
.184
07150-07008
.268
07150-09008
.110
+.012
.196
07150-07108
.330
07150-09108
.134
07150-07808
REF.
Nº
HOLE
SIZE
2ND OVERSIZE MANDREL - BLUE
P
P
MANDREL
# S/R MANDREL
MAX.
MAX.
PART Nº
PART Nº
.185
07150-06103
-
HOLE
SIZE
3RD OVERSIZE MANDREL - RED
P
P
MANDREL
# S/R MANDREL
MAX.
MAX.
PART Nº
PART Nº
-
SPRING
PART Nº
-
HEAD
Ø
-
1
-
-
-
-
-
-
-
-
-
-
-
-
-
2
+.0035
.076
07150-06103
.185
-
-
-
-
-
-
-
-
07170-06873
1
3/32" CHOBERT®
& GROVIT®
HOLE
SIZE
HEAD
Ø
+.0035 .076
07150-06803
2
-
-
-
-
-
-
-
-
-
-
-
-
-
3
+.0035
.076
07150-06103
.185
-
-
-
-
-
-
-
-
07170-06903
3
-
-
-
-
-
-
-
-
-
-
-
-
-
4
+.0035
.076
07150-07103
.185
-
-
-
-
-
-
-
-
07150-07803
5
+.010
.098
07150-06204
.268
07150-08204
.110
+.014
.102
07150-06304
.288
07150-08304
.118
07150-06804
6
+.010
.098
07150-07204
.268
07150-09204
.110
+.014
.102
07150-07304
.288
07150-09304
.118
07150-07804
7
+.015
.122
07150-06205
.320
07150-08205
.130
-
-
-
-
-
-
07170-06875
7
-
-
-
-
-
-
+.025
.132
07150-06305
.372
07150-08305
.150
07150-06805
8
+.015
.122
07150-07205
.320
07150-09205
.130
-
-
-
-
-
-
07170-07875
8
-
-
-
-
-
-
+.025
.132
07150-07305
.372
07150-09305
.150
07150-07805
9
-
-
-
-
-
-
-
-
-
-
-
-
-
9
+.024
.156
07150-06206
.372
07150-08206
.150
-
-
-
-
-
-
07150-06806
10
-
-
-
-
-
-
-
-
-
-
-
-
-
10
+.024
.156
07150-07206
.372
07150-09206
.150
-
-
-
-
-
-
07150-07806
11
-
-
-
-
-
-
-
-
-
-
-
-
-
12
-
-
-
-
-
-
-
-
-
-
-
-
-
# S/R: Short Reach Mandrel. See page 19-20 for explanation.
17
Nose Assemblies
Tables below left and right and over the next four pages list part numbers of all mandrels and mandrel follower springs available per
fastener or group of fasteners, i.e. for Chobert® and Grovit® on these pages.
While fastener sizes are always shown in their specified units, each table has been produced twice to offer dimensions in imperial units
on the left-hand page then in metric units on the right-hand page. These 'Mandrel Selection' tables cross-reference with the 'Nose Jaw
Selection' tables on pages 15-16 through the ‘Ref. Nº’ column.
It is the diameter of the head at the end of a mandrel which when pulled through controls the expansion of the fastener body.
While there are different head shapes to suit different types of fasteners (see illustration on page 20), progressive head sizes are
needed to reflect manufacturing tolerances on the diameter of the hole in your application so that the fastener always expands
sufficiently to fill the hole.
Too large a mandrel head would overstress the mandrel and mandrels which fail during use could forcibly exit the tool.
Selection tables are arranged into four 'mandrel size' sections, ranging from 'standard’ to '3rd oversize', each being colour coded as
per the end of the mandrel heads themselves.
C h o b e r t ® a n d G ro v i t ® - M e t r i c
FASTENER
REF.
Nº
1/8" CHOBERT®
& GROVIT®
5/32" CHOBERT®
& GROVIT®
3/16" CHOBERT®
& GROVIT®
1/4" CHOBERT®
FASTENER
3/32" CHOBERT®
& GROVIT®
1/8" CHOBERT®
& GROVIT®
5/32" CHOBERT®
& GROVIT®
3/16" CHOBERT®
& GROVIT®
1/4" CHOBERT®
HEAD
Ø
AS REC. 1.84
STANDARD MANDREL - GREEN
P
P
MANDREL
# S/R MANDREL
MAX.
MAX.
PART Nº
PART Nº
4.22
1.80
07150-06003
07150-08003
1ST OVERSIZE MANDREL - YELLOW
P
P
MANDREL
# S/R MANDREL
MAX.
MAX.
PART Nº
PART Nº
4.42
07150-06303
-
SPRING
PART Nº
+.04
1
-
-
-
-
-
-
+.09
1.93
-
-
07150-08103
1.98
07150-06803
2
AS REC.
1.84
07150-06003
4.22
07150-08003
1.80
+.04
1.88
07150-06303
4.42
-
-
07170-06873
2
-
-
-
-
-
-
+.09
1.93
-
-
07150-08103
1.98
07170-06873
3
AS REC.
1.84
07150-06003
4.22
07150-08003
1.80
+.04
1.88
07150-06303
4.42
-
-
07170-06903
3
-
-
-
-
-
-
+.09
1.93
-
-
07150-08103
1.98
07170-06903
4
AS REC.
1.84
07150-07003
4.22
07150-09003
1.80
+.09
1.93
-
-
07150-09103
1.98
07150-07803
5
AS REC.
2.24
07150-06004
5.49
07150-08004
2.29
+.10
2.34
07150-06104
6.02
07150-08104
2.49
07150-06804
6
AS REC.
2.24
07150-07004
5.49
07150-09004
2.29
+.10
2.34
07150-07104
6.02
07150-09104
2.49
07150-07804
7
AS REC.
2.72
07150-06005
6.20
07150-08005
2.54
+.20
2.92
07150-06105
7.21
07150-08105
2.95
07170-06875
7
-
-
-
-
-
-
-
-
-
-
-
-
-
8
AS REC.
2.72
07150-07005
6.20
07150-09005
2.54
+.20
2.92
07150-07105
7.21
07150-09105
2.95
07170-07875
07150-06803
8
-
-
-
-
-
-
-
-
-
-
-
-
-
9
AS REC.
3.35
07150-06006
6.27
07150-08006
2.59
+.35
3.71
07150-06106
8.13
07150-08106
3.30
07170-06876
9
-
-
-
-
-
-
-
-
-
-
-
-
-
10
AS REC.
3.35
07150-07006
6.27
07150-09006
2.59
+.35
3.71
07150-07106
8.13
07150-09106
3.30
07170-07876
10
-
-
-
-
-
-
-
-
-
-
-
-
-
11
AS REC.
4.67
07150-06008
6.81
07150-08008
2.79
+.30
4.98
07150-06108
8.38
07150-08108
3.40
07150-06808
12
AS REC.
4.67
07150-07008
6.81
07150-09008
2.79
+.30
4.98
07150-07108
8.38
07150-09108
3.40
07150-07808
REF.
Nº
HOLE
SIZE
1
+.09
HEAD
Ø
1.93
2ND OVERSIZE MANDREL - BLUE
P
P
MANDREL
# S/R MANDREL
MAX.
MAX.
PART Nº
PART Nº
4.70
07150-06103
-
-
HEAD
Ø
-
1
-
-
-
-
-
-
-
-
-
-
-
-
-
2
+.09
1.93
07150-06103
4.70
-
-
-
-
-
-
-
-
07170-06873
HOLE
SIZE
3RD OVERSIZE MANDREL - RED
P
P
MANDREL
# S/R MANDREL
MAX.
MAX.
PART Nº
PART Nº
-
SPRING
PART Nº
07150-06803
2
-
-
-
-
-
-
-
-
-
-
-
-
-
3
+.09
1.93
07150-06103
4.70
-
-
-
-
-
-
-
-
07170-06903
3
-
-
-
-
-
-
-
-
-
-
-
-
-
4
+.09
1.93
07150-07103
4.70
-
-
-
-
-
-
-
-
07150-07803
5
+.25
2.49
07150-06204
6.81
07150-08204
2.79
+.35
2.59
07150-06304
7.32
07150-08304
3.00
07150-06804
6
+.25
2.49
07150-07204
6.81
07150-09204
2.79
+.35
2.59
07150-07304
7.32
07150-09304
3.00
07150-07804
7
+.38
3.10
07150-06205
8.13
07150-08205
3.30
-
-
-
-
-
-
07170-06875
7
-
-
-
-
-
-
+.63
3.35
07150-06305
9.45
07150-08305
3.81
07150-06805
8
+.38
3.10
07150-07205
8.13
07150-09205
3.30
-
-
-
-
-
-
07170-07875
8
-
-
-
-
-
-
+.63
3.35
07150-07305
9.45
07150-09305
3.81
07150-07805
9
-
-
-
-
-
-
-
-
-
-
-
-
-
9
+.60
3.96
07150-06206
9.45
07150-08206
3.81
-
-
-
-
-
-
07150-06806
10
-
-
-
-
-
-
-
-
-
-
-
-
-
10
+.60
3.96
07150-07206
9.45
07150-09206
3.81
-
-
-
-
-
-
07150-07806
11
-
-
-
-
-
-
-
-
-
-
-
-
-
12
-
-
-
-
-
-
-
-
-
-
-
-
-
# S/R: Short Reach Mandrel. See page 19-20 for explanation.
18
HOLE
SIZE
HEAD
Ø
1.88
1
3/32" CHOBERT®
& GROVIT®
HOLE
SIZE
Nose Assemblies
To find the correct part number of a mandrel for a particular application, read the instructions below after you have gathered the following
information as per example alongside. Answers for the example are shown in grey italic.
•
•
•
•
•
•
•
•
Chobert®
example
FASTENER NAME
FASTENER SIZE
DATASHEET
APPLICATION HOLE SIZE
CLEARANCE BEHIND APPLICATION
‘REF.Nº’ FROM NOSE JAW SELECTION TABLE
1/8”
Series 1125
0.1335”
Infinite
5 (standard flat)
Subtract the minimum hole size recommended (AS REC.) in the fastener datasheet from the actual application hole size. -example: 0.005.
Turn to the page with the ‘Mandrel Selection’ table for your fastener, selecting either the imperial or the metric dimensions table
(pages 17-21). -example: page 17.
Staring with the ‘Standard Mandrel - Green’ section, find your fastener size in the left-hand column. -example 1/8” Chobert® & Grovit®.
If you selected a nose jaw which place you fastener, you should now be able to find a line within your fastener section with the same ‘Ref
No.’ as that from the ‘Nose Jaw Selection’ table. -example: 5. This is your line ‘Ref. No.’ in which you will find both your mandrel and
mandrel follower spring part number. This line continues into the second half of the table for the ‘2nd’ and ‘3rd’ oversize mandrels.
Scan along the line to the ‘hole size’ columns and select which ever is the nearest or equal to the figure calculated in step one. You may
now read the mandrel part number next to the ‘hole size’.
-example: 07150-06104
For Chobert® and Grovit® only, most mandrels are also available in a ‘short reach’ version (see illustration on page 20). Short reach
mandrels are used to minimise the possibility of the mandrel head contacting a read obstruction. This would result in the underside of the
fastener head not seating properly on the application surface, causing a lack on clench in the joint.
Whichever size mandrel you settle on, you will also need to check the ‘P’ figure against that mandrel is adequate. ‘P’ is the clearance
required for the mandrel head at the back of the application IN ADDITION to the length of the fastener protruding through the application,
as shown in the illustration on page 20.
You may now read the corresponding mandrel follower spring part number in the right-hand column of the table. -example: 07150-06804.
In all cases, satisfactory clenching of the joint should be assessed particularly if the size of the hole in your application is very close to the next
oversize hole condition, when it will be safe to select the greater size of mandrel to obtain a higher clench. REMEMBER that this will increase
the broach load and reduce the mandrel life.
Briv® - Imperial
For mandrel or mandrel follower spring selection, follow instructions above.
1ST OVERSIZE MANDREL - YELLOW
P
MANDREL
MAX.
PART Nº
.123
07150-06113
07170-06873
07150-06113
.123
07170-06903
.097
07271-06514
.126
07150-06814
+.005
.097
07271-07514
.126
07150-07814
.136
+.005
.115
07150-06115
.142
07170-06875
07150-07015
.136
+.005
.115
07150-07115
.142
07170-07875
.120
07170-06805
.126
+.005
.124
07170-06825
.132
07170-06875
AS REC.
.120
07170-07805
.126
+.005
.124
07170-07825
.132
07170-07875
21
AS REC.
.141
07150-06016
.157
+.005
.146
07150-06116
.164
07170-06876
22
AS REC.
.141
07150-07016
.157
+.005
.146
07150-07116
.164
07170-07876
3/16" BRIV®
St.Steel only
23
AS REC.
.150
07170-06806
.150
+.005
.1535
07170-06826
.156
07170-06876
24
AS REC.
.150
07170-07806
.150
+.005
.1535
07170-07826
.156
07170-07876
6mm BRIV®
25
AS REC
.179
07150-06018
.165
+.005
.183
07150-06118
.171
07150-06846
Al. Alloy, Steel
26
AS REC
.179
07150-07018
.165
+.005
.183
07150-07118
.171
07150-07846
FASTENER
REF.
Nº
HOLE
SIZE
13
+.008
HEAD
Ø
.079
-
HEAD
Ø
-
3RD OVERSIZE MANDREL - RED
MANDREL
PART Nº
-
P
MAX.
-
07170-06873
14
+.008
.079
07150-06213
.126
-
-
-
-
07170-06903
1/8" BRIV®
Al. Alloy,
Brass, Steel
15
+.010
.102
07271-06614
.133
-
-
-
-
07150-06814
16
+.010
.102
07271-07614
.133
-
-
-
-
07150-07814
5/32" BRIV®
Al. Alloy,
Brass, Steel
17
+.010
.120
07150-06215
.149
-
-
-
-
07170-06875
18
+.010
.120
07150-07215
.149
-
-
-
-
07170-07875
5/32" BRIV®
St.Steel only
19
-
-
-
-
-
-
-
-
-
20
-
-
-
-
-
-
-
-
-
3/16" BRIV®
Al. Alloy,
Brass, Steel
21
+.010
.151
07150-06216
.170
+.012
.153
07150-06316
.173
07170-06876
22
+.010
.151
07150-07216
.170
+.012
.153
07150-07316
.173
07170-07876
3/16" BRIV®
St.Steel only
23
-
-
-
-
-
-
-
-
-
24
-
-
-
-
-
-
-
-
-
6mm BRIV®
Al. Alloy, Steel
25
+.010
.189
07150-06218
.177
-
-
-
-
07150-06846
26
+.010
.189
07150-07218
.177
-
-
-
-
01750-07846
AS REC.
HEAD
Ø
.072
STANDARD MANDREL - GREEN
MANDREL
PART Nº
07150-06013
P
MAX.
.119
+.004
HEAD
Ø
.076
AS REC.
.072
07150-06013
.119
+.004
.076
15
AS REC.
.092
07271-06414
.120
+.005
16
AS REC.
.092
07271-07414
.120
5/32" BRIV®
Al. Alloy,
Brass, Steel
17
AS REC.
.110
07150-06015
18
AS REC.
.110
5/32" BRIV®
St.Steel only
19
AS REC.
20
3/16" BRIV®
Al. Alloy,
Brass, Steel
REF.
Nº
HOLE
SIZE
13
14
1/8" BRIV®
Al. Alloy,
Brass, Steel
FASTENER
3/32" BRIV®
Brass only
3/32" BRIV®
Brass only
2ND OVERSIZE MANDREL - BLUE
P
MANDREL
MAX.
PART Nº
.126
07150-06213
HOLE
SIZE
HOLE
SIZE
SPRING
PART Nº
SPRING
PART Nº
19
Nose Assemblies
M a n d r e l H e a d Ty p e s a n d ‘ P ’ L e n g t h
Mandrels for stainless steel Briv® are easily identifiable by a ‘V’ cut in the end of the mandrel heads.
When using curved nose jaws, mandrels have to be bent by hand to match the curvature of the nose jaw, thus ensuring good feed of
fasteners.
P
P
SHORT REACH
(CHOBERT® &
GROVIT® ONLY)
CHOBERT®, GROVIT®,
AVSERT®, AVTRONIC®
P
P
BRIV®
(STAINLESS STEEL)
BRIV®
P
P
RIVSCREW®
AVLUG®
Briv® - Metric
AS REC.
HEAD
Ø
1.83
STANDARD MANDREL - GREEN
MANDREL
PART Nº
07150-06013
P
MAX.
3.02
+.10
HEAD
Ø
1.93
1ST OVERSIZE MANDREL - YELLOW
P
MANDREL
MAX.
PART Nº
3.12
07150-06113
AS REC.
1.83
07150-06013
3.02
+.10
1.93
07170-06873
07150-06113
3.12
15
AS REC.
2.34
07271-06414
3.05
+.13
07170-06903
2.46
07271-06514
3.20
16
AS REC.
2.34
07271-07414
3.05
07150-06814
+.13
2.46
07271-07514
3.20
5/32" BRIV®
Al. Alloy,
Brass, Steel
17
AS REC.
2.79
07150-06015
07150-07814
3.45
+.13
2.92
07150-06115
3.61
18
AS REC.
2.79
07170-06875
07150-07015
3.45
+.13
2.92
07150-07115
3.61
5/32" BRIV®
St.Steel only
19
AS REC.
07170-07875
3.05
07170-06805
3.20
+.13
3.15
07170-06825
3.35
20
07170-06875
AS REC.
3.05
07170-07805
3.20
+.13
3.15
07170-07825
3.35
3/16" BRIV®
Al. Alloy,
Brass, Steel
07170-07875
21
AS REC.
3.58
07150-06016
3.99
+.13
3.71
07150-06116
4.17
07170-06876
22
AS REC.
3.58
07150-07016
3.99
+.13
3.71
07150-07116
4.17
07170-07876
3/16" BRIV®
St.Steel only
23
AS REC.
3.81
07170-06806
3.81
+.13
3.90
07170-06826
3.96
07170-06876
24
AS REC.
3.81
07170-07806
3.81
+.13
3.90
07170-07826
3.96
07170-07876
6mm BRIV®
25
AS REC
4.54
07150-06018
4.18
+.13
4.65
07150-06118
4.34
07150-06846
Al. Alloy, Steel
26
AS REC
4.54
07150-07018
4.18
+.13
4.65
07150-07118
4.34
07150-07846
FASTENER
REF.
Nº
HOLE
SIZE
13
+.20
HEAD
Ø
2.01
-
HEAD
Ø
-
3RD OVERSIZE MANDREL - RED
MANDREL
PART Nº
-
P
MAX.
-
07170-06873
14
+.20
2.01
07150-06213
3.20
-
-
-
-
07170-06903
1/8" BRIV®
Al. Alloy,
Brass, Steel
15
+.25
2.59
07271-06614
3.38
-
-
-
-
07150-06814
16
+.25
2.59
07271-07614
3.38
-
-
-
-
07150-07814
5/32" BRIV®
Al. Alloy,
Brass, Steel
17
+.25
3.05
07150-06215
3.78
-
-
-
-
07170-06875
18
+.25
3.05
07150-07215
3.78
-
-
-
-
07170-07875
5/32" BRIV®
St.Steel only
19
-
-
-
-
-
-
-
-
-
20
-
-
-
-
-
-
-
-
-
3/16" BRIV®
Al. Alloy,
Brass, Steel
21
+.25
3.84
07150-06216
4.32
+.30
3.85
07150-06316
4.39
07170-06876
22
+.25
3.84
07150-07216
4.32
+.30
3.85
07150-07316
4.39
07170-07876
3/16" BRIV®
St.Steel only
23
-
-
-
-
-
-
-
-
-
24
-
-
-
-
-
-
-
-
-
6mm BRIV®
Al. Alloy, Steel
25
+.25
4.79
07150-06218
4.49
-
-
-
-
07150-06846
26
+.25
4.79
07150-07218
4.49
-
-
-
-
07150-07846
REF.
Nº
HOLE
SIZE
13
14
1/8" BRIV®
Al. Alloy,
Brass, Steel
FASTENER
3/32" BRIV®
Brass only
3/32" BRIV®
Brass only
20
2ND OVERSIZE MANDREL - BLUE
P
MANDREL
MAX.
PART Nº
3.20
07150-06213
HOLE
SIZE
HOLE
SIZE
SPRING
PART Nº
SPRING
PART Nº
Nose Assemblies
A v l u g ® , A v s e r t ® , A v t ro n i c ® & R i v s c r e w ® - I m p e r i a l & M e t r i c
For mandrel or mandrel follower spring selection, follow instructions on page 19.
AS REC.
HEAD
Ø
.076
STANDARD MANDREL - GREEN
MANDREL
PART Nº
07150-06603
P
MAX.
.353
+.005
HEAD
Ø
.081
AS REC.
.076
07150-07603
.353
+.003
.079
29
AS REC.
.098
07150-06604
.593
-
30
AS REC.
.098
07150-07604
.593
31
AS REC.
.0725
07150-06003
32
AS REC.
.088
33
AS REC.
34
1ST OVERSIZE MANDREL - YELLOW
P
MANDREL
MAX.
PART Nº
.478
07150-06703
07150-06803
07150-07703
.368
07150-07803
-
-
-
07150-06804
-
-
-
-
07150-07804
.145
-
-
-
-
07150-06803
07150-06004
.185
-
-
-
-
07150-06804
.070
07170-06025
.140
+.003
.073
07170-06125
.140
07150-06803
AS REC.
.070
07170-07025
.140
+.003
.073
07170-07125
.140
07150-07803
35
AS REC.
.079
07170-06028
.150
+.003
.082
07170-06128
.150
07170-06528
36
AS REC.
.079
07170-06028
.150
+.003
.082
07170-06128
.150
07170-06873
37
AS REC.
.079
07170-07028
.150
+.003
.082
07170-07128
.150
07170-07528
2.8mm RIVSCREW®
38
AS REC.
* .065
07271-06030
.127
-
-
-
-
07271-06630
3.0mm RIVSCREW®
39
AS REC.
* .065
07271-06030
.127
-
-
-
-
07271-06630
3.5mm RIVSCREW®
40
AS REC.
* .0825
07271-06035
.132
-
-
-
-
07271-06635
4.0mm RIVSCREW®
41
AS REC.
* .103
07271-06140
.150
-
-
-
-
07271-06640
3RD OVERSIZE MANDREL - RED
MANDREL
PART Nº
-
P
MAX.
-
FASTENER
3/32" AVLUG®
1/8" AVLUG®
2.5mm, 4-40 UNC
AVSERT®
3.0mm, 6-32 UNC
AVSERT®
2.5mm AVTRONIC®
2.8mm AVTRONIC®
REF.
Nº
HOLE
SIZE
27
28
HOLE
SIZE
SPRING
PART Nº
* These Dimensions are Across Flats
2ND OVERSIZE MANDREL - BLUE
P
MANDREL
MAX.
PART Nº
-
REF.
Nº
HOLE
SIZE
27
-
HEAD
Ø
-
-
HEAD
Ø
-
28
-
-
-
-
-
-
-
-
-
29
-
-
-
-
-
-
-
-
-
30
-
-
-
-
-
-
-
-
-
31
-
-
-
-
-
-
-
-
-
32
-
-
-
-
-
-
-
-
-
33
+.006
.076
07170-06225
.140
-
-
-
-
07150-06803
34
+.006
.076
07170-07225
.140
-
-
-
-
07150-07803
35
+.006
.085
07170-06228
.150
-
-
-
-
07170-06528
36
+.006
.085
07170-06228
.150
-
-
-
-
07170-06873
37
+.006
.085
07170-07228
.150
-
-
-
-
07170-07528
2.8mm RIVSCREW®
38
-
-
-
-
-
-
-
-
-
3.0mm RIVSCREW®
39
-
-
-
-
-
-
-
-
-
3.5mm RIVSCREW®
40
-
-
-
-
-
-
-
-
-
4.0mm RIVSCREW®
41
-
-
-
-
-
-
-
-
-
FASTENER
LINE
Nº
HOLE
SIZE
27
AS REC.
HEAD
Ø
1.93
STANDARD MANDREL - GREEN
MANDREL
PART Nº
07150-06603
P
MAX.
8.97
+.10
HEAD
Ø
2.06
28
AS REC.
1.93
07150-07603
8.97
+.10
2.01
29
AS REC.
2.49
07150-06604
15.06
-
30
AS REC.
2.49
07150-07604
15.06
31
AS REC.
1.84
07150-06003
32
AS REC.
2.24
33
AS REC.
34
FASTENER
3/32" AVLUG®
1/8" AVLUG®
2.5mm, 4-40 UNC
AVSERT®
3.0mm, 6-32 UNC
AVSERT®
2.5mm AVTRONIC®
2.8mm AVTRONIC®
HOLE
SIZE
SPRING
PART Nº
-
1ST OVERSIZE MANDREL - YELLOW
P
MANDREL
MAX.
PART Nº
12.14
07150-06703
07150-06803
07150-07703
9.35
07150-07803
-
-
-
07150-06804
-
-
-
-
07150-07804
3.68
-
-
-
-
07150-06803
07150-06004
4.70
-
-
-
-
07150-06804
1.78
07170-06025
3.56
+.07
1.85
07170-06125
3.56
07150-06803
AS REC.
1.78
07170-07025
3.56
+.07
1.85
07170-07125
3.56
07150-07803
35
AS REC.
2.01
07170-06028
3.81
+.07
2.08
07170-06128
3.81
07170-06528
36
AS REC.
2.01
07170-06028
3.81
+.07
2.08
07170-06128
3.81
07170-06873
37
AS REC.
2.01
07170-07028
3.81
+.07
2.08
07170-07128
3.81
07170-07528
2.8mm RIVSCREW®
38
AS REC
* 1.65
07271-06030
3.23
-
-
-
-
07271-06630
3.0mm RIVSCREW®
39
AS REC.
* 1.65
07271-06030
3.23
-
-
-
-
07271-06630
3.5mm RIVSCREW®
40
AS REC.
* 2.10
07271-06035
3.35
-
-
-
-
07271-06635
4.0mm RIVSCREW®
41
AS REC.
* 2.62
07271-06140
3.81
-
-
-
-
07271-06640
3RD OVERSIZE MANDREL - RED
MANDREL
PART Nº
-
P
MAX.
-
3/32" AVLUG®
1/8" AVLUG®
2.5mm, 4-40 UNC
AVSERT®
3.0mm, 6-32 UNC
AVSERT®
2.5mm AVTRONIC®
2.8mm AVTRONIC®
HOLE
SIZE
SPRING
PART Nº
* These Dimensions are Across Flats
2ND OVERSIZE MANDREL - BLUE
P
MANDREL
MAX.
PART Nº
-
HOLE
SIZE
LINE
Nº
HOLE
SIZE
27
-
HEAD
Ø
-
-
HEAD
Ø
-
28
-
-
-
-
-
-
-
-
-
29
-
-
-
-
-
-
-
-
-
30
-
-
-
-
-
-
-
-
-
31
-
-
-
-
-
-
-
-
-
32
-
-
-
-
-
-
-
-
-
33
+.15
1.93
07170-06225
3.56
-
-
-
-
07150-06803
34
+.15
1.93
07170-07225
3.56
-
-
-
-
07150-07803
35
+.15
2.16
07170-06228
3.81
-
-
-
-
07170-06528
36
+.15
2.16
07170-06228
3.81
-
-
-
-
07170-06873
37
+.15
2.16
07170-07228
3.81
-
-
-
-
07170-07528
2.8mm RIVSCREW®
38
-
-
-
-
-
-
-
-
-
3.0mm RIVSCREW®
39
-
-
-
-
-
-
-
-
-
3.5mm RIVSCREW®
40
-
-
-
-
-
-
-
-
-
4.0mm RIVSCREW®
41
-
-
-
-
-
-
-
-
-
FASTENER
3/32" AVLUG®
1/8" AVLUG®
2.5mm, 4-40 UNC
AVSERT®
3.0mm, 6-32 UNC
AVSERT®
2.5mm AVTRONIC®
2.8mm AVTRONIC®
SPRING
PART Nº
-
21
S e r v i c i n g t h e To o l
Regular servicing should be carried out and a comprehensive inspection performed annually or every 500,000 cycles, whichever is
sooner.
I M P O R TA N T
The employer is responsible for ensuring that tool maintenance instructions are given to the appropriate personnel.
The operator should not be involved in maintenance or repair of the tool unless properly trained.
Daily
•
•
•
•
•
Daily, before use or when first putting the tool into service. Pour a few drops of clean lubricating oil into the air inlet of the
intensifier if no lubricator is fitted on air supply. If the tool is in continuous use, the air hose should be disconnected from the main
air supply and the tool lubricated every two to three hours.
Check for air and oil leaks. If damaged, hoses and couplings should be replaced.
If there is no filter on the pressure regulator, bleed the airline to clear it of accumulated dirt or water before connecting the air
hose to the intensifier. If there is a filter, drain it.
Check that the nose equipment is correct.
Check mandrels regularly for signs of wear or damage monitoring the number of placings (read the safety instructions on page 4).
We e k l y
•
•
•
Conduct the full “Daily” procedures as described above.
Remove, inspect, clean and grease the Tail Jaws (refer to “Tail Jaw Cylinder” in the "Maintenance Section" page 24).
Check oil level in the intensifier Unit reservoir is approximately 12mm (1/2”) below the transparent cover plate.
Moly Lithium Grease EP 3753 Safety Data
Grease can be ordered as a single item, the part number is shown in the service kit page 23.
First Aid
SKIN:
As the grease is completely water resistant it is best removed with an approved emulsifying skin cleaner.
INGESTION:
Ensure the individual drinks 30ml Milk of Magnesia, preferably in a cup of milk.
EYES:
Irritant but not harmful. Irrigate with water and seek medical attention.
Fire
FLASH POINT: Above 220°C.
Not classified as flammable.
Suitable extinguishing media: CO2, Halon or water spray if applied by an experienced operator.
Environment
Scrape up for burning or disposal on approved site.
Handling
Use barrier cream or oil resistant gloves
Storage
Away from heat and oxidising agent.
22
S e r v i c i n g t h e To o l
Service Kit
For all servicing we recommend the use of the service kit (part number 07900-05300).
SERVICE KIT
ITEM PART Nº
07900-00157
07900-00006
07900-00446
07900-00603
07900-00520
07900-00521
07900-00602
07900-00595
07900-00434
07900-00237
07900-00012
07900-00008
DESCRIPTION
CIRCLIP PLIERS
SPATULA
EXTRACTOR
BARREL VICE JAWS
3
/8" ROD
1
/4" ROD
'O' RING ASSEMBLY BULLET
18mm SPANNER
32mm SPANNER
3/8" x 5/16" B.S.W. SPANNER
9/16" x 5/8" SPANNER
7/16" x 1/2" SPANNER
Nº OFF
ITEM PART Nº
1
1
1
1
1
1
1
1
1
1
1
1
07900-00352
07900-00710
07900-00725
07900-00243
07900-00717
07900-00013
07900-00617
07900-00469
07900-00351
07900-00224
07900-00225
07992-00020
DESCRIPTION
SEAL REMOVAL HOOK
BARREL PLUG REMOVAL SPANNER
BULLET
SCREWDRIVER
INTENSIFIER SPANNER
1/8" ALLEN KEY
LOCTITE MULTI-GASKET 574 50ml PACK
2.5mm ALLEN KEY
3mm ALLEN KEY
4mm ALLEN KEY
5mm ALLEN KEY
80g TIN MOLY LITHIUM GREASE EP 3753
Nº OFF
1
1
1
1
1
1
1
1
1
1
1
1
Note: Spanner sizes are measured 'across flats' unless otherwise specified.
23
Maintenance
Every 500,000 cycles the tool should be completely dismantled and new components should be used where worn, damaged or when
recommended. All ‘O’ rings and seals should be renewed and lubricated with Moly Lithium grease EP 3753 before assembling.
I M P O R TA N T
Safety Instructions appear on page 4.
The employer is responsible for ensuring that tool maintenance instructions are given to the appropriate personnel.
The operator should not be involved in maintenance or repair of the tool unless properly trained.
The airline must be disconnected before any servicing or dismantling is attempted, unless specifically instructed otherwise.
It is recommended that any dismantling operation be carried out in clean conditions.
Dismantling of the 07530 MkII and 07532 MkII are covered separately. For the 07530 MkII refer to the dismantling procedures below
and for the 07532 MkII refer to pages 26-27. Item numbers in bold refer to the general assemblies and parts lists for the respective
model on pages 28-31.
Prior to dismantling the tool, you will need to remove the nose equipment.
For total tool servicing we advise that you proceed with the dismantling of sub-assemblies in the order shown below after having
disconnected the hydraulic hose from the intensifier unit and the trigger air line from the intensifier valve, thus separating the pistol
unit from the intensifier unit.
Dismantling 07530-02200 MkII
To dismantle the 07532-02200 MkII refer to pages 26-27.
TAIL JAW CYLINDER
•
•
•
•
•
•
•
•
•
•
•
•
Manually flip the Clip 47 up and remove the End Cap 38.
Using an Allen Key*, remove one Cap Head Screw 44 ensuring that any trapped air in the tail jaw cylinder is exhausted. Remove the
second Cap Head Screw 44.
Pull out Rear Plug 46.
Extract air tail jaw components, comprising Tail Jaw Piston Assembly 14, Spring 13, Jaws 9 and Jaw Housing 8.
Remove plug at rear of piston assembly using an Allen Key* and a bar through the large slot in the turret.
Clean out turret using a 4.7mm (3/16”) drill and replace plug using a non-hardening sealing compound, e.g. Loctite Multi-gasket 574*.
Remove piston seal ‘O’ Ring 10.
Using an Allen Key*, remove all five handle moulding securing Screws 34, 39 and Nuts 33 from the tool handle.
Grip Barrel 25 in a vice using soft jaws* to avoid damage.
Using a box spanner*, unscrew Barrel Plug 7, preventing Barrel 25 turning by using an open ended spanner*.
Disconnect Air Tail Jaw Concertina Tube 12 from Switch Block 28 and pull Tail Jaw Cylinder 6 from tool.
Remove ‘O’ Ring 4, Rubbing Strip 15 and Barrel Return Spring 16.
•
•
Free length of Spring 13 should be 38.1mm (1.5”). Replace if necessary.
Coat the tail jaws with Moly Lithium grease before assembling.
•
Assemble in reverse order of dismantling.
HYDRAULIC PISTON
•
•
•
•
•
•
•
•
•
•
•
Remove Tail Jaw Cylinder 6 as described earlier.
Grip Body 19 in vice using soft jaws* to avoid damage, undo Stroke Limiter 17.
Grip Barrel 25 in soft jaw vice, pull Body 19 from Barrel 25 (a small quantity of hydraulic oil will be ejected from inside body).
Remove Piston 18 carefully so as not to damage body bore.
Remove Seal 3.
Seal 1 is difficult to remove without damaging, but can remain in place during cleaning (provided it is not affected by cleaning process). If
however, Seal 1 requires renewing proceed as follows:
Using spatula*, prise out Seal 1 from Body 19, taking care not to damage body cavity and bores. The removed Seal 1 MUST be
discarded.
To replace Seal 1, unscrew Hydraulic Hose Assembly 22 and fit a spare Bleed Plug Assembly 2 screwing it in to bring inside face level
with internal bore.
Unscrew existing bleed plug until inside face is level with internal bore. This will provide a smooth passage for insertion of new Seal 1
through rear of body.
Ensure the seal is well greased and the correct way round with the open end of the seal facing the rear tail jaws.
Complete assembly in reverse order of dismantling.
* Refers to items included in the 0753 Mkll service kit. For complete list see page 23.
Item numbers in bold refer to the general assemblies and parts lists on pages 28-29.
24
Maintenance
Dismantling 07530-02200 MkII
TRIGGER ASSEMBLY
•
•
•
•
•
•
•
To dismantle/service assembly, remove covers from the tool as described earlier.
Disconnect all air hoses from assembly, taking care not to damage them. Remove assembly.
Using a spanner*, unscrew the Retainer 49 and remove. Take care to keep the Spring 50.
Prise off the ‘O’ Ring 53 taking care not to damage the Spindle 54 and Retainer 49 seatings.
Clean and re-assemble using a new ‘O’ Ring 53.
Check length of Spring 50 which must be 12.7mm (0.5”) free length – replace if necessary.
Assembly in reverse order of dismantling.
TAIL JAW ON/OFF VALVE
•
•
•
•
•
•
•
•
•
•
The unit is designed so that minimum of servicing is required during the life of the tool.
If it is necessary to dismantle valve, proceed as follows:
Disconnect air hose from assembly, taking care not to damage them. Remove assembly.
Using an Allen Key*, loosen Screw 27 clamping assembly to Barrel 25 and remove assembly.
Using a screwdriver*, carefully remove the Chrome Star-lock Washer 26 from Air Tail Jaw Spool 29 and discard washer.
Extract Air Tail Jaw Spool 29 from Switch Block 28.
Taking care not to damage the Air Tail Jaw Spool 29, remove the ‘O’ Rings 31.
Clean spool and refit new ‘O’ Rings 31 using assembly bullet* and insert into Switch Block 28, noting its orientation.
Fit New Chrome Star-lock Washer 26 by clamping in vice using a soft jaw vice to prevent damage. DO NOT USE UNDUE FORCE.
Complete assembly in reverse order of dismantling.
TAIL JAW PRESSURE NON-RETURN VALVE
•
•
•
The Non-return Valve 21 is located in the tool handle.
To remove/replace the Non-return Valve 21 depress the bulk head fittings and withdraw the Blue Plastic Tube 23 from both ends.
When replacing the Non-return Valve 21, note the orientation.
HANDLE & END CAP
•
Clean and inspect mouldings for cracks or other damage.
CURSOR
•
Clean and oil Mechanical Cursor Assembly 5 occasionally with a little light oil.
I M P O R TA N T
Check the tool against daily and weekly servicing.
Priming is ALWAYS necessary after the tool has been dismantled and prior to operating.
* Refers to items included in the 0753 Mkll service kit. For complete list see page 23.
Item numbers in bold refer to the general assemblies and parts lists on pages 28-29.
25
Maintenance
Dismantling 07532-02200 MkII
To dismantle the 07530-02200 MkII refer to pages 24-25.
TAIL JAW CYLINDER
•
•
•
•
•
•
•
•
Manually flip the Clip 54 up and remove the End Cap 45.
Using an Allen Key*, remove one cap head Screw 51 ensuring that any trapped air in the tail jaw cylinder is exhausted. Remove
the second cap head Screw 51.
Push forward Rear Plug 53 against Spring 20 and release quickly to allow Rear Plug 53 to fall away.
Extract air tail jaw components, comprising Tail Jaw Piston Assembly 21, Spring 20, Jaws 16 and Jaw Housing 15.
Remove plug at rear of piston assembly using an Allen Key* and a bar through the large slot in the turret.
Clean out turret using a 4.7mm (3/16”) drill and replace plug using a non-hardening sealing compound, e.g. Loctite Multi-gasket
574*.
Remove piston seal ‘O’ Ring 17.
Using an Allen Key*, remove all five handle moulding securing Screws 41, 46 and Nuts 40 from the tool handle.
Grip Barrel 31 in a vice using soft jaws* to avoid damage.
Using a box spanner*, unscrew Barrel Plug 14, preventing Barrel 31 turning by using an open ended spanner*.
Disconnect Air Tail Jaw Concertina Tube 19 from Switch Block 35 and pull Tail Jaw Cylinder 12 from tool.
Remove ‘O’ Ring 10, Rubbing Strip 22 and Barrel Return Spring 13.
•
•
Free length of Spring 20 should be 38.1mm (1.5”). Replace if necessary.
Coat the tail jaws with Moly Lithium grease before assembling.
•
Assemble in reverse order of dismantling.
•
•
•
•
HYDRAULIC PISTON
•
•
•
•
•
•
•
•
•
•
•
Remove Tail Jaw Cylinder 12 as described earlier.
Grip Body 25 in vice using soft jaws* to avoid damage, undo Stroke Limiter 23.
Grip Barrel 31 in soft jaw vice, pull Body 25 from Barrel 31 (a small quantity of hydraulic oil will be ejected from inside body).
Remove Piston 24 carefully so as not to damage body bore.
Remove Seal 9.
Seal 1 is difficult to remove without damaging, but can remain in place during cleaning (provided it is not affected by cleaning
process). If however, Seal 1 requires renewing proceed as follows:
Using spatula*, prise out Seal 1 from Body 25, taking care not to damage body cavity and bores. The removed Seal 1 MUST be
discarded.
To replace Seal 1, disconnect Hydraulic Hose Assembly 63 and all the associated air pipes. Unscrew Self Closing Coupler 6,
remove Suspension Mounting Plate 4, unscrew the Adapter Top Hose 2 and fit a spare Bleed Plug Assembly 30 screwing it into
bring the inside face level with the internal bore.
Unscrew existing bleed plug until inside face is level with internal bore. This will provide a smooth passage for insertion of new
Seal 1 through rear of body.
Ensure the seal is well greased and the correct way round with the open end of the seal facing the rear tail jaws.
Complete assembly in reverse order of dismantling.
* Refers to items included in the 0753 Mkll service kit. For complete list see page 23.
Item numbers in bold refer to the general assemblies and parts lists on pages 30-31.
26
Maintenance
Dismantling 07532-02200 MkII
TRIGGER ASSEMBLY
•
•
•
•
•
•
•
To dismantle/service assembly, remove covers from the tool as described earlier.
Disconnect all air hoses from assembly, taking care not to damage them. Remove assembly.
Using a spanner*, unscrew the Retainer 56 and remove. Take care to keep the Spring 57.
Prise off the ‘O’ Ring 60 taking care not to damage the Spindle 61 and Retainer 56 seatings.
Clean and re-assemble using a new ‘O’ Ring 60.
Check length of Spring 57 which must be 12.7mm (0.5”) free length – replace if necessary.
Assembly in reverse order of dismantling.
TAIL JAW ON/OFF VALVE
•
•
•
•
•
•
•
•
•
•
The unit is designed so that minimum of servicing is required during the life of the tool.
If it is necessary to dismantle valve, proceed as follows:
Disconnect air hose from assembly, taking care not to damage them. Remove assembly.
Using an Allen Key*, loosen Screw 34 clamping assembly to Barrel 31 and remove assembly.
Using a screwdriver*, carefully remove the Chrome Star-lock Washer 33 from Air Tail Jaw Spool 36 and discard washer.
Extract Air Tail Jaw Spool 36 from Switch Block 35.
Taking care not to damage the Air Tail Jaw Spool 36, remove the ‘O’ Rings 38.
Clean spool and refit new ‘O’ Rings 38 using assembly bullet* and insert into Switch Block 35, noting its orientation.
Fit New Chrome Star-lock Washer 33 by clamping in vice using soft Jaws to prevent damage. DO NOT USE UNDUE FORCE.
Complete assembly in reverse order of dismantling.
TAIL JAW PRESSURE NON-RETURN VALVE
•
•
•
The Non-return Valve 26 is located in the tool handle.
To remove/replace the Non-return Valve 26 depress the bulk head fittings and withdraw Blue Plastic Tube 27 from both ends.
When replacing the Non-return Valve 26, note the orientation.
HANDLE & END CAP
•
Clean and inspect mouldings for cracks or other damage.
CURSOR
•
Clean and oil Mechanical Cursor Assembly 11 occasionally with a little light oil.
I M P O R TA N T
Check the tool against daily and weekly servicing.
Priming is ALWAYS necessary after the tool has been dismantled and prior to operating.
* Refers to items included in the 0753 Mkll service kit. For complete list see page 23.
Item numbers in bold refer to the general assemblies and parts lists on pages 30-31.
27
28
48
31
53
49
50
SECTION 'X'-'X'
32
25
24
20
51
30
29
28
52
TRIGGER VALVE DETAIL
54
26
27
60
X
X
23
1
2
20
3
4
22
21
19
40
41
39
33
18
5
34
33
17
6
16
7
15
8
39
33
35
36
W
14
13
43
10
44
12
46
45
11
45
44
PART SECTION 'W'-'W'
9
HANDLE COVER DETAILS
34
33
34
33
47
38
37
W
G e n e r a l A s s e m b l y o f B a s e To o l 0 7 5 3 0 - 0 2 2 0 0 M k I I
PART Nº
07003-00237
07530-00500
07003-00236
07003-00167
07271-01100
07530-02207
07530-02205
07530-00208
07151-00403
07003-00113
07005-01972
07530-02211
07154-00404
07530-02800
07530-00206
07490-03002
07530-00204
07530-00203
07530-02202
07003-00142
07005-01973
07008-00423
07005-01083
07007-00017
07530-02201
07004-00058
07001-00404
07530-02301
ITEM
1
2
3
4
5
6
7
8
9
10
11
12
13
14
15
16
17
18
19
20
21
22
23
24
25
26
27
28
DESCRIPTION
SEAL (STATIC)
BLEED PLUG ASSEMBLY (ITEMS 56 to 59)
SEAL (DYNAMIC)
'O' RING
MECHANICAL CURSOR ASSEMBLY
TAIL JAW CYLINDER
BARREL PLUG
JAW HOUSING
JAWS
'O' RING
L TYPE THREADED NIPPLE
AIR TAIL JAW CONCERTINA TUBE
SPRING
TAIL JAW PISTON ASSEMBLY
RUBBING STRIP
BARREL RETURN SPRING
STROKE LIMITER
PISTON
BODY
1/8" BSP BONDED SEAL
NON-RETURN VALVE
HYDRAULIC HOSE ASSEMBLY
4mm O/D BLUE PLASTIC TUBE
DUST CAP
BARREL
1/8" STARLOCK WASHER CHROME
M5 X 6 LONG SOCKET HEAD SCREW
SWITCH BLOCK
1
1
1
1
1
1
1
1
2
1
1
1
1
1
1
1
1
1
1
2
1
1
60mm
1
1
1
1
1
1
1
2
2
1
2
29
30
31
32
33
34
35
36
37
38
39
40
41
43
44
45
46
47
48
49
50
51
52
53
54
56
57
58
59
60
QTY SPARES ITEM
07530-02302
07004-00059
07003-00121
07005-01571
07002-00134
07001-00401
07530-02210
07007-01504
07007-01503
07530-02603
07001-00262
07530-02601
07530-02602
07003-00113
07001-00504
07002-00153
07530-02213
07530-02220
07007-00300
07220-00803
07125-00215
07530-02311
07005-01357
07003-00022
07241-00208
07003-00142
07003-00194
07001-00442
07530-00501
07530-00310
PART Nº
07530-02200 PARTS LIST
DESCRIPTION
AIR TAIL JAW SPOOL
1/8" STARLOCK WASHER BLACK
'O' RING
ELBOW CONNECTOR
M4 HEX NUT
M4 X 10 LONG SOCKET HEAD CAP SCREW
LABEL
CE MARK LABEL
BOOK SYMBOL LABEL
END CAP
M4 X 22 LONG SOCKET HEAD CAP SCREW
MODIFIED HANDLE MOULDING (RIGHT)
MODIFIED HANDLE MOULDING (LEFT)
'O' RING
M4 X 6 LONG SOCKET HEAD CAP SCREW
M4 WASHER PLASTIC
REAR PLUG
CLIP
TRIGGER BUTTON
RETAINER
SPRING
TRIGGER HOUSING
COLLET TYPE CONNECTOR
'O' RING
SPINDLE
● BONDED SEAL
● BONDED SEAL
● SCREW
● PLUG
BLANKING PLUGS
1
1
2
2
5
3
2
1
1
1
2
1
1
1
2
2
1
1
1
1
1
1
1
1
1
1
1
1
1
2
3
2
1
1
-
QTY SPARES
P a r t s L i s t f o r B a s e To o l 0 7 5 3 0 - 0 2 2 0 0 M k I I
29
30
55
60
56
57
58
37
X
1
30
3
2
X
5
3
4
29
7
9
8
28
27
12
41
40
24
26
11
25
10
47
48
36
6
46
40
63
35
32
31
SECTION 'X'-'X'
39
38
7
TRIGGER VALVE DETAIL
61
33
34
68
3
13
23
14
22
15
46
40
42
43
W
21
16
50
19
51
18
52
51
PART SECTION 'W'-'W'
20
17
HANDLE COVER DETAILS
41
40
41
40
53
52
54
45
44
W
G e n e r a l A s s e m b l y o f B a s e To o l 0 7 5 3 2 - 0 2 2 0 0 M k I I
PART Nº
07003-00237
07532-00203
07003-00142
07532-02202
07532-00205
07005-00759
07005-01357
07005-01325
07003-00236
07003-00167
07271-01100
07530-02207
07490-03002
07530-02205
07530-00208
07151-00403
07003-00113
07005-01972
07530-02211
07154-00404
07530-02800
07530-00206
07530-00204
07530-00203
07530-02202
07005-01973
07005-01083
07532-02215
07005-01084
07530-00500
07530-02201
07007-00017
ITEM
1
2
3
4
5
6
7
8
9
10
11
12
13
14
15
16
17
18
19
20
21
22
23
24
25
26
27
28
29
30
31
32
SEAL (STATIC)
ADAPTOR TOP HOSE
1/8" BSP BONDED SEAL
SUSPENSION MOUNTING PLATE
MODIFIED SCREW
SELF CLOSING COUPLER
COLLET TYPE CONNECTOR
BARBED STRAIGHT CONNECTOR
SEAL (DYNAMIC)
'O' RING
MECHANICAL CURSOR ASSEMBLY
TAIL JAW CYLINDER
BARREL RETURN SPRING
BARREL PLUG
JAW HOUSING
JAWS
'O' RING
L TYPE THREADED NIPPLE
AIR TAIL JAW CONCERTINA TUBE
SPRING
TAIL JAW PISTON ASSEMBLY
RUBBING STRIP
STROKE LIMITER
PISTON
BODY
NON-RETURN VALVE
4mm O/D BLUE PLASTIC TUBE
SEALING PLUG
4mm O/D BLACK PLASTIC TUBE
BLEED PLUG ASSEMBLY (ITEMS 64 to 67)
BARREL
DUST CAP
DESCRIPTION
1
1
1
220mm
1
350mm
1
1
4
1
1
1
3
2
1
1
1
1
1
1
1
2
1
1
1
1
1
1
1
1
1
1
2
1
1
2
2
1
33
34
35
36
37
38
39
40
41
42
43
44
45
46
47
48
50
51
52
53
54
55
56
57
58
60
61
63
64
65
66
67
68
QTY SPARES ITEM
07004-00058
07001-00404
07530-02301
07530-02302
07004-00059
07003-00121
07005-01571
07002-00134
07001-00401
07530-02210
07007-01504
07007-01503
07530-02603
07001-00262
07532-02208
07532-02209
07003-00113
07001-00504
07002-00153
07530-02213
07530-02220
07007-00300
07220-00803
07125-00215
07530-02311
07003-00022
07241-00208
07008-00414
07003-00142
07003-00194
07001-00442
07530-00501
07530-00310
PART Nº
07532-02200 PARTS LIST
1/8" STARLOCK WASHER CHROME
M5 X 6 LONG SOCKET HEAD SCREW
SWITCH BLOCK
AIR TAIL JAW SPOOL
1/8" STARLOCK WASHER BLACK
'O' RING
ELBOW CONNECTOR
M4 HEX NUT
M4 X 10 LONG SOCKET HEAD CAP SCREW
LABEL
CE MARK LABEL
BOOK SYMBOL LABEL
END CAP
M4 X 22 LONG SOCKET HEAD CAP SCREW
MODIFIED HANDLE MOULDING (RIGHT)
MODIFIED HANDLE MOULDING (LEFT)
'O' RING
M4 X 6 LONG SOCKET HEAD CAP SCREW
M4 WASHER PLASTIC
REAR PLUG
CLIP
TRIGGER BUTTON
RETAINER
SPRING
TRIGGER HOUSING
'O' RING
SPINDLE
HYDRAULIC HOSE ASSEMBLY
● BONDED SEAL
● BONDED SEAL
● SCREW
● PLUG
BLANKING PLATE
DESCRIPTION
1
1
1
1
1
2
2
5
3
2
1
1
1
2
1
1
1
2
2
1
1
1
1
1
1
1
1
1
1
1
1
1
2
3
2
1
1
-
QTY SPARES
P a r t s L i s t f o r B a s e To o l 0 7 5 3 2 - 0 2 2 0 0 M k I I
31
Intensifier 07531-02200 - Maintenance
Dismantling Instructions
•
•
•
•
•
•
•
•
•
•
•
•
•
•
•
•
•
•
•
•
•
•
•
•
•
•
•
When dismantling the intensifier assembly, first disconnect the air supply hose to intensifier inlet Connector 22.
Using an Allen Key* undo four Screws 27 and remove Protection Plate 24.
Disconnect the trigger hose (item 22 on page 28 or item 29 on page 30) from the intensifier Valve 43 or 48 by depressing the
outlet collet and withdrawing the hose.
Remove Cover Plate 4 and Gasket 35 by removing Screws 37 and Washers 36 using Allen Key*.
Ensure that gasket is not damaged to ensure a proper seal on assembly.
Invert intensifier assembly and drain oil from reservoir into a suitable container.
Remove Quick Release Connector 32 together with Connector 31 and Seals 33 with suitable spanner*.
Remove intensifier Valve 43 or 48 by removing the fixing screws with a suitable spanner taking care to retain ‘O’ Ring 21 located
in the Intensifier Body Casting.
Remove Screw 19 using a suitable Allen Key* and remove Silencer Cover 16, Foam Silencer 15, Spacer 18 and Retaining Plate
20.
Pull off the 6mm Plastic Tube 41 from Vacuum Connectors 42.
From the base of the intensifier insert a 3mm Allen Key * through the two holes and unscrew the Vacuum Connectors 42. Note:
• Care must be taken as the vacuum connectors are locked and sealed in place using Loctite 574.
• If difficult to remove, the vacuum connectors can be drilled out using a 3/16” or 4.7mm diameter drill.
To reassemble the Vacuum Connectors 42, the following procedure must be followed: • Soak the vacuum connectors in a suitable primer, i.e. Perma Bond A905
• Place a drop of Loctite 574 in the intensifier threaded hole.
• From the base of the intensifier insert the Allen Key * through the hole. Ensure that the Allen Key * is free from Loctite 574
before inserting into the vacuum connector.
• Rotate the Allen Key while applying Loctite 574 to the base of the vacuum connector.
• Screw the Vacuum connector into the intensifier, ensuring that there is sufficient Loctite 574 at the base of the fitting such the
thread is not visible.
Using a screwdriver, carefully remove internal Retaining Ring 14. Clean and inspect groove for sign of damage.
Using Extractor*, insert male threaded end into End Cover 12 and withdraw it along with intensifier Sleeve 28 and ‘O’ Rings 10
and 13.
Insert Rod* through the connector orifice at the front of the intensifier body and tap out Piston Rod 9 and Piston Assembly.
Using a suitable Allen Key*, unscrew two Screws 25 and remove End Cover 12 from intensifier Sleeve 28.
Remove Seal Plug 7 with spanner*.
Insert rod* through connector orifice at the front of the intensifier body and push out Seal Housing 5 and associated ‘O’ rings and
lip seals.
Remove Valve Housing Assembly 34 from the main body with a suitable spanner*. Clean by blowing through with a low-pressure
air jet.
Remove Piston Rod 9 from intensifier Air Piston 11 by gripping the first 20 mm (3/4”) of the rod in a vice fitted with soft jaws,
taking care not to damage or mark the working surface.
Unscrew locking Nut 17 with a suitable spanner*.
Assemble in the reverse order of dismantling, observing the following:
Clean all parts and renew all ‘O’ rings.
Lubricate all seals using Moly Lithium grease.
Valve Housing Assembly 34 must be refitted using a thread sealing adhesive.
Assemble the Piston Assembly using a new Nut 17.
End Cover 12 must be fitted correctly inside Retaining Ring 14. The tool must not be operated if the end cover has been omitted.
I M P O R TA N T
Priming is ALWAYS necessary after the tool has been dismantled and prior to operating.
* Refers to items included in the 0753 MkII service kit. For complete list see page 23.
Item numbers in bold refer to the illustration and parts list opposite.
32
Intensifier 07531-02200
1
3
5
2
4
37
36
6
9
7
8
11
13
10
12
15
14
16
Note
units will not
*Some
include these items
35
33
34
17
6
18
(The required link is
achieved via internal porting)
38
19
39
'B'
40
20
32
31
41
*
21*
22
30
29
42
*
28
27
44
26
47
46
45
25
24
23
'A'
48
VIEW ON ARROW 'B'
43
49
50
54
53
VIEW ON ARROW 'A'
52
51
VIEW ILLUSTRATING FESTO VALVE
VIEW ILLUSTRATING COMPAIR VALVE
07531-02200 PARTS LIST
ITEM
PART Nº
1
2
3
4
5
6
7
8
9
10
11
12
13
14
15
16
17
18
19
20
21
22
23
24
25
26
27
07003-00037
07240-00211
07001-00418
07240-00210
71420-02006
07003-00153
71420-02007
71420-02300
71420-02008
07003-00182
07531-00202
07531-00204
07003-00183
07004-00069
07240-00213
07240-00214
07002-00017
07240-00215
07001-00417
07240-00216
* 07003-00042
07005-00041
07003-00065
07240-00220
07001-00375
07003-00238
07001-00396
DESCRIPTION
SEAL
FILLER SCREW
BLEED SCREW
COVER PLATE
SEAL HOUSING
'O' RING
SEAL PLUG
BODY ASSEMBLY
PISTON ROD
'O' RING
AIR PISTON
END COVER
'O' RING
RETAINING RING
FOAM SILENCER
SILENCER COVER
NUT
SPACER
SCREW
RETAINING PLATE
'O' RING
CONNECTOR
WASHER
PROTECTION PLATE
SCREW
'O' RING
SCREW
QTY SPARES ITEM
1
1
1
1
1
2
1
1
1
1
1
1
1
1
1
1
1
1
1
1
1
1
1
1
2
1
4
1
1
1
1
1
1
1
1
1
1
-
28
29
30
31
32
33
34
35
36
37
38
39
40
41
42
43
44
45
46
47
48
49
50
51
52
53
54
PART Nº
DESCRIPTION
07531-00201
07003-00337
07003-00336
07005-00406
07005-00759
07003-00142
07240-00400
07240-00209
07002-00073
07001-00554
07007-01504
07240-00217
07531-00205
07005-00596
07245-00103
07005-00590
07005-01431
07005-00668
07005-00670
07005-01084
07005-01524
07001-00176
07007-00292
07005-00647
07005-01085
07005-00855
07007-01503
SLEEVE
LIP SEAL
LIP SEAL
CONNECTOR
QUICK RELEASE CONNECTOR
SEAL
VALVE HOUSING ASSEMBLY
GASKET
WASHER
SCREW
LABEL
LABEL
LABEL
* 6mm PLASTIC TUBE
* VACUUM CONNECTOR
COMPAIR VALVE
BULKHEAD CONNECTOR
M5 PLUG
M5 SEALING RING
4mm PLASTIC TUBE (150mm)
FESTO VALVE
SCREW
1/4" BSP REDCAP
CONNECTOR
6mm PLASTIC TUBE (150mm)
BULKHEAD UNION
LABEL
QTY SPARES
1
1
2
1
1
2
1
1
4
4
1
1
2
2
1
1
1
1
1
3
1
1
1
1
1
2
1
1
1
1
1
1
-
33
P i l o t Va l v e 0 7 0 0 5 - 0 0 5 9 0 - M a i n t e n a n c e
Dismantling Instructions
Please note that these service instructions refer to the Compair valve where fitted.
Servicing of the valve is limited to the removal/replacement of ‘O’ rings.
•
Remove Screws 24 and remove pilot assembly .
•
Remove Piston 11 and discard ‘O’ Rings 3, 10, 4 and 5.
•
Remove Screws 26 and 21 and remove End Caps 22 and 25.
•
Withdraw Pistons 12 and 18 and remove ‘O’ Rings 7 and 9 from pistons.
•
Withdraw Spool 16 from bore, taking care not to damage surface of spool and remove location Washers 14 and 17, ‘O’ Ring 8,
Spacers 15 and ‘O’ Ring 6 from each end of valve body.
•
Remove five interface ‘O’ Rings 4.
•
Discard ALL ‘O’ rings removed.
•
Clean all parts with paraffin or white spirit. DO NOT USE SOLVENTS. Dry all parts.
•
Lightly smear bores of valve Body 23, pilot valve Body 19, both End Caps 22 and 25 and all replacement ‘O’ rings with
CENTOPLEX 2 grease.
•
Fit new ‘O’ Rings 10, 4 and 5 to Piston 11 and insert into pilot valve body.
•
Fit new ‘O’ Rings 3, 10 and 6 to pilot valve body, place Top Cap 20 in position and secure pilot valve assembly to main valve Body
23 with Screws 24. Ensure that the interface seal housing faces upward with the G1/4 at the bottom. Ensure orientation of Piston
11 is correct.
•
With main valve Body 23 in the same position, fit green location Washer 17 to the left hand side of the valve assembly.
•
Starting from the right hand side of the valve, assemble alternately ‘O’ Rings 8 and Spacers 15 (6 seals and 5 spacers) and finally
complete the stack assembly with white location Washer 14.
•
Lightly smear Spool 16 with CENTOPLEX 2 grease, supplied with the service kit, and slide spool through seal/spacer stack.
•
Fit ‘O’ Rings 9 and 7 to respective Pistons 18 and 12, fit ‘O’ Rings 6 to ends of main valve Body 23.
•
Insert pistons into End Caps 25 and 22 and assemble end caps to valve, taking care to locate piston shafts into holes in the ends
of Spool 16.
•
Secure end cap assemblies to main valve Body 23 with Screws 26 and 21.
•
Fit interface ‘O’ Rings 4 into their housings in the main valve body.
•
If the pipe connection to the pilot assembly is damaged, replace Plastic Collet 2 and lift out the ‘O’ Ring 1 from Cartridge 27.
•
Fit new ‘O’ Ring 1 and insert Plastic Collet 2 into Cartridge 27.
I M P O R TA N T
Priming is ALWAYS necessary after the tool has been dismantled and prior to operating.
Item numbers in bold refer to the illustration and parts list opposite.
34
P i l o t Va l v e 0 7 0 0 5 - 0 0 5 9 0 - S p a re s I n f o r m a t i o n
1
20
18
2
27
10
3
19
4
10
11
6
5
6
12
4
13
VIEW ON ARROW 'A'
9
17
26
16
25
15
8
23
24
14
7
22
INTERFACE 'O' RINGS
21
'A'
07005-00590 VALVE PARTS LIST
ITEM
PART Nº
1
2
3
4
5
6
7
8
9
10
11
12
13
14
07005-00599
07005-00598
07003-00204
07003-00103
07003-00042
07003-00121
08005-00127
07003-00105
07003-00178
07003-00017
07005-00590
-
DESCRIPTION
* 'O' RING
* PLASTIC COLLET
* 'O' RING
* 'O' RING
* 'O' RING
* 'O' RING
* 'O' RING
* 'O' RING
* 'O' RING
* 'O' RING
† PISTON
† PISTON
VALVE ASSEMBLY
† WASHER
QTY SPARES ITEM
1
6
1
4
1
6
1
2
1
1
1
-
15
16
17
18
19
20
21
22
23
24
25
26
27
PART Nº
-
DESCRIPTION
†
†
†
†
†
†
†
†
†
†
†
†
†
SPACER
SPOOL
WASHER
PISTON
BODY
TOP CAP
SCREW
END CAP
BODY
SCREW
END CAP
SCREW
CARTRIDGE
QTY SPARES
5
1
1
1
1
1
2
1
1
2
1
2
1
-
*
Together these items make up a Service Kit for the valve with the addition of one Centoplex 2 tube of grease, the kit is available from Avdel,
part number 07005-01538.
†
Not available as a spare
35
Priming
Priming is ALWAYS necessary after the tool has been dismantled and prior to operating. It may also be necessary to restore the full
stroke after considerable use, when the stroke may be reduced and fasteners are not fully placed by one operation of the trigger.
Oil Details
The recommended oil for priming is Hyspin VG32 and AWS 32 available in 0.5l (part number 07992-00002) or one gallon containers
(part number 07992-00006). Please see safety data below.
Hyspin VG 32 and AWS 32 Oil Safety Data
First Aid
SKIN:
Wash thoroughly with soap and water as soon as possible. Casual contact requires no immediate attention. Short term contact
requires no immediate attention.
INGESTION:
Seek medical attention immediately. DO NOT induce vomiting.
EYES:
Irrigate immediately with water for several minutes. Although NOT a primary irritant, minor irritation may occur following contact.
Fire
Suitable extinguishing media: CO2, dry powder, foam or water fog. DO NOT use water jets.
Environment
WASTE DISPOSAL: Through authorised contractor to a licensed site. May be incinerated. Used product may be sent for reclamation.
SPILLAGE: Prevent entry into drains, sewers and water courses. Soak up with absorbent material.
Handling
Wear eye protection, impervious gloves (e.g. of PVC) and a plastic apron. Use in well ventilated area.
Storage
No special precautions.
P r i m i n g P ro c e d u r e
I M P O R TA N T
DO NOT OPERATE THE TRIGGER WHILE THE BLEED SCREW IS REMOVED
All operations should be carried out on a clean bench, with clean hands in a clean area.
Ensure that the new oil is perfectly clean and free from air bubbles.
Care MUST be taken at all times, to ensure that no foreign matter enters the tool, or serious damage may result.
•
•
•
•
•
•
•
•
Remove Screw 2 and Seal 1 from Plastic Cover plate 4 on the intensifier reservoir.
Pour the priming oil into the reservoir until it is approximately 1/2” (12mm) from the top.
Replace Screw 2 and Seal 1.
Connect the intensifier unit to the air supply. Remove screw from reservoir.
With the pistol unit fitted to the intensifier unit and held below the level of the intensifier unit, unscrew Bleed Screw 58 from Bleed
Plug Assembly 2 on the 07530 Mk II tool or Bleed Screw 66 from Bleed Plug Assembly 30 on the 07532 Mk II tool two turns and
allow oil to flow out of the tool.
When the oil runs freely and free of air bubbles, tighten the bleed screw.
Top up the reservoir on the intensifier unit with priming oil.
Cycle the tool until any air bubbles present in the oil are expelled into the oil reservoir.
Item numbers in bold refer to the general assemblies and parts lists pages 28-33.
36
Fault Diagnosis
Symptom
Possible Cause
Remedy
Tool will not place
Low air pressure.
Increase air pressure
fastener
Lack of lubrication.
Lubricate tool at air inlet point
High broach load.
Page Ref
Check fastener grip and application
hole size
Check for correct size mandrel.
Worn or broken tail jaws.
New tail jaws
Tail jaws switched off.
Switch on tail jaws
Air in hydraulic system.
See ‘Priming Procedure’
‘Mandrel Slip’ -
Worn or dirty tail jaws.
Clean or renew as necessary
jaws will not grip
’ Insufficient air pressure/volume.
Increase air pressure/volume
mandrel
’ Tail jaw switch inoperable.
Replace switch
’ Air leaks to tail jaws.
Renew ‘O’ rings on piston 8
Mandrel broken and not reaching tail jaws.
Replace mandrel
Defective non-return valve.
Replace non-return valve
Jaws will not
Dirty tail jaws or jaw housing.
Clean and lubricate
release mandrel
Faulty tail jaw switch.
Replace ‘O’ rings
Fasteners will not
Tail jaws not switched on.
Switch on tail jaws
feed through nose
Worn tail jaws.
Renew tail jaws
jaws
Cursor orientation incorrect.
Refit, ensuring correct orientation
Incorrect cursor
Fit correct cursor
Incorrect nose jaws.
Fit correct nose jaws
Excessive tail jaw
Mandrel follower spring not fitted.
Fit correct mandrel follower spring
Incorrect gap between fastener head
Set gap to 1.5mm - 3mm (1/16” - 1/8”)
and nose jaws when loaded.
See ‘Loading the Tool’
Cursor sticking.
Clean and oil cursor
Weak outer spring around cursor.
Renew cursor
Incorrect mandrel follower spring fitted.
Fit correct mandrel follower spring
High broach load.
wear
36
10
Check application hole size and thickness
and fastener grip capability
Feeding more than
Mandrel slip.
Check as for ‘Mandrel Slip’, stage 2
one fastener at a
Incorrect gap between fastener head
Set gap to 1.5mm - 3mm (1/16” - 1/8”)
time
and nose jaws when loaded
See ‘Loading the Tool’
10
Other symptoms or failures should be reported to your local Avdel authorised distributor or repair centre.
37
Notes
38
Declaration of Conformity
We, Avdel UK Limited, Watchmead Industrial Estate, Welwyn Garden City, Herts, AL7 1LY
declare under our sole responsibility that the product:
Model 0753 MkII type 07530 - 07532 models
Hand Tool Serial No.
................................................
Intensifier Serial No.
................................................
to which this declaration relates is in conformity with the following standards:
EN ISO 12100 - parts 1 & 2
BS EN ISO 8662 - part 6
BS EN ISO 11202
BS EN ISO 3744
BS EN 982
ISO EN 792 part 13 - 2000
BS EN 983
following the provisions of the Machine Directive 2006/42/EC.
A. Seewraj - Product Engineering Manager - Automation Tools
Date of issue
This box contains a power tool which is in
conformity with Machines Directive
2006/42/EC. The ‘Declaration of Conformity’
is contained within.
40
Since 1936
2010
AUSTRALIA
Infastec (Australia) Pty Ltd.
891 Wellington Road
Rowville
Victoria 3178
Tel: +61 3 9765 6400
Fax: +61 3 9765 6445
[email protected]
GERMAN
Avdel Deutschland GmbH
Rotenburger Str. 28
30659 Hannover
Tel: +49 (0) 511 7288 0
Fax: +49 (0) 511 7288 133
[email protected]
CANADA
Avdel Canada Limited
1030 Lorimar Drive
Mississauga
Ontario L5S 1R8
Tel: +1 905 364 0664
+800 268 9947
Fax: +1 905 364 0678
+800 594 7661
[email protected]
INDIA
Infastech Fastening Technologies
India Private Limited
Plot No 0Z-14, Hi Tech SEZ,
SIPCOT Industrial Growth Center,
Oragadam, Sriperumbudur Taluk,
Kanchipuram District,
602105 Tamilnadu
Tel: +91 44 4711 8001
Fax: +91 44 4711 8009
info-in@infastech. com
T
CHINA
Infastech (China) Ltd
RM 1708, 17/F.,
Nanyang Plaza,
57 Hung To Rd., Kwun Tong
Hong Kong
Tel: +852 2950 0631
Fax: +852 2950 0022
[email protected]
FRANCE
Avdel France S.A.S.
Bat. Le Monet Paris Nord 2
9 Allée des Impressionistes
CS 59328 Villepinte
95941 Roissy CDG Cedex
Tel: +33 (0) 149 909500
Fax: +33 (0) 149 909550
[email protected]
T
ITALY
Avdel Italia S.r.L.
Viale Lombardia 51/53
20861 Brugherio (MB)
Tel: +39 039 2879911
Fax: +39 039 2873079
[email protected]
JAPAN
Infastech Kabushiki Kaisha
Center Minami SKY,
3-1 Chigasaki-Chuo, Tsuzuki-ku,
Yokohama-city,
Kanagawa Prefecture
Japan 224-0032
Tel: +81 45 947 1200
Fax: +81 45 947 1205
[email protected]
Manual No.
Issue
Change Note No.
07900-00724
B5
13/112
MALAYSIA
Infastech (Malaysia) Sdn Bhd
Lot 63 Persiaran Bunga
Tanjung 1,
Senawang Industrial Park
70400 Seremban
Negeri Sembilan
Tel: +606 676 7168
Fax: +606 676 7101
[email protected]
SINGAPORE
Infastech (Singapore) Pte Ltd.
31 Kaki Bukit Road 3
#05-03/06 Techlink
Singapore, 417818
Tel: +65 6372 5653
Fax: +65 6744 5643
[email protected]
SOUTH KOREA
Infastech (Korea) Ltd.
32-9, Jik-dong,
Gwangju-si, Gyeonggi-do
Korea, 464-090
Tel: +82 31 661 6342
+82 31 798 6340
Fax: +82 31 798 6342
[email protected]
SPAIN
Avdel Spain S.A
C/ Puerto de la
Morcuera, 14
Poligono Industrial Prado
Overa
Ctra. de Toledo, km 7,8
28919 Leganés (Madrid)
Tel: +34 91 3416767
Fax: +34 91 3416740
[email protected]
TAIWAN
Infastech/Tri-Star Limited
No 269-7, Baodong Rd,
Guanmiao Dist.
Tainan City
Taiwan, R.O.C. 71841
Tel: +886 6 596 5798 (ext 201)
Fax: +886 6 596 5758
[email protected]
THAILAND
Infastech Thai Co., Ltd
64/132 Moo 4 Tambon
Pluakdaeng
Amphur Pluakdaeng Rayong
21140 Thailand
Tel: +66 (0) 38 656360
Fax: +66 (0) 38 656346
info-th@infastech. com
UNITED KINGDOM
Avdel UK Limited
Pacific House
2 Swiftfields
Watchmead Industrial Estate
Welwyn Garden City
Hertfordshire AL7 1LY
Tel: +44 (0) 1707 292000
Fax: +44 (0) 1707 292199
[email protected]
USA
Avdel USA LLC
614 NC Highway 200 South
Stanfield, North Carolina 28163
Tel: +1 704 888 7100
Fax: +1 704 888 0258
[email protected]
Infastech (Decorah) LLC
1304 Kerr Drive
Decorah, IA 52101
Tel: +1 563 383 4216
Fax: +1 563 387 3540
www.avdel-global.com
www.infastech.com
AV™, Aut osert ® (equipment), Avbolt ®, Avdel ®, Avdelmate ®, Avdel TX2000 ®, Avdelok ®, Avex ®, Avibulb®, Avinox®, Avinut ®, Avlug ®, Avmatic ®,
Avplas®, Avseal ®, Avsert ®, Avtainer ®, Avtronic ®, Briv ®, Bulbex ®, Chobert ®, Eurosert ®, Fastriv ®, Finsert ®, Genesis ®, Grovit ®, Hemlok®, Hexsert ®,
Holding your world together ®, Hydra ®, Infalok ®, Interlock ®, Klamp-Tite ®, Klamptite KTR ®, Kvex ®, Maxlok ®, Monobolt ®, Monob ulb®, Neobolt ®,
Nutsert ®, Nutsert SQ ®, Portariv ®, Rivmatic ®, Rivscrew ®, Speed Fastening ®, Squaresert ®, Stavex ®, Supersert® , Thin Sheet Nutsert ®, Titan ®,
T- Lok ®, TLR ®, TSN ®, TX2000 ®, Versa- Nut ®, Viking ® and Viking 360 ® are trademarks of Avdel UK Limited. eRiv™, Infastech ®, NeoSpeed ® and
Our Technology, Your Success™ are trademarks of Infastech Intellectual Properties Pte Ltd. The names and logos of other companies
mentioned herein may be trademarks of their respective owner s.
This document is for informational purposes only. Infastech makes no warranties, expressed or implied, in this document.
Data shown is subject to change without prior notice as a result of continuous product development and improvement policy.
Your local Avdel representative is at your disposal should you need to confirm latest information.
© 2012 Infastech
Since 1922