1
Troubleshooting:
AVERTISSEMENT:
If your MailMinder system does not operate properly, please check the following:
Step2 MailMinder
®
™
•
Mail Arrival Notification System
•
•
Sistema de Aviso de Llegada de Correo MailMinder™
The Step2 Company
10010 Aurora-Hudson Rd.
Streetsboro, OH 44241 USA
1-800-347-8372
5526
Valid only in U.S.A. and Canada
Numéro disponible uniquement
aux USA et au Canada
Número válido sólo en EUA y Canadá
(330)656-0440
www.step2.com
Tools required: Phillips Screwdriver.
Thank you for purchasing the Step2 MailMinder. This system will notify you when your mail arrives or if your
mailbox door is opened at any time. Enclosed in this package you will find:
• MailMinder Receiver
• 2 “AA” Receiver batteries
• MailMinder Transmitter
• 1 Transmitter 23A 12V battery
• Double-Sided Tape
Specifications:
Transmitter
Battery Type: 12V 23A Alkaline
Battery Life: approximately 1 year
Operating Temperature: 0 deg. F to 110 deg. F (-18 deg. C to 43.3 deg. C)
The batteries are new, the proper type (see Specifications), and they are installed in the correct orientation
with respect to polarity. The “+” and “-” symbols are engraved into each battery compartment.
The transmitter is oriented as shown in the instruction sheet with the arrow facing upward.
Move the Receiver in close proximity to the Transmitter to check that the switch is triggering properly and
the signal is being sent.
Each MailMinder Receiver and Transmitter pair have a specific serial number and signal code. The probability of
buying 2 MailMinders with the same transmission signal is minimal. In the rare case that your MailMinder has the
same signal code as your neighbor’s, you will have to return the product and exchange for another set.
• If MailMinder functions erratically after a period of proper operation, the voltage may be low; replace batteries.
•
The Receiver chime can be inadvertently activated if the Transmitter is positioned within approximately 30 feet of the
Receiver or jarred side to side (i.e. strong wind or poorly installed mailbox).
For assistance please call The Step2 Company rather than the store where you purchased the MailMinder.
In the USA and Canada please call 1-800-347-8372 for service. Or you may email us at www.step2.com.
Please Note:
• Use only “AA” type batteries where indicated. Use only a 12v - 23A battery where indicated. Do not mix
old and new batteries. Do not mix alkaline, standard (carbon-zinc), or rechargeable (nickel-cadmium)
batteries.
• Do not recharge non-rechargable batteries. Rechargable battreries are to be removed from the unit before
recharging. Rechargable batteries are to be charged only under adult supervision. Check to make sure batteries
are inserted with the correct polarity and that the supply terminals are not short circuted. Exhausted batteries
should be removed.
PLEASE SAVE THIS SHEET FOR FUTURE REFERENCE
Implementos Requeridas: Destornillador Phillips
Receiver
Battery Type: 2 “AA” 1.5V Alkaline
Codes: 20,000 combinations of signals
Distance: 150 ft. (up to 200 feet in ideal conditions)*
Gracias por comprar el MailMinder de Step2. Este sistema le avisará cuando llega su correo o si se abre la puerta
de su buzón. En este paquete encontrará:
• Receptor del MailMinder
• 2 pilas “AA” para el receptor
• Transmisor del MailMinder
• 1 pila 23A de 12V para el transmisor
• Cinta doble
The effective operating distance for this system will vary due to the conditions at the location of use. The
usage range may be reduced due to the material that the mailbox is made of, ambient weather conditions,
obstacles or obstructions between the Transmitter & Receiver, and interference with other signals.
Especificaciones:
Transmisor
*
•
•
•
The Receiver is for indoor use only
This is not a toy.
If you decide to dispose of the Step2 MailMinder, disassemble and dispose of it in such a way that
no unreasonable hazards exist. Step2 products are level 4 recycable plastic; please recycle.
Operation:
The MailMinder system will only work on mailboxes with doors that are horizontally-hinged. The switch in the
Transmitter is triggered when the door is fully opened. The mailbox door must be completely closed in order to
stop the signal transmission. It is required that the Transmitter is installed on the mailbox door with the arrow
facing toward the top of the mailbox door (when closed). This ensures the switch will be oriented properly.
The MailMinder Transmitter is designed to send a signal to the Receiver when your mailbox door is opened.
The Receiver will chime when the door is opened, and the small LED light on the Receiver will begin to blink.
When the mailbox door is closed, the chime will automatically stop. However, the LED light will continue to
blink until the Receiver is reset by pressing the large button on the top of the Receiver. You must push the
reset button on the Reciever before the MailMinder will chime again. The blinking light provides notification
that the mailbox door was opened even if you are not home or in proximity of the Receiver to hear the chime.
Tipo de pila: Alcalina 23A de 12V
Duración de la pila: aproximadamente 1 año
Temperatura de funcionamiento: 0° F a 110° F (-18° C a 43.3° C)
Receptor
Tipo de pila: 2 alcalinas “AA” de 1,5V
Códigos: 20.000 combinaciones de señales
Distancia: 200 pies (61m) (hasta 300 pies (91m) en condiciones ideales)*
La distancia real de funcionamiento de este sistema varía según las condiciones del lugar donde se usa. El
alcance puede verse reducido por el material del que está hecho el buzón, las condiciones climáticas, los obstáculos
u obstrucciones entre el transmisor y el receptor y la interferencia con otras señales.
*
El receptor es para uso en interiores solamente.
Este no es un juguete.
Si usted decide desechar el MailMinder de Step2, desármelo y deséchelo de forma que no ocasione riegos
innecesarios. Los productos de Step2 son de material plástico reciclable de nivel 4. Por favor recicle el producto.
•
•
•
Funcionamiento:
It is recommended that you test your system prior to installing it on your mailbox. Install the batteries (included)
as indicated in this instruction manual. Hold the Transmitter in the vertical position in close proximity to the
Receiver, with the arrow facing upward. Rotate the transmitter downward to simulate the opening of a mailbox
door. The Receiver should begin to chime. If it does not, please check the Troubleshooting Section of this
instruction manual.
El sistema MailMinder sólo funcionará en buzones con puertas que tienen las bisagras ubicadas horizontalmente.
El interruptor del transmisor se activa cuando la puerta se abre completamente. La puerta del buzón debe estar
completamente cerrada para detener la transmisión de la señal. Es necesario que el transmisor se instale en la
puerta del buzón con los tornillos de cara a la parte superior de la misma (cuando está cerrada). Esto garantiza que
el interruptor esté orientado correctamente.
The MailMinder is designed with self diagnostic capability for checking low battery voltage. When the Receiver
battery is low, the Receiver LED will give 2 flashes continuously. When the Transmitter battery is low, the
Receiver LED will give 3 flashes continuously.
El transmisor del MailMinder está diseñado para enviar una señal al receptor cuando se abre la puerta del buzón.
El receptor emitirá un sonido cuando se abra la puerta y la pequeña luz LED del receptor comenzará a parpadear.
3/15/06
1
Cuando la puerta se cierra, el receptor dejará de sonar automáticamente. Sin embargo la luz LED continuará
parpadeando hasta que se reinicie el receptor apretando el botón grande encima del receptor. La luz intermitente
avisa que se ha abierto la puerta del buzón, aún cuando usted no está en casa o cerca del receptor para escuchar
el sonido.
1
Tools Required:
Herramientas
Requeridas:
Se recomienda que pruebe el sistema antes de instalarlo en su buzón. Coloque las pilas (incluidas) según se indica
en el manual de instrucciones. Sostenga el transmisor en posición vertical cerca del receptor, con el lado de los
tornillos hacia arriba. Gire el transmisor hacia abajo para fingir que se está abriendo la puerta del buzón. El receptor
debería sonar. Si no lo hace, consulte la Sección de Solución de Problemas de este manual de instrucciones.
The MailMinder is designed with self diagnostic capability for checking low battery voltage. When the Receiver
battery is low, the Receiver LED will give 2 flashes continuously. When the Transmitter battery is low, the Receiver
LED will give 3 flashes continuously.
Solución de Problemas:
Si su sistema MailMinder no funciona correctamente, verifique que:
Las pilas sean nuevas, del tipo adecuado (vea las Especificaciones) y que estén instaladas en la orientación
correcta con respecto a la polaridad. Los símbolos “+” y “-” están grabados en cada compartimiento de las pilas.
• El transmisor esté orientado como se indica en la hoja de instrucciones, es decir con el lado de los tornillos hacia arriba.
• Mueva el receptor cerca del transmisor para comprobar que el interruptor se active correctamente y la señal se envíe.
•
Cada par de receptor y transmisor de MailMinder tiene un código de señal y número de serie específico. La
probabilidad de comprar 2 MailMinders con la misma señal de transmisión es mínima. En el caso bastante
improbable que su MailMinder tenga el mismo código de señal que el de su vecino, tendrá que regresarlo y cambiarlo
por otro juego.
• Si el MailMinder funciona de manera irregular después de un período en el que funciona correctamente, es posible
que el voltaje esté bajo, en cuyo caso debe reemplazar las pilas.
To install the batteries on the Transmitter (B), remove the screw
and slide the cover off.
Para reemplazar las pilas en el transmisor (B), quite el tornillo
y deslice la tapa para retirarla.
•
2
3
El sonido del receptor puede activarse accidentalmente si se coloca el transmisor a una distancia aproximada de
9 m (30 pies) del receptor y se sacude de un lado a otro (en el caso de viento fuerte o que el buzón no esté bien
instalado por ejemplo).
Para obtener ayuda, llame a la compañía Step2 y no al lugar donde compró el MailMinder.
En EE.UU. y Canadá llame al teléfono gratuito 1-800-347-8372 para obtener servicio. O puede enviarnos un
mensaje electrónico a www.step2.com.
Observación:
• Use solamente pilas tipo “AA” donde esté indicado. Use solamente una pila 23A de 12V donde esté indicado. No
mezcle pilas nuevas con viejas. No mezcle pilas estándar (carbón-zinc), alcalinas o recargables (níquel-cadmio).
• No recargue pilas no recargables. Debe quitar las pilas de la unidad antes de recargarlas. Esto debe hacerse sólo
bajo la supervisión de un adulto. Verifique que las pilas estén colocadas con la polaridad correcta y que las terminales
de suministro no estén en corto circuito. Deben quitarse las pilas descargadas.
Install 1 battery (D). (provided).
Coloque 1pila (D). (provista).
RETENGA ESTA INFORMACIÓN PARA REFERENCIA FUTURA.
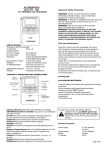
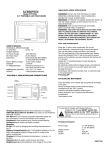
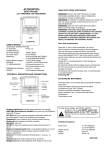
PARTS LIST:
A. Receiver/ Receptor
B. Transmitter/ Transmisor
C. 2 x “AA” Batteries/ 2 pilas “AA”
D. 1 x 12v-23A Battery/ 1 pila 23A de 12V.
E. Adhesive Strip/ la Bande Adhésive
Lista de Partes:
A
B
D
E
C
4
Replace the cover and tighten the screw
to secure.
Vuelva a colocar la tapa y ajuste el tornillo
para asegurarla.
5
6
Peel the protective paper off the
adhesive strip (E).
Place the adhesive strip onto the
Transmitter (B).
On the back of the Transmitter (B), peel
the protective paper off the adhesive strip.
Quite el papel protector de la
cinta adhesiva (E).
Coloque la cinta adhesiva en el
transmisor.
Quite el papel protector de la cinta adhesiva
que está en la parte posterior del
transmisor (B).
2
5
6
Place the Transmitter (B) with the long dimension hoizontal to the
door as shown. It is important that the transmitter is installed with
the Top arrow pointing upward (toward the top of the door) regardless
which type of mailbox you have - there is a switch in the transmitter
that only works in the correct orientation.
Coloque el transmisor (B) con el lado más largo horizontal a la
puerta tal y como se muestra. Es importante que el transmisor se
instale con la flecha superior apuntando hacia arriba (hacia la parte
superior de la puerta), sin importar el tipo de buzón que tenga,
debido a que hay un interruptor en el transmisor que sólo funciona
si está ubicado en la orientación correcta.
7
First make sure the surface is clean. Use rubbing alcohol
& swab to clean the surface and allow to dry fully.
Press down firmly to ensure adhesion.
To install the batteries on the Receiver (A), remove the back cover.
Para instalar las pilas en el receptor (A), retire la tapa posterior.
Asegúcrese primero que la superficie esté limpia. Utilice alcohol
y una torunda para limpiar la superficie. Deje que se seque por
completo. Presione con firmeza para asegurarse que se adhiera.
Reset Button ( press down)
Botón de reinicio (apretar)
8
9
Hi
Low
Place 2 x “AA” batteries (C). (provided).
Coloque 2 pilas “AA” (C). (provistas).
Replace the battery cover.
Note: The receiver is what notifies you when your mail box has
been opened. This device should be placed where it can be easily
heard.
Vuelva a colocar la tapa de las pilas.
Nota: El receptor es el dispositivo que le avisa cuando se ha
abierto el buzón. Debe colocarse donde pueda escucharse
fácilmente.
On the side of the Receiver (B) you may choose
low volume or high volume. Push the reset button
on the top of the receiver to reset the LED light.
En el receptor (B) puede elegir entre volumen alto y bajo.
Apriete el botón de reinicio
encima del receptor para restablecer la luz.
3