1
Fax +1 305 430 9692
Copies of the I/B. Please reproduce them without any
changes except under special instruction from Team
International USA. The pages must be reproduced and
folded in order to obtain a booklet A5 (+/- 148.5 mm
width x 210 mm height). When folding, make sure you
keep the good numbering when you turn the pages of
the I/B. Don’t change the page numbering. Keep the
language integrity. Print only what is inside the frame.
#
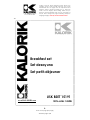
Breakfast set
Set desayuno
Set petit-déjeuner
USK BSET 15191
www.KALORIK.com
120V~60Hz 1450W
é
Front cover page (first page)
Assembly page 1/28
Fax +1 305 430 9692
Copies of the I/B. Please reproduce them without any
changes except under special instruction from Team
International USA. The pages must be reproduced and
folded in order to obtain a booklet A5 (+/- 148.5 mm
width x 210 mm height). When folding, make sure you
keep the good numbering when you turn the pages of
the I/B. Don’t change the page numbering. Keep the
language integrity. Print only what is inside the frame.
#
IMPORTANT SAFEGUARDS
When using your appliance, basic safety precautions should always
be followed, including the following:
1. READ ALL INSTRUCTIONS
2. Check that your mains voltage corresponds to that stated on the
appliance.
3. Do not touch hot surfaces. Use handles or knobs.
4. To protect against electrical shock do not immerse cord, plugs, or
the appliance in water or other liquid.
5. Close supervision is necessary when the appliance is used by or
near children.
6. Unplug from outlet when not in use and before cleaning. Allow to
cool before putting on or taking off parts.
7. Do not operate any appliance with a damaged cord or plug or
after the appliance malfunctions or has been damaged in any
manner. Return appliance to the nearest authorized service
facility for examination, repair, or adjustment.
8. The use of accessory attachments not recommended by the
appliance manufacturer may cause injuries.
9. Do not use outdoors.
10. Do not let cord hang over edge of table or counter, or touch hot
surfaces.
11. Do not place on or near a hot gas or electric burner, or in a
heated oven.
12. Always attach plug to appliance first, then plug cord into the wall
outlet. To disconnect, turn any control to off (or 0), then remove
plug from wall outlet.
13. Do not use appliance for other than intended use.
14. Oversize foods, metal foil packages, or utensils must not be
inserted in a toaster as they may involve a risk of fire or electric
shock.
15. A fire may occur if the appliance is covered or touching
flammable material, including curtains, draperies, walls, and the
2
Assembly page 2/28
USK BSET 15191 - 111026
Fax +1 305 430 9692
Copies of the I/B. Please reproduce them without any
changes except under special instruction from Team
International USA. The pages must be reproduced and
folded in order to obtain a booklet A5 (+/- 148.5 mm
width x 210 mm height). When folding, make sure you
keep the good numbering when you turn the pages of
the I/B. Don’t change the page numbering. Keep the
language integrity. Print only what is inside the frame.
#
like, when in operation. Do not store any item on top of the
appliance when in operation.
16. Extreme caution must be used when moving an appliance
containing hot oil or other hot liquids.
17. Do not clean with metal scouring pads. Pieces can break off the
pad and touch electrical parts involving a risk of electric shock.
18. Extreme caution should be exercised when using containers
constructed of other than metal or glass.
19. Do not store any materials, other than manufacturers
recommended accessories, in this oven when not in use.
20. Do not place any of the following materials in the oven: paper,
cardboard, plastic, and the like.
21. Do not cover crumb tray or any part of the oven with metal foil.
This causes overheating of the oven.
22. Scalding may occur if the lid of the coffee maker is removed
during the brewing cycles.
23. The preheating of the appliance is not necessary.
24. To disconnect the appliance, put all knobs in off (or 0) position
and remove the plug from the wall outlet.
SAVE THESE INSTRUCTIONS
HOUSEHOLD USE ONLY
POLARIZED PLUG INSTRUCTIONS
Some appliances are equipped with a polarized plug (one blade is
wider than the other). To reduce the risk of electric shock, this plug
will fit into the polarized outlet only one way. If the plug does not
properly fit into the outlet at first, reverse it. If it still does not fit,
contact a competent qualified electrician. Do not attempt to modify
the plug in any way.
For appliances equipped with a standard plug, simply insert the plug
into the outlet without paying attention to the way you plug it.
3
Assembly page 3/28
USK BSET 15191 - 111026
Fax +1 305 430 9692
Copies of the I/B. Please reproduce them without any
changes except under special instruction from Team
International USA. The pages must be reproduced and
folded in order to obtain a booklet A5 (+/- 148.5 mm
width x 210 mm height). When folding, make sure you
keep the good numbering when you turn the pages of
the I/B. Don’t change the page numbering. Keep the
language integrity. Print only what is inside the frame.
#
SHORT CORD INSTRUCTIONS
A short power supply cord is provided to reduce the hazards resulting
from becoming entangled in, or tripping over a longer cord.
Extension cords may be used if care is exercised in their use.
· The electrical rating of the extension cord should be at least
that of the appliance. If the electrical rating of the extension
cord is too low, it could overheat and burn.
· The resulting extended cord should be arranged so that it will
not drape over the counter top or tabletop where it can be
pulled on by children or tripped over.
PART DESCRIPTION
1. Water tank lid
2. Water tank
3. Filter holder
4. Hot plate
5. Glass jug
6. Coffee maker switch
7. Timer
8. Pilot light
9. Function selector
10. Glass door
11. Grill rack
12. Frying tray
BEFORE THE FIRST USE
Unpack the appliance and accessories, then wash and wipe these
accessories.
Oven: It is normal if some smoke or smell emanates from the
appliance when using it for the first time. This is not harmful. In order
to eliminate any packing oil that may remain after production, we
recommend operating the appliance for 10 minutes, putting the
function selector on UP & DOWN position.
4
Assembly page 4/28
USK BSET 15191 - 111026
Fax +1 305 430 9692
Copies of the I/B. Please reproduce them without any
changes except under special instruction from Team
International USA. The pages must be reproduced and
folded in order to obtain a booklet A5 (+/- 148.5 mm
width x 210 mm height). When folding, make sure you
keep the good numbering when you turn the pages of
the I/B. Don’t change the page numbering. Keep the
language integrity. Print only what is inside the frame.
#
Coffee maker: When you use your appliance for the first time, pour
fresh water into the water tank (without coffee) and switch on the
appliance. Once all the water has passed through, switch the
appliance off and let it cool down. Repeat this process 3 times.
HOW TO USE THE OVEN
·
·
·
·
·
·
·
·
·
·
·
Before using the appliance, clean the surface of the trays with a
damp cloth and wipe dry. Put some butter or cooking oil in the
baking tray. The non-stick coating of the frying tray makes the use
of butter or oil optional.
Put the frying tray in the opening foreseen on top of the oven.
Put the function selector in OFF position.
Plug the unit into the power supply socket.
Turn the function selector to the desired position:
- DOWN: only the lower heating element heats up to bake or
reheat a preparation without roasting it.
- UP & DOWN: both heating elements will heat up to bake and
roast the preparation.
- UP: only the upper heating element heats up in order to roast
the preparation or to heat up the frying tray.
Turn the timer knob to choose the required time, indicated in
minutes on the appliance. The pilot light will come on, indicating
that the oven is heating.
Thanks to the heat resistant glass door, you can check the food
during use, which means you can adjust the cooking setting and
time if necessary according to your own appreciation.
You can also put food in the frying pan on top of the oven. To fry
the food, make sure the upper heating element is activated.
Even if you do not fry food in the tray, leave the tray on top of the
oven during use, otherwise the oven is open and heat might
escape through the top.
If you want to stop before the selected time is over, turn the timer
to "0" and put the function selector in OFF position.
A sound will be heard when the cooking time has elapsed. The
appliance will switch off automatically. As soon as the food is
ready, turn the function selector to OFF.
Carefully open the door, preferably using an oven glove.
5
Assembly page 5/28
USK BSET 15191 - 111026
Fax +1 305 430 9692
Copies of the I/B. Please reproduce them without any
changes except under special instruction from Team
International USA. The pages must be reproduced and
folded in order to obtain a booklet A5 (+/- 148.5 mm
width x 210 mm height). When folding, make sure you
keep the good numbering when you turn the pages of
the I/B. Don’t change the page numbering. Keep the
language integrity. Print only what is inside the frame.
#
·
Be very careful not to touch the rack or when removing the tray,
as these might be very hot and you might get burned.
CLEANING AND MAINTENANCE
Switch off the appliance by putting the knobs of the control panel in
OFF, LOW or "0" position. Before cleaning, unplug the appliance from
outlet and allow it to cool down.
Inside cleaning
·
·
·
Wipe trays with absorbent paper toweling or a soft cloth. To
remove baked on food pour a little cooking oil on the food and
allow to stand for five to ten minutes. This should soften the food
and allow it to be removed with absorbent paper toweling or a
soft cloth.
If the above method fails to remove the food we suggest wiping
the trays with damp cloth and a little detergent.
For easy cleaning, you can remove the rack. To do so, lift the
front part of the rack (Fig. 1). Once the front part is released, take
the rack out of the oven cavity. To put the rack back into
position, insert the rear part of the rack on the rear bar in the
oven cavity. Then swing the rack down and press it on the front
bar (Fig. 2 and 3).
1
·
·
2
3
Never use abrasive products. Never immerse the appliance in
water and make sure no water or damp penetrates into the
appliance.
Make sure no water comes on the oven door when the latter is
still hot.
6
Assembly page 6/28
USK BSET 15191 - 111026
Fax +1 305 430 9692
Copies of the I/B. Please reproduce them without any
changes except under special instruction from Team
International USA. The pages must be reproduced and
folded in order to obtain a booklet A5 (+/- 148.5 mm
width x 210 mm height). When folding, make sure you
keep the good numbering when you turn the pages of
the I/B. Don’t change the page numbering. Keep the
language integrity. Print only what is inside the frame.
#
Outside cleaning
·
·
Wipe clean with soft dry cloth or paper toweling
Do not use steel wool, scouring pads or abrasive cleaners.
Do not immerse in water or any other liquid.
HOW TO USE THE COFFEE MAKER
·
·
·
·
·
·
·
·
Open the lid of the water tank and pour the desired volume of
water in it. The water level can be read off the water level
indicator on the water tank. Never exceed the maximum level
indicated.
Swing the filter holder by pulling at its handle, insert a paper filter
or permanent filter (depending on the model) in the filter holder
and add the desired quantity of ground coffee.
Put the filter holder back into its initial position and make sure it is
closed properly.
Never forget to close the lid of the water tank before switching
on your coffee maker.
Put the glass jug with closed lid on the base of the appliance.
Switch on the coffee maker. The pilot light of the switch will be
illuminated, indicating that your appliance is operating. Thanks to
the keep warm function, your coffee is warmed up as long as the
appliance is switched on. Note that the appliance will be
switched on as long as you do not switch it off manually.
However, we advise you not to let the appliance switched on
more than 2 hours and make sure that you never let an empty jug
on the appliance.
When you remove the jug from the appliance, a non-drip valve
will automatically operate to stop any drops of coffee dripping
onto the hotplate. Replacement of the carafe automatically
opens the non-drip valve and allows remaining coffee to filter
trough into the jug.
When the water tank is empty, wait a few additional minutes
before removing the jug.
7
Assembly page 7/28
USK BSET 15191 - 111026
Fax +1 305 430 9692
Copies of the I/B. Please reproduce them without any
changes except under special instruction from Team
International USA. The pages must be reproduced and
folded in order to obtain a booklet A5 (+/- 148.5 mm
width x 210 mm height). When folding, make sure you
keep the good numbering when you turn the pages of
the I/B. Don’t change the page numbering. Keep the
language integrity. Print only what is inside the frame.
#
DESCALING AND CLEANING
·
·
·
·
·
Descaling the coffee maker prolongs its life span. To descale your
coffee maker only use products especially made for this purpose
and read their instruction manual carefully.
To simplify cleaning, you can remove the swing filter holder.
Clean the jug and the filter holder in soapy water and rinse them
with clear water.
For the other parts of the appliance such as the hot plate, use
soft damp cloth.
Never use a dishwasher to clean any part of your coffee maker
PRACTICAL HINTS
When you notice that the coffee making process is longer than it
should be it is probably time to descale the appliance. Do not wait
until the situation gets worse. The descaling frequency depends on
the amount of lime in water and therefore can be different from
family to family. Therefore it is important to pay attention to this. A
good maintenance of your appliance will prolong its lifespan.
Guarantee claims will not be accepted for the replacement of a
heating element full of scale.
8
Assembly page 8/28
USK BSET 15191 - 111026
Fax +1 305 430 9692
Copies of the I/B. Please reproduce them without any
changes except under special instruction from Team
International USA. The pages must be reproduced and
folded in order to obtain a booklet A5 (+/- 148.5 mm
width x 210 mm height). When folding, make sure you
keep the good numbering when you turn the pages of
the I/B. Don’t change the page numbering. Keep the
language integrity. Print only what is inside the frame.
#
WARRANTY
We suggest that you complete and return the enclosed Product
Registration Card promptly to facilitate verification of the date of
original purchase. However, return of the Product Registration Card is
not a condition of these warranties. You can also fill this warranty
card online, at the following address: www.KALORIK.com
This KALORIK product is warranted in the U.S.A. for 1 year from the
date of purchase against defects in material and workmanship. This
warranty is not transferable. Keep the original sales receipt. Proof of
purchase is required to obtain warranty performance.
During this period, the KALORIK product that, upon inspection by
KALORIK, is proved defective, will be repaired or replaced, at
Kalorik’s option, without charge to the customer. If a replacement
product is sent, it will carry the remaining warranty of the original
product.
This warranty does not apply to any defect arising from a buyer's or
user's misuse of the product, negligence, failure to follow KALORIK
instructions noted in the user’s manual, use on current or voltage
other than that stamped on the product, wear and tear, alteration
or repair not authorized by KALORIK, or use for commercial purposes.
There is no warranty for glass parts, glass containers, filter basket,
blades and agitators, and accessories in general. There is also no
warranty for parts lost by the user.
ANY WARRANTY OF MERCHANTABILITY OR FITNESS WITH RESPECT TO
THIS PRODUCT IS ALSO LIMITED TO THE ONE YEAR LIMITED WARRANTY
PERIOD.
Some states do not allow limitation on how long an implied warranty
lasts or do not allow the exclusion of incidental or consequential
damages, so the above limitations may not apply to you. This
warranty gives you specific legal rights, and you may also have other
rights which vary from state to state.
9
Assembly page 9/28
USK BSET 15191 - 111026
Fax +1 305 430 9692
Copies of the I/B. Please reproduce them without any
changes except under special instruction from Team
International USA. The pages must be reproduced and
folded in order to obtain a booklet A5 (+/- 148.5 mm
width x 210 mm height). When folding, make sure you
keep the good numbering when you turn the pages of
the I/B. Don’t change the page numbering. Keep the
language integrity. Print only what is inside the frame.
#
If the appliance should become defective within the warranty
period and more than 30 days after date of purchase, do not return
the appliance to the store: often, our Customer Service
Representatives can help solve the problem without having the
product serviced. If servicing is needed, a Representative can
confirm whether the product is under warranty and direct you to the
nearest service location.
If this is the case, bring the product, or send it, postage prepaid by
the user (all Kalorik customers are responsible for the initial shipment
back to the warranty center), along with proof of purchase and
indicating a return authorization number given by our Customer
Service Representatives, to the authorized KALORIK Service Center
(please visit our website at www.KALORIK.com or call our Customer
Service Department for the address of our authorized KALORIK
Service Center).
If you send the product, please include a letter explaining the nature
of the claimed defect.
If you have additional questions, please call our Customer Service
Department (please see below for complete contact information),
Monday through Friday from 9:00am - 6:00pm (EST). Please note
hours are subject to change.
If you would like to write, please send your letter to:
KALORIK Customer Service Department
Team International Group of America Inc.
1400 N.W 159th Street, Suite 102
Miami Gardens, FL 33169 USA
Or call:
Toll Free: +1 888-521-TEAM / +1 888-KALORIK
Only letters can be accepted at this address above. Shipments and
packages that do not have a return authorization number will be
refused.
10
Assembly page 10/28
USK BSET 15191 - 111026
Fax +1 305 430 9692
Copies of the I/B. Please reproduce them without any
changes except under special instruction from Team
International USA. The pages must be reproduced and
folded in order to obtain a booklet A5 (+/- 148.5 mm
width x 210 mm height). When folding, make sure you
keep the good numbering when you turn the pages of
the I/B. Don’t change the page numbering. Keep the
language integrity. Print only what is inside the frame.
#
CONSEJOS DE SEGURIDAD
Cuando use algún aparato eléctrico siempre deben seguirse
precauciones básicas de seguridad incluyendo las siguientes:
1. LEA TODAS LAS INSTRUCCIONES.
2. Antes de utilizar el aparato, compruebe que el voltaje de la red
eléctrica coincide con el del aparato.
3. No toque las superficies calientes. Siempre utilice las asas o los
botones.
4. Para protegerse contra una descarga eléctrica, no sumerja el
aparato o el enchufe en agua o en otros líquidos.
5. Es siempre necesaria la supervisión cercana cuando este
aparato sea utilizado cerca de niños. Este aparato no debe ser
usado por niños.
6. Desconecte el aparato de la toma de corriente cuando la
unidad no se encuentre en uso y antes de limpiarla. Deje enfriar
el aparato antes de insertar o sacar accesorios.
7. No opere este y ningún aparato si el cable o el enchufe están
quemados o dañados, o después de que el aparato ha
funcionado inadecuadamente, se ha caído o ha sido dañado
en cualquier manera. El aparato debe ser remplazado por el
fabricante o por un centro de servicio autorizado o por una
persona similar calificada.
8. El uso de accesorios o aditamentos que no sean los
recomendados por el fabricante pueden causar incendios,
descargas eléctricas o lesiones.
9. No use en exteriores
10. No permita que el cable cuelgue de la orilla de la mesa o del
mostrador o toque las partes calientes.
11. No coloque este aparato cerca de quemadores de estufas de
gas o eléctricas, o dentro de un horno caliente.
12. Enchufe siempre primero el cable al aparato y después en el
enchufe de la red eléctrica. Para desconectar el aparato, gire
los botones hacia la posición apagada (off o 0) y desenchufe el
aparato.
11
Assembly page 11/28
USK BSET 15191 - 111026
Fax +1 305 430 9692
Copies of the I/B. Please reproduce them without any
changes except under special instruction from Team
International USA. The pages must be reproduced and
folded in order to obtain a booklet A5 (+/- 148.5 mm
width x 210 mm height). When folding, make sure you
keep the good numbering when you turn the pages of
the I/B. Don’t change the page numbering. Keep the
language integrity. Print only what is inside the frame.
#
13. No use este aparato mas que para lo que ha sido diseñado.
14. Los alimentos grandes o utensilios metálicos no deben
introducirse en el aparato ya que pueden crear el riesgo de
incendio.
15. Puede ocurrir un incendio si el aparato está en funcionamiento y
se encuentra en contacto o cubierto con materiales inflamables,
incluyendo cortinas, tapicerías, paredes, etc. No coloque ningún
objeto sobre el aparato cuando éste se encuentre en
funcionamiento.
16. Cuando ase alimentos, tenga mucho cuidado cuando saque la
bandeja o deseche grasa caliente.
17. No limpie el aparato con fibras metálicas abrasivas. Se pueden
romper pequeños pedazos de las fibras y pueden entrar en
contacto con las partes eléctricas, lo anterior puede ocasionar
una descarga eléctrica.
18. Debe tener extremo cuidado cuando use contenedores que no
estén hechos de metal o de vidrio.
19. Cuando esta unidad no se encuentre en uso, no almacene
ningún otro material que no sean los accesorios recomendados
por el fabricante.
20. No coloque dentro del horno ningún material inflamable, tal
como papel, cartón, plástico o cualquier material que pueda
incendiarse o derretirse.
21. No cubra con papel aluminio la bandeja para migas o ninguna
otra parte del horno. Este causará que el aparato se sobre
caliente.
22. Pueden ocurrir quemaduras si la tapa se levanta durante el ciclo
de calentamiento.
23. No es necesario precalentare el aparato.
24. Para desconectar este aparato, coloque todos los controles en
la posición de apagado (OFF o 0) y desenchufe el aparato.
GUARDE ESTAS INSTRUCCIONES
SOLAMENTE PARA USO DOMESTICO
12
Assembly page 12/28
USK BSET 15191 - 111026
Fax +1 305 430 9692
Copies of the I/B. Please reproduce them without any
changes except under special instruction from Team
International USA. The pages must be reproduced and
folded in order to obtain a booklet A5 (+/- 148.5 mm
width x 210 mm height). When folding, make sure you
keep the good numbering when you turn the pages of
the I/B. Don’t change the page numbering. Keep the
language integrity. Print only what is inside the frame.
#
INFORMACIÓN SOBRE EL ENCHUFE POLARIZADO
Este aparato esta provisto de un enchufe polarizado (una pata es
más ancha que la otra). Para reducir el riesgo de choque eléctrico,
este enchufe calza en el tomacorriente polarizado de una sola
manera. Si el enchufe no cabe totalmente en el tomacorriente, gire
el enchufe. Si aun así no calza, consulte a un servicio técnico
cualificado. No intente anular esta característica de seguridad.
INSTRUCCIONES DEL CABLE
El cable de alimentación del aparato es un cable corto a fin de
disminuir el riesgo de accidentes (caídas al tropezar con él, etc.)
Puede utilizar un alargador si es necesario.
· Asegúrese de que el nivel eléctrico del cable es igual o
mayor que el indicado. Una extensión con un bajo nivel
eléctrico correría el riesgo de sobrecalentarse y de
estropearse.
· Para evitar riesgos colocar de forma tal que los niños no
puedan jalarlo o tropezar con él. Que no arrastre nunca por
el suelo.
PARTES
1. Tapa del depósito de agua
2. Depósito de agua
3. Porta-filtro
4. Placa de calefacción
5. Jarra
6. Interruptor de la cafetera
7. Minutero
8. Testigo luminoso
9. Selector de funciones
10. Puerta de cristal
11. Rejilla
12. Bandeja asador
13
Assembly page 13/28
USK BSET 15191 - 111026
Fax +1 305 430 9692
Copies of the I/B. Please reproduce them without any
changes except under special instruction from Team
International USA. The pages must be reproduced and
folded in order to obtain a booklet A5 (+/- 148.5 mm
width x 210 mm height). When folding, make sure you
keep the good numbering when you turn the pages of
the I/B. Don’t change the page numbering. Keep the
language integrity. Print only what is inside the frame.
#
ANTES DE LA PRIMERA UTILIZACIÓN
Desembale el aparato, los accesorios, y después lave los accesorios
y séquelos.
Horno: Es normal que algunos humos u olores a nuevo se produzcan
cuando utilice su aparato por primera vez. Si usted quiere utilizar el
horno ponga el selector de funciones en la posición UP & DOWN y el
minutero sobre 10 minutos. Esto, hace que las cubiertas protectoras
y los elementos se quemen.
Cafetera: Antes de utilizar la cafetera por primera vez, eche agua
en el depósito (pero sin poner café en el filtro) y ponga el aparato
en funcionamiento. Repita esta operación 3 veces.
FUNCIONAMIENTO DEL HORNO
·
·
·
·
·
·
·
·
Antes de utilizar su aparato, debe limpiar la placa con un paño
húmedo, secarla y untarla de aceite de cocinar o mantequilla.
La bandeja "asador" es antiadherente. No es obligatorio utilizar
mantequilla o cualquier tipo de grasa.
Ponga la bandeja asador en la abertura provista con este fin
encima del horno.
Seleccione la posición "OFF" del selector de funciones.
Enchufe el aparato a la red.
Seleccione la posición del selector, según el tipo de alimento
que vaya a cocinar.
DOWN
: solo la resistencia inferior calienta para cocer o
recalentar sin asar la preparación.
UP & DOWN : Las 2 resistencias calientan simultáneamente
para cocer, recalentar y asar la preparación.
UP
: solo la resistencia superior calienta para asar la
preparación.
Ponga el minutero en el tiempo necesario para la cocción. El
tiempo está indicada en minutos. El testigo luminoso se
enciende, indicando que el aparato está en funcionamiento.
La puerta de cristal resistente al calor permite verificar la comida
durante el uso. Esto significa que puede ajustar el modo de
cocción y el tiempo si necesario según su propia apreciación.
También puede poner alimentos en la bandeja asador encima
del horno. Cuando cocine en esta bandeja, asegúrese que la
14
Assembly page 14/28
USK BSET 15191 - 111026
Fax +1 305 430 9692
Copies of the I/B. Please reproduce them without any
changes except under special instruction from Team
International USA. The pages must be reproduced and
folded in order to obtain a booklet A5 (+/- 148.5 mm
width x 210 mm height). When folding, make sure you
keep the good numbering when you turn the pages of
the I/B. Don’t change the page numbering. Keep the
language integrity. Print only what is inside the frame.
#
·
·
·
·
resistencia superior del horno este activada. De todos modos, si
no utiliza la bandeja "asador" es necesario que esta se
mantenga en la abertura encima del horno. De otro modo, el
horno será abierto y el calor saldrá del horno.
Si desea terminar la cocción antes del tiempo seleccionado, ponga
el minutero en la posición “0” y el selector de funciones en la
posición OFF.
Cuando el tiempo de cocción haya terminado, sonara la alarma
sonora. Cuando la cocción haya terminado el selector de
funciones en la posición OFF.
Abrir suavemente la puerta del horno, utilizando un guante o
agarradero como protección al calor.
Cuando retire la placa o la rejilla sea prudente. Estos
instrumentos estarán muy calientes y correría el riesgo de
quemarse. Utilice el asa provista por este fin para retirar la placa
y la rejilla del horno.
LIMPIEZA Y MANTENIMIENTO
Antes de limpiar su aparato, asegúrese de que esta desconectado
de la red y completamente frío.
Limpieza en el interior del mini-horno
·
·
·
Limpie el plato con un papel absorbente o un paño húmedo.
Para limpiar los posibles restos de alimentos que puedan haber
quedado tras la cocción, unte el plato con unas gotas de aceite
de cocinar y déjelo durante 5 minutos, después pase un papel
absorbente.
Si la limpieza del horno no se realiza diariamente, puede limpiarlo
con un paño húmedo y detergente.
Para una limpieza más fácil, es posible quitar la rejilla. Para
hacerlo, eleve la parte delantera de la rejilla (Imagen 1).
Cuando la parte delantera esté suelta, tire la rejilla fuera del
horno. Para poner la rejilla de nuevo en el horno, inserte la parte
trasera de la rejilla sobre la barra trasera del horno. Después, baje
la rejilla y empújela sobre la barra delantera del horno (Imágenes
2 y 3).
15
Assembly page 15/28
USK BSET 15191 - 111026
Fax +1 305 430 9692
Copies of the I/B. Please reproduce them without any
changes except under special instruction from Team
International USA. The pages must be reproduced and
folded in order to obtain a booklet A5 (+/- 148.5 mm
width x 210 mm height). When folding, make sure you
keep the good numbering when you turn the pages of
the I/B. Don’t change the page numbering. Keep the
language integrity. Print only what is inside the frame.
#
1
·
·
2
3
No utilice nunca estropajos de aluminio ni detergentes abrasivos.
No sumerja el aparato en agua y asegúrese que no haya agua
ni humedad que penetre en el aparato.
Asegúrese que no haya agua en la puerta del horno mientas
este aún caliente. .
Limpieza del exterior del aparato
·
·
Utilice un paño seco y suave.
No utilice nunca estropajos de aluminio ni detergentes abrasivos.
No sumerja el aparato en agua o en otros líquidos.
FUNCIONAMIENTO DE LA CAFETERA
·
·
·
·
·
Eche el agua deseada en el depósito. El nivel del agua esta
indicado en el depósito. Nunca sobrepase el nivel máximo.
Abra el porta-filtro tirando por el asa y ponga un filtro de papel o
filtro permanente (dependiendo del modelo) en ello. Ponga la
cantidad deseada de café en el filtro.
Cierre el porta-filtro. Compruebe que el porta-filtro está bien
instalado.
No olvide cerrar la tapadera del depósito antes de hacer
funcionar la cafetera.
Ponga el aparato en marcha. El testigo luminoso del interruptor
se enciende, indicando que su aparato está en funcionamiento.
Un dispositivo permite conservar el café caliente mientras la
cafetera esté en funcionamiento. Note que el aparato seguirá
en funcionamiento hasta que no lo apague manualmente. Le
desaconsejamos dejar el aparato más de 2 horas en
funcionamiento y sobretodo si la jarra se encuentra vacía.
16
Assembly page 16/28
USK BSET 15191 - 111026
Fax +1 305 430 9692
Copies of the I/B. Please reproduce them without any
changes except under special instruction from Team
International USA. The pages must be reproduced and
folded in order to obtain a booklet A5 (+/- 148.5 mm
width x 210 mm height). When folding, make sure you
keep the good numbering when you turn the pages of
the I/B. Don’t change the page numbering. Keep the
language integrity. Print only what is inside the frame.
#
·
·
Cuando Vd. retira la jarra del aparato, una válvula anti-goteo se
pone automáticamente en marcha, para evitar que caiga
alguna gota de café sobre la placa calefactora. Cuando vuelve
a poner la jarra, el sistema anti-goteo se detiene y permite al
café que queda pasar a la jarra.
Cuando el agua haya salido del depósito espere a que esta
haya también terminado de pasar por el filtro antes de retirar la
jarra.
DESCALCIFICACIÓN Y LIMPIEZA
·
·
·
·
·
Le aconsejamos descalcificar su aparato con regularidad para
guardar la cafetera en buen estado. Para ello utilice cualquier
producto que venden en el mercado para este fin y siga sus
instrucciones.
Para simplificar la limpieza, puede quitar el porta-filtro.
Limpie la jarra y el porta-filtro con agua caliente y un poco de
detergente líquido.
Para las partes de plástico y la placa de calefacción utilice una
esponja no abrasiva o un paño húmedo.
No introducir las partes de la cafetera en el lavavajillas.
CONSEJO
Cuando empiece a notar que el café tarda en pasar mas tiempo
de lo habitual, decalcifique su aparato y no espere, sobre todo, a
que la situación se agrave, con ello mantendrá mas tiempo la vida
de su aparato. El mantenimiento de su cafetera es importante para
la duración de vida de su aparato. Tenga en cuenta que la
garantía no cubre los deterioros causados por el mal uso, ni el
recambio de la resistencia por estar cubierta de cal.
17
Assembly page 17/28
USK BSET 15191 - 111026
Fax +1 305 430 9692
Copies of the I/B. Please reproduce them without any
changes except under special instruction from Team
International USA. The pages must be reproduced and
folded in order to obtain a booklet A5 (+/- 148.5 mm
width x 210 mm height). When folding, make sure you
keep the good numbering when you turn the pages of
the I/B. Don’t change the page numbering. Keep the
language integrity. Print only what is inside the frame.
#
GARANTÍA
Le sugerimos rellenen y nos envíen rápidamente la Tarjeta de
Registro de Producto adjunta para facilitar la verificación de la
fecha de compra. Por lo tanto, la devolución de esa Tarjeta de
Registro de Producto no es una condición imprescindible para la
aplicación de esa garantía. Puede también rellenar dicha tarjeta de
garantía en línea en la dirección siguiente: www.KALORIK.com
A partir de la fecha de compra, este producto KALORIK está
garantizado un año contra los defectos materiales y de fabricación,
en los Estados Unidos. Esta garantía no es transferible. Conserve la
prueba de compra original. Se exige una prueba de compra para
obtener la aplicación de la garantía.
Durante este período, si el producto KALORIK después de una
inspección por parte de KALORIK, se manifiesta defectuoso, será
reparado o remplazado, según lo que decida KALORIK, sin gastos
para el consumidor. Si se envía un producto de remplazo, se
aplicará la garantía que queda del producto original.
Esta garantía no se aplica a los defectos causados por una mala
utilización por parte del comprador o del usuario, o una negligencia
al no respeto del manual de instrucciones KALORIK, o una utilización
en un circuito eléctrico cuyo voltaje es diferente al que figura en el
producto, o un desgaste normal, o modificaciones o reparaciones
no autorizadas por KALORIK, o por un uso con fines comerciales. No
existe garantía por las partes de cristal, jarras de cristal, filtros, cestos,
cuchillas y accesorios en general. No existe tampoco garantía por
las piezas perdidas por el usuario.
Toda garantía de valor comercial o de adaptabilidad a este
producto está limitada a un año también.
Algunos estados no ponen límites a la duración de la garantía tácita
o no autorizan la exclusión de daños y perjuicios accesorios o
indirectos, por lo que puede que las restricciones anteriormente
mencionadas no le sean aplicables a Usted. Esta garantía le otorga
derechos legales particulares, pero usted puede tener también otros
18
Assembly page 18/28
USK BSET 15191 - 111026
Fax +1 305 430 9692
Copies of the I/B. Please reproduce them without any
changes except under special instruction from Team
International USA. The pages must be reproduced and
folded in order to obtain a booklet A5 (+/- 148.5 mm
width x 210 mm height). When folding, make sure you
keep the good numbering when you turn the pages of
the I/B. Don’t change the page numbering. Keep the
language integrity. Print only what is inside the frame.
#
derechos que varían de un estado a otro y algunos derechos
pueden variar de un estado a otro.
Si el aparato tuviera un defecto durante el periodo de garantía y / o
más de 30 días después de que se compró, no devuelva el aparato
en la tienda donde le compró: a menudo, nuestro Servicio al
Consumidor puede ayudar a resolver el problema sin que el
producto tenga que ser reparado. Si hace falta una reparación, uno
de nuestros representantes puede confirmar si el producto está bajo
garantía y dirigirle al servicio post-venta más próximo.
Si fuera el caso, traiga el producto (o envíelo, correctamente
franqueado) con la prueba de compra que mencione el número de
autorización de devolución indicado por nuestro Servicio al
Consumidor, al servicio post-venta KALORIK más próximo. (Visite
nuestra web www.KALORIK.com o llame al Servicio al Consumidor
para obtener la dirección del Servicio post-venta KALORIK exclusivo
más próximo).
Si envía el producto, le rogamos añadan una carta explicando la
naturaleza del defecto.
Si tiene preguntas adicionales, por favor llame al Servicio al
Consumidor (véase abajo para los datos completos), de lunes a
viernes, de las 9 a las 18 (EST). Note que las horas pueden ser
modificadas.
Si quiere escribirnos, puede hacerlo a la dirección siguiente:
KALORIK Servicio al Consumidor
Team International Group of America Inc.
1400 N.W 159th Street, Suite 102
Miami Gardens, FL 33169 USA
O llame gratuitamente (U.S.A.) al +1 888-521-TEAM / +1 888-KALORIK
Las cartas se aceptan solamente en la dirección anteriormente
mencionada. Los envíos y paquetes que no tengan número de
autorización de devolución serán rechazados.
19
Assembly page 19/28
USK BSET 15191 - 111026
Fax +1 305 430 9692
Copies of the I/B. Please reproduce them without any
changes except under special instruction from Team
International USA. The pages must be reproduced and
folded in order to obtain a booklet A5 (+/- 148.5 mm
width x 210 mm height). When folding, make sure you
keep the good numbering when you turn the pages of
the I/B. Don’t change the page numbering. Keep the
language integrity. Print only what is inside the frame.
#
CONSIGNES DE SECURITE
Lors de l’utilisation de votre appareil, veillez à toujours respecter des
mesures de précaution élémentaires, notamment:
1. LISEZ L’ENSEMBLE DES INSTRUCTIONS.
2. Vérifiez que la tension du réseau correspond bien à celle notée
sur la plaque signalétique de l’appareil.
3. Ne touchez pas les surfaces chaudes. Manipulez les poignées et
les boutons.
4. Pour écarter les risques d’électrocution, n'immergez pas le
cordon, la fiche ou l'appareil dans l'eau ou dans tout autre
liquide.
5. Faites particulièrement attention lorsque l’appareil est utilisé par
ou en présence d’enfants.
6. Débranchez l'appareil de la prise murale lorsqu’il n’est pas utilisé
ou avant de le nettoyer. Laissez l'appareil refroidir avant d'insérer
ou retirer des pièces.
7. Ne faites pas fonctionner l'appareil si son cordon ou sa fiche est
endommagé ou si l'appareil a présenté un dysfonctionnement
ou est endommagé. Retournez l’appareil au centre de service
autorisé pour le faire vérifier ou réparer.
8. L'utilisation d’accessoires non recommandés par le fabricant
présente des risques d’incendie, d’électrocution ou de blessure.
9. N'utilisez pas l'appareil à l'extérieur.
10. Ne laissez pas le cordon pendre de la table ou d'un comptoir et
évitez qu’il touche une surface chaude.
11. Ne placez pas l'appareil sur ou près d'un brûleur à gaz ou
électrique ou dans un four chaud.
12. Insérez toujours le cordon d'abord dans l'appareil et ensuite dans
la prise murale. Pour déconnecter l'appareil, placez tous les
boutons sur la position arrêt (off ou 0) et débranchez l'appareil.
13. N'utilisez pas cet appareil à des fins autres que celles pour
lesquelles il est conçu.
20
Assembly page 20/28
USK BSET 15191 - 111026
Fax +1 305 430 9692
Copies of the I/B. Please reproduce them without any
changes except under special instruction from Team
International USA. The pages must be reproduced and
folded in order to obtain a booklet A5 (+/- 148.5 mm
width x 210 mm height). When folding, make sure you
keep the good numbering when you turn the pages of
the I/B. Don’t change the page numbering. Keep the
language integrity. Print only what is inside the frame.
#
14. En raison des risques d’incendie ou d’électrocution n'introduisez
pas d’ustensiles de cuisine ni d’aliments de taille excessive dans
l'appareil.
15. Pour écarter les risques d’incendie pendant le fonctionnement
de l'appareil, ne le couvrez pas et assurez-vous qu'il n'entre pas
en contact avec des matières inflammables notamment rideaux,
tentures, cloisons, etc. Ne rangez aucun objet sur le dessus de
l’appareil pendant qu’il fonctionne.
16. Soyez extrêmement prudent lorsque vous déplacez un appareil
contenant de l'huile chaude ou d'autres liquides chauds.
17. N'utilisez pas de tampon métallique pour le nettoyage. Le
tampon métallique pourrait perdre des morceaux susceptibles
de venir en contact avec des éléments sous tension et de créer
un risque d’électrocution.
18. Faites preuve d'une extrême prudence lorsque vous utilisez des
récipients en matériaux autre que le métal ou le verre.
19. Ne rangez aucun objet autre que les accessoires conseillés par le
fabricant dans le four lorsqu’il n'est pas utilisé.
20. Ne placez aucune matière inflammable dans le four, notamment
papier, carton, plastique ou tout autre matériau susceptible de
s’enflammer ou de fondre.
21. Ne pas couvrir le ramasse-miettes, ni aucune autre partie du four,
de papier aluminium. Ceci provoquerait une surchauffe de
l'appareil.
22. Des brûlures peuvent être occasionnées si le couvercle est
soulevé durant le cycle de chauffe.
23. Il n'est pas nécessaire de préchauffer cet appareil.
24. Pour éteindre l’appareil, ramenez toutes les commandes à leur
position arrêt (off ou 0).
CONSERVEZ CES INSTRUCTIONS
USAGE DOMESTIQUE UNIQUEMENT
21
Assembly page 21/28
USK BSET 15191 - 111026
Fax +1 305 430 9692
Copies of the I/B. Please reproduce them without any
changes except under special instruction from Team
International USA. The pages must be reproduced and
folded in order to obtain a booklet A5 (+/- 148.5 mm
width x 210 mm height). When folding, make sure you
keep the good numbering when you turn the pages of
the I/B. Don’t change the page numbering. Keep the
language integrity. Print only what is inside the frame.
#
INSTRUCTIONS POUR LES FICHES POLARISÉES
Cet appareil est équipé d’une prise polarisée (une des deux tiges
métalliques est plus large que l’autre). Pour réduire le risque de choc
électrique, cette prise ne peut être introduite que d’une seule façon
dans la fiche murale. Si cette prise ne rentre pas correctement dans
la fiche, retournez-la. Si elle ne rentre toujours pas, contactez un
électricien qualifié. N’essayez jamais de modifier vous-même la prise
polarisée.
CONSIGNES CONCERNANT LE CORDON
Le cordon d’alimentation de l’appareil est un cordon de type court,
et ce afin de diminuer les risques d’accidents (chute si vous marchez
sur le cordon...). Vous pouvez toutefois utiliser une rallonge si
nécessaire mais:
· Assurez-vous que l'ampérage de la rallonge est égal ou supérieur
à celui de l'appareil. Une rallonge avec un ampérage inférieur à
celui de l'appareil risquerait de surchauffer et de brûler.
· La rallonge ne doit pas pendre du plan de travail ou de la table
afin d'éviter que les enfants ne le tirent ou trébuchent.
DESCRIPTION
1. Couvercle du réservoir
2. Réservoir d'eau
3. Porte-filtre
4. Plaque chauffante
5. Verseuse en verre
6. Interrupteur de la cafetière
7. Minuterie
8. Témoin lumineux
9. Sélecteur de fonctions
10. Porte en verre
11. Grille
12. Plateau à frire
22
Assembly page 22/28
USK BSET 15191 - 111026
Copies of the I/B. Please reproduce them without any
changes except under special instruction from Team
International USA. The pages must be reproduced and
folded in order to obtain a booklet A5 (+/- 148.5 mm
width x 210 mm height). When folding, make sure you
keep the good numbering when you turn the pages of
the I/B. Don’t change the page numbering. Keep the
language integrity. Print only what is inside the frame.
Fax +1 305 430 9692
#
AVANT LA PREMIERE UTILISATION
Déballez l’appareil puis lavez les accessoires et séchez-les.
Four: Il est normal que de la fumée ou une odeur de neuf se dégage
lorsque vous utilisez votre appareil pour la première fois. Ceci n'est
pas nocif. C'est pourquoi il est conseillé de faire fonctionner
l'appareil à vide pendant 10 minutes avec le sélecteur de fonctions
sur la position UP & DOWN ("gril & four").
Cafetière: Lorsque vous utilisez votre appareil pour la première fois,
versez de l’eau dans le réservoir (sans mettre de café) et mettez
l'appareil en fonctionnement. Dès que l’eau est passée, éteignez
votre appareil et laissez-le refroidir. Répétez cette opération 3 fois.
UTILISATION DU FOUR
·
·
·
·
·
·
·
·
Avant d’utiliser votre appareil pour la première fois, vous devez
nettoyer le plateau avec un chiffon humide, le sécher et l'enduire
de matière grasse (huile de cuisine, beurre...). Le revêtement
antiadhésif du plateau à frire rend l'utilisation de beurre ou d'huile
optionnelle.
Placez le plateau à frire dans l'ouverture prévue à cet effet sur le
dessus de l'appareil.
Placez le sélecteur de fonction sur la position OFF.
Branchez l’appareil.
Placez le sélecteur sur la position désirée:
- DOWN: seule la résistance inférieure chauffe pour cuire ou
réchauffer sans griller la préparation.
- UP & DOWN: les deux résistances chauffent simultanément
pour à la fois cuire, réchauffer et griller la préparation.
- UP: seule la résistance du haut chauffe pour griller la
préparation.
Tournez le bouton de la minuterie pour régler le temps de cuisson,
indiqué en minutes sur l'appareil. Le voyant lumineux s'allumera,
indiquant que le four chauffe.
Grâce à la porte en verre réfractaire il vous est possible de
surveiller la cuisson des aliments et par conséquent d'ajuster la
fonction et le temps de cuisson si nécessaire.
Vous pouvez également mettre des aliments dans le plateau à
frire sur le dessus du four. Pour frire les aliments, assurez-vous que
la résistance supérieure est activée. Même si vous ne faites pas
23
Assembly page 23/28
USK BSET 15191 - 111026
Fax +1 305 430 9692
Copies of the I/B. Please reproduce them without any
changes except under special instruction from Team
International USA. The pages must be reproduced and
folded in order to obtain a booklet A5 (+/- 148.5 mm
width x 210 mm height). When folding, make sure you
keep the good numbering when you turn the pages of
the I/B. Don’t change the page numbering. Keep the
language integrity. Print only what is inside the frame.
#
·
·
·
·
frire d'aliments dans le plateau à frire, laissez le plateau sur le
dessus de l'appareil, si non le four sera ouvert et la chaleur
s'échappera par le dessus de l'appareil.
Si vous voulez arrêter la cuisson avant le temps choisi sur la
minuterie, mettez la minuterie sur la position 0 et le sélecteur de
fonctions sur OFF.
Lorsque la minuterie s’arrête, une sonnerie retentit et l'appareil
s'arrête automatiquement. Dès que les aliments sont cuits,
placez le sélecteur de fonction sur la position OFF.
Ouvrez doucement la porte du four en utilisant un gant de
cuisine de préférence.
Soyez très prudent lorsque vous retirez la plaque ou la grille. Ces
parties sont très chaudes et vous risqueriez de vous brûler.
NETTOYAGE ET ENTRETIEN
Avant de nettoyer l'appareil, assurez-vous que les boutons de
réglage soient sur OFF, LOW ou "0" et que l'appareil soit débranché
et laissez-le totalement refroidir.
Nettoyage de l’intérieur du four
·
·
Essuyez le plateau avec du papier absorbant ou un chiffon doux.
Pour enlever les résidus d’aliments qui pourraient s’y trouver,
versez un peu d’huile de cuisine sur ceux-ci et attendez 5 à 10
minutes avant de frotter avec un papier absorbant.
Vous pouvez retirer la grille pour faciliter le nettoyage. Pour cela,
soulevez l'avant de la grille (Fig. 1). Dès que la partie avant est
détachée, retirez la grille du four. Pour remettre la grille en place,
insérez la partie arrière de la grille sur la barre à l'intérieur du four.
Puis basculez la grille vers le bas et appuyez sur l'avant de la
barre (Fig. 2 et 3).
1
2
24
Assembly page 24/28
3
USK BSET 15191 - 111026
Fax +1 305 430 9692
Copies of the I/B. Please reproduce them without any
changes except under special instruction from Team
International USA. The pages must be reproduced and
folded in order to obtain a booklet A5 (+/- 148.5 mm
width x 210 mm height). When folding, make sure you
keep the good numbering when you turn the pages of
the I/B. Don’t change the page numbering. Keep the
language integrity. Print only what is inside the frame.
#
·
·
N'utilisez pas de produits abrasifs. Ne plongez jamais l'appareil
dans l'eau et assurez-vous qu'il n'y a pas d'eau ou d'humidité qui
pénètre dans l'appareil.
Assurez-vous qu'il n'y a pas d'eau sur la porte du four quand celleci est chaude.
Nettoyage de l’extérieur de l’appareil
·
·
Essuyez l'appareil avec un papier absorbant ou un chiffon sec et
doux.
N’utilisez surtout pas d’éponge métallique ou de produits abrasifs,
cela abîmerait le revêtement.
Ne plongez pas l'appareil dans l'eau ni dans tout autre liquide.
UTILISATION DE LA CAFETIERE
·
·
·
·
·
·
·
Ouvrez le couvercle du réservoir et versez la quantité d’eau
désirée. Le niveau d’eau est visible au travers du réservoir. Ne
dépassez pas le niveau maximal indiqué.
Faites pivoter le porte-filtre, mettez-y un filtre papier ou un filtre
permanent (selon modèle) et remplissez-le avec la quantité de
café moulu désirée.
Remettez le porte-filtre dans sa position initiale et assurez-vous
qu'il est bien fermé.
N’oubliez pas de refermer le couvercle du réservoir avant de
mettre l’appareil en fonctionnement.
Placez la verseuse avec couvercle fermé sur la base de
l'appareil.
Mettez la cafetière en marche. Le témoin lumineux s’allumera
vous indiquant que votre appareil est en fonctionnement. Un
dispositif vous permet de conserver le café au chaud tant que la
cafetière est en fonctionnement. Attention, votre cafetière
restera allumée tant que vous n’aurez pas placé l’interrupteur sur
la position arrêt. Il est déconseillé de la laisser allumée pendant
une durée supérieure à deux heures et surtout de laisser la
verseuse vide sur la plaque chauffante.
Lorsque vous retirez la verseuse de l’appareil, une valve antigouttes se ferme automatiquement pour éviter que toute goutte
25
Assembly page 25/28
USK BSET 15191 - 111026
Copies of the I/B. Please reproduce them without any
changes except under special instruction from Team
International USA. The pages must be reproduced and
folded in order to obtain a booklet A5 (+/- 148.5 mm
width x 210 mm height). When folding, make sure you
keep the good numbering when you turn the pages of
the I/B. Don’t change the page numbering. Keep the
language integrity. Print only what is inside the frame.
Fax +1 305 430 9692
#
·
de café ne tombe sur la plaque chauffante. La remise en place
de la verseuse ouvre automatiquement le système anti-gouttes et
permet au café restant dans le filtre de passer dans la verseuse.
Lorsque le réservoir d’eau est vide, attendez quelques minutes
supplémentaires avant de retirer la verseuse.
DETARTRAGE ET NETTOYAGE
·
·
·
·
·
Nous vous conseillons de détartrer votre appareil régulièrement
pour le garder en bon état. Pour cela utilisez un détartrant pour
cafetières électriques que vous trouverez dans le commerce et
conformez-vous à son mode d’emploi.
Pour faciliter le nettoyage, il est possible de retirer le porte-filtre.
Nettoyez la verseuse et le porte-filtre à l’eau chaude savonneuse
et rincez-les à l’eau claire.
Pour les parties plastiques et la plaque chauffante, utilisez une
éponge non-abrasive ou un chiffon humide.
Ne mettez aucune partie de votre cafetière dans le lavevaisselle.
CONSEILS PRATIQUES
Lorsque vous constatez une augmentation du temps de passage du
café, effectuez un détartrage complet de votre appareil et
n’attendez surtout pas que la situation s’aggrave. La fréquence de
détartrage est fonction de la dureté de l’eau et varie par
conséquent selon les foyers. Il est par conséquent important de
porter une attention particulière au phénomène d’entartrage.
L’entretien de votre cafetière est important pour sa durée de vie et
le remplacement d’une résistance entartrée ne sera pas pris en
compte dans le cadre de la garantie.
26
Assembly page 26/28
USK BSET 15191 - 111026
Fax +1 305 430 9692
Copies of the I/B. Please reproduce them without any
changes except under special instruction from Team
International USA. The pages must be reproduced and
folded in order to obtain a booklet A5 (+/- 148.5 mm
width x 210 mm height). When folding, make sure you
keep the good numbering when you turn the pages of
the I/B. Don’t change the page numbering. Keep the
language integrity. Print only what is inside the frame.
#
GARANTIE
Nous vous suggérons de remplir et de nous renvoyer rapidement la
Carte d’Enregistrement Produit ci-jointe afin de faciliter la vérification
de la date d’achat. Cependant, le renvoi de la Carte
d’Enregistrement Produit n’est pas une condition indispensable à
l’application de la présente garantie. Vous pouvez aussi remplir
cette carte de garantie en ligne à l’adresse suivante :
www.KALORIK.com.
A compter de la date d’achat, ce produit KALORIK est garanti un
an, sur le territoire des Etats-Unis, contre les défauts matériels et de
fabrication. Cette garantie n’est pas transférable. Conservez la
preuve d’achat originelle. Une preuve d’achat est exigée pour
obtenir l’application de la garantie.
Durant cette période, le produit KALORIK qui, après inspection par
KALORIK, s’avère défectueux, sera réparé ou remplacé, au choix de
KALORIK, sans frais pour le consommateur. Si un produit de
remplacement est envoyé, c’est la garantie restante du produit
originel qui s’appliquera.
La présente garantie ne s’applique pas aux défauts dus à une
mauvaise utilisation de la part de l’acheteur ou de l’utilisateur, à une
négligence, au non-respect des consignes du manuel d’utilisation
KALORIK, à une utilisation sur un circuit électrique au voltage
différent de celui renseigné sur le produit, à une usure normale, à des
modifications ou réparations non autorisées par KALORIK, ou par un
usage à des fins commerciales. Il n’existe pas de garantie pour les
parties en verre, récipients en verre, filtres, paniers, lames et
accessoires en général. Il n’existe également pas de garantie pour
les pièces perdues par l’utilisateur.
Toute garantie de valeur commerciale ou d’adaptabilité à ce
produit est également limitée à la garantie d’un an.
Certains états ne limitent pas la longueur de la garantie tacite ou
n’autorisent pas l’exclusion de dommages-intérêts accessoires ou
indirects, les restrictions ci-dessus peuvent donc ne pas s’appliquer à
27
Assembly page 27/28
USK BSET 15191 - 111026
Fax +1 305 430 9692
Copies of the I/B. Please reproduce them without any
changes except under special instruction from Team
International USA. The pages must be reproduced and
folded in order to obtain a booklet A5 (+/- 148.5 mm
width x 210 mm height). When folding, make sure you
keep the good numbering when you turn the pages of
the I/B. Don’t change the page numbering. Keep the
language integrity. Print only what is inside the frame.
#
vous. Cette garantie vous donne des droits légaux particuliers, et
certains droits peuvent varier d’un état à l’autre.
Si l’appareil devait présenter un défaut durant la période de
garantie et plus de 30 jours après l’achat, ne ramenez pas l’appareil
au magasin : souvent, notre Service Clientèle peut aider à résoudre
le problème sans que le produit ne doive être réparé. Si une
réparation est nécessaire, un représentant peut confirmer si le
produit est sous garantie et vous rediriger vers notre centre de
réparation.
Le cas échéant, ramenez le produit (ou envoyez-le, dûment
affranchi), ainsi qu’une preuve d’achat, en mentionnant le numéro
d’autorisation de retour, indiqué par notre service clientèle, au
service après-vente KALORIK agrée (visitez notre site internet
www.KALORIK.com ou appelez notre département Service Clientèle
pour obtenir l’adresse du service après-vente KALORIK agréé).
Si vous envoyez le produit, veuillez y joindre une lettre expliquant la
nature du défaut.
Si vous avez des questions complémentaires, veuillez appeler notre
département Service Clientèle (voyez plus bas pour les coordonnées
complètes), du lundi au vendredi de 9h à 18h (EST). Veuillez noter
que les heures sont sujettes à modification.
Si vous souhaitez nous écrire, adressez votre courrier à:
KALORIK Customer Service Department
Team International Group of America Inc.
1400 N.W 159th Street, Suite 102
Miami Gardens, FL 33169 USA
Ou appelez (Gratuitement des Etats-Unis): +1 888-521-TEAM ou +1
888-KALORIK.
Seules les lettres seront acceptées à l’adresse ci-dessus. Les envois
et colis n’ayant pas de numéro d’autorisation de retour seront
refusés.
K111026
www.KALORIK.com
é
Back cover page (last page)
Assembly page 28/28