1
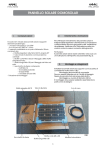
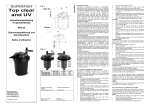
IT
DE
ES
GB
Vienna Parc 80
0821
Manual Use
- Manuale d’istruzioni Introduzione
Grazie per aver acquistato una lampada solare della gamma Solarjet!
La lampada solare modello Vienna Parc 80 è un articolo innovativo che rende ogni giardino ancora più bello,
grazie ai giochi di luce emessi dai LED super potenti. Adatta per illuminare o delimitare percorsi e sentieri.
Vi preghiamo di leggere attentamente le istruzioni per ottenere il miglior funzionamento della lampada.
Vantaggi
•
•
•
•
•
•
•
•
•
•
•
Lampada decorativa per giardini e parchi in inox
1 x 1 Watt LED
Pannello solare monocristallino
Funziona senza cavo
Riposizionabile
Attivazione automatica con sensore
3 batterie ricaricabili
Lente stabilizzata UV
Almeno 10 ore di illuminazione a batteria carica
Resistente alle intemperie
Altezza 80cm
Posizionamento
1) La lampada deve essere collocata in un luogo
dove le è consentito accumulare luce solare,
quindi lontano da alberi o tetti (vedi fig. 1).
2) Assicurarsi che vicino alla lampada non ci siano altre fonti di illuminazione (ad es. un lampione) altrimenti il
sensore non garantisce l’accensione della lampada.
3) La lampada va lasciata in carica per due giorni sotto il sole prima del suo utilizzo.
Istruzioni per il montaggio
Questo tipo di lampada può essere fissata nel terreno oppure solo appoggiata con
l’utilizzo della sua base.
1) Togliere la lampada ed ogni accessorio con cura dalla scatola.
2) Unire le parti e spingere il paletto direttamente nel terreno (non battere né
sulla luce né sul paletto!!!).
3) Posizionare l’interruttore al di sotto della lampada su “AUTO”.
Funzionamento
1) Per un utilizzo quotidiano, posizionare l’interruttore su “AUTO”, e la lampada si accenderá automaticamente
durante la notte o appena fará buio. Importante é far caricare la lampada per due giorni sotto la luce del sole.
2) Il numero di ore di illuminazione è inoltre determinato dal suo posizionamento, dalle condizioni
meteorologiche e stagionali. In inverno si hanno meno ore di luce rispetto ad altre stagioni, pertanto la durata
d’illuminazione della lampada sará minore.
Sostituzione batterie
Per un risultato ottimale, è consigliabile sostituire le batterie ogni 12 mesi!
1) Capovolgere la lampada. Togliere la vite dal coperchio.
2) Rimuovere le batterie scariche. Assicurarsi che le nuove batterie siano Ni-MH ricaricabili.
3) Posizionare le batterie correttamente.
4) Riassemblare il tutto prima di riaccendere la lampada.
NB: Le batterie esaurite, dovranno essere smaltite negli appositi raccoglitori.
Per maggiori informazioni rivolgersi all’Ente di smaltimento rifiuti locale. Non bruciare.
Mal funzionamento
Se la lampada non dovesse funzionare nonostante il buio e la corretta manutenzione,
verificare che:
1) La lampada non abbia una fonte di luce vicina (ad es. un lampione).
2) La lampada sia sotto la luce del sole durante il giorno.
3) Che l’ interruttore sia posizionato su AUTO.
4) Che le batterie siano inserite correttamente.
Mantenimento
Pulire regolarmente con un panno umido la lampada in modo che il pannello sia sempre pulito.
Non utilizzare alcun tipo di solvente per la pulizia e non esercitare troppa pressione con il panno.
- Gebrauchsanweisung Einleitung
Wir bedanken uns, dass Sie sich entschlossen haben eine Solarlampe bei Solarjet zu beziehen.
Die schöne Parc- Lampe im zeitlosen Design, dient zur Wegbeleuchtung und zur Wegabgrenzung.
Vorteile
•
•
•
•
•
•
•
•
•
Inox Parklampe
1 x 0,5 Watt LED
Kristall-Solarpaneel
Funktioniert ohne Kabel
Schaltet bei Dunkelheit automatisch mittels eingebautem Dämmerungsschalter ein
Aufladbarer Akku – 3 Batterien
Leuchtdauer bei vollgeladenem Akku bis zu 10 Stunden
Wetterbeständig
Höhe 80cm
Positionierung
1) Um der Lampe optimale Voraussetzungen bieten,
platzieren Sie die Solarzellenfläche an einem Ort, wo
Sie die maximale Sonneneinstrahlung sammeln kann (siehe Bild 1)
2) Bitte laden Sie die Batterien zwei Tage vor der Inbetriebnahme auf.
3) In der Wintermonaten nehmen die Solarzellen nicht viel direktes Sonnenlicht auf, deshalb verringern sich die
Leuchtstunden der Solarlampen.
Gebrauchsanweisung
Diese Lampe kann mit dem Stiel im Boden fixiert werden oder nur mit der Basis
hingestellt werden
1) Entnehmen Sie die Lampe und jeglichen Gegenstand aus der Verpackung.
2) Positionieren Sie den Schalter unter der Lampe auf “AUTO”.
Leistung
1) Für den täglichen Gebrauch, positionieren Sie den Schalter unter der Lampe
auf “AUTO”; die Lampe wird sich bei Dämmerung selbst einschalten. Es ist
wichtig vorher die Lampe zwei Tage unter den Sonnenstrahlen aufladen zu
lassen.
2) In den Wintermonaten nehmen die Solarzellen nicht viel direktes Sonnenlicht auf, deshalb verringern sich die
Leuchtstunden der Solarlampe. Beim bewölktem Himmel wird die Batterie nicht für den nächtlichen Betrieb
aufgeladen.
Austausch der Batterie
Um der Lampe optimale Voraussetzungen zu bieten, sollen die Ni-Mh Batterien alle 12 Monate gewechselt
werden.
1) Öffnen Sie die Verschlusskappe.
2) Wechseln Sie die Batterien. Kontrollieren Sie ob die neuen Batterien Ni-Mh Akku Batterien sind.
Wenn die Funktionstüchtigkeit der Batterie erschöpf ist, müssen diese ordnungsgemäß entsorgt
werden. Für weitere Informationen hinsichtlich der Entsorgung setzen Sie sich mit Ihrer örtlichen
Abfallbeseitigungsbehörde in Verbindung. Nicht verbrennen.
Problembehandlung
Sollte Ihre Solarlampe nicht richtig funktionieren, befolgen Sie die folgenden Anweisungen:
1) Vergewissern Sie sich, dass das Solarpaneel der Sonne ausgesetzt ist.
2) Kontrollieren Sie ob die Batterien richtig installiert wurden.
Instandhaltung
Reinigen Sie regelmäßig mit einem feuchten Tuch die Lampe, damit das Solarpaneel immer sauber ist, benutzen
Sie dabei kein Reinigungsmittel und drücke Sie nicht auf das Paneel.
-MANUAL DE INSTRUCCIONESIntroducción
Gracias por comprar una unidad de calidad. Utilizada con cuidado y en concordancia con las instrucciones
explicadas a continuación, su LÁMPARA DE JARDÍN debería proporcionarle muchos años de uso sin ningún
problema. Por favor, lea las instrucciones detenidamente para obtener los mejores resultados de su compra.
Diseñada elegantemente, este producto tiene las siguientes características:
• Atractiva lámpara de parque en acero inoxidable.
• 1 pieza 0.5 Watt LED
• 1 panel solar mono-cristal
• 3x pilas recargables
• Encendido hasta 10 horas con carga completa
• Interruptor manual AUTO/OFF
• Resistente al agua
• Altura 80cm
Colocación de la lámpara solar
1) La lámpara solar debe ser colocada en una posición
donde pueda tomar luz solar directamente al panel
solar y generalmente sin estar cubierta ni en la sombra. (Como muestra la figura 1).
2) Asegurarse de que el foto sensor (situado en la parte superior de la lámpara) no vaya a ser afectado por
cualquier otra fuente de luz. De lo contrario la lámpara no iluminará al atardecer.
3) La lámpara solar debe dejarse en carga durante 2 soleados días antes de conseguir los mejores resultados.
Instrucciones de montaje
Montada en el suelo
1) Cuidadosamente saque la lámpara solar y todos los accesorios fuera de la caja.
2) Monte todas las partes e introduzca el poste directamente en la tierra sin martillear la
lámpara solar o el poste!
3) Coloque cuidadosamente la lámpara en la parte superior del poste.
4) Ajuste el interruptor bajo la tapa de la lámpara a la posición “AUTO”
Operación
1) Para operaciones diarias normales, mueve el interruptor a la posición de “AUTO”, automáticamente se
encenderá durante la noche después de haber estado inicialmente 2 días soleados en carga completa.
2) La función de la lámpara solar variará en cada estación del año. Proporcionará más luz cuando haya tenido un
día entero de sol que en un día nublado.
Cambio de pilas
Para mejores resultados las pilas Ni-MH deberían ser cambiadas cada 12 meses.
1) Coloque la lámpara boca abajo. Quite los tornillos de la tapa y extraiga el lente, la bandeja de las pilas y la
tapa de la parte superior. Separe el lente de la lámpara, tenga cuidado y no tire o enrede los cables durante el
cambio de pilas.
2) Extraiga las pilas viejas. Asegúrese que las nuevas pilas son Ni-MH recargables.
3) Asegúrese que las nuevas pilas han sido colocadas correctamente.
4) Vuelva a montar la pieza revisando el procedimiento explicado anteriormente.
Problemas de encendido
Si su lámpara solar no se enciende al atardecer a pesar de haber observado todas las instrucciones, por favor
intente seguir los siguientes pasos:
1)
2)
3)
4)
Asegúrese de que la lámpara solar no está siendo afectada por ninguna otra fuente de luz.
Asegúrese de que la lámpara solar no está bajo la sombra durante el día.
Asegúrese de que el interruptor está en la posición de “AUTO”
Compruebe que las pilas están colocadas correctamente.
Mantenimiento
Limpie el módulo solar regularmente con un paño húmedo para garantizar un óptimo funcionamiento del panel
solar. No utilice ningún tipo de limpiador y tenga cuidado de no presionar mucho el módulo mientras lo limpia.
-
Instruction Manual –
Introduction
Thank you for purchasing a quality unit. Used carefully and in accordance with the instructions set out below your
GARDEN LAMP Vienna Parc 80 should give you many years of trouble free use. Please read the instructions
carefully to obtain the best results from your purchase.
Stylishly designed, your unit features:
• Attractive parc lamp in stainless steel
• 1 pc 1 Watt LED
• Mono-crystal solar panel
• 3 x solar rechargeable batteries
• Light up to 10 hours as fully charged
• Manual AUTO/OFF switch
• Safe water resistant
• Height 80cm
Location of the Solar Light
1) The solar light must be located in a
position where it can get direct sunlight on
the solar panel, and generally free from
cover and shade. (As shown in figure 1).
2) Make sure that the photo sensor (located on the top of the light) is not going to be affected by any other light
source. Otherwise the light will not illuminate at dusk.
3) The Solar light must be left to charge for 2 sunny days before best results are achieved.
Assembly Instructions
Ground Mounted
1)
2)
3)
4)
5)
Carefully remove the solar light and all the fittings out of the box.
Assemble all parts and push the stake directly into the ground
DO NOT hammer the light or the stakes!
Set the lamp unit on the upper part of the mounting poles carefully.
Adjust the switch under the lid of the lamp unit to “AUTO” position.
Operation
1) For daily / normal operation, turn the switch to the “AUTO” position, it will automatically turn on during the
night time after it has had a initial full 2 sunny days to charge.
2) The performance of the solar light will vary with the time of year. It will deliver more light when it has had a
full day in the sun rather than a day in overcast weather.
Replacing the Batteries
For best results Ni-MH batteries should be replaced every 12 months.
1) Turn the lamp upside down. Remove the screws from the cover. The lens, battery tray and the top lid will be
separated. Detach the lens from the lamp unit. Be careful not to twist or pull the wires during replacement of
batteries.
2) Remove the old batteries. Make sure the new batteries are Ni-MH rechargeable batteries.
3) Make sure that the batteries have been put in the correct directions.
4) Reassemble the unit by reversing the above procedure.
Trouble Shooting
If your solar light does not come on at dusk despite observance of all the instructions, please try the
following steps:
1)
2)
3)
4)
Make sure that the solar light is not being affected by any other light source.
Ensure the solar light does not stand in the shade during the day.
Make sure the switch is in the auto position.
Check that the batteries are installed correctly.
Maintenance
Clean the solar module regularly with a damp towel to guarantee optimum performance of the solar panel. Do not
use any type of solvent for cleaning and be careful not to put too much pressure on the module while cleaning.
[email protected]
www.solarjet.it