1
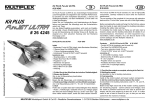
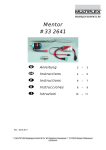
RR EasyGlider PRO electric
# 26 4224
RR
PR
O
PRO
Zusatzanleitung RR EasyGlider PRO electric Nr. 82 5904 - Seite 1 von 2
# 26 4224
D : Zusätzlich Empfohlene Ausrüstung
Empfänger z.B. RX-5 light M-LINK
oder RX-7-DR M-LINK
Akku z.B. Li-BATT eco 3/1-2000 (M6)
# 5 5808
# 5 5810
# 15 7231
GB: Additional recommended equipment:
Receiver e.g. z.B. RX-5 light M-LINK
or RX-7-DR M-LINK
Flight battery e.g. Li-BATT eco 3/1-2000 (M6)
# 5 5808
# 5 5810
# 15 7231
F : Equipement recommandé:
Récepteur z.B. RX-5 light M-LINK
ou RX-7-DR M-LINK
accu p.es. Li-BATT eco 3/1-2000 (M6)
# 5 5808
# 5 5810
# 15 7231
I:
Componenti consiglati:
Ricevente p.es. z.B. RX-5 light M-LINK
# 5 5808
oppure RX-7-DR M-LINK
# 5 5810
pacco batteria p.es. Li-BATT eco 3/1-2000 (M6) # 15 7231
E : Componentes recomendados:
Receptor, p.ej. z.B. RX-5 light M-LINK
o RX-7-DR M-LINK
batería, p.ej. Li-BATT eco 3/1-2000 (M6)
# 5 5808
# 5 5810
# 15 7231
D
Das Modell RR EasyGlider PRO electric # 26 4224 ist nahezu flugfertig
vormontiert und es entfallen für Sie zahlreiche Arbeitsschritte, die in der
Bauanleitung beschrieben sind. Das Modell ist somit in kürzester Zeit
betriebsbereit. Lesen Sie vor Fertigstellung und Inbetriebnahme die Bauanleitung und beachten unbedingt auch die Sicherheitshinweise und
Tipps.
Zur Ausrüstung zum Elektrosegler ist noch zusätzlich ein Antriebsakku
notwendig. Unsere Empfehlungen hierzu entnehmen Sie bitte aus der
Bauanleitung und darüber hinaus (z.B. Sender, Ladegerät etc.) dem aktuellen Katalog oder der Multiplex Homepage unter: www.multiplex-rc.de
RR EasyGlider PRO electric
# 26 4224
The RR EasyGlider PRO electric # 26 4224 is supplied pre-assembled
and virtually ready to fly. Many of the individual stages of construction
described in the Building Instructions are already completed for you, with
the result that the model can be ready for the air very quickly. Please take
the time to read through the Building Instructions before completing and
flying the model, paying particular attention to the Safety Notes and Tips.
To complete the electric glider you will also require a flight battery. For
our recommended items please refer to the Building Instructions. For
additional items (e.g. transmitter, battery charger etc.) refer to the current
catalogue or the MPX website at: www.multiplex-rc.de
Parts List - RR EasyGlider PRO electric
Stückliste RR EasyGlider PRO electric
Material
# 26 4224
Lfd.
Stk. Bezeichnung
Abmessungen
1 1
1.1 1
2 1
3* 1
5 1
8 ** 1
9 ** 1
12 1
13 1
20 2
21 2
29 1
Bauanleitung EasyGlider PRO KIT
Anleitungen EG PRO electric / MULTIcont BL-20 S-BEC / Antrieb
Dekorbogen
bedruckte Klebefolie Fertigteil
Rumpf vormontiert *
Elapor geschäumt
Fertigteil
Rumpfnase Segler
Elapor geschäumt
Fertigteil
Tragfläche links **
Elapor geschäumt
Fertigteil
Tragfläche rechts **
Elapor geschäumt
Fertigteil
Höhenleitwerk
Elapor geschäumt
Fertigteil
Seitenleitwerk
Elapor geschäumt
Fertigteil
Klettband Pilzkopf
Kunststoff
25 x 60 mm
Klettband Velours
Kunststoff
25 x 60 mm
Inbusschlüssel
Metall
SW 1,5
* mit 2 eingebauten Servos Tiny-S (UNI) incl. kompl. Ruderanlenkung,
Motor PERMAX BL-O 2816-0850F, Regler MULTIcont BL-20 S-BEC.
** mit eingebauten Servos Nano-S (UNI) incl. kompl. Ruderanlenkung.
1. Prüfen Sie mit Hilfe der Stückliste den Inhalt auf Vollständigkeit.
2. Höhen- und Seitenleitwerk verkleben
Punkt 13. in der Bauanleitung ==> Abb.18
3. Leitwerke mit dem Rumpf verkleben
Punkt 14. in der Bauanleitung ==> Abb.18
4. Höhen- und Seitenrudergestänge arretieren
Punkt 15. in der Bauanleitung ==> Abb.19+20
5. Tragflächensteckung überprüfen
Punkt 22. in der Bauanleitung ==> Abb.25
6. Fernsteuerungseinbau allgemein Punkt 24. in der Bauanleitung
7. Dekorbogen aufkleben Punkt 27. in der Bauanleitung
8. Ruderausschläge und Schwerpunkt einstellen
Punkt 26. und 28. in der Bauanleitung ==> Abb.29 + 30
9. Der Erstflug - ab Punkt 29. in der Bauanleitung
Prüfen Sie vor jedem Start die Funktionsfähigkeit Ihres Modells, der Ruder und Anlenkungen sowie den Anrieb und die Akkus.
.
MULTIPLEX Modellsport GmbH & Co.KG
Westliche Gewerbestrasse 1
.
GB
# 26 4224
Part-No No.off Description Material
Dimensions
1 1 EasyGlider PRO KIT building instructions
1.1 1 RR EG PRO electric / BL-20 S-BEC / Power Set instructions
2 1 Decal sheet
Printed adhesive film Ready made
3 * 1 Fuselage, assembled * Moulded Elapor foam Ready made
5 1 Glider fuselage nose
Moulded Elapor foam Ready made
8 ** 1 L.H. wing panel **
Moulded Elapor foam Ready made
9 ** 1 R.H. wing panel **
Moulded Elapor foam Ready made
12 1 Tailplane
Moulded Elapor foam Ready made
13 1 Fin
Moulded Elapor foam Ready made
20 2 Velcro tape, “hook”
Plastic 25 x 60 mm
21 2 Velcro tape, “loop”
Plastic 25 x 60 mm
29 1 Allen key
Metal 1.5 mm A/F
* With two factory-fitted Tiny-S (UNI) servos, including all control surface linkages,
Brushless motor PERMAX BL-O 2816-0850F,
controller MULTIcont BL-20 S-BEC.
** Each with factory-fitted Nano-S (UNI) servo, including all control surface
linkages.
1. Check that all kit components are present, referring to the Parts List.
2. Glue the tailplane and fin together
Point 13. in the Building Instructions ==> Fig. 18
3. Glue the tail assembly to the fuselage
Point 14. in the Building Instructions ==> Fig. 18
4. Secure the elevator and rudder pushrods
Point 15. in the Building Instructions ==> Figs. 19 + 20
5. Check the wing joiner system
Point 22. in the Building Instructions ==> Fig. 25
6. Radio control system - general installation
Point 24. in the Building Instructions
7. Apply the decals Point 27. in the Building Instructions
8. Setting the control surface travels and the Centre of Gravity
Points 26. and 26. in the Building Instructions ==> Figs. 29 + 30
9. First flight - section in the Building Instructions starting at Point 29.
Before each flight check all the model’s working systems: the control
surfaces, the linkages, the power system and the batteries.
D-75015 Bretten-Gölshausen
.
www.multiplex-rc.de
Zusatzanleitung RR EasyGlider PRO electric Nr. 82 5904 - Seite 2 von 2
RR EasyGlider PRO electric
# 26 4224
F
RR EasyGlider PRO electric
# 26 4224
I
Le modèle RR EasyGlider PRO electric #26 4224 est pré assemblé et quasiment
près à voler, cela vous économise beaucoup d’étapes de constructions décrits
dans la notice d’assemblage. De ce fait, votre modèle est près à l’utilisation en
très peu de temps. Néanmoins, lisez attentivement la notice avant l’assemblage
et l’utilisation et respectez les remarques ainsi que les conseils de sécurités. Si
vous souhaitez équiper votre planeur en électrique, il vous faut également
l’équiper d’un accu de propulsion. Vous trouverez dans la notice d’assemblage
des indications sur le matériel conseillé, et pour le matériel en annexe (par ex. :
émetteur, chargeur, etc.) veillez vous reporter à notre catalogue général ou
visiter notre site Internet sous : www.multiplex-rc.de
Il modello RR EasyGlider PRO electric # 26 4224 è quasi pronto al volo e
molti dei lavori di assemblaggio, descritti nelle istruzioni di montaggio,
sono già stati effettuati. Il modello può essere terminato in breve tempo.
Prima di terminare e di mettere in funzione il modello, leggere
assolutamente le istruzioni di montaggio, le avvertenze ed i consigli. Per
la versione elettrica è ulteriormente necessario il pacco batteria. Per i
componenti consigliati, consultare le istruzioni di montaggio e (per esempio
per radio, caricabatterie, ecc.) il nostro catalogo o il nostro sito Multiplex:
www.multiplex-rc.de
Liste de pièces RR EasyGlider PRO electric
# 26 4224
Nr. Nbr Désignation
Matière
Dimensions
1 1 Instructions d’assemblage Easyglider PRO KIT
1.1 1 Notice RR EG PRO electric / BL-20 S-BEC / Kit de propulsion
2 1 Planche de décoration Film autocollant
pièce complète
3* 1 Fuselage pré-assemblé* MousseElapor
pièce complète
5 1 Nez de fuselage version planeur ME
pièce complète
8** 1 Aile gauche**
Mousse Elapor
pièce complète
9** 1 Aile droite**
Mousse Elapor
pièce complète
12 1 Profondeur
Mousse Elapor
pièce complète
13 1 Direction
Mousse Elapor
pièce complète
20 2 Bande Velcro côté crochets
Plastique
25x60mm
21 2 Bande Velcro côté velours
Plastique
25x60mm
29 1 Clé six pans
Métallique SW 1,5
Lista materiale RR EasyGlider PRO electric
# 26 4224
Pos. Pz.DescrizioneMateriale Dimensioni
1 1 Istruzioni di montaggio EasyGlider PRO KIT
1.1 1 Istruzioni RR EG PRO electric / BL-20 S-BEC / set
motorizzazione
2 1 Decals
foglio adesivo stampato finito
3* 1 Fusoliera preassemblata*
espanso Elapor finito
5 1 Punta fusoliera aliante
espanso Elapor finito
8** 1 Semiala sinistra **
espanso Elapor finito
9** 1 Semiala destra **
espanso Elapor finito
12 1 Piano di quota
espanso Elapor finito
13 1 Direzionale
espanso Elapor finito
20 2 Velcro parte uncinata
materiale plastico 25 x 60 mm
21 2 Velcro parte stoffa
materiale plastico 25 x 60 mm
29 1 Chiave a brugola
metallo
SW 1,5
* équipé de deux servos Tiny-S (UNI) avec leurs tringles de commandes,
Motor PERMAX BL-O 2816-0850F, controller MULTIcont BL-20 S-BEC.
** équipé de servos Nano-S (UNI) avec leurs tringles de commandes.
1. Vérifiez à l’aide de la liste de pièces que le kit est complet.
2. Collez la profondeur et la dérive
Paragraphe 13. de la notice d’assemblage è ==> Fig. 18
3. Collez les stabilisateurs sur le fuselage
Paragraphe 14. de la notice d’assemblage è ==> Fig. 18
4. Réglez les tringles de commandes pour la profondeur et la direction
Paragraphe 15. de la notice d’assemblage è ==> Fig. 19+20
5. Vérifiez le système de fixation de l’aile
Paragraphe 22. de la notice d’assemblage è ==> Fig. 25
6. Mise en place des éléments de radiocommunications
paragraphe 24. de la notice d’assemblage
7. Collage des décorations paragraphe 27. de la notice d’assemblage
8. Réglage des débattements et du centre de gravité
Paragraphe 26. et 28. de la notice d’assemblage è ==> Fig. 29+30
9. Le premier vol paragraphe 29. de la notice d’assemblage
Avant chaque décollage, vérifiez soigneusement le bon fonctionnement de
votre modèle, des gouvernes et leurs commandes ainsi que de la propulsion et
des accus.
MULTIPLEX Modellsport GmbH & Co.KG
* con installati 2 servi Tiny-S (UNI), inclusi tutti i rinvii, motore PERMAX
BL-O 2816-0850F, regolatore MULTIcont BL-20 S-BEC.
** con installati rispettivamente servi Nano-S (UNI), inclusi i rinvii.
1. Con l’ausilio della lista materiale, controllare che il contenuto
della scatola sia completo.
2. Unire i piani di coda
Punto 13. delle istruzioni di montaggio ==> Fig. 18
3. Incollare i piani di coda sulla fusoliera
Punto 14. delle istruzioni di montaggio ==> Fig. 18
4. Collegare i rinvii all’elevatore e al direzionale
Punto 15. delle istruzioni di montaggio ==> Fig. 19+20
5. Controllare il montaggio delle ali
Punto 22. delle istruzioni di montaggio ==> Fig. 25
6. Versione elettrica (installare il motore)
Punto 25. delle istruzioni di montaggio ==> Fig. 28
7. Applicare i decals Punto 27. delle istruzioni di montaggio
8. Regolare le corse dei timoni e bilanciare il modello
Punto 26. e 28. delle istruzioni di montaggio ==> Fig. 29+30
9. Il primo volo – dal punto 29. delle istruzioni di montaggio
Prima del decollo, controllare tutte le funzioni del modello, i timoni ed i
rinvii, come pure la motorizzazione ed i pacchi batteria.
.
Westliche Gewerbestrasse 1
.
RR EasyGlider PRO electric
# 26 4224
E
El modelo RR EasyGlider PRO electric # 26 4224 está premontado y
casi listo para volar. Por tanto, hay muchos pasos de las instrucciones
de montaje que no debe seguir. De este modo, el tiempo de montar el
modelo se acorta considerablemente. Antes de terminar y de volarlo, lea
detenidamente las instrucciones de montaje y siga sin falta las
advertencias y los consejos acerca de la seguridad.
Para prepararlo como velero eléctrico además es necesario una batería
para el motor. Por favor, consulte el manual de instrucciones para ver
los productos que nosotros le recomendamos y nuestro catalogo actual
o la página web de Multiplex en www.multiplex-rc.de para la emisora, el
cargador, etc.
Lista de piezas RR EasyGlider PRO electric
# 26 4224
Nº Cant. Denominación
Material Medidas
1 1 Instrucciones de montaje EasyGlider PRO KIT
1.1 1 Instrucciones RR EasyGlider PRO electric / MULTIcont BL20 S-BEC / Kit de propulsión
2 1 Pliego de adhesivos Adhesivo impreso Pieza terminada
3* 1 Fuselaje premontado* Elapor espumado Pieza terminada
5 1 Morro velero
Elapor espumado Pieza terminada
8** 1 Ala izquierda **
Elapor espumado Pieza terminada
9** 1 Ala derecha **
Elapor espumado Pieza terminada
12 1 Cola
Elapor espumado Pieza terminada
13 1 Deriva
Elapor espumado Pieza terminada
20 2 Velcro lado ganchos Plástico
25 x 60 mm
21 2 Velcro lado velours
Plástico
25 x 60 mm
29 1 Llave hexagonal
Metal
SW
* con dos servos Tiny-S (UNI) montados incl. articulación completa de
los timones, motor PERMAX BL-O 2816-0850F,
regulador MULTIcont BL-20 S-BEC.
** con servo Nano-S (UNI) montados incl. articulación completa de los
timones.
1. Compruebe el contenido con ayuda de la lista de piezas.
2. Pegar la cola y la deriva
Punto 13 en las instrucciones de montaje è ==> Ilustr. 18
3. Pegar los empenajes al fuselaje
Punto 14 en las instrucciones de montaje è ==> Ilustr. 18
4. Fijar el varillaje del timón de profundidad y de dirección
Punto 15 en las instrucciones de montaje è ==> Ilustr. 19+20
5. Comprobar el anclaje de las alas
Punto 22 en las instrucciones de montaje è ==> Ilustr. 25
6. Montaje del motor en general Punto 24 en las instrucciones de montaje
7. Pegar los adhesivos Punto 27 en las instrucciones de montaje
8. Ajustar los recorridos de los timones y el centro de gravedad
Puntos 26 y 28 en las instrucciones de montaje è ==> Ilustr. 29 + 30
9. El primer vuelo - desde punto 29 en las instrucciones de montaje
Antes de cada despegue compruebe el correcto funcionamiento del
modelo, los timones, las articulaciones así como el motor y las baterías.
D-75015 Bretten-Gölshausen
.
www.multiplex-rc.de