1
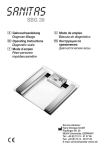
BF 100 Body Complete
D Diagnose-Waage
Gebrauchsanweisung ............ 2 –13
G Diagnostic scale
Instructions for use .............. 14 – 24
F Pèse-personne impédancemétre
Mode d’emploi ...................... 25 – 37
E Báscula para diagnóstico
Manual de instrucciones ...... 38 – 49
I Bilancia diagnostica
Istruzioni per l’uso ................ 50 – 61
T Diyagnoz terazisi
Kullanım kılavuzu .................. 62 – 72
r Диагностические весы
Инструкция по
применению ......................... 73 – 86
Q Waga diagnostyczna
Instrukcja obsługi ................. 97 – 98
Beurer GmbH • Söflinger Str. 218 • 89077 Ulm, Germany
Tel.: +49 (0)731 / 39 89 -144 • Fax: +49 (0)731 / 39 89 - 255
www.beurer.de • Mail: [email protected]
DEUTSCH
Inhalt
und ist für die Eigenanwendung im privaten Bereich
bestimmt.
Die Analyse erfolgt über das bewährte Prinzip der B.I.A.
(Bioelektrischen-Impedanz-Analyse, siehe „Das Messprinzip“, Seite 5). Wobei bei dieser Waage statt üblicherweise einer sogar zwei verschiedene Frequenzen
eingesetzt werden, um den elektrischen Widerstand
(Impedanz) exakter ermitteln zu können.
Außerdem wird der elektrische Kontakt zum Körper
durch 4 Handelektroden und 4 Fußelektroden optimiert,
um eine höhere Messgenauigkeit und somit eine bessere Analyse zu erreichen.
Die Messwerte werden per Funkübertragung bis zu
2 Meter Reichweite gesendet. Sämtliche Einstellungen erfolgen mittels innovativer Menüführung klar und
deutlich und werden im großen Display angezeigt,
wahlweise in 5 Sprachen. Dabei kann das Display auf
der Waage verbleiben, separat abgestellt oder an der
Wand befestigt werden.
Für eine Langzeitbeobachtung Ihrer Werte können Sie
mit beiliegendem USB-Kabel und der PC-Software die
Daten auf Ihrem Computer speichern. Die Waage wird
zu Ihrem persönlichen Fitnesscoach.
1. Kennenlernen ......................................................2
2. Zeichenerklärung .................................................2
3. Sicherheitshinweise .............................................3
4. Gerätebeschreibung ............................................3
5. Inbetriebnahme ...................................................4
6. Montage des Bedienteils .....................................4
7. Informationen ......................................................5
8. Einstellung ...........................................................6
9. Displayanzeigen ..................................................7
10. Bedienung ...........................................................7
11. Ergebnisse bewerten .........................................10
12. Messwerte zu einem PC übertragen /
HealthManager / EasyFit ....................................12
13. Batterien wechseln ............................................12
14. Gerät reinigen und pflegen ................................12
15. Entsorgen ..........................................................12
16. Was tun bei Problemen? ...................................12
17. Technische Angaben .........................................13
18. Garantie und Service .........................................13
Lieferumfang
•
•
•
•
•
•
•
Diagnose-Waage
Abnehmbares Bedienteil mit Display
Wandhalterung
Montagesatz für Wandmontage
3 x 1,5 V Typ AA (Waage)
3 x 1,5 V Typ AA (Bedienteil)
USB-Kabel
Die Waage hat folgende Funktionen:
• Gewichtsmessung (in 100 g).
• Ermittlung der Körperfett- und Körperwasseranteile
sowie des Muskelanteils (in 0,1%), der Knochenmasse (in 100 g), des Grundumsatzes und Aktivitätsumsatzes (in Kcal).
• Separate Körperfett- und Muskelmessung von Oberkörper und Unterkörper mit Anzeige der Teilmessungen.
• Diagrammanzeige von Gewicht und Körperfett.
• Anzeige der letzten 30 Messungen für 10 Personen.
• Einmalige, schnelle Analysefunktion für Gäste.
• Datum und Uhrzeit im Standby-Modus.
Sehr geehrte Kundin,
sehr geehrter Kunde,
wir freuen uns, dass Sie sich für ein Produkt unseres
Sortimentes entschieden haben. Unser Name steht
für hochwertige und eingehend geprüfte Qualitätsprodukte aus den Bereichen Wärme, Gewicht, Blutdruck, Körpertemperatur, Puls, Sanfte Therapie, Massage und Luft.
Bitte lesen Sie diese Gebrauchsanweisung aufmerksam durch, bewahren Sie sie für späteren Gebrauch
auf, machen Sie sie anderen Benutzern zugänglich und
beachten Sie die Hinweise.
2. Zeichenerklärung
Folgende Symbole werden in der Gebrauchsanweisung verwendet.
Warnung
Warnhinweis auf Verletzungsgefahren oder Gefahren für Ihre Gesundheit.
Achtung
Sicherheitshinweis auf mögliche
Schäden am Gerät/Zubehör.
Hinweis
Hinweis auf wichtige Informationen.
Mit freundlicher Empfehlung
Ihr Beurer-Team
1. Kennenlernen
Funktionen des Gerätes
Mit dieser Diagnose-Waage leisten Sie einen entscheidenden Beitrag zu Ihrer Gesundheit. Sie dient zum Wiegen und zur Analyse Ihrer persönlichen Fitness-Daten
2
3. Sicherheitshinweise
• Im Auslieferungszustand ist die Waage auf die Einheiten „cm“ und „kg“ eingestellt. Zum Einstellen der
Einheiten beachten Sie bitte die Information im Kapitel „Einstellung“.
• Stellen Sie die Waage auf einen ebenen, festen Boden; ein fester Bodenbelag ist Voraussetzung für eine
korrekte Messung.
• Schützen Sie das Gerät vor Stößen, Feuchtigkeit,
Staub, Chemikalien, starken Temperaturschwankungen und zu nahen Wärmequellen (Öfen, Heizkörper).
• Stellen Sie sicher, dass keine Flüssigkeit auf die
Waage gelangt. Tauchen Sie die Waage niemals in
Wasser. Spülen Sie sie niemals unter fließendem
Wasser ab.
• Stellen Sie keine Gegenstände auf die Waage, wenn
sie nicht benutzt wird.
• Drücken Sie nicht mit Gewalt oder mit spitzen Gegenständen auf die Tasten.
• Setzen Sie die Waage nicht hohen Temperaturen
oder starken elektromagnetischen Feldern (z. B. Mobiltelefone) aus.
• Reparaturen dürfen nur vom Kundenservice oder autorisierten Händlern durchgeführt werden. Prüfen Sie
jedoch vor jeder Reklamation zuerst die Batterien
und wechseln Sie diese gegebenenfalls aus.
• Sollten Sie noch Fragen zur Anwendung unserer Geräte haben, so wenden Sie sich bitte an Ihren Händler
oder an den Kundenservice.
• Alle Waagen entsprechen der EG Richtlinie 2004/108/
EC. Sollten Sie noch Fragen zur Anwendung unserer Geräte haben, so wenden Sie sich bitte an Ihren
Händler oder an den Kundenservice.
Bitte lesen Sie diese Gebrauchsanweisung aufmerksam durch, bewahren Sie sie für späteren Gebrauch
auf, machen Sie sie auch anderen Anwendern zugänglich und beachten Sie die Hinweise.
Sicherheitshinweise
• Die Waage darf nicht von Personen mit medizinischen Implantaten (z.B. Herzschrittmacher) verwendet werden. Andernfalls
kann deren Funktion beeinträchtigt sein.
• Nicht während der Schwangerschaft benutzen.
• Steigen Sie nicht einseitig auf den äußersten Rand
der Waage: Kippgefahr!
• Halten Sie Kinder vom Verpackungsmaterial fern (Erstickungsgefahr).
Hinweise zum Umgang mit Batterien
• Batterien können bei Verschlucken lebensgefährlich
sein. Bewahren Sie Batterien und Waage für Kleinkinder unerreichbar auf. Wurde eine Batterie verschluckt, nehmen Sie sofort medizinische Hilfe in
Anspruch.
• Wechseln Sie schwächer werdende Batterien rechtzeitig aus.
• Wechseln Sie immer alle Batterien gleichzeitig aus
und verwenden Sie Batterien des gleichen Typs.
• Batterien dürfen nicht geladen oder mit anderen Mitteln reaktiviert, nicht auseinander genommen, in Feuer geworfen oder kurzgeschlossen werden.
• Auslaufende Batterien können Beschädigungen am
Gerät verursachen. Wenn Sie das Gerät längere Zeit
nicht benutzen, nehmen Sie die Batterien aus dem
Batteriefach.
• Wenn eine Batterie ausgelaufen ist, ziehen Sie
Schutzhandschuhe an und reinigen Sie das Batteriefach mit einem trockenen Tuch.
• Batterien können Giftstoffe enthalten, die die Gesundheit und die Umwelt schädigen. Entsorgen Sie
die Batterien deshalb unbedingt entsprechend der
geltenden gesetzlichen Bestimmungen. Werfen Sie
die Batterien niemals in den normalen Hausmüll.
4. Gerätebeschreibung
Übersicht
2
1
3
Allgemeine Hinweise
4
• Das Gerät ist nur zur Eigenanwendung, nicht für den
medizinischen oder kommerziellen Gebrauch vorgesehen.
• Beachten Sie, dass technisch bedingt Messtoleranzen möglich sind, da es sich um keine geeichte Waage für den professionellen, medizinischen Gebrauch
handelt.
• Die Belastbarkeit der Waage beträgt max. 150 kg
(330 lb, 24 St).
1
2
3
4
3
Fuß-Elektroden, linker Fuß
Bedienteil mit Display
Anzeige Betriebszustand
Fuß-Elektroden, rechter Fuß
Bedienteil mit Display
5
Waage
7
8
9
5
6
7
8
9
10
11
12
3 x AA
6
10
11
12
Zeigt die Waage bzw. das Bedienteil keine Funktion,
so entfernen Sie die Batterien komplett und setzen Sie
sie erneut ein.
Hinweise zum Batteriewechsel, siehe Seite 12.
5
6
Kontakt-Elektroden, linke Hand
Kontakt-Elektroden, rechte Hand
set Einstelltaste, Eingaben bestätigen
Menü: Auf-Taste
Menü: Ab-Taste
ON-Taste
Einstellung: Auf-Taste
Einstellung: Ab-Taste
Waage aufstellen
Stellen Sie die Waage auf einen ebenen und festen
Untergrund. Eine feste Standfläche ist Voraussetzung
für eine korrekte Messung.
6. Montage des Bedienteils
Analyse mit Bedienteil
Bedienteil aufstellen
Hinweis
Das Bedienteil kann wahlweise in der Hand gehalten
werden, auf einer ebenen Standfläche abgestellt werden oder auch auf der Waage verbleiben.
Schieben Sie die Lade (an der Rückseite der Waage)
wie dargestellt aus, um das Bedienteil darauf abzustellen. Die Lade besitzt einen Magneten, der das Bedienteil auf der Waage fixiert.
Beidhändiges Halten um sicheren
Kontakt zu den Elektroden (5) und
(6) an der Vorder- und Rückseite zu
gewährleisten.
5. Inbetriebnahme
Batterien einlegen
Entnehmen Sie die Batterien aus dem Verpackungsschutz und setzen Sie die Batterien gemäß Polung in
die Waage und in das Bedienteil ein. Beachten Sie die
Grafik im Batteriefach. Nach Einlegen der Batterien
blinkt die Anzeige des Jahres, siehe Seite 6.
Wandmontage
Mit dem Montagesatz (Wandhalter, Schrauben, Dübel)
kann das Bedienteil an einer Wand montiert werden.
Verwenden Sie zur Montage den mitgelieferten Montagesatz und montieren Sie den Wandhalter wie dargestellt. Verwenden Sie ggf. dem Untergrund entsprechende, geeignete Dübel.
Bedienteil
3 x AA
• Verwenden Sie den Wandhalter als Bohrschablone,
um die Löcher anzuzeichnen.
4
• Bohren Sie mit einem 6-mm-Bohrer 2 Löcher ca.
40 mm tief in einem Abstand von 36 mm waagerecht
nebeneinander in die Wand.
• Setzen Sie die Dübel ein.
• Verschrauben Sie den Wandhalter mit beiden
Schrauben. Prüfen Sie den festen Sitz der Montage.
• Schieben Sie das Bedienteil dann auf den Halter, so
dass die Führungen des Wandhalters parallel in die
Führungen des Bedienteils greifen.
unbedenklichen und ungefährlichen Strom eine Bestimmung von Körperanteilen ermöglicht. Mit dieser Messung des elektrischen Widerstandes (Impedanz) und
der Einberechnung von Konstanten bzw. individuellen
Werten (Alter, Größe, Geschlecht, Aktivitätsgrad) können
der Körperfettanteil und weitere Größen im Körper bestimmt werden. Muskelgewebe und Wasser haben eine
gute elektrische Leitfähigkeit und daher einen geringeren
Widerstand. Knochen und Fettgewebe hingegen haben
eine geringe Leitfähigkeit, da die Fettzellen und Knochen
durch sehr hohen Widerstand den Strom kaum leiten.
Darüber hinaus misst diese Waage mit zwei verschiedenen Frequenzen, um die Impedanz noch besser ermitteln zu können. Diese unterschiedlichen Frequenzen
haben auf die Zellmembran und auf das Körperwasser
unterschiedliche Einflüsse. Außerdem wird der elektrische Kontakt zum Körper durch 4 Handelektroden und
4 Fußelektroden optimiert, um eine höhere Messgenauigkeit und somit eine bessere Analyse zu erreichen.
Durch diese sensible Analysetechnik ist es möglich,
dass sich bei Wiederholungsmessungen die Werte geringfügig ändern können. Der Grund hierfür sind Abweichungen während der Impedanzmessung (z.B. anderer elektrischer Kontakt zu den Elektroden mit Händen
und Füßen, andere Verteilung des Wassers im Köper).
Beachten Sie, dass die von der Diagnosewaage ermittelten Werte nur eine Annäherung an die medizinischen, realen Analysewerte des Körpers darstellen.
Nur der Facharzt kann mit medizinischen Methoden
(z.B. Computertomografie) eine exakte Ermittlung von
Körperfett, Körperwasser, Muskelanteil und Knochenbau durchführen.
Halten Sie zuerst das Bedienteil über dem Wandhalter gegen die Wand und schieben Sie das Bedienteil
dann nach unten, um das Einführen zu erleichtern.
• Schieben Sie das Bedienteil vollständig auf den Halter. Prüfen Sie, ob das Bedienteil parallel und fest auf
dem Halter sitzt.
Einstellung der Neigung
Das Bedienteil kann auf dem Wandhalter geschwenkt
und die Neigung damit angepasst werden. Eine Arretierung verhindert, dass sich im geschwenkten Zustand
das Bedienteil vom Wandhalter abnehmen lässt.
Schwenken Sie das Bedienteil wieder ganz nach
vorne, bevor Sie es vom Wandhalter nehmen!
Messmethoden
Die Analyse kann folgendermaßen durchgeführt werden:
• Oberkörper: Bedienteil mit Händen greifen, mit Schuhen auf die Waage treten.
• Unterkörper: Bedienteil z.B. auf der Waage belassen,
barfuß auf die Waage treten.
• Oberkörper und Unterkörper: Bedienteil mit Händen
greifen und barfuß auf die Waage treten.
Alternative Wandmontage
Mit dem doppelseitigen Klebestreifen können Sie den
Wandhalter ebenfalls an einer Wand befestigen. Die
Wandfläche muss dazu sauber und trocken sein. Die
Montage ist geeignet zur Verklebung auf Kacheln, Glas,
Kunststoff und vielen anderen Untergründen.
• Entfernen Sie die Schutzfolie des Klebestreifens auf
der Rückseite des Wandhalters.
• Drücken Sie den Wandhalter fest gegen die Wand.
• Prüfen Sie den festen Sitz der Montage.
In dieser Anleitung wird die Analyse für Ober- und
Unterkörper beschrieben.
Wird das Bedienteil zur Analyse in der Hand gehalten, wird dessen Gewicht automatisch abgezogen.
Warten Sie nach dem Befestigen des Wandhalters mit Klebestreifen mindestens 1 Stunde, bevor Sie
das Bedienteil einsetzen!
Allgemeine Tipps
• Wiegen Sie sich möglichst zur selben Tageszeit (am
besten morgens), nach dem Toilettengang, nüchtern
und ohne Bekleidung, um vergleichbare Ergebnisse
zu erzielen.
• Wichtig bei der Messung: Die Ermittlung des Körperfettes (Unterkörper) darf nur barfuß und kann
zweckmäßig mit schwach befeuchteten Fußsohlen
7. Informationen
Das Messprinzip
Diese Waage arbeitet mit dem Prinzip der B.I.A., der
Bioelektrischen-Impedanz-Analyse. Dabei wird innerhalb von Sekunden durch einen nicht spürbaren, völlig
5
•
•
•
•
vorgenommen werden. Völlig trockene oder stark
verhornte Fußsohlen können zu unbefriedigenden
Ergebnissen führen, da diese eine zu geringe Leitfähigkeit aufweisen.
Stehen Sie während des Messvorgangs aufrecht und
still.
Warten Sie einige Stunden nach ungewohnter körperlicher Anstrengung.
Warten Sie ca. 15 Minuten nach dem Aufstehen, damit sich das im Körper befindliche Wasser verteilen
kann.
Wichtig ist, dass nur der langfristige Trend zählt. In
der Regel sind kurzfristige Gewichtsabweichungen
innerhalb von wenigen Tagen durch Flüssigkeitsverlust bedingt; Körperwasser spielt jedoch für das
Wohlbefinden eine wichtige Rolle.
Anschließend zeigt das Display die gewählten Einstellungen in einer Übersicht an.
Datum, Uhrzeit einstellen
• Drücken Sie im Standby-Modus (Uhrzeit und Datum
eingeblendet) die Taste [SET].
• Wählen Sie mit der Einstelltaste [ ] den Menüpunkt
„ZEIT EINSTELLEN“ und bestätigen Sie mit der Taste
[SET].
• Die Anzeige des Jahres blinkt.
• Stellen Sie nacheinander das Jahr, den Monat, den
Tag sowie die Uhrzeit in Minuten und Stunden mit
den Einstelltasten [ , ] ein.
• Bestätigen Sie Ihre Eingebe jeweils durch Drücken
der Taste [SET].
Benutzerdaten einstellen
Um Ihren Körperfettanteil und weitere Körperwerte ermitteln zu können, müssen Sie die persönlichen Benutzerdaten einspeichern.
Die Waage verfügt über 10 Benutzerspeicherplätze, auf
denen Sie und beispielsweise die Mitglieder Ihrer Familie die persönlichen Einstellungen abspeichern und
wieder abrufen können.
Außerdem steht ein „GAST“-Modus zur Verfügung
(falls dieser eingeschaltet ist), dessen Einstellungen
und Messwerte nicht gespeichert werden.
Einschränkungen
Bei der Ermittlung des Körperfettes und der weiteren
Werte können abweichende und nicht plausible Ergebnisse auftreten bei:
• Kindern unter ca. 10 Jahren,
• Leistungssportlern und Bodybuildern,
• Schwangeren,
• Personen mit Fieber, in Dialysebehandlung, ÖdemSymptomen oder Osteoporose,
• Personen, die kardiovaskuläre Medizin einnehmen
(Herz und Gefäßsystem betreffend),
• Personen, die gefäßerweiternde oder gefäßverengende Medikamente einnehmen,
• Personen mit erheblichen anatomischen Abweichungen an den Beinen bezüglich der Gesamtkörpergröße (Beinlänge erheblich verkürzt oder verlängert).
Im „GAST“-Modus sind die Funktionen Speicher,
Trendanzeige und Durchschnitt nicht verfügbar.
• Drücken Sie die Taste [SET].
• Wählen Sie „PERSON ÄNDERN“ und bestätigen Sie
mit der Taste [SET].
• Wählen Sie mit den Einstelltaste [ , ] die Person
aus und bestätigen Sie mit der Taste [SET].
• Sind auf dem Speicherplatz bereits Einstellungen
vorhanden, werden diese im Display angezeigt. Sind
keine Einstellungen vorhanden, dann ist dies ein freier Benutzerspeicherplatz.
• Nun können Sie folgende Einstellungen vornehmen:
Benutzerdaten Einstellwerte
Geschlecht
männlich , weiblich
Größe
100 bis 250 cm
(3‘-03“ bis 8‘-02“)
Geburtstag
Jahr, Monat, Tag
Aktivitätsgrad
1 bis 5
Zielgewicht
einstellbar, in kg (für grafische
Verlaufsdarstellung)
8. Einstellung
Bevor Sie Ihre Waage benutzen, geben Sie bitte Ihre
Daten ein.
Gerät einstellen
• Drücken Sie im Standby-Modus (Uhrzeit und Datum
eingeblendet) die Taste [SET].
• Wählen Sie mit der Einstelltaste [ ] den Menüpunkt
„GERÄT EINSTELLEN“ und bestätigen Sie mit der
Taste [SET].
• Wählen Sie mit den Einstelltasten [ ,
] das
Sprachsymbol (D, GB, F, E, I) und bestätigen Sie mit
der Taste [SET].
• Wählen Sie mit den Einstelltasten [ , ] das Einheitensymbol (kg, lb, st) und bestätigen Sie mit der
Taste [SET].
• Wählen Sie mit den Einstelltasten [ , ] wie Sie die
Uhrzeit anzeigen wollen (24 h oder 12 h) und bestätigen Sie mit der Taste [SET].
• Wählen Sie mit den Einstelltasten [ , ] ob Sie
den „GAST“-Modus ein- bzw. ausschalten wollen
und bestätigen Sie mit der Taste [SET].
• Werte verändern: Taste [ , ] drücken bzw. für
schnellen Durchlauf gedrückt halten.
• Eingaben bestätigen: Taste [SET] drücken.
Nach Eingabe aller Daten ist die Waage zur Messung
bereit. Wird keine weitere Aktion durchgeführt, schaltet sich die Waage ab.
6
Aktivitätsgrade
10. Bedienung
Bei der Auswahl des Aktivitätsgrades ist die mittel- und
langfristige Betrachtung entscheidend.
Erst nachdem alle Parameter eingegeben wurden, können nun auch Körperfett und die weiteren Werte ermittelt werden.
Aktivitätsgrad
Körperliche Aktivität
1
Keine.
Geringe: Wenige und leichte körperli2
che Anstrengungen (z.B. Spazierengehen, leichte Gartenarbeit, gymnastische
Übungen).
Mittlere: Körperliche Anstrengungen, min3
destens 2 bis 4 mal pro Woche, jeweils
30 Minuten.
Hohe: Körperliche Anstrengungen, min4
destens 4 bis 6 mal pro Woche, jeweils
30 Minuten.
Sehr hohe: Intensive körperliche Anstren5
gungen, intensives Training oder harte
körperliche Arbeit, täglich, jeweils mindestens 1 Stunde.
Gewicht messen
9. Displayanzeigen
Nach erfolgter Messung wird das Messergebnis für ca.
10 Sekunden angezeigt.
1. Waage einschalten
• Drücken Sie die Taste [ ] am Bedienteil.
Es erscheint 0.0 kg im Display. Die Waage ist jetzt bereit zur Messung.
2. Wiegen (ohne Diagnose)
Stellen Sie die Waage auf einen ebenen und festen
Untergrund. Eine feste Standfläche ist Voraussetzung
für eine korrekte Messung.
• Stellen Sie sich nun auf die Waage. Die Anzeige [3]
der Waage leuchtet grün.
Stehen Sie ruhig auf der Waage mit
gleichmäßiger Gewichtsverteilung
auf beiden Beinen. Stehen Sie möglichst weit außen, ohne die Waage zu
kippen.
Wird das Bedienteil in der Hand gehalten, wird
dessen Gewicht (300 Gramm) automatisch abgezogen.
Übersicht
1
5
Wenn Sie die Trittfläche verlassen, schaltet sich die
Waage nach einigen Sekunden ab. Die Anzeige [3] erlischt. Die Messung wird nicht gespeichert.
Analyse durchführen
1. Waage einschalten
• Drücken Sie die Taste [ ] am Bedienteil.
Es erscheint 0.0 kg im Display.
4
3
2
1 Uhrzeit, Datum, Benutzer
2 Gewicht mit Bewertung
Gewicht
3 Analysedaten (teils mit Bewertung)
BF
Körperfett
Wasser
Muskelanteil
Knochenmasse
4 Menü
Übersicht aktuelle Messung
Trendanzeige
Detaillierte Darstellung Körperfett,
Muskelanteil von Ober-/Unterkörper
Mem gespeicherte Messungen 1 bis max. 30
Durchschnittswerte
Kcal Kalorienverbrauch
Markierung des aktuellen Menüpunktes
5
2. Diagnose
• Wählen Sie nach dem Einschalten Ihren Benutzer
1–10 durch Drücken der rechten Taste [ ]. Dazu
Taste ggf. wiederholt drücken.
• Drücken Sie die Taste [SET] oder warten Sie 3 Sekunden. Es erscheint der Messbildschirm im Display.
Wenn Sie den Benutzer „GAST“ aktivieren, müssen Sie vor jeder Messung die Benutzerdaten neu ein7
Analyse der Messwerte nach erfolgter
Messung
geben. Im „GAST“-Modus werden die Benutzerdaten
und Messwerte nicht gespeichert. Sie haben die Möglichkeit, den „GAST“-Modus ein- bzw. auszuschalten,
siehe Seite 6.
Grafische Darstellung
Gewicht
• Drücken Sie die Menü-Taste [ ] am Bedienteil, um
zu einzelnen Untermenüs bzw. Speicher zu schalten.
Die Entwicklung Ihres Körpergewichtes wird von Messung zu Messung dargestellt. Neuere Messungen werden rechts angefügt. Die Bezugslinie stellt das Zielgewicht dar.
• Stellen Sie sich nun barfuß auf die Waage und halten
Sie das Bedienteil fest in den Händen. Wird das Bedienteil in der Hand gehalten, wird dessen Gewicht
(300 Gramm) automatisch abgezogen.
• Halten Sie das Bedienteil mit dem unteren Bereich
des Daumens auf den vorderen Elektroden und mit
den Fingern die hinteren Elektroden fest gedrückt.
Sie müssen ein Zielgewicht definieren, um den
Verlauf des Körpergewichtes darstellen zu können,
siehe Seite 6. Das Zielgewicht können Sie jederzeit ändern.
Körperfett
• Schalten Sie mit der Taste [ , ] zum Verlauf der
Körperfettwerte.
Die Entwicklung Ihres Körperfettwertes wird von Messung zu Messung dargestellt. Die Bezugslinie stellt den
Durchschnittswert aller Körperfettmessungen dar, die
Balken zeigen, ob sich die Werte nach oben oder unten verändert haben.
Nach der Gewichtsmessung erfolgt die Messung der
Impedanz für die Analyse. Der Oberkörper durch
die 4 Elektroden des Bedienteils, der Unterkörper durch die 4 Elektroden der Waage. Dies wird
durch das Symbol des durchströmten Körpers
angezeigt.
Wichtig:
Stehen Sie ruhig auf der Waage mit gleichmäßiger
Gewichtsverteilung auf beiden Beinen. Beachten Sie,
dass kein Hautkontakt zwischen beiden Füßen, Beinen,
Waden und Oberschenkeln bestehen darf. Andernfalls
kann die Messung nicht korrekt ausgeführt werden. Um
dies zu vermeiden ziehen Sie z.B. eine leichte Hose an.
Oberkörper, Unterkörper
Körperfett
• Drücken Sie die Taste [ ] am Bedienteil, um zur detaillierten Ansicht Ober-/Unterkörper zu schalten.
Das aktuelle Messergebnis Körperfett wird dargestellt
als Gesamtkörper und unterteilt in Oberkörper/Unterkörper.
3. Ergebnis
Die Übersicht wird angezeigt.
Zur Auswertung siehe Ergebnisse bewerten Seite 10.
Beim Abschalten wird der Messwert automatisch gespeichert. Werden mehr Messungen an einem Tag
durchgeführt, wird nur die letzte Messung gespeichert.
8
Muskel
• Schalten Sie mit der Taste [ ,
Darstellung der Muskelmasse.
Kcal Kalorienverbrauch
• Drücken Sie die Taste [ ] am Bedienteil, um zu Kcal
zu schalten. Der theoretisch berechnete Grundumsatz BMR sowie Aktivitätsumsatz AMR werden in
Kcal dargestellt.
] zur detaillierten
Nur die aktuellen Messergebnisse können angezeigt werden, nicht die alten gespeicherten Messwerte.
Messwertspeicher aus Standby abrufen
Mem Speicherwerte anzeigen
Beim Abschalten werden die Messwerte nach einer
Analyse automatisch gespeichert. Für jeden Benutzer
stehen 30 Speicherplätze zur Verfügung.
• Schalten Sie das Bedienteil mit der Taste [ ] ein.
• Wählen Sie Ihren Benutzer durch Drücken der Taste
[ ]. Dazu Taste ggf. wiederholt drücken.
• Drücken Sie die Taste [ , ] am Bedienteil, um
durch die Analysewerte zu schalten bzw. [ , ],
um in Untermenüs (z.B. Wechsel BF, ) zu gelangen.
• Drücken Sie die Taste [ ] am Bedienteil, um zum
Speicher zu schalten.
Die Übersicht wird dargestellt. Oben steht das Datum
der Messung sowie die Speicherplatz-Nummer (03-03)
z.B. der dritte = letzte Speicherplatz von insgesamt 3
belegten Speicherplätzen.
Angaben löschen
• Schalten Sie mit der Taste [
cherplätze.
,
1. Benutzer mit allen Einstellungen und Speicherwerten löschen
• Wählen Sie nach dem Einschalten Ihren Benutzer
durch Drücken der Taste [ ]. Dazu Taste ggf. wiederholt drücken und mit [SET] bestätigen.
• Drücken Sie wenn die Anzeige 0.0 erscheint die Taste
[SET] 5 Sekunden lang, um den Benutzer zu löschen.
• Wählen Sie mit den Tasten [ , ] „Ja“ und bestätigen Sie die Abfrage mit der Taste [SET]. Falls Sie
den Benutzer nicht löschen möchten, bestätigen Sie
„Nein“ mit der Taste [SET].
] durch die Spei-
Mittelwerte
• Drücken Sie die Taste [ ] am Bedienteil, um zum
Durchschnitt zu schalten.
Sämtliche Mittelwerte aus den gespeicherten Messungen werden dargestellt.
Alle gespeicherten Werte und Einstellungen dieses Benutzers werden gelöscht.
2. Einzelnen Speicherwert eines Benutzers
löschen
• Wählen Sie im Messwertspeicher „Mem“ einen Messwert und drücken Sie die Taste [SET] am Bedienteil
kurz, um den angezeigten Speicherwert zu löschen.
Dies können Sie auch direkt nach der Messung
durchführen.
• Wählen Sie mit den Tasten [ , ] „Ja“ und bestätigen Sie die Abfrage mit der Taste [SET]. Falls Sie den
Wert nicht löschen möchten, bestätigen Sie „Nein“
mit der Taste [SET].
Oben steht das Datum der ersten sowie der letzten Messung.
3. Alle Speicherwerte eines Benutzers löschen
• Rufen Sie den Messwertspeicher „Mem“ auf und
drücken Sie die Taste [SET] am Bedienteil für ca.
3 Sekunden, um alle Werte zu löschen.
9
• Wählen Sie mit den Tasten [ , ] „Ja“ und bestätigen Sie die Abfrage mit der Taste [SET]. Falls Sie
nichts löschen möchten, bestätigen Sie „Nein“ mit
der Taste [SET].
den, die noch unterhalb der angegebenen Richtwerte
liegen. Bitte beachten Sie jedoch, dass bei extrem niedrigen Werten Gesundheitsgefahren bestehen können.
Waage ausschalten (Standby-Modus)
Der Anteil des Körperwassers in % liegt normalerweise
in folgenden Bereichen:
Körperwasseranteil
• Warten Sie, bis sich das Display nach ca. 45 Sekunden selbstständig ausschaltet oder drücken Sie die
Taste [ ] am Bedienteil, um das Display manuell
auszuschalten.
Mann
Alter
10 –100
Datum und Uhrzeit bleiben sichtbar.
Stromsparmodus
• Drücken Sie 10 Sekunden lang die Menü-Tasten
und gleichzeitig. Die Datum- und Uhrzeit-Anzeige
verschwindet.
• Zum Wiedereinschalten die Menü-Tasten und
10 Sekunden gleichzeitig gedrückt halten.
Alter
10 –100
Die Körperfettwerte werden im Display dargestellt und
dem Balkendiagramm bewertet. Nachfolgende Körperfettwerte in % geben Ihnen eine Richtlinie (für weitere
Informationen wenden Sie sich bitte an Ihren Arzt!).
Mann
normal
11–16 %
12 –17 %
13 –18 %
14 –19 %
15 – 20 %
16 – 21 %
17 – 22 %
18 – 23 %
viel
16,1– 21 %
17,1– 22 %
18,1– 23 %
19,1– 24 %
20,1– 25 %
21,1– 26 %
22,1– 27 %
23,1– 28 %
sehr viel
>21,1 %
>22,1 %
>23,1 %
>24,1 %
>25,1 %
>26,1 %
>27,1 %
>28,1 %
wenig
<16 %
<17 %
<18 %
<19 %
<20 %
<21 %
<22 %
<23 %
normal
16 – 21 %
17 – 22 %
18 – 23 %
19 – 24 %
20 – 25 %
21– 26 %
22 – 27 %
23 – 28 %
viel
21,1– 26 %
22,1– 27 %
23,1– 28 %
24,1– 29 %
25,1– 30 %
26,1– 31 %
27,1– 32 %
28,1– 33 %
schlecht
<45 %
gut
45 – 60 %
sehr gut
>60 %
Muskelanteil
Der Muskelanteil in % liegt normalerweise in folgenden Bereichen:
Mann
Alter
10 –14
15 –19
20 – 29
30 – 39
40 – 49
50 – 59
60 – 69
70 –100
Frau
Alter
10 –14
15 –19
20 – 29
30 – 39
40 – 49
50 – 59
60 – 69
70 –100
sehr gut
>65 %
Körperfett beinhaltet relativ wenig Wasser. Deshalb
kann bei Personen mit einem hohen Körperfettanteil
der Körperwasseranteil unter den Richtwerten liegen.
Bei Ausdauer-Sportlern hingegen können die Richtwerte aufgrund geringer Fettanteile und hohem Muskelanteil überschritten werden.
Die Körperwasserermittlung mit dieser Waage ist nicht
dazu geeignet, medizinische Rückschlüsse auf z.B. altersbedingte Wassereinlagerungen zu ziehen. Fragen
sie gegebenenfalls Ihren Arzt. Grundsätzlich gilt es, einen hohen Körperwasseranteil anzustreben.
Körperfettanteil
wenig
<11 %
<12 %
<13 %
<14 %
<15 %
<16 %
<17 %
<18 %
gut
50 – 65 %
Frau
11. Ergebnisse bewerten
Alter
10 –14
15 –19
20 – 29
30 – 39
40 – 49
50 – 59
60 – 69
70 –100
schlecht
<50 %
sehr viel
>26,1 %
>27,1 %
>28,1 %
>29,1 %
>30,1 %
>31,1 %
>32,1 %
>33,1 %
wenig
<44%
<43%
<42%
<41%
<40%
<39%
<38%
<37%
normal
44 – 57 %
43 – 56 %
42 – 54 %
41– 52 %
40 – 50 %
39 – 48 %
38 – 47 %
37 – 46 %
viel
>57 %
>56 %
>54 %
>52 %
>50 %
>48 %
>47 %
>46 %
wenig
<36%
<35%
<34%
normal
36 – 43 %
35 – 41 %
34 – 39 %
viel
>43 %
>41 %
>39 %
Frau
Alter
10 –14
15 –19
20 – 29
Bei Sportlern ist oft ein niedrigerer Wert festzustellen.
Je nach betriebener Sportart, Trainingsintensität und
körperlicher Konstitution können Werte erreicht wer10
AMR
Alter
30 – 39
40 – 49
50 – 59
60 – 69
70 –100
wenig
<33%
<31%
<29%
<28%
<27%
normal
33 – 38 %
31– 36 %
29 – 34 %
28 – 33 %
27 – 32 %
Der Aktivitätsumsatz (AMR = Active Metabolic Rate) ist
die Energiemenge, die der Körper im aktiven Zustand
pro Tag verbraucht. Der Energieverbrauch eines Menschen steigt mit zunehmender körperlicher Aktivität an
und wird bei der Diagnosewaage über den eingegebenen Aktivitätsgrad (1– 5) ermittelt.
Um das aktuelle Gewicht zu halten, muss die verbrauchte Energie dem Körper in Form von Essen und
Trinken wieder zugeführt werden. Wird über einen längeren Zeitraum hinweg weniger Energie zugeführt als
verbraucht, holt sich der Körper die Differenz im wesentlichen aus den angelegten Fett-Speichern, das
Gewicht nimmt ab. Wird hingegen über einen längeren Zeitraum hinweg mehr Energie zugeführt als der
berechnete Aktivitätsumsatz (AMR) kann der Körper
den Energieüberschuss nicht verbrennen, der Überschuss wird als Fett im Körper eingelagert, das Gewicht nimmt zu.
viel
>38 %
>36 %
>34 %
>33 %
>32 %
Knochenmasse
Unsere Knochen sind wie der Rest unseres Körpers
natürlichen Aufbau-, Abbau- und Alterungsprozessen
unterworfen. Die Knochenmasse nimmt im Kindesalter rasch zu und erreicht mit 30 bis 40 Jahren das Maximum. Mit zunehmendem Alter nimmt die Knochenmasse dann wieder etwas ab. Mit gesunder Ernährung
(insbesondere Kalzium und Vitamin D) und regelmäßiger körperlicher Bewegung können Sie diesem Abbau
ein Stück weit entgegen wirken. Mit gezieltem Muskelaufbau können Sie die Stabilität Ihres Knochengerüstes zusätzlich verstärken. Beachten Sie, dass diese
Waage nicht den Kalziumgehalt der Knochen ausweist,
sondern sie ermittelt das Gewicht aller Bestandteile
der Knochen (organische Stoffe, anorganische Stoffe
und Wasser). Die Knochenmasse lässt sich kaum beeinflussen, schwankt aber geringfügig innerhalb der
beeinflussenden Faktoren (Gewicht, Größe, Alter, Geschlecht). Es sind keine anerkannten Richtlinien und
Empfehlungen vorhanden.
Zeitlicher Zusammenhang der Ergebnisse
Beachten Sie, dass nur der langfristige Trend von
Bedeutung ist. Kurzfristige Gewichtsabweichungen innerhalb von wenigen Tagen sind in der Regel durch
Flüssigkeitsverlust bedingt.
Die Deutung der Ergebnisse richtet sich nach den Veränderungen des Gesamtgewichts und der prozentualen Körperfett-, Körperwasser- und Muskelanteile, sowie nach der Zeitdauer mit welcher diese Änderungen
erfolgen. Rasche Veränderungen im Bereich von Tagen sind von mittelfristigen Änderungen (im Bereich
von Wochen) und langfristigen Änderungen (Monaten)
zu unterscheiden.
Als Grundregel kann gelten, dass kurzfristige Veränderungen des Gewichts fast ausschließlich Änderungen des Wassergehalts darstellen, während mittel- und
langfristige Veränderungen auch den Fett- und Muskelanteil betreffen können.
• Wenn kurzfristig das Gewicht sinkt, jedoch der Körperfettanteil steigt oder gleich bleibt, haben Sie lediglich Wasser verloren – z.B. nach einem Training,
Saunagang oder einer nur auf schnellen Gewichtsverlust beschränkten Diät.
• Wenn das Gewicht mittelfristig steigt, der Körperfettanteil sinkt oder gleich bleibt, könnten Sie hingegen
wertvolle Muskelmasse aufgebaut haben.
• Wenn Gewicht und Körperfettanteil gleichzeitig sinken, funktioniert Ihre Diät – Sie verlieren Fettmasse.
• Idealerweise unterstützen Sie Ihre Diät mit körperlicher Aktivität, Fitness- oder Krafttraining. Damit können Sie mittelfristig Ihren Muskelanteil erhöhen.
• Körperfett, Körperwasser oder Muskelanteile dürfen
nicht addiert werden (Muskelgewebe enthält auch
Bestandteile aus Körperwasser).
Achtung
Bitte verwechseln Sie nicht die Knochenmasse mit
der Knochendichte. Die Knochendichte kann nur bei
medizinischer Untersuchung (z.B. Computertomographie, Ultraschall) ermittelt werden. Deshalb sind Rückschlüsse auf Veränderungen der Knochen und der Knochenhärte (z.B. Osteoporose) mit dieser Waage nicht
möglich.
BMR
Der Grundumsatz (BMR = Basal Metablic Rate) ist die
Energiemenge, die der Körper bei völliger Ruhe zur
Aufrechterhaltung seiner Grundfunktionen benötigt
(z.B. wenn man 24 Stunden im Bett liegt). Dieser Wert
ist im Wesentlichen vom Gewicht, der Körpergröße
und dem Alter abhängig. Er wird bei der Diagnosewaage in der Einheit kcal/Tag angezeigt und anhand
der wissenschaftlich anerkannten Harris-Benedict-Formel berechnet.
Diese Energiemenge benötigt Ihr Körper auf jeden Fall
und muss in Form von Nahrung dem Körper wieder zugeführt werden. Wenn Sie längerfristig weniger Energie
zu sich nehmen, kann sich dies gesundheitsschädlich
auswirken.
11
12. Messwerte zu einem PC
übertragen / HealthManager /
EasyFit
15. Entsorgen
Batterien und Akkus gehören nicht in den Hausmüll.
Als Verbraucher sind Sie gesetzlich verpflichtet, gebrauchte Batterien zurückzugeben. Sie können Ihre
alten Batterien bei den öffentlichen Sammelstellen Ihrer Gemeinde oder überall dort abgeben, wo Batterien
der betreffenden Art verkauft werden.
Systemvoraussetzungen:
Windows 7, Windows Vista, Windows XP SP3
HealthManager:
Gesundheitsmanagement in Verbindung mit Beurer
Blutdruck- bzw. Blutzuckermessgeräten.
Hinweis
Diese Zeichen finden Sie auf schadstoffhaltigen Batterien: Pb = Batterie enthält Blei,
Cd = Batterie enthält Cadmium,
Hg = Batterie enthält Quecksilber.
EasyFit:
Trainingsanalyse in Verbindung mit Beurer Pulsuhren.
Ablauf:
• Download und Installation der Beurer Software finden Sie im Downloadbereich unter
http://www.beurer.com
• USB-Verbindung herstellen.
Im Interesse des Umweltschutzes darf die Waage einschließlich der Batterien am Ende ihrer Lebensdauer
nicht mit dem Hausmüll entfernt werden. Die Entsorgung kann über entsprechende Sammelstellen in Ihrem Land erfolgen.
Befolgen Sie die örtlichen Vorschriften bei der Entsorgung der Materialien.
Entsorgen Sie das Gerät gemäß der Elektro- und
Elektronik-Altgeräte-EG-Richtlinie 2002/96/EC –
WEEE (Waste Electrical and Electronic Equipment).
Bei Rückfragen wenden Sie sich an die für die Entsorgung zuständige kommunale Behörde.
USB
• Bei der Installation der Software folgen Sie den Anweisungen.
13. Batterien wechseln
16. Was tun bei Problemen?
Das Bedienteil ist mit einer Batteriewechselanzeige
ausgestattet. Im Display erscheint das Symbol
,
falls die Batterien des Bedienteils bzw. das Symbol ,
wenn die Batterien der Waage zu schwach sind. Die
Batterien müssen in diesem Fall ersetzt werden.
Stellt die Waage bei der Messung einen Fehler fest,
wird folgendes angezeigt.
Displayanzeige Ursache
ÜBERLASTUNG! Die maximale
Tragkraft von
150 kg wurde
überschritten.
BATTERIE_LEER Die Batterien sind
fast leer.
Hinweis
• Verwenden Sie bei jedem Batteriewechsel Batterien
gleichen Typs, gleicher Marke und gleicher Kapazität.
• Wechseln Sie alle Batterien immer gleichzeitig.
• Verwenden Sie keine wiederaufladbaren Akkus.
• Verwenden Sie schwermetallfreie Batterien.
SPEICHER_VOLL Es sind 30 Messungen gespeichert.
14. Gerät reinigen und pflegen
Die Genauigkeit der Messwerte und Lebensdauer des
Gerätes hängt ab vom sorgfältigen Umgang. Von Zeit
zu Zeit sollte das Gerät gereinigt werden.
Benutzen Sie zur Reinigung ein feuchtes Tuch auf das
Sie bei Bedarf etwas Spülmittel auftragen können. Benutzen Sie keine scharfen Reinigungsmittel und halten
Sie das Gerät niemals unter Wasser.
KONTAKTFEHLER!
Achtung
• Verwenden Sie niemals scharfe Lösungs- und Reinigungsmittel!
• Tauchen Sie das Gerät keinesfalls unter Wasser!
• Gerät nicht in der Spülmaschine reinigen!
12
Der elektrische
Widerstand zwischen den Elektroden und Fußsohle ist zu hoch
(z.B. bei starker
Hornhaut).
Behebung
Nur bis 150 kg
belasten.
Wechseln Sie die
Batterien (siehe
Seite 4 und 12).
Übertragen Sie
die Messwerte
zum PC, siehe
Seite 12.
Die Messung bitte
barfuß wiederholen. Feuchten Sie
ggf. Ihre Fußsohlen leicht an. Entfernen Sie ggf. die
Hornhaut an den
Fußsohlen.
Displayanzeige Ursache
MESSBEREICH Die BIA-Messung
war zwar erfolgreich aber der
Fettanteil liegt
außerhalb des
messbaren Bereichs (kleiner 5%
oder größer 50%).
Keine Anzeige
Die Batterien im
Bedienteil sind
vollständig leer.
Die Batterien im
Bedienteil sind
nicht richtig eingelegt.
Behebung
Die Messung bitte
barfuß wiederholen oder feuchten
Sie ggf. Ihre Fußsohlen leicht an.
Ändern Sie ggf.
Ihren eingestellten
Aktivitätsgrad.
Wechseln Sie die
Batterien (siehe
Seite 4).
Überprüfen Sie
die korrekte Polung, (siehe Seite 4).
Mögliche Fehler Behebung
Waage steht auf Waage auf ebenen und festen BoTeppichboden.
den stellen.
Stehen Sie möglichst weit nach außen ohne die Waage zu kippen.
17. Technische Angaben
Abmessungen der Waage
Batterien Waage
Batterien Bedienteil
Funkübertragung
Messbereich
Einteilung Gewicht, Knochenmasse
Einteilung Körperfett, -wasser,
-muskelanteil
Einteilung BMR, AMR
Keine Messung möglich
Mögliche Fehler
Das Bedienteil
wurde vor dem
Betreten nicht
aktiviert.
Funkverbindung
zwischen Waage
und Bedienteil ist
gestört.
Das Bedienteil
ist zu weit von
der Waage entfernt.
Die Batterien in
der Waage sind
leer oder falsch
eingelegt.
Behebung
Vor der Messung zuerst das Bedienteil einschalten. Ggf. 30 Sekunden
warten und dann Messung wiederholen.
Setzen Sie die Batterien der Waage
und des Bedienteils erneut ein.
Halten Sie einen größeren Abstand
von folgenden elektromagnetischen
Quellen: Hochspannungsmasten,
Fernseh- oder Computerfunksysteme, Fitnessgeräte, Mobiltelefone,
Wetterstationen.
Verringern Sie den Abstand zwischen
Waage und Bedienteil, maximaler
Abstand ist 2 Meter.
330 x 330 x 41 mm
3 x 1,5 V Typ AA
3 x 1,5 V Typ AA
433 MHz
5 kg bis 150 kg
100 g
0,1 %
1 Kcal
Technische Änderungen vorbehalten.
Die Waage entspricht der EG Richtlinie 2004/108/EC
+ Ergänzungen.
18. Garantie und Service
Sie erhalten 5 Jahre Garantie ab Kaufdatum auf Material- und Fabrikationsfehler des Produktes.
Die Garantie gilt nicht:
• im Falle von Schäden, die auf unsachgemäßer Bedienung beruhen,
• für Verschleißteile (z.B. Batterien),
• für Mängel, die dem Kunden bereits bei Kauf bekannt
waren,
• bei Eigenverschulden des Kunden.
Die gesetzlichen Gewährleistungen des Kunden bleiben durch die Garantie unberührt. Für Geltendmachung
eines Garantiefalles innerhalb der Garantiezeit ist durch
den Kunden der Nachweis des Kaufes zu führen.
Die Garantie ist innerhalb eines Zeitraumes von 5 Jahren ab Kaufdatum gegenüber der Beurer GmbH, Söflinger Straße 218, 89077 Ulm, Deutschland, geltend zu
machen. Der Kunde hat im Garantiefall das Recht zur
Reparatur der Ware bei unserem eigenen oder bei von
uns autorisierten Werkstätten. Weitergehende Rechte werden dem Kunden (aufgrund der Garantie) nicht
eingeräumt.
Wechseln Sie die Batterien (siehe
Seite 4) und prüfen Sie ggf. die
korrekte Polung.
Falsche Gewichtsmessung
Mögliche Fehler Behebung
Waage hat falWaage vor der Messung kurz mit
schen Nullpunkt. dem Fuß aktivieren bis die Anzeige
Betriebszustand
leuchtet.
Ca. 5 Sekunden warten und Messung wiederholen. Zu Ihrer Information: Da Sie die Waage im normalen
Gebrauch sofort betreten, speichert
die Waage den Nullpunkt beim Abschalten der Waage (wenn die Anzeige Betriebszustand
erlischt).
13
ENGLISH
Contents
quencies, rather than the usual one, are used for this
scale so that electrical resistance (impedance) can be
more precisely determined.
In addition, the electrical contact with the body is optimised through the used of 4 hand electrodes and 4
foot electrodes in order to achieve a more accurate
measurement and therefore a better analysis.
The measured values are sent wirelessly within a range
of up to 2 metres. Settings can be clearly and simply
made thanks to the innovative menu navigation and are
shown on the large display in a choice of 5 languages.
The display can either remain on the scale, be placed
elsewhere or be fixed to the wall.
In order to monitor your figures over a long period of
time, you can use the enclosed USB cable and the PC
software to save your data to your computer. This turns
the scale into your very own fitness coach.
1. About the device ...............................................14
2. Explanation of symbols .....................................14
3. Safety notes ......................................................14
4. Description of the unit .......................................15
5. Initial use ...........................................................16
6. Installing the control unit ...................................16
7. Information ........................................................17
8. Setting ...............................................................18
9. The display ........................................................18
10. Operation ..........................................................19
11. Analysing results ...............................................21
12. Transferring measurements to a PC –
HealthManager / EasyFit ....................................23
13. Replacing batteries ...........................................23
14. Cleaning and care of the unit ............................23
15. Disposal ............................................................23
16. What if there are problems? ..............................24
17. Technical specifications ....................................24
The scale offers the following functions:
• Weight measurement (in 100 g / 0.2 lb / 0.2 lb).
• Determination of the proportions of fat, water and
muscle in the body (in 0.1%), bone mass (in 100 g),
basal metabolic rate and active metabolic rate (in
kcal).
• Separate body fat and muscle measurement in the
upper and lower body with display of partial measurements.
• Diagrammatic display of weight and body fat.
• Display of the last 30 measurements for 10 people.
• One-off quick analysis function for guests.
• Date and time in standby mode.
Delivery includes
•
•
•
•
•
•
•
Diagnostic scale
Removable control unit with display
Wall mount
Wall mount kit
3 x 1.5 V type AA (scale)
3 x 1.5 V type AA (control unit)
USB cable
Dear Customer
Thank you for choosing one of our products. Our name
stands for high-quality, thoroughly tested products for
applications in the areas of heat, weight, blood pressure, body temperature, pulse, gentle therapy, massage and air.
Please read these instructions for use carefully and
keep them for later use, be sure to make them accessible to other users and observe the information
they contain.
2. Explanation of symbols
The following symbols appear in these instructions.
Warning
Warning instruction indicating a
risk of injury or damage tohealth.
Important Safety note indicating possible
damage to theunit/accessory.
With kind regards
Your Beurer team
Note
Note on important information.
1. About the device
3. Safety notes
Functions of the unit
Please read these instructions for use carefully and
keep them for later use, be sure to make them accessible to other users and observe the information
they contain.
This diagnostic scale is designed to make a significant
contribution to your health. It is used for weighing and
for analysing your personal fitness data and is suitable
for personal home use.
Analysis is performed using the established BIA principle (Bioelectric Impedance Analysis, see “The measuring principle”, page 17). This means that two fre14
• Do not press the buttons using excessive force or
with pointed objects.
• Do not expose the scale to high temperatures or
strong electromagnetic fields (e.g. mobile phones).
• Repairs may only be carried out by customer services or authorised retailers. Before submitting any
complaint, first check the batteries and replace them
if necessary.
• Should you have any questions concerning the use
of our devices, please contact your dealer or customer service.
• All scales comply with EC Directive 2004/108/EC.
Should you have any questions concerning the use
of our devices, please contact your dealer or customer service.
Safety notes
• The scales must not be used by persons
with medical implants (e.g. heart pacemakers). Otherwise their function could be impaired.
• Do not use during pregnancy.
• Do not stand on the outer edge to one side of the
scale otherwise it may tip!
• Keep children away from packaging materials (risk
of suffocation).
Notes on handling batteries
• Swallowing batteries can be extremely dangerous.
Keep the batteries and scale out of the reach of small
children. Should a child swallow a battery, seek medical assistance immediately.
• Replace weak batteries before they discharge completely.
• Always replace all batteries at the same time and use
batteries of the same type.
• Batteries must not be recharged, taken apart, thrown
into an open fire or short circuited.
• Leaking batteries may damage the unit. If you do not
intend to use the device for longer periods, remove
the batteries from the battery compartment.
• If a battery has leaked, put on protective gloves and
clean the battery compartment with a dry cloth.
• Batteries can contain toxins that are harmful to health
and the environment. Always dispose of batteries
in accordance with applicable legal regulations. Do
not dispose of batteries with the normal household
waste.
4. Description of the unit
Overview
2
1
3
4
1
2
3
4
General notes
• The unit is for personal use only and is not intended
for medical or commercial applications.
• Please note that technically related measuring tolerances are possible, as the scale is not calibrated for
professional medical applications.
• The capacity of the scale is 150 kg (330 lb, 24 St).
• On delivery, the scale is set to “cm” and “kg”. At the
back of the scales is a switch to change between
“inches”, “pounds” and “stones”.
• Place the scale on a firm level floor; a firm floor covering is required for correct measurement.
• Protect the unit against hard knocks, moisture, dust,
chemicals, major temperature fluctuations and heat
sources which are too close (stoves, heating radiators).
• Ensure that no liquid gets on the scale. Never dip the
scale into water. Never wash it under running water.
• Do not place any objects on the scale when it is not
being used.
Foot electrodes, left foot
Control unit with display
Operating status indicator
Foot electrodes, right foot
Control unit with display
5
6
7
8
9
5
5
Contact electrodes, left hand
6
Contact electrodes, right hand
7 set Setting button, confirms inputs
Menu: up button
8
Menu: down button
9
ON button
10
Settings: up button
11
Settings: down button
12
15
10
11
12
6
Analysis with control unit
Slide out the tray (on the rear of the scale) as shown to
place the control unit on the scale. The tray contains a
magnet that fixes the control unit to the scale.
Note
Hold with both hands to ensure
good contact with the electrodes
(5) and (6) on the front and rear.
Wall mounting
The control unit can be mounted on the wall using the
mounting kit (wall holder, screws, wall plugs). Use the
mounting kit provided and install the wall holder as
shown. Use wall plugs that are suitable for the surface
onto which it is to be mounted.
5. Initial use
Inserting batteries
Remove the batteries from the protective packaging
and insert them into the scale and control unit according to the polarity indicated. See the diagram inside the
battery compartment. Once you have inserted the batteries, the year flashes on the display, see page 18.
Control unit
3 x AA
• Use the wall holder as a template to mark where the
holes are to be drilled.
• Use a 6 mm drill to drill 2 holes in the wall that are
approximately 40 mm deep and 36 mm apart at the
same height.
• Insert the wall plugs.
• Use the two screws to screw the wall holder in place.
Check that it is firmly seated.
• Then slide the control unit onto the holder so that the
guides in the wall holder fit parallel into the guides in
the control unit.
Scale
3 x AA
First hold the control unit against the wall above
the wall holder and then slide the control unit down to
facilitate insertion.
If the scale and the control unit do not function, remove
the batteries completely and reinsert them.
For instructions on changing the batteries, see p. 23.
Setting up the scale
Set up the scale on a level and solid surface. A solid
surface is a prerequisite for a correct measurement.
6. Installing the control unit
Setting up the control unit
• Slide the control unit fully onto the holder. Check that
the control unit is sitting securely and parallel on the
holder.
You can either hold the control unit in your hand, set it
on a level surface or keep it on the scale.
16
Adjusting the angle
The control unit can be pivoted on the wall holder, allowing you to adjust the angle. A locking device prevents the control unit from being removed from the wall
holder when it has been pivoted.
Please be aware that values obtained from the diagnostic scale represent only an approximation of actual
analytical medical data. Only a specialist physician can
accurately determine body fat, body water, muscle percentage and bone structure using medical procedures
(e.g. computed tomography).
Pivot the control unit fully forwards again before
removing it from the wall holder.
Measurement methods
The analysis can be carried out as follows:
• Upper body: grip the control unit with both hands,
stand on the scale wearing shoes.
• Lower body: leave the control unit where it is (on the
scale for example) and stand barefoot on the scale.
• Upper and lower body: grip the control unit with both
hands and stand barefoot on the scale.
Alternative wall mounting method
You can also fasten the wall holder to a wall using the
double-sided adhesive tape. For this purpose, the wall
surface must be clean and dry. This mounting method is suitable for tiles, glass, plastic and many other
surfaces.
• Remove the protective film from the adhesive tape
on the rear side of the wall holder.
• Press the wall holder firmly against the wall.
• Check that it is firmly seated.
These instructions describe the analysis for upper and lower body.
If you hold the control unit in your hands for the
analysis, its weight is automatically deducted.
After mounting the wall holder using adhesive
tape, wait at least 1 hour before inserting the control unit.
General tips
• If possible, always weigh yourself at the same time
of day (preferably in the morning), after using the toilet, on an empty stomach and unclothed, in order to
achieve comparable results.
• Important for the measurement: body fat (lower
body) can only be determined barefoot and should
be carried out with slightly moist soles if possible.
Completely dry soles can result in unsatisfactory
measurements due to inadequate conductivity.
• Stand still and upright during the measurement.
• Wait a few hours after unaccustomed physical activity.
• Wait approx. 15 minutes after getting up in the morning to allow the water in the body to distribute.
• Remember that only long-term trends are important.
Short-term changes in weight within a few days are
usually caused by a loss of fluid. Body water plays
an important role towards our general wellbeing.
7. Information
The measuring principle
This scale operates according to the B.I.A. principle
(bioelectric impedance analysis). In the process, it is
possible to determine bodily proportions within seconds, using an undetectable current which is completely harmless and safe.
The body fat percentage and other physical relationships in the body can be determined by measuring the
electrical resistance (impedance) and calculating constants and individual parameters such as age, height,
gender and degree of activity.
Muscle tissue and water have good electrical conductivity, and therefore lower resistance. Bones and fatty
tissue, on the other hand, have low conductivity as fat
cells and bones conduct hardly any current as a result
of their very high resistance.
This scale also measures using two different frequencies in order to better determine impedance. These
different frequencies have different effects on the cell
membrane and on the body water. In addition, the electrical contact with the body is optimised through the
used of 4 hand electrodes and 4 foot electrodes in
order to achieve a more accurate measurement and
therefore a better analysis.
This sensitive analysis technology means that the values may change marginally if repeat measurements are
taken. This is caused by variations during the impedance measurement (e.g. different electrical contact of
the electrodes with hands and feet, different distribution of water in the body).
Limitations
When measuring body fat and other values, deviating
and implausible results may occur in:
• children under approx. 10 years,
• competitive athletes and body builders,
• pregnant women,
• persons with fever, undergoing dialysis treatment or
with symptoms of edema or osteoporosis,
• persons taking cardiovascular medication (affecting
the heart and vascular system),
• persons taking vascular dilating or vascular constricting medication,
• persons with considerable anatomic deviations of
the legs in relation to total body size (length of the
legs considerably shortened or lengthened).
17
8. Setting
• Now you can enter the following settings:
User data
Parameters
Sex
male , female
Height
100 to 250 cm (3‘ 03“ to 8‘ 02“)
Date of birth
year, month, day
Degree of activity 1 to 5
Target weight
adjustable, in kg (for graphical
progress display)
Enter your personal information before using the scale.
Setting the unit
• From standby mode (time and date displayed), press
the [SET] button.
• Use the [ ] setting button to select the “SET_UNIT”
menu item and confirm with the [SET] button.
• Use the [ , ] setting buttons to select the language symbol (D, GB, F, E, I) and confirm with the
[SET] button.
• Use the [ , ] setting buttons to select the unit
symbol (kg, lb, st) and confirm with the [SET] button.
• Use the [ , ] setting buttons to select how you
wish to display the time (24h or 12h) and confirm with
the [SET] button.
• Use the [ , ] setting buttons to select whether
you wish to switch GUEST MODE on or off and confirm with the [SET] button.
Then the display shows an overview of the selected
settings.
• Modifying values: press the [ , ] buttons or press
and hold for quick scrolling.
• Confirming entries: Press the [SET] button.
Once you have entered all the data, the scale is ready
to take measurements. The scale switches off automatically if no other actions are performed.
Degrees of activity
Selection of the degree of activity mustrefer to the medium and long term. All parameters must be entered
before the body fat and other values can be entered.
Degree of Physical activity
activity
1
None.
2
Low: A small amount of light physical
effort (e.g. short walks, light garden
work, gymnastic exercises).
3
Medium: Physical effort for 30 minutes
at least 2 to 4 times a week.
4
High: Physical effort for 30 minutes at
least 4 to 6 times a week.
5
Very high: Intensive physical effort, intensive training or hard physical work
for at least one hour daily.
Setting the date and time
• From standby mode (time and date displayed), press
the [SET] button.
• Use the [ ] setting button to select the “SET_TIME”
menu item and confirm with the [SET] button.
• The year flashes on the display.
• Set the year, month and day in turn, then the time in
minutes and hours using the [ , ] setting buttons.
• Confirm each entry by pressing the [SET] button.
Setting user data
You must enter personal user parameters in order to
measure your body fat percentage and other physical data.
The scale has memories for 10 users in which you and
your family members, for example, can store your personal settings and call them up again.
There is also a “guest” mode (where switched on), for
which settings and measured values are not saved.
9. The display
Overview
1
5
The memory, trend and average functions are not
available in guest mode.
• Press the [SET] button.
• Select “SET_USER” and confirm with the [SET] button.
• Use the [ , ] setting buttons to select the person
and confirm with the [SET] button.
• If settings are already available for this memory location, these are shown on the display. If no settings
are available, then this user memory location is free.
4
3
2
1 Time, date, user
2 Weight with analysis
Weight
3 Analysis data (partly with assessment)
BF
Body fat
Water
Muscle percentage
Bone mass
18
4 Menu
• Press the [SET] button or wait 3 seconds. The measurement screen is shown on the display.
Overview of current measurement
Trend
Detailed display of body fat, muscle percentage of upper/lower body
Mem Saved measurements 1 – 30
Average values
Kcal Calorie consumption
Indicator for the current menu item
5
If you activate the “guest” user, you must re-enter the user data before each measurement. User data
and measurement values are not saved in guest mode.
You have the option of switching guest mode on or off,
see page 18.
10. Operation
Measuring weight
• Now step barefoot onto the scale and hold the control unit firmly in your hands. (If you hold the control
unit in your hands, its weight (300 grammes) is automatically deducted.)
1. Switching on the scale
• Press the [ ] button on the control unit.
0.0 kg appears on the display. The scale is now ready
for measurement.
2. Weighing (without diagnosis)
Set up the scale on a level and solid surface. A solid surface is a prerequisite for a correct measurement.
• Now step onto the scale. The indicator [3] on the
scale lights up green.
• Hold the control unit with the lower part of your
thumb pressed firmly on the front electrodes and
your fingers pressed firmly on the rear electrodes.
Stand still with your weight distributed evenly on both legs. Stand with
your feet as far apart as possible without tipping the scales.
If you hold the control unit in your hands, its weight
(300 grammes) is automatically deducted.
Once the measurement has been taken, the result will
be displayed for approximately 10 seconds.
Following the weight measurement, impedance is
measured for the analysis. The upper body is
measured by the 4 electrodes on the control
unit, the lower body by the 4 electrodes on the
scale. This is indicated by the symbol of the current flowing through the body.
When you step off the scale, the scale will switch off
after a few seconds. The indicator [3] goes out. The
measurement is not saved.
Important:
Stand still with your weight distributed evenly on both
legs. Please note that there must be no skin contact
between feet, legs, calves and thighs. Otherwise the
measurement will not be performed correctly. To prevent skin contact, you can wear, for example, a lightweight pair of trousers.
Carrying out an analysis
1. Switching on the scale
• Press the [ ] button on the control unit.
0.0 kg appears on the display.
3. Result
The overview is displayed.
2. Diagnostics
• Switch the device on and select your user number
from 1 to 10 by pressing the right-hand button [ ].
To do so, press the button repeatedly if necessary.
19
For the analysis, see “Analysing results” on page 21.
When the unit is switched off, the measurement is
saved automatically.
If several measurements are taken on one day, only
the last measurement is saved.
Muscle
• Use the [ , ] buttons to switch to the detailed
view of muscle mass.
Analysis of the measured values following
a measurement
Graph
Weight
• Press the [ ] menu button on the control unit to
switch to individual submenus or memories.
The progression of your body weight is shown from
measurement to measurement. Newer measurements
are added on the right. The reference line represents
your target weight.
Only the current measurement results can be displayed, not the old saved measurement values.
Mem Displaying saved values
• Press the [ ] button on the control unit to switch to
the Memory screen.
The overview is displayed. The date of the measurement is shown at the top, together with the memory
location number (03-03) e.g. the third (= last) memory
location of a total of 3 occupied memories.
You must define a target weight in order to be
able to display the progression of your body weight,see
page 18. You can change the target weight at any
time.
• Use the [
ries.
Body fat
• Use the [ , ] buttons to switch to the body fat
graph. The progression of your body fat is shown
from measurement to measurement.
The reference line represents the average value of all
body fat measurements, the bars indicate whether the
values have moved up or down.
,
] buttons to scroll through the memo-
Averages
• Press the [ ] button on the control unit to switch to
the Average screen.
All the averages from the saved measurements are
shown.
Upper body, lower body
Body fat
• Press the [ ] button on the control unit to switch to
the detailed view for the upper/lower body.
The current body fat measurement is shown both as
the entire body and divided into upper/lower body.
The dates of the first and last mea surements are
shown at the top.
20
Kcal Calorie consumption
to delete anything, select “NO” and confirm with the
[SET] button.
• Press the [ ] button on the control unit to switch to
the kcal screen. The theoretically calculated basal
metabolic rate (BMR) and active metabolic rate
(AMR) are shown in kcal.
Switching off the scale (standby mode)
• Wait until the display automatically switches itself
off after approximately 45 seconds or press the [ ]
button on the control unit to switch the display off
manually.
Date and time can still be seen.
Power-saving mode
• Press and hold the and menu buttons simultaneously for 10 seconds. The date and time disappear.
• To switch back on again, press and hold the and
menu buttons simultaneously for 10 seconds.
Calling up the measurement memory from
standby
When the unit is switched off, the measurements from
an analysis are automatically saved. There are 30 memory locations for each user.
• Switch on the control unit with the [ ] button.
• Select your user number by pressing the [ ] button.
To do so, press the button repeatedly if necessary.
• Press the [ , ] buttons on the control unit to scroll
through the analysis values or the [ , ] buttons
to enter the submenus (e.g. switch to BF, ).
11. Analysing results
Body fat percentage
The body fat values are displayed on the display and
analysed in the bar graph. The following body fat percentages are guide values (contact your physician for
further information).
Man
Deleting details
1. Deleting a user and all settings and saved values
• Switch the device on and select your user number by
pressing the [ ] button. To do this, press the button
repeatedly and confirm with [SET].
• When 0.0 appears on the display, press and hold the
[SET] button for 5 seconds to delete the user.
• Use the [ , ] buttons to select “YES” and confirm
the prompt with the [SET] button. If you do not wish
to delete the user, select “NO” and confirm with the
[SET] button.
Age
10 –14
15 –19
20 – 29
30 – 39
40 – 49
50 – 59
60 – 69
70 –100
All saved values and settings for this user are deleted.
low
<11 %
<12 %
<13 %
<14 %
<15 %
<16 %
<17 %
<18 %
normal
11–16 %
12 –17 %
13 –18 %
14 –19 %
15 – 20 %
16 – 21 %
17 – 22 %
18 – 23 %
high
16.1– 21 %
17.1– 22 %
18.1– 23 %
19.1– 24 %
20.1– 25 %
21.1– 26 %
22.1– 27 %
23.1– 28 %
very high
>21.1 %
>22.1 %
>23.1 %
>24.1 %
>25.1 %
>26.1 %
>27.1 %
>28.1 %
low
<16 %
<17 %
<18 %
<19 %
<20 %
<21 %
<22 %
<23 %
normal
16 – 21 %
17 – 22 %
18 – 23 %
19 – 24 %
20 – 25 %
21– 26 %
22 – 27 %
23 – 28 %
high
21.1– 26 %
22.1– 27 %
23.1– 28 %
24.1– 29 %
25.1– 30 %
26.1– 31 %
27.1– 32 %
28.1– 33 %
very high
>26.1 %
>27.1 %
>28.1 %
>29.1 %
>30.1 %
>31.1 %
>32.1 %
>33.1 %
Woman
2. Deleting individual saved values for a user
• From the “Mem” measurement memory, select a
measurement and briefly press the [SET] button on
the control unit to delete the displayed value from
the memory. You can also do this immediately after
the measurement has been taken.
• Use the [ , ] buttons to select “YES” and confirm
the prompt with the [SET] button. If you do not wish
to delete the value, select “NO” and confirm with the
[SET] button.
Age
10 –14
15 –19
20 – 29
30 – 39
40 – 49
50 – 59
60 – 69
70 –100
3. Deleting all saved values for a user
• Call up the “Mem” measurement memory and press
and hold the [SET] button on the control unit for approximately 3 seconds to delete all the values.
• Use the [ , ] buttons to select “YES” and confirm
the prompt with the [SET] button. If you do not wish
A lower value is often found in athletes. Depending on
the type of sports, training intensity and physical constitution, values may result which are below the recommended values stated. It should, however, be noted
that there could be a danger to health in the case of
extremely low values.
21
Body water percentage
Bone mass
The body water percentage is normally within the following ranges:
Like the rest of our body, our bones are subject to the
natural development, degeneration and ageing processes. Bone mass increases rapidly in childhood and
reaches its maximum between 30 and 40 years of age.
Bone mass reduces slightly with increasing age. You
can reduce this degeneration somewhat with healthy
nutrition (particularly calcium and vitamin D) and regular exercise. With appropriate muscle building, you
can also strengthen your bone structure. Note that this
scale will not show you the calcium content of your
bones, but will measure the weight of all bone constituents (organic substances, inorganic substances and
water). Little influence can be exerted on bone mass,
but it will vary slightly within the influencing factors
(weight, height, age, gender).
There are no recognised guidelines or recommendations relating to bone mass measurement.
Man
Age
10 –100
poor
<50 %
good
50 – 65 %
very good
>65 %
poor
<45 %
good
45 – 60 %
very good
>60 %
Woman
Age
10 –100
Body fat contains relatively little water. People with a
high proportion of body fat may therefore have a proportion of body water below the guideline values. With
endurance athletes, however, the recommended values could be exceeded due to low fat percentages and
high muscle percentage.
This scale is unsuitable for measuring body water in
order to draw medical conclusions concerning agerelated water retention, for example. If necessary ask
your physician. Basically, a high body water percentage should be the aim.
Important
Please do not confuse bone mass with bone density.
Bone density can be determined only by means of a
medical examination (e.g. computer tomography, ultrasound). It is therefore not possible to draw conclusions
concerning changes to the bones and bone hardness
(e.g. osteoporosis) using this scale.
Proportion of muscle
BMR
The muscle percentage is normally within the following ranges:
The basal metabolic rate (BMR) is the amount of energy which the body requires to maintain its basic functions when completely at rest (sufficient for e.g. lying
in bed for a period of 24 hours). This value essentially
depends on weight, height and age. The diagnostic
scale displays this in kcal/day and calculates it using
the scientifically recognised Harris Benedict formula.
This is the amount of energy that your body requires as
an absolute minimum which must be supplied to the
body in the form of food. If you consume less energy
than this in the long term, it can have a detrimental effect on your health.
Man
Age
10 –14
15 –19
20 – 29
30 – 39
40 – 49
50 – 59
60 – 69
70 –100
low
<44%
<43%
<42%
<41%
<40%
<39%
<38%
<37%
normal
44 – 57 %
43 – 56 %
42 – 54 %
41– 52 %
40 – 50 %
39 – 48 %
38 – 47 %
37 – 46 %
high
>57 %
>56 %
>54 %
>52 %
>50 %
>48 %
>47 %
>46 %
low
<36%
<35%
<34%
<33%
<31%
<29%
<28%
<27%
normal
36 – 43 %
35 – 41 %
34 – 39 %
33 – 38 %
31– 36 %
29 – 34 %
28 – 33 %
27 – 32 %
high
>43 %
>41 %
>39 %
>38 %
>36 %
>34 %
>33 %
>32 %
AMR
The active metabolic rate (AMR) is the amount of energy required daily by the body in its active state. The energy consumption of a human being rises with increasing physical activity and is measured on the diagnostic
scale in relation to the degree of activity entered (1 – 5).
To maintain your existing weight, the amount of energy
used must be reintroduced into the body in the form
of food and drink. If less energy is introduced than is
used over a longer period of time, your body will obtain
the difference largely from the amount of fat stored and
your weight will decrease. If, on the other hand, over a
longer period of time more energy is introduced than
the total active metabolic rate (AMR) calculated, your
Woman
Age
10 –14
15 –19
20 – 29
30 – 39
40 – 49
50 – 59
60 – 69
70 –100
22
body will be unable to burn off the excess energy, and
the excess will be stored in the body as fat and your
weight will increase.
• Establish USB connection.
USB
Results in relation to time
Remember that only long-term trends are important. Short-term fluctuations in weight over a few days
are usually the result of a loss of fluid.
• Follow the instructions for software installation.
13. Replacing batteries
The interpretation of the results will depend on changes in your overall weight and body fat, body water and
muscle percentages, as well as on the period during
which these changes take place. Sudden changes
within days must be distinguished from medium term
changes (over weeks) and long term changes (months).
A basic rule is that short term changes in weight almost exclusively represent changes in water content,
whereas medium and long term changes may also involve the fat and muscle percentages.
• If your weight reduces over the short term, but your
body fat percentage increases or remains the same,
you have merely lost water – e.g. after a training session, sauna session or a diet restricted only to rapid
weight loss.
• If your weight increases over the medium term and
the body fat percentage falls or stays the same, then
you could have built up valuable muscle mass.
• If your weight and body fat percentage fall simultaneously then your diet is working – you are losing fat
mass.
• Ideally you should support your diet with physical
activity, fitness or power training. This way you can
increase your muscle percentage over the medium
term.
• Body fat, body water or muscle percentages should
not be added (certain elements of muscle tissue also
contain body water).
The control unit is fitted with a „change battery“ indicator. The
symbol appears on the display if the control unit batteries are low or the symbol if the scale
batteries are low. The batteries must then be replaced.
Note
• When changing batteries, always use batteries of
the same type, brand and capacity.
• Always replace all batteries simultaneously.
• Do not use rechargeable batteries.
• Use batteries that are free of heavy metals.
14. Cleaning and care of the unit
The accuracy of the measured values and the service
life of the unit depend on careful handling: The unit
should be cleaned occasionally.
To clean the unit, use a damp cloth, on which you
can apply a little washing-up liquid if required. Do not
use abrasive detergents and never immerse the unit
in water.
Important
• Do not use aggressive solvents or cleaning agents!
• Never immerse the unit in water!
• Do not wash the unit in a dishwasher!
15. Disposal
12. Transferring measurements to
a PC – HealthManager / EasyFit
Standard and rechargeable batteries should not be
disposed of separately from the household waste. As
a consumer, you are legally obliged to return used batteries for proper disposal. You can hand in your used
batteries at public collection points in your district or
sales outlets where batteries of this type are sold.
System requirements:
Windows 7, Windows Vista, Windows XP SP3
HealthManager:
Health management in conjunction with Beurer blood
pressure and blood glucose monitors.
Note
The codes below are printed on batteries
containing harmful substances:
Pb = battery contains lead,
Cd = battery contains cadmium,
Hg = battery contains mercury.
EasyFit:
Training analysis in conjunction with Beurer heart rate
monitors.
Process:
• You will find the Beurer software download and installation in the download area at http://www.beurer.com
For environmental reasons, do not dispose of the scale
with the batteries in the household waste at the end
of its useful life. Dispose of the unit at a suitable local
collection or recycling point.
23
Observe the local regulations for material disposal.
Dispose of the unit in accordance with EC Directive 2002/96/EC–WEEE (Waste Electrical
and Electronic Equipment).
If you have any questions, please contact the local authorities responsible for waste disposal.
Possible errors
Cordless connection between scale
and control unit is
interrupted.
Remedy
Reinsert the batteries for the
scale and the control unit. Maintain a larger distance from the
following electromagnetic sources: high-voltage pylons, television or wireless computer systems, fitness equipment, mobile
phones, weather stations.
The control unit is Reduce the distance between the
too far away from scale and control unit; maximum
distance is 2 metres.
the scale.
The batteries in the Change the batteries (see page
scale are flat or in- 16) and check that they are incorrectly inserted. serted the correct way round.
16. What if there are problems?
If the scale detects and error when measuring, the following is displayed.
Display
Cause
ERROR:_
The maximum load
OVERLOAD capacity of 150 kg
was exceeded.
LOW_
The batteries are
BATTERY almost empty.
Remedy
Do not load the unit
with over 150 kg.
Replace the batteries (see page 16
and 23).
MEMORY_ 30 measurements Transfer the measFULL
have been saved. urements to a PC,
see page 23.
Repeat the measERROR:_
The electrical reCONTACT sistance between urement barefoot. If
the electrodes and necessary, moisten
the soles of your feet
the sole of your
slightly. If necessary,
foot is too high
remove the calluses
(e.g. if you have
from the soles of
tough calluses).
your feet.
ERROR:_
The BIA measure- Repeat the measureDATA
ment was success- ment barefoot or, if
ful but the fat per- necessary, moisten
centage is outside the soles of your feet
slightly. If necessary,
the measurable
change the level of
range (less than
5% or greater than activity that you have
set.
50%).
Replace the batterNo display The batteries in
the control unit are ies (see page 16).
completely empty.
The batteries in the Check to ensure that
control unit are not the polarity is correct
inserted correctly. (see page 16).
Incorrect weight measurement
Possible errors
The scale is not
zeroed correctly.
Scale is on
carpeting.
17. Technical specifications
Dimensions of the scale
Scale batteries
Control unit batteries
Cordless transmission
Measuring range
No measurement possible
Possible errors
The control unit
was not activated
before you stepped
on the scale.
Remedy
Before taking a measurement,
activate the scale briefly with
your foot until the
operating
status indicator lights up.
Wait approximately 5 seconds
and repeat the measurement.
For your information: because
you would normally step onto
the scale immediately, the scale
saves the zero point when the
scale is switched off (when the
operating status indicator
goes out).
Place the scale on a level and
solid surface.
Stand with your feet as far apart
as possible without tipping the
scales.
Remedy
Switch on the control unit first
before the measurement. If necessary, wait 30 seconds, then repeat the measurement.
Weight, bone mass unit
Unit for body fat, water
and muscle
BMR, AMR unit
330 x 330 x 41 mm
3 x 1.5 V type AA
3 x 1.5 V type AA
433 MHz
5 kg to 150 kg
11 lb to 330,6 lb
0.79 St. to 23.61 St.
100 g / 0.2 lb / 0.2 lb
0.1 %
1 Kcal
Subject to technical modifications.
The scale conforms to EC Directive 2004/108/EC +
supplements.
24
FRANÇAIS
Sommaire
« Principe de mesure », page 28). En outre, ce pèsepersonne utilise deux fréquences distinctes, au lieu
d’une usuellement, permettant de déterminer la résistance électrique (impédance) de façon plus précise.
Par ailleurs, le contact électrique avec le corps est optimisé au moyen de 4 électrodes « main » et de 4 électrodes « pied », afin d’obtenir une meilleure précision
de mesure, et donc une meilleure analyse.
Les valeurs mesurées sont envoyées par radiotransmission jusqu’à une portée de 2 mètres. Tous les réglages sont réalisés au moyen d’un guidage par menus
innovant, de façon claire et nette, et sont affichés sur
un afficheur de grande taille, en 5 langues (au choix).
L’afficheur peut rester sur le pèse-personne, être placé
séparément ou être fixé au mur.
Pour une surveillance à long terme de vos valeurs, vous
pouvez enregistrer les données sur votre ordinateur
par l’intermédiaire d’un câble USB et du logiciel PC.
Le pèse-personne devient ainsi votre coach sportif
personnel.
1. Familiarisation avec l’appareil ...........................25
2. Symboles utilisés ..............................................25
3. Consignes de sécurité .......................................26
4. Description de l’appareil ....................................26
5. Mise en service .................................................27
6. Montage de l’unité de commande ....................27
7. Informations ......................................................28
8. Réglage .............................................................29
9. Affichages .........................................................30
10. Utilisation ..........................................................30
11. Interprétation des résultats ...............................33
12. Transfert des valeurs mesurées vers un PC /
HealthManager / EasyFit ....................................35
13. Remplacement des piles ...................................35
14. Nettoyage et entretien de l’appareil ..................35
15. Elimination .........................................................35
16. Que faire en cas de problèmes ?.......................36
17. Caractéristiques techniques ..............................37
Le pèse-personne possède les fonctions suivantes :
• Mesure du poids (par 100 g).
• Détermination des taux de graisse corporelle et de
masse hydrique, ainsi que du taux de masse musculaire (par 0,1 %), de la masse osseuse (par 100 g),
du métabolisme basal et du taux métabolique actif
(en Kcal).
• Mesure séparée de la graisse corporelle et de la
masse musculaire de la partie supérieure et de la
partie inférieure du corps avec affichage des mesures partielles.
• Affichage des diagrammes de poids et de graisse
corporelle.
• Affichage des dernières 30 mesures pour 10 personnes.
• Fonction d’analyse unique, rapide, pour les invités.
• Date et heure en mode veille.
Eléments fournis
•
•
•
•
•
•
•
Pèse-personne impédancemètre
Unité de commande démontable avec afficheur
Support mural
Kit de montage pour montage mural
3 x 1,5 V type AA (pèse-personne)
3 x 1,5 V type AA (unité de commande)
Câble USB
Chère cliente, cher client.
Nous vous remercions d’avoir choisi l’un de nos produits. Notre société est réputée pour l’excellence de
ses produits et les contrôles de qualité approfondis
auxquels ils sont soumis, dans les domaines suivants:
chaleur, contrôle de poids, diagnostic de pression artérielle, mesure de température du corps et du pouls,
thérapies douces, massage et purification d’air.
Lisez attentivement cette notice, conservez-la pour un
usage ultérieur, mettez-la à la disposition des autres
utilisateurs et suivez les consignes qui y figurent.
2. Symboles utilisés
Voici les symboles utilisés dans la notice d’utilisation.
Sincères salutations,
Votre équipe Beurer
Avertissement Ce symbole vous avertit des
risques de blessures ou des
dangers pour votre santé.
1. Familiarisation avec l’appareil
Fonctions de l’appareil
Ce pèse-personne impédancemètre se révélera être
un allié de poids pour votre santé. Il sert au pesage
et à l’analyse de vos données de forme physique personnelles et est destiné à un usage personnel dans le
domaine privé.
L’analyse est effectuée selon le principe éprouvé de
la B.I.A. (analyse de l’impédance bioélectrique, voir
25
Attention
Ce symbole vous avertit des
éventuels dommages au niveau de l’appareil ou d’un
accessoire.
Remarque
Ce symbole indique des informations importantes.
3. Consignes de sécurité
Lisez attentivement cette notice, conservez-la pour
un usage ultérieur, mettez-la également à la disposition des autres utilisateurs et suivez les consignes
qui y figurent.
•
•
Consignes de sécurité
• Le pèse-personne ne doit pas être utilisé
par des personnes portant des implants
médicaux (par ex. stimulateur cardiaque).
Ces appareils risqueraient alors de ne pas fonctionner correctement.
• L’appareil ne doit pas être utilisé par des femmes
enceintes.
• Ne montez pas sur un seul côté ni sur le bord du
pèse-personne : il risquerait de basculer et de vous
faire tomber !
• Ne laissez pas l’emballage à la portée des enfants
(risque d’étouffement).
•
•
•
•
•
Remarques relatives aux piles
• Les piles sont extrêmement dangereuses si elles sont
avalées. Les piles et le pèse-personne doivent être
tenus hors de portée des enfants. Si l’un deux avale
une pile, consultez immédiatement un médecin !
• Remplacez à temps les piles usagées.
• Changez systématiquement les piles à temps et utilisez des piles de même type.
• Les piles ne doivent être ni rechargées, ni réactivées
par d’autres méthodes, ni démontées, ni jetées au
feu, ni court-circuitées.
• Des piles qui fuient peuvent endommager l’appareil.
Si vous n’utilisez pas l’appareil pendant une période
prolongée, retirez les piles du compartiment à piles.
• Si l’une des piles a fui, enfilez des gants protecteurs
et nettoyez le compartiment à piles avec un chiffon
sec.
• Les piles peuvent contenir des produits toxiques qui
sont nuisibles pour la santé et l’environnement. Eliminez les piles conformément aux dispositions légales
en vigueur. Ne jetez jamais les piles avec les ordures
ménagères.
•
•
informations du chapitre « Réglage » pour régler les
unités.
Placez le pèse-personne sur un sol plan et stable ;
une surface ferme est la condition préalable à une
mesure exacte.
Protégez le pèse-personne des chocs, de l’humidité,
de la poussière, des produits chimiques, des variations importantes de température et des sources de
chaleur (four, radiateur).
Assurez-vous qu’aucun liquide ne parvienne sur le
pèse-personne. Ne plongez en aucun cas le pèsepersonne dans l’eau. Ne rincez en aucun cas le
pèse-personne à l’eau courante.
Ne posez pas d’objets sur le pèse-personne lorsqu’il
n’est pas utilisé.
N’appuyez pas sur les touches en forçant ou avec
des objets pointus.
N’exposez pas le pèse-personne à des températures
trop élevées ou à de forts champs électromagnétiques (p. ex. téléphones mobiles).
Les réparations doivent uniquement être effectuées
par le service après-vente ou des revendeurs autorisés. Cependant, avant toute réclamation, vérifiez
d’abord les piles et changez-les le cas échéant.
Pour toute question sur l’utilisation de nos appareils,
adressez-vous à votre revendeur ou à notre service
après-vente.
Tous les pèse-personnes sont conformes à la directive CEM 2004/108/CEE. Pour toute question sur
l’utilisation de nos appareils, adressez-vous à votre
revendeur ou à notre service aprèsvente.
4. Description de l’appareil
Aperçu
2
1
3
4
Remarques générales
• L’appareil est prévu pour un usage exclusivement
personnel. Il n’est en aucun cas destiné à des fins
médicales ou commerciales.
• Des variations de mesure d’ordre technique sont
possibles, ce pèse-personne n’étant pas étalonné
en vue d’un usage médical professionnel.
• La portée maximale du pèse-personne est de
150 kg (330 lb, 24 st.).
• Les unités réglées par défaut à la livraison du pèsepersonne sont en « cm » et « kg ». Référezvous aux
1
2
3
4
26
Electrodes pied, pied gauch
Unité de commande avec afficheur
Affichage de l’état de fonctionnement
Electrodes pied, pied droit
Unité de commande avec afficheur
5
Pèse-personne
3 x AA
6
7
8
9
10
11
12
Si le pèse-personne ou l’unité de commande n’indique
aucune fonction, veuillez retirer toutes les piles et insérer des piles neuves.
Remarques pour le changement de piles, voir page 35.
5
6
5
Electrodes de contact, main gauche
6
Electrodes de contact, main droite
7 set Touche de réglage, confirmation des saisies
Menu : Touche vers le haut
8
Menu : Touche vers le bas
9
Touche ON
10
Réglage : Touche vers le haut
11
Réglage : Touche vers le bas
12
Installation du pèse-personne
Posez le pèse-personne sur un support stable et plan.
Une surface d’assise solide constitue la condition préalable pour une mesure correcte.
6. Montage de l’unité de
commande
Analyse avec l’unité de commande
Remarque
Installation de l’unité de commande
Maintien des deux mains afin de garantir un contact sûr avec les électrodes (5) et (6) à l’avant et à l’arrière.
L’unité de commande peut être, au choix, soit tenue
dans la main, déposée sur une surface d’appui plane
ou encore rester sur le pèse-personne.
Déployez le compartiment (à l’arrière du pèse-personne) comme illustré, afin d’y déposer l’unité de commande. Le compartiment possède un aimant, qui fixe
l’unité de commande sur le pèse-personne.
5. Mise en service
Insertion des piles
Retirez les piles de l’emballage de protection et insérez-les selon la polarité correcte dans le pèse-personne
et dans l’unité de commande. Conformez-vous pour
cela au dessin dans le compartiment à piles. Après
l’insertion des piles, l’affichage de l’année clignote,
voir page 29.
Montage mural
Le kit de montage (support mural, vis, chevilles) permet de monter l’unité de commande sur un mur. Utilisez le kit de montage fourni et montez le support mural comme illustré. Le cas échéant, utilisez des chevilles
adaptées à la structure du mur.
Unité de commande
3 x AA
• Utilisez le support mural comme gabarit de perçage,
afin de tracer les trous.
27
7. Informations
• A l’aide d’un foret de 6 mm, percez dans le mur 2
trous d’env. 40 mm de profondeur, selon un entraxe
de 36 mm, horizontalement l’un à côté de l’autre.
• Insérez les chevilles.
• Vissez le support mural avec les deux vis. Vérifiez le
maintien ferme du montage.
• Faites ensuite glisser l’unité de commande sur le
support, de telle sorte que les guides du support
mural s’engagent parallèlement dans les guides de
l’unité de commande.
Principe de mesure
Ce pèse-personne fonctionne selon le principe d’analyse d’impédance bioélectrique (B.I.A). Il permet en
l’espace de quelques secondes une détermination des
taux de masse corporelle au moyen d’un courant imperceptible, totalement inoffensif et sans danger. La
mesure de la résistance électrique (impédance) ainsi
que la prise en compte de constantes ou de données
individuelles (âge, taille, sexe, activité physique) permet de définir le taux de graisse corporelle et d’autres
paramètres physiques.
Le tissu musculaire et l’eau ont une bonne conductibilité électrique et donc une faible résistance. Par contre,
les os et le tissu adipeux ont une faible conductibilité, car les os et les cellules adipeuses sont très peu
conducteurs en raison de leur résistance très élevée.
Par ailleurs, le pèse-personne utilise deux fréquences
distinctes pour déterminer l’impédance de manière encore plus précise. Ces fréquences distinctes ont des
influences différentes sur la membrane cellulaire et la
masse hydrique. Par ailleurs, le contact électrique avec
le corps est optimisé au moyen de 4 électrodes « main »
et de 4 électrodes « pied », afin d’obtenir une meilleure
précision de mesure, et donc une meilleure analyse. En
raison de la technique d’analyse sensible, il est possible
que les valeurs se modifient légèrement lors de mesures
répétées. Cela s’explique par les écarts lors de la mesure de l’impédance (p. ex. contact électrique différent
par rapportaux électrodes avec les mains et les pieds,
autre répartition de la masse hydrique dans le corps).
Les valeurs déterminées par le pèsepersonneimpédancemètre ne représentent que des approximations
par rapport aux analyses physiques effectives d’ordre
médical. Seul un médecin spécialisé peut déterminer
avec précision la graisse corporelle, la masse hydrique,
le taux de masse musculaire et la masse osseuse par
des méthodes médicales (tomographie, par ex.).
Positionnez dans un premier temps l’unité de
commande audessus du support mural, contre le mur,
puis faites glisser l’unité de commande vers le bas, afin
de faciliter son introduction.
• Faites glisser l’unité de commande entièrement sur le
support. Vérifiez que l’unité de commande est parallèle et repose fermement sur le support.
Réglage de l’inclinaison
L’unité de commande peut être basculée sur le support
mural et l’inclinaison ainsi adaptée. Un dispositif d’arrêt
empêche que l’unité de commande à l’état basculé ne
puisse être retiré du support mural.
Rebasculez l’unité de commandecomplètement
vers l’avant, avant de la retirer du support mural !
Montage mural alternatif
Vous pouvez également fixer le support mural sur un
mur au moyen du ruban adhésif double face. A cet
égard, la surface du mur doit être propre et sèche. Ce
type de montage convient pour le collage sur les carreaux, le verre, le plastique et bien d’autres supports.
• Retirez le film de protection du ruban adhésif sur la
face arrière du support mural.
• Pressez fortement le support mural contre le mur.
• Vérifiez le maintien ferme du montage.
Méthodes de mesure
L’analyse peut être réalisée comme suit :
• Partie supérieure du corps : saisir l’unité de commande avec les mains, monter avec les chaussures
sur le pèsepersonne.
• Partie inférieure du corps : laisser par exemple l’unité
de commande sur le pèse-personne, monter pieds
nus sur le pèse-personne.
• Partie supérieure et partie inférieure du corps : saisir
l’unité de commande avec les mains et monter pieds
nus sur le pèse-personne.
Après avoir fixé le support mural à l’aide de ruban adhésif, attendez au moins 1 heure avant d’utiliser
l’unité de commande !
Dans le présent mode d’emploi est décrite l’analyse pour les parties supérieure et inférieure du corps.
Si l’unité de commande est tenue dans la main pour
l’analyse, son poids est déduit automatiquement.
28
Conseils généraux
• Sélectionnez avec les touches de réglage [ , ] le
symbole des unités (kg, lb, st) et confirmez avec la
touche [SET].
• Sélectionnez avec les touches de réglage [ , ] le
mode d’affichage de l’heure (24 h ou 12 h) et confirmez avec la touche [SET].
• Sélectionnez avec les touches de réglage [ , ]
si vous souhaitez activer ou désactiver le MODE INVITE, puis confirmez avec la touche [SET].
Ensuite, l’afficheur indique les réglages sélectionnés
dans une vue d’ensemble.
• Pesez-vous, si possible, à la même heure (de préférence le matin), après la selle, à jeun et nu(e) afin
d’obtenir des résultats comparables.
• Important : La détermination de la graisse corporelle
(partie inférieure du corps) doit uniquement être effectuée pieds nus et en humidifiant éventuellement
légèrement les plantes des pieds. Il se peut que des
mesures effectuées avec les pieds complètement
secs ne conduisent pas à des résultats satisfaisants,
leur conductibilité étant trop faible.
• Ne bougez pas pendant la mesure.
• Attendez quelques heures après un effort physique
inhabituel.
• Attendez 15 minutes environ après le lever avant de
procéder à la mesurepour que l’eau puisse se répartir dans le corps.
• Seules les tendances à long terme comptent. Des
écarts de poids de courte durée enregistrés en l’espace de quelques jours ne sont généralement dus
qu’à une simple perte de liquides. L’eau corporelle
joue cependant un rôle important pour le bien-être.
Réglage de la date et de l’heure
• Pressez en mode veille (date et heure affichées) la
touche [SET].
• Sélectionnez avec la touche de réglage [ ] la commande de menu « REGLER_ HEURE » et confirmez
avec la touche [SET].
• L’affichage de l’année clignote.
• Réglez tour à tour l’année, le mois, le jour ainsi que
l’heure en minutes et heures à l’aide des touches de
réglage [ , ].
• Confirmez respectivement votre entrée en pressant
la touche [SET].
Restrictions
Dans certains cas, la détermination de la graisse corporelle et d’autres données peut présenter des écarts
et des résultats non plausibles :
• les enfants de moins de 10 ans environ,
• les sportifs de haut niveau et les personnes pratiquant le bodybuilding,
• les femmes enceintes,
• les personnes fiévreuses, en dialyse, présentant des
symptômes d’oedèmes ou d’ostéoporose,
• les personnes sous traitement médical cardiovasculaire,
• les personnes prenant des médicaments vasodilatateurs ou vasoconstricteurs,
• les personnes présentant des écarts anatomiques
sérieux des jambes par rapport à leur taille (jambes
nettement courtes ou longues).
Réglage des données de l’utilisateur
Pour déterminer votre taux de graisse corporelle ainsi
que les autres paramètres, il vous faut enregistrer vos
données personnelles.
Le pèse-personne dispose de 10 emplacements
de mémoire utilisateurs, sur lesquels vous pouvez par
exemple enregistrer et de nouveau appeler les réglages
personnels pour les membres de votre famille.
En outre, vous disposez d’un mode « INVITE » (dans la
mesure où il est activé), dont les réglages et les valeurs
mesurées ne sont pas enregistrés.
En mode Invité, les fonctions Mémoire, Affichage
de la tendance et Moyenne ne sont pas disponibles.
• Pressez la touche [SET].
• Sélectionnez « CHANGER_UTILIS. » et confirmez
avec la touche [SET].
• Sélectionnez avec la touche de réglage [ , ] la
personne et confirmez avec la touche [SET].
• Si des réglages sont déjà existants sur l’emplacement de mémoire, ceux-ci sont affichés sur l’afficheur. Si aucun réglage n’est présent, il s’agit d’un
emplacement de mémoire utilisateur libre.
• Vous pouvez alors procéder aux réglages suivants :
Données de
Valeurs de réglage
l’utilisateur
Sexe
homme , femme
Taille
100 à 250 cm
(3‘-03“ à 8‘-02“)
Date de naissance Année, mois, jour
8. Réglage
Entrez vos données personnelles avant d’utiliser le
pèse-personne.
Réglage de l’appareil
• Pressez en mode veille (date et heure affichées) la
touche [SET].
• Sélectionnez avec la touche de réglage [ ] la commande de menu « REGLER_ APPAREIL » et confirmez avec la touche [SET].
• Sélectionnez avec les touches de réglage [ , ] le
symbole de langue (D, GB, F, E, I) et confirmez avec
la touche [SET].
29
Données de
l’utilisateur
Niveau d’activité
Poids cible
Valeurs de réglage
4 Menu
Aperçu de la mesure actuelle
Affichage de la tendance
Représentation détaillée de la graisse corporelle, du taux de masse musculaire dans la
partie supérieure / inférieure du corps
Mem Mesures enregistrées 1 – 30 max.
Valeurs moyennes
Kcal Consommation de calories
5
Marquage de la commande de menu actuelle.
1à5
réglable, en kg (pour représentation de la courbe graphique)
• Pour modifier des valeurs : Pressez la touche [ , ]
ou maintenez-la enfoncée pour un défilement rapide.
• Pour saisir des données : presser la touche [SET].
Après avoir entré toutes les données, le pèse-personne
est prêt pour la pesée. Si aucune autre action n’a lieu,
il s’éteint automatiquement.
10. Utilisation
Niveaux d’activité
Mesure du poids
Le niveau d’activité est sélectionné en fonction des
perspectives à moyen et à long terme.
La graisse corporelle et les autres valeurs peuvent seulement être déterminées après l’entrée de tous les paramètres.
Niveau
Activité physique
d’activité
1
Aucune.
2
Réduite : peu d’efforts physiques et efforts limités (promenade, jardinage facile,
exercices de gymnastique par ex.).
3
Moyenne : efforts physiques au moins
2 à 4 fois par semaine, pendant 30 minutes.
4
Intense : efforts physiques au moins 4 à
6 fois par semaine, pendant 30 minutes.
5
Très intense : efforts physiques très prononcés, entraînement intense ou travail
physique dur quotidiennement, au moins
pendant 1 heure.
1. Mise en marche du pèse-personne
• Pressez la touche [ ] sur l’unité de commande.
0.0 kg apparaît à l’affichage.
Le pèse-personne est à présent prêt pour la pesée.
9. Affichages
Au terme de la mesure, le résultat de mesure est affiché pendant env. 10 secondes.
2. Pesée (sans diagnostic)
Posez le pèse-personne sur un support stable et
plan. Une surface d’assise solide constitue la condition préalable pour une mesure correcte.
• Montez sur le pèse-personne. L’affichage [3] du pèsepersonne s’allume en vert.
Restez tranquille en veillant à bien
répartir votre poids sur les deux
jambes. Placez vos jambes le plus
possible vers l’extérieur, sans faire
basculer le pèse-personne.
Si l’unité de commande est tenue dans la main,
son poids (300 grammes) est déduit automatiquement.
Aperçu
1
5
Lorsque vous descendez du pèse-personne, celuici s’éteint automatiquement au bout de quelques secondes. L’affichage [3] s’éteint. La mesure n’est pas
enregistrée.
Exécution d’une analyse
4
3
2
1 Heure, date, utilisateur
2 Poids avec pondération
Poids
3 Données d’analyse (en partie avec pondération)
BF
Graisse corporelle
Eau
Taux de masse musculaire,
Masse osseuse
1. Mise en marche du pèse-personne
• Pressez la touche [ ] sur l’unité de commande.
0.0 kg apparaît à l’affichage.
30
2. Diagnostic
• Après la mise en marche, sélectionnez votre utilisateur 1 – 10 en pressant la touche de droite [ ]. A cet
égard, presser le cas échéant de façon répétée sur
la touche.
• Pressez la touche [SET] ou attendez pendant 3 secondes. L’écran de mesure apparaît à l’affichage.
3. Résultat
La vue d’ensemble est affichée.
Pour l’interprétation, voir Interprétation des résultats,
page 33.
La valeur de mesure est mémorisée automatiquement
lors de la mise hors tension. Si plusieurs mesures sont
effectuées dans une même journée, seule la dernière
mesure est enregistrée.
Si vous activez l’utilisateur « INVITÉ », vous devez entrer à nouveau les données de l’utilisateur avant
chaque mesure. En mode « INVITÉ », les données de
l’utilisateur et les valeurs mesurées ne sont pas enregistrées. Vous avez la possibilité d’activer ou désactiver le mode « INVITÉ », voir page 29.
Analyse des valeurs mesurées au terme de
la mesure
• Placez-vous maintenant pieds nus sur le pèse-personne et maintenez fermement l’unité de commande
dans vos mains. (Si l’unité de commande est tenue
dans la main, son poids (300 grammes) est déduit
automatiquement).
Représentation graphique
Poids
• Pressez la touche Menu [ ] sur l’unité de commande pour commuter entre les différents sousmenus ou mémoires.
L’évolution du poids de votre corps est représentée de
mesure en mesure. Les mesures les plus récentes sont
ajoutées à droite. La ligne de référence représente le
poids cible.
• Maintenez l’unité de commande avec la partie inférieure du pouce sur les électrodes avant et serrez
fermement les électrodes arrière avec les doigts.
Vous devez définir un poids cible pour pouvoir représenter la courbe du poids du corps, voir page 30.
Vous pouvez modifier à tout moment le poids cible.
Graisse corporelle
• Accédez avec la touche [ , ] à la courbe des valeurs de graisse corporelle. L’évolution de la valeur
de votre graisse corporelle est représentée de mesure en mesure. La ligne de référence représente la
valeur moyenne de l’ensemble des mesures de
graisse corporelle ; les barres indiquent si les valeurs
ont évolué vers le haut ou vers le bas.
Après la pesée, il s’ensuit la mesure de l’impédance
pour l’analyse. La partie supérieure du corps au
moyen des 4 électrodes de l’unité de commande, la partie inférieure du corps au moyen
des 4 électrodes du pèse-personne. Cet état
est signalé par le symbole du corps parcouru
par du courant.
Important :
Restez tranquille en veillant à bien répartir votre poids
sur les deux jambes. Remarque : il ne doit pas y avoir
de contact avec la peau entre les deux pieds, jambes,
mollets et cuisses. La mesure ne peut pas être correctement effectuée si tel est le cas. Pour éviter cela,
enfilez par exemple un pantalon léger.
31
Valeurs moyennes
• Pressez la touche [ ] sur l’unité de commande pour
accéder à la Moyenne.
L’ensemble des valeur moyennes à partir des mesures
enregistrées sont affichées.
Partie supérieure / partie inférieure du corps
Graisse corporelle
• Pressez la touche [ ] sur l’unité de commande pour
accéder à la vue détaillée Partie supérieure / partie
inférieure du corps.
Le résultat de mesure actuel pour la graisse corporelle
est représenté pour le corps entier et de façon répartie
en partie supérieure du corps / partie inférieure du corps.
En haut est affichée la date de la première et de
la dernière mesure.
Kcal Consommation de calories
Masse musculaire
• Accédez avec la touche [ , ] à la représentation
détaillée de la masse musculaire.
• Pressez la touche [ ] sur l’unité de commande pour
accéder à Kcal. Le métabolisme basal BMR théorique calculé ainsi que le taux métabolique actif AMR
sont représentés en Kcal.
Seuls les résultats de mesure actuels peuvent être
affichés, pas les anciennes mesures enregistrées.
Appel de la mémoire des valeurs mesurées
à partir du mode veille
Mem Affichage des valeurs de mémoire
• Pressez la touche [ ] sur l’unité de commande pour
accéder à la mémoire.
La vue d’ensemble est affichée. En haut est affichée
la date de la mesure, ainsi que le numéro d’emplacement de mémoire (03-03) p. ex. le troisième = dernier
emplacement de mémoire parmi un total de 3 emplacements de mémoire occupés.
Lors de l’extinction du pèse-personne, les valeurs mesurées sont enregistrées automatiquement après une
analyse. 30 emplacements de mémoire sont disponibles pour chaque utilisateur.
• Allumez l’unité de commande avec la touche [ ].
• Sélectionnez votre utilisateur en pressant la touche
[ ]. A cet égard, presser le cas échéant de façon
répétée sur la touche.
• Pressez la touche [ , ] sur l’unité de commande
pour naviguer à travers les valeurs d’analyse, ou
] pour accéder aux sous-menus
pressez [ ,
(p. ex. commutation BF, ).
Suppression de données
• Naviguez avec la touche [
cements de mémoire.
,
1. Supprimer un utilisateur avec tous les réglages
et valeurs de mémoire
• Après la mise en marche, sélectionnez votre utilisateur en pressant la touche [ ]. A cette fin, pressez
la touche, le cas échéant de façon répétée, et confirmez avec [SET].
• Lorsque l’affichage 0.0 apparaît, pressez la touche
[SET] pendant 5 secondes pour supprimer l’utilisateur.
• Sélectionnez avec les touches [ , ] « Oui » et
confirmez avec la touche [SET]. Si vous ne souhai-
] à travers les empla-
32
tez pas supprimer l’utilisateur, sélectionnez « Non »
et confirmez avec la touche [SET].
Homme
Toutes les valeurs et tous les réglages enregistrés
de cet utilisateur sont supprimés.
Age
10 –14
15 –19
20 – 29
30 – 39
40 – 49
50 – 59
60 – 69
70 –100
2. Supprimer une valeur de mémoire isolée d’un
utilisateur
• Sélectionnez dans la mémoire des valeurs mesurées
« Mem » une valeur mesurée, puis pressez brièvement la touche [SET] sur l’unité de commande pour
supprimer la valeur de mémoire affichée. Vous pouvez également effectuer cette opération directement
après la mesure.
• Sélectionnez avec les touches [ , ] « Oui » et
confirmez avec la touche [SET]. Si vous ne souhaitez pas supprimer la valeur, sélectionnez « Non » et
confirmez avec la touche [SET].
Faible
<11 %
<12 %
<13 %
<14 %
<15 %
<16 %
<17 %
<18 %
Normal
11–16 %
12 –17 %
13 –18 %
14 –19 %
15 – 20 %
16 – 21 %
17 – 22 %
18 – 23 %
Elevé
16,1– 21 %
17,1– 22 %
18,1– 23 %
19,1– 24 %
20,1– 25 %
21,1– 26 %
22,1– 27 %
23,1– 28 %
Obésité
>21,1 %
>22,1 %
>23,1 %
>24,1 %
>25,1 %
>26,1 %
>27,1 %
>28,1 %
Faible
<16 %
<17 %
<18 %
<19 %
<20 %
<21 %
<22 %
<23 %
Normal
16 – 21 %
17 – 22 %
18 – 23 %
19 – 24 %
20 – 25 %
21– 26 %
22 – 27 %
23 – 28 %
Elevé
21,1– 26 %
22,1– 27 %
23,1– 28 %
24,1– 29 %
25,1– 30 %
26,1– 31 %
27,1– 32 %
28,1– 33 %
Obésité
>26,1 %
>27,1 %
>28,1 %
>29,1 %
>30,1 %
>31,1 %
>32,1 %
>33,1 %
Femme
Age
10 –14
15 –19
20 – 29
30 – 39
40 – 49
50 – 59
60 – 69
70 –100
3. Supprimer toutes les valeurs de mémoire d’un
utilisateur
• Appelez la mémoire des valeurs mesurées « Mem »
et pressez la touche [SET] sur l’unité de commande
pendant env. 3 secondes pour supprimer toutes les
valeurs.
• Sélectionnez avec les touches [ , ] « Oui » et
confirmez avec la touche [SET]. Si vous ne souhaitez rien supprimer, sélectionnez « Non » et confirmez
avec la touche [SET].
Chez les sportifs, les valeurs sont souvent plus basses.
En fonction du type de sport pratiqué, de l’intensité de
l’entraînement et de la constitution physique de la personne, il se peut que les taux obtenus soient encore
inférieurs aux taux de référence. Des valeurs extrêmement basses peuvent cependant représenter des
risques pour la santé.
Extinction du pèse-personne (mode veille)
• Attendez que l’afficheur se soit éteint de lui-même
après env. 45 secondes ou pressezla touche [ ]
sur l’unité de commande pour éteindre l’afficheur
manuellement.
Taux de masse hydrique
La date et l’heure restent visibles.
Le taux de masse hydrique (en %) se situe normalement dans les plages suivantes :
Mode économie d’énergie
Homme
• Pressez simultanément pendant 10 secondes les
touches de menu et . L’affichage de la date et
de l’heure disparaît.
• Pour la remise en marche, pressez et maintenez simultanément les touches de menu et pendant
10 secondes.
Age
10 –100
Mauvais
<50 %
Bon
50 – 65 %
Très bon
>65 %
Mauvais
<45 %
Bon
45 – 60 %
Très bon
>60 %
Femme
11. Interprétation des résultats
Taux de graisse corporelle
Age
10 –100
Les valeurs de graisse corporelle sont affichées sur
l’afficheur et interprétées dans le diagramme à barres.
Les taux de graisse corporelle suivants (en %) sont
donnés à titre indicatif (consultez votre médecin pour
de plus amples informations).
La graisse corporelle contient relativement peu d’eau.
C’est pourquoi, pour des personnes avec un taux de
graisse corporelle élevé, le taux de masse hydrique
peut se situer en dessous des données de référence.
Par contre, chez les personnes pratiquant des sports
d’endurance, le taux de masse hydrique peut être su33
périeur aux données de référence en raison d’un taux
de graisse corporelle inférieur et d’un taux de masse
musculaire supérieur.
Le taux de masse hydrique déterminé sur ce pèse-personne ne permet pas de tirer de conclusions d’ordre
médical sur la rétention d’eau dans les tissus due à
l’âge. Consultez le cas échéant votre médecin. De manière générale, il est préférable que le taux de masse
hydrique soit élevé.
de certains facteurs (poids, taille, âge, sexe). Aucune
directive ni recommandation n’existent en la matière.
Attention
ne confondez pas la masse osseuse et la densité osseuse. Seul un examen médical (tomographie, échographie, par ex.) permet de déterminer la densité osseuse. Par conséquent, ce pèse-personne ne permet
pas de tirer de conclusions sur les modifications et la
dureté des os (ostéoporose, par ex.).
Taux de masse musculaire,
Le taux de masse musculaire (en %) se situe normalement dans les plages suivantes :
BMR
Le métabolisme basal (BMR = Basal Metabolic Rate)
est la quantité d’énergie, dont le corps a besoin pour
le maintien de ses fonctions de base lorsqu’il est complètement au repos (p. ex. lorsqu’on est au lit pendant
24 heures). Cette valeur dépend pour l’essentiel du
poids, de la taille et de l’âge. Sur le pèse-personne impédancemètre, elle est indiquée par l’unité kcal/jour et
est calculée sur la base de l’équation Harris Benedict,
reconnue au plan scientifique.
Le corps a absolument besoin de cette quantité d’énergie, qui doit lui être restituée sous la forme d’aliments.
Si vous consommez moins d’énergie pendant une durée prolongée, cela peut avoir des conséquences préjudiciables à votre santé.
Homme
Age
10 –14
15 –19
20 – 29
30 – 39
40 – 49
50 – 59
60 – 69
70 –100
Faible
<44%
<43%
<42%
<41%
<40%
<39%
<38%
<37%
Normal
44 – 57 %
43 – 56 %
42 – 54 %
41– 52 %
40 – 50 %
39 – 48 %
38 – 47 %
37 – 46 %
Elevé
>57 %
>56 %
>54 %
>52 %
>50 %
>48 %
>47 %
>46 %
Femme
Age
10 –14
15 –19
20 – 29
30 – 39
40 – 49
50 – 59
60 – 69
70 –100
AMR
Faible
<36%
<35%
<34%
<33%
<31%
<29%
<28%
<27%
Normal
36 – 43 %
35 – 41 %
34 – 39 %
33 – 38 %
31– 36 %
29 – 34 %
28 – 33 %
27 – 32 %
Le taux métabolique actif (AMR = Active Metabolic
Rate) représente la quantité d’énergie dont le corps en
activité a besoin quotidiennement. Les besoins énergétiques d’une personne augmentent en fonction de son
activité physique ; sur le pèse-personne impédancemètre, celle-ci est déterminée à l’aide du niveau d’activité entré (1 à 5).
Pour maintenir le poids actuel, il faut que l’énergie dépensée soit restituée au corps sous forme d’aliments
et de boissons. Si, pendant une assez longue période,
le corps dépense plus d’énergie qu’il ne lui en est
restitué, il contrebalance cette différence en puisant
dans les réserves de graisse accumulées et le poids
diminue. Au contraire, si l’énergie fournie au corps est
supérieure au taux métabolique actif (AMR) déterminé
pendant une assez longue période, il ne peut consommer ce surplus d’énergie qu’il emmagasine sous forme
de graisse et le poids augmente.
Elevé
>43 %
>41 %
>39 %
>38 %
>36 %
>34 %
>33 %
>32 %
Masse osseuse
Tout comme le reste du corps, notre squelette est soumis à des phases naturelles de croissance, de dégradation et de vieillissement. La masse osseuse augmente
rapidement au cours de l’enfance pour atteindre son
maximum à l’âge de 30 à 40 ans. Avec l’âge, elle diminue alors progressivement. Il est possible de lutter en
partie contre cette dégénérescence par une alimentation saine (calcium et vitamine D surtout) et par un exercice physique régulier. Une musculation adaptée vous
permettra en plus de stabiliser le support osseux. Ce
pèse-personne n’indique pas la teneur en calcium du
squelette mais détermine le poids de tous les constituants des os (matières organiques, matières inorganiques et eau). La masse osseuse n’est guère soumise
à des influences, mais elle varie légèrement sous l’effet
Corrélation des résultats dans le temps
Seule compte la tendance à long terme. Des
écarts de poids de courte durée enregistrés en l’espace de quelques jours ne sont généralement dus qu’à
une simple perte de liquides.
L’interprétation des résultats dépend des modifications
du poids d’ensemble et des pourcentages de graisse
corporelle, de masse hydrique et musculaire ainsi que
34
13. Remplacement des piles
de la durée de ces changements. Il faut distinguer les
modifications rapides (de l’ordre de quelques jours) des
modifications à moyen terme (de l’ordre de quelques
semaines) et à long terme (plusieurs mois).
La règle générale peut être la suivante : les modifications
de poids à court terme représentent presque exclusivement des changements de la teneur en eau, alors que
les modifications à moyen et à long terme peuvent aussi
concerner le taux de graisse et de masse musculaire.
• Si votre poids diminue à court terme alors que le taux
de graisse corporelle augmente ou reste stable, vous
n’avez perdu que de l’eau, par exemple suite à un
entraînement, une séance de sauna ou un régime
visant uniquement à une perte de poids rapide.
• Si votre poids augmente à moyen terme, alors que le
taux de graisse corporelle diminue ou reste stable, il
se peut au contraire que votre masse musculaire ait
augmenté, ce qui est précieux.
• Si votre poids et votre taux de graisse corporelle
diminuent simultanément, cela signifie que votre régime fonctionne : vous perdez de la graisse.
• L’activité physique, les séances de remise en forme
ou de musculation sont de parfaits alliés pour votre
régime. Ils vous permettent d’augmenter votre taux
de masse musculaire à moyen terme.
• Il ne faut pas additionner la graisse corporelle, la
masse hydrique ou musculaire (le tissu musculaire
contient aussi des constituants de la masse hydrique).
L’unité de commande est pourvue d’un affichage de
changement de pile. Le symbole
apparaît à l’affichage si les piles de l’unité de commande ou le symbole si les piles du pèse-personne sont trop faibles.
Dans ce cas, les piles doivent être remplacées.
Remarque
• Utilisez pour chaque changement de piles, des piles
de même type, de même marque et de même capacité.
• Remplacez systématiquement toutes les piles en
même temps.
• N’utilisez pas d’accumulateurs rechargeables.
• Utilisez des piles sans métal lourd.
14. Nettoyage et entretien de
l’appareil
La précision des valeurs mesurées et la durée de vie
de l’appareil dépendent d’un maniement soigné. Nettoyez de temps en temps l’appareil.
Utilisez pour le nettoyage un chiffon humide, sur lequel vous pouvez appliquer au besoin un peu de produit vaisselle. N’utilisez pas de produits de nettoyage
agressifs et n’immergez jamais l’appareil dans l’eau.
Attention
12. Transfert des valeurs mesurées
vers un PC / HealthManager /
EasyFit
• N’utilisez en aucun cas de dissolvants ou produits
de nettoyage agressifs !
• N’immergez en aucun cas l’appareil !
• Ne nettoyez pas l’appareil dans le lavevaisselle !
Configuration requise :
Windows 7, Windows Vista, Windows XP SP3
15. Elimination
Les piles usagées ne doivent pas être jetées avec
les ordures ménagères. En tant que consommateur /
consommatrice, la législation vous impose de restituer les piles usagées. Vous pouvez déposer les piles
usagées dans les points de collecte locaux réservés
à cet usage ou dans tout magasin vendant des piles
de ce type.
HealthManager :
Gestion de la santé en association avec les tensiomètres et lecteurs de glycémie sanguine Beurer.
EasyFit :
Analyse des données d‘entraînement en association
avec les cardiofréquencemètres Beurer.
Étapes à suivre :
• Vous trouverez les informations de téléchargement
et d‘installation dans la rubrique Téléchargement du
site http://www.beurer.com
• Établissez la connexion USB.
Remarque
Ce pictogramme se trouve sur les piles à
substances nocives :
Pb = pile contenant du plomb,
Cd = pile contenant du cadmium,
Hg = pile contenant du mercure.
Afin de respecter l’environnement, ne jetez pas le pèsepersonne ni les piles dans les ordures ménagères, une
fois ceux-ci devenus inutilisables. L’élimination doit
se faire par le biais des points de collecte compétents
dans votre pays.
USB
• Veuillez suivre les consignes lors de l‘installation du
logiciel.
35
Pas de mesure possible
Respectez les réglementations locales en matière d’élimination de matériaux.
Eliminez l’appareil conformément à la directive
européenne 2002/96/CE-WEEE (Waste Electrical and Electronic Equipment) relative aux appareils électriques et électroniques usagés.
Pour toute question, adressez-vous aux collectivités
locales responsables de l’élimination et du recyclage
de ces produits.
Causes possibles
d’erreurs
L’unité de commande n’a pas été
activée avant la
montée sur le pèsepersonne.
La liaison radio
entre le pèse-personne et l’unité de
commande est en
dérangement.
L’affichage suivant apparaît si le pèse-personne détecte une erreur lors de la mesure.
Remède
Charger uniquement jusqu’à
150 kg.
Remplacez les piles
(voir pages 27 et
35).
Transférez les valeurs mesurées
vers le PC, voir
page 35.
Recommencez la
mesure pieds nus.
Humidifiez si besoin légèrement la
plante des pieds.
Eliminez si besoin
les callosités de la
plante des pieds.
Recommencez la
mesure pieds nus
ou humidifiez si
besoin légèrement
la plante des pieds.
Modifiez éventuellement votre niveau
d’activité réglé.
Remplacez les piles
(voir page 27).
ERREUR DE
CONT.!
La résistance
électrique entre
les électrodes et
la plante de pied
est trop élevée (p.
ex. en cas de forte
callosité).
Plage de
mesure
La mesure BIA a
certes bien fonctionné, mais le
taux de graisse se
situe en dehors de
la plage mesurable
(inférieur à 5 % ou
supérieur à 50 %).
Les piles de l’unité
de commande
sont entièrement
déchargées.
Les piles de l’unité Contrôlez la polade commande ne rité correcte, (voir
sont pas insérées page 27).
correctement.
Pas
d’affichage
Enclencher tout d’abord l’unité
de commande avant la mesure.
Attendre le cas échéant 30 secondes, puis répéter la mesure.
Réintroduisez les piles du pèsepersonne et de l’unité de commande.
Eloignez-vous davantage des
sources électromagnétiques
suivantes : pylônes pour lignes
à haute tension, systèmes de
télévision et informatiques, appareils de mise en forme, téléphones mobiles, stations météo.
Réduisez la distance entre le
L’unité de commande est trop éloi- pèse-personne et l’unité de
gnée du pèse-per- commande ; la distance maximale est de 2 mètres.
sonne.
Remplacez les piles (voir
Les piles du pèsepersonne sont vides page 27) et vérifiez la polarité.
ou mal introduites.
16. Que faire en cas de
problèmes ?
Affichage
Cause
SURCHARGE ! La force portante
maximale de
150 kg a été dépassée.
BATTERIE_
Les piles sont
FAIBLE
presque déchargées.
MEM._PLEINE 30 mesures sont
à présent enregistrées.
Remède
Mesure de poids erronée
Causes possibles Remède
d’erreurs
Le zéro du pèseper- Activez brièvement le pèsesonne est incorrect. personne au pied avant la mesure, jusqu’à ce que l’afficheur
indique l’état de fonctionnement .
Attendre env. 5 secondes et
répéter la mesure. Pour votre
information : Etant donné que
vous montez immédiatement
sur le pèse-personne en utilisation normale, le pèse-personne
mémorise le zéro à l’extinction
du pèse-personne (lorsque l’affichage de l’état de fonctionnement
disparaît).
Poser le pèse-personne sur un
Le pèse-personne
repose sur une mo- sol plan et stable.
Placez vos jambes le plus posquette.
sible vers l’extérieur, sans faire
basculer le pèse-personne.
36
17. Caractéristiques techniques
Dimensions du pèse-personne
Piles du pèse-personne
Piles de l’unité de commande
Radiotransmission
Plage de mesure
Incréments d’affichage poids,
masse osseuse
Incréments d’affichage taux
de graisse corporelle, taux de
masse hydrique, taux de masse
musculaire
Incréments d’affichage BMR,
AMR
330 x 330 x 41 mm
3 x 1,5 V type AA
3 x 1,5 V type AA
433 MHz
5 kg à 150 kg
100 g
0,1 %
1 Kcal
Sous réserve de modifications techniques.
Le pèse-personne est conforme à la directive
2004/108/CE + compléments.
37
ESPAÑOL
Índice
El análisis se basa en el acreditado principio B.I.A.
(Análisis de la Impedancia Bioeléctrica, véase „El principio de medición“, página 41). En este análisis, la
báscula utiliza, en lugar de una frecuencia como es habitual, dos frecuencias distintas para determinar con
exactitud la resistencia eléctrica (impedancia).
Asimismo, se ha optimizado el contacto eléctrico con
el cuerpo gracias a 4 electrodos de mano y 4 electrodos de pie con el fin de conseguir una mayor precisión
en la medición y, por consiguiente, un mejor análisis.
Los valores de medición se envían por radiotransmisión con un alcance de hasta 2 metros. Los ajustes se
introducen fácilmente gracias a una innovadora guía
de menú y se visualizan en una pantalla de gran formato en 5 idiomas. Para ello, la pantalla puede permanecer sobre la báscula, colocarse por separado o
fijarse a la pared.
Para un análisis a largo plazo de los valores, los datos
pueden guardarse en el ordenador utilizando el cable
USB y el software de ordenador incluidos en el volumen de suministro. La báscula se convierte en su entrenador personal.
La báscula presenta las siguientes funciones:
• Medición de peso (en 100 g).
• Cálculo de la proporción de grasa y agua corporales
así como de la masa muscular (en 0,1%), la masa
ósea (en 100 g), la tasa de metabolismo basal y la
tasa de metabolismo activo (en Kcal).
• Medición de la grasa corporal y la masa muscular
por separado de la parte superior e inferior del cuerpo con visualización de las mediciones parciales.
• Diagrama del peso y la grasa corporal.
• Visualización de las últimas 30 mediciones de 10
usuarios.
• Función de análisis único para invitados.
• Fecha y hora en el modo standby.
1. Introducción ......................................................38
2. Aclaración de los símbolos ...............................38
3. Indicaciones de seguridad ................................39
4. Descripción del aparato ....................................39
5. Puesta en marcha .............................................40
6. Montaje del panel de mando .............................40
7. Información .......................................................41
8. Configuración ....................................................42
9. Indicaciones en pantalla ....................................43
10. Manejo ...............................................................43
11. Evaluación de los resultados .............................46
12. Transferencia de los valores de medición
a un ordenador / HealthManager / EasyFit .........48
13. Cambio de pilas ................................................48
14. Limpieza y cuidado del aparato ........................48
15. Eliminación ........................................................48
16. Resolución de problemas .................................48
17. Características técnicas ....................................49
Volumen de suministro
•
•
•
•
•
•
•
Báscula para diagnóstico
Panel de mando desmontable con pantalla
Soporte para la pared
Juego de montaje para montaje en la pared
3 x 1,5 V tipo AA (báscula)
3 x 1,5 V tipo AA (panel de mando)
Cable USB
Estimada clienta, estimado cliente:
Nos alegramos de que haya elegido un producto de
nuestra serie. Nuestro nombre es sinónimo de productos de calidad de primera clase sometidos a un riguroso control en los ámbitos del calor, el peso, la tensión
arterial, la temperatura corporal, el pulso, las terapias
no agresivas, los masajes y el aire.
Lea atentamente estas instrucciones para el uso, consérvelas para su posterior utilización, póngalas a disposición de otros usuarios y tenga en cuenta las indicaciones.
2. Aclaración de los símbolos
En estas instrucciones de uso se utilizan los símbolos siguientes.
Atentamente,
Su equipo Beurer
1. Introducción
Advertencia
Nota de advertencia sobre
peligro de lesiones o riesgopara su salud.
Atención
Indicación de seguridad sobre
posibles daños en el aparato/
accesorios.
Aviso
Aviso sobre informaciones importantes.
Funciones del aparato
Con esta báscula para diagnóstico hace una contribución decisiva a su salud. La báscula sirve para pesar y analizar sus datos personales de fitness. Está
destinada exclusivamente al uso personal en el ámbito privado.
38
3. Indicaciones de seguridad
• Proteja el dispositivo frente a los golpes, la humedad, el polvo, los productos químicos, los cambios
bruscos de temperatura y la proximidad a las fuentes de calor (hornos, radiadores).
• Asegúrese de que no entre líquido en la báscula. No
sumerja la báscula en agua. No la lave nunca con
agua.
• No coloque ningún objeto encima de la báscula si
no la está utilizando.
• No presione las teclas demasiado fuerte o con objetos afilados.
• No exponga la báscula a temperaturas elevadas o
a campos electromagnéticos de gran intensidad (p.
ej., teléfonos móviles).
• Solo el servicio de asistencia al cliente o los comerciantes autorizados pueden realizar reparaciones en
el aparato. Antes de una reclamación, compruebe
primero las pilas y cámbielas si fuera necesario.
• Si aún tiene preguntas sobre la utilización de nuestro
aparato, póngase en contacto con el vendedor o el
servicio de asistencia al cliente.
• Todas las básculas cumplen la Directiva CE 2004/108/
EC. Si aún tiene preguntas sobre la utilización de
nuestro aparato, póngase en contacto con el vendedor o el servicio de asistencia al cliente.
Lea atentamente estas instrucciones de uso, consérvelas para su posterior utilización, póngalas a disposición
de otros usuarios y tenga en cuenta las indicaciones.
Indicaciones de seguridad
• Las personas con implantes médicos (como
marcapasos) no pueden utilizar la báscula.
De lo contrario se puede ver dañado su funcionamiento.
• No utilizar durante el embarazo.
• No se coloque sobre el borde más exterior de la báscula: peligro de vuelco.
• Mantenga a los niños alejados del material de embalaje (peligro de asfixia).
Indicaciones para el manejo de pilas
• Las pilas pueden representar un grave riesgo para la
salud en caso de que se traguen. Mantenga las pilas
y la báscula fuera del alcance de los niños pequeños.
En caso de tragarse una pila, acuda de inmediato al
médico.
• Cambie las pilas que tengan poca carga con la debida antelación.
• Cambie siempre todas las pilas al mismo tiempo y
utilice pilas del mismo tipo.
• Las pilas no se pueden cargar o reactivar por otros
medios, desmontar, echar al fuego o poner en cortocircuito.
• Las fugas en las pilas pueden ocasionar daños en el
aparato. Si no va a utilizar el aparato durante un periodo prolongado, retire las pilas del compartimento.
• Si una pila se derrama, póngase guantes de protección y limpie el compartimento de las pilas con un
paño seco.
• Las pilas pueden contener sustancias nocivas para
la salud y el medio ambiente. Elimínelas según lo establecido en la normativa legal correspondiente. No
tire nunca las pilas a la basura doméstica normal.
4. Descripción del aparato
Vista general
2
1
3
4
Indicaciones generales
1
2
3
4
• El aparato es de uso únicamente privado, no se puede utilizar con fines médicos o comerciales.
• Tenga en cuenta que es posible que existan tolerancias de medición ya que no se trata de una báscula
apropiada para el empleo médico profesional.
• La báscula soporta un peso máximo de 150 kg
(330 libras, 24 St).
• La báscula viene configurada en „cm“ y „kg“. Para
configurar las unidades, le rogamos que tenga en
cuenta lo expuesto en el capítulo „Configuración“.
• Coloque la báscula sobre una superficie recta y estable; esta es una condición previa para garantizar
una medición correcta.
39
Electrodos de pie, pie izquierdo
Panel de mando con pantalla
Indicador del estado de funcionamiento
Electrodos de pie, pie derecho
Panel de mando con pantalla
5
Báscula
3 x AA
6
7
8
9
10
11
12
Si la báscula o el panel de mando no muestra ninguna función, retire las pilas por completo y colóquelas
de nuevo.
Para consultar las indicaciones relativas al cambio de
pilas, véase la página 48.
5
6
5
Electrodos de contacto, mano izquierda
6
Electrodos de contacto, mano derecha
7 set Tecla de ajuste, confirmar las entradas
Menú: tecla para subir
8
Menú: tecla para bajar
9
Tecla ON
10
Configuración: tecla para subir
11
Configuración: tecla para bajar
12
Colocación de la báscula
Coloque la báscula sobre una superficie firme y plana
para obtener una medición correcta.
6. Montaje del panel de mando
Análisis con panel de mando
Colocación del panel de mando
Aviso
El panel de mando puede sostenerse en la mano, colocarse sobre una superficie lisa o permanecer sobre
la báscula.
Inserte la carga (en el lado trasero de la báscula) como
se muestra en la figura para colocar encima el panel
de mando. La carga se compone de un imán que fija
el panel de mando sobre la báscula.
Sujeción con ambas manos para
garantizar un contacto seguro con
los electrodos (5) y (6) en el lado delantero y trasero.
5. Puesta en marcha
Colocación de las pilas
Montaje en la pared
Extraiga las pilas del embalaje e introdúzcalas, observando la polaridad correcta, en la báscula y en el
panel de mando.
Observe el gráfico del compartimento de la pilas. Una
vez insertadas las pilas, la indicación del año parpadea, véase la página 42.
El panel de mando puede fijarse a la pared con el juego de montaje (soporte para pared, tornillos y tacos).
Para realizar el montaje utilice el juego de montaje suministrado e instale el soporte para pared como se indica en la figura. Utilice tacos adecuados en función
de la superficie.
Panel de mando
3 x AA
• Utilice el soporte de pared como plantilla para marcar los orificios.
40
7. Información
• Con una broca de 6 mm, taladre en la pared 2 orificios de aprox. 40 mm de profundidad a una distancia horizontal de 36 mm entre sí.
• Introduzca los tacos.
• Atornille el soporte de pared con los dos tornillos.
Compruebe que esté firmemente montado.
• A continuación, deslice el panel de mando sobre el
soporte de forma que las guías del soporte de pared
se enganchen paralelamente a las guías del panel de
mando.
El principio de medición
Esta báscula funciona de acuerdo con el principio del
B.I.A., análisis de impedancia bioeléctrica, el cual permite calcular las proporciones corporales en cuestión
de segundos mediante una descarga eléctrica imperceptible, completamente inofensiva e inocua. Con esta
medición de la resistencia eléctrica (impedancia) y el
cálculo de constantes o valores individuales (edad, estatura, sexo, actividad), se pueden determinar la proporción de grasa corporal y otras magnitudes corporales.
El tejido muscular y el agua tienen una buena conductividad eléctrica y por ello poca resistencia. Los huesos
y el tejido adiposo por el contrario poseen una conductividad limitada ya que las células adiposas y los
huesos casi no conducen la electricidad debido a su
gran resistencia.
Además, esta báscula mide con dos frecuencias diferentes para obtener un cálculo más preciso de la
impedancia. Estas frecuencias diferentes ejercen una
influencia distinta sobre la membrana celular y el agua
corporal. Asimismo, se ha optimizado el contacto eléctrico con el cuerpo gracias a 4 electrodos de mano y
4 electrodos de pie con el fin de conseguir una mayor precisión en la medición y, por consiguiente, un
mejor análisis.
Con esta técnica de análisis tan sensible se pueden
obtener valores ligeramente diferentes cuando se repiten las mediciones. Esto se debe a variaciones que
se producen durante la medición de la impedancia (p.
ej., un contacto eléctrico diferente de los electrodos
con las manos y los pies o una distribución distinta del
agua en el cuerpo).
Tenga en cuenta que los valores determinados por la
báscula para diagnóstico sólo suponen una aproximación a los valores analíticos médicos reales del cuerpo.
Sólo un médico especialista puede determinar por medio de pruebas médicas (como la tomografía computerizada) los índices exactos de grasa y agua corporal
así como de masa muscular y ósea.
Mantenga el panel de mando por encima del soporte de pared contra la pared y, a continuación, deslice el panel de mando hacia abajo para facilitar la inserción.
• Deslice el panel de mando por todo el soporte. Compruebe que el panel de mando esté bien montado
en paralelo al soporte.
Ajuste de la inclinación
El panel de mando puede inclinarse sobre el soporte
de pared con el fin de adaptar la inclinación. Un bloqueo impide que el panel de mando pueda soltarse
del soporte de pared cuando se encuentra inclinado.
Para extraer el panel de mando del soporte de
pared, este debe inclinarse de nuevo totalmente hacia adelante.
Montaje en pared alternativo
También puede fijar el soporte en la pared utilizando
la tira doble adhesiva. Para ello, la superficie de la pared debe estar limpia y seca. Este montaje es apropiado para azulejos, cristal, plástico y muchas otras
superficies.
• Retire la lámina protectora de la tira adhesiva situada en la parte posterior del soporte para pared.
• Presione el soporte firmemente contra la pared.
• Compruebe que esté firmemente montado.
Métodos de medición
El análisis se puede efectuar de los modos siguientes:
• Parte superior del cuerpo: sujetar el panel de mando
con las manos y subirse a la báscula con zapatos.
• Parte inferior del cuerpo: dejar el panel de mando, p.
ej., sobre la báscula y subirse a la báscula descalzo.
• Parte superior e inferior del cuerpo: sujetar el panel
de mando con las manos y subirse a la báscula descalzo.
Después de haber fijado el soporte de pared con
tiras adhesivas, espere 1 hora como mínimo para utilizar el panel de mando.
En este manual se describe el análisis para la parte superior e inferior del cuerpo.
Si el panel de mando se sujeta en las manos durante el análisis, su peso se resta automáticamente.
41
Consejos generales
• Seleccione con las teclas de ajuste [ , ] si desea
activar o desactivar el modo „INVITADO“ y confirme
con la tecla [SET].
A continuación, la pantalla muestra los ajustes seleccionados en una vista general.
• Intente pesarse siempre a la misma hora (mejor por
la mañana) tras haber estado en el servicio, en ayunas y sin ropa para obtener resultados comparables.
• Importante para la medición: El cálculo de la grasa
corporal (parte inferior del cuerpo) solo se puede llevar a cabo descalzo y preferentemente con las plantas de los pies ligeramente húmedas. Las plantas de
los pies completamente secas o con muchas durezas pueden dar lugar a resultados poco satisfactorios ya que presentan una conductividad demasiado
limitada.
• Manténgase durante el proceso de medición erguido
y quieto.
• Espere algunas horas tras haber realizado un gran
esfuerzo físico.
• Espere aprox. 15 minutos después de levantarse
para que el agua corporal pueda distribuirse.
• Tenga en cuenta solo la tendencia a largo plazo. Por
lo general las diferencias de peso a corto plazo en el
transcurso de pocos días pueden deberse a la pérdida de líquido; sin embargo, el agua corporal desempeña un papel importante en el bienestar.
Ajuste de la fecha y la hora
• En modo standby (se visualizan la hora y la fecha),
pulse la tecla [SET].
• Seleccione el punto de menú „CONFIG._TIEMPO“
con la tecla de ajuste [ ] y confirme con la tecla
[SET].
• La indicación del año parpadea.
• Ajuste sucesivamente el año, el mes, el día así como
la hora en minutos y horas con las teclas de ajuste
[ , ].
• Confirme la introducción pulsando la tecla [SET].
Ajuste de los datos de usuario
Para poder determinar su proporción de grasa corporal y otros valores corporales, es necesario que guarde
los datos personales de usuario.
La báscula dispone de 10 posiciones de memoria de
usuario en las que puede guardar sus datos y los de,
por ejemplo, su familia, y a los que podrá acceder con
posterioridad.
Asimismo, dispone de un modo „INVITADO“ (si está
activado), cuyos ajustes y valores de medición no se
guardan.
Limitacziones
La determinación de la grasa corporal y el resto de valores puede dar resultados discordantes y poco fiables en:
• Niños menores de aprox. 10 años,
• Deportistas de competición y culturistas,
• Embarazadas,
• Personas con fiebre, en tratamiento de diálisis, con
síntomas de edemas u osteoporosis,
• Personas bajo tratamiento cardiovascular,
• Personas que toman medicación vasoconstrictiva o
vasodilatadora,
• Personas con grandes diferencias anatómicas en las
piernas en relación con su estatura (piernas demasiado cortas o largas).
El modo „INVITADO“ no dispone de las funciones
Memoria, Visualización de la tendencia y Valor medio.
• Pulse la tecla [SET].
• Seleccione „CAMB._USUARIO“ y confirme con la
tecla [SET].
• Seleccione el usuario con las teclas de ajuste [ ,
] y confirme con la tecla [SET].
• Si esta posición de memoria tiene ajustes guardados, estos se visualizarán en la pantalla. Si no presenta ajustes significa que esta posición de memoria
de usuario está libre.
• Ahora puede realizar los ajustes siguientes:
Datos de usuario Valores de ajuste
Sexo
hombre , mujer
Estatura
de 100 a 250 cm
(de 3‘-03“ a 8‘-02“)
Nacimiento
Año, mes, día
Actividad
de 1 a 5
Peso objetivo
ajustable, en kg (para la representación gráfica de la evolución)
8. Configuración
Introduzca sus datos antes de utilizar la báscula.
Config. Apto.
• En modo standby (se visualizan la hora y la fecha),
pulse la tecla [SET].
• Seleccione el punto de menú „CONFIG._APTO.“ con
la tecla de ajuste [ ] y confirme con la tecla [SET].
• Seleccione el símbolo del idioma (D, GB, F, E, I) con
las teclas de ajuste [ , ] y confirme con la tecla
[SET].
• Seleccione el símbolo de la unidad (kg, lb, st) con las
teclas de ajuste [ , ] y confirme con la tecla [SET].
• Seleccione el modo de Hora deseado (24 h o 12 h)
con las teclas de ajuste [ , ] y confirme con la
tecla [SET].
• Modificar los valores: Pulsar la tecla [ , ] o mantenerla pulsada para un avance rápido.
• Confirmar las entradas: Pulsar la tecla [SET].
42
10. Manejo
Una vez introducidos todos los datos, la báscula está
preparada para realizar la medición. Si no hace nada
más, la báscula se apaga.
Medición del peso
1. Encendido de la báscula
• Pulse la tecla [ ] del panel de mando.
En la pantalla se muestra
0.0 kg. Ahora, la báscula
está preparada para realizar la medición.
Actividad
En la selección de la actividad es importante la observación a medio y largo plazo.
Únicamente después de haber introducido todos los
parámetros podrán calcularse también la grasa corporal y el resto de valores.
Actividad Actividad física
1
Ninguna.
Poca: Ejercicio físico esporádico y suave
2
(p.ej. paseos, trabajo suave en el jardín,
ejercicios gimnásticos).
3
Media: Ejercicio físico, al menos entre 2 y
4 vez por semana, 30 minutos cada vez.
4
Alta: Ejercicio físico, al menos entre 4 y 6
vez por semana, 30 minutos cada vez.
5
Muy alta: Ejercicio físico intenso, entrenamiento intensivo o fuerte trabajo físico diario, al menos 1 hora en cada caso.
2. Pesaje (sin diagnóstico)
Coloque la báscula sobre una superficie firme y
plana para obtener una medición correcta.
• Colóquese sobre la báscula. El indicador [3] de la
báscula se ilumina en verde.
Permanezca quieto sobre ella y reparta el peso de forma homogénea
sobre ambas piernas. Sitúese lo más
cerca posible de los bordes sin inclinar la báscula.
Si el panel de mando se sujeta en las manos, su
peso (300 gramos) se resta automáticamente.
9. Indicaciones en pantalla
Una vez realizada la medición, el resultado se muestra
durante aprox. 10 segundos.
Vista general
1
5
Cuando baje de la superficie de pisado, la báscula se
apagará transcurridos algunos segundos. El indicador
[3] se apaga. La medición no se guarda.
Análisis
1
2
3
4
5
1. Encendido de la báscula
• Pulse la tecla [ ] del panel de mando.
En la pantalla se muestra
0.0 kg.
4
3
2
Hora, fecha, usuario
Peso con valoración
Peso
Datos de análisis (parcialmente con valoración)
BF
Grasa corporal
Agua
Porcentaje de masa muscular
Masa ósea
Menú
Vista general de la medición actual
Visualización de la tendencia
Representación detallada: grasa corporal, proporción muscular de la parte superior/inferior
del cuerpo
Mem Mediciones guardadas 1 – máx. 30
Valores medios
Kcal Consumo de calorías
Marca de los puntos de menú actuales
2. Diagnóstico
• Después de conectar la báscula, seleccione su usuario 1 – 10 pulsando la tecla derecha [ ]. Para ello,
pulse varias veces la tecla si fuera necesario.
• Pulse la tecla [SET] o espere 3 segundos. En la pantalla se muestra la pantalla de medición.
Siempre que active el usuario „Invitado“, antes de
cada medición debe volver a introducir los datos de
usuario. En el modo Invitado no se guardan los datos
43
de usuario ni los valores de medición. El modo Invitado
se puede activar o desactivar, véase la página 42.
Análisis de los valores tras realizar una
medición
• Ahora colóquese descalzo sobre la báscula y sujete
firmemente el panel de mando en las manos. (Si el
panel de mando se sujeta en las manos, su peso
(300 gramos) se resta automáticamente).
Representación gráfica
Peso
• Pulse la tecla del menú [ ] del panel de mando para
cambiar a los distintos submenús o a la memoria.
Se representa la evolución de su peso corporal entre
las distintas mediciones. Las últimas mediciones se
añaden a la derecha. La línea principal representa el
peso objetivo.
• Sujete el panel de mando con la parte inferior de los
pulgares sobre los electrodos delanteros y presionando firmemente los electrodos traseros con los
dedos.
Se debe definir un peso objetivo para poder representar la evolución del peso corporal, véase la página 42. El peso objetivo puede modificarse en cualquier momento.
Grasa corporal
• Pulse la tecla [ , ] para recorrer los valores de
grasa corporal.
Se representa la evolución de su grasa corporal entre
las distintas mediciones. La línea principal representa
el valor medio de todas las mediciones de grasa corporal, mientras que las barras indican si los valores han
variado hacia arriba o hacia abajo.
Después de medir el peso, se efectúa la medición de
la impedancia para el análisis. La parte superior
del cuerpo es analizada por los 4 electrodos del
panel de mando, mientras que la parte inferior
del cuerpo por los 4 electrodos de la báscula.
Esto se muestra con el símbolo del cuerpo.
Importante:
Permanezca quieto sobre ella y reparta el peso de forma homogénea sobre ambas piernas. Cerciórese de
que no exista contacto alguno entre los pies, las piernas, las pantorrillas ni los muslos. De lo contrario la
medición no se puede realizar correctamente. Esto se
puede evitar, p. ej., poniéndose unos pantalones finos.
3. Resultado
Se muestra la vista general.
Parte superior e inferior del cuerpo
Grasa corporal
• Pulse la tecla [ ] del panel de mando para cambiar
a la vista detallada de la parte superior/inferior del
cuerpo.
El resultado actual de la medición de la grasa corporal
se representa como cuerpo completo y se subdivide
en la parte superior/inferior del cuerpo.
Para valorar los resultados, véase Evaluación de los
resultados, página 46.
Al desconectar la báscula, el valor de medición se memoriza automáticamente. Si se realizan varias mediciones en un día, solo se guardará la última medición.
44
Masa muscular
• Pulse la tecla [ , ] para cambiar a la representación detallada de la masa muscular.
Kcal Consumo de calorías
• Pulse la tecla [ ] del panel de mando para cambiar
a Kcal. La tasa de metabolismo basal BMR así como
la tasa de metabolismo activo AMR teóricas se representan en Kcal.
Solo pueden visualizarse los resultados de medición actuales, no los resultados anteriormente guardados.
Acceso a la memoria de valores desde el
modo standby
Mem Visualización de los valores guardados
Al desconectar la báscula, los valores de medición
se guardan automáticamente tras realizar un análisis.
Cada usuario dispone de 30 posiciones en la memoria.
• Conecte el panel de mando con la tecla [ ].
• Seleccione su usuario con la tecla [ ]. Para ello,
pulse varias veces la tecla si fuera necesario.
• Pulse la tecla [ , ] del panel de mando para recorrer los valores analíticos o [ , ] para acceder
a los submenús (p. ej., Cambio BF, ).
• Pulse la tecla [ ] del panel de mando para cambiar
a la Memoria.
Se muestra la vista general. En la parte superior se
muestra la fecha de la medición así como el número
de posición de la memoria (03-03); en este caso., la
tercera = última posición de la memoria de un total de
3 posiciones ocupadas.
Borrado de los datos
• Pulse la tecla [
de la memoria.
,
1. Borrado de un usuario junto con todos los ajustes y valores de la memoria
• Después de conectar la báscula, seleccione su usuario pulsando la tecla [ ]. Para ello, pulse repetidamente la tecla y confirme con [SET].
• Cuando se muestre la indicación 0.0, pulse la tecla
[SET] durante 5 segundos para borrar el usuario.
• Seleccione „Sí“ con las teclas [ , ] y confirme la
pregunta con la tecla [SET].
En caso de no quiera borrar el usuario, seleccione
„No“ con la tecla [SET].
] para recorrer las posiciones
Valores medios
• Pulse la tecla [ ] del panel de mando para cambiar
al Valor medio.
Se representan todos los valores medios de las mediciones guardadas.
Se borrarán todos los ajustes y valores memorizados de este usuario.
2. Borrado de un valor determinado de la memoria de un usuario
• Seleccione un valor de medición de la memoria de
valores „Mem“ y pulse brevemente la tecla [SET] del
panel de mando para borrar el valor mostrado de la
memoria. Esto también puede realizarse directamente tras la medición.
• Seleccione „Sí“ con las teclas [ , ] y confirme la
pregunta con la tecla [SET].
En caso de no quiera borrar el valor, seleccione „No“
con la tecla [SET].
En la parte superior se muestra la fecha de la primera y la última medición.
45
3. Borrado de todos los valores de la memoria de
un usuario
• Acceda a la memoria de valores „Mem“ y pulse la
tecla [SET] del panel de mando durante aprox. 3 segundos para borrar todos los valores.
• Seleccione „Sí“ con las teclas [ , ] y confirme la
pregunta con la tecla [SET].
En caso de no quiera borrar nada, seleccione „No“
con la tecla [SET].
Edad
50 – 59
60 – 69
70 –100
Poca
<21 %
<22 %
<23 %
Normal
21– 26 %
22 – 27 %
23 – 28 %
Mucha
26,1– 31 %
27,1– 32 %
28,1– 33 %
Excesiva
>31,1 %
>32,1 %
>33,1 %
En el caso de deportistas, el valor de grasa corporal
suele ser bajo. Dependiendo del tipo de deporte practicado, la intensidad del entrenamiento y la constitución
corporal se pueden alcanzar valores que se encuentran
por debajo de la pauta proporcionada. Sin embargo,
tenga en cuenta que los valores extremadamente bajos pueden suponer un riesgo para la salud.
Desconexión de la báscula (modo standby)
• Espere aprox. 45 segundos hasta que la pantalla se
desconecte automáticamente o pulse la tecla [ ] del
panel de mando para desconectar manualmente la
pantalla.
Proporción de agua corporal
La fecha y la hora permanecen visibles.
La proporción de agua corporal (en %) se encuentra
normalmente en los siguientes niveles:
Modo de ahorro de energía
• Pulse simultáneamente las teclas del menú y
durante 10 segundos. Se apaga la indicación de la
fecha y la hora.
• Para que vuelva a visualizarse, mantener pulsadas
simultáneamente las teclas del menú y durante
10 segundos.
Hombre
11. Evaluación de los resultados
Mujer
Edad
10 –100
Mala
<50 %
Buena
50 – 65 %
Muy buena
>65 %
Mala
<45 %
Buena
45 – 60 %
Muy buena
>60 %
Proporción de grasa corporal
Los valores de grasa corporal se muestran en la pantalla y se evalúan en un diagrama de barras. Los valores de grasa corporal (en %) que aparecen a continuación le ofrecen una pauta (si desea más información le
rogamos que se ponga en contacto con su médico).
Edad
10 –100
La grasa corporal contiene relativamente poca agua.
Por este motivo, en personas con una proporción alta
de grasa, la proporción de agua corporal puede encontrarse por debajo de los valores orientativos. En deportistas que practican deportes de resistencia, por el
contrario, los valores pueden sobrepasarse debido a la
baja proporción de grasa y la alta cantidad de músculo.
La determinación del agua corporal realizada con esta
báscula no es adecuada para mostrar conclusiones
médicas como la retención de líquidos debida a la
edad. Pregunte a su médico en caso necesario. Por
regla general hay que intentar tener una alta proporción de agua corporal.
Hombre
Edad
10 –14
15 –19
20 – 29
30 – 39
40 – 49
50 – 59
60 – 69
70 –100
Poca
<11 %
<12 %
<13 %
<14 %
<15 %
<16 %
<17 %
<18 %
Normal
11–16 %
12 –17 %
13 –18 %
14 –19 %
15 – 20 %
16 – 21 %
17 – 22 %
18 – 23 %
Mucha
16,1– 21 %
17,1– 22 %
18,1– 23 %
19,1– 24 %
20,1– 25 %
21,1– 26 %
22,1– 27 %
23,1– 28 %
Excesiva
>21,1 %
>22,1 %
>23,1 %
>24,1 %
>25,1 %
>26,1 %
>27,1 %
>28,1 %
Porcentaje de masa muscular
La proporción muscular (en %) se encuentra normalmente en los niveles siguientes:
Mujer
Hombre
Edad
10 –14
15 –19
20 – 29
30 – 39
40 – 49
Poca
<16 %
<17 %
<18 %
<19 %
<20 %
Normal
16 – 21 %
17 – 22 %
18 – 23 %
19 – 24 %
20 – 25 %
Mucha
21,1– 26 %
22,1– 27 %
23,1– 28 %
24,1– 29 %
25,1– 30 %
Excesiva
>26,1 %
>27,1 %
>28,1 %
>29,1 %
>30,1 %
Edad
10 –14
15 –19
20 – 29
46
Poca
<44%
<43%
<42%
Normal
44 – 57 %
43 – 56 %
42 – 54 %
Mucha
>57 %
>56 %
>54 %
Edad
30 – 39
40 – 49
50 – 59
60 – 69
70 –100
Poca
<41%
<40%
<39%
<38%
<37%
Normal
41– 52 %
40 – 50 %
39 – 48 %
38 – 47 %
37 – 46 %
sus funciones básicas (p. ej., si se está todo el día en
la cama). Este valor depende básicamente del peso,
la estatura y la edad. En la báscula de diagnóstico se
muestra en la unidad kcal/día y se calcula según la reconocida fórmula de Harris-Benedict.
Su cuerpo necesita esta cantidad de energía en todo
caso y se le debe administrar en forma de alimento. Si
ingiere menos energía a largo plazo, esto puede afectar negativamente su salud.
Mucha
>52 %
>50 %
>48 %
>47 %
>46 %
Mujer
Edad
10 –14
15 –19
20 – 29
30 – 39
40 – 49
50 – 59
60 – 69
70 –100
AMR
Poca
<36%
<35%
<34%
<33%
<31%
<29%
<28%
<27%
Normal
36 – 43 %
35 – 41 %
34 – 39 %
33 – 38 %
31– 36 %
29 – 34 %
28 – 33 %
27 – 32 %
La tasa de metabolismo activo (AMR = Active Metabolic Rate) es la cantidad de energía que el cuerpo consume al día en estado activo. El consumo de energía de
una persona aumenta con la intensidad de la actividad
corporal y se determina con la báscula para diagnóstico con la actividad introducida (1 – 5).
Para mantener el peso actual, hay que volver a proporcionar al cuerpo la energía utilizada en forma de comida y bebida. Si durante un periodo de tiempo prolongado se proporciona al cuerpo menos energía de la que
gasta, este compensa la diferencia a partir de las reservas de grasa, con lo que se produce una pérdida peso.
Si por el contrario, durante un periodo prolongado de
tiempo se le proporciona más energía de la calculada
en la tasa de metabolismo activo (AMR), el cuerpo no
puede quemar ese exceso de energía y se almacena en
forma de grasa, produciéndose un aumento de peso.
Mucha
>43 %
>41 %
>39 %
>38 %
>36 %
>34 %
>33 %
>32 %
Masa ósea
Nuestros huesos, como el resto de nuestro cuerpo,
también están naturalmente sometidos a procesos de
envejecimiento, formación y descalcificación. La masa
ósea aumenta rápidamente en la infancia y alcanza su
nivel máximo entre los 30 y los 40 años.
Al aumentar la edad la masa ósea disminuye un poco.
Con una alimentación sana (especialmente calcio y
vitamina D) y ejercicio físico regular se puede contrarrestar esta descalcificación en cierta medida. Con un
trabajo muscular adecuado se puede reforzar también
la estabilidad del esqueleto. Tenga en cuenta que esta
báscula no muestra el contenido de calcio de los huesos, sino que determina el peso de todos los componentes óseos (elementos orgánicos, inorgánicos y
agua). La masa ósea admite muy pocas variaciones;
puede oscilar mínimamente en función de determinados factores (peso, estatura, edad, sexo). No existen
pautas ni recomendaciones fiables.
Relación temporal de los resultados
Tenga en cuenta que sólo posee importancia la
tendencia a largo plazo. Las diferencias de peso en el
espacio de pocos días suelen ser consecuencia de la
pérdida de líquidos.
La interpretación de los resultados depende de los
cambios del peso total y el porcentaje de músculo,
grasa y agua corporales así como de la duración con
la que se producen estas modificaciones. Es necesario distinguir los cambios rápidos que tienen lugar en
cuestión de días de los que se producen a medio plazo (semanas) y largo plazo (meses).
Como regla básica puede considerarse que los cambios de peso a corto plazo representan de forma casi
exclusiva alteraciones en el contenido de agua, mientras que los cambios a medio y largo plazo pueden
afectar a la proporción de grasa y músculo.
• Si su peso disminuye a corto plazo, pero su proporción de grasa aumenta o permanece igual, sólo ha
perdido agua; p.ej. después de un entrenamiento,
la sauna o debido a una dieta limitada a la pérdida
rápida de peso.
• Si su peso aumenta a medio plazo, la proporción de
grasa corporal disminuye o permanece igual puede
que haya creado una valiosa masa muscular.
Atención
No confunda la masa ósea con la densidad ósea.
La densidad ósea sólo se puede determinar con exámenes médicos (p.ej. la tomografía computerizada y
los ultrasonidos). Por ese motivo, esta báscula no permite sacar conclusiones sobre los cambios de los huesos o sobre su dureza (por ej. osteoporosis).
BMR
La tasa de metabolismo basal (BMR = Basal Metabolic Rate) es la cantidad de energía que el cuerpo necesita en estado de reposo absoluto para mantener
47
• Si pierde peso y proporción de grasa corporal al mismo tiempo, su dieta funciona: está perdiendo masa
adiposa.
• Lo ideal es que complete su dieta con ejercicio físico,
gimnasio o entrenamiento muscular. De este modo
puede aumentar su proporción muscular a medio
plazo.
• No se puede sumar la grasa, el agua corporal y la
proporción de músculo (el tejido muscular también
contiene agua corporal como componente).
Utilice un paño húmedo para la limpieza y, en caso necesario, aplique un poco de lavavajillas. No utilice detergentes agresivos y no sumerja el aparato nunca en agua.
12. Transferencia de los valores de
medición a un ordenador /
HealthManager / EasyFit
Las pilas y los acumuladores no deben tirarse a la basura doméstica. Como consumidor está obligado por
ley a devolver las pilas usadas. Puede entregar las pilas
usadas en los puntos limpios oficiales de su municipio
o en cualquier sitio donde se vendan pilas de este tipo.
Atención
• No use nunca detergentes o disolventes agresivos
• No sumerja nunca el aparato en agua
• No lave el aparato en el lavavajillas
15. Eliminación
Requisitos del sistema:
Windows 7, Windows Vista, Windows XP SP3
Aviso
HealthManager:
Gestión de la salud en combinación con tensiómetros
y medidores de glucemia de Beurer.
En las pilas que contienen sustancias nocivas aparecen los siguientes símbolos:
Pb = la pila contiene plomo,
Cd = la pila contiene cadmio,
Hg = la pila contiene mercurio.
EasyFit:
Análisis del entrenamiento en combinación con pulsímetros de Beurer.
Para proteger el medio ambiente, la báscula y las pilas
no se pueden eliminar junto con la basura doméstica
al final de su vida útil. La eliminación se puede efectuar a través del punto de recogida correspondiente
en su país.
Siga las disposiciones locales referentes a la eliminación de materiales.
Elimine el aparato según la directiva CE sobre residuos de aparatos eléctricos y electrónicos 2002/96/EC – WEEE (Waste Electrical and
Electronic Equipment).
Si tiene alguna duda o consulta le rogamos que se
ponga en contacto con el organismo responsable de
su municipio.
Secuencia:
• En el área de descargas de http://www.beurer.com
podrá descargar e instalar el software de Beurer.
• Establecer la conexión USB.
USB
• Para instalar el software siga las instrucciones.
13. Cambio de pilas
El panel de mando está provisto de una indicación de
cambio de pilas. En la pantalla se mostrará el símbocuando las pilas del panel de mando estén a
lo
punto de agotarse, o el símbolo
cuando sean las
pilas de la báscula las que estén a punto de agotarse.
En este caso, las pilas deberán cambiarse.
16. Resolución de problemas
Si la báscula encuentra un error en la medición, se
muestra el siguiente mensaje:
Indicación
Causa
en pantalla
SOBRECARGA Se ha excedido
la capacidad de
carga máxima de
150 kg.
BATERÍA_
Las pilas están
BAJA
casi vacías.
Aviso
• Al cambiar las pilas, utilice siempre pilas del mismo
tipo, de la misma marca y con la misma capacidad.
• Cambie siempre todas las pilas al mismo tiempo.
• No utilice pilas recargables.
• Emplee pilas sin metales pesados.
MEMORIA_
LLENA
14. Limpieza y cuidado del aparato
La precisión de los valores de medición, así como la
vida útil del aparato, dependen de su correcta utilización. El aparato debe limpiarse de vez en cuando.
48
Se han guardado
30 mediciones.
Reparación
Cargue la báscula
únicamente hasta
150 kg.
Cambie las pilas
(véanse las páginas 40 y 48).
Transfiera los valores de medición
a un ordenador,
véase la página 48.
Indicación
en pantalla
ERROR_
CONTACTO
ERROR_
DATOS
Pantalla en
blanco
Causa
Medición de peso incorrecta
Reparación
Posible fallo
La báscula tiene un
punto cero incorrecto.
Repetir la medición descalzo.
En caso necesario, humedezca la
planta de los pies
ligeramente. En
caso necesario,
elimine las durezas de las plantas
de los pies.
Repetir la mediLa medición BIA
se ha realizado co- ción descalzo o
rrectamente, aun- con las plantas
que la proporción de los pies ligeramente húmedas.
de grasa se enEn caso necesacuentra fuera del
rango de medición rio, modifique la
actividad introdu(menor del 5 % o
cida.
mayor del 50 %).
Las pilas del panel Cambie la pila (ver
página 40).
de mando están
completamente
vacías.
Las pilas del panel Compruebe la polaridad correcta,
de mando no se
han colocado co- (véase la página 40).
rrectamente.
La resistencia eléctrica entre los electrodos y la planta
del pie es demasiado alta (p. ej.
debido a un exceso de durezas).
La báscula se encuentra encima de una alfombra.
Reparación
Justo antes de realizar la
medición, active la báscula
con el pie para que se ilumine el indicador del estado de
funcionamiento .
Espere aprox. 5 segundos
y repita la medición. Para su
información: puesto que normalmente el usuario suele
subirse a la báscula enseguida, la báscula memoriza el
punto cero al desconectarse
(cuando se apaga el indicador del estado de funcionamiento ).
Coloque la báscula sobre
una superficie lisa y sólida.
Sitúese lo más cerca posible
de los bordes sin inclinar la
báscula.
17. Características técnicas
Dimensiones de la báscula
Pilas de la báscula
Pilas del panel de mando
Radiotransmisión
Rango de medición
Graduación del peso, masa ósea
Graduación de la grasa corporal,
el agua, la masa muscular
Graduación de la BMR, AMR
No es posible realizar la medición
Posible fallo
No se ha activado
el panel de mando
antes de subirse a
la báscula.
Reparación
Antes de realizar la medición,
conecte el panel de mando.
Dado el caso, espere 30 segundos y, a continuación, repita la
medición.
La radiocomunica- Vuelva a introducir las pilas de la
báscula y del panel de mando.
ción entre la básMantenga una distancia consicula y el panel de
derable respecto a las siguienmando está intetes fuentes electromagnéticas:
rrumpida.
postes de alta tensión, sistemas
de televisión u ordenador, aparatos de gimnasio, teléfonos
móviles y estaciones meteorológicas.
El panel de mando Reduzca la distancia entre la
se encuentra dema- báscula y el panel de mando.
siado alejado de la La distancia máxima es de
2 metros.
báscula.
Las pilas de la bás- Cambie las pilas (véase la pácula se han gastado gina 40) y compruebe que la
o se han introduci- polaridad sea correcta.
do incorrectamente.
330 x 330 x 41 mm
3 x 1,5 V tipo AA
3 x 1,5 V tipo AA
433 MHz
De 5 a 150 kg
100 g
0,1 %
1 Kcal
Reservado el derecho a realizar modificaciones técnicas.
La báscula cumple con la directiva 2004/108/EC y sus
ampliaciones.
49
ITALIANO
Indice
consueto, per poter rilevare con più precisione la resistenza elettrica (impedenza).
Inoltre il contatto con il corpo è ottimizzato dai 4 elettrodi posti sulla mano e dai 4 elettrodi posti sul piede:
ciò permette di ottenere una maggiore precisione nella
misurazione e conseguentemente un’analisi migliore.
I valori misurati vengono inviati mediante trasmissione
radio fino a 2 metri di distanza. Mediante il menu innovativo è possibile attivare tutte le impostazioni in modo
semplice e chiaro, queste vengono mostrate sul display
in una delle 5 lingue da selezionare. È possibile lasciare il display sulla bilancia, collocarlo in un altro luogo a
scelta oppure appenderlo alla parete.
Al fine di osservare i valori per un periodo prolungato è possibile salvare i dati sul computer mediante il
cavo USB e il software del PC inclusi nella confezione. La bilancia assume così il ruolo di personal trainer.
1. Introduzione ......................................................50
2. Spiegazione dei simboli ....................................50
3. Norme di sicurezza ............................................50
4. Descrizione dell’apparecchio ............................51
5. Messa in funzione .............................................52
6. Montaggio del pannello di comando .................52
7. Informazioni .......................................................53
8. Impostazioni ......................................................54
9. Indicatori sul display ..........................................55
10. Funzionamento ..................................................55
11. Valutazione dei risultati ......................................58
12. Trasmissione dei valori misurati su
un PC / HealthManager / EasyFit ........................60
13. Sostituzione batterie .........................................60
14. Pulizia e cura dell’apparecchio ..........................60
15. Smaltimento ......................................................60
16. Che cosa fare in caso di problemi? ...................60
17. Dati tecnici ........................................................61
La bilancia ha le seguenti funzioni:
• Misurazione del peso (in 100 g).
• Analisi della percentuale di grasso e di liquido corporeo
e della massa muscolare (0,1%), della massa ossea
(100 g), del metabolismo basale e di attività (in Kcal).
• Misurazione separata del grasso corporeo e della massa muscolare relativi alla parte superiore del
corpo e a quella inferiore con l’indicazione della misurazione per ciascuna parte.
• Illustrazione sul diagramma di peso e grasso corporeo.
• Indicazione delle ultime 30 misurazioni per 10 persone.
• Funzione di analisi unica e rapida per ospiti.
• Data e ora in modalità standby.
Contenuto della confezione
•
•
•
•
•
•
•
Bilancia diagnostica
Pannello di comando rimovibile con display
Supporto a parete
Kit per il montaggio a parete
3 x 1,5 V tipo AA (bilancia)
3 x 1,5 V tipo AA (pannello di comando)
Cavo USB
Gentile cliente,
siamo lieti che Lei abbia scelto un prodotto del nostro
assortimento. Il nostro marchio è garanzia di prodotti di
elevata qualità, controllati nei dettagli, relativi ai settori
calore, peso, pressione, temperatura corporea, pulsazioni, terapia dolce, massaggio e aria.
Leggere attentamente questo manuale d’uso, conservarlo per un eventuale utilizzo futuro e tenerlo alla portata di
chiunque utilizza l’apparecchio. Rispettare le istruzioni.
2. Spiegazione dei simboli
Nelle istruzioni d’uso sono utilizzati i seguenti simboli.
Pericolo
Segnalazione di rischi di lesioni o
pericoli per la salute.
Attenzione Segnalazione di rischi di possibili
danni all’apparecchio.
Cordiali saluti
Il Beurer Team
Avvertenza Indicazione di importanti informazioni.
1. Introduzione
3. Norme di sicurezza
Funzioni dell’apparecchio
Leggere attentamente questo manuale d’uso, conservarlo per un eventuale utilizzo futuro e tenerlo anche
a disposizione di chiunque utilizzi l’apparecchio. Rispettare le istruzioni.
Con questa bilancia diagnostica Lei contribuisce in
misura decisiva alla Sua salute. Questa bilancia serve
per pesarsi e per analizzare i dati personali relativi al
fitness ed è destinata all’uso personale.
L’analisi si basa sul principio del B.I.A. (analisi dell’impedenza bioelettrica, vedere „Principio di misurazione“, pagina 53). Questa bilancia è dotata addirittura
di due diverse frequenze, invece di una sola come di
Norme di sicurezza
• La bilancia non deve essere utilizzata da
portatori di dispositivi medici impiantati (ad
50
es pacemaker), in quanto se ne potrebbe pregiudicare il funzionamento.
• Non utilizzare durante la gravidanza.
• Non salire sul bordo della bilancia da un solo lato:
pericolo di ribaltamento!
• Tenere il materiale di imballo fuori dalla portata dei
bambini (pericolo di soffocamento).
• Non premere i tasti né con troppa forza, né utilizzando oggetti appuntiti.
• Non esporre la bilancia a temperature elevate o a
forti campi elettromagnetici (per es. cellulari).
• Le riparazioni possono essere eseguite solo dall’Assistenza tecnica o da rivenditori autorizzati. Prima di
inoltrare qualsiasi reclamo controllare le batterie ed
eventualmente sostituirle.
• Per qualsiasi altra domanda sull’uso dei nostri apparecchi rivolgersi al rivenditore o all’Assistenza tecnica.
• Tutte le bilance sono conformi alla direttiva CE
2004/108/CE. Per qualsiasi altra domanda sull’uso
dei nostri apparecchi rivolgersi al rivenditore o all’Assistenza tecnica.
Avvertenze sull’uso delle batterie
• Se ingoiate, le batterie rappresentano un pericolo
mortale. Conservare batterie e bilancia fuori dalla
portata dei bambini. In caso di ingestione di una batteria, richiedere immediatamente assistenza medica.
• Sostituire in tempo utile le batterie quasi scariche.
• Sostituire sempre tutte le batterie con altre dello stesso tipo.
• Le batterie non devono essere ricaricate o riattivate con altri mezzi; inoltre non devono essere aperte,
gettate nel fuoco o cortocircuitate.
• La fuoriuscita di liquido dalle batterie può danneggiare l’apparecchio. Se l’apparecchio non venisse utilizzato per lunghi periodi, togliere le batterie dall’apposito scomparto.
• Se una batteria presenta una perdita di liquido, indossare guanti protettivi e pulire lo scomparto con
un panno asciutto.
• Le batterie possono contenere sostanze nocive per
la salute e l’ambiente. Quindi devono essere smaltite correttamente, nel rispetto delle norme di legge
vigenti. Non gettare mai le batterie nei normali rifiuti
domestici.
4. Descrizione dell’apparecchio
Panoramica
2
1
3
4
1
2
3
4
Avvertenze generali
• L’apparecchio è destinato a un uso personale, non
va utilizzato per usi medici o commerciali.
• Poiché non si tratta di una bilancia tarata per uso
professionale e medico, sono possibili tolleranze intrinseche.
• La portata della bilancia è max. 150 kg (330 lb, 24 St).
• Allo stato di fornitura la bilancia è impostata sulle
unità di misura „cm“ e „kg“. Per impostare le unità
di misura leggere le informazioni del capitolo „Impostazioni“.
• Collocare la bilancia su un fondo piano e solido; una
pavimentazione stabile è fondamentale per una corretta misurazione.
• Proteggere l’apparecchio da urti, umidità, polvere,
prodotti chimici, forti oscillazioni di temperatura e
fonti di calore troppo vicine (stufe, termosifoni).
• Prestare attenzione affinché nessun liquido cada sulla bilancia. Non immergere mai la bilancia nell’acqua.
Non lavarla mai sotto l’acqua corrente.
• Non appoggiare alcun oggetto sulla bilancia quando
non è utilizzata.
Elettrodi piede, piede sinistro
Pannello di comando con display
Indicazione di stato
Elettrodi piede, piede destro
Pannello di comando con display
5
7
8
9
6
10
11
12
5
6
5
Elettrodi di contatto, mano sinistra
6
Elettrodi di contatto, mano destra
7 set Tasto di installazione, Confermare le immissioni
Menu: Tasto SU
8
Menu: Tasto GIÙ
9
Tasto ON
10
Impostazione: Tasto SU
11
Impostazione: Tasto GIÙ
12
51
Analisi con pannello di comando
Collocazione della bilancia
Collocare la bilancia su una superficie piana e stabile.
Una superficie stabile è indispensabile per una corretta pesatura.
Avvertenza
Tenere il pannello di comando con
due mani per garantire il contatto
con gli elettrodi (5) e (6) sia nella
parte anteriore che posteriore.
6. Montaggio del pannello di
comando
Collocazione del pannello di comando
Il pannello di comando può essere tenuto in mano,
posato su una superficie piana o rimanere sulla bilancia, a scelta.
Spostare il vano (nella parte posteriore della bilancia)
come illustrato per poterci collocare sopra il pannello
di comando. Il vano è dotato di una calamita che fissa
il pannello di comando sulla bilancia.
5. Messa in funzione
Inserimento delle batterie
Togliere le batterie dalla confezione e inserirle nella bilancia e nel pannello di comando, rispettando la polarità. Attenersi al disegno nello scomparto portabatterie.
Dopo aver inserito le batterie l’indicatore dell’anno lampeggia, vedere pagina 54.
Pannello di comando
3 x AA
Montaggio a parete
Utilizzando il kit di montaggio (supporto a parete, viti,
tasselli) è possibile montare il pannello di comando
sulla parete. Per il montaggio utilizzare il kit in dotazione e applicare il supporto a parete come raffigurato.
Utilizzare eventualmente i tasselli adatti alla superficie.
Bilancia
3 x AA
• Utilizzare il supporto a parete per contrassegnare i
fori prima di trapanare.
• Utilizzando un trapano dalla punta di 6 mm, praticare
sulla parete 2 fori orizzontali di circa 40 mm di profondità posti a una distanza di 36 mm l’uno dall’altro.
• Inserire i tasselli.
• Fissare con entrambe le viti il supporto a parete. Verificare che il supporto sia fissato in modo sicuro.
• Portare il pannello di comando sul supporto in modo
tale che le guide del supporto a parete si innestino
parallelamente in quelle del pannello di comando.
Se la bilancia o il pannello di comando non mostrano
nessuna funzione, rimuovere completamente le batterie e inserirle nuovamente.
Note per il cambio delle batterie, vedere pagina 60.
52
Le ossa e i tessuti adiposi, viceversa, presentano una
debole conduttività poiché l’elevato grado di resistenza delle cellule del tessuto adiposo e delle ossa impediscono quasi completamente il passaggio della corrente.
Questa bilancia misura in due diverse frequenze per
poter rilevare con più precisione l’impedenza. Le diverse frequenze influiscono in modo differente sulla
membrana cellulare e sul liquido corporeo.
Inoltre il contatto con il corpo è ottimizzato dai 4 elettrodi posti sulla mano e dai 4 elettrodi posti sul piede:
ciò permette di ottenere una maggiore precisione nella
misurazione e conseguentemente un’analisi migliore.
Attraverso questa delicata tecnica di analisi è possibile
che, nel caso di misurazioni ripetute più volte, i valori
possano variare in modo impercettibile.
Ciò è dovuto dalle oscillazioni riscontrate durante la
misurazione dell’impedenza (ad es. un diverso tipo di
contatto elettrico tra gli elettrodi e le mani e i piedi, una
distribuzione differente dell’acqua nel corpo).
Non dimenticare che i valori indicati dalla bilancia diagnostica rappresentano solo un’approssimazione dei
reali valori medici di un’analisi del corpo. Solo un medico specialista può eseguire con metodi idonei (ad
es. tomografia computerizzata) un’analisi precisa di
grasso corporeo, acqua corporea, massa muscolare e
struttura ossea.
Appoggiare prima contro la parete il pannello di
comando posto sul supporto a parete, poi spingerlo
verso il basso per facilitarne l’innesto.
• Spingere il pannello di comando completamente sul
supporto. Assicurarsi che il pannello di comando sia
saldo e parallelo al supporto.
Impostazione dell’inclinazione
Il pannello di comando può essere inclinato sul supporto a parete e l’inclinazione deve perciò essere regolata.
Evitare che il dispositivo di arresto, posto in una posizione inclinata, faccia cadere l’elemento di comando
dal supporto a parete.
Inclinare nuovamente il pannello di comando in
avanti prima di estrarlo dal supporto a parete!
Montaggio a parete alternativo
Metodi di misurazione
Il supporto può essere applicato alla parete anche con
una striscia biadesiva. La superficie della parete deve
essere pulita e asciutta. È possibile montare il supporto mediante incollaggio su piastrelle, vetro, plastica e
molti altri tipi di superfici.
• Togliere la pellicola protettiva del nastro adesivo sul
retro del supporto a parete.
• Premere con forza il supporto contro la parete.
• Verificare che il supporto sia fissato in modo sicuro.
L’analisi può essere effettuata come segue:
• Parte superiore del corpo: afferrare con entrambe
le mani il pannello di comando e salire sulla bilancia
con le scarpe.
• Parte inferiore del corpo: lasciare il pannello di comando ad es. sulla bilancia, e salire sulla bilancia a
piedi nudi.
• Parte del corpo superiore e inferiore: afferrare con
entrambe le mani il pannello di comando e salire
sulla bilancia a piedi nudi.
Attendere almeno 1 ora dopo il fissaggio del supporto a parete mediante nastro adesivo prima di inserire il pannello di comando!
Nelle presenti istruzioni per l’uso viene descritta l’analisi per la parte superiore e quella inferiore del
corpo.
Se si decide di tenere in mano il pannello di comando, il peso dello stesso viene sottratto automaticamente.
7. Informazioni
Principio di misurazione
Questa bilancia funziona in base al metodo dell’analisi dell’impedenza bioelettrica (B.I.A.). Esso consente
di determinare in pochi secondi le percentuali di parti
corporee tramite una corrente elettrica non percettibile
e del tutto innocua. La misura della resistenza elettrica
(impedenza) e l’inclusione nel calcolo di costanti e di
dati personali (età, altezza, sesso, livello di attività fisica) consente di determinare la percentuale di grasso
e di altre componenti del corpo.
I tessuti muscolari e l’acqua possiedono una buona
conduttività elettrica e quindi una bassa resistenza.
Consigli generali
• Pesarsi possibilmente sempre alla stessa ora (meglio
la mattina), dopo essere andati in bagno, a digiuno e
senza indumenti addosso, per ottenere risultati comparabili.
• Importante per la misurazione: La determinazione del
grasso corporeo (parte inferiore del corpo) deve essere effettuata solo a piedi nudi; sarebbe opportuno
inumidire leggermente la pianta dei piedi. Piante dei
53
•
•
•
•
Impostazione di data e ora
piedi secche o con notevoli duroni possono portare
a risultati insoddisfacenti, perché la loro conduttività
è troppo bassa.
Durante la pesatura restare dritti e immobili.
Dopo un notevole sforzo fisico, attendere alcune ore
prima di pesarsi.
Attendere circa 15 minuti dopo essersi alzati, in
modo che l’acqua possa distribuirsi nel corpo.
Importante è solo la tendenza a lungo termine. Le
differenze di peso nell’ambito di pochi giorni sono
generalmente dovute soltanto alla perdita di liquidi.
Tuttavia l’acqua presente nell’organismo svolge un
ruolo importante per il benessere generale.
• In modalità standby (ora e data inseriti) premere il
tasto [SET].
• Selezionare mediante il tasto di impostazione [ ] la
voce di menu „IMPOSTA ORA“ e confermare con il
tasto [SET].
• L’indicatore dell’anno lampeggia.
• Impostare in successione l’anno, il mese e il giorno
e, per quanto riguarda l’ora, regolare i minuti e le ore
mediante i tasti di impostazione [ , ].
• Confermare i dati immessi premendo ogni volta il tasto [SET].
Impostazione dei datipersonali
Limitazioni
Per poter determinare la percentuale di grasso corporeo e altri valori, occorre impostare i propri dati personali.
La bilancia è dotata di più di 10 posti di memoria per
gli utenti, nei quali Lei e ad esempio i membri della
Sua famiglia potete salvare le impostazioni personali
e riprendere i dati.
Inoltre è disponibile la „MODAL. OSPITE“ (se attivata) le cui impostazioni e i valori misurati non vengono salvati.
Durante il rilevamento del grasso corporeo e di altri valori si possono ottenere risultati diversi e non plausibili
nei seguenti casi:
• bambini inferiori ai 10 anni circa,
• sportivi professionisti e bodybuilder,
• donne incinte,
• persone con febbre, in dialisi, con sintomi di edema
o affette da osteoporosi,
• persone che assumono farmaci cardiovascolari (riguardanti il cuore e il sistema vascolare),
• persone che assumono farmaci vasocostrittori o vasodilatatori,
• persone con notevoli differenze anatomiche nel rapporto tra le gambe e le dimensioni complessive del
corpo (gambe di lunghezza notevolmente maggiore
o inferiore alla norma).
Nella MODALITÀ OSPITE non sono disponibili le
funzioni Memoria, Indicatore di tendenza e Media.
• Premere il tasto [SET].
• Selezionare „CAMBIA PERSONA“ e confermare con
il tasto [SET].
• Selezionare mediante il tasto di impostazione [ ,
] la persona e confermare con il tasto [SET].
• Se sono già presenti delle impostazioni nel posto di
memoria vengono visualizzate sul display. In caso
contrario il posto di memoria utente è completamente libero.
• Adesso si possono effettuare le seguenti impostazioni:
Dati personali Valori impostati
Sesso
maschio , femmina
Statura
100 – 250 cm
(da 3‘-03“ a 8‘-02“)
Data di nascita Anno, mese, giorno
Grado di
attività
da 1 a 5
Peso target
regolabile, in kg (per una
rappresentazione grafica
dell’andamento)
8. Impostazioni
Prima di utilizzare la bilancia immettere i propri dati.
Installazione dell’apparecchio
• In modalità standby (ora e data inseriti) premere il
tasto [SET].
• Selezionare mediante il tasto di impostazione [ ] la
voce di menu „IMPOSTA APPAR.“ e confermare con
il tasto [SET].
• Selezionare mediante i tasti di impostazione [ , ]
il simbolo relativo alla lingua (D, GB, F, E, I) e confermare con il tasto [SET].
• Selezionare mediante i tasti di impostazione [ , ]
il simbolo relativo all’unità di misura (kg, lb, st) e confermare con il tasto [SET].
• Selezionare mediante i tasti di impostazione [ , ]
quale formato dell’ora si desidera (24 h oppure 12 h)
e confermare con il tasto [SET].
• Selezionare mediante i tasti di impostazione [ , ]
se si desidera attivare o disattivare la MODALITÀ
OSPITE e confermare con il tasto [SET].
Infine sul display compare una panoramica delle impostazioni selezionate.
• Modificare i valori: Premere il tasto [ , ] oppure tenerlo premuto se si desidera uno scorrimento rapido.
• Confermare le immissioni: Premere il tasto [SET].
Dopo aver inserito tutti i dati la bilancia è pronta per la
misurazione. Se non vengono eseguite altre operazioni, la bilancia si spegne.
54
Gradi di attività
10. Funzionamento
Nella scelta del grado di attività occorre considerare il
medio-lungo periodo.
Dopo che tutti i parametri sono stati inseriti, la bilancia
può misurare anche il grasso corporeo e gli altri valori.
Grado di Attività fisica
attività
1
Nessuna.
2
Ridotta: poca attività fisica leggera (ad es.
passeggiate, lavori di giardinaggio non pesanti, esercizi di ginnastica).
3
Media: attività fisica almeno 2 – 4 volte alla
settimana, ogni volta per 30 minuti.
4
Elevata: attività fisica almeno 4 – 6 volte
alla settimana, ogni volta per 30 minuti.
5
Molto elevata: intensa attività fisica, allenamento intenso o duro, attività quotidiana
per almeno 1 ora.
Misurazione del peso
1. Accensione della bilancia
• Premere il tasto [ ] sul pannello di comando.
Sul display compare 0.0 kg.
Adesso la bilancia è pronta
per la misurazione.
2. Pesatura (non diagnostica)
Collocare la bilancia su una superficie piana e
stabile. Una superficie stabile è indispensabile per una
corretta pesatura.
• Adesso salire sulla bilancia. L’indicatore [3] della bilancia viene visualizzato in verde.
Stare fermi sulla bilancia, distribuendo il peso uniformemente su entrambe le gambe. Tenere le gambe divaricate il più possibile, senza ribaltare
la bilancia.
9. Indicatori sul display
Panoramica
Se si decide di tenere in mano il pannello di comando, il suo peso (300 grammi) viene sottratto automaticamente.
1
5
Dopo una misurazione il risultato viene mostrato per
ca 10 secondi.
4
3
2
1 Ora, data, utente
2 Peso con valutazione
Peso
3 Dati in analisi (in parte con valutazione)
BF
Grasso corporeo
acqua
massa muscolare
Massa ossea
4 Menu
Panoramica della misurazione attuale
Indicatore di tendenza
Rappresentazione dettagliata del grasso corporeo e della massa muscolare della parte superiore/inferiore del corpo
Mem Misurazioni salvate 1 – max. 30
Media dei valori
Kcal Consumo di calorie
Indicazione della voce di menu utilizzata
5
Quando si scende dalla pedana, la bilancia si spegne
dopo pochi secondi. L’indicatore [3] si spegne. La misurazione non viene memorizzata.
Svolgimento dell’analisi
1. Accensione della bilancia
• Premere il tasto [ ] sul pannello di comando.
Sul display compare 0.0 kg.
2. Diagnosi
• Dopo l’attivazione, selezionare l’utente 1 – 10 premendo il tasto destro [ ]. Se necessario, premere più
volte il tasto.
• Premere il tasto [SET] oppure attendere 3 secondi. Sul
display compare la schermata delle misurazioni.
Se viene attivato l’utente „OSPITE“, prima di ogni misurazione devono essere nuovamente inseriti i dati dell’u55
Analisi dei valori a seguito di una misurazione
tente. Nella MODALITÀ OSPITE i dati dell’utente e i valori
misurati non vengono memorizzati. È possibile attiva re/
disattivare la MODALITÀ OSPITE; vedere pagina 54.
Rappresentazione grafica
Peso
• Premere la voce di menu [ ] sul pannello di comando, per passare al sotto menu o alla voce Memoria.
L’andamento del peso corporeo viene rappresentato
dopo ogni misurazione. Le nuove misurazioni vengono
inserite sulla destra. La linea di riferimento rappresenta il peso target.
• Salire ora a piedi nudi sulla bilancia e tenere saldamente in mano il pannello di comando. (Se si decide di tenere in mano il pannello di comando, il peso dello stesso (300 grammi) viene sottratto automaticamente).
• Tenere il pannello di comando con la parte inferiore
del pollice premendo gli elettrodi posti nella parte anteriore e con le dita tenere saldamente premuti gli
elettrodi posti nella parte posteriore.
È necessario stabilire il peso target, per far sì che
l’andamento del peso corporeo possa essere rappresentato. A questo proposito vedere pagina 54.
È possibile modificare in ogni momento il peso target.
Grasso corporeo
• Azionare il tasto [ , ] per visualizzare i valori del
grasso corporeo.
L’andamento del grasso corporeo viene rappresentato
dopo ogni misurazione. La linea di riferimento rappresenta i valori medi di tutte le misurazioni relative al grasso corporeo; le lineette poste al di sopra o al sotto invece indicano se i valori sono aumentati o diminuiti.
Dopo la misurazione del peso viene misurata l’impedenza per l’analisi. Per la parte superiore del
corpo avviene mediante i 4 elettrodi del pannello di comando, mentre per la parte inferiore
mediante i 4 elettrodi della bilancia. Ciò viene
illustrato attraverso il simbolo del corpo attraversato da corrente.
Importante:
Stare fermi sulla bilancia, distribuendo il peso uniformemente su entrambe le gambe. Prestare attenzione
che non vi sia alcun contatto tra piedi, gambe, polpacci e cosce. In caso contrario la misurazione non può
essere eseguita correttamente. Per evitare il contatto
indossare ad esempio dei pantaloni leggeri.
Parte superiore del corpo, parte inferiore del
corpo
Grasso corporeo
• Premere il tasto [ ] sul pannello di comando, per
attivare una visione dettagliata della parte superiore
e inferiore del corpo.
Viene illustrato il risultato della misurazione aggiornato
del grasso corporeo sia dell’intero corpo sia della parte superiore/inferiore del corpo.
3. Risultato
Viene mostrata la panoramica dei valori.
Per l’interpretazione vedere Valutazione dei risultati a
pagina 58.
Allo spegnimento il valore misurato viene salvato automaticamente. Qualora venissero effettuate più misurazioni al giorno, viene salvata solamente l’ultima
misurazione.
56
Muscolatura
• Azionare mediante il tasto [ , ] per avere una rappresentazione dettagliata della massa muscolare.
Kcal Consumo di calorie
• Premere il tasto [ ] sul pannello di comando, per
attivare Kcal. Il metabolismo basale BMR e quello
di attività AMR, calcolati in modo teorico, vengono
visualizzati in kcal.
Vengono mostrati soltanto i risultati di misurazione più recenti; non i valori di misurazione salvati in
precedenza.
Richiamo della memoria dei valori misurati
dalla modalità standby
Mem Visualizzazione dei valori salvati
All’attivazione i valori di misurazione vengono memorizzati automaticamente dopo ogni analisi. Ogni utente
dispone di 30 posti di memoria.
• Attivare il pannello di comando mediante il tasto [ ].
• Selezionare l’utente premendo il tasto[ ]. Se necessario, premere più volte il tasto.
• Premere il tasto [ , ] sul pannello di comando,
per scorrere i valori di analisi oppure premere [ ,
] per passare al sotto menu (ad es. Cambiamento
BF, ).
• Premere il tasto [ ] sul pannello di comando per
attivare la funzione Memoria.
Viene mostrata la panoramica dei valori. In alto è indicata la data della misurazione e il numero del posto di
memoria (03-03) per esempio 03 = l’ultimo posto di
memoria su un totale di 3 posti di memoria disponibili.
Eliminazione dati
• Utilizzare il tasto [
moria.
,
1. Eliminazione della voce utente e di tutte le impostazioni ed i valori memorizzati
• Dopo l’attivazione, selezionare l’utente premendo il
tasto [ ]. Se necessario premere ripetutamente il
tasto e confermare con [SET].
• Quando sull’indicatore compare 0.0 premere il tasto
[SET] per 5 secondi per eliminare la voce utente.
• Selezionare „Sì“ mediante il tasto [ , ] e confermare la domanda con il tasto [SET]. Se non si desidera eliminare la voce utente, confermare „No“ mediante il tasto [SET].
] per scorrere i posti di me-
Valori medi
• Premere il tasto [ ] sul pannello di comando per
attivare la funzione Media.
Vengono rappresentati tutti i valori medi delle misurazioni presenti in memoria.
Tutte i valori e le impostazioni memorizzati dell’utente vengono eliminati.
2. Eliminazione di un solo valore memorizzato di
un utente
• Nella memoria dei valori misurati „Mem“ selezionare un valore misurato e premere brevemente il tasto
[SET] sul pannello di comando, per eliminare il valore in memoria selezionato. Ciò può essere eseguito
direttamente al termine della misurazione.
• Selezionare „Sì“ mediante il tasto [ , ] e confermare la domanda con il tasto [SET]. Se non si desidera eliminare il valore, confermare „No“ mediante
il tasto [SET].
In alto è indicata la data della prima e dell’ultima
misurazione.
57
3. Eliminazione di tutti i valori memorizzati di un
utente
• Richiamare la memoria dei valori misurati “Mem“ e
premere il tasto [SET] sul pannello di comando per
ca. 3 secondi per eliminare tutti i valori.
• Selezionare „Sì“ mediante il tasto [ , ] e confermare la domanda con il tasto [SET]. Se non si desidera eliminare alcun valore, confermare „No“ mediante
il tasto [SET].
Età
60 – 69
70 –100
bassa
<22 %
<23 %
normale
22 – 27 %
23 – 28 %
alta
molto alta
27,1– 32 % >32,1 %
28,1– 33 % >33,1 %
Negli sportivi spesso si rileva un valore più basso. A seconda del tipo di sport praticato, dell’intensità degli allenamenti e della costituzione fisica si possono raggiungere valori che sono al di sotto dei valori indicativi qui
riportati. Occorre tuttavia considerare che valori estremamente bassi costituiscono un pericolo per la salute.
Disattivazione della bilancia (modalità
standby)
• Attendere ca. 45 secondi finché il display non si spegne automaticamente oppure premere il tasto [ ] sul
pannello di comando per spegnere manualmente il
display.
Percentuale di acqua corporea
La quantità in % di acqua corporea di norma rientra
nei seguenti valori:
Uomo
La data e l’ora restano ben visibili.
Modalità a risparmio energetico
• Premere contemporaneamente per 10 secondi i tasti e posti sul menu. L’indicazione della data e
dell’ora non è più visibile.
• Per riattivarla tenere premuti per 10 secondi contemporaneamente i tasti e posti sul menu.
Età
10 –100
Età
10 –100
Percentuale di grasso corporeo
I valori del grasso corporeo vengono mostrati sul display valutati sull’istogramma. I valori del grasso corporeo in % riportati qui sotto sono indicativi (per ulteriori informazioni rivolgersi al proprio medico!).
normale
11–16 %
12 –17 %
13 –18 %
14 –19 %
15 – 20 %
16 – 21 %
17 – 22 %
18 – 23 %
alta
16,1– 21 %
17,1– 22 %
18,1– 23 %
19,1– 24 %
20,1– 25 %
21,1– 26 %
22,1– 27 %
23,1– 28 %
ottima
>65 %
pessima
<45 %
buona
45 – 60 %
ottima
>60 %
Il grasso corporeo contiene relativamente poca acqua.
Perciò in soggetti con una percentuale elevata di grasso
corporeo, la percentuale di acqua nel corpo può essere
inferiore ai valori indicativi. Chi pratica sport di resistenza, invece, può superare i valori indicativi a causa delle
basse percentuali di grassi e dell’elevata massa muscolare. I valori dell’acqua corporea determinati con questa
bilancia non sono idonei a trarre conclusioni mediche,
ad es. sui depositi di liquido dovuti all’età. Eventualmente rivolgersi al proprio medico. In generale è opportuno avere un’elevata percentuale di acqua nel corpo.
Uomo
bassa
<11 %
<12 %
<13 %
<14 %
<15 %
<16 %
<17 %
<18 %
buona
50 – 65 %
Donna
11. Valutazione dei risultati
Età
10 –14
15 –19
20 – 29
30 – 39
40 – 49
50 – 59
60 – 69
70 –100
pessima
<50 %
molto alta
>21,1 %
>22,1 %
>23,1 %
>24,1 %
>25,1 %
>26,1 %
>27,1 %
>28,1 %
Massa muscolare
La massa muscolare in % di norma rientra nei seguenti valori:
Uomo
Donna
Età
10 –14
15 –19
20 – 29
30 – 39
40 – 49
50 – 59
bassa
<16 %
<17 %
<18 %
<19 %
<20 %
<21 %
normale
16 – 21 %
17 – 22 %
18 – 23 %
19 – 24 %
20 – 25 %
21– 26 %
alta
21,1– 26 %
22,1– 27 %
23,1– 28 %
24,1– 29 %
25,1– 30 %
26,1– 31 %
Età
10 –14
15 –19
20 – 29
30 – 39
40 – 49
50 – 59
60 – 69
70 –100
molto alta
>26,1 %
>27,1 %
>28,1 %
>29,1 %
>30,1 %
>31,1 %
58
bassa
<44%
<43%
<42%
<41%
<40%
<39%
<38%
<37%
normale
44 – 57 %
43 – 56 %
42 – 54 %
41– 52 %
40 – 50 %
39 – 48 %
38 – 47 %
37 – 46 %
alta
>57 %
>56 %
>54 %
>52 %
>50 %
>48 %
>47 %
>46 %
AMR
Donna
Età
10 –14
15 –19
20 – 29
30 – 39
40 – 49
50 – 59
60 – 69
70 –100
bassa
<36%
<35%
<34%
<33%
<31%
<29%
<28%
<27%
normale
36 – 43 %
35 – 41 %
34 – 39 %
33 – 38 %
31– 36 %
29 – 34 %
28 – 33 %
27 – 32 %
Il metabolismo di attività (AMR = active metabolic rate)
è il fabbisogno energetico quotidiano del corpo in condizioni di attività. Il consumo di energia di un essere
umano cresce con l’aumentare dell’attività fisica; questo consumo viene rilevato dalla bilancia diagnostica
grazie al grado di attività impostato (1 – 5).
Per mantenere il proprio peso occorre reintegrare nel
corpo l’energia consumata assumendo cibi e bevande. Se per un lungo periodo non si reintegra completamente l’energia consumata, il corpo colma la differenza attingendo dalle scorte di grasso, e il peso
diminuisce. Se invece per un lungo periodo si assume
energia superiore al valore del metabolismo di attività (AMR) calcolato, il corpo non riesce a bruciare l’eccesso di energia, il surplus si deposita sotto forma di
grasso e il peso aumenta.
alta
>43 %
>41 %
>39 %
>38 %
>36 %
>34 %
>33 %
>32 %
Massa ossea
Come il resto del nostro corpo, anche le ossa sono
soggette a processi naturali di crescita, calo e invecchiamento. La massa ossea aumenta rapidamente durante l’infanzia e raggiunge il massimo in un’età compresa fra i 30 e 40 anni. Con l’aumentare dell’età la
massa ossea diminuisce leggermente. Un’alimentazione sana (ricca specialmente di calcio e vitamina D)
e un esercizio fisico regolare possono contrastare efficacemente questo deperimento. La crescita mirata dei
muscoli contribuisce a rafforzare la stabilità dell’ossatura. Tenere presente che questa bilancia non indica il
contenuto di calcio nelle ossa, ma determina il peso di
tutte le componenti delle ossa (sostanze organiche e
inorganiche, acqua). Sulla massa ossea è quasi impossibile influire, tuttavia può variare leggermente per determinati fattori (peso, statura, età, sesso). Al riguardo
non esistono valori consigliati né direttive riconosciute.
Interazione temporale dei risultati
Considerare che conta solo la tendenza nel lungo
periodo. Variazioni di peso nell’ambito di qualche giorno sono di regola da imputare a una perdita di liquidi.
L’interpretazione dei risultati si orienta sulle variazioni
del peso totale e della percentuale di grasso, acqua e
muscoli corporei, nonché sull’intervallo di tempo in cui
queste variazioni sono avvenute. Occorre distinguere
tra le variazioni nell’ambito di qualche giorno e quelle a medio (nell’ambito di qualche settimana) e lungo
termine (mesi).
Come regola fondamentale si può valere che le variazioni di peso a breve termine sono da imputare quasi
esclusivamente alla variazione della quantità di acqua
presente nel corpo, mentre le variazioni a medio e lungo termine possono riguardare anche le percentuali di
grasso e muscoli.
• Se il peso diminuisce entro breve termine, mentre la
percentuale di grasso corporeo aumenta o rimane
invariata, significa che è stata persa solo acqua –
ad es. dopo un allenamento, una sauna oppure una
dieta mirante solo a una rapida perdita di peso.
• Quando il peso aumenta a medio termine, mentre la
percentuale di grasso corporeo diminuisce o rimane
invariata, potrebbe invece essersi creata della preziosa massa muscolare.
• Quando peso e percentuale di grasso corporeo diminuiscono contemporaneamente, significa che la
dieta ha successo e che si perde massa grassa.
• Una soluzione ideale è „aiutare“ la dieta con attività
fisica, allenamento fitness o di forza. In questo modo
è possibile incrementare a medio termine la propria
percentuale di muscoli.
• Grasso e acqua corporei o percentuale di muscoli
non devono essere sommati (il tessuto muscolare
contiene anche acqua).
Attenzione
Non bisogna confondere la massa ossea con la densità delle ossa.
La densità delle ossa può essere determinata solo con
un’analisi medica(ad es. tomografia computerizzata,
ultrasuoni). Pertanto questa bilancia nonconsente di
trarre conclusioni su variazioni delle ossa e della durezza delleossa (ad es. osteoporosi).
BMR
Il metabolismo basale (BMR = Basal Metabolic Rate) è
la quantità minima di energie di cui un corpo a riposo
necessita per mantenere le sue funzioni vitali (ad es.
se si resta sdraiati a letto per 24). Tale valore dipende essenzialmente dal peso, dalla statura e dall’età.
Sulla bilancia diagnostica viene mostrato in kcal/giorno e calcolato sulla base dell’equazione scientifica di
Harris-Benedict.
Il fabbisogno energetico indispensabile per il corpo
viene assunto mediante il cibo. Se al corpo viene a
mancare per un lungo periodo l’energia necessaria,
possono insorgere dei problemi di salute.
59
12. Trasmissione dei valori misurati
su un PC / HealthManager /
EasyFit
15. Smaltimento
Batterie e accumulatori non sono rifiuti domestici. La
legge impone di restituire le batterie usate. Le vecchie
batterie possono essere consegnate nei centri di raccolta comunali oppure dove vengano vendute batterie
dello stesso tipo.
Requisiti del sistema:
Windows 7, Windows Vista, Windows XP SP3
HealthManager:
Gestione della salute in combinazione con il misuratore
di glicemia o di pressione Beurer.
Avvertenza
Sulle batterie contenenti sostanze tossiche
si trovano questi simboli:
Pb = la batteria contenente piombo,
Cd = batteria contenente cadmio,
Hg = la batteria contenente mercurio.
EasyFit:
Analisi dell‘allenamento in combinazione con il cardiofrequenzimetro Beurer.
Procedura:
• Per scaricare e installare il software Beurer, accedere
all‘area download del sito http://www.beurer.com
• Effettuare il collegamento USB.
Per rispetto dell’ambiente la bilancia, batterie incluse,
non deve essere gettata tra i normali rifiuti domestici
al termine della sua vita utile. Lo smaltimento va effettuato negli appositi centri di raccolta.
Seguire le norme locali vigenti per lo smaltimento.
Smaltire l’apparecchio rispettando le norme
previste dalla Direttiva CE sui rifiuti di apparecchi elettrici ed elettronici 2002/96/EC – WEEE
(Waste Electrical and Electronic Equipment).
Per eventuali chiarimenti, rivolgersi alle autorità comunali competenti per lo smaltimento.
USB
• Per l‘installazione del software, seguire le istruzioni.
13. Sostituzione batterie
16. Che cosa fare in caso di
problemi?
Il pannello di comando è dotato di un indicatore del
cambio batterie. Sul display compare il simbolo
, se
le batterie del pannello di comando sono scariche oppure il simbolo se sono scariche le batterie della bilancia. In questo caso è necessario sostituire le batterie.
Se la bilancia rileva un errore nella pesatura, viene
visualizzato:
Display
Causa
SOVRACCARICO! È stata superata
la portata massima di 150 kg.
BATT. SCARICA La batteria è
quasi scarica.
Rimedio
Non superare la
portata massima di
150 kg.
Sostituire la batteria
(vedere pag. 52
e 60).
MEMORIA PIENA Sono state meTrasmettere al PC i
morizzate 30 mi- valori misurati, vedere pagina 60.
surazioni.
ERR. CONTATTO! La resistenza
Ripetere la misuraelettrica tra elet- zione a piedi nudi.
trodi e pianta dei Event. inumidipiedi è eccessi- re leggermente le
va (ad es. per la piante dei piedi.
presenza di du- Event. eliminare i
duroni dalla pianta
roni).
dei piedi.
Avvertenza
• Quando si sostituiscono le batterie occorre utilizzare
batterie dello stesso tipo, marca e potenza.
• Sostituire sempre tutte le batterie contemporaneamente.
• Non utilizzare accumulatori ricaricabili.
• Utilizzare batterie prive di metalli pesanti.
14. Pulizia e cura dell’apparecchio
La precisione del valore misurato e la durata dell’apparecchio dipendono da un utilizzo attento e scrupoloso. L’apparecchio andrebbe pulito di tanto in tanto.
Per la pulizia utilizzare un panno umido e, se necessario, qualche goccia di detergente. Non utilizzare prodotti di pulizia aggressivi e non immergere mai l’apparecchio nell’acqua.
Attenzione
• Non utilizzare mai solventi o prodotti di pulizia aggressivi!
• Non immergere mai l’apparecchio nell’acqua!
• Non lavare l’apparecchio nella lavastoviglie.
60
Display
CAMPO MISURA
Nessuna indicazione
Causa
La misurazione
BIA è terminata
positivamente
ma la percentuale di grasso non
rientra nell’intervallo misurabile
(inferiore al 5 %
o superiore al
50 %).
Le batterie nel
pannello di comando sono
completamente
scariche.
Le batterie nel
pannello di comando non sono
inserite correttamente.
Misurazione del peso non corretta
Rimedio
Ripetere la misurazione a piedi nudi,
event. inumidire leggermente la
pianta dei piedi.
Modificare eventualmente il livello
di attività fisica impostato.
Possibili errori
Rimedio
La bilancia non è tarata Prima della misurazione attisullo 0 in modo corretto. vare la bilancia appoggiando
sopra i piedi finché non compare l’attivazione di stato .
Attendere per ca. 5 secondi e ripetere la misurazione.
Utile da sapere: poiché normalmente si sale subito sulla bilancia, allo spegnimento la bilancia memorizza lo 0
(quando l’indicazione di stato
si spegne).
La bilancia poggia sulla Posare la bilancia su un fondo
moquette.
piano e solido.
Tenere le gambe divaricate il
più possibile, senza ribaltare
la bilancia.
Sostituire la batteria (vedere pagina
52).
Verificare che la polarità delle batterie
sia corretta, (vedere
pagina 52).
17. Dati tecnici
Dimensioni della bilancia
Batterie della bilancia
Batterie del pannello di
comando
Trasmissione radio
Intervallo di misurazione
Scala per peso, massa ossea
Suddivisione della percentuale di grasso corporeo, acqua e
massa muscolare
Scala BMR, AMR
Misurazione impossibile
Possibili errori
Il pannello di comando
non è stato attivato prima dell’accesso.
Rimedio
Prima della misurazione accendere il pannello di comando. Attendere 30 secondi,
quindi ripetere la misurazione.
Il collegamento radio tra Inserire nuovamente le batterie della bilancia e del pannelbilancia e pannello di
comando è disturbato. lo di comando.
Tenere a debita distanza dalle
seguenti fonti elettromagnetiche: tralicci dell’alta tensione,
antenne radio per computer
e televisione, attrezzi per il fitness, telefoni cellulari, stazioni meteorologiche.
Il pannello di comando Ridurre la distanza tra bilancia
e pannello di comando, diè troppo distante dalla
stanza massima 2 metri.
bilancia.
Le batterie della bilancia Sostituire le batterie (vedere
non sono state inserite pagina 52) e all’occorrenza
verificare la polarità.
correttamente oppure
sono scariche.
330 x 330 x 41 mm
3 x 1,5 V tipo AA
3 x 1,5 V tipo AA
433 MHz
5 kg – 150 kg
100 g
0,1 %
1 Kcal
Con riserva di modifiche tecniche.
La bilancia è conforme alla Direttiva CE 2004/108/EC
+ integrazioni.
61
TÜRKÇE
İçindekiler
Bu analiz işlemi B.I.A. prensibine bağlı olarak gerçekleşir (Biyoelektrikli impedans analizi, „Ölçme prensibi“, sayfa 65).
Elektrik direncini (impedans) daha kesin bir şekilde belirleyebilmek için bu basküle bir yerine iki adet farklı frekans yerleştirilmiştir.
Ayrıca yapılan ölçümün sonuçlarını daha kesin bir hale
getirmek ve daha iyi bir analiz sonucuna ulaşmak için
gövdeye ilişkin elektrik kontağı, 4 adet el elektrodu ve
4 adet ayak elektrodu aracılığıyla optimize edilmiştir.
Ölçüm değerleri radyo sinyal aktarımı ile 2 metrelik bir
mesafeye kadar gönderilebilir. Tüm ayarlar yenilikçi
menü kılavuzu sayesinde açık ve kolay bir şekilde gerçekleştirilebilir ve büyük bir ekranda görüntülenir, 5 ayrı
dilde seçilebilir. Bu ekran baskülün üzerinde bırakılabilir, başka bir yere koyulabilir veya duvara sabitlenebilir.
Değerlerinizi, daha sonraki zamanlarda denetleyebilmek için istediğiniz bir USB kablosu ve PC yazılımı
aracılığıyla bilgisayarınıza kaydedebilirsiniz. Bu dijital
baskül sizin kişisel egzersiz koçunuzdur.
Baskül aşağıdaki fonksiyonlara sahiptir:
• Ağırlık ölçme (100 g olarak).
• Vücuttaki yağ, su ve kas oranının (% 0,1 olarak), kemik kütlesinin (100 g olarak), bazal metabolik hızın
ve aktif metabolik hızın belirlenmesi.
• Alt ölçüm değerlerini içeren gösterge ile üst ve alt
gövdeye ilişkin ayrı yağ ve kas kütlesi ölçümü.
• Ağırlığa ve yağ oranına ilişkin diyagram göstergesi.
• 10 kişiye ilişkin son 30 ölçüm değerini gösteren gösterge.
• Misafirlere ilişkin bir seferlik, hızlı analiz fonksiyonu.
• Bekleme modunda tarih ve saat gösterimi.
1. Tanıtım ...............................................................62
2. Sembol açıklaması ............................................62
3. Güvenlik Uyarıları ..............................................62
4. Cihaz açıklaması ...............................................63
5. Çalıştırma ..........................................................64
6. Kontrol ünitesinin montajı ..................................64
7. Bilgiler ................................................................65
8. Ayar ...................................................................66
9. Ekran göstergeleri ..............................................66
10. Kullanım .............................................................67
11. Sonuçların değerlendirilmesi .............................69
12. Ölçüm değerlerinin PC’ye aktarılması /
HealthManager / EasyFit ....................................71
13. Pillerin değiştirilmesi ..........................................71
14. Cihaz Temizliği ve Bakımı ..................................71
15. İmha ..................................................................71
16. Problemle karşılaşılması durumunda ne
yapılmalıdır? ......................................................72
17. Teknik Veriler .....................................................72
Teslimat kapsamı
•
•
•
•
•
•
•
Dijital Baskül
Göstergesi olan çıkarılabilir kontrol ünitesi
Duvar braketi
Duvar montajına ilişkin montaj takımı
3 x 1,5 V tip AA (baskül)
3 x 1,5 V tip AA (kontrol ünitesi)
USB kablosu
Değerli Müşterimiz,
Ürün yelpazemiz dahilindeki bir ürünü satın almayı
tercih ettiğiniz için teşekkür ederiz. Adımız; ısı, ağırlık,
tansiyon, vücut sıcaklık derecesi, nabız, hassas terapi, masaj ve hava konuları ile ilgili alanlarda, kapsamlı
kontrollerden geçirilmiş yüksek kaliteli ürünlerin simgesidir.
Lütfen bu kullanma kılavuzunu itinayla okuduktan sonra, ileride yine kullanmak üzere saklayınız. Cihazı kullanan diğer kişilerin de kılavuzu okumasını sağlayınız ve
içinde verilen bilgi ve uyarılara dikkat ediniz.
2. Sembol açıklaması
Kullanım kılavuzunda aşağıdaki semboller kullanılacaktır.
Uyarı
Yaralanma tehlikelerine veya sağlığınızla ilgili tehlikelereyönelik uyarılar.
Dikkat Cihazla/aksesuarlarıyla ilgili olası hasarlara yönelik güvenlik uyarıları.
Saygılarımızla
Beurer Ekibiniz
Not
Önemli bilgilere yönelik notlar.
1. Tanıtım
3. Güvenlik Uyarıları
Cihazın fonksiyonları
Lütfen bu kullanma kılavuzunu itinayla okuduktan sonra,
ileride yine kullanmak üzere saklayınız. Cihazı kullanan
diğer kişilerin de kılavuzu okumasını sağlayınız ve içinde
verilen bilgi ve uyarılara dikkat ediniz.
Bu baskül sağlığınıza önemli katkı sağlar. Bu dijital baskül, tartma ve kişisel egzersiz verilerinin analizi için tasarlanmıştır ve kişisel kullanıma uygundur.
62
• Baskülü yüksek sıcaklıklara veya ciddi elektromanyetik
alanlara (örn. cep telefonları) maruz bırakmayınız.
• Onarım işleri yalnız müşteri hizmetleri veya yetkili satıcılar tarafından yapılabilir. Şikayette bulunmadan önce
pilleri kontrol edin ve gerekliyse değiştiriniz.
• Cihazımızın kullanımına ilişkin sorularınız için satıcınıza
veya müşteri hizmetlerine başvurmalısınız.
• Tüm basküller AB yönergesi 2004/108/EC’ye uygundur. Cihazımızın kullanımına ilişkin sorularınız için satıcınıza veya müşteri hizmetlerine başvurmalısınız.
Güvenlik Uyarıları
• Baskül, tıbbi implant kullanan kişilerce (örneğin kalp pili) kullanılmamalıdır. Aksi takdirde fonksiyonu zarar görebilir.
• Hamilelik döneminde kullanılmamalıdır.
• Baskülün dış kenarına tek tarafından basmayın: Devrilme tehlikesi!
• Çocukları ambalaj malzemesinden uzak tutun (Boğulma tehlikesi).
4. Cihaz açıklaması
Pillerle temas etme durumu için uyarılar
Genel görünüm
• Yutma durumunda piller hayati tehlikeye neden olabilir. Pilleri ve baskülü küçük çocukların erişemeyeceği bir yerde saklayınız. Pil yutulduysa hemen tıbbi
yardım alınmalıdır.
• Zayıflayan pilleri hemen değiştiriniz.
• Her zaman aynı tip piller kullanın ve tüm pilleri aynı
anda değiştiriniz.
• Piller yeniden şarj edilmemeli, içindeki maddeler çıkartılmamalı, ateşe atılmamalı ve kısa devre yaptırılmamalıdır.
• Akmış piller cihazda arızalara neden olabilir. Cihazı
uzun süre kullanmayacaksanız, pilleri yuvasından çıkartınız.
• Eğer bir pil akmışsa koruyucu eldiven takın ve pil yuvasını kuru bir bezle temizleyiniz.
• Piller, sağlığı ve çevreyi tehdit eden zehirli maddeler
içerebilir. Pilleri geçerli yasal belirlemelere uygun bir
şekilde imha ediniz. Pilleri hiçbir zaman normal ev
çöpüne koymayınız.
2
1
3
4
1
2
3
4
Ayak elektrotları, Sol ayak
Göstergeli kontrol ünitesi
Çalışma durumuna ilişkin gösterge
Ayak elektrotları, Sağ ayak
Göstergeli kontrol ünitesi
Genel Uyarılar
5
• Bu cihaz kendi kullanımınız içindir, tıbbi veya ticari
amaçlı kullanım için üretilmemiştir.
• Baskül, profesyonel ve tıbbi kullanım için tasarlanmadığından teknik olarak belirli ölçüm toleranslarının
mümkün olduğunu dikkate alınız.
• Baskülün kapasitesi azami 150 kg’dır. (330 lb, 24 St).
• Teslimatta baskül ayarları „cm” ve „kg” cinsinden
yapılmıştır. Birimlerin ayarlanmasında „Setting“ bölümündeki bilgileri dikkate alınız.
• Baskül sabit bir zemine yerleştirilmelidir. Doğru ölçüm için ön koşul sabit bir zemindir.
• Cihazı darbelerden, nemden, tozdan, kimyasallardan,
aşırı ısı değişikliklerinden koruyun ve ısı kaynaklarından (fırın, ısıtıcı) uzak tutunuz.
• Baskülün içine sıvı kaçmadığından emin olunuz. Baskülü hiçbir zaman suya batırmayınız. Baskülü hiçbir
zaman akan suyun altında yıkamayınız.
• Kullanmadığınız durumlarda baskülün üzerine herhangi
bir madde koymayınız.
• Tuşlara şiddetle veya sivri uçlu maddeler ile basmayınız.
6
7
8
9
5
6
5
Kontak elektrotları, sol el
6
Kontak elektrotları, sağ el
7 set Ayar tuşu, Girişlerin onaylanması
Menü: Açma tuşu
8
Menü: Kapatma tuşu
9
ON tuşu
10
Ayar: Açma tuşu
11
Ayar: Kapatma tuşu
12
63
10
11
12
Kontrol ünitesi ile analiz
Kontrol ünitesini üzerine yerleştirebilmek için şarj aletini (baskülün arka tarafındaki) gösterilen şekilde dışarıya doğru itiniz. Şarj aleti, kontrol ünitesini basküle sabitleyen bir mıknatıs içermektedir.
Not
(5) ve (6) numaralı elektrotların ön ve
arka tarafa güvenli bir şekilde bağlanabilmeleri için cihaz iki elle tutulmalıdır.
Duvar montajı
Kontrol ünitesi montaj takımı (duvar tutucusu, cıvatalar,
dübel) yardımıyla duvara monte edilebilir. Montaj için
birlikte teslim edilen montaj takımını kullanınız ve duvar
braketini gösterilen şekilde monte ediniz. Gerekirse alt
zemin için de uygun dübeller kullanabilirsiniz.
5. Çalıştırma
Pillerin takılması
Pilleri ambalajından çıkartınız ve kutuplarına uygun olacak şekilde basküle ve kontrol ünitesine yerleştiriniz. Pil
yuvasındaki grafiğe dikkat ediniz. Piller takıldıktan sonra yıl göstergesi yanıp söner, bkz. sayfa 66.
Kontrol ünitesi
3 x AA
• Deliklerin yerlerini işaretleyebilmek için duvar tutucusunu delme şablonu olarak kullanınız.
• 6 mm’lik matkap ucu ile duvara yan yana yatay konumda ve 36 mm mesafede olacak şekilde yakl.
40 mm derinlikte 2 adet delik açınız.
• Dübelleri yerleştiriniz.
• Cıvatalar yardımıyla duvar tutucusunu sabitleyiniz.
Cihazın yerine tam olarak oturup oturmadığını kontrol ediniz.
• Bu işlem sonrasında duvar tutucusu kılavuzlarının
kontrol ünitesi kılavuzlarına paralel konumda olması
için kontrol ünitesini tutucunun üzerine doğru itiniz.
Baskül
3 x AA
Sürme işlemini kolaylaştırmak için kontrol ünitesini önce duvar tutucusu üzerinden duvara doğru itiniz
ve daha sonra kontrol ünitesini aşağıya bastırınız.
Baskül veya kontrol ünitesi çalışmıyorsa, pilleri tamamen çıkartınız ve yeniden yerleştiriniz.
Pil değişimine ilişkin bilgiler, bkz. sayfa 71.
Baskülün yerleştirilmesi
Baskülü düz ve sabit bir zemin üzerine yerleştiriniz.
Ölçümün doğru yapılabilmesi için zeminin düzgün olması bir önkoşuldur.
6. Kontrol ünitesinin montajı
Kontrol ünitesinin yerleştirilmesi
Kontrol ünitesi isteğe bağlı olarak elde tutulabilir, düz
bir zemin üzerine yerleştirilebilir veya baskül üzerinde
bırakılabilir.
64
• Kontrol ünitesini tam olarak tutucunun üzerine itiniz.
Kontrol ünitesinin paralel konumda ve sağlam bir şekilde tutucunun üzerindeki yerine oturup oturmadığını
kontrol ediniz.
Dijital baskül tarafından belirlenen değerler, tıbbi ve
gerçek analiz değerlerine yaklaşık değerlerdir. Yalnız
uzman doktorlar tıbbi yöntemler (örneğin bilgisayarlı
tomografi) kullanarak vücuttaki yağ, su, kas oranları ile
kemik yapısını kesin olarak belirleyebilirler.
Eğim ayarı
Ölçme yöntemleri
Kontrol ünitesi duvar tutucusu üzerinde kaydırılabilir ve
bu şekilde eğim ayarı yapılabilir. Bir kilit yardımıyla eğim
ayarı sırasında kontrol ünitesinin duvar tutucusundan
aşağı düşmesi engellenir.
Analiz işlemi aşağıdaki şekillerde yürütülebilir:
• Üst gövde: Kontrol ünitesi elle tutulmalı, ayakkabılar
ile baskülün üzerine çıkılmalıdır.
• Alt gövde: Kontrol ünitesi örneğin baskülün üzerinde
bırakılmalı, ayakkabısız baskülün üzerine çıkılmalıdır.
• Üst gövde ve alt gövde: Kontrol ünitesi elle tutulmalı
ve ayakkabısız olarak baskülün üzerine çıkılmalıdır.
Duvar tutucusundan çıkarmadan önce kontrol ünitesini tekrar tam olarak öne doğru bastırınız!
Alternatif duvar montajı
Duvar braketini çift taraflı yapışkan şeritler yardımıyla
da duvara sabitleyebilirsiniz.
Bu işlem sırasında duvar yüzeyi temiz ve kuru olmalıdır. Montaj işlemi fayans, cam, plastik ve daha birçok
yüzeye uygulanabilir.
• Yapışkan şeridin koruyucu folyosunu, duvar braketinin arka tarafında çıkartınız.
• Duvar braketini kuvvetli bir şekilde duvara bastırınız.
• Cihazın yerine tam olarak oturup oturmadığını kontrol
ediniz.
Bu kılavuz içerisinde üst ve alt gövdeye ilişkin analiz açıklanmaktadır.
Kontrol ünitesinin analize ilişkin olarak elde tutulması durumunda, bunun ağırlığı otomatik olarak
çıkartılır.
Genel İpuçları
• Karşılaştırılabilir sonuçlar elde etmek için mümkünse
günün aynı saatinde (en iyisi sabah), tuvalete gittikten
sonra, aç karnına ve kıyafetsiz olarak tartılmalısınız.
• Ölçüm sırasında önemli: Vücuttaki yağ oranının (alt
gövde) belirlenmesi için çıplak ayak ile ve ayak tabanları hafif ıslak olacak şekilde basküle çıkılmalıdır.
Kuru ve nasırlı ayak tabanlarının iletkenliği düşük olacağından tatmin edici sonuçlar vermeyebilir.
• Ölçüm işlemi boyunca dik ve sabit durmalısınız.
• Alışılmışın dışındaki bedensel yorgunluktan sonra birkaç saat bekleyiniz.
• Vücuttaki suyun dağılabilmesi için ayağa kalktıktan
sonra yaklaşık 15 dakika bekleyiniz.
• Önemli olan uzun süreli eğilimin hesaplanmasıdır. Kural olarak, birkaç gün içindeki kısa süreli ağırlık farklılıklarının nedeni sıvı kaybıdır ve vücuttaki su sağlık
için önemli bir role sahiptir.
Duvar tutucusunun yapışkan şeritler yardımıyla
sabitlenmesinden sonra kontrol ünitesi yerleştirilmeden önce en az 1 saat beklenmelidir!
7. Bilgiler
Ölçme prensibi
Bu baskül B.I.A. prensibine göre (Biyoelektrik İmpedans Analizi) çalışır. Burada, şiddetli, sakıncalı ve tehlikeli olmayan kısa süreli bir akım ölçümlerin yapılmasını
olanaklı kılar. Elektrik direncinin (impedans) ölçülmesi
ve bazı kişisel değerler (yaş, boy, cinsiyet, aktivite derecesi) gibi sabitlerin hesaplanmasıyla vücuttaki yağ
oranı ve diğer değerler belirlenebilir.
Kas dokusu ve su iyi birer iletkendir ve bu nedenle dirençleri düşüktür. Buna karşın yağ hücreleri ve kemikler yüksek elektrik direncine sahip olduklarından yağ
ve kemik dokusu iyi iletken değildir. İmpedansın daha
iyi bir şekilde belirlenebilmesi için baskül iki ayrı frekans kullanmaktadır. Bu farklı frekansların hücre zarı
ve vücuttaki su üzerinde farklı etkileri olur. Ayrıca yapılan ölçümün sonuçlarını daha kesin bir hale getirmek
ve daha iyi bir analiz sonucuna ulaşmak için gövdeye
ilişkin elektrik kontağı, 4 adet el elektrodu ve 4 adet
ayak elektrodu aracılığıyla optimize edilmiştir. Bu hassas analiz tekniği sayesinde, yineleme ölçümleri sırasındaki değer değişikliklerinin çok küçük oranda olması
sağlanır. Burada anlatılmak istenen impedans ölçümü
sırasındaki farklılıklardır (örneğin ellere ve ayaklara ilişkin elektrotlar için başka elektrikli kontak, vücuttaki suyun başka dağılımı).
Sınırlamalar
Aşağıda sayılan kişilerde, vücuttaki yağ oranının ve diğer değerlerin belirlenmesinde farklılıklar ve tutarsız
sonuçlar ortaya çıkabilir:
• 10 yaşından küçük çocuklar,
• rekabete dayalı spor yapan kişiler ve vücut geliştirme
sporu yapanlar,
• hamileler,
• ateşli, diyaliz tedavisi gören, ödem semptomları olan
veya osteoporozlu kişiler,
• kardiyovasküler ilaç (kalp ve damar sistemiyle ilgili)
kullanan kişiler,
• damar genişletici veya daraltıcı ilaç kullanan kişiler,
• genel vücut büyüklüğü (bacak boyu kısa veya uzun)
ile ilişkili olarak bacaklarında önemli anatomik farklılıklara sahip kişiler.
65
8. Ayar
• Şimdi aşağıdaki ayarlamaları yapabilirsiniz:
Kullanıcı verileri Ayar değerleri
Cinsiyet
Erkek , Kadın
Boy
100 ile 250 cm arasında
(3‘-03“ ile 8‘-02“ arasında)
Doğum günü
Yıl, ay, gün
Aktivite derecesi 1’den 5’e kadar
Hedef ağırlık
ayarlanabilir, kg cinsinden (grafiksel gelişim gösterimi için)
• Değerlerin değiştirilmesi: [ , ] tuşuna basınız veya
hızlı geçiş için basılı tutunuz.
• Girişlerin onaylanması: [SET] tuşuna basınız.
Baskülünüzü kullanmadan önce lütfen verilerinizi giriniz.
Cihazın ayarlanması
• Bekleme modunda (saat ve tarih görüntülenir) [SET]
tuşuna basınız.
• Ayar tuşu [ ] ile „SET_UNIT“ menü bölümünü seçiniz ve [SET] tuşuna basarak onaylayınız.
• Ayar tuşları [ , ] ile dil sembolünü (D, GB, F, E, I)
seçiniz ve [SET] tuşuna basarak onaylayınız.
• Ayar tuşları [ , ] ile birim sembolünü (kg, lb, st)
seçiniz ve [SET] tuşuna basarak onaylayınız.
• Ayar tuşları [ , ] ile saati nasıl görüntülemek
(24 saat veya 12 saat) istediğinizi seçiniz ve [SET]
tuşuna basarak onaylayınız.
• Ayar tuşları [ , ] ile GUEST_MODE açık mı yoksa
kapalı mı olmasını istediğinizi seçiniz ve [SET] tuşuna
basarak onaylayınız.
Bu işlem sonrasında ekranda seçilen ayarlar genel bir
bakış altında görüntülenir.
Tüm veriler girildikten sonra baskül ölçüme hazır durumdadır. Başka işlem yapılmazsa baskül kendiliğinden kapanır.
Aktivite dereceleri
Aktivite derecesi seçiminde orta ve uzun süreli gözlem belirleyicidir.
Tüm parametreler girildikten sonra vücuttaki yağ oranı
ve diğer değerler de belirlenebilir.
Aktivite Vücut aktivitesi
derecesi
1
Yok.
2
Düşük: Az ve hafif bedensel yorgunluklar
(örneğin yürüyüş yapmak, hafif bahçe işi,
jimnastik hareketleri).
3
Orta: Bedensel yorgunluklar, ortalama haftada 2 ila 4 defa, her defasında 30 dakika.
4
Yüksek: Bedensel yorgunluklar, ortalama
haftada 4 ila 6 defa, her defasında 30 dakika.
5
Çok yüksek: Yoğun bedensel yorgunluklar,
günde en az 1 saat yoğun çalışma veya ağır
bedensel iş.
Tarihin, saatin ayarlanması
• Bekleme modunda (saat ve tarih görüntülenir) [SET]
tuşuna basınız.
• Ayar tuşu [ ] ile „SET_TIME“ menü bölümünü seçiniz ve [SET] tuşuna basarak onaylayınız.
• Yıl göstergesi yanıp söner.
• Yılı, ayı, günü, saat ve dakikayı arka arkaya ayar tuşları [ , ] ile ayarlayınız.
• Girişinizi [SET] tuşuna basarak onaylayınız.
Kullanıcı verilerinin ayarlanması
Vücudunuzdaki yağ oranını ve diğer değerleri belirleyebilmek için kişisel kullanıcı verilerini hafızaya almalısınız.
Baskülün, sizin ve örneğin aile üyelerinizin kişisel ayarlarını saklayabileceği ve yeniden çağırabileceği 10’un
üzerinde kullanıcı hafızası vardır.
Ayrıca bir „GUEST“ mode kullanıma hazır durumdadır
(eğer bu devreye alındıysa), buna ilişkin ayarlar ve ölçüm değerleri kaydedilmez.
9. Ekran göstergeleri
Genel görünüm
1
5
Misafir modunda kaydetme, eğilim göstergesi ve
ortalama fonksiyonları kullanılamaz.
• [SET] tuşuna basınız.
• „SET_USER“ tuşunu seçiniz ve [SET] tuşuna basarak
onaylayınız.
• Ayar tuşu [ , ] ile kişiyi seçiniz ve [SET] tuşuna
basarak onaylayınız.
• Bellekte önceden mevcut olan ayarlar var ise, bunlar ekranda görüntülenir. Mevcut olan bir ayar yoksa,
kullanıcı belleği boş demektir.
4
3
2
1 Saat, tarih, kullanıcı
2 Değerlendirmeli ağırlık
Ağırlık
3 Analiz verileri (kısmen değerlendirmeli)
BF
Yağ
Su
Kas oranı
Kemik kütlesi
66
4 Menü
2. Diyagnoz
• Cihaz çalıştırıldıktan sonra 1 – 10 arası bir kullanıcıyı
sağ tuşa [ ] basarak seçiniz. Bunun için tuşa gerekirse tekrar basınız.
• [SET] tuşuna basınız veya 3 saniye bekleyiniz. Ölçüm
ekranı görüntülenir.
Güncel ölçüme ilişkin genel bakış
Eğilim göstergesi
Üst gövdeye/alt gövdeye ilişkin ayrıntılandırılmış yağ oranı ve kas kütlesi görüntüsü
Mem 1 – maks. 30 arasında kaydedilen ölçümler
Ortalama değerler
Kcal Kalori tüketimi
Güncel menü bölümlerinin işaretlenmesi
5
10. Kullanım
„GUEST“ kullanıcıyı aktifleştirmeniz durumunda,
her ölçüm işleminden sonra kullanıcı verileri yeniden
girilmelidir. „GUEST“ mode’da kullanıcı verileri ve ölçüm değerleri kaydedilmez. „GUEST“ mode’unu devreye alma veya devre dışı bırakma olanağı mevcuttur,
bkz. sayfa 66.
Ağırlığın ölçülmesi
1. Baskülün açılması
• Kontrol ünitesindeki [ ] tuşuna basınız.
Ekranda 0.0 kg görünür.
Baskül şu anda ölçüm için
hazır durumdadır.
• Şimdi ayakkabısız olarak baskülün üzerine çıkınız ve
kontrol ünitesini elinizde tutunuz. (Kontrol ünitesinin
elde tutulması durumunda, onun ağırlığı (300 gram)
otomatik olarak düşülür).
2. Tartma (diyagnoz olmadan)
Baskülü düz ve sabit bir zemin üzerine yerleştiriniz. Ölçümün doğru yapılabilmesi için zeminin düzgün
olması bir önkoşuldur.
• Baskülün üzerine çıkınız. Basküle ilişkin gösterge [3]
yeşil yanar.
Baskülün üzerinde hareket etmeden
ve ağırlığınızı iki ayağınıza eşit şekilde vererek durunuz. Baskülü yatırmadan mümkün olduğunca dış tarafta durunuz.
• Kontrol ünitesini, başparmağın alt kısmı ile ön elektrodun üzerine bastırınız ve diğer parmaklar ile diğer
elektrodu sıkıca tutunuz.
Kontrol ünitesinin elde tutulması durumunda, onun
ağırlığı (300 gram) otomatik olarak düşülür.
Başarılı bir ölçüm işleminden sonra ölçüm sonucu yakl.
10 saniyeliğine görüntülenir.
Ağırlık ölçümünden sonra analize ilişkin impedans ölçümü gerçekleştirilir. Bu işlem üst gövde için
kontrol ünitesine ilişkin 4 elektrot aracılığıyla, alt
gövde için ise basküle ilişkin 4 elektrot aracılığıyla gerçekleştirilir. Bu durum gövde sembolü
aracılığıyla görüntülenir.
Baskül, üzerinden indikten birkaç saniye sonra kendi kendine kapanır. Gösterge [3] söner. Ölçüm kaydedilmez.
Önemli:
Baskülün üzerinde hareket etmeden ve ağırlığınızı iki
ayağınıza eşit şekilde vererek durunuz. Bu işlem sırasında ayaklar, bacaklar, kalça ve baldırlar arasında deri
teması olmamasına dikkat edilmelidir. Aksi takdirde ölçüm doğru sonuç vermeyebilir. Bu durumu engellemek
için örneğin hafif bir pantolon giyiniz.
Analizin yürütülmesi
1. Baskülün açılması
• Kontrol ünitesindeki [ ] tuşuna basınız.
Ekranda 0.0 kg görünür.
67
3. Sonuç
Genel bakış görüntülenir.
Üst gövde, alt gövde
Yağ
• Üst/alt gövdeye ilişkin ayrıntılı görünüme ulaşmak
için kontrol ünitesindeki [ ] tuşuna basınız.
Tüm gövde ve üst gövde/alt gövde olarak ayrılmış şekilde vücuttaki yağ oranına ilişkin güncel ölçüm sonucu görüntülenir.
Değerlendirme için bkz. „Sonuçların değerlendirilmesi“ sayfa 69.
Kapatma işlemi sırasında ölçüm değeri otomatik olarak
hafızaya alınır. Aynı günde birden fazla ölçümün yapılması durumunda sadece son ölçüm kaydedilir.
Kas
• Kas kütlesine ilişkin ayrıntılı görüntüye ulaşmak için
[ , ] tuşuna basınız.
Başarılı bir ölçüm sonrasında ölçüm değerlerinin analizi
Grafiksel görüntü
Ağırlık
• Münferit alt menülere veya belleğe geçmek için kontrol ünitesindeki menü tuşuna [ ] basınız.
Ölçümden ölçüme vücut ağırlığı gelişiminiz görüntülenir. Yeni ölçümler sağ tarafa eklenir. Referans hattı hedef ağırlığı görüntüler.
Sadece güncel ölçüm sonuçları görüntülenebilir, kaydedilmiş eski ölçüm değerleri görüntülenmez.
Mem Hafıza değerlerinin görüntülenmesi
• [ ] tuşuna basarak hafızaya ulaşabilirsiniz.
Genel bakış görüntülenir. Yukarı kısımda ölçüm tarihi
ve bellek numarası bulunur (03-03). Örneğin üçüncü =
Dolu olan üç bellekten sonuncusu.
Vücut ağırlığının akışını görüntüleyebilmek için bir
hedef ağırlık tanımlamanız gereklidir, bkz. sayfa 66.
Hedef ağırlığı istediğiniz zaman değiştirebilirsiniz.
Yağ
• Yağ değerlerinin akışı için [ , ] tuşuna basınız.
Ölçümden ölçüme yağ değeri gelişiminiz görüntülenir.
Referans hattı tüm yağ ölçümlerine ilişkin ortalama değeri görüntüler, bu işlem sırasında çubuklar, değerlerin
aşağı mı yoksa yukarı mı yönde değişim gösterdiğini
belirtir.
• Bellekleri [
,
] tuşuna basarak görüntüleyebilirsiniz.
Ortalama değerler
• Kontrol ünitesindeki [ ] tuşuna basarak ortalama
değere ulaşabilirsiniz.
Kaydedilen ölçümlere ilişkin tüm ortalama değerler görüntülenir.
Yukarıda ilk ve son ölçüme ilişkin tarih bulunur.
68
Kcal Kalori tüketimi
3. Kullanıcıya ilişkin tüm hafıza değerlerinin silinmesi
• „Mem“ ölçüm değeri hafızasını çağırınız ve tüm değerleri silmek için kontrol ünitesindeki [SET] tuşuna
yakl. 3 saniye boyunca basınız.
• [ , ] tuşlarına basarak „Yes“ durumunu seçiniz ve
[SET] tuşuna basarak sorguyu onaylayınız. Herhangi
bir değeri silmek istemiyorsanız, [SET] tuşuna basarak „No“ durumunu seçiniz.
• Kontrol ünitesindeki [ ] tuşuna basarak Kcal değerlerine ulaşabilirsiniz. Teorik olarak hesaplanan bazal metabolik hız BMR ve aktif metabolik hız AMR
değerleri Kcal olarak görüntülenir.
Baskülün devre dışı bırakılması (bekleme
modu)
• Ekranın 45 saniye içinde kendi kendine kapanmasını
bekleyiniz veya ekranı manüel olarak kapatmak için
kontrol ünitesindeki [ ] tuşuna basınız.
Bekleme modunda ölçüm değerleri hafızasının çağrılması
Cihazın kapatılması sırasında ölçüm değerleri bir analiz
işlemi sonrasında otomatik olarak kaydedilir. Her kullanıcı için 30 adet saklama yeri mevcuttur.
• [ ] tuşuna basarak kontrol ünitesini devreye sokunuz.
• [ ] tuşuna basarak kullanıcı seçimini yapınız. Bunun
için tuşa gerekirse tekrar basınız.
• Kontrol ünitesindeki [ , ] tuşuna basarak analiz
değerlerini görüntüleyebilir veya [ , ] tuşuna basarak (örneğin BF’ye geçiş, ) alt menülere ulaşabilirsiniz.
Tarih ve saat görünür durumda kalır.
Elektrik tasarruf modu
•
ve menü tuşlarına aynı anda 10 saniye boyunca
basılı tutulmalıdır. Tarih ve saat göstergesi kaybolur.
• Tekrar devreye sokma işlemi için ve menü tuşlarına aynı anda 10 saniye boyunca basılı tutulmalıdır.
11. Sonuçların değerlendirilmesi
Vücuttaki yağ oranı
Vücuda ilişkin yağ değerleri ekranda görüntülenir ve çubuk diyagramda değerlendirilir. % olarak verilen aşağıdaki yağ oranları size yol gösterir (daha fazla bilgi için
lütfen doktorunuza başvurun!).
Girişlerin silinmesi
1. Tüm ayarlar ve hafıza değerleri ile birlikte kullanıcının silinmesi
• Devreye sokma işleminden sonra [ ] tuşuna basarak kullanıcınızı seçiniz. Bunun için gerekirse tuşa
yeniden basınız ve [SET] tuşuna basarak onaylayınız.
• Göstergenin 0.0 olması durumunda [SET] tuşuna 5
saniye boyunca basınız, bu sayede kullanıcıyı silebilirsiniz.
• [ , ] tuşlarına basarak „Yes“ durumunu seçiniz ve
[SET] tuşuna basarak sorguyu onaylayınız. Kullanıcıyı silmek istemiyorsanız, [SET] tuşuna basarak „No“
durumunu seçiniz.
Erkek
Yaş
10 –14
15 –19
20 – 29
30 – 39
40 – 49
50 – 59
60 – 69
70 –100
Bu kullanıcıya ilişkin kaydedilen tüm değerler ve
ayarlar silinir.
2. Kullanıcıya ilişkin münferit hafıza değerinin silinmesi
• „Mem“ ölçüm değeri hafızasında bir ölçüm değeri
seçiniz ve görüntülenen hafıza değerini silmek için
kontrol ünitesindeki [SET] tuşuna kısa süreliğine basınız. Bu işlemi doğrudan ölçümden sonra da yürütebilirsiniz.
• [ , ] tuşlarına basarak „Yes“ durumunu seçiniz
ve [SET] tuşuna basarak sorguyu onaylayınız. Değeri silmek istemiyorsanız, [SET] tuşuna basarak „No“
durumunu seçiniz.
Düşük
<11 %
<12 %
<13 %
<14 %
<15 %
<16 %
<17 %
<18 %
Normal
11–16 %
12 –17 %
13 –18 %
14 –19 %
15 – 20 %
16 – 21 %
17 – 22 %
18 – 23 %
Yüksek
16,1– 21 %
17,1– 22 %
18,1– 23 %
19,1– 24 %
20,1– 25 %
21,1– 26 %
22,1– 27 %
23,1– 28 %
Çok
yüksek
>21,1 %
>22,1 %
>23,1 %
>24,1 %
>25,1 %
>26,1 %
>27,1 %
>28,1 %
Düşük
<16 %
<17 %
<18 %
<19 %
<20 %
<21 %
Normal
16 – 21 %
17 – 22 %
18 – 23 %
19 – 24 %
20 – 25 %
21– 26 %
Yüksek
21,1– 26 %
22,1– 27 %
23,1– 28 %
24,1– 29 %
25,1– 30 %
26,1– 31 %
Çok
yüksek
>26,1 %
>27,1 %
>28,1 %
>29,1 %
>30,1 %
>31,1 %
Kadın
Yaş
10 –14
15 –19
20 – 29
30 – 39
40 – 49
50 – 59
69
Kadın
Yaş
60 – 69
70 –100
Düşük
<22 %
<23 %
Normal
22 – 27 %
23 – 28 %
Çok
Yüksek
yüksek
27,1– 32 % >32,1 %
28,1– 33 % >33,1 %
Yaş
10 –14
15 –19
20 – 29
30 – 39
40 – 49
50 – 59
60 – 69
70 –100
Sporcularda genellikle daha düşük değerler elde edilir. Elde edilen değerler, yapılan spor türü, antrenman
yoğunluğu ve vücut yapısına göre verilen ortalama değerlerin altında olabilir. Aşırı düşük değerler çıkması
durumunda sağlık tehlikesi olabileceğini dikkate alınız.
Vücuttaki su oranı
İyi
50 – 65 %
Çok iyi
>65 %
Kötü
<45 %
İyi
45 – 60 %
Çok iyi
>60 %
Kadın
Yaş
10 –100
Vücut yağı içindeki su oran olarak düşüktür. Bu nedenle
yağ oranının yüksek olduğu kişilere ilişkin su oranı normal değerlerin altında yer alabilir. Buna karşın dayanıklı
sporcularda, düşük yağ oranı ve yüksek kas oranı nedeniyle ortalama değerler aşılabilir.
Bu baskül ile vücuttaki su oranının belirlenmesinden,
örneğin yaşa bağlı su tutma gibi tıbbi sonuçlar çıkarmak uygun değildir. Gerekli durumda doktorunuza danışınız. Temel olarak geçerli olan yüksek su oranına
ulaşmaktır.
Dikkat
Lütfen kemik kütlesini kemik yoğunluğu ile karıştırmayınız. Kemik yoğunluğu yalnız tıbbi muayeneyle (örneğin
bilgisayarlı tomografi, ultrason) belirlenebilir. Bu nedenle kemiklerdeki ve kemik sertliğindeki (örneğin osteoporoz) değişikliklerden bu baskülü kullanarak sonuç
çıkarmak olanaksızdır.
BMR
Bazal Metabolik Hız (BMR = Basal Metabolic Rate),
vücudun tam dinlenme durumunda temel fonksiyonlarını yerine getirmek için ihtiyaç duyduğu enerji miktarıdır (örneğin kişi 24 saat yatakta kaldığında). Bu değer aslında ağırlık, boy ve yaşa bağlıdır. Bu değer dijital
baskülde kcal/gün cinsinden görüntülenir ve bilimsel
olarak kabul edilen Harris-Benedict formülüne göre hesaplanır.
Vücudunuzun bu enerji miktarına ihtiyacı vardır ve besin maddesi olarak alınmalıdır. Eğer uzun süreli olarak
düşük miktarda enerji alırsanız bu, sağlık sorunlarının
ortaya çıkmasına neden olabilir.
Kas oranı
Normal koşullarda kas oranı % olarak aşağıdaki aralıkta olmalıdır:
Erkek
Yaş
10 –14
15 –19
20 – 29
30 – 39
40 – 49
50 – 59
60 – 69
70 –100
Düşük
<44%
<43%
<42%
<41%
<40%
<39%
<38%
<37%
Normal
44 – 57 %
43 – 56 %
42 – 54 %
41– 52 %
40 – 50 %
39 – 48 %
38 – 47 %
37 – 46 %
Yüksek
>43 %
>41 %
>39 %
>38 %
>36 %
>34 %
>33 %
>32 %
Kemiklerimizin de vücudumuzun geri kalanı gibi büyüme, küçülme ve yaşlanma prosesleri vardır. Kemik
kütlesi çocukken hızlı artar ve 30 – 40 yaşlarında maksimum seviyeye ulaşır. Yaş büyüdükçe kemik kütlesi
tekrar azalır. Sağlıklı beslenme (özellikle kalsiyum ve
D vitamini) ve düzenli bedensel hareketlerle kemik kütlesindeki azalmayı biraz engelleyebilirsiniz. Hedeflenen
kas yapısıyla iskeletinizin sağlamlığını daha da arttırabilirsiniz. Baskülün kemiklerin kalsiyum oranını değil tüm
bileşenlerinin (organik maddeler, anorganik maddeler
ve su) ağırlığını belirlediğine dikkat ediniz. Kemik kütlesi etkileyici faktörlere (ağırlık, boy, yaş, cinsiyet) göre
küçük farklılıkla gösterir ama çok etkilenmez. Kabul
edilmiş yönerge veya öneri mevcut değil.
Erkek
Kötü
<50 %
Normal
36 – 43 %
35 – 41 %
34 – 39 %
33 – 38 %
31– 36 %
29 – 34 %
28 – 33 %
27 – 32 %
Kemik kütlesi
Normal koşullarda vücuttaki su oranı % olarak aşağıdaki aralıkta olmalıdır:
Yaş
10 –100
Düşük
<36%
<35%
<34%
<33%
<31%
<29%
<28%
<27%
Yüksek
>57 %
>56 %
>54 %
>52 %
>50 %
>48 %
>47 %
>46 %
AMR
Aktif Metabolik Hız (AMR = Active Metabolic Rate),
vücudun aktif durumda günlük alması gereken enerji
miktarıdır. Kişinin enerji tüketimi artan bedensel aktivi70
telere bağlı olarak artar ve dijital baskülde girilen aktivite derecesi (1 – 5) aracılığıyla belirlenir.
Güncel ağırlığı korumak için tüketilen enerji vücuda yiyecek ve içecek biçiminde yeniden alınmalıdır. Uzun
süreli olarak, tüketilen enerji miktarından daha azı vücuda girerse vücut bu farkı depolanan yağdan karşılar
ve kilo verilir. Buna karşın uzun süreli olarak, vücuda
hesaplanan Aktif Metabolik Hızdan (AMR) daha fazla
enerji girişi olursa, vücut bu fazla enerjiyi yakamaz ve
yağ olarak depolar. Bu durumda kilo alınır.
• USB bağlantısını kurun.
USB
• Yazılımın kurulumu esnasında talimatları izleyin.
13. Pillerin değiştirilmesi
Kontrol ünitesi bir pil değiştirme göstergesi ile donatılmıştır. Ekranda, kontrol ünitesine ilişkin piller zayıfsa
sembolü veya basküle ilişkin piller zayıfsa
sembolü görünür. Bu durumda pillerin değiştirilmesi
gereklidir.
Sonuçların Zamansal İlişkisi
Yalnız uzun süreli eğilimin anlamlı olduğuna dikkat ediniz. Birkaç gün içindeki kısa süreli ağırlık değişikliklerine genelde sıvı kaybı neden olur.
Not
Sonuçların yorumu, toplam ağırlıktaki değişikliklere,
yüzdesel olarak yağ, su ve kas oranlarına ve bu değişikliklerin gerçekleştiği zamana göre yapılır. Gün cinsinden çabuk değişiklikler orta süreli değişikliklerden (hafta cinsinden) ve uzun süreli değişikliklerden (ay) ayrılır.
Temel kural olarak geçerli olan şudur: Ağırlıktaki kısa
süreli değişiklikler ancak su miktarındaki değişiklikler
olabilir, orta ve uzun süreli değişiklikler ise yağ ve kas
oranındaki değişikliklerdir.
• Kısa süreli olarak kilo kaybı olursa ve yağ oranı yükselir veya aynı kalırsa su kaybettiniz demektir - örneğin antrenmandan, saunadan veya hızlı kilo kaybına
neden olan sınırlı diyetten.
• Ağırlık orta vadede artar ve yağ oranı düşer veya aynı
kalırsa, değerli bir kas kütlesi yaptınız demektir.
• Ağırlık ve yağ oranı eş zamanlı olarak düşerse diyetiniz işe yarıyor demektir - yağ kütlesi kaybediyorsunuz.
• İdeal olanı diyetinizi bedensel aktivite, egzersiz veya
güç gerektiren çalışmalarla desteklemenizdir. Böylece orta vadede kas oranınızı da arttırabilirsiniz.
• Yağ, su veya kas oranı arttırılmamalıdır (kas dokusu
sudan meydana gelen parçalar da içerir).
• Her pil değişimi sırasında aynı tipte, markada ve güçte pilleri tercih ediniz.
• Tüm pilleri her zaman aynı anda değiştiriniz.
• Yeniden şarj edilebilir aküleri kullanmayınız.
• Ağır metal içermeyen pilleri kullanınız.
14. Cihaz Temizliği ve Bakımı
Ölçüm değerlerinin hassasiyeti ve cihazın kullanım
ömrü itinalı kullanıma bağlıdır. Cihaz zaman zaman temizlenmelidir.
Temizleme işlemi için, gereksinim durumunda üstüne
bir miktar deterjan da ekleyebileceğiniz nemli bir bez
kullanınız. Temizleme için kesinlikle cihazın üzerine su
dökmeyin ve keskin temizlik maddeleri kullanmayınız.
Dikkat
• Hiçbir zaman sert kir çözücü ve temizleyici maddeler
kullanmayınız!
• Cihazı kesinlikle suyun altına tutmayınız!
• Cihazı bulaşık makinesinde yıkamayınız!
15. İmha
Piller ve aküler ev çöpüne ait değildir. Tüketici olarak
kullanılmış pilleri iade etmekle yasal olarak yükümlüsünüz. Eski pillerinizi bölgenizdeki toplama noktalarına veya ilgili türdeki pilleri satan her yere verebilirsiniz.
12. Ölçüm değerlerinin PC’ye
aktarılması / HealthManager /
EasyFit
Sistem gereksinimleri:
Windows 7, Windows Vista, Windows XP SP3
Not
Zehirli madde içeren pillerde aşağıdaki
işaret mevcuttur:
Pb = Pil kurşun içermektedir,
Cd = Pil kadmiyum içermektedir,
Hg = Pil cıva içermektedir.
HealthManager:
Beurer tansiyon ve kan şekeri ölçme aletleriyle sağlık yönetimi.
EasyFit:
Beurer nabız saatleri ile birlikte antrenman analizi.
Çevrenin korunması adına, baskül ve piller, kullanım
ömürlerinin sonunda ev atıklarıyla beraber atılmamalıdır. İmha işlemi ülkenizdeki ilgili atık toplama yerlerinde
gerçekleştirilmelidir.
Prosedür:
• Beurer yazılımını ve kurulum talimatını
http://www.beurer.com internet sayfasındaki indirmeler başlığı altında bulabilirsiniz.
71
Malzemelerin atılması sırasında yerel yönetmeliklere
uyunuz.
Cihaza ilişkin imha etme işlemini Elektrikli ve
Elektronik Eski Cihazlar AB Yönergesi 2002/96/
EC – WEEE (Waste Electrical and Electronic
Equipment) doğrultusunda gerçekleştiriniz.
Atma işlemiyle ilgili sorularınız için yetkili yerel makamlarla irtibat kurunuz.
Olası Hatalar
Baskül ve kontrol
ünitesi arasındaki
radyo sinyali bağlantısı arızalı.
16. Problemle karşılaşılması
durumunda ne yapılmalıdır?
Kontrol ünitesi baskülden çok fazla
uzakta bulunuyor.
Baskülün pilleri boş
veya yanlış takılmış.
Tartma sırasında baskül bir hata belirlerse, bu hatayı
aşağıdaki şekilde gösterir.
Ekran
Neden
göstergesi
ERROR:_
150 kg’lik maksiOVERLOAD! mum taşıma kapasitesinin üzerine
çıkıldı.
LOW_
Piller neredeyBATTERY
se boş.
MEMORY_
30 ölçüm değeri
FULL
kaydedilmiştir.
Giderme
Sadece 150 kg’ye kadar olan ağırlıklar tartılabilir.
Elektrotlar ve ayak
tabanı arasındaki
elektrik direnci çok
yüksek (örneğin
kalın nasır).
ERROR:_
DATA
BIA ölçümü başarılı ama vücuttaki
yağ oranı ölçülebilir alanın dışında
yer alıyor (% 5’ten
küçük veya %
50’den büyük).
Kontrol ünitesindeki piller tam olarak boş durumda.
Kutupların doğru şeKontrol ünitesinkilde yerleştirilip yerdeki piller doğru
olarak takılmamış. leştirilmediğin kontrol ediniz (bkz. sayfa
64).
Gösterge
yok
Yanlış ağırlık ölçümü
Olası Hatalar
Giderme
Baskülün sıfır nokta- Baskülü ölçüm işlemi öncesinsı yanlış durumda.
de ayağınız ile çalışma durumu
yanana kadar hafifçe aktifleştiriniz.
Yakl. 5 saniye bekleyiniz ve ölçümü tekrarlayınız. Bilgilendirme:
Normal kullanım sırasında doğrudan baskülün üzerine basıldığından, baskül, devre dışı kalma
sırasında otomatik olarak sıfır
noktasını kaydeder (çalışma durumu göstergesi söndüğünde).
Baskül, halı üzerinde Baskülü düz ve sert bir zemin
bulunuyor.
üzerine yerleştiriniz.
Baskülü yatırmadan mümkün olduğunca dış tarafta durunuz.
Pilleri değiştiriniz (bkz.
sayfa 64 ve 71).
Ölçüm değerlerini
PC’ye aktarınız, bkz.
sayfa 71.
Lütfen ölçümü çıplak
ayakla tekrarlayınız.
Gerekirse ayak tabanlarınızı hafifçe ıslatınız.
Gerekirse ayak tabanlarındaki nasır temizlenmelidir.
Lütfen ölçümü çıplak ayakla tekrarlayın
veya gerekirse ayak
tabanlarınızı hafifçe ıslatınız. Gerekirse ayarlanmış olan aktivite
derecenizi değiştiriniz.
Pilleri değiştiriniz (bkz.
sayfa 64).
ERROR:_
CONTACT!
17. Teknik Veriler
Baskülün boyutları
Baskülün pilleri
Kontrol ünitesinin pilleri
Radyo sinyali aktarımı
Ölçme Aralığı
Ağırlık, kemik kütlesi aralığı
Vücuttaki yağ, su,
kas kütlesi aralığı
BMR, AMR aralığı
Ölçüm olanaklı değil
Olası Hatalar
Kontrol ünitesi üzerine çıkan kişi tarafından aktif hale getirilmedi.
Giderme
Basküle ve kontrol ünitesine ilişkin pilleri yeniden yerleştiriniz.
Aşağıdaki elektromanyetik kaynaklara uzak bir mesafede tutunuz: Yüksek gerilim hatları, televizyon veya bilgisayar sinyal
sistemleri, egzersiz cihazları, cep
telefonları, hava tahmin istasyonları.
Baskül ve kontrol ünitesi arasındaki mesafeyi azaltınız, maksimum mesafe 2 metre olmalıdır.
Pilleri değiştiriniz (bkz. sayfa
64) ve gerekirse kutupların
doğru yönde yerleştirilip yerleştirilmediğini kontrol ediniz.
Giderme
Ölçüm işlemi öncesinde ilk olarak
kontrol ünitesi açılmalıdır. Gerekirse 30 saniye kadar beklenmeli
ve ölçüm tekrarlanmalıdır.
330 x 330 x 41 mm
3 x 1,5 V tip AA
3 x 1,5 V tip AA
433 MHz
5 kg’dan 150 kg’a kadar
100 g
% 0,1
1 Kcal
Teknik değişiklik hakkı saklıdır.
Baskül, AB yönetmeliğine 2004/108/EC + eklerine uygundur.
72
РУССКИЙ
Оглавление
1. Для ознакомления
1. Для ознакомления ...........................................73
2. Пояснения к символам ...................................74
3. Указания по технике безопасности ...............74
4. Описание прибора ..........................................75
5. Подготовка к работе .......................................75
6. Монтаж пульта управления ............................76
7. Информация ....................................................76
8. Настройка ........................................................77
9. Показания на дисплее ....................................79
10. Управление ......................................................79
11. Оценка результатов .........................................82
12. Перенос результатов измерений на ПК /
HealthManager / EasyFit ....................................84
13. Замена батареек .............................................84
14. Чистка прибора и уход за ним .......................84
15. Утилизация .......................................................84
16. Что делать при возникновении каких-либо
проблем? ..........................................................84
17. Технические данные ........................................85
18. Гарантия ...........................................................86
Функции прибора
Наши диагностические весы являются ценным
приобретением для людей, заботящихся о своём
здоровье. Они служат для взвешивания и оценки
состава тела и предназначены для частного индивидуального использования.
Оценка выполняется проверенным методом B.I.A.
(анализ биоэлектрического сопротивления, см.
„Принцип измерения (Принцип измерения)“, странице 76). Причем в этих весах вместо обычной
одной частоты используются две различные частоты, позволяющие точнее определить электрическое
сопротивление (импеданс).
Кроме того, оптимизирован электрический контакт
с телом, который теперь осуществляется 4 ручными
и 4 ножными электродами, что позволяет повысить
точность измерений и оценки.
Результаты измерений передаются по радио на расстояние до 2 метров. Все настройки выполняются
легко и просто с помощью нового меню и отображаются на большом дисплее на одном из 5 языков.
Дисплей может оставаться на весах, крепиться к
стене или устанавливаться отдельно.
Для отслеживания показаний за длительный период
Вы можете сохранить их на своём компьютере при
помощи прилагаемого USB-кабеля и программного
обеспечения для ПК.
Весы станут Вашим личным тренером.
Комплект поставки
•
•
•
•
•
•
•
Диагностические весы
Съёмный пульт управления с дисплеем
Настенный держатель
Комплект креплений для настенного монтажа
3 батарейки 1,5 В тип AA (весы)
3 батарейки 1,5 В тип AA (пульт управления)
USB-кабель
Весы имеют следующие функции:
• Измерение веса (с шагом 100 г).
• Определение жировой массы и содержания воды
в организме, а также мышечной массы (с шагом
0,1%), костной массы (с шагом 100 г), основного
обмена веществ и жизненной активности пользователя (в ккал).
• Раздельное измерение жировой и мышечной
массы верхней части тела и нижней части тела с
отображением отдельных измерений.
• Диаграмма веса и жировой массы.
• Отображение последних 30 измерений для 10 человек.
• Функция однократной быстрой диагностики для
гостей.
• Дата и время в режиме ожидания.
Уважаемый покупатель,
мы благодарим Вас за выбор продукции нашей
фирмы. Мы производим современные, тщательно протестированные, высококачественные изделия для измерения массы, артериального давления,
температуры тела, пульса, мягкой терапии, массажа и очистки воздуха.
Внимательно прочитайте данную инструкцию и следуйте указаниям, приведённым в ней. Сохраните
инструкцию на случай возможной передачи другому пользователю.
С наилучшими пожеланиями,
компания Beurer
73
2. Пояснения к символам
• Если одна из батареек разрядилась, наденьте защитные перчатки и почистите батарейный отсек
сухой салфеткой.
• Батарейки могут содержать токсичные вещества,
вредные для здоровья и окружающей среды.
В связи с этим утилизируйте батарейки в строгом соответствии с действующими законодательными нормами. Ни в коем случае не выбрасывайте отработавшие батарейки в обычный мусор.
В инструкции по применению используются следующие символы.
Предосте- Предупреждает об опасности
режение травмирования или ущерба для
здоровья.
Внимание Указывает на возможные повреждения прибора/принадлежностей.
Указание
Общие указания
Отмечает важную информацию.
• Прибор разработан для личного пользования и не
предназначен для использования в медицинских
или коммерческих целях.
• Обратите внимание, что по техническим причинам диапазон погрешности измерения весов не
является удовлетворительным для использования
их в профессиональных медицинских целях.
• Допустимая подъёмность весов макс. 150 кг
(330 фунтов, 24 Ст).
• Заводской установкой для единиц измерения являются «см» и «кг». Чтобы изменить настройки,
воспользуйтесь информацией в главе «Настройка».
• Установите весы на ровное твёрдое покрытие;
твёрдость и ровность площадки под весами является необходимым условием для корректных
измерений.
• Защищайте прибор от ударов, воздействия влаги, пыли, химических агентов, сильных температурных колебаний. Не устанавливайте прибор в
непосредственной близости от источников тепла
(печи, нагревательные приборы).
• Следите за тем, чтобы на весы не попадала вода.
Не погружайте весы в воду. Не мойте весы под
струёй воды.
• Если весы не используются для взвешивания, не
ставьте на них никакие предметы.
• Не нажимайте на кнопки острыми предметами
или слишком сильно.
• Не подвергайте весы воздействию высокой температуры или сильного электромагнитного поля
(напр., мобильные телефоны).
• Ремонтные работы должны выполняться только в
сервисном центре или в авторизованной мастерской. При возникновении отказа в работе сначала
проверьте батарейки. При необходимости замените их.
• При возникновении вопросов по использованию
прибора обращайтесь к поставщику или в Сервисный центр.
• Все весы соответствуют Директиве ЕЭС 2004/108/
EC. При возникновении вопросов по использованию прибора обращайтесь к поставщику или в
Сервисный центр.
3. Указания по технике
безопасности
Внимательно прочитайте данную инструкцию и следуйте указаниям, приведённым в ней.
Сохраните инструкцию для дальнейшего использования и на случай возможной передачи другому
пользователю.
Указания по технике безопасности
• Запрещается пользоваться весами людям с установленными медицинскими
имплантантами (напр. электростимулятор сердца). В противном случае функционирование имплантантов может быть нарушено.
• Весы не предназначены для беременных, так как
околоплодные воды могут исказить точность измерения.
• Не вставайте на одну сторону весов у самого
края. Опасность опрокидывания!
• Не давайте детям упаковочные материалы от весов (опасность удушья).
Обращение с батарейками
• Батарейки содержат вредные при попадании
внутрь организма вещества. Проследите, чтобы
маленькие дети не имели доступа к батарейкам.
При проглатывании батарейки следует немедленно обратиться к врачу.
• Регулярно заменяйте батарейки.
• Заменяйте одновременно сразу все батарейки.
Используйте при этом батарейки одного типа.
• Батарейки нельзя перезаряжать или реактивировать с помощью различных средств, не разбирайте их, не бросайте в огонь и не замыкайте
накоротко.
• Разряженные батарейки могут стать причиной
неисправности прибора. При длительном перерыве в использовании прибора выньте батарейки
из батарейного отсека.
74
4. Описание прибора
Оценка при помощи пульта управления
Обзор
Указание
Удерживание двумя руками обеспечивает надёжный контакт с
электродами (5) и (6) на передней
и задней сторонах.
2
1
3
4
1
2
3
4
5. Подготовка к
работе
Ножные электроды, левая нога
Пульт управления с дисплеем
Отображение режима работы
Ножные электроды, правая нога
Установка батареек
Извлеките батарейки из упаковки и установите их в
весах и пульте управления, соблюдая правильность
расположения полюсов. См. рисунок в батарейном
отсеке. После установки батареек мигает индикатор года, см. странице 78.
Пульт управления с дисплеем
5
6
7
8
9
10
11
12
Пульт управления
3 x AA
5
6
5
Контактные электроды, левая рука
6
Контактные электроды, правая рука
7 set Установочная кнопка, Подтверждение
ввода
Меню: Кнопка вверх
8
Меню: Кнопка вниз
9
кнопка ON (включение)
10
Настройка: Кнопка вверх
11
Настройка: Кнопка вниз
12
Весы
3 x AA
Если весы или пульт управления не работают, извлеките и снова вставьте весь комплект батареек.
Указания по замене батареек см. на странице 84.
Установка весов
Устанавливайте весы на ровную и твёрдую поверхность. Только на твёрдой поверхности весы будут
показывать правильный вес.
75
6. Монтаж пульта управления
Сначала подведите пульт управления к стене
над настенным держателем, после чего сдвиньте
пульт управления вниз, чтобы облегчить зацепление.
Установка пульта управления
Пульт управления можно по выбору держать в руке,
установить на ровную устойчивую поверхность или
прикрепить к стене.
Вытяните выдвижную полочку (на задней стороне
весов), как показано на рисунке, и установите на
неё пульт управления. На полочке имеется магнит,
фиксирующий пульт управления на весах.
• Полностью наденьте пульт управления на держатель. Убедитесь, что пульт управления прочно сел
на держатель в горизонтальном положении.
Регулировка наклона
Пульт управления может поворачиваться на настенном держателе, благодаря чему можно регулировать наклон. Фиксация препятствует снятию пульта
с держателя в наклоненном положении.
Настенный монтаж
С помощью комплекта креплений (настенный держатель, шурупы, дюбели) пульт управления можно
прикрепить к стене. Для этого установите настенный держатель, как описано далее. При необходимости используйте соответствующий материалу
стены дюбель.
Перед снятием пульта с держателя поверните
его полностью вперёд!
Альтернативный способ крепления на
стене
Вы можете прикрепить держатель к стене с помощью двустороннего скотча.
Поверхность стены должна быть при этом сухой
и чистой. Крепление подходит для приклеивания
к кафелю, стеклу, пластику и многим другим основаниям.
• Удалите защитную плёнку со скотча на задней
стороне держателя.
• Крепко прижмите держатель к стене.
• Проверьте надёжность крепления.
• Используйте настенный держатель для разметки
отверстий в стене.
• Просверлите сверлом 6 мм 2 отверстия глубиной
примерно 40 мм на расстоянии 36 мм друг от друга на горизонтальной линии.
• Вставьте дюбели.
• Закрепите настенный держатель обоими шурупами. Проверьте надёжность крепления.
• Наденьте пульт управления на держатель таким
образом, чтобы направляющие держателя одновременно вошли в направляющие пульта управления.
После крепления держателя к стене при помощи скотча пульт управления можно устанавливать
на держатель не ранее чем через 1 час!
7. Информация
Принцип измерения
Принцип действия данных весов базируется на биоэлектрическом импедансном анализе (БИА). При
этом в течение нескольких секунд на тело человека воздействуют абсолютно безопасные для здоровья электрические токи. Измерение электрического сопротивления (импеданс) и использование
постоянных коэффициентов, напр. индивидуальных
параметров (возраст, рост, пол, степень активно-
76
сти) позволяет определить жировую массу тела и
другие параметры.
Мышечная ткань и жидкость имеют хорошую электрическую проводимость и, соответственно, низкое
сопротивление.
Кости и жировая ткань, наоборот, имеют низкую
проводимость, т. е. жировые клетки и кости имеют
высокое электрическое сопротивление.
Исходя из сказанного, эти весы производят измерения на двух различных частотах, что позволяет лучше измерить сопротивление. Эти частоты оказывают
различное влияние на клеточную мембрану и на тканевую жидкость. Кроме того, оптимизирован электрический контакт с телом, который теперь осуществляется 4 ручными и 4 ножными электродами, что
позволяет повысить точность измерений и оценки.
Вследствие такой чувствительности измерительной
техники при повторных измерениях значения могут
незначительно различаться. Причиной этого являются отклонения во время измерения сопротивления (например, изменение электрического контакта рук и ног с электродами, иное распределение
жидкости в теле).
Обратите внимание, что значения, определенные
диагностическими весами, являются только приблизительными относительно реальных данных медицинских анализов. Только врач-специалист с помощью медицинских методик (напр. компьютерная
томография) может дать точное заключение о жировой массе, содержании жидкости, мышечной и
костной массе.
• Важно при измерении: Определение жировой
массы (нижняя часть тела) обязательно нужно
выполнять босиком. При этом подошвы стоп
должны быть слегка влажными. Если подошвы
стоп будут полностью сухие с ороговелостями,
результат измерения может быть неверным изза плохой проводимости.
• Во время измерения стойте прямо и не шевелитесь.
• После непривычных для тела нагрузок подождите несколько часов.
• После подъёма с постели подождите прим. 15 минут, чтобы имеющаяся в теле жидкость равномерно распределилась.
• Правильной является только длительная тенденция. Кратковременные отклонения массы в пределах нескольких дней, как правило, обусловлены потерей жидкости; содержание жидкости
имеет очень важное для здоровья значение.
Ограничения
При определении жировой массы и других значений результаты измерения могут быть неточными
или недостоверными в следующих случаях:
• для детей младше 10 лет,
• для профессиональных спортсменов и занимающихся бодибилдингом,
• для беременных,
• для людей с повышенной температурой, при лечении диализом, при систематических отеках или
остеопорозе,
• для людей, принимающих сердечно-сосудистые
препараты (при проблемах с сердцем и сосудистой системой),
• для людей, принимающих сосудорасширяющие
или сосудосуживающие препараты,
• для людей со значительными анатомическими
отклонениями в ногах относительно всего организма в целом (слишком длинные или слишком
короткие ноги).
Методы измерений
Измерение может проводиться следующим образом:
• Верхняя часть тела: Возьмите в руки пульт управления и встаньте в обуви на весы.
• Нижняя часть тела: Оставьте пульт управления,
например, на весах, встаньте босыми ногами на
весы.
• Верхняя и нижняя части тела: Возьмите в руки
пульт управления и встаньте босыми ногами на
весы.
8. Настройка
Перед использованием весов введите ваши персональные данные.
В данном руководстве описывается оценка для
верхней и нижней частей тела.
Если во время измерения пульт управления находится в руках, его вес автоматически вычитается из общей суммы.
Настройка прибора
• Нажмите кнопку SET, когда прибор находится в
режиме ожидания (отображаются время и дата).
• Выберите с помощью установочной кнопки [ ]
пункт меню „SET UNIT“ и подтвердите кнопкой
[SET].
• Выберите с помощью установочных кнопок [ ,
] обозначение языка (D, GB, F, E, I) и подтвердите кнопкой [SET].
Общие советы
• Чтобы получить более точные результаты, взвешивайтесь примерно в одно и то же время суток
(лучше утром), посетив предварительно туалет,
натощак и без одежды.
77
Данные пользователя Значения
Степень физической
от 1 до 5
активности
Желательный вес
регулируется, в кг (для
графического отображения)
• Выберите с помощью установочных кнопок [ ,
] единицы измерения (кг, фунт, стоун) и подтвердите кнопкой [SET].
• Выберите с помощью установочных кнопок [ ,
] способ отображения времени (24 часа или
12 часов) и подтвердите кнопкой [SET].
• Выберите с помощью установочных кнопок [ ,
] включение или отключение GUEST MODE и
подтвердите кнопкой [SET].
После этого на дисплее будут отображены выбранные настройки.
• Изменение данных: нажмите или для быстрого
прохождения удерживайте нажатой кнопку [ ,
].
• Подтверждение ввода: нажмите кнопку [SET].
После ввода всех данных весы готовы к измерению.
Если никакие действия не будут произведены, весы
автоматически выключатся.
Установка даты и времени суток
• Нажмите кнопку SET, когда прибор находится в
режиме ожидания (отображаются время и дата).
• Выберите с помощью установочной кнопки [ ]
пункт меню „SET TIME“ и подтвердите кнопкой
[SET].
• Начинает мигать индикация года.
• Последовательно установите год, месяц, день, а
также время в минутах и часах при помощи установочных кнопок [ , ].
• Для подтверждения введённого значения нажмите кнопку SET.
Степени активности
Для выбора степени активности имеет значение
средне- или долгосрочное наблюдение.
После ввода всех параметров Вы сможете определять вес тела, а также жировую массу и другие
показатели.
Степень
Физическая активность
физической
активности
1
Нет.
2
Низкая: Низкая или лёгкая физическая нагрузка (напр. прогулки, лёгкая работа в саду, гимнастика).
3
Средняя: Физическая нагрузка как
минимум 2 – 4 раза в неделю, по
30 минут.
4
Высокая: Физическая нагрузка
как минимум 4 – 6 раз в неделю, по
30 минут.
5
Очень высокая: Интенсивные физические нагрузки, интенсивные тренировки или тяжёлый физический
труд, ежедневно не менее 1 часа.
Установка данных о пользователе
Чтобы более точно определять жировую массу и
другие параметры тела, необходимо ввести некоторые персональные данные о пользователе.
В весах предусмотрены ячейки памяти для 10 пользователей, таким образом Вы имеете возможность
пользоваться весами всей семьей, запоминая в
ячейках памяти персональные данные
для каждого члена семьи.
Кроме того, имеется режим «GUEST» (если включен), настройки и результаты измерений которого
не сохраняются.
В гостевом режиме функции памяти, индикации направления изменений и усредненного показателя не доступны.
• Нажмите кнопку [SET].
• Выберите пункт «SET USER» и подтвердите кнопкой [SET].
• Выберите с помощью установочных кнопок [ ,
] пользователя и подтвердите кнопкой [SET].
• Если в памяти уже были сохранены настройки,
они отображаются на дисплее. Если настроек нет,
то ячейка памяти для пользователя пуста.
• Здесь Вы можете задать следующие данные:
Данные пользователя Значения
Пол
мужской , женский
Рост
от 100 до 250 см
(от 3‘-03“ до 8‘-02“)
Дата рождения
Год, месяц, день
78
9. Показания на дисплее
Если пульт управления удерживается в руках,
его вес (300 г) автоматически вычитается из общей суммы.
Обзор
1
5
1
2
3
4
5
После успешно выполненного измерения его результат отображается примерно на 10 секунд.
Весы автоматически выключаются через несколько секунд после освобождения контактных поверхностей. Индикатор [3] гаснет. Измерение не сохраняется.
4
3
2
Время, дата, пользователь
Вес с автоматическим подсчётом
Вес
Данные оценки (частично с автоматическим подсчётом)
BF
Жировая масса
Вода
измерение мышечной массы,
Костная масса
Меню
Обзор текущего измерения
Индикация направления изменений
Подробное отображение жировой массы,
мышечной массы верхней / нижней частей
тела
Mem сохранённые измерения 1 - не более 30
Усреднённый показатель
Kcal Расход энергии
Выделение текущего пункта меню
Проведение оценки
1. Включение весов
• Нажмите кнопку [ ] на пульте управления.
На дисплее будет показано «0.0 kg».
2. Диагностика
• После включения выберите свои персональные
данные 1 – 10 нажатием правой кнопки [ ]. При
необходимости нажмите на кнопку несколько
раз.
• Нажмите кнопку [SET] или подождите 3 секунды.
На дисплее появится экран измерения.
10. Управление
Измерение веса
1. Включение весов
• Нажмите кнопку [ ] на пульте управления.
На дисплее будет показано «0.0 kg». Весы готовы к
измерению.
Если Вы выбрали пользователя «GUEST», то
перед каждым измерением данные пользователя
придётся вводить заново. В гостевом режиме данные пользователя и результаты измерений не сохраняются. Вы можете включать или отключать гостевой режим, см. странице 78.
2. Взвешивание (без оценки)
• Встаньте на весы босиком и крепко возьмите в
руки пульт управления.
(Если пульт управления находится в руках, его вес
(300 г) автоматически вычитается из общей суммы).
Устанавливайте весы на ровную и твёрдую поверхность. Только на твёрдой поверхности весы
будут показывать правильный вес.
• Встаньте на весы. Индикатор [3] весов горит зеленым.
На весах стойте спокойно, равномерно распределив вес тела на обе
ноги. Стойте максимально близко к
краю, не опрокидывая весы.
• Держите пульт управления так, чтобы нижняя
часть большого пальца лежала на переднем элек79
троде, а остальные пальцы прижимали задние
электроды.
Необходимо определить желательный вес, чтобы можно было отобразить график веса тела, см.
странице 78. Желательный вес можно изменить
в любой момент.
Жировая масса
• С помощью кнопки [ , ] переключитесь на график жировой массы.
Отображается изменение жировой массы Вашего
тела от измерения к измерению. Линия отсчёта обозначает усредненный показатель всех измерений
жировой массы, столбики обозначают увеличение
или уменьшение значений.
После измерения веса выполняется измерение сопротивления (импеданса). В верхней части
тела - 4 электродами пульта управления, в
нижней части тела - 4 электродами весов.
Это действие индицируется значком пронизываемого тела.
Важно:
На весах стойте спокойно, равномерно распределив вес тела на обе ноги. Следите за тем, чтобы
ваши ступни, ноги, икроножные мышцы и бёдра не
соприкасались. В противном случае результат измерения может быть искажён.
Во избежание этого наденьте, например, легкие
брюки.
Верхняя часть тела, нижняя часть тела
Жировая масса
• Нажмите кнопку [ ] на пульте управления, чтобы перейти к подробному отображению верхней /
нижней частей тела.
Текущий результат измерения жировой массы отображается для всего тела, а также по отдельности
для верхней / нижней части тела.
3. Результат
Отображается обзор результатов.
Оценка см. Оценка результатов на странице 82.
При выключении весов результаты измерений автоматически сохраняются. Если в течение одного
дня было выполнено несколько измерений, то сохраняется только последнее измерение.
Мышцы
• С помощью кнопки [ , ] переключитесь на
подробное отображение мышечной массы.
Оценка результатов успешного измерения
Графическое представление
Вес
• Нажмите кнопку меню [ ] на пульте управления,
чтобы перейти к пунктам меню или памяти.
Отображается изменение веса Вашего тела от измерения к измерению. Последние измерения показываются справа. Линия отсчёта обозначает желательный вес.
Могут быть показаны только результаты текущего измерения, а не все сохранённые результаты измерений.
Mem Отображение сохранённых результатов
• Нажмите кнопку [ ] на пульте управления, чтобы
перейти к памяти.
Отображается обзор результатов. Наверху указывается дата измерения, а также номер ячейки па80
Удаление данных
мяти (03-03), например, третья = последняя ячейка
памяти из трёх заполненных ячеек.
1. Удаление пользователя со всеми настройками и сохранёнными результатами
• После включения выберите свои персональные
данные нажатием кнопки [ ].
При необходимости нажмите кнопку несколько
раз и подтвердите нажатием [SET].
• При появлении на дисплее 0.0 нажмите кнопку
[SET] и удерживайте её нажатой в течение 5 секунд, чтобы удалить пользователя.
• Выберите с помощью кнопок [ , ] пункт «Yes»
(Да) и подтвердите запрос кнопкой [SET]. Если Вы
не хотите удалять пользователя, выберите пункт
«No» (Нет) и подтвердите кнопкой [SET].
• С помощью кнопок [ , ] Вы можете переключаться по ячейкам памяти.
Усреднённые значения
• Нажмите кнопку [ ] на пульте управления, чтобы
перейти к усреднённым значениям.
Отображаются все усреднённые значения сохранённых измерений.
Все сохранённые результаты и настройки этого пользователя будут удалены.
2. Удаление отдельного результата пользователя
• Выберите в памяти измерений «Mem» результат
и кратковременно нажмите кнопку [SET] на пульте управления, чтобы удалить отображаемый сохранённый результат. Это можно сделать, в том
числе, непосредственно после измерения.
• Выберите с помощью кнопок [ , ] пункт «Yes»
(Да) и подтвердите запрос кнопкой [SET]. Если Вы
не хотите удалять значение, выберите пункт «No»
(Нет) и подтвердите кнопкой [SET].
Наверху указывается дата первого и последнего измерения.
Kcal Энерготраты
• Нажмите кнопку [ ] на пульте управления, чтобы
перейти к Kcal (ккал). Теоретически рассчитанный основной обмен веществ BMR, а также уровень физической активности AMR отображаются
в ккал.
3. Удаление всех сохранённых результатов
пользователя
• Вызовите память результатов «Mem» и удерживайте нажатой кнопку [SET] на пульте управления
в течение примерно 3 секунд, чтобы удалить все
значения.
• Выберите с помощью кнопок [ , ] пункт «Yes»
(Да) и подтвердите запрос кнопкой [SET]. Если
Вы не хотите удалять результаты, выберите пункт
«No» (Нет) и подтвердите кнопкой [SET].
Выключение весов (режим ожидания)
Вызов памяти из режима ожидания
• Подождите, пока дисплей не отключится самостоятельно через примерно 45 секунд, или нажмите кнопку [ ] на пульте управления, чтобы
вручную отключить дисплей.
При отключении результаты измерений после оценки автоматически сохраняются. Для каждого пользователя доступно 30 ячеек памяти.
• Включите пульт управления кнопкой [ ].
• Выберите свои персональные данные нажатием
на кнопку [ ].
При необходимости нажмите на кнопку несколько раз.
• Нажмите кнопку [ , ] на пульте управления,
чтобы перейти к оценочным значениям, или кнопку [ , ], чтобы перейти в подменю (например,
Изменение BF, ).
Дата и время остаются видны.
Экономичный режим
• Удерживайте нажатыми в течение 10 секунд одновременно кнопки меню и . Отображение
даты и времени исчезнет.
• Для повторного их вывода снова нажмите и удерживайте нажатыми в течение 10 секунд одновременно кнопки меню и .
81
11. Оценка результатов
Женщины
Жировая масса тела
Значения жировой массы тела отображаются на
дисплее и оцениваются с помощью гистограммы.
В следующих таблицах приведены нормативные
значения жировой массы тела в % (за более подробной информацией обратитесь к врачу!).
Возраст
10 –100
мало
<11 %
<12 %
<13 %
<14 %
<15 %
<16 %
<17 %
<18 %
норма
11–16 %
12 –17 %
13 –18 %
14 –19 %
15 – 20 %
16 – 21 %
17 – 22 %
18 – 23 %
много
16,1– 21 %
17,1– 22 %
18,1– 23 %
19,1– 24 %
20,1– 25 %
21,1– 26 %
22,1– 27 %
23,1– 28 %
хорошо
45 – 60 %
очень
хорошо
>60 %
Жировая масса содержит относительно небольшое
количество жидкости. Поэтому у людей с высокой
жировой массой тела содержание воды в организме может быть ниже нормы. Для выносливых спортсменов наоборот нормой является низкая жировая масса и высокая мышечная масса.
На основании определения содержания жидкости с
помощью данных весов нельзя делать медицинское
заключение о возрастных проблемах с удержанием
жидкости. При необходимости проконсультируйтесь с врачом. Это особенно важно при высоком
содержании жидкости.
Мужчины
Возраст
10 –14
15 –19
20 – 29
30 – 39
40 – 49
50 – 59
60 – 69
70 –100
плохо
<45 %
очень
много
>21,1 %
>22,1 %
>23,1 %
>24,1 %
>25,1 %
>26,1 %
>27,1 %
>28,1 %
Измерение мышечной массы,
Мышечная масса в теле в % приведена в следующей таблице:
Женщины
Мужчины
Возраст
10 –14
15 –19
20 – 29
30 – 39
40 – 49
50 – 59
60 – 69
70 –100
мало
<16 %
<17 %
<18 %
<19 %
<20 %
<21 %
<22 %
<23 %
норма
16 – 21 %
17 – 22 %
18 – 23 %
19 – 24 %
20 – 25 %
21– 26 %
22 – 27 %
23 – 28 %
много
21,1– 26 %
22,1– 27 %
23,1– 28 %
24,1– 29 %
25,1– 30 %
26,1– 31 %
27,1– 32 %
28,1– 33 %
очень
много
>26,1 %
>27,1 %
>28,1 %
>29,1 %
>30,1 %
>31,1 %
>32,1 %
>33,1 %
Возраст
10 –14
15 –19
20 – 29
30 – 39
40 – 49
50 – 59
60 – 69
70 –100
Для спортсменов часто определяется заниженное
значение. В зависимости от вида спорта, интенсивности тренировок и конституции тела значения могут оказаться меньше, чем указано в нормативных
таблицах. Тем не менее, обратите внимание, если
ваши значения окажутся слишком низкими. Это может быть опасным для здоровья.
мало
<44%
<43%
<42%
<41%
<40%
<39%
<38%
<37%
норма
44 – 57 %
43 – 56 %
42 – 54 %
41– 52 %
40 – 50 %
39 – 48 %
38 – 47 %
37 – 46 %
много
>57 %
>56 %
>54 %
>52 %
>50 %
>48 %
>47 %
>46 %
норма
36 – 43 %
35 – 41 %
34 – 39 %
33 – 38 %
31– 36 %
29 – 34 %
28 – 33 %
27 – 32 %
много
>43 %
>41 %
>39 %
>38 %
>36 %
>34 %
>33 %
>32 %
Женщины
Возраст
10 –14
15 –19
20 – 29
30 – 39
40 – 49
50 – 59
60 – 69
70 –100
Содержание жидкости
Содержание жидкости в теле в % приведено в следующей таблице:
Мужчины
мало
<36%
<35%
<34%
<33%
<31%
<29%
<28%
<27%
Костная масса
Возраст
10 –100
плохо
<50 %
хорошо
50 – 65 %
очень
хорошо
>65 %
Наши кости подвержены процессам развития, роста и старения. Костная масса достаточно сильно
набирается в детском возрасте, но к 30 – 40 годам
жизни набирает свой максимум. В более старшем
возрасте костная масса снова немного снижается.
82
При правильном питании (особенно кальций и витамин D) и регулярной физической активности Вы
можете противостоять этому снижению.
При правильном построении мышечного корсета
Вы можете дополнительно усилить скелет. Обратите внимание, что данные весы не показывают содержание кальция в костях, а определяют костную
массу в целом (органические вещества, неорганические вещества и вода). Костная масса практически не меняется, тем не менее, некоторое снижение
всё же возможно под действием многих факторов
(масса, рост, возраст, пол). Также нет нормативных
значений и рекомендаций.
длительного времени восполнение энергии больше,
чем рассчитанное значение для жизненной активности (AMR), организм получает избыток энергии,
который создаёт прирост жировой массы. Общая
масса тела при этом увеличивается.
Временная связь результатов
Обратите внимание, что это всё имеет значение только при достаточно длительном наблюдении. Кратковременные изменения массы тела
в пределах нескольких дней как правило вызваны
потерей жидкости.
Трактовка результатов даётся на основании изменений общей массы тела, процентного соотношения жировой массы, содержания жидкости и
мышечной массы тела, и зависит от промежутка
времени, за который эти изменения произошли.
Кратковременные изменения в течение дня могут
сильно отличатся от среднесрочных изменений (в
течение недели) и долгосрочных изменений (месяцы).
Как правило, кратковременные изменения в основном связаны с содержанием жидкости, в то время
как средне- и долгосрочные изменения вызваны изменениями в жировой и мышечной массах.
• Кратковременное снижение массы и одновременный рост или неизменное количество жировой массы вызваны исключительно снижением
жидкости в организме, напр. в результате тренировки, посещения сауны или при быстрой потере массы под воздействием диеты.
• Если отмечается среднесрочное увеличение массы при снижении или неизменном количестве жировой массы, возможно, произошло увеличение
мышечной массы.
• Если Вы отмечаете одновременное снижение общей массы и жировой массы, ваша диета работает - Вы теряете жировую массу.
• Идеальным является сочетание диеты с физической деятельностью, занятиями фитнесом или
силовыми нагрузками. При этом Вы можете наблюдать среднесрочное повышение мышечной
массы.
• Нельзя суммировать жировую массу, содержание
жидкости или мышечную массу, так как мышечные ткани также содержат жидкости, учитывающиеся при содержании жидкости.
Внимание
Пожалуйста, не путайте понятие костной массы и
плотности костей. Плотность костей определяется
только при медицинском обследовании (напр. компьютерная томография или ультразвук). Поэтому с
помощью данных весов нельзя делать медицинское
заключение о заболеваниях костных тканей и плотности костей (напр. остеопороз).
Основной обмен веществ BMR
Основной обмен веществ (BMR = Basal Metabolic
Rate) определяется как количество энергии, необходимое организму в состоянии полного покоя для
поддержания основных жизненных функций (напр.
при постельном режиме в течение 24 часов). Это
значение в основном зависит от веса, роста и возраста. Диагностические весы показывают это значение в единицах ккал/день, а само значение рассчитывается по формуле Харриса-Бенедикта.
Это такое количество энергии, которое необходимо
Вашему организму в любом случае, и должно быть
восполнено при приёме пищи.
Длительное недополучение энергии может отрицательно сказаться на здоровье.
Жизненная активность AMR
Жизненная активность (AMR = Active Metabolic
Rate) определяется как количество энергии, необходимое организму для поддержания активной
жизнедеятельности в течение дня.
Расход энергии тем больше, чем выше физическая
активность человека.
Диагностические весы определяют это значение
согласно степени активности (1 – 5), заданной в настройках весов.
Чтобы поддержать текущую массу тела, необходимо восполнить расход энергии при приёме пищи и
напитков. Если в течение длительного времени восполнение энергии меньше, чем расход, организм
начнёт его за счёт жировых отложений. Масса тела
при этом снижается. И наоборот, если в течение
83
12. Перенос результатов
измерений на ПК /
HealthManager / EasyFit
Внимание
• Ни в коем случае не пользуйтесь растворителями
и чистящими средствами!
• Ни в коем случае не погружайте прибор в воду!
• Запрещается чистить прибор в стиральной или
посудомоечной машине!
Системные требования:
Windows 7, Windows Vista, Windows XP SP3
HealthManager:
Менеджмент здоровья в комбинации с прибором
для измерения артериального давления или прибором для измерения сахара в крови.
15. Утилизация
Использованные батарейки и аккумуляторы утилизируются отдельно от бытового мусора. Как потребитель Вы обязаны сдавать отработавшие батарейки. Вы можете сдать их в специализированные
приёмные пункты по месту жительства, занимающиеся сбором такого вида отходов.
EasyFit:
Тренировочный анализ в комбинации с пульсотахографом Beurer.
Выполнение:
• Для загрузки и установки программного обеспечения Beurer пройдите в раздел загрузок на сайте
http://www.beurer.com
• Восстановите соединение USB.
Указание
Эти знаки предупреждают о наличии в
батарейках следующих токсичных веществ:
Pb = батарейка содержит свинец,
Cd = батарейка содержит кадмий,
Hg = батарейка содержит ртуть.
USB
В интересах охраны окружающей среды отработавшие весы с батарейками ни в коем случае нельзя
выбрасывать в обычный мусор. Утилизация должна
производиться в соответствии с местными законодательными нормами.
Соблюдайте местные законодательные нормы по
утилизации отходов.
Прибор следует утилизировать согласно
Директиве ЕС по отходам электрического
и электронного оборудования 2002/96/EC
– WEEE (Waste Electrical and Electronic Equipment).
В случае вопросов обращайтесь в местную коммунальную службу, ответственную за утилизацию
отходов.
• При установке программного обеспечения следуйте указаниям.
13. Замена батареек
Пульт управления оснащён индикатором замены батареек. На дисплее отображается символ
, если разряжены батарейки пульта управления, или символ , если разряжены батарейки весов. В этом случае батарейки нужно заменить.
Указание
• При замене батареек используйте батарейки одинакового типа, одинаковой марки и одинаковой
ёмкости.
• Всегда заменяйте все батарейки одновременно.
• Не используйте заряжаемые аккумуляторные батарейки.
• Используйте батарейки, не содержащие тяжёлых
металлов.
16. Что делать при
возникновении каких-либо
проблем?
Если при взвешивании произошла ошибка, на дисплей выводится одно из следующих сообщений.
Дисплейное Причина
сообщение
ERROR:_
Превышена доOVERLOAD!
пустимая грузоподъёмность
150 кг.
LOW_BATTERY Батарейки поч(РАЗРЯД_
ти разряжены.
БАТАРЕИ)
14. Чистка прибора и уход за ним
Точность результатов измерений и срок службы
прибора зависят от бережного обращения с ним.
Периодически следует чистить прибор.
Для чистки используйте влажную тряпочку, на которую нанесите при необходимости моющее средство. Не используйте абразивные моющие средства, не погружайте прибор в воду.
84
Устранение
Вес не должен
превышать 150 кг.
Замените батарейки (см. страницу 75 и 84).
Дисплейное Причина
сообщение
MEMORY_FULL Сохранены 30
измерений.
ERROR:_
CONTACT
ERROR:_
CONTACT
Индикация
отсутствует
Электрическое сопротивление между
электродами и
подошвами ног
слишком высокое (напр. при
сильных мозолях).
BIA-измерение
прошло успешно, однако
жировая масса выходит за
пределы диапазона измерения
(менее 5 % или
более 50 %).
Батарейки в
пульте управления полностью
разряжены.
Батарейки
вставлены в
пульт управления неправильно.
Устранение
Возможные ошибки
Пульт управления
расположен слишком
далеко от весов.
Передайте результаты измерений
на ПК, см. страницу 84.
Повторите измерения с босыми
ногами. При необходимости увлажните подошвы
ступней. При необходимости удалите
мозоли и ороговелости стоп.
Повторите измерения с босыми
ногами или при необходимости увлажните подошвы
ступней. При необходимости, измените настройки
своей жизненной
активности.
Замените батарейки (см. страницу 75).
Батарейки в весах
разряжены или неправильно установлены.
Устранение
Уменьшите расстояние
между весами и пультом
управления, максимальное
расстояние - 2 метра.
Замените батарейки (см.
страницу 75) и проверьте
полярность.
Весы показывают неправильный вес
Возможные ошибки
Неправильная нулевая отметка шкалы
весов.
Весы стоят на ковровом покрытии.
Проверьте правильность расположения полюсов, (см.
страницу 75).
Устранение
Перед измерением кратковременно активируйте
весы ногой до отображения индикации рабочего
режима .
Подождите 5 секунд и затем повторите измерение.
Для Вашего сведения: Так
как весы в нормальном режиме выполняют измерение сразу, они сохраняют
нулевую отметку при отключении весов (когда индикация рабочего режима
гаснет).
Установите весы на ровное
и устойчивое основание.
Стойте максимально близко к краю, не опрокидывая весы.
17. Технические данные
Весы не производят измерений
Размер весов
Батарейки для весов
Батарейки для пульта
управления
Передача радиосигналов
Диапазон измерения
Шаг показаний массы,
костной массы
Шаг показаний жировой массы, жидкости,
мышечной массы
Шаг показаний BMR,
AMR
Возможные ошибки
Пульт управления не
активирован перед
измерением.
Устранение
Перед началом измерения включите пульт управления.
Подождите 30 секунд и затем повторите измерение.
Нарушена радиосвязь Выньте и повторно устамежду весами и пуль- новите батарейки весов и
пульта управления.
том управления.
Увеличьте расстояние до
следующих источников
электромагнитного излучения: высоковольтные ЛЭП,
системы дистанционного
управления телевизором и
компьютером, тренажеры,
мобильные телефоны, метеорологические станции.
330 x 330 x 41 мм
3 батарейки 1,5 В тип AA
3 батарейки 1,5 В тип AA
433 МГц
от 5 кг до 150 кг
100 г
0,1 %
1 ккал
Возможны технические изменения.
Весы соответствуют директиве ЕС 2004/108 и последующих к ней дополнений.
85
18. Гарантия
Мы предоставляем гарантию на дефекты материалов и изготовления на срок 36 месяцев со дня продажи через розничную сеть.
Гарантия не распространяется:
– на случаи ущерба, вызванного неправильным использованием,
– на быстроизнашивающиеся части (батарейки),
– на дефекты, о которых покупатель знал в момент
покупки,
– на случаи собственной вины покупателя.
Товар не подлежит обязательной сертификации
Срок эксплуатации изделия: мин 5 лет
Фирма изготовитель: Бойрер Гмбх,
Софлингер штрассе 218,
89077-УЛМ, Германия
Фирма-импортер:
OOO БОЙРЕР,
109451 г. Москва,
ул. Перерва 62,
корп. 2, офис 3
Сервисный центр:
109451 г. Москва,
ул. Перерва 62, корп. 2
Тел(факс) 495 – 658 54 90
Дата продажи
Подпись продавца
Штамп магазина
Подпись покупателя
86
POLSKI
Spis treści
Metoda diagnostyczna jest oparta na zasadzie B.I.A.
(analizy impedancji bioelektrycznej, patrz „ Zasada
działania“, strona 90). Waga wykorzystuje nie jedną,
lecz dwie różne częstotliwości, co umożliwia dokładniejsze określenie oporu elektrycznego (impendancji).
Płaszczyzna elektrycznego kontaktu urządzenia z ciałem została zoptymalizowana dzięki 4 elektrodom na
dłonie i 4 elektrodom na stopy, co pozwala osiągnąć
większą precyzję pomiarów, a tym samym dokładniejszą analizę.
Mierzone wartości są przesyłane za pomocą transmisji
radiowej na odległość do 2 metrów. Wszystkie ustawienia wprowadzane są w jasny i prosty sposób za
pomocą innowacyjnego menu, a następnie wyświetlane na dużym wyświetlaczu, w jednym z 5 dostępnych
języków. Wyświetlacz może być umieszczony na wadze, ustawiony osobno lub przymocowany do ściany.
W celu obserwowania uzyskiwanych wartości na
przestrzeni dłuższego okresu można zapisać dane w
komputerze za pomocą dołączonego przewodu USB
i oprogramowania PC. Waga może pełnić rolę osobistego trenera fitness.
1. Informacje o urządzeniu ....................................87
2. Objaśnienia do rysunków ..................................87
3. Wskazówki dotyczące bezpieczeństwa ............88
4. Opis urządzenia .................................................88
5. Uruchomienie ....................................................89
6. Montaż panelu obsługi ......................................89
7. Informacje .........................................................90
8. Ustawienia .........................................................91
9. Wyświetlacz ......................................................92
10. Obsługa .............................................................92
11. Ocena wyników .................................................95
12. Przesyłanie mierzonych wartości do
komputera PC / HealthManager / EasyFit ...........97
13. Wymiana baterii .................................................97
14. Czyszczenie i konserwacja urządzenia .............97
15. Utylizacja ...........................................................97
16. Co robić w przypadku problemów? ..................98
17. Dane techniczne ................................................98
Zakres dostawy
•
•
•
•
•
•
•
Waga diagnostyczna
Zdejmowany panel obsługi z wyświetlaczem
Uchwyt ścienny
Zestaw montażowy do montażu ściennego
3 x 1,5 V typ AA (waga)
3 x 1,5 V typ AA (panel obsługi)
Przewód USB
Waga posiada następujące funkcje:
• Pomiar ciężaru ciała (z dokładnością do 100 g).
• Pomiar tkanki tłuszczowej, tkanki mięśniowej i zawartości wody (z dokładnością do 0,1%), masy kostnej (z dokładnością do 100 g), podstawowej przemiany materii oraz czynnej przemiany materii (w kcal).
• Oddzielny pomiar tkanki tłuszczowej i tkanki mięśniowej dla górnej i dolnej połowy ciała z podaniem
pomiarów cząstkowych.
• Prezentacja pomiarów ciężaru ciała i zawartości
tkanki tłuszczowej w formie diagramu.
• Prezentacja ostatnich 30 pomiarów dla 10 osób.
• Jednorazowa, szybka funkcja analizy dla gości.
• Data i godzina w trybie standby.
Szanowni Klienci,
Dziękujemy, że wybrali Państwo produkt z naszego
asortymentu. Firma Beurer oferuje dokładnie przetestowane produkty wysokiej jakości przeznaczone do
pomiaru ciężaru, ciśnienia, temperatury i tętna, a także przyrządy do łagodnej terapii, masażu, inhalacji i
ogrzewania.
Prosimy uważnie przeczytać instrukcję obsługi i przestrzegać zawartych w niej wskazówek. Instrukcję należy dać do przeczytania innym użytkownikom urządzenia oraz zachować do wglądu.
2. Objaśnienia do rysunków
W instrukcji obsługi zastosowano następujące symbole:
Z poważaniem
Zespół firmy Beurer
Ostrzeżenie Ostrzeżenie przed niebezpieczeństwem obrażeń ciała lub
utraty zdrowia.
1. Informacje o urządzeniu
Funkcje urządzenia
Uwaga
Waga diagnostyczna pomaga w sprawowaniu kontroli
nad własnym ciałem, mającej na celu poprawę zdrowia.
Służy do określania ciężaru ciała oraz indywidualnych
parametrów fitness i jest przeznaczona do użytku własnego w warunkach domowych.
Wskazówka Ważne informacje.
87
Ostrzeżenie przed niebezpieczeństwem uszkodzenia urządzenia lub akcesoriów.
3. Wskazówki dotyczące
bezpieczeństwa
• Maksymalne obciążenie wagi wynosi 150 kg (330 lb,
24 St).
• Waga ustawiona jest fabrycznie na jednostki „cm”
i „kg”. Jak zmienić ustawienie jednostek, podano w
rozdziale „Ustawienia“.
• Wagę ustawić na równej, twardej powierzchni. Twarda powierzchnia jest warunkiem przeprowadzenia
prawidłowych pomiarów.
• Chronić urządzenie przed uderzeniami, wilgocią, kurzem, chemikaliami, dużymi wahaniami temperatury
oraz nie stawiać zbyt blisko źródła ciepła (pieców,
kaloryferów).
• Należy się upewnić, że waga nie ma styczności z
żadnym płynem. Nigdy nie zanurzać wagi w wodzie.
Nigdy nie myć wagi pod bieżącą wodą.
• Nie stawiać żadnych przedmiotów na wadze, gdy się
z niej nie korzysta.
• Nie naciskać zbyt mocno ani ostrymi przedmiotami
na przyciski.
• Nie narażać wagi na działanie wysokiej temperatury
lub silnego pola elektromagnetycznego (np. telefony
komórkowe).
• Naprawy mogą być przeprowadzane wyłącznie przez
pracowników serwisu lub autoryzowanego sprzedawcę. Przed złożeniem reklamacji należy sprawdzić,
czy baterie są naładowane i ewentualnie je wymienić.
• W przypadku pytań dotyczących zastosowania naszego urządzenia należy zwrócić się do sprzedawcy
lub serwisu.
• Wszystkie wagi są zgodne z dyrektywą WE
2004/108/EC. W przypadku pytań dotyczących zastosowania naszego urządzenia należy zwrócić się
do sprzedawcy lub serwisu.
Instrukcję obsługi należy uważnie przeczytać i przestrzegać zawartych w niej wskazówek.
Instrukcję należy dać do przeczytania również innym
użytkownikom urządzenia oraz zachować
do wglądu.
Wskazówki dotyczące bezpieczeństwa
• Osoby z wszczepionymi urządzeniami
medycznymi (np. rozrusznikiem serca) nie
mogą używać wagi diagnostycznej. Działanie tych urządzeń może zostać zaburzone.
• Kobiety w ciąży nie mogą korzystać z wagi diagnostycznej.
• Nie stawać z jednej strony na brzegu wagi. Waga
może się przechylić!
• Nie zezwalać dzieciom na zabawę opakowaniem
(niebezpieczeństwo uduszenia).
Wskazówki dotyczące obchodzenia
się z bateriami
• Połknięcie baterii stanowi zagrożenie dla życia. Baterie i wagę przechowywać w miejscu niedostępnym
dla małych dzieci. W przypadku połknięcia baterii
natychmiast skontaktować się z lekarzem.
• Słabo naładowane baterie należy zawczasu wymienić.
• Zawsze należy wymieniać równocześnie wszystkie
baterie oraz stosować baterie jednego typu.
• Baterii nie wolno ładować ani regenerować w żaden
inny sposób, rozkładać na części, wrzucać do ognia
oraz nie wolno dopuścić do zwarcia baterii.
• Wyciekający z baterii elektrolit może uszkodzić urządzenie. Jeżeli urządzenie nie będzie przez dłuższy
czas używane, należy wyjąć baterie.
• Jeśli z baterii wyciekł elektrolit, należy założyć rękawice ochronne i suchą ściereczką wyczyścić przegrodę na baterie.
• Baterie mogą zawierać substancje trujące, szkodliwe
dla zdrowia i środowiska. Baterie należy utylizować
zgodnie z przepisami obowiązującymi w danym kraju. Nigdy nie wyrzucać baterii z odpadami z gospodarstwa domowego.
4. Opis urządzenia
Budowa
2
1
3
4
Wskazówki ogólne
• Urządzenie przeznaczone jest do użytku własnego.
Nie należy używać go do celów medycznych lub komercyjnych.
• Należy pamiętać, że w zakresie tolerancji możliwe są
technicznie uwarunkowane odchylenia pomiarów,
ponieważ waga nie jest przeznaczona do profesjonalnego medycznego zastosowania.
1
2
3
4
88
Elektrody na stopy, lewa stopa
Panel obsługi z wyświetlaczem
Wskazanie trybu pracy
Elektrody na stopy, prawa stopa
Panel obsługi z wyświetlaczem
5
Waga
3 x AA
6
7
8
9
10
11
12
Jeśli waga lub panel obsługi nie działają, należy wyjąć
baterie i ponownie włożyć. Wskazówki dotyczące wymiany baterii, patrz strona 97.
5
6
5
Elektrody kontaktowe, lewa ręka
6
Elektrody kontaktowe, prawa ręka
7 set Przycisk sterujący, potwierdzanie wprowadzonych ustawień
Menu: Przycisk „w górę“
8
Menu: Przycisk „w dół“
9
Przycisk ON
10
Ustawianie: przycisk „w górę“
11
Ustawianie: Przycisk „w dół“
12
Ustawianie wagi
Wagę ustawić na płaskim i twardym podłożu. Twarde
podłoże jest warunkiem prawidłowego ważenia.
6. Montaż panelu obsługi
Ustawianie panelu obsługi
Panel obsługi można trzymać w ręku, ustawić na płaskim podłożu lub pozostawić na wadze.
Wysunąć klapkę (z tyłu wagi) w sposób przedstawiony
na rysunku i umieścić na niej panel obsługi. Klapka
posiada magnes, który umożliwia przymocowanie panelu obsługi do wagi.
Analiza za pomocą panelu obsługi
Wskazówka
Panel obsługi należy trzymać oburącz, aby zapewnić stabilny kontakt z elektrodami (5) i (6) z przodu i z tyłu.
Montaż ścienny
Zestaw montażowy (uchwyt ścienny, śruby, kołki)
umożliwia zamocowanie panelu obsługi na ścianie.
Montażu należy dokonać za pomocą dołączonego zestawu, a uchwyt ścienny zamontować w sposób przedstawiony na rysunku.
5. Uruchomienie
Wkładanie baterii
Wyjąć baterie z opakowania i włożyć je, zwracając
uwagę na prawidłową biegunowość, do wagi i panelu obsługi. Przestrzegać schematu umieszczonego w
przegrodzie na baterie. Po włożeniu baterii miga wskazanie roku, patrz strona 91.
Panel obsługi
3 x AA
Używać kołków odpowiednich do danego podłoża.
• Użyć uchwytu ściennego jako schematu nawiercania
otworów, aby zaznaczyć odpowiednie miejsca.
• Za pomocą wiertła 6 mm wywiercić w ścianie 2 otwory o głębokości ok. 40 mm poziomo obok siebie w
odstępie 36 mm.
89
• Włożyć kołki.
• Przykręcić uchwyt ścienny za pomocą obu śrub.
Sprawdzić stabilność montażu.
• Wsunąć panel obsługi w uchwyt w taki sposób, aby
prowadnice uchwytu ściennego były ustawione równolegle do prowadnic panelu obsługi.
Przed zdjęciem panelu obsługi z uchwytu ściennego należy ponownie odchylić go całkowicie do przodu!
Pomiar oporu elektrycznego (impedancja) i podanie
stałych lub indywidualnych wartości (wiek, wzrost,
płeć, stopień aktywności fizycznej) umożliwia zmierzenie zawartości tłuszczu, wody, tkanki mięśniowej i
masy kostnej w organizmie.
Tkanka mięśniowa i woda dobrze przewodzą prąd
elektryczny, a tym samym mają niewielki opór. Natomiast masa kostna i tkanka tłuszczowa nie są dobrymi
przewodnikami ze względu na swój duży opór.
Waga dokonuje pomiarów za pomocą dwóch różnych
częstotliwości, co umożliwia dokładniejsze określenie impendancji. Różne częstotliwości mają zróżnicowany wpływ na błonę komórkową i cząsteczki wody.
Płaszczyzna elektrycznego kontaktu urządzenia z ciałem została zoptymalizowana dzięki 4 elektrodom na
dłonie i 4 elektrodom na stopy, co pozwala osiągnąć
większą precyzję pomiarów, a tym samym dokładniejszą analizę. Ta precyzyjna technologia przeprowadzania analizy powoduje, że wartości uzyskiwane w kolejnych pomiarach mogą w niewielkim stopniu różnić się
od siebie. Wynika to z odchyleń podczas pomiaru impendancji (np. inny przepływ impulsów elektrycznych
między elektrodami a rękami i stopami, inny rozkład
wody w organizmie).
Należy pamiętać, że wyniki pomiarów podane przez
wagę są tylko zbliżone do rzeczywistych wyników analiz medycznych. Jedynie lekarz specjalista może przy
pomocy metod medycznych (np. tomografii komputerowej) przeprowadzić dokładne pomiary tkanki tłuszczowej, tkanki mięśniowej, masy kostnej i zawartości wody.
Alternatywny montaż ścienny
Metody pomiaru
Uchwyt ścienny można przymocować do ściany
również za pomocą dwustronnej taśmy klejącej. Powierzchnia ściany musi być czysta i sucha. Montaż
jest możliwy w przypadku naklejania na płytkach ceramicznych, szkle, tworzywie sztucznym i wielu innych
podłożach.
• Usunąć folię ochronną taśmy klejącej z tyłu uchwytu
ściennego.
• Uchwyt ścienny mocno docisnąć do ściany.
• Sprawdzić stabilność montażu.
Analizę można przeprowadzić w następujący sposób:
• Górna część ciała: Wziąć w ręce panel obsługi, wejść
w butach na wagę.
• Dolna część ciała: Panel obsługi położyć na przykład
na wadze, wejść boso na wagę.
• Górna i dolna część ciała: Wziąć w ręce panel obsługi, wejść w butach na wagę.
Najpierw przycisnąć panel obsługi nad uchwytem
ściennym do ściany, a następnie wsunąć panel obsługi do dołu.
• Panel obsługi wsunąć całkowicie w uchwyt. Sprawdzić, czy panel obsługi jest umieszczony w uchwycie
równolegle i stabilnie.
Ustawianie nachylenia
Panel obsługi można obracać na uchwycie ściennym
i w ten sposób dopasować nachylenie. Blokada uniemożliwia zdjęcie panelu obsługi z uchwytu ściennego
w pozycji wychylenia.
W niniejszej instrukcji opisana jest analiza górnej
i dolnej części ciała.
Jeśli podczas analizy panel obsługi jest trzymany w
ręku, jego ciężar zostanie automatycznie odliczony.
Od przyklejenia uchwytu ściennego za pomocą
taśmy klejącej do umieszczenia w nim panelu obsługi
powinna upłynąć co najmniej 1 godzina!
Porady
• Aby wyniki były porównywalne, należy ważyć się o
możliwie stałych porach (najlepiej rano), po skorzystaniu z toalety, na trzeźwo i bez ubrań.
• Ważna wskazówka dotycząca analizy: pomiaru tkanki tłuszczowej (dolnej części ciała) można dokonać
wyłącznie boso i z lekko zwilżonymi od spodu stopami. Suche lub mocno zrogowaciałe stopy mogą
być przyczyną niedokładnych pomiarów, ponieważ
nie przewodzą dobrze prądu elektrycznego.
7. Informacje
Zasada działania
Waga działa na zasadzie analizy impedancji bioelektrycznej B.I.A. Oznacza to, że w ciągu kilku sekund
nieodczuwalny i zupełnie niegroźny prąd dokonuje pomiaru składu organizmu.
90
Ustawianie daty, godziny
• Podczas pomiaru należy stać prosto i nie poruszać
się.
• Po dużym wysiłku fizycznym należy odczekać kilka
godzin.
• Po wstaniu z łóżka należy poczekać ok. 15 minut,
aby woda rozeszła się w organizmie.
• Ważne jest, aby pomiary przeprowadzać przez dłuższy okres czasu. Z reguły krótkotrwałe (następujące
w ciągu kilku dni) wahania ciężaru ciała uwarunkowane są przez utratę wody w organizmie. Woda odgrywa jednak ważną rolę dla samopoczucia.
• Nacisnąć w trybie standby (wyświetlacz wskazuje
godzinę oraz datę) przycisk [SET].
• Za pomocą przycisku sterującego [ ] wybrać w
menu punkt „SET_TIME“ i zatwierdzić przyciskiem
[SET].
• Miga wskazanie roku.
• Za pomocą przycisków sterujących [ , ] ustawić kolejno rok, miesiąc i dzień, jak również aktualny
czas w minutach i godzinach.
• Wprowadzone ustawienia każdorazowo zatwierdzić
przez naciśnięcie przycisku [SET].
Ograniczenia
Wyniki pomiarów mogą być niedokładne i wykazywać
znaczące odchylenia w przypadku:
• Dzieci poniżej 10 roku życia,
• Sportowców wyczynowych i kulturystów,
• Kobiet w ciąży,
• Osób z gorączką, obrzękami, osteoporozą lub dializowanych,
• Osób, które przyjmują lekarstwa na serce i układ krążenia,
• Osób, które przyjmują lekarstwa na rozszerzenie lub
zwężenie naczyń krwionośnych,
• Osób ze znaczną dysproporcją nóg w stosunku do
wzrostu (nogi znacznie dłuższe lub krótsze).
Wprowadzanie danych użytkownika
8. Ustawienia
• Nacisnąć przycisk [SET].
• Wybrać „SET_USER“ i zatwierdzić przyciskiem
[SET].
• Za pomocą przycisku sterującego [ , ] wybrać
osobę i zatwierdzić przyciskiem [SET].
• Jeśli w pamięci zapisane są wcześniejsze ustawienia,
pojawią się na wyświetlaczu. Jeśli nie wprowadzono
wcześniej żadnych ustawień, pamięć jest pusta.
• Można wprowadzić następujące ustawienia:
Dane użytkownika
Wartości nastawcze
Płeć
męska , żeńska
Wzrost
100 do 250 cm
(3‘-03“ do 8‘-02“)
Data urodzenia
Rok, miesiąc, dzień
Stopień aktywności
fizycznej
1 do 5
Waga docelowa
ustawiana w kg (do graficznej prezentacji zachodzących zmian)
Aby dokonać pomiaru tkanki tłuszczowej oraz innych
pomiarów w swoim organizmie, należy zapisać swoje dane.
Waga umożliwia zapisywanie i kasowanie indywidualnych ustawień 10 użytkowników, na przykład członków rodziny.
Można korzystać również z trybu „GUEST“ (jeśli jest
włączony), w przypadku którego nie ma możliwości
zapisu ustawień i pomiarów.
Funkcja pamięci, wskaźnik tendencji i średnia wartość pomiarów są niedostępne w trybie „Gość“.
Przed przeprowadzeniem pomiarów należy wprowadzić swoje dane.
Nastawianie urządzenia
• Nacisnąć w trybie standby (wyświetlacz wskazuje
godzinę oraz datę) przycisk [SET].
• Za pomocą przycisku sterującego [ ] wybrać w
menu punkt „SET_UNIT“ i zatwierdzić przyciskiem
[SET].
• Za pomocą przycisków sterujących [ , ] wybrać
symbol języka (D, GB, F, E, I) i zatwierdzić przyciskiem [SET].
• Za pomocą przycisków sterujących [ , ] wybrać
symbol jednostki pomiaru (kg, lb, st) i zatwierdzić
przyciskiem [SET].
• Za pomocą przycisków sterujących [ , ] wybrać
format wyświetlania godziny (24 h lub 12 h) i zatwierdzić przyciskiem [SET].
• Za pomocą przycisków sterujących [ , ] wybrać,
czy GUEST_MODE ma być włączony lub wyłączony
i zatwierdzić przyciskiem [SET].
Na wyświetlaczu można następnie odczytać wprowadzone ustawienia.
• Zmiana wartości: nacisnąć przycisk [ , ] lub przytrzymać wciśnięty, w celu szybkiego przewijania.
• Potwierdzenie ustawień: Nacisnąć przycisk [SET].
Po wprowadzeniu wszystkich danych waga jest przygotowana do pracy. Jeśli nie przeprowadza się dalszych ustawień ani pomiarów, waga wyłącza się.
91
Stopień aktywności fizycznej
10. Obsługa
Wybór stopnia aktywności fizycznej zależy w głównej
mierze od okresu (średni lub długi), na jaki jest planowany.
Dopiero po wprowadzeniu wszystkich parametrów
można dokonać pomiaru tkanki tłuszczowej i pozostałych wartości.
Stopień
Aktywność fizyczna
aktywności
fizycznej
1
Brak.
2
Mała: mały wysiłek fizyczny (np. spacer, lekka praca w ogrodzie, ćwiczenia
gimnastyczne).
3
Średnia: wysiłek fizyczny przynajmniej
2 – 4 razy w tygodniu, po 30 minut.
4
Duża: wysiłek fizyczny przynajmniej
4 – 6 razy w tygodniu, po 30 minut.
5
Bardzo duża: duży wysiłek fizyczny,
intensywny trening lub ciężka praca fizyczna, codziennie, przynajmniej przez
1 godzinę.
Pomiar ciężaru ciała
1. Włączanie wagi
• Nacisnąć przycisk [ ] na panelu obsługi.
Na wyświetlaczu pojawia
się 0.0 kg. Waga jest teraz
przygotowana do pracy.
2. Ważenie (bez diagnozy)
Wagę ustawić na płaskim i twardym podłożu.
Twarde podłoże jest warunkiem prawidłowego ważenia.
• Stanąć boso na wagę. Wskaźnik [3] wagi świeci się
na zielono.
Należy stać spokojnie, równomiernie rozkładając ciężar ciała na obie
nogi. W miarę możliwości stawać na
zewnętrznych krawędziach wagi, nie
przechylając jej.
Jeśli panel obsługi jest trzymany w ręku, jego ciężar (300 g) zostanie automatycznie odliczony.
9. Wyświetlacz
Wynik wyświetla się przez 10 sekund od chwili zakończenia pomiaru.
Budowa
1
5
Kilka sekund po zejściu z wagi, waga wyłącza się.
Wskaźnik [3] gaśnie. Pomiar nie został zapisany.
Wykonanie analizy
1. Włączanie wagi
• Nacisnąć przycisk [ ] na panelu obsługi.
Na wyświetlaczu pojawia
się 0.0 kg.
4
3
2
1 Godzina, data, użytkownik
2 Ciężar ciała wraz z oceną
Ciężar ciała
3 Wyniki analizy (częściowo z oceną)
BF
Tkanka tłuszczowa
Woda
Pomiar tkanki mięśniowej
Masa kostna
4 Menu
Aktualny pomiar
Wskaźnik tendencji
Szczegółowa prezentacja zawartości tkanki
tłuszczowej oraz procentowego udziału tkanki
mięśniowej w górnej i dolnej części ciała
Mem Zapisane pomiary od 1 do 30
Średnie wartości pomiarów
Kcal Zużycie kalorii
Oznaczenie aktualnego punktu menu
5
2. Diagnoza
• Włączyć urządzenie i naciskając prawy przycisk [ ]
wybrać użytkownika 1 – 10. W tym celu może być konieczne wielokrotne naciśnięcie przycisku.
• Nacisnąć przycisk [SET] lub odczekać 3 sekundy.
Na wyświetlaczu pojawia się ekran pomiarowy.
W przypadku aktywowania użytkownika „GUEST“,
przed każdym pomiarem konieczne jest ponowne
wprowadzenie danych użytkownika. W trybie gościa
92
Analiza wartości uzyskanych podczas
pomiaru
nie są zapisywane dane użytkownika ani pomiary. Istnieje możliwość włączenia lub wyłączenia trybu gościa,
patrz strona 91.
Prezentacja graficzna
Ciężar ciała
• Nacisnąć przycisk menu [ ] na panelu obsługi, aby
przejść do poszczególnych podmenu lub do pamięci.
Przedstawiane są zmiany ciężaru ciała między kolejnymi pomiarami. Nowe pomiary są dodawane po prawej stronie. Linia odniesienia oznacza wagę docelową.
• Stanąć boso na wagę o mocno trzymać w rękach
panel obsługi. (Jeśli panel obsługi jest trzymany w
ręku, jego ciężar (300 g) zostanie automatycznie odliczony).
• Dolną część kciuka należy mocno zacisnąć na przednich elektrodach, a palce na tylnych elektrodach panelu obsługi.
Należy zdefiniować wagę docelową, co umożliwi prezentację przebiegu zmian ciężaru ciała, patrz
strona 91. W każdej chwili można dokonać korekty
wagi docelowej.
Tkanka tłuszczowa
• Za pomocą przycisku [ , ] przejść do zestawienia pomiarów tkanki tłuszczowej. Przedstawiane są
zmiany zawartości tkanki tłuszczowej między kolejnymi pomiarami. Linia odniesienia odzwierciedla
średnią wartość wszystkich pomiarów tkanki tłuszczowej, słupki wskazują, czy mierzone wartości rosną, czy maleją.
Po pomiarze ciężaru następuje pomiar impendancji
umożliwiający dokonanie analizy. Do tego celu
służą 4 elektrody panelu obsługi w przypadku
górnej części ciała oraz 4 elektrody wagi w przypadku dolnej części ciała. Na wyświetlaczu pojawia się symbol ciała człowieka, przez które
przepływają impulsy elektryczne.
Wskazówka:
Należy stać spokojnie, równomiernie rozkładając ciężar
ciała na obie nogi. Należy zwrócić uwagę, aby stopy,
nogi, łydki i uda nie miały ze sobą kontaktu skórnego.
W przeciwnym przypadku pomiar nie będzie przebiegał prawidłowo. Aby tego uniknąć, należy włożyć np.
cienkie spodnie.
Górna część ciała, dolna część ciała
Tkanka tłuszczowa
• Nacisnąć przycisk [ ] na panelu obsługi, aby
przejść do szczegółowego opisu górnej/dolnej części ciała.
Aktualny wynik pomiaru tkanki tłuszczowej jest prezentowany zarówno w ujęciu całościowym, jak również
z podziałem na górną i dolną część ciała.
3. Wynik
Wyświetla się wynik pomiaru.
W celu dokonania analizy patrz Ocena wyników strona 95.
Przy wyłączaniu wartość pomiarów jest automatycznie
zapisywana. W przypadku wykonania kilku pomiarów
jednego dnia, zapisany zostanie tylko ostatni pomiar.
93
Mięśnie
• Za pomocą przycisku [ , ] przejść do szczegółowej prezentacji masy mięśniowej.
Kcal Zużycie kalorii
• Nacisnąć przycisk [ ] na pulpicie obsługi, aby
przejść do kcal. Na wyświetlaczu pojawią się wyniki teoretycznych obliczeń podstawowej przemiany
materii BMR oraz czynnej przemiany materii AMR w
kcal.
Wyświetlane są tylko aktualne wyniki pomiarów,
poprzednie wyniki nie są zapisywane.
Mem Wyświetlanie zapisanych wartości
Wywoływanie pamięci pomiarów w trybie
Standby
• Nacisnąć przycisk [ ] na panelu obsługi, aby przejść
do pamięci.
Wyświetla się zestawienie wyników pomiaru. Na górze
podawana jest data pomiaru, jak również numer miejsca w pamięci (03-03) np. trzeci = ostatni z 3 zapisanych pomiarów.
• Za pomocą przycisku [
zapisu.
,
Podczas wyłączania urządzenia następuje automatyczne zapisywanie mierzonych wartości po dokonaniu analizy. Każdy użytkownik ma do dyspozycji 30
miejsc w pamięci.
• Włączyć panel obsługi za pomocą przycisku [ ].
• Wybrać użytkownika przez naciśnięcie przycisku
[ ]. W tym celu może być konieczne wielokrotne
naciśnięcie przycisku.
• Nacisnąć przycisk [ , ] na panelu obsługi, aby
przeglądać wyniki analizy lub [ , ], aby przejść
do podmenu (np. zmiana BF, ).
] przeglądać miejsca
Kasowanie danych
1. Kasowanie użytkowników wraz ze wszystkimi
ustawieniami i zapisanymi wartościami
• Po włączeniu urządzenia wybrać użytkownika przez
naciśnięcie przycisku [ ]. W tym celu należy w razie
potrzeby kilkakrotnie nacisnąć przycisk i zatwierdzić
przyciskiem [SET].
• Gdy pojawi się wskazanie 0.0 naciskać przez 5 sekund przycisk [SET], aby skasować użytkownika.
• Za pomocą przycisków [ , ] wybrać „Yes“ i zatwierdzić przyciskiem [SET]. W przypadku rezygnacji
ze skasowania danego użytkownika wybrać „No“ i
nacisnąć przycisk [SET].
Średnie wartości
• Nacisnąć przycisk [ ] na panelu obsługi, aby
przejść do przekrojowej prezentacji pomiarów.
Wyświetlone zostaną wszystkie średnie wartości obliczone na podstawie zapisanych wyników pomiarów.
Wszystkie zapisane wartości i ustawienia tego
użytkownika zostaną skasowane.
Na górze podawana jest data pierwszego oraz
ostatniego pomiaru.
2. Kasowanie pojedynczego zapisu użytkownika
• W pamięci pomiarów „Mem“ wybrać mierzoną wartość i krótko nacisnąć przycisk [SET] na panelu obsługi, aby skasować wyświetloną wartość. Można to
zrobić bezpośrednio po wykonaniu pomiaru.
• Za pomocą przycisków [ , ] wybrać „Yes“ i zatwierdzić przyciskiem [SET]. W przypadku rezygnacji
ze skasowania danej wartości wybrać „No“ i nacisnąć przycisk [SET].
94
3. Kasowanie wszystkich zapisanych wartości
użytkownika
• Wywołać pamięć pomiarów naciskać przez ok. 3 sekundy przycisk [SET] na panelu obsługi, aby skasować wszystkie wartości.
• Za pomocą przycisków [ , ] wybrać „Yes“ i zatwierdzić przyciskiem [SET]. W przypadku rezygnacji ze skasowania wartości wybrać „No“ i nacisnąć
przycisk [SET].
Wiek
30 – 39
40 – 49
50 – 59
60 – 69
70 –100
Włączanie wagi (tryb standby)
mało
<19 %
<20 %
<21 %
<22 %
<23 %
w normie
19 – 24 %
20 – 25 %
21– 26 %
22 – 27 %
23 – 28 %
dużo
24,1– 29 %
25,1– 30 %
26,1– 31 %
27,1– 32 %
28,1– 33 %
bardzo
dużo
>29,1 %
>30,1 %
>31,1 %
>32,1 %
>33,1 %
U sportowców często można zauważyć mniejszą zawartość tłuszczu w organizmie. W zależności od rodzaju uprawianego sportu, intensywności treningu i fizycznej budowy ciała zawartość tłuszczu może być niższa
od podanych tutaj wartości orientacyjnych.
Należy jednak pamiętać, że bardzo niska zawartość
tłuszczu może prowadzić do zagrożenia zdrowia.
• Należy poczekać, aż wyświetlacz wyłączy się samoczynnie po upływie ok.45 sekund lub nacisnąć
przycisk [ ] na panelu obsługi, aby ręcznie wyłączyć wyświetlacz.
Data i godzina są nadal widoczne.
Tryb oszczędzania energii
Zawartość wody w organizmie
• Przez 10 sekund naciskać jednocześnie przyciski
menu oraz . Wskazanie daty i godziny znika.
• W celu ponownego włączenia należy przez 10 sekund przytrzymywać jednocześnie przyciski menu
oraz .
Procentowa zawartość wody w organizmie znajduje
się zazwyczaj w przedziale:
Mężczyzna
11. Ocena wyników
Wiek
10 –100
Zawartość tłuszczu w organizmie
Na wyświetlaczu pojawiają się dane dotyczące zawartości tkanki tłuszczowej, które są oceniane w formie
wykresu słupkowego. Podana poniżej procentowa zawartość tłuszczu w organizmie jest wartością orientacyjną (w celu uzyskania dokładniejszych informacji
należy skonsultować się z lekarzem).
mało
<11 %
<12 %
<13 %
<14 %
<15 %
<16 %
<17 %
<18 %
w normie
11–16 %
12 –17 %
13 –18 %
14 –19 %
15 – 20 %
16 – 21 %
17 – 22 %
18 – 23 %
dużo
16,1– 21 %
17,1– 22 %
18,1– 23 %
19,1– 24 %
20,1– 25 %
21,1– 26 %
22,1– 27 %
23,1– 28 %
bardzo
dużo
>21,1 %
>22,1 %
>23,1 %
>24,1 %
>25,1 %
>26,1 %
>27,1 %
>28,1 %
Wiek
10 –100
mało
<16 %
<17 %
<18 %
w normie
16 – 21 %
17 – 22 %
18 – 23 %
dużo
21,1– 26 %
22,1– 27 %
23,1– 28 %
bardzo
dużo
>26,1 %
>27,1 %
>28,1 %
bardzo
dobrze
>65 %
źle
<45 %
dobrze
45 – 60 %
bardzo
dobrze
>60 %
Tkanka tłuszczowa zawiera niewiele wody. Dlatego w
przypadku osób o wysokiej zawartości tłuszczu zawartość wody może kształtować się na poziomie niższym
od wartości orientacyjnych. Natomiast w przypadku
osób uprawiających sporty wytrzymałościowe zawartość wody może przekroczyć wartości orientacyjne,
ze względu na małą zawartość tłuszczu i duży udział
procentowy tkanki mięśniowej.
Wagi diagnostycznej nie należy używać do medycznych pomiarów zawartości wody, np.
w celu ustalenia obrzęków uwarunkowanych wiekiem.
W razie pytań należy skonsultować się z lekarzem. Zasadniczo należy dążyć do tego, aby zawartość wody
w organizmie była wysoka.
Kobieta
Wiek
10 –14
15 –19
20 – 29
dobrze
50 – 65 %
Kobieta
Mężczyzna
Wiek
10 –14
15 –19
20 – 29
30 – 39
40 – 49
50 – 59
60 – 69
70 –100
źle
<50 %
95
Pomiar tkanki mięśniowej
wyciągać wniosków dotyczących zmian w kościach i
twardości kości (np. osteoporoza).
Procentowa zawartość tkanki mięśniowej mieści się
zazwyczaj w przedziale:
BMR
Mężczyzna
Wiek
10 –14
15 –19
20 – 29
30 – 39
40 – 49
50 – 59
60 – 69
70 –100
mało
<44%
<43%
<42%
<41%
<40%
<39%
<38%
<37%
w normie
44 – 57 %
43 – 56 %
42 – 54 %
41– 52 %
40 – 50 %
39 – 48 %
38 – 47 %
37 – 46 %
dużo
>57 %
>56 %
>54 %
>52 %
>50 %
>48 %
>47 %
>46 %
mało
<36%
<35%
<34%
<33%
<31%
<29%
<28%
<27%
w normie
36 – 43 %
35 – 41 %
34 – 39 %
33 – 38 %
31– 36 %
29 – 34 %
28 – 33 %
27 – 32 %
dużo
>43 %
>41 %
>39 %
>38 %
>36 %
>34 %
>33 %
>32 %
Podstawowa przemiana materii (BMR = Basal Metabolic Rate) oznacza ilość energii, jaką zużywa organizm w
stanie spoczynku do utrzymania podstawowych funkcji życiowych (np. w przypadku leżenia przez 24 godziny w łóżku).
Wartość ta zależy w dużym stopniu od ciężaru ciała,
wzrostu i wieku.
Podstawowa przemiana materii jest podawana przez
wagę diagnostyczną w kcal/dzień i obliczana za pomocą uznanego naukowo wzoru Harrisa Benedicta.
Taka ilość energii jest niezbędna organizmowi w każdym przypadku i musi być dostarczana w formie pożywienia.
Dostarczanie organizmowi mniejszej ilości energii przez
dłuższy czas może być szkodliwe dla zdrowia.
Kobieta
Wiek
10 –14
15 –19
20 – 29
30 – 39
40 – 49
50 – 59
60 – 69
70 –100
AMR
Czynna przemiana materii (AMR = Active Metabolic
Rate) oznacza ilość energii, jaką zużywa dziennie organizm w stanie aktywności fizycznej. Zużycie energii
przez człowieka zwiększa się w miarę wzrostu aktywności fizycznej i mierzone jest przez wagę na podstawie wprowadzonego stopnia aktywności (1 – 5).
Aby utrzymać ciężar ciała, należy w formie jedzenia i picia dostarczyć organizmowi energii w ilości, jaką zużył.
Jeśli przez dłuższy okres czasu organizmowi dostarcza
się mniej energii, niż on zużywa, wówczas organizm
pobiera energię z tkanki tłuszczowej, co prowadzi do
chudnięcia. Jeśli natomiast przez dłuższy okres czasu
organizmowi dostarcza się więcej energii, niż to wynika z obliczeń czynnej przemiany materii (AMR), wówczas organizm nie może spalić nadmiaru energii i magazynuje ją w postaci tłuszczu, co prowadzi do tycia.
Masa kostna
Nasze kości, tak jak całe ciało, podlegają naturalnym
procesom budowy, zużywania i starzenia się. Duży
przyrost masy kostnej następuje w dzieciństwie, aby
w wieku 30 – 40 lat osiągnąć swój najwyższy poziom.
Z wiekiem ilość masy kostnej zmniejsza się.
Zdrowe odżywianie (bogate w wapń i witaminę D) i regularna aktywność fizyczna mogą nieco zapobiec zużywaniu się kości. Poprzez ćwiczenie mięśni można
dodatkowo wzmocnić układ kostny. Należy pamiętać,
że waga nie podaje zawartości wapnia w kościach, lecz
mierzy ciężar wszystkich materiałów budulcowych kości (substancje organiczne i nieorganiczne oraz wodę).
Wpływ, jaki mamy na masę kostną, jest bardzo niewielki. Zawartość masy kostnej waha się nieznacznie
w zależności od współczynników: ciężaru, wzrostu,
wieku i płci. Nie ma uznawanych wartości odniesienia ani zaleceń.
Czasowa zależność wyników pomiarów
Ważne jest, aby pomiary przeprowadzać przez
dłuższy okres czasu. Z reguły krótkotrwałe wahania
ciężaru ciała uwarunkowane są przez utratę wody w
organizmie.
Wyniki zależą od zmian ciężaru ciała, procentowych
zmian zawartości tłuszczu, wody i mięśni oraz czasu, w
jakim doszło do tych zmian. Nagłe zmiany, następujące
w ciągu kilku dni, należy odróżniać od zmian średniej
długości (w okresie kilku tygodni) oraz od zmian długotrwałych (w okresie kilku miesięcy).
Jako regułę można przyjąć, że krótkotrwałe zmiany
ciężaru ciała są prawie wyłącznie wynikiem zmian w
zawartości wody, podczas gdy zmiany średniej długości oraz długotrwałe dotyczą również zawartości tkanki
tłuszczowej i mięśniowej.
Uwaga
Nie należy mylić masy kostnej z gęstością kości.
Gęstość kości można zmierzyć jedynie metodami medycznymi (np. tomografia komputerowa, USG). Dlatego
na podstawie pomiarów przy pomocy wagi nie należy
96
• Jeśli ciężar ciała zmniejszy się na krótko, a zawartość
tłuszczu wzrośnie lub pozostanie na tym samym poziomie, oznacza to, że zmniejszyła się jedynie zawartość wody w organizmie – np. po treningu, pobycie
w saunie lub diecie mającej na celu szybkie zmniejszenie ciężaru ciała.
• Jeśli natomiast po średnio długim okresie czasu ciężar ciała wzrośnie, a zawartość tłuszczu spadnie lub
pozostanie na tym samym poziomie, oznacza to rozbudowanie cennej masy mięśniowej.
• Jeśli ciężar ciała i zawartość tłuszczu zmniejszają się
równocześnie, oznacza to, że zastosowana dieta jest
prawidłowa – utrata masy tłuszczowej.
• W idealnym przypadku dieta powinna być połączona
z aktywnością fizyczną, treningami fitness lub siłowymi. W ten sposób można w średnio długim okresie
czasu zwiększyć masę mięśniową.
• Nie należy sumować wyników pomiaru tkanki tłuszczowej, tkanki mięśniowej i zawartości wody (tkanka
mięśniowa również zawiera wodę).
Wskazówka
• Przy każdej wymianie baterii używać baterii tego samego typu, tej samej marki i pojemności.
• Wszystkie baterie wymieniać jednocześnie.
• Nie używać ładowalnych akumulatorów.
• Używać baterii nie zawierających metali ciężkich.
14. Czyszczenie i konserwacja
urządzenia
Dokładność pomiarów i trwałość urządzenia zależą
od prawidłowego obchodzenia się z urządzeniem: Od
czasu do czasu należy czyścić urządzenie.
Do czyszczenia używać wilgotnej ściereczki, ewentualnie z niewielką ilością płynu do mycia naczyń. Nie
używać żrących środków czyszczących i nigdy nie myć
urządzenia pod bieżącą wodą.
Uwaga
12. Przesyłanie mierzonych
wartości do komputera PC /
HealthManager / EasyFit
• Nigdy nie używać rozpuszczalników ani żrących
środków czyszczących!
• Pod żadnym pozorem nie zanurzać urządzenia w
wodzie!
• Nie czyścić urządzenia w zmywarce!
Wymagania systemowe:
Windows 7, Windows Vista, Windows XP SP3
15. Utylizacja
HealthManager:
Kontrola stanu zdrowia z wykorzystaniem ciśnieniomierzy lub glukometrów firmy Beurer.
Nie wyrzucać baterii z odpadami z gospodarstwa domowego. Użytkownik jest prawnie zobowiązany do
zwrotu zużytych baterii. Zużyte baterie należy oddać do
punktu utylizacji lub do sklepu, który prowadzi sprzedaż baterii tego typu.
EasyFit:
Analiza treningu z wykorzystaniem pulsometrów firmy Beurer.
Wskazówka
Na bateriach zawierających szkodliwe substancje zamieszczone są następujące oznaczenia:
Pb = bateria zawiera ołów,
Cd = bateria zawiera kadm,
Hg = bateria zawiera rtęć.
Proces:
• Pliki do pobrania i instalacji oprogramowania firmy
Beurer znajdują się w sekcji pobierania na stronie
http://www.beurer.com
• Tworzenie połączenia USB.
Ze względu na ochronę środowiska wagi i baterii nie
wolno wyrzucać z wraz z odpadami z gospodarstwa
domowego.
Urządzenie należy odnieść do punktu zbiórki zużytego
sprzętu elektrycznego i elektronicznego.
Należy przestrzegać krajowych przepisów dotyczących
utylizacji materiałów.
Urządzenie należy zutylizować zgodnie z wytyczną 2002/96/EC – WEEE (Waste Electrical
and Electronic Equipment) o zużytych urządzeniach elektrycznych i elektronicznych.
W razie pytań należy zwrócić się do odpowiedniej instytucji odpowiedzialnej za utylizację.
USB
• Podczas instalacji oprogramowania należy przestrzegać zaleceń.
13. Wymiana baterii
Panel obsługi posiada wskaźnik wymiany baterii. Na
wyświetlaczu pojawia się symbol
, jeśli konieczna jest wymiana baterii panelu obsługi lub symbol ,
jeśli wyczerpały się baterie wagi. W takim przypadku
należy jak najszybciej wymienić baterie.
97
16. Co robić w przypadku
problemów?
Błąd
Rozwiązanie
Panel obsługi jest zbyt Zmniejszyć odległość mięoddalony od wagi.
dzy wagą a panelem obsługi,
maksymalny odstęp wynosi
2 metry.
Wymienić baterie (patrz stroBaterie wagi są wyczerpane lub nieprawi- na 89) i sprawdzić prawidłową biegunowość.
dłowo włożone.
Jeśli w trakcie pomiaru waga wykaże błąd, na wyświetlaczu pojawiają się następujące wskazania.
Wyświetlacz Przyczyna
ERROR:_
PrzekroczoOVERLOAD!
no maksymalny
udźwig 150 kg.
LOW_
Baterie są prawie
BATTERY
wyczerpane.
MEMORY_
FULL
Zapisano 30 wyników pomiarów.
ERROR:_
CONTACT!
Opór elektryczny
między elektrodami a spodem
stóp jest za wysoki (np. przy silnym zrogowaceniu naskórka).
ERROR:_DATA Pomiar BIA przebiegł pomyślnie,
ale zawartość
tłuszczu znajduje
się poza zakresem pomiarowym (poniżej
5% lub powyżej
50%).
Brak
Baterie w panelu
wskazania
obsługi są wyczerpane.
Nieprawidłowo
włożone baterie
w panelu obsługi.
Rozwiązanie
Dopuszczalne obciążenie do 150 kg.
Wymienić baterie
(patrz strona 89
i 97)
Przesyłanie wyników pomiarów
do komputera PC,
patrz strona 97.
Powtórzyć pomiar
na boso. Ewentualnie lekko zwilżyć
stopy od spodu.
Ewentualnie usunąć
zrogowaciały naskórek na stopach.
Powtórzyć pomiar
na boso lub ewentualnie lekko zwilżyć
stopy od spodu.
Ewentualnie zmienić ustawiony stopień aktywności fizycznej.
Błędny pomiar ciężaru ciała
Wymienić baterię
(patrz strona 89).
Wymiary wagi
Baterie stosowane w wadze
Baterie stosowane w panelu
obsługi
Transmisja radiowa
Zakres pomiarowy
Podziałka: ciężar, masa kostna
Podziałka: tkanka tłuszczowa,
woda, udział procentowy tkanki
mięśniowej
Podziałka: BMR, AMR
Błąd
Waga ma nieprawidłowo wyznaczony punkt
zerowy.
Rozwiązanie
Przed wykonaniem pomiaru aktywować wagę przez
krótkie dotknięcie stopą, aż
zaświeci się wskaźnik trybu
pracy .
Odczekać ok. 5 sekund i powtórzyć pomiar. Informacja:
Natychmiastowe wejście na
wagę powoduje, że waga zapisuje punkt zerowy w momencie jej wyłączenia (gdy
zgaśnie wskaźnik trybu pracy ).
Waga stoi na dywanie. Ustawić wagę na twardym
podłożu.
W miarę możliwości stawać
na zewnętrznych krawędziach
wagi,nie przechylając jej.
17. Dane techniczne
Sprawdzić prawidłową biegunowość,
(patrz strona 89).
Brak możliwości pomiaru
Błąd
Panel obsługi nie został włączony zanim
użytkownik stanął na
wadze.
Zakłócenia połączenia radiowego między
wagą a panelem obsługi.
Rozwiązanie
Przed dokonaniem pomiaru
włączyć panel obsługi. W razie potrzeby odczekać 30 sekund i powtórzyć pomiar.
Ponownie włożyć baterie do
wagi i panelu obsługi.
Zachować większy odstęp
od następujących źródeł pola
elektromagnetycznego: słupów wysokiego napięcia, telewizyjnych i komputerowych
systemów łączności, urządzeń fitness, telefonów komórkowych, stacji pogody.
330 x 330 x 41 mm
3 x 1,5 V typ AA
3 x 1,5 V typ AA
433 MHz
5 kg do 150 kg
100 g
0,1 %
1 kcal
Zastrzegamy sobie prawo do zmian technicznych.
Waga spełnia wymogi dyrektywy WE 2004/108/EC
wraz z uzupełnieniami.
98
99
100
753.325 – 0712 Irrtum und Änderungen vorbehalten