1
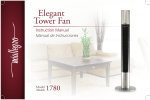
Ionizing
Tower Fan
Instruction Manual
Manual de Instrucciones
Model
Modelo
1760
De sc r i p t io n
1
2
1
2
3
4
5
6
7
8
3
4
Congrat ula t i ons…
Digital Panel
Control Button Region
Remote Control
Main Body
Front Base
Base Screws (x3)
Rear Base
Power cord and plug
on your purchase of the Miallegro® Ionizing Tower
Fan, an exemplary appliance carefully crafted to
bring supreme comfort and style to any living space.
The Miallegro® Ionizing Tower Fan seamlessly
harmonizes environment and design, delighting
and refreshing the times you share with family
and friends.
You can be confident of the quality and excellent
service we always offer our clients.
8
The
1
7
5
6
English 1
Team
A s s emb ly
F O R S T E P B Y S T E P A S S E M B LY
CAUTION
(Please refer to the illustration on Page 1 of the English section.)
1. Assemble the front and rear base (5 and 7).
2.Insert the main body into the base and turn the base
screws clockwise (4, 5 and 7).
• Do not plug the cord into the power socket before
installation is complete.
TO REMOVE THE REMOTE CONTROL
• Do not let small children operate the fan without adult
supervision.
1.Push the control button, the digital panel slides up
automatically (see Fig. 1).
2. Slide down the digital panel until it locks.
NOTE:Before using the fan, remove the clear plastic sticker on
the remote control (fig. 2).
Fig. 1
Fig. 2
• If the electrical cord is damaged, please do not use.
Contact Miallegro® for safety instructions.
• For indoor use only.
This appliance has a polarized plug (one blade is wider than
the other). To reduce the risk of electrical shock, the plug is
configured to fit into a polarized outlet in only one position.
If it does not fit properly in the outlet, try reversing the
position. Do not try to force the plug into the outlet, as doing
so will bypass this important safety feature and may damage
your fan.
English 2
Io n i z a t io n Sy st e m
C leani ng Ins t r uctions
W H AT I S A N I O N I Z E R ?
An Ionizer is a negative ion generator that helps to improve
air quality, reducing the volume of positive ions harmful to
your health, achieving purer air quality.
1. Turn the fan off and unplug it.
2. Remove dust from the fan grill using the brush attachment
of your vacuum cleaner.
3. Wipe the entire grill with a soft cloth to remove any dust
residue. For stubborn spots, a damp cloth may be used.
W H AT A R E T H E A D VA N TA G E S O F T H E
IONIZER?
• Cleans environment pollution, achieving oxygen be better
absorbed by the organism.
• Increases the quality of the air.
• Reduces depression, weariness and stress.
• Relieves asthmatic and allergic conditions and absorbs
tobacco smoke to eliminate allergens in the air.
• It purifies air in closed spaces (i.e. office), eliminates the
static transmitted by computers and carpets.
English 3
O p e r a t i ng Your Fa n
(Indicated by color-coded symbols on each switch)
The picture displayed on your left
is the 1760 Tower Fan Digital Panel.
The picture displayed on your left
is the 1760 Tower Fan Remote Control.
TO STAR T OR STOP THE FAN
On: Blue light
Off: Light off
TO SET NORMAL WIND OR
NATURAL WIND MODE
On: Blue light
Off: Light off
TO
ADJUST THE 3 SPEED LEVEL
Low speed: I
Mid speed: I I
High speed: I I I
TO
TO STAR T OR STOP
OSCILLATION OF THE FAN
On: Blue light
Off: Light off
English 4
SET THE TIMER LEVEL
2 hours: 2
4 hours: 4
8 hours: 8
De s c r i p c ío n
1
2
¡Feli c i t a c i ones!
1 Pantalla Digital
2 Boton de control de
la pantalla
3 Control Remoto
4 Cuerpo Principal
5 Base Frontal
6 Tornillos de la Base (x3)
7 Base Posterior
8 Cable de alimentación
y enchufe
3
4
Por elegir ser parte del equipo Miallegro® y
compartir con nosotros la magia de nuestros
productos que traerán a su hogar momentos
especiales de alegría en familia.
Disfrute de la primera línea de electrodomésticos
creada para embellecer sus espacios de vida y
siéntase seguro con el apoyo de calidad y servicios
excelentes que siempre le brindaremos.
Comparta su creatividad con sus seres queridos.
8
1
¡y asegure los aplausos…!
El Equipo
7
5
6
Español 1
Ens amb laje
METODO DE ENSAMBLAJE
Para ensamblaje paso a paso, por favor refiera a la ilustración
en la página 1 de la sección en Español.
1. Ensamble la parte delantera y posterior de la base (5 y 7).
2.Insertar el cuerpo principal en la base y coloque los
tornillos (4, 5 y 7).
COMO EXTRAER EL CONTROL REMOTO
1.Pulse el botón, el panel digital se deslizara hacia arriba
automáticamente (como se indica en la Fig. 1).
2. Empuje hacia abajo el panel digital hasta que se cierre.
NOTA: Para el uso inicial del ventilador elimine el plástico
transparente adhesivo (como muestra la fig. 2).
Fig. 1
Fig. 2
El uso adequado del ventilador considera las precauciones
básicas de cualquier aparato eléctrico.
MEDIDAS DE PRECAUCIÓN
• No lo conecte en los enchufes antes de haber completado
la instalación.
• Si el cable esta dañado debe ser reemplazado por su
agente de servicio o persona calificada con el fin de evitar
riesgos de peligro.
• No debe ser utilizado por niños pequeños sin supervisión.
• Solo para uso en interiores.
Este aparato tiene un enchufe polarizado (un contacto
más ancho que el otro), para reducir el riesgo de descarga
eléctrica. Este complemento se destina a encajar en una
toma corriente de una sola manera, si el enchufe no encaja
plenamente en el tomacorriente invierte el enchufe, si aun no
encaja contacte a un electricista calificado. No intente pasar
por alto esta característica de seguridad.
Español 2
Sistema de Ionización
Instrucciones Para la Limpieza
EN QUE CONSISTE EL IONIZADOR?
El Ionizador es un generador de iones negativos que ayudan
a mejorar la calidad de aire, reduciendo el volumen de iones
positivos nocivos para la salud, logrando así un aire mas puro.
C U A L E S S O N L A S V E N TA J A S D E L
IONIZADOR?
1. Apague el ventilador y desenchúfelo del toma corriente.
2. Elimine el polvo de las rejillas del ventilador con el uso de
una aspiradora con el accesorio de cepillo.
3. Retire cualquier residuo de polvo de toda el área de la rejilla
con un paño o trapo suave de limpieza. Para manchas
humedezca el paño con agua y frote el área de la mancha
hasta eliminarla.
• Limpieza de la polución ambiental, logrando que el
oxigeno sea mejor absorbido por el organismo.
• Incrementa la calidad del aire, siendo este mas sano y con
mejor oxigenación.
• Reduce la depresión, el cansancio y el estrés.
• Alivio de estados asmáticos y alérgicos ya que absorbe el
humo del tabaco y elimina los alergenos de aire.
• Purifica el aire en lugares cerrados (oficinas), elimina la
estaticidad transmitida por las computadoras, alfombras,
etc.
Español 3
Pro c e d imi ent o Op era t i vo
(Múltiples funciones)
El cuadro exhibido a su izquierda es el
panel digital de la Torre de Ventilador
1760.
El cuadro exhibido a su izquierda es
el control remoto de la Torre de
Ventilador 1760.
PARA INICIAR O DETENER
EL VENTILADOR
Encendido: luz azul
Apagado: luz apagada
FUNCION BOTON IONIZADOR
Encendido: luz azul
Apagado: luz apagada
PARA CONFIGURAR EL
TEMPORIZADOR DE APAGADO
AUTOMATICO: 2, 4 O 8 HORAS
2 horas: 2
4 horas: 4
8 horas: 8
PARA AJUSTAR EL NIVEL DE
VELOCIDAD: BAJO, MEDIO Y ALTO
Velocidad baja: I
Velocidad media: I I
Velocidad alta: I I I
PARA INICIAR O DETENER LA
OSCILACIÓN DEL VENTILADOR
Encendido: luz azul
Apagado: luz apagada
Español 4
Miallegro®’s 15-month Warranty
Póliza de Garantía
Miallegro® will replace this item due to any defect in material
or workmanship, including electrical or mechanical defects,
within the 15 month warranty period beginning on the date of
purchase. This present policy will remain valid only if the product
is used solely for domestic purposes.
Miallegro® substituirá gratuitamente por cualquier defecto de
fabricación eléctrico o mecánico, de este aparato dentro de
los 15 meses del periodo de garantía, de la fecha original de la
compra. La presente póliza tendrá cobertura siempre y cuando
el artefacto sea aplicado al uso domestico.
This warranty becomes null and void if any of the following occurs:
• The item is used for commercial purposes or contrary to the
user manual.
• The item has been disassembled, repaired or altered by any
person other than an authorized Miallegro® Service Center.
• The item has been misused or not properly maintained.
• The item has any damage not caused by manufacturer’s
defects.
• The item was damaged due to accident, unnecessary force or
use of improper voltage or current;
• The item is damaged due to normal wear and tear.
This warranty provides you with specific legal rights. You may
also have other rights, which vary from state to state.
Perderá validez la póliza en los siguientes casos:
• Cuando se detecte al momento de su revisión el uso del
artefacto a nivel industrial o comercial.
• Cuando el articulo haya sido abierto, desarmado o reparado
por personal o establecimientos no autorizados.
• Cuando el artículo fue abusado o descuidado
• Cuando los daños no sean causado por defectos de fabricación
• Cuando los daños sean productos de accidentes, caso
fortuito o fuerza mayor, o cuando sean causados por voltajes
incorrecto.
• Por desgaste normal del articulo a sus componentes causado
por el uso o el transcurso del tiempo.
Contact us for excellent customer support:
Via e-mail at [email protected]
or toll free by calling 1-888-Miallegro (1-888-642-5534).
Para cualquier información es un placer atenderle por los
siguientes canales:
a traves de este correo electronico [email protected]
o llamada gratuita al 1-888-Miallegro (1-888-642-5534).
©
©
2011 Idea Team Work, LLC, all rights reserved. The Miallegro® logo, MiTutto® logo, are trademarks of
Idea Team Work, LLC, Registered in the U.S. and other countries.
2011 Idea Team Work, LLC, todos los derechos reservados. Miallegro® logo y MiTutto® logo son marcas registradas de
Idea Team Work, LLC, registradas en los EEUU y otros países.