1
Alternativa de Arreglo de Polea
Su persiana requerirá una instalación que no es estándar si:
1) Usted quiere cambiar la cadena al lado izquierdo de la
persiana, o 2) Usted quiere montar la persiana en el techo.
NOTA: Si usted compro una persiana especial o esta
instalando una persiana uniforme, no necesita hacer estos
cambios.
Retire los (4) tornillos para
cambiar el control del lado
derecho al lado izquierdo.
Cambiando la cadena a un
control izquierdo
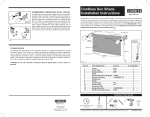
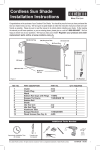
Exterior Roller Sun Shade
Installation Instructions
Congratulations on the purchase of your Coolaroo® Sun Shade. You should be proud to know
you have purchased the best sun shade money can buy. We have gone to great lengths to make
this instruction manual as simple and user friendly as possible. Please be sure to read the manual
in its entirety before installing your shade. If after reading the manual you still have questions, or
you are missing pieces, please give us a call at 1-800-560-4667. We’ll be happy to answer any
of your questions. We hope you enjoy your shade! Register online at www.cooalroo.com
Si usted quiere que su cadena este en el lado izquierdo de
la persiana, usted necesita hacer un cambio sencillo a su
soporte de polea antes de instalar la persiana. Para hacer
este cambio, comience deslizando las tapas de soporte en
el soporte de polea y el soporte parado (Fig. 10). Quite los
cuatro tornillos de los dos soportes.
Fig. 10
gire la polea 180º
Fig. 11
Fig. 12
quite los tornillos
Gale Pacific USA, Inc.
P.O. Box 162625
Altamonte Springs, FL 32716-2625
1-800-560-4667
coolaroo.com
(1) Clutch Unit
(2) Clutch Plug
(3) Bracket Covers
(9) Idle
End Unit
Gire el soporte de polea 180 grados para que la cadena
pueda colgar hacia abajo (Fig. 11). Vuelva a poner los
tornillos y deslice la tapa de soporte. Ningún cambio es
necesario en el soporte parado. Remueva los dos tapones
en el tubo y cámbielos. (Fig. 12)
Si usted quiere que su persiana cuelgue encima o en el techo,
necesitara hacer cambios a los soportes antes de instalar su
persiana. Para hacer ese cambio, comience deslizando las
tapas de soporte en el soporte de polea y el soporte parado
(Fig. 13). Quite los cuatro tornillos de los dos soportes. Gire
el soporte del polea 90 grados para que la cadena cuelgue
directamente hacia abajo haciendo que el polea cuelgue en
el techo y gire el soporte parado para que la apertura este
enfrente del lado más lejos de la ventana (Fig. 14). Vuelva a
poner los tornillos y deslice la tapa de soporte.
Fig. 14
(11) Aluminum Tube
(4) Chain
(8) Shade
Cambiando a montada en el techo
Cambie los (2) tapones terminales
Fig. 13
(10) Idle End Plug
CONSERVACIÓN
Su persiana solar esta hecha con los materiales mas finos
y, cuidada apropiadamente, durará muchísimo tiempo.
Para limpiar su persiana, simplemente enjuague con agua;
restregando con un cepillo muy suave y un jabón o
limpiador que no sea muy abrasivo. Favor de no usar
ningún limpiador con base de cloro, ya que esto podría
malograr sus persianas. Después de limpiar, solo enjuague
y deje secar. Llámenos si tiene alguna pregunta o problema
mecánico. Favor de no guardar su persiana mojada. Déjela
secar al aire libre.
(5) Bottom
Rail Cap
(7) Bottom Rail
(6) Tie Downs
Figure 1
ref. no. Part descriptionpart No. 1Clutch
2Clutch Plug
3
Bracket Covers
4Chain
5
Bottom Rail Caps
6Tie Downs
7
Bottom Rail
8Shade
9Idle End Unit
10Idle End Plug
11Aluminum Tube
12Tension Device (See Fig.7)
13
Wood Screws (See Fig. 6)
Qty. Required
4-CU
1-CP
4-BC
4-CV-10
4-BRCS
4-TD
1-BRS
3-S
4-IU
1-IP
1-AT
4-T
4-WS
1
1
2
1
2
2
1
1
1
1
1
1
7
Additional Tools Needed
CUIDADO: El uso de solventes o tintorería abrasiva
puede dañar la tela y anular su garantía
Política de devolución para persianas especiales: Este producto ha sido
personalizado bajo sus especificaciones. Por ese tanto, no se aceptará ninguna
devolución o reembolso por ningún pedido al menos que sea un defecto de fábrica.
Por favor comuníquese con nuestro Departamento de Servicio al Cliente llamando al
1-800-560-4667 si tiene algún defecto en su persiana dentro de los 60 días después
de la compra. Reclamos de garantía serán honorados de acuerdo a la información
de garantía que esta descrita en nuestra pagina Web www.coolaroo.com
3/16"
#6 5/8"
Anchors
(optional)
x2
Approximate Installation Time:
20 minutes
2 people may
be required
(optional)
© by Gale Pacific Limited. All rights reserved. Coolaroo® mark is a registered trademark of Gale Pacific Limited.
5.04.004.163 12 2010
Your shade comes standard with the chain on the right side of the shade (Fig. 1) and ready to
be mounted on the inside or outside of your window frame. If you purchased a custom shade,
or intend to keep your shade with the standard settings, you may skip this section and proceed
to the installation instructions.
If you want to move the chain to the left side of the shade or you want to hang your shade from
the top of the window (or ceiling), you will need to make a few simple changes to your shade
before proceeding to the installation instructions. Refer to the Alternate Clutch Setup
section of the manual for instructions on how to make these changes.
4. Instalando el dispositivo de tensión
b
a
C
Refer to the front page of this manual for help identifying the various components of the
shade.
Important: The screws included in your hardware kit are for use with wood only. See your
dealer for mounting recommendations when attaching your shade to any other material.
Fig. 6
INSTALLATION INSTRUCTIONS
1. Mark The Holes
Cloth width
screws to screw overall width approximate
measurement (bracket-to-bracket) weight
72”
73 ¼”
74 ¾”
7 lbs.
96”
97 ¼”
98 ¾”
9 lbs.
120”
121 ¼”
122 ¾” 11 lbs.
Fig. 2
tapa
Fig. 7
2. Install Brackets
Install the Clutch and Idle End Brackets
(Fig 3).
The Clutch Unit Bracket will
be on the right side, and the Idle End
Unit Bracket should be on the left for
standard installation.
Idle Unit bracket
clutch
Unit
bracket
Do not tighten screws completely yet.
Fig. 3
clutch end plug
3. Install the Shade.
First, insert the Clutch Plug into the Clutch
Unit (Fig. 4).
Then insert the Idle End Plug into the
Idle End Unit, and snap the Idle End Plug
securely into place (Fig. 5).
Fig. 4
Snap end plug
into end Unit
Para instalar el dispositivo de tensión (A), posicione el dispositivo de
tensión sobre una superficie plana (marco de la ventana, la pared,
etc) para que la cadena y el dispositivo de tensión no interfieran
con la subida y bajada de la persiana. La cadena debe estar tensa,
pero todavía manejable ( Fig. 6). No permita que quede floja.
No tuerza, cruce o incline la cadena. La cadena no
funcionará si no está correctamente instalada.
Marque la posición de los agujeros de guía con un lápiz o marcador.
Taladre tres agujeros de 1/16”. Utilice los tornillos para fijar el
dispositivo de tensión (A) y su base (B) en su lugar. Una vez instalado,
la cadena se desbloqueará y funcionara normalmente.
• For stock shades, use (Fig 2) to determine
the placement of your screws.
• For custom shades, mark holes 1/2” less than
overall (bracket-to-bracket) measurement at
each end.
(the above measurements are for stock shades)
Es muy recomendable que las cadenas y cordones no sean
accesibles a los niños. Como medida de seguridad adicional,
deben fijarse con un dispositivo de tensión cuando no estén en
uso. Mantenga los cordones fuera del alcance de
los niños pequeños.
conexión
Para volver a colocar el dispositivo de tensión, retire la tapa y el complemento
de plástico con unas pinzas; retire la tapa con un destornillador (Fig. 7). La
cubierta se desprenderá, liberando la cadena del dispositivo de tensión.
Remueva el dispositivo de tensión usado y alimente la cadena a través de la
rueda en el dispositivo de tensión nuevo. Vuelva a colocar la tapa, el tapón de
plástico y la tapa para operar la cadena.
En caso de emergencia, cortar la cadena con unas tijeras
5. Instale anclajes (Si desea)
Anclajes ha sido proporcionado para asegurar su
persiana solar en condiciones de viento.
Fig. 8
NOTA: Si usted decide usar los anclajes, usted necesitara instalar algo para anclarlos. Muchos
clientes han usado: ganchos en forma de U o S y también tornillos. Las persianas deben de ser
enrolladas en temporada de viento o cuando hay exposición prolongada para prevenir daños.
Para colocar los anclajes: Primero retire las tapas del riel inferior de ambos lados. Después,
deslice los anclajes en el canal o ranura (Fig. 8). Vuelva a poner las tapas al riel inferior.
Ahora usted esta listo para gozar de los muchos beneficios de su persiana solar.
AJUSTANDO LA TENSIÓN DE LA CADENA
Usted puede ajustar la tensión de la cadena
si necesita.
With the shade in place, adjust the
brackets so they fit snugly on each end of
the shade.
Si la tensión de la cadena esta demasiado
apretada (o la cadena es difícil de estirar),
deslice las tapas de soporte y afloje los cuatro
tornillos un poquito; muévalos a la izquierda
(Fig. 9).
Important:
Now go back and tighten the Bracket
screws completely.
tornillos para
ajustar la tensión
Fig. 5
Fig. 9
Si la tensión de la cadena esta demasiado
floja (la cadena se estira muy fácilmente),
deslice las tapas de soporte y asegure los
cuatro tornillos un poquito; muévalos a la
derecha. (Fig. 9)
La posición estándar de su persiana tiene la cadena en el lado derecho (Fig 1) y está preparada
para ser montada en el interior o exterior de su ventana. Si usted compro una persiana de orden
especial, o piensa mantener su persiana con los ajustes uniformes, puede saltarse esta sección y
proceder a las instrucciones de instalación normal.
4. Install Tension Device
b
Si usted quiere mover la cadena al lado izquierdo de la persiana o quiere colgar su persiana
encima de la ventana (o en el techo), necesita hacer unos cambios sencillos a su persiana antes de
proceder con las instrucciones de instalación. Por favor referirse a la sección de “Arreglo alterno
de polea” en el manual de instrucciones para ver cómo hacer esos cambios. Refiérase a la página
anterior de este manual para identificar las diferentes partes de la persiana.
IMPORTANTE: Los tornillos que están incluidos en su juego de aditamentos son solamente para
el uso en madera. Visite su ferretería mas cercana par recomendaciones en que usar para montar
su persiana en otras superficies.
a
C
Fig 6
Medida
Medida General
(de abrazadera a
abrazadera)
(aproximado)
183 cm
186 cm
190 cm
3k
244 cm
247 cm
251 cm
4k
308 cm
312 cm
5k
305 cm
Fig. 2
(de tornillo a
tornillo)
Peso
(las medidas superiores son para persianas de
tamanos specificos)
1. Marque los hoyos
• El primer paso es de marcar los hoyos
donde usted va a poner sus cuatro tornillos.
Determine que tan aparte deben de ser
puestos usando la tabla en la Fig. 2.
• Para persianas de medidas especiales,
marque los hoyos 13 mm menos que la
medida total (de abrazadera a abrazadera)
a cada lado.
To install the Tension Device (A), position the Tension Device on a
flat surface (window frame, wall, etc.) so that the chain and tension
device do not interfere with the raising and lowering of the blind.
The chain must be taut, but still operable ( Fig. 6). Do not allow
for any slack. Do not twist, cross or slant the chain.
The chain will not work if not properly installed.
Mark the position for the pilot holes using a pencil or marker.
Pre-drill three 1/16" holes. Use the screws provided to attach the
Tension Device (A) and Tension Device Base (B) into place. Once
installed, the chain will unlock and operate normally.
INSTRUCCIONES DE INSTALACIÓN
ancho de
la tela
It is highly recommended that chains/pull cords are not accessible
to small children and as an added safety measure, should be
secured with a tension device when not in use.
Keep blind cords out of reach of young children.
Cap
Fig 7
Plug
To replace the Tension Device, remove Cap and Plastic Plug with
pliers, remove Cover using a screwdriver (Fig. 7). The cover will
pop off, releasing the chain from the Tension Device. Remove
old Tension Device and feed chain through wheel on new Tension
Device. Replace the cover, plastic plug and cap to operate chain.
In case of emergency, cut the chain with scissors
5. Install Tie Downs
(if desired)
2. Instale los soportes
Abrazadera de la unidad inactiva
mecanismo
de polea
Instale las dos piezas, el soporte de polea
y el soporte parado (Fig. 3). El soporte de
polea estará en el lado derecho y el soporte
parado debe estar en el lado izquierdo para
una instalación estándar.
No apriete los tornillos completamente.
Note: If you choose to use the Tie Downs, you will need to install something to anchor them
to. Many customers have used: u-shaped hooks, s-shaped hooks, or screws. In severe wind or
prolonged exposure to wind, sun shades should be rolled up to prevent damage.
3. Instale la persiana
First, remove the End Caps from either end of the Bottom Rail. Then, slide the Tie Downs into
the channel/groove (Fig. 8). Reinstall the End Cap.
Fig. 3
TAPÓN TERMINAL DEL EJE
Fig. 4
ENGANCHE EL TAPÓN TERMINAL A
LA UNIDAD TERMINAL
Tie Downs have been provided to secure your
sun shade in mild to moderate wind conditions.
Fig 8
Primero, meta el tapón de polea en la
polea. Después, mete el tapón de polea en
el soporte parado y cierre el tapón de polea
fijo en su lugar. (Fig. 5) Con la persiana en
su lugar, ajuste los soportes para que
queden cómodamente encajados.
You are now ready to enjoy the many benefits of your Coolaroo Sun Shade.
adjusting chain tension
IMPORTANTE: Después de seguir
estas instrucciones, vuelva y
APRIETE los tornillos de los
soportes completamente.
You can adjust chain tension if needed.
If chain tension is too tight (chain
is difficult to pull), slide off bracket
cover and loosen four (4) screws;
turn counter clockwise. See (Fig. 9).
screws
to adjust
tension
Fig. 5
Fig 9
If chain tension is too loose (chain pulls too
easily), slide off bracket cover and tighten
four (4) screws; turn clockwise. See (Fig. 9).
Alternative Clutch Setup
Your shade will require a non-standard installation if:
1) you are changing the chain to the left side of the shade, or
2) if you are mounting your shade from the top/ceiling.
remove (4)
screws to
change from
right hand to
left hand
control
Note: If you purchased a custom shade or are doing a
standard installation, you do NOT need to make these
changes.
Changing to a
Instrucciones de instalación
para persianas con polea
Queremos felicitarlos por su compra de su persiana Coolaroo. Usted debe estar orgulloso de saber
que ahora es dueño de la mejor persiana que su dinero puede comprar. Hemos tratado de hacer este
manual lo mas sencillo posible y fácil de entender. Por favor asegúrese de leer las instrucciones antes
de instalar su persiana.Si después de leer el manual todavía tiene alguna pregunta, no dude en llamar
a nuestra línea de ayuda 1-800-560-4667. Seria un placer para nosotros poder asistirle con cualquier
pregunta. Esperamos que disfrute de su persiana. Registrese en nuestra pagina web www.cooalroo.com
Left-hand Chain Control
(10) Tapón terminal
inactivo
If you want your chain to be on the left side of your shade,
you will need to make a simple change to your Clutch
Unit before you install your shade. To make this change,
start by sliding off the Bracket Cover on the Clutch Unit
(Fig. 10). Remove the four screws.
Fig 10
rotate clutch
unit 180°
Fig 11
switch end plugs
Fig 12
remove (4)
screws
Fig 13
Top/ceiling Mount
Fig 14
Gale Pacific USA, Inc.
P.O. Box 162625
Altamonte Springs, FL 32716-2625
1-800-560-4667
coolaroo.com
Your sun shade has been made of the finest materials
and, when properly cared for, will last a very long time.
To clean your shade, simply rinse with water, scrub with
soap or any non-abrasive cleaner, rinse and allow to dry.
Call us for missing parts or mechanical problems.
Do not store shade wet. In moist areas roll shade down
frequently to air dry.
(2) Conexión de la polea
(9) Unidad
terminal inactiva
Changing to a
Maintenance
(8) Tela
(4) Cadena
(7) Riel inferior
(5) Cubierta de
riel inferior
(6) Anillos de anclaje
Fig. 1
no. de ref. DescripciÓnCodigo de pieza Cantidad
1Mecanismo de polea 2Conexión de la polea
3Cubierta de polea
4Cadena
5Cubierta de riel inferior
6Anillos de anclaje
7Riel inferior
8Tela
9Unidad terminal inactiva
10Tapón terminal inactivo
11Tubo de aluminio
12Dispositivo tensor (Fig.7)
13Tornillos para madera (Fig. 6)
4-CU
1-CP
4-BC
4-CV-10
4-BRCS
4-TD
1-BRS
3-S
4-IU
1-IP
1-AT
4-T
4-WS
1
1
2
1
2
2
1
1
1
1
1
1
7
Herramientos adicionales necesarias
Caution: Use of solvents or abrasive cleaners may
damage the fabric and will void your warranty.
Do not use bleach or chlorine.
Custom Shade Return Policy: This product has been custom
made according to your specifications. As such, no replacement
or refunds are possible other than for defects or faults that are
reported to our Customer Service Department at 1-800-560-4667
within 60 days of shipping. Warranty claims will continue to be
honored in accordance with our warranty policy as outlined at
www.coolaroo.com.
(1) Mecanismo de polea
(3) Cubierta de
mecanismo de polea
Turn the clutch unit 180 degrees so the chain can now hang
down from the left side (Fig. 11). Put the screws back in,
and tighten. Next, slide the Bracket Cover back on. No
change is needed to the Idle End Unit, it works for right
and left mounts. Pull out both End Plugs from the tube and
switch them (Fig. 11).
If you want your Clutch Unit to hang from the top (for
example, the ceiling), you will need to make a simple change
to your Clutch Unit and Idle End Unit before you install your
shade. To make this change, start by sliding off the Bracket
Covers on both the Clutch Unit and Idle End Unit (Fig. 13).
Remove the four screws from both brackets. Turn the Clutch
Unit 90 degrees so the chain hangs straight down if the
Clutch were hanging from the top, and turn the Idle End Unit
so the opening is facing away from the window. (Fig. 14).
Put screws back in, and slide the Bracket Cover back on.
(11) Tubo de aluminio
3/16"
#6 5/8"
Anclas
(opcionall)
x2
Tiempo aproximado de montaje:
20 minutos
2 personas pueden
ser necasanas
(optional)
© por Gale Pacific Limited. Todos los derechos reservados. Coolaroo® es una marca registrada de Gale Pacific Limited.
5.04.004.163 12 2010