1
USER´S MANUAL
BEDIENUNGSANLEITUNG
MANUEL D´UTILISATION
MANUAL DE USUARIO
INSTRUKCJA OBSŁUGI
MANUALE D‘USO
LED
GOBO
SCANNER
60W
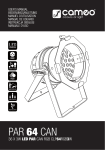
CLSCAN60W
ENGLISH
DEUTSCH
Thank you for choosing Cameo Lights!
FRANCAIS
ITALIANO
FRANCAIS
POLSKI
ESPAÑOL
FRANCAIS
We have designed this product to give you reliable operation over many years.
2
Please, take a few moments to read these instructions carefully, as we want you to enjoy your new Cameo Lights
products quickly and to the fullest.
Further information about Cameo Lights check our website WWW.CAMEOLIGHT.COM
FRANCAIS
ENGLISH
LED GOBO SCANNER 60W
CLSCAN60W
DEUTSCH
FRANCAIS
FRANCAIS
ESPAÑOL
POLSKI
ITALIANO
3
FRANCAIS
ITALIANO
FRANCAIS
POLSKI
ESPAÑOL
FRANCAIS
DEUTSCH
ENGLISH
PREVENTIVE MEASURES:
4
1. Please read these instructions carefully.
2. Keep all information and instructions in a safe place.
3. Follow the instructions.
4. Observe all safety warnings. Never remove safety warnings or other information from the equipment.
5. Use the equipment only in the intended manner and for the intended purpose.
6. Use only sufficiently stable and compatible stands and/or mounts (for fixed installations). Make certain that wall
mounts are properly installed and secured. Make certain that the equipment is installed securely and cannot fall down.
7. During installation, observ e the applicable safety regulations for your country.
8. Never install and operate the equipment near radiators, heat registers, ovens or other sources of heat. Make
certain that the equipment is always installed so that is cooled sufficiently and cannot overheat.
9. Never place sources of ignition, e.g., burning candles, on the equipment.
10. Ventilation slits must not be blocked.
11. Do not use this equipment in the immediate vicinity of water (does not apply to special outdoor equipment in this case, observe the special instructions noted below. Do not expose this equipment to flammable materials,
fluids or gases.
12. Make certain that dripping or splashed water cannot enter the equipment. Do not place containers filled with
liquids, such as vases or drinking vessels, on the equipment.
13. Make certain that objects cannot fall into the device.
14. Use this equipment only with the accessories recommended and intended by the manufacturer.
15. Do not open or modify this equipment.
16. After connecting the equipment, check all cables in order to prevent damage or accidents, e.g., due to
tripping hazards.
17. During transport, make certain that the equipment cannot fall down and possibly cause property damage and
personal injuries.
18. If your equipment is no longer functioning properly, if fluids or objects have gotten inside the equipment or
if it has been damaged in anot her way, switch it off immediately and unplug it from the mains outlet (if it is a
powered device). This equipment may only be repaired by authorized, qualified personnel.
19. Clean the equipment using a dry cloth.
20. Comply with all applicable disposal laws in your country. During disposal of packaging, please separate
plastic and paper/cardboard.
21. Plastic bags must be kept out of reach of children.
FOR EQUIPMENT THAT CONNECTS TO THE POWER MAINS:
22. CAUTION: If the power cord of the device is equipped with an earthing contact, then it must be connected to
an outlet with a protective ground. Never deactivate the protective ground of a power cord.
23. If the equipment has been exposed to strong fluctuations in temperature (for example, after transport), do
not switch it on immediately. Moisture and condensation could damage the equipment. Do not switch on the
equipment until it has reached room temperature.
24. Before connecting the equipment to the power outlet, first verify that the mains voltage and frequency match
the values specified on the equipment. If the equipment has a voltage selection switch, connect the equipment to
the power outlet only if the equipment values and the mains power values match. If the included power cord or
power adapter does not fit in your wall outlet, contact your electrician.
25. Do not step on the power cord. Make certain that the power cable does not become kinked, especially at the
mains outlet and/or power adapter and the equipment connector.
26. When connecting the equipment, make certain that the power cord or power adapter is always freely
accessible. Always disconnect the equipment from the power supply if the equipment is not in use or if you want
SAFETY:
FRANCAIS
ENGLISH
DEUTSCH
FRANCAIS
to clean the equipment. Always unplug the power cord and power adapter from the power outlet at the plug or
adapter and not by pulling on the cord. Never touch the power cord and power adapter with wet hands.
27. Whenever possible, avoid switching the equipment on and off in quick succession because otherwise this
can shorten the useful life of the equipment.
28. IMPORTANT INFORMATION: Replace fuses only with fuses of the same type and rating. If a fuse blows repeatedly, please contact an authorised service centre.
29. To disconnect the equipment from the power mains completely, unplug the power cord or power adapter
from the power outlet.
30. If your device is equipped with a Volex power connector, the mating Volex equipment connector must be
unlocked before it can be removed. However, this also means that the equipment can slide and fall down if
the power cable is pulled, which can lead to personal injuries and/or other damage. For this reason, always be
careful when laying cables.
31. Unplug the power cord and power adapter from the power outlet if there is a risk of a lightning strike or
before extended periods of disuse.
CAUTION
CAUTION:
Never remove the cover, because otherwise there may be a risk of electric shock. There are no user serviceable
parts inside. Have repairs carried out only by qualified service personnel.
The exclamation mark within an equilateral triangle is intended to alert the user to the presence of
important operating and maintenance instructions.
ITALIANO
The product has been developed for professional use in the field of event technology and is not suitable as
household lighting.
POLSKI
CAUTION! IMPORTANT INFORMATION ABOUT LIGHTING PRODUCTS
1. Do not look into the beam from a distance of less than 40 cm.
2. Do not stare into the beam for extended periods at short-to-medium distances.
3. Do not view the beam directly with optical instruments such as magnifiers.
4. Under some circumstances, stroboscopic effects may trigger epileptic seizures in sensitive individuals! For this
reason, persons who suffer from epilepsy should always avoid places where strobe lights are used.
ESPAÑOL
The lightning flash with arrowhead symbol within an equilateral triangle is intended to alert the user
to the presence of uninsulated “dangerous voltage” within the product’s enclosure that may be of
sufficient magnitude to constitute a risk of electrical shock.
FRANCAIS
RISK OF ELECTRIC SHOCK
DO NOT OPEN
5
FRANCAIS
ITALIANO
FRANCAIS
POLSKI
ESPAÑOL
FRANCAIS
DEUTSCH
ENGLISH
INTRODUCTION:
6
60W DMX LED SCANNER
(CLSCAN60W)
CONTROL FUNCTIONS
• 10-channel DMX controller
• Music control
• Automatic mode
FEATURES
• 1x 60W LED
• Colour wheel with 8 colours plus white
• Gobo wheel with 7 different gobos
• DMX-controlled focus
• DMX-controlled prism
• Master/slave functionality
• Rugged metal housing
• Power consumption: 90W
• Long life LED with especially long service life
• Mounting bracket
OPERATION
The Cameo LED scanner is a DMX-512-controllable LED effects scanner that stands out because of a highly
efficient 60W LED. The colour and gobo wheels can be controlled independently of one another, thus permitting
numerous lighting effects.
The Cameo LED scanner can can be used both individually as well as in master/slave mode and via DMX-512 protocol.
CONNECTIONS AND CONTROL PANEL:
FRANCAIS
ENGLISH
1
IMPORTANT INFORMATION: Replace the fuse only with a fuse of the same type and rating. If the fuse blows
repeatedly, please contact an authorised service centre.
DEUTSCH
FRANCAIS
1 IEC power socket with fuse holder
FRANCAIS
4
3
3-pole XLR input socket for connection of a DMX controller (e.g., DMX mixer).
3 DMX OUT
POLSKI
2 DMX IN
ESPAÑOL
2
3-pole XLR output socket for looping through the DMX control signal.
4 SAFETY CATCH
ITALIANO
Metal eyelet for attaching a safety rope.
7
ENGLISH
CONNECTIONS AND CONTROL PANEL:
DEUTSCH
5
FRANCAIS
6
5 LED DISPLAY
FRANCAIS
ITALIANO
FRANCAIS
POLSKI
ESPAÑOL
Display of the operating modes and additional system settings.
8
6 CONTROL BUTTONS
4 easily accessible control buttons let you configure the system.
OPERATION:
ESPAÑOL
POLSKI
ITALIANO
MICROPHONE SENSITIVITY
Press the MODE button and then use the UP and DOWN buttons to set the
microphone sensitivity ("MIC" appears in the display). Press ENTER and use
the UP and DOWN buttons to select the desired sensitivity (M-00 to M-99).
Confirm with ENTER.
FRANCAIS
MUSIC CONTROL
Press the MODE button and then use the UP and DOWN buttons to select
the music control mode ("SOUN" appears in the display). Now press the
ENTER button and use the UP button to select the master mode (MAST)
or the DOWN button to select the stand-alone mode (ALON) and confirm
with ENTER. The display now reads "SO-M" for master mode or "SO-A" for
stand-alone mode.
In master mode, additional scanners of the same type can be be used on the
master unit as slave units. Select the DMX mode for the slave unit and set
the DMX Start address to 001. Now, using a DMX cable, connect the slave
unit(s) to the master unit (master unit DMX OUT - slave unit DMX IN). Now
the slave unit follows the master unit.
In stand-alone mode, the scanner runs independently of other connected units.
DEUTSCH
FRANCAIS
SELECTING THE DMX START ADDRESS
Press the MODE button and then use the UP and DOWN buttons to select the
DMX start address mode ("ADDR" appears in the display). Now press ENTER
and use the UP and DOWN buttons to select the desired DMX start address
(A001 - A512).
Confirm with ENTER.
FRANCAIS
ENGLISH
STARTUP
Once you have connected the Cameo LED scanner to the power mains, the
motor reset process starts. After approx. 20 seconds, they are recalibrated
and the unit is operational.
Focus the projection by turning the objective ring.
In DMX mode, the focus can additionally be controlled in DMX channel 6.
9
AUTO MODE
Press the MODE button and then use the UP and DOWN buttons to select the
auto mode ("AUTO" appears in the display). Now press the ENTER button
and use the UP button to select the master mode (MAST) or the DOWN
button to select the stand-alone mode (ALON) and confirm with ENTER. The
display now reads "AU-M" for master mode or "AU-A" for stand-alone mode.
In master mode, additional scanners of the same type can be be used on the
master unit as slave units. Select the DMX mode for the slave unit and set
the DMX Start address to 001. Use a DMX cable to connect the slave unit(s)
to the master unit (master unit DMX OUT - slave unit DMX IN). Now the slave
unit follows the master unit.
In stand-alone mode, the scanner runs independently of other connected units.
FRANCAIS
ITALIANO
FRANCAIS
POLSKI
ESPAÑOL
FRANCAIS
DEUTSCH
ENGLISH
OPERATION:
10
REVERSE PAN
The PAN motion can be reversed using this function.
Press the MODE button and then use the UP and DOWN buttons to select the
reverse pan function ("r PAN" appears in the display). Now press the ENTER
button and use the UP button to select reverse on (ON) or the DOWN button
to select reverse off (OFF)
Confirm with ENTER.
REVERSE TILT
The TILT motion can be reversed using this function.
Press the MODE button and then use the UP and DOWN buttons to select the
reverse pan function ("r t I L" appears in the display). Now press the ENTER
button and use the UP button to select reverse on (ON) or the DOWN button
to select reverse off (OFF)
Confirm with ENTER.
POLSKI
ITALIANO
NOTE
If one of the 4 buttons is not pushed, the LED display
switches off automatically after approx. 70 seconds. As soon as one of the
four buttons is pressed, the display switches on again automatically.
ESPAÑOL
FACTORY DEFAULTS
You can use this function to reset the unit to the factory default settings.
Press the MODE button and then use the UP and DOWN buttons to select
"LOAd". Now press the ENTER button. All settings (microphone sensitivity,
reverse display...) have now been reset to the factory defaults. The unit is
immediately operational again.
FRANCAIS
RESET
Use this function to start the motor reset process.
Press the MODE button and then use the UP and DOWN buttons to select
the reset function ("r E s t" appears in the display). Now press the ENTER
button. The rest process begins and after approx. 20 seconds the motors are
recalibrated and the unit is operational.
DEUTSCH
FRANCAIS
FIXTURE TIME
Using this function, the fixture time can be displayed.
Press the MODE button and then use the UP and DOWN buttons to select
the fixture time display ("F l t l" appears in the display). Now press the
ENTER button. The display shows the number of hours for which the unit has
already been in operation.
FRANCAIS
ENGLISH
REVERSE DISPLAY
Using this function, the characters in the display can be reversed by 180°.
Press the MODE button and then use the UP and DOWN buttons to select
the reverse display function ("r d l S" appears in the display). Now press the
ENTER button and use the UP button to select reverse on (ON) or the DOWN
button to select reverse off (OFF)
Confirm with ENTER.
11
10-CHANNEL MODE
CHANNEL
000 - 255
Pan motion180°
CH2
Tilt
000 - 255
Tilt motion 90°
FRANCAIS
Colour
wheel
ESPAÑOL
FRANCAIS
POLSKI
FRANCAIS
ITALIANO
FUNCTION
Pan
CH3
12
VALUE
CH1
DEUTSCH
ENGLISH
DMX CONTROL:
CH4
Gobo
wheel
000 - 013
White
014 - 027
Yellow
028 - 041
Magenta
042 - 055
Green
056 - 069
Violet
070 - 083
Cyan
084 - 097
Bright green
098 - 111
Amber
112 - 127
Dark red
128 - 190
Rainbow, direction of rotation left (speed slow - fast)
191 - 255
Rainbow, direction of rotation right (speed slow - fast)
000 - 009
open
010 - 019
Gobo 1
020 - 029
Gobo 2
030 - 039
Gobo 3
040 - 049
Gobo 4
050 - 059
Gobo 5
060 - 069
Gobo 6
070 - 079
Gobo 7
080 - 099
Gobo 1 shake, (speed)
100 - 119
Gobo 2 shake, (speed)
120 - 139
Gobo 3 shake, (speed)
140 - 159
Gobo 4 shake, (speed)
160 - 179
Gobo 5 shake, (speed)
180 - 199
Gobo 6 shake, (speed)
200 - 219
Gobo 7 shake, (speed)
220 - 255
Gobo wheel rotation (speed)
DMX CONTROL:
CHANNEL
CH5
CH7
CH9
Dimmer
Prism
128 - 191
Gobo rotation right (speed slow - fast)
192 - 195
no function
196 - 255
Gobo rotation left (speed slow - fast)
000 - 255
Focus
000 - 009
closed
010 - 019
open
020 - 127
Stroboscope effect 1 (speed slow - fast)
128 - 137
open
138 - 201
Stroboscope effect 2 (speed slow - fast)
202 - 255
open
000 - 255
Dimmer 0 - 100%
000 - 003
open
004 - 127
Prism
128 - 255
Prism rotation right (speed slow - fast)
000 - 059
no function
060 - 079
Colour motor and gobo wheel motor reset
080 - 099
Reset all motors
100 - 119
Program 1
120- 139
Program 2
140 -159
Program 3
160 - 179
Program 4
180 - 199
Program 5
200 - 219
Program 6
220 - 239
Program 7
240 - 255
Program 8
POLSKI
Function/
program
manual gobo rotation
ESPAÑOL
CH10
Shutter
000 - 127
FRANCAIS
CH8
Focus
FUNCTION
DEUTSCH
FRANCAIS
CH6
Gobo
rotation
VALUE
FRANCAIS
ENGLISH
10-CHANNEL MODE
ITALIANO
13
FRANCAIS
ITALIANO
FRANCAIS
POLSKI
ESPAÑOL
FRANCAIS
DEUTSCH
ENGLISH
SPECIFICATIONS:
14
MODEL NAME:
CLSCAN60W
Product type:
LED moving light
Type:
Scanner
Colour spectrum:
8 colours + white
Gobos:
7 + open
Number of LEDs:
1
LED type:
60 W
Luminous intensity @ 1 metre:
26000 lx
DMX input:
3-pole XLR male
DMX connector:
3-pole XLR female
DMX mode:
10-channel
DMX functions:
Pan, tilt, shutter, prism, focus, program, dimmer, colour wheel,
gobo wheel
Stand-alone functions:
Auto, sound control
Controls:
Mode, Enter, Up, Down
Indicators:
4-character LED display
Operating voltage:
230 V AC, 50 Hz
Power consumption:
90 W
Power connector:
IEC power socket
Housing material:
metal
Housing colour:
black
Cooling system:
Fan
Dimensions (W x H x D, excluding bracket):
205 x 150 x 475 mm
Weight:
4.4 kg
MANUFACTURER´S DECLARATIONS:
This warranty covers the Adam Hall, LD Systems, Defender, Palmer, and Cameo brands.
It applies to all products distributed by Adam Hall.
This warranty declaration does not affect the statutory warranty claims against the manufacturer, but expands
them with additional warranty claims vis-a-vis Adam Hall.
The warranty period begins on the date on which the product was purchased, proof of which must be produced
(through presentation of the invoice or the delivery note with the date of purchase) in the event of a warranty claim.
Should products of the brands named above be in need of repair within the limited warranty period, you are entitled
to warranty service according to the terms and conditions stated here.
In the unlikely event that the product which you purchased has a recurring failure, Adam Hall has the right, at its
discretion, to replace the defective product with another product, provided that the new product is at least equivalent to the product being replaced with regard to the technical specifications.
ESPAÑOL
POLSKI
Adam Hall does not warrant that the operation of this product will be uninterrupted or error-free. Adam Hall is not
responsible for damage that occurs as a result of your failure to follow the instructions included with the Adam Hall
branded product. The manufacturer‘s warranty does not cover – expendable parts (e. g., rechargeable batteries)
- products from which the serial number has been removed or with a serial number that has been damaged as a
result of an accident - damage due to improper use, user error or other external reasons
- damage to devices operated outside the usage parameters stated in the documentation included with the product
- damage due to the use of replacement parts not manufactured, sold or recommended by Adam Hall,
- damage due to modification or servicing by anyone other than Adam Hall.
These terms and conditions constitute the complete and exclusive warranty agreement between you and Adam
Hall regarding the Adam Hall branded product you have purchased.
FRANCAIS
During the Limited Warranty Period, Adam Hall will repair or replace the defective component parts or the product.
In the event of repair or replacement during the Limited Warranty Period, the replaced original parts and/or products become property of Adam Hall.
DEUTSCH
FRANCAIS
Adam Hall warrants that the Adam Hall product that you have purchased from Adam Hall or from an Adam Hall
authorized reseller is free from defects in materials or workmanship under normal use for a period of 2 or 5 years
(please inquire on a product-by-product basis) from the date of purchase.
FRANCAIS
ENGLISH
MANUFACTURER‘S WARRANTY
ITALIANO
15
FRANCAIS
ITALIANO
FRANCAIS
POLSKI
ESPAÑOL
FRANCAIS
DEUTSCH
ENGLISH
MANUFACTURER´S DECLARATIONS:
16
LIMITATION OF LIABILITY
If your Adam Hall branded hardware product fails to work as warranted above, your sole and exclusive remedy
shall be repair or replacement. Adam Halls’ maximum liability under this limited warranty is expressly limited to
the lesser of the price you have paid for the product or the cost of repair or replacement of any components that
malfunction under conditions of normal use.
Adam Hall is not liable for any damages caused by the product or the failure of the product, including any lost
profits or savings or special, incidental, or consequential damages. Adam Hall is not liable for any claim made by
a third party or made by you for a third party.
This limitation of liability applies whether damages are sought, or claims are made, under this Limited Warranty
or as a tort claim (including negligence and strict product liability), a contract claim, or any other claim, and
cannot be rescinded or changed by anyone. This limitation of liability will be effective even if you have advised
Adam Hall or an authorized representative of Adam Hall of the possibility of any such damages, but not, however,
in the event of claims for damages in connection with personal injuries.
This manufacturer‘s warranty grants you specific rights; depending on jurisdiction (nation or state), you may be
be entitled to additional claims. You are advised to consult applicable state or national laws for a full determination of your rights.
REQUESTING WARRANTY SERVICE
To request warranty service for the product, contact Adam Hall or the Adam Hall authorized reseller from which
you purchased the product.
EC DECLARATION OF CONFORMITY
The equipment marketed by Adam Hall complies (where applicable) with the essential requirements and other
relevant specifications of Directives 1999/5/EC (R&TTE), 2004/108/EC (EMC) und 2006/95/EC (LVD). Additional
information can be found at www.adamhall.com.
MANUFACTURER´S DECLARATIONS:
(Valid in the European Union and other European countries with waste separation)
This symbol on the product, or the documents accompanying the product, indicates that this appliance may not
be treated as household waste. This is to avoid environmental damage or personal injury due to uncontrolled
waste disposal. Please dispose of this product separately from other waste and have it recycled to promote
sustainable economic activity.
ENVIRONMENTAL PROTECTION AND ENERGY CONSERVATION
FRANCAIS
Energy conservation is an active contribution to environmental protection. Please turn off all unneeded electrical
devices. To prevent unneeded devices from consuming power in standby mode, disconnect the mains plug.
DEUTSCH
FRANCAIS
Household users should contact either the retailer where they purchased this product, or their local government
office, for details on where and how they can recycle this item in an environmentally friendly manner.
Business users should contact their supplier and check the terms and conditions of the purchase contract. This
product should not be mixed with other commercial wastes for disposal .
FRANCAIS
ENGLISH
PROPER DISPOSAL OF THIS PRODUCT
ESPAÑOL
POLSKI
ITALIANO
Adam Hall GmbH, all rights reserved. The technical data and the functional product characteristics can be subject
to modifications. The photocopying, the translation, and all other forms of copying of fragments or of the integrlity
of this user’s manual is prohibited.
17
ENGLISH
DEUTSCH
FRANCAIS
ESPAÑOL
FRANCAIS
POLSKI
FRANCAIS
ITALIANO
18
Wir freuen uns, dass Sie sich für ein Produkt von Cameo Light entschieden haben!
Dieses Gerät wurde unter hohen Qualitätsanforderungen entwickelt und gefertigt, um viele Jahre einen reibungslosen Betrieb zu gewährleisten.
Bitte lesen Sie diese Bedienungsanleitung sorgfältig, damit Sie Ihren neuen Scheinwerfer von Cameo Light
schnell optimal einsetzen können.
Weitere Informationen über Cameo Light erhalten Sie auf unserer Website WWW.CAMEOLIGHT.COM.
FRANCAIS
ENGLISH
LED GOBO SCANNER 60W
CLSCAN60W
DEUTSCH
FRANCAIS
FRANCAIS
ESPAÑOL
POLSKI
ITALIANO
19
FRANCAIS
ITALIANO
FRANCAIS
POLSKI
ESPAÑOL
FRANCAIS
DEUTSCH
ENGLISH
SICHERHEITSHINWEISE:
20
1. Lesen Sie diese Anleitung bitte sorgfältig durch.
2. Bewahren Sie alle Informationen und Anleitungen an einem sicheren Ort auf.
3. Befolgen Sie die Anweisungen.
4. Beachten Sie alle Warnhinweise. Entfernen Sie keine Sicherheitshinweise oder andere Informationen vom Gerät.
5. Verwenden Sie das Gerät nur in der vorgesehenen Art und Weise.
6. Verwenden Sie ausschließlich stabile und passende Stative bzw. Befestigungen (bei Festinstallationen). Stellen
Sie sicher, dass Wandhalterungen ordnungsgemäß installiert und gesichert sind. Stellen Sie sicher, dass das
Gerät sicher installiert ist und nicht herunterfallen kann.
7. Beachten Sie bei der Installation die für Ihr Land geltenden Sicherheitsvorschriften.
8. Installieren und betreiben Sie das Gerät nicht in der Nähe von Heizkörpern, Wärmespeichern, Öfen oder
sonstigen Wärmequellen. Sorgen Sie dafür, dass das Gerät immer so installiert ist, dass es ausreichend gekühlt
wird und nicht überhitzen kann.
9. Platzieren Sie keine Zündquellen wie z.B. brennende Kerzen auf dem Gerät.
10. Lüftungsschlitze dürfen nicht blockiert werden.
11. Betreiben Sie das Gerät nicht in unmittelbarer Nähe von Wasser. Bringen Sie das Gerät nicht mit brennbaren
Materialien, Flüssigkeiten oder Gasen in Berührung.
12. Sorgen Sie dafür, dass kein Tropf- oder Spritzwasser in das Gerät eindringen kann. Stellen Sie keine mit
Flüssigkeit gefüllten Behältnisse wie Vasen oder Trinkgefäße auf das Gerät.
13. Sorgen Sie dafür, dass keine Gegenstände in das Gerät fallen können.
14. Betreiben Sie das Gerät nur mit dem vom Hersteller empfohlenen und vorgesehenen Zubehör.
15. Öffnen Sie das Gerät nicht und verändern Sie es nicht.
16. Überprüfen Sie nach dem Anschluss des Geräts alle Kabelwege, um Schäden oder Unfälle, z. B. durch
Stolperfallen zu vermeiden.
17. Achten Sie beim Transport darauf, dass das Gerät nicht herunterfallen und dabei möglicherweise Sach- und
Personenschäden verursachen kann.
18. Wenn Ihr Gerät nicht mehr ordnungsgemäß funktioniert, Flüssigkeiten oder Gegenstände in das Geräteinnere
gelangt sind, oder das Gerät anderweitig beschädigt wurde, schalten Sie es sofort aus und trennen es von der
Netzsteckdose (sofern es sich um ein aktives Gerät handelt). Dieses Gerät darf nur von autorisiertem Fachpersonal repariert werden.
19. Verwenden Sie zur Reinigung des Geräts ein trockenes Tuch.
20. Beachten Sie alle in Ihrem Land geltenden Entsorgungsgesetze. Trennen Sie bei der Entsorgung der Verpackung bitte Kunststoff und Papier bzw. Kartonagen voneinander.
21. Kunststoffbeutel müssen außer Reichweite von Kindern aufbewahrt werden.
BEI GERÄTEN MIT NETZANSCHLUSS:
22. ACHTUNG: Wenn das Netzkabel des Geräts mit einem Schutzkontakt ausgestattet ist, muss es an einer
Steckdose mit Schutzleiter angeschlossen werden. Deaktivieren Sie niemals den Schutzleiter eines Netzkabels.
23. Schalten Sie das Gerät nicht sofort ein, wenn es starken Temperaturschwankungen ausgesetzt war (beispielsweise nach dem Transport). Feuchtigkeit und Kondensat könnten das Gerät beschädigen. Schalten Sie das
Gerät erst ein, wenn es Zimmertemperatur erreicht hat.
24. Bevor Sie das Gerät an die Steckdose anschließen, prüfen Sie zuerst, ob die Spannung und die Frequenz
des Stromnetzes mit den auf dem Gerät angegebenen Werten übereinstimmen. Verfügt das Gerät über einen
Spannungswahlschalter, schließen Sie das Gerät nur an die Steckdose an, wenn die Gerätewerte mit den Werten
des Stromnetzes übereinstimmen. Wenn das mitgelieferte Netzkabel bzw. der mitgelieferte Netzadapter nicht in
Ihre Netzsteckdose passt, wenden Sie sich an Ihren Elektriker.
25. Treten Sie nicht auf das Netzkabel. Sorgen Sie dafür, dass spannungsführende Kabel speziell an der Netz-
SICHERHEITSHINWEISE:
Das gleichschenkelige Dreieck mit Ausrufungszeichen kennzeichnet wichtige Bedienungs- und
Wartungshinweise.
ITALIANO
Das Produkt ist für den professionellen Einsatz im Bereich der Veranstaltungstechnik entwickelt worden und ist
nicht für die Raumbeleuchtung in Haushalten geeignet.
POLSKI
VORSICHT! WICHTIGE HINWEISE IN BEZUG AUF LICHT-PRODUKTE
1. Blicken Sie nicht aus Entfernungen von unter 40 cm in den Lichtstrahl.
2. Blicken Sie niemals längere Zeit aus kurzem bis mittlerem Abstand in den Lichtstrahl.
3. Blicken Sie niemals mit optischen Geräten wie Vergrößerungsgläsern in den Lichtstrahl.
4. Stoboskopeffekte können unter Umständen bei empfindlichen Menschen epileptische Anfälle auslösen! Epilepsiekranke Menschen sollten daher unbedingt Orte meiden, an denen Stroboskope eingesetzt werden.
ESPAÑOL
Das gleichschenkelige Dreieck mit Blitzsymbol warnt vor nichtisolierten, gefährlichen Spannungen
im Geräteinneren, die einen elektrischen Schlag verursachen können.
FRANCAIS
ACHTUNG:
Entfernen Sie niemals die Abdeckung, da sonst das Risiko eines elektrischen Schlages besteht. Im Inneren des
Geräts befinden sich keine Teile, die vom Bediener repariert oder gewartet werden können. Lassen Sie Reparaturen ausschließlich von qualifiziertem Servicepersonal durchführen.
DEUTSCH
FRANCAIS
CAUTION
RISK OF ELECTRIC SHOCK
DO NOT OPEN
FRANCAIS
ENGLISH
buchse bzw. am Netzadapter und der Gerätebuchse nicht geknickt werden.
26. Achten Sie bei der Verkabelung des Geräts immer darauf, dass das Netzkabel bzw. der Netzadapter stets frei
zugänglich ist. Trennen Sie das Gerät stets von der Stromzuführung, wenn das Gerät nicht benutzt wird, oder
Sie das Gerät reinigen möchten. Ziehen Sie Netzkabel und Netzadapter immer am Stecker bzw. am Adapter und
nicht am Kabel aus der Steckdose. Berühren Sie Netzkabel und Netzadapter niemals mit nassen Händen.
27. Schalten Sie das Gerät möglichst nicht schnell hintereinander ein und aus, da sonst die Lebensdauer des
Geräts beeinträchtigt werden könnte.
28. WICHTIGER HINWEIS: Ersetzen Sie Sicherungen ausschließlich durch Sicherungen des gleichen Typs und
Wertes. Sollte eine Sicherung wiederholt auslösen, wenden Sie sich bitte an ein autorisiertes Servicezentrum.
29. Um das Gerät vollständig vom Stromnetz zu trennen, entfernen Sie das Netzkabel bzw. den Netzadapter aus
der Steckdose.
30. Wenn Ihr Gerät mit einem verriegelbaren Netzanschluss bestückt ist, muss der passende Gerätestecker
entsperrt werden, bevor er entfernt werden kann. Das bedeutet aber auch, dass das Gerät durch ein Ziehen am
Netzkabel verrutschen und herunterfallen kann, wodurch Personen verletzt werden und/oder andere Schäden
auftreten können. Verlegen Sie Ihre Kabel daher immer sorgfältig.
31. Entfernen Sie Netzkabel und Netzadapter aus der Steckdose bei Gefahr eines Blitzschlags oder wenn Sie das
Gerät länger nicht verwenden.
21
FRANCAIS
ITALIANO
FRANCAIS
POLSKI
ESPAÑOL
FRANCAIS
DEUTSCH
ENGLISH
EINFÜHRUNG:
22
60W DMX LED SCANNER
(CLSCAN60W)
STEUERUNGSFUNKTIONEN
• 10-Kanal DMX-Steuerung
• Musiksteuerung
• Automatik-Modus
EIGENSCHAFTEN
• 1x 60W LED
• Farbrad mit 8 Farben plus Weiß
• Gobo-Rad mit 7 verschiedenen Gobos
• DMX-kontrollierter Fokus
• DMX-kontrolliertes Prisma
• Master/Slave-Funktionalität
• Robustes Metallgehäuse
• Leistungsaufnahme: 90W
• Longlife-LED mit besonders langer Lebensdauer
• Haltebügel
BEDIENUNG
Der Cameo LED Scanner ist ein DMX-512-steuerbarer LED-Effektstrahler, der sich durch eine hocheffiziente 60W
LED auszeichnet. Farb- und Goborad können unabhängig voneinander gesteuert werden und ermöglichen somit
eine Vielzahl an Lichteffekten.
Der Cameo LED Scanner lässt sich sowohl einzeln als auch im Master/Slave-Betrieb und via DMX-512-Protokoll betreiben.
ANSCHLÜSSE UND BEDIENFELD:
FRANCAIS
ENGLISH
1
WICHTIGER HINWEIS: Ersetzen Sie die Sicherung ausschließlich durch eine Sicherung des gleichen Typs und
mit gleichen Werten. Sollte die Sicherung wiederholt auslösen, wenden Sie sich bitte an ein autorisiertes
Servicezentrum.
DEUTSCH
FRANCAIS
1 IEC Gerätebuchse mit Sicherungshalter
FRANCAIS
4
3
3-polige XLR-Eingangsbuchse zum Anschließen eines DMX-Kontrollgerätes (z.B. DMX-Mischpult).
3 DMX OUT
POLSKI
2 DMX IN
ESPAÑOL
2
3-polige XLR-Ausgangsbuchse zum Weiterleiten des DMX-Steuersignals.
4 FANGSICHERUNG
ITALIANO
Metallöse zum Anbringen eines Sicherheitsfangseils.
23
ENGLISH
ANSCHLÜSSE UND BEDIENFELD:
DEUTSCH
5
FRANCAIS
6
5 LED-DISPLAY
FRANCAIS
ITALIANO
FRANCAIS
POLSKI
ESPAÑOL
Anzeige der Betriebsarten und weiterer Systemeinstellungen.
24
6 BEDIENTASTEN
4 leicht zugängliche Bedientasten ermöglichen es, Systemeinstellungen vorzunehmen.
BEDIENUNG:
ESPAÑOL
POLSKI
ITALIANO
MIKROFONEMPFINDLICHKEIT
Drücken Sie die MODE-Taste und wählen dann mit Hilfe der Tasten UP und
DOWN den Menüpunkt zum Einstellen der Mikrofonempfindlichkeit aus (im
Display erscheint „MIC“). Drücken Sie ENTER und wählen dann die gewünschte
Empfindlichkeit mit Hilfe der Tasten UP und DOWN aus (M-00 bis M-99).
Bestätigen Sie mit ENTER.
FRANCAIS
MUSIKSTEUERUNG
Drücken Sie die MODE-Taste und wählen dann mit Hilfe der Tasten UP und
DOWN den Musiksteuerungsmodus aus (im Display erscheint „SOUN“).
Drücken Sie nun die ENTER-Taste und wählen mit Hilfe der Tasten UP den
Master-Modus (MAST) und DOWN den Standalone-Modus (ALON) aus und
bestätigen mit ENTER. Im Display erscheint nun „SO-M“ für Master-Modus
oder „SO-A“ für Standalone-Modus.
Im Master-Modus können an der Master-Einheit weitere Scanner des
gleichen Typs als Slave-Einheiten genutzt werden. Wählen Sie für die
Slave-Einheit den DMX-Modus und setzen die DMX Startadresse auf 001.
Verbinden Sie die Slave-Einheite(n) mit Hilfe eines DMX-Kabels mit der
Master-Einheit (Master-Einheit DMX OUT - Slave-Einheit DMX IN). Nun folgt
die Slave-Einheit der Master-Einheit.
Im Standalone-Modus arbeitet der Scanner unabhängig von weiteren angeschlossenen Einheiten.
DEUTSCH
FRANCAIS
DMX-STARTADRESSE EINSTELLEN
Drücken Sie die MODE-Taste und wählen dann mit Hilfe der Tasten UP und
DOWN den DMX-Startadressen Modus aus (im Display erscheint „ADDR“).
Drücken Sie nun die ENTER-Taste und wählen mit Hilfe der Tasten UP und
DOWN die gewünschte DMX-Startadresse (A001 - A512) aus.
Bestätigen Sie mit ENTER.
FRANCAIS
ENGLISH
INBETRIEBNAHME
Nachdem Sie den Cameo LED-Scanner an das Stromnetz angeschlossen
haben, startet der Reset-Prozess der Motoren. Nach circa 20 Sekunden sind
diese neu justiert und das Gerät ist betriebsbereit.
Stellen Sie die Projektion durch Drehen am Objektivring scharf.
Im DMX-Betrieb kann der Fokus zusätzlich im DMX-Kanal 6 gesteuert werden.
25
AUTO-MODUS
Drücken Sie die MODE-Taste und wählen dann mit Hilfe der Tasten UP und
DOWN den Auto-Modus aus (im Display erscheint „AUTO“). Drücken Sie
nun die ENTER-Taste und wählen mit Hilfe der Tasten UP den Master-Modus
(MAST) und DOWN den Standalone-Modus (ALON) aus und bestätigen mit
ENTER. Im Display erscheint nun „AU-M“ für Master-Modus oder „AU-A“ für
Standalone-Modus.
Im Master-Modus können an der Master-Einheit weitere Scanner des
gleichen Typs als Slave-Einheiten genutzt werden. Wählen Sie für die
Slave-Einheit den DMX-Modus und setzen die DMX Startadresse auf 001.
Verbinden Sie die Slave-Einheite(n) mit Hilfe eines DMX-Kabels mit der
Master-Einheit (Master-Einheit DMX OUT - Slave-Einheit DMX IN). Nun folgt
die Slave-Einheit der Master-Einheit.
Im Standalone-Modus arbeitet der Scanner unabhängig von weiteren angeschlossenen Einheiten.
FRANCAIS
ITALIANO
FRANCAIS
POLSKI
ESPAÑOL
FRANCAIS
DEUTSCH
ENGLISH
BEDIENUNG:
26
REVERSE PAN
Die PAN-Bewegung kann mit Hilfe dieser Funktion umgekehrt werden.
Drücken Sie die MODE-Taste und wählen dann mit Hilfe der Tasten UP und
DOWN die Reverse Pan Funktion aus (im Display erscheint „r PAN“). Drücken
Sie nun die ENTER-Taste und wählen mit Hilfe der Tasten UP Reverse On
(ON) und DOWN Reverse Off (OFF) aus.
Bestätigen Sie mit ENTER.
REVERSE TILT
Die TILT-Bewegung kann mit Hilfe dieser Funktion umgekehrt werden.
Drücken Sie die MODE-Taste und wählen dann mit Hilfe der Tasten UP und
DOWN die Reverse Tilt Funktion aus (im Display erscheint „r t I L“). Drücken
Sie nun die ENTER-Taste und wählen mit Hilfe der Tasten UP Reverse On
(ON) und DOWN Reverse Off (OFF) aus.
Bestätigen Sie mit ENTER.
POLSKI
ITALIANO
HINWEIS
Ohne dass eine der 4 Tasten betätigt wird, schaltet sich das LED-Display
nach circa 70 Sekunden automatisch ab. Sobald eine der vier Tasten betätigt
wird, schaltet sich das Display wieder ein.
ESPAÑOL
WERKSEINSTELLUNG
Mit Hilfe dieser Funktion setzen Sie das Gerät auf die Werkseinstellung zurück.
Drücken Sie die MODE-Taste und wählen dann mit Hilfe der Tasten UP und
DOWN „LOAd“ aus. Drücken Sie nun die ENTER-Taste. Alle Einstellungen
(Mikrofonempfindlichkeit, Reverse Display...) sind nun auf Werkseinstellung
zurückgesetzt. Das Gerät ist sofort wieder Betriebsbereit.
FRANCAIS
RESET
Starten Sie die Resetprozess der Motoren mit Hilfe dieser Funktion.
Drücken Sie die MODE-Taste und wählen dann mit Hilfe der Tasten UP und
DOWN die Reset-Funktion aus (im Display erscheint „r E S t“). Drücken Sie
nun die ENTER-Taste. Der Reset-Prozess beginnt und nach circa 20 Sekunden sind die Motoren neu justiert und das Gerät ist betriebsbereit.
DEUTSCH
FRANCAIS
BETRIEBSSTUNDENANZEIGE (FIXTURE TIME)
Mit dieser Funktion können die Betriebsstunden des Geräts abgelesen werden.
Drücken Sie die MODE-Taste und wählen dann mit Hilfe der Tasten UP und
DOWN die Betriebsstundenanzeige aus (im Display erscheint „F I t I“). Drücken Sie nun die ENTER-Taste. Im Display erscheint die Anzahl der Stunden,
die das Gerät bereits in Betrieb war.
FRANCAIS
ENGLISH
REVERSE DISPLAY
Mit Hilfe dieser Funktion können die Zeichen im Display um 180° gedreht
werden. Drücken Sie die MODE-Taste und wählen dann mit Hilfe der Tasten
UP und DOWN die Reverse Display Funktion aus (im Display erscheint „r d
I S“). Drücken Sie nun die ENTER-Taste und wählen mit Hilfe der Tasten UP
Reverse On (ON) und DOWN Reverse Off (OFF) aus.
Bestätigen Sie mit ENTER.
27
10-KANAL MODUS
KANAL
WERT
FUNKTION
CH1
Pan
000 - 255
Pan Bewegung 180°
CH2
Tilt
000 - 255
Tilt Bewegung 90°
000 - 013
Weiß
DEUTSCH
ENGLISH
DMX STEUERUNG:
Farbrad
FRANCAIS
ITALIANO
FRANCAIS
POLSKI
ESPAÑOL
FRANCAIS
CH3
28
CH4
Goborad
014 - 027
Gelb
028 - 041
Magenta
042 - 055
Grün
056 - 069
Violett
070 - 083
Cyan
084 - 097
Hellgrün
098 - 111
Amber
112 - 127
Dunkelrot
128 - 190
Regenbogen, Drehrichtung links (Geschwindigkeit schnell - langsam)
191 - 255
Regenbogen, Drehrichtung rechts (Geschwindigkeit langsam - schnell)
000 - 009
offen
010 - 019
Gobo 1
020 - 029
Gobo 2
030 - 039
Gobo 3
040 - 049
Gobo 4
050 - 059
Gobo 5
060 - 069
Gobo 6
070 - 079
Gobo 7
080 - 099
Gobo 1 Shake, (Geschwindigkeit)
100 - 119
Gobo 2 Shake, (Geschwindigkeit)
120 - 139
Gobo 3 Shake, (Geschwindigkeit)
140 - 159
Gobo 4 Shake, (Geschwindigkeit)
160 - 179
Gobo 5 Shake, (Geschwindigkeit)
180 - 199
Gobo 6 Shake, (Geschwindigkeit)
200 - 219
Gobo 7 Shake, (Geschwindigkeit)
220 - 255
Goborad-Rotation (Geschwindigkeit)
DMX STEUERUNG:
KANAL
Gobo
Rotation
CH6
Fokus
CH7
Shutter
Dimmer
CH9
Prisma
Gobo Rotation rechts (Geschwindigkeit schnell - langsam)
192 - 195
keine Funktion
196 - 255
Gobo Rotation links (Geschwindigkeit langsam - schnell)
000 - 255
Fokus
000 - 009
geschlossen
010 - 019
offen
020 - 127
Stroboskopeffekt 1 (Geschwindigkeit langsam - schnell)
128 - 137
offen
138 - 201
Stroboskopeffekt 2 (Geschwindigkeit langsam - schnell)
202 - 255
offen
000 - 255
Dimmer 0 - 100%
000 - 003
offen
004 - 127
Prisma
128 - 255
Prisma Rotation (Geschwindigkeit schnell - langsam)
keine Funktion
060 - 079
Farbrad-Motor und Goborad-Motor Reset
080 - 099
Reset aller Motoren
100 - 119
Programm 1
120- 139
Programm 2
140 -159
Programm 3
160 - 179
Programm 4
180 - 199
Programm 5
200 - 219
Programm 6
220 - 239
Programm 7
240 - 255
Programm 8
POLSKI
000 - 059
ESPAÑOL
CH10
Funktion/
Programm
128 - 191
FRANCAIS
CH8
FUNKTION
manuelle Gobo Rotation
DEUTSCH
FRANCAIS
CH5
WERT
000 - 127
FRANCAIS
ENGLISH
10-KANAL-MODUS
ITALIANO
29
FRANCAIS
ITALIANO
FRANCAIS
POLSKI
ESPAÑOL
FRANCAIS
DEUTSCH
ENGLISH
TECHNISCHE DATEN:
30
MODELLBEZEICHNUNG:
CLSCAN60W
Produktart:
LED Moving Light
Typ:
Scanner
Farbspektrum:
8 Farben + Weiß
Gobos:
7 + offen
LED Anzahl:
1
LED Typ:
60 W
Beleuchtungsstärke @ 1 Meter:
26000 lx
DMX-Eingang:
3-Pol XLR männlich
DMX-Ausgang:
3-Pol XLR weiblich
DMX-Modus:
10-Kanal
DMX Funktionen:
Pan, Tilt, Shutter, Prisma, Fokus, Programm, Dimmer, Farbrad,
Goborad
Standalone Funktionen:
Auto, Sound Control
Bedienelemente:
Mode, Enter, Up, Down
Anzeigeelemente:
4-stelliges LED-Display
Betriebsspannung:
230 V AC, 50 Hz
Leistungsaufnahme:
90 W
Stromversorgungsanschluss:
IEC Gerätebuchse
Gehäusematerial:
Metall
Gehäusefarbe:
schwarz
Kühlung:
Lüfter
Abmessungen (B x H x T, ohne Bügel):
205 x 150 x 475 mm
Gewicht:
4,4 kg
HERSTELLERERKLÄRUNGEN:
Diese Garantie erstreckt sich auf die Marken Adam Hall, LD Systems, Defender, Palmer und Cameo.
Sie gilt für alle Produkte im Vertrieb von Adam Hall.
Diese Garantieerklärung berührt nicht die gesetzlichen Gewährleistungsansprüche an den Hersteller, sondern erweitert diese um zusätzliche Garantieansprüche gegenüber der Firma Adam Hall.
Der Garantiezeitraum beginnt mit dem Kaufdatum des Produkts, das im Garantiefall entsprechend nachzuweisen
ist (durch Vorlegen der Rechnung oder des Lieferscheins mit dem Kaufdatum). Sollte bei Produkten der oben genannten Marken innerhalb der Garantiezeit eine Reparatur erforderlich sein, sind Sie berechtigt, diese zu den hier
aufgeführten Bedingungen durchführen zu lassen.
POLSKI
Adam Hall übernimmt keine Garantie für einen störungs- und/oder fehlerfreien Betrieb dieses Produkts. Auch für
Schäden durch Nichtbeachtung der diesem Adam Hall-Produkt beiliegenden Bedienungsanleitung und anderen
Unterlagen ist Adam Hall nicht verantwortlich. Die Herstellergarantie gilt nicht - für Verschleißteile (z. B. Akkus)
- für Produkte, von denen die Seriennummer entfernt wurde oder die aufgrund eines Unfalls beschädigt wurden
- für Schäden durch unsachgemäßen Betrieb, durch Fehlbedienung oder andere externe Gründe
- für Schäden an Geräten, die nicht entsprechend den Betriebsparametern betrieben wurden (Parameter gemäß
den im Lieferumfang enthaltenen Unterlagen),
- für Schäden durch die Verwendung nicht von Adam Hall hergestellter, vertriebener oder empfohlener Ersatzteile,
- für Schäden durch Fremdeingriffe/Modifikationen oder nicht durch Adam Hall durchgeführte Reparaturen.
Diese Bestimmungen und Bedingungen stellen die vollständige und ausschließliche Garantievereinbarung zwischen Ihnen und Adam Hall für das von Ihnen erworbene Adam Hall-Produkt dar.
ESPAÑOL
Sollte der unwahrscheinliche Fall eintreten, dass bei dem von Ihnen erworbenen Produkt ein Fehler wiederholt
auftritt, hat die Firma Adam Hall das Recht, das defekte Produkt nach eigenem Ermessen durch ein anderes
Produkt zu ersetzen, sofern das neue dem ausgetauschten Produkt in Bezug auf die technischen Spezifikationen
mindestens gleichwertig ist.
FRANCAIS
Innerhalb des Garantiezeitraums übernimmt Adam Hall die Reparatur oder den Ersatz der defekten Komponente(n)
bzw. des Produkts. Im Falle einer Reparatur bzw. eines Austauschs innerhalb des Garantiezeitraumes gehen ausgewechselte Originalteile bzw. Produkte in das Eigentum der Firma Adam Hall über.
DEUTSCH
FRANCAIS
Adam Hall garantiert für den Zeitraum von zwei beziehungsweise fünf Jahren (bitte produktspezifisch erfragen) ab
Kaufdatum, dass dieses Adam Hall-Produkt, welches Sie direkt über Adam Hall oder einen von Adam Hall autorisierten Händler erworben haben, bei bestimmungsgemäßem Gebrauch frei von Material- und Fertigungsfehlern ist.
FRANCAIS
ENGLISH
GARANTIEBESTIMMUNGEN
ITALIANO
31
FRANCAIS
ITALIANO
FRANCAIS
POLSKI
ESPAÑOL
FRANCAIS
DEUTSCH
ENGLISH
HERSTELLERERKLÄRUNGEN:
32
HAFTUNGSBESCHRÄNKUNG
Falls an Hardware-Produkten von Adam Hall innerhalb der Garantiezeit Material- oder Verarbeitungsfehler
(gemäß der Garantieerklärung oben) auftreten, besteht Ihr alleiniger und ausschließlicher Anspruch aus dieser
Garantie in der Reparatur oder dem Austausch des Geräts. Die maximale Haftung der Firma Adam Hall ist entsprechend dieser Garantie ausdrücklich auf den Kaufpreis oder die Kosten für eine Reparatur oder Ersatz – und
zwar den jeweils niedrigeren Betrag – der bei üblichem Gebrauch fehlerhaften Komponenten begrenzt.
Adam Hall ist nicht haftbar für jegliche durch das Produkt oder das Versagen des Produkts verursachte Schäden,
einschließlich Gewinneinbußen und unterbliebener Einsparungen sowie besonderer, indirekter oder Folgeschäden. Des Weiteren ist Adam Hall nicht haftbar gegenüber Rechtsansprüchen Dritter oder durch Sie im Namen
Dritter angemeldeten Forderungen.
Diese Haftungsbeschränkung gilt unabhängig davon, ob Schäden gerichtlich verfolgt oder Schadensersatzansprüche im Rahmen dieser Garantie oder aufgrund unerlaubter Handlungen (einschließlich Fahrlässigkeit
und Gefährdungshaftung) oder aufgrund vertraglicher oder sonstiger Ansprüche gestellt werden, und kann von
niemandem aufgehoben oder verändert werden. Diese Haftungsbeschränkung ist auch dann gültig, wenn Sie die
Firma Adam Hall oder einen autorisierten Vertreter von Adam Hall auf die Möglichkeit solcher Schäden aufmerksam gemacht haben, nicht jedoch bei Schadensersatzansprüchen in Zusammenhang mit Personenschäden.
Diese Herstellergarantie räumt Ihnen bestimmte Rechte ein; je nach Gerichtsbarkeit (Staat oder Land) stehen
Ihnen möglicherweise weitere Ansprüche zu. Es ist ratsam, in solchen Fällen die entsprechenden Gesetze heranzuziehen, um Ihre Rechte umfassend zu ermitteln.
INANSPRUCHNAHME DER GARANTIE
Wenden Sie sich im Garantiefall direkt an Adam Hall oder den von Adam Hall autorisierten Händler, bei dem Sie
das Produkt erworben haben.
EG-KONFORMITÄTSERKLÄRUNG
Die von Adam Hall vertriebenen Geräte entsprechen (soweit zutreffend) den grundlegenden Anforderungen und
weiteren relevanten Spezifikationen der Richtlinien 1999/5/EC (R&TTE), 2004/108/EC (EMC) und 2006/95/EC
(LVD). Weitere Informationen finden Sie unter www.adamhall.com.
HERSTELLERERKLÄRUNGEN:
HERSTELLERERKLÄRUNGEN:
(Gültig in der Europäischen Union und anderen europäischen Ländern mit Mülltrennung)
Als Privatkunde erhalten Sie Informationen zu umweltfreundlichen Entsorgungsmöglichkeiten über den Händler,
bei dem das Produkt erworben wurde, oder über die entsprechenden regionalen Behörden.
Als gewerblicher Nutzer kontaktieren Sie bitte Ihren Lieferanten und prüfen die ggf. vertraglich vereinbarten
Konditionen zur Entsorgung der Geräte. Dieses Produkt darf nicht zusammen mit anderen gewerblichen Abfällen
entsorgt werden.
Energiesparen ist ein aktiver Beitrag zum Umweltschutz. Schalten Sie bitte alle nicht benötigten elektrischen
Geräte aus. Um zu verhindern, dass nicht benötigte Geräte im Standby-Modus Strom verbrauchen, ziehen Sie
den Netzstecker.
FRANCAIS
UMWELTSCHUTZ UND ENERGIESPAREN
DEUTSCH
FRANCAIS
Dieses Symbol auf dem Produkt oder dazugehörigen Dokumenten weist darauf hin, dass das Gerät am Ende der
Produktlebenszeit nicht zusammen mit dem normalen Hausmüll entsorgt werden darf, um Umwelt- oder Personenschäden durch unkontrollierte Abfallentsorgung zu vermeiden. Bitte entsorgen Sie dieses Produkt getrennt
von anderen Abfällen und führen es zur Förderung nachhaltiger Wirtschaftskreisläufe dem Recycling zu.
FRANCAIS
ENGLISH
KORREKTE ENTSORGUNG DIESES PRODUKTES
ESPAÑOL
POLSKI
ITALIANO
Adam Hall GmbH, alle Rechte vorbehalten. Die technischen Daten und die funktionalen Produkteigenschaften
können Änderungen und Irrtümer vorbehalten. Das Kopieren, die Übersetzung, und alle anderen Formen des
Kopierens von Fragmenten oder der Vollständigkeit dieser Bedienungsanleitung ist untersagt.
33
ENGLISH
DEUTSCH
Merci d'avoir choisi Cameo Light !
FRANCAIS
ITALIANO
FRANCAIS
POLSKI
ESPAÑOL
FRANCAIS
Nous avons conçu ce produit en vue d'une fiabilité optimale pendant des années.
34
Veuillez prendre quelques instants pour lire attentivement ces instructions - cela vous permettra d'utiliser plus
rapidement et de façon optimale votre nouveau produit Cameo Light.
Pour plus d'informations sur Cameo Light, visitez notre site Web, WWW.CAMEOLIGHT.COM
FRANCAIS
ENGLISH
SCANNER À LED
ET GOBOS 60 W
DEUTSCH
FRANCAIS
CLSCAN60W
FRANCAIS
ESPAÑOL
POLSKI
ITALIANO
35
FRANCAIS
ITALIANO
FRANCAIS
POLSKI
ESPAÑOL
FRANCAIS
DEUTSCH
ENGLISH
MESURES PRÉVENTIVES :
36
1. Veuillez lire attentivement ce manuel.
2. Rangez tous les documents d‘information et d‘instructions en lieu sûr.
3. Veuillez suivre toutes les instructions
4. Observez tous les messages d‘avertissement N‘enlevez pas de l‘appareil les étiquettes de sécurité ou autres informations.
5. N‘utilisez l‘appareil que pour des applications et de la façon appropriées.
6. Utilisez exclusivement des pieds et des dispositifs de fixation stables et adaptés lorsque l‘appareil est utilisé en
installation fixe. Assurez-vous que les fixations murales ont été montées correctement, et qu‘elles sont sécurisées.
Vérifiez que l‘appareil est installé en toute sécurité, et qu‘il ne peut pas tomber.
7. Lors de l‘installation, observez les règlementations de sécurité en vigueur dans votre pays.
8. N‘installez et n‘utilisez pas l‘appareil à proximité de radiateurs, d‘accumulateurs de chaleur, de fours ou de toute
autre source de chaleur. Vérifiez que l‘appareil est installé de façon à bénéficier en permanence d‘un refroidissement efficace et qu‘il ne peut pas chauffer de façon excessive.
9. Ne placez aucune source de flamme sur l‘appareil – par exemple, une bougie allumée.
10. Ne bloquez pas les ouïes d‘aération.
11. N‘utilisez pas l‘appareil à proximité immédiate d‘eau (à moins qu‘il ne s‘agisse d‘un appareil conçu pour une
utilisation en extérieur – dans ce cas, respectez les instructions correspondantes ci après) Ne mettez pas l‘appareil
en contact avec des matériaux, des liquides ou des gaz inflammables.
12. Vérifiez qu‘aucune projection ou liquide ne puisse s‘introduire dans l‘appareil. Ne posez sur l‘appareil aucun
objet renfermant du liquide : vase, verre d‘eau...
13. Vérifiez qu‘aucun petit objet ne puisse tomber à l‘intérieur de l‘appareil.
14. N‘utilisez avec cet appareil que des accessoires recommandés et approuvés par le fabricant.
15. N‘ouvrez pas l‘appareil, et n‘essayez pas de le modifier.
16. Lors du branchement de l‘appareil, sécurisez le passage du câble secteur, afin d‘éviter tout dommage ou
accident, par exemple quelqu‘un qui trébuche sur le câble.
17. Lors du transport, vérifiez que l‘appareil ne peut tomber, ce qui pourrait provoquer des dommages matériels et/ou corporels.
18. Si votre appareil ne fonctionne plus correctement, que de l‘eau ou des objets ont pénétré à l‘intérieur, ou qu‘il
a été endommagé de quelque façon que ce soit, éteignez-le immédiatement et débranchez sa prise secteur (s‘il
s‘agit d‘un appareil alimenté). Cet appareil ne doit être réparé que par un personnel autorisé.
19. Pour le nettoyage de l‘appareil, utilisez un chiffon sec/
20. Observez toutes les réglementations en vigueur dans votre pays pour mettre l‘appareil au rebut. Lorsque vous
jetez l‘emballage de l‘appareil, veuillez séparer plastique, papier et carton.
21. Les films plastique doivent être mis hors de portée des enfants.
APPAREILS RELIÉS AU SECTEUR :
22. ATTENTION : Si le câble de l‘appareil est muni d‘un fil de terre, il doit être relié à une prise murale avec terre.
Ne désactivez jamais la mise à la terre d‘un appareil.
23. N‘allumez pas l‘appareil immédiatement s‘il a subi une grande différence de température ambiante (par exemple, lors du transport). L‘humidité et la condensation pourraient l‘endommager. Ne mettez l‘appareil sous tension
que lorsqu‘il est parvenu à la température de la pièce.
24. Avant de relier l‘appareil à la prise murale, vérifiez que la valeur et la fréquence de tension secteur sur laquelle
il est réglé correspondent bien à la valeur et à la fréquence de la tension secteur locale. Si l‘appareil possède un
sélecteur de tension, ne le branchez sur la prise murale qu‘après avoir vérifié que la valeur réglée correspond à la
valeur effective de la tension secteur. Si la fiche du cordon secteur ou du bloc adaptateur livré avec votre appareil
ne correspond pas au format de votre prise murale, veuillez consulter un électricien.
25. Ne piétinez pas le câble secteur. Assurez-vous que le câble secteur n‘est pas trop pincé, notamment au niveau
de l‘arrière de l‘appareil (ou de son adaptateur secteur) et de la prise murale.
SÉCURITÉ :
Le pictogramme en forme de triangle équilatéral renfermant un point d’exclamation signal eà
l’utilisateur la présence d’instructions importantes concernant l’utilisation ou l’entretien de l’appareil.
POLSKI
ATTENTION ! CONSEILS IMPORTANTS POUR LES PRODUITS ‘ÉCLAIRAGE
1. Ne regardez pas directement l’appareil si vous vous trouvez à une distance de moins de 40 cm.
2. Ne fixez jamais le rayon lumineux, même pendant une courte durée, même à distance moyenne.
3. Ne regardez jamais le rayon lumineux par l’intermédiaire d’un appareil optique grossissant (jumelles par exemple).
4. Les effets stroboscopiques peuvent, dans certaines circonstances, provoquer des crises d’épilepsie chez les sujets
sensibles. Les personnes concernées doivent donc absolument éviter les lieux dans lesquels les stroboscopes sont utilisés.
ESPAÑOL
Le pictogramme en forme de triangle équilatéral renfermant un éclair signale à l’utilisateur la
présence à l’intérieur de l’appareil d’une tension dangereuse non protégée, suffisamment élevée
pour présenter un risque pour les personnes.
FRANCAIS
ATTENTION :
Ne démontez jamais le couvercle de l’appareil, vous risquez de recevoir un choc électrique. L’appareil ne
renferme aucune pièce ni composant réparable ou remplaçable par l’utilisateur Ne confiez sa réparation qu’à un
personnel technique qualifié.
DEUTSCH
FRANCAIS
CAUTION
RISK OF ELECTRIC SHOCK
DO NOT OPEN
FRANCAIS
ENGLISH
26. Lors du branchement de l‘appareil, vérifiez que l‘accès au câble secteur ou au bloc adaptateur reste facile.
Sortez la fiche secteur de la prise murale dès que vous n‘utilisez pas l‘appareil pendant un certain temps, ou si vous
désirez nettoyer l‘appareil. Pour ce faire, tirez toujours sur la fiche elle-même, ou sur le bloc secteur lui-même ; ne
tirez jamais sur le câble. Ne manipulez jamais le câble secteur ou l‘adaptateur secteur avec des mains mouillées.
27. N‘éteignez/rallumez pas l‘appareil rapidement plusieurs fois de suite : vosu risquez de réduire la longévité de
ses composants internes.
28. CONSEIL IMPORTANT : Ne remplacez le fusible que par un fusible de même type et du même calibre. Si le
fusible fond de façon répétée, veuillez consulter un centre de réparations agréé.
29. Pour séparer complètement l‘appareil du secteur, débranchez le cordon secteur ou l‘adaptateur de la prise murale.
30. Si votre appareil est muni d‘un connecteur secteur verrouillable (Volex), il faut d‘abord déverrouiller le mécanisme avant d‘enlever le cordon secteur. Attention, lorsque vous retirez le câble secteur, à ne pas faire bouger
l‘appareil, ce qui pourrait se traduire par un risque de chute, de blesser quelqu‘un, ou tout autre dommage.
Manipulez toujours le cordon secteur avec soin.
31. Débranchez la fiche secteur ou l‘adaptateur de la prise murale en cas d‘orage, ou si vous n‘utilisez pas
l‘appareil pendant une longue période.
ITALIANO
Ce produit a été développé pour une utilisation professionnelle, dans le secteur du spectacle : il ne convient pas à
l’éclairage domestique.
37
FRANCAIS
ITALIANO
FRANCAIS
POLSKI
ESPAÑOL
FRANCAIS
DEUTSCH
ENGLISH
INTRODUCTION:
38
SCANNER À LED 60 W DMX
(CLSCAN60W)
FONCTIONS DE PILOTAGE :
• Pilotage DMX 10 canaux
• Commande par la musique
• Mode automatique
FONCTIONNALITÉS :
• 1 LED 60 W
• Roue chromatique 8 couleurs plus blanc
• Roue de gobos avec 7 gobos différents
• Focus contrôlé via DMX
• Prisme contrôlé via DMX
• Modes Master/Slave
• Boîtier métallique robuste
• Consommation électrique : 90 W
• LED de longue durée de vie
• Support intégré
UTILISATION
Le scanner à LED Cameo est un projecteur à LED pilotable DMX-512, se distinguant par sa LED d'une puissance
de 60 W, de haute efficacité lumineuse. La roue chromatique et la roue de gobos sont pilotables indépendamment, ce qui autorise un grand nombre d'effets lumineux.
Le scanner à LED Cameo peut s'utiliser en mode Master ou Slave, il peut aussi se piloter via le protocole DMX-512.
CONNECTEURS ET PANNEAU UTILISATEUR :
FRANCAIS
ENGLISH
1
CONSEIL IMPORTANT : Remplacez exclusivement le fusible par un fusible neuf du même format et du même
calibre (valeurs indiquées sur le panneau arrière de l'appareil). Si le fusible fond de façon répétée, veuillez
consulter un centre de réparations agréé.
DEUTSCH
FRANCAIS
1 Embase secteur au format IEC avec porte-fusible intégré
FRANCAIS
4
3
Entrée DMX sur connecteur XLR 3 points, pour branchement d'un contrôleur DMX (par exemple, pupitre DMX)
3 DMX OUT
POLSKI
2 DMX IN
ESPAÑOL
2
Connecteur XLR 3 points, pour renvoi du signal de pilotage DMX.
4 POINT D'ACCROCHE DE SÉCURITÉ
ITALIANO
Point d'accroche métallique, pour élingue de sécurité
39
ENGLISH
CONNECTEURS ET PANNEAU UTILISATEUR :
DEUTSCH
5
FRANCAIS
6
5 AFFICHEUR LED
FRANCAIS
ITALIANO
FRANCAIS
POLSKI
ESPAÑOL
Indique le mode de fonctionnement et les valeurs correspondant à telle ou telle fonction.
40
6 TOUCHES UTILISATEUR
Ces 4 touches utilisateur, d'accès facile, permettent de gérer le paramétrage du système.
UTILISATION :
ESPAÑOL
POLSKI
ITALIANO
SENSIBILITÉ MICROPHONE
Appuyez sur la touche MODE, puis sélectionnez, avec les touches Haut/Bas,
l'élément de menu permettant de régler la sensibilité du microphone intégré
(sur l'afficheur apparaît la mention "MIC"). Appuyez sur la touche ENTER,
puis réglez la sensibilité avec les touches Haut/Bas (M-00 à M-99).
Validez en appuyant sur la touche ENTER.
FRANCAIS
PILOTAGE PAR LA MUSIQUE
Appuyez sur la touche MODE, puis sélectionnez, avec les touches Haut/
Bas, le mode de pilotage par la musique (sur l'afficheur apparaît la mention
"SOUN"). Appuyez sur la touche ENTER, puis sélectionnez le mode Master
(MAST) en appuyant sur la touche Haut, ou le mode autonome, Standalone
(ALON), en appuyant sur la touche Bas. Validez votre choix en appuyant sur
la touche ENTER. Sur l'afficheur apparaît alors la mention "SO-M" pour le
mode Master, ou "SO-A" pour le mode autonome.
En mode Master, on peut connecter à l'appareil maître d'autres scanners
du même type, en tant qu'esclaves. Il faut alors passer en mode DMX sur
l'appareil esclave, et régler l'adresse DMX sur 001. Avec un câble DMX,
reliez l'appareil esclave à l'appareil maître (DMX OUT du Master vers DMX IN
du Slave). Dès lors, l'appareil esclave (Slave) suit l'appareil maître (Master).
En mode autonome, le scanner travaille indépendamment des autres
appareils connectés.
DEUTSCH
FRANCAIS
RÉGLAGE DE L'ADRESSE DE DÉPART DMX
Appuyez sur la touche MODE, puis sélectionnez, avec les touches Haut/
Bas, l'adresse de départ DMX désirée (sur l'afficheur apparaît la mention
"ADDR"). Appuyez sur la touche ENTER, puis réglez la valeur d'adresse de
départ DMX désirée avec les touches Haut/Bas (A001 à A512).
Validez vos choix en appuyant sur la touche ENTER.
FRANCAIS
ENGLISH
MISE EN SERVICE
Une fois le scanner à LED Cameo relié au secteur, le processus de réinitialisation des moteurs démarre. Après environ 20 secondes, ils sont de
nouveau réglés, et l'appareil est prêt à l'utilisation.
Réglez la projection en tournant la bague de l'objectif.
En mode DMX, le focus (mise au point) se commande aussi via le canal DMX 6.
41
MODE AUTO
Appuyez sur la touche MODE, puis sélectionnez, avec les touches Haut/Bas,
le mode Auto (sur l'afficheur apparaît la mention "AUTO"). Appuyez sur la
touche ENTER, puis sélectionnez le mode Master (MAST) en appuyant sur
la touche Haut, ou le mode autonome, Standalone (ALON), en appuyant sur
la touche Bas. Validez votre choix en appuyant sur la touche ENTER. Sur
l'afficheur apparaît alors la mention "AU-M" pour le mode Master, ou "AU-A"
pour le mode autonome.
En mode Master, on peut connecter à l'appareil maître d'autres scanners du
même type, en tant qu'esclaves. Faites passer l'appareil esclave en mode
DMX, puis réglez son adresse DMX sur 001. Avec un câble DMX, reliez
l'appareil esclave à l'appareil maître (DMX OUT du Master vers DMX IN du
Slave). Dès lors, l'appareil esclave (Slave) suit l'appareil maître (Master).
En mode autonome, le scanner travaille indépendamment des autres
appareils connectés.
FRANCAIS
ITALIANO
FRANCAIS
POLSKI
ESPAÑOL
FRANCAIS
DEUTSCH
ENGLISH
UTILISATION :
42
REVERSE PAN
Cette fonction permet d'inverser le mouvement panoramique (PAN).
Appuyez sur la touche MODE, puis sélectionnez, avec les touches Haut/
Bas, la fonction Reverse Pan (sur l'afficheur apparaît la mention "r PAN").
Appuyez sur la touche ENTER, puis activez (Reverse ON) avec la touche Haut
ou désactivez (Reverse OFF) la fonction.
Validez votre choix en appuyant sur la touche ENTER.
REVERSE TILT
Cette fonction permet d'inverser le mouvement de TILT.
Appuyez sur la touche MODE, puis sélectionnez, avec les touches Haut/Bas,
la fonction Reverse Tilt (sur l'afficheur apparaît la mention "r t I L"). Appuyez
sur la touche ENTER, puis activez (Reverse ON) avec la touche Haut ou
désactivez (Reverse OFF) la fonction.
Validez vos choix en appuyant sur la touche ENTER.
POLSKI
ITALIANO
ATTENTION :
En l'absence d'utilisation des 4 touches, l'afficheur LED s'éteint
automatiquement au bout d'environ 70 secondes. Dès qu'une des 4 touches
est utilisée, l'afficheur se rallume.
ESPAÑOL
RESTAURATION DES PARAMÈTRES USINE
Cette fonction permet de rétablir les valeurs d'usine des paramètres de l'appareil.
Appuyez sur la touche MODE, puis sélectionnez, avec les touches Haut/Bas,
l'a fonction de restauration (sur l'afficheur apparaît la mention "ADDR"). Appuyez sur la touche ENTER. Tous les paramètres (sensibilité du microphone
intégré, fonction Reverse Display...) retrouvent alors leurs valeurs d'usine.
L'appareil est immédiatement prêt à l'emploi.
FRANCAIS
RESET
Cette fonction permet de lancer le processus de réinitialisation des moteurs.
Appuyez sur la touche MODE, puis sélectionnez, avec les touches Haut/Bas, la
fonction Reset (sur l'afficheur apparaît la mention "r E S t"). Appuyez sur la touche
ENTER. Le processus de réinitialisation commence ; après environ 20 secondes,
les moteurs sont de nouveau réglés, et l'appareil est prêt à l'utilisation.
DEUTSCH
FRANCAIS
DURÉE TOTALE D'UTILISATION
Cette fonction permet de connaître la durée totale d'utilisation de l'appareil.
Appuyez sur la touche MODE, puis sélectionnez, avec les touches Haut/Bas,
l'affichage de la durée totale d'utilisation (sur l'afficheur apparaît la mention
"F I t I"). Appuyez sur la touche ENTER. L'afficheur affiche alors le nombre
total d'heures d'utilisation de l'appareil.
FRANCAIS
ENGLISH
REVERSE DISPLAY
Cette fonction permet de faire pivoter à 180° les caractères affichés.
Appuyez sur la touche MODE, puis sélectionnez, avec les touches Haut/Bas,
la fonction Reverse Display (sur l'afficheur apparaît la mention "ADDR").
Appuyez sur la touche ENTER, puis réglez la valeur d'adresse de départ DMX
désirée avec les touches Haut/Bas (A001 à A512).
Validez vos choix en appuyant sur la touche ENTER.
43
MODE 10 CANAUX
CANAL
000 - 255
Mouvement panoramique (gauche/droite), sur 180°
CH2
Tilt
000 - 255
Mouvement de haut en bas (Tilt), sur 90°
FRANCAIS
Roue
chromatique
ESPAÑOL
FRANCAIS
POLSKI
FRANCAIS
ITALIANO
FONCTION
Pan
CH3
44
VALEUR
CH1
DEUTSCH
ENGLISH
PILOTAGE DMX:
CH4
Roue de
gobos
000 - 013
Blanc
014 - 027
Jaune
028 - 041
Magenta
042 - 055
Vert
056 - 069
Violet
070 - 083
Cyan
084 - 097
Vert clair
098 - 111
Ambre
112 - 127
Rouge foncé
128 - 190
Arc-en-ciel, mouvement vers la gauche (rapide - lent)
191 - 255
Arc-en-ciel, mouvement vers la droite (lent - rapide)
000 - 009
ouvert
010 - 019
Gobo 1
020 - 029
Gobo 2
030 - 039
Gobo 3
040 - 049
Gobo 4
050 - 059
Gobo 5
060 - 069
Gobo 6
070 - 079
Gobo 7
080 - 099
Gobo 1 Shake, (rapidité)
100 - 119
Gobo 2 Shake, (rapidité)
120 - 139
Gobo 3 Shake, (rapidité)
140 - 159
Gobo 4 Shake, (rapidité)
160 - 179
Gobo 5 Shake, (rapidité)
180 - 199
Gobo 6 Shake, (rapidité)
200 - 219
Gobo 7 Shake, (rapidité)
220 - 255
Goborad-Rotation (rapidité)
PILOTAGE DMX :
CANAL
CH5
CH7
CH9
Dimmer
Prisme
128 - 191
Rotation Gobo vers la droite (rapide - lente)
192 - 195
Non fonctionnel
196 - 255
Rotation Gobo vers la gauche (lente - rapide)
000 - 255
Focus (mise au point)
000 - 009
fermé
010 - 019
ouvert
020 - 127
Effet Stroboscope 1 (lent - rapide)
128 - 137
ouvert
138 - 201
Effet Stroboscope 2 (lent - rapide)
202 - 255
ouvert
000 - 255
Dimmer 0 - 100%
000 - 003
ouvert
004 - 127
Prisme
128 - 255
Rotation Prisme (rapide - lent)
000 - 059
Non fonctionnel
060 - 079
Réinitialisation moteur roue chromatique et roue de Gobos
080 - 099
Réintialisation de tous les moteurs
100 - 119
Programme 1
120- 139
Programme 2
140 -159
Programme 3
160 - 179
Programme 4
180 - 199
Programme 5
200 - 219
Programme 6
220 - 239
Programme 7
240 - 255
Programme 8
POLSKI
Fonction/
Programme
Rotation Gobo manuelle
ESPAÑOL
CH10
Volet
000 - 127
FRANCAIS
CH8
Focus
FONCTION
DEUTSCH
FRANCAIS
CH6
Rotation
Gobo
VALEUR
FRANCAIS
ENGLISH
MODE 10 CANAUX
ITALIANO
45
FRANCAIS
ITALIANO
FRANCAIS
POLSKI
ESPAÑOL
FRANCAIS
DEUTSCH
ENGLISH
CARACTÉRISTIQUES TECHNIQUES :
46
RÉFÉRENCE MODÈLE :
CLSCAN60W
Type de produit :
Projecteur LED automatique (lyre)
Type :
Scanner
Spectre de couleurs :
8 couleurs + blanc
Gobos:
7 + ouvert
Nombre de LED :
1
Type de LED :
60 W
Intensité lumineuse à 1 mètre :
26000 lux
Entrée DMX :
XLR 3 points mâle
Sortie DMX :
XLR 3 points femelle
Modes DMX :
10 canaux
Fonctions DMX :
Pan, Tilt, Volet, Prisme, Focus, Programme, Dimmer, Roue
chromatique, Roue de gobos
Fonctions en mode autonome :
Auto, pilotage par le son
Contrôles :
Touches Mode, Enter, Haut, Bas
Indicateurs :
Afficheur 4 caractères LED
Tension d'alimentation :
230 Volts, 50 Hz
Consommation électrique :
90 W
Branchement secteur :
Embase IEC
Matériau boîtier :
Métal
Couleur boîtier :
noir
Refroidissement :
Ventilateur
Dimensions (L x H x P, sans support) :
205 x 150 x 475 mm
Masse :
4,4 kg
DECLARATIONS DECLARATIONS
Cette garantie concerne tous les produits de marque Adam Hall, LD Systems, Defender, Palmer et Cameo.
Elle s‘applique également à tous les produits distribués par Adam Hall.
Elle ne concerne pas les droits statutaires relatifs à la garantie envers le vendeur. En fait, elle justifie des requêtes
en garantie supplémentaires, indépendantes, envers Adam Hall.
Pendant toute la période de garantie limitée, Adam Hall réparera ou procédera au remplacement de tous les composants défectueux, ou le produit lui-même. En cas de réparation ou d‘échange pendant la période de garantie, les
pièces originales remplacées ou le produit échangé deviennent la propriété de la société Adam Hall.
POLSKI
Adam Hall ne garantit pas que l‘utilisation de ce produit ne sera sujette à aucune interruption ni défaillance.
Adam Hall n‘est pas responsable des dommages occasionnés par le non-respect des instructions contenues dans
le manuel d‘utilisation livré avec le produit de marque Adam Hall. La garantie fabricant ne s‘applique pas- aux
pièces d‘usure (accumulateurs par exemple) - aux produits dont le numéro de série a été effacé, ou qui ont été
endommagés ou rendus inutilisables à la suite d‘un accident - aux dommages provoqués une utilisation peu
précautionneuse, à une erreur de manipulation ou tout autre motif externe.
- en cas de dommages subis par des appareils suite à une utilisation hors des valeurs d‘usage des paramètres
(telles que mentionnées dans le manuel utilisateur livré avec le produit)
- en cas de dommages consécutifs à l‘utilisation de pièces de rechange non fabriquées ou non vendues par Adam
Hall
- en cas de dommages consécutifs à des modifications ou réparations non assurées par Adam Hall
Ces termes et conditions constituent l‘accord de garantie complet et exclusif entre cous et Adam Hall, relativement
au produit de marque Adam Hall que vous avez acheté.
ESPAÑOL
Dans le cas improbable où votre produit Adam Hall serait sujet à des défaillances répétées, Adam Hall, à sa discrétion, peut choisir de mettre à votre disposition un appareil de remplacement de son choix, au moins équivalent à
votre produit de marque Adam Hall en termes de performances matérielles et techniques.
FRANCAIS
La période pendant laquelle cette garantie limitée est applicable commence à partir de la date d‘achat. Cette date
se justifie d‘après une facture ou un bon de livraison daté. Dans le cas où des produits des marques citées ci
avant nécessiteraient une réparation pendant la période de garantie limitée, vous avez droit à des réparations sous
garantie, conformément aux termes et conditions exposés dans ce document.
DEUTSCH
FRANCAIS
Adam Hall garantit, pendant une période s‘étendant selon le cas de deux à cinq ans (à vérifier selon le produit) à
compter de la date d‘achat, que le produit Adam Hall que vous avez acheté directement auprès d‘Adam Hall ou
chez un revendeur autorisé est dépourvu de défaut, au niveau des composants ou de la fabrication, dans le cadre
d‘une utilisation normale.
FRANCAIS
ENGLISH
GARANTIE FABRICANT LIMITÉE
ITALIANO
47
FRANCAIS
ITALIANO
FRANCAIS
POLSKI
ESPAÑOL
FRANCAIS
DEUTSCH
ENGLISH
DECLARATIONS DECLARATIONS
48
RESPONSABILITÉ LIMITÉE
Si votre appareil de marque Adam Hall présente, pendant la période de garantie, des défaillances au niveau des
composants ou de la fabrication, couvertes par les conditions ci avant, le seul recours, exclusif, est sa réparation
ou son remplacement au titre de cette garantie. Dans le cadre de cette garantie limitée, la responsabilité financière maximale d‘Adam Hall est expressément limitée à la plus faible des deux sommes suivantes : prix d‘achat
payé pour le produit ou coût de réparation ou de remplacement de tout composant matériel ne fonctionnant pas
correctement dans des conditions normales d‘utilisation.
Adam Hall ne peut être tenu pour financièrement responsable de tout dommage causé par le produit ou sa
défaillance – y compris toute perte de recettes ou de bénéfices, ni de tout dommage spécifique, incidentel ou
consécutif. De plus, Adam Hall n‘est pas responsable financièrement en cas de requête émanant d‘une tierce
partie ou de votre part pour le compte d‘une tierce partie.
Cette limitation de responsabilité financière s‘applique en cas de demande de dommages et intérêts ou de
poursuites, dans le cadre de cette garantie limitée ou en cas de procédure (négligence et stricte responsabilité
produit), de non-respect du contrat, ou de toute autre procédure. Cette limitation de responsabilité financière
ne peut être annulée ou amendée par quiconque. Cette limitation de responsabilité financière s‘applique même
si vous avez prévenu Adam Hall ou tout représentant autorisé de Adam Hall de la possibilité de tels dommages.
Toutefois, cette limitation de responsabilité financière ne s‘applique pas en cas de blessures aux personnes.
Cette garantie fabricant limitée vous donne des droits légaux spécifiques. Vous pouvez également avoir d‘autres
droits, variables d‘un état ou d‘un pays à l‘autre. Nous vous conseillons de vous reporter aux lois applicables
dans votre état ou votre pays afin de déterminer l‘étendue exacte de vos droits.
DEMANDE DE RÉPARATIONS SOUS GARANTIE
Pour demander des réparations sous garantie pour votre produit, veuillez contacter Adam Hall ou le revendeur
agréé Adam Hall auprès de qui vous l‘avez acheté.
DÉCLARATION DE CONFORMITÉ CE
Les appareils commercialisés par Adam Hall répondent (à la date actuelle) aux exigences et spécifications applicables des Directives 1999/5/EC (R&TTE), 2004/108/EC (EMC) et 2006/95/EC (LVD). Pour plus d‘informations,
référez-vous au site www.adamhall.com.
DECLARATIONS DECLARATIONS
(Applicable dans l‘Union Européenne et les autres pays européens dotés de systèmes de collecte sélective)
Nous conseillons aux utilisateurs non professionnels de contacter le revendeur chez qui ils ont acheté le produit,
ou un représentant gouvernemental local, pour plus de détails sur le lieu de collecte et la façon de recycler cet
appareil dans le meilleur respect de l‘environnement possible..
Nous invitons les utilisateurs professionnels à contacter leur fournisseur et à vérifier les termes et conditions de
leur contrat d‘achat. Ce produit ne doit pas être mélangé à d‘autres déchets commerciaux lors de la collecte.
Économiser l'énergie constitue une contribution active efficace à la protection de l'environnement. Pensez à
éteindre tout appareil électrique dès que vous ne vous en servez plus. Pour éviter que les appareils placés en
mode de veille (Standby) ne continuent à consommer de l'électricité, débranchez-les de leur prise secteur.
FRANCAIS
PROTECTION DE L'ENVIRONNEMENT ET ÉCONOMIES D'ÉNERGIE
DEUTSCH
FRANCAIS
La présence de ce logo sur le produit ou son manuel d‘utilisation indique qu‘en fin de vie, il ne doit pas être
jeté avec les autres déchets domestiques. Afin d‘éviter toute atteinte à l‘environnement ou à la santé humaine
pouvant résulter d‘une gestion incontrôlée des déchets, veuillez assurer son recyclage de manière responsable.
Séparez-le des autres types de déchets et recyclez-le, afin de promouvoir la réutilisation durable des ressources
naturelles.
FRANCAIS
ENGLISH
MISE AU REBUT DE CE PRODUIT
ESPAÑOL
POLSKI
ITALIANO
Adam Hall GmbH, tous droits réservés. Les caractéristiques techniques et les fonctions disponibles sur le produit
sont sujettes à modifications. La photocopie, la traduction et toute forme de copie, partielle ou intégrale, de ce
manuel utilisateur sont interdites.
49
ENGLISH
DEUTSCH
¡Gracias por elegir Cameo Light!
FRANCAIS
ITALIANO
FRANCAIS
POLSKI
ESPAÑOL
FRANCAIS
Este producto se ha diseñado para ofrecer una fiabilidad y durabilidad óptimas.
50
Le rogamos que lea atentamente estas instrucciones para familiarizarse rápidamente con este producto Cameo
Light y aprovechar al máximo todas las funciones.
Si desea obtener más información sobre Cameo Light, visite nuestro sitio web WWW.CAMEOLIGHT.COM
FRANCAIS
ENGLISH
ESCÁNER DE LED CON
GOBOS 60 W
DEUTSCH
FRANCAIS
CLSCAN60W
FRANCAIS
ESPAÑOL
POLSKI
ITALIANO
51
FRANCAIS
ITALIANO
FRANCAIS
POLSKI
ESPAÑOL
FRANCAIS
DEUTSCH
ENGLISH
MEDIDAS DE SEGURIDAD:
52
1. Lea atentamente las instrucciones de este manual.
2. Guarde toda la información en un lugar seguro para futuras consultas.
3. Siga las instrucciones indicadas.
4. Siga todas las advertencias. No quite las instrucciones de seguridad ni cualquier otra información indicada en el equipo.
5. Utilice el equipo únicamente según la finalidad prevista.
6. Utilice solo soportes y fijaciones que sean robustos y adecuados cuando instale el equipo en instalaciones
fijas. Asegúrese de que los soportes de pared están correctamente instalados y firmemente fijados. Asegúrese de
que el equipo está sólidamente instalado y no se puede caer.
7. Al instalar el equipo, respete las normas de seguridad aplicables en su país.
8. Evite instalar el equipo cerca de radiadores, acumuladores de calor, estufas o cualquier otra fuente de calor. Asegúrese de que el equipo esté instalado en un lugar con ventilación suficiente para evitar cualquier sobrecalentamiento.
9. No coloque sobre el equipo fuentes de llamas sin protección, por ejemplo, velas encendidas.
10. Evite bloquear las rejillas de ventilación.
11. No utilice este equipo cerca del agua (excepto los equipos específicamente diseñados para uso en exterior,
en cuyo caso tenga en cuenta las indicaciones mencionadas a continuación). No exponga este equipo a materiales, líquidos o gases inflamables.
12. Evite exponer el equipo a gotas o salpicaduras que puedan caer dentro del mismo. No coloque recipientes
llenos de líquido, como floreros o vasos, sobre el equipo.
13. Asegúrese de no dejar caer ningún objeto dentro del equipo.
14. Emplee el equipo únicamente con los accesorios recomendados por el fabricante.
15. No abra el equipo ni intente modificarlo.
16. Una vez conectado el equipo, compruebe que en toda la longitud del cableado no hay peligro de que provoque una caída, por ejemplo.
17. Durante el transporte, asegúrese de que el equipo no se caiga y pueda causar daños personales o materiales.
18. Si el equipo no funciona correctamente, o si se ha vertido líquido sobre él, o si un objeto ha caído en su
interior o si ha sufrido algún desperfecto, apague inmediatamente el equipo y desenchufe el cable eléctrico (si se
trata de un equipo activo). Únicamente un técnico especialista debe reparar el equipo.
19. Para limpiar el equipo utilice un paño seco.
20. Procure seguir las normas vigentes en su país sobre reciclaje de desechos. Separe los componentes de
plástico, papel y cartón del paquete para reciclarlos en sus contenedores respectivos.
21. No deje las bolsas de plástico al alcance de los niños.
PARA LOS EQUIPOS CON TOMA ELÉCTRICA:
22. ADVERTENCIA: Si el cable eléctrico está provisto de un contacto de protección, debe conectarse a una toma
eléctrica con conexión a tierra. No desactivar nunca esta conexión de protección a tierra del cable eléctrico.
23. Si el equipo ha estado expuesto a un cambio brusco de temperatura (por ejemplo, después del transporte),
no lo encienda inmediatamente. La condensación o la humedad podrían dañar el equipo. Deje que el equipo
alcance la temperatura ambiente antes de encenderlo.
24. Antes de conectar el cable eléctrico a la toma de corriente, compruebe si la tensión y la frecuencia del
suministro eléctrico coinciden con las especificaciones de este equipo. Si el equipo dispone de un selector de
tensión, antes de enchufarlo a la red eléctrica, asegúrese de que el valor seleccionado coincide con la tensión de
suministro. Si el enchufe o el adaptador de corriente no encajan en la toma eléctrica, consulte a un electricista.
25. Asegúrese de que el cable eléctrico no está pinzado. Evite que el cable resulte pellizcado, sobre todo en los
extremos de conexión al equipo y en la toma eléctrica.
26. Al conectar el equipo, asegúrese de que el cable eléctrico o el adaptador de corriente estén siempre
accesibles. Desconecte el equipo de la toma de corriente cuando no esté en uso o antes de limpiarlo. Para ello,
SEGURIDAD:
DEUTSCH
FRANCAIS
CAUTION
FRANCAIS
ENGLISH
desconecte el cable eléctrico y el adaptador de corriente del conector del equipo en vez de desenchufar el cable
de la toma eléctrica. No tocar el cable eléctrico ni el adaptador de corriente con las manos húmedas.
27. No encienda y apague el equipo en cortos intervalos de tiempo, ya que se reduce así la vida útil del sistema.
28. NOTA IMPORTANTE: Sustituya los fusibles únicamente por otros del mismo tipo y de las mismas características. Si el fusible se funde continuamente, póngase en contacto con un servicio técnico autorizado.
29. Para desconectar completamente el equipo de la tensión eléctrica, desenchufe el cable eléctrico o el adaptador de corriente de la toma eléctrica.
30. Si el equipo dispone de un enchufe eléctrico Volex, deberá desbloquearse el Volex del equipo para desenchufarlo. Esto implica que un tirón en el cable eléctrico puede desplazar el equipo y provocar daños personales o
materiales. Por tanto, asegúrese de instalar los cables con sumo cuidado.
31. Si es probable que caiga un rayo por una tormenta eléctrica o si no va a emplear el equipo durante mucho
tiempo, desenchufe el cable eléctrico y el adaptador de corriente.
RISK OF ELECTRIC SHOCK
DO NOT OPEN
El símbolo de rayo dentro de un triángulo equilátero advierte al usuario de la presencia de tensiones
peligrosas sin aislamiento dentro del equipo que pueden causar una descarga eléctrica y suponer un
riesgo para la salud.
POLSKI
¡ATENCIÓN! INFORMACIÓN IMPORTANTE SOBRE LOS PRODUCTOS DE ILUMINACIÓN
1. No mire el haz de luz desde una distancia inferior a 40 cm.
2. No mire el haz de luz de cerca durante periodos prolongados.
3. No mire directamente el haz de luz con instrumentos ópticos, como lentes de aumento.
4. ¡Los efectos estroboscópicos pueden a veces causar convulsiones en personas fotosensibles! Las personas
con epilepsia deben evitar los lugares en los que se usan luces estroboscópicas.
ESPAÑOL
El símbolo de exclamación dentro de un triángulo equilátero advierte al usuario de la existencia de
importantes instrucciones de uso y mantenimiento.
FRANCAIS
ADVERTENCIA:
Para evitar el riesgo de descarga eléctrica, no retire la tapa. El equipo no contiene piezas que el usuario pueda
reparar o sustituir. Para cualquier tarea de mantenimiento o reparación, acuda a un técnico cualificado.
ITALIANO
Este producto ha sido desarrollado para uso profesional en el sector de eventos y no está diseñado para la
iluminación doméstica.
53
FRANCAIS
ITALIANO
FRANCAIS
POLSKI
ESPAÑOL
FRANCAIS
DEUTSCH
ENGLISH
INTRODUCCIÓN:
54
ESCÁNER DE LED DMX 60 W
(CLSCAN60W)
CONTROLES
• Control DMX de 10 canales
• Activación por sonido
• Modo Automático
CARACTERÍSTICAS
• 1 LED de 60 W
• Rueda de colores con 8 colores, más blanco
• Rueda de gobos con 7 gobos diferentes
• Enfoque controlado por DMX
• Prisma controlado por DMX
• Funciones Maestro/Esclavo
• Robusta carcasa metálica
• Consumo: 90 W
• LED de larga duración
• Soporte
OPERACIÓN
El escáner de LED de Cameo es un foco de efectos LED controlado por DMX512, equipado con un LED de 60 W
de alta eficiencia. Las ruedas de colores y de gobos se controlan por separado, lo que permite obtener una gran
variedad de efectos de iluminación.
El escáner de LED de Cameo funciona en modo autónomo, maestro/esclavo o controlado por DMX512.
CONEXIONES Y PANEL DE CONTROL:
FRANCAIS
ENGLISH
1
NOTA IMPORTANTE: Sustituya el fusible únicamente por otro del mismo tipo y características. Si el fusible se
fundiera continuamente, póngase en contacto con un servicio técnico autorizado.
DEUTSCH
FRANCAIS
1 Toma IEC con portafusibles
FRANCAIS
4
3
Conector XLR de entrada de 3 pines para conectar un equipo de control DMX (como un controlador DMX).
3 DMX OUT
POLSKI
2 DMX IN
ESPAÑOL
2
Conector XLR de salida de 3 pines para reenviar la señal de control DMX.
4 ARGOLLA DE SEGURIDAD
ITALIANO
Argolla metálica para pasar un cable de seguridad.
55
ENGLISH
CONEXIONES Y PANEL DE CONTROL:
DEUTSCH
5
FRANCAIS
6
5 PANTALLA LED
FRANCAIS
ITALIANO
FRANCAIS
POLSKI
ESPAÑOL
Muestra el modo de funcionamiento y otros ajustes del sistema.
56
6 BOTONES DE AJUSTE
Estos 4 botones permiten realizar los ajustes del sistema de manera rápida y fácil.
OPERACIÓN:
ESPAÑOL
POLSKI
ITALIANO
SENSIBILIDAD DEL MICRÓFONO
Pulse el botón MODE y con los botones UP y DOWN seleccione el menú para
ajustar la sensibilidad del micrófono (se muestra "MIC" en la pantalla). Pulse
el botón ENTER y seleccione la sensibilidad deseada con los botones UP y
DOWN (M-00 a M-99).
Confirme con el botón ENTER.
FRANCAIS
ACTIVACIÓN POR SONIDO
Pulse el botón MODE y luego con los botones UP y DOWN seleccione el
modo Activación por sonido (se muestra "SOUN" en la pantalla). Pulse ahora
el botón ENTER y luego seleccione con el botón UP el modo Maestro (MAST)
o con el botón DOWN el modo Autónomo (ALON) y confirme la selección
pulsando ENTER. En la pantalla se mostrará "SO-M" para el modo Maestro o
"SO-A" para el modo Autónomo.
En modo Maestro se pueden conectar otros escáners del mismo tipo para
utilizarlos como equipos esclavos. Seleccione el modo DMX para el equipo
esclavo y establezca en 001 la dirección inicial DMX. Mediante un cable
DMX, conecte el equipo esclavo al equipo maestro (la salida DMX OUT del
equipo maestro a la entrada DMX IN del equipo esclavo). Ahora el equipo
esclavo seguirá al equipo maestro.
En modo Autónomo, el escáner funciona de manera independiente de los
demás equipos conectados.
DEUTSCH
FRANCAIS
AJUSTE DE LA DIRECCIÓN INICIAL DMX
Pulse el botón MODE y luego con los botones UP y DOWN seleccione el
modo de ajuste de la dirección inicial DMX (se muestra "ADDR" en la
pantalla). Pulse ahora el botón ENTER y con los botones UP y DOWN
seleccione la dirección inicial DMX (A001 a A512).
Confirme con el botón ENTER.
FRANCAIS
ENGLISH
PUESTA EN MARCHA
Después de enchufar el escáner de LED de Cameo a la red eléctrica, se
inicia el proceso de ajuste de los motores. Al cabo de 20 segundos, los
motores están reajustados y el dispositivo está listo para funcionar.
Ajuste la proyección girando el anillo de enfoque del objetivo.
En modo DMX, el enfoque también se puede controlar en el modo de 6 canales.
57
MODO AUTOMÁTICO
Pulse el botón MODE y luego con los botones UP y DOWN seleccione el
modo Automático (se muestra "AUTO" en la pantalla). Pulse ahora el botón
ENTER y luego seleccione con el botón UP el modo Maestro (MAST) o con
el botón DOWN el modo Autónomo (ALON) y confirme la selección pulsando
ENTER. En la pantalla se mostrará "AU-M para el modo Maestro o "AU-A"
para el modo Autónomo.
En modo Maestro se pueden conectar otros escáners del mismo tipo para
utilizarlos como equipos esclavos. Seleccione el modo DMX para el equipo
esclavo y establezca en 001 la dirección inicial DMX.Mediante un cable
DMX, conecte el equipo esclavo al equipo maestro (la salida DMX OUT del
equipo maestro a la entrada DMX IN del equipo esclavo). Ahora el equipo
esclavo seguirá al equipo maestro.
En modo Autónomo, el escáner funciona de manera independiente de los
demás equipos conectados.
FRANCAIS
ITALIANO
FRANCAIS
POLSKI
ESPAÑOL
FRANCAIS
DEUTSCH
ENGLISH
OPERACIÓN:
58
INVERTIR MOVIMIENTO HORIZONTAL (REVERSE PAN)
Esta función permite invertir el movimiento horizontal (PAN).
Pulse el botón MODE y luego con los botones UP y DOWN seleccione la
función Reverse Pan (se muestra "rPAN" en la pantalla). Pulse ahora el
botón ENTER y luego pulse el botón UP para activar la función Reverse (ON)
o el botón DOWN para desactivar la función Reverse (OFF).
Confirme con el botón ENTER.
INVERTIR MOVIMIENTO VERTICAL (REVERSE TILT)
Esta función permite invertir el movimiento vertical (TILT).
Pulse el botón MODE y luego con los botones UP y DOWN seleccione la
función Reverse Tilt (se muestra "rtIL" en la pantalla). Pulse ahora el botón
ENTER y luego pulse el botón UP para activar la función Reverse (ON) o el
botón DOWN para desactivar la función Reverse (OFF).
Confirme con el botón ENTER.
POLSKI
ITALIANO
NOTA
Si no se pulsa ninguno de los 4 botones, la pantalla LED se apagará
automáticamente al cabo de 70 segundos. Al pulsar uno de los cuatro
botones, la pantalla se volverá a iluminar.
ESPAÑOL
CONFIGURACIÓN DE FÁBRICA
Esta función permite restablecer el equipo a los valores de fábrica.
Pulse el botón MODE y luego pulse los botones UP y DOWN hasta que aparezca "LOAd" en la pantalla. Pulse ahora el botón ENTER. Todos los ajustes
(sensibilidad del micrófono, Reverse Display...) recuperarán los valores
originales de fábrica. El equipo está ahora listo para funcionar.
FRANCAIS
REAJUSTE (RESET)
Esta función permite lanzar el proceso de ajuste de los motores.
Pulse el botón MODE y luego con los botones UP y DOWN seleccione la
función Reset (se muestra "rESt"). Pulse ahora el botón ENTER. Se inicia
el proceso y, al cabo de 20 segundos, los motores están reajustados y el
dispositivo está listo para funcionar.
DEUTSCH
FRANCAIS
VER EL TIEMPO OPERATIVO (FIXTURE TIME)
Esta función permite mostrar en pantalla el tiempo de funcionamiento del equipo.
Pulse el botón MODE y luego con los botones UP y DOWN seleccione la
visualización del tiempo operativo (se muestra "FItI" en la pantalla). Pulse
ahora el botón ENTER. El número de horas que el equipo ha estado
funcionando aparece en la pantalla.
FRANCAIS
ENGLISH
INVERTIR PANTALLA (REVERSE DISPLAY)
Esta función permite girar 180° los caracteres de la pantalla. Pulse el botón
MODE y luego con los botones UP y DOWN seleccione la función Reverse
Display (se muestra "rdIS" en la pantalla). Pulse ahora el botón ENTER y
luego pulse el botón UP para activar la función Reverse (ON) o el botón
DOWN para desactivar la función Reverse (OFF).
Confirme con el botón ENTER.
59
MODO 10 CANALES
CANAL
000 - 255
Movimiento horizontal de 180°
2
Tilt
000 - 255
Movimiento vertical de 90°
FRANCAIS
Rueda de
colores
ESPAÑOL
FRANCAIS
POLSKI
FRANCAIS
ITALIANO
FUNCIÓN
Pan
3
60
VALOR
1
DEUTSCH
ENGLISH
CONTROL DMX:
4
Rueda de
gobos
000 - 013
Blanco
014 - 027
Amarillo
028 - 041
Magenta
042 - 055
Verde
056 - 069
Violeta
070 - 083
Cian
084 - 097
Verde intenso
098 - 111
Ámbar
112 - 127
Rojo oscuro
128 - 190
Arco iris, con rotación hacia la izquierda (ajustable rápido - lento)
191 - 255
Arco iris, con rotación hacia la derecha (ajustable lento - rápido)
000 - 009
Vacío
010 - 019
Gobo 1
020 - 029
Gobo 2
030 - 039
Gobo 3
040 - 049
Gobo 4
050 - 059
Gobo 5
060 - 069
Gobo 6
070 - 079
Gobo 7
080 - 099
Gobo 1, con sacudida (ajustable)
100 - 119
Gobo 2, con sacudida (ajustable)
120 - 139
Gobo 3, con sacudida (ajustable)
140 - 159
Gobo 4, con sacudida (ajustable)
160 - 179
Gobo 5, con sacudida (ajustable)
180 - 199
Gobo 6, con sacudida (ajustable)
200 - 219
Gobo 7, con sacudida (ajustable)
220 - 255
Rueda de gobos, rotación (ajustable)
CONTROL DMX:
CANAL
5
7
9
Dimmer
Prisma
128 - 191
Rotación de gobos hacia la derecha (ajustable rápido - lento)
192 - 195
No operativo
196 - 255
Rotación de gobos hacia la izquierda (ajustable lento - rápido)
000 - 255
Enfoque
000 - 009
Cerrado
010 - 019
Abierto
020 - 127
Efecto estroboscópico 1 (ajustable lento - rápido)
128 - 137
Abierto
138 - 201
Efecto estroboscópico 2 (ajustable lento - rápido)
202 - 255
Abierto
000 - 255
Atenuación de 0 a 100%
000 - 003
Abierto
004 - 127
Prisma
128 - 255
Rotación de prisma (ajustable rápido - lento)
000 - 059
No operativo
060 - 079
Reajuste de los motores de ruedas de colores/gobos
080 - 099
Reajuste de todos los motores
100 - 119
Programa 1
120 - 139
Programa 2
140 - 159
Programa 3
160 - 179
Programa 4
180 - 199
Programa 5
200 - 219
Programa 6
220 - 239
Programa 7
240 - 255
Programa 8
POLSKI
Función/
Programa
Rotación de gobos manual
ESPAÑOL
10
Obturador
000 - 127
FRANCAIS
8
Enfoque
FUNCIÓN
DEUTSCH
FRANCAIS
6
Rotación
de gobos
VALOR
FRANCAIS
ENGLISH
MODO 10 CANALES
ITALIANO
61
FRANCAIS
ITALIANO
FRANCAIS
POLSKI
ESPAÑOL
FRANCAIS
DEUTSCH
ENGLISH
CARACTERÍSTICAS TÉCNICAS:
62
NOMBRE DEL MODELO:
CLSCAN60W
Tipo de producto:
Cabeza móvil LED
Tipo:
Escáner
Colores:
8 colores + blanco
Gobos:
7 + 1 vacío
Número de LEDs:
1
Tipo de LEDs:
60 W
Iluminancia en lux a 1 metro:
26.000 lux
Entrada DMX:
XLR de 3 pines macho
Salida DMX:
XLR de 3 pines hembra
Modos DMX:
10 canales
Funciones DMX:
Pan, tilt, obturador, prisma, enfoque, programa, Dimmer
(atenuación), rueda de colores, rueda de gobos
Modos Autónomo:
Automático, activación por sonido
Controles:
Mode, Enter, Up, Down
Indicadores:
Pantalla LED de 4 dígitos
Alimentación eléctrica:
230 VAC, 50 Hz
Consumo:
90 W
Conexión de alimentación eléctrica:
Toma IEC
Material de la carcasa:
Metal
Color de la carcasa:
Negro
Sistema de refrigeración:
Ventilador
Dimensiones (An x Al x F, sin soporte):
205 x 150 x 475 mm
Peso:
4,4 kg
DECLARACIÓN DEL FABRICANTE:
La presente garantía cubre las marcas Adam Hall, LD Systems, Defender, Palmer y Cameo.
Se aplica a todos los productos distribuidos por Adam Hall.
No afecta a los derechos de garantía legal que asume el fabricante. De hecho, le concede al usuario derechos
adicionales ante Adam Hall, independientes de la garantía legal.
Durante el periodo de garantía limitada, Adam Hall se compromete a reparar o sustituir las piezas defectuosas del
producto. En caso de reparación o sustitución dentro del período de garantía, las piezas originales y productos
retirados pasarán a ser propiedad de Adam Hall.
POLSKI
Adam Hall no garantiza el funcionamiento ininterrumpido y sin fallos de este producto. Además, Adam Hall no se
hace responsable de los posibles daños ocasionados por no seguir las instrucciones de uso suministradas con el
producto Adam Hall. Esta garantía no se aplica - a los consumibles (baterías, etc.) - a los productos cuyo número
de serie ha sido borrado, o que han quedado dañados y defectuosos debido a un accidente - en caso de defectos
ocasionados por una incorrecta utilización o manipulación, o cualquier otra causa ajena
- en caso de utilización del producto no conforme con los parámetros establecidos en la documentación facilitada
con el producto
- en caso de utilización de piezas de repuesto no fabricadas, no recomendadas ni vendidas por Adam Hall
- si el producto ha sido modificado o reparado por personal no autorizado por Adam Hall.
Estos términos y condiciones constituyen el acuerdo de garantía íntegro y exclusivo entre usted y Adam Hall en
relación con el producto Adam Hall que acaba de adquirir.
ESPAÑOL
En el caso poco probable de que se produzca un fallo recurrente en el producto adquirido, Adam Hall, a su entera
discreción, podrá optar por sustituir dicho producto defectuoso por otro de similares características.
FRANCAIS
La garantía limitada entra en vigor el día de la fecha de compra. Para tener derecho a esta garantía será necesario presentar un justificante de compra válido en el que figure la fecha de compra del producto, por ejemplo,
la factura o el albarán de entrega. Si el producto que ha adquirido necesitara una reparación durante la vigencia
de la garantía limitada, tendrá derecho a obtener los servicios de garantía conforme a los términos y condiciones
establecidos en este documento.
DEUTSCH
FRANCAIS
Adam Hall garantiza que el producto que ha adquirido de Adam Hall o de un distribuidor autorizado de Adam Hall
estará exento de defectos de material y fabricación, en condiciones normales de uso, durante un período de 2 o 5
años (consúltese el producto concreto) a partir de la fecha de compra.
FRANCAIS
ENGLISH
GARANTÍA DEL FABRICANTE
ITALIANO
63
FRANCAIS
ITALIANO
FRANCAIS
POLSKI
ESPAÑOL
FRANCAIS
DEUTSCH
ENGLISH
DECLARACIÓN DEL FABRICANTE:
64
LIMITACIÓN DE RESPONSABILIDAD
Si durante el período de garantía aparecen defectos de material o de fabricación en su producto Adam Hall (de
acuerdo con las garantías mencionadas en este documento), tendrá derecho exclusivamente a la reparación o
sustitución del mismo. La responsabilidad máxima de Adam Hall en virtud de los términos de esta garantía está
limitada al menor importe que resulte del precio de compra del producto, del coste de la reparación o la sustitución de las piezas que han dejado de funcionar en condiciones normales de uso.
Adam Hall no será responsable de ningún daño causado por el producto o por el mal funcionamiento del
producto, incluidas la pérdida de beneficios, la pérdida de ahorros o cualquier consecuencia derivada de dichas
pérdidas. Además, Adam Hall no se hará responsable de ninguna reclamación presentada por un tercero o por el
comprador original en nombre de un tercero.
Esta limitación de responsabilidad se aplicará con independencia de que se solicite una indemnización por daños
y perjuicios, o se presenten reclamaciones por negligencia, contractuales o de cualquier otra índole, y no podrá
ser derogada o modificada. Esta limitación de responsabilidad será efectiva incluso en el caso de que el comprador hubiese avisado previamente a Adam Hall o a alguno de sus representantes de la posibilidad de reclamar
daños y perjuicios. No obstante, esta limitación de responsabilidad no tendrá efecto en caso de reclamación por
daños personales.
Esta garantía limitada le otorga derechos legales específicos. Puede que posea derechos adicionales conforme a
la legislación del país o Estado en el que se encuentre. Le recomendamos que consulte la legislación vigente en
su país o Estado para conocer el alcance de sus derechos.
APLICACIÓN DE LA GARANTÍA
Para solicitar asistencia técnica en relación con el producto en garantía, póngase en contacto con Adam Hall o
con el distribuidor autorizado donde adquirió el producto.
DECLARACIÓN CE DE CONFORMIDAD
Los productos distribuidos por Adam Hall cumplen (según proceda) los requisitos esenciales de las Directivas
europeas 1999/5/CE (Equipos radioeléctricos y equipos terminales de telecomunicación, R&TTE), 2004/108/
CE (Compatibilidad Electromagnética) y 2006/95/CE (Baja Tensión), así como las correspondientes cláusulas
adicionales. Para más información consulte www.adamhall.com.
DECLARACIÓN DEL FABRICANTE:
(Aplicable en la Unión Europea y en los países europeos que dispongan de un sistema de recogida selectiva)
Si es un particular, póngase en contacto con el distribuidor donde adquirió este producto, o con el ayuntamiento,
para informarse sobre el reciclaje adecuado de este equipo.
Si es una empresa, póngase en contacto con su proveedor para informarse sobre los términos y condiciones de
su contrato de compra-venta. Este producto no debe mezclarse con otros residuos industriales.
Ahorre energía eléctrica para proteger el medio ambiente. Para ello, apague todos los aparatos eléctricos cuando
no estén en uso. Además, para evitar el consumo de energía en modo En espera, desenchufe todo aparato
eléctrico de la toma de corriente cuando no esté en uso.
FRANCAIS
PROTECCIÓN MEDIOAMBIENTAL Y AHORRO ENERGÉTICO
DEUTSCH
FRANCAIS
El símbolo que aparece sobre el producto o en la documentación adjunta indica que al final de la vida útil del
equipo, no deberá desecharlo con los demás residuos domésticos, con el fin de evitar posibles efectos negativos
en el medio ambiente y en la salud humana debidos al vertido incontrolado de desechos. La recogida selectiva
ayuda a su posterior reciclaje y fomenta la reutilización sostenible de los componentes de este equipo.
FRANCAIS
ENGLISH
ELIMINACIÓN CORRECTA DE ESTE PRODUCTO
ESPAÑOL
POLSKI
ITALIANO
Adam Hall GmbH. Todos los derechos reservados. Los datos técnicos y las características funcionales del producto están sujetos a modificaciones. Se prohíbe la fotocopia, traducción y cualquier otra forma de reproducción
parcial o total de este manual de usuario.
65
ENGLISH
DEUTSCH
Dziękujemy za wybór marki Cameo Light!
FRANCAIS
ITALIANO
FRANCAIS
POLSKI
ESPAÑOL
FRANCAIS
Zaprojektowaliśmy ten produkt tak, aby działał niezawodnie przez wiele lat.
66
Prosimy o dokładne zapoznanie się z niniejszą instrukcją, ponieważ chcemy, abyś szybko mógł cieszyć się w
pełni swoim nowym produktem Cemeo Light.
Więcej informacji o marce Cameo Light znajduje się na naszej stronie internetowej WWW.CAMEOLIGHT.COM
FRANCAIS
ENGLISH
SKANER LED GOBO 60 W
CLSCAN60W
DEUTSCH
FRANCAIS
FRANCAIS
ESPAÑOL
POLSKI
ITALIANO
67
FRANCAIS
ITALIANO
FRANCAIS
POLSKI
ESPAÑOL
FRANCAIS
DEUTSCH
ENGLISH
ŚRODKI OSTROŻNOŚCI:
68
1. Należy dokładnie przeczytać niniejszą instrukcję.
2. Wszystkie informacje i instrukcje przechowywać w bezpiecznym miejscu.
3. Należy przestrzegać zaleceń.
4. Należy przestrzegać wszystkich wskazówek ostrzegawczych. Nie wolno usuwać wskazówek bezpieczeństwa
ani innych informacji znajdujących się na urządzeniu.
5. Używać urządzenia wyłącznie w sposób zgodny z jego przeznaczeniem.
6. Stosować wyłącznie stabilne i pasujące statywy, ew. elementy mocujące (w przypadku instalacji stałych).
Należy zadbać o prawidłową instalację uchwytów ściennych i ich odpowiednie zabezpieczenie. Zapewnić
bezpieczną instalację urządzenia i upewnić się, że urządzenie nie spadnie.
7. Podczas instalacji przestrzegać obowiązujących w danym kraju przepisów bezpieczeństwa.
8. Urządzenie instalować i eksploatować z dala od grzejników, zasobników ciepła, pieców i innych źródeł ciepła. Zadbać o
zainstalowanie urządzenia w taki sposób, aby zawsze było ono wystarczająco chłodzone i nie mogło ulec przegrzaniu.
9. Nie umieszczać na urządzeniu źródeł zapłonu, takich jak np. palące się świece.
10. Nie wolno blokować szczelin wentylacyjnych.
11. Nie używać urządzenia w bezpośrednim sąsiedztwie wody (nie dotyczy specjalnych urządzeń do stosowania
na zewnątrz – w takim przypadku należy przestrzegać podanych poniżej wskazówek specjalnych). Urządzenie
nie może mieć kontaktu z palnymi materiałami, płynami ani gazami.
12. Zabezpieczyć urządzenie przed wniknięciem kapiącej lub pryskającej wody. Nie wolno stawiać na urządzeniu
pojemników napełnionych płynami, takich jak wazony czy naczynia z piciem.
13. Należy zadbać o to, aby do urządzenia nie wpadały żadne przedmioty.
14. Urządzenie można eksploatować tylko przy użyciu akcesoriów zalecanych i przewidzianych przez producenta.
15. Nie otwierać urządzenia ani nie dokonywać w nim zmian.
16. Po podłączeniu urządzenia sprawdzić wszystkie ciągi kablowe, aby zapobiec szkodom lub wypadkom np. w
wyniku potknięcia.
17. Podczas transportu zadbać o to, aby urządzenie nie upadło, gdyż może to spowodować uszkodzenie mienia i
obrażenia ciała.
18. Jeśli urządzenie nie działa prawidłowo, do jego wnętrza dostały się płyny lub przedmioty lub jeśli urządzenie
zostało uszkodzone w inny sposób, należy je natychmiast wyłączyć i odłączyć od gniazda sieciowego (jeśli
urządzenie jest aktywne). Naprawę takiego urządzenia może wykonać tylko autoryzowany personel specjalistyczny.
19. Do czyszczenia urządzenia stosować suchą ściereczkę.
20. Przestrzegać obowiązujących w danym kraju przepisów dotyczących usuwania odpadów. Podczas utylizacji
opakowania oddzielić tworzywo sztuczne od papieru i tektury.
21. Worki z tworzywa sztucznego należy przechowywać w miejscu niedostępnym dla dzieci.
DOTYCZY URZĄDZEŃ Z ZASILANIEM SIECIOWYM:
22. UWAGA: jeśli kabel sieciowy urządzenia jest wyposażony w zestyk ochronny, należy go podłączyć do gniazda
z przewodem uziemiającym. Nigdy nie wolno dezaktywować przewodu uziemiającego kabla sieciowego.
23. Nie włączać urządzenia bezpośrednio po narażeniu go na silne wahania temperatury (np. po transporcie). Wilgoć
i skropliny mogą uszkodzić urządzenie. Włączyć urządzenie dopiero wtedy, gdy osiągnie temperaturę pokojową.
24. Przed podłączeniem urządzenia do gniazda elektrycznego należy sprawdzić, czy napięcie i częstotliwość sieci elektrycznej odpowiada wartościom podanym na urządzeniu. Jeśli urządzenie jest wyposażone w przełącznik
napięcia, należy podłączyć je do gniazda tylko wówczas, gdy wartości urządzenia odpowiadają wartościom sieci
elektrycznej. Jeśli dołączony kabel sieciowy lub dołączony adapter sieciowy nie pasuje do gniazda elektrycznego, należy skontaktować się z elektrykiem.
25. Nie stawać na kablu sieciowym. Należy zadbać o to, aby kable przewodzące napięcie nie były zagięte przy
gnieździe sieciowym, przy adapterze sieciowym ani przy gnieździe urządzenia.
BEZPIECZEŃSTWO:
Trójkąt równoramienny z wykrzyknikiem oznacza ważne wskazówki dotyczące obsługi i wskazówki
ostrzegawcze.
POLSKI
OSTROŻNIE! WAŻNE WSKAZÓWKI DOTYCZĄCE PRODUKTÓW OŚWIETLENIOWYCH
1. Nie spoglądać w stronę promienia świetlnego z odległości mniejszej niż 40 cm.
2. Nigdy nie spoglądać przez dłuższy czas z krótkiej lub średniej odległości w stronę promienia świetlnego.
3. Nigdy nie spoglądać w stronę promienia świetlnego przy pomocy urządzeń optycznych, takich jak np. szkło
powiększające.
4. Światło stroboskopowe może u wrażliwych osób powodować drgawki. Chorzy na padaczką powinny
bezwzględnie unikać miejsc, w których używa się tego typu lamp.
ESPAÑOL
Trójkąt równoramienny z symbolem błyskawicy oznacza niezaizolowane, „niebezpieczne” napięcie w
urządzeniu, które może spowodować niebezpieczne dla zdrowia porażenie prądem.
FRANCAIS
UWAGA:
Nigdy nie wolno zdejmować pokrywy, gdyż grozi to porażeniem prądem. We wnętrzu urządzenia nie ma żadnych
części, które mogłyby zostać naprawione bądź poddane czynnościom konserwacyjnym przez użytkownika.
Naprawy może przeprowadzać wyłącznie wykwalifikowany personel serwisowy.
DEUTSCH
FRANCAIS
CAUTION
RISK OF ELECTRIC SHOCK
DO NOT OPEN
FRANCAIS
ENGLISH
26. Przy podłączaniu urządzenia zawsze należy zadbać o to, aby kabel sieciowy lub adapter sieciowy był zawsze
łatwo dostępny. Odłączyć urządzenie od źródła zasilania, gdy nie jest ono używane lub gdy ma zostać poddane
czyszczeniu. Zawsze należy wyjmować kabel sieciowy i adapter sieciowy z gniazda, chwytając za wtyczkę lub
adapter, a nie za kabel. Nigdy nie dotykać kabla sieciowego i adaptera sieciowego mokrymi dłońmi.
9. W miarę możliwości nie włączać i wyłączać urządzenia w krótkich odstępach czasu, gdyż może to mieć
negatywny wpływ na jego żywotność.
28. WAŻNA INFORMACJA: bezpieczniki należy wymieniać wyłącznie na bezpieczniki tego samego typu i o takich samych
wartościach. Jeśli bezpiecznik stale się przepala, należy skontaktować się z autoryzowanym centrum serwisowym.
29. Aby całkowicie odłączyć urządzenie od sieci, należy wyjąć kabel sieciowy lub adapter sieciowy z gniazda.
30. Jeśli urządzenie jest wyposażone w przyłącze sieciowe Volex, konieczne jest odblokowanie odpowiedniej
wtyczki urządzenia Volex, zanim będzie możliwe jej odłączenie. Oznacza to także, iż w wyniku pociągnięcia za
kabel urządzenie może się przesunąć i spaść, co może spowodować obrażenia ciała i/lub inne szkody, dlatego
ważne jest, aby przewody były odpowiednio poprowadzone.
31. W przypadku zagrożenia uderzeniem pioruna lub jeśli urządzenie przez dłuższy czas nie jest używane, należy
wyjąć kabel sieciowy i adapter sieciowy z gniazda.
ITALIANO
Produkt powstal z mysla o profesjonalnych zastosowaniach w branzy estradowej i nie jest przeznaczony do
oswietlania pomieszczen w gospodarstwach domowych.
69
FRANCAIS
ITALIANO
FRANCAIS
POLSKI
ESPAÑOL
FRANCAIS
DEUTSCH
ENGLISH
WPROWADZENIE:
70
SKANER LED 60 W DMX
CLSCAN60W
FUNKCJE STEROWANIA
• 10-kanałowe sterowanie DMX
• sterowanie muzyką
• tryb automatyczny
CECHY
• 1 x 60 W LED
• tarcza kolorów z 8 kolorami plus biały
• tarcza Gobo z 7 różnymi wzorami
• ogniskowanie sterowane poprzez DMX
• pryzmat sterowany poprzez DMX
• funkcje master/slave
• wytrzymała metalowa obudowa
• pobór mocy: 90 W
• trwałe diody LED o wyjątkowo długiej żywotności
• uchwyt
OBSŁUGA
Skaner Cameo LED CAN to reflektor efektowy ze sterowaniem DMX 512, wyposażony w niezwykle wydajne diody
60 W LED. Oddzielne sterowanie dla tarczy kolorów i tarczy Gobo umożliwia tworzenie licznych efektów świetlnych.
Skaner Cameo LED może być obsługiwany zarówno indywidualnie, jak również w trybie master/slave i przez
protokół DMX 512.
PRZYŁĄCZA I PANEL OBSŁUGI:
FRANCAIS
ENGLISH
1
WAŻNA INFORMACJA: bezpiecznik należy wymieniać wyłącznie na bezpiecznik tego samego typu i o takich
samych parametrach. Jeśli bezpiecznik stale się przepala, należy skontaktować się z autoryzowanym
centrum serwisowym.
DEUTSCH
FRANCAIS
1 Gniazdo urządzenia IEC z podstawą bezpiecznika
FRANCAIS
4
3
3-stykowe gniazdo wejściowe XLR do podłączenia urządzenia kontrolnego DMX (np. pulpitu mikserskiego DMX).
3 DMX OUT
POLSKI
2 DMX IN
ESPAÑOL
2
3-stykowe gniazdo wyjściowe XLR do przesyłania sygnału sterowania DMX.
4 ZABEZPIECZENIE OCHRONNE
ITALIANO
Metalowe ucho do mocowania liny zabezpieczającej
71
ENGLISH
PRZYŁĄCZA I PANEL OBSŁUGI:
DEUTSCH
5
FRANCAIS
6
5 WYŚWIETLACZ LED
FRANCAIS
ITALIANO
FRANCAIS
POLSKI
ESPAÑOL
Wyświetlanie trybów pracy i innych ustawień systemowych.
72
6 PRZYCISKI OBSŁUGI
4 łatwo dostępne przyciski obsługi umożliwiają wprowadzanie ustawień systemowych.
OBSŁUGA:
ESPAÑOL
POLSKI
ITALIANO
CZUŁOŚĆ MIKROFONU
Nacisnąć przycisk MODE i za pomocą przycisków UP i DOWN wybrać opcję
menu służącą do ustawiania czułości mikrofonu (na wyświetlaczu pojawi się
napis „MIC”). Nacisnąć przycisk ENTER i za pomocą przycisków UP i DOWN
wybrać żądaną czułość (M–00 do M–99).
Zatwierdzić wprowadzone dane za pomocą przycisku ENTER.
FRANCAIS
STEROWANIE MUZYKĄ
Nacisnąć przycisk MODE i za pomocą przycisków UP i DOWN wybrać tryb
sterowania muzyką (na wyświetlaczu pojawi się napis „SOUN”). Nacisnąć
przycisk ENTER i za pomocą przycisku UP wybrać tryb Master (MAST), a za
pomocą przycisku DOWN tryb Standalone (ALON), a następnie zatwierdzić
wybór przyciskiem ENTER. Na wyświetlaczu pojawi się napis „SO-M” dla
trybu Master lub „SO-A” dla trybu Standalone.
W trybie Master do jednostki Master można podłączyć dodatkowe skanery
tego samego typu jako jednostki Slave. Dla jednostki Slave należy wybrać
tryb DMX i ustawić adres startowy DMX 001. Jednostkę (lub jednostki) Slave
połączyć za pomocą kabla DMX z jednostką Master (jednostka Master DMX
OUT – jednostka Slave DMX IN). Jednostka Slave jest podrzędna w stosunku
do jednostki Master.
W trybie Standalone skaner pracuje niezależnie od innych podłączonych jednostek.
DEUTSCH
FRANCAIS
USTAWIANIE ADRESU STARTOWEGO DMX
Nacisnąć przycisk MODE i za pomocą przycisków UP i DOWN wybrać tryb
adresów startowych DMX (na wyświetlaczu pojawi się napis „ADDR”).
Nacisnąć przycisk ENTER i za pomocą przycisków UP i DOWN wybrać
żądany adres startowy DMX (A001–A512).
Zatwierdzić wprowadzone dane za pomocą przycisku ENTER.
FRANCAIS
ENGLISH
URUCHOMIENIE
Po podłączeniu skanera Cameo LED do sieci elektrycznej nastąpi proces
resetowania silników. Po około 20 sekundach silniki zostaną wyregulowane,
a urządzenie będzie gotowe do pracy.
Regulując pierścień obiektywu, należy ustawić ostrość projekcji.
W trybie DMX można dodatkowo sterować ogniskowaniem za pomocą
kanału DMX 6.
73
TRYB AUTOMATYCZNY
Nacisnąć przycisk MODE i za pomocą przycisków UP i DOWN wybrać tryb
automatyczny (na wyświetlaczu pojawi się napis „AUTO”). Nacisnąć przycisk
ENTER i za pomocą przycisku UP wybrać tryb Master (MAST), a za pomocą
przycisku DOWN tryb Standalone (ALON), a następnie zatwierdzić wybór
przyciskiem ENTER. Na wyświetlaczu pojawi się napis „AU-M” dla trybu
Master lub „AU-A” dla trybu Standalone.
W trybie Master do jednostki Master można podłączyć dodatkowe skanery
tego samego typu jako jednostki Slave. Dla jednostki Slave wybrać tryb DMX
i ustawić adres startowy DMX 001. Jednostkę (lub jednostki) Slave połączyć
za pomocą kabla DMX z jednostką Master (jednostka Master DMX OUT –
jednostka Slave DMX IN). Jednostka Slave jest podrzędna w stosunku do
jednostki Master.
W trybie Standalone skaner pracuje niezależnie od innych podłączonych jednostek.
FRANCAIS
ITALIANO
FRANCAIS
POLSKI
ESPAÑOL
FRANCAIS
DEUTSCH
ENGLISH
OBSŁUGA:
74
REVERSE PAN
Za pomocą tej funkcji można odwrócić ruch PAN.
Nacisnąć przycisk MODE i za pomocą przycisków UP i DOWN wybrać
funkcję Reverse Pan (na wyświetlaczu pojawi się napis „r PAN”). Nacisnąć
przycisk ENTER i za pomocą przycisku UP wybrać Reverse On (ON), a za
pomocą przycisku DOWN Reverse Off (OFF).
Zatwierdzić wprowadzone dane za pomocą przycisku ENTER.
REVERSE TILT
Za pomocą tej funkcji można odwrócić ruch TILT.
Nacisnąć przycisk MODE i za pomocą przycisków UP i DOWN wybrać
funkcję Reverse Tilt (na wyświetlaczu pojawi się napis „r t l L”). Nacisnąć
przycisk ENTER i za pomocą przycisku UP wybrać Reverse On (ON), a za
pomocą przycisku DOWN Reverse Off (OFF).
Zatwierdzić wprowadzone dane za pomocą przycisku ENTER.
POLSKI
ITALIANO
WSKAZÓWKA
Jeśli przez ok. 70 sekund żaden z 4 przycisków nie zostanie naciśnięty,
wyświetlacz LED automatycznie się wyłączy. Po naciśnięciu dowolnego z 4
przycisków wyświetlacz ponownie się włączy.
ESPAÑOL
USTAWIENIA FABRYCZNE
Za pomocą tej funkcji można przywrócić ustawienia fabryczne urządzenia.
Nacisnąć przycisk MODE i za pomocą przycisków UP i DOWN wybrać
„LOAd”. Nacisnąć przycisk ENTER. Zostaną przywrócone ustawienia
fabryczne dla wszystkich funkcji (czułość mikrofonu, Reverse Display...).
Urządzenie jest natychmiast gotowe do pracy.
FRANCAIS
RESET
Ta funkcja umożliwia uruchomienie procesu resetowania silników.
Nacisnąć przycisk MODE i za pomocą przycisków UP i DOWN wybrać
funkcję resetowania (na wyświetlaczu pojawi się napis „r E S t”). Nacisnąć
przycisk ENTER. Rozpocznie się proces resetowania i po około 20 sekundach
silniki zostaną wyregulowane, a urządzenie będzie gotowe do pracy.
DEUTSCH
FRANCAIS
WYŚWIETLANIE GODZIN PRACY (FIXTURE TIME)
Ta funkcja umożliwia odczytanie godzin pracy urządzenia.
Nacisnąć przycisk MODE i za pomocą przycisków UP i DOWN wybrać tryb
wyświetlania godzin pracy (na wyświetlaczu pojawi się napis „F l t l”).
Nacisnąć przycisk ENTER. Na wyświetlaczu pojawi się liczba godzin dotychczasowej pracy urządzenia.
FRANCAIS
ENGLISH
REVERSE DISPLAY
Za pomocą tej funkcji można obrócić wskazanie na wyświetlaczu o 180°.
Nacisnąć przycisk MODE i za pomocą przycisków UP i DOWN wybrać
funkcję Reverse Display (na wyświetlaczu pojawi się napis „r d l S”).
Nacisnąć przycisk ENTER i za pomocą przycisku UP wybrać Reverse On
(ON), a za pomocą przycisku DOWN Reverse Off (OFF).
Zatwierdzić wprowadzone dane za pomocą przycisku ENTER.
75
TRYB 10-KANAŁOWY
KANAŁ
000–255
ruch Pan 180°
CH2
Tilt
000–255
ruch Tilt 90°
000–013
biały
014–027
żółty
028–041
magenta
042–055
zielony
056–069
fioletowy
070–083
cyjan
084–097
zielony jasny
FRANCAIS
Tarcza
kolorów
ESPAÑOL
FRANCAIS
POLSKI
FRANCAIS
ITALIANO
FUNKCJA
Pan
CH3
76
WARTOŚĆ
CH1
DEUTSCH
ENGLISH
STEROWANIE DMX:
CH4
Tarcza
Gobo
098–111
bursztynowy
112–127
czerwony ciemny
128–190
tęcza, kierunek obrotu w lewo (prędkość szybko – wolno)
191–255
tęcza, kierunek obrotu w prawo (prędkość wolno – szybko)
000–009
otwarta
010–019
Gobo 1
020–029
Gobo 2
030–039
Gobo 3
040–049
Gobo 4
050–059
Gobo 5
060–069
Gobo 6
070–079
Gobo 7
080–099
Gobo 1 Shake, (prędkość)
100–119
Gobo 2 Shake, (prędkość)
120–139
Gobo 3 Shake, (prędkość)
140–159
Gobo 4 Shake, (prędkość)
160–179
Gobo 5 Shake, (prędkość)
180–199
Gobo 6 Shake, (prędkość)
200–219
Gobo 7 Shake, (prędkość)
220–255
rotacja tarczy Gobo (prędkość)
STEROWANIE DMX:
KANAŁ
CH5
CH7
CH9
Ściemnianie
Pryzmat
128–191
rotacja tarczy Gobo w prawo (prędkość szybko – wolno)
192–195
brak funkcji
196–255
rotacja tarczy Gobo w lewo (prędkość wolno – szybko)
000–255
ogniskowanie
000–009
zamknięta
010–019
otwarta
020–127
Efekt stroboskopu 1 (prędkość wolno – szybko)
128–137
otwarta
138–201
Efekt stroboskopu 2 (prędkość wolno – szybko)
202–255
otwarta
000–255
ściemnianie 0–100%
000–003
otwarty
004–127
pryzmat
128–255
rotacja pryzmatu (prędkość szybko – wolno)
000–059
brak funkcji
060–079
resetowanie silnika tarczy kolorów i silnika tarczy Gobo
080–099
resetowanie wszystkich silników
100–119
program 1
120–139
program 2
140–159
program 3
160–179
program 4
180–199
program 5
200–219
program 6
220–239
program 7
240–255
program 8
POLSKI
Funkcja/Program
ręczna rotacja tarczy Gobo
ESPAÑOL
CH10
Migawka
000–127
FRANCAIS
CH8
Ogniskowanie
FUNKCJA
DEUTSCH
FRANCAIS
CH6
Rotacja tarczy
Gobo
WARTOŚĆ
FRANCAIS
ENGLISH
TRYB 10-KANAŁOWY
ITALIANO
77
FRANCAIS
ITALIANO
FRANCAIS
POLSKI
ESPAÑOL
FRANCAIS
DEUTSCH
ENGLISH
DANE TECHNICZNE:
78
OZNACZENIE MODELU:
CLSCAN60W
Rodzaj produktu:
LED Moving Light
Typ:
skaner
Spektrum kolorów:
8 kolorów + biały
Tarcze Gobo:
7 + otwarta
Liczba diod LED:
1
Typ diod LED:
60 W
Natężenie oświetlenia/1 metr:
26000 lx
Wejście DMX:
męskie, 3-stykowe, XLR
Wyjście DMX:
żeńskie, 3-stykowe, XLR
Tryb DMX:
10-kanałowy
Funkcje DMX:
Pan, Tilt, migawka, pryzmat, ogniskowanie, program,
ściemnianie, tarcza kolorów, tarcza Gobo
Funkcje Standalone:
Auto, Sound Control
Elementy obsługi:
Mode, Enter, Up, Down
Wyświetlacz:
4-znakowy wyświetlacz LED
Napięcie robocze:
230 V AC, 50 Hz
Pobór mocy:
90 W
Złącze zasilania:
gniazdo urządzenia IEC
Materiał obudowy:
metal
Kolor obudowy:
czarny
Chłodzenie:
wentylator
Wymiary (szer. x wys. x gł., bez pałąka):
205 x 150 x 475 mm
Waga:
4,4 kg
DEKLARACJE PRODUCENTA:
Niniejsza gwarancja dotyczy marek Adam Hall, LD Systems, Defender, Palmer i Cameo.
Obejmuje ona wszystkie marki znajdujące się w ofercie firmy Adam Hall.
Niniejsze oświadczenie gwarancyjne nie ogranicza ustawowych roszczeń wobec producenta wynikających z
rękojmi, lecz rozszerza je o dodatkowe roszczenia gwarancyjne wobec firmy Adam Hall.
Okres gwarancji rozpoczyna się od daty zakupu produktu, którą w razie wystąpienia przypadku objętego gwarancją
należy odpowiednio udokumentować (poprzez przedłożenie faktury lub dowodu dostawy z datą zakupu). Jeśli w
przypadku produktów wymienionych powyżej marek konieczna będzie naprawa w trakcie trwania okresu gwarancji, klient jest uprawniony do jej zlecenia w oparciu o niniejsze warunki.
POLSKI
Adam Hall nie udziela gwarancji na bezzakłóceniowe i/lub bezawaryjne działanie tego produktu. Adam Hall nie
ponosi także odpowiedzialności za szkody powstałe wskutek nieprzestrzegania instrukcji obsługi lub innych dokumentów załączonych do tego produktu firmy Adam Hall. Gwarancja producenta nie obejmuje – części zużywalnych
(np. akumulatory), – produktów, z których usunięto numer seryjny lub które zostały uszkodzone w wyniku wypadku,
– szkód wynikających z nieodpowiedniej eksploatacji, nieprawidłowej obsługi lub innych przyczyn zewnętrznych,
– szkód w urządzeniach, które były eksploatowane niezgodnie z ich parametrami roboczymi (parametry zgodne z
dokumentacją załączoną do produktu),
– szkód wynikających ze stosowania części zamiennych, które nie są produkowane, sprzedawane lub zalecane
przez firmę Adam Hall,
– szkód wynikających z ingerencji osób trzecich/modyfikacji lub napraw, które nie zostały przeprowadzone przez
firmę Adam Hall.
Niniejsze postanowienia i warunki stanowią kompletną i wyłączną umowę gwarancyjną między klientem a firmą
Adam Hall dotyczącą zakupionego przez klienta produktu Adam Hall.
ESPAÑOL
Jeśli nastąpi bardzo mało prawdopodobna sytuacja wielokrotnego występowania wady w nabytym przez klienta
produkcie, firma Adam Hall ma prawo, według własnego uznania, zastąpić wadliwy produkt, pod warunkiem, że
nowy produkt będzie co najmniej równoważny z wymienianym produktem pod względem specyfikacji technicznej.
FRANCAIS
W trakcie trwania okresu gwarancji firma Adam Hall naprawi lub wymieni wadliwe elementy lub produkty. W
przypadku naprawy lub wymiany w trakcie trwania okresu gwarancji wymienione części oryginalne lub produkty
stają się własnością firmy Adam Hall.
DEUTSCH
FRANCAIS
Adam Hall gwarantuje, że w okresie od dwóch do pięciu lat (w zależności od produktu) od daty zakupu dany produkt Adam Hall, który został zakupiony bezpośrednio od firmy Adam Hall lub od autoryzowanego sprzedawcy, pod
warunkiem zgodnego z przeznaczeniem użytkowania jest wolny od wad materiałowych i produkcyjnych.
FRANCAIS
ENGLISH
GWARANCJA PRODUCENTA
ITALIANO
79
FRANCAIS
ITALIANO
FRANCAIS
POLSKI
ESPAÑOL
FRANCAIS
DEUTSCH
ENGLISH
DEKLARACJE PRODUCENTA:
80
OGRANICZENIE ODPOWIEDZIALNOŚCI
Jeśli w produktach sprzętowych firmy Adam Hall w trakcie trwania okresu gwarancji wystąpią szkody
materiałowe lub technologiczne (zgodnie z powyższym oświadczeniem gwarancyjnym), jedyne i wyłączne
prawo klienta wynikające z niniejszej gwarancji dotyczy naprawy lub wymiany urządzenia. Maksymalna
odpowiedzialność firmy Adam Hall jest zgodnie z niniejszą gwarancją wyraźnie ograniczona do ceny kupna lub
kosztów naprawy lub wymiany (w zależności od tego, która z tych kwot będzie niższa) elementów uszkodzonych
podczas normalnego użytkowania.
Adam Hall nie ponosi odpowiedzialności za żadne szkody spowodowane przez produkt lub jego nieprawidłowe
działanie, włącznie z utraconym zyskiem i niepowstałymi oszczędnościami oraz szkodami szczególnymi,
pośrednimi i wynikowymi. Ponadto Adam Hall nie ponosi odpowiedzialności za roszczenia prawne osób trzecich
ani roszczenia zgłoszone przez klienta w imieniu osób trzecich.
Niniejsze ograniczenie odpowiedzialności obowiązuje niezależnie od tego, czy szkody są dochodzone na drodze
sądowej lub czy roszczenia odszkodowawcze wnoszone są w ramach niniejszej gwarancji w wyniku niedozwolonych działań (włącznie z niedbalstwem i odpowiedzialnością z tytułu zagrożenia) lub w wyniku roszczeń
umownych lub innych. Nie może ono zostać także przez nikogo zniesione ani zmienione. Niniejsze ograniczenie
odpowiedzialności obowiązuje także wówczas, gdy klient poinformuje firmę Adam Hall lub autoryzowanego
przedstawiciela firmy Adam Hall o możliwości wystąpienia takich szkód, nie obowiązuje natomiast w przypadku
roszczeń odszkodowawczych związanych ze szkodami na osobie.
Niniejsza gwarancja producenta przyznaje klientowi określone prawa. W zależności od jurysdykcji (państwo lub
kraj związkowy) klientowi może przysługiwać prawo zgłoszenia dalszych roszczeń. W takich przypadkach zaleca
się zastosowanie odpowiednich przepisów umożliwiających skorzystanie z pełni przysługujących danej osobie
praw.
SKORZYSTANIE Z GWARANCJI
W razie wystąpienia przypadku objętego gwarancją należy zwrócić się bezpośrednio do firmy Adam Hall lub do
autoryzowanego sprzedawcy, u którego produkt został zakupiony.
DEKLARACJA ZGODNOŚCI WE
Sprzedawane przez firmę Adam Hall urządzenia są zgodne z podstawowymi wymogami i pozostałymi
obowiązującymi specyfikacjami określonymi dyrektywami 1999/5/WE (R&TTE), 2004/108/WE (EMC) i 2006/95/
WE (LVD) (o ile mają zastosowanie). Dalsze informacje dostępne są na stronie www.adamhall.com.
DEKLARACJE PRODUCENTA:
(dotyczy Unii Europejskiej i innych krajów europejskich, w których stosuje się segregację odpadów)
Klienci prywatni otrzymują informacje w zakresie przyjaznych dla środowiska możliwości usuwania odpadów od
sprzedawcy, u którego produkt został zakupiony, lub w odpowiednich placówkach regionalnych.
Użytkownicy będący przedsiębiorcami proszeni są o kontakt ze swoimi dostawcami i ewentualne sprawdzenie
uzgodnionych umownie warunków utylizacji urządzeń. Niniejszy produkt nie może być utylizowany razem z
innymi odpadami przemysłowymi.
Oszczędzanie energii stanowi aktywny wkład w ochronę środowiska. Należy wyłączać wszystkie nieużywane
urządzenia elektryczne. Aby zapobiec zużywaniu prądu przez nieużywane urządzenia znajdujące się w trybie
czuwania (standby), należy wyjąć wtyczkę z gniazda sieciowego.
FRANCAIS
OCHRONA ŚRODOWISKA I OSZCZĘDZANIE ENERGII
DEUTSCH
FRANCAIS
Niniejszy symbol na produkcie lub związanych z nim dokumentach wskazuje, iż po zakończeniu okresu
użytkowania urządzenie nie może być utylizowane razem ze standardowymi odpadami domowymi, ponieważ
mogłoby to spowodować szkody w środowisku lub szkody na osobie powstałe w wyniku niekontrolowanego
usuwania odpadów. Niniejszy produkt należy utylizować oddzielnie od innych odpadów i przekazać do punktu
recyklingu w celu wspierania ruchu okrężnego w gospodarce w ramach idei zrównoważonego rozwoju.
FRANCAIS
ENGLISH
PRAWIDŁOWA UTYLIZACJA NINIEJSZEGO PRODUKTU
ESPAÑOL
POLSKI
ITALIANO
Adam Hall GmbH, wszystkie prawa zastrzeżone. Dane techniczne i funkcjonalne produktu mogą podlegać
modyfikacjom. Kopiowanie, tłumaczenie i pozostałe formy reprodukcji fragmentów lub całości tej instrukcji
obsługi są zabronione.
81
ENGLISH
DEUTSCH
La ringraziamo per aver scelto un prodotto Cameo Light!
FRANCAIS
ITALIANO
FRANCAIS
POLSKI
ESPAÑOL
FRANCAIS
Questo prodotto è stato progettato per garantire un funzionamento affidabile per molti anni.
82
La invitiamo a dedicare un po' del suo tempo per leggere con attenzione le presenti istruzioni affinché possa
sfruttare al meglio e rapidamente il suo nuovo prodotto Cameo Light.
Per maggiori informazioni su Cameo Light visiti il sito WWW.CAMEOLIGHT.COM
FRANCAIS
ENGLISH
SCANNER A LED PER
GOBO 60W
DEUTSCH
FRANCAIS
CLSCAN60W
FRANCAIS
ESPAÑOL
POLSKI
ITALIANO
83
FRANCAIS
ITALIANO
FRANCAIS
POLSKI
ESPAÑOL
FRANCAIS
DEUTSCH
ENGLISH
MISURE PRECAUZIONALI:
84
1. Leggere attentamente il presente manuale di istruzioni.
2. Conservare tutte le indicazioni e le istruzioni in un luogo sicuro.
3. Seguire le istruzioni.
4. Rispettare tutte le avvertenze. Non rimuovere dal dispositivo le indicazioni sulla sicurezza o altre informazioni.
5. Utilizzare il dispositivo solo nei modi previsti dal manuale.
6. Utilizzare esclusivamente stativi e fissaggi stabili e adatti (per installazioni fisse). Verificare che i supporti a parete
siano installati e fissati a regola d‘arte. Verificare che il dispositivo sia installato in modo stabile e non possa cadere.
7. Durante l‘installazione, osservare le normative sulla sicurezza in vigore nel proprio Paese.
8. Non installare né azionare il dispositivo in prossimità di radiatori, accumulatori termici, stufe o altre fonti di calore. Accertarsi che il dispositivo sia sempre installato in modo che venga raffreddato a sufficienza e non possa surriscaldarsi.
9. Non appoggiare sul dispositivo fonti di combustione, quali candele accese.
10. Le fessure di areazione non devono essere bloccate.
11. Non attivare il dispositivo nelle immediate vicinanze di acqua (questo punto non interessa i dispositivi specifici per l‘esterno, per i quali valgono le speciali indicazioni riportate di seguito). Non portare mai il dispositivo a
contatto con materiali, liquidi o gas infiammabili.
12. Accertarsi che all‘interno del dispositivo non possa penetrare acqua per gocciolamento o spruzzo. Non collocare sul dispositivo oggetti contenenti liquidi, quali vasi, tazze o bicchieri.
13. Assicurarsi che non sia possibile la caduta di oggetti nel dispositivo.
14. Azionare il dispositivo esclusivamente con gli accessori appositamente consigliati e previsti dal produttore.
15. Non aprire né modificare il dispositivo.
16. Una volta collegato il dispositivo, verificare tutti i cavi per evitare danni o incidenti, ad esempio per inciampo.
17. Durante il trasporto, assicurarsi che il dispositivo non possa cadere e causare possibili danni a cose e/o persone.
18. Se il dispositivo non funzionasse più correttamente, vi fosse caduto sopra del liquido o un oggetto o fosse
stato danneggiato in altro modo, spegnerlo immediatamente e staccare la spina (se si tratta di un dispositivo
attivo). La riparazione del dispositivo deve essere affidata esclusivamente a personale qualificato autorizzato.
19. Per la pulizia del dispositivo utilizzare un panno pulito.
20. Rispettare le leggi sullo smaltimento in vigore nel Paese di installazione. Al momento di smaltire l‘imballo,
separare la plastica dalla carta e dal cartone.
21. I sacchetti di plastica devono essere tenuti lontani dalla portata dei bambini.
DISPOSITIVI CON ALLACCIAMENTO DI RETE:
22. ATTENZIONE: se il cavo di rete è dotato di contatto di protezione, deve essere collegato a una presa di rete
con messa a terra. Non disattivare mai la connessione di messa a terra di un cavo di rete.
23. Non accendere il dispositivo subito dopo essere stato sottoposto a forti variazioni di temperatura (ad esempio
dopo il trasporto). Umidità e condensa potrebbero danneggiare il dispositivo. Accendere il dispositivo solo dopo
che ha raggiunto la temperatura ambiente.
24. Prima di collegare il dispositivo alla presa, controllare innanzitutto se la tensione e la frequenza della rete
elettrica coincidono con i valori indicati sul dispositivo stesso. Nel caso di dispositivo munito di selettore di
tensione, collegarlo alla presa unicamente se i valori del dispositivo coincidono con quelli della rete elettrica. Se il
cavo di rete o l‘adattatore di rete forniti in dotazione non sono compatibili con la presa, rivolgersi a un elettricista.
25. Non calpestare il cavo di rete. Accertarsi che i cavi sotto tensione, in particolare della presa di rete o
dell‘adattatore di rete, non vengano pizzicati.
26. Durante il cablaggio del dispositivo, verificare sempre che il cavo di rete e l‘adattatore di rete siano costantemente accessibili. Staccare sempre il dispositivo dall‘alimentazione di rete quando non è utilizzato o durante la
pulizia. Per staccare dalla presa il cavo di rete e l‘adattatore di rete, tirare sempre dalla spina o dall‘adattatore e
non dal cavo. Non toccare mai il cavo di alimentazione e l’alimentatore con le mani umide.
SICUREZZA:
Il triangolo isoscele con il simbolo del fulmine indica la presenza nel dispositivo di tensioni non
isolate, “pericolose”, che possono provocare scosse dannose alla salute.
Il triangolo isoscele con punto esclamativo avverte di importanti
segnalazioni relative all’uso e alla manutenzione.
ESPAÑOL
ATTENZIONE! INDICAZIONI IMPORTANTI RELATIVE AI PRODOTTI DI ILLUMINAZIONE
1. Non guardare il fascio di luce da distanze inferiori a 40 cm.
2. Non guardare mai a lungo il fascio di luce da breve-media distanza.
3. Non guardare mai il fascio di luce con dispositivi ottici quali le lenti d’ingrandimento.
4. In alcuni casi, in persone sensibili gli effetti stroboscopici possono causare attacchi epilettici. Pertanto, le
persone affette da epilessia devono assolutamente evitare luoghi in cui vengono impiegati effetti stroboscopici.
FRANCAIS
ATTENZIONE:
non togliere mai il coperchio di protezione per evitare il pericolo di scosse elettriche. L’interno del dispositivo
non contiene parti che possono essere riparate o sottoposte a manutenzione da parte dell’utente. Le riparazioni
dovranno essere realizzate esclusivamente da tecnici qualificati.
DEUTSCH
FRANCAIS
CAUTION
RISK OF ELECTRIC SHOCK
DO NOT OPEN
FRANCAIS
ENGLISH
27. Evitare per quanto possibile di accendere e spegnere velocemente il dispositivo per non pregiudicarne la durata.
28. NOTA IMPORTANTE: Sostituire i fusibili esclusivamente con fusibili dello stesso tipo e valore. Se un fusibile
continua a saltare, rivolgersi a un centro di assistenza autorizzato.
29. Per staccare completamente il dispositivo dalla rete elettrica, rimuovere il cavo di rete o l‘adattatore di rete dalla presa.
30. Per staccare un dispositivo provvisto di presa Volex, è prima necessario sbloccare la relativa spina Volex del
dispositivo stesso. Tirando il cavo di rete, però, il dispositivo potrebbe spostarsi e cadere, provocando danni alle
persone o di altro genere. Prestare quindi la più scrupolosa attenzione durante la posa dei cavi.
31. In caso di pericolo di caduta di fulmine, o se il dispositivo rimane inutilizzato a lungo, staccare sempre il cavo
di rete e l‘adattatore di rete dalla presa.
POLSKI
ITALIANO
Il prodotto è stato sviluppato per un uso professionale nella tecnologia applicata a spettacoli e non è idoneo
all’impiego nell’illuminazione domestica.
85
FRANCAIS
ITALIANO
FRANCAIS
POLSKI
ESPAÑOL
FRANCAIS
DEUTSCH
ENGLISH
INTRODUZIONE:
86
SCANNER A LED DA 60 W DMX
(CLSCAN60W)
FUNZIONI DI COMANDO
• Controllo DMX a 10 canali
• Controllo tramite musica
Modalità automatica
CARATTERISTICHE
• 1 LED da 60 W
• Ruota di colori a 8 colori più il bianco
• Disco gobo con 7 diversi gobo
• Messa a fuoco DMX
• Prisma DMX
• Funzionalità master/slave
• Resistente alloggiamento in metallo
• Potenza assorbita: 90W
• LED di lunga durata
• Staffa di supporto
UTILIZZO
Lo scanner a LED Cameo è un proiettore per effetti a LED controllabile con DMX512 che si distingue per il suo
LED da 60 W ad alta efficienza. Grazie al fatto che la ruota di colori e la ruota gobo si possono attivare in maniera
indipendente l'una dall'altra, è possibile ottenere una molteplicità di effetti luce.
Lo scanner a LED Cameo può essere messo in funzione sia singolarmente sia in modalità master/slave e tramite
protocollo DMX512.
CONNESSIONI E PANNELLO DI COMANDO:
FRANCAIS
ENGLISH
1
NOTA IMPORTANTE: sostituire il fusibile solo con un fusibile dello stesso tipo e con gli stessi valori. Se il
fusibile continua a saltare, rivolgersi a un centro di assistenza autorizzato.
DEUTSCH
FRANCAIS
1 Presa di corrente IEC con portafusibili
FRANCAIS
4
3
Presa di ingresso XLR a 3 poli per collegare un apparecchio di controllo DMX (quale un mixer DMX).
3 DMX OUT
POLSKI
2 DMX IN
ESPAÑOL
2
Presa di uscita XLR a 3 poli per inoltrare il segnale di controllo DMX.
4 OCCHIELLO DI FISSAGGIO
ITALIANO
Anello in metallo per il fissaggio di un cavo di sicurezza.
87
ENGLISH
CONNESSIONI E PANNELLO DI COMANDO:
DEUTSCH
5
FRANCAIS
6
5 DISPLAY LED
FRANCAIS
ITALIANO
FRANCAIS
POLSKI
ESPAÑOL
Indica le modalità di funzionamento e altre impostazioni di sistema.
88
6 TASTI DI COMANDO
I 4 tasti di comando di facile accesso permettono di modificare le impostazioni di sistema.
UTILIZZO:
ESPAÑOL
POLSKI
ITALIANO
SENSIBILITÀ DEL MICROFONO
Premere MODE e con i tasti UP e DOWN selezionare la voce di menu per
impostare la sensibilità del microfono (sul display appare "MIC"). Premere
ENTER e con i tasti UP e DOWN selezionare la sensibilità desiderata (da
M-00 a M-99).
Confermare con ENTER.
FRANCAIS
CONTROLLO TRAMITE MUSICA
Premere MODE e con i tasti UP e DOWN selezionare la modalità di controllo
tramite musica (sul display appare "SOUN"). Ora premere ENTER e selezionare
la modalità master (MAST) con il tasto UP e la modalità standalone (ALON) con
il tasto DOWN, quindi confermare con ENTER. Nel display ora compare
"SO-M", indicante la modalità master, o "SO-A" per la modalità standalone.
In modalità master, sull'unità master si possono utilizzare altri scanner dello
stesso tipo come unità slave. Selezionare la modalità DMX per l'unità slave
e impostare l'indirizzo di avvio DMX su 001. Con un cavo DMX, collegare le
unità slave con l'unità master (unità master DMX OUT - unità slave DMX IN).
Ora l'unità slave segue l'unità master.
Nella modalità standalone, lo scanner funziona indipendentemente da altre
unità collegate.
DEUTSCH
FRANCAIS
IMPOSTAZIONE DELL'INDIRIZZO DI AVVIO DMX
Premere MODE e con i tasti UP e DOWN selezionare la modalità indirizzi di
avvio DMX (sul display appare "ADDR"). Ora premere ENTER e con i tasti UP/
DOWN selezionare l'indirizzo di avvio DMX desiderato (A001-A512).
Confermare con ENTER.
FRANCAIS
ENGLISH
MESSA IN FUNZIONE
Dopo il collegamento dello scanner a LED Cameo alla rete elettrica, inizia il
processo di reset dei motori. Dopo circa 20 secondi, i motori sono regolati e
il dispositivo è operativo.
Mettere a fuoco la proiezione ruotando l'anello dell'obiettivo.
In modalità DMX, il fuoco può essere regolato anche come DMX a 6 canali.
89
MODALITÀ AUTOMATICA
Premere MODE e con i tasti UP e DOWN selezionare la modalità automatica
(sul display appare "AUTO"). Ora premere ENTER e selezionare la modalità
master (MAST) con il tasto UP e la modalità standalone (ALON) con il tasto
DOWN, quindi confermare con ENTER. Sul display ora compare "AU-M",
indicante la modalità master, o "AU-A" per la modalità standalone.
In modalità master, sull'unità master si possono utilizzare altri scanner dello
stesso tipo come unità slave. Per l'unità slave selezionare la modalità DMX
e impostare su 001 l'indirizzo di avvio DMX. Con un cavo DMX, collegare
l'unità slave all'unità master (unità master DMX OUT - unità slave DMX IN).
Ora l'unità slave segue l'unità master.
Nella modalità standalone, lo scanner funziona indipendentemente da altre
unità collegate.
FRANCAIS
ITALIANO
FRANCAIS
POLSKI
ESPAÑOL
FRANCAIS
DEUTSCH
ENGLISH
UTILIZZO:
90
REVERSE PAN
Questa funzione consente di invertire il movimento PAN.
Premere MODE e con i tasti UP e DOWN selezionare la funzione Reverse Pan
(sul display appare "rPAN"). Ora premere ENTER quindi selezionare Reverse
On (ON) con il tasto UP e Reverse Off (OFF) con il tasto DOWN.
Confermare con ENTER.
REVERSE TILT
Questa funzione consente di invertire il movimento TILT.
Premere MODE e con i tasti UP e DOWN selezionare la funzione Reverse Tilt
(sul display appare "rtIL"). Ora premere ENTER quindi selezionare Reverse
On (ON) con il tasto UP e Reverse Off (OFF) con il tasto DOWN.
Confermare con ENTER.
POLSKI
ITALIANO
NOTA
Se non viene premuto nessuno dei 4 tasti, il display LED si spegne
automaticamente dopo circa 70 secondi. Non appena viene premuto uno dei
quattro tasti, il display si riaccende.
ESPAÑOL
IMPOSTAZIONI DI FABBRICA
Questa funzione ripristina le impostazioni di fabbrica del dispositivo.
Premere MODE e con i tasti UP e DOWN selezionare "LOAd". Ora premere
il pulsante ENTER. Tutte le impostazioni (sensibilità del microfono, Reverse
Display...) ora sono ripristinate sulle impostazioni di fabbrica. Il dispositivo è
di nuovo immediatamente operativo.
FRANCAIS
RESET
Con questa funzione si avvia il processo di reset dei motori.
Premere MODE e con i tasti UP e DOWN selezionare la funzione di reset (sul
display appare "rESt"). Ora premere il pulsante ENTER. Il processo di reset
ha inizio e dopo circa 20 secondi, i motori sono regolati e il dispositivo è operativo.
DEUTSCH
FRANCAIS
VISUALIZZAZIONE DEL TEMPO OPERATIVO (FIXTURE TIME)
Questa funzione consente di leggere le ore di funzionamento del dispositivo.
Premere MODE e con i tasti UP e DOWN selezionare la visualizzazione del
tempo operativo (sul display appare "Fltl"). Ora premere il pulsante ENTER.
Sul display viene visualizzato il numero di ore di funzionamento del dispositivo.
FRANCAIS
ENGLISH
REVERSE DISPLAY
Questa funzione consente di ruotare di 180° i caratteri sul display. Premere
MODE e con i tasti UP e DOWN selezionare la funzione Reverse Display (sul
display appare "rdIS"). Ora premere ENTER quindi selezionare Reverse On
(ON) con il tasto UP e Reverse Off (OFF) con il tasto DOWN.
Confermare con ENTER.
91
MODALITÀ 10 CANALI
CANALE
000 - 255
Movimento Pan 180°
CH2
Tilt
000 - 255
Movimento Tilt 90°
000 - 013
Bianco
014 - 027
Giallo
028 - 041
Magenta
042 - 055
Verde
FRANCAIS
Ruota dei
colori
ESPAÑOL
FRANCAIS
POLSKI
FRANCAIS
ITALIANO
FUNZIONE
Pan
CH3
92
VALORE
CH1
DEUTSCH
ENGLISH
CONTROLLO DMX:
CH4
Ruota
gobo
056 - 069
Viola
070 - 083
Ciano
084 - 097
Verde chiaro
098 - 111
Verde chiaro
112 - 127
Rosso scuro
128 - 190
Arcobaleno, rotazione a sinistra (regolabile veloce-lento)
191 - 255
Arcobaleno, rotazione a destra (regolabile lento-veloce)
000 - 009
Libero
010 - 019
Gobo 1
020 - 029
Gobo 2
030 - 039
Gobo 3
040 - 049
Gobo 4
050 - 059
Gobo 5
060 - 069
Gobo 6
070 - 079
Gobo 7
080 - 099
Gobo 1 shake, (regolabile)
100 - 119
Gobo 2 shake, (regolabile)
120 - 139
Gobo 3 shake, (regolabile)
140 - 159
Gobo 4 shake, (regolabile)
160 - 179
Gobo 5 shake, (regolabile)
180 - 199
Gobo 6 shake, (regolabile)
200 - 219
Gobo 7 shake, (regolabile)
220 - 255
Rotazione della ruota gobo (velocità regolabile)
CONTROLLO DMX:
CANALE
CH5
CH7
Messa a
fuoco
Otturatore
Dimmer
CH9
Prisma
Rotazione gobo manuale
128 - 191
Rotazione gobo a destra (regolabile veloce-lento)
192 - 195
nessuna funzione
196 - 255
Rotazione gobo a sinistra (regolabile lento-veloce)
000 - 255
Messa a fuoco
000 - 009
Chiuso
010 - 019
Aperto
020 - 127
Effetto stroboscopico 1 (regolabile lento-veloce)
128 - 137
Aperto
138 - 201
Effetto stroboscopico 2 (regolabile lento-veloce)
202 - 255
Aperto
000 - 255
Dimmer 0 - 100%
000 - 003
Aperto
004 - 127
Prisma
128 - 255
Rotazione prisma (regolabile veloce-lento)
Reset del motore della ruota colori e del motore della ruota gobo
080 - 099
Reset di tutti i motori
100 - 119
Programma 1
120 - 139
Programma 2
140 - 159
Programma 3
160 - 179
Programma 4
180 - 199
Programma 5
200 - 219
Programma 6
220 - 239
Programma 7
240 - 255
Programma 8
ITALIANO
Nessuna funzione
060 - 079
POLSKI
000 - 059
ESPAÑOL
CH10
Funzione/
programma
000 - 127
FRANCAIS
CH8
FUNZIONE
DEUTSCH
FRANCAIS
CH6
Rotazione
gobo
VALORE
FRANCAIS
ENGLISH
MODALITÀ A 10 CANALI
93
FRANCAIS
ITALIANO
FRANCAIS
POLSKI
ESPAÑOL
FRANCAIS
DEUTSCH
ENGLISH
DATI TECNICI:
94
NOME DEL MODELLO:
CLSCAN60W
Tipo di prodotto:
Testa mobile LED
Tipo:
Scanner
Spettro cromatico:
8 colori + bianco
Gobo:
7 + libero
Numero LED:
1
Tipo LED:
60 W
Potenza di illuminazione a un metro:
26.000 lx
Ingresso DMX:
XLR maschio a tre poli
Uscita DMX:
XLR femmina a tre poli
Modalità DMX:
A 10 canali
Funzioni DMX:
Pan, tilt, otturatore, Prisma, messa a fuoco, programma,
dimmer, ruota di colori, ruota gobo
Funzioni standalone:
Automatico, controllo del suono
Dispositivi di comando:
Mode, Enter, UP/DOWN
Indicatori:
Display LED a 4 digiti
Tensione di esercizio:
230 V AC, 50 Hz
Potenza assorbita:
90 W
Collegamento alimentazione elettrica:
Presa di corrente IEC
Materiale cassa:
Metallo
Colore alloggiamento:
Nero
Raffreddamento:
Ventola
Dimensioni (L x H x P, senza staffa):
205 x 150 x 475 mm
Peso:
4,4 kg
DICHIARAZIONI DEL PRODUTTORE:
La presente garanzia copre i marchi Adam Hall, LD Systems, Defender, Palmer e Cameo.
Essa è valida per tutti i prodotti distribuiti da Adam Hall.
La presente dichiarazione di garanzia non influisce sui diritti legali di garanzia verso il produttore, bensì li estende
con ulteriori diritti di garanzia nei confronti della ditta Adam Hall.
Il periodo di garanzia ha inizio dalla data di acquisto, che, nei casi contemplati dalla garanzia, deve essere adeguatamente documentata presentando la fattura o la bolla di consegna su cui è riportata la data di acquisto.
Laddove prodotti delle marche summenzionate necessitassero di interventi di riparazione nel periodo di garanzia,
l‘acquirente ha diritto a usufruire del servizio alle condizioni indicate nel presente documento.
POLSKI
Adam Hall non garantisce che il prodotto sia perfettamente funzionante e/o non presenti guasti. Adam Hall esclude
inoltre qualsiasi responsabilità per danni derivanti dall‘inosservanza del manuale d‘uso accluso al prodotto e di
altra documentazione. La garanzia del produttore non copre: - Parti soggette a usura (come le batterie) - Prodotti
da cui sia stato rimosso il numero di serie o che siano stati danneggiati a causa di un incidente - Danni causati da
uso improprio, uso errato o altri motivi esterni
- Danni ad apparecchi che non siano stati impiegati secondo i parametri di funzionamento (indicati nella documentazione fornita in dotazione)
- Danni derivanti dall‘utilizzo di ricambi non prodotti, distribuiti o consigliati da Adam Hall
- Danni derivanti da interventi o modifiche di terzi o da riparazioni non effettuate da Adam Hall.
Le presenti disposizioni e condizioni costituiscono l‘accordo di garanzia completo ed esclusivo tra l‘Acquirente e
Adam Hall per il prodotto Adam Hall acquistato.
ESPAÑOL
Nell‘improbabile caso in cui il prodotto acquistato presentasse ripetuti malfunzionamenti, Adam Hall si riserva il
diritto di sostituire, a propria discrezione, il prodotto difettoso con un altro prodotto, a condizione che le caratteristiche tecniche del nuovo prodotto siano almeno equivalenti a quelle del prodotto sostituito.
FRANCAIS
Nel periodo di garanzia, Adam Hall si fa carico della riparazione o della sostituzione dei componenti o degli apparecchi difettosi. In caso di riparazione o sostituzione nel periodo di garanzia, i prodotti o le parti originali sostituiti
passano in proprietà della ditta Adam Hall.
DEUTSCH
FRANCAIS
Adam Hall garantisce, per un periodo di due o cinque anni (chiedere informazioni per il prodotto specifico) dalla
data di acquisto, che questo prodotto Adam Hall, acquistato direttamente presso Adam Hall o attraverso un rivenditore autorizzato, laddove utilizzato correttamente, è privo di difetti di materiale e di fabbricazione.
FRANCAIS
ENGLISH
GARANZIA DEL PRODUTTORE
ITALIANO
95
FRANCAIS
ITALIANO
FRANCAIS
POLSKI
ESPAÑOL
FRANCAIS
DEUTSCH
ENGLISH
DICHIARAZIONI DEL PRODUTTORE:
96
LIMITAZIONE DI RESPONSABILITÀ
Laddove nei prodotti hardware Adam Hall insorgessero difetti di materiale o di fabbricazione (in conformità con
la dichiarazione di garanzia di cui sopra) durante il periodo di garanzia, il Cliente usufruirebbe, come unico ed
esclusivo diritto previsto dalla presente garanzia, della riparazione o sostituzione dell‘apparecchio. La massima responsabilità di Adam Hall è limitata, come espressamente indicato nella presente garanzia, al prezzo
d‘acquisto o ai costi di riparazione o sostituzione (optando per l‘importo minore) dei componenti che risultano
difettosi nonostante siano stati correttamente utilizzati.
Adam Hall non è responsabile di alcun danno provocato dal prodotto o dal suo malfunzionamento, ivi compresi
mancati guadagni, perdite e danni speciali indiretti o conseguenti. Adam Hall inoltre non è responsabile verso
reclami presentati da terzi né verso richieste avanzate dal cliente a nome di terzi.
La presente limitazione di responsabilità vale indipendentemente dal fatto che i danni siano oggetto di procedimenti giudiziari o che le richieste di risarcimento danni siano presentate ai sensi della presente garanzia o per
atti illeciti (incluse negligenza e responsabilità oggettiva) o per pretese contrattuali o di altra natura, e non può
essere né annullata né modificata da nessuno. La presente limitazione di responsabilità è valida anche nel caso
in cui l‘utente abbia avvisato Adam Hall o un rappresentante autorizzato circa la possibilità di tali danni. Tale
limitazione non è però valevole in caso di richieste per risarcimento danni in relazione a danni a persone.
La garanzia del produttore accorda all‘Acquirente determinati diritti; possono tuttavia competere ulteriori diritti in
funzione della giurisdizione di pertinenza (stato o regione). Si consiglia quindi di consultare le leggi applicabili per
determinare in modo esaustivo i propri diritti.
RICORSO ALLA GARANZIA
Per usufruire della garanzia, rivolgersi direttamente ad Adam Hall o al rivenditore autorizzato Adam Hall, presso il
quale è stato acquistato il prodotto.
DICHIARAZIONE DI CONFORMITÀ CE
I dispositivi distribuiti da Adam Hall ottemperano (ove del caso) ai requisiti essenziali e ad altre specifiche rilevanti delle direttive 1999/5/CE (R&TTE - Apparecchiature radio e apparecchiature terminali di telecomunicazione),
2004/108/CE (EMC - Compatibilità elettromagnetica) e 2006/95/CE (LVD - Materiale elettrico a bassa tensione).
Per ulteriori informazioni, consultare il sito www.adamhall.com.
DICHIARAZIONI DEL PRODUTTORE:
(In vigore nell‘Unione Europea e in altri paesi europei in cui si attui la raccolta differenziata)
I clienti privati possono richiedere informazioni sulle possibilità di smaltimento ecosostenibile al rivenditore
presso il quale è stato acquistato il prodotto o presso le autorità regionali competenti.
I clienti aziendali devono invece contattare il proprio fornitore e controllare le eventuali condizioni contrattuali
inerenti allo smaltimento degli apparecchi. Questo prodotto non deve essere smaltito assieme ad altri rifiuti
industriali.
Il risparmio energetico contribuisce attivamente alla protezione ambientale. Spegnere tutti i dispositivi elettrici
non utilizzati. Staccare la spina dei dispositivi non utilizzati per evitare che consumino corrente in modalità
stand-by.
FRANCAIS
PROTEZIONE DELL'AMBIENTE E RISPARMIO ENERGETICO
DEUTSCH
FRANCAIS
Questo simbolo apposto sul prodotto o sui relativi documenti indica che, per evitare danni all‘ambiente e alle
persone causati da uno smaltimento incontrollato dei rifiuti, alla fine del suo ciclo di vita l‘apparecchio non deve
essere smaltito insieme ai normali rifiuti domestici. Il prodotto deve quindi essere smaltito separatamente da altri
rifiuti e riciclato nell‘ottica dell‘incentivazione di cicli economici sostenibili.
FRANCAIS
ENGLISH
CORRETTO SMALTIMENTO DEL PRODOTTO
ESPAÑOL
POLSKI
ITALIANO
Adam Hall GmbH, tutti i diritti riservati. I dati tecnici e le caratteristiche del prodotto possono essere soggetti a
modifiche. È vietata la copia, la traduzione e qualsiasi altra riproduzione delle presenti istruzioni d‘uso o di parte
di esse senza previa autorizzazione.
97
98
99
WWW.CAMEOLIGHT.COM
Adam Hall GmbH | Daimlerstrasse 9 | 61267 Neu-Anspach | Germany
Tel. +49(0)6081/9419-0 | Fax +49(0)6081/9419-1000
web : www.adamhall.com | e-mail : [email protected]
100