1
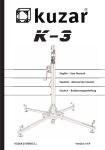
English - User Manual
Español - Manual de Usuario
Deutch - Bedienungsanleitung
KUZAR SYSTEMS S.L.
Version.14/9
125 kg (275.6lb)
3.8 m (12.5’)
KUZAR SYSTEMS S.L.
C/ Ciudad de Ferrol Nº8
Pol.Ind. Fuente del Jarro
46988 Paterna - Valencia (Spain)
Made in Spain (EU)
Manual de usuario propiedad de KUZAR SYSTEMS S.L. Deposito legal y copyright 2014.
Todos los derechos reservados.
K-1
2
1301
A
Tramo 3 / Section 3
1302
Tramo 2 / Section 2
4001
Cabrestante / Winch
1303
Tramo 1 Base / Section 1
B
1001
7001
2104
Tapón tirante/
Strap cap
Tornillo / Screw
Tuerca / Nut
C
2103
1201
Tirante/ Strap
Pata / Leg
2102
Tapón pata/
Leg cap
3
A
2110
1006
Contera / Bracket
Tornillo / Screw
A.1
A.1
1012
Tornillo / Screw
2182
Gatillo / Lock
A.1 - Despiece / Breakdown
1007
8002
1102
2002
1008
8003
7002
1007
8002
1007
8002
1103
4
B
2109
2105
Pomo soporte patas /
Leg support knob
Soporte patas /
Leg support
2101
Tapón superior pata/
Leg upper cap
2107
Gatillo / Lock
1001
Tornillo / Screw
7001
Tuerca / Nut
C
2106
Soporte fijo tirantes /
Fixed strap support
1002N
7001
Tornillo / Screw
Tuerca / Nut
C.1 - Reenvío inferior Tramo 2 (Ref.1302) / Lower pulleys set Section 2
2001
1101
3001
1005
1004
1010
1005
5
D
D.1
9001
Cable
1003
8001
7001
Tornillo / Screw
Arandela / Washer
Tuerca / Nut
4001
Cabrestante /
Winch
1006
Tornillo / Screw
D.1 - Despiece / Breakdown
2003
7002
8004
1009
2131
Prolongador /
Extension bar
8003
9001
Cable acero /
Steel cable
2111
Prisionero cable /
Cable clamp
6
LISTA DE REPUESTOS / SPARE PARTS LIST
Code/Código
1001
1002N
1003
1004
1005
1006
1007
1008
1009
1010
1012
1101
1102
1103
1201
1301
1302
1303
2001
2002
2003
2101
2102
2103
2104
2105
2106
2107
2109
2110
2111
2131
2182
3001
4001
7001
7002
8001
8002
8003
8004
9001
Description/Descripción
M8x55 hexagonal screw / Tornillo hexagonal M8x55
M8x25 hexagonal screw / Tornillo Hexagonal M8x25
Allen screw M8x16 / Tornillo allen M8x16
Conic allen screw M5x12 / Tornillo allen cónico M5x12
Conic screw M6x16 / Tornillo cónico M6x16
Allen screw M10x25/ Tornillo allen M10x25
Allen screw M6x20 / Tornillo allen M6x20
Special M10 screw / Tornillo especial M10
Hexagonal screw M10x40 / Tornillo hexagonal M10x40
Conic screw M4x35 / Tornillo cónico M4x35
Allen screw M6x10 / Tornillo allen M6x10
10mm axel plate / Pletina eje 10 mm
Pletina portapolea / Pulley support plate
K-1 threaded pulley cover plate / Pletina roscada portapoleas K-1
Leg K-1 / Pata K-1
Section 3 K-1 / Tramo 3 K-1
Section 2 K-1 / Tramo 2 K-1
Section 1 (Base) K-1 / Tramo 1 (Base) K-1
Pulley Ø 50 / Polea Ø 50
Pulley Ø 40 (Upper pulley support K-1) / Polea Ø 40 (Portapoleas superior K-1)
Pulley Ø 40 (Cable entry) / Polea Ø 40 (Entrada cable)
Upper leg tap / Tapón superior pata
Ground leg tap / Tapón pata suelo
Leg strap / Tirante patas
Strap tap / Tapón tirante
Sliding leg support / Soporte patas deslizante
Fixed strap support / Soporte fijo tirantes
Short lock for sliding leg bracket / Gatillo corto para soporte deslizante patas
Knob for sliding leg bracket / Pomo soporte deslizante patas
35x35 mm Bracket / Contera 35x35 mm
Cable clamp screw Ø4 mm / Prisionero cable Ø4 mm
Extension bar / Barra de extensión
KAT Lock K-1 / Gatillo KAT K-1
10x50 axel / Eje 10x50
450 kg winch / Cabrestante 450 Kg
Auto-block nut M8 / Tuerca autoblocante M8
Auto-block nut M8 / Tuerca autoblocante M8
Flat M8 washer / Arandela plana M8
M6 washer / Arandela M6
Flat M10 washer / Arandela plana M10
M12 washer / Arandela M12
Cable K-1 (Ø4 mm) / Cable K-1 (Ø4 mm)
7
Operating Instructions - ENGLISH
1 - INTRODUCTION.
Dear user. Thank you purchasing your Kuzar K-1 lifter. We hope you will be very satisfied
with it.
This manual has been written so that you can understand how to effectively use the lift
and most importantly, so that you can use it safely.
It is important that you fully read the manual and follow the instructions carefully before
using your lift. All Kuzar lifts undergo a very strict quality control process during their
manufacture. So that your lift always works properly please only purchase original Kuzar
parts from an authorized distributor or dealer. The user waives all warranty rights if using
parts other than Kuzar or if the product is manipulated in any way by an unauthorized
third party. When requesting parts, please refer to the diagrams in the back of this manual and quote the serial number and year of manufacture located on your lifter.
2.- TECHNICAL SPECIFICATIONS.
Kuzar lifter, model K-1 has been designed for vertically lifting lighting, trussing etc in the
Professional sound and light sector. For various Kuzar supports available please refer to
our website www.kuzar.es or catalogue.
2.1 - Max. load: 125 kg (275.6 lb).
2.2 - Min. load: 25 kg (55 lb).
2.3 - Max. height: 3.2 m (10,5’) (with extension bar 3.8m (12,5’))
2.4 - Folded. height: 1.26 m (4,1’)
2.5 - Work surface: 1.50 x 1.50 m (4,90’ x 4,90’)
2.6 - Weight: 21 kg (46 lb)
2.7- Winch: 450 kg certified.
2.8 - Cable: Steel DIN 3060. Tensile strength 180 kg/mm2. Anti-torsion & anti-corrosion
4 mm cable diameter.
2.9 - Construction material: Steel profiles EN 10305.
2.10 - Three-profile telescopic system operated by steel cable driven by pulleys with
metal protected bearing pads. Adaptor Ø35 mm.
2.11 - Antirust protection priming paint bathed black steel, covered with cured polyester
dust.
K-1
8
Operating Instructions - ENGLISH
3 - SAFETY GUIDELINE.
3.1.- Situate the tower on a solid and flat surface.
3.2.- Check that the support system is fixed by the security trigger and that the tower is
in a upright position.
3.3.- Check that the tower is locked in its working position with the safety lock.
3.4.- When used outdoors, place the tower on a hard surface and if necessary secure it
against excess wind force via cable braces.
3.5.- Do not use ladders nor lean them against the lifter.
3.6.- Be careful with any cables, prominent objects etc. placed above the tower.
3.7.- Do not stand underneath the load.
3.8.- Do not move the tower when it is elevated or loaded.
3.9.- Before using the tower, check the condition of the cable. This must be free of cuts
and frays. Never use damaged cables.
3.10.- Never dismount the winch handle or any element of the winch under any circumstance.
3.11.- Once the tower is set-up in its working position we recommended the winch handle
is locked to avoid anyone interfering with it.
3.12.- The minimum load for a safe operation of the brake is 25 kg. The brake will not
function without this minimum load.
3.13.- Do not grease or lubricate the brake mechanism of the winch.
3.14.- This lift cannot lift human beings.
3.15.- For transportation it is necessary to retract all profiles and lock them with the corresponding safety lock.
4.- OPERATION.
4.1.- Place the tower on a flat and solid surface where it is going to be used.
4.2.- Unlock the safety lock from the legs support system. Slide the support system
downwards until the lock has reached the required position.
4.3.- Attach the load to the tower using the desired support (the support varies upon the
application), and ensure it is only used to lift loads vertically. The minimum load is 25 kg.
4.4.- Elevation: Extend the tower by turning the winch handle clockwise, lifting the load
to the desired height.
K-1
9
Operating Instructions - ENGLISH
4.5.- Hold: Release the winch handle, it will remain in position by the action of the
winch’s automatic brake. Ensure the KAT lock has introduced in to the profile by turning
the handle slightly anti-clockwise.
4.6.- Continue elevating: Turn the winch handle again clockwise and lift the load until
the second profile is fully extended. Release the handle which will remain fixed by the
winch’s automatic brake and proceed to ensure that the KAT lock has introduced into the
second profile by turning the handle again anti-clockwise. The tower can be stopped in
any desired intermediate position. Simply release the winch handle and secure the tower
by inserting the corresponding KAT lock into the hole which is closest to the required
position.
4.7.- Descent: Descending the load follows the same procedure but in reverse. Firstly
unlock the KAT lock and turn the winch handle anti-clockwise, until the first profile is completely folded down. Now unlock the next KAT lock and retract the second profile. Just as
when lifting the load, the lift may be stopped at any intermediate position.
4.8.- Transport: When transporting / carrying the lift it is necessary to fold the tower by
retracting all the profiles completely. Then close the sliding support piece and fix it with
the safety lock and tightening the knob.
5.- MAINTENANCE.
5.1.- All cables must be checked regularly. Faulty cables must be replaced immediately.
Do not use the lifter with faulty cables as it is potentially very dangerous. Only use DIN
3060 cables, supplied from an authorised dealer.
5.2.- The lifter is delivered ex factory completely greased. Depending on its mechanical
use though, we recommend that the crown wheel of the winch, the pads & bushings of
the drive shaft, the handle thread and the profiles of the lift are periodically greased.
ATTENTION:
Do not apply oil or grease to the brake mechanism.
The brake discs have been pre-greased with a special heat and pressure resistant grease. To avoid malfunction to the winch brake, no other products must be used except the
original provided by the company. It is not necessary to grease the brake discs.
K-1
10
Operating Instructions - ENGLISH
5.3.- Your lifter should be inspected at least once a year by a specialized / authorized
service centre.
5.4.- Only original Kuzar spare parts must be used to guarantee the reliability and operational safety of your lifter. The user shall lose all warranty claims if he uses anything
other than original spare parts or modifies this product in any way.
5.5.- In case a spare part is required please indicate the reference number which can be
found in the spare parts list at the back of this manual.
6.- WARRANTY.
All Kuzar lifts come with 2 years warranty. This warranty period is from the date of purchase. Kuzar will repair any defect product caused by either faulty materials or poor
workmanship free of charge within this period as long as the parts are fitted by an authorized Kuzar dealer.
Should the product have been manipulated in any way or a repair attempted by an
unauthorized dealer the warranty will be invalid. This warranty does not cover damage
occurred by improper use.
7.- CERTIFICATIONS.
Kuzar reserves the right to make any modification/alteration to the lift without prior notice. Any modification/alteration would be an innovation, intended to improve the product.
K-1
11
Manual de instrucciones - ESPAÑOL
1.- INTRODUCCIÓN.
Estimado usuario. Gracias por la compra de su torre elevadora Kuzar K-1. Esperamos
quede satisfecho con ella.
Este manual ha sido escrito para que usted pueda entender cómo utilizar eficazmente la
torre y lo más importante, el modo para que pueda utilizarla con seguridad.
Es importante que lea el manual y siga las instrucciones cuidadosamente antes de usar
la torre. Todas las torres Kuzar son sometidas a un proceso de control de calidad muy
estricto durante su fabricación. Para que su torre elevadora funcione siempre correctamente por favor reemplazar únicamente con piezas originales Kuzar de un distribuidor
o concesionario autorizado. El usuario renuncia a todos los derechos de garantía si se
usan piezas que no sean Kuzar o si el producto es manipulado por un tercero no autorizado. Al solicitar piezas, por favor consulte los dibujos en la parte de atrás de este
manual así como el número de serie y año de fabricación ubicados en el elevador.
2.- ESPECIFICACIONES TÉCNICAS.
Torre elevadora Kuzar, modelo K-1 ha sido diseñada para elevar verticalmente iluminación y las estructuras, etc. para el sector del sonido e iluminación profesional. Existen
diversos soportes disponibles Kuzar, por favor consulte nuestro catálogo o página web:
www.kuzar.es.
2.1 - Max. carga: 125 kg (275.6 lb).
2.2 - Min. carga: 25 Kg (55 lb).
2.3 - Max. Altura: 3,2 m (10,5’) (con barra de extensión 3,8m (12,4’).
2.4 - Altura plegada: 1,26 m (4,1’).
2.5 - Superficie de trabajo: 1,50 x 1,50 m (4,90’ x 4,90’).
2.6 - Peso: 21 Kg (46 lb).
2.7 - Cabrestante: 450 kg certificado.
2.8 - Cable: Acero DIN 3060. Resistencia a la tracción 180 kg/mm2. Anti-torsión y anticorrosión de Ø4 mm.
2.9 - Material de construcción: Perfiles de acero EN 10305.
2.10 - Tres perfiles de sistema telescópico operados por cable de acero guiado por poleas. Adaptador Ø35 mm.
2.11 - Acero con pintura de imprimación negra y protección anti-óxido, cubiertos de
polvo de poliéster al horno.
K-1
12
Manual de instrucciones - ESPAÑOL
3 - GUÍA PARA USO SEGURO.
3.1.- Poner la torre sobre una superficie sólida y plana.
3.2.- Comprobar que el sistema de apoyo queda fijado por el gatillo de seguridad y que
la torre está en posición vertical.
3.3.- Comprobar que la torre se bloquea en su posición de trabajo con el bloqueo de
seguridad.
3.4. - Cuando se usa al aire libre, colocar la torre en una superficie sólida y si es necesario asegurarla contra la fuerza excesiva del viento por medio de tirantes de cable.
3.5 .- No utilice escaleras ni las apoye en la torre.
3.6.- Tenga cuidado con los cables, los objetos prominentes etc. situados por encima
de la torre.
3.7.- No permanezca debajo de la carga.
3.8.- No mover la torre si está elevada o con carga.
3.9 -. Antes de utilizar la torre, verificar el estado del cable. Éste debe estar libre de cortes y desgastes. No utilice nunca cables dañados.
3.10.- Nunca desmontar la palanca del cabrestante o cualquier elemento del cabrestante bajo ninguna circunstancia.
3.11.- Una vez que la torre está puesta a punto en su posición de trabajo es recomendable que la palanca del cabrestante quede bloqueada para evitar cualquier interferencia
con la misma.
3.12.- La carga mínima para un funcionamiento seguro del freno es 25 kg. El freno no
funcionará sin esta carga mínima.
3.13.- No engrasar ni lubricar el mecanismo de freno del cabrestante.
3.14 -. Este elevador no puede utilizarse para elevar personas.
3.15 -. Para el transporte hay que bajar todos los tramos y bloquearlos con el bloqueo
de seguridad correspondiente.
4 - MODO DE EMPLEO.
4.1.- Colocar la torre en la zona de trabajo, sobre una superficie plana y sólida.
4.2.- Desbloquear el bloqueo de seguridad del sistema de apoyo. Deslice el soporte
hacia abajo a la vez que extiende las patas, deslicelo hasta que el bloqueo del sistema
alcance la posición requerida.
4.3.- Fije la carga a la torre mediante un soporte que desee (el soporte varía dependien-
K-1
13
Manual de instrucciones - ESPAÑOL
do de la función requerida, y asegúrese de que sólo se utiliza para levantar cargas en
sentido vertical. La carga mínima es de 25 kg.
4.4.- Elevación: Elevar el primer tramo girando la manivela del cabrestante en sentido
horario, subiendo la carga hasta la altura deseada.
4.5.- Sujeción: Suelte la palanca del cabrestante, se mantendrá en la posición por la
acción del freno automático del cabrestante. Asegurese de que el gatillo KAT esta fijado,
para ello gire la manivela en sentido anti-horario hasta enclavar el gatillo. Continue elevando la torre, si es necesario, girando la manivela del cabrestante en sentido horario,
subiendo la carga hasta la altura final deseada, siempre asegurando que el gatillo KAT
se enclava en la posición que corresponda.
4.6.- Descenso: Desbloquear el gatillo de seguridad y girar la manivela del cabrestante
en sentido anti-horario hasta que el primer perfil quede completamente plegado. Ahora
desbloquear el gatillo de seguridad y retraer el segundo perfil. Así como al subir la carga,
la elevación puede ser parada en cualquier posición intermedia.
4.7.- Transporte: Para el transporte o movimiento es necesario recoger la torre, retraer
completamente todos los perfiles. A continuación, cierre la pieza del soporte de patas
deslizandola hacia arriba a la vez que cierra las patas, fijela con el cierre de seguridad
y apriete el pomo.
5 - MANTENIMIENTO.
5.1.- Todos los cables deben ser revisados regularmente. Los cables defectuosos deben
sustituirse inmediatamente. No utilice el elevador con cables en mal estado, ya que es
potencialmente muy peligroso. Utilice únicamente cables DIN 3060, suministrados por
un distribuidor autorizado. No utilice el elevador con cables en mal estado, ya que es
potencialmente muy peligroso. Utilice únicamente cables DIN 3060, suministrados por
un distribuidor autorizado.
5.2.- La torre se entrega completamente engrasada de fábrica. Dependiendo de su uso
mecánico, se recomienda que las coronas dentadas del cabrestante y del eje de transmisión y los perfiles de elevación sean periódicamente engrasados.
ATENCIÓN:
No engrasar ni lubricar el mecanismo de freno situado en el interior de la tapa plástica.
Los discos de freno, han sido previamente engrasados con una grasa especial resisten-
K-1
14
Manual de instrucciones - ESPAÑOL
te a la presión y el calentamiento. Para evitar el mal funcionamiento del freno del cabrestante, no deben ser utilizados otros productos distintos a los originales suministrado por
la empresa. No es necesario engrasar los discos de freno.
5.3.- Su torre elevadora debe ser inspeccionada al menos una vez al año por un centro
de servicio especializado / autorizado.
5.4.- Deben utilizarse sólo piezas originales de repuesto Kuzar para garantizar la fiabilidad y seguridad de funcionamiento de la torre. El usuario perderá todos los derechos
de garantía si se utiliza otras piezas de repuesto que las originales o modifique este
producto de alguna manera.
5.5.- En caso de requerir una pieza de recambio es necesario indicar el número de referencia que se puede encontrar en la Lista de Repuestos de la parte posterior de este
manual.
6 - GARANTÍA.
Todas las torres Kuzar vienen con 2 años de garantía. Este período de garantía se inicia
desde la fecha de compra. Kuzar reparará cualquier defecto del producto, ya sea causado por defectos de materiales o mano de obra defectuosa de forma gratuita dentro de
este plazo, siempre y cuando las partes están relacionadas a través de un distribuidor
autorizado Kuzar. Si el producto hubiera sido manipulado de algún modo o sufriera un
intento de reparación por un distribuidor no autorizado, la garantía no será válida. Esta
garantía no cubre el daño producido por un uso inadecuado.
7 - CERTIFICACIONES.
Kuzar se reserva el derecho de realizar cualquier modificación / alteración de la torre
sin previo aviso. Cualquier modificación / alteración sería una innovación, destinada a
mejorar el producto.
K-1
15
Bedienungsanleitung – DEUTSCH
1 – EINFÜHRUNG
Sehr geehrter Kunde,
die vorliegende Betriebsanleitung wurde mit dem Zweck erstellt, eine zuverlässige Bedienung des K-1 Hebeturms zu ermöglichen. Lesen Sie bitte die Betriebsanleitung vor
Inbetriebnahme sorgfältig durch. Bitte beachten Sie auch die technischen Daten.
Unsere Produkte unterliegen strengsten Prüfungen und Kontrollen bei der Fertigung.
Es sind ausschließlich Original-Ersatzteile zu verwenden. Für den Anwender werden
alle Gewährleistungsansprüche aufgehoben, wenn er Nicht-Original-Ersatzteile verwendet bzw. Änderungen am Produkt selbst vornimmt.
2 – TECHNISCHE DATEN
2.1 - Zulässige Hubkraft: 125 kg (275.6 lb)
2.2 - Mindesthublast: 25 kg (55 lb)
2.3 - Zulässige Hubhöhe: 3.8 m (12.4’)
2.4 - Mindesthubhöhe: 1.26 m (4.1’)
2.5 - Grundplattenfläche: 1.50 x 1.50 m (4.90’ x 4.90’)
2.6 - Oberfläche des gefalteten hebeturme: 20 cm x 20 cm (0.66’ x 0.66’)
2.7 - Gewicht: 21 Kg (46 lb)
2.8 - Die Winde, mit einer zusätzlichen Hublast von 450 Kg, ist mit einer automatischen
Lasthaltebremse Ausgestattet.
2.9 - Seil: aus Stahl nach DIN 3060. Gute 180 Kg/mm2 verwindungssteif.
2.10 - Seildurchmesser: Ø4 mm
2.11 - Werkstoff: Stahlprofil nach EN 10305
2.12 - Ausleger mit rutschfesten Gummifüßen aus synthetischem Kautschuk.
2.13 - Teleskopierbares System, bestehend aus swe, von einem über genutete Rollen
mit Wälzlagern geführten Stahlseil angetriebenen Abschnitten. Adapter Ø35 mm.
2.14 - Das Gerät ist zum senkrechten Heben von Lasten, wie auf verschiedene Höhen,
konzipiert worden.
2.15 - Stützsystem mittels der Sicherheitsbolzen.
2.16 - Einstellbare Platten in den Beinen zur Stabilisationsfunktion mit rutschfestem
Gummi.
K-1
16
Bedienungsanleitung – DEUTSCH
2.17 - Wasserwaage zur vertikalen Ausrichtung.
2.18 - Arretierung der Turmabschnitte auf die Arbeitshöhe über Sicherheitsbolzen aus
Stahl.
3 – SICHERHEITSMAßNAHMEN
3.1 - Den Hubturm nur auf harten und ebenen Flächen aufstellen.
3.2 - Prüfen Sie, dass das Stützsystem mittels der Sicherheitsbolzen befestigt ist
3.3 - Prüfen Sie, ob der Lift senkrecht steht. Prüfen Sie ggf. mit der Wasserwaage, die
sich auf dem Grundprofil befindet. Wenn nötig, stellen Sie die Ausrichtung mit den Platten durch Drehen des Griffs in die entsprechende Richtung.
3.4 - Prüfen Sie bitte, ob der Turm in seine Arbeitsstellung mittels Sicherheitsbolzen
fixiert ist.
3.5 - Bei Freiluftanwendungen, den Turm auf festem Boden stellen und mittels Seilanker
gegen die Windbelastung schützen.
3.6 - Keine Leiter auf dem Turm verwenden bzw. auf dieser anlehnen.
3.7 - Achten Sie auf herausragende Teile (wie Seile, Drähte, Deckenvorsprünge usw.)
oberhalb des Turmes.
3.8 - Niemand soll sich unter dem Turm aufhalten.
3.9 - Den Turm nicht bewegen, wenn dieser unter Last und ausgefahren ist.
3.10 - Vor der Verwendung des Turms den Seilzustand kontrollieren. Das Seil darf keine
Drahtbrüche bzw. Quetschstellen aufweisen. Unter keinen Umständen Seile im schlechten Zustand verwenden.
3.11 - Niemals die Windekurbel unter Last stehendem und ausgefahrenem Turm
abbauen.
3.12 - Sobald der Turm in seiner Arbeitsposition aufgestellt wurde, empfehlen wir die
Windekurbel zu sperren, um Störungen zu vermeiden.
3.13 - Die Mindestlast für eine reibungslose Funktion der Bremse beträgt 25 Kg.
3.14 - Bitte nicht den Bremsmechanismus der Winde fetten oder schmieren.
3.15 - Für den Transport sind alle Abschnitte herunterzufahren und mit dem entsprechenden Sicherheitsbolzen zu fixieren.
K-1
17
Bedienungsanleitung – DEUTSCH
4 – BEDIENUNG
4.1 - Den Hebeturm auf eine ebene und feste Fläche an der Arbeitsstelle aufstellen.
4.2 - Den Sicherheitsbolzen des Stützsystems entriegeln. Das System weiter senken,
bis der Sicherheitsbolzen in der gewünschten Position der Öffnung der Ausleger eingerastet ist.
4.3 - Die zu hebende Last auf dem Turm mittels eines geeigneten Trägers so aufstellen,
dass das Lastgewicht nur senkrecht wirkt. Die Mindestlast muss 25 Kg betragen.
4.4 – Heben:
Den Turm mit der Last durch Drehen der Windekurbel im Uhrzeigersinn heben, indem
man Turmabschnitt 1 voll herausfährt.
4.5 – Halten:
Windekurbel loslassen. Durch die Wirkung der von der Last betätigten automatischen
Bremse bleibt die Kurbel in dieser Stellung. Diesen ersten Abschnitt mittels Sicherheitsbolzen verriegeln.
4.6 – Weiter heben:
Erneut die Windekurbel im Uhrzeigersinn drehen. Dabei wird die Last weiter angehoben, bis der Turmabschnitt voll herausgefahren ist. Nun die Kurbel loslassen. Durch die
Wirkung der automatischen Last-druckbremse bleibt sie in dieser Stellung. Der Turm
kann in jeder beliebigen Zwischenstellung belassen werden, indem man einfach die
Kurbel loslässt und den Turm durch hineindrücken des Bolzens in das entsprechende
Loch die gewünschte Stellung befestigt.
4.7 – Senken:
Der Senkvorgang erfolgt umgekehrt! Bolzen entriegeln und den Turm weiter nach unten
senken bis Abschnitt 2 voll heruntergefahren ist. Bolzen entriegeln und die Last weiter
senken bis der Hebeturm vollkommen bis zur Mindesthöhe heruntergefahren ist. Der
Hebeturm kann genauso wie beim Heben der Lasten auf jeder beliebigen Zwischenstellung belassen werden.
K-1
18
Bedienungsanleitung – DEUTSCH
4.8. - Für den Transport des Turmes ist dieser durch Senken der Einzelabschnitte herunterzufahren, wobei die Einzelabschnitte mittels der Sicherheitsbolzen befestigt werden
müssen. Das Stützsystem vollkommen bis zur Mindesthöhe herunterfahren und mit dem
Sicherheitsbolzen fixieren.
5 – WARTUNG
5.1 - Regelmäßige Kontrollen des Seilzustandes. Weist ein Seil Drahtbrüche bzw. Quetschungen auf, ist es sofort durch ein neues zu ersetzen. Unter keinen Umständen den
Hebeturm mit Seilen im schlechten Zustand verwenden. Nur verwindungssteifes Stahlseil nach DIN 3060 verwenden.
5.2 - Der Hebeturm wird werkseitig komplett geschmiert geliefert. Es wird jedoch empfohlen, regelmäßig (je nach Bedarf) das Zahnrad der Winde, die Wälzlager der Antriebswelle und Hülse, das Kurbelgewinde und die Abschnitte zu schmieren.
ACHTUNG:
Die Bremsscheiben nicht ölen oder fetten!
Die Bremsscheiben sind mit einem speziellen Fett vorgeschmiert. Um Fehlfunktionen
bei der Windenbremse zu vermeiden, dürfen keine anderen als die von dem Unternehmen zur Verfügung gestellten Produkte verwendet werden. Es ist nicht notwendig die
Bremscheibe zu schmieren.
5.3 - Der Hebeturm sollte von einer Fachkraft mindestens einmal jährlich geprüft werden.
5.4 - Für eine kontinuierliche Betriebssicherheit sind ausschließlich Original-Ersatzteile
zu verwenden. Alle Gewährleistungsansprüche sind für den Anwender aufgehoben,
wenn er Nicht-Original-Ersatzteile verwendet bzw. Änderungen am Produkt selbst vornimmt.
5.5 - Für die Bestellung von Ersatzteilen ist stets dessen Bestellnummer anzugeben,
welche den Stücklisten dieser Anleitung zu entnehmen ist.
K-1
19
Bedienungsanleitung – DEUTSCH
6 – GARANTIE
Alle Kuzar Hebetürme haben eine Garantie von 2 Jahren. Die Garantieansprüche beginnen mit dem Kaufdatum. Kuzar wird in dieser Garantiezeit jedes defekte Produkt kostenlos reparieren, wenn es durch fehlerhaftes Material oder durch schlechte Verarbeitung
verursacht wurde, solange die Teile von einem Fachhändler eingebaut wurden. Sollte
das Produkt in irgendeiner Weise manipuliert oder eine Reparatur durch einem nicht
autorisierten Händler versucht worden sein, werden Garantieansprüche ungültig. Die
Garantie gilt auch nicht für Schäden durch unsachgemäßen Gebrauch.
7 – Zertifikate
Kuzar behält sich das Recht vor, jede Änderung des Hebeturms ohne vorherige Ankündigung vorzunehmen. Jede Änderung wäre eine Innovation, die dazu führt, das Produkt
zu verbessern.
K-1
20
CERTIFICATIONS:
CERTIFICACIONES:
ZERTIFIKATE:
K-1
21
DECLARACIÓN DE CONFORMIDAD
KUZAR SYSTEMS, S.L., con C.I.F. B98453319, con domicilio social en: C/ Ciudad de Ferrol
nº8, Pol. Ind. Fuente del Jarro · 46988 Paterna · Valencia · Spain.
declara bajo su única y exclusiva responsabilidad que el producto:
MARCA:
DESCRIPCIÓN:
MODELO:
ALTURA MÁXIMA:
CARGA MÁXIMA ADMISIBLE:
PESO:
KUZAR
Torre elevadora
K-1
3.8 m
125 kg
21 Kg
Es conforme con los requisitos esenciales de las siguientes Directivas Comunitarias:
•
2006/42/CE Directiva sobre Seguridad en Máquinas, que deroga a 98/37/CEE Directiva
sobre Seguridad en Máquinas.
Que en su diseño y fabricación han sido tenidos en cuenta tanto en su totalidad como
parcialmente, los aspectos recogidos en las normas armonizadas siguientes:
• UNE-UNE-EN 292-1:93 93 “Seguridad de las máquinas. Conceptos básicos, principios
generales para el diseño. Parte 1: Terminología básica, metodología”.
• UNE EN 292-2: 93 + A1:96 + A1 ERRATUM: 97 Seguridad de las máquinas. Conceptos
básicos, principios generales para el diseño. Parte 2: Principios y especificaciones
técnicas”.
• UNE-EN 287-1: 92 + A1:97 “Cualificación de soldadores. Soldeo por fusión. Parte 1:
Aceros”.
• UNE-EN 288-3: 93 + A1:97 + ERRATUM: 94 “Especificación y cualificación de los
procedimientos de soldeo para los materiales metálicos. Parte 3: Cualificación del
procedimiento para el soldeo por arco de aceros”.
habiendo constituido el correspondiente expediente técnico de construcción; y para
que conste a los efectos oportunos emite la presente declaración de conformidad.
En Paterna, a 25 de junio de 2014
Firmado: Responsable calidad Kuzar Systems
K-1
22
K-1
23
KUZAR SYSTEMS S.L.
www.kuzar.es
C/ Ciudad de Ferrol nº 8
Pol. Ind. Fuente del Jarro
46988 Paterna - Valencia (Spain)
Tel. +34 96 378 10 04
[email protected]