1
Manual de usuario
Manuel d’usager
User’s guide
Super SS
Balanza solo peso
Balance seul poids
Check weight scale
ENG
FR
ESP
ÍNDICE
2
INDEX
INDEX
Manual de usuario
Manuel d’usager
User’s guide
1. Características técnicas principales
2. Teclado y mensajes de pantalla
2.1. Teclado
2.2. Mensajes de pantalla
3. Guía de operaciones
3.1. Preparación
3.2. Encender o apagar
3.3. Cero
3.4. Pesado
3.5. Pesado Tara
3.6. Función ahorro de energía
3.7. Indicación de batería
3.8. Carga
3.9. Fijar parámetros
3.10. Graduar el brillo de los LED
4. Notas
5. Cambio de divisióm
6. Calibración
3
3
3
4
4
4
4
4
4
4
4
4
5
5
6
6
6
6
1. Caractéristiques techniques principales
2. Clavier et messages de l’écran
2.1. Clavier
2.2. Messages de l’écran
3. Guide d’operations
3.1. Préparation
3.2. Allumer ou éteindre
3.3. Zéro
3.4. Pesage
3.5. Pesage Tare
3.6. Fonction d’économie d’énergie
3.7. Indication de batterie
3.8. Charge
3.9. Fixer des paramètres
3.10. Choisir le brillation des LED
4. Notes
5. Changement de division
6. Calibration
7
7
7
8
8
8
8
8
8
8
8
8
9
9
10
10
10
10
1. Main technical index
2. Keyboard and character prompt
2.1. Keyboard
2.2. Character prompt
3. Operation guide
3.1. Preparation
3.2. Turn on or turn off
3.3. Zero
3.4. Weighing
3.5. Tare weighing
3.6. Save power function
3.7. Battery Indicate
3.8. Charge
3.9. Set parameter
3.10. Tune Led lighting
4. Notes
5. Division changement
6. Calibration
11
11
11
12
12
12
12
12
12
12
12
12
13
13
14
14
14
14
Declaración de conformidad
Déclaration de conformité
Declaration of conformity
15
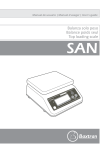
Balanza solo peso
Manual de usuario
Gracias por utilizar nuestra balanza de la serie SUPER SS de doble lado y protegida contra la humedad y el
agua. La balanza SUPER SS es una balanza de acero inoxidable. La balanza incluye avances de altas técnicas de ordenador-control. Incluye una alta precisión en el pesado, con facilidades de transporte y un precio
bajo.
Es resistente y de larga duración. Puede ser utilizada en almacenes para pesar diferentes paquetes de productos, así como en lugares con humedad alta gracias a su alta protección contra la humedad.
ENG FR ESP
Modelo Super SS
1. CARACTERÍSTICAS TÉCNICAS PRINCIPALES
1.1. INFORMACIÓN BÁSICA
CAPACIDAD MÁXIMA (kg)
SS3
SS6
SS15
SS30
3
6
15
30
CAPACIDAD MÍNIMA
DIVISIONES DE TEST (g)
20e
1
2
5
10
DIVISIONES DE PANTALLA (1) (g)
0,5
1
2
5
DIVISIONES DE PANTALLA (2) (g)
0,2
0,5
1
2
TARA MÁXIMA
100% de la capacidad máxima
CLASE
DIMENSIONES DEL PLATO (mm)
230 x 190
1.2. TEMPERATURA DE FUNCIONAMIENTO: -5 ~ +35ºC
1.3. TEMPERATURA DE ALMACENAMIENTO: -25 ~ +50ºC
1.4. ALIMENTACIÓN: Batería recargable 6V4Ah de 90 horas de duración.
1.5. PESO NETO: 3,6 kg.
1.6. GRADO DE PROTECCIÓN IP: IP68.
2. TECLADO Y MENSAJES DE PANTALLA
2.1. TECLADO
Enciende la balanza y cero.
Botón tara.
Apaga la balanza.
Botón SET/Fig. Parámetro de funcionamiento y fijación de información.
3
ENG FR ESP
Manual de usuario
Balanza solo peso
Modelo Super SS
2.2. MENSAJES DE PANTALLA
dc x.xx
Significa que el voltaje de la batería es x.xx V.
------
Aparece este señal cuando el peso está cerca del 100% FS+9e, si suena una señal significa que
hay sobrecarga y por lo tanto el usuario debe reducir el peso.
AdC
Cuando se sobrepasa el cambio A/D la pantalla lo mostrará con la señal sonando.
-BAtLo-
La potencia es baja. La balanza se puede utilizar un período corto de tiempo y debe recargarla
inmediatamente.
C_End
La recarga ha terminado.
Err-0
Sobrecarga del cero de la célula de carga. Por favor, reajuste o cambie la célula de carga.
3. GUÍA DE OPERACIONES
3.1. PREPARACIÓN
Ajuste los pies de la base, vigile el nivel, situe la bandeja horizontalmente.
3.2. ENCENDER O APAGAR
3.2.1. Encender:
Presione el botón ON/ZERO, el sonido de alarma, la pantalla mostrará el número de versión y la po
ten cia del nivel de batería y 9, 8, 7, ..., 1, 0, se encenderá el LED de “ZERO”. Ahora la balanza
stá en estado de pesar.
3.2.2. Apagar:
Presione durante unos segundos el botón OFF.
3.2.3. Auto apagado:
Después de 10 minutos en cero, se apagará automáticamente.
3.2.4. Auto apagado de batería baja:
Cuando la potencia es inferior a 5.6V la balanza se apaga.
3.3. CERO
Cuando sin tara el peso mostrado en la pantalla es ≤ 4% de la capacidad máxima, presione el botón ON/
ZERO, la pantalla mostrará “0”, el LED de “ZERO” se encenderá.
3.4. PESADO
Situe el peso en la bandeja.
3.5. PESADO TARA
Presione el botón TARE, el peso mostrado es “0”, el LED de “ZERO” se encuentra apagado y el LED de
“TARE” encendido. Retire el peso y el contenedor, el peso mostrado es negativo, el LED de “ZERO” está encendido, presione el botón TARE, la pantalla muestra “0”, el led de “TARE” se encuentra apagado.
3.6. FUNCIÓN AHORRO DE ENERGÍA
Después de 40 segundos de cero, se activa la función de ahorro de energía, la pantalla muestram “0”. Coloque
un peso para empezar a pesar.
3.7. INDICACIÓN DE BATERÍA
Led de batería: “High” significa que la potencia es superior a 6,3 V, “Mid” que se encuentra entre 6 V y 6,3 V,
“Low” significa que la potencia es inferior a 6 V.
4
Balanza solo peso
Manual de usuario
3.8. CARGA
Potencia suministrada por una batería interna recargable de ácido de plomo de 6V/4Ah. Cuando muestre
“-BAtLo-” por favor, apague y cargue la batería inmediatamente. El tiempo de recarga completa es de 12
horas.
ENG FR ESP
Modelo Super SS
3.9. FIJAR PARÁMETROS
Presione el botón SET/0~9 durante 3 segundos. Ahora muestra el menú. Presione el botón SET/0~9 continuadamente, la pantalla mostrará:
rAngE (Fijar límites)
UnItS (elegir unidad)
A-OFF (elegir auto apagado)
FILt (fijar el modo de pantalla)
ZEro (fijar auto cero)
bUZZEr (fijar alarma)
d (elegir división)
On-rA (Elegir rango de encendido)
d-dP (Elegir mono o doble pantalla)
3.9.1 Fijar límites:
3.9.1.1 Cuando muestra “rAngE”, presione TARE y después SET/0~9 para elegir “on” o “oFF”, “on” empieza
la función, “oFF” sale, presione TARE para confirmar.
3.9.1.2 Cuando elija “on” y presione TARE, ahora pesará con límites, el led “under” se enciende, la figura
max parpadea, presione SET/0~9 una vez para añadir 1, presione TARE para confirmar, cuando
termina sale automáticamente y fija “over”. Después de fijar en pesado.
3.9.1.3 Cuando el límite inferior > límite superior, muestra “oFF” entonces sale.
3.9.1.4 Indicaciones de alarma
“m” es el peso.
Cuando “m” = ?l?mite superior§, el led ?over§ se enciende.
Cuando ¡l¨mite inferior¡ < ¡m¡ < ¡l¨mite superior¡, el led ¡accept¡ se enciende.
Cuando ¡m¡ ¡ ¡l¨mite inferior¡, el led ¡low¡ se enciende.
Precaución: cuando la pantalla no est¨ estable, los leds no se encienden.
3.9.2 Cambio de unidad
3.9.2.1 Cuando muestra “UnItS”, presione TARE, entonces presione SET/0~9 para elegir, entonces presione
TARE para confirmar y salir.
Unidades: H9 (kg), 9 (g), Lb, oz, pcs (cuentapiezas).
3.9.2.2 Cuentapiezas: cuando la pantalla muestra “pcs” presione TARE. Ahora se enciende el led “pcs”.
Presione largamente ON/ZERO, muestra una cuenta y vuelve a 0. Entonces coloque la muestra y
presione TARE. Presione SET/0~9 y presione TARE para elegir. Después de acabar muestra “pcs” y
se enciende el led “pcs”.
Para salir de la función cuentapiezas, elija una unidad.
Precaución: Coloque cantidades de como máximo 30000.
3.9.3 A-oFF (elegir auto apagado)
Cuando el menú muestra A-oFF, presione TARE para entrar, presione SET/0~9 para elegir “n” o “y”,
“n” significa que no se utiliza el auto apagado, “y” significa que después de 10 minutos en cero la ba
lanza se apagará automáticamente.
3.9.4 Cambiar el modo de pantalla:
Cuando muestre “FILtX” (FILt1 significa un paso para el display, FILt2 significa 3-4 pasos para el dis
play, FILt3 significa 6-8 pasos para el display) Presione SET/0~9 para cambiar, presione TARE para
confirmar y salir.
3.9.5 Fijar el rango de auto cero:
Cuando la balanza muestre cero, presione TARE, ahora mostrará zero x.x (x.x es el rango: 0.5d, 1d,
2d, 2.5d, 3d, 3.5d, 4d, 4.5d, 5d. “d” es el valor de división cuando n=3000). Presione SET/0~9 para
cambiar, presione TARE para confirmar y salir.
5
ENG FR ESP
Manual de usuario
Balanza solo peso
Modelo Super SS
3.9.6 bUZZEr (fija el sonido de la alarma)
Cuando el menú muestra bUZZEr, presione TARE para entrar, presione SET/0~9 para elegir “on” o “oFF”,
presione TARE para confirmar.
3.9.7 Cambiar la figura de división
Cuando el menú muestra d, presione TARE para entrar, presione SET/0~9 para elegir la división.
3.9.8 On-rA (Elegir el rango de encendido)
Cuando el menú muestra On-rA presione TARE para entrar, presione SET/0~9 para elegir “20” o “100”, “20”
significa 20% de la capacidad máxima, 100 significa 100% de la capacidad máxima. Presione TARE para
confirmar.
3.9.9 d-dP (elegir mono o doble pantalla)
Cuando el menú muestra d-dP, presione TARE para entrar, presione SET/0~9 para elegir “n” o “y”, “n” significa
mono-pantalla, “y” significa doble pantalla. Presione TARE para confirmar.
3.10. GRADUAR EL BRILLO DE LOS LED
Con la balanza encendida, presione largamente ZERO/ON, aparece LC-, presione SET/0~9 para elegir LU-1
o LU-2, LU-1 es el modo de guardar. Presione TARE para confirmar.
4. NOTAS
1. Debe cargar la batería como mínimo cada 3 meses cuando usted no utilice la balanza durante un período
largo de tiempo. La carga durará unas 12 horas.
2. No sobrecargue la balanza. No tire violentamente objetos pesados sobre la balanza. El daño por
sobrepeso no se encuentra dentro del rango de garantía de mantenimiento.
3. No utilice objetos afilados para manejar el teclado. Si la goma está dañada, ello afectará la garantía
contra agua y humedad de la balanza.
4. Mantenga la balanza limpia para asegurar un pesado correcto.
5. Hay un precinto de plomo en la parte inferior de la balanza. Los usuarios no deben quitar este precinto. Si
se daña el precinto no se garantiza el correcto mantenimiento de la balanza.
5. CAMBIO DE DIVISIÓN
1. Pulse ON/ZERO para encender la balanza.
2. Presione la tecla TARE hasta que aparezca la división deseada (nXXXX). Al volver a presionar TARE
regresa a la división anterior. La división que aparece en pantalla es la división seleccionada.
3. La balanza regresa automáticamente al modo de pesaje.
6. CALIBRACIÓN
Esta operación sólo puede realizarla el personal autorizado competente por las leyes de cada país.
1. Con la balanza apagada, desprecintar el precinto del interruptor de modificación de división situado en la
cara inferior de la balanza.
2. Cambiar la posición del interruptor de modificiación de división.
3. Pulse el botón ON/ZERO para encender la balanza.
4. Presione la tecla TARE hasta que apareza “CAL” en la pantalla.
5. Pulse la tecla TARE nuevamente, aparezerá la capacidad máxima de la balanza.
6. Situe sobre la balanza el peso de su capacidad máxima.
7. Espere 5 segundos.
8. Pulse la tecla TARE nuevamente, aparecerá el mensaje “CaEnd” en la pantalla. La calibración ha
terminado y la balanza regresa automáticamente al modo de pesaje.
9. Presione la tecla OFF para apagar la balanza.
10. Situe el interruptor de modificación de división a su posición original.
11. Vuelva a precintar el interruptor de modificación.
NOTA: DURANTE LA CALIBRACIÓN, SI USTED DESEA SALIR, PRESIONE ON/ZERO.
6
Balance seul poids
Manuel d’usager
Merci par utiliser notre série SUPER SS de produit individuel/double côté protégé contre l’humidité et l’eau.
La SUPER SS est une balance d’acier inoxydable. La balance inclut des avances de grands techniques
d’ordinateur - contrôle. Elle inclut une grande précision des pesages, avec des facilités du transport et un prix
sous. Elle est résistant et de longue durée. Elle peut être utilisée en magasins et pour peser différents paquets
de produits, ainsi qu’en lieux avec grand niveau d’humidité grâce à sa haute protection contre l’humidité.
ENG FR ESP
Modèle Super SS
1. CARACTÉRISTIQUES TECHNIQUES PRINCIPALES
1.1. INFORMATION BASIQUE
SS3
SS6
SS15
SS30
3
6
15
30
1
2
5
10
DIVISIONS D’ÉCRAN (1) (g)
0,5
1
2
5
DIVISIONS D’ÉCRAN (2) (g)
0,2
0,5
1
2
PORTÉE MAXIMALE (kg)
PORTÉE MINIMALE
DIVISION DE TEST (g)
20e
TARE MAXIMALE
100% de la portée maximale
CLASSE
DIMENSIONS DU PLATEAU (mm)
230 x 190
1.2. TEMPÉRATURE DE FONCTIONNEMENT: -5 ~ +35ºC
1.3. TEMPÉRATURE D’EMMAGASINAGE: -25 ~ +50ºC
1.4. PUISSANCE: Batterie interne rechargeable 6V4Ah de 90 heures de durée.
1.5. POIDS NET: 3,6 kg.
1.6. DEGRÉ DE PROTECTION IP: IP68.
2. CLAVIER ET MESSAGES DE L’ÉCRAN
2.1. CLAVIER
Cette touche allume la balance et zéro
Touche tare.
Pour éteindre la balance.
Touche SET/Fix. Paramètre de fonctionnement et fixation de l’information.
7
ENG FR ESP
Manuel d’usager
Balance seul poids
Modèle Super SS
2.2. MESSAGES DE L’ÉCRAN
dc x.xx
Il signifie que la puissance de la batterie est x.xx V.
------
Ce signal apparaît quand le poids ce tout près du 100% FS+9e, s’il sonne un signal il signifie qu’il
y a surcharge et c’est pourquoi l’usager doit réduire le poids.
AdC
Quand on surpèse le changement A/D l’écran le montrera avec un signal sonnant.
-BAtLo-
La puissance est faible. La balance peut être utilisée une courte période de temps et doit immédiatement la recharger.
C_End
La recharge a terminé.
Err-0
Surcharge du zéro du capteur de chargement. S’il vous plaît, rajuster ou changer le capteur de
chargement.
3. GUIDE D’OPÉRATIONS
3.1. PRÉPARATION
Ajuster le pied fonde, surveiller le niveau, situer le plateau horizontalement.
3.2. ALLUMER OU ÉTEINDRE
3.2.1. Allumer:
Pousser la touche ON/ZERO, le son d’alarme, l’écran montrera le numéro de la version et la puissance
du niveau de batterie et 9, 8, 7...1, 0, le “ZERO” s’allumera. Maintenant la balance se trouve en état de
fonctionnement.
3.2.2. Éteint:
Presione durante unos segundos el botón OFF.
3.2.3. Auto éteint:
Après 10 minutes à zéro, elle s’éteindra automatiquement.
3.2.4. Auto éteint de batterie baisse:
Quand la puissance est inférieure à 5.6V la balance s’éteindra.
3.3. ZÉRO
Quand sans tare le poids montré sur l’écran est ≤ 4% de capacité maximale, pousser la touche ON/ZERO, et
l’écran montrera “0”, le zéro s’allumera.
3.4. PESAGE
Situer le poids sur le plateau.
3.5. PESAGE TARE
Pousser la touche TARE, le poids montré est “0”, la lumière de “ZERO” devient éteinte et la lumière de “TARE”
allumée. Retirer le poids et le container, le poids montré il est négatif, la lumière de “ZERO” est allumée, pousser la touche TARE, l’écran montre “0”, la lumière de “Tare” devient éteinte.
3.6. FONCTION D’ÉCONOMIE D’ÉNERGIE
Zéro après 40 secondes, fonction auto sauve, montre “0”. Placer un poids pour peser.
3.7. INDICATION DE BATTERIE
Lumière de batterie: “HIGH” signifie que la puissance est supérieure à 6.3 V, “Mid” signifie que la puissance
se trouve entre 6V et 6.3 V, et “Low” signifie que la puissance est inférieure à 6V.
8
Balance seul poids
Manuel d’usager
3.8. CHARGE
Puissance suppléée par une batterie lead acide de recharge interne (6V/4Ah) Quand elle montrera “-BAtLo” s’il vous plaît éteindre et charger immédiatement la batterie. Le temps de recharge complète c’est de 12
heures.
ENG FR ESP
Modèle Super SS
3.9. FIXER DES PARAMÈTRES
Pousser la touche SET/0~9 pendant 3 secondes. L’écran montrera le menu. Pousser la touche SET/0~9 continuament, l’écran montrera:
rAngE (Fixer des limits)
UnItS (Changement d’unité)
A-OFF (Choisir éteindre automatiquement)
FILt (Fixer le mode d’écran)
ZEro (Fixer l’auto zéro)
bUZZEr (Fixer l’alarme)
d (Choisir la division)
On-rA (Choisir le rang d’allumer)
d-dP (Choisir mono-écran ou double écran)
3.9.1 Fixer des limits
3.9.1.1 Quand elle montrera rAngE, pousser TARE et après SET/0~9 pour choisir “on” ou “oFF”, “on”
commence la fonction, “oFF” sorts, pousser TARE pour confirmer.
3.9.1.2 Quand vous choisies “on” et pousses TARE, la balance pesera avec des limites, le led “under”
s’allumera, la figure “max” s’allume et s’etient, pousser SET/0~9 pour addicioner 1, pousser TARE
pour confirmer, quand elle finisse sots automatiquement et fixe “over”.
3.9.1.3 Quand le limite inférieur > limite supérieur, montre “oFF” alors elle sorts.
3.9.1.4 Indications d’alerte.
“m” est le poids.
Quand “m” = “limite supérieur”, le led “over” s’allumera.
Quand “limite inférieur” < “m” < “limite supérieur”, le led “accept” s’allumera.
Quand “m” ? “limite inférieur”, le led “low” s’allumera.
Attention : quand l’écran n’est pas stable, aucun led ne s’allume.
3.9.2 Changement d’unité
3.9.2.1 Quand l’écran montre “UnItS”, pousser TARE, alors pousser SET/0~9 pour choisir, alors pousser
TARE pour confirmer et sortir.
Unité : H9 (kg), 9 (g), Lb, oz, pcs (mode compteuse)
3.9.2.2 Mode compteuse : Quand l’écran montre “pcs” pousser TARE. Le led “pcs” s’allumera. Pousser
continuement ON/ZERO, elle montre un compte et retourne a 0. Alors placer un échantillon et
pousser TARE.
Pousser SET/0~9 et pousser TARE pour choisir. Après de finir elle montre “pcs” et le led “pcs”
s’allume.
Pour sortir de la fonction compteuse, choisir une unité.
Attention : placer quantités maximales de 30000.
3.9.3 A-oFF (Choisir éteindre automatiquement)
Quand le menu montre A-oFF, pousser TARE pour entrer, pousser SET/0~9 pour choisir “n” ou “y”, “n” signifie
ne utilizer pas la fonction éteindre automatiquement, “y” signifie que après de 10 minutes en zéro, la balance
s’éteindra automatiquement.
3.9.4 Changer le mode d’écran.
Quand elle montrera “FILtX” (FILt1 signifie un pas pour écran, FILt2 signifie 3-4 pas pour écran, FILt3 signifie
6-8 pas pour écran). Pousser SET/0~9 pour changer, pousser TARE pour confirmer et sortir.
3.9.5 Fixer l’auto zéro
Quand la balance montrera zéro, pousser TARE, elle montrera maintenant zéro x.x (x.x est le rang : 0.5d, 1d,
2d, 2.5d, 3d, 3.5d, 4d, 4.5d, 5d. “d” est la valeur de division quand n=3000). Pousser SET/0~9 pour choisir et
TARE pour confirmer.
9
ENG FR ESP
Manuel d’usager
Balance seul poids
Modèle Super SS
3.9.6 bUZZEr (Fixer l’alarme acoustique)
Quand le menu montre bUZZEr, pousser TARE pour entrer, pousser SET/0~9 pour choisir « on » ou « oFF »,
pousser TARE pour confirmer.
3.9.7 Changer la figure de division
Quand le menu montre d, pousser TARE pour entrer, pousser SET/0~9 pour choisir la division.
3.9.8 On-rA (Choisir le rang d’allumer)
Quand le menu montre On-rA, pousser TARE pour entrer, pousser SET/0~9 pour choisir “20” ou “100”, “20”
signifie 20% de la capacité maximale, “100” signifie 100% de la capacité maximale. Pousser TARE pour confirmer.
3.9.9 d-dP (mono-écran ou double écran)
Quand le menu montre d-dP, pousser TARE pour entrer, pousser SET/0~9 pour choisir “n” ou “y”, “n” signifie
mono-écran, “y” signifie double-écran. Pousser TARE pour confirmer.
3.10. CHOISIR LE BRILLATION DES LED
Avec la balance allumée, pousser continuement ZERO/ON, apparêitra LC-, pousser SET/0~9 pour choisir LU1 ou LU-2, LU-1 est le mode pour garder. Pousser TARE pour confirmer.
4. NOTES
1. On doit charger la batterie comme minimum chaque 3 mois quand on n’utilisera pas la balance pendant une
période longue de temps. La charge durera quelques 12 heures.
2. Ne surcharger pas la balance. Ne jeter pas violemment objets pesés sur la balance. Le dommage par surcharge ne se trouve pas dans le rang de garantie de subsistance.
3. N’utiliser pas objets aiguisés pour manier le clavier. Si la gomme est endommagée, cela affectera la garantie
contre l’eau et l’humidité de la balance.
4. Maintenir la balance propre pour assurer un pesage correct.
5. Il y a une pose des scellés de plomb à la partie inférieure de la balance. Les usagers ne doivent pas enlever cette
pose des scellés. S’il s’endommage la pose des scellés on ne assure pas la correcte subsistance de la balance.
5. CHANGEMENT DE DIVISION
1. Pousser ON/ZERO pour allumer la balance.
2. Pousser la touche TARE jusqu’à ce qu’il apparaisse la division désirée (nXXXX). Au recommencer à pousser
la touche TARE il revient à la division antérieure. La division qui apparaît à l’écran est la division sélectionnée.
3. La balance revient automatiquement au mode de pesage.
6. CALIBRATION
Cette opération peut être réalisée seulement par personnel autorisé par les lois de chaque pays.
1. Avec la balance éteinte, enlever la pose des scellés de l’interrupteur de modification de division situé à la
part inférieure de la balance.
2. Changer la position de l’interrupteur de modification de division.
3. Pousser la touche ON/ZERO pour allumer la balance.
4. Pousser la touche TARE jusqu’à ce qu’il apparaisse “CAL” sur l’écran.
5. Pousser la touche TARE nouvellement, il apparaîtra la capacité maximale de la balance.
6. Situer sur la balance le poids de la capacité maximale.
7. Atteindre 5 secondes.
8. Pousser la touche TARE nouvellement, il apparaîtra le message “CaEnd” à l’écran. La calibration a terminé
et la balance revient automatiquement au mode de pesage.
9. Pousser la touche OFF pour éteindre la balance.
10. Situer l’interrupteur de modification de division à la position originale.
11. Recommencer à plomber l’interrupteur de modification de division.
NOTE: Pendant la calibration, pour sortir, pousser ON/ZERO.
10
Check Weight scale
User’s Guide
Thank you for using our SUPER SS serial double side displays product of electronic waterproof counting scale.
SUPER SS are a stainless steel scale. The scale is manufactured with advances computer-controlled hi-techniques. It has the characteristics of satisfactory in perfomance accurate in weighing, convenient for carrying,
cheap in price. It is sturdy and durable and widely used in not only retail stores and weighing of ration packing
of commodities but also in high humidity surroundings because of it’s well waterproof function.
ENG FR ESP
Model Super SS
1. MAIN TECHNICAL INDEX
1.1. BASIC DATA
SS3
SS6
SS15
SS30
3
6
15
30
1
2
5
10
DISPLAY DIVI. (1) (g)
0,5
1
2
5
DISPLAY DIVI. (2) (g)
0,2
0,5
1
2
MAX. CAPACITY (kg)
MIN. CAPACITY
TEST DIVI. (g)
20e
MAX. TARE
100% de la capacidad máxima
ACCURACY
PAN SIZE (mm)
230 x 190
1.2. WORKING TEMPERATURE: -5 ~ +35ºC
1.3. STORAGE TEMPERATURE: -25 ~ +50ºC
1.4. POWER: Batería recargable 6V4Ah de 90 horas de duración.
1.5. NET WEIGHT: 3,6 kg.
1.6. IP: IP68.
2. KEYBOARD AND CHARACTER PROMPT
2.1. KEYBOARD
Turns the scale on and zero.
Tare key.
Power off.
Set/Fig. key. Set parameter and input Fig.
11
ENG FR ESP
User’s Guide
Check Weight scale
Model Super SS
2.2 MENSAJES DE PANTALLA
dc x.xx
Mean the voltage of battery is x.xx V.
------
Show this as the weight over 100% FS+9e, with the ding sounding, this means over load, reduce
the weight.
AdC
As the A/D change overflowing, display shows this with the ding sounding.
-BAtLo-
The voltage is lower. You can use a short while and charge immediately.
C_End
Recharge is end.
Err-0
Overload zero of loadcell. Please re-adjust or change loadcell.
3. OPERATION GUIDE
3.1. PREPARATION
Adjust the base foot, watch the level, make the pan in horitzontal.
3.2. TURN ON OR TURN OFF
3.2.1. Turn on:
Press the ON/ZERO key, the ding sound, it displays version No. and the battery voltage level and 9, 8,
7, ..., 1, 0, the “ZERO” lamp lighting. Now the scale is in a working state.
3.2.2. Turn off:
Long-press OFF key.
3.2.3. Auto-off:
After 10 minutes in zeroing, auto-off.
3.2.4. Low voltage auto-off:
When the voltage lower than 5.6V, then power-off.
3.3. ZERO
When without taring the weight display is ≤ 4% Max. capa., press the ON/ZERO key, the display shows “0”,
the zero lamp lighting.
3.4. WEIGHING
Put weight to pan.
3.5. TARE WEIGHING
Press the TARE key, it’s being think the “skin” tare, the weight display is “0”, the ZERO lamp off, the TARE
lamp lighting. Pick up the weight and the “skin”, the weight display is negative, the ZERO lamp lighting, press
the TARE key, the TARE lamp off.
3.6. SAVE POWER FUNCTION
Zero after 40 seconds, auto save power, shows “0”. Put a weight start weighing.
3.7. BATTERY INDICATE
Battery lamp: “High” means voltage higher than 6.3V, “Mid” means voltage between 6V and 6.3V, “Low” means
voltage lower than 6V.
12
Check Weight scale
User’s Guide
3.8. CHARGE
Power supplied by a internal rechargeable lead acid battery (6V/4Ah). When it shows “-bAtLo-”. Please turn off
and charge immediately. The time of full charging is 12 hours.
ENG FR ESP
Model Super SS
3.9. SET PARAMETER
Press SET/0~9 key 3 seconds to set. Now show menu. Press SET/0~9 continuous it displays:
rAngE (set limit)
UnItS (choose unit)
A-OFF (choose auto power off)
FILt (set display mode)
ZEro (set auto zero)
bUZZEr (set buzzle)
d (choose division)
On-rA (choose range of power on)
d-dP (choose single or dual display)
3.9.1 Set range of auto-zero:
3.9.1.1 When it shows “rAngE”, press TARE and then SET/0~9 to choose “on” or “oFF”, “on” is start the function, “oFF” is exit, press TARE to confirm.
3.9.1.2 When choose “on” and press TARE, now weighing with limit, “under” lighting, max figure is blinking,
press SET/0~9 once to add 1, press TARE to confirm, when finishing auto exit and set “over”. After
setting into weighing.
3.9.1.3 When low limit > high limit, it displays “oFF”, then exit.
3.9.1.4 Alarming Indicate
“m” is the weight.
When “m”≥ high limit, “over” lamp is lighting.
When low limit <m<high limit, “accept” lamp is lighting.
When m≤ low limit, “low” lamp lighting.
Caution: when the display is not stabilization, no lamp lights.
3.9.2 Change Unit
3.9.2.1 When it displays “UnItS”, press TARE, then press SET/0~9 to choose, then press TARE to confirm and
exit.
Unit: H9 (kg), 9 (g), Lb, oz, pcs (counting).
3.9.2.2 Counting: when it displays “pcs” press TARE. Now “pcs” lamp lighting. Longtime press ON/ZERO, it
displays count and return to 0. Then put the sample and press TARE. Press SET/0~9 to add 1 and
press TARE to choose. After finishing it displays “pcs” and “pcs” lamp lighting.
Exit counting: choose unit.
Caution: Pick quantities of Max less 30000.
3.9.3 A-oFF (choose auto power off)
When menu displays A-oFF, press TARE to enter, press SET/0~9 to choose “n” o “y”, “n” is not auto power off,
“y” is after 10 minutes in zeroing, auto-off.
3.9.4 Change display mode:
When it displays “FILtX” (FILt1 means one step to display, FILt2 means 3-4 steps to display, FILt3 means 6-8
steps to display) Press SET/0~9 to change, press TARE to confirm and exit.
3.9.5 Set range of auto-zero:
When it displays zero, press TARE, now shows zero x.x (x.x is the range: 0.5d, 1d, 2d, 2.5d, 3d, 3.5d, 4d, 4.5d,
5d. “d” is the division value when n=3000). Press SET/0~9 to choose and TARE to confirm.
13
ENG FR ESP
User’s Guide
Check Weight scale
Model Super SS
3.9.6 bUZZEr (set buzze)
When menu displays bUZZEr, press TARE to enter, press SET/0~9 to choose “on” or “oFF”, press TARE to
confirm.
3.9.7 Change division figure
When menu displays d, press TARE to enter, press SET/0~9 to choose division.
3.9.8 On-rA (choose range of power on)
When menu displays On-rA press TARE to enter, press SET/0~9 to choose “20” or “100”, “20” is 20% max.
capacity, 100 is 100% capacity. Press TARE to confirm.
3.9.9 d-dP (Choose single or dual display)
When menu displays d-dP, press TARE to enter, press SET/0~9 to choose “n” or “y”, “n” is single display, “y”
is dual display. Press TARE to confirm.
3.10. TUNE LED LIGHTING
On powering on, long time press ZERO/ON, it shows LC-, press SET/0~9 to choose LU-1 or LU-2, LU-1 is
saving mode (commend). Press TARE to confirm.
4. NOTE
1. Not overloading. Not throw heavy things on the scale violently. The damage for overloading is not within the
range of guaranteed maintenance.
2. Don’t use sharp thing to operation the keyboard. if the rubber is damaged it will influence the performance
of waterproof.
3. Keep the scale clean in order to weighing well.
4. There is a lead seal on the bottom of the scale. Users are not allowed to remove the seal. If the seal is damaged the scale is not guaranteed for maintenance.
5. a. You must charge the battery at least per 3 months when you don’t use the scale for long time.
b. Please correctly connect line between adapter and battery, black to black, red to red.
c. If after charging the used time becomes short than often, please change a new battery.
5. DIVISION CHANGEMENT
1. Press ON/ZERO to turn on the scale.
2. Press TARE key until the wanted (nXXXX) division appears. When pressing TARE again it returns to the
previous division. The division that it appears on screen is the selected division.
3. The scale automatically returns to the weighing mode.
6. CALIBRATION
This operation can only be done by competent authorized personnel according to the laws of each country.
1. With the scale turned off, unseal the seal of the division modification switch. This switch is located in the
inferior face of the scale.
2. To change the position of the switch of division modification.
3. Press the button ON / ZERO to turn on the scale.
4. Press the TARE key until “CAL” appears in the screen.
5. Press the TARE key again, the maximum capacity of the scale will appear.
6. Locate on the scale the weight of its maximum capacity.
7. Wait 5 seconds.
8. Press the TARE key again, the message “CaEnd” will appear in the screen. The calibration has finished and
the scale automatically returns to the weighing mode.
9. Press the key OFF to turn off the scale.
10. Locate the switch of division modification to their original position.
11. Seal the modification switch again.
14
NOTES: during the calibration, if you want to quit, press ON/ZERO.
DECLARACIÓN DE CONFORMIDAD
DÉCLARATION DE CONFORMITÉ
DECLARATION OF CONFORMITY
GIROPÈS S.L,
Sociedad domiciliada en
Société domiciliée à
Society domiciled in:
Polígono Empordà Internacional
C/F, parcela 15-16
17469 Vilamalla (Girona / España)
declara que los modelos de báscula
déclare que les modèles de balances
declares that the models of scale
SS3, SS6, SS15 y SS30 de la serie SUPER SS
son conformes a la directiva 2004/108/CE de compatibilidad electromagnética y a la directiva
77/23/CEE de seguridad eléctrica y en su caso a las siguientes normas armonizadas:
exécutent avec les directives 2004/108/CE de compatibilité électromagnétique et 77/23/CEE de sécurité éléctrique à travers les suivantes règles européennes:
they are according to the directive 2004/108/CE of electromagnetic compatibility and to the directive 77/23/CEE
of electric security and in their case to the following harmonized norms:
EN55014-1:2006
EN55014-2: 1997/A1: 2001/A2:2008
EN61000-3-2: 2006
EN61000-3-3: 2008
EN61558-2-6:1997
EN61558-1:1997+A1:1998+A11:2003
Por lo que expedimos la presente declaración de conformidad.
Par ce que nous expédions la présente déclaration de conformité.
For what we send the present declaration of conformity.
Jordi Ribalta Busquets