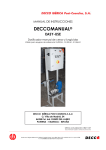
Download CUADRO DE CONTROL DE BOMBAS CON
Transcript
CUADRO DE CONTROL DE BOMBAS CON VARIADOR DE FRECUENCIA Incluye esquema eléctrico Nº de Cuadro: Cxxxx Nº de Equipo: Exxxx Tipo: -- s/n Variador: -- 1. Puesta en marcha: La primera vez que pongamos el cuadro en marcha pueden ocurrir dos errores típicos e invisibles a la hora de realizar la prueba de cuadro en BOMBAS SACI. Estos errores son los siguientes: • • Salto del diferencial general donde cogemos la línea de alimentación del cuadro. Esto sólo se da en redes flotantes, conectadas a tierra por impedancia o de forma asimétrica. Giro incorrecto de las bombas. Para solucionar el tema del salto del diferencial, este se debería sustituir por uno de los denominados superinmunizados. Como forma cautelar podemos extraer los tornillos EM1 y EM3 que se muestran en el dibujo de más abajo. Un giro incorrecto de las bombas puede tener varias soluciones dependiendo de si la bomba gira mal en el modo manual (directo), en el modo variador o en ambos. La siguiente tabla muestra como solucionar cada uno de ellos: MANUAL VARIADOR SOLUCIÓN GIRA MAL GIRA BIEN Intercambiar dos fases de la entrada de alimentación al cuadro. GIRA BIEN GIRA MAL Intercambiar dos fases de la salida a motor del variador. La salida a motor del variador se muestra en el dibujo de mas abajo como U2,V2,W2. GIRA MAL GIRA MAL Se deben realizar las soluciones de los dos estados anteriores, o sea, cambiar una fase de entrada al cuadro y una fase de salida del variador. 1 2. Funcionamiento del panel de control: Al conectar el cuadro eléctrico el panel se muestra de la siguiente manera: En el se pueden observar una serie de datos que comentamos a continuación: MODO DE TRABAJO LOC – Indica que el convertidor está en modo local, es decir, se controla desde el panel. REM – Indica que es convertidor está en modo remoto, es decir, se controla mediante sus entradas y salidas. (Es el modo de trabajo que utilizaremos). - Indica el estado de giro del motor. Flecha girando Flecha girando destellante Flecha parada Convertidor funcionando en el punto de consigna. Convertidor funcionando pero no en el punto de consigna. Comando de marcha presente pero no funciona. REFERENCIA ACTIVA Indica la referencia activa en ese momento. En nuestro caso el valor de la presión de consigna en % del transductor. Ej: Para un transductor 0-10 bar si nuestra consigna es de 4 bar nos indicará 40%. 2 VALORES DE PARÁMETROS La pantalla indica tres valores relacionados con nuestra aplicación. de parámetros 1º) Velocidad del motor (en Hertzios). 2º) Consumo del motor (en Amperios). 3º) Presión leída por el transductor (en bares). En la parte central inferior se indica la hora. FUNCION TECLA MULTIFUNCIÓN 1 y 2 En la parte inferior izquierda nos muestra la función asignada en ese momento a la tecla multifunción 1 que es la que se encuentra justamente debajo. De esa misma forma en la parte inferior derecha, nos encontramos con la función asignada en ese momento a la tecla multifunción 2 que es la que se encuentra justamente debajo. También encontramos una serie de teclas de las cuales algunas ya se han comentado anteriormente: FLECHAS ARRIBA / ABAJO Estas teclas tienen dos utilidades básicas, nos permiten desplazarnos por los menús o listas y sirven para incrementar o disminuir un valor si previamente se ha seleccionado. TECLA LOC/REM Cambia entre el modo de control local o remoto. Estos modos de control se han comentado anteriormente en MODO DE TRABAJO. Esta tecla puede ser bloqueada mediante el parámetro 1606. 3 TECLA AYUDA Muestra información de ayuda relativa al elemento resaltado en esos momentos en la pantalla de trabjo. TECLA STOP Detiene el convertidor sólo en modo local. TECLA START Arranca el convertidor sólo en modo local. LED DE ESTADO Verde: Funcionamiento normal. Rojo o parpadeo: Consultar averías. 4 3. Modificación de parámetros: Por ejemplo parámetro 4011, para cambio de presión. Partiendo desde la pantalla principal, pulsamos la tecla multifunción de la derecha, accediendo de esta forma al menú principal, donde nos encontraremos la siguiente pantalla: REM MENU PRPAL 1 PARÁMETROS _ ASISTENTES PAR CAMBIADOS SALIR INTRO Con las flechas arriba / abajo seleccionaremos el menú “PARÁMETROS”, podemos saber el menú seleccionado porque queda remarcado. Pulsamos la tecla multifunción de la derecha, que nos ofrece la opción “INTRO”, y nos aparece otro menú como el siguiente: REM 01 03 04 10 11 GRUPO PARAM DATOS FUNCIONAM SEÑALES ACT BC HISTORIAL FALLOS MARCHA/PARO/DIR SELEC REFERENCIA SALIR 01 _ SEL De nuevo, con las flechas arriba / abajo seleccionaremos el grupo de parámetros en el que se encuentra nuestro parámetro a cambiar. En nuestro caso al tratarse del parámetro 4011, las dos primeras cifras nos indican el grupo al que perteneced, el 40. Por lo tanto nos desplazaremos hasta dejar remarcado el grupo 40 “CONJ PID PROCESO 1” REM 34 35 36 37 40 GRUPO PARAM 40 PANTALLA PANEL TEMP MOT MED FUNCIONES TEMP CURVA CARGA USUA CONJ PID PROCESO 1 _ SALIR SEL Pulsamos la tecla multifunción de la derecha, que nos ofrece la opción “SEL”, y nos aparece el último menú con un listado de parámetros como el siguiente: REM _ 4001 4002 4003 4004 SALIR PARAMETROS GANANCIA 1.0 TIEMP INTEGRAC. TIEMP DERIVACION FILTRO DERIV PID _ _ EDITAR 5 De la misma forma que hemos procedido hasta ahora, con las flechas arriba / abajo seleccionaremos el parámetro a cambiar. Por lo tanto nos desplazaremos hasta dejar remarcado el parámetro 4011 “PUNT CONSIG INT” NOTA: A medida que nos desplazamos por los parámetros podemos ver que justo debajo de cada parámetro seleccionado nos indica el valor que en esos momentos tiene el parámetro, de esta manera no es necesario entrar para visualizar dicho valor. REM 4008 4009 4010 _ 4011 PARAMETROS VALOR 0% VALOR 100% SEL PUNTO CONSIG PUNTO CONSIG INT 4.0 bar SALIR _ _ EDITAR Para finalizar, pulsamos la tecla multifunción de la derecha, que nos ofrece la opción “EDITAR”, y nos aparece en pantalla el valor del parámetro a modificar REM 4011 EDICION PAR VPUNTO CONSIG INT 4.0 bar CANCELA GUARDAR En este momento podemos modificar el parámetro mediante las flechas subir bajar. En los parámetros numéricos como el del ejemplo, con las flechas aumentaremos o disminuiremos el valor del parámetro a modificar. En los parámetros con opciones, con las flechas nos moveremos por esas opciones hasta encontrar la que necesitamos. Una vez modificado el parámetro según nuestras necesidades, debemos pulsar la tecla multifunción de la derecha que en esta ocasión nos indica “GUARDAR”. Una vez realizado el cambio y guardado, pulsamos la tecla multifunción debajo del texto SALIR, para regresar a los menús anteriores ó con las teclas flecha arriba, abajo, buscamos los otros parámetros a cambiar repitiendo los pasos anteriores. 4. Cargar / Descargar programación entre pantalla y variador Una vez tenemos programado el variador de frecuencia, podemos cargar esta programación a la pantalla de manera que podamos recuperar esa programación en cualquier momento y volverla a cargar en el convertidor. Los pasos a seguir son los siguientes: Paso 1: Ir al parámetro 1606 y poner: SIN SEL. Paso 2: Volver al menú principal y pulsar la tecla LOC/REM. Ver que en la pantalla aparece LOC. Paso 3: Pulsar Menú y bajar hasta SALVAR PARÁMETROS. Paso 4: Entrar en SALVAR PARÁMETROS y elegir la opción que queremos: Cargar a panel Para guardar en el panel la programación realizada. Descargar todo a unidad Recuperamos la programación guardada en el panel. Paso 5: Volvemos a pulsar la tecla LOC/REM. Ver que en pantalla aparece REM. Paso 6: Ir al parámetro 1606 y poner: SI. 6 5. Parámetros básicos en un equipo de bombeo Hay dos parámetros básicos en una programación para equipo de bombeo, la presión de consigna y el nivel dormir. Estos son los dos únicos parámetros que el cliente deberá modificar, puesto que no dependen del equipo electrónico, sino de la bomba usada y la instalación. PRESION DE CONSIGNA La presión de consigna es la presión a la que queremos mantener nuestra instalación, sabiendo que en todo momento nuestro variador modificará la velocidad del motor de la bomba para adaptarse a esa presión. La presión de consigna se modifica en el parámetro 4011 (ejemplo usado en el apartado 2 de este manual). Un cambio de presión siempre conlleva a un cambio de nivel dormir, que comentaremos a continuación. NIVEL DORMIR El nivel dormir es la velocidad (en Hz) en la cual la bomba no impulsa agua. Cuando el sistema se pasa un tiempo trabajando por debajo de esta velocidad, consideramos que en la red no hay consumo y damos orden de paro. Para poder hallar este nivel dormir con cierta exactitud procederemos de la siguiente manera: Paso 1: Ajustamos la presión de trabajo que queremos y un nivel dormir de 30Hz. Paso 2: Volvemos al menú principal y arrancamos el equipo (Selector en Variador y Bombas en Automático). Paso 3: Esperamos unos segundos hasta que el equipo se estabilice, procedemos a cerrar la válvula lentamente hasta que el consumo sea cero. Podremos ver como desciende la velocidad (Hz) del variador. Esperamos a que esta velocidad se estabilice en un valor concreto. Paso 4: En este momento la bomba queda girando a un régimen, “batiendo agua”. Mediante la pantalla de control tomamos nota de la frecuencia a la que trabaja (por ejemplo: 43 Hz). A este dato le añadimos 1 Hz y lo consideramos el nivel dormir (44 Hz). Paso 5: Colocamos este dato de nivel dormir en el parámetro 4023. Si hay bombas auxiliares este dato también se debe colocar en los parámetros 8112, 8113 y 8114. 6. Fallos y alarmas En el panel del variador podemos ser advertidos de diversos fallos o alarmas, algunos de ellos en realidad son avisos y no suponen ningún problema para que nuestro equipo funcione correctamente. El listado completo de fallos se puede consultar en el manual de usuario de ABB. En esta sección indicaremos los más comunes. FALLOS Código 8 Indicación en panel FALLO EA2 Descripción Fallo entrada analógica 2 Causa - Transductor mal conectado. - Transductor estropeado. - Transductor obstruido. ALARMAS Código Indicación en panel Descripción 2014 AUTOCAMBIO Función de autocambio activada 2015 BLOQUEO PFC 1 El convertidor no puede arrancar algún motor DORMIR PID Indica que la función PID está activada. Nuestro sistema ha llegado a la presión de consigna y se ha detenido, pudiendo ponerse en marcha en cualquier momento. 2018 Causa AVISO COMÚN PARA NUESTRA APLICACIÓN - Algún selector no está en automático. - Guardamotor saltado. - Motor desconectado. AVISO COMÚN PARA NUESTRA APLICACIÓN 7 7. Aplicación bombas. Lista de parámetros más comunes: GRUPO 99: DATOS DE PARTIDA Param. Descripción Nº Programación Notas 9901 Idioma 4 Español 9902 Aplicación 7 PFC 9904 Modo control motor 3 Escalar frecuencia 9905 Tensión nominal motor 400 V Tensión nominal motor en V. 9906 Intensidad nominal motor A Intensidad nominal motor en A. 9907 Frecuencia nominal motor 50 Hz Frecuencia nominal motor en Hz. 9908 Velocidad nominal motor 2850 Velocidad nominal motor en rpm. 9909 Potencia nominal motor Kw Potencia motor en Kw. GRUPO 10: MARCHA / PARO / DIRECCIÓN Param. Descripción Nº Programación 1001 Comando exterior 1 0 SIN SEL 1002 Comando exterior 2 6 ED6 Notas Define la marcha del equipo GRUPO 11: SELECCIÓN DE REFERENCIA Param. Descripción Nº 1101 Selección referencia panel 2 REF 2 % 1102 Selección EXT 1 / EXT 2 7 EXT 2 1103 Selección REF 1 0 Panel 1104 Ref 1 Mínimo 0 Hz 1105 Ref 1 Máximo 52 Hz 1106 Selección referencia 2 19 Programación Notas SALPID 1 GRUPO 13: ENTRADAS ANALÓGICAS Param. 1304 Descripción Nº Mínimo ent. analógica 2 Programación 20 % Notas Para entradas 4 – 20 ma 1305 Máximo ent. analógica 2 100 % 1306 Filtro entrada analógica 2 0.2 Seg. Filtra la entrada del transductor GRUPO 14: SALIDAS DE RELÉ Param. Descripción Nº Programación 1401 Salida relé 1 1402 Salida relé 2 ∗ ∗ 1403 Salida relé 3 ∗ 1410 Salida relé 4 ∗ 1411 Salida relé 5 ∗ 1412 Salida relé 6 ∗ Notas ∗ En los cuadros con alternancia se deben programar como PFC tantas salidas a relé como bombas tengamos, el resto de salidas las dejaremos en SIN SEL. En los cuadros básicos la salida a relé 1 se debe programar como SUPERV1 SOBR, se deben poner como PFC tantas salidas adicionales hasta completar el número total de bombas y el resto de salidas en SIN SEL. En este caso también se debe programar el grupo 32 como se indica mas adelante. 8 GRUPO 16: CONTROLES DEL SISTEMA Param. Descripción Nº Programación 1601 Permiso de marcha 0 SIN SEL 1602 Bloqueo parámetros 1603 Código de acceso 1 ABIERTO 1604 Reset de fallos 0 Panel 1605 Camb. ajuste par. Usuario 0 SIN SEL 1606 Bloqueo local 7 SI 358 Notas Para desbloquear parámetros ∗ Inhabilita la tecla LOC del panel ∗ Si los parámetros están bloqueados en el apartado 1602, primero hay que ir al parámetro 1603, introducir el código 358, e inmediatamente después ir al parámetro 1602 y desbloquear parámetros. GRUPO 20: LÍMITES Param. Descripción Nº Programación Notas 2003 Intensidad máxima I.n. x 1.5 1,5 veces la intensidad nominal 2007 Frecuencia mínima 25 Hz 30 Hz para motores FRANKLIN 2008 Frecuencia máxima 52 Hz GRUPO 21: MARCHA / PARO Param. Descripción Nº Programación 2101 Función marcha 1 Auto 2102 Función de paro 1 Paro libre Notas GRUPO 30: FUNCIONES FALLOS Param. Descripción Nº Programación 3001 Entrada analógica min. 1 Fallo 3002 Perdida de panel 3 Ultima velocidad 3010 Función bloqueo 1 Fallo 3022 Limite fallo ent. analógica 15% Notas Fallo por debajo de 3 mA GRUPO 31: REARRANQUES AUTOMÁTICOS Param. Descripción Nº Programación 3101 Numero de tentativas 3102 Tiempo de tentativas 30 Seg. 3103 Tiempo de demora 5 Seg. 3104 Sobre intensidad 1 Activar 3105 Sobre tensión 1 Activar 3106 Subtensión 1 Activar Notas 5 GRUPO 32: SUPERVISIÓN Param. Descripción Nº 103 Programación 3201 Param Superv 1 3202 Lim Super 1 Baj 1 Hz 3203 Lim Super 1 Alt 1 Hz. Notas Frec Salida 9 GRUPO 34: PANTALLA PANEL / VARIABLES DE PROCESO Param. Descripción Nº 130 Programación 3415 Parámetro señal 3 3416 Señal mínima 0 bar 3417 Señal máxima 10 bar 3419 Unidades de salida 22 Notas REALIM PID 1 Limite del transductor Bar GRUPO 40: CONJUNTO PID PROCESO 1 Param. Descripción Nº Programación 4001 Ganancia 1 4002 Tiempo integración 5 Seg. 4003 Tiempo derivación 0 Seg. 4004 Filtro derivación 1 Seg. 4006 Unidades 4009 Valor 100% 4010 Selec. punto de consigna 4011 Punto de consigna interno 4016 Notas 22 bar 19 Interno Entrada actual 1 2 EA2 4022 Selección dormir 7 Interno 4023 Nivel dormir 40 Hz Nivel dormir 4024 Demora dormir 20 Seg. 4025 Nivel despertar 0.5 bar Tiempo antes de ir a dormir Diferencial por debajo de la presión de trabajo 10 bar Valor máximo del transductor 4 bar Presión de trabajo GRUPO 81: CONTROL PFC Param. Descripción Nº Programación Notas 8109 Marcha frecuencia 1 51 Hz Nivel de marcha bomba aux. 1 8110 Marcha frecuencia 2 51 Hz Nivel de marcha bomba aux. 2 8111 Marcha frecuencia 3 51 Hz Nivel de marcha bomba aux. 3 8112 Baja frecuencia 1 40 Hz Nivel de paro bomba auxiliar 1 8113 Baja frecuencia 2 40 Hz Nivel de paro bomba auxiliar 2 8114 Baja frecuencia 3 40 Hz Nivel de paro bomba auxiliar 3 8115 Ret. marcha motores aux. 3 Seg. 8116 Retardo paro motores aux. 2 Seg. 8117 Numero de motores aux. 1 1 menos que el total de motores 0.1 h Para aplicaciones con alternancia 8118 Intervalo de autocambio 8119 Nivel de autocambio 8120 Enclavamientos 8123 Activar PFC 8127 Nº de motores SIN SELEC Para aplicaciones básicas 0% Realiza la alternancia en paro ED1 SIN SELEC 1 Para una ó dos bombas básico Activo 2 Numero total de motores 10 BASIC MANUAL FOR PROGRAMMING ACS 550 1 0. Index: 1. Screen control assistant presentation 3 2. Screen Information of the inverter 3 3. Sequence to be followed to change a parameter on the screen 4 4. Changing the pressure 6 5. Application for pumps. List of parameters to be changed 7 6. Manufacturing data 7 2 1. Screen Control assistant presentation: The - control panel of the ACS550 has the following characteristics: Alphanumerical control panel with an LCD screen. Language selection on he screen Copy function. The parameters can be copied on the memory of the control panel for a future transfer to other inverters or as a safety copy and backup of specific inverter. When the panel is connected some value are displayed as shown below. Indicates the reference of pressure % from the pressure trasducer Shows the remote working Work Frecuency of the pump Consumption of the pump in Amps Multifunctional key 1 – Its function is defined by text on the bottom left side. Net Pressure Multifunctional key 1 – Its function is defined by text on the bottom right side. Local/Remote – blocking of the parameters Help STOP: Stops the inverter. Only used on 6 pumps applications. RUN: Starts the inverter. Only used on 6 pumps applications. Up/Down - Allows the movement inside the screen. - Once a parameter is selected, increases or decreases its value. 2. Screen information of the inverter: Upper Part. The upper line of the screen shows Basic information about the inverter. LOC – Indicates inverter is in LOCAL, that must be managed from the panel. REM – Indicates that the inverter is in REMOTE. On the usual way of working. - Indicates the sense of rotation: Arrow rotating: The motor is turning in the point of consignment. Arrow rotating and flashing: The motor is turning but no at the point of consignment. Central Part. Through the group of parameters 34, it is possible the set the central part with up to 3 different values. These values refer to data of functioning from the Group 01. First Line: Work frequency of the pump. Second Line: Consumption in Amps. Third Line: Net pressure, in the outlet. Below part. Bottom Corners: Show the actual values set for the multifunctional key. In the center it shows the time(in case has been set previously) 3 3. Sequence to be followed to change a parameter on the screen: For example (4011) for changing the pressure. Access to menu Multifunctional Key It appears in the screen the following menu: PARAMETERS ASISTANTS CHANGED PAR EXIT ENTER We have the press the key Up/Down (if necessary) until the line “Parameters” is marked. We press the multifunctional key that is under the text INTRO. 01 OPERATING DATA 03 FB ACTUAL SIGNALS 04 FAULT HISTORY 10 START/STOP/DIR 11 REFERENCE SELEC EXIT ENTER We have the press the key Up/Down (if necessary) until the line ““40 CONJ PID PROCESO 1”” is marked. 33 INFORMATION 34 PANEL DISPLAY 35 MOTOR TEMP MEAS 36 TIMED FUNCTIONS 40 PROCESS PID SET 1 EXIT SEL Press the multifunction key under the text SEL. We have the press the key Up/Down (if necessary) until the line “4011 PUNT CONSIG INT” is marked. 4008 0% VALUE 4009 100% VALUE 4010 SET POINT SEL 4011 INTERNAL SETPNT EXIT EDIT Press the multifunction key under the text EDIT. 4 4011 INTERNAL SETPNT 4.0 BAR CANCEL SAVE We have to press the arrows Up/DOWN to modify the working pressure. Once we reach the desired value, we press the multifunctional key under the text SAVE. If we press CANCEL we leave without saving the changes. 4008 0% VALUE 4009 100% VALUE 4010 SET POINT SEL 4011 INTERNAL SETPNT EXIT EDIT We press the multifunctional key under the text EXIT, to return on the previous menus. With the UP/DOWN we search for new parameters to change. 4. Changing the pressure Changing the pressure is done using the parameter 4011. The “sleep level” must be set, parameter 4023. Setting the stops for the auxiliary pumps (if any), parameters 8112, 8113 & 8114. To be able to make these changes follow the instructions form the manual on the screen. Group 40: PID process 1 Parameters 4011 4023 Group 81: Control PFC Parameters 8112 8113 8114 Nº Internal setpnt PID Sleep Level Low frequency 1 Low frequency 2 Low frequency 3 Standard settings 5 bar 40 Hz Nº Standard settings 40 Hz 40 Hz 40 Hz Notes Working Pressure Sleep level Notes Stop Level Auxiliary pump 1 Stop Level Auxiliary pump 2 Stop Level Auxiliary pump 3 Keep in mind that Sleep level and stop of the auxiliary pumps depends on the type of pump and the working pressure set. ¿What is the sleep level? Is the frequency level (r.p.m.) in which the pump is not able to supply water but maintains the pressure. When the puma is turning below this level we consider that there’s no consumption of water in the net, and alter a while, that can be programmed, we stop the equipment. ¿How to find the value “sleep level”? It is important to control the consumption of water with a valve in the outlet of the booster in order to test the equipment. Once the pressure is set, the pump connected to the inverted is started, this pump covers a consumption of water below 100% of its curve. We wait a few seconds until the booster stabilizes; we proceed to close the valve slowly until the consumption becomes zero. In this point the pump is stirring up the water. 5 Looking at the control screen we take note of the frequency in which the pump is working, for instance 43 Hz. If necessary we will do it several times to be sure. To this point (43 Hz) we ad 1 Hz, and consider this (44 Hz) as the “sleep level”. Stop of the auxiliary pumps. The pump connected to the inverter regulates the speed to the needs of the net in each moment. When it ‘s in full speed for a while and it is not able to recover the set pressure, starts auxiliary pumps. If the needs of the net reduce, the pumps reduce speed. If we consider that below sleep level we are not pumping water, it is the moment to stop the auxiliary pump. For this reason the point of stop for the auxiliary pumps must be the sleep level. 5. Application for pumps. List of parameters to be changed: In the list below are omitted the parameters that are not used regularly. Group 99: Starting data Parameters 9901 9902 9904 9905 9906 9907 9908 9909 Language Application Mode control motor Tension nominal motor Intensity nominal motor Frequency nominal motor Speed nominal motor Power nominal motor Nº 4 7 3 Standard settings english PFC Scalar speed 400 V I.n. 50 Hz 2850 Kw. Group 10: Run / Stop / Sense of direction Parameters Nº 1001 1002 External Command 1 External Command 2 0 6 Group 11: Selection of reference Parameters Nº 1101 1102 1103 1104 1105 1106 Reference selection panel Selection EXT 1 / EXT 2 Selection REF 1 Ref 1 Minimum Ref 1 Maximum Selection reference 2 Group 12: Constant Speeds Parameters 1201 Selecting constant speed 2 7 0 19 Group 13: Analogical entrances Parameters 1304 1305 1306 Nº 1401 1402 1403 1410 1411 1412 31 31 31 31 31 31 relay relay relay relay relay relay 1 2 3 4 5 6 Standard settings Standard settings 20 % 100 % 0.2 Sec. Group 14: Exits for the relay Parameters Notes Defines the run of the equipment Notes Notes SIN SEL Nº Minimum analogical entrance 1 Minimum analogical entrance 2 Analogical entrance filter 2 Exit Exit Exit Exit Exit Exit Standard settings Same to intensity nominal motor Frequency nominal motor Speed nominal motor Power motor in Kw. REF 2 % EXT 2 Panel 0 Hz 52 Hz SALPID 1 Nº 0 Standard settings SIN SEL ED6 Notes Standard settings Notes For entrances 4 – 20 ma Filters the entrances of the transducer Notes PFC PFC SUPERV1 OVER SIN SEL SIN SEL SIN SEL The above parameters must be set as a PFC if is going to be used to active pumps. If not set, as SIN SEL. For this reason we must put as much relay exits in PFC as auxiliary pumps. 6 Group 16: System controls Parameters Nº 1601 1602 1603 1604 1605 1606 0 1 358 0 0 7 Run permit Blocking of the parameters Access Code Failure Reset Adjust Change User Blocking Local Standard settings SIN SEL OPEN Panel SIN SEL SI Notes To unblock parameters Blocks the key LOC in the screen panel If the parameters are bocked in 1602, first go to parameter 1603, enter code 358 and after go to parameter 1602 and unblock parameters. Group 20: Limits Parameters 2003 2007 2008 Nº Maximum intensity Minimum frequency Maximum frequency I.n. x 1.5 25 Hz 52 Hz Group 21: Run/Stop Parameters 2101 2102 Nº Run Function Stop Function 3101 3102 3103 3104 3105 3106 Number of attempts Time of attempts Delay time Over intensity Over tension Subvention Group 32: Supervision Parameters 3201 3202 3203 Superv 1 param Superv 1 lim LO Superv 1 lim HI Auto Stop free Nº Minimum Analogical entrance Lost of panel Blocking function Failure Limit analogical entrance Group 31: Automatical re starts Parameters Standard settings 1 1 Group 30: failure functions Parameters 3001 3002 3010 3022 Standard settings 1 3 1 Nº 1 1 1 Nº Standard settings Failure Last speed Failure 15% Standard settings Parameter signal 3 Signal minimal Signal maximal Units of exit 1,5 times the nominal intensity 30 Hz for FRANKLIN motors Notes For the most part of cases Notes Failure under 3 m.a. Notes 5 30 Sec. 5 Sec. Active Active Active Standard settings Notes OUTPUT FREQ 1 Hz 1Hz Group 34: Screen Panel / Variable of the process Parameters Nº Standard settings 3415 3416 3417 3419 Notes 130 REALIM PID 1 0 bar 10 bar 22 Bar Notes Actual Pressure on line 3 Limit of the transducer 7 Group 40: PID process 1 Parameters 4001 4002 4003 4004 4006 4009 4010 4011 4016 4022 4023 4024 4025 Profit Integration Time Derivation Time Derivation Filter Units Value 100% Selection point consign Internal consign point Actual entrance 1 Selection sleep Sleep level Delay sleep Wake up level Group 81: Control PFC Parameters 8109 8110 8111 8112 8113 8114 8115 8116 8117 8118 8119 8120 8123 8127 Run frequency 1 Run frequency 2 Run frequency 3 Low frequency 1 Low frequency 2 low frequency 3 Delay run auxiliary motor Delay Stop auxiliary pumps. Number of auxiliary motors. Interval of auto-change Level of auto-change Enslavements Active PFC Nº of motors Nº 22 19 2 7 Nº 1 Standard settings 1 5 Sec. 0 Sec. 1 Sec. bar 10 bar Internal 5 bar EA2 Internal 40 Hz 20 Sec. 0.5 bar Standard settings 51 Hz 51 Hz 51 Hz 40 Hz 40 Hz 40 Hz 1.5 Sec. 2 Sec. 1 0.1 h 0% ED1 Active 2 Notes Maximum value of transducer Working pressure Sleep Level Time before going to sleep Differential below the working pressure Notes Run Level Auxiliary pump 1 Run Level Auxiliary pump 2 Run Level Auxiliary pump 3 Stop level auxiliary pump 1 Stop level auxiliary pump 2 Stop level auxiliary pump 3 1 less of the total of motors For alternate applications Make the alternate in stop mode Total number of motors Once the set and the test is finished it is very important to save the changes in the internal memory. Group 16: Controls for the system Parameters Nº 1607 Save parameters 1 Standard settings Notes Save parameters Also its very convenient to save the parameters in the screen panel, with the screen menu. 8


