1
TEFEN
TEFEN
TEFEN Advanced Plastic Solutions.
®
Propotional Injector
Pompe à Dosage Proportionnel
Pompa proporzionale
Injetor Proporcional
Proportionale Injektorpumpe
TEFEN
MixRite
TF5
MixRite TF5
User's Manual
MixRite
TF5
User's Manual
10032
®
Recommended:
120 mesh water filter prior to the MixRite injector
Propotional Injector
CE
SI
ISO 9001:
2008
MS
IFED Q
RT
THE STANDARDS INSTITUTIONOF ISRSEL
10033
Edition 6.11
Edition 01.12
Pompe
à Dosage Proportionnel
www.tefenplastic.com
E-mail:
[email protected]
Pompa proporzionale
Bedienungsanleitung
Manual
do usuario
English
Espaniol
p.1-17 E-mail:
p.18-28
www.tefenplastic.com
[email protected]
www.tefenplastic.com E-mail: [email protected]
English
Espan
Edition
01.14
Edition 01.12
p. 2 - 1 0 p. 1 1 -1 9
Edition 01.12
User's Manual
Manual del Usuario
User
Manuel
Injetor Proporcional
Manuale d’Uso
Manuel
Utilisateur
Proportionale
Injektorpumpe
[email protected]
www.tefentech.com
Français
p. 2 0 - 3 0
Italiano
p. 31-39
1
Russian
p. 40-46
Portuguese
p. 47-55
www.tefenplastic.com E-mail: [email protected]
Deutsch
p. 56-63
TEFEN
TEFEN
TEFEN Advanced Plastic Solutions.
TEFEN Advanced Plastic Solutions.
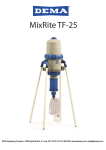
Tefen MixRite TF 5 Fertilizer and Chemicals Injector
Congratulations on your purchase of one of Tefen’s high quality products.
To get the best results from the MixRite TF-5 Proportioning Dosing Injector it is important to spend
a few minutes reading carefully the explanations and recommendations in this user’s manual.
Operating principle
The proportioning dosing injector is fitted on the water line. The flow of water passing through the
injector activates it and causes the pumping of liquid fertilizer (or other additive) and inject it in a
relative quantity into the water line.
The MixRite TF 5 technical working range:
The flow rate of water passing through the injector is between 0.2 and 5 m³/Hr. (0.88-22 GPM).
The water pressure is between 1 and 8 bar (14.7 and 120 PSI).
The water and air temperatures are not less than 4°C and not more than 40°C (39°F - 104°F).
Head loss: Low flow 0.1 Bar – High flow 0.8 Bar.
Max deviation injection rate +/- 10%.
Before using, an initial calibration should be done, in order to assure accurate match with the
injector printed scale.
The flow rate of the fertilizer and chemicals can be adjusted relative to the flow rate of the water in
the range of:
0.1% to 1%
0.2% to 2%
0.5% to 5%
Installing the Injector
Check that Injector package contains the following items:
* One proportioning dosing injector to which are attached
Two compression fittings (Plasson) for a 32 mm PE pipe.
* One flexible suction tube to which is attached a flat seal
And a filter.
* 2 stand brackets.
* One User’s manual.
* 4 legs (optional).
To fit to wall – connect one of the brackets to the
wall by inserting 4 screws in the Bracket.
To install the stand – insert the brackets into the body grooves at the bottom and press up until
they fit in place. Place the legs in the holes and press until they well locked.
Para asesoramiento, soporte técnico y compra de repuestos, contacte al
representante de ventas autorizado en su área
GARANTIA LIMITADA
Tefen Manufacture & Marketing Plastic Products 1990 Ltd. reemplazará todas aquellas
partes que muestren defectos en el material o que presenten defectos debido a mano
de obra durante un período de doce mese desde la fecha de compra por parte del
comprador original.
Para obtener garantía de reemplazo de una parte, el MixRite debe ser devuelto con la
prueba original de compra, es decir el recibo original, al fabricante o al distribuidor
autorizado y posteriormente ser reconocida como parte defectuosa por medio de un
examen realizado por los servicios técnicos del fabricante o del distribuidor.
El MixRite debe entregarse limpio de cualquier producto químico y enviado al
fabricante o distribuidor en forma prepaga (con el pago del envío realizado por el
cliente), y será devuelto sin cargo una vez que se haya realizado la reparación si es
que se ha considerado que la garantía lo cubre.
Cualquier reparación bajo garantía no extenderá el período inicial de garantía.
La garantía cubre solamente las circunstancias en donde la parte ha fallado debido a
defectos causados por el proceso de fabricación. Esta garantía no es válida si los
defectos se originaron debido a un mal uso del producto, uso con herramientas
inadecuadas, falta de mantenimiento o instalación defectuosa, accidentes ambientales
o corrosión debido a cuerpos extraños y líquidos que se encuentren dentro o en las
proximidades del MixrRite.
Los sellos y O rings no están cubiertos por esta garantía y tampoco aquellos daños
que hayan sido causados al MixRite por impurezas del agua tales como la arena. Se
debe utilizar un filtro de 200 mesh antes de la unidad para que la garantía sea válida.
Tefen Manufacture & Marketing Plastic Products 1990 Ltd. declina cualquier
responsabilidad si el MixRite no es utilizado de acuerdo a las instrucciones operativas
y tolerancia indicadas en el manual del usuario.
La garantía otorga derechos legales específicos y otros derechos que varían de estado
en estado. Pero toda garantía o comerciabilidad para un propósito particular aplicable
a este producto está limitado en el tiempo al período de garantía escrita.
No existe garantía expresa o implícita relacionada con productos utilizados en forma
conjunta con Tefen Manufacture & Marketing Plastic Products 1990 Ltd.
El fabricante o distribuidor autorizado no será obligado a responder por daño incidental,
o por cualquier pérdida de tipo económico, que resulte de incumplimiento de esta
garantía escrita o cualquier garantía implícita.
No hay otras garantías, expresas o implícitas, más allá de lo que está descripto en los
párrafos anteriores.
2
27
TEFEN
TEFEN
TEFEN Advanced Plastic Solutions.
TEFEN Advanced Plastic Solutions.
Guía para la Solución de Problemas
Problema
El inyector no funciona
El inyector dejó de
funcionar
Hay una pérdida en el
inyector
Verificar
El inyector está conectado
con las flechas en la
dirección opuesta a la de
circulación de agua
Las válvulas de entrada y
salida están cerradas
La entrada del filtro está
bloqueada
No hay flujo de agua a la
presión adecuada
No hay caudal de agua a
la presión adecuada. Abra
la válvula principal. Abra la
tuerca que traba la
cubierta del motor, retire la
cubierta del motor, y retire
el mecanismo. Verifique
que los sellos del motor no
estén defectuosos
Verifique si los resortes
están rotos
Verifique si los sellos por
encima de las válvulas
están defectuosos o si han
sido desplazados
Verifique si una de las
partes del mecanismo está
rota
La pérdida proviene de la
conexión entre el cuerpo y
la cubierta
La pérdida proviene de la
conexión del tubo de
succión
La pérdida proviene de la
válvula de no retorno
No hay succión
El filtro de succión está
bloqueado
Desarme la unidad
inyectora y verifique si el
sello de succión está
defectuoso
La válvula de no retorno
está defectuosa
26
Solución
Coloque el inyector con las
flechas en la dirección del
flujo de agua
Connection of the suction tube
Insert the flat seal into the nut of the coupling on the end of the tube (1). Thread and tighten the
nut to the inlet valve on the bottom of the injector. Make sure that the nut is threaded and tighten
properly (2,3).
Abra las válvulas
Limpie el filtro
Abra la válvula principal
Reemplace los sellos del
motor
Reemplace los resortes
Reemplace los sellos
Reemplace la parte rota
Abra y retire la cubierta del
motor, reemplace el sello,
coloque la cubierta, y
ajuste con firmeza la
tuerca de cierre de la
cubierta
Retire el tubo de succión,
reemplace el sello
defectuoso y reconecte
Desarme la válvula de no
retorno y reemplace el
sello defectuoso
Limpie el filtro
Reemplace el sello de
succión
Connection of the Injector to a 1” threaded line
Note the direction of the water flow. Place the injector so that the arrow stamped on the body of
the injector and the red arrow on central sticker point in the direction of the water flow. Connect
the injector using the plastic couplings.
Connection of the Injector to a 32 mm. polyethylene line
Note the direction of the water flow. Place the injector so that the arrow stamped on the body of
the injector and the red arrow point in the direction of the water flow. Make sure that the ends of
the entry pipe and the exit pipe are cut straight and that the end is in the shape of a rounded
cone. The distance between the entry end and the exit ends should be about 20 cm (7.87").
Remove the 32 mm nut from the injector and the white
ring and slide them onto the pipe at a short distance
from the end. Check that accessory seal 32 and that
the sealing 32 fixture closes the unit from outside (1).
Insert the pipe into the entry opening or exit opening
in accordance with the direction indicated and push it
so that the pipe penetrates passes the seal and stops
at the end of the track.
To facilitate the penetration of the pipe spread a little
silicone grease on the end of the tube before
inserting it. Push the white ring in until it reaches the
thread (2). Close the nut and tighten securely.
In the same way connect the injector to the other pipe.
Reemplace la válvula de
no retorno
3
TEFEN
TEFEN
TEFEN Advanced Plastic Solutions.
TEFEN Advanced Plastic Solutions.
Water with high particle content
(ex.: 120 mesh - 130 microns depending on your water quality) water filter must
be installed prior to the injector (see accessories), if a filter is not installed abrasive substances will
cause the injector to deteriorate prematurely.
Installing the injector on an irrigation line
It is recommended to fit a main valve (1) at the beginning of the line as well as a backflow
prevention valve (3). On a drinking water line, according to local regulations, it is obligatory to
install a backflow prevention valve to prevent entry of chemicals into the drinking water. Then as
shown in the diagram the following have to be installed: A pressure reducer (4) to protect the
injector from excess pressure, a filter (2) of at least 120 mesh (130 micron), a valve (6) before
entry to the injector, vacuum valve (7) to prevent siphoning when the injector is not operating, and
valves to the feed lines have then to be installed. It is advisable to add a bypass pipe through
which the water can flow to irrigation without fertilizer or when it is required to dismantle the
injector.
Mantenimiento de rutina
En forma periódica limpie el filtro de agua a la entrada del inyector y el filtro de succión
de fertilizante.
Si se planifica no operar el inyector durante un largo período de tiempo, haga funcionar
al inyector durante unos minutos con el tubo de medición sumergido en un tanque con
agua limpia para eliminar residuos de fertilizante del inyector para evitar que se
puedan solidificar adentro del inyector.
Si existe un riesgo de congelamiento y la temperatura cae por debajo de los 4°C
(39°F) drene el agua del inyector. Para hace esto, cierre las válvulas de entrada y
salida en forma firme. Abra y desarme el record  ” que conecta la tubería de succión.
Presione la válvula de chequeo de succión usando un dedo o una varilla delgada,
permitiendo que el agua que haya acumulada en el inyector drene hacia fuera
mientras presiona la válvula liberadora de aire en la parte superior del inyector.
Installation of the injector on a bypass line
It is necessary to fit the proportional dosing injector to a bypass line when irrigation with a flow
rate higher than the maximum recommended for the injector. The bypass enables only part of the
water flow to pass through the bypass and activate the injector, while the reminder passes through
the main line. Using the choke valve (7) on the main line, the flow of water passing through the
main line is regulated so that the rest of the flow passes through the bypass and activates the
injector.
The metering must be calculated in accordance with the flow rate passing through both lines.
4
25
TEFEN
TEFEN
TEFEN Advanced Plastic Solutions.
TEFEN Advanced Plastic Solutions.
Control Manual On/Off
En modelos con control manual On/Off se puede controlar la succión mientras el agua
fluye a través del inyector. Para inyectar aditivos, coloque la manija en la posición “On”
(“On” cara arriba), y para detener la inyección coloque la manija en la posición “Off”
(“Off” cara arriba).
It is necessary to fit a main valve (1) at the beginning of the line and after it a backflow
prevention valve (3), pressure reducer (4), a water filter (2) of at least 120 mesh (130 micron),
a T connection (A) for diversion from the main line to the bypass, a valve on the bypass before
the inlet to the proportioning dosing injector, a valve after the outlet from the injector (9) on the
bypass and a T-connector for the return to the main line (B). A choke valve, preferably an angled
valve, should be fitted on the main line between the bypass. An anti vacuum valve (8) should be
fitted together with valves for the branch lines after the return connection from the bypass.
Installation of two injectors in parallel
Control hidráulico On/Off
En modelos con control hidráulico se puede controlar la succión mientras el agua
continúa fluyendo a través del inyector, usando una conexión a los tubos de control
que están controlados por la computadora de riego por medio de válvulas eléctricas.
24
When the water flow rate in the irrigation line is higher than the maximum nominal flow rate of the
injector, the water may be divided between two injectors. If the 2 injectors are used for pumping the
same type of fertilizer, the scale should be adjusted in an identical manner to the same level of
metering. Two different additives may be metered at different levels. The metering in each unit must
be calculated separately for each flow rate passing through each of the two injectors.
It is necessary to fit a main valve (1) at the beginning of the water line and after it, a backflow
prevention valve (3), a pressure reducer (4), a filter (2) with at least 120 mash (130 micron). a Tjunction (5) is then fitted from the main line into 2 lines. To each of these lines are fitted a regulation
valve (6), the injector and non-return valve (7) immediately after the injector and a connection back
to the main line (8). Care must be taken to ensure that both branches are exactly the same length.
5
TEFEN
TEFEN
TEFEN Advanced Plastic Solutions.
TEFEN Advanced Plastic Solutions.
Connection to the Fertilizer Tank
Conexión a un tanque de fertilizante
Connect the suction tube to the fertilizer tank (preferably about 5cm (2") above the bottom). The
liquid fertilizer must be passed through a filter with at least a 120 mesh (130 micron).
If the fertilizer is drawn from an open tank, a heavy weight should be placed at the end of the
suction tube that will keep the opening of the suction tube inside the additive liquid and prevent
the tube from floating and failing outside the tank. Make sure that the level of the fertilizer is
always below the injector. Otherwise uncontrolled flow of the fertilizer may occur.
When connecting to a large fertilizer tank use a valve that is not affected by the fertilizer and an
N.C. valve to prevent the siphon effect. The valve will only open when there is water pressure
irrigation line.
Conecte el tubo de succión al tanque de fertilizante (preferiblemente a unos 5 cm (2”)
por encima del fondo). El líquido fertilizante debe ser pasado a través del filtro de al
menos 120 mesh (130 micrones). Si el fertilizante se toma de un tanque abierto, se
debe colocar un peso pesado al final del tubo de succión de forma tal que se pueda
mantener la abertura del tubo de succión siempre adentro del líquido aditivo y evitar
que el tubo flote y caiga fuera del tanque. Asegúrese de que el nivel del fertilizante
esté siempre por debajo del inyector. De lo contrario puede haber un flujo
descontrolado del fertilizante.
Cuando se conecte a un tanque de fertilizante grande use una válvula que no esté
afectada por el fertilizante y una válvula N.C. para evitar el efecto sifón. La válvula se
abrirá solamente cuando haya presión de agua en la línea de riego.
Adjustment of Metering
Ajuste de la medición
En el cilindro de medición hay una escala que indica el porcentaje de aditivos. Cuando
la válvula de entrada está cerrada y no hay presión de agua en el inyector, gire la
tuerca de ajuste de control y coloque su borde superior en el porcentaje requerido.
Girando en el sentido contrario al de las agujas del reloj aumenta la cantidad de
fertilizante medido. Girando en el sentido de las agujas del reloj la cantidad de
fertilizante se reduce. Se debe verificar la tasa de medición del fertilizante para su
correcto funcionamiento. Si es necesario, ajuste aumentando o reduciendo la tuerca
de ajuste de control.
On the metering cylinder there is a scale indicating the percentage of additives. When the entry
valve is closed and there is no water pressure in the injector, turn the adjustment control nut and
set its upper edge on the percentage required. Turning it counterclockwise increases the amount of
fertilizer metered. Turning it clockwise decreases the amount of fertilizer metered. The actual
fertilizer metering rate should be checked. If necessary, adjust by increasing or decreasing the
adjustment control nut.
6
23
TEFEN
TEFEN
TEFEN Advanced Plastic Solutions.
TEFEN Advanced Plastic Solutions.
Resulta necesario conectar una válvula principal (1) al comienzo de la línea y luego de
ella una válvula de prevención de reflujo (3), un reductor de presión (4), un filtro de
agua (2) de al menos 120 mesh (130 micrones), una conexión T (A) para desvío desde
la línea principal a la derivación, una válvula en la derivación antes de la entrada al
inyector de dosificación proporcional, una válvula después de la salida desde el
inyector (9) en la derivación y un conector T para el retorno a la línea principal (B). Se
debe conectar una válvula de estrangulación, preferentemente una válvula angulada, a
la línea principal. Se debe instalar una válvula antivacío (8) junto con las válvulas de
los ramales luego de la conexión de retorno desde la derivación.
Instalación de dos inyectores en paralelo
Cuando el caudal de agua en la línea de riego es mayor que el caudal nominal máximo
de los inyectores, el agua debe ser dividida entre dos unidades. Si los 2 inyectores son
utilizados para bombear el mismo tipo de fertilizante, las escalas deben ser ajustadas
de idéntica forma al mismo nivel de medición. Dos aditivos diferentes pueden ser
medidos a diferentes niveles. La medición en cada unidad debe ser calculada para
cada caudal que pase a través de los dos inyectores.
Manual On/Off Control
In models with manual on/off control the suction can be controlled while water flows through the
injector. To inject the additive, flick the handle to it's 'on' position ('on' face up), to stop injection of
additive flick the handle to it's 'off' position ('off' face up).
Hydraulic On/Off Control
In models with a hydraulic on/off control the suction can be controlled while the water continues to
flow through the injector, using a connection to the control tubes that are controlled by irrigation
computer by means of electric valves.
Resulta necesario instalar: una válvula principal (1) al comienzo de la línea y luego de
ésta una válvula de prevención de reflujo (3), un reductor de presión (4), un filtro (2)
con un grado de filtración de al menos 120 mesh (130 micrones), un empalme T (5) se
conecta desde la línea principal a 2 líneas. A cada una de estas líneas se conecta una
válvula reguladora (6), el inyector y la válvula de no retorno (7) inmediatamente luego
del inyector y una conexión de regreso a la línea principal (8). Se debe tener
precaución para asegurar que los dos ramales sean exactamente de la misma longitud.
22
7
TEFEN
TEFEN
Agua con alto contenido de partículas
(Ej: 120 mesh – 130 micrones dependiendo de la calidad del agua)
Se debe instalar un filtro antes
del inyector (ver accesorios), de lo contrario las
TEFEN Advanced Plastic Solutions.
sustancias abrasivas pueden provocar que el inyector se deteriore en forma prematura.
TEFEN Advanced Plastic Solutions.
Routine Maintenance
Regularly clean the water filter at the injector inlet and the fertilizer suction filter.
If its planned not to operate the injector for a long period, operate the injector for a few minutes
with the metering tube immersed in a tank with clean water to remove fertilizer residues from the
injector preventing them solidifying in the injector.
If there is fear of frost and the temperature falling below 4°C (39°F) empty the water from the
injector. To do this, close the entry and exit valves securely. Open and dismantle the 3/4" record
that connects the suction pipe. Press the suction check valve using a finger or a thin rod, allowing
all the water that has collected in the injector to drain out while pressing the air release valve at
the top of the injector.
Troubleshooting Guide
Problem
Check
Solution
The injector does not
The injector is fitted with the arrows in the
work
opposite direction to the water flow.
Instalación del inyector en una línea de riego
Se recomienda conectar una válvula principal (1) al comienzo de la línea como así
también una válvula de prevención de reflujo (3). En una línea de agua potable, de
acuerdo a las normas locales es obligatorio instalar una válvula de prevención de
reflujo para evitar el ingreso de productos químicos en el agua potable. Entonces tal
como se muestra en el diagrama se debe instalar lo siguiente: un reductor de presión
(4) para proteger al inyector de una presión excesiva, un filtro (2) de al menos 120
mesh (130 micrones), una válvula (6) antes de la entrada al inyector, una válvula de
vacío (7) para evitar el sifonamiento cuando el inyector no está en funcionamiento, y
válvulas para las líneas de alimentación. Es aconsejable agregar una tubería de
derivación a través de la cual el agua pueda fluir hacia el riego sin fertilizante o cuando
se necesite proceder al desarme del inyector.
Fit The injector with the arrows in
the direction of the water flow.
The inlet and outlet valves are closed.
Open the valves
The inlet filter is blocked.
Clean the filter.
There is no water flow at the appropriate
Open the main valve.
pressure.
The injector has
There is no water flow at the appropriate
stopped working
pressure. Open the main valve. Open the nut
Replace the motor seals.
locking the motor cover, remove the motor
cover, and remove the mechanism. Check if
the motor seals are defective.
Check if the springs are broken.
Replace the springs.
Check if the seals above the valves are
Replace the seals.
defective or have been displaced.
Check if one of the parts of the mechanism
Replace the broken part.
is broken.
There is a leak from
The leak is from the connection between the
Open and remove the motor
the injector.
body and the cover.
cover, replace the seal, fit the
cover, and thoroughly tighten the
cover locking nut.
The leak is from the connection of the
Remove the suction tube, replace
suction tube.
the defective seal and reconnect.
The leak is from the non-return valve.
Dismantle the non-return valve
Instalación del inyector en una línea de derivación
Resulta necesario instalar el inyector de dosificación proporcional en una línea de
derivación cuando se riega con un caudal superior al máximo recomendado para el
inyector. La derivación permite que sólo una parte del agua pase a través del inyector
y lo active, mientras que el resto pasa a través de la línea principal. Usando la válvula
de estrangulación (7) en la línea principal, el flujo de agua que pasa a través de la
línea principal se regula de forma tal que el resto del flujo pase a través de la
derivación y active al inyector.
La medición debe ser calculada en función del flujo de agua que pase a través de
ambas líneas.
and replace the defective seal.
There is no suction.
The suction filter is blocked.
Clean the filter.
Dismantle the injector unit and check if the
Replace the suction seal.
suction seal is defective.
The non-return valve is defective.
8
Replace the non-return valve.
21
TEFEN
TEFEN
TEFEN Advanced Plastic Solutions.
TEFEN Advanced Plastic Solutions.
.
Conexión del tubo de succión
Inserte el sello plano en la tuerca del acoplamiento en el extremo del tubo (1).
Enrosque y ajuste la tuerca a la válvula de entrada ubicada en la parte inferior del
inyector. Asegúrese de que la tuerca esté bien enroscada y debidamente ajustada
(2,3).
Conexión del inyector a una línea roscada de 1”
Tenga en cuenta la dirección del flujo de agua. Arme el inyector de forma tal que la
flecha que está estampada en su cuerpo y la flecha roja en la etiqueta central apunten
en la dirección del flujo de agua. Conecte el inyector usando los acoplamientos
plásticos.
Conexión del inyector a una línea de polietileno de 32 mm
Tenga en cuenta la dirección del flujo de agua. Arme el inyector de forma tal que la
flecha que está estampada en su cuerpo y la flecha roja apunten en la dirección del
flujo de agua. Asegúrese de que los extremos de la tubería de entrada y salida estén
cortados en forma recta y que el extremo tenga una forma de cono redondeado. La
distancia entre el extremo de entrada y el de salida debe ser de 20 cm (7,87”).
Retire la tuerca de 32 mm y el anillo blanco del
inyector, y deslícelos por fuera de la tubería hasta
llegar a una corta distancia de su extremo. Verifique
que el accesorio sello 32 y que el sellado de
sujeción 32 cierren la unidad desde afuera (1).
Inserte la tubería en la abertura de entrada o de
salida de acuerdo con la dirección indicada y
empuje con fuerza de modo tal que la tubería
penetre y el sello pase y se detenga al final de su
recorrido.
Para facilitar la penetración de la tubería aplique un
poco de grasa siliconada en el extremo del tubo
antes de insertarla. Empuje el anillo blanco hasta
que alcance la rosca (2). Coloque la tuerca y
ajústela con firmeza. De la misma forma conecte el
inyector a la otra tubería.
20
For advice, technical support and purchase of spare parts, Contact the authorized sales
representative in your area.
LIMITED WARRANTY
Tefen Manufacture & Marketing Plastic Products 1990 Ltd. will replace all parts shown to be
defective in material or workmanship during a period of twelve months from the date of purchase
by the original purchaser.
To obtain warranty replacement of a part, the MixRite must be returned with original proof of
purchase receipt to the manufacturer or authorized distributor and thereafter recognized as
defective after examination by the technical services of the manufacturer or distributor.
The MixRite must be flushed of any chemical and sent to the manufacturer or distributor prepaid,
but will be returned free of charge once repairs are made if found to be covered by the warranty.
Any repairs made under warranty will not extend the initial warranty period.
This warranty only covers circumstances where the part has failed due to defects caused by the
manufacturing process. This warranty is invalid if the defects are found to be due to the product's
misuse, inappropriate use of tools, lack of maintenance or defective installation or environmental
accidents or corrosion by foreign bodies and liquids found within or in proximity to the MixRite.
The seals and "O" rings are not covered under warranty, nor is damage to the MixRite caused by
water impurities such as sand. A filter (200 Mesh) must be used in front of the unit for the warranty
to be valid.
Tefen Manufacture & Marketing Plastic Products 1990 Ltd. declines any responsibility if the MixRite
is not used in compliance with the operating instructions and tolerances as indicated herein.
This warranty gives you specific legal rights and you may also have other rights which vary from
state to state. But any implied warranty or merchantability or fitness for a particular purpose
applicable to this product is limited in duration to the time period of this written warranty or any
implied warranty.
There is no warranty express or implied relating in any way to products used in conjunction with
Tefen Manufacture & Marketing Plastic Products 1990 Ltd.
The manufacturer or authorized distributor shall not be liable for incidental or consequential
damage, such as any economic loss, resulting from breach of this written warranty or any implied
warranty.
There are no warranties, express or implied, which will extend beyond those described above.
9
TEFEN
TEFEN
TEFEN Advanced Plastic Solutions.
TEFEN Advanced Plastic Solutions.
5
Inyector de Fertilizante y Productos Químicos Tefen MixRite TF 5
Manual On/Off
Lo felicitamos por haber adquirido uno de los excelentes productos de Tefen.
Es muy importante que dedique algunos minutos a la lectura, en forma cuidadosa, de
las explicaciones y recomendaciones que contiene este Manual del Usuario para
obtener los mejores resultados del inyector de dosificación proporcional MixRite TF-5.
82
83
87
46
Principios operativos
El inyector de dosificación proporcional se conecta a la línea de agua. El flujo de agua
que pasa a través del inyector lo activa y provoca el bombeo del líquido fertilizante (u
otro aditivo) y lo inyecta en una cantidad proporcional en la línea de agua.
85
88
89
84
46
El MixRite TF 5 tiene el siguiente rango de trabajo:
El caudal que pasa a través del inyector debe estar entre 0,2 y 5 m3/h (0,88 – 22 GPM).
La presión de agua debe estar entre 1 y 8 bar (14,7 y 120 PSI).
Las temperaturas del agua y del aire no deben ser inferiores a 4°C y tampoco
superiores a 40°C (39 °F – 104°F).
Pérdida de carga: caudal bajo 0,1 bar – caudal alto 0,8 bar
Máxima desviación de la tasa de inyección: +/- 10%
Antes de usarlo, se debe realizar una calibración inicial a los efectos de asegurar una
coincidencia precisa con la escala impresa en el inyector.
El caudal de fertilizante y de productos químicos puede ser ajustado en forma
proporcional al caudal de agua en el siguiente rango:
0,1% a 1%
0,2% a 2%
0,5% a 5%
86
91
90
92
Instalación del inyector
x Verifique que el paquete del inyector contenga los siguientes
ítems:
x Un inyector de dosificación proporcional al que están fijados dos
67
68
69
x
x
x
x
105
10
conectores de compresión (Plasson) para una tubería de PE de 32
mm.
Un tubo de succión flexible al que está fijado un sello plano y un
filtro.
2 soportes de pie.
Un Manual del Usuario.
4 patas (opcional)
Para amurarlo a la pared – fije uno de los soportes a la pared insertando los 4 tornillos
en el soporte.
Para instalar el pie - inserte los soportes en las ranuras del cuerpo en la parte inferior
y presione hasta que entren en su lugar. Coloque las patas en los agujeros y presione
hasta que estén bien trabadas.
19
TEFEN
TEFEN
TEFEN Advanced Plastic Solutions.
TEFEN Advanced Plastic Solutions.
32 mm
PARTS
Manual del Usuario
[email protected]
www.tefentech.com
www.tefenplastic.com
E-mail:
[email protected]
Edition
Edición01.14
01-12
Edición 01-12
18
28050110000
28050210000
28050510000
TF 5 COVER
BODY 1" BSP
BODY 1" NPT
BODY 11/4" NPT
BODY 32
PISTON TF 5
CYLINDER SUPPORT TF5
CYLINDER SUPPORT NUT TF5
ADJUSTMENT NUT TF5
LATCH NUT TF5
CYLINDER 1% MIXRITE TF 5
CYLINDER 2% MIXRITE TF 5
CYLINDER 5% MIXRITE TF 5
CYLINDER SUPPORT SPACER TF5
INSIDE BASE TF5
LARGE EXIT VALVE 3 TF5
CENTRAL VALVE 3 TF5
TOGGLE FRAME TF5
TOGGLE TF5
TOGGLE PIN TF5
BRIDGE PIN TF5
BRIDGE TF5
COMPONENT
CODE
35201011301
35202041302
35202031302
35202061302
35202051302
35203013103
35204011305
35205011806
35207011807
35208011808
35209016109
35210016109
35211016109
35217013110
35212010111
35219013112
35227011113
35227011214
35216013115
35213013116
35213013117
35206011118
O RING 2-110
TOGGLE BEARING
PISTON BAR 1% TF5
PISTON BAR 2% TF5
PISTON BAR 5% TF5
38060211045
35121011121
35222011222
35222021222
35225051222
23
24
25
25
25
26
27
28
29
30
31
32
33
33
33
34
35
SUCTION SEAL 1% MIXRITE TF 5
SUCTION SEAL 2% MIXRITE TF 5
SUCTION SEAL 5% MIXRITE TF 5
OPERATION ROD
"O" Ring 12X2
"O" RING 2-011 VITON
UPPER PISTON SEAL
LOWER PISTON SEAL
O RING 2-356
O RING 7*50
O RING 2-321 FOR 1`% MODEL
O RING 28*7 FOR 2% MODEL
O RING 2-219 FOR 5% MODEL
CHECK VALVE SLEEVE
CHECK VALVE LID
35202014225
35202024225
35202054225
35214013126
37005852002
38020111228
35223012229
35224012230
38023562231
38050072232
38023212233
38028072233
38022192233
36
PISTON CHECK VALVE
36030162284
37
38
SPRING FOR CHECK VALVE HSTY
O RING 2-206 PO
38028110529
38022060284
39
40
O RING 30*3 PO
38003033246
41
CHECK VALVE NUT
36030622100
No.
MixRite TF 5
Manual del Usuario
MixRite
TF
5
www.tefenplastic.com E-mail: [email protected]
MixRite TF5 , 0.1-1% , On Off,
MixRite TF5 , 0.2-2% , On Off,
MixRite TF5 , 0.5-5% , On Off,
1
2
2
2
2
3
5
6
7
8
9
9
9
10
11
12
13
14
15
16
17
18
19
20
21
22
22
22
COMPONENT NAME
36030675102
36030101101
11
1" BSPT
28040110000
28040210000
28040510000
1" NPT
28030110000
28030210000
28030510000
No.
COMPONENT NAME
COMPONENT
CODE
42
43
44
44
45
46
47
48
49
50
51
52
53
NUT 3/4"HOLE 20
WASHER FOR SWIVEL 3/4"
RECORD BODY 19X3/4" - 5% model
RECORD BODY 12x3/4" - 1%,2% MODEL
PLASTIC SPRING TF 5
SPRING FOR INNER VALVE TF 10/5
SEAL 32 mm (MODEL COMPR. 32 MM)
WHITE LOCK RING 32 MM
NUT 32 mm BLACK
FLAT SEAL
SEAL HOLDER 32 MM
EJOTE SCREW WN-1412
36030120033
37245581200
32454759122
32454752122
35126018249
38000001151
38002003247
38003003248
38004603249
36000022248
35217013151
38000001152
SUCTION TUBE 19mm - 5% MODEL
SUCTION TUBE 16 mm - 1%,2% model
36030001955
O RING 2-113
38060211362
35220013166
38000000067
35226013324
35217013123
38000004171
35125011872
35228011168
36030111935
84
85
86
87
88
INNER VALVE TF5
BALL
1/2" BSPT NUT
1/2" SEAL PLATE
EASEL LEG TF 10
TF10 BRACKET
GUIDE RING CYLINDER SUPPORT TF5
HOSE COVER 19 MM - 5% MODEL
HOSE COVER 12 MM - 1%,2% MODEL
SUCTION FILTER 30
EASEL LEG PLUG D. 22
FILTER WEIGHT - 5% MODEL
FILTER WEIGHT - 1%,2% MODEL
V7 INNER VALVE LOCKER
ON/OFF HANDLE FOR TF
COVER FOR ONOFF TF
PIN
O RING 9*3
BAR FOR TF5 HANDLE ON/OFF
O RING 2-116
O RING 20*3
89
ADAPTOR 3/4" ONOFF TF
90
EJOTE SCREW WN-1412 4*25
35301011287
38000042565
91
92
ON/OFF DISC FOR TF5
STAINLESS STEEL DISC
35302051290
38060351641
95
SPACER FOR CYLINDER 2%
35200023195
105
SST CLIP SCREW - 5% MODEL
38013322102
54
55
55
62
63
64
65
66
67
68
69
71
72
73
75
75
76
77
78
78
81
82
83
36030001655
36030111235
36030013036
38001003277
38002000107
38060801038
35028001181
35305011285
35303011258
35308011286
38000932246
35308011288
38021169292
38002032264
5
TEFEN
TEFEN
TEFEN Advanced Plastic Solutions.
TEFEN Advanced Plastic Solutions.
7)&/.,76
Manual
On/Off
Manual On/Off
Manual
Manual
On/Off
On/OffCLCL
5 55CL
82
H
83
87
8785
8887
88
89
84
88 46
46
86
91
82 82
82
87 8783
85
88 88 85
89
$
85 85
89 89
89
8484
8686
'
(
84 84
86 86
91 91
91
91
)
90 90
90
92
12
83 83
83
90
90
A
82
92 92
92
*
D
&
A
67
68
E
69
67
68
69
67 67
6968 68
67
68
G
3$57
6($/.,7
6($/.,7
6($/.,7
68&7,21&+(&.9$/9(.,7
0(&+$1,60635,1*
68&7,21&</,1'(5.,7
68&7,21&</,1'(5.,7
68&7,21&</,1'(5.,7
68&7,213,6721.,7
68&7,213,6721.,7
68&7,213,6721.,7
68&7,2178%(.,7
68&7,2178%(.,7
69 69
C
105
105
105
105 105
A
F
12
17
&$712
5
TEFEN
TEFEN
TEFEN Advanced Plastic Solutions.
TEFEN Advanced Plastic Solutions.
CL
5
Manual On/Off
CL
Manual
Manual
On/Off
On/OffCLCL
5 5
82
82 82
82
83
87
85
87
88
8988
87 87
83
88 88
85
89
84
84
86
86
91
91
90
90
92
A
7).,76
12
83 83
$
85 85
89 89
'
(
84 84
86 86
91 91
)
90 90
92 92
*
D
&
+
A
67
68
E
69
67 67
686968
67
68
69 69
105
G
3$57
6($/.,7
6($/.,7
6($/.,7
68&7,21&+(&.9$/9(.,7
0(&+$1,60635,1*
68&7,21&</,1'(5.,7
68&7,21&</,1'(5.,7
68&7,21&</,1'(5.,7
68&7,213,6721.,7
68&7,213,6721.,7
68&7,213,6721.,7
68&7,2178%(.,7
68&7,2178%(.,7
:$7(5(1*,1(&203/(7(
0$18$/212)).,7
C
105
105 105
A
F
16
13
&$712
5
TEFEN
TEFEN
TEFEN Advanced Plastic Solutions.
TEFEN Advanced Plastic Solutions.
Manual On/Off
Manual
Manual
On/Off
On/OffCLCL
5 5 CL
Manual On/Off CL
5
82
82
83
87
87 87
85
87
88
88 88
88
89
84
86
86
91
91
90
90
92
69
85
89
84
67
68
83
92
67
68
67 67
69 68
68
PARTS
82 82
83 83
COMPONENT
CODE
35201011301
35202041302
35202031302
35202061302
35202051302
35203013103
35204011305
35205011806
35207011807
35208011808
35209016109
35210016109
35211016109
35217013110
35212010111
35219013112
35227011113
35227011214
35216013115
35213013116
35213013117
35206011118
O RING 2-110 VITON
TOGGLE BEARING
PISTON BAR 1% TF5
PISTON BAR 2% TF5
PISTON BAR 5% TF5
38021101145
35121011121
35222011222
35222021222
35225051222
23
24
25
25
25
26
27
28
29
30
31
32
33
33
33
34
35
SUCTION SEAL 1% MIXRITE TF 5
SUCTION SEAL 2% MIXRITE TF 5
SUCTION SEAL 5% MIXRITE TF 5
OPERATION ROD
"O" Ring 12X2 VITON
"O" RING 2-011 VITON
UPPER PISTON SEAL
LOWER PISTON SEAL
O RING 2-356 VITON
O RING 7*50 VITON
O RING 2-321 VITON FOR 1`% MODEL
O RING 28*7 VITON FOR 2% MODEL
O RING 2-219 VITON FOR 5% MODEL
CHECK VALVE SLEEVE
CHECK VALVE LID
35202014225
35202024225
35202054225
35214013126
38001221127
38020111228
35223012229
35224012230
38023561231
38050071232
38023211233
38028071233
38022191233
36
PISTON CHECK VALVE
36030162284
37
38
SPRING FOR CHECK VALVE HSTY
O RING 2-206 VITON
38028110529
38060102206
39
40
O RING 30*3 VITON
38003031246
41
CHECK VALVE NUT
36030622100
1
2
2
2
2
3
5
6
7
8
9
9
9
10
11
12
13
14
15
16
17
18
19
20
21
22
22
22
89 89
84 84
86 86
91 91
90 90
92 92
69 69
105
14
TF 5 COVER
BODY 1" BSP
BODY 1" NPT
BODY 11/4" NPT
BODY 32
PISTON TF 5
CYLINDER SUPPORT TF5
CYLINDER SUPPORT NUT TF5
ADJUSTMENT NUT TF5
LATCH NUT TF5
CYLINDER 1% MIXRITE TF 5
CYLINDER 2% MIXRITE TF 5
CYLINDER 5% MIXRITE TF 5
CYLINDER SUPPORT SPACER TF5
INSIDE BASE TF5
LARGE EXIT VALVE 3 TF5
CENTRAL VALVE 3 TF5
TOGGLE FRAME TF5
TOGGLE TF5
TOGGLE PIN TF5
BRIDGE PIN TF5
BRIDGE TF5
No.
85 85
105
105 105
MIXRITE TF 5 -1% CL
MIXRITE TF 5 -2% CL
MIXRITE TF 5 -5% CL
COMPONENT NAME
36030675102
36030101101
15
No.
42
43
44
44
45
46
50
51
52
53
COMPONENT NAME
NUT 3/4"HOLE 20
WASHER FOR SWIVEL 3/4"
RECORD BODY 19X3/4" - 5% model
RECORD BODY 12x3/4" - 1%,2% MODEL
PLASTIC SPRING TF 10 /TF5
COMPONENT
CODE
36030120033
37245581200
32454759122
32454752122
35126018249
FLAT SEAL IL
36000021248
EJOTE SCREW WN-1412
38000001152
SUCTION TUBE 19mm - 5% MODEL
SUCTION TUBE 16 mm - 1%,2% model
36030001955
O RING 2-113 VITON
38021131262
35220013166
38000000067
35226013324
35217013123
38000004171
35125011872
35228011168
36030111935
84
85
86
87
88
INNER VALVE TF5
BALL
1/2" BSPT NUT
1/2" SEAL PLATE
EASEL LEG TF 10
TF10 BRACKET
GUIDE RING CYLINDER SUPPORT TF5
HOSE COVER 19 MM - 5% MODEL
HOSE COVER 12 MM - 1%,2% MODEL
SUCTION FILTER 30
EASEL LEG PLUG D. 22
FILTER WEIGHT - 5% MODEL
FILTER WEIGHT - 1%,2% MODEL
V7 INNER VALVE LOCKER
ON/OFF HANDLE FOR TF
COVER FOR ONOFF TF
PIN
O RING 9*3 VITON
BAR FOR TF5 HANDLE ON/OFF
O RING 2-116 VITON
O RING 20*3 VITON
89
ADAPTOR 3/4" ONOFF TF
90
EJOTE SCREW WN-1412 4*25
35301011287
38000042565
91
92
ON/OFF DISC FOR TF5
STAINLESS STEEL DISC
38060351641
95
SPACER FOR CYLINDER 2%
35200023195
105
SST CLIP SCREW - 5% MODEL
38013322102
54
55
55
56
57
58
59
60
61
62
63
64
65
66
67
68
69
71
72
73
75
75
76
77
78
78
81
82
83
36030001655
36030111235
36030013036
38001003277
38002000107
38060801038
35028001181
35305011285
35303011258
35308011286
38000931246
35308011288
38021161292
38002031264
35302051290