1
Handheld Weather Forecaster
Model: EB313HGA
User Manual
1
EN
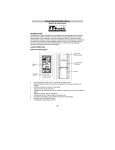
PRODUCT OVERVIEW
1
MODEL: EB313HGA
USER MANUAL
1.
SNOOZE / LIGHT button
2.
Weather Forecast & Barometric Trend Area
3.
Temperature & Humidity Area
4.
Clock / Alarm Area
5
Moon Phase
6.
ALARM: View alarm status; set alarm
7.
MEM: View current, maximum and minimum
temperature / humidity readings
8.
MODE: Change display / settings
9.
+ and - : increase or decrease setting.
2
3
5
4
6
8
9
10
11
12
13
14
15
10. Strap hole
11.
: Turn alarm off for 24 hours
12.
: Lock button
7
13. Table stand / belt clip
14. Battery compartment
15. °C / °F switch
16. RESET hole
1
16
EN
GETTING STARTED
BATTERIES
This unit operates with 2 x CR2032 batteries.
Insert batteries before first use, matching the polarity as
shown in the battery compartment.
NOTE
shows the batteries are low.
NOTE It is recommended that you use alkaline batteries
with this product for longer performance. However, in
colder climates, if the unit is exposed to cold
temperatures i.e. 10°F (-12°C) to -40°F (-40°C), it is
recommended that you use lithium batteries.
CLOCK
This product shows the current time, and day-of-week
in English, French, German, Italian, or Spanish.
SET CLOCK
CHANGE SETTINGS
1. Press and hold MODE for 2 seconds to enter setting
mode.
2. Press + or - to change settings.
3. Press MODE to confirm.
1.
Press and hold MODE for 2 seconds. The Clock
Area will blink.
2.
Select the time zone, hour, minute, year, month,
day, and language. Press + or - to change
the setting. Press MODE to confirm.
TABLE STAND OR BELT CLIP
NOTE The language options are (E) English,
(F) French, (D) German, (I) Italian, and (S) Spanish.
NOTE The time zone options are (PA) Pacific,
(CE) Central, (MO) Mountain, and (EA) Eastern.
You can wear the belt clip on your belt or use it as a
stand. To use the belt clip as a stand, remove the belt
clip from the back of the monitor. Insert the left or right
side of the clip into the lower part of the slot then snap
the other side of the clip into the other lower slot.
SWITCH CLOCK DISPLAY
Press MODE to toggle between Clock with Seconds and
Clock with Weekday display.
2
EN
ALARMS
BAROMETER
This product is equipped with a 2-minute alarm.
This product tracks barometric pressure changes over
the past 24 hours to provide the weather forecast
and a trend line showing the direction of barometric
change.
VIEW ALARM SETTINGS
Press ALARM. The Alarm Time and ((.)) icon will show
in the Clock Area.
BAROMETRIC TREND
DESCRIPTION
TREND
SET ALARM
1.
Press ALARM to switch to Alarm display.
2.
Press and hold ALARM again for 2 seconds. The
Alarm settings will blink.
3.
Select the hour and minute. Press + or
change settings. Press ALARM to confirm.
-
Rising
Steady
to
Falling
ACTIVATE ALARM
Press
to activate or deactivate the Alarm.
shows in the Clock / Alarm Area when the Alarm
is activated.
WEATHER FORECAST
This product forecasts the next 12 to 24 hours of weather
within a 19 - 31 mile (30 to 50 km) radius with 70 to
75 percent accuracy. The weather forecast is always
displayed.
SILENCE ALARM
When the Alarm time is reached, the alarm will sound
for 2 minutes. Press SNOOZE / LIGHT to silence it
to turn it off until the next
for 8 minutes. Or, press
day.
CLEAR
If no button is pressed, the Alarm will automatically
silence after 2 minutes. It will then sound again after
8 minutes.
3
PARTLY
CLOUDY
CLOUDY
RAINY
SEVERE
WEATHER
EN
TEMPERATURE AND HUMIDITY
BACKLIGHT
This product can display current, minimum, and
maximum temperatures and humidity percentage
information.
Press SNOOZE / LIGHT to activate the backlight.
KEY LOCK
The buttons may be locked to avoid accidental changes.
To activate lock, press and hold
LOCK for two
seconds. Repeat the same procedure to unlock buttons.
SELECT TEMPERATURE UNIT
Slide the °C / °F switch into the desired location. The
switch is located inside battery compartment.
WARNINGS
MINIMUM / MAXIMUM RECORDS
This product is designed to give you years of service if
handled properly. Observe the following guidelines:
Never immerse the product in water. This can cause
electrical shock and damage the product.
Do not subject the main unit to extreme force, shock,
or fluctuations in temperature or humidity.
Do not tamper with the internal components.
Press MEM to toggle between current, maximum (MAX)
and minimum (MIN) records. To clear the records, press
and hold MEM for 2 seconds. A beep will sound to
confirm that the memory has been cleared.
MOON PHASE
Do not mix old and new batteries. Do not mix
alkaline, standard (carbon-zinc), or rechargeable
(nickel-cadmium) batteries.
Do not use rechargeable batteries with this product.
SPECIFICATIONS
Remove the batteries if storing this product for along
period of time.
Do not scratch the LCD display.
The Calendar must be set for this feature to work.
Press + or - to view the moon phase for the
next or previous day. Press and hold + or - to scan
quickly through the years (2001 to 2099).
New Moon
Full Moon
Waxing crescent
Waning gibbous
First quarter
Last quarter
Waxing gibbous
Waning crescent
Do not make any changes or modifications to this
product. Unauthorized changes may void your right to
use the product. The technical specification of this
product and contents of this user guide are subject to
change without notice. Images not drawn to scale.
4
EN
TROUBLESHOOTING
SPECIFICATIONS
Check here before contacting our customer service
department.
TEMPERATURE
Unit
°C or °F
PROBLEM SYMPTOM
Calendar Strange date /
month
REMEDY
Change language
Temperature Range
-20.0 °C to +60.0 °C
(-4.0 °F to 140.0 °F)
Resolution
0.2° F (0.1 °C)
Temp
Temperature is out-ofrange
Shows LLL
or HHH
RELATIVE HUMIDITY
Range
25% to 95%
Resolution
1%
BAROMETER
Weather Forcast
Rainy, cloudy, partly
cloudy, sunny, severe
weather
NOTE Suggested operating temperature for a more
accurate weather forecast: 32 °F to +140 °F
(0 °C to +60 °C )
CLOCK
5
Clock display
HH:MM:SS
Hour format
12hr AM/PM
Time zone
PA (Pacific), MO
(Mountain), CE (Central)
or EA (Eastern)
Calendar
MM/DD; weekday in
5 languages (E, D, F, I, S)
EN
Alarm
FCC STATEMENT
2- minute single alarm
This device complies with Part 15 of the FCC Rules.
Operation is subject to the following two conditions: (1)
This device may not cause harmful interference, and (2)
This device must accept any interference received,
including interference that may cause undesired
POWER
Main unit batteries
2 x CR2032 Lithium
batteries
WARNING Changes or modifications to this unit not
expressly approved by the party responsible for
compliance could void the user’s authority to operate
the equipment.
ABOUT OREGON SCIENTIFIC
Visit our website (www.oregonscientific.com) to learn more
about Oregon Scientific products such as digital cameras;
MP3 players; children’s electronic learning products and
games; projection clocks; health and fitness gear; weather
stations; and digital and conference phones. The website
also includes contact information for our customer care
department in case you need to reach us, as well as
frequently asked questions and customer downloads.
NOTE This equipment has been tested and found to
comply with the limits for a Class B digital device, pursuant
to Part 15 of the FCC Rules. These limits are designed to
provide reasonable protection against harmful interference
in a residential installation. This equipment generates, uses
and can radiate radio frequency energy and, if not installed
and used in accordance with the instructions, may cause
harmful interference to radio communications.However,
there is no guarantee that interference will not occur in a
particular installation. If this equipment does cause harmful
interference to radio or television reception, which can be
determined by turning the equipment off and on, the user
is encouraged to try to correct the interference by one or
more of the following measures:
We hope you will find all the information you need on our
website, however if you’d like to contact the Oregon
Scientific Customer Care department directly, please visit:
www2.oregonscientific.com/service/default.asp
OR
Call 1-800-853-8883 in the US.
Reorient or relocate the receiving antenna.
Increase the separation between the equipment
and receiver.
Connect the equipment into an outlet on a circuit
different from that to which the receiver is connected.
Consult the dealer or an experienced radio/
TV technician for help.
For international enquiries, please visit:
www2.oregonscientific.com/about/international.asp
6
EN
DECLARATION OF CONFORMITY
CAUTION
The information below is not to be used as contact for
support or sales. Please call our customer service number
(listed on our website at www.oregonscientific.com, or
on the warranty card for this product) for all inquiries
instead.
The content of this manual is subject to change
without further notice.
Due to printing limitations, the displays shown
in this manual may differ from the actual display.
We
Name:
Address:
The contents of this manual may not be
reproduced without the permission of the
manufacturer.
Oregon Scientific, Inc.
19861 SW 95th Place,
Tualatin, Oregon 97062 USA
Telephone No.:
1-800-853-8883
declare that the product
Product No.:
EB313HGA
Product Name:
Remote Thermometer
Manufacturer:
IDT Technology Limited
Address:
Block C, 9/F, Kaiser Estate,
Phase 1, 41 Man Yue St.,
Hung Hom, Kowloon,
Hong Kong
is in conformity with Part 15 of the FCC Rules. Operation
is subject to the following two conditions:
1)This device may not cause harmful interference.
2)This device must accept any interference received,
including interference that may cause undesired
operation.
7
ES
DESCRIPCION GENERAL DEL PRODUCTO
1
MODELO: EB313HGA
MANUAL DEL USUARIO
2
1.
Botón REPETICION DE ALARMA/LUZ
3
2.
Area de pronóstico del tiempo y tendencia
barométrica
4
3.
Area de temperatura y humedad
4.
Area de reloj/alarma
5
Fase lunar
6.
ALARMA: Ver estado de alarma y configurar
alarma
7.
MEM: Ver lecturas actuales de humedad/
temperatura máximas y mínimas
8.
MODO: Para cambiar visualización/configuración
9.
+ y - : Para incrementar o disminuir la configuración
6
11.
: Apaga alarma durante 24 horas
: Botón de bloqueo
7
8
9
10
11
12
13
14
15
10. Orificio para correa
12.
5
13. Soporte para mesa/sujetador para cinturón
14. Compartimiento de batería
15. Interruptor °C/°F
16. Orificio RESTABLECER
EB313HGA_SP_R1.indd 1
1
16
11/28/05 5:03:07 PM
ES
INICIO
BATERIAS
La unidad funciona con 2 baterías CR2032.
Antes de utilizar la unidad por primera vez, inserte las
baterías respetando la polaridad que se muestra en el
compartimiento.
NOTA
muestra que el nivel de batería es bajo.
RELOJ
NOTA : Para un rendimiento más prolongado, se
recomienda el uso de batería alcalinas. No obstante,
en climas más fríos, es preferible utilizar baterías de
litio cuando la unidad se expone a temperaturas bajas,
es decir, -12° C (10° F) a -40° C (-40° F).
CAMBIAR CONFIGURACION
1. Presione y mantenga presionado MODO
durante 2 segundos para ingresar al modo de
configuración.
2. Presione + o – para cambiar la configuración.
3. Presione MODO para confirmar.
Este producto muestra la hora actual y el día de la
semana en inglés, francés, alemán, italiano o español.
CONFIGURACION DEL RELOJ
1.
Presione y mantenga presionado MODO durante
2 segundos. El Area del reloj parpadeará.
2.
Seleccione la zona horaria, la hora, los minutos, el
año, el mes, el día y el idioma. Presione + o – para
cambiar la configuración. Presione MODO para
confirmar.
NOTA La opciones de idioma son (I) inglés, (F) francés,
(A) alemán, (It) italiano y (Es) español.
SOPORTE PARA MESA O SUJETADOR PARA CINTURON
NOTA Las opciones de zona horaria son (PA) Pacífico,
(CE) Centro, (MO) Montaña y (EA) Este.
Puede usar el sujetador en el cinturón o utilizarlo como
soporte. Para usar el sujetador como soporte, quite
el sujetador de la parte posterior del monitor. Inserte
la parte izquierda o derecha del sujetador en la parte
inferior de la ranura y luego encaje el otro lado del mismo
en la otra ranura inferior.
INTERCAMBIAR VISUALIZACIONES DEL RELOJ
Presione MODO para alternar entre Reloj con segundos
y Reloj con día de la semana.
2
EB313HGA_SP_R1.indd 2
11/28/05 5:03:21 PM
ES
ALARMAS
BAROMETRO
Este producto viene con una alarma de 2 minutos.
Este producto rastrea los cambios de la presión
barométrica durante las últimas 24 horas para
proporcionar el pronóstico del tiempo y la línea de
tendencia donde se puede observar la dirección del
cambio barométrico.
VER CONFIGURACIONES DE LA ALARMA
Presione ALARMA. La hora de la alarma y el icono ((.))
se mostrarán en el Area del reloj.
TENDENCIA BAROMETRICA
CONFIGURACION DE LA ALARMA
1.
Presione ALARMA para ir a la pantalla de la
alarma.
2.
Presione y mantenga presionado ALARMA
nuevamente durante 2 segundos. La configuración
de la alarma parpadeará.
3.
Seleccione la hora y los minutos. Presione + o - para
cambiar la configuración. Presione ALARMA para
confirmar.
DESCRIPCION
TENDENCIA
En ascenso
Constante
En descenso
ACTIVAR LA ALARMA
para activar o desactivar la Alarma.
Presione
se muestra en el Area del reloj/alarma cuando la
Alarma está activada.
PRONOSTICO DEL TIEMPO
Este producto pronostica el tiempo de las próximas 12 a
24 horas dentro de un radio de 30 a 50 millas (19 a 31
km) con una precisión del 70% al 75%. En la pantalla,
siempre se muestra el pronóstico del tiempo.
SILENCIAR LA ALARMA
Cuando llega la hora estipulada para la alarma, la alarma
sonará durante 2 minutos. Presione REPETICION DE
ALARMA/LUZ para silenciarla durante 8 minutos.
O bien, presione
para apagarla hasta el día
siguiente.
DESPEJADO
PARCIALMENTE
NUBLADO
NUBLADO
LLUVIOSO
CONDICIONES
CLIMATICAS
INCLEMENTES
Si no se presiona ningún botón, la alarma se silenciará
automáticamente una vez transcurridos 2 minutos.
Volverá a sonar nuevamente después de 8 minutos.
3
EB313HGA_SP_R1.indd 3
11/28/05 5:04:10 PM
ES
TEMPERATURA Y HUMEDAD
ILUMINACION
Este producto puede mostrar los valores de temperatura
actual, máxima y mínima, el porcentaje de humedad y
la información del índice de calor recogidos mediante
los sensores remotos y la unidad principal (ubicada en
el interior).
Presione REPETICION DE ALARMA/LUZ para activar
la iluminación.
BLOQUEAR
Los botones pueden estar bloqueados para evitar
cambios accidentales. Para activar el bloqueo, presione
BLOQUEO durante dos
y mantenga presionado
segundos. Repita el mismo procedimiento para
desbloquear los botones.
SELECCIONAR UNIDAD DE TEMPERATURA
Deslice el interruptor ∞ C/∞ F a la posición deseada. El
interruptor está ubicado en el compartimiento de las
baterías.
REGISTROS DE VALORES DE MINIMA/MAXIMA
Presione MEM para alternar entre los registros de
valores actuales, máximo (MAX.) y mínimo (MIN.). Para
borrar registros, presione y mantenga presionado MEM
durante 2 segundos. Escuchará un sonido que confirma
que la memoria se ha borrado.
ADVERTENCIAS
FASE LUNAR
Se debe configurar el calendario para activar esta
función. Presione + o – para ver la fase lunar del día
siguiente o del día anterior. Presione y mantenga
presionado + o – para realizar una exploración rápida
de los años (2001 a 2099).
Luna nueva
Luna llena
Creciente
iluminante
Gibosa
menguante
Cuarto
creciente
Cuarto
menguante
Gibosa
iluminante
Creciente
menguante
EB313HGA_SP_R1.indd 4
4
Este producto está diseñado para proporcionarle años
de servicio si se maneja con cuidado. Tenga en cuenta
las siguientes pautas:
• Nunca sumerja el producto en agua. Esto puede
provocar descargas eléctricas y daños en
el producto.
• No someta la unidad principal a fuerza extrema,
choques o fluctuaciones en la temperatura o la
humedad.
• No toque los componentes internos.
• No mezcle pilas nuevas con usadas. No mezcle
pilas alcalinas, estándar (carbón-cinc), o
recargables (níquel-cadmio).
• No use baterías recargables con este producto.
• Si desea guardar este producto temporalmente retire
las baterías .
• No raye la pantalla LCD.
No haga ningún cambio o modificación a este producto.
Cualquier cambio sin autorización podría anular su
derecho a usar este producto. Las especificaciones
11/28/05 5:05:05 PM
ES
derecho a usar este producto. Las especificaciones
técnicas para este producto y el contenido de la guía
del usuario están sujetas a cambios sin previo aviso. Las
imágenes no están dibujadas a escala.
ESPECIFICACIONES
TEMPERATURA
Unidad
°C o °F
SOLUCION DE PROBLEMAS
Intervalo de temperatura:
Verifique aquí antes de comunicarse con nuestro departamento
de atención al cliente (consulte la sección Acerca de Oregon
Scientific para obtener detalles de contacto).
-20° C a +60° C
(-4.0° F a 140.0° F)
Resolución:
0.2° F (0.1° C)
Problema Síntoma
Solución
HUMEDAD RELATIVA
Calendario
Cambie el idioma
Intervalo:
25% al 95%
Resolución:
1%
Fecha/mes
extraños
Temperatura Se muestra “LLL”
o “HHH”
BAROMETRO
La temperatura está fuera
del rango
Pronóstico del tiempo: Lluvioso, nublado, parcialmente
nublado, soleado, condiciones
climáticas inclementes
NOTA Temperatura de operación sugerida para un
pronóstico meteorológico más exacto: 0° C a +60° C
(32° F a +140° F)
RELOJ
Visualización del reloj
HH:MM:SS
Formato horario:
12 h, a.m./p.m.
Zona horaria:
PA (Pacífico), MO
(Montaña), CE (Centro)
o EA (Este)
Calendario:
MM/DD; día de la
semana en 5 idiomas
(I, A, F, It., E)
5
EB313HGA_SP_R1.indd 5
11/28/05 5:05:05 PM
ES
Alarma:
minutos
alarma simple de 2
DECLARACION DE LA COMISION FEDERAL DE
COMUNICACIONES (FCC)
Este dispositivo cumple con la Parte 15 de las Reglas
de la FCC (Comisión de Comunicaciones Federales).
Su funcionamiento queda sujeto a las dos condiciones
siguientes: (1) Es probable que este dispositivo
no provoque interferencias perjudiciales y (2) Este
dispositivo debe aceptar las interferencias que reciba,
incluso las interferencias que puedan provocar un
funcionamiento no deseado.
ENCENDIDO
Baterías de la
unidad principal:
2 baterías de litio
CR2032
ACERCA DE OREGON SCIENTIFIC
Visite nuestro sitio web (www.oregonscientific.com) para
obtener más información sobre los productos de Oregon
Scientific, por ejemplo, cámaras digitales, reproductores
MP3, productos y juegos de aprendizaje electrónicos para
niños; relojes de proyección; equipos para la salud y de
gimnasia; estaciones meteorológicas y teléfonos digitales
y de conferencia. El sitio web también incluye información
de contacto a nuestro departamento de atención al cliente
en caso de que necesite comunicarse con nosotros,
además de preguntas frecuentes y descargas para
clientes.
Esperamos que en nuestro sitio web encuentre toda la
información que necesite, no obstante, si es residente
de Estados Unidos y desea comunicarse directamente
con el departamento de Atención del cliente de Oregon
Scientific, visite:
www2.oregonscientific.com/service/default.asp
ADVERTENCIA: Los cambios o las modificaciones
no aprobados en forma expresa por los responsables
del cumplimiento de las normas pertinentes anulará la
autoridad del usuario a operar el equipo.
NOTA: Este equipo ha sido probado y se comprobó
que cumple con los límites para un dispositivo digital
Clase B conforme a la Parte 15 de las Reglas de la
FCC. Estos límites están diseñados para proporcionar
protección contra interferencias perjudiciales en una
instalación residencial. Este equipo genera, usa y puede
irradiar energía de radiofrecuencia y, si no se instala y
utiliza de acuerdo a las instrucciones, puede provocar
interferencia perjudicial en las comunicaciones de radio.
No obstante, no se garantiza que no se producirán
interferencias en una instalación en particular. Si este
equipo provoca interferencia perjudicial en la recepción
de radio o televisión, lo que puede determinarse al
encender o apagar el equipo, se recomienda que el
usuario intente corregir la interferencia mediante una o
más de las siguientes medidas:
O
En Estados Unidos, llame al 1-800-853-8883.
Para consultas internacionales, visite:
www2.oregonscientific.com/about/international.asp
6
EB313HGA_SP_R1.indd 6
•
Vuelva a colocar o posicionar la antena receptora.
11/28/05 5:05:06 PM
•
Incremente la distancia entre el equipo y el receptor.
Conecte el equipo a un tomacorriente en un circuito
diferente de aquel al que se conectó el receptor.
Consulte al distribuidor o a un técnico experimentado
de radio/TV para obtener ayuda.
cumple con la Parte 15 de las Reglas de la FCC.
Su funcionamiento queda sujeto a las dos condiciones
siguientes: (1) Es probable que este dispositivo no
provoque interferencias perjudiciales.
(2) Este dispositivo debe aceptar las interferencias que
reciba, incluso las interferencias que puedan provocar
un funcionamiento no deseado.
Declaración de conformidad
La siguiente información no se utilizará como contacto
para soporte o ventas. Llame a nuestro número de
atención al cliente (mencionado en nuestro sitio web en
www.oregonscientific.com) o en la tarjeta de garantía de
este producto) para realizar todas sus consultas.
PRECAUCION
— El contenido de este manual está sujeto a
cambios sin previo aviso.
— Debido a limitaciones de impresión, las pantallas
que se muestran en este manual pueden diferir
de la pantalla real.
— Está prohibida la reproducción del contenido
de este manual sin el consentimiento del
fabricante.
Nosotros
Nombre:
Oregon Scientific, Inc.
Dirección:
19861 SW 95th Place,
Tualatin, Oregon 97062
Estados Unidos
Número de teléfono:
ES
•
•
1-800-853-8883
declaramos que el producto
Número de producto:
EB313HGA
Nombre del producto:
Termómetro remoto
Fabricante:
IDT Technology Limited
Dirección:
Block C, 9/F, Kaiser Estate,
Phase 1, 41 Man Yue St.,
Hung Hom, Kowloon,
Hong Kong
7
EB313HGA_SP_R1.indd 7
11/28/05 5:05:06 PM
© 2006 Oregon Scientific. All Rights Reserved.
2
086L003462-104