1
LEDS11SRGB
SOUND-CONTROLLED LED STRIP, CONTROLLER AND POWER SUPPLY
MUZIEKGESTUURDE LEDSTRIP, CONTROLLER EN VOEDING
FLEXIBLE LED PILOTÉ PAR MUSIQUE, CONTRÔLEUR ET
ALIMENTATION
CINTA DE LEDs FLEXIBLE, CONTROLADOR Y ADAPTADOR DE RED
FLEXIBLER LED-LEISTE, CONTROLLER UND NETZTEIL
FAIXA LED CONTROLADA POR SOM, CONTROLADOR E FONTE DE
ALIMENTAÇÃO
TAŚMA LED STEROWANA DŹWIĘKIEM, STEROWNIK I
ZASILACZ
USER MANUAL
RUGGEBRUIKERSHANDLEIDING
MODE D'EMPLOI
MANUAL DEL USUARIO
BEDIENUNGSANLEITUNG
MANUAL DO UTILIZADOR
INSTRUKCJA OBSŁUGI
4
9
14
19
24
30
34
LEDS11SRGB
A1
A2
A3
A4
V. 01 – 18/05/2015
2
©Velleman nv
LEDS11SRGB
B1
B2
V. 01 – 18/05/2015
3
©Velleman nv
LEDS11SRGB
USER MANUAL
1.
Introduction
To all residents of the European Union
Important environmental information about this product
This symbol on the device or the package indicates that
disposal of the device after its lifecycle could harm the
environment. Do not dispose of the unit (or batteries) as
unsorted municipal waste; it should be taken to a
specialized company for recycling. This device should be
returned to your distributor or to a local recycling service. Respect
the local environmental rules.
If in doubt, contact your local waste disposal authorities.
Thank you for choosing Vellight! Please read the manual thoroughly
before bringing this device into service. If the device was damaged in
transit, do not install or use it and contact your dealer.
2.
Safety Instructions
Keep this device away from children and unauthorized users.
There are no user-serviceable parts inside the device. Refer
to an authorized dealer for service and/or spare parts.
Warning: Do not puncture the batteries or throw them in fire
as they may explode. Do not attempt to recharge nonrechargeable (alkaline) batteries. Dispose of batteries in
accordance with local regulations. Keep batteries away from
children.
Indoor use only. Keep this device away from rain,
moisture, splashing and dripping liquids.
V. 01 – 18/05/2015
4
©Velleman nv
LEDS11SRGB
Keep at a distance of at least 0,5 m from any illuminated
object.
This is a Safety Class III device.
3.
General Guidelines
Refer to the Velleman® Service and Quality Warranty on the last
pages of this manual.
• Keep away from dust and extreme temperatures.
• Protect form shocks and abuse. Avoid brute force when operating.
• Familiarise yourself with the functions of the device before actually
using it.
• All modifications of the device are forbidden for safety reasons.
Damage caused by user modifications to the device is not covered
by the warranty.
• Only use the device for its intended purpose. Using the device in
an unauthorised way will void the warranty.
• Damage caused by disregard of certain guidelines in this manual
is not covered by the warranty and the dealer will not accept
responsibility for any ensuing defects or problems.
• Keep this manual for future reference.
4.
Features
• flexible PCB (white)
• contains 150 high brightness LEDs (type 5050)
• RGB controller with different programs:
o fixed colour
o animated programs
o sound-controlled programs
• controlled through infrared remote (incl.)
• common anode:
o black wire: ground
o red wire: 12 VDC
• can be cut every 3 LEDs (10 cm)
• power supply included
• for illuminated advertising and marking
• self-adhesive
V. 01 – 18/05/2015
5
©Velleman nv
LEDS11SRGB
5.
Remote Control Overview
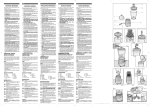
Refer to illustration [B2] on page 3 of this manual.
1
2
3
4
5
6
7
8
9
6.
dimming and speed setting
colour selection
sound-controlled programmes
7-colour smooth fade in and fade out effect
RGB fade in and fade out effect
white strobe
automatic 7-colour change
on/off
warm/cold white
Installation
Guidelines
• Avoid installing the LED strips near heat sources such as ovens,
toasters, etc.
• Never use the LED strip when it is coiled up as this can cause
overheating.
• Before mounting, ensure the desired surface is flat and clean of
any grease, dirt or debris.
• Avoid tight bends in the LED strip.
• Observe the correct polarity when re-joining cable sections. The
polarity is marked at regular intervals along the LED strip.
• Cut the strip using sharp scissors or a craft knife with a fresh
blade. Cut directly on the marked line. Never cut the LED strip
when it is pugged in.
Installation
Refer to the illustrations on page 2 of this manual.
1. Mount the LED strip in the desired location. The LED strip can be
cut every 10 cm (see [A1]). Protect the cut ends to avoid shortcircuits.
2. Connect the LED strips to the controller (see [A2]). Make sure
to connect matching wire colours and do not short-circuit any
wires. Connecting tools are not included.
V. 01 – 18/05/2015
6
©Velleman nv
LEDS11SRGB
3.
4.
7.
Connect the included power adapter to the controller (see
[A3]).
Plug the adapter into the mains. Refer to illustration [A4] for a
general connection scheme.
Remote Control
Battery
Refer to illustration [B1] on page 3 of this manual.
The remote control uses 1 battery type 3 V lithium CR2025
(included). Remove the tag from the battery compartment before
use.
1. To (re)place a battery, press on the side of the battery cover
and pull to slide open.
2. Insert the battery with the correct polarity and close the battery
compartment by pushing back into the housing of the remote
control until it snaps into place.
Operation
1. Aim the remote control towards the IR LED of the controller to
control the output of the LED strip.
2. Switch on the LED strip with the ON button on the remote
control. To switch it off again, press the OFF button.
3. Refer to chapter 5. Overview for more information about
operating the remote control.
8.
Technical Specifications
IP rating
coating
colour
wavelength
power consumption
viewing angle
LED spacing
V. 01 – 18/05/2015
IP61
silicone
red/green/blue
red
green
blue
615-630 nm
520-530 nm
465-470 nm
23,8 W (red 8,8 W/green 7,5 W/blue 7,5 W)
120°
33 mm
7
©Velleman nv
LEDS11SRGB
power supply
dimensions
weight
12 VDC 24 W (adapter incl.)
5 m x 10 mm
480 g
Use this device with original accessories only. Velleman nv
cannot be held responsible in the event of damage or injury
resulting from (incorrect) use of this device. For more info
concerning this product and the latest version of this manual,
please visit our website www.velleman.eu. The information in
this manual is subject to change without prior notice.
© COPYRIGHT NOTICE
The copyright to this manual is owned by Velleman nv. All
worldwide rights reserved. No part of this manual may be copied,
reproduced, translated or reduced to any electronic medium or
otherwise without the prior written consent of the copyright holder.
V. 01 – 18/05/2015
8
©Velleman nv
LEDS11SRGB
RUGGEBRUIKERSHANDLEIDING
1.
Inleiding
Aan alle ingezetenen van de Europese Unie
Belangrijke milieu-informatie betreffende dit product
Dit symbool op het toestel of de verpakking geeft aan dat, als het na
zijn levenscyclus wordt weggeworpen, dit toestel schade
kan toebrengen aan het milieu. Gooi dit toestel (en
eventuele batterijen) niet bij het gewone huishoudelijke
afval; het moet bij een gespecialiseerd bedrijf terechtkomen
voor recyclage. U moet dit toestel naar uw verdeler of naar
een lokaal recyclagepunt brengen. Respecteer de plaatselijke
milieuwetgeving.
Hebt u vragen, contacteer dan de plaatselijke autoriteiten
betreffende de verwijdering.
Dank u voor uw aankoop! Lees deze handleiding grondig voor u het
toestel in gebruik neemt. Werd het toestel beschadigd tijdens het
transport, installeer het dan niet en raadpleeg uw dealer.
2.
Veiligheidsinstructies
Houd dit toestel buiten het bereik van kinderen en
onbevoegden.
Er zijn geen onderdelen in het toestel die door de gebruiker
gerepareerd kunnen worden. Voor onderhoud of
reserveonderdelen, contacteer uw dealer.
Waarschuwing: U mag batterijen nooit doorboren of in het
vuur gooien (explosiegevaar). Herlaad geen
alkalinebatterijen. Gooi batterijen weg volgens de plaatselijke
milieuwetgeving. Houd batterijen buiten het bereik van
kinderen.
V. 01 – 18/05/2015
9
©Velleman nv
LEDS11SRGB
Gebruik het toestel enkel binnenshuis. Bescherm dit
toestel tegen regen, vochtigheid en opspattende
vloeistoffen.
Houd op een afstand van minstens 0,5 m van het belichte
object.
Dit toestel valt onder beschermingsklasse III.
3.
Algemene richtlijnen
Raadpleeg de Velleman® service- en kwaliteitsgarantie
achteraan deze handleiding.
• Bescherm tegen stof en extreme temperaturen.
• Bescherm tegen schokken en voorkom misbruik. Vermijd brute
kracht tijdens de bediening.
• Leer eerst de functies van het toestel kennen voor u het gaat
gebruiken.
• Om veiligheidsredenen mag u geen wijzigingen aanbrengen aan
het toestel. Schade door wijzigingen die de gebruiker heeft
aangebracht aan het toestel, valt niet onder de garantie.
• Gebruik het toestel enkel waarvoor het gemaakt is. De garantie
vervalt automatisch bij ongeoorloofd gebruik.
• De garantie geldt niet voor schade door het negeren van bepaalde
richtlijnen in deze handleiding en uw dealer zal de
verantwoordelijkheid afwijzen voor defecten of problemen die hier
rechtstreeks verband mee houden.
• Bewaar deze handleiding voor verdere raadpleging.
4.
Eigenschappen
• flexibele printplaat (wit)
• bevat 150 zeer heldere leds (type 5050)
V. 01 – 18/05/2015
10
©Velleman nv
LEDS11SRGB
• RGB-controller met verschillende programma's:
o vaste kleur
o animatie
o muziekgestuurde programma's
• bediening via IR afstandsbediening (meegelev.)
• gemeenschappelijke anode:
o zwart: aarding
o rood: 12 VDC
• kan worden afgesneden om de 3 leds (10 cm)
• voedingsadapter meegeleverd
• geschikt voor lichtreclame en markeringen
• zelfklevend
5.
Overzicht afstandsbediening
Raadpleeg afbeelding [B2] op pagina 3 van deze handleiding.
1
2
3
4
5
6
7
8
9
6.
dimmen en snelheidsinstelling
kleurselectie
muziekgestuurde programma's
soepel in- en uitvloei-effect met 7 kleuren
RGB met in- en uitvloei-effect
witte stroboscoop
automatische 7-kleurenwissel
on/off
warm/koud wit
Installatie
Richtlijnen
• Vermijd installatie van de ledstrip dicht bij warmtebronnen zoals
ovens, broodroosters, etc.
• Gebruik de ledstrip nooit opgerold aangezien dit kan leiden tot
oververhitting.
• Zorg ervoor dat de gewenste ondergrond vlak en schoon is en vrij
van vet, vuil of puin voor het monteren.
• Vermijd strakke plooien in de ledstrip.
• Let op de juiste polariteit bij het opnieuw verbinden van de
kabelsecties. De polariteit staat herhaaldelijk aangeduid op de
ledstrip.
V. 01 – 18/05/2015
11
©Velleman nv
LEDS11SRGB
• Knip de strip met behulp van een scherpe schaar of met een
cutter. Snijd in de gemarkeerde lijn. Snijd nooit in de LED-strip
indien deze aangesloten is.
Installatie
Raadpleeg de afbeeldingen op pagina 2 van deze handleiding.
1. Bevestig de ledstrip op de gewenste plaats. U kunt de strip om
de 10 cm afknippen (zie [A1]). Bescherm de gesneden
uiteinden om kortsluiting te voorkomen.
2. Sluit de ledstrip aan op de controller (zie [A2]). Zorg ervoor dat
u de bijpassende draadkleuren verbindt en vermijd kortsluiting.
Verbindingsgereedschap is niet bijgeleverd.
3. Sluit de ledstrip aan op de controller (zie [A3]).
4. Steek de adapter in het stopcontact. Zie afbeelding [A4] voor
een algemeen verbindingsoverzicht.
7.
Afstandsbediening
Batterijen
Raadpleeg afbeelding [B1] op pagina 3 van deze handleiding.
De afstandsbediening wordt gevoed door 1 x 3 V-lithiumbatterij type
CR2025 (meegeleverd). Verwijder het label uit het
batterijcompartiment voor gebruik.
1. Om de batterij te vervangen, druk op de batterijhouder en trek
uit.
2. Plaats de batterij (let op de polariteit) en duw de batterijhouder
terug in de afstandsbediening tot het erin past.
Gebruik
1. Richt de afstandsbediening naar de infraroodled van de
controller.
2. Schakel de ledstrip in met de -knop van de afstandsbediening.
Druk op de OFF-knop om de strip opnieuw uit te schakelen.
3. Zie hoofdstuk 5. Overzicht voor meer informatie over de
afstandsbediening.
V. 01 – 18/05/2015
12
©Velleman nv
LEDS11SRGB
8.
Technische specificaties
IP-norm
coating
kleur
golflengte
verbruik
kijkhoek
afstand tussen twee
leds
voeding
afmetingen
gewicht
IP61
silicone
rood/groen/blauw
rood
groen
blauw
615-630 nm
520-530 nm
465-470 nm
23,8 W (rood 8,8 W, groen 7,5 W, blauw 7,5
W)
120°
33 mm
12 VDC/24 W (adapter meegelev.)
5 m x 10 mm
480 g
Gebruik dit toestel enkel met originele accessoires. Velleman
nv is niet aansprakelijk voor schade of kwetsuren bij
(verkeerd) gebruik van dit toestel. Voor meer informatie over
dit product en de laatste versie van deze handleiding, zie
www.velleman.eu. De informatie in deze handleiding kan te
allen tijde worden gewijzigd zonder voorafgaande
kennisgeving.
© AUTEURSRECHT
Velleman nv heeft het auteursrecht voor deze handleiding.
Alle wereldwijde rechten voorbehouden. Het is niet toegestaan
om deze handleiding of gedeelten ervan over te nemen, te kopiëren,
te vertalen, te bewerken en op te slaan op een elektronisch medium
zonder voorafgaande schriftelijke toestemming van de
rechthebbende.
V. 01 – 18/05/2015
13
©Velleman nv
LEDS11SRGB
MODE D'EMPLOI
1.
Introduction
Aux résidents de l'Union européenne
Informations environnementales importantes concernant ce
produit
Ce symbole sur l'appareil ou l'emballage indique que l’élimination
d’un appareil en fin de vie peut polluer l'environnement. Ne
pas jeter cet appareil (ni les piles) parmi les déchets
municipaux non sujets au tri sélectif ; une déchetterie
traitera l’appareil en question. Renvoyer l'appareil à votre
fournisseur ou à un service de recyclage local. Il convient
de respecter la réglementation locale relative à la protection de
l’environnement.
En cas de questions, contacter les autorités locales pour
élimination.
Nous vous remercions de votre achat ! Lire attentivement le présent
mode d'emploi avant la mise en service de l’appareil. Si l’appareil a
été endommagé pendant le transport, ne pas l’installer et consulter
votre revendeur.
2.
Consignes de sécurité
Garder cet appareil hors de la portée des enfants et des
personnes non autorisées.
Il n’y a aucune pièce réparable par l’utilisateur dans
l'appareil. Commander des pièces de rechange éventuelles
chez votre revendeur.
Avertissement : Ne jamais perforer les piles et ne pas les
jeter au feu (danger d’explosion). Ne jamais recharger des
piles alcalines. Se débarrasser des piles en respectant la
réglementation locale relative à la protection de
l’environnement. Garder les piles hors de la portée des
enfants.
V. 01 – 18/05/2015
14
©Velleman nv
LEDS11SRGB
Utiliser cet appareil uniquement à l'intérieur.
Protéger de la pluie, de l’humidité et des projections
d’eau.
Conserver à une distance d'au moins 0,5 m de tout objet
éclairé.
Cet appareil ressort à la classe de protection III.
3.
Directives générales
Se référer à la garantie de service et de qualité Velleman® en
fin de ce mode d'emploi.
• Protéger contre la poussière et les températures extrêmes.
• Protéger des chocs et éviter l'abus. Traiter avec circonspection
pendant l’opération.
• Se familiariser avec le fonctionnement de l’appareil avant de
l’utiliser.
• Toute modification est interdite pour des raisons de sécurité. Les
dommages occasionnés par des modifications par le client ne
tombent pas sous la garantie.
• N’utiliser l'appareil qu’à sa fonction prévue. Un usage impropre
annule d'office la garantie.
• La garantie ne s’applique pas aux dommages survenus en
négligeant certaines directives de cette notice et votre revendeur
déclinera toute responsabilité pour les problèmes et les défauts
qui en résultent.
• Garder ce mode d'emploi pour toute référence ultérieure.
4.
Caractéristiques
• CI flexible (blanc)
• 150 LED très lumineuses (type 5050)
V. 01 – 18/05/2015
15
©Velleman nv
LEDS11SRGB
• contrôleur RVB avec plusieurs programmes :
o couleur fixe
o animation
o programmes pilotés par la musique
• pilotage depuis la télécommande IR (incl.)
• anode commune
o noir : masse
o rouge : 12 VCC
• peut être coupé tous les 3 LED (10 cm)
• adaptateur secteur inclus
• pour la publicité lumineuse et le marquage
• auto-adhésif
5.
Description télécommande
Se référer à l’illustration [B2] en page 3 de ce mode d'emploi.
1
2
3
4
5
6
7
8
9
6.
gradation et réglage de vitesse
sélection de couleurs
programmes motorisés
effet de fondu entrant et de fondu sortant souple avec 7
couleurs
effet de fondu entrant et de fondu sortant RVB
stroboscope blanc
changement de 7 couleurs automatique
on/off
blanc chaud / froid
Installation
Directives
• Éviter d'installer les flexibles LED à proximité des sources de
chaleur comme les fours, les grille-pain, etc.
• Ne jamais utiliser un flexible LED enroulé, car cela peut provoquer
une surchauffe.
• Avant le montage, s'assurer que la surface est plane et propre de
toute graisse, saleté et des débris.
• Éviter les plis serrés dans le flexible LED.
V. 01 – 18/05/2015
16
©Velleman nv
LEDS11SRGB
• Respecter la polarité lors du branchement. La polarité est indiquée
à intervalles réguliers le long du flexible LED.
• Couper le flexible avec des ciseaux aiguisés ou avec un cutter.
Couper directement sur la ligne marquée. Ne jamais couper le
flexible LED quand il est branché.
Installation
Se référer aux illustrations en page 2 de ce mode d'emploi.
1. Monter le flexible LED à l’emplacement souhaité. Le flexible LED
peut être coupé tous les 10 cm (voir [A1]). Protéger les
extrémités coupées pour éviter les courts-circuits.
2. Connecter les flexibles LED au contrôleur (voir [A2]). S'assurer
de connecter les couleurs de fil assorties et ne pas courtcircuiter les fils. Les outils de connexion ne sont pas inclus.
3. Brancher l'adaptateur d'alimentation fourni au contrôleur (voir
[A3]).
4. Brancher l'adaptateur sur le secteur. Pour un système de
connexion général se reporter à l'illustration [A4]
7.
Télécommande
Piles
Se référer à l’illustration [B1] en page 1 de ce mode d'emploi.
La télécommande est alimentée par une pile au lithium de 3 V type
CR2025 (incluse). Retirer l'étiquette du compartiment de la batterie
avant de l'utiliser.
1. Pour remplacer la pile, enfoncer la languette et tirer pour retirer
le porte-pile.
2. Insérer la pile en respectant la polarité. Réinsérer le porte-pile
dans la télécommande.
Emploi
1. Pointer la télécommande vers l’œil IR du contrôleur.
2. Allumer le flexible LED avec le bouton ON de la télécommande.
Pour l’éteindre de nouveau, appuyer sur le bouton OFF.
3. Voir chapitre 5. Description pour plus d'informations sur
l'utilisation de la télécommande.
V. 01 – 18/05/2015
17
©Velleman nv
LEDS11SRGB
8.
Spécifications techniques
Indice IP
revêtement
couleur
longueur d'onde
consommation
angle de vue
distance entre les
LED
alimentation
dimensions
poids
IP61
silicone
rouge-vert-bleu
rouge
vert
bleu
615-630 nm
520-530 nm
465-470 nm
23,8 W (rouge 8,8 W, vert 7,5 W, bleu 7,5 W)
120°
33 mm
12 VCC 24 W (chargeur incl.)
5 m x 10 mm
480 g
N’employer cet appareil qu’avec des accessoires d’origine. La
SA Velleman ne peut, dans la mesure conforme au droit
applicable être tenue responsable des dommages ou lésions
(directs ou indirects) pouvant résulter de l’utilisation de cet
appareil. Pour plus d'informations concernant cet article et la
dernière version de ce mode d'emploi, consulter notre site
www.velleman.eu. Toutes les informations présentées dans
ce mode d'emploi peuvent être modifiées sans notification
préalable.
© DROITS D’AUTEUR
SA Velleman est l’ayant droit des droits d’auteur de ce mode
d'emploi. Tous droits mondiaux réservés. Toute reproduction,
traduction, copie ou diffusion, intégrale ou partielle, du contenu de
ce mode d'emploi par quelque procédé ou sur tout support
électronique que ce soit est interdite sans l’accord préalable écrit de
l’ayant droit.
V. 01 – 18/05/2015
18
©Velleman nv
LEDS11SRGB
MANUAL DEL USUARIO
1.
Introducción
A los ciudadanos de la Unión Europea
Importantes informaciones sobre el medio ambiente
concerniente a este producto
Este símbolo en este aparato o el embalaje indica que, si tira las
muestras inservibles, podrían dañar el medio ambiente. No
tire este aparato (ni las pilas, si las hubiera) en la basura
doméstica; debe ir a una empresa especializada en
reciclaje. Devuelva este aparato a su distribuidor o a la
unidad de reciclaje local. Respete las leyes locales en
relación con el medio ambiente.
Si tiene dudas, contacte con las autoridades locales para
residuos.
¡Gracias por elegir Vellight! Lea atentamente las instrucciones del
manual antes de usar el aparato. Si ha sufrido algún daño en el
transporte no lo instale y póngase en contacto con su distribuidor.
2.
Instrucciones de seguridad
Mantenga el aparato lejos del alcance de personas no
capacitadas y niños.
El usuario no habrá de efectuar el mantenimiento de ninguna
pieza. Contacte con su distribuidor si necesita piezas de
recambio.
Advertencia: Nunca perfore las pilas y no las eche al fuego
(peligro de explosión). Nunca recargue pilas no recargables
(alcalinas). Respete las leyes locales en relación con el medio
ambiente al tirar las pilas. Mantenga las pilas lejos del
alcance de niños.
V. 01 – 18/05/2015
19
©Velleman nv
LEDS11SRGB
Utilice el aparato sólo en interiores. No exponga
este equipo a lluvia, humedad ni a ningún tipo de
salpicadura o goteo.
Respete una distancia de mín. 0,5 m entre la salida de luz y
el área iluminada.
Este aparato pertenece a la clase de protección III.
3.
Normas generales
Véase la Garantía de servicio y calidad Velleman® al final de
este manual del usuario.
• No exponga este equipo a polvo ni temperaturas extremas.
• Proteja el aparato contra choques y golpes. Evite usar excesiva
fuerza durante la operación.
• Familiarícese con el funcionamiento del aparato antes de utilizarlo.
• Por razones de seguridad, las modificaciones no autorizadas del
aparato están prohibidas. Los daños causados por modificaciones
no autorizadas, no están cubiertos por la garantía.
• Utilice sólo el aparato para las aplicaciones descritas en este
manual Su uso incorrecto anula la garantía completamente.
• Los daños causados por descuido de las instrucciones de
seguridad de este manual invalidarán su garantía y su distribuidor
no será responsable de ningún daño u otros problemas
resultantes.
• Guarde este manual del usuario para cuando necesite consultarlo.
4.
Características
• placa de circuito impreso flexible (blanco)
• 150 LEDs muy luminosos (tipo 5050)
• controlador RGB con diferentes programas
o color fijo
o animación
o programas controlados por la música
V. 01 – 18/05/2015
20
©Velleman nv
LEDS11SRGB
• se controla por el mando a distancia IR (incl.)
• ánodo común
o cable negro: masa
o cable rojo: 12 VDC
• se puede cortar cada 3 LEDs (10 cm)
• adaptador de red incl.
• apto para publicidad luminosa y señalización
• autoadhesiva
5.
Descripción del mando a distancia
Véase la figura [B2] en la página 3 de este manual del usuario.
1
2
3
4
5
6
7
8
9
6.
ajustar la intensidad luminosa y la velocidad
selección de colores
programas controlados por la música
efecto 'Fade In' y 'Fade Out' suaves (7 colores)
efecto 'Fade In' y 'Fade Out' (RGB)
blanco, estroboscopio
cambio de color automático (7 colores)
on/off
blanco cálido/frío
Instalación
Normas generales
• No instale la cinta de LEDs cerca de fuentes de calor (p.ej. horno,
tostador, etc.).
• Nunca utilice la cinta de LEDs cuando esté enrollada para evitar un
sobrecalentamiento.
• Antes de la instalación, asegúrese de que la superficie esté plana
y limpia de cualquier grasa.
• Evite curvas estrechas en la cinta de LEDs.
• Respete la polaridad al conectar las secciones del cable. La
polaridad está marcada en intervalos regulares en la cinta de
LEDs.
V. 01 – 18/05/2015
21
©Velleman nv
LEDS11SRGB
• Corte la cinta de LEDs con unas tijeras o un cuchillo afilados.
Corte la cinta de LEDs directamente en la marca. Nunca corte la
cinta de LEDs cuando esté conectada a la red eléctrica.
Instalación
Véase las figuras en la página 2 de este manual del usuario.
1. Instale la cinta con LEDs en el lugar deseado. Es posible cortar
la cinta cada 10 cm (véase [A1]). Proteja los extremos cortados
para evitar cortocircuitos.
2. Conecte la cinta de LEDs al controlador (véase [A2]). Asegúrese
de que conecte los cables de color correctos y no los
cortocircuite. Los accesorios de conexión no están incluidos.
3. Conecte el adaptador de red (incl.) al controlador (véase [A3]).
4. Enchufe la cinta de LEDs a una toma eléctrica adecuada. Véase
la figura [A4] para un esquema de conexión general.
7.
Mando a distancia
La batería
Véase la figura [B1] en la página 3 de este manual del usuario.
El mando a distancia se alimenta por una pila de litio tipo CR2025 de
3 V (incl.). Quite la lengüeta de plástico del compartimiento de pilas
tirando de ella antes del uso.
1. Para reemplazar o introducir una pila, pulse la lengüeta y tire de
ella para sacar el portapilas.
2. Introduzca la pila al respetar la polaridad. Vuelva a introducir el
portapilas en el mando a distancia.
Funcionamiento
1. Apunte el mando a distancia hacia el LED IR del controlador para
controlar la cinta de LEDs.
2. Active la cinta con el botón ON del mando a distancia.
Desactívela con el botón OFF.
3. Consulte capítulo 5. Descripción para más información sobre el
funcionamiento del mando a distancia.
V. 01 – 18/05/2015
22
©Velleman nv
LEDS11SRGB
8.
Especificaciones
grado de protección
IP
revestimiento
color
longitud de onda
consumo
ángulo de visión
espacio entre los
LEDs
alimentación
dimensiones
peso
IP61
silicona
rojo/verde/azul
rojo
verde
azul
615-630 nm
520-530 nm
465-470 nm
23,8 W (rojo 8,8 W, verde 7,5 W, azul 7,5 W)
120°
33 mm
12 VDC 24 W (adaptador de red incl.)
5 m x 10 mm
480 g
Utilice este aparato sólo con los accesorios originales.
Velleman NV no será responsable de daños ni lesiones
causados por un uso (indebido) de este aparato. Para más
información sobre este producto y la versión más reciente de
este manual del usuario, visite nuestra página
www.velleman.eu. Se pueden modificar las especificaciones y
el contenido de este manual sin previo aviso.
© DERECHOS DE AUTOR
Velleman NV dispone de los derechos de autor para este
manual del usuario. Todos los derechos mundiales
reservados. Está estrictamente prohibido reproducir, traducir,
copiar, editar y guardar este manual del usuario o partes de ello sin
previo permiso escrito del derecho habiente.
V. 01 – 18/05/2015
23
©Velleman nv
LEDS11SRGB
BEDIENUNGSANLEITUNG
1.
Einführung
An alle Einwohner der Europäischen Union
Wichtige Umweltinformationen über dieses Produkt
Dieses Symbol auf dem Produkt oder der Verpackung zeigt an, dass
die Entsorgung dieses Produktes nach seinem Lebenszyklus
der Umwelt Schaden zufügen kann. Entsorgen Sie die
Einheit (oder verwendeten Batterien) nicht als unsortiertes
Hausmüll; die Einheit oder verwendeten Batterien müssen
von einer spezialisierten Firma zwecks Recycling entsorgt
werden. Diese Einheit muss an den Händler oder ein örtliches
Recycling-Unternehmen retourniert werden. Respektieren Sie die
örtlichen Umweltvorschriften.
Falls Zweifel bestehen, wenden Sie sich für
Entsorgungsrichtlinien an Ihre örtliche Behörde.
Vielen Dank, dass Sie sich für Vellight entschieden haben! Lesen Sie
diese Bedienungsanleitung vor Inbetriebnahme sorgfältig durch.
Überprüfen Sie, ob Transportschäden vorliegen. Sollte dies der Fall
sein, verwenden Sie das Gerät nicht und wenden Sie sich an Ihren
Händler.
2.
Sicherheitshinweise
Halten Sie Kinder und Unbefugte vom Gerät fern.
Es gibt keine zu wartenden Teile. Bestellen Sie eventuelle
Ersatzteile bei Ihrem Fachhändler.
Warnung: Durchbohren Sie niemals die Batterien und werfen
Sie diese nicht ins Feuer (Explosionsgefahr). Laden Sie keine
nicht-wiederaufladbare Batterien (Alkali). Respektieren Sie
die örtlichen Umweltvorschriften beim Entsorgen der
Batterien. Halten Sie die Batterien von Kindern fern.
V. 01 – 18/05/2015
24
©Velleman nv
LEDS11SRGB
Verwenden Sie das Gerät nur im Innenbereich.
Schützen Sie das Gerät vor Regen und Feuchte.
Setzen Sie das Gerät keiner Flüssigkeit wie z.B.
Tropf- oder Spritzwasser, aus.
Beachten Sie eine minimale Entfernung von 0.5 m zwischen
dem Gerät und irgendeiner beleuchteten Fläche.
Das Gerät gehört zur Schutzklasse III.
3.
Allgemeine Richtlinien
Siehe Velleman® Service- und Qualitätsgarantie am Ende dieser
Bedienungsanleitung.
• Schützen Sie das Gerät vor Staub und extremen Temperaturen.
• Schützen Sie das Gerät vor Stößen und Erschütterungen.
Vermeiden Sie rohe Gewalt während der Bedienung.
• Nehmen Sie das Gerät erst in Betrieb, nachdem Sie sich mit
seinen Funktionen vertraut gemacht haben.
• Eigenmächtige Veränderungen sind aus Sicherheitsgründen
verboten. Bei Schäden verursacht durch eigenmächtige
Änderungen erlischt der Garantieanspruch.
• Verwenden Sie das Gerät nur für Anwendungen beschrieben in
dieser Bedienungsanleitung. Sonst kann dies zu Schäden am
Produkt führen und erlischt der Garantieanspruch.
• Bei Schäden, die durch Nichtbeachtung der Bedienungsanleitung
verursacht werden, erlischt der Garantieanspruch. Für daraus
resultierende Folgeschäden übernimmt der Hersteller keine
Haftung.
• Bewahren Sie diese Bedienungsanleitung für künftige
Einsichtnahme auf.
4.
Eigenschaften
• flexible Leiterplatte (weiß)
• 150 sehr helle LEDs (Typ 5050)
V. 01 – 18/05/2015
25
©Velleman nv
LEDS11SRGB
• RGB-Controller mit verschiedenen Programmen:
o feste Farbe
o Animation
o musikgesteuerte Programme
• Bedienung über IR-Fernbedienung (mitgeliefert)
• gemeinsame Anode
o schwarze Ader: Erdung
o rote Ader: 12 VDC
• kann alle 3 LEDs abgeschnitten werden (10 cm)
• Lieferung mit Netzteil
• eignet sich für Leuchtreklame und Markierungen
• selbstklebend
5.
Funktionen der Fernbedienung
Siehe Abb. [B2] Seite 3 dieser Bedienungsanleitung.
1
2
3
4
5
6
7
8
9
6.
Dimmung und Geschwindigkeit einstellbar
Farbauswahl
musikgesteuerte Programme
stufenloser 'Fade In'- und 'Fade Out'-Effekt (7 Farben)
'Fade In'- und 'Fade Out'-Effekt (RGB)
Weiß, Stroboskop
automatischer Farbwechsel (7 Farben)
on/off
warm-/kaltweiß
Installation
Richtlinien
• Installieren Sie die LED-Leiste nicht in der Nähe von Hitzequellen
(z.B. Ofen, Toaster, usw.).
• Verwenden Sie die LED-Leiste niemals wenn diese aufgerollt ist,
um Überhitzung zu vermeiden.
• Vor der Installation, achten Sie darauf, dass die Oberfläche eben
und fettfrei ist.
• Vermeiden Sie enge Kurven in der LED-Leiste.
• Beachten Sie die richtige Polarität wenn Sie Abschnitte wieder
miteinander verbinden. Die Polarität wird in regelmäßigen
Abständen auf der LED-Leiste markiert.
V. 01 – 18/05/2015
26
©Velleman nv
LEDS11SRGB
• Schneiden Sie die LED-Leiste mit einer scharfen Schere oder
einem Cutter ab. Schneiden Sie direkt auf der Linie. Schneiden Sie
die LED-Leiste niemals ab, wenn diese mit dem Netz verbunden
ist.
Installation
Siehe Abbildungen, Seite 2 dieser Bedienungsanleitung.
1. Installieren Sie die LED-Leiste am gewünschten Ort. Die LEDLeiste kann alle 10 cm abgeschnitten werden (siehe [A1]).
Schützen Sie die Anschnitte, um Kurzschlüsse zu vermeiden.
2. Verbinden Sie die LED-Leiste mit dem Controller (siehe [A2]).
Achten Sie darauf, dass Sie die richtigen Farbdrähte miteinander
verbinden und diese nicht kurzschließen. Die
Anschlusswerkzeuge sind nicht im Lieferumfang enthalten.
3. Verbinden Sie das mitgelieferte Netzteil mit dem Controller
(siehe [A3]).
4. Verbinden Sie das Netzteil mit dem Netz. Siehe Abb. [A4] für
ein allgemeines Anschlussdiagramm.
7.
Fernbedienung
Batterie
Siehe Abbildung [B1] Seite 3 der Bedienungsanleitung.
Die Fernbedienung funktioniert 1 x 3V-Lithiumbatterie, Typ CR2025
(mitgeliefert). Entfernen Sie vor Gebrauch die Lasche aus dem
Batteriefach.
1. Um eine Batterie zu ersetzen oder einzulegen, drücken Sie die
Seite des Batteriehalters [6] und ziehen Sie [7], um ihn zu
öffnen.
2. Legen Sie die (neue) Batterie (Beachten Sie die Polarität) ein
und schieben Sie den Batteriehalter zurück in die
Fernbedienung.
Anwendung
1. Richten Sie die Fernbedienung auf die IR-LED des Controllers,
um die LED-Leiste zu bedienen.
2. Schalten Sie die LED-Leiste mit der ON-Taste der Fernbedienung
ein. Schalten Sie die LED-Leiste mit der OFF-Taste aus.
3. Siehe Kapitel 5. Beschreibung für mehr Informationen über die
Bedienung der Fernbedienung.
V. 01 – 18/05/2015
27
©Velleman nv
LEDS11SRGB
8.
Technische Daten
IP-Schutzart
Beschichtung
Farbe
Wellenlänge
Stromverbrauch
Betrachtungswinkel
Abstand zwischen
den LEDs
Stromversorgung
Abmessungen
Gewicht
IP61
silikon
rot/grün/blau
rot
grün
blau
615-630 nm
520-530 nm
465-470 nm
23,8 W (rot 8,8 W/grün 7,5 W/blau 7,5 W)
120°
33 mm
12 VDC 24 W (Netzteil mitgeliefert)
5 m x 10 mm
480 g
Verwenden Sie dieses Gerät nur mit originellen Zubehörteilen.
Velleman NV übernimmt keine Haftung für Schaden oder
Verletzungen bei (falscher) Anwendung dieses Gerätes. Mehr
Informationen zu diesem Produkt und die neueste Version
dieser Bedienungsanleitung finden Sie hier:
www.velleman.eu. Alle Änderungen ohne vorherige
Ankündigung vorbehalten.
© URHEBERRECHT
Velleman NV besitzt das Urheberrecht für diese
Bedienungsanleitung. Alle weltweiten Rechte vorbehalten.
Ohne vorherige schriftliche Genehmigung des Urhebers ist es nicht
gestattet, diese Bedienungsanleitung ganz oder in Teilen zu
reproduzieren, zu kopieren, zu übersetzen, zu bearbeiten oder zu
speichern.
V. 01 – 18/05/2015
28
©Velleman nv
LEDS11SRGB
MANUAL DO UTILIZADOR
1.
Introdução
Aos cidadãos da União Europeia
Importantes informações sobre o meio ambiente no que
respeita a este produto
Este símbolo no aparelho ou na embalagem indica que,
enquanto desperdícios, poderão causar danos no meio
ambiente. Não coloque a unidade (ou as pilhas) no
depósito de lixo municipal; deve dirigir-se a uma empresa
especializada em reciclagem. Devolva o aparelho ao seu
distribuidor ou ao posto de reciclagem local. Respeite a legislação
local relativa ao meio ambiente.
Em caso de dúvidas, contacte com as autoridades locais para os
resíduos.
Obrigada por escolher a Vellight! Leia atentamente as instruções do
manual antes de usar o aparelho. Caso o aparelho tenha sofrido
algum dano durante o transporte não o instale e entre em contacto
com o seu distribuidor.
2.
Instruções de segurança
Mantenha o aparelho fora do alcance de crianças e pessoas
não qualificadas.
O utilizador não terá de fazer a manutenção das peças.
Contacte o seu distribuidor caso necessite de peças de
substituição.
Advertência: Nunca perfure as pilhas nem jogá-las no fogo,
pois elas podem explodir. Não tente recarregar pilhas não
recarregáveis (alcalinas). Descarte as pilhas de acordo com
as regulamentações locais. Mantenha as pilhas fora do
alcance das crianças.
V. 01 – 18/05/2015
29
©Velleman nv
LEDS11SRGB
Usar apenas em espaços interiores. Proteger o
aparelho contra a chuva e humidade ou qualquer
tipo de salpicos ou gotas.
Mantenha uma distância de pelo menos 0,5 mm
relativamente a qualquer objecto iluminado.
Este é um dispositivo de Classe de Segurança III.
3.
Normas gerais
Consulte a Garantia de serviço e qualidade Velleman® na parte
final deste manual do utilizador.
• Não exponha o equipamento ao pó nem a temperaturas extremas.
• Proteja o aparelho contra choques e má utilização. Evite usar
força excessiva durante a utilização.
• Familiarize-se com o funcionamento do aparelho antes de o
utilizar.
• Por razões de segurança, estão proibidas quaisquer modificações
do aparelho desde que não autorizadas. Os danos provocados por
modificações não autorizadas, não estão cobertos pela garantia.
• Utilize o aparelho apenas para as aplicações descritas neste
manual. Uma utilização incorreta anula a garantia completamente.
• Danos causados pelo não cumprimento das normas de segurança
referidas neste manual anulam a garantia e o seu distribuidor não
será responsável por quaisquer danos ou outros problemas daí
resultantes.
• Guarde este manual para posterior consulta.
4.
Características
• PCB flexível (branco)
• contem 150 LEDs de luminosidade intensa (tipo 5050)
• controlador RGB com diferentes programas:
o cor fixa
o programas animados
V. 01 – 18/05/2015
30
©Velleman nv
LEDS11SRGB
o programas controlados através de som
controlado através de comando por infravermelhos (incl.)
ânodo comum:
o fio preto: terra
o fio vermelho: 12 VDC
pode ser cortada a cada 3 LEDs (10 cm)
fonte de alimentação incluída
para publicidade e sinalização com iluminação
auto-adesivo
•
•
•
•
•
•
5.
Descrição do Controlo Remoto
Observe a ilustração [B2] da página 2 deste manual.
1
2
3
4
5
6
7
8
9
6.
configuração da velocidade e ajuste da intensidade de
luz
selecção de cores
programas controlados por som
7 cores que vão aparecendo e desaparecendo de forma
gradual
efeito de aparecimento e desaparecimento RGB
Estroboscópio branco
7 cores em mudança automática
Ligar/Desligar
branco frio/quente
Instalação
Normas gerais
• Evite instalar as faixas LED na proximidade de fontes de calor tais
como fornos, torradeiras, etc.
• Nunca use a faixa de LED se esta estiver enrolada, pois isso pode
causar aquecimento excessivo.
• Antes de instalar, certifique-se de que a superfície escolhida é
plana e está livre de qualquer tipo de gordura, sujidade ou
detritos.
• Evite curvaturas apertadas ao longo da faixa LED.
• Respetie a polaridade correcta quando re-unir seções de cabos. A
polaridade está marcada em determinados intervalos ao longo da
faixa LED.
V. 01 – 18/05/2015
31
©Velleman nv
LEDS11SRGB
• Corte a faixa usando uma tesoura bem afiada ou uma faca com
uma lâmina nova. Corte directamente na linha marcada. Nunca
corte a faixa LED se esta estiver ligada.
Instalação
Ver as figuras da página 2 deste manual do utilizador.
1. Monte a faixa LED no local desejado. A faixa LED pode ser
cortada a cada 10 cm (ver [A1]). Proteja as pontas cortadas
para evitar curto-circuitos.
2. Ligue as faixas LED ao controlador (see [A2]). Certifique-se de
que liga os fios fazendo corresponder as cores e de que não cria
curto-cirtuito em nenhum dos fios. As ferramentas de ligação
não estão incluídas.
3. Ligue o adaptador incluído ao controlador (ver [A3]).
4. Ligue o adaptador à tomada de corrente. Consulte a imagem
[A4] para ver o esquema de ligação.
7.
Controlo remoto
As pilhas
Veja a imagem [B1] na página 3 deste manual.
O comando à distância leva uma pilha tipo 3 V lítio CR2025
(incluída). Retirar a lingueta do compartimento das pilhas antes de
utilizar.
1. Para colocar a pilha, pressione a parte lateral da tampa do
compartimento e faça deslizar para abrir.
2. Introduza a pilha respeitando a polaridade e feche o
compartimento das pilhas empurrando novamnente até ouvir um
clic.
Utilização
1. Aponte o controlo remoto na direcção do LED IR do controlador
para controlar a saída da faixa LED.
2. Ligue a faixa LED usando o botão ON do controlo remoto. Para
voltar a desligar, pressione o botão OFF.
3. Consulte o capítulo 5. Descrição para mais informação acerca
do funcionamento do controlo remoto.
8.
Especificações
grau de proteção IP
V. 01 – 18/05/2015
IP61
32
©Velleman nv
LEDS11SRGB
revestimento
cor
comprimento de
onda
consumo
ângulo de visão
espaçamento dos
LEDs
alimentação
dimensões
peso
silicone
vermelho/verde/azul
vermelho
verde
azul
615-630 nm
520-530 nm
465-470 nm
23,8 W (vermelho 8,8 W, verde 7,5 W, azul
7,5 W)
120°
33 mm
12 VDC 24 W (adaptador incl.)
5 m x 10 mm
480 g
Utilize este aparelho apenas com acessórios originais. A
Velleman nv não será responsável por quaisquer danos ou
lesões causados pelo uso (indevido) do aparelho. Para mais
informação sobre este produto e para aceder à versão mais
recente deste manual do utilizador, visite a nossa página
www.velleman.eu. Podem alterar-se as especificações e o
conteúdo deste manual sem aviso prévio.
© DIREITOS DE AUTOR
A Velleman NV detém os direitos de autor deste manual do
utilizador. Todos os direitos mundiais reservados. É
estritamente proibido reproduzir, traduzir, copiar, editar e gravar
este manual do utilizador ou partes deste sem prévia autorização
escrita por parte da detentora dos direitos.
V. 01 – 18/05/2015
33
©Velleman nv
LEDS11SRGB
INSTRUKCJA OBSŁUGI
1.
Wstęp
Przeznaczona dla mieszkańców Unii Europejskiej.
Ważne informacje dotyczące środowiska.
Niniejszy symbol umieszczony na urządzeniu bądź
opakowaniu wskazuje, że utylizacja produktu może być
szkodliwa dla środowiska. Nie należy wyrzucać urządzenia
(lub baterii) do zbiorczego pojemnika na odpady
komunalne, należy je przekazać specjalistycznej firmie
zajmującej się recyklingiem. Niniejsze urządzenie należy zwrócić
dystrybutorowi lub lokalnej firmie świadczącej usługi recyklingu.
Przestrzegać lokalnych zasad dotyczących środowiska.
W razie wątpliwości należy skontaktować się z firmą
zajmującą się utylizacją odpadów.
Dziękujemy za wybranie produktu Vellight! Prosimy o dokładne
zapoznanie się z instrukcją obsługi przed użyciem urządzenia. Jeśli
urządzenie zostało uszkodzone podczas transportu, nie należy go
instalować ani używać, prosimy o skontaktowanie się ze sprzedawcą.
2.
Instrukcje bezpieczeństwa
Chronić urządzenie przed dziećmi i nieupoważnionymi
użytkownikami.
W urządzeniu nie występują części, które mogą być
serwisowane przez użytkownika. W celu uzyskania części
serwisowych lub zamiennych należy skontaktować się z
autoryzowanym sprzedawcą.
Uwaga: Nie przebijać i nie wrzucać baterii do ognia, ponieważ
mogą one eksplodować. Nie podejmować prób ładowania
baterii alkalicznych (nie będących akumulatorkami).
Utylizować baterie zgodnie z lokalnymi przepisami. Trzymać
baterie z dala od dzieci.
V. 01 – 18/05/2015
34
©Velleman nv
LEDS11SRGB
Wyłącznie do użytku wewnątrz pomieszczeń.
Chronić urządzenie przed deszczem, wilgocią,
rozpryskami i ściekającymi cieczami.
Zachować odległość przynajmniej 0,5 m od każdego
podświetlonego przedmiotu.
Urządzenie należy do klasy bezpieczeństwa III.
3.
Informacje ogólne
Proszę zapoznać się z informacjami w części Usługi i gwarancja
®
jakości Velleman na końcu niniejszej instrukcji.
• Chronić urządzenie przed zbyt wysoką temperaturą i pyłem.
• Chronić wstrząsami i użytkować wyłącznie zgodnie z
przeznaczeniem Podczas obsługi urządzenia unikać używania siły.
• Przed rozpoczęciem pracy z urządzeniem należy zapoznać się z
jego funkcjami.
• Wprowadzanie zmian w urządzeniu jest zabronione ze względów
bezpieczeństwa. Należy pamiętać, że uszkodzenia spowodowane
przez modyfikacje wprowadzone przez użytkownika nie są objęte
gwarancją.
• Urządzenie należy używać jedynie zgodnie z przeznaczeniem.
Używanie urządzenia niezgodnie z przeznaczeniem powoduje
unieważnienie gwarancji.
• Gwarancja nie obejmuje uszkodzeń spowodowanych
nieprzestrzeganiem niniejszej instrukcji, a sprzedawca nie ponosi
odpowiedzialności za wynikłe uszkodzenia lub problemy.
• Należy zachować niniejszą instrukcję na przyszłość.
4.
Właściwości
• elastyczna płytka drukowana (biała)
• zawiera 150 diod LED o dużej jasności (typ 5050)
• sterownik RGB z różnymi programami:
o kolor stały
V. 01 – 18/05/2015
35
©Velleman nv
LEDS11SRGB
o programy animowane
o programy sterowane dźwiękiem
sterowanie pilotem na podczerwień (w zestawie)
wspólna anoda:
o czarny przewód: uziemienie
o czerwony przewód: 12 Vdc
możliwość docinania w odstępach co 3 diody (10 cm)
zasilacz w zestawie
do podświetlania reklam i oznakowań
samoprzylepna
•
•
•
•
•
•
5.
Funkcje pilota zdalnego sterowania
Patrz rysunek [B2] na str. 3 niniejszej instrukcji.
1
2
3
4
5
6
7
8
9
6.
ściemnianie i ustawianie szybkości
wybór koloru
programy sterowane dźwiękiem
efekt płynnego rozjaśniania i ściemniania w 7 kolorach
efekt rozjaśniania i ściemniania RGB
strobo białe
automatyczne przełączanie 7 kolorów
wł./wył. (on/off)
ciepły/zimny biały
Instalacja
Wskazówki
• Unikać instalacji taśm LED w pobliżu źródeł ciepła, jak piece,
tostery itd.
• Nie używać zwiniętej taśmy LED - może to spowodować
przegrzanie.
• Przed montażem, upewnić się, że docelowa powierzchnia jest
płaska oraz pozbawiona tłuszczu, zabrudzeń i innych
zanieczyszczeń.
• Unikać mocnego zginania taśmy LED.
• Podczas ponownego łączenia odcinków kabla należy zachować
właściwą biegunowość. Biegunowość jest oznaczona na taśmie w
regularnych odstępach.
V. 01 – 18/05/2015
36
©Velleman nv
LEDS11SRGB
• Taśmę należy docinać ostrymi nożyczkami lub nożem
modelarskim. Ciąć wzdłuż zaznaczonej linii. Nie docinać taśmy
LED, jeżeli jest podłączona.
Instalacja
Patrz rysunki na stronie 2 niniejszej instrukcji.
1. Umieścić taśmę LED w żądanym miejscu. Taśmę można docinać
w odstępach co 10 cm (patrz [A1]). Zabezpieczyć docięte
końcówki, aby uniknąć zwarcia.
2. Podłączyć taśmy LED do sterownika (patrz [A2]). Upewnić się,
że kolory łączonych przewodów są zgodne, nie doprowadzać do
zwarcia. Narzędzia do łączenia nie są częścią zestawu.
3. Podłączyć dołączony zasilacz do sterownika (patrz [A3]).
4. Podłączyć zasilacz do sieci. Ogólny schemat połączeń znajduje
się na rysunku [A4].
7.
Pilot zdalnego sterowania
Bateria
Patrz rys. [B1] na stronie 3 niniejszej instrukcji.
Pilot zdalnego sterowania jest zasilany jedną baterią litową 3V
CR2025 (w zestawie). Przed użyciem usunąć etykietę z gniazda
baterii.
1. Aby wymienić baterię, nacisnąć bok pokrywy baterii i pociągnąć,
aby otworzyć.
2. Umieścić baterię, zachowując właściwą biegunowość i zamknąć
gniazdo baterii, nasuwając pokrywę z powrotem na obudowę
pilota.
Obsługa
1. Aby obsługiwać taśmę LED, skierować pilota na diodę LED IR
sterownika.
2. Uruchomić taśmę LED przyciskiem ON znajdującym się na
pilocie. Aby ponownie wyłączyć taśmę, nacisnąć przycisk OFF.
3. Więcej informacji na temat obsługi pilota przedstawiono w
rozdziale 5. Funkcje pilota zdalnego sterowania.
8.
Specyfikacja techniczna
klasa IP
pokrycie
V. 01 – 18/05/2015
IP61
silikon
37
©Velleman nv
LEDS11SRGB
kolor
długość fali
zużycie prądu
kąt widzenia
odległości pomiędzy
diodami
zasilanie
wymiary
waga
czerwony/zielony/niebieski
czerwony
zielony
niebieski
615-630 nm
520-530 nm
465-470 nm
23,8 W (czerwony 8,8 W, zielony 7,5 W,
niebieski 7,5 W)
120°
33 mm
12 VDC 24 W (zasilacz w zestawie)
5 m x 10 mm
480 g
Należy używać tylko oryginalnych akcesoriów. Firma
Velleman nv nie ponosi odpowiedzialności w przypadku
uszkodzeń lub obrażeń ciała powstałych w wyniku
(nieprawidłowej) obsługi urządzenia. Aby uzyskać więcej
informacji dotyczących produktu i najnowszą wersję
niniejszej instrukcji, należy odwiedzić naszą stronę
internetową www.velleman.eu. Informacje zawarte w
niniejszej instrukcji obsługi mogą ulec zmianie bez
wcześniejszego powiadomienia.
© INFORMACJA O PRAWACH AUTORSKICH
Instrukcja jest własnością firmy Velleman nv i jest chroniona
prawami autorskimi. Wszystkie prawa są zastrzeżone na
całym świecie. Żadna część niniejszej instrukcji nie może być
kopiowana, przedrukowywana, tłumaczona lub przenoszona na
nośniki elektroniczne lub w inny sposób, bez uprzedniej pisemnej
zgody właściciela praw autorskich.
V. 01 – 18/05/2015
38
©Velleman nv