Download OWNER`S MANUAL MANUAL DEL USUARIO
Transcript
Look for these other EURO-PRO Kitchen
products for professional cooking results
Busque estos otros productos de cocina EURO-PRO
para obtener resultados profesionales
U.S.:
EURO-PRO Operating LLC
Newton, MA 02459
Canada:
EURO-PRO Operating LLC
4400 Bois Franc
Ville St. Laurent, Québec H4S 1A7
1-800-798-7398
www.euro-pro.com
OWNER’S MANUAL
MANUAL DEL USUARIO
F1400 34
COPYRIGHT© EURO-PRO OPERATING LLC 2010
PRINTED IN CHINA / IMPRESO EN CHINA
Illustrations may differ from actual product.
El dibujo puede no ser igual al producto real.
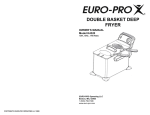
Large Capacity Deep Fryer
Freidora de inmersión de alta capacidad
REV. 100505
IMPORTANT SAFETY INSTRUCTIONS
When using electrical appliances, basic safety precautions should always be
followed, including the following:
basket and locked in place. (See
1. Read all instructions carefully before
assembly instructions.)
use.
10. The use of accessory attachments
2. Do not touch hot surfaces, always
not recommended by the appliance
use handles or knobs.
manufacturer may cause injuries.
3. To protect against electrical shock, do
11. Always insert heating element in the
not immerse cord or plug in water or
appliance first, then plug into the
other liquids.
wall outlet. To disconnect, remove
4. Close supervision is necessary when
plug from wall outlet then wait for
any appliance is used by or near
the unit to cool completely before
children.
removing the heating element.
5. Unplug from outlet when not in use
12. Extreme caution must be used
and before cleaning. Allow to cool
when moving fryer containing hot
before putting on or taking off parts
oil.
and before cleaning the appliance.
13. Do not leave appliance unattended
6. Do not operate any appliance with a
while in use.
damaged cord or plug, or after the
14. Do not use outdoors.
appliance malfunctions, has been
15. Do not let cord hang over the edge
dropped or damaged in any manner.
of the table, counter or touch hot
Return the appliance to EURO-PRO
surfaces.
Operating LLC for examination,
16. Do not place on or near a hot gas
repair or adjustment. (See warranty.)
or electric burner, or in a heated
7. Never plug in before the unit is
oven.
assembled and before oil is added to
17. Do not use appliance for other than
the oil reservoir.
intended household use.
8. Never overfill the fryer with oil. Fill
18. Periodically check for looseness of
only between the minimum and
screws or nuts and tighten them.
maximum levels, as indicated inside
CAUTION: Over tightening can result in
the oil reservoir.
stripping of screws or nuts or cracking of
9. Be sure the frying basket handle is
handle or feet.
properly assembled to the frying
SPECIAL SAFETY INSTRUCTIONS
• A detachable magnetic power cord is
provided to reduce the risk resulting from
becoming entangled in or tripping over a
longer cord. An extension cord (or
longer detachable cord) is not
recommended for use with deep fryers.
• Never plug in the unit to an electrical
outlet before the oil reservoir has been
filled with oil.
• Do not immerse the deep fryer or the
power cord in water.
• When opening the lid after frying, lift it
slowly and wait a moment to allow
the steam inside to escape before
opening fully.
• To avoid a circuit overload, do not
operate another high wattage appliance
on the same circuit.
This appliance has a polarized plug (one blade is wider than the other). To reduce
the risk of electric shock, this plug is intended to fit into a polarized outlet only one
way. If the plug does not fit fully into the outlet, reverse the plug. If it still does not fit,
contact a qualified electrician. Do not attempt to modify the plug in any way.
SAVE THESE INSTRUCTIONS
FOR HOUSEHOLD USE ONLY
1
Modelo
F1400 34
GARANTÍA LIMITADA DE UN (1) AÑO
EURO-PRO Operating LLC garantiza este producto contra defectos de
materiales y mano de obra por un término de un (1) año a partir de la fecha de
compra original, siempre que sea utilizado para uso doméstico normal, sujeto a
las siguientes condiciones, exclusiones y excepciones.
Si su artefacto no funciona correctamente al utilizarlo bajo condiciones
domésticas normales dentro del período de garantía, devuelva el artefacto
completo y sus accesorios. Por servicio al cliente, llame al 1 (800) 798-7395 o
visite nuestro sitio Web www.euro-pro.com.
Si el artefacto presenta un defecto de materiales o mano de obra, EURO-PRO
Operating LLC lo reparará o remplazará sin cargo.
Debe incluir un
comprobante de compra fechado y un cheque a favor de EURO-PRO Operating
LLC por la suma de $11,95 para cubrir los gastos de envío y procesamiento. *
La responsabilidad de EURO-PRO Operating LLC se limita únicamente al costo
de reparación o reemplazo de la unidad, a nuestro criterio. Esta garantía no
cubre el desgaste normal de las partes y no cubre ninguna unidad que haya sido
alterada o utilizada con fines comerciales. Esta garantía limitada no cubre daños
ocasionados por uso inadecuado, abuso, negligencia o daños causados por
embalaje inapropiado o maltrato durante el transporte. Esta garantía no cubre
daños o defectos causados o resultantes durante el transporte para su
reparación o alteraciones del producto o cualquiera de sus partes, realizadas por
una persona no autorizada por EURO-PRO Operating LLC.
Esta garantía es válida para el comprador original del producto y excluye
cualquier otra garantía legal y/o convencional. La responsabilidad de EUROPRO Operating LLC, de existir, se limita a las obligaciones específicas
asumidas expresamente bajo los términos de esta garantía limitada. Bajo
ninguna circunstancia EURO-PRO Operating LLC será responsable por
daños incidentales o indirectos de ninguna clase. Algunos estados/provincias no
permiten la exclusión o limitación de daños consiguientes o incidentales, por lo
tanto lo anterior puede no ser válido para usted.
Esta garantía le otorga derechos legales específicos, y usted puede también
tener otros derechos los que varían de estado a estado o de provincia a
provincia.
*Importante: Embale el producto cuidadosamente para evitar daños
durante el transporte. Asegúrese de incluir un comprobante de la fecha de
compra y de colocarle una etiqueta al producto con su nombre, dirección
completa y número de teléfono, una nota proporcionando información de
la compra, número de modelo y una descripción del problema. Le
recomendamos asegurar el paquete (puesto que la garantía no cubre
daños de envío).
Escriba en el exterior del paquete “ATTENTION
CUSTOMER SERVICE”. Nosotros nos esforzamos constantemente en
mejorar nuestros productos, por lo tanto las especificaciones aquí
indicadas pueden cambiar sin previo aviso.
18
INSTRUCCIONES DE OPERACIÓN
GETTING TO KNOW YOUR DEEP FRYER
3. Vuelva a enchufar el cable de
alimentación en la parte de atrás del
artefacto.
4. Vuelva a conectar el cable de
alimentación al tomacorriente.
5. Siga cocinando.
• Cuando el aceite se utilice
principalmente para freír papas y se lo
filtre luego de cada uso, puede llegar
a usarse entre 8 y 10 veces.
• No use el mismo aceite por más de
seis (6) meses.
• Siempre reemplace el aceite ni bien
comienza a producir espuma al
calentarlo, cuando se vuelve oscuro,
cuando tenga olor o sabor rancio o
cuando se vuelva espeso.
• Asegúrese de que los alimentos a freír
estén lo más secos posible.
• Siempre saque el hielo de los
alimentos congelados antes de
freírlos.
• Para que se cocinen parejo, los trozos
deben ser del mismo tamaño y
espesor.
• Las piezas más gruesas tardarán más
en cocinarse.
Instrucciones de Limpieza
Advertencia: Siempre desenchufe el
cable del tomacorriente antes de limpiar
la unidad. Permita que la freidora y el
aceite se enfríen completamente
(aproximadamente 2 horas) antes de
limpiarla. Nunca sumerja el panel de
control, cable o enchufe en agua o
ningún otro líquido.
Para limpiar su freidora de inmersión y
sus partes, siga siempre las
instrucciones de la sección "Limpieza
antes de usarla por primera vez".
• No coloque el panel de control, cable
o enchufe en el lavavajillas.
• Limpie el panel de control con un trapo
húmedo únicamente.
• El recipiente del aceite, la canasta
freidora y la tapa se pueden lavar en
el estante superior de un lavavajillas.
• El cuerpo de la freidora puede
lavarse con agua tibia jabonosa. No
coloque el cuerpo de la freidora en el
lavavajillas.
Cable de Alimentación Removible
Su freidora de inmersión ha sido diseñada
específicamente para su seguridad. Su
freidora de inmersión tiene un cable de
alimentación desmontable. Este cable de
alimentación está diseñado para
“desconectarse” del cuerpo de la freidora
en caso de sufrir un tirón accidental. Esta
función de seguridad está diseñada para
evitar que la freidora de inmersión se
vuelque accidentalmente derramando
peligrosamente el aceite caliente de su
interior.
Para colocar el cable de alimentación:
1. El enchufe macho del cable de
alimentación está montado
permanentemente en la parte
posterior del panel de control.
(Fig. 9)
Fig. 9
2. Para conectar el enchufe
hembra del cable de alimentación al
enchufe macho del artefacto, haga
coincidir la orientación de los enchufes.
Nota: El enchufe hembra puede
enchufarse de una sola forma. Si no entra
en el enchufe del artefacto, gírelo 180º.
IMPORTANTE: Si el enchufe magnético
se desconecta del artefacto mientras se lo
está usando, es importante que haga lo
siguiente:
1. Desenchufe el cable de alimentación.
2. Gire el temporizador de seguridad a
cero y gire el control de temperatura
a la posición de apagado.
1.
2.
3.
4.
5.
6.
7.
8.
9.
10.
11.
12.
13.
14.
15.
16.
Built-in Filter
Viewing Window
Lid Cover
Frying Basket Handle
Frying Basket
Oil Reservoir
Body (Housing)
Body Handle (x2)
Guide Edges
Heating Element
Control Panel
Safety Timer
Power Light
Ready Light
Temperature Control
Break Away Power Cord
(not shown)
Función de reinicio
Su freidora de inmersión tiene una función
de reinicio. Si la freidora de inmersión
deja de calentar por cualquier motivo,
puede haberse activado el interruptor
automático de reinicio.
Para reiniciar la freidora de inmersión:
1. Presione el botón de reinicio del
termostato ubicado en la parte de
atrás del panel de control con la punta
de un bolígrafo o un lápiz. (Fig. 10)
2. La unidad emitirá un pitido para indicar
que se ha reiniciado y que puede
seguir cocinando.
Botón de
reinicio
Technical Specifications
Fig. 10
Voltage:
Power:
120V., 60Hz.
1650 Watts
*Illustrations may differ from actual product.
17
2
OPERATING INSTRUCTIONS
INSTRUCCIONES DE OPERACIÓN
Deep Fryer Features
The Safety Timer
Using for the First Time
Warning: Do not plug in the deep
The safety timer turns the unit on and off.
It counts down the allotted cooking time
and makes a ‘ding’ sound when the time
is up.
fryer when the control panel is not
installed in the deep fryer body. Only
plug in the deep fryer when the unit is
fully assembled and the heating
element is immersed in oil.
Warning: Do not immerse the control
panel, cord or plug in water.
Warning: This unit should not be used
to boil water
The Power Light
The power light illuminates when the
deep fryer is on.
The Ready Light
The ready light will cycle on and off
several times during frying. This
indicates that the temperature is
thermostatically maintained.
The Detachable Power Cord
The power supply is designed to “Break
Away” from the fryer body in the event
that it is inadvertently pulled. This is
intended to prevent the tipping of the
appliance and the hazardous spillage of
hot oil.
The Reset Feature
Your deep fryer is equipped with a
feature that protects damage due to
overheating. If for some reason the unit
overheats, the deep fryer will
automatically turn off. Once the deep
fryer is reset, it can be turned on again.
(See page 8 for Reset instructions.)
Los siguientes tiempos de cocción son los aproximados para freír una canasta llena
hasta la marca de MAX. Los tiempos exactos pueden variar, dependiendo de la
cantidad, preferencias personales, tamaño y grosor de los trozos, etc.
Ajuste de Temperatura
Por lo general, use bajas temperaturas para alimentos delicados (verduras, pescado)
y temperaturas más altas para alimentos congelados, papas fritas y pollo.
Comida
Tiempo de Cocción
Papas Fritas
6-9 minutos
375°F
Filete de Pescado
3-5 minutos
325°F
Cleaning Prior To First Use
Bastoncitos de Pollo
6-8 minutos
350°F
The body, oil reservoir, frying basket,
frying basket handle, and lid can be
washed in warm soap water. Dry
thoroughly before use.
Warning: Do not immerse the control
panel, power cord, or plugs into liquid of
any kind.
To wash the deep fryer:
1. Lift the control panel with heating
element out of its slots by pushing it
up from the bottom with one hand
while holding the body of the deep
fryer with your other hand.
2. Remove the oil reservoir from the
body of the deep fryer.
3. Wash the oil reservoir and the frying
basket with hot water, a non-abrasive
sponge, and dishwashing liquid or
other non-poisonous detergent.
Trozos de Pollo
13-20 minutos
350°F
Calabacín Frito
3 minutos
325°F
Champiñones Fritos
3 minutos
325°F
Aros de Cebolla
3 minutos
325°F
Rosquillas
3-5 minutos
350°F
Beignet de Manzana
4 minutos
350°F
Camarones
4-6 minutos
325°F
The Frying Basket Handle
Use the frying basket handle to remove
the frying basket. Always make sure the
frying basket handle is securely attached
to the frying basket.
To attach the frying basket handle to
the frying basket:
1. Insert the metal part of the handle into
the metal bracket on the frying
basket. (Fig. 1)
Press together
here
Al Terminar de Cocinar
1. Gire el control de temperatura a la
posición "Off" y el temporizador de
seguridad a cero.
2. Desenchufe el cable de alimentación
del tomacorriente.
3. Levante la tapa lentamente y permita
que salga el vapor antes de abrir
completamente la tapa.
4. Levante la canasta freidora por el
mango. Colóquela en el recipiente del
aceite y permita que la comida se
escurra por un minuto. (Fig. 6)
5. Una vez que el aceite haya drenado de
la canasta freidora, puede levantar la
canasta y servir la comida.
Advertencia: Siempre deje enfriar
completamente la freidora
(aproximadamente 2 horas) antes de
limpiarla o guardarla.
Nunca transporte o
mueva la freidora de
inmersión con aceite
caliente en su interior.
Fig. 6
Fig. 1
Filtrado y Cambio del Aceite
Atención: Asegúrese de que la freidora
de inmersión esté desenchufada y que el
aceite se haya enfriado (aproximadamente
2 horas) antes de cambiar el aceite,
limpiarla o guardarla.
3
Temperatura
Nota: No hace falta cambiar el aceite
después de cada uso. Por lo general, el
aceite se contaminará más rápidamente al
freír alimentos con mucha proteína, (como
aves, carnes o pescado). Cuando el aceite
se utilice principalmente para freír papas y
se lo filtre luego de cada uso, puede llegar
a usarse entre 8 y 10 veces. Sin embargo,
nunca use el mismo aceite por más de seis
(6) meses.
Para filtrar el aceite:
1. Verifique que el aceite se haya enfriado
(unas 2 horas) luego vierta el aceite del
recipiente del aceite en
otro recipiente o frasco.
(Fig. 7)
2. Lave y seque el recipiente
del aceite y la canasta
freidora.
Fig. 7
3. Vuelva a llenar el
recipiente del aceite
con el aceite, haciéndolo
pasar por un colador de
alambre o un filtro de
papel. (Fig. 8)
Consejos Útiles
Fig. 8
• No mezcle aceites diferentes, o aceite
nuevo y viejo.
• Reemplace el aceite a menudo. Por lo
general, el aceite se contaminará más
rápidamente al freír alimentos con
mucha proteína, (como aves, carnes y
16
pescado).
INSTRUCCIONES DE OPERACIÓN
Nota: No debe colocar el canasto dentro
del recipiente del aceite durante el
precalentamiento.
2. Coloque la tapa.
3. Enchufe el artefacto en un tomacorriente
de 120 voltios.
4. Gire el control de temperatura como lo
desee.
5. Gire el temporizador de seguridad a 15
minutos. Se encenderá la luz de
encendido indicando que la freidora está
encendida.
6. Para indicar que el aceite ha llegado a la
temperatura seleccionada, se encenderá
la luz de lista.
7. Cuando se acabe el tiempo
seleccionado, escuchará una
campanada y se apagará la luz de
encendido indicando que la freidora de
inmersión está apagada.
Usando la freidora de inmersión de
gran capacidad
Advertencia: Nunca enchufe la freidora
antes de llenarla de aceite hasta el nivel
indicado. Siempre asegúrese de que el
panel de control esté colocado
correctamente en su lugar y que el elemento
calefactor esté dentro del aceite en el
recipiente antes de enchufarla.
Importante: Verifique que el panel de
control esté colocado correctamente en la
unidad principal, de lo contrario no
funcionará. Esto no es una falla. Este
producto está equipado con un interruptor
de seguridad para evitar que se encienda
accidentalmente.
Advertencia: Para evitar daños o
quemaduras, nunca toque ninguna parte
metálica de la freidora ya que pueden estar
calientes.
Llenado de la Canasta
• No llene la canasta cuando esté inmersa
en el aceite. Saque la canasta freidora del
aceite caliente y luego llene la canasta
con comida.
• Coloque la comida en la canasta. No
llene de más la canasta freidora y nunca
exceda la línea de MAX indicada en la
misma. Para mejores resultados y
cocciones más rápidas, sólo llene la
canasta hasta la mitad.
• Nunca llene la canasta por encima de la
línea de máximo con alimentos
congelados.
15
Advertencia: Para evitar salpicaduras y
quemaduras, saque la canasta de la
freidora de inmersión antes de llenarla con
comida congelada.
Advertencia: Le recomendamos que los
alimentos queden por lo menos ¾ por
debajo de la línea de MAX al freír
alimentos congelados. Siempre saque
todo el hielo de los alimentos congelados
antes de freírlos. El no hacerlo puede
hacer que la freidora rebalse al colocar los
alimentos en el aceite.
OPERATING INSTRUCTIONS
2. Holding the frying basket securely in
one hand, pull the handle toward you
so that the metal part of the handle
fastens securely to the rounded frying
basket latch. (Fig. 2)
shortening in the oil reservoir or the frying
basket.
• If using solid vegetable shortening,
melt it first in a separate container and
then very carefully pour the melted fat
into the oil reservoir.
• Previously used solid vegetable
shortening which has curdled and
hardened in the oil reservoir should be
removed from the oil reservoir and
melted in a separate pan before
reusing.
Warning: If you try to melt the solidified
fat in the oil reservoir, there is a risk of hot
melted fat suddenly sputtering from below
through the solid top layer of fat.
Use only the following procedure when
melting solid fat in your deep fryer:
1. Make sure the fat is at room
temperature. If the fat is cold, then
there is a greater risk of splashing.
2. Using a fork, carefully make some
holes in the fat.
3. Make sure the lid is always securely
closed while the fat is melting.
4. Set the temperature control to 325°F.
5. Turn the safety timer to the required
period of time to melt the amount of
fat placed in the reservoir.
Important: Setting the safety timer will
automatically turn the deep fryer “On” and
the power light will illuminate. The ready
light will illuminate when the fat or oil in
the reservoir has reached the selected
temperature.
Pull
Latch
Fritura de Alimentos
Nota: Siempre utilice la canasta para freír
alimentos. Siempre coloque la tapa al
freír.
1. Para precalentar el aceite, coloque el
control de temperatura en la
temperatura deseada y luego ajuste el
temporizador en 15 minutos.
2. Cuando el aceite se haya precalentado
se encenderá la luz de lista.
Nota: Muchos factores pueden afectar la
cantidad de tiempo que tarda el aceite en
precalentarse. Puede llevar más de 15
minutos el precalentar el aceite. Puede
necesitar ajustar el temporizador de
seguridad para aumentar o disminuir el
tiempo de acuerdo con sus necesidades.
3. Llene la canasta freidora con comida y
desciéndala lentamente dentro del
aceite caliente. Si desciende la
canasta muy rápidamente puede hacer
que el aceite se rebalse y salpique.
4. Vuelva a ajustar el temporizador de
seguridad al tiempo deseado.
5. Vuelva a colocar la tapa con cuidado.
Nota: Es normal que salga vapor por los
costados de la tapa al freír.
Advertencia: Evite estar demasiado
cerca de la freidora mientras esté
funcionando.
Advertencia: Al abrir la tapa luego de
freír, ábrala solo un poco y permita que
salga el vapor antes de abrirla completamente. Mantenga la cara lejos de la
unidad para evitar quemaduras por el
vapor.
Using Solid Fat
Warning: Do not put solid vegetable
Fig. 2
Warning: Never immerse the control
panel or power cord in water or any other
liquids.
Warning: All components must be
completely dry before filling with oil or
using.
Warning: Never exceed the maximum
lines indicated on the frying basket and
on the reservoir.
Filling the Oil Reservoir
Warning: Never plug in the deep fryer
before filling with oil to specified level.
Before you plug in the appliance, make
sure the control panel is securely
attached to the body and the heating
element is in the oil filled reservoir.
• Use blended vegetable oil, peanut
oil, pure corn oil or canola
(rapeseed) oil. Do not use olive oil,
margarine, lard or drippings.
• The oil level must always be
maintained between the minimum
and the maximum levels marked
inside the oil reservoir. Check the
oil level before each use. For best
results, keep the oil close to the
maximum level (16 cups/4 liters).
(Fig. 3)
• Never mix different oils and fats
together. Do not mix old and new
oil.
Oil level
indicator
Fig. 3
4
OPERATING INSTRUCTIONS
INSTRUCCIONES DE OPERACIÓN
Installing the Control Panel with the
Heating Element Into Place
Using the Safety Timer
Attention: Setting the timer will
Instalación del panel de control con
el elemento calefactor
1. Lift up the control panel with heating
element.
2. Insert the guide edges on the control
panel into the guide rails mounted on
the metal body. (Fig. 4)
3. Slide the guide edges down as far as
they can go.
Note: The deep fryer has an automatic
safety switch to ensure that the unit will not
operate unless the control panel has been
inserted securely into the guide rails on the
body of the deep fryer. (Fig. 5)
automatically turn the deep fryer “On”.
The power light will illuminate indicating
that the deep fryer is “On”. The safety
timer will turn the unit off at the end of the
selected time period.
The maximum time you can run the deep
fryer is 60 minutes. In the event that you
forget that the deep fryer is running, this
safety feature to ensure that the deep
fryer does not continue to operate for
extended period of time.
To set the safety timer:
1. Turn the safety timer to the right to
set the amount of time your deep fryer
will run. The safety timer will start the
count-down immediately.
2. The power light will illuminate as soon
as you turn the safety timer to the
right. The light will go out and the unit
will make a ‘ding’ sound when the
allotted time period ends.
3. You can always add time or decrease
time by turning the safety timer to the
right or left.
1. Levante el panel de control con el
elemento calefactor.
2. Inserte los bordes guía del panel de
control dentro de la ranuras guía del
cuerpo metálico. (Fig. 4)
3. Deslice los bordes de la guía hacia
abajo todo lo que se pueda.
Nota: La freidora de inmersión tiene un
interruptor automático de seguridad que
hace que la unidad no funcione a menos
que el panel de control esté bien colocado
en las ranuras guía del cuerpo de la
freidora. (Fig. 5)
Slide
Down
Guide
Edges
Guide
Rails
Fig. 4
Control Panel
Deslizar
hacia
abajo
12.
13.
14.
15.
Fig. 4
Control Panel
Panel de control
Elemento
calefactor
Guide
Edges
12.
13.
14.
15.
Fig. 5
Temperature Control
Power Light
Ready Light
Safety Timer
Pre-Heating the Oil
Warning: Never plug in the deep fryer
before filling the reservoir with oil. (See
"Filling the Oil Reservoir" for
instructions) Always unplug the
appliance when not in use.
1. Make sure the oil level in the oil
reservoir is between the minimum
and maximum lines inside the oil
reservoir.
Note: The frying basket should not be
immersed in the oil during pre-heating.
2. Replace the lid cover.
5
Panel de control
Bordes guía
Riel guía
Heating
Element
Safety
Switch
Para ajustar el temporizador de
seguridad:
1. Gire el temporizador de seguridad
hacia la derecha para ajustar el tiempo
que funcionará su freidora de
inmersión. El temporizador comenzará
la cuenta regresiva inmediatamente.
2. Se iluminará la luz de encendido ni bien
gire el temporizador de seguridad hacia
la derecha. La luz se apagará y la
unidad emitirá una campanada cuando
se termine el tiempo seleccionado.
3. Siempre puede aumentar o disminuir el
tiempo girando el temporizador de
seguridad hacia la derecha o la
izquierda.
Bordes
guía
Interruptor
de Seguridad
Fig. 5
Usando el temporizador de
seguridad
Atención: Ajustando el temporizador, la
freidora se encenderá automáticamente.
Se iluminará la luz de encendido indicando
que la freidora está encendida. El
temporizador de seguridad apagará la
unidad al final del tiempo seleccionado.
El tiempo máximo que puede hacer
funcionar la freidora de inmersión es 60
minutos. Si se llegara a olvidar que la
freidora está funcionando, esta función de
seguridad se encargará de que no siga
funcionando durante mucho tiempo.
Control de temperatura
Luz de encendido
Luz de listo
Temporizador de seguridad
Precalentando el aceite
Advertencia: Nunca enchufe la
freidora antes de llenar el recipiente con
aceite. (Ver "Llenado del recipiente del
aceite" por instrucciones) Siempre
desenchufe el artefacto cuando no lo
utilice.
1. Asegúrese de que el nivel de aceite
en el recipiente esté entre las marcas
de nivel mínimo y máximo dentro del
recipiente del aceite.
Nota: No debe colocar el canasto
dentro del recipiente del aceite durante
el precalentamiento.
2. Coloque la tapa.
Precalentando el aceite
Advertencia: Nunca enchufe la
freidora antes de llenar el recipiente con
aceite. (Ver "Llenado del recipiente del
aceite" por instrucciones) Siempre
desenchufe el artefacto cuando no lo
utilice.
1. Asegúrese de que el nivel de aceite
en el recipiente esté entre las marcas
de nivel mínimo y máximo dentro del
recipiente del aceite.
14
INSTRUCCIONES DE OPERACIÓN
2. Sosteniendo bien la canasta freidora
con una mano, tire del mango hacia
usted de modo que la parte metálica
del mango se trabe en el borde
redondeado de la canasta freidora.
(Fig. 2)
Tire
Uso de Grasa Sólida
Advertencia: No coloque mantequilla
vegetal sólida en el recipiente del aceite o
en la canasta.
• Si quiere usar mantequilla vegetal
sólida, derrítala primero en otro
recipiente y luego viértala
cuidadosamente dentro del recipiente
del aceite.
• La mantequilla vegetal sólida usada
que se haya cuajado y endurecido
dentro del recipiente del aceite debe
quitarse y derretirse en otra sartén
antes de usarse nuevamente.
Advertencia: Si trata de fundir la grasa
sólida en el recipiente del aceite, la grasa
fundida de la parte de abajo del recipiente
puede salpicar por encima de la capa
sólida de la parte de arriba.
Siga únicamente el siguiente
procedimiento al fundir grasa sólida en
su freidora de inmersión:
1. Asegúrese de que la grasa se
encuentre a temperatura ambiente. Si
la grasa está fría, el riesgo de
salpicaduras es mayor.
2. Con un tenedor, haga algunos
agujeros en la grasa.
3. Asegúrese de que la tapa esté
siempre correctamente cerrada
mientras derrite la grasa.
4. Ajuste el control de temperatura a
325°F.
5. Gire el temporizador de seguridad al
tiempo necesario para fundir la
cantidad de gras que puso en el
recipiente.
Importante: El ajustar el temporizador
de seguridad encenderá la freidora de
inmersión y se iluminará la luz de
encendido. La luz de listo se encenderá
cuando la grasa o el aceite del recipiente
haya alcanzado la temperatura
seleccionada.
Traba
Fig. 2
Advertencia: Nunca sumerja el panel
de control o el cable de alimentación en
agua o ningún otro líquido.
Advertencia: Todas las partes deben
estar completamente secas antes de
llenar la unidad con aceite y usarla.
Advertencia: Nunca exceda las líneas
de máximo de la canasta freidora y el
recipiente.
Llenado del Recipiente del Aceite
Advertencia: Nunca enchufe la
freidora antes de llenarla de aceite hasta
el nivel indicado. Antes de enchufar el
artefacto, verifique que el panel de
control esté correctamente colocado en el
cuerpo principal y que el elemento
calefactor esté en el recipiente lleno de
aceite.
• Use aceite mezcla vegetal, aceite de
maní, aceite puro de maíz o aceite de
canola. No use aceite de oliva,
margarina, manteca o grasa de carne.
• Siempre debe mantener el nivel de
aceite entre las marcas de nivel
mínimo y máximo dentro del
recipiente del aceite. Verifique el nivel
de aceite antes de cada uso. Para
obtener mejores resultados,
mantenga el nivel de aceite cerca del
máximo (16 tazas / 4 litros). (Fig. 3)
• Nunca mezcle aceites diferentes y
grasas. No mezcle aceite nuevo y
viejo.
Pre-Heating the Oil
Warning: Never plug in the deep fryer
•
Place the food in the frying basket.
Do not overfill the frying basket and
never exceed the MAX line indicated
on the frying basket. For optimum
results and shorter frying time, the
frying basket should be only 1/2 full.
• Never fill the frying basket higher
than the MAX line on the frying
basket with frozen food.
Warning: To prevent spattering and
burns, remove the frying basket from the
deep fryer before filling with frozen food.
Caution: When frying frozen food, it is
recommended that food is at the 3/4
level, below the MAX line. Always
clean off any ice from frozen food prior
to frying. Failure to do so may cause
fryer to overflow when food is placed in
oil.
before filling the reservoir with oil. (See
"Filling the Oil Reservoir" for instructions)
Always unplug the appliance when not in
use.
1. Make sure the oil level in the oil
reservoir is between the minimum
and maximum lines inside the oil
reservoir.
Note: The frying basket should not be
immersed in the oil during pre-heating.
2. Replace the lid cover.
3. Plug the appliance into a 120-volt
electrical outlet.
4. Turn the temperature control to the
desired temperature.
5. Turn the safety timer to 15 minutes.
The power light will come on indicating
that the deep fryer is now “On”.
6. To indicate that the oil has reached the
selected temperature, the ready light
will illuminate.
7. When the allotted time runs out, you
will hear a ‘ding’ sound and the power
light will turn off, indicating that the
deep fryer is now “Off”.
Frying Food
Note: Always use the frying basket to
Using the Large Capacity Deep
Fryer
Warning: Never plug in the deep fryer
before filling with oil to specified level.
Before plugging in, make sure control
panel is securely in place on the body and
the heating element is covered in oil in the
reservoir.
Important: Ensure the control panel is
fitted correctly to the body otherwise the
unit will not function. This is not a defect.
This product is fitted with a safety switch
to prevent the unit from turning “on”
accidentally.
Warning: In order to avoid injury or
burns, never touch any metal parts on the
deep fryer because they may be hot.
Filling the Frying Basket
•
Indicador de
Nivel de Aceite
Fig. 3
OPERATING INSTRUCTIONS
13
Do not fill the frying basket when it
is immersed in oil. Remove the frying
basket from the hot oil and then fill the
frying basket with food.
6
fry food. Always close the lid cover
during frying.
1. To preheat the oil, set the
temperature control to the desired
temperature and turn the safety timer
to 15 minutes.
2. When the oil is pre-heated, the ready
light will illuminate.
Note: Many factors can effect the
length of time it takes to preheat oil. It
may take more or less then 15 minutes
to preheat your oil. You may need to
adjust the safety timer to add or remove
time according to your needs.
3. Fill the frying basket with the food
and slowly lower the frying basket
into the hot oil. Lowering the frying
basket too quickly can result in oil
overflow and splashing.
4. Reset the safety timer to the desired
time.
5. Replace the lid cover carefully.
Note: It is normal for steam to escape
through the sides of the lid cover while
frying.
Warning: Avoid standing too close to
the deep fryer while it is working.
Warning: When opening the lid cover
after frying, lift up the lid slightly, then
wait to allow steam to escape before
opening the lid completely. Keep face
away from unit to avoid burns caused by
escaping steam.
OPERATING INSTRUCTIONS
INSTRUCCIONES DE OPERACIÓN
The following cooking times reflect the approximate time needed to fry one basket filled
only to the MAX line. The exact time may be different depending on actual quantity,
personal cooking preferences, size and thickness of pieces, etc...
Características de la freidora de
inmersión
Temporizador de seguridad
Temperature Settings
El temporizador de seguridad enciende y
apaga la unidad. Cuenta
descendentemente el tiempo
seleccionado de cocción y emite una
campanada cuando se acaba el tiempo.
In general, use lower settings for delicate foods (vegetables, fish) and higher settings
for frozen foods, French Fries and chicken.
Food
Cooking Time
Temperature
French Fries
6-9 minutes
375°F
Fish Fillets
3-5 minutes
325°F
Chicken Fingers
6-8 minutes
350°F
Chicken Pieces
13-20 minutes
350°F
Fried Zucchini
3 minutes
325°F
Luz de listo
Fried Mushrooms
3 minutes
325°F
Onion Rings
3 minutes
325°F
Donuts
3-5 minutes
350°F
Apple Beignets
4 minutes
350°F
La luz de listo puede encenderse y
apagarse varias veces al freír. Esto
indica que el termostato está
manteniendo la temperatura.
Shrimp
4-6 minutes
325°F
At the End of Cooking
Fig. 6
Fig. 7
Filtering & Changing the Oil
Attention: Make sure the deep fryer is
Frying Tips
unplugged from the electrical socket and
the oil has cooled (approximately 2 hours)
before changing the oil, or cleaning and
storing the deep fryer.
•
•
7
inmersión si no tiene el panel de control
instalado en el cuerpo principal.
Enchúfela únicamente cuando esté
completamente armada y con el elemento
calefactor completamente sumergido en
aceite.
Advertencia: No sumerja el panel de
control, el elemento calefactor o el
enchufe en agua.
Advertencia: Esta unidad no debe
usarse para hervir agua.
Luz de encendido
La luz de encendido se ilumina cuando la
freidora de inmersión está encendida.
Note: The oil does not need to be
changed after each use. In general, the oil
will be tainted rather quickly when frying
food containing a lot of protein (such as
poultry, meat or fish). When oil is mainly
used to fry potatoes and is filtered after
each use, it can be used 8 to 10 times.
However, do not use the same oil for longer
than 6 months.
To filter the oil:
1. Make sure the oil has cooled
(approximately 2 hours) and then empty
the oil from the oil reservoir into another
container or bottle. (Fig. 7)
2. Wash and dry the oil reservoir and
frying basket.
3. Refill the oil reservoir with the oil by
pouring the oil through a wire
strainer or paper filter. (Fig. 8)
1. Turn the temperature control to “Off”
and the safety timer to zero.
2 Unplug the power cord from the
electrical socket.
3. Lift up the lid cover slowly and wait
to allow steam to escape before
opening the lid cover completely.
4. Lift up the frying basket by the
handle. Place it on the oil reservoir
and allow the food to drain for a
minute. (Fig. 6)
5 Once the oil has drained from the
frying basket, the frying basket may
be lifted off and the food served.
Warning: Always let the deep fryer
cool completely (approximately 2 hours)
before cleaning or storing. Never carry
or move the deep fryer with hot oil
inside.
Uso Inicial
Advertencia: No enchufe la freidora de
Limpieza antes de usarla por
primera vez
El cuerpo, recipiente del aceite, canasta
freidora, mango de la canasta y la tapa
se pueden lavar en agua tibia con jabón.
Séquelos bien antes de usarlos.
Advertencia: No sumerja el panel de
control, cable de alimentación o enchufes
en ningún tipo de líquido.
Para lavar la freidora de inmersión:
1. Levante el panel de control con el
elemento calefactor fuera de sus
ranuras tirando con una mano hacia
arriba desde su base mientras
sostiene el cuerpo de la freidora con
su otra mano.
2. Saque el recipiente del aceite del
cuerpo principal de la freidora de
inmersión.
3. Lave el recipiente del aceite y la
canasta con agua caliente,
detergente para líquido de cocina u
otro detergente no tóxico y una
esponja no abrasiva.
Cable de alimentación
desmontable
Este cable de alimentación está
diseñado para “desconectarse” del
cuerpo de la freidora en caso de sufrir un
tirón accidental. Esto evita que el
artefacto se caiga y que se derrame el
aceite caliente.
Función de reinicio
Su freidora de inmersión viene equipada
con una función que la protege contra
sobrecalentamiento. Si la unidad se
sobrecalienta por cualquier motivo, se
apagará automáticamente. Una vez que
se haya reiniciado se podrá volver a
encender. (Vea la página 17 por
instrucciones de reinicio).
Mango de la canasta freidora
Use el mango para sacar la canasta
freidora. Siempre verifique que el mango
esté enganchado correctamente a la
canasta freidora.
Para enganchar el mango a la canasta
freidora:
1. Inserte la parte de metal del mango
en el soporte metálico de la canasta
freidora. (Fig. 1)
Fig. 8
Presione
entre sí
Do not mix different types of oils or
new and old oil together.
Replace oil regularly. In general, oil
will be tainted fast when frying food
containing a lot of protein, (such as
poultry, meat and fish).
12
Fig. 1
PARTES DE SU FREIDORA DE INMERSIÓN
OPERATING INSTRUCTIONS
•
1.
2.
3.
4.
5.
6.
7.
8.
9.
10.
11.
12.
13.
14.
15.
16.
Filtro incorporado
Ventana de observación
Tapa
Mango de la canasta freidora
Canasta freidora
Recipiente del aceite
Cuerpo (gabinete)
Asas del cuerpo (x2)
Bordes guía
Elemento calefactor
Panel de control
Temporizador de seguridad
Luz de encendido
Luz de listo
Control de temperatura
Cable desmontable
(no se muestra)
•
•
•
•
•
•
When oil is used mainly to fry
potatoes, and is filtered after each
use, it can be used up to 8 to 10
times.
Do not use the same oil for more
than 6 months.
Always replace all oil when it starts
to foam when heated, when it’s color
becomes dark, when it has a rancid
smell or taste, or when it becomes
syrupy.
Make sure that the food to be fried is
as dry as possible.
Always remove loose ice from
frozen food before frying.
To cook evenly, pieces should be the
same size and thickness.
Thicker pieces will take longer to
cook.
3. Re-attach the power cord to the
receptacle at the rear of the
appliance.
4. Re-connect the power cord to the
electrical outlet.
5. Resume cooking.
Cleaning Instructions
Warning: Always remove the plug
Detachable Power Cord
Especificaciones Técnicas
Voltaje:
120V, 60Hz.
Potencia: 1650 Vatios
* El dibujo puede no ser igual al producto real.
11
Your deep fryer has been specifically
designed with your safety in mind. Your
deep fryer features a detachable power
cord. This power cord is designed to
break away from the fryer body in the
event that the cord is inadvertently
pulled or tugged. This safety feature is
intended to prevent the deep fryer from
accidentally tipping over and
dangerously spilling the hot oil inside.
To attach the power cord:
1. The male receptacle
for the power cord is
permanently attached
to the rear of the
control panel. (Fig. 9)
Fig. 9
2. To connect the female
power cord plug to the
male receptacle on the appliance,
orient the female plug so that it
mates with the male receptacle.
Note: The female plug can only be
inserted one way. If the female plug will
not go into the receptacle on the
appliance, rotate the male plug 180°.
IMPORTANT: Should the magnetic
plug become detached from the
appliance during use, it is important to
do the following:
1. Unplug the power cord from the
electrical outlet.
2. Turn the safety timer to zero and turn
the temperature control to the “Off”
position.
8
from the wall socket before cleaning.
Allow the deep fryer and the oil to cool
completely (approximately 2 hours)
before cleaning. Never immerse the
control panel, cord or plug in water or
any other liquid.
To clean your deep fryer and it parts,
always follow the instruction under the
section “Cleaning Prior to First Use”.
• Do not place the control panel, cord
or plug in the dishwasher.
• Clean the control panel with a
damp cloth only.
• The oil reservoir, frying basket, and
lid cover can be washed on the top
rack of a dishwasher.
• The body of the deep fryer can be
washed in warm soapy water. Do
not put the body of the deep fryer in
the dishwasher.
The Reset Feature
Your deep fryer is equipped with a reset
feature. If for some reason the deep
fryer stops heating, the reason may be
that the reset switch has tripped.
To reset the deep fryer:
1. Push the thermostat reset button
located on the back of the control
panel with a ball point pen or pencil.
(Fig. 10)
2. The unit will beep to indicate that it
has reset and you may resume
cooking.
Reset
Button
Fig. 10
INSTRUCCIONES IMPORTANTES DE SEGURIDAD
Model
F1400 34
ONE (1) YEAR LIMITED WARRANTY
EURO-PRO Operating LLC warrants this product to be free from defects in
material and workmanship for a period of one (1) year from the date of the
original purchase, when utilized for normal household use, subject to the
following conditions, exclusions and exceptions.
If your appliance fails to operate properly while in use under normal household
conditions within the warranty period, return the complete appliance and
accessories. For Customer Service support, call 1 (800) 798-7398 or visit our
website www.euro-pro.com.
If the appliance is found to be defective in material or workmanship, EURO-PRO
Operating LLC will repair or replace it free of charge. Proof of purchase date
and a check payable to EURO-PRO Operating LLC in the amount of $11.95 to
cover the cost of return shipping and handling must be included. *
The liability of EURO-PRO Operating LLC is limited solely to the cost of the
repair or replacement of the unit at our option. This warranty does not cover
normal wear of parts and does not apply to any unit that has been tampered with
or used for commercial purposes. This limited warranty does not cover damage
caused by misuse, abuse, negligent handling or damage due to faulty packaging
or mishandling in transit. This warranty does not cover damage or defects
caused by or resulting from damages from shipping or repairs, service or
alterations to the product or any of its parts, which have been performed by a
repair person not authorized by EURO-PRO Operating LLC.
This warranty is extended to the original purchaser of the unit and excludes all
other legal and/or conventional warranties. The responsibility of EURO-PRO
Operating LLC if any, is limited to the specific obligations expressly assumed by
it under the terms of the limited warranty. In no event is EURO-PRO Operating
LLC liable for incidental or consequential damages of any nature whatsoever.
Some states/provinces do not permit the exclusion or limitation of incidental or
consequential damages, so the above may not apply to you.
This warranty gives you specific legal rights, and you may also have other rights
which vary from state to state or from province to province.
*Important: Carefully pack item to avoid damage in shipping. Be sure to
include proof of purchase date and to attach a tag to item before packing
with your name, complete address and phone number with a note giving
purchase information, model number and what you believe is the problem
with item. We recommend you insure the package (as damage in shipping
is not covered by your warranty). Mark the outside of your package
“ATTENTION CUSTOMER SERVICE”.
We are constantly striving to
improve our products, therefore the specifications contained herein are
subject to change without notice.
Al usar aparatos eléctricos, siempre debe seguir precauciones básicas de
seguridad, incluyendo las siguientes:
10. El uso de accesorios no
1. Lea cuidadosamente las instrucciones
recomendados por el fabricante
antes de usarla.
puede ocasionar daños.
2. No toque las superficies calientes, use
11. Siempre coloque primero el
siempre las manijas o perillas.
elemento calefactor en el artefacto,
3. Para evitar una descarga eléctrica, no
luego enchúfelo en el
sumerja el cable o el enchufe en agua o
tomacorriente. Para desconectarla,
cualquier otro líquido.
desenchúfela del tomacorriente y
4. Tenga mucho cuidado al utilizar
deje que la unidad se enfríe
cualquier aparato eléctrico cerca de
completamente antes de quitar el
niños.
elemento calefactor.
5. Desenchúfelo del tomacorriente cuando
12. Debe tener mucho cuidado al mover
no lo utilice y antes de limpiarlo. Deje
la freidora con aceite caliente.
que se enfríe antes de ponerle o quitarle
13. No deje el artefacto desatendido
partes, y antes de limpiarla.
mientras esté en funcionamiento.
6. No utilice ningún artefacto si el cable o
14. No la utilice en el exterior.
el enchufe están dañados o luego de
15. No permita que el cable cuelgue
una falla, o si ha sufrido cualquier tipo
sobre el borde de la mesa o
de daño. Retórnelo a EURO-PRO
mesada o que toque superficies
Operating LLC para que sea
calientes.
examinado, reparado o ajustado. (Vea
16. No lo coloque sobre o cerca de un
la garantía).
quemador eléctrico o a gas, o
7. Nunca enchufe la unidad antes de que
dentro de un horno caliente.
ésta esté completamente armada y se
17. No utilice el artefacto para ningún
haya agregado aceite al recipiente.
otro uso distinto al uso doméstico
8. Nunca llene de más la freidora con
indicado.
aceite. Llénela únicamente entre los
18. Verifique periódicamente si hay
niveles mínimo y máximo, indicados
tornillos o tuercas flojas y ajústelos.
dentro del recipiente del aceite.
9. Asegúrese de que el mango de la
CUIDADO: El ajustarlos de más
canasta freidora esté correctamente
puede falsear los tornillos o las tuercas,
agarrado a la canasta y que esté
o rajar las asas o las patas.
trabado en su lugar. (Vea las
instrucciones de armado).
INSTRUCCIONES ESPECIALES DE SEGURIDAD
• Se suministra un cable de alimentación
• No sumerja la freidora de inmersión o el
magnético removible para reducir el riesgo
cable de alimentación en agua.
de enredarse o tropezarse con un cable
• Al levantar la tapa luego de freír, hágalo
más largo. No se recomienda el uso de
lentamente y espere un momento para
un prolongador (o cable removible más
que salga el vapor antes de abrirla
largo) con freidoras de inmersión.
completamente.
• Nunca enchufe la unidad al tomacorriente • Para evitar la sobrecarga del circuito, no
antes de llenar el recipiente con aceite.
use otro artefacto de alto consumo en el
mismo circuito.
Este artefacto tiene un enchufe polarizado (una de las patas es más ancha que la
otra). Para reducir el riesgo de una descarga eléctrica, este enchufe entra de una sola
forma en un tomacorriente polarizado. De no ser así, inviértalo. Si aún no entra, llame
a un electricista calificado. No intente modificar el enchufe de ninguna manera.
CONSERVE ESTAS INSTRUCCIONES
PARA USO DOMÉSTICO SOLAMENTE
9
10


