1
PA R R I L L A
®
E L I M I N A
L A
G R A S A
G R I L L
®
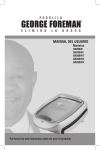
MANUAL DEL USUARIO
Modelos
E L I M I N A T E
T H E
GRP90WGR
G R E AGRP90WGP
S E
Por favor lea este instructivo antes de usar el producto
Por favor lea este instructivo antes de usar el producto
INSTRUCCIONES IMPORTANTES DE
SEGURIDAD
INSTRUCCIONES DE SEGURIDAD
ADICIONALES
PRECAUCIÓN: SUPERFICIES CALIENTES: Este aparato genera calor y escape
de vapor mientras está en funcionamiento. Se deben tomar las precauciones
debidas para evitar el riesgo de quemaduras, incendio u otras lesiones a las
personas o daño a la propiedad.
Al utilizar aparatos eléctricos, siempre se deben tomar medidas básicas de
seguridad, incluidas las siguientes::
❑ Lea todas las instrucciones.
❑ No toque las superficies calientes. Utilice los mangos o las perillas. Utilice manoplas
o agarraderas.
❑ A fin de protegerse contra el riesgo de un choque eléctrico, no sumerja el cable, el
enchufe ni el aparato en agua ni en cualquier otro líquido.
❑ Todo aparato eléctrico utilizado en la presencia de menores de edad o por ellos
mismos requiere la supervisión de un adulto.
❑ Desconecte el aparato de la toma de corriente cuando no esté en uso y antes de
limpiarlo. Permita que se enfríe antes de colocarle o quitarle piezas, y antes de
limpiarlo.
❑ No utilice ningún aparato eléctrico que tenga el cable o el enchufe averiado, que
presente un problema de funcionamiento o que se haya dañado de alguna forma.
Póngase en contacto con el Departamento de atención al cliente para que se
realice una examinación, reparación o un ajuste.
❑ El uso de accesorios no recomendados por el fabricante del aparato puede
ocasionar lesiones.
4. Cuando use este aparato, asegúrese de proporcionar el espacio vacío
adecuado para la circulación de aire. Mientras el aparato esté en
funcionamiento no permita que entre en contacto con las cortinas,
tapizados, ropa, toallas de cocina ni demás materiales inflamables.
❑ No utilice este aparato a la intemperie.
5. Este aparato genera vapor y no se debe operar en posición abierta. ❑ No permita que el cable cuelgue del borde de la mesa o del mostrador, o que
toque superficies calientes.
6. Siempre use una agarradera de cocina para abrir la cubierta superior
(tapa) antes de colocar o retirar los alimentos de la superficie de cocinar,
a fin de evitar un cierre accidental o lesiones personales.
❑ No lo coloque sobre un quemador a gas o eléctrico que esté caliente ni cerca
del mismo, o en un horno caliente.
PRECAUCIÓN: Este aparato permanece caliente mientras está en
funcionamiento y retiene el calor por algún tiempo después de apagarlo.
Siempre use guantes de cocina cuando maneje materiales calientes y espere
que las piezas de metal se enfríen bien antes de limpiarlas. No coloque nada
sobre el aparato mientras esta en operación o mientras está caliente.
1. Todo usuario debe leer y comprender el manual de uso y cuidado del
propietario antes de usar o limpiar este aparato.
2. Si este aparato no funciona bien, desconecte el cable de inmediato. No use
el aparato ni trate de repararlo personalmente.
3. No desatienda este aparato mientras está en funcionamiento.
❑ Si es necesario mover un aparato que contiene aceite u otros líquidos
calientes, hágalo con extremada precaución. Antes de retirar y vaciar la
bandeja de goteo, permita que el líquido se enfríe.
❑ Para desconectar el aparato, gire el control de temperatura ajustable a la
posición de apagado (0), tome el enchufe y extráigalo de la toma de corriente.
❑ No utilice este aparato para ningún fin que no sea el establecido por el
fabricante
CONSERVE ESTAS INSTRUCCIONES
Este aparato eléctrico es para uso doméstico únicamente.
1
2
Enchufe polarizado (Solamente en los modelos de 120V)
Conozca su parrilla
Este aparato tiene un enchufe polarizado en el que un contacto es más ancho
que el otro. Para reducir el riesgo de un choque eléctrico, este enchufe encaja
en una toma de corriente polarizada en un solo sentido. Si tiene dificultad para
conectarlo en la toma de corriente, invierta el enchufe e intente de nuevo. Si aun así no logra enchufarlo, busque la ayuda de un electricista. No trate de
alterar esta medida de seguridad, modificando el enchufe de ninguna manera.
Instrucciones para el cordón corto
El producto trae un cable corto para reducir el riesgo de enredarse o de tropezar
con un cable largo. No se recomienda el uso de extensiones eléctricas con este
producto.
Energía eléctrica
5
Si el circuito está sobrecargado con otros aparatos, el producto podría no
funcionar apropiadamente. Este producto debe ser enchufado sin otros aparatos
conectados a la misma toma de corriente.
PRECAUCIÓN: Para evitar que el plastificante migre de ciertas superficies de los
mostradores, mesas u otros muebles, coloque protectores NO PLÁSTICOS o manteles individuales entre el aparato y la superficie del mostrador o la mesa.
6
La falta de protección puede oscurecer u ocasionar manchas permanentes
en el acabado de las superficies.
3
1. Carcasa del aparato
2. Placa inferior y/o palancas de liberación de la bandeja
3. Placa de asar (1)
4. Placa para filetes (1)
5. Placas para wafles, superior (1) inferior (1)
6. Bandeja para hornear (1)
7. Palancas de liberación de la placa superior
8. Palanca de bloqueo de placas
9. Cable
10. Bandeja de goteo
11. Espátula de plástico
12. Control de temperatura ajustable
13. Luz indicadora de encendido (roja)
14. Luz indicadora (verde)
4
Como usar la parrilla George Foreman®
1. Antes de usar la parrilla por primera vez, limpie todas las placas y la bandeja
para hornear con un paño húmedo para eliminar el polvo.
2. Coloque las placas o la bandeja para hornear: La parrilla cuenta con 5 placas calefactoras: 1 placa para asar, 1 placa para filetes, 2 placas para
wafles y 1 bandeja para hornear. Coloque las placas en la parte superior
e inferior del aparato. Para ello, utilice las palancas de liberación a ambos
lados de las placas y de la bandeja. La bandeja para hornear sólo debe
colocarse en la parte inferior del aparato. Use la palanca de bloqueo en la
posición de traba frontal o posterior. La posición de traba posterior se usa
para cocinar en forma horizontal. La posición de traba frontal se usa para
cocinar en forma inclinada. En esta posición, el líquido se recoge en la
bandeja de goteo.
11. Retire los alimentos con la espátula de plástico proporcionada. Asegúrese
de utilizar siempre utensilios de plástico o madera para evitar raspar
la superficie de las placas o la bandeja. Nunca utilice pinzas de metal,
tenedores o cuchillos ya que pueden dañar el revestimiento de las placas o
la bandeja.
12. Cuando se enfría, la bandeja de goteo puede retirarse y vaciarse. Asegúrese
de que el líquido se haya enfriado antes de retirar la bandeja de goteo.
Nota: No retire ni cambie las placas o la bandeja para hornear mientras el
aparato esté caliente. Permita que el aparato se enfríe por completo antes de
hacerlo.
Nota: Al colocar las placas o la bandeja para hornear, asegúrelas con cuidado
en el aparato mediante las palancas de liberación.
3. Para precalentar: Cierre la tapa y conecte el cable a la toma de corriente.
Gire el control de temperatura ajustable desde la posición de apagado (0) a
la temperatura baja (BAJA), media (MEDIA) o alta (ALTA), según lo desee.
Las luces de encendido (roja) e indicadora (verde) se encenderán. Consulte
la Tabla de cocción sugerida para conocer temperaturas específicas.
Cuando el aparato se precalienta, la luz indicadora (verde) se apaga.
Nota: Al llegar a la temperatura de precalentamiento correcta, la luz de
encendido estará encendida pero la luz indicadora no lo estará.
4. Abra cuidadosamente la tapa con una agarradera.
5. Coloque la bandeja de goteo de grasa debajo y al frente del aparato.
6. Coloque cuidadosamente los alimentos que se van a cocinar en la placa o bandeja inferior.
7. Cierre la tapa y cocine los alimentos durante el tiempo deseado. Preste
atención al aparato durante su uso. Recordatorio: El aparato continuará
emitiendo calor hasta que se apague.
8. Después del tiempo de cocción deseado, el alimento debería estar listo.
9. Gire el control de temperatura ajustable a la posición de apagado (0).
Desconecte el enchufe de la toma de corriente.
PRECAUCIÓN: Para evitar que se produzcan chispas en el enchufe mientras se
desconecta el aparato, asegúrese de que esté apagado antes de desconectarlo.
10. Abra cuidadosamente la tapa con una agarradera.
5
6
Tabla de tiempos de cocción sugeridos
Los tiempos de cocción siguientes sólo deben usarse como guía. Los tiempos varían en
función del corte o espesor de los alimentos que se van a cocinar. Para asegurarse de
que el alimento esté listo, utilice un termómetro. Si es necesario más tiempo de cocción,
vuelva a seleccionar la temperatura y controle los alimentos periódicamente para evitar
que se cocinen demasiado.
Alimento
Minutos
Temperatura
Notas
Carne vacuna, cordero, cerdo
Vacío de vaca Carne vacuna molida, 115 g
5-6 3-5 Alta Alta Cortada en rodajas finas
para servir
2 cm de espesor
Brocheta de carne vacuna 5-7 Media Pedazos de 1 pulgada
Chuletón 5-7 Alta
Costillas 7-8 Alta Lomo vacuno 4-6 Alta
Cordero molido 3-4 Alta
Brochetas de cordero 6-8 Media Chuletas de cordero 7-9 Alta
Tocino 10-13 Alta Bandeja para hornear
Tocino 7-8
Alta Placa de asar
Jamón 2-4 Media Totalmente cocido, rodaja de 1 cm de espesor
Chuletas de cerdo 6-7 Alta 2 cm de espesor
Chuletas de corte central de cerdo
3-4 Alta 1 cm (½ pulgada) de espesor
Cerdo molido 3-4 Alta
Costillas, costillar de cerdo 4-6 Alta Dar un hervor primero
Salchicha 4-6 Media De bajo contenido graso, chorizo o tipo hamburguesa
7
Dar un hervor primero
Alimento
Minutos
Temperatura
Notas
Aves
Pechugas de pollo 6-8 Alta Sin huesos ni piel
Brochetas de pollo 6-8 Media Pedazos de 2,5 cm
Muslos de pollo 6-7 Alta
Pavo molido 8-9 Alta
Pechuga de pavo 4-5 Alta Sin huesos ni piel
Filet de pescado (firme) 6-8 Alta 1-2,5 cm de espesor
Brochetas de pescado 6-8 Media Pedazos de 2,5 cm Filete de pescado 3-5 Alta
Vieiras (ostiones) 4-6 Media
Mariscos
Camarones medianos 1½-2½ Alta
3-5 Alta
Sandwich de queso o jamón 2-3 Alta
Atún con queso derretido, Reuben o rosbif
3-4 Media
Porción individual de pizza (20 cm)
8-10 Media Bandeja para hornear
Papas fritas – corte común 12-14 Alta Bandeja para hornear
5-7 Alta Bandeja para hornear
12-14 Med Bandeja para hornear
Wafles 3-5 Alta 160 ml de masa
Burrito 8-10 Med Bandeja para hornear
Taquitos 6-8 Alta Bandeja para hornear
Trucha Sandwiches y tentempiés
Pedazos de 2,5 cm
Nuggets de pollo Mini-quiche 8
Alimento
Minutos
Temperatura
Recetas
Notas
Bizcochitos caseros frescos
Frutas y vegetales
Manzanas 2-3 Media Rodajas de 1 cm
Espárragos 4-5 Media A lo largo
Bananas 1-2 Media
Cortadas a lo largo
Zanahorias 6-8 Media Rodajas de 1 cm de espesor
Berenjena 8-10 Media Rodajas de ½ a 1 cm de espesor
Cebollas 2-3 Alta Rodajas finas
Duraznos 1-2 Media Cortados a la mitad o en rodajas
Pimientos 4-5 Alta Rodajas finas
Piña 2-3 Media Rodajas de 1 cm de espesor
Papas, para horno 7-8 Alta Rodajas de ½ a 1 cm de espesor
Papas rojas 7-8 Alta Rodajas de ½ a 1 cm de espesor
Calabaza 7-9 Media Rodajas de ½ a 1 cm de espesor
NOTA: El Departamento de Agricultura de los Estados Unidos recomienda cocinar carnes
y aves a las siguientes temperaturas internas para asegurar que se eliminen bacterias
dañinas. La carne molida de pavo y pollo debe cocinarse a una temperatura interna
de 73º C (165° F). La carne molida de vaca, ternera, cordero y cerdo debe cocinarse
a una temperatura interna de 71º C (160° F). El pollo y el pavo deben cocinarse a una
temperatura interna de 76º C (170° F) (carne blanca) y 82º C (180° F) (carne oscura). El
ganso y el pato deben cocinarse a una temperatura interna de 82º C (180° F). La carne
fresca de vaca, ternera, cordero, etc. debe cocinarse a una temperatura interna mínima
de 145° F. El cerdo fresco debe cocinarse a una temperatura interna mínima de 63º C
(160° F). Al recalentar carnes y aves, también deben cocinarse a una temperatura interna
de 73º C (165° F).
9
475 ml de harina común
12 ml de bicarbonato de sodio
2,5 ml de sal
75 ml de margarina baja en grasa
175 ml de leche semidescremada
Mezcle la harina, el bicarbonato de sodio y la sal. Agregue la margarina y mezcle
todo hasta que logre una consistencia granulosa. Agregue la leche. Mezcle
con un tenedor hasta que la masa se convierta en una bola. Colóquela en una
superficie enharinada. Amase la masa aproximadamente 10 veces y estírela a un
círculo de 1/2 cm de espesor. Corte la masa en círculos con un molde redondo
de entre 5 y 10 cm. Coloque la placa para filetes en la parte superior de la parrilla
y la bandeja para hornear en la parte inferior. Coloque la palanca de bloqueo en
la posición de traba posterior. Seleccione la temperatura media y precaliente el
aparato. Coloque los bizcochitos en la bandeja a una pulgada de distancia entre
ellos. Cierre la tapa. Hornee entre 6 y 8 minutos.
Rinde 8 a 12 bizochitos.
Huevos fritos con tocino
4 fetas de tocino de pavo ahumado
2 huevos
2,5 ml de pimienta negra
Coloque la placa para filetes en la parte superior de la parrilla y la bandeja para
hornear en la parte inferior. Coloque la palanca de bloqueo en la posición de
traba posterior. Coloque el tocino en la parrilla. Seleccione la temperatura alta.
No es necesario precalentar el aparato. Cierre la tapa. Cocine el tocino entre
10 y 13 minutos. Escurra el tocino sobre toallas de papel. Rompa los huevos
en la parrilla y espolvoréelos con pimienta. Cierre la tapa y cocínelos durante
1 minuto. Abra la tapa y dé vuelta los huevos. Cierre la tapa y cocínelos como
prefiera: 1 minuto para huevos volteados pero no muy cocidos, 1½ minutos para
huevos volteados y medianamente cocidos y 2 minutos para huevos volteados y
totalmente cocidos. Transfiera los huevos a platos individuales y sírvalos con el
tocino crocante.
Rinde 2 porciones
10
Bifes de lomo con hongos a la parrilla y queso azul
Lenguado a la parrilla con salsa de cítricos y alcaparras
115 gramos de hongos frescos en rodajas
(pueden ser enlatados)
1 feta de tocino de pavo, cortada en 4 pedazos
4 bifes de lomo vacuno de 115 gramos cada uno
Sal y pimienta negra
20 ml de queso azul desmenuzado
(puede sustituirse por queso gorgonzola)
Coloque la placa para filetes en la parte superior de la parrilla y la de asar en
la parte inferior. Coloque la palanca de bloqueo en la posición de traba frontal.
Seleccione la temperatura alta y precaliente el aparato. Coloque los hongos en
la placa de asar con tocino por encima. Cierre la tapa. Cocínelos durante 8 minutos, hasta que el tocino esté crocante y los hongos estén tostados.
Descarte el tocino. Retire los hongos y manténgalos calientes. Condimente los
bifes con sal y pimienta de acuerdo con su gusto. Cierre la tapa. Cocine los bifes
durante 4 minutos. Controle la cocción y continúe asando si es necesario. Para
servir, coloque 5 ml de queso y hongos sobre los bifes.
Rinde 4 porciones
30 ml de margarina baja en grasa
30 ml de aceite de oliva extra virgen
60 ml de jugo de limón fresco
60 ml de jugo de naranja fresco
1,3 ml de mostaza Dijon
30 ml de alcaparras sin líquido
4 filetes de lenguado de 170 gramos
5 ml de pimienta de limón
30 ml de perejil italiano fresco y picado
Derrita la margarina y el aceite en una olla pequeña a fuego lento. Agregue el
jugo de limón, el de naranja, la mostaza y las alcaparras. Mezcle y deje hervir
a fuego lento durante 2 ó 3 minutos. Coloque la placa para filetes en la parte
superior de la parrilla y la de asar en la parte inferior. Coloque la palanca de
bloqueo en la posición de traba frontal. Seleccione la temperatura media y
precaliente el aparato. Coloque los filetes en la placa de asar y condiméntelos
con pimienta de limón. Cocínelos durante 7 minutos. Controle la cocción y
continúe asando si es necesario. Para servir, cubra los filetes con salsa y perejil
fresco.
Rinde 4 porciones
Pollo al orégano griego
60 ml de aceite de oliva extra virgen
30 ml de jugo de limón fresco
45 ml de orégano griego seco
1 diente de ajo picado
5 ml de pimienta negra
2,5 ml de sal
4 mitades de pechuga de pollo sin piel ni huesos
Combine todos los ingredientes excepto el pollo en una bolsa de plástico con
cierre. Agregue el pollo y sacuda la bolsa para que quede cubierto. Refrigere
entre 1 y 4 horas. Coloque la placa para filetes en la parte superior de la parrilla
y la de asar en la parte inferior. Coloque la palanca de bloqueo en la posición de
traba frontal. Seleccione la temperatura mediana y precaliente el aparato. Cierre
la tapa. Cocine el pollo durante 6 minutos. Descarte el adobo. Controle el pollo y
continúe cocinando hasta que no tenga partes rosadas y la temperatura interna
de la carne sea de 82º C (180º F).
Rinde 4 porciones
11
12
Galletitas de chips de chocolate
600 ml de harina común
5 ml de bicarbonato de sodio
240 ml de margarina baja en grasa, a temperatura ambiente
175 ml de azúcar morena prensada
120 ml de azúcar común
2 huevos
1 cucharita de extracto de vainilla
1 paquete de 340 gramos de chips de chocolate semidulce
Mezcle la harina y el bicarbonato de sodio. En un recipiente grande, mezcle la
margarina y los azúcares hasta que logren una consistencia liviana y esponjosa.
Agregue los huevos y la vainilla; vuelva a mezclar. Agregue la mezcla de harina
y revuelva hasta que se forme una masa suave. Incorpore los chips. Coloque la
placa para filetes en la parte superior de la parrilla y la bandeja para hornear en
la parte inferior. Coloque la palanca de bloqueo en la posición de traba posterior.
Seleccione la temperatura media y precaliente el aparato. Coloque las galletitas
con una cucharita en la bandeja para hornear a 2 pulgadas de distancia entre
ellas. Alise las galletitas con la parte redondeada de una cuchara. Cierre la tapa.
Hornee entre 6 y 8 minutos. Retire las galletitas con una espátula de plástico
y permita que se enfríen. Las galletitas estarán suaves hasta que se enfríen.
Repita el procedimiento con la masa restante.
Rinde aproximadamente 40 galletitas.
Instrucciones para el mantenimiento
PRECAUCIÓN: Para evitar quemaduras accidentales, permita que el aparato se
enfríe completamente antes de limpiarlo.
1. Antes de limpiar el aparato, desconéctelo de la toma de corriente y permita
que se enfríe.
PRECAUCIÓN: Para evitar que se produzcan chispas en el enchufe mientras
se desconecta el aparato, asegúrese de que el mismo esté apagado antes de
desconectarlo.
2. Limpieza interior: Coloque la bandeja de goteo debajo del aparato. Para
limpiar las placas, utilice la espátula especialmente diseñada para retirar
el exceso de grasa y las partículas de alimentos. Seque las placas con una
toalla de papel o esponja. Los residuos se recogerán en la bandeja de goteo.
Para limpiar la bandeja para hornear, utilice la espátula especialmente
diseñada para retirar partículas de alimentos. Séquela con una toalla de
papel o esponja.
3. Vacíe la bandeja de goteo y lávela con agua tibia y jabonosa. Las placas y
la bandeja para hornear se retiran del aparato destrabando las palancas
de liberación. Lávelas en agua tibia y jabonosa y séquelas completamente.
Vuelva a instalar las placas o la bandeja y asegúrese de que queden
firmemente aseguradas al aparato. Las placas y la bandeja desmontables
también pueden limpiarse en la máquina lavaplatos. Una vez que se limpian
en la máquina lavaplatos, seque el lado no recubierto de las placas con una
toalla seca para evitar que se descolore. Los detergentes para máquinas
lavaplatos pueden hacer que el lado no recubierto de la placa de cocción se
oxide. Esto no es dañino y puede limpiarse con una toalla húmeda
4. Acumulación persistente de residuos: Limpie las placas con una almohadilla
de fregar no metálica.
5. Limpieza exterior: Limpie el aparato con una esponja tibia y húmeda y
séquelo con un paño suave y seco.
6. No utilice almohadillas de lana de acero, ni almohadillas o limpiadores
abrasivos en ningún lugar del aparato.
7. NO SUMERJA LA CARCASA DEL APARATO EN AGUA NI EN NINGÚN OTRO
LÍQUIDO.
8. Toda reparación que requiera el desarmado del aparato con cualquier otro
fin que no sea el de limpieza debe llevarse a cabo por un técnico calificado.
9. Sostenga la cubierta superior (tapa) con la mano mientras limpia el aparato
para evitar que éste se cierre accidentalmente y provoque una lesión.
13
14
¿NECESITA AYUDA?
Para servicio, reparaciones o preguntas relacionadas al producto, por favor llame al número
del centro de servicio en el país donde usted compró su producto. NO devuelva el producto
al fabricante. Llame o lleve el producto a un centro de servicio autorizado.
DOS AÑOS DE GARANTÍA LIMITADA
(No aplica en México, Estados Unidos o Canadá)
¿Qué cubre la garantía?
• La garantía cubre cualquier defecto de materiales o de mano de obra. Applica no se
responsabiliza por ningún costo que exceda el valor de compra del producto.
¿Por cuánto tiempo es válida la garantía?
• Por dos años a partir de la fecha original de compra.
¿Cómo se puede obtener servicio?
• Conserve el recibo original de compra.
• Por favor llame al número del centro de servicio autorizado.
Esta garantía no cubre:
• Los productos que han sido utilizados en condiciones distintas a las normales
• Los daños ocasionados por el mal uso, el abuso o negligencia
• Los productos que han sido alterados de alguna manera
• Los daños ocasionados por el uso comercial del producto
• Los productos utilizados o reparados fuera del país original de compra
• Las piezas de vidrio y demás accesorios empacados con el aparato
• Los gastos de tramitación y embarque asociados al reemplazo del producto
• Los daños y perjuicios indirectos o incidentales
15
Póliza de Garantía
(Válida sólo para México)
Duración
Applica Manufacturing, S. de R. L. de C.V. garantiza este producto por 2 años a partir de
la fecha original de compra.
¿Qué cubre esta garantía?
Esta Garantía cubre cualquier defecto que presenten las piezas, componentes y la mano
de obra contenidas en este producto.
Requisitos para hacer válida la garantía
Para reclamar su Garantía deberá presentar al Centro de Servicio Autorizado la póliza
sellada por el establecimiento en donde adquirió el producto. Si no la tiene, podrá
presentar el comprobante de compra original.
¿Donde hago válida la garantía?
Llame sin costo al teléfono 01 800 714 2503, para ubicar el Centro de Servicio Autorizado
más cercano a su domicilio en donde usted podrá encontrar partes, componentes,
consumibles y accesorios.
Procedimiento para hacer válida la garantía
Acuda al Centro de Servicio Autorizado con el producto con la póliza de Garantía sellada
o el comprobante de compra original, ahí se reemplazará cualquier pieza o componente
defectuoso sin cargo alguno para el usuario final. Esta Garantía incluye los gastos de
transportación que se deriven de su cumplimiento.
Excepciones
Esta Garantía no será válida cuando el producto:
A)Se hubiese utilizado en condiciones distintas a las normales.
B)No hubiese sido operado de acuerdo con el instructivo de uso que le acompaña.
C) Cuando el producto hubiese sido alterado o reparado por personas no autorizadas por Applica Manufacturing, S. de R. L. de C.V.
Nota: Usted podra encontrar partes, componentes, consumibles y accesorios en los
centros de servicios autorizados. Esta garantía incluyen los gastos de transportación que se deriven de sus cumplimiento dentro de sus red de servicio.
16
E L I M I N A
Por favor llame al número correspondiente que aparece en la lista a continuación para solicitar que se
haga efectiva la garantía y donde Ud. puede solicitar servicio, reparaciones o partes en el país donde el
producto fué comprado. También puede consultarnos en el e-mail. “[email protected]
Argentina
Servicio Central Attendace
Monroe 3351 Ciudad Autónoma
de Bs. As.
Buenos Aires Argentina
Tel. 0810-999-8999
Chile
Servicio Máquinas y
Herramientas Ltda.
Av. Apoquindo No. 4867 Las Condes
Santiago, Chile
Tel.: (562) 263-2490
Colombia
PLINARES
Avenida Quito # 88A-09
Bogotá, Colombia
Tel. sin costo 01 800 7001870
Costa Rica
Aplicaciones Electromecanicas,
S.A.
Calle 26 Bis y Ave. 3
San Jose, Costa Rica
Tel.: (506) 257-5716
223-0136
Ecuador
Servicio Master de Ecuador
Av. 6 de Diciembre 9276
y los Alamos
Tel. (593) 2281-3882
Sello del Distribuidor:
Fecha de compra:
Modelo:
El Salvador
Calle San Antonio Abad 2936
San Salvador, El Salvador
Tel. (503) 2284-8374
Guatemala
MacPartes SA
3ª Calle 414 Zona 9
Frente a Tecun
Tel. (502) 2331-5020
2332-2101
Honduras
ServiTotal
Contigua a Telecentro
Tegucigalpa, Honduras,
Tel. (504) 235-6271
México
Articulo 123 # 95 Local 109
y 112 Col. Centro, Cuauhtemoc,
México, D.F.
Tel. 01 800 714 2503
Nicaragua
ServiTotal
De semáforo de portezuelo
500 metros al sur.
Managua, Nicaragua,
Tel. (505) 248-7001
Panamá
Servicios Técnicos CAPRI
Tumbamuerto Boulevard
El Dorado Panamá
500 metros al sur.
Tel. (507) 2360-236
(507) 2360-159
Perú
Servicio Central Fast Service
Av. Angamos Este 2431
San Borja, Lima Perú
Tel. (511) 2251 388
Puerto Rico
Buckeye Service
Jesús P. Piñero #1013
Puerto Nuevo, SJ PR 00920
Tel.: (787) 782-6175
Republica Dominicana
Plaza Lama, S.A.
Av, Duarte #94
Santo Domingo,
República Dominicana
Tel.: (809) 687-9171
Venezuela
Inversiones BDR CA
Av. Casanova C.C.
City Market Nivel Plaza
Local 153
Diagonal Hotel Melia, Caracas.
Tel. (582) 324-0969
L A
G R A S A
G R I L L
®
E L I M I N A T E
T H E
G R E A S E
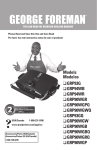
OWNER'S MANUAL
Models
GRP90WGR
GRP90WGP
www.applicaservice.com
[email protected]
Comercializado por:
Applica Manufacturing, S. de R. L. de C.V.
Presidente Mazaryk No111, 1er Piso
Col. Chapultepec Morales, Mexico D.F
Deleg. Miguel Hidalgo
CP 11570
MEXICO
Servicio y Reparación
Art. 123 No. 95
Col. Centro, C.P. 06050
Deleg. Cuauhtemoc
Servicio al Consumidor,
Venta de Refacciones y Accesorios
01 800 714 2503
Por favor lea este instructivo antes de usar el producto
Please Read and Save this Use and Care Book
18
IMPORTANT SAFEGUARDS
When using electrical appliances, basic safety precautions should always be
followed, including the following:
❑ Read all instructions.
❑ Do not touch hot surfaces. Use handles or knobs.
❑ To protect against electrical shock do not immerse cord, plugs or appliance in water or other liquid.
❑ Close supervision is necessary when any appliance is used by or near
children.
❑ Unplug from outlet when not in use and before cleaning. Allow to cool before
putting on or taking off parts.
❑ Do not operate any appliance with a damaged cord or plug, or after the
appliance malfunctions or has been damaged in any manner. Return appliance
to the nearest authorized service facility for examination, repair or adjustment.
❑ The use of accessory attachments not recommended by the appliance
manufacturer may cause injuries.
❑ Do not use outdoors.
❑ Do not let cord hang over edge of table or counter, or touch hot surfaces.
❑ Do not place on or near a hot gas or electric burner, or in a heated oven.
❑ Extreme caution must be used when moving an appliance containing hot oil or
other hot liquids.
❑ To disconnect, remove plug from wall outlet.
❑ Do not use this appliance for other than intended use.
Additional Important Safeguards
CAUTION, HOT SURFACES: This appliance generates heat and escaping steam
during use. Proper precautions must be taken to prevent the risk of burns, fires
or other injury to persons or damage to property.
CAUTION: This appliance is hot during operation and retains heat for some
time after turning off. Always use oven mitts when handling hot materials and
allow metal parts to cool before cleaning. Do not place anything on top of the
appliance while it is operating or while it is hot.
1. All users of this appliance must read and understand this Owner's Manual
before operating or cleaning this appliance.
2. If this appliance begins to malfunction during use, immediately unplug cord
from outlet. Do not use or attempt to repair the malfunctioning appliance.
3. Do not leave this appliance unattended during use.
4. When using this appliance, provide adequate air space above and on all
sides for air circulation. Do not allow this appliance to touch curtains, wall
coverings, clothing, dish towels or other flammable materials during use.
5. This appliance generates steam — do not operate in open position.
6. Using pot holder, hold the top cover (lid) open while placing or removing
food on the cooking surface to prevent accidental closing and injury.
SAVE THESE INSTRUCTIONS.
THIS APPLIANCE IS FOR HOUSEHOLD USE ONLY
19
20
Polarized Plug (120V Models Only)
Getting To Know Your Grill
This appliance has a polarized plug (one blade is wider than the other). To
reduce the risk of electric shock, this plug is intended to fit into a polarized outlet
only one way. If the plug does not fit fully in the outlet, reverse the plug. If it still
does not fit, contact a qualified electrician. Do not attempt to modify the plug in
any way.
Short Cord Instructions
A short power-supply cord is provided to reduce the risk resulting from becoming
entangled in or tripping over a longer cord.
Do not use an extension cord with this product.
Electric Power
If the electric circuit is overloaded with other appliances, your appliance may not
operate properly. It should be operated on a separate electrical circuit from other
appliances.
5
CAUTION: To prevent plasticizers from migrating from the finish of the counter
top or table top or other furniture, place NON-PLASTIC coasters or placemats
between the appliance and the finish of the counter top or table top.
Failure to do so may cause the finish to darken, permanent blemishes may occur
or stains can appear.
6
1. Appliance body
2. Lower plate and/or pan release handles
3. Grill plate (1)
4. Steak plate (1)
5. Waffle plates (2)
6. Baking pan (1)
7. Upper plate release handles
8. Plate position lock lever
9. Cord
10. Drip Tray
11. Plastic spatula
12. Adjustable temperature control
13. Power light (red)
14. Indicator light (green)
21
22
How To Use Your George Foreman® Grill
1. Before using the grill for the first time, wipe the grill plates and baking pan
with a damp cloth to remove all dust.
2. Attach the Plates or Baking Pan: The grill has 5 heating plates — 1 grill plate, 1
steak plate, 2 waffle plates, 1 baking pan. Securely attach the plates in the top
and bottom of the appliance using the release handles on each side of the plates
and pan. The baking pan should only be attached to the bottom of the appliance.
Use the lock lever in either the back, locked position or front, locked position.
The back, locked position is for level cooking of foods. The front, locked position
is for sloped cooking. Liquid will drain into the drip tray when in the front, locked
position.
10. Use a pot holder to carefully open the lid.
11. R
emove the food using the plastic spatula provided. Be sure to always use
either plastic or wooden utensils to avoid scratching the nonstick surface
of the plates and pan. Never use metal tongs, forks or knives as these can
damage the coating on the plates and pan.
12. When cool, the drip tray may be removed and emptied. Be sure the liquid has
cooled before removing the drip tray.
NOTE: Do not remove or change the plates or baking pan while the unit is hot. The
appliance must cool completely before removing or changing the plates or pan.
Note: When attaching the plates or baking pan, carefully and securely attach each
into the appliance using the release handles on the plates or pan.
3. To Preheat: Close the lid and plug the cord into outlet. Turn the adjustable
temperature control from Off (0) to BAJA (Low), MEDIA (Medium) or ALTA (High)
temperature as desired. The power light (red) and indicator light (green) will turn
on. See the Suggested Cooking Chart for specific temperature settings. When
the appliance is preheated, the indicator light (green) will go off.
Note: When the correct temperature is reached for preheating, the power light will
be on although the iindicator light will turn off.
4. Use a pot holder to carefully open the lid.
5. Slide the grease-catching drip tray under the front of the unit.
6. Carefully place or pour the food to be cooked on the bottom plate or pan.
7. Close the lid and allow the food to cook for the desired time. Do not leave the
unit unattended during use! Reminder: The heat continues to be on until the
appliance is turned to the off position.
8. After the desired amount of cooking time, the food should be done.
9. Turn the adjustable temperature control to the off position. Disconnect the
plug from the wall outlet.
CAUTION: To avoid any sparks at the outlet while disconnecting the plug, make
sure the power is off before disconnecting the plug from the outlet.
23
24
Suggested Cooking Chart
Food
The following times are meant to be used as guidelines only. Times will vary due to the cut
or thickness of the food being cooked. To be sure that the food is truly done, use a cooking
thermometer. If more cooking time is needed, reset the adjustable temperature control and
check the food periodically to avoid overcooking.
Food
Minutes
Setting
Notes
Beef, Lamb, Pork
Minutes
Setting
Notes
Seafood
Fish steak (firm)
6-8 High
½-1 inch thick
Fish kebabs
6-8
Med
1-inch pieces
Fish fillet
3-5 High
Scallops
4-6
Med
1½-2½
High
3-5
High
Cheese or ham sandwic h
2-3
High
Tuna melt, rueben or roast beef
3-4
Med
Single serving pizza (7-inch)
8-10
Med
Baking Pan
French fries - reg cut
12-14
High
Baking Pan
5-7
High
Baking Pan
12-14
Med
Baking Pan
Waffles
3-5
High
2/3 cup batter
Burrito
8-10
Med
Baking Pan
Taquitos
6-8
High
Baking Pan
Shrimp - medium
Beef flank steak
5-6
High
sliced thinly to serve
Beef hamburger, 4 oz.
3-5
High
¾ -inch thick
Beef kebabs
5-7
Med
1-inch pieces
Beef ribeye
5-7
High
Beef ribs, short ribs
7-8
High
Beef tenderloin
4-6
High
Lamb, ground 3-4
High
Lamb kebabs
6-8
Med
Lamb loin chops
7-9
High
Bacon
10-13
High
Baking Pan
Bacon
7-8
High Grilling Plate
Ham
slice
2-4
Med
fully cooked, ½-inch thick
Pork loin chops
6-7
High
¾-inch thick
Apple
2-3
Med
½-inch slices
Pork center cut chops
3-4
High
½-inch thick
Asparagus
4-5
Med
lengthwise
Pork, ground 3-4
High
Bananas
1-2
Med
sliced lengthwise
Ribs, baby back ribs
4-6
High
parboil first
Carrots
6-8
Med
½-inch thick slices
Sausage
4-6
Med
lowfat, link or patty style
Eggplant
8-10
Med
¼-½ inch thick slices
Onions
2-3
High
thinly sliced
Peaches
1-2
Med
cut in half or sliced
Peppers
4-5
High
thinly sliced
Pineapple
2-3
Med
½-inch thick slices
Potatoes, baking
7-8
High
¼-½ inch thick slices
Potatoes, red
7-8
High
¼-½ inch thick slices
Squash
7-9
Med
¼-½ inch thick slices
parboil first
1-inch pieces
Poultry
Chicken breasts
6-8
High
boneless/skinless
Chicken kebabs
6-8
Med
1-inch pieces
Chicken thighs
6-7
High
Turkey, ground 8-9
High
Turkey breast 4-5
High
25
boneless/skinless
Trout
Sandwiches & Snacks
Chicken nuggets
Mini quiche
Fruit & Vegetables
26
NOTE: The United States Department of Agriculture recommends that meat and poultry be
cooked to the following internal temperatures to be sure any harmful bacteria have been
killed. Ground turkey and chicken should be cooked to an internal temperature of 165° F
and ground beef, veal, lamb and pork be cooked to an internal temperature of 160˚F (71˚C). Chicken and turkey should be cooked to an internal temperature of 170˚F (76˚C) F for white
meat and 180˚F (82˚C) for dark meat. Goose and duck should be cooked to an internal
temperature of 180˚F (82˚C). Fresh beef, veal and lamb, etc. should be cooked to an internal
temperature of at least 145˚F (62˚C). Fresh pork should be cooked to an internal temperature
of at least 160˚F (71˚C). When re-heating meat and poultry products, they should also be
cooked to an internal temperature of 165˚F (73˚C).
Recipes
Fresh Home-Baked Biscuits
2 c. all-purpose white flour
2½ tsp. baking powder
½ tsp. salt
5 tbsp. lowfat margarine
¾ cup lowfat milk
Mix the flour, baking powder and salt. Mix the margarine into the flour mixture until
it resembles coarse crumbs. Add the milk. Stir with a fork until the dough forms a
ball. Place on a floured surface. Knead the dough about 10 times. Roll the dough
into a circle about ¼-inch thick. Use a 2 to 3-inch round cutter to cut out circles.
Place the steak plate in the top of the unit and the baking pan in the bottom. Set
the lock lever to the back, locked position. Set the temperature to Medium and
preheat. Place the biscuits in the pan 1 inch apart. Close the lid. Bake 6-8 minutes.
Makes 8 to 12 biscuits.
Sunny Eggs & Bacon
4 pieces smoked turkey bacon
2 eggs
½ tsp. black pepper
Place the steak plate in the top of the grill and the baking pan in the bottom.
Set the Lock Lever to the back, locked position. Place the bacon in the grill. Set
the temperature to High. Do not preheat. Close the lid. Grill the bacon for 1013 minutes. Drain the bacon on paper towels. Break the eggs into the grill and
dust with pepper. Close the Lid and cook for 1 minute. Open the lid and flip the
eggs. Close the lid and cook as desired: 1 minute for over-easy eggs, 1½ minutes
for over-medium eggs, and 2 minutes for over-hard eggs. Transfer the eggs to
individual plates and serve with crispy bacon. Serves 2.
27
28
Tenderloin Steaks with Grilled Mushrooms & Blue Cheese
4 oz. fresh mushrooms, sliced (or 4 oz. can sliced mushrooms)
1 strip turkey bacon, cut into 4 pieces 4, 4 oz. beef tenderloin steaks
salt and black pepper 4 tsp. blue cheese, crumbled (substitute gorgonzola cheese)
Place the steak plate in the top of the unit and the grill plate in the bottom. Set the
lock lever to the front, locked position. Set the temperature to High and preheat.
Place the mushrooms on the grill plate and top with the bacon. Close the lid. Cook
for 8 minutes. Cook until the bacon is crisp and mushrooms are browned. Discard
the bacon. Remove the mushrooms and keep warm. Dust the steaks with salt and
pepper to taste. Close the lid. Grill the steaks for 4 minutes. Check the steaks and
continue grilling if needed. To serve, top each steak with 1 teaspoon of the cheese
and the mushrooms.
Serves 4.
Greek Oregano Chicken
¼ cup extra-virgin olive oil
2 tbsp. resh lemon juice
3 tbsp. dried Greek oregano
1 clove garlic, minced 1 tsp. black pepper
½ tsp. salt
4 halves boneless, skinless chicken breasts
Combine all ingredients except the chicken in a self-sealing plastic bag. Add the
chicken breasts and turn to coat. Refrigerate 1 to 4 hours. Place the steak plate in
the top of the unit and the grill plate in the bottom. Set the lock lever to the front,
locked position. Set the temperature to Medium and preheat. Close the lid. Cook
the chicken for 6 minutes. Discard the marinade. Check the chicken continue
grilling until no pink remains and the internal temperature of the meat reaches
180ºF. (82ºC)
Serves 4.
29
Grilled Halibut with Citrus-Caper Sauce
2 tbsp. lowfat margarine
2 tbsp. extra-virgin olive oil
¼ cup fresh lemon juice
¼ cup fresh orange juice
¼ tsp. Dijon mustard
2 tbsp. capers, drained
4, 6 oz. halibut steaks
1 tsp. lemon pepper
2 tbsp. fresh Italian parsley, chopped
In a small saucepan, melt the margarine with the oil over low heat. Add the
lemon juice, orange juice, mustard and capers. Blend and simmer 2-3 minutes.
Place the steak plate in the top of the unit and the grill plate in the bottom. Set
the lock lever to the front, locked position. Set the temperature to Medium and
preheat. Place the steaks on the grill plate and sprinkle with lemon pepper.
Cook for 7 minutes. Check and continue grilling if necessary. To serve, top each
steak with sauce and fresh parsley.
Serves 4.
Chocolate Chip Cookies
2½ cup all-purpose flour
1 tsp. baking soda
1 cup lowfat margarine, softened
¾ cup packed brown sugar
½ cup white sugar
2 eggs
1 tsp. vanilla extract
12 oz. pkg. semisweet chocolate chips
Mix together the flour and baking soda; set aside. In a large bowl, mix the
margarine and sugars until light and fluffy. Add the eggs and vanilla; stir again.
Add the flour mixture and stir until a smooth batter forms. Fold in the chips.
Place the steak plate in the top of the unit and the baking pan in the bottom.
Set the lock lever to the back, locked position. Set the temperature to Medium
and preheat. Drop the cookies by teaspoons, 2 inches apart, in the baking pan.
Flatten each cookie with the back of a spoon. Close the lid. Bake 6-8 minutes.
Remove cookies with a plastic spatula and cool. Cookies will be soft until
cooled. Repeat with the remaining dough.
Makes about 40 cookies.
30
User Maintenance Instructions
CAUTION: To avoid accidental burns, allow your appliance to cool thoroughly
before cleaning.
1. Before cleaning, unplug the appliance from the wall outlet and allow to cool.
CAUTION: To avoid any sparks at the outlet while disconnecting the plug, make
sure the power is off before disconnecting the plug from the outlet.
2. Inside cleaning: Place the drip tray under the appliance. To clean the plates, use
the specially designed Spatula to scrape off any excess fat and food particles.
Wipe the plates dry with a paper towel or sponge. Run off will drip into the drip
Tray. To clean the baking pan, use the specially designed spatula to scrape off
any remaining food particles. Wipe the pan dry with a paper towel or sponge.
3. Empty the drip tray and wash with warm, soapy water. The plates and baking
Pan may be removed from the unit by pulling out on the release handles. Wash
in warm, soapy water and dry thoroughly. Reinstall the plates or pan, making
sure they are securely attached to the appliance. The removable plates and pan
are also dishwasher safe. After washing the plates in the dishwasher, wipe the
uncoated side with a dry towel to prevent discoloration. Dishwasher detergent
may cause oxi1dation on the uncoated side of the cooking plate. This is not
harmful and can be wiped off with a damp towel.
4. Stubborn build-up: Use a non-metallic scrubbing pad to clean the plates.
5. Outside cleaning: Wipe with a warm, wet sponge and dry with a soft, dry cloth.
6. Do not use steel wool, scouring pads, or abrasive cleaners on any part of the
appliance.
NEED HELP?
For service, repair or questions regarding your appliance, please call the service center in the
country you purchased your product. DO NOT return the product to the manufacturer. Take the
product to an authorized service center.
TWO-YEAR LIMITED WARRANTY
(Does not apply to Mexico, the United States or Canada)
What does the warranty cover?
• Any defect in materials or workmanship. Applica’s liability will not exceed the purchase price
of the product.
How long is the warranty valid?
• For two years after the date of original purchase.
How can you get service?
• Save your original proof of purchase.
• Please contact an authorized service center
What is not covered under this warranty?:
• Products used under abnormal conditions
• Damage from misuse, abuse or neglect
• Products that have been altered in any way
• Damage caused by commercial use
• Products used or serviced outside the country of purchase
• Glass parts and other accessory items packed with the product
• Shipping and handling costs associated with the replacement of the product
• Consequential or incidental damages
7. DO NOT IMMERSE THE BODY OF THE APPLIANCE IN WATER OR OTHER LIQUID.
8. Any servicing requiring disassembly other than the above cleaning must be
performed by a qualified electrician.
9. Make sure to hold the top cover (lid) by hand while cleaning to prevent
accidental closing and injury.
31
32
Warranty
(Applies only to Mexico)
How long does the coverage last?
Applica Manufacturing, S. de R. L. de C.V., warrants this product for 2 years after the
original date of purchase.
What does the warranty cover?
This warranty covers any defects in parts, components and workmanship for this product.
Requirements to validate the warranty
In order to validate your warranty you must bring your stamped proof of purchase to an
authorized service center. If not available, you may submit the original purchase receipt.
Where can I validate the warranty?
You may call our toll free number, 01 800 714 2503, to locate an authorized service
center near you where you will be able to find parts, components, consumables and
accessories.
Procedure to validate the warranty
Visit an authorized service center with the product and the stamped warranty document
or the original purchase receipt. All defective parts or components will be replaced free
of charge. This warranty includes transportation costs based on delivery within Applica’s
service network.
Exceptions
This warranty is not valid when:
A)The product has been used under abnormal conditions.
B)The product has not been used in accordance with the instruction manual provided.
C) The product has been altered or repaired by personnel not authorized by Applica
Manufacturing, S. de R. L. de C.V.
Note: Parts, components, consumables and accessories are available in authorized
service centers. This warranty includes transportation costs based on delivery within
Applica’s service network.
33
NOTAS / NOTES
34
PA R R I L L A
ESTA ES SU GARANTÍA
CONSERVELA
®
E L I M I N A
L A
G R A S A
G R I L L
POLÍTICA DE GARANTÍA
®
(Válida
E L I M Isólo
N A Tpara
E TColombia)
H E G R E A S E
Líneagratuitadeservicioalcliente018007001870
Ref.:
FechadeCompra
Garantía Global de 2 Años
Applica®,RepresentantedeELECTRODOMÉSTICOSGEORGEFOREMAN®Garantiza:Lareparaciónoreemplazo
decualquiercomponenteopartequeafecteelbuenfuncionamienodelproductoespecificadoduranteel
períododedos(2)años,contadosapartirdelafechadelafacturadecompra,siempreycuandoeldefecto
seaimputablealosmateriales,partesomanodeobraempleadosenelprocesodefabricación,sinrecargopor
reparaciónalclienteyconapegoalascondicionesestabledasenesteCertificadodeGarantía.
CONDICIONES PARA HACER EFECTIVA SU GARANTÍA
PA R R I L L A
• ConserveesteCertificadodeGarantíaypresenteloconcopiadefacturadeCompra.
• LafechadelaFacturadeCompra,defineeltiempoapartirdelcualestavigentelaGarantíadelProducto.
• EnlaFacturadeComprayenelCertificadodeGarantíadebeestarclaramenteespeficiadoelmodelodel
producto,lafechadecompra,elnombredelclienteysunúmerotelefónico.
®
E L I M I N A
CENTROS DE SERVICIO TÉCNICO CORPORATIVO PLINARES LTDA,
AvenidaQuitoNo.88A-09Tels.:6101604/5334680Bogotá,D.C.
HORARIO DE ATENCIÓN
LunesaViernes:8:30a.m.a5:00p.m./Sábado:9:00a.m.a12:30p.m.
CENTRO DE SERVICIO TÉCNICO AUTORIZADO
SiensuciudadnoexisteServicioTécnicoautorizadoporAPPLICADECOLOMBIA,llamarsincostoanuestra
líneadeServicioalCliente:018007001870.
CENTROS DE SERVICIO DE COLOMBIA
BOGOTA
PLINARES
Avenidacarrera30#88ª-09
Teléfono:6101604-2570932
Fax:6109876
Contacto:PedroLinares/Emilse
Daza
BARRANQUILLA
REPUESTOS Y SERVICIOS C & M
Calle70No.45-29
Teléfono:3564010-3688929
Fax:3564080–3684624
Contacto:MarisolLizarazoPabn
Email:cymservirepuestos@
hotmail.com
MEDELLIN
SOLUTECNIC
Carrera51(Bolívar)No40-59
Teléfono:3810118/2326142
Fax:2623337
Contacto:MarthaJaramillo
Email:[email protected]
G R A S A
G R I L L
CERTIFICADO DE GARANTÍA
UNA GARANTÍA SE INVALIDA CUANDO OCURRE ALGUNA DE ESTAS CIRCUNSTANCIAS
• Documentos(FacturadeComprayCertificadodeGarantía)incompletosy/ocondatosincorrectosoqueno
concuerden.
• Productodesermadoy/oreparadoporpersonanoautorizada.
• Usodeunvoltajediferentealdesufuncionamientonormalestablecidoenelmanual,empaquey/oplacasde
especificacionesdelproducto.
• Cuandolafallaesoriginadaporelmaluso,maltrato,instalacióndefectuosa,impericia,imprudenciadel
usuariooesutilizadoparafinesnodomésticos.
• LosproductosGEORGEFOREMAN®sonfabricadosparausoenhogar,porloquesuusoenaplicaciones
comercialestalescomofabricaciónartesanal,oficinas,conserjerias,restaurantes,hoteles,etc.,dejasin
efectolaGarantía.
• Tantolaspiezasrotasyquebradasasícomoaquellasquesedesgastanporelusoregulardelproductotales
comocuchillas,aspas,mangos,antiadherentesdelaszapatas,carbones,etc.,NOestánprotegidosporesta
Garantía.
L A
E L I M I N A T E
Nombre:
C.C.No.:
Tel.:
Dirección:
Depto:
Ciudad:
Vendidoen:
®
T H E
G R E A S E
NOTAS / NOTES
37
38
Date Code
120 V
60 Hz CAT.NO.EHB500
TYPE1160W120V
ACONLY60Hz
1 440 W
Copyright © 2008 Applica Consumer Products, Inc.
Fabricado en la República Popular de China
Impreso en la República Popular de China
Importado por:
Applica Americas, Inc.
Av. Juan B Justo 637 Piso 10
(C1425FSA) Ciudad Autonoma de Buenos Aires
Argentina
C.U.I.T No. 30-69729892-0
APPLICA MANUFACTURING, S. DE R. L. DE C. V.
Presidente Mazaryk No111, 1er Piso
Col. Chapultepec Morales, Mexico D.F
Deleg. Miguel Hidalgo
CP 11570
MEXICO
Teléfono: (55) 5263-9900
Del interior marque sin costo
01 (800) 714 2503
2008/2-21-51S/E
Made in People’s Republic of China
Printed in People’s Republic of China