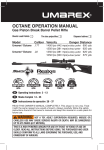
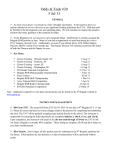
1
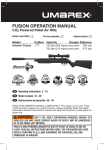
APX OPERATION MANUAL
™
Multi-Pump Pneumatic Air Rifle
Shoots Pellets or BBs
Caliber
Velocity
.177
.177
800 fps (245 mps) w/alloy pellet
800 fps (245 mps) w/alloy pellet
or STEEL BB
.17
7 (4 , 5 mm)
stock
i
e té
a ut oma t
aut
i
qu e
7 (4 , 5 mm)
syn t hét
que
PELLET
.17
sse
Danger Distance
sûr
APX™
APX™ w/Scope
cro
Model
Disparar balines o BBs
Tire des projectiles ou BBs
omatic
525 yds (480 m)
525 yds (480 m)
can
on rayé
barrel
Operating instructions 2 - 13
Mode d´emploi 14 - 27
Instrucciones de operación 28 - 40
READ THIS OWNER’S MANUAL COMPLETELY. This airgun is not a toy. Treat
it with the same respect you would a firearm. Always carefully follow the safety
instructions found in this owner’s manual and keep this manual in a safe place for
future use.
WARNING: NOT A TOY. ADULT SUPERVISION REQUIRED. MISUSE OR
CARELESS USE MAY CAUSE SERIOUS INJURY OR DEATH. MAY BE DANGEROUS
UP TO 525 YARDS (480 METERS).
THIS IS A HIGH POWERED AIRGUN FOR USE BY THOSE 16 YEARS OF AGE OR
OLDER. READ ALL INSTRUCTIONS BEFORE USING. THE PURCHASER AND USER
SHOULD CONFORM TO ALL LAWS GOVERNING THE PURCHASE, USE AND
OWNERSHIP OF AIRGUNS.
1
EN
SAFETY INSTRUCTIONS
WARNING: THIS AIRGUN CAN CAUSE SERIOUS INJURY OR DEATH.
READ AND FOLLOW THE INSTRUCTIONS CAREFULLY. DO NOT LOAD A PROJECTILE
INTO THE AIRGUN UNTIL YOU ARE READY TO SHOOT. IF YOU DO LOAD A
PROJECTILE AND THEN DECIDE NOT TO SHOOT, REMOVE IT EITHER MANUALLY
OR BY SHOOTING THE AIRGUN AT A SAFE TARGET. AN UNLOADED, UNPUMPED
AIRGUN WHICH IS “ON SAFE” IS SAFEST. ACCIDENTS HAPPEN FAST, PLEASE
HANDLE THE AIRGUN SAFELY.
Airguns differ in their operation and you
are never ready to fire any gun until you
are thoroughly familiar with it. Read the
following operating instructions thoroughly
prior to operating.
These symbols,
, mark warnings
and cautions in this operation manual.
Carefully follow them for your own safety
and the safety of others.
DESCRIPTION
OPERATION
CAUTION
FAILURE TO FOLLOW THE INSTRUCTIONS
AND RECOMMENDATIONS IN THIS OWNER'S
MANUAL MAY RESULT IN BODILY INJURY
INCLUDING FACE, EYE, AND EAR INJURY,
BLINDNESS, OR DEAFNESS.
CARE
CAUTION:
EYE PROTECTION
REQUIRED
WEAR YOUR
SHOOTING GLASSES
OPERATING STEPS
1. Reviewing Safety
2. Learning the Parts of Your Air Rifle
3. Operating the Safety
4. Pumping your Air Rifle
5. Loading your Air Rifle
6. Unloading your Air Rifle
2
SAFETY INSTRUCTIONS
7. Aiming at a safe target
8.Firing your Air Rifle
9.Adjusting the Sights
10.Trouble Shooting
11. Care and Maintenance
12.Repair / Service / Warranty
SAFETY INSTRUCTIONS
CARE
EN
STEP 1. Reviewing Safety
• Always keep the muzzle of the airgun pointed in a SAFE DIRECTION.
• Always keep your finger off the trigger and out of the trigger guard until
ready to shoot.
• You and others with you MUST always wear shooting glasses to protect your eyes. If you wear reading glasses the lenses must be certified for impact resistance or you should wear safety glasses intended for use over
normal optical reading glasses.
• Always aim in a SAFE DIRECTION.
• Never point the airgun at anything you do not intend to shoot.
• Never point an airgun at people or pets.
• Always treat the airgun as though it is loaded and with the same respect
you would a firearm.
• Never look down the barrel of an gun.
• Always keep the airgun “ON SAFE” until you are ready to shoot.
• Always check to see if the airgun is “ON SAFE” and unloaded when getting
it from another person or from storage.
• Never leave a loaded airgun unattended.
• Never climb or jump with an airgun.
• You must control the direction of the muzzle if you stumble or fall.
• Keep the muzzle clear. Never let anything obstruct the muzzle of the airgun. Don’t allow the muzzle to come in contact with the ground.
• Use only the proper size and type of projectile as it is marked on the airgun.
• Never reuse ammunition.
• Do not shoot at hard surfaces or at the surface of water. The projectile may
bounce off or ricochet and hit someone or something you had not intended to hit.
• Do not shoot at fragile objects such as windows.
• Place the backstop in a location that will be safe should the backstop fail.
• Your backstop should be checked for wear before and after each use.
All backstops are subject to wear and will eventually fail. Replace your
backstop if the surface is worn or damaged or if a ricochet occurs.
• Do not attempt to disassemble or tamper with your airgun. Unauthorized
repairs or modifying the function of your airgun in any way may be unsafe
and will void your warranty.
• Before you store or transport your airgun, make sure it is unloaded
and is “ON SAFE.”
• Always store your airgun in a secure location away from unauthorized
users and separate from ammunition.
• Only persons who are thoroughly familiar with the airgun’s function and
proper use and who are allowed by law should handle the airgun.
• Always wear safety shooting glasses when shooting or performing
maintenance on airguns.
• Only shoot where permitted by law.
SHOOT SAFELY
We encourage you to contact a local organization to sign up for a shooting safety
class in your area. Here are some suggestions:
• A local gun club
• NSSF.org
• Civilian Marksmanship Program (CMP) - www.odcmp.com
• NRAHQ.org
3
EN
DESCRIPTION
STEP 2. Learning the Parts of Your Air Rifle
Muzzle
Muzzle Break
Front Sight
Barrel
Forearm
T
Rear Sight
BB Resevoir
Loading Door
EZ-Load Pellet Ramp
Multi-Pump
Pumping Lever
Bolt Handle
(on right side)
SAFE-T-MATIC
Automatic Safety
Trigger
Trigger
Guard
Chamber
(on right side)
Picatinny
Rail
Stock
Cheek Piece
illustration 1
4
T
to
T
a
le
T
p
(F
EN
OPERATION
WARNING: BE SURE THE AIRGUN IS ALWAYS POINTED IN A SAFE
DIRECTION. NEVER POINT THE AIRGUN AT ANY PET OR PERSON EVEN IF IT IS
UNPUMPED AND UNLOADED. ALWAYS ASSUME AND HANDLE THE AIRGUN AS IF IT
WERE LOADED AND READY TO FIRE.
CAUTION
• ALWAYS MAKE SURE THAT THE MUZZLE POINTS IN A SAFE DIRECTION.
• ONLY HANDLE THE AIR RIFLE WHEN IT IS ON SAFE.
STEP 3. Operating the Safety
The NXG™ APX™ Air Rifle has an automatic safety.
To put “ON SAFE”, push the safety slider
to the SAFE (S) position. (illustration 2a)
Illustration 2a
The Safety will be placed on SAFE (S)
automatically every time the pumping
lever is activated.(illustration 2b)
To Fire, put the airgun “ON FIRE” by
pushing the safety from SAFE (S) to FIRE
(F). (illustration 2c)
ATTENTION
Illustration 2b
Illustration 2c
BEFORE YOU PUT YOUR AIR RIFLE “ON FIRE”, BE ABSOLUTELY CERTAIN THAT YOUR AIR
RIFLE IS POINTED IN A SAFE DIRECTION AND THAT YOU ARE READY TO FIRE. ONCE YOUR AIR
RIFLE IS PUMPED AND AUTOMATICALLY “ON SAFE”, DO NOT RECOCK THE AIR RIFLE WHILE
IT IS LOADED. TO PUT IT BACK “ON SAFE”, SEE “STEP 3. OPERATING THE SAFETY” FOR
INSTRUCTION ON HOW TO PUT THE APX BACK “ON SAFE”.
CAUTION
LIKE ALL MECHANICAL DEVICES, AN AIRGUN SAFETY CAN FAIL. EVEN WHEN THE SAFETY
IS "ON SAFE", YOU SHOULD CONTINUE TO HANDLE THE AIRGUN SAFELY. NEVER POINT THE
AIRGUN AT ANYTHING YOU DO NOT INTEND TO SHOOT.
5
EN
OPERATION
WARNING: DO NOT OPEN THE BOLT, CLOSE THE BOLT AND THEN PULL
THE TRIGGER BEFORE PUMPING. THIS PROCEDURE CAN RESULT IN A LOADED
GUN AND A PROJECTILE BEING EXPELLED FROM THE GUN DURING PUMPING.
OPENING THE BOLT, PUMP, THEN CLOSE THE BOLT.
STEP 4. Pumping Your Air Rifle
Open the bolt. (illustration 3). It must be open to pump
the airgun. For added safety, leave the bolt open while
pumping. Keep the muzzle pointed in a safe direction,
then pump the airgun. More pumps means more power,
but DO NOT pump more than 10 times. NOTE: Pumping
more than 10 times will not increase muzzle energy, but it
will damage you airgun and void the warranty.
Illustration 3
CLOSING THE PUMPING LEVER - Grasp the pumping lever, return it to the
closed position. (illustration 2c)
CAUTION
NEVER PUT YOUR FINGER ON
THE TRIGGER UNTIL YOUR
TARGET IS DEEMED SAFE
AND YOU ARE READY TO FIRE.
CAUTION
PULL LEVER OUTWARD FOR
FULL STROKE THEN RETURN
ONLY CLOSE THE BOLT
WHEN THE MUZZLE
IS POINTED IN A SAFE
DIRECTION.
Number of pumps vary depending on your target
distance. Here are some examples.
• Indoor shooting, 2 pumps
• 10-meter (33-ft.) distance, 4 to 6 pumps.
• Over 33-ft., 7 to 10 pumps.
NOTE: Never pump more than 10 times. Over
pumping will cause serious damage to your air rifle.
1
PINCH
POINTS
2
CAUTION
Illustration 4
BE CAREFUL TO KEEP FINGERS CLEAR OF PUMPING MECHANISIM (SEE “PINCH POINTS”,
ILLUSTRATION 4). GRASP THE LEVER FIRMLY AS YOU PUMP IT AND CLOSE IT TO PREVENT IT
FROM SNAPPING BACK AND POSSIBLY CAUSING INJURY.
WARNING: BBS FEED FROM THE RESERVOIR BY GRAVITY WHICH
REQUIRES THAT THE MUZZLE BE RAISED. NEVER ASSUME THE RESERVOIR OR
CHAMBER IS EMPTY EVEN IF THE AIR RIFLE DOES NOT FIRE A PROJECTILE.
6
EN
OPERATION
STEP 5. Loading Your Air Rifle
Filling the BB reservoir - The loading door is
located on the left side of the receiver. Slide door
open and fill reservoir with approximately 75 BBs.
(illustration 5a) Do not overfill or the feed system may
not operate properly.
LOADING BBs - With the bolt handle back and BBs
in the reservoir, RAISE the muzzle of the air rifle 45
degrees to 90 degrees. (illustration 5e).
When raising the muzzle, be sure the
front sight is pointed upward since the
air rifle may not feed properly if it is on
its side (illustration 5b). A BB can be
seen on the magnetic tip by looking
into the loading port (see illustration 5c). If a BB does
not feed onto the magnetic tip when the muzzle is raised,
shake the gun slightly. Push bolt handle fully forward to
place the BB in firing position. NOTE: Do not load more
than one BB at a time.
LOADING PELLETS - With the bolt back and BBs
removed from the reservoir (See “TO EMPTY BB
RESERVOIR” STEP 6), lower the muzzle and load a
pellet into the loading port, solid end forward (illustration
5d). Push the bolt handle fully forward and the pellet
is chambered in the firing position. NOTE: Do not load
more than one pellet at a time.
STEP 6. Unloading Your Air Rifle
Illustration 5a
Illustration 5b
Illustration 5c
Illustration 5d
UNLOADING A PELLET - The magnetic tip does not extract a pellet. You must shoot
the pellet out into a safe target if available. If a safe target is not available, open bolt,
insert a .177 cleaning rod into the muzzle end and push the pellet out of the barrel. Do
not allow a pellet to fall into the rear of the loading port and become jammed in the BB
feeding hole.
TO EMPTY BB RESERVOIR - Open bolt, open the BB reservoir door, cup your hand
over it and tilt the Air Rifle fully to the left side. Shake air rifle until all BBs are removed.
Then remove BBs from loading port. (see illustration 5c).
WARNING: LEAD PELLETS CONTAIN LEAD, A CHEMICAL KNOWN TO
THE STATE OF CALIFORNIA TO CAUSE CANCER AND BIRTH DEFECTS OR OTHER
REPRODUCTIVE HARM. DO NOT INHALE DUST OR PUT LEAD PELLETS IN MOUTH.
WASH HANDS AFTER HANDLING. KEEP AWAY FROM CHILDREN.
7
EN
OPERATION
CAUTION
USE ONLY .177 CALIBER (4.5 MM) PELLETS OR STEEL BBs. DO NOT ATTEMPT TO REUSE
PELLETS OR STEEL BBs THAT HAVE BEEN FIRED OR ARE DEFORMED. DO NOT USE BUCK
SHOT, DARTS, BALL BEARINGS, OR OTHER FOREIGN OBJECTS BECAUSE THEY CAN CAUSE
INJURY TO YOU OR SOMEONE ELSE OR MAY DAMAGE AND/OR JAM THE AIRGUN.
STEP 7. Aiming at a Safe Target
Always aim your air rifle in a SAFE DIRECTION. Always choose your target
carefully. It is best to shoot at a paper bullseye target which is attached to a safe
backstop. A heavy blanket should be hung behind the target backstop to prevent
ricochet should you miss the backstop. Think about what you will hit if you miss
the target.
THE NXG™ APX™ AIR RIFLE has open sights. Air rifles with this type of sight are
correctly aimed when the front sight blade is positioned exactly in the notch of
the rear sight. The top of the front sight blade should be even with the top of the
notch in the rear sight. The bullseye should appear to rest on the top of the front
sight (illustration 6).
Illustration 6
CAUTION
YOUR BACKSTOP SHOULD BE INSPECTED FOR WEAR BEFORE AND AFTER EACH USE.
DISCONTINUE USE IF THE BACKSTOP SURFACE SHOWS SIGNS OF FAILURE. ALWAYS
PLACE THE BACKSTOP IN A LOCATION THAT WILL BE SAFE SHOULD THE BACKSTOP FAIL.
DISCONTINUE THE USE OF A BACKSTOP IF THE PROJECTILE REBOUNDS OR RICOCHETS.
8
e
OPERATION
EN
STEP 8. Firing Your Air Rifle
When you are absolutely sure your air rifle is aimed at a safe target and you
are ready to fire, put your air rifle “OFF SAFE” (see STEP 3. OPERATING THE
SAFETY). Squeeze the trigger.
WARNING: IF A PROJECTILE DOES NOT FIRE AFTER COMPLETING THE
OPERATION STEPS, THE AIRGUN MAY BE JAMMED. AN UNFIRED PROJECTILE IN
THE BARREL CAN BE A DANGEROUS SITUATION. KEEP THE AIRGUN POINTED IN
A SAFE DIRECTION AND REPEAT THE OPERATION STEPS. IF A PROJECTILE STILL
DOES NOT FIRE, DO THE FOLLOWING:
1. Open Bolt.
2. Clear barrel by inserting a cleaning rod through the muzzle end.
(see illustration 9)
3. Repeat operation steps.
WARNING: NEVER ASSUME THAT BECAUSE THE AIRGUN NO LONGER
FIRES A PROJECTILE THAT A PROJECTILE IS NOT LODGED IN THE BARREL.
ALWAYS TREAT THE AIRGUN AS THOUGH IT IS LOADED AND WITH THE SAME
RESPECT YOU WOULD A FIREARM.
NOTE: Many factors affect airgun performance and velocity, including number of
pumps, brand of projectile, lubrication, barrel condition and temperature.
CAUTION
DO NOT ATTEMPT TO REUSE FIRED PROJECTILES OR PROJECTILES WHICH ARE
DEFORMED. PROJECTILES SUCH AS STEEL SHOT (BBS) AND DARTS MAY DAMAGE YOUR
AIR RIFLE AND CAUSE INJURY TO YOURSELF OR BYSTANDERS DUE TO RICOCHETING,
AND WILL VOID THE WARRANTY.
WARNING: NEVER CARRY YOUR AIR RIFLE WHILE PUMPED AND/OR
WHILE LOADED. NEVER CLIMB OR JUMP WITH YOUR AIR RIFLE WHILE PUMPED AND/
OR LOADED. IT IS BEST TO PUMP THE AIR RIFLE ONLY BEFORE SHOOTING. UNDER NO
CIRCUMSTANCES SHOULD YOUR AIR RIFLE BE CARRIED PUMPED AND LOADED.
9
EN
OPERATION
STEP 9. Adjusting the Sights
The rear sight can be adjusted for windage (horizontal) and
elevation (vertical).
Elevation Settings—To raise point of impact on the target,
push the sight elevator toward the muzzle. To lower point of
impact on the target, push the sight elevator rearward, away
from the muzzle. (see illustration 7)
Windage Settings—Loosen windage adjustment screw “A”
by turning counterclockwise (see illustration 8). Adjust rear
sight to the right side of the air rifle to make it shoot to the
right, or to the left side of the air rifle to make it shoot to the
left. Make certain windage adjustment screw is retightened
after adjustment.
Correct Sight Elevator Position
Sight
Elevator
LOWER
RAISE
Illustration 7
Screw “A”
Illustration 8
STEP 10. Trouble Shooting
CLEARING A JAM - Open the bolt, if the bolt is not completely closed, do not try to
close it until after opening it by pulling the bolt handle all the way back. The air rifle
will not fire a projectile when the bolt is completely open. Repeat previous operations
except ( Do Not Load BBs or Pellets). Pump your air rifle up 10 times, if a projectile still
does not fire, follow these steps carefully:
1.) Open Bolt 2.) Clear barrel by running the correct caliber ramrod into the muzzle
end and push the projectile out (see illustration 9). Be careful not to damage the bolt
tip by pushing the rod through too hard. Do not reuse this BB or pellet. If you are not
able to unjam your air rifle, contact Umarex USA’s Service Department.
Bolt
Muzzle End
Illustration 9
10
ll
OPERATION
CARE
EN
STEP 11. Care and Maintenance
CAUTION
BEFORE ANY CARE, CLEANING OR MAINTENANCE, ALWAYS BE SURE YOUR AIRGUN IS
UNLOADED. KEEP POINTED IN A SAFE DIRECTION. IT IS IMPORTANT TO PERFORM ROUTINE
INSPECTIONS AND MAINTAIN YOUR AIRGUN PROPERLY.
NEVER STORE A LOADED OR PUMPED AIRGUN. Unload pellet from the
airgun. Keep air rifle away from unsupervised children and untrained shooters.
Store projectiles separately from the air rifle. Protect your air rifle from moisture
and dirt; clean airgun and wrap it in a smooth, dry cloth. If you are going to store
your airgun for an extended length of time be sure the barrel is protected. This
can be accomplished by coating the bore with RWS Spring Cylinder Oil. Remove
the oil completely before the next use. REMEMBER: Always check to see that
the airgun is unloaded when getting from storage or from another person.
With care and routine inspections your airgun will provide many sessions of
shooting enjoyment. Abuse, neglect and continued exposure to the elements will
impair the performance of any airgun.
NXG™ APX™ Air Rifle is designed to fire caliber .177 pellets and steel BBs
only. We recommend the use of RWS Pellets and Umarex BBs because of
their superb accuracy and dimensional uniformity. The correct caliber is clearly
indicated on the rifle.
CAUTION
NEVER LEAVE YOUR AIR RIFLE PUMPED FOR AN EXTENDED PERIOD OF TIME. THIS COULD
RESULT IN A TIME DELAY FROM THE TIME THE TRIGGER IS PULLED UNTIL THE PROJECTILE IS
ACTUALLY FIRED FROM THE AIR RIFLE. LEAVING YOUR AIR RIFLE PUMPED FOR MORE THAN
ONE HOUR COULD RESULT IN PERMANENT DAMAGE TO THE AIR RELEASE VALVE.
OILS THAT CONTAIN ACID OR RESIN CAN DAMAGE SEALS AND POSSIBLY THE FINISH OF
THE AIRGUN.
WARNING: DO NOT BRANDISH OR DISPLAY THIS AIRGUN IN PUBLIC
– IT MAY CONFUSE PEOPLE AND MAY BE A CRIME. POLICE AND OTHERS MAY
THINK IT IS A FIREARM. DO NOT CHANGE THE COLORATION AND MARKINGS
TO MAKE IT LOOK MORE LIKE A FIREARM. THAT IS DANGEROUS AND MAY BE A
CRIME.
11
EN
OPERATION
WORKING PARTS: The working parts (pumping lever hinges, trigger hinges, bolt
and the foam wiper on the piston) require very little lubrication. Two(2) drops of
RWS Air Chamber Lube every 1000 shots will suffice. It is easily applied with a 3
1/2” applicator needle (see illustration 10). Remember, a little is good—a lot is
not better.
BARREL: In day to day use, very little dirt or residue will accumulate in the bore.
This can be removed by using RWS Cleaning Pellets. Note: High quality RWS
Lead Pellets not only increase accuracy, they help to reduce lead deposit. During
periods of regular use the bore of the barrel should be cleaned periodically by
means of a felt wad or cleaning rod with wool mop.
SURFACE: The exposed metal parts (rear sights, screw heads, trigger, etc.)
MUST be wiped clean using a slightly oiled cloth after handling to prevent rust.
Use light acid free and resin free oil. RWS Spring Cylinder Oil is excellent for this.
illustration 10
PUMPING LEVER
HINGES
FELT PAD
PUMP ROD
CAUTION
CHECK THE TIGHTNESS OF THE STOCK SCREWS BETWEEN, DURING, AND AFTER
SHOOTING ACTIVITY. LOOSE SCREWS MAY CAUSE INJURY.
CAUTION
THE COMPONENTS OF THIS AIRGUN WERE ENGINEERED AND MANUFACTURED TO DELIVER
OPTIMUM PERFORMANCE. ANY MODIFICATION OR TAMPERING WITH AN AIRGUN MAY CAUSE
A MALFUNCTION, VOID YOUR WARRANTY AND MAY MAKE IT UNSAFE TO USE. ANY CHANGE
IN PERFORMANCE (SUCH AS A LOWERED TRIGGER PULL FORCE AND SHORTENED TRIGGER
TRAVEL) INDICATES POSSIBLE MODIFICATION, TAMPERING AND/OR WEAR. SUCH AIRGUN
SHOULD BE INSPECTED, REPLACED, OR PROPERLY REPAIRED BY ONLY QUALIFIED UMAREX
USA PERSONNEL. ANY AIRGUN THAT HAS BEEN DROPPED SHOULD BE CHECKED BY QUALIFIED
PERSONNEL TO ENSURE THAT ITS FUNCTION HAS NOT BEEN AFFECTED.
WARNING: AN AIRGUN THAT IS NOT OPERATING PROPERLY MAY
BE DANGEROUS. IT SHOULD BE KEPT SAFELY FROM USE BY ANYONE UNTIL
REPAIRED OR DESTROYED. DO NOT TRY TO TAKE THE AIRGUN APART. IT IS
DIFFICULT TO REASSEMBLE AND IMPROPER DISASSEMBLY OR REASSEMBLY
CAN CAUSE SERIOUS INJURY OR DEATH.
12
lt
.
g
s.
CARE
EN
STEP 12. Repair / Service / Warranty
Do not return defective or damaged product to the dealer. If your airgun needs
repair, call Umarex USA (479) 646-4210 and ask for the Service Department
or visit www.umarexusa.com. DO NOT ATTEMPT TO DISASSEMBLE IT!
Your airgun requires special tools and fixtures to repair it. Any disassembly or
modification not performed by Umarex USA will void the warranty.
1 YEAR LIMITED WARRANTY
This product is warranted to the retail consumer for one (1) year from date of
purchase against defects in material and workmanship and is not transferable.
WHAT IS COVERED
Replacement parts and labor.
WHAT IS NOT COVERED
Shipping charges to Umarex USA for defective product and damages caused by
abuse or failure to perform normal maintenance as well as any other expense.
Consequential damages, or incidental expenses, including damage to property.
Some states do not allow the exclusion or limitation of incidental or consequential
damages, so the above limitation or exclusion may not apply to you.
WARRANTY CLAIMS
Warranty Claims and Repair for U.S. and Canadian customers only. Call
Umarex USA (479)-646-4210 and ask for the Service Department. If it is
determined a return is necessary, you will be issued a Return Authorization
Number. Write this number boldly on the box and return the product prepaid
to Umarex USA (Canadian customers will be provided with the address of an
authroized Canadian Repair Facility). Your name, address, phone number and
a note explaining the defect found must be included in the package. A copy of
the original dated cash register receipt must accompany the return. U.S.
customers, include a check made to Umarex USA in the amount provided by
Umarex USA’s service department to cover shipping and handling.
IMPLIED WARRANTIES
Any implied warranties, including the implied warranties of merchantability and
fitness for a particular purpose, are limited in duration to one (1) year from date
of retail purchase. SOME STATES DO NOT ALLOW LIMITATIONS ON HOW
LONG AN IMPLIED WARRANTY LASTS, SO THE ABOVE LIMITATIONS
MAY NOT APPLY TO YOU. TO THE EXTENT ANY PROVISION OF THIS
WARRANTY IS PROHIBITED BY FEDERAL, STATE, OR MUNICIPAL LAW
WHICH CANNOT BE PREEMPTED, IT SHALL NOT BE APPLICABLE.
THIS WARRANTY GIVES YOU SPECIFIC LEGAL RIGHTS, AND YOU MAY
ALSO HAVE OTHER RIGHTS WHICH VARY FROM STATE TO STATE AND
COUNTRY TO COUNTRY.
TO VALIDATE THIS WARRANTY–Send in the registration card within 30 days
to: Umarex USA, 7700 Chad Colley Boulevard, Fort Smith, Arkansas 72916
or Register online at www.UmarexUSA.com.
13
FR
DESIGNATION
EMPLOI
INSTRUCTIONS
DE SÉCURITÉ
ENTRETIEN
MANUEL DE L’UTILISATEUR
CARABINE À AIR MULTI-POMPE
Modelé
APX™
APX™ w/Scope
Calibre
Velocité
0,177
0,177
245 mps (projectiles en alliage)
245 mps (projectiles en alliage)
Distance Dangereuse
480 m
480 m
LISEZ COMPLÈTEMENT CE MANUEL DU PROPRIÉTAIRE. Traitez-le avec le
même respect que celui attribué à une arme à feu. Suivez toujours avec soin les
instructions concernant la sécurité contenues dans le manuel du propriétaire et
conservez ce manuel dans un endroit sûr pour vous y référer dans l’avenir.
AVERTISSEMENT
: PAS UN JOUET. LA SUPERVISION D’UN ADULTE
EST NÉCESSAIRE. UN MAUVAIS USAGE OU UN USAGE IMPRUDENT PEUVENT CAUSER
DES BLESSURES GRAVES OU LA MORT. PEUT ÊTRE DANGEREUX JUSQU’À 525 VERGES
(480 MÈTRES).
DES PERSONNES ÂGÉES DE 16 ANS OU PLUS. LISEZ TOUTES LES
INSTRUCTIONS AVANT D’UTILISER CETTE ARME. L'ACHETEUR ET L'UTILISATEUR
DEVRAIENT SE CONFORMER À TOUTES LES LOIS CONCERNANT L'ACHAT,
L'UTILISATION ET LA POSSESSION D'ARMES À AIR.
14
INSTRUCTIONS DE SÉCURITÉ
FR
AVERTISSEMENT
: CE CARABINE À AIR PEUT CAUSER DES
BLESSURES GRAVES OU LA MORT. LISEZ ET SUIVEZ BIEN LES INSTRUCTIONS.
NE CHARGEZ PAS L’ARME AVANT D’ÊTRE PRÊT À TIRER. SI VOUS PLACEZ UN
PROJECTILE DANS L’ARME PUIS DÉCIDEZ DE NE PAS TIRER, ENLEVEZ-LE DE
L’ARME MANUELLEMENT OU EN TIRANT VERS UNE CIBLE SÉCURITAIRE. UN
CARABINE À AIR DÉCHARGÉ ET NON ARMÉ, EN POSITION “ON SAFE”, EST LE
PLUS SÉCURITAIRE. LES ACCIDENTS SE PRODUISENT RAPIDEMENT S.V.P.,TIREZ
AVEC PRUDENCE.
Le fonctionnement de chaque type de pistolets est différent et vous n’êtes jamais
prêt à faire feu si vous n’êtes pas familier avec le fonctionnement de l’arme
utilisée. Lisez bien les instructions qui suivent concernant l’utilisation de cette
arme avant de vous en servir.
Ces symboles
indiquent des avertissements et des mises en garde
dans le manuel du propriétaire. Tenez-en bien compte pour votre propre sécurité
et celle des autres.
ATTENTION :
SI VOUS NE SUIVEZ PAS LES INSTRUCTIONS ET LES RECOMMANDATIONS DE CE MANUEL
DU PROPRIÉTAIRE, IL POURRAIT EN RÉSULTER DES DOMMAGES CORPORELS INCLUANT DES
BLESSURES AU VISAGE, AUX YEUX ET AUX OREILLES, LA CÉCITÉ ET LA SURDITÉ.
ATTENTION :
PROTECTION OCULAIRE
NÉCESSAIRE
PORTEZ DES
LUNETTES DE TIR
Consignes d’utilisation
1. Révision des règles de sécurité
2. Connaître les pièces de votre
carabine à air
3. Utiliser le cran de sûreté
4. Pomper la carabine à air
5. Charger votre carabine à air
6. Décharger la carabine à air
7. Viser une cible sécuritaire
8.Tirer avec votre carabine à air
9. Règler les mires
10.Dépannage
11. Entretien, Nettoyage et Remisage
12.Réparation / Service / Garantie
15
INSTRUCTIONS DE SÉCURITÉ
FR
1. Révision des Règles de Sécurité
•Vous et ceux qui vous accompagnent DEVEZ porter des lunettes de tir pour protéger vos yeux. Si vous portez des lunettes pour lire, les lentilles doivent être conçues pour résister aux impacts ou vous devriez porter des verres de sécurité conçus pour une utilisation par-dessus vos lunettes de lecture.
• Visez toujours dans une DIRECTION SÉCURITAIRE. Gardez le canon pointé dans une DIRECTION SÉCURITAIRE.
• Gardez toujours votre doigt loin de la détente et en dehors du pontet jusqu’à ce que vous soyez prêt à faire feu.
• Ne pointez jamais votre pistolet vers une personne ou vers un objet sur lequel vous n’avez pas l’intention de tirer.
• Ne pointez jamais une arme à air vers des gens ou des animaux domestiques.
• Manipulez toujours votre carabine à air comme s’il était chargé et avec le même respect pour la sécurité que si c’était une arme à feu.
• Ne regardez jamais dans le canon d’un carabine à air.
• Maintenez toujours le cran de sûreté dans la position “ON SAFE” jusqu’à ce que vous soyez prêt à tirer.
• Vérifiez toujours si le cran de sûreté du pistolet est dans la position “ON SAFE” et déchargé lorsque vous le recevez d’une autre personne ou le sortez du remisage.
• Ne laissez jamais une arme à air chargée sans surveillance.
• Utilisez des projectiles du bon format convenant à votre carabine à air.
• Il ne faut jamais grimper ou sauter avec une arme à air en main.
• Vous devez maîtriser la direction vers laquelle pointe le canon si vous trébuchez
ou tombez.
• Gardez le canon libre. Il ne faut jamais que le canon de votre arme à air soit
obstrué.Ne laissez jamais le canon venir en contact avec le sol.
• Ne réutilisez jamais des munitions.
• Ne tirez pas vers des surfaces dures ou vers la surface de l’eau. Le projectile peut rebondir ou effectuer un ricochet et frapper une personne ou quelque chose que vous ne vouliez pas atteindre.
• Ni tirez pas vers les surfaces fragiles comme des fenêtres.
• Placez toujours votre pare-balles dans une zone qui sera sécuritaire si le pare-
balles est défectueux.
• Votre pare-balles devrait être inspecté pour y déceler de l’usure avant et après chaque session de tir. Tous les pare-balles peuvent s’user et éventuellement devenir défectueux. Remplacez votre pare-balles si sa surface est usée ou endommagée ou s’il se produit un ricochet.
• Ne tentez pas de démonter ou de faire des altérations à votre carabine à air. Des réparations non autorisées ou des modifications quelles qu’elles soient au fonctionnement de votre carabine à air peuvent être non sécuritaires et annulent l
a garantie.
• Avant de remiser ou de transporter votre arme à air, assurez-vous qu’elle est déchargée et dans la position “ON SAFE.”
• Rangez toujours votre carabine à air dans un endroit sécuritaire loin des personnes non-autorisées à l’utiliser et à l’écart des munitions.
• Les personnes qui sont très familières avec le fonctionnement de l’arme à air et avec son utilisation sécuritaire et qui en ont le droit selon la loi devraient être les seules à manipuler cette arme à air.
• Portez toujours des lunettes de tir lorsque vous tirez avec une arme à air ou que vous procédez à son entretien.
• Tirez seulement là où la loi le permet.
TIREZ DE FAÇON SÉCURITAIRE
Nous vous suggérons de communiquer avec un organisme local pour participer à
des cours de tir sécuritaire dans votre région. Voici quelques suggestions:
Un club de tir de votre région. Programme de tir pour civil (CMP).
NSSF.org • ODCMP.com • NRAHQ.org
16
FR
DESIGNATION
2. Connaître Les Pièces De Votre Carabine À Air
Bouche
s
Frein de la
bouche
Guidon
Canon
t Fût
Levier de pompage
Multi-Pump
Trappe de chargement du
réservoir de projectiles BB
Rampe de chargement
EZ-Load pour projectiles
Levier de culasse
(sur le côté droit)
Cran de sûreté
automatique
SAFE-T-MATICMC
Détente
Chambre
(sur le côté droit)
Pontet
Hausse
Crosse
Raînure
Picatinny
Busc
illustration 1
17
FR
EMPLOI
AVERTISSEMENT
: ASSUREZ-VOUS QUE L'ARME À AIR EST
TOUJOURS POINTÉE DANS UNE DIRECTION SÉCURITAIRE. NE POINTEZ JAMAIS
L'ARME VERS UNE PERSONNE MÊME SI LA CARABINE N’EST PAS ARMÉE ET PAS
CHARGÉE. PRÉSUMEZ TOUJOURS QUE L'ARME À AIR EST CHARGÉE, PRÊTE À
FAIRE FEU ET MANIPULEZ-LA EN CONSÉQUENCE.
ATTENTION :
• MANIPULEZ LA CARABINE À AIR SEULEMENT SI ELLE EST DANS LA POSITION “ON SAFE”.
• ASSUREZ-VOUS QUE LE CANON POINTE TOUJOURS DANS UNE DIRECTION SÉCURITAIRE.
3. Utiliser le cran de sûreté
La carabine à air NXG™ APX™ possède un cran de sûreté
automatique.
Pour placer l’arme “ON SAFE”, poussez
la glissière du cran de sûreté à la position
SAFE (S). (illustration 2a)
Illustration 2a
Le cran de sûreté est automatiquement
placé sur SAFE (S) chaque fois que
le levier de pompage est utilisé.
(illustration 2b)
Pour tirer, placez le cran de sûreté de
l’arme à air à la position “ON FIRE”
en poussant le cran de sûreté de la
position SAFE (S) à la position FIRE (F).
(illustration 2c)
ATTENTION :
Illustration 2b
Illustration 2c
AVANT DE PLACER VOTRE CARABINE À AIR DANS LA POSITION “OFF SAFE”, SOYEZ
ABSOLUMENT SÛR QUE VOTRE CARABINE EST POINTÉE DANS UNE DIRECTION SÉCURITAIRE
ET QUE VOUS ÊTES PRÊT À FAIRE FEU. UNE FOIS QUE VOTRE CARABINE EST ARMÉE ET
AUTOMATIQUEMENT DANS LA POSITION “ON SAFE”, NE RÉARMEZ PAS LA CARABINE
LORSQU’ELLE EST CHARGÉE POUR LA REPLACER DANS LA POSITION “ON SAFE”. VOIR
“L’ÉTAPE 2. LE FONCTIONNEMENT DU CRAN DE SÛRETÉ” POUR DES INSTRUCTIONS
CONCERNANT LA REMISE DU MODÈLE APX DANS LA POSITION “ON SAFE”.
COMME TOUS LES MÉCANISMES, LE CRAN DE SÛRETÉ D’UN CARABINE À AIR PEUT
FAIRE DÉFAUT. MÊME LORSQUE LE CRAN DE SÛRETÉ EST DANS LA POSITION “ON
SAFE”, VOUS DEVRIEZ CONTINUER À MANIPULER LE PISTOLET À AIR DE FAÇON
SÉCURITAIRE. NE POINTEZ JAMAIS LA CARABINE À AIR VERS UNE CIBLE SUR LAQUELLE
VOUS NE VOULEZ PAS FAIRE FEU.
18
FR
EMPLOI
AVERTISSEMENT
: N’OUVREZ PAS ET NE REFERMEZ PAS LA
CULASSE POUR ENSUITE TIRER SUR LA DÉTENTE AVANT L’OPÉRATION DE
POMPAGE. CETTE FAÇON DE FAIRE PEUT CHARGER L’ARME ET PERMETTE À UN
PROJECTILE D’ÊTRE EXPULSÉ PENDANT L’OPÉRATION DE POMPAGE. OUVREZ
LA CULASSE, POMPER L’ARME, PUIS REFERMEZ LA CULASSE.
4. Pomper la carabine à air
Ouvrez la culasse (illustration 3). Elle doit être ouverte pour pomper
l’arme à air. Pour plus de sécurité, laissez la culasse ouverte durant
l’opération de pompage. Gardez le canon pointé dans une direction
sécuritaire et ensuite, effectuez l’opération de pompage. Plus
de mouvements de pompage vous donnent plus de puissance,
mais N’EFFECTUEZ PAS plus de 10 mouvements de pompage.
NOTEZ BIEN: Effectuer plus de 10 mouvements de pompage
n’augmente pas l’énergie initiale au niveau de la bouche du canon,
mais endommagera votre arme à air et annule la garantie.
Illustration 3
REMETTRE LE LEVIER DE POMPAGE EN POSITION D’ORIGINE – Saisissez le
levier de pompage et retournez-le dans sa position d’origine. (illustration 2c)
CAUTION
CAUTION
NE PLACEZ JAMAIS VOTRE
REFERMEZ LA CULASSE
DOIGT SUR LA DÉTENTE
SEULEMENT LORSQUE
JUSQU’À CE QUE VOUS
LE CANON POINTE
JUGIEZ QUE VOTRE CIBLE
DANS UNE DIRECTION
EST SÉCURITAIRE ET QUE
SÉCURITAIRE.
VOUS SOYEZ PRÊT À TIRER.
Le nombre de mouvements de pompage varie
selon la distance de votre cible. Voici quelques
exemples: Tir intérieur, 2 mouvements - Distance de
10 mètres (33 pi), 4 à 6 mouvements.
Plus de 33 pi, 7 à 10 mouvements. NOTEZ BIEN:
N’effectuez jamais plus de 10 mouvements de
pompage. Trop pomper peut endommager votre
arme à air.
CAUTION
TIREZ LE LEVIER VERS L’EXTÉRIEUR
POUR QUE SA COURSE SOIT COMPLÈTE
ET ENSUITE, RETOURNEZ-LE EN
POSITION
1
PINCH
POINTS
2
Illustration 4
SOYEZ PRUDENT ET GARDEZ LES DOIGTS LOIN DU MÉCANISME DE POMPAGE (VOIR LES
POINTS DE “PINCEMENTS”, ILLUSTRATION 4). SAISISSEZ FERMEMENT LE LEVIER POUR
EFFECTUER LE POMPAGE ET REMETTEZ-LE EN POSITION INITIALE POUR ÉVITER TOUT
MOUVEMENT DE RETOUR SUBIT QUI POURRAIT CAUSER DES BLESSURES.
AVERTISSEMENT
: POUR QUE LES PROJECTILES BB SORTENT DU
RÉSERVOIR PAR GRAVITÉ, IL FAUT QUE LE CANON SOIT RELEVÉ. NE PRÉSUMEZ
JAMAIS QUE LE RÉSERVOIR OU LA CHAMBRE EST VIDE MÊME SI L’ARME À AIR
NE TIRE PAS DE PROJECTILE.
19
FR
EMPLOI
5. Charger Votre Carabine à Air
Remplir le réservoir de projectiles BB – La trappe
de chargement est située sur la côté gauche du bloc de
culasse. Glissez la trappe pour l’ouvrir et remplissez
le réservoir avec environ 75 projectiles BB (illustration
5a). Ne le remplissez pas trop, car le système
d’alimentation peut ne pas fonctionner adéquatement.
Charger les projectiles BB - Avec le levier de culasse
en position arrière et des projectiles BB dans le réservoir,
SOULEVEZ le canon de la carabine à air de 45 à 90 degrés
(illustration 5e).Lorsque vous soulevez
le canon, assurez-vous que le guidon
pointe vers le haut, car l’alimentation
de projectiles de la carabine à air peut
ne pas se faire de la bonne façon si le
guidon est sur le côté (illustration 5 b).
Vous pouvez voir un projectile BB sur l’extrémité magnétique
en regardant dans l’orifice de chargement (voir illustration
5c). Si un projectile BB ne se place pas sur l’extrémité
magnétique lorsque le canon est relevé, secouez légèrement
l’arme. Poussez le levier de culasse complètement vers
l’avant pour placer le projectile BB en position de tir. NOTEZ
BIEN: Ne chargez pas plus d’un projectile BB à la fois.
CHARGER LES PROJECTILES À JUPE - Avec le levier
de culasse en position arrière et les projectiles BB retirés du
réservoir (voir “POUR VIDER LE CHARGEUR” ÉTAPE 6),
abaissez le canon et placez un projectile à jupe dans l’orifice de
chargement avec la partie pleine vers l’avant (illustration 5d).
Poussez le levier de culasse complètement vers l’avant pour que
le projectile se place dans la chambre en position de tir. NOTEZ
BIEN: Ne chargez pas plus d’un projectile à jupe à la fois.
6. Décharger la carabine à air
Illustration 5a
Illustration 5b
Illustration 5c
Illustration 5d
DÉCHARGER UN PROJECTILE À JUPE - L’extrémité magnétique ne peut expulser
un projectile à jupe. Vous devez tirer le projectile sur une cible sécuritaire, si disponible.
S’il n’y a pas de cible sécuritaire, ouvrez la culasse, insérez une baguette de nettoyage
de calibre .177 dans le canon et poussez le projectile hors du canon. Ne laissez pas
le projectile tomber à l’arrière de l’orifice de chargement et se coincer dans le trou
d’alimentation des projectiles BB.
POUR VIDER LE RÉSERVOIR DE PROJECTILES BB - Ouvrez la culasse, ouvrez la
trappe du réservoir de projectiles BB, mettez votre main en coupe sur ce dernier et faites
basculer la carabine à air complètement à gauche. Secouez la carabine à air jusqu’à ce
que tous les projectiles BB soient enlevés. Ensuite, enlevez les projectiles BB de l’orifice
de chargement. (see illustration 5c).
AVERTISSEMENT
: LE PLOMB ES RECONNU PAR L’ÉTAT DE LA
CALIFORNIE COMME POUVANT CAUSER LA CANCER, DES DÉFORMATIONS À LA
NAISSANCE OU D’AUTRES PROBLEMÉS CONNEXES A LA REPRODUCTION.
20
V
to
q
à
P
L
O
co
la
su
su
FR
EMPLOI
ATTENTION :
UTILISEZ UNIQUEMENT DES PROJECTILES DE CALIBRE 0,177 (4,5MM). NE FAITES AUCUNE
TENTATIVE DE RÉUTILISER DES PROJECTILES DÉJÀ UTILISÉS OU DÉFORMÉS. N’UTILISEZ
PAS DES PROJECTILES DE PLOMB, DE LA CHEVROTINE, DES DARDS, DES ROULEMENTS À
BILLES OU D’AUTRES OBJETS, CAR ILS PEUVENT VOUS CAUSER OU CAUSER À D’AUTRES
PERSONNES DES BLESSURES OU ENDOMMAGER/ENRAYER L’ARME.
7. Viser une Cible Sécuritaire
Visez toujours dans une DIRECTION SÉCURITAIRE avec votre carabine. Choisissez
toujours votre cible avec prudence. Il est préférable de tirer sur une cible de papier
qui est fixée à un pare-balles sécuritaire. Une couverture épaisse devrait être tendue
à l’arrière du pare-balles afin d’éviter les ricochets si vous manquez le pare-balles.
Pensez à ce que vous frapperez si vous manquez la cible.
LE MODÈLE DE CARABINE À AIR NXG™ APX™ POSSÈDE DES MIRES
OUVERTES. La visée des carabines à air, munies de ce genre de mire, est réglée
correctement lorsque la lame du guidon est placée exactement dans l’encoche de
la hausse. La partie supérieure de la lame du guidon devrait être égale à la partie
supérieure de l’encoche de la hausse. Le centre de la cible devrait sembler reposer
sur la partie supérieure du guidon (voir illustration 6).
Illustration 6
ATTENTION :
VOTRE PARE-BALLES DEVRAIT ÊTRE INSPECTÉ POUR Y DÉTECTER DES SIGNES D’USURE
AVANT ET APRÈS CHAQUE UTILISATION. N’UTILISEZ PLUS VOTRE PARE-BALLES SI SA
SURFACE MONTRE DES SIGNES DE FAIBLESSE. PLACEZ TOUJOURS LE PARE-BALLES DANS
UN ENDROIT QUI SERA SÉCURITAIRE SI CELUI-CI VIENT QU’À ÊTRE DÉFECTUEUX. N’UTILISEZ
PLUS VOTRE PARE-BALLES SI UN PROJECTILE REBONDIT OU S’IL SE PRODUIT UN RICOCHET.
21
EMPLOI
FR
8. Tirer avec Votre Carabine à Air
Lorsque vous êtes absolument certain que votre carabine à air vise une cible
sécuritaire et que vous êtes prêt à tirer, placez votre carabine à air dans la
position “OFF SAFE” (voir Étape 3 - UTILISER LE CRAN DE SÛRETÉ). Pressez
sur la détente.
AVERTISSEMENT
: SI VOUS NE POUVEZ TIRER UN PROJECTILE
APRÈS AVOIR EFFECTUÉ LES PROCÉDURES D’UTILISATION, L’ARME À AIR PEUT
ÊTRE ENRAYÉE. IL EST DANGEREUX D’AVOIR UN PROJECTILE NON TIRÉ DANS
LE CANON. GARDEZ L’ARME POINTÉE DANS UNE DIRECTION SÉCURITAIRE ET
RÉPÉTEZ LES PROCÉDURES D’UTILISATION. SI VOUS NE POUVEZ TOUJOURS
PAS TIRER LE PROJECTILE, FAITES CE QUI SUIT: 1. OUVREZ LA CULASSE 2.
DÉGAGEZ LE CANON EN INSÉRANT UNE BAGUETTE DE NETTOYAGE DANS
L’EXTRÉMITÉ DU CANON. 3. RÉPÉTEZ LES PROCÉDURES D’UTILISATION.
AVERTISSEMENT
: NE PRENEZ JAMAIS POUR ACQUIS, PARCE
QU’UNE ARME À AIR NE TIRE PLUS DE PROJECTILES, QU’IL N’Y A PLUS DE PROJECTILES DANS LE CANON. CONSIDÉREZ TOUJOURS LE PISTOLET À AIR COMME
CHARGÉ ET TRAITEZ-LE AVEC LE MÊME RESPECT QUE VOUS ACCORDERIEZ À
UNE ARME À FEU.
NOTEZ BIEN: Plusieurs facteurs peuvent influencer les performances d’une
arme et la vélocité des projectiles, incluant la marque des projectiles, le type de
projectiles, la lubrification, l’état du canon et la température.
ATTENTION :
NE TENTEZ PAS DE RÉUTILISER LES PROJECTILES QUI ONT ÉTÉ TIRÉS OU LES PROJECTILE
DÉFORMÉS. LES PROJECTILES, COMME LES PLOMBS D’ACIER (BB) ET LES DARDS, PEUVENT
ENDOMMAGER VOTRE CARABINE À AIR ET VOUS CAUSER DES BLESSURES OU CAUSER DES
BLESSURES AUX PERSONNES À PROXIMITÉ EN FAISANT DES RICOCHETS, ET ANNULERA
VOTRE GARANTIE.
AVERTISSEMENT
: NE TRANSPORTEZ JAMAIS VOTRE CARABINE
À AIR LORSQU’ELLE EST ARMÉE ET/OU LORSQU’ELLE EST CHARGÉE. NE
GRIMPEZ PAS ET NE SAUTEZ PAS EN TRANSPORTANT VOTRE CARABINE À AIR
LORSQU’ELLE EST POMPÉE ET/OU CHARGÉE. IL EST PRÉFÉRABLE D’ARMER
LA CARABINE À AIR SEULEMENT AVANT DE TIRER. VOTRE CARABINE À AIR NE
DEVRAIT JAMAIS ÊTRE TRANSPORTÉE CHARGÉE ET ARMÉE QUELLES QUE
SOIENT LES CIRCONSTANCES.
22
1
z
FR
EMPLOI
9. Règler les Mires
La hausse peut être réglée pour la dérive (horizontalement) et la
hauteur du point d’impact (verticalement).
Réglages pour la hauteur du point d’impact —Pour hausser le
point d’impact sur la cible, poussez la commande de réglage de la
hausse vers la bouche du canon. Pour abaisser le point d’impact
sur la cible, poussez la commande de réglage de la hausse dans
la direction opposée de la bouche du canon. (see illustration 7)
Réglages pour la dérive —Dévissez la vis “A” de réglage de la
dérive en la tournant dans le sens contraire des aiguilles d’une
montre (voir illustration 8). Effectuez un réglage de la hausse vers
la droite de la carabine à air pour qu’elle tire plus à droite, ou vers
la gauche de la carabine à air pour la faire tirer plus à gauche.
Assurez-vous de bien serrer la vis de réglage de la dérive après
les réglages.
Bonne position de la
commande de réglage de
la hausse
Commande de réglage
de la hausse
ABAISSEZ
RELEVEZ
Illustration 7
Vis “A”
Illustration 8
10. Dépannage
Enlever un Projectile Bloqué - Ouvrez le boulon, si le boulon n’est pas complètement
fermé, n’essayent pas de le fermer jusqu’à après que l’ouvrant en tirant le boulon
manipuliez toute la voie en arrière. Le fusil à air comprimé ne mettra pas le feu à une
projectile quand.
1.) Ouvrez le boulon 2.) Effacez le baril en exécutant la baguette correcte de calibre
dans l’extrémité de museau et poussez la projectile dehors (voir l’illustration 9). Faites
attention à ne pas endommager l’extrémité de boulon en, Umarex USA’s Service
Department.
Levier de culasse
Frein de la bouche
Illustration 9
23
EMPLOI
ENTRETIEN
FR
11. Entretien, Nettoyage et Remisage
ATTENTION :
AVANT DE PRODIGUER DES SOINS, D’ENTRETENIR OU DE NETTOYER VOTRE PISTOLET,
ASSUREZ-VOUS TOUJOURS QU’IL N’EST PAS ARMÉ ET QU’IL EST DÉCHARGÉ. GARDEZ VOTRE
ARME POINTÉE DANS UNE DIRECTION SÉCURITAIRE. IL EST IMPORTANT D’INSPECTER VOTRE
ARME RÉGULIÈREMENT ET DE L’ENTRETENIR CORRECTEMENT.
NE RANGEZ JAMAIS UNE ARME À AIR SI ELLE EST CHARGÉ OU ARMÉE.
Enlevez les projectiles de votre arme. Gardez la carabine à air loin des enfants et des
tireurs sans expérience. Rangez les projectiles dans un endroit différent de celui où
vous rangez la carabine pour les garder loin des tireurs sans expérience. Protégez
votre carabine à air de l’humidité et de la poussière; nettoyez l’arme et enroulez-la
dans un chiffon doux et sec. Si vous rangez votre carabine à air pour une longue
période de temps, assurez-vous que le canon est protégé. Vous pouvez y parvenir
en recouvrant l’âme du canon d’huile “RWS Spring Cylinder Oil”. Utilisez toujours un
chiffon doux et faites pénétrer la baguette par la culasse pour les carabines à canon
basculant. Pour les carabines à levier, insérez la baguette par la bouche du canon.
Enlevez l’huile complètement avant d’utiliser l’arme de nouveau. SOUVENEZ-VOUS
DE: Toujours vous assurer que l’arme à air est déchargée lorsque vous la sortez du
remisage ou l’obtenez d’une autre personne.
Avec de bons soins et des inspections routinières, votre arme à air vous fournira de
nombreuses sessions de tir agréables. Les mauvais traitements, la négligence et une
exposition aux intempéries nuisent au fonctionnement de toute arme à air.
Votre carabine à air de modèle NXG™ APX™ est conçue pour tirer des projectiles
de plomb de calibre 0,177 seulement. Nous vous recommandons l’utilisation de
projectiles RWS, car ils vous offrent une précision exceptionnelle et une dimension
uniforme. Le calibre approprié est clairement indiqué sur la carabine.
ATTENTION :
NE LAISSEZ JAMAIS VOTRE CARABINE À AIR POMPÉE POUR UNE LONGUE PÉRIODE DE
TEMPS. CELA PEUT OCCASIONNER UN DÉCALAGE ENTRE LE MOMENT OÙ LA DÉTENTE EST
PRESSÉE ET LE TIR RÉEL D’UN PROJECTILE DE LA CARABINE À AIR. EN LAISSANT VOTRE
CARABINE À AIR POMPÉE PLUS D’UNE HEURE, VOUS POURRIEZ ENDOMMAGER LA VALVE DE
DÉSAÉRATION DE FAÇON PERMANENTE.
LES HUILES QUI CONTIENNENT DE L’ACIDE OU DE LA RÉSINE PEUVENT ENDOMMAGER LES
JOINTS ET POSSIBLEMENT LE FINI DU CARABINE À AIR.
AVERTISSEMENT
: NE BRANDISSEZ PAS ET NE MONTREZ PAS
VOTRE PISTOLET À AIR EN PUBLIC. LES GENS PEUVENT SE MÉPRENDRE
ET CELA PEUT ÊTRE UN CRIME. LES POLICIERS ET D’AUTRES PERSONNES
PEUVENT PENSER QUE C’EST UNE ARME À FEU. NE CHANGEZ PAS LA COULEUR
ET LES PARTICULARITÉS DE VOTRE ARME POUR LA FAIRE RESSEMBLER À UNE
ARME À FEU. CELA EST DANGEREUX ET PEUT ÊTRE UN CRIME.
24
FR
EMPLOI
PIÈCES ACTIVES: Les pièces actives (le piston et le ressort principal) nécessitent
très peu de lubrification. Deux (2) gouttes d’huile “RWS Air Chamber Lube” à chaque
1000 coups suffisent. Cette huile est facile à appliquer en utilisant une aiguille
d’injection de 3 1/2”, insérée dans l’orifice de la chambre de compression (voir
illustrations 10).
CANON: Lors d’une utilisation quotidienne, très peu de poussière ou de résidus
s’accumulent dans le canon. On peut les enlever à l’aide de projectiles de nettoyage
RWS. Notez bien: Les projectiles de plomb RWS de qualité supérieure n’augmentent
pas seulement la précision de votre tir mais, diminuent aussi les possibilités de
résidus de plomb. Lors de périodes régulières d’utilisation, l’âme du canon devrait
être nettoyée régulièrement à l’aide d’une baguette et d’une pièce de feutre ou d’un
écouvillon en laine. Les brosses en métal ne devraient pas être utilisées. Insérez la
baguette dans la culasse.
SURFACE: Les pièces de métal visibles (hausse, boîtier de culasse, têtes de vis,
œilleton, etc.) possèdent un fini bleuté et DOIVENT être essuyées à l’aide d’un chiffon
légèrement imprégné d’huile après une manipulation pour éviter la rouille. Utilisez une
huile légère sans acide et sans résine. L’huile “RWS Spring Cylinder Oil” est excellente
pour ce type d’utilisation.
illustration 10
LEVIER DE POMPAGE
CHARNIÈRES
COUSSINETS DE FEUTRE
TIGE DE
POMPE
ATTENTION :
VÉRIFIEZ SI LE PONTET ET LES VIS QUI RETIENNENT LA CROSSE SONT BIEN SERRÉS DURANT
ET APRÈS LE TIR. DES VIS QUI NE SONT PAS SERRÉES PEUVENT CAUSER DES BLESSURES
OU LA MORT.
AVERTISSEMENT
: UNE ARME À AIR QUI NE FONCTIONNE PAS
BIEN PEUT ÊTRE DANGEREUSE. ELLE DEVRAIT ÊTRE RANGÉE SÉCURITAIREMENT
ET NE PAS ÊTRE UTILISÉE JUSQU’À CE QU’ELLE SOIT RÉPARÉE OU DÉTRUITE.
NE TENTEZ PAS DE DÉMONTER CETTE ARME À AIR. ELLE EST DIFFICILE À
REMONTER ET UN DÉMONTAGE OU UN MONTAGE FAUTIF PEUVENT CAUSER DES
BLESSURES GRAVES OU LA MORT.
25
ENTRETIEN
FR
12. Réparation / Service / Garantie
Ne retournez pas un produit défectueux ou endommagé chez le détaillant.
Si votre pistolet à air a besoin d’être réparé, appelez Umarex USA au (479)
646-4210 et demandez le service ou visitez le site: www.UmarexUSA.com.
NE TENTEZ PAS DE DÉMONTER VOTRE PISTOLET! Des outils et des
accessoires particuliers sont nécessaires pour réparer votre pistolet à air.
Tout démontage ou toute modification qui n’est pas entrepris par Umarex USA
annule la garantie.
26
GARANTIE LIMITÉE DE 1 ANNÉE
Pour l’acheteur au détail, ce produit est garanti pour une période de 1 année à
partir de la date d’achat contre tout défaut de matériau ou de fabrication. Cette
garantie n’est pas transférable.
CE QUI EST COUVERT PAR LA GARANTIE : Les pièces de remplacement et
la main-d’œuvre.
CE QUI N’EST PAS COUVERT : Les frais de transport pour envoyer le produit
défectueux à Umarex USA et les dommages causés par un usage abusif ou par
un manque d‘entretien en plus de toute dépense supplémentaire ou fortuite,
tout dommage indirect comprenant le dommage à la propriété. Certains états
ne permettent pas ces exclusions ou ces limites pour les dommages directs
et indirects, donc les exclusions et les limites mentionnées peuvent ne pas
s‘appliquer.
RÉCLAMATION SOUS GARANTIE : Demandes de réparation sous garantie et
réparation pour les clients des U.S.A et du Canada seulement. Communiquez
par téléphone avec Umarex USA au (479)-646-4210 et demandez le service.
Si nous jugeons qu‘un retour du produit est nécessaire, vous obtiendrez un
numéro d‘autorisation de retour. Écrivez ce numéro en gros caractères sur le
colis et retournez-nous le produit port payé à Umarex USA. (On donnera aux
clients canadiens l’adresse d’une centre de service canadien agréé). Incluez
dans l’envoi votre nom, votre adresse, votre numéro de téléphone et une
note expliquant la défectuosité. Une copie du reçu de caisse original daté
doit accompagner le produit retourné. Clients des É.-U., doivent inclure un
chèque au nom d’Umarex USA au montant fourni par le service à la clientèle
Umarex USA afin de couvrir les frais d’envoi et de manutention.
GARANTIE TACITE : Toute garantie tacite, comprenant la garantie tacite de
qualité marchande et de convenance pour une utilisation particulière est limitée
à une durée de 1 année à partir de la date d’achat. CERTAINS ÉTATS NE
PERMETTENT PAS DE LIMITER LA DURÉE DES GARANTIES TACITES,
DONC LES LIMITES CI-DESSUS PEUVENT NE PAS S’APPLIQUER À
VOUS. SI UNE PARTIE DE CETTE GARANTIE CONTREVIENT À UNE
LOI FÉDÉRALE, PROVINCIALE OU MINICIPALE QUI NE PEUT ÊTRE
PRÉEMPTÉE, ELLE NE SERA PAS APPLIQUABLE. CETTE GARANTIE VOUS
DONNE DES DROITS LÉGAUX SPÉCIFIQUES ET VOUS POUVEZ AUSSI
AVOIR D’AUTRES DROITS QUI PEUVENT VARIER D’UN ÉTAT À UN AUTRE
ET D’UN PAYS À UN AUTRE.
TO POUR METTRE LA GARANTIE EN FORCE –Faites parvenir la carte
d’enregistrement à l’intérieur d’un délai de 30 jours à: Umarex USA,
7700 Chad Colley Blvd., Fort Smith, AR 72916 ou enregistrez-vous en ligne
au www.UmarexUSA.com.
NOTES
FR
r
t
S
27
ES
DESCRIPCIÓN
OPERACIÓN
INSTRUCCIONES
DE SEGURIDAD
CUIDADO
MANUAL DE OPERACÓN
Neumático Rifle de Aire Multi-Bombeo
Modélo
Calibre
APX™
.177
APX™ w/Scope .177
Vélocidad
Distancia de Peligro
245 mps (proyectiles de aleación)
245 mps (proyectiles de aleación)
480 m
480 m
LEA COMPLETAMENTE ESTE MANUAL DE OPERACIÓN DEL USUARIO.
Esta arma de aire comprimido no es un juguete. Trátela con el mismo respeto
que trataría un arma de fuego. Siempre siga las instrucciones de seguridad
encontradas en este manual del usuario y mantenga este manual en un lugar
seguro para uso futuro.
ADVERTENCIA:
NO ES UN JUGUETE. SE REQUIERE LA SUPERVISIÓN
DE UN ADULTO. EL MAL USO O USO DESCUIDADO PUEDE CAUSAR SERIAS LESIONES O LA MUERTE. PUEDE SER PELIGROSO HASTA 525 YARDAS (480 METROS).
ÈSTA ES UN ARMA DE AIRE COMPRIMIDO DE ALTO PODER PARA USO DE PERSONAS MAYORES DE 16 AÑOS O MÁS. LEA TODAS LAS INSTRUCCIONES ANTES DE
USARSE. EL COMPRADOR O USUARIO DEBE DE AJUSTARSE A TODAS LAS LEYES
QUE REGULAN LA COMPRA, USO Y POSESIÓN DE ARMAS DE AIRE COMPRIMIDO.
28
P
1
2
3
4
5
6
7
S
INSTRUCCIONES DE SEGURIDAD
ES
ADVERTENCIA: ESTA ARMA DE AIRE COMPRIMIDO PUEDE CAUSAR
SERIAS LESIONES O LA MUERTE. LEA Y SIGA LAS INSTRUCCIONES CUIDADOSAMENTE. NO CARGUE UN PROYECTIL EN EL ARMA DE AIRE HASTA QUE ESTÉ LISTO
PARA DISPARAR. SI USTED CARGA EL PROYECTIL Y LUEGO DECIDE NO DISPARAR,
QUÍTELO YA SEA MANUALMENTE O DISPARANDO EL ARMA HACIA UN BLANCO SEGURO. UNA PISTOLA DE AIRE DESCARGADA Y DESARMADA QUE ESTÁ EN MODO
SEGURO “ON SAFE”, ES LA MÁS SEGURA. LOS ACCIDENTES SUCEDEN RÁPIDO,
POR FAVOR MANEJE CUIDADOSAMENTE EL ARMA DE AIRE.
Las armas de aire comprimido difieren en su operación y usted nunca está
listo para disparar ningún arma de aire comprimido hasta que usted esté
completamente familiarizado con ella. Lea las siguientes instrucciones de
operación antes de operarlas.
Estos símbolos,
, marcan advertencias y precauciones en el manual de
operación. Cuidadosamente sígalas por su propia seguridad y por la seguridad
de otros.
PRECAUCIÓN
EL FALTAR A CUMPLIR LAS INSTRUCCIONES Y RECOMENDACIONES EN EL MANUAL DEL
PROPIETARIO PUEDE RESULTAR EN LESIONES CORPORALES INCLUYENDO LA CARA, OJO Y
LESIONES AL OÍDO, CEGUERA O SORDERA.
ADVERTENCIA:
SE REQUIERE PROTECCIÓN
DE LOS OJOS.
USE SUS LENTES
DE DISPARAR.
Pasos a seguir
1. Revisando la Seguridad
2. Aprendiendo las Partes de
Su Arma de Aire
3. Operando bajo Seguridad
4. Bombeando su rifle de aire
5. Cargando su arma de Aire Comprimido
6. Descargando su rifle de aire
7. Apunte hacia un blanco seguro
8. Disparando su Arma de Aire
Comprimido
9. Ajustando las Miras
10.Solución de Problemas
11. Mantenimiento, Limpieza y
Almacenamiento
12.Reparación/Servicio/Garantía
29
INSTRUCCIONES DE SEGURIDAD
1. Revisando la Seguridad
30
ES
• Usted y otras personas con usted, DEBEN utilizar anteojos de seguridad para proteger sus ojos. Si usted utiliza anteojos de lectura, los lentes deben de estar certificados en resistencia a impactos o debe utilizar anteojos de seguridad hechos para colocar sobre los anteojos de lectura normales.
• Siempre apunte hacia una DIRECCIÓN SEGURA. Siempre mantenga la boca del arma de aire apuntando hacia una DIRECCIÓN SEGURA.
• Siempre mantenga su dedo fuera del gatillo y fuera del guardamonte hasta que esté listo para disparar.
• Nunca apunte el arma de aire a cualquier cosa que no intente disparar.
• Nunca apunte la pistola de aire a personas ni a mascotas.
• Siempre trate al arma de aire como si está cargada y con el mismo respeto que una arma de fuego.
• Nunca mire al cañón de un arma de aire.
• Siempre mantenga el arma de aire “EN SEGURO” – ON SAFE hasta que esté listo para disparar.
• Siempre esté listo para ver si el arma de aire está “EN SEGURO” – ON SAFE y descargada cuando la agarre de otra persona o del lugar en donde estaba guardada.
• Nunca deje la pistola de aire cargada y sin supervisión.
• Use solamente el tamaño apropiado y tipo de proyectil como está marcado en el arma de aire.
• Nunca escale o brinque con su arma de aire.
• Usted debe controlar la dirección de la boca de su arma de aire si se tropieza o
se cae.
• Mantenga la boca de su arma de aire libre. Nunca permita que ningún objeto
obstruya la boca de su arma de aire.
• No permita que la boca de su arma de aire entre en contacto con el suelo.
• Nunca reutilice la munición.
• No dispare a las superficies duras o a la superficie de agua. El BB puede rebotar y golpear a alguien o a algo que no intentaba golpear.
• No dispare a objetos frágiles como las ventanas.
• Ponga el soporte en un lugar que será seguro si falla el soporte.
• Su soporte debe de revisarse por desgaste antes y después de cada uso. Todos los soportes están sujetos a desgastes y con el tiempo fallarán. Remplace su soporte si la superficie se desgasta o daña o si ocurre un rebote.
• No intente desarmar o modificar su arma de aire. Las reparaciones no autorizadas o las modificaciones de la función de su arma de aire en cualquier manera pueden ser inseguras y anularán su garantía.
• Antes de guardar o transportar la pistola de aire, asegúrese de que está descargada y está en MODO SEGURO (“ON SAFE”).
• Siempre guarde su arma de aire en un lugar seguro lejos de usuarios no
autorizados y separadas de las municiones.
• Sólo personas que están familiarizadas con la función y uso apropiado de la pistola de aire y están amparadas por la ley deben manipular la pistola de aire.
• Siempre use los anteojos de seguridad cuando dispare o dé mantenimiento a la pistola de aire.
• Solamente dispare donde está permitido por la ley.
SEGURIDAD AL DISPARAR
Nosotros le instamos a que contacte a la organización local de su área para que se
inscriba en una clase seguridad para uso de armas.
Aquí están algunas sugerencias:
• Un club de armas local • NSSF.org
• Programa Markmanship para civiles (CMP) www.odcmp.com
• NRAHQ.org
ES
DESCRIPCIÓN
2. Aprendiendo las Partes de Su Arma de Aire
Boca
é
Freno de boca
a Punto de Mira
Cañon
a.
Forearm
o
s i o
r
a
Alza
Puerta de carga de reserva
de municiones BB’s
Rampa de carga de
pelet EZ
Palanca de bombeo tipo
de bombeo multiple
Perilla
(en el lado derecho)
Seguro automático
SAFE-T-MATIC™
Gatillo
Recámara
(en el lado derecho)
Guardamonte
Culata
Picatinny
Rail
Pieza de la mejilla
e
ilustración 1
31
ES
OPERACIÓN
ADVERTENCIA: ASEGÚRESE QUE EL ARMA DE AIRE COMPRIMIDO
ESTÉ SIEMPRE APUNTANDO HACIA UNA DIRECCIÓN SEGURA. NUNCA APUNTE
SU PISTOLA DE AIRE A NINGUNA MASCOTA O PERSONA INCLUSO SI ESTÁ
DESARMADA Y DESCARGADA. SIEMPRE SUPONGA Y MANEJE EL ARMA DE AIRE
COMPRIMIDO COMO SI ESTUVIERA CARGADA Y LISTA PARA DISPARAR.
PRECAUCIÓN
• SOLAMENTE MANEJE EL ARMA DE AIRE CUANDO ESTÉ CON EL SEGURO – ON SAFE.
• SIEMPRE ASEGÚRESE QUE EL CAÑÓN APUNTE HACIA UNA DIRECCIÓN SEGURA.
3. Operando la Seguridad
El rifle de aire NXG™ APX™ tiene un
seguro automático.
Para colocar en “MODO SEGURO” (ON
SAFE), empuje el control deslizante del
seguro a la posición “SEGURO” (S).
(ilustración 2a).
ilustración 2a
El seguro se colocará de forma
automática en SEGURO (S) cada vez
que la palanca de bombeo esté activada.
(ilustración 2b).
Para disparar, coloque el arma de aire
“FUEGO” (ON FIRE) empujando el
seguro desde SEGURO (S) a FUEGO
(F). (ilustración 2c).
PRECAUCIÓN
ilustración 2b
ilustración 2c
ANTES DE PONER SU RIFLE DE AIRE COMPRIMIDO “SIN SEGURO” (OFF SAFE), ESTÉ
COMPLETAMENTE SEGURO QUE SU RIFLE DE AIRE COMPRIMIDO ESTÉ AMARTILLADO Y
AUTOMÁTICAMENTE “EN SEGURO” (ON SAFE), NO VUELVA A AMARTILLAR EL RIFLE DE
AIRE COMPRIMIDO MIENTRAS ESTÉ CARGADO PARA VOLVERLO A PONER DE REGRESO “EN
SEGURO”(ON SAFE), VEA EL “PASO 1. OPERANDO EL SEGURO” PARA INSTRUCCIONES EN
CÓMO PONER EL APX DE REGRESO “EN SEGURO”.
COMO TODOS LOS ARTEFACTOS MECÁNICOS, EL SEGURO DE UN ARMA DE AIRE PUEDE
FALLAR. AÚN CUANDO EL SEGURO ESTÉ “EN SEGURO,” – ON SAFE, DEBE DE CONTINUAR
MANEJANDO EL ARMA DE AIRE CON SEGURIDAD. NUNCA APUNTE EL ARMA DE AIRE HACIA
ALGO QUE NO INTENTE DISPARAR.
32
A
b
d
d
b
p
B
b
C
re
E
d
A
in
d
e
d
a
ES
OPERACIÓN
ADVERTENCIA: NO ABRA LA PERILLA, CIERRE LA PERILLA Y LUEGO
TIRE DEL GATILLO ANTES DE BOMBEAR. ESTE PROCEDIMIENTO PUEDE RESULTAR
EN UN ARMA CARGADA Y UN PROYECTIL EXPULSADO DEL ARMA MIENTRAS
BOMBEA. ABRIENDO LA PERILLA, BOMBEE, LUEGO CIERRE LA PERILLA.
4. Bombeando su rifle de aire
Abra la perilla (Ilustración 3). Debe estar abierta para
bombear el arma de aire. Para incrementar la seguridad,
deje la perilla abierta mientras bombea. Mantenga la boca
del arma de aire apuntando a una dirección segura, luego
bombee el arma de aire. Mayor bombeo significa mayor
potencia, pero NO bombee más de 10 veces. NOTA:
Bombear más de 10 veces no incrementará la energía de la
boca, pero si dañará su arma de aire y anulará la garantía.
ilustración 3
CERRANDO LA PALANCA DE BOMBEO – Tome la palanca de bombeo,
regrésela a la posición de cierre. (ilustración 2c).
CAUTION
NUNCA COLOQUE SU DEDE
EN EL GATILLO HASTA QUE SU
BLANCO SEA CONSIDERADO
SEGURO Y USTED ESTÁ LISTO
PARA DISPARAR.
CAUTION
SOLAMENTE CIERRE LA
PERILLA CUANDO LA
BOCA ESTÁ APUNTANDO
A UNA DIRECCIÓN
SEGURA.
El número de bombeos puede variar
dependiendo de la distancia del blanco.
Acá hay algunos ejemplos. Para disparos en
interiores, 2 bombeos - 10 metros (33 pies) de
distancia, entre 4 y 6 bombeos. Más de 33 pies,
entre 7 y 10 bombeos. NOTA: Nunca bombee más
de 10 veces. Sobrebombear causará daños severos
al rifle de aire.
PRECAUCIÓN
TIRE DE LA PALANCA
HACIA EL EXTERIOR PARA
GOLPE COMPLETO LUEGO
REGRÉSELA
1
PINCH
POINTS
2
ilustración 4
TENGA CUIDADO, MANTENGA SUS DEDOS LEJOS DEL MECANISMO DE BOMBEO (VEA “PUNTOS
DE PELLIZCO”, ILUSTRACIÓN 4). TOME LA PALANCA FIRMEMENTE CUANDO BOMBEE Y
CIÉRRELA PARA PREVENIR QUE SE DEVUELVA DE GOLPE Y PUEDA CAUSAR ALGUNA LESIÓN.
ADVERTENCIA: LOS PROYECTILES BB’S DE LA RESERVA SE
ALIMENTAN POR GRAVEDAD, LO QUE REQUIERE QUE LA BOCA ESTÉ ELEVADA.
NUNCA ASUMA QUE LA RESERVA NI LA RECÁMARA ESTÁN VACÍAS INCLUSO SI EL
RIFLE DE AIRE NO DISPARA NINGÚN PROYECTIL.
33
ES
OPERACIÓN
5. Cargando su Arma de Aire Comprimido
Llenando la reserve de proyectiles BB’s – La puerta
de carga está localizada en el lado izquierdo del recibidor.
Deslice la puerta para abrir y llene la reserva con
aproximadamente 75 proyectiles BB’s (Ilustración 5a). No
la sobrecargue ya que el sistema de alimentación puede no
operar apropiadamente.
CARGANDO PROYECTILES BB’s – Con la perilla hacia
atrás y los proyectiles BB’s en la reserva, ELEVE la boca del
rifle de aire entre 45 y 90 grados. (Ilustración 5e). Cuando
eleve la boca, asegúrese de que la mira
frontal esté apuntando hacia arriba, ya
que el rifle de aire no se va a alimentar
apropiadamente si se posiciona de lado
(Ilustración 5b). Un proyectil BB puede
ser visto en la punta magnética si mira
dentro del puerto de carga (Vea la Ilustración 5c).
Si un proyectil BB no se ve dentro de la punta magnética
cuando la boca está elevada, entonces sacuda el arma
ligeramente. Empuje la perilla completamente hacia adelante
para colocar los proyectiles BB’s en posición de disparo.
NOTA: No cargue más de un proyectil BB a la vez.
CARGANDO PELETS – Con la perilla hacia atrás y
la reserva sin proyectiles BB’s (Vea “PARA VACIAR
CARGADOR” PASO 6), baje la boca y cargue un pelet
hacia el puerto de carga, la parte sólida hacia adelante
(Ilustración 5d). Empuje la perilla completamente hacia
adelante que el pelet esté en la recámara en la posición
de disparo. NOTA: No cargue más de un pelet a la vez.
6. Descargando su rifle de aire
ilustración 5a
ilustración 5b
ilustración 5c
ilustración 5d
Descargando un Pelet - La punta magnética no extrae un pelet. Usted debe disparar
el pelet hacia un blanco seguro si está disponible. Si no hay un blanco seguro
disponible, abra la perilla, inserte una varilla de limpieza de .177 en la boca y empuje
el pelet hacia afuera del cañón. No permita que un pelet se caiga en la parte trasera
del puerto de carga y se atasque en el hueco de alimentación de proyectiles BB’s.
Para vaciar la RESERVA DE BB’s – Abra la perilla, abra la puerta de la reserva de
BB’s, arquee su mano sobre ella y vuelque el rifle de aire completamente hacia el lado
izquierdo. Sacuda el rifle de aire hasta que todos los proyectiles BB’s hayan salido.
Luego saque los BB’s del puerto de carga. (Ilustración 5c).
ADVERTENCIA: ESTE PRODUCTO CONTIENE PLOMO, UN QUÍMICO
CONOCIDO EN EL ESTADO DE CALIFORNIA POR CAUSAR CÁNCER Y DEFECTOS
DE NACIMIENTO (U OTROS PROBLEMAS REPRODUCTIVOS).
34
ES
OPERACIÓN
PRECAUCIÓN
SOLAMENTE UTILIZE PROYECTILES DE CALIBRE .177 (4,5 MM). NO INTENTE REUTILIZAR
PROYECTILES QUE YA SE DISPARARON O QUE ESTÁN DEFORMADOS. NO USE PERDIGONES,
DARDOS, BALERO DE BOLAS, U OTROS OBJETOS EXTRAÑOS PORQUE ELLOS LE PUEDEN CAUSAR
LESIONES A USTED O A ALGUIEN MÁS O PUEDEN DAÑAR Y/O ATASCAR EL ARMA DE AIRE.
7. Apunte hacia un Blanco Seguro
Siempre apunte su rifle de aire comprimido en una DIRECCIÓN SEGURA.
Siempre escoja cuidadosamente su blanco. Es mejor disparar al centro de un
blanco de papel el cual esté adherido a un soporte seguro. Se debe colgar una
colcha detrás del soporte del blanco para prevenir rebotes en caso de que no atine
al soporte. Piense sobre que golpearía si falla en darle al blanco.
EL RIFLE NXG™ APX™ tiene miras abiertas. Los rifles de aire comprimido con
este tipo de mira están correctamente apuntadas cuando la hoja del punto de mira
está ubicada exactamente en la muesca de la mira. El centro del blanco debe
parecer que descansa en la parte de arriba del frente de la mira (Ilustración 6).
ilustración 6
PRECAUCIÓN
SU SOPORTE DEBE DE SER INSPECCIONADO POR DESGASTE ANTES Y DESPUÉS DE CADA
USO. DESCONTINÚE SU USO SI LA SUPERFICIE DEL SOPORTE MUESTRA SEÑALES DE FALLA.
SIEMPRE PONGA EL SOPORTE EN UN LUGAR QUE SERÁ SEGURO SI EL SOPORTE FALLA.
DESCONTINÚE EL USO DEL SOPORTE SI EL PROYECTIL REBOTA.
35
OPERACIÓN
ES
8. Disparando su Arma de Aire Comprimido
Cuando esté completamente seguro que su rifle de aire comprimido está
apuntando a un blanco seguro y que usted está listo para disparar, ponga su rifle
de aire comprimido-“SIN SEGURO” (vea PASO 2. OPERANDO EL SEGURO).
Apriete el gatillo.
ADVERTENCIA: SI UN PROYECTIL NO DISPARA DESPUÉS DE
COMPLETAR LOS PASOS DE OPERACIÓN, EL ARMA DE AIRE PUEDE ESTAR
ATASCADA. Y UN PROYECTIL NO DISPARADO EN EL CAÑÓN PUEDE SER UNA
SITUACIÓN PELIGROSA. MANTENGA EL ARMA DE AIRE APUNTANDO A UNA
DIRECCIÓN SEGURA Y REPITA LOS PASOS DE OPERACIÓN. SI UN PROYECTIL
TODAVÍA NO SE DISPARA, HAGA LO SIGUIENTE:
1. Abra la perilla
2. Limpie el canon insertando una varilla de limpieza por la boca.
(Ilustración 5c)
3. Repita los pasos de operacion.
ADVERTENCIA: NUNCA ASUMA QUE PORQUE EL ARMA DE AIRE
NO DISPARA MÁS UN PROYECTIL Y/O EL CARGADOR SE HA QUITADO DE LA
MONTURA DEL AGARRADOR QUE EL PROYECTIL NO ESTÁ METIDO EN EL CAÑÓN.
SIEMPRE TRATE AL ARMA DE AIRE COMO SI ESTUVIERA CARGADA Y CON EL
MISMO RESPETO QUE TRATARÍA A UN ARMA DE FUEGO.
NOTA: Muchos factores afectan la función y velocidad del arma de aire,
incluyendo la marca del proyectile, lubricación, condición del cañón y la
temperatura.
PRECAUCIÓN
NO INTENTE REUSAR LOS BALINES DISPARADOS O LOS BALINES QUE ESTÁN DEFORMADOS.
LOS PROYECTILES TALES COMO LOS TIROS DE ACERO (BBS) Y LOS DARDOS PUEDEN
DAÑARSE POR CAUSA DE REBOTE Y PUEDEN INVALIDAR SU GARANTÍA.
ADVERTENCIA: NUNCA CARGUE SU RIFLE DE AIRE COMPRIMIDO
MIENTRAS ESTÉ AMARTILLADO Y/O MIENTRAS ESTÉ CARGADO. NUNCA ESCALE
NI BRINQUE CON UN ARMA DE AIRE MIENTRAS LA BOMBEA Y/O CARGA. ES
MEJOR AMARTILLAR EL RIFLE DE AIRE COMPRIMIDO SOLAMENTE ANTES DE
DISPARAR. BAJO NINGUNA CIRCUNSTANCIA DEBE DE CARGAR SU RIFLE DE
AIRE COMPRIMIDO AMARTILLADO Y CARGADO.
36
ES
OPERACIÓN
9. Ajustando las Miras
La mira trasera puede ser ajustada para contraviento
(horizontal) y elevación (vertical).
Configuración de elevación – Para elevar el punto de
impacto en el blanco, empuje el elevador de la mira hacia la
boca. Para bajar el punto de impacto en el blanco, empuje el
elevador de la mira hacia atrás, lejos de la boca. (Ilustración 7)
Configuración para contraviento - Afloje el tornillo
de contraviento “A” volteándolo en dirección contra las
manecillas de reloj (Vea Ilustración 8). Ajuste la mira trasera
hacia el lado derecho del rifle de aire para hacerlo disparar
hacia la derecha, o hacia el lado izquierdo del rifle de aire
para hacerlo disparar hacia la izquierda. Asegúrese de que el
tornillo de ajuste de contraviento esté de nuevo bien colocado
después de hacer los ajustes correspondientes.
Posición correcta para elevar
la mira
Elevador de
la mira
BAJAR
ELEVAR
ilustración 7
Tornillo “A”
ilustración 8
10. Solución de Problemas
BORRANDO UN ATASCO - ABRA EL PERNO, SI EL PERNO NO ES TOTALMENTE
CERRADO, NO INTENTAN CERRARLO HASTA DESPUÉS DE ABRIRLO TIRANDO
DE LA MANIJA DEL PERNO HASTA EL FINAL DETRÁS. EL RIFLE DE AIRE NO
ENCENDERÁ UN PROYECTIL CUANDO EL PERNO ESTÁ
1.) Abra el perno 2.) Borre el barril ejecutando la baqueta de fusil correcta del calibre
en el extremo del bozal y empuje el proyectil hacia fuera (Vea Ilustración 9). Tenga
cuidado de no dañar la extremidad del perno empujando la barra
Perilla
Boca
ilustración 9
37
OPERACIÓN
CUIDADO
ES
11. Mantenimiento, Limpieza y Almacenamiento
PRECAUCIÓN
ANTES DE CUALQUIER CUIDADO O MANTENIMIENTO, SIEMPRE ASEGÚRESE QUE SU ARMA
DE AIRE COMPRIMIDO ESTÉ “EN SEGURO” (ON SAFE) Y DESCARGADO. MANTÉNGALO
APUNTANDO HACIA UNA DIRECCIÓN SEGURA. ES MUY IMPORTANTE MANTENER
APROPIADAMENTE SU ARMA DE AIRE COMPRIMIDO.
NUNCA GUARDE UN ARMA DE AIRE COMPRIMIDO CARGADA O AMARTILLADA.
Mantenga el rifle de aire comprimido lejos de los niños y de los tiradores no
entrenados. Almacene las municiones separadas del rifle de aire comprimido para
mantenerlas lejos de los tiradores no entrenados. Proteja su rifle de aire comprimido
de la humedad y polvo; limpie el arma de aire comprimido y envuélvala en un
trapo liso y seco. Si va a guardar su arma de aire comprimido por un largo tiempo
asegúrese que el cañón esté protegido. Ésto se puede lograr poniendo en el agujero
una capa de Aceite RWS de Resortes y Cilindro (RWS Spring Cylinder Oil). Siempre
use un trapo suave y meta la varilla para limpiar desde el final de la recámara del
cañón del rifle de quiebre. Quite el aceite completamente antes del próximo uso.
RECUERDE: Siempre revise para ver si su arma de aire comprimido está cargada
cuando la agarre del lugar en donde la tiene guardada o de otra persona.
Con cuidado y las retinas de inspección su pistola de aires puede proveerle de
disfrute en muchas sesiones de disparo. Abuso, negligencia y exposición continua a
elementos va a impedir el buen funcionamiento de cualquier pistola de aire.
Su Rifle de Aire Comprimido NXG™ está diseñado para disparar solamente
balines de plomo de calibre .177. Recomendamos que use balines RWS debido a
su espléndida exactitud y uniformidad dimensional. El calibre correcto está claramente
sellado en el cañón cerca del bloque de la recámara o en el bloque de la recámara.
PRECAUCIÓN
NUNCA DEJE SU RIFLE DE AIRE BOMBEADO POR UN PERIODO DE TIEMPO PROLOGADO. ESTO
PODRÍA RESULTAR EN UN RETRASO DE TIEMPO DESDE QUE TIRA DEL GATILLO HASTA QUE
EL PROYECTIL ES REALMENTE DISPARADO DEL RIFLE DE AIRE. DEJAR EL RIFLE DE AIRE
BOMBEADO POR MÁS DE UNA HORA PUEDE RESULTAR EN UN DAÑO PERMANENTE A LA
VÁLVULA DE AIRE.
LOS ACEITES QUE CONTIENEN ÁCIDO O RESINA PUEDEN DAÑAR EL SELLO DE LA
RECÁMARA, EL SELLO DE COMPRESIÓN, Y POSIBLEMENTE EL ACABADO DE ARMA DE
AIRE COMPRIMIDO.
ADVERTENCIA: NO EMPUÑE O MUESTRE ESTE PRODUCTO EN
PÚBLICO – PUEDE CONFUNDIR A LAS PERSONAS Y PUEDE SER UN CRIMEN. LA
POLICÍA U OTROS PUEDEN PENSAR QUE ES UN ARMA DE FUEGO. NO CAMBIE LA
COLORACIÓN Y MARCAS PARA HACERLA VER MÁS COMO UN ARMA DE FUEGO.
ÉSO ES PELIGROSO Y PUEDE SER UN CRIMEN.
38
ES
OPERACIÓN
PARTES FUNCIONALES: Las partes funcionales (pistón y muelle principal) requieren muy poca
lubricación. Dos(2) gotas de Lubricante RWS Cámara de Aire (RWS Air Chamber Lube) cada 1000
disparos serán suficientes. Se aplica fácilmente a través del Puerto de la cámara de compresión con
una aguja aplicadora de 3 ½” (vea la ilustración 10).
CAÑÓN: Con el uso de día a día, se acomulará muy poco polvo o residuo en el alma del cañón. Ésto
se puede quitar usando balines de limpieza RWS. Nota:
Los balines de plomo RWS de alta calidad no solamente incrementan la precisión, ellos ayudan a
reducir el depósito de plomo. Durante períodos de uso regular, el alma del cañón se debe limpiar
periódicamente por medio de un tapón de fieltro o varilla de limpieza con trapeador de lana. Meta la
varilla de limpieza desde el final de la recámara.
SUPERFICIE: Las partes metálicas expuestas (mira, caja del cerrojo, cabezas de los tornillos,
capucha de mira, etc.) son el acabado de un arma y DEBEN de
limpiarse usando un trapo levemente engrasado después de usarse y prevenir la oxidación. Utilice
aceite suave y libre de ácido y aceite libre de resina. El aceite RWS de Resortes y Cilindro (RWS
Spring Cylinder Oil) es excelente para ésto.
ilustración 10
PALANCA DE BOMBEO
BISAGRA
FIELTRO
ACOLCHONADO
VARILLA DE
BOMBEO
PRECAUCIÓN
REVISE SI LOS TORNILLOS DE LA CULATA ESTÁN BIEN SOCADOS, ENTRE, DURANTE
Y DESPUÉS DE LA SESIÓN DE DISPARO. LOS TORNILLOS SUELTOS PUEDEN CAUSAR
LESIONES E INCLUSO LA MUERTE.
PRECAUCIÓN
LOS COMPONENTES DE SU ARMA DE AIRE COMPRIMIDO FUERON FABRICADOS
Y CONFECCIONADOS PARA PROPORCIONAR ÓPTIMAS FUNCIONES. CUALQUIER
MODIFICACIÓN O ALTERACIÓN PUEDE CAUSAR UN MALFUNCIONAMIENTO, INVALIDARÁ
SU GARANTÍA Y PUEDE HACER QUE SEA INSEGURO SU USO. CUALQUIER CAMBIO EN SU
FUNCIÓN (TALES COMO UNA FUERZA DE JALE BAJA DELGATILLO O UN RECORTAMIENTO
DE RECORRIDO DEL GATILLO), INDICA POSIBLES MODIFICACIONES, ALTERACIONES
Y/O USO. TALES ARMAS DE AIRE COMPRIMIDO DEBEN DE SER INSPECCIONADAS,
REEMPLAZADAS O APROPIADAMENTE REPARADAS POR SOLAMENTE EL PERSONAL
CALIFICADO DE UMAREX PARA ASEGURAR QUE SU FUNCIÓN NO HA SIDO AFECTADA.
ADVERTENCIA: UN ARMA DE AIRE COMPRIMIDO QUE NO SE MANEJE
APROPIADAMENTE PUEDE SER PELIGROSA. DEBE DE MANTENERSE SEGURA DEL
USO DE ALGUIEN HASTA QUE SE REPARE O DESTRUYA. NO TRATE DE DESARMAR
EL ARMA DE AIRE COMPRIMIDO. ES DIFÍCIL DE REENSAMBLAR Y EL DESAMBLAJE
Y REENSAMBLAJE INAPROPIADO PUEDE CAUSAR LESIONES O LA MUERTE.
39
CUIDADO
ES
12. Reparación/Servicio/Garantía
No regrese producto defectuoso o dañado al vendedor. Si su arma de aire
necesita reparación, llame a Umarex USA al (479) 646-4210 y pregunte por
el Departamento de Servicio o visite www.umarexusa.com. ¡NO INTENTE
DESARMARLA! Su arma de aire requiere herramientas y partes especiales
para repararla. Cualquier desarme o modificación no hecha por Umarex USA
invalidará la garantía.
40
GARANTÍA LIMITADA DE UN AÑO
Este producto está garantizado al consumidor minorista por un (1) año de la
fecha de compra por defectos de material y confección y no es transferible.
LO QUE TIENE COBERTURA
Partes reemplazables y mano de obra.
LO QUE NO TIENE COBERTURA
Los cargos de envío a Umarex USA por producto defectuoso y daños causados
por abuso o incumplimiento en realizar el mantenimiento normal y también
cualquier otro cargo. Daños resultantes o cargos incidentales, incluyendo daños
a la propiedad. Algunos estados no permiten la exclusión o limitación de los
daños incidentales o resultantes, por lo tanto, las limitaciones o exclusiones no
se pueden aplicar a usted.
RECLAMOS DE GARANTÍAS
Los Reclamos de Garantías y Reparaciones son solamente para los clientes de
Estados Unidos y Canadá. Llame a Umarex USA (479) 646-4210 y pregunte por
el Departamento de Servicio. Si se determina que es necesaria una devolución,
se le dará un Número de Devolución Autorizado. Escriba este número en
negritas en la caja y devuelva el producto prepagado a Umarex USA (a los
clientes canadienses se les proporcionará una dirección de una Instalación
Canadiense de Reparaciones autorizada). Se debe incluir en el paquete
su nombre, dirección, número de teléfono y una nota explicando el defecto
encontrado. Para realizar una devolución debe traer la copia de la factura
fechada original de caja. Clientes de EEUU, incluyan un cheque por pagar a
Umarex USA por la cantidad que les proporcionó el departamento de servicios
de Umarex USA para cubrir los gastos de envío y manejo.
GARANTÍAS IMPLICADAS
Cualquier garantía implicada incluyendo las garantías implicadas de
comerciabilidad y adaptabilidad por cualquier propósito, están limitadas en
duración de un (1) año después de la fecha de compra. ALGUNOS ESTADOS
NO PERMITEN LIMITACIONES EN CUANTO A LA DURACIÓN DE UNA
GARANTÍA IMPLICADA, POR LO TANTO, LAS LIMITACIONES ANTERIORES
NO SE PUEDEN APLICAR A USTED. A LA MEDIDA QUE CUALQUIER
ESTIPULACIÓN DE ESTA GARANTÍA ESTÉ PROHIBIDA POR LEY FEDERAL,
ESTATAL O MUNICIPAL LA CUAL NO SE PUEDE INVALIDAR, NO SERÁ
APLICABLE. ESTA GARANTÍA LE DA DERECHOS ESPECÍFICOS Y USTED
PUEDE TAMBIÉN TENER OTROS DERECHOS QUE VARÍAN DE ESTADO A
ESTADO Y DE PAÍS A PAÍS.
PARA VALIDAR ESTA GARANTÍA – Envíe la tarjeta de registro durante los
primeros 30 días a: Umarex USA, 7700 Chad Colley Boulevard, Fort Smith,
Arkansas 72916 o Regístrese en línea a www.UmarexUSA.com.
NOTES
ES
s
s
o
e
or
,
L,
41
NOTES
NXG™ APX™ Specifications
Multi-Pump
Action
Pneumatic
Caliber /
Ammunition
LOP
Trigger
Weight
.177 Cal. (4.5 mm)
Lead Pellet
14.25" (36.2 cm)
3.5 lbs. (1.6 kg)
3.4 lbs. (1.5 kg)
Caractéristiques du NXG™ APX™
Multi-Pump
Action
Pneumatic
4.5 mm (.177 Cal.)
Calibre /
Projectiles de
Projectiles
Plomb
Distance
36.2 cm (14.25")
détente/crosse
Détente
Poids
1.6 kg (3.5 lbs.)
1.5 kg (3.4 lbs.)
Sights
Overall Length
Barrel Length
Barrel
Safety
Velocity
Danger Distance
Mires
Longueur
Longueur du
canon
Canon
Sûreté
Vélocité
Distance
Dangereuse
Especificaciones de NXG™ APX™
Acción
Calibre /
Munición
Longitud de
tracción
Gatillo
Peso
Multi-Pump
Pneumatic
4.5 mm (.177 Cal.)
Proyectiles de
plomo
36.2 cm (14.25”)
1.6 kg (3.5 lbs.)
1.5 kg (3.4 lbs.)
Miras
Longitud
Longitud del
cañon
Cañon
Seguridad
Vélocidad
Distancia de
Peligro
Blade Front, Adj
Rear
39" (99cm)
20" (51cm)
Rifled
Automatic
800 fps w/alloy
525 yds (480 m)
Blade Front, Adj
Rear
99 cm (39")
51 cm (20")
Rayé
Automatique
245 mps w/alloy
480 m (525 yds)
Blade Front, Adj
Rear
99.2 cm (39.1”)
51 cm (20”)
Único
Automático
245 mps w/lead
480 m (525 yds)
7 (4,5 m
vélocité
i
cro
.17
7 (4 , 5 mm)
e té
a ut oma t
stock
aut
i
qu e
800 fps
syn t hét
que
sse
or STEEL BB
m)
sûr
PELLET
.17
omatic
can
on rayé
barrel
This OWNER'S OPERATION MANUAL should always accompany the airgun and be
transferred with it upon change of ownership or when presented to another person.
Ce manuel d’UTILISATION DU PROPRIÉTAIRE devrait toujours accompagner l’arme
à air et être donné avec celle-ci lorsqu’il y a changement de propriétaire ou lors de
l’utilisation par une autre personne.
Este MANUAL DE OPERACIONES DEL DUEÑO siempre debe acompañar a la pistola de
aire y transferirlo con ella si se cambia el dueño o cuando se le presenta a otra persona.
We reserve the right to make color and design changes and technical improvements.
No responsibility is accepted for printing errors or incorrect information.
Sauf modifications de la couleur et du design ainsi que des améliorations techniques, erreurs d’impression et erreur.
Toutes les données sont fournies sans garantie.
Nos reservamos el derecho para realizar cambios al color y diseño y mejoras técnicas.
No se acepta responsabilidad por errores de impresión o información incorrecta.
© UMAREX USA
Distributed by / Distribué par:
UMAREX USA, INC.
© 2014
7700 Chad Colley Boulevard
Fort Smith, AR 72916
www.UmarexUSA.com
07R14