1
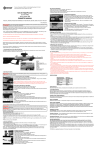
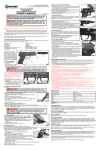
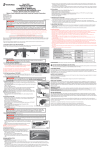
ADVERTENCIA:
Nunca parta de la base de que, debido a que el rifle de aire suave
ya no dispara una munición o se ha quitado el cargador del marco de la cacha, no hay una
munición alojada en el cañón. Siempre trate el rifle de aire suave como si estuviera cargado
y con el mismo respeto que le tendría a un arma de fuego.
Modelo Stinger R36
Rifle de aire suave
Municiones de plástico de 6 mm
MANUAL DEL PROPIETARIO
LEA TODAS LAS INSTRUCCIONES Y ADVERTENCIAS DE ESTE
Instrucciones en inglés incluidas del otro lado.
Distribuido por
Crosman Corporation
Routes 5 & 20
P.O. Box 308
E. Bloomfield, NY 14443
www.crosman.com
1-800-7AIRGUN
El uso inapropiado o descuidado puede causar lesiones graves,
en particular a los ojos. Puede ser peligroso hasta a 91.44 metros (100 yardas).
USTED Y LAS DEMÁS PERSONAS DEBEN USAR SIEMPRE LENTES DE TIRO PARA PROTEGER SUS
OJOS. LEA TODAS LAS INSTRUCCIONES ANTES DE USARLAS.
EL COMPRADOR Y EL USUARIO TIENEN EL DEBER DE OBEDECER TODAS LAS LEYES RELATIVAS AL
USO Y PROPIEDAD DE ESTE RIFLE DE AIRE SUAVE.
ESTE RIFLE DE AIRE SUAVE ESTÁ HECHO PARA SER USADA POR PERSONAS DE 16 AÑOS DE
EDAD O MAYORES.
Por favor lea por completo este manual del usuario. Trate este rifle de aire suave con el mismo
respeto que le tendría a un arma de fuego. Siempre siga cuidadosamente las instrucciones de
seguridad que se encuentran en este manual del propietario y consérvelo en lugar seguro para
utilizarlo en el futuro.
Si tiene preguntas sobre su nuevo rifle de aire suave, comuníquese con Servicio al cliente de
Crosman al 1-800-724-7486, al 585-657-6161 o www.crosman.com.
1. Aprender las partes de
su nuevo rifle de aire
suave.
Aprenderse los nombres de
las partes de su nuevo rifle
de aire suave le ayudará a
entender el manual del
propietario. Use este manual
para aumentar su disfrute de
este rifle de aire suave.
2. Operación del seguro
2.1 Para activar el seguro
del rifle de aire suave ("ON
SAFE"):
• Encuentre el seguro
del lado izquierdo del
receptor. (Fig. 2)
• Empuje la palanca
hacia arriba hasta que
ADVERTENCIA:
Manija de amartillado
Mira de
trasera
Riel
Mira
delantera
Culata
Seguro
Compensador
removible
Riel
Liberador
del
cargador Gatillo
Liberador
de la culata
Fig 1
Cargador
Mantenga la pistola de aire en la posición "ON SAFE" (Seguro
activado) hasta que esté totalmente listo para disparar. Entonces empuje el seguro a la
posición "OFF SAFE" (Seguro desactivado).
la escuche entrar en su sitio con un clic y que esté alineada con
la "S" de "ON SAFE" (Seguro activado).
Como todos los dispositivos mecánicos, el seguro de los rifles de aire
suaves puede fallar. Incluso con el seguro activado ("ON SAFE"),
debe seguir manipulando con seguridad el rifle de aire suave. NUNCA
apunte el rifle de aire suave a una persona. NUNCA apunte con el rifle
de aire suave a nada a lo que no tenga intención de dispararle.
Para usar la mira accesoria
• Para instalar la mira, coloque el extremo delantero de la mira sobre las ranuras de la corredera de
la mira directamente detrás de la mira delantera estándar. Baje la parte posterior de la mira
accesoria dentro de las ranuras que están a la mitad de la corredera de la mira.
• Levante el selector simulado y deslice la mira hacia atrás hasta que se bloquee en la posición
deseada.
• Para mover la mira hacia adelante o hacia atrás, levante el selector simulado y deslice la mira en
cualquier dirección.
• Mirando por la mira, alinee el blanco en el centro de la retícula
• Para quitar la mira accesoria, levante el selector y deslice la mira completamente hacia la parte
delantera de la corredera de la mira, justo detrás de la mira estándar. Levante y quite la mira.
Para usar la mira estándar
• Quite la mira accesoria siguiendo las direcciones que aparecen anteriormente.
• El rifle de aire suave está correctamente apuntado cuando la diana parece descansar encima de la
mira delantera.
8. Revisión de seguridad
• Nunca apunte el rifle de aire suave a una persona. Nunca apunte con el rifle de aire suave a
nada a lo que no tenga intención de dispararle.
• Siempre trate el rifle de aire suave como si estuviera cargado y con el mismo respeto que le
tendría a un arma de fuego.
• Apunte siempre en una DIRECCIÓN SEGURA. Mantenga siempre el cañón del rifle de aire
suave apuntado en DIRECCIÓN SEGURA.
• Mantenga siempre el rifle de aire suave en la posición "ON SAFE" (Seguro activado) hasta
que esté totalmente listo para disparar en una DIRECCIÓN SEGURA.
• Siempre compruebe que el rifle de aire suave tenga el seguro activado ("ON SAFE") y esté
descargado al recibirlo de otra persona o al sacarlo después de estar guardado.
• Mantenga siempre el dedo apartado del gatillo y fuera del guardamonte hasta que esté listo
para disparar.
• Usted y las demás personas deben siempre usar anteojos de tiro para proteger sus ojos.
• Si sus lentes de lectura o para ver no son de seguridad, cuide de usar anteojos de tiro
encima de sus lentes normales.
• Use solamente municiones de 6 mm.
• No dispare a superficies duras o a la superficie del agua. Las municiones pueden rebotar y
golpear a alguien o algo que usted no tenía intención de golpear. Si las municiones llegaran
a golpear una superficie dura, no reutilice tales municiones, ya que podrían causarle daños
a su rifle de aire suave.
• Reemplace el respaldo si se desgasta. Coloque el respaldo en un lugar que sea seguro en
caso de que falle el respaldo.
• No intente desarmar el rifle de aire suave ni lo manipule indebidamente. Llame al Servicio al
cliente de Crosman Corporation para que lo repare. El uso de centros de reparaciones no
autorizados o la modificación de las funciones del rifle de aire suave en cualquier forma
puede ser inseguro y anulará la garantía.
• No guarde el rifle de aire suave cargado. Asegúrese de que TODAS las municiones se hayan
descargado del rifle de aire suave.
• Siempre almacene este rifle de aire suave en un sitio seguro.
Repetidor de aire
de resorte
Calibre/Munición
Municiones de calibre
.24 (6 mm)
Peso
2
Para ensamblar la culata
3.2 Instalación y uso de la linterna
• Afloje el tornillo de ensamblaje de la linterna
• Coloque la linterna en la corredera en la posición
deseada y apriete el tornillo de ensamblaje.
• Para encender la linterna, empuje el botón de la parte trasera de la linterna.
• Para apagar la linterna, empuje de nuevo el botón de la parte trasera de la linterna.
Mecanismo/Acción
Cargador
3. Instalación y extracción de accesorios
Antes de instalar o extraer los accesorios, asegúrese de que su rifle esté con el seguro activado ("ON
SAFE") (vea la sección 2.1) y apuntado en una DIRECCIÓN SEGURA.
ADVERTENCIA:
Guía de
municiones
ESPECIFICACIONES
“S” para seguro activado
“ON SAFE”
2.2 Para desactivar el seguro del rifle de aire suave ("OFF SAFE"):
“E” or “F” para
• Encuentre el seguro del lado izquierdo del receptor. (Fig. 2)
seguro desactivado
• Empuje la palanca hacia abajo para que esté apuntando a la
“OFF SAFE”
Fig
letra "E" o a la letra "F".
• El rifle de aire suave tiene el seguro desactivado ("OFF SAFE") y
está listo para disparar cuando escuche que la palanca entra en su sitio con un clic y apunta a
cualquiera de estas letras.
• NOTA- Este rifle de aire suave dispara en un solo modo. Las letras "F" y "E" no indican los
distintos modos de disparo.
3.1 Instalación y extracción de la culata
• Para instalarla, alinee la culata con las ranuras en la
parte posterior del rifle. (Fig.3) Con la culata en esta
posición, empújela hacia abajo hasta que quede
bloqueada en su sitio.
• Para quitarla, tire del botón Liberador de la culata hacia
la parte posterior de la misma. Empuje hacia arriba la
culata hasta que salga de la corredera.
Cargue las
municiones
aquí
Mantenga
hacia
atrás
cuando
esté
haciendo
la carga
6. Apuntar y disparar con seguridad
Fig 4
• Usted y las demás personas deben siempre usar anteojos de tiro para
proteger sus ojos.
• Siempre apunte el rifle de aire suave en una DIRECCIÓN SEGURA Cuando esté seguro de su
blanco y respaldo, y no haya gente en el área alrededor del blanco, desactive el seguro del rifle de
aire ("OFF SAFE"). (vea el Paso 2B)
• No dispare a superficies duras o a la superficie del agua. Las
municiones de plástico pueden rebotar y golpear a alguien o algo
que usted no tenía intención de golpear. Si las municiones de
plástico llegaran a golpear una superficie dura, NO reutilice tales
municiones de plástico, ya que podrían causarle daños a su rifle
de aire suave.
• Su rifle de aire suave está diseñado para tiro al blanco y es
adecuado para usarlo bajo techo o al aire libre. Recuerde
siempre colocar su blanco con cuidado. PIENSE en lo que puede
Manija de amarttillado Fig 5
golpear si no atina al blanco.
• Cuando esté seguro de su blanco y respaldo, y no haya gente en
el área alrededor del blanco, desactive el seguro del rifle de aire
suave ("OFF SAFE") (vea la sección 2.2B) y tire del gatillo para disparar.
MANUAL ANTES DE USAR ESTE RIFLE DE AIRE
ADVERTENCIA:
5. Amartillado del rifle
• Asegúrese de que el seguro del rifle de aire suave esté activado ("ON
SAFE"). (consulte el Paso 2.1)
• Apunte el rifle de aire suave en una DIRECCIÓN SEGURA
• Cerciórese de que el cargador esté cargado e instalado en el rifle.
• Encuentre la palanca de amartillado en el lado izquierdo del rifle.
• Tire de la palanca hacia atrás hasta que escuche un clic. (Fig. 5)
• Suelte la palanca.
• El rifle de aire suave está ahora amartillado y listo para disparar.
NOTA: Debe amartillar el rifle de aire suave antes de todos y cada uno
de los disparos.
Longitud Total
Miras
Delantera:De hoja
Trasera: De mirilla
Mira accesoria:
De retícula
Longitud del cañón
31.6 cm. (12.44 pulgadas)
1.02 Kg. (2.25 lbs)
Material del cañón
Aluminio de precisión
71.756 cm. (28.25
pulgadas)
Seguro
Palanca
Velocidad
hasta 79.25 m/s (260 fps)
Hasta 20 municiones
• La linterna de LED usa tres baterías de celda de litio tipo botón de 1.5 V (AG13).
DESEMPEÑO
Muchos factores afectan la velocidad, incluida la marca del proyectil, el tipo de proyectil y las
condiciones del cañón.
SERVICIO DE REPARACIONES
Si su rifle de aire suave necesita una reparación, le recomendamos que llame a Servicio al cliente de
Crosman Corporation al
1-800-724-7486 o 585-657-6161 o visite nuestro sitio Web en www.crosman.com. (Los clientes
internacionales deben ponerse en contacto con su distribuidor.) ¡NO INTENTE DESARMARLO! El rifle
de aire suave requiere de herramientas y accesorios especiales para repararlo. Si lo desarma,
probablemente no podrá volver a armarlo correctamente. Crosman no asume ninguna responsabilidad
de garantía bajo tales circunstancias.
GARANTÍA LIMITADA POR 30 DÍAS
Fig 3
Use solamente municiones calibre .24 en este rifle de aire suave.
El uso de cualquier otro tipo de munición puede causarle lesiones o dañar el rifle de aire
suave.
4. Carga de las municiones de plástico
• Asegúrese de que el seguro del rifle de aire suave esté activado ("ON SAFE"). (consulte el Paso 2.1)
• Apunte el rifle de aire suave en una DIRECCIÓN SEGURA
• Encuentre la palanca liberadora del cargador delante del guardamonte, detrás del cargador.
• Empuje la palanca hacia adelante al tiempo que tira del cargador hacia abajo.
• Encuentre la guía de municiones en la parte lateral del cargador. Empuje la guía hacia abajo
completamente hasta que se bloquee. (Fig. 4)
• Manteniendo el cargador verticalmente con el agujero de carga hacia arriba, oprima y mantenga
así el botón de liberación que está en la parte superior y cargue hasta 20 municiones de plástico
permitiendo que entren rodando al cargador. (Fig. 4)
• Con el agujero de carga mirando hacia la boca del cañón, introduzca el cargador lleno de nuevo
en el rifle de aire suave hasta que escuche un clic que indica que el cargador está firmemente
bloqueado en su sitio.
• Oprima el botón de la parte inferior del cargador para permitir que las municiones se deslicen a su
posición correcta.
Este producto está garantizado para el comprador al menudeo durante 30 días a partir de la fecha de
compra al menudeo contra defectos en materiales y mano de obra, y es transferible.
QUÉ ESTÁ CUBIERTO
Refacciones y mano de obra. Se carga el transporte del producto reparado al consumidor.
QUÉ NO ESTÁ CUBIERTO
Cargos de transporte a Crosman del producto defectuoso. Los daños ocasionados por el abuso,
modificación o negligencia en la realización del mantenimiento normal, consulte el paso 7. Cualquier
otro gasto. DAÑOS CONSECUENCIALES O INCIDENTALES, O GASTOS INCIDENTALES INCLUIDOS
LOS DE DAÑOS A LA PROPIEDAD. ALGUNOS ESTADOS NO PERMITEN LA EXCLUSIÓN O
LIMITACIÓN DE DAÑOS INCIDENTALES O CONSECUENCIALES, DE MODO QUE ES POSIBLE QUE
LA LIMITACIÓN ANTES SEÑALADA NO SE LE APLIQUE A USTED.
RECLAMACIONES POR GARANTÍA
Clientes de los EE.UU.: Adjunte al producto su nombre, dirección, descripción del problema, número
telefónico y una copia del recibo de ventas. Empaque y devuelva a Crosman Corporation, Rts. 5 & 20,
E. Bloomfield, NY 14443.
Clientes canadienses: Siga los procedimientos de empaque indicados antes y envíelo a Crosman Parts
& Service Depot, 611 Neal Drive, Peterborough, Ontario, K9J 6X7 Canada.
Clientes internacionales: devuelva el producto a su distribuidor más cercano. Si no conoce a su
distribuidor, llame al 585-657-6161 y pida hablar con nuestro departamento internacional (International
Department) para obtener ayuda.
GARANTÍAS IMPLÍCITAS
CUALQUIER GARANTÍA IMPLÍCITA, INCLUIDAS LAS GARANTÍAS IMPLÍCITAS DE
COMERCIABILIDAD E IDONEIDAD PARA UN PROPÓSITO EN PARTICULAR TIENEN UNA
DURACIÓN LIMITADA DE UN AÑO A PARTIR DE LA FECHA DE LA COMPRA AL MENUDEO.
ALGUNOS ESTADOS NO PERMITEN LIMITACIONES SOBRE LA DURACIÓN DE UNA GARANTÍA
IMPLÍCITA, DE MODO QUE ES POSIBLE QUE LAS LIMITACIONES ANTES INDICADAS NO SE LE
APLIQUEN A USTED.
En la medida en que cualquier disposición de esta garantía esté prohibida por leyes federales, estatales
o municipales que no puedan invalidarse, no será aplicable. Esta garantía le otorga derechos legales
concretos y es posible que usted tenga también otros derechos que varían según el estado o el país.
5. Cocking the gun
• Make sure the soft air gun is "ON SAFE" (See Step 2.1).
• Point the soft air gun in a SAFE DIRECTION.
• Make sure the magazine is loaded and installed in the gun.
• Locate the cocking handle on the left side of the gun.
• Pull the handle back until you hear it click. (Fig. 5)
• Release the handle.
• The soft air gun is now cocked and ready to fire.
Model Stinger R36
Soft Air Rifle
6 mm Plastic BB
Hold
back
while
loading
BB
guide
NOTE: You must cock the soft air gun before each and every shot.
6. Aiming and Firing Safely
• You and others with you should always wear shooting glasses to
Fig 4
protect your eyes.
• Always point your soft air gun in a SAFE DIRECTION. When you are
sure of your target and backstop and the area around the target is clear, take "OFF SAFE" (See Step
2.2).
• Do not shoot at hard surfaces or at the surface of water. The plastic BBs may bounce off or
ricochet and hit someone or something you had not intended to hit. If the plastic BBs should
happen to hit a hard surface, DO NOT re-use those plastic BBs because they could cause possible
damage to your soft air gun.
• Your soft air gun is designed for target shooting and is suited for both indoor and outdoor use.
Always remember to place your target carefully. THINK about what you will hit if you miss the
target.
• When you are sure of your target and backstop, and the area
around the target is clear, take the soft air gun "OFF SAFE" (See
Section 2.2) and pull the trigger to fire.
OWNER'S MANUAL
READ ALL INSTRUCTIONS AND WARNINGS IN THIS
MANUAL BEFORE USING THIS SOFT AIR GUN
Instructions in Spanish included on reverse side.
Distributed by
Crosman Corporation
Routes 5 & 20,
P.O. Box 308
E. Bloomfield, NY 14443
www.crosman.com
1-800-7AIRGUN
Load
plastic
BBs
here
SASR36-515
WARNING:
This is not a toy. Adult supervision required. Misuse or careless use
may cause serious injury, particularly to the eye. May be dangerous up to 100 yards
(91.44 meters).
YOU AND OTHERS WITH YOU SHOULD ALWAYS WEAR SHOOTING GLASSES TO PROTECT YOUR EYES.
To use the Accessory Sight
• To install the sight, place the front end of the sight over the
grooves in the sight rail directly behind the standard front sight.
Lower the back of the accessory sight into the groves in the
Fig
middle of the sight rail.
Cocking lever
• Lift the mock dial and slide the sight back until it locks in the
desired position.
• To move the sight forward or backward, pull up on the mock dial and slide the sight in either
direction.
• Looking through the sight, align the target in the center of the cross hairs
• To remove the accessory sight, lift the dial and slide the sight all the way to the front of the sight
rail, just behind the standard sight. Pull the sight up and off.
5
READ ALL INSTRUCTIONS BEFORE USING.
BUYER AND USER HAVE THE DUTY TO OBEY ALL LAWS ABOUT THE USE AND OWNERSHIP OF THIS SOFT AIR GUN.
THIS SOFT AIR GUN IS INTENDED FOR USE BY THOSE 16 YEARS OF AGE OR OLDER.
Please read this owner's manual completely. Remember to treat this soft air gun with the same
respect you would a firearm. Always carefully follow the safety instructions found in this owner's
manual and keep this manual in a safe place for future use.
7. Maintaining Your Soft Air Gun
• DO NOT MODIFY OR ALTER YOUR SOFT AIR GUN. Tampering with the soft air gun or attempts
to change the soft air gun in any way may make it unsafe to use and will void the warranty.
• If you drop your soft air gun, visually check to see that it works properly before you use it again. If
anything seems changed, like a shorter or weaker trigger pull, this may indicate parts are worn or
broken. Call Customer Service at Crosman for assistance before using your soft air gun again.
If you have any questions regarding your new soft air gun, please contact Crosman Customer
Service at: 1-800-724-7486, 585-657-6161 or www.crosman.com.
1. Learning the Parts of
Your New Soft Air Gun.
Learning the names of the
parts of your new soft air
gun will help you to
understand your owner's
manual. Use this manual to
increase your enjoyment of
this soft air gun.
Cocking handle
Rail
Rear sight
Front
sight
Removable
Compensator
Stock
Safety
Rail
Stock release
2. Operating the Safety
2.1 To Put the Soft Air Gun
"ON SAFE":
• Locate the safety on
Magazine
release Trigger
Fig 1
Magazine
WARNING:
Keep the soft air gun in the "ON SAFE" position until you are actually
ready to shoot. Then turn the safety to the "OFF SAFE" position.
the left side of the receiver. (Fig. 2)
• Push the lever up until you hear it click into place and it is lined
up with the "S" for "ON SAFE".
“S” for “ON SAFE”
Like all mechanical devices, a soft air gun safety can fail. Even when
the safety is "ON SAFE", you should continue to handle the soft air
gun safely. NEVER point the soft air gun at any person. NEVER point
the soft air gun at anything you do not intend to shoot
“E”or “F”for
“OFF SAFE”
Fig 2
2.2 To take the Soft Air Gun "OFF SAFE":
• Locate the safety on the left side of the receiver. (Fig. 2)
• Push the lever down so it is either pointing to the letter "E" or the letter "F".
• The soft air gun is "OFF SAFE" and ready to fire when you hear the lever click into place and it is
pointing to either of these letters.
NOTE- This soft air gun shoots in one mode. The letters "F"
and "E" do not indicate the different modes of firing.
To assemble stock:
3. Installing and removing accessories
Before installing or removing any accessories, make sure your
gun is "ON SAFE" (see section 2.1) and pointed in a SAFE
DIRECTION.
3.1 Installing and Removing the stock
• To install, line stock up with grooves at the back of the
Fig
rifle. (Fig. 3) With the stock in this position push the
stock down until it locks into place.
• To remove the stock, pull the stock release button toward the back of the stock. Push the stock
upward until it has cleared the rail.
8. Reviewing Safety
• Do not ever point the soft air gun at any person. Do not ever point the soft air gun at anything you
do not intend to shoot.
• Always treat the soft air gun as though it is loaded and with the same respect you would a firearm.
• Always aim in a SAFE DIRECTION. Always keep the muzzle of the soft air gun pointed in a SAFE
DIRECTION.
• Always keep the soft air gun "ON SAFE" until you are ready to shoot in a SAFE DIRECTION.
• Always check to see if the soft air gun is "ON SAFE" and unloaded when getting it from another
person or from storage.
• Always keep your finger off the trigger and out of the trigger guard until ready to shoot.
• You and others with you should always wear shooting glasses to protect your eyes.
• If your reading or prescription glasses are not safety glasses, make sure you wear shooting
glasses over your regular glasses.
• Use 6 mm plastic BBs only.
• Do not shoot at hard surfaces or at the surface of water. The plastic BBs may bounce off or
ricochet and hit someone or something you had not intended to hit. If the plastic BBs should
happen to hit a hard surface, do not reuse those plastic BBs because they could cause possible
damage to your soft air gun.
• Replace the backstop if it becomes worn. Place the backstop in a location that will be safe should
the backstop fail.
• Do not attempt to disassemble or tamper with your soft air gun. Call Customer Service at Crosman
Corporation for repair. Using unauthorized repair centers or modifying the function for your soft air
gun in any way may be unsafe and will void your warranty.
• Do not put the soft air gun away loaded. Make sure ALL of the plastic BBs are unloaded from the
soft air gun.
• Always store this soft air gun in a secure location.
SPECIFICATIONS
Mechanism/Action
Spring Air Repeater
Sights
Front: Blade
Rear: Peep
Caliber/Ammunition
6mm plastic BBs
Accessory Sight:
Cross hair
Magazine
Up to 20 BBs
Barrel Length
12.44 in (31.6 cm)
Weight
2.25 lbs (1.02 kg)
Barrel Material
Precision aluminum
Overall Length
Safety
28 inches (71.12 cm)
Velocity
Lever
up to 260 fps (79.25 m/s)
• LED flashlight takes three 1.5V (AG13) button cell lithium batteries.
PERFORMANCE: Many factors can affect velocity, including brand of projectile, type of projectile and
barrel condition.
3
3.2 Installing and using the flashlight
• Loosen the mounting screw on the mount.
• Place the flashlight on the rail in the desired position and tighten the mounting screw.
• To turn the flashlight on, push the button on the back of the flashlight.
WARNING:
Use 6 mm BBs only in this soft air gun. Use of any other ammunition
can cause injury to you or damage to the soft air gun.
• To turn the flashlight off, push the button on the back of the flashlight again.
4. Loading Plastic BBs
• Make sure the soft air gun is "ON SAFE" (See Step 2.1).
• Point the soft air gun in a SAFE DIRECTION.
• Locate the magazine release lever in front of the trigger guard, behind the magazine.
• Press lever forward toward the magazine while pulling the magazine down.
• Locate the BB guide on the side of the magazine. Pull guide down all the way until it locks in to
place (Fig. 4).
• Holding the magazine vertically with the loading hole up, press and hold the release button at the
top and load up to 20 plastic BBs, allowing the plastic BBs to roll down into the magazine. (Fig. 4)
• With the loading hole facing towards the muzzle, insert the loaded magazine back into the soft air
gun until you hear it click, indicating that the magazine is securely locked into place.
• Press the button on bottom of the magazine to allow the BBs to slide up into position.
WARNING:
To Use the Standard Sight
• Remove the accessory sight, following the directions above.
• The soft air gun is correctly aimed when the bulls-eye appears to rest on the top of the front sight.
Never assume that because the soft air gun no longer fires a BB
and/or the magazine is removed from the grip frame, that a BB is not lodged in the
barrel. Always treat the soft air gun as though it is loaded and with the same respect
you would a firearm.
REPAIR SERVICE
If your soft air gun needs repair, we recommend that you call Crosman Corporation Customer service at
1-800-724-7486 or 585-657-6161. (International customers should contact their distributor.) DO NOT
ATTEMPT TO DISASSEMBLE IT! Your soft air gun requires special tools and fixtures to repair it. If you
take it apart you probably will not be able to reassemble it correctly. Crosman assumes no warranty
responsibility under such circumstances.
LIMITED 30 DAY WARRANTY
This product is warranted to the retail consumer for 30 days from date of retail purchase against defects
in material and workmanship and is transferable.
WHAT IS COVERED
Replacement parts and labor. Transportation charges to consumer for repaired product.
WHAT IS NOT COVERED
Transportation charges to Crosman for defective product. Damages caused by abuse, modification or
failure to perform normal maintenance - see step 7. Any other expense. CONSEQUENTIAL
DAMAGES, INCIDENTAL DAMAGES, OR INCIDENTAL EXPENSES, INCLUDING DAMAGE TO
PROPERTY. SOME STATES DO NOT ALLOW THE EXCLUSION OR LIMITATION OF INCIDENTAL OR
CONSEQUENTIAL DAMAGES, SO THE ABOVE LIMITATION OR EXCLUSION MAY NOT APPLY TO
YOU.
WARRANTY CLAIMS
USA Customers: Attach your name, address, description of problem, phone number and copy of sales
receipt to product. Package and return to Crosman Corporation, Rts. 5 & 20, E. Bloomfield, NY 14443.
Canadian Customers: Follow packaging procedures above and send to Crosman Parts & Service Depot,
611 Neal Drive, Peterborough, Ontario, K9J 6X7 Canada.
International Customers: Please return product to your nearest distributor. If you do not know your
distributor, please call 585-657-6161 and ask for our International Department for assistance.
IMPLIED WARRANTIES
ANY IMPLIED WARRANTIES, INCLUDING THE IMPLIED WARRANTIES OF MERCHANTABILITY AND
FITNESS FOR A PARTICULAR PURPOSE, ARE LIMITED IN DURATION TO 30 DAYS FROM DATE
OF RETAIL PURCHASE. SOME STATES DO NOT ALLOW LIMITATIONS ON HOW LONG AN IMPLIED
WARRANTY LASTS, SO THE ABOVE LIMITATIONS MAY NOT APPLY TO YOU.
To the extent any provision of this warranty is prohibited by federal, state, or municipal law which cannot
be preempted, it shall not be applicable. This warranty gives you specific legal rights, and you may also
have other rights which vary from state to state.
CROSMAN is a registered trademark of Crosman Corporation in the United States.