1
Z-12048
Paralume™
Rev 3 15/07/2007
“RL” Plaster Frame Installation Instructions
Important Safeguards:
WARNING – When using electrical equipment, basic safety precautions should always be used including the following:
This product must be installed in accordance with the applicable installation code by a person familiar with the construction and
operation of the product and the hazards involved.
READ AND FOLLOW ALL SAFETY INSTRUCTIONS
Hg
Mark means lamp contains mercury.
Follow disposal laws.
See www.lamprecycle.org
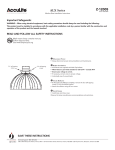
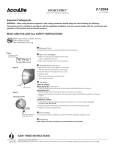
Figure 1
❶ Disconnect Power
Frame Supports
(from building
structure)
• Always disconnect power during installation and maintenance.
➋
Install frame See Figure 1
• Attach frame securely to the building structure
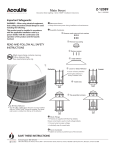
Figure 2
Do not attach the
lens assembly
at this point
①
➁
➂
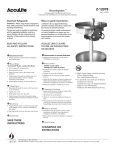
❸ Assemble Luminaire See Figure 2
➃
NOTE:
Paralume™ luminaires are shipped disassembled to prevent breakage during
shipping and installation. Follow this assembly sequence carefully.
• Attach the ballast assembly ① to the side of the housing. Use the hinges ➁ and
wing nut ➂ provided
• Attach the socket assembly ➃ to the top of the housing using the screws provided.
➁
• Do not attach the lens assembly at this point.
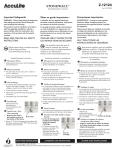
Figure 3
➍
Luminaire Supports
(from building structure)
Frame Supports
(from building structure)
Mount Luminaire See Figure 3
Install with minimum spacing . . .
(A) between center to center of luminaires of 72” (1800 mm)
(B) between top of the luminaire to overhead building member of 8” (200 mm)
(C) between luminaire center to side building member of 36” (900mm)
Do not install insulation within 3” (76mm) of any part of this luminaire.
Blinking light of this thermally protected luminaire may indicate overheating
• Install luminaire in an open ceiling.
Do not install in enclosed ceiling.
• Tilt the fixture to insert through the opening.
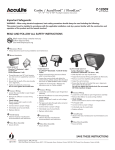
Figure 4
➄
• Support the luminaire from the structure.
Do not use ceiling for support.
➄
➄
➄
❺
Check Voltage See Figure 4
• Attach flexible conduit to connector provided.
• Remove the screws ➄ holding the black ballast housing in place.
• Ensure correct lead is used on multi-voltage ballasts.
• Connect wires to proper voltage.
Figure 5
• Individually cap all unused leads.
“T” slots
• Replace screws to secure the ballast housing.
➏
Attach Lens Assembly See Figure 5
• Place hinges in “T” slots ➅.
➅
➅
❼ Install Lamp
• Install Lamp
Observe the lamp manufacturers recommendations and restrictions.
• Close door
• Secure both latches.
SAVE THESE INSTRUCTIONS
®
Technical Support: 888 / 387-2212
1300 S Wolf Road, Des Plaines, Illinois, 60017 / 219 Shoemaker Street, Kitchener, Ontario, N2E 3B3 / 220 Chrysler Drive, Brampton, Ontario L6S 6B6
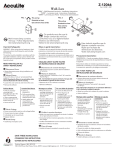
Trouble Shooting Guide
First, check for physical damage to the luminaire. If it appears to be in good condition follow the following steps:
Warning – Disconnect power: Always disconnect power during installation and maintenance.
Lamp does not start or is slow to start
Short Lamp Life
• Wrong lamp or ballast
– Check labels (lamp and ballast
must match)
Wrong lamp or ballast
• Check labels (lamp and ballast must
match)
Lamp is Loose
• Turn power off then, back off
and retighten
• Operating Cycle
– Lamps life is based on a 10
hour per start operating cycle.
Wiring
• Check wiring
– wiring loose?
– connected to the correct lead
in multi-tap ballasts
End of Lamp Life
• Replace with new lamp.
• Visible Signs of End of Life:
– HPS lamps will cycle on and off
at this stage of life
– MH lamps experience severe
colour shift.
Voltage
• Line or ballast output voltage too
Low
– Check line voltage at the fixture
– Check open circuit voltage
Starter Circuit Failure
– Use known good lamp to confirm
Ambient Temperature
• Check ballast and lamp ratings
against existing conditions
Ballast Not Operating
• Check circuit continuity
Lamp Turns on & Off (Cycling)
Low Lamp Output
• End of Life
• Replace with new lamp.
– HPS lamps will cycle
on and off
• Faulty Lamp
– Replace Lamp.
• Wrong lamp or ballast
• Check labels (lamp and
ballast must match)
• Voltage
Line or ballast output voltage
too Low
– Check line voltage at the
fixture
– Check open circuit voltage
• Operating Position
Metal Halide lamps may
be position oriented.
– Check lamp specification.
– Replace lamp with correct
orientation.
• Capacitor
Check for failure
• Voltage
Line or ballast output
voltage too Low
– Check line voltage at
the fixture
– Check open circuit voltage
• Line Voltage Varies
– Use recording volt meter
to check
Guide de dépannage
Voyez d'abord si le luminaire a subi des dommages physiques. S'il semble en bon état, vous devriez procéder comme suit.
Avertissement – Déconnectez le courant : Vous devez toujours débrancher le courant électrique durant l'installation et l'entretien.
La lampe refuse de s'allumer ou démarre lentement
Courte vie utile de la lampe
La lampe est desserrée
Coupez le courant, dévissez la
lampe puis resserrez-la.
Lampe ou ballast incorrect
• Examinez les étiquettes (car le
ballast et la lampe doivent être
appariés).
Tension (voltage)
• La tension de sortie de la ligne ou
du ballast est trop basse.
– Vérifiez la tension de la ligne au
luminaire.
– Vérifiez la tension à circuit ouvert.
Défaillance du circuit
de l'amorceur
• Employez une lampe que vous
savez être en bon état pour
confirmer le problème.
• Lampe ou ballast incorrect
Examinez les étiquettes (car le
ballast et la lampe doivent être
appariés).
Câblage
• Vérifiez le câblage.
– Est-il desserré ?
– Est-il connecté au bon conducteur
s'il s'agit d'un ballast à prises
multiples ?
Température ambiante
• Vérifiez les puissance nominales du
ballast et de la lampe par rapport à
la situation existante.
Fin de la vie utile de la lampe
• Remplacez-la par une lampe neuve.
• Signes visibles de la fin de sa vie
utile :
– À ce stade-là, une lampe SHP
s'allume et s'éteint constamment.
– Dans le cas d'une lampe HM, elle
change vraiment de couleur.
Cycle de fonctionnement
• La durée de la lampe est basée
sur un cycle d'utilisation de 10
heures par mise en service.
Lampe défectueuse
• Remplacez la lampe.
Tension (voltage)
• La tension de sortie de la ligne
ou du ballast est trop basse.
– Vérifiez la tension de la ligne
au luminaire.
– Vérifiez la tension à circuit
ouvert.
La lampe s'allume et s'éteint constamment
Faible rendement de la lampe
Fin de sa vie utile
• Remplacez-la par une lampe
neuve.
– Les lampes SHP s'allument
et s'éteignent sans cesse.
Lampe ou ballast incorrect
• Examinez les étiquettes (car
le ballast et la lampe doivent
être appariés).
• Position de fonctionnement
Les lampes à haloïde
métallisé peuvent être
orientées.
– Vérifiez les spécifications
de la lampe.
– Corrigez l'orientation de
la lampe.
Condensateur
• Assurez-vous qu'il est en
bon état.
Tension (voltage)
• La tension de sortie de la
ligne ou du ballast est
trop basse.
– Vérifiez la tension de la
ligne au luminaire.
– Vérifiez la tension à circuit
ouvert.
La tension de la ligne varie
• Servez-vous d'un voltmètre
enregistreur pour la vérifier.
Ballast qui ne fonctionne pas
• Vérifiez la continuité du circuit.
Guía de Localización y Resolución de Problemas:
Primero, verifique el posible daño físico de la luminaria. Si parece estar en buenas condiciones, siga los siguientes pasos:
Advertencia – Desconecte la corriente: Siempre desconecte la corriente eléctrica durante la instalación o el mantenimiento.
La lámpara no enciende o tarda en encender
La lámpara está floja
• Desconecte la corriente; luego
regrese y ajústela.
Voltaje
• El voltaje de línea o el de la salida
del balasto es demasiado bajo.
– Verifique el voltaje de línea en
el aparato.
– Verifique el voltaje en el circuito
abierto.
Temperatura ambiente
• Verifique los valores del balasto y
de la lámpara contra las
condiciones existentes.
Lámpara o balasto equivocado.
• Verifique las etiquetas (la lámpara y
el balasto deben coincidir).
Cableado
• Verifique que el cableado.
– ¿Hay cables perdidos?
– esté conectado al cable correcto
Falla en el circuito arrancador
en los balastos multivoltaje.
• Use una lámpara probada como
Lámpara agotada.
buena para confirmar.
• Reemplace con una lámpara nueva.
El balasto no funciona.
• Verifique la continuidad del circuito. • Signos visibles de agotamiento:
– Las lámparas HPS se encienden y
se apagan intermitentemente en
esta etapa de vida.
– Las lámparas MH experimentan
un cambio importante de color.
Corta vida útil de la lámpara
Lámpara o balasto equivocado.
• Verifique las etiquetas (la lámpara
y el balasto deben coincidir).
• Ciclo de funcionamiento.
• La vida de las lámparas está
basada en un ciclo de
funcionamiento de 10 horas por
cada encendido.
Lámpara defectuosa.
• Reemplace la lámpara.
Voltaje
• El voltaje de línea o el de la salida
del balasto es demasiado bajo.
– Verifique el voltaje de línea en
el aparato.
– Verifique el voltaje en el circuito
abierto.
La lámpara se enciende y se apaga
(intermitentemente)
Lámpara de bajo rendimiento
Lámpara agotada.
• Reemplace con una lámpara
nueva.
– Las lámparas HPS se
encienden y apagan
intermitentemente.
Voltaje
• El voltaje de línea o el de la
salida del balasto es
demasiado bajo.
– Verifique el voltaje de
línea en el aparato.
Lámpara o balasto
equivocado.
• Verifique las etiquetas (la
lámpara y el balasto deben
coincidir).
– Verifique el voltaje en el
circuito abierto.
Capacitor.
• Verifique posible falla.
El voltaje de línea varía
• Para verificar, utilice la
lectura de un voltímetro.
Posición de funcionamiento.
• Las lámparas de Halogenuro
Metálico pueden ser de
posición orientada.
– Verifique la especificación
de la lámpara.
– Reemplace la lámpara en
la orientación correcta.
®
Technical Support: 888 / 387-2212
1300 S Wolf Road, Des Plaines, Illinois, 60017 / 219 Shoemaker Street, Kitchener, Ontario, N2E 3B3 / 220 Chrysler Drive, Brampton, Ontario L6S 6B6