1
DUAL® SH DBC ®
D
B ISC
!
E
R F ON
W
E O N
P R
A
LA E E
R
C RE CT
E M F
N
M
IN
E OV RO
N A M
G
T L P
O O O
F F W
A A E
N N R
Y Y
C P SO
O A U
M N R
P EL C
O
N O E
E R
N
T!
WITH SMART FUNNEL®
!
ER
N
NT
IO CA
UT RD DE
CA DISCA
D
KE D
AC HEY EMPTY
ME
. CRRATCDR EN
D
FLA RIC
. SC ILE D WH H CT
ELE
. BOATE HIG
ONSED
. HEED
PO S
US
IF:
.
EX NT
Y
. OR ME
UR
N
ELE
INJ
ATIO
TS
POR
KS
EN
COR
NT
RIS
TIC
CO T
LY
-MA
N-O
MP
EL
BUN
NN E HO
CO
1985
FU AR
TO
RE
ILU
FA
PN:
658
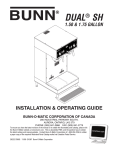
INSTALLATION & OPERATING GUIDE
BUNN-O-MATIC CORPORATION OF CANADA
280 INDUSTRIAL PARKWAY SOUTH,
AURORA, ONTARIO, L4G 3T9.
PHONE: (905) 841-2866 FAX: (905) 841-2775
To ensure you have the latest revision of the manual or to obtain the illustrated parts catalog, please visit
the Bunn-O-Matic website, at www.bunn.com. This is absolutely FREE, and the quickest way to obtain
the latest catalog and manual updates. Contact Bunn-O-Matic Corporation at 1-800-263-2256 to obtain
a paper copy of the required Illustrated Parts Catalog mailed via Canada Post.
29877.7004A
03/12 ©2012 Bunn-O-Matic Corporation
BUNN-O-MATIC COMMERCIAL PRODUCT WARRANTY
Bunn-O-Matic Corporation of Canada (“Bunn”) warrants equipment manufactured by it as follows:
1) Airpots, thermal carafes, decanters, GPR servers, iced tea/coffee dispensers, MCP/MCA pod brewers
thermal servers and Thermofresh servers (mechanical and digital) - 1 year parts and 1 year labour.
2) All other equipment - 2 years parts and 1 year labour plus added warranties as specified below:
a) Electronic circuit and/or control boards - parts and labour for 3 years.
b) Compressors on refrigeration equipment - 5 years parts and 1 year labour.
c) Grinding burrs on coffee grinding equipment to grind coffee to meet original factory screen sieve
analysis - parts and labour for 4 years or 40,000 pounds of coffee, whichever comes first.
These warranty periods run from the date of installation. Bunn warrants that the equipment manufactured
by it will be commercially free of defects in material and workmanship existing at the time of manufacture and appearing
within the applicable warranty period. This warranty does not apply to any equipment, component or part that was not
manufactured by Bunn or that, in Bunn’s judgement, has been affected by misuse, neglect, alteration, improper installation
or operation, improper maintenance or repair, non periodic cleaning and descaling, equipment failures related to poor
water quality, damage or casualty. In addition, the warranty does not apply to replacement of items subject to normal use
including but not limited to user replaceable parts such as seals and gaskets. This warranty is conditioned on the Buyer
1) giving Bunn prompt notice of any claim to be made under this warranty by telephone at (905) 841-2866 or by writing
to 280 Industrial Parkway South, Aurora, Ontario, L4G 3T9. 2) if requested by Bunn, shipping the defective equipment
prepaid to an authorized Bunn service location; and 3) receiving prior authorization from Bunn that the defective equipment
is under warranty.
THE FOREGOING WARRANTY IS EXCLUSIVE AND IS IN LIEU OF ANY OTHER WARRANTY, CONDITION, WRITTEN OR
ORAL, EXPRESS OR IMPLIED, INCLUDING, BUT NOT LIMITED TO, ANY IMPLIED WARRANTY OF EITHER MERCHANTABILITY,
MERCHANTABLE QUALITY OR FITNESS FOR A PARTICULAR PURPOSE.The agents, dealers or employees of Bunn are not
authorized to make modifications to this warranty or to make additional warranties that are binding on Bunn. Accordingly,
statements by such individuals, whether oral or written, do not constitute warranties and should not be relied upon.
If Bunn determines in its sole discretion that the defective equipment is covered by warranty, Bunn, at its exclusive
option while the equipment is under warranty, shall either 1) provide at no charge replacement parts and/or labour (during
the applicable parts and labour warranty periods specified above) to repair the defective components, provided that this
repair is done by a Bunn Authorized Service Representative; or 2) shall replace the equipment or refund the purchase price
for the equipment.
THE BUYER’S REMEDY AGAINST BUNN FOR THE BREACH OF ANY OBLIGATION ARISING OUT OF THE SALE OF THIS
EQUIPMENT, WHETHER DERIVED FROM WARRANTY OR OTHERWISE, SHALL BE LIMITED, AT BUNN’S SOLE OPTION
AS SPECIFIED HEREIN, TO REPAIR, REPLACEMENT OR REFUND.
In no event shall Bunn be liable for any other damage or loss, including, but not limited to, lost profits, lost sales, loss
of use of equipment, claims of Buyer’s customers, cost of capital, cost of down time, cost of substitute equipment, facilities
or services, or any other special, incidental, consequential or punitive damages.
392, AutoPOD, AXIOM, BrewLOGIC, BrewMETER, Brew Better Not Bitter, BrewWISE, BrewWIZARD, BUNN Espress, BUNN Family Gourmet, BUNN Gourmet, BUNN Pour-O-Matic, BUNN, BUNN with the stylized red line, BUNNlink, Bunn-OMatic, Bunn-O-Matic, BUNNserve, BUNNSERVE with the stylized wrench design, Cool Froth, DBC, Dr. Brew stylized Dr. design, Dual, Easy Pour, EasyClear, EasyGard, FlavorGard, Gourmet Ice, Gourmet Juice, High Intensity, iMIX, Infusion Series, Intellisteam, My Café, Phase Brew, PowerLogic,
Quality Beverage Equipment Worldwide, Respect Earth, Respect Earth with the stylized leaf and coffee cherry design, Safety-Fresh,
savemycoffee.com, Scale-Pro, Silver Series, Single, Smart Funnel, Smart Hopper, SmartWAVE, Soft Heat, SplashGard, The Mark of
Quality in Beverage Equipment Worldwide, ThermoFresh, Titan, trifecta, Velocity Brew, A Partner You Can Count On, Air Brew, Air
Infusion, Beverage Bar Creator, Beverage Profit Calculator, Brew better, not bitter., BUNNSource, Coffee At Its Best, Cyclonic Heating
System, Daypart, Digital Brewer Control, Nothing Brews Like a BUNN, Pouring Profits, Signature Series, Tea At Its Best, The Horizontal
Red Line, Ultra are either trademarks or registered trademarks of Bunn-O-Matic Corporation.
INTRODUCTION
The brewer incorporates a wireless interface system that allows the DBC Grinder to load certain information into the
"programming tag" located inside the handle of the funnel. This information includes what flavor of coffee is being
ground and what batch size will be brewed (small, medium, or large). Once the correct flavor name and amount of
coffee is ground, the funnel is loaded into the brewer. The information from the funnel handle is then transferred into
the brewer. The brewer then takes this information and dispenses the amount of water preset in the brewer for that
particular flavor of coffee and batch size. The brewer can also be programmed to adjust different functions of the brewing
process, such as brew temperature, brew volumes, bypass percentages, pulse brew, etc. This allows the operator to
program a certain "recipe" for each coffee flavor to be brewed.
Page 2
29877.4 030912
USER NOTICES
The notices on this brewer should be kept in good condition. Replace unreadable or damaged labels.
WARNING / AVERTISSEMENT
DISCARD DECANTER
IF:
• CRACKED
• SCRATCHED
• BOILED DRY
• HEATED WHEN EMPTY
• USED ON HIGH FLAME
OR EXPOSED ELECTRIC
ELEMENTS
FUNNEL CONTENTS
ARE HOT
LE CONTENU
DE L’ENTONNOIR
EST CHAUD
JETER LA CARAFE :
• SI ELLE EST FISSURÉE
• SI ELLE EST RAYÉE
• SI ON A LAISSÉ DE L’EAU
S’ÉVAPORER PAR
ÉBULLITION
• SI ELLE A ÉTÉ CHAUFFÉE À VIDE
• SI ELLE A ÉTÉ UTILISÉE SUR
UNE FLAMME VIVE OU SUR
DES ÉLÉMENTS ÉLECTRIQUES
DÉCOUVERTS
READ THE ENTIRE OPERATING MANUAL BEFORE USING THIS PRODUCT.
FAILURE TO COMPLY RISKS INJURY.
VEUILLEZ LIRE LE MANUEL D’EMPLOI AVANT D’UTILISER CE PRODUIT.
L’INOBSERVATION DE CES CONSEILS PEUT ENTRAÎNER DES RISQUES DE BLESSURE.
WARNING
AVERTISSEMENT
• DO NOT OVERLOAD CIRCUIT.
• ALWAYS ELECTRICALLY GROUND THE CHASSIS.
• DO NOT DEFORM PLUG OR CORD.
• FOLLOW NATIONAL AND LOCAL
ELECTRICAL CODES.
• KEEP COMBUSTIBLES AWAY.
TOUT MANQUEMENT À SE CONFORMER À CES
DIRECTIVES PEUT ENTRAINER DES DOMMAGES
À L'ÉQUIPEMENT OU PRODUIRE DES DANGERS
D'INCENDIE OU D'ÉLECTROCUTION.
FAILURE TO COMPLY RISKS EQUIPMENT
DAMAGE, FIRE OR SHOCK HAZARD.
READ THE ENTIRE OPERATING MANUAL INCLUDING
THE LIMIT OF WARRANTY AND LIABILITY BEFORE
BUYING OR USING THIS PRODUCT.
THIS EQUIPMENT IS ENERGIZED AT ALL TIMES UNLESS
ELECTRICALLY DISCONNECTED.
• NE PAS SURCHARGER LE CIRCUIT.
• TOUJOURS METTRE LE BOÎTIER À LA MASSE.
• NE PAS DÉFORMER LA FICHE OU LE CORDON.
• SE CONFORMER AUX CODES NATIONAL OU
LOCAL D'ÉLECTRICITÉ.
• GARDER LES PRODUITS COMBUSTIBLES À
DISTANCE.
VEUILLEZ LIRE LE MANUEL DE FONCTIONEMENT EN
ENTIER, Y COMPRIS LES LIMITES DE GARANTIES ET
RESPONSABILITÉS,AVANT D’ACHETER OU
D'UTILISER LE PRÉSENT PRODUIT.
L' ÉQUIPEMENT EST TOUJOURS SOUS TENSION LORSQU'IL
N'EST PAS DÉBRANCHÉ.
00986.7000B 01/10 ©2007 Bunn-O-Matic Corporation
PN: 00658.7000G 02/10 © 1985 BUNN-O-MATIC CORPORATION OF CANADA
00986.7002
00658.7000
Artwork for P/N: 00658.7000
Artwork Rev: G
Updated by: RN
Date: 02/16/10
Colors:
PANTONE 1375 C
WARNING
PANTONE 108 C
PANTONE Process Black C
This equipment
must
installed
to be whiteto comply with Canadian
hand
andbe
Funnel
Plumbing Codes and applicable health and safety regulations.
For models installed outside Canada, comply with the
applicable Plumbing /Sanitation Code.
Cet équipement doit être installé conformément au code
Canadien de plomberie et aux règlements de santé et de
sécurité qui s’ appliquent. Les modèles destinés à être
installés ailleurs qu’au Canada doivent respecter les codes de
plomberie et d’hygiène de la localité.
AVERTISSEMENT
To reduce the risk of electric shock, do not remove or
open cover. No user-serviceable parts inside.
Authorized service personnel only. Disconnect power
before servicing.
Afin d’éviter un risque d’électrocution, ne pas ouvrir ou
enlever le panneau. Aucune pièce utile pour
l’opérateur à l’intérieur. Seulement le personnel
autorisé peut effectuer les réparations. Débrancher de la
source de courant avant d’effectuer une réparation.
00656.7000
37881.7000
Artwork for P/N: 00656.7000
Artwork Rev: F
Drawn: RN
Date: 06/27/08
WARNING/AVERTISSEMENT
MAIN ON/OFF
SWITCH
RETIRER
L’ENTONNOIR
REMOVE
FUNNEL
LENTEMENT
SLOWLY
INTERRUPTEUR
PRINCIPAL
03408.7002
WARNING/AVERTISSEMENT
RETIRER
L’ENTONNOIR
REMOVE
FUNNEL
39803.7000
LENTEMENT
SLOWLY
03409.7002
WARNING
AVERTISSEMENT
Artwork for P/N: 39803.7000
Artwork Rev: A
Drawn: RN
Date: 12/17/09
00824.0002
HOT WATER
EAU CHAUDE
20201.7600
00824.0001
Page 3
29877.4 031312
ELECTRICAL REQUIREMENTS
WARNING - The brewer must be disconnected from the power source until specified in Initial Set-Up.
Refer to Data Plate on the Brewer, and local/national electrical codes to determine circuit requirements.
L2 RED
L1 BLACK
GREEN
L2 RED
L1 BLACK
GREEN
L2
L2 RED
L2 RED
WHITE
WHITE
NEUTRAL
L1 BLACK
L1
GREEN
G
NEUTRAL
L1 BLACK
GREEN
L2
N
L1
G
200 and 230 volt ac models
120/208 and 120/240 volt ac models
Note: This electrical service consists of 2
current carrying conductors (L1 and L2)
and a separate conductor for earth ground.
Note: This electrical service consists of 3 current carrying conductors (Neutral, L1 and L2)
and a separate conductor for earth ground.
ELECTRICAL HOOK-UP (Models without power cord)
CAUTION – Improper electrical installation will damage electronic components. Damage caused by incorrect
electrical connections is not covered by warranty.
1. An electrician must provide electrical service as specified in conformance with all local, state and federal
electrical codes.
2. Using a voltmeter, check the voltage and color coding of each conductor at the electrical source.
3. Remove the front panel beneath the sprayheads to gain access to the terminal block.
4. Feed the cord through the strain relief and connect it to the terminal block.
5. Connect the brewer to the power source and verify the voltage at the terminal block before proceeding. Replace the front panel.
6. If plumbing is to be hooked up later be sure the brewer is disconnected from the power source. If plumbing
has been hooked up, the brewer is ready for Initial Set-Up.
ELECTRICAL HOOK-UP (Models with power cord)
WARNING – If the power cord is ever damaged, it must be replaced by the manufacturer or authorized service
personel with a special cord available from the manufacturer or its authorized service personel in order to
avoid a hazard. Improper electrical installation will damage electronic components. Damage caused by
incorrect electrical connections is not covered by warranty.
1. An electrician must provide electrical service as specified in conformance with all local, state and federal
electrical codes.
2. Using a voltmeter, check the voltage and color coding of each conductor at the electrical source.
NOTE - If the brewer was shipped without a plug on the power cord a qualified service personnel must
select and install the proper UL listed grounding type attachment plug specified on the rear of the brewer.
3. Remove the front panel beneath the sprayheads to gain access to the terminal block.
4. Connect the brewer to the power source and verify the voltage at the terminal block before proceeding.
5. If plumbing is to be hooked up later be sure the brewer is disconnected from the power source. If plumbing has been hooked up, the brewer is ready for Initial Set-Up.
WARNING – Electrical connections must be made as specified above. Failure to follow these instructions can
result in personal injury, property or equipment damage.
Page 4
29877.4 031312
CE REQUIREMENTS
• This appliance must be installed in locations where it can be overseen by trained personnel.
• For proper operation, this appliance must be installed where the temperature is between 5°C to 35°C.
• Appliance shall not be tilted more than 10° for safe operation.
• An electrician must provide electrical service as specified in conformance with all local and national codes.
• This appliance must not be cleaned by water jet.
• This appliance is not intended for use by persons (including children) with reduced physical, sensory or mental
capabilities, or lack of experience and knowledge, unless they have been given instructions concerning use of
this appliance by a person responsible for its safety.
• Children should be supervised to ensure they do not play with the appliance.
• If the power cord is ever damaged, it must be replaced by the manufacturer or authorized service personnel with
a special cord available from the manufacturer or its authorized service personnel in order to avoid a hazard.
PLUMBING REQUIREMENTS
This brewer must be connected to a cold water system with operating pressure between 20 and 90 psi (138
and 620 kPa) from a 1⁄2" or larger supply line. A shut-off valve should be installed in the line before the brewer.
Install a regulator in the line when pressure is greater than 90 psi (620 kPa) to reduce it to 50 psi (345 kPa). The
water inlet fitting is 1⁄4" flare or female quick connect.
NOTE – Bunn-O-Matic recommends 1⁄4" copper tubing for installations of less than 25 feet and 3⁄8" for more than 25
feet from the 1⁄2" water supply line. A tight coil of copper tubing in the water line will facilitate moving the brewer
to clean the counter top. Bunn-O-Matic does not recommend the use of a saddle valve to install the brewer. The
size and shape of the hole made in the supply line by this type of device may restrict water flow.
This equipment must be installed to comply with the National Plumbing Code of Canada and the
Canadian Food Inspection Agency. For models installed outside Canada, you must comply with the
applicable Plumbing/Sanitation Code for your area.
PLUMBING HOOK-UP
NOTE - If a backflow preventer is required by code, a shock arrestor should be installed between backflow preventer
and dispenser. Installing the shock arrestor as close to dispenser as possible will provide best results.
1. Flush the water line and securely attach it to the fitting located on bottom of brewer.
2. Turn on the water supply.
Page 5
29877.4 031312
OPERATING CONTROLS
f
g
j
e
b
b
/O
ON
IN CH
MA WIT
S
FF
a
h
d
c
c
d
h
OPERATING CONTROLS
(a) MAIN ON/OFF SWITCH
This switch, located under the brewer behind the right front leg, turns power on and off to all components
in the brewer.
(b) BATCH SELECTOR SWITCHES
Pressing the switch corresponding to the Small, Medium, or Large batch selects the amount of coffee to be
brewed. Pressing a different switch after a brew cycle has been initiated does not change the brew batch in
progress. Light indicates the selected batch to brew.
(c) ON/OFF SWITCH (ENABLE BREW)
Pressing the ON/OFF switch alternately turns the brewing side on and off. Pressing this switch during the brew
cycle will interrupt the brew cycle, stopping the flow of water. Pressing this switch during the programming
of the brewer will exit the setup and return to the main screen.
(d) BREW SWITCH
Momentarily pressing and releasing this switch begins a brew cycle.
(e) PROGRAM SWITCH
Pressing and holding the upper right hidden switch allows entry to the programming menus. Pressing and
releasing the switch steps through each function screen during programming.
(f) FUNCTION SCREEN
This is the display which shows the various functions of the brewer and allows the programming to be accomplished.
(g) FUNCTION SCREEN SWITCHES
These are the hidden switches which are used to program the brewer.
(h) FUNNEL SENSING COILS
These are used to "receive" information from the Smart Funnel handle (coffee name and batch size), and also
from RECIPE CARDS.
(j) SCROLL BACKWARDS
The upper left hidden switch can be used to scroll backwards through the function list.
Page 6
29877.4 031312
INITIAL SETUP
CAUTION: The brewer must be disconnected from the power source throughout the initial setup, except when
specified in the instructions.
1. Insert an empty funnel into the funnel rails of one of the
brew stations.
2. Place an empty server under the funnel.
3. Connect the brewer to the power source. Main ON/OFF
Switch (located in bottom cover behind right front leg on
some brewers) must be in the ON position. Water will begin
°
°
°
°
flowing into the tank and stop when the tank is filled to its
capacity. Display will show PLEASE WAIT...TANK FILLING
until tank is filled with water.
4. Wait approximately twenty minutes for the water in the
tank to heat to the proper temperature. Display will show
READY TO BREW...WATER TEMP: XXX˚ when tank is at
operating temperature.
NOTE: Brew water temperature is factory set at 200° F
(93.3° C). Refer to TEMPERATURE SELECTION below
should the water temperature need to be increased or
decreased. When brew water temperature is changed,
ready temperature should be increased or decreased accordingly.
5. Place a small vessel beneath the faucet and open the faucet
handle. Release it when you hear the tank refilling.
6. Water volumes have been preset at the factory. Refer
to adjustments for the Set Brew Volumes section of the
Programming Manual on the Bunn-O-Matic website, at
www.bunn.com should the volume need to be increased or decreased.
7. The brewer is now ready for use in accordance with the coffee brewing instructions.
TEMPERATURE SELECTION
SET TEMP - Range: 185˚F (85˚C) to 205˚F (96˚C)
This function allows the operator to set the brew water temperature in the tank. It also sets the hot water
faucet dispense temperature.
SET TEMP: XXX°
(-) DONE (+)
Procedure to set brew temperature:
1. Press and hold upper right hidden switch until the display reads SELECT RECIPE. Release switch. Continue
to press and release switch until the display reads SET TEMP.
2. To adjust the brew temperature, press (-) to decrease or (+) to increase the brew temperature.
3. When finished, press and release DONE to save the new setting, exit the SET TEMP function and advance to
the next function screen, SET READY. Another alternative is to press and release the ON/OFF switch (either
on DUAL brewers) located on the front switch panel to exit the SET TEMP function and return to the MAIN
SCREEN.
Page 7
29877.4 031312
TEMPERATURE SELECTION (cont)
SET READY - Range: 185˚F (85˚C) to 203˚F (95˚C)
This function allows the operator to set the minimum temperature allowable to start a brew cycle. The range
can be from 185˚F (85˚C) to within 2˚F (-1.7°C) of the SET TEMP. The water must be at the SET READY temperature or higher for the display to indicate READY TO BREW. If brew lockout is enabled, the brewing process will
not start below this READY temperature.
NOTE: The upper limit for SET READY temperature is 2˚F (-1.7°C) less than the water temperature (SET TEMP)
setting.
SET READY: XXX°
(-) DONE (+)
Procedure to set ready temperature:
1. Press and hold upper right hidden switch until the display reads SELECT RECIPE. Release switch. Continue
to press and release switch until the display reads SET READY.
2. To adjust the ready temperature, press the (-) button to decrease, or (+) to increase the ready temperature.
3. When finished, press and release DONE to save the new setting, exit the SET READY function and advance
to the next function screen, REFILL. Another alternative is to press and release the ON/OFF switch (either
on DUAL brewers) located on the front switch panel to exit the SET READY function and return to the MAIN
SCREEN.
COFFEE BREWING
1. Insert a BUNN filter into the Smart Funnel.
2. If a grinder is not used to obtain the coffee grounds, pour the proper amount of fresh coffee grounds into
the funnel and level by gently shaking. Slide the funnel into the funnel rails and select batch size. Proceed to
step 5.
3. If a G9-2T DBC or MHG grinder is used with a compatible Smart Funnel, select the desired batch size on the
grinder. Grind the selected amount of fresh coffee into funnel and level grounds by gently shaking. It is not
necessary to select a size on the brewer.
4. Slide the funnel into the funnel rails. The brewer will read the size ground through the chip in the funnel
handle and will automatically select the correct size to brew.
5. Place an empty server under the funnel.
6. The ENABLE BREW switch must be ON. Momentarily press and release the "BREW" switch. If the brewer has
the funnel lock option and if it is activated, once a brew cycle has been started the funnel is locked in place.
There may be certain situations in which the brew cycle will not begin when the brew switch is pressed:
a) BREW TEMPERATURE TOO LOW - wait until heated or cancel BREW LOCKOUT option.
b) FUNNEL NOT IN PLACE (or using a standard brew funnel) - cancel FUNNEL DETECT option.
c)
CHECK FUNNEL - remove funnel, empty previously brewed grounds and grind a new batch into funnel.
d)
SERVER NOT IN PLACE - place Soft Heat Server, or cancel SERVER DETECT option.
7. If none of the above messages are displayed, the display will read NOW BREWING and the time remaining
in the brew cycle. Arrows will point to the side which is brewing. If both sides are brewing simultaneously,
the arrows will alternate from left to right on the display.
8. Following the BREW will be a countdown of DRIPPING time which shows the time remaining until the funnel
lock will release. Discard the grounds and filter only after visible dripping stops.
29877.4 031312
Page 8
CLEANING
1. The use of a damp cloth rinsed in any mild, nonabrasive, liquid detergent is recommended for cleaning all
surfaces on Bunn-O-Matic equipment.
2. Check and clean the sprayhead. Use the pointed end of sprayhead cleaning tool (#38227.0000) to remove
any mineral deposits from the sprayhead holes.
3. Insert the long end of sprayhead cleaning tool into the sprayhead fitting, and rotate several times to remove
any mineral deposits from the fitting.
4. Insert the short end of sprayhead cleaning tool into the bypass fitting, and rotate several times to remove
any mineral deposits from the fitting.
NOTE: In hard water areas, this may need to be done daily. It will help prevent liming problems in the brewer
and takes less than a minute.
Page 9
29877.4 031312
NETTOYAGE
1. L’usage d’un linge humide rincé dans un détergent liquide doux non abrasif est recommandé pour nettoyer
toutes les surfaces des appareils Bunn-O-Matic.
2. Retirez la buse et nettoyez-la. Insérez la partie pointue de l’outil de nettoyage (no 38227.0000) pour enlever
les dépôts calcaires qui peuvent obstruer les orifices de la buse.
3. Insérez la partie longue de l’outil de nettoyage dans le raccord de la buse et faites-le tourner plusieurs fois
pour en retirer tous les dépôts calcaires.
4. Insérez la partie courte de l'outil de nettoyage dans le raccord de la buse de dérivation et faites-le tourner
plusieurs fois pour en retirer tous les dépôts calcaires.
NOTE: En présence d’eau dure, il peut être nécessaire de faire ce nettoyage quotidiennement. Cela contribue à
prévenir les bris et nécessite peu de temps.
Page 9
29877.4 031312
CHOIX DE TEMPÉRATURE (Suite)
RÉGLER TEMPÉRATURE MINIMALE – Entre 185 ˚F (85 ˚C) et 203 ˚F (95 ˚C)
Cette fonction permet à l’utilisateur de régler la température minimale pour lancer un cycle d’infusion. Elle
peut être au minimum de 185 ˚F (85 ˚C) et aller jusqu’à - 2 ˚F (- 1,7 °C) de la température de l’eau du réservoir.
L’eau doit être au moins à la température minimale pour que l’écran affiche PRÊT À INFUSER. Si le verrouillage
d’infusion est activé, l’infusion ne s’entamera pas en-dessous de cette température.
NOTE: La limite supérieure de réglage de la température minimale est de 2 °F (1,7 °C) de moins que la température
de l’eau du réservoir.
SET READY: XXX°
(-) DONE (+)
Procédure pour régler la température minimale :
1. Tenez enfoncée la touche dissimulée de droite jusqu’à ce que l’écran affiche UNITÉS, puis relâchez-la. Continuez
à appuyer sur la touche et à la relâcher jusqu’à ce que l’écran affiche RÉGLER TEMPÉRATURE MINIMALE.
2. Pour ajuster la température, appuyez sur (-) pour la réduire ou sur (+) pour l’augmenter.
3. Lorsque vous avez terminé, appuyez sur TERMINÉ puis relâchez la touche pour sauvegarder le nouveau réglage,
quittez la fonction RÉGLER TEMPÉRATURE MINIMALE et accédez au prochain écran, REMPLISSAGE. Une
autre façon de faire est d’appuyer sur la touche MARCHE-ARRÊT et de la relâcher (n’importe quelle sur les
modèles doubles), située sur le panneau avant, pour quitter la fonction RÉGLER TEMPÉRATURE MINIMALE
et revenir à l’écran principal.
PRÉPARATION DU CAFÉ
1. Insérez un filtre BUNN dans l’entonnoir « Smart Funnel ».
2. Si un moulin n'a pas été utilisé pour moudre le café, versez la quantité suffisante de mouture fraîche dans
l'entonnoir et nivelez-la en la remuant délicatement. Faites glisser l'entonnoir dans ses rails et réglez la quantité
à infuser. Poursuivez à l'étape 5.
3. Si un moulin G9-2T DBC ou MHG est utilisé conjointement avec un entonnoir Smart Funnel compatible, réglez
la quantité à infuser sur le moulin. Moulez la quantité nécessaire de mouture fraîche à même le moulin et
nivelez-la par la suite en la remuant délicatement. Il n'est pas nécessaire de sélectionner une quantité sur
l'infuseur.
4. Faites glisser l’entonnoir dans ses rails. L'infuseur, au moyen de la puce logée dans la poignée de l'entonnoir,
fera la lecture de la quantité de café moulu et déterminera la bonne quantité de café à infuser.
5. Placez un nécessaire de service vide sous l’entonnoir.
6 L'interrupteur d'INFUSION doit être en position MARCHE. Appuyez sur l’interrupteur d’infusion et relâchez-le.
Si l'infuseur est muni d'un verrou d'entonnoir et qu'il est activé, l'entonnoir sera bloqué dès le début d'un cycle
d'infusion. Il peut arriver que le cycle d'infusion ne s'entame pas en appuyant sur l'interrupteur d'infusion :
a) L'INTERRUPTEUR d’INFUSION n'est pas à la position MARCHE.
b)
LA TEMPÉRATURE D'INFUSION EST TROP BASSE - attendez qu'elle soit à la bonne température ou annulez la fonction de VERROU D'INFUSION.
c)
VÉRIFIEZ L'ENTONNOIR : retirez l'entonnoir, jetez le marc de café et faites une mouture fraîche.
d) L'ENTONNOIR N'EST PAS EN PLACE (ou un entonnoir ordinaire est utilisé) : annulez la fonction de DÉTECTION D'ENTONNOIR.
7. Si aucun de ces messages ne s'affiche, l'écran indiquera INFUSION EN COURS et le temps restant au cycle
d'infusion. Les flèches pointeront en direction du côté de l'infusion en cours. Si les deux postes infusent
simultanément, les flèches alterneront d'un côté à l'autre sur l'écran.
8. Une fois l'infusion terminée, il y aura un décompte de L'ÉGOUTTEMENT indiquant le temps restant avant le
déverrouillage de l'entonnoir. Jetez le marc et le filtre lorsque l'égouttement n'est plus perceptible.
29877.4 031312
Page 8
RÉGLAGE INITIAL
ATTENTION - L'infuseur doit être débranché de la prise de courant pendant toute la durée du réglage initial, sauf
lorsque les instructions spécifient le contraire.
1. Insérez un entonnoir vide dans les rails d’entonnoir de La température d’infusion est réglée en usine à 205 °F (96,1 °C).
En haute altitude. il faudra réduire cette température pour éviter
l'un des deux postes d'infusion.
l’ébullition. Consultez le tableau ci-dessous pour effectuer
l’ajustement. Il sert de guide pour réajuster la température de
2. Placez un nécessaire de service vide sous l’entonnoir.
l’eau d’infusion.
3. Branchez l’infuseur dans la prise de courant. L’interrupteur
Point
Température recomAltitude
PRINCIPAL (situé derrière la patte avant sous l'infuseur sur
d’ébullition
mandée de l’eau
(en pieds)
°F
°C
°F
°C
certains modèles) doit être à la position MARCHE. L’eau
-1000
213,8
101,0
200
93,3
s’écoulera dans le réservoir et s’arrêtera une fois plein. L’écran
-500
212,9
100,5
200
93,3
affichera VEUILLEZ ATTENDRE PENDANT REMPLISSAGE
0
212,0
100,0
200
93,3
jusqu’à ce que le réservoir soit plein.
500
211,1
99,5
200
93,3
1000
210,2
99,0
200
93,3
4. Attendez environ 20 minutes pour que l’eau s’échauffe à la
1500
209,3
98,5
200
93,3
bonne température. L’écran affichera PRÊT À INFUSER…
2000
208,4
98,0
200
93,3
2500
207,4
97,4
200
93,3
TEMP. EAU XXX° lorsque l’eau sera à la bonne température.
3000
206,5
96,9
199
92,8
3500
205,6
96,4
198
92,2
NOTE: La température de l’eau d’infusion est réglée en
4000
204,7
95,9
197
91,7
usine à 200 °F (93,3 °C). Consultez la section CHOIX DE
4500
203,8
95,4
196
91,1
5000
202,9
94,9
195
90,6
TEMPÉRATURE ci-dessous pour augmenter ou réduire la
5500
201,9
94,4
195
90,6
température au besoin. Si vous modifiez la température
6000
201,0
93,9
194
90,0
6500
200,1
93,4
193
89,4
de l’eau d’infusion, il faudra aussi ajuster la température
7000
199,2
92,9
192
88,9
d’infusion minimale.
7500
198,3
92,4
191
88,3
8000
197,4
91,9
190
87,8
5. Placez un petit contenant sous le robinet et actionnez le
8500
196,5
91,4
189
87,2
robinet à levier. Relâchez-le lorsque vous entendrez le
9000
195,5
90,8
188
86,7
9500
194,6
90,3
187
86,1
réservoir se remplir de nouveau.
10000
193,7
89,8
186
85,6
6. Les volumes d’eau sont préréglés en usine. Consultez le
manuel de programmation sur le site Internet de Bunn-OMatic, à l’adresse www. bunn.com, pour les réduire ou les augmenter.
7. L’infuseur est maintenant prêt à utiliser conformément aux instructions de Préparation du café.
NOTICE
CHOIX DE TEMPÉRATURE
TEMPÉRATURE DE L’EAU D’INFUSION – Entre 185 ˚F (85 ˚C) et 205 ˚F (96 ˚C)
Cette fonction permet à l’utilisateur de régler la température de l’eau du réservoir. Elle règle également la
température de l’eau chaude du robinet de distribution.
SET TEMP: XXX°
(-) DONE (+)
Procédure pour régler la température de l’eau d’infusion :
1. Tenez enfoncée la touche dissimulée de droite jusqu’à ce que l’écran affiche SÉLECTIONNER RECETTE, puis
relâchez-la. Continuez à appuyer sur la touche et à la relâcher jusqu’à ce que l’écran affiche TEMPÉRATURE
DE L’EAU D’INFUSION.
2. Pour ajuster la température, appuyez sur (-) pour la réduire ou sur (+) pour l’augmenter.
3. Lorsque vous avez terminé, appuyez sur TERMINÉ puis relâchez la touche pour sauvegarder le nouveau
réglage, quittez la fonction TEMPÉRATURE DE L’EAU D’INFUSION et accédez au prochain écran, RÉGLER
TEMPÉRATURE MINIMALE. Une autre façon de faire est d’appuyer sur la touche MARCHE-ARRÊT et de la
relâcher (n’importe quelle sur les modèles doubles), située sur le panneau avant, pour quitter la fonction
TEMPÉRATURE DE L’EAU D’INFUSION et revenir à l’écran principal.
29877.4 031312
Page 7
COMMANDES DE FONCTIONNEMENT
g
f
j
e
b
b
/O
ON
IN CH
MA WIT
S
FF
a
h
d
c
c
d
h
COMMANDES DE FONCTIONNEMENT
(a) INTERRUPTEUR PRINCIPAL
Cet interrupteur, situé derrière la patte droite sous l'infuseur, met l'appareil sous tension et hors tension.
(b) INTERRUPTEURS DE QUANTITÉ D'INFUSION
Appuyez sur les interrupteurs correspondant à la quantité d'infusion (petit, moyen, grand) pour déterminer
la quantité de café à infuser. Le fait d'appuyer sur un autre interrupteur après que le cycle d'infusion ait été
lancé ne modifiera pas la quantité en cours. Le voyant indique la sélection en cours.
(c) INTERRUPTEUR MARCHE-ARRÊT
La touche MARCHE-ARRÊT active ou désactive l'opération de l'infuseur de celui-ci du côté sélectionné. Si
cette touche est appuyée pendant le cycle d'infusion, l'alimentation en eau sera coupée occasionnant l'arrêt
du cycle d'infusion. Si la touche est appuyée durant la programmation de l'infuseur, l'appareil quittera le
mode de configuration et reviendra à l'écran principal.
(d) INTERRUPTEUR D’INFUSION
Cette touche, lorsqu’elle est appuyée et relâchée, entame un cycle d’infusion.
(e) INTERRUPTEUR DE PROGRAMMATION
En appuyant sur l'interrupteur ® et en le tenant enfoncé, l'utilisateur accède aux menus de programmation.
En appuyant sur cet interrupteur et en le relâchant, l'écran se déplace d'une fonction à l'autre
pendant la programmation.
(f) ÉCRAN DE FONCTION
Il s’agit de l’écran qui renferme les différentes fonctions et de l'infuseur afin de le programmer.
(g) INTERRUPTEUR D'ÉCRAN DE FONCTIONS
Ce sont les boutons dissimulés qui servent à programmer l'infuseur.
(h) SERPENTINS DE DÉTECTION D'ENTONNOIR
Ils recueillent l'information venant de la poignée Smart Funnel (type de café et quantité à infuser) ainsi que des FICHES DE RECETTES.
(i) DÉFILEMENT VERS L'ARRIÈRE
Le bouton à la gauche du « B » de « BUNN » sert à défiler vers l'arrière dans la liste de fonctions.
Page 6
29877.4 031312
NORME EUROPÉENNE (CE)
•Cet appareil doit être installé dans un endroit où il peut être sous la surveillance étroite de personnel qualifié.
•Pour fonctionner adéquatement, l’appareil doit être installé dans un lieu où la température demeure entre 5 et
35 ºC.
• L’appareil ne doit pas être incliné à plus de 10º pour une utilisation sécuritaire.
• Un électricien doit effectuer l’installation électrique conformément aux codes local et national en vigueur.
•L’appareil ne doit pas être nettoyé par jet d’eau.
•Cet appareil n’est pas destiné à être utilisé par des personnes (ni des enfants) dont les capacités physiques,
sensorielles ou mentales sont réduites, ni même par des personnes non expérimentées ou non formées à
son utilisation, à moins d’avoir reçu des instructions d’une personne responsable de sa sécurité à l’égard de
l’utilisation de l’appareil.
•La supervision d'adultes est nécessaire pour s'assurer que les enfants ne jouent pas avec cet appareil.
•Si le cordon devenait endommagé, le fabricant ou un réparateur autorisé doit le remplacer par un cordon obtenu
du fabricant ou d’un centre autorisé pour éviter tout risque d’accident.
TUYAUTERIE
Le distributeur doit être relié à un système d’alimentation en eau froide utilisant une pression variant entre
20 et 90 lb/po2 (138 et 620 kPa) par une conduite de 1⁄2 po ou plus. Un robinet d’arrêt doit être installé entre la
conduite et le distributeur. Il faut installer un régulateur sur la conduite lorsque la pression est supérieure à 90
lb/po2 (620 kPa) afin de la réduire à 50 lb/po2 (345 kPa). Le raccord d’entrée d’eau est évasé à 3⁄8 po.
NOTE – Bunn-O-Matic recommande d’utiliser des tuyaux de 3⁄8 po en cuivre pour toutes les installations menant
à la conduite de 1⁄2 po d’alimentation en eau. L’installation sur la conduite d’alimentation d’un tuyau en cuivre en
couronnes permet de déplacer l’infuseur pour nettoyer le dessus du comptoir. Bunn-O-Matic ne recommande
pas d’utiliser un robinet-vanne à étrier pour installer le distributeur. La taille et la forme de l’orifice perforé dans
la conduite d’alimentation par ce type de dispositif peut réduire le débit d’eau.
Cet équipement doit être installé conformément aux normes du Code national de la plomberie du
Canada et des normes de l’Agence canadienne d’inspection des aliments. Les modèles destinés à être
installés ailleurs qu’au Canada doivent respecter les codes de plomberie et d’hygiène de la localité.
RACCORDEMENT DE LA TUYAUTERIE
NOTE - Si le Code national de la plomberie du Canada requiert l’installation d’un dispositif antiretour, un appareil
anti-bélier devrait être installé en amont de l’infuseur, le plus près possible de ce dernier, pour de meilleurs
résultats.
1. Évacuez la conduite d’alimentation en eau et fixez-la solidement au raccord évasé ou à l’adapateur au bas de
l’infuseur.
2. Ouvrez l’alimentation d’eau.
Page 5
29877.4 031312
ALIMENTATION ÉLECTRIQUE
MISE EN GARDE - Le distributeur doit demeurer débranché de la prise de courant jusqu’à indication contraire à
la section branchement électrique
Consultez la plaque signalétique de l’infuseur ainsi que les codes national et local de l’électricité pour
connaître les besoins en alimentation électrique
L2 ROUGE
L2 ROUGE
L1 NOIR
VERT
L2 ROUGE
L1 NOIR
VERT
L2
L1
G
Modèle 200 ou 230 V, c.a.
Note : Ce modèle comprend 2 conducteurs sous
tension (L1 et L2) et un conducteur de mise à la
terre.
L2 ROUGE
NEUTRE
L1 NOIR
NEUTRE
L1 NOIR
BLANC
BLANC
VERT
VERT
L2
N
L1
G
Modèle 120-208 V, c.a. et 120-240 V, c.a.
Note : Ce modèle comprend 3 conducteurs sous
tension (neutre, L1 et L2) et un conducteur de
mise à la terre.
BRANCHEMENT ÉLECTRIQUE (Modèles sans cordons d’alimentation)
CAUTION – Une installation électrique inadéquate peut endommager les composantes électriques. Tout dommage
causé par un mauvais branchement électrique n’est pas couvert par la garantie.
Un électricien doit effectuer l’installation électrique telle que spécifiée.
À l’aide d’un voltmètre, vérifiez la tension et le code-couleur de chaque conducteur à la prise de courant.
Retirez le panneau avant sous les buses.
Faites passer le cordon d’alimentation sous le réducteur de tension et raccordez-le au bloc de jonction.
Branchez le distributeur à la prise de courant et vérifiez la tension au bloc de jonction. Replacez le panneau avant.
Si la tuyauterie doit être raccordée par la suite, assurez-vous que le distributeur est débranché de la prise de
courant. Si la tuyauterie a été raccordée, le distributeur est prêt pour le réglage initial.
1.
2.
3.
4.
5.
6.
BRANCHEMENT ÉLECTRIQUE (Modèles avec cordons d’alimentation)
AVERTISSEMENT! Si l’infuseur est muni d’un cordon d’alimentation et que ce dernier devient endommagé, il faut
le faire remplacer par un cordon spécial obtenu du fabricant ou d’un centre de service autorisé et le travail
doit être effectué par ces derniers pour éviter tout risque de blessure. Une installation électrique inadéquate
peut endommager les composantes électroniques.
Tout dommage causé par un mauvais branchement électrique n’est pas couvert par la garantie.
1. Un électricien doit effectuer l’installation électrique telle que spécifiée.
2. À l’aide d’un voltmètre, vérifiez la tension et le code-couleur de chaque conducteur à la prise de courant.
NOTE - Les infuseurs livrés avec un cordon d’alimentation n’ont pas de fiche de raccordement. Un centre
de service autorisé doit sélectionner et installer la fiche de mise à la terre certifiée UL qui convient tel que
spécifié à l’arrière de l’infuseur.
3. Retirez le panneau avant sous les buses.
4. Branchez le distributeur à la prise de courant et vérifiez la tension au bloc de jonction. Replacez le panneau avant.
5. Si la tuyauterie doit être raccordée par la suite, assurez-vous que le distributeur est débranché de la prise
de courant. Si la tuyauterie a été raccordée, le distributeur est prêt pour le réglage initial.
MISE EN GARDE : Les raccordements électriques doivent être faits comme spécifié ci-dessus. L’inobservation
de ces instructions peut entraîner des blessures corporelles et des dommages matériels ou l’endommagement
de l’équipement.
Page 4
29877.4 031312
AVIS À L’UTILISATEUR
Toutes les mises en garde inscrites sur le moulin doivent être maintenues en bonne condition. Veuillez
remplacer toute décalcomanie endommagée ou illisible.
WARNING / AVERTISSEMENT
DISCARD DECANTER
IF:
• CRACKED
• SCRATCHED
• BOILED DRY
• HEATED WHEN EMPTY
• USED ON HIGH FLAME
OR EXPOSED ELECTRIC
ELEMENTS
FUNNEL CONTENTS
ARE HOT
LE CONTENU
DE L’ENTONNOIR
EST CHAUD
JETER LA CARAFE :
• SI ELLE EST FISSURÉE
• SI ELLE EST RAYÉE
• SI ON A LAISSÉ DE L’EAU
S’ÉVAPORER PAR
ÉBULLITION
• SI ELLE A ÉTÉ CHAUFFÉE À VIDE
• SI ELLE A ÉTÉ UTILISÉE SUR
UNE FLAMME VIVE OU SUR
DES ÉLÉMENTS ÉLECTRIQUES
DÉCOUVERTS
READ THE ENTIRE OPERATING MANUAL BEFORE USING THIS PRODUCT.
FAILURE TO COMPLY RISKS INJURY.
VEUILLEZ LIRE LE MANUEL D’EMPLOI AVANT D’UTILISER CE PRODUIT.
L’INOBSERVATION DE CES CONSEILS PEUT ENTRAÎNER DES RISQUES DE BLESSURE.
WARNING
• DO NOT OVERLOAD CIRCUIT.
• ALWAYS ELECTRICALLY GROUND THE CHASSIS.
• DO NOT DEFORM PLUG OR CORD.
• FOLLOW NATIONAL AND LOCAL
ELECTRICAL CODES.
• KEEP COMBUSTIBLES AWAY.
FAILURE TO COMPLY RISKS EQUIPMENT
DAMAGE, FIRE OR SHOCK HAZARD.
READ THE ENTIRE OPERATING MANUAL INCLUDING
THE LIMIT OF WARRANTY AND LIABILITY BEFORE
BUYING OR USING THIS PRODUCT.
THIS EQUIPMENT IS ENERGIZED AT ALL TIMES UNLESS
ELECTRICALLY DISCONNECTED.
AVERTISSEMENT
• NE PAS SURCHARGER LE CIRCUIT.
• TOUJOURS METTRE LE BOÎTIER À LA MASSE.
• NE PAS DÉFORMER LA FICHE OU LE CORDON.
• SE CONFORMER AUX CODES NATIONAL OU
LOCAL D'ÉLECTRICITÉ.
• GARDER LES PRODUITS COMBUSTIBLES À
DISTANCE.
TOUT MANQUEMENT À SE CONFORMER À CES
DIRECTIVES PEUT ENTRAINER DES DOMMAGES
À L'ÉQUIPEMENT OU PRODUIRE DES DANGERS
D'INCENDIE OU D'ÉLECTROCUTION.
VEUILLEZ LIRE LE MANUEL DE FONCTIONEMENT EN
ENTIER, Y COMPRIS LES LIMITES DE GARANTIES ET
RESPONSABILITÉS,AVANT D’ACHETER OU
D'UTILISER LE PRÉSENT PRODUIT.
L' ÉQUIPEMENT EST TOUJOURS SOUS TENSION LORSQU'IL
N'EST PAS DÉBRANCHÉ.
00986.7000B 01/10 ©2007 Bunn-O-Matic Corporation
PN: 00658.7000G 02/10 © 1985 BUNN-O-MATIC CORPORATION OF CANADA
00986.7002
00658.7000
Artwork for P/N: 00658.7000
Artwork Rev: G
Updated by: RN
Date: 02/16/10
Colors:
PANTONE 1375 C
PANTONE 108 C
This equipment must be installed to comply with Canadian
PANTONE Process Black C
Plumbing Codes
and applicable health and safety regulations.
to be white
Funnel and hand
For models installed
outside
Canada, comply with the
applicable Plumbing /Sanitation Code.
Cet équipement doit être installé conformément au code
Canadien de plomberie et aux règlements de santé et de
sécurité qui s’ appliquent. Les modèles destinés à être
installés ailleurs qu’au Canada doivent respecter les codes de
plomberie et d’hygiène de la localité.
00656.7000
WARNING
AVERTISSEMENT
To reduce the risk of electric shock, do not remove or
open cover. No user-serviceable parts inside.
Authorized service personnel only. Disconnect power
before servicing.
Afin d’éviter un risque d’électrocution, ne pas ouvrir ou
enlever le panneau. Aucune pièce utile pour
l’opérateur à l’intérieur. Seulement le personnel
autorisé peut effectuer les réparations. Débrancher de la
source de courant avant d’effectuer une réparation.
37881.7000
Artwork for P/N: 00656.7000
Artwork Rev: F
Drawn: RN
Date: 06/27/08
WARNING/AVERTISSEMENT
REMOVE
FUNNEL
SLOWLY
RETIRER
L’ENTONNOIR
LENTEMENT
MAIN ON/OFF
SWITCH
INTERRUPTEUR
PRINCIPAL
03408.7002
WARNING/AVERTISSEMENT
REMOVE
FUNNEL
SLOWLY
RETIRER
L’ENTONNOIR
39803.7000
LENTEMENT
03409.7002
WARNING
AVERTISSEMENT
Artwork for P/N: 39803.7000
Artwork Rev: A
Drawn: RN
HOT WATER
EAU CHAUDE
Date: 12/17/09
00824.0002
20201.7600
00824.0001
Page 3
29877.4 031312
BUNN-O-MATIC GARANTIE DE PRODUIT COMMERCIAL
Bunn-O-Matic Corporation of Canada (« Bunn ») garantit les appareils qu’elle fabrique ainsi :
1) Cafetières, carafes thermiques, carafes à décanter, serveurs GPR, distributrices de thé glacé / de café glacé, infuseursnacelle de type MCP/MCA, serveurs thermiques et serveurs de type Thermofresh (mécanique et numérique) - 1 an pièces
et 1 an main-d’œuvre.
2) Tout autre appareil - 2 ans pièces et 1 an main-d’œuvre ainsi que les garanties additionnelles indiquées ci-dessous :
a) Cartes de circuits électroniques et / ou de contrôle - 3 ans pièces et main-d’œuvre.
b) Compresseurs inclus dans l’équipement de réfrigération - 5 ans pièces et 1 an main-d’œuvre.
c) Bavures de mouture sur équipement de moulure de café pour mourde le café afin de répondre à l’analyse de passage au crible
original de l’usine - 4 ans pièces et main-d’œuvre ou 40 000 livres de café, selon la première éventualité.
Ces délais de garantie commencent à courir à partir de la date d’installation. Bunn garantit que les appareils fabriqués par elle ne sont
affectés d’aucun défaut commercial quant à leur matériel ou leur fabrication, existant au moment de fabrication, et se manifestant
pendant la période couverte par la garantie. Cette garantie ne s’applique pas aux appareils, composants ou pièces qui n’ont pas
été fabriqués par Bunn ou qui, selon Bunn, auraient subi un usage abusif, une négligence, une altération, une installation impropre,
ou un usage impropre, un entretien impropre ou une réparation impropre, un manque de nettoyage et détartrage, des défaillances
d’équipement liées à une eau de mauvaise qualité, à des dommages ou à un accident. En outre, cette garantie ne s’applique pas au
remplacement des composantes des appareils devant être remplacées dans le cour normal de leur utilisation; cela comprend mais
n’est pas limité à des pièces remplaçables par l’utilisateur tels des joints d’étanchéité. Cette garantie est conditionnelle à ce que
l’acheteur 1) avise Bunn ponctuellement de toute réclamation en vertu de cette garantie par téléphone au (905) 841-2866 ou par
écrit au 280 Industrial Parkway South, Aurora, Ontario L4G 3T9; 2) fasse livrer, à la demande de Bunn, l’appareil défectueux, port
payé, à un centre de service autorisé par Bunn; et 3) reçoive une autorisation préalable de la part de Bunn que l’appareil défectueux
est sous garantie.
LA GARANTIE CI-DESSUS EST EXCLUSIVE ET REMPLACE TOUTE AUTRE GARANTIE, CONDITION, ÉCRITE OU ORALE,
EXPRESSE OU IMPLICITE, Y COMPRIS MAIS NON LIMITÉE À TOUTE GARANTIE IMPLICITE DE QUALITÉ, DE QUALITÉ
MARCHANDE, OU DE CONFORMITÉ À UN USAGE PARTICULIER. Les agents, concessionnaires ou employés de Bunn
ne sont pas autorisés à modifier cette garantie ou à apporter des garanties supplémentaires qui engageront ou affecteront
Bunn. Ainsi, les déclarations de ces individus, orales comme écrites, ne constituent pas de garanties et n’engagent pas
la responsibilité de Bunn.
Si Bunn détermine à son entière discrétion que l’appareil défectueux est couvert par la garantie, Bunn, à sa discrétion
exclusive, pendant que l’appareil est sous garantie, devra soit 1) fournir gratuitement des pièces de rechange et / ou de la
main-d’œuvre (pendant le délai applicable de garantie tel qu’indiqué ci-dessus) pour réparer les composants défectueux, à
condition que la réparation soit effectuée par un représentant de service autorisé par Bunn; soit 2) remplacer l’équipement
ou rembourser le prix d’achat de l’équipement.
LE RECOURS DE L’ACHETEUR CONTRE BUNN POUR LA VIOLATION DE TOUTE OBLIGATION DÉCOULANT DE LA
VENTE DE CET APPAREIL, QU’IL RELÈVE OU NON DE GARANTIE, SERA LIMITÉ, TEL QUE PRÉCISÉ DANS LA PRÉSENTE,
À LA RÉPARATION, AU REMPLACEMENT, OU AU REMBOURSEMENT DU PRIX D’ACHAT DE L’APPAREIL, À L’ENTIÈRE
DISCRÉTION DE BUNN.
En aucun cas Bunn ne sera tenu responsable d’autres dommages ou pertes, y compris, mais sans y être limité à, la perte de
profits, les ventes perdues, la perte d’utilisation de l’appareil, les réclamations des clients de l’acheteur, le coût du capital, le coût
des temps d’arrêt, le coût d’appareils de remplacement, de services de remplacement, ou des installations de remplacement, et
touts autres dommages-intérêts spéciaux, accessoires, indirects ou punitifs.
392, AutoPOD, AXIOM, BrewLOGIC, BrewMETER, Brew Better Not Bitter, BrewWISE, BrewWIZARD, BUNN Espress, BUNN Family Gourmet, BUNN Gourmet, BUNN Pour-O-Matic, BUNN, BUNN with the stylized red line, BUNNlink, Bunn-OMatic, Bunn-O-Matic, BUNNserve, BUNNSERVE with the stylized
wrench design, Cool Froth, DBC, Dr. Brew stylized Dr. design, Dual, Easy Pour, EasyClear, EasyGard, FlavorGard, Gourmet Ice, Gourmet Juice, High
Intensity, iMIX, Infusion Series, Intellisteam, My Café, Phase Brew, PowerLogic, Quality Beverage Equipment Worldwide, Respect Earth, Respect
Earth with the stylized leaf and coffee cherry design, Safety-Fresh, savemycoffee.com, Scale-Pro, Silver Series, Single, Smart Funnel, Smart Hopper,
SmartWAVE, Soft Heat, SplashGard, The Mark of Quality in Beverage Equipment Worldwide, ThermoFresh, Titan, trifecta, Velocity Brew, A Partner
You Can Count On, Air Brew, Air Infusion, Beverage Bar Creator, Beverage Profit Calculator, Brew better, not bitter., BUNNSource, Coffee At Its Best,
Cyclonic Heating System, Daypart, Digital Brewer Control, Nothing Brews Like a BUNN, Pouring Profits, Signature Series, Tea At Its Best, The Horizontal Red Line, Ultra sont des marques de commerce déposées de Bunn-O-Matic Corporation.
INTRODUCTION
L'infuseur comprend une interface sans fil qui permet au moulin DBC de mémoriser de l'information sur
une puce située à l'intérieur de la poignée de l'entonnoir. Cette information comprend le type de grains de café
employé et la quantité de café à infuser (petite, moyenne ou grande portion). Lorsque le bon type de café est
moulu en quantité voulue, l'entonnoir est positionné sous l'infuseur. Les données de la poignée de l'infuseur
sont alors transférées à l'infuseur, qui distribue la quantité d'eau préréglée en fonction du type de grain et de la
quantité voulue. L'infuseur peut aussi être programmé pour ajuster plusieurs fonctions du procédé d'infusion,
comme la température, les volumes d'infusion, les pourcentages de dérivation et l'infusion par impulsion. Cela
permet à l'utilisateur de programmer un certain nombre de recettes pour chaque saveur de café infusé.
29877.4 030912
Page 2
DUAL® SH DBC®
AVEC ENTONNOIR D'INFUSION
SMART FUNNEL®
D
B ISC
!
E
R F ON
W
E O N
P R
A
L E E
A
R
C RE CT
E M F
N
M
IN
E OV RO
N A M
G
T L P
O O O
F F W
A A E
N N R
Y Y
C P SO
O A U
M N R
P EL C
O
N O E
E R
N
T!
!
ER
N
NT
IO CA
UT RD DE
CA DISCA
D
KE D
AC HEY EMPTY
ME
. CRRATCDR EN
D
FLA RIC
. SC ILE D WH H CT
ELE
. BOATE HIG
ONSED
. HEED
PO S
US
IF:
.
EX NT
Y
. OR ME
UR
N
ELE
INJ
ATIO
TS
POR
KS
EN
COR
NT
RIS
TIC
CO T
LY
-MA
N-O
MP
EL
BUN
NN E HO
CO
1985
FU AR
TO
RE
ILU
FA
PN:
658
MANUEL D’INSTALLATION ET D’UTILISATION
BUNN-O-MATIC CORPORATION OF CANADA
280 INDUSTRIAL PARKWAY SOUTH,
AURORA, ONTARIO, L4G 3T9.
TÉLÉPHONE: (905) 841-2866 TÉLÉCOPIEUR (905) 841-2775
Pour obtenir la plus récente version du manuel d’utilisation ou pour visualiser le catalogue illustré de pièces,
le manuel de programmation ou le manuel d’entretien, visitez le site Internet de Bunn-O-Matic, à l’adresse
www.bunn.com. Ces manuels sont GRATUITS et le téléchargement des mises à jour est rapide. Pour le
service technique, contactez la Bunn-O-Matic Corporation, au numéro 1 800-263-2256.
29877.7004A
03/12 ©2012 Bunn-O-Matic Corporation